


Gebrauchsanweisung |
Brugsanvisning |
|
Instructions for use |
Bruksanvisning |
EMCHE 8145 |
Mode d’emploi |
Käyttöohje |
|
Gebruiksaanwijzing |
Manual de utilização |
|
Istruzioni per l’uso |
Instrucciones para el uso |
|
Οδηγίες Χρήσης |
Návod k použití |
Instrukcje użytkowania |
Návod na použitie |
Használati utasítás |
Instrucţiuni de utilizare |
Инструкция за употреба |
Инструкции по эксплуатации |
1

INSTALLATION
MOUNTING THE APPLIANCE
FOLLOW THE SUPPLIED separate mounting instructions when installing the appliance.
PRIOR TO CONNECTING
CHECK THAT THE VOLTAGE on the rating plate corresponds to the voltage in your home.
DO NOT REMOVE THE MICROWAVE INLET PROTECTION
PLATES located on the side of  the oven cavity wall. They


 prevent grease & food par-


 ticles from entering the mi-


 crowave inlet channels.

ENSURE the oven cavity is empty before mounting.
AFTER CONNECTING
THE OVEN CAN BE OPERATED ONLY if the oven door is
firmly closed.
ENSURE THAT THE APPLIANCE IS NOT DAMAGED. Check
that the oven door closes firmly against the door support and that the internal door seal is not damaged. Empty the oven and clean the interior with a soft, damp cloth.
DO NOT OPERATE THIS APPLIANCE if it has a damaged
mains cord or plug, if it is not working properly, or if it has been damaged or dropped. Do not immerse the mains cord or plug in water. Keep the cord away from hot surfaces. Electrical shock, fire or other hazards may result.
THE EARTHING OF THIS APPLIANCE is compulsory. The
manufacturer will accept no responsibility for injury to persons, animals or damage to objects arising from the non-observance of this requirement.
The manufacturers are not liable for any problems caused by the user’s failure to observe these instructions.
2

IMPORTANT SAFETY INSTRUCTIONS
READ CAREFULLY AND KEEP FOR FUTURE REFERENCE
DO NOT HEAT, OR USE FLAMMABLE MATERIALS in or
near the oven. Fumes can create a fire hazard or explosion.
DO NOT USE YOUR MICROWAVE oven for drying tex-
tiles, paper, spices, herbs, wood, flowers, fruit or other combustible materials. Fire could result.
IF MATERIAL INSIDE / OUTSIDE THE OVEN SHOULD IGNITE
OR SMOKE IS OBSERVED, keep oven door closed and turn the oven off. Disconnect the power cord or shut off power at the fuse or circuit breaker panel.
DO NOT OVER-COOK FOOD. Fire could result.
DO NOT LEAVE THE OVEN UNATTENDED, especially
when using paper, plastic or other combustible materials in the cooking process. Paper can char or burn and some plastics can melt if used when heating foods.
DO NOT USE corrosive chemicals or vapors in this appliance. This type of oven is specifically designed to heat or cook food. It is not designed for industrial or laboratory use.
ONLY ALLOW CHILDREN to use the appliance under adult supervision and after adequate instructions have been given, so that the child is able to use the appliance in a safe way and understands the hazards of improper use.
THIS APPLIANCE IS NOT INTENDED FOR use by persons
(including children) with reduced physical, sensory or mental capabilities, unless used under the supervision of a person responsible for their safety.
WARNING!
ACCESSIBLE PARTS MAY BECOME HOT during use, young
children should be kept away
DO NOT USE YOUR MICROWAVE oven for |
heat- |
ing anything in airtight sealed con- |
|
tainers. The pressure increases |
|
and may cause damage when |
|
opening or may explode. |
|
THE DOOR SEALS AND THE DOOR SEAL AREAS must be reg-
ularly inspected for damage. If these areas are damaged the appliance should not be operated until it has been repaired by a trained service technician.
EGGS
DO NOT USE YOUR MICROWAVE oven for cook-
ing or reheating whole eggs with or  without shell since they may
 explode even after microwave
 heating has ended.
3
IMPORTANT PRECAUTIONS
GENERAL
THIS APPLIANCE IS DESIGNED FOR DOMESTIC USE ONLY!
THE APPLIANCE SHOULD NOT BE OPERATED without food
in the oven when using microwaves. Operation in this manner is likely to damage the appliance.
IF YOU PRACTICE OPERATING the oven, put a glass
of water inside. The water will absorb the microwave energy and the oven will not be damaged.
DO NOT USE THE CAVITY for any storage purposes.
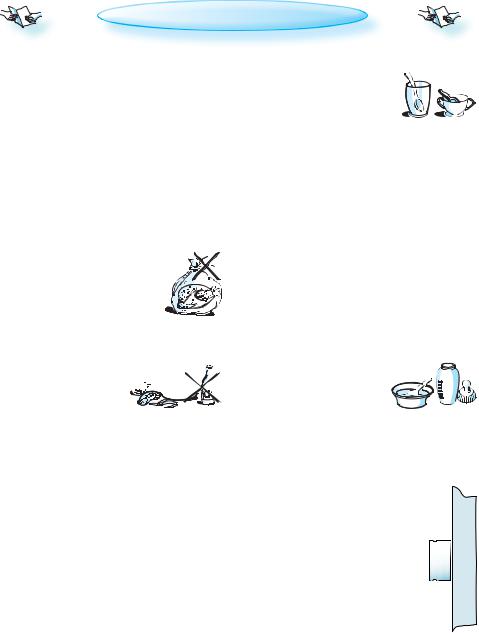
REMOVE WIRE TWIST-TIES from paper or
plastic bags before placing bag in the oven.
DEEP-FRYING
DO NOT USE YOUR MICROWAVE oven for deep-frying,
because the oil temperature cannot be  controlled.


USE HOT PADS OR OVEN MITTS to prevent burns,
when touching containers, oven parts, and pan after cooking.
LIQUIDS
E.G. BEVERAGES OR WATER. Overheating the liquid beyond boiling point can occur 

without evidence of bubbling.
This could result in a sudden boil over of the hot liquid. To prevent this possibility the
following steps should be taken:
1.Avoid using straight-sided containers with narrow necks.
2.Stir the liquid before placing the container in the oven and let the teaspoon remain in the container.
3.After heating, allow standing for a short time, stirring again before carefully removing the container from the oven.
CAREFUL
ALWAYS REFER to a microwave cookbook for details. Especially, if cooking or reheating food that contains alcohol.
AFTER HEATING BABY FOOD or liquids in a
baby bottle or in a baby food jar, always stir and check the temperature before serving.
This will ensure that the heat is evenly distributed and the risk of scalding or burns can be avoided.
Ensure the Lid and the Teat is removed before heating!
PUSH - PUSH KNOBS
THE KNOBS OF THIS OVEN are aligned with
the buttons on the panel, at delivery. The knobs will slide out if pushed  and their various functions
can be accessed. It is not necessary to have them petruding from the panel during operation.
Simply push them back into the panel when you are done with the setting and continue to operate the oven.
4
ACCESSORIES
GENERAL
THERE ARE a number of accessories available on the market. Before you buy, ensure they are suitable for microwave use.
ENSURE THAT THE UTENSILS YOU USE are oven proof
and allow microwaves to pass through them before cooking.
WHEN YOU PUT FOOD AND ACCESSORIES in the micro-
wave oven, ensure that they do not come in contact with the interior of the oven.
This is especially important with accessories made of metal or metal parts.
IF ACCESSORIES CONTAINING METAL comes in contact
with the oven interior, while the oven is in operation, sparking can occur and the oven could be damaged.
ALWAYS ENSURE that the turntable is able to turn freely before starting the oven.
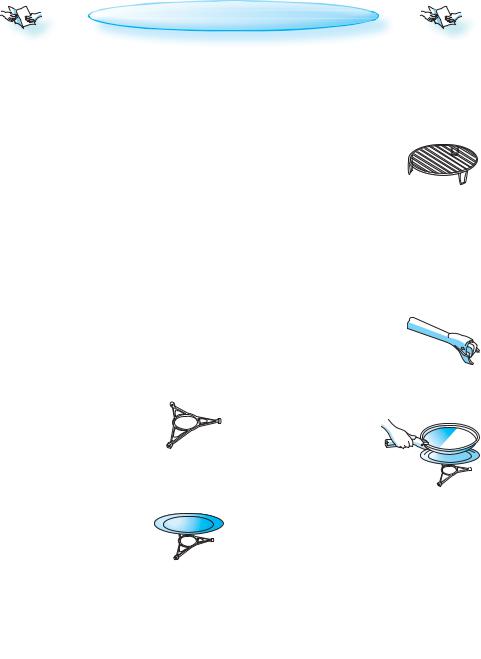
TURNTABLE SUPPORT
USE THE TURNTABLE SUPPORT under the
Glass turntable. Never put any other utensils on the turntable sup-
port.
Fit the turntable support in the oven.
GLASS TURNTABLE
USE THE GLASS TURNTABLE with all cooking methods. It collects the dripping juic- 
es and food particles that otherwise would stain and soil the in-
Place the Glass turntable on the turntable support.terior of the oven.
BAKING PLATE
USE THE BAKINGPLATE when
cooking in forced air only or when grilling. Never use
it in combination with microwaves.
WIRE RACK
USE THE WIRE RACK when cooking
and baking.
WHEN GRILLING without mi-
crowaves, place the wire rack on the baking plate in order to elevate the food closer to the grill element in the ceiling.
CRISP HANDLE
USE THE SUPPLIED SPECIAL CRISP HAN-
DLE to remove the hot Crisp plate from the oven.
CRISP-PLATE
PLACE THE FOOD DIRECTLY ON THE CRISP-PLATE.
Always use the Glass turntable as support when using the Crisp-plate.
DO NOT PLACE ANY UTENSILS on the
Crisp-plate since it will quickly become very hot and is likely to cause damage to the utensil.
THE CRISP-PLATE may be preheated before use (max. 3 min..). Always use the Crisp function when preheating the crisp-plate.
STEAMER
USE THE STEAMER WITH THE
STRAINER in place for foods
such as fish, vegetables and potatoes. 
USE TEH STEAMER WITHOUT THE
STRAINER in place for foods such as rice, pasta and white beans.
ALWAYS place the steamer on the Glass Turntable.
5
START PROTECTION / KEY LOCK
THIS AUTOMATIC SAFETY FUNCTION IS ACTIVATED ONE
MINUTE AFTER the oven has returned to 
 “stand by mode“. (The oven is in


 “stand by” when the 24-hour clock is


 displayed or if the clock has not been
 set, when the display is blank).
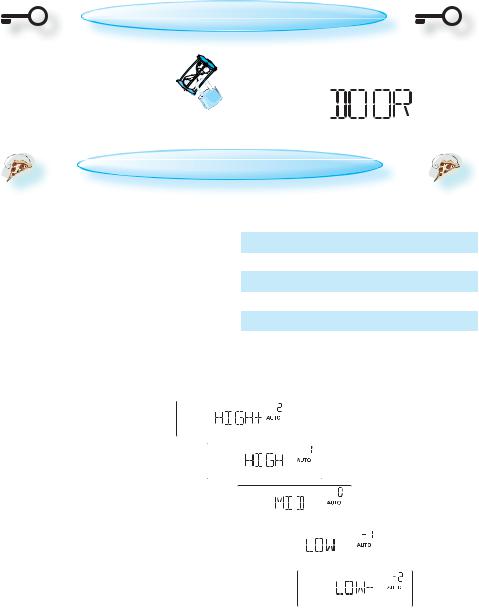
THE DOOR MUST BE OPENED AND CLOSED e.g. putting
food into it, before the safety lock is released. Else the display will show “DOOR”.
DONENESS (AUTO FUNCTIONS ONLY)
DONENESS IS AVAILABLE in most of the auto functions. You have the possibility to personally control the end result through the Adjust
doneness feature. This feature enables you to achieve higher or lower end temperature compared to the default standard setting.
WHEN USING one of these functions the oven chooses the default standard setting. This setting normally gives you the best result. But if the food you heated became too warm to eat at once, you can easily adjust this before you use that function the next time.
|
DONENESS |
|
|
LEVEL |
EFFECT |
|
|
HIGH +2 |
YIELDS HIGHEST END TEMPERATURE |
|
|
HIGH +1 |
YIELDS HIGHER END TEMPERATURE |
|
|
MED 0 |
DEFAULT STANDARD SETTING |
|
|
LOW -1 |
YIELDS LOWER END TEMPERATURE |
|
|
LOW -2 |
YIELDS LOWEST END TEMPERATURE |
|
|
NOTE:
THE DONENESS can only be set or altered during the first 20 seconds of operation.
THIS IS DONE BY SELECTING A DONENESS LEVEL with the
adjust knob right after you have pressed the Start button.
6
STIR OR TURN FOOD (AUTO FUNCTIONS ONLY)
WHEN USING SOME OF THE AUTO FUNCTIONS the oven
may stop (depending on the chosen program and food class) and prompt you to STIR FOOD or TURN FOOD.
TO CONTINUE COOKING:
Stir or turn the food.
Close the door and restart by pressing the Start button.Open the door.
NOTE: IN AUTO DEFROST MODE, THE OVEN CONTIN- UES AUTOMATICALLY AFTER 2 MIN. if the food hasn’t
been turned / stirred. The defrost time will be longer in this case.
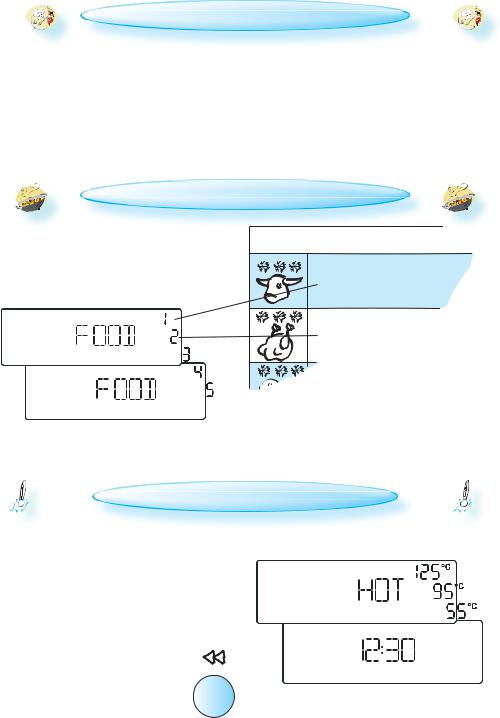
FOOD CLASSES (AUTO FUNCTIONS ONLY)
WHEN USING THE AUTO FUNCTIONS the oven needs
to know which food class it is to use to reach proper results. The word FOOD and a food class digit is displayed when you are choosing a food class with the adjust knob.
THE FOOD CLASSES are listed in the tables placed with each Auto function.
FOOD |
MEAT (100g - 2.0Kg) |
POULTRY (100g - |
FOR FOOD NOT LISTED IN THE TABLES and if the
weight is lesser or greater than recommended weights, you should follow the procedure for ”Cook & Reheat with microwaves”.
COOLING DOWN
WHEN A FUNCTION IS FINISHED, the oven may carry
out a cooling procedure. This is normal.
After this procedure the oven switches off automatically.
IF THE TEMPERATURE IS HIGHER THAN 100°C, “HOT”
and the current cavity temperature is displayed. Be careful not to touch the cavity inside when removing food. Use oven mittens.
IF THE TEMPERATURE IS LESS THAN 50°C, the 24 hour
clock is displayed.
PRESS THE BACK BUTTON to temporarily
view the 24 hour clock when “HOT” is displayed.
THE COOLING PROCEDURE can be interrupted without any harm to the oven by opening the door.
7

|
CHANGING SETTINGS |
|
|
|
|
WHEN THE APPLIANCE IS FIRST PLUGGED |
|
|
|
IN it will ask you to set the Clock. |
|
|
|
AFTER A POWER FAILURE the Clock will |
|
|
|
flash and needs to be reset. |
|
OUR OVEN HAS |
a number of func- |
||
|
Y |
||
TURN THE MULTIFUNCTION KNOB until Setting is shown. |
tions which can be adjusted to |
||
your personal taste. |
|||
USE THE ADJUST KNOB to choose one of the following settings to adjust.
ClockSoundECO
Brightness
PRESS THE STOP BUTTON TO EXIT the settings function and save all your changes when you are done.
CLOCK SETTING
PRESS THE OK BUTTON. (The left right hand digits (hours) flicker).
TURN THE ADJUST KNOB to set the hours.
PRESS THE OK BUTTON. (The two right hand digits (minutes) flicker).
TURN THE ADJUST KNOB to set the minutes.
PRESS THE OK BUTTON again to confirm the change.
THE CLOCK IS SET AND IN OPERATION.
IF YOU WISH TO REMOVE THE CLOCK from the display once it has been set, simply enter the clock setting mode again and press the Stop button while the digits flicker.
8

CHANGING SETTINGS
SOUND SETTING
PRESS THE OK BUTTON.
TURN THE ADJUST KNOB to turn the buzzer ON or OFF.
PRESS THE OK BUTTON again to confirm the change.
ECO
PRESS THE OK BUTTON.
TURN THE ADJUST KNOB to turn the ECO setting ON or OFF.
PRESS THE OK BUTTON again to confirm the change.
WHEN ECO IS ON, the display will automatically turn off after a while to save energy. It will automatically light up again when a button is pressed or the door is opened.
WHEN OFF IS SET, the display will not turn off and the 24 h clock will always be visible.
9

CHANGING SETTINGS
BRIGHTNESS
PRESS THE OK BUTTON.
TURN THE ADJUST KNOB to set the level of brightness suitable to your preference.
PRESS THE OK BUTTON again to confirm your selection.
KITCHEN TIMER
|
|
USE THIS FUNCTION when you need |
|
|
|
a kitchen timer to measure exact |
|
|
|
time for various purposes such |
|
as cooking eggs or letting the |
|||
|
|||
TURN THE ADJUST KNOB to set the desired length of the timer. |
dough rise before baking etc. |
||
|
|||
PRESS THE OK BUTTON. |
|
|
|
AN ACOUSTIC SIGNAL will be heard when the timer has finished to count down.
PRESSING THE STOP BUTTON before the timer has finished will reset the timer to zero.
10
 Loading...