

Page 1
IAN 100683
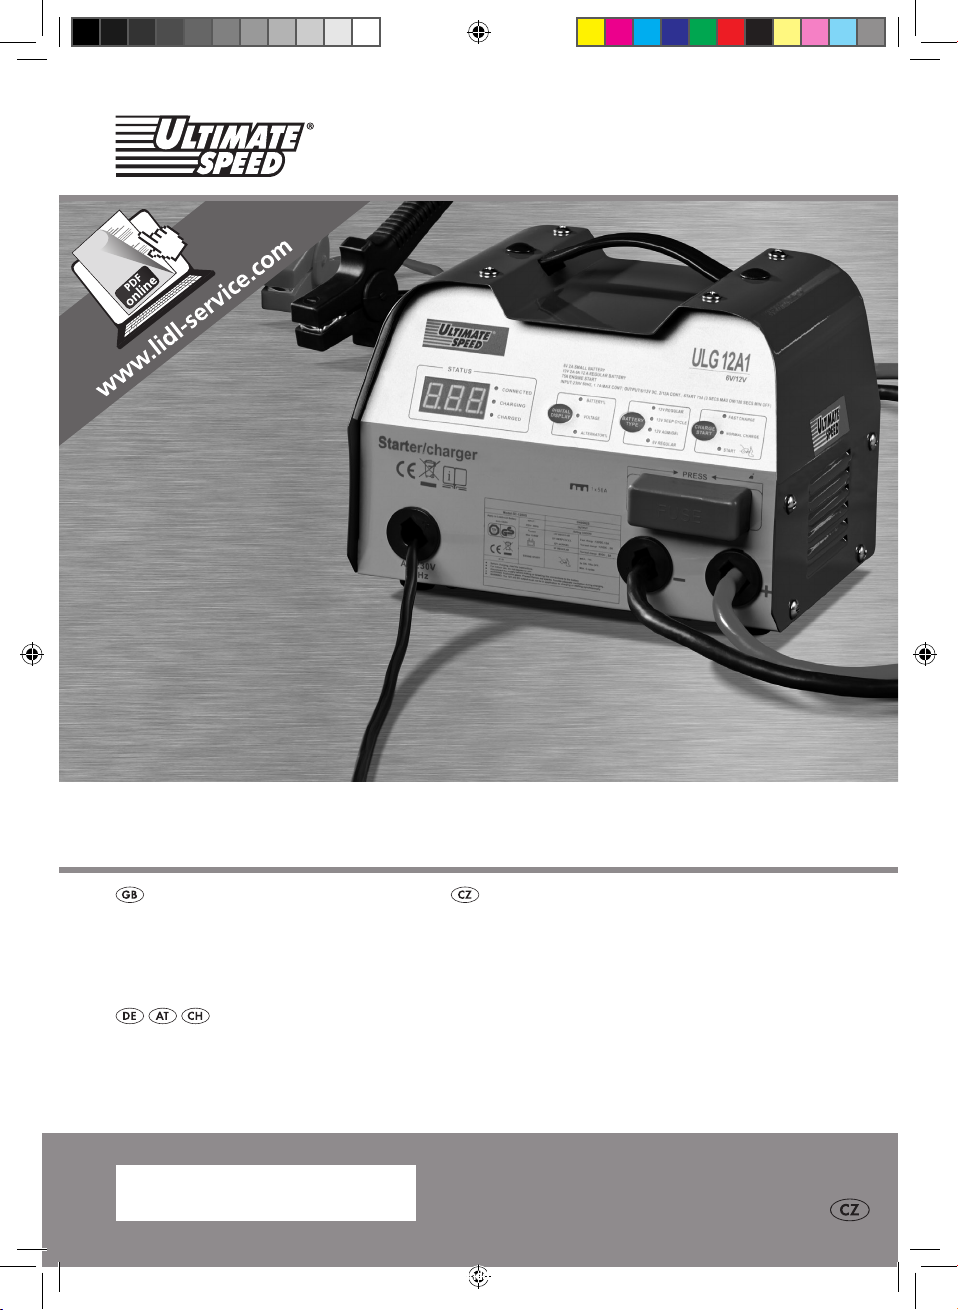
CAR CHARGER WITH JUMP
START FUNCTION ULG 12 A1
CAR CHARGER WITH
JUMP START FUNCTION
Operation and Safety Notes
Translation of original operation manual
AUTONABÍJEČKA S FUNKCÍ
POMOCNÉHO STARTU
Pokyny pro obsluhu a bezpečnostní pokyny
Překlad originálního provozního návodu
KFz-LAdEGERäT MIT
STARTHILFEFUNKTION
Bedienungs- und Sicherheitshinweise
Originalbetriebsanleitung
100683_uls_Kfz-Ladegeraet mit Starthilfefunktion ULG 12 A1_cover_CZ.indd 2 29.09.14 12:20
Page 2
Before reading, unfold the page containing the illustrations and familiarise yourself with all functions of the
device.
Před čtením si otevřete stranu s obrázky a potom se seznamte se všemi funkcemi přístroje.
Klappen Sie vor dem Lesen die Seite mit den Abbildungen aus und machen Sie sich anschließend mit allen
Funktionen des Gerätes vertraut.
GB Operation and Safety Notes Page 5
CZ Pokyny pro obsluhu a bezpečnostní pokyny Strana 15
DE / AT / CH Bedienungs- und Sicherheitshinweise Seite 25
100683_uls_Kfz-Ladegeraet mit Starthilfefunktion ULG 12 A1_cover_CZ.indd 3 29.09.14 12:20
Page 3
1 2 3
4 5
10
9
8
7
100683_uls_Kfz-Ladegeraet mit Starthilfefunktion ULG 12 A1_cover_CZ.indd 4 29.09.14 12:20
6
Page 4

100683_uls_Kfz-Ladegeraet mit Starthilfefunktion ULG 12 A1_cover_CZ.indd 5 29.09.14 12:20
Page 5

Table of contents
Introduction
Intended use ........................................................................................................................................ Page 6
Parts description .................................................................................................................................. Page 6
Technical Data ....................................................................................................................................Page 6
Scope of delivery ................................................................................................................................ Page 6
Safety notices ..............................................................................................................................Page 7
Operation
Product properties ............................................................................................................................... Page 8
Connecting ..........................................................................................................................................Page 8
Disconnecting ...................................................................................................................................... Page 9
Selecting the charging mode .............................................................................................................Page 9
Jump starting ........................................................................................................................................ Page 10
Replacing the fuse ............................................................................................................................... Page 11
Maintenance and care .........................................................................................................Page 11
Warranty and service information
Warranty terms ...................................................................................................................................Page 11
Extent of warranty ............................................................................................................................... Page 11
Processing of warranty claims ............................................................................................................ Page 11
Environmental instructions and disposal information .............................. Page 12
Declaration of Conformity ................................................................................................ Page 12
5 GB
100683_uls_Kfz-Ladegeraet mit Starthilfefunktion ULG 12 A1_content_CZ.indd 5 29.09.14 12:20
Page 6
Introduction
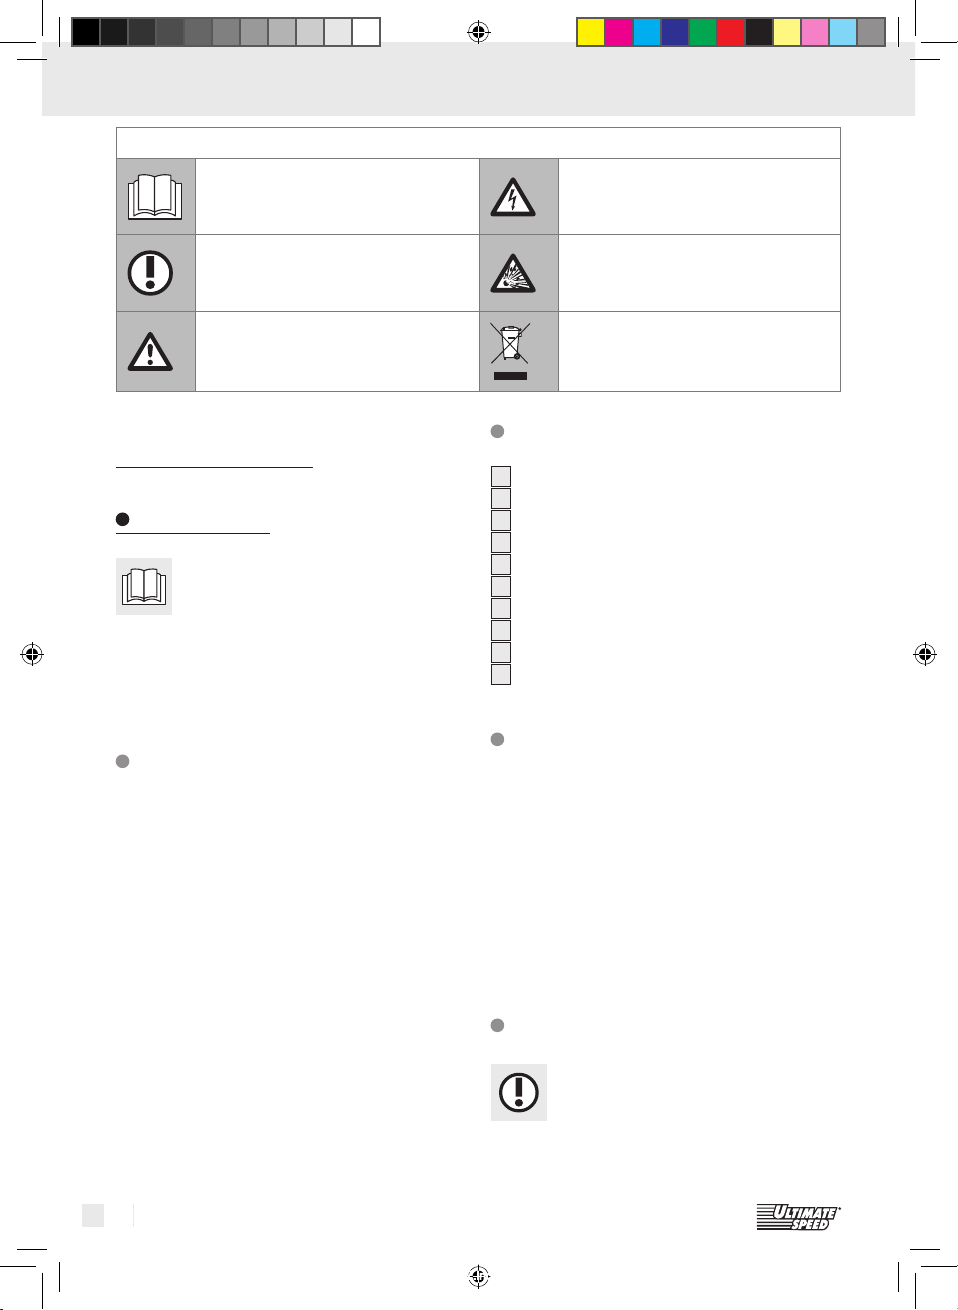
These original operating instructions / the device uses the following pictograms:
Read original operating instructions! Caution! Risk of electric shock!
Note Caution! Explosion hazard!
Observe the warning and safety
instructions!
Car charger with jump start
function ULG 12 A1
Introduction
Congratulations!
You have chosen high-quality device by
our company. Familiarise yourself with the
product before using it for the first time. Carefully
read the following original operating instructions and
safety notices. Initial operation of this tool must be
performed by trained personnel.
Intended use
The Ultimate Speed ULG 12 A1 is a car charger with
impulse trickle charge (Chip Software) suitable for
charging and trickle charging the following 6 V or
12 V rechargeable lead batteries with electrolyte
solution, AMG batteries, lead-acid batteries, deep
cycle (marine batteries), or gel batteries:
• For automotive and motorcycle batteries with
12 V / 6 V and 8–180 Ah capacity
You can also regenerate drained batteries (depending on battery type). The car charger features a
protective circuit against sparking and overheating.
Any improper or incorrect use will void the warranty.
The manufacturer is not liable for damage caused by
improper use. The device is not intended for commercial use.
Note: The car charger is not suitable for charging
electric vehicles with built-in rechargeable battery.
Dispose of packaging and device in
an environmentally-friendly way!
Parts description
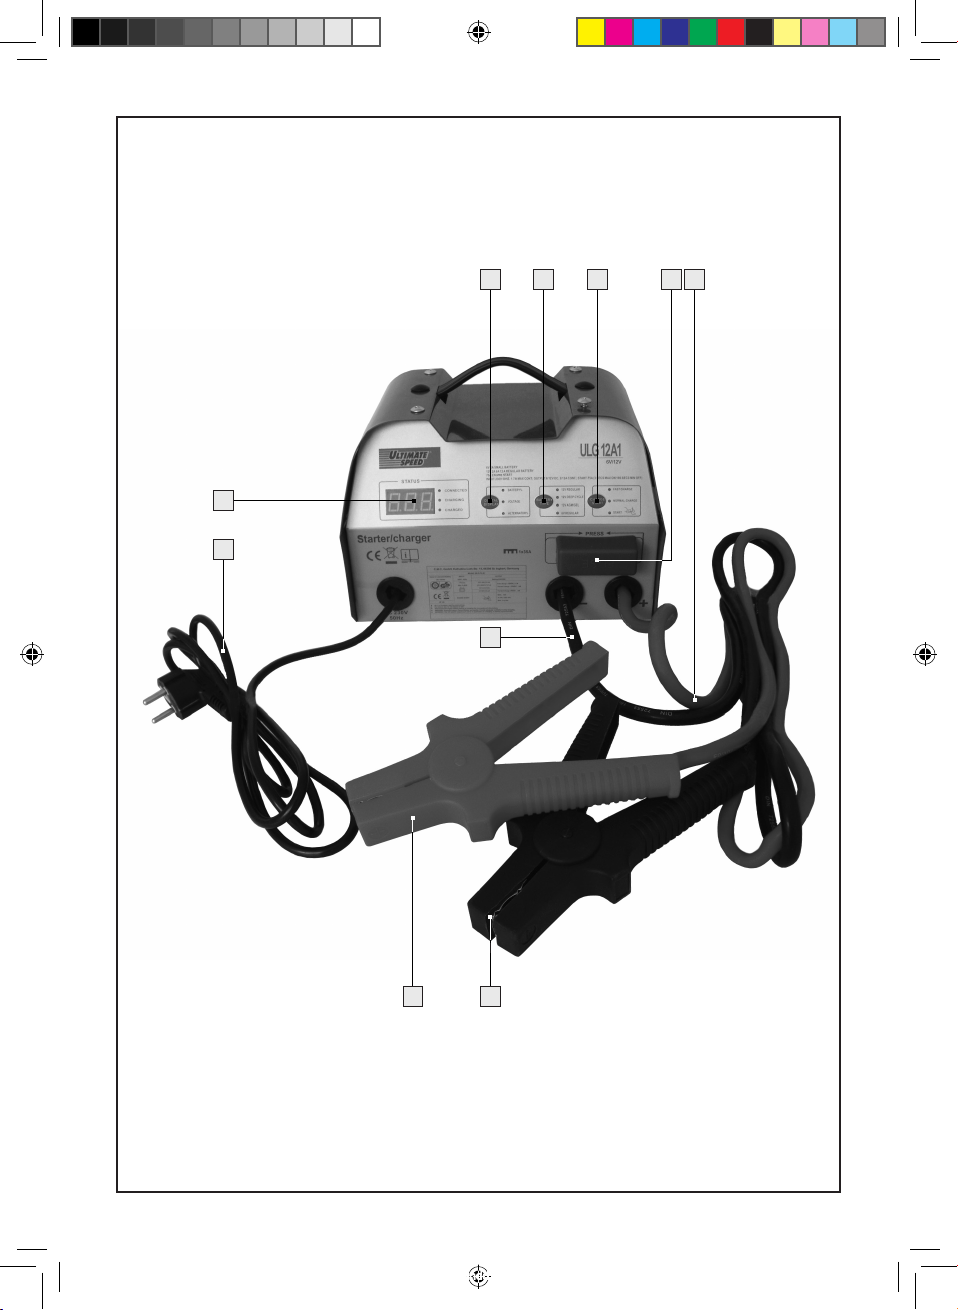
1
Digital display button
2
Battery type button
3
Charge Start button
4
Fuse with cover
5
“+“ Terminal connection cable (red)
6
“–“ Terminal clamp (black)
7
“+“ Terminal clamp (red)
8
“–“ Terminal connection cable (black)
9
Mains cable
10
Digital display
Technical Data
Input voltage: 230 V∼ 50 Hz
Reverse current*: < 5 mA (no AC input)
Rated output voltage: 6 V / 12 V
Charging current: 2 A, 6 A, 12 A ± 10 %
Battery type with: 12 V / 6 V and
8–180 Ah capacity
Housing protection type: IP 20
* = Reverse current is the battery current the charger
uses when not connected to power.
Scope of delivery
Check the contents and device along with
all parts for damage immediately after
unpacking. Do not use if the device or
parts are damaged.
6 GB
100683_uls_Kfz-Ladegeraet mit Starthilfefunktion ULG 12 A1_content_CZ.indd 6 29.09.14 12:20
Page 7
Introduction / Safety notices
1 Charger Ultimate Speed ULG 12 A1
2 Alligator clips (1 red, 1 black)
1 Original operating instructions
Safety notices
KEEP OUT OF THE REACH OF CHILDREN!
DANGER! Avoid a danger to life and the risk
of injuries due to improper use!
CAUTION! Do not operate the device if the
cables, the mains cable or plug are damaged.
A damaged mains cable indicates a life-threatening danger due to electric shock.
Only have a damaged power cable repaired
by authorised and trained professionals! In the
event a repair is required, please contact the
service centre for your country!
DANGER OF ELECTRIC SHOCK!
For batteries permanently mounted in
a vehicle, verify the vehicle is switched
off! Switch off the ignition und put the vehicle
in park with the handbrake engaged (e.g. car)
or fixed rope (e.g. electric boat)!
DANGER OF ELECTRIC SHOCK!
Disconnect the car charger from the
mains before connecting or removing
the connectors to / from the battery.
First connect the clamp not connected to the car
body.
Connect the other clamp to the car body, away
from the battery and the petrol pipe.
Only then connect the car charger to the power
supply.
Disconnect the car charger from the power sup-
ply after charging.
Only then remove the clamp from the car body.
Following this, remove the clamp from the batte
DANGER OF ELECTRIC SHOCK!
Only touch the terminal connection
cables (“–“ and “+“) in the insulated
area!
DANGER OF ELECTRIC SHOCK!
Establish the connection to the battery
and the mains current socket completely protected from moisture!
DANGER OF ELECTRIC SHOCK!
Only assemble, maintain and care
for the car charger whilst disconnect-
ed from the mains!
DANGER OF ELECTRIC SHOCK!
Once the charging and discharge
process is completed, on batteries
permanently installed in vehicles first disconnect
the charger‘s negative terminal connection cable (black) from the battery‘s negative terminal.
Do not leave toddlers or children unsupervised
with the car charger!
Children are not yet able to assess potential
dangers in handling electric appliances. Always
supervise children to ensure they do not play
with the tool.
This device may be used by children age 8 years
and up, as well as by persons with reduced physical, sensory or mental capacities, or lacking
experience and / or knowledge, so long as they
are supervised or instructed in the safe use of
the device and understand the associated risks.
Children should not be allowed to play with the
device. Cleaning and user maintenance should
not be performed by children without supervisi
EXPLOSION HAZARD! Protect
yourself from a highly explosive hy-
drogen-oxygen reaction! The battery
may emit gaseous hydrogen during charging and
trickle charging. Oxyhydrogen is an explosive
mix of gaseous hydrogen and oxygen. Contact
with open fire (flames, embers or sparks) will
cause the so-called oxyhydrogen reaction! Perform charging and trickle charging in a well ventilated room protected from the weather. Be
there is no open fire (flames, embers or spark)
during charging and maintenance charging!
DANGER OF EXPLOSION AND FIRE
HAZARD! Ensure that there is no possibility of
ry.
ignition of explosive or flammable materials, su
as petrol or solvents, while using the charger!
EXPLOSIVE GASSES! Avoid flames and
sparks!
Ensure adequate ventilation whilst charging.
Place the battery on a well ventilated surface
whilst charging. Ignoring this advice may damage the device.
on.
sure
ch
7 GB
100683_uls_Kfz-Ladegeraet mit Starthilfefunktion ULG 12 A1_content_CZ.indd 7 29.09.14 12:20
Page 8
Safety notices / Operation
EXPLOSION HAZARD! Ensure
the positive terminal connection cable
does not come into contact with fuel
lines (e.g. petrol pipe)!
DANGER OF CHEMICAL BURNS! Protect
your eyes and skin against corrosion from acids
(sulphuric acid) when coming into contact with
the battery!
Use acid-proof goggles, clothing and gloves! If
eyes or skin has come into contact with sulphuric
acid, rinse the affected body region off with a
plenty of clean water and consult a doctor str
away!
Avoid electric short-circuits when connecting the
car charger to the battery. Only connect the negative terminal connection cable to the negative
battery terminal or the car body. Only connect
the positive terminal connection cable to the
positive battery terminal!
Before connecting to the mains, verify the mains
power has the required 230 V∼ 50 Hz, neutral
lead, a 16 A fuse and an ELCB switch (earth
leakage circuit breaker)! Ignoring this advice
may damage the device.
Do not place the charger close to fire, heat and
prolonged temperatures over 50 °C! The output
power of the car charger automatically drops
In higher temperatures.
Ensure no fuel lines, electric cables, hydraulic-,
water pipes are damaged by the screws whilst
assembling the charger! Otherwise there is a
risk of death or injuries!
Only use the car charger with the included orig-
inal parts!
Do not cover the car charger with objects! Ignor-
ing this advice may damage the device.
Protect the surfaces of the battery‘s electrical
contacts from short circuiting!
Only use the car charger for charging and main-
tenance charging undamaged 6 V- / 12 V leadacid batteries (with electrolyte solution or gel)!
Otherwise material damage could occur.
Do not use the car charger for charging or trickle
charging non-rechargeable batteries. Otherwise
material damage could occur.
Do not use the car charger to charge or trickle
charge a damaged or frozen battery! Otherwise
material damage could occur.
8 GB
aight
Before connecting the charger, refer to the bat-
tery‘s original operating instructions for battery
maintenance information! Otherwise there is a
risk of injury and / or damaging the device.
Before connecting the charger to a battery per-
manently connected to a vehicle, refer to the
vehicle‘s operating instructions for information
about maintaining electrical safety and maintenance! Otherwise there is a risk of injury and /
or property damage.
Also disconnect the car charger from the mains
when not in use for environmental reasons! Remember standby operation also consumes electricity.
Always be alert and always be careful what you
do. Always proceed with caution and do not
operate the car charger when unfocused or feel
unwell.
Operation
Remove the mains plug from the mains socket before
performing any work on the car charger.
RISK OF ELECTRIC SHOCK!
DANGER OF DAMAGE TO PROPERTY!
RISK OF INJURY!
Product properties
This device is designed to charge a variety of SLA
batteries (sealed lead-acid batteries) primarily used
in cars, motorcycles and some other vehicles. These
can be e.g. WET- (with liquid electrolyte), GEL- (with
gelified electrolyte) or AGM batteries (with electrolyte
absorbent glass mat). The special design of the device
(also referred to as “three-level charging strategy“)
allows the battery to be charged to nearly 100 %
its capacity. The charger can further be connected
to the battery for extended periods to keep it in optimal condition.
of
Connecting
Before charging and trickle charging a battery
permanently connected to the vehicle, first dis-
100683_uls_Kfz-Ladegeraet mit Starthilfefunktion ULG 12 A1_content_CZ.indd 8 29.09.14 12:20
Page 9

Operation
connect the battery‘s negative terminal connection cable (black) from the negative battery terminal. The negative battery terminal is typically
connected to the car body.
Then disconnect the vehicle‘s positive terminal
connection cable (red) from the positive battery
terminal.
Only then connect the battery charger‘s “+“
crocodile clamp (red)
7
to the “+“ battery
terminal.
Connect the “-“ crocodile clamp (black) 6 to
the “–“ battery terminal. Plug the car charger‘s
mains cable
9
into the mains socket.
Note: If the connector clamps are correctly connected, the display will show the voltage and “connected“ will light up. If the poles are reversed, the displ
ay
will read 0.0 and “connected“ will not light up.
Disconnecting
Disconnect the device from the mains.
Remove the “–“ crocodile clamp (black) 6 from
the “–“ battery terminal.
Remove the “+“ crocodile clamp (red) 7 from
the “+“ battery terminal.
Reconnect the vehicle‘s positive connection cable
to the positive battery terminal.
R
econnect the vehicle‘s negative connection cab
to the negative battery terminal.
If the connector clamps connected to the battery
and the device is connected to power, the digital
10
display
will read “Connected“. After selecting a
charging mode, the display will read “Charging“.
Once charging is complete, the display will read
“Charged“.
A continuously lit display with the battery not yet fully
charged indicate a fault.
In this event, verify the connection clamps 6,
7
are correctly connected to the battery and
the correct battery type is selected. If the display
is still continuously lit, the battery may be defective.
Digital Display button
1
: Use to switch be-
tween the digital display of voltage and charging
progress in percent (Battery %). Use this button to
switch between the following displays:
– Battery %: indicates the charging progress for
the connected battery in percent.
– Voltage: indicates the voltage of the connected
battery.
– Alternator %: output power in percent
Battery Type button
2
: Use this button to set
the battery type to be charged. You can choose from
battery types. The battery type must absolutely be
correctly selected before starting the charging pro-
le
cess:
–
Selecting the charging mode
12 V Regular: these batteries (lead-acid batteries
are typically used in cars, lorries and motorcycles.
)
They have vent caps and are often labelled
You can charge a variety of batteries at different
ambient temperatures using different charging mo
des.
Compared to conventional car chargers, this device
features a special function for reusing a drained battery / rechargeable battery. You can recharge a
completely drained battery / rechargeable battery.
The safe charging process protects against faulty co
nnection and short-circuits. The integrated electronics
do not switch the car charger on immediately after
being connected, but only after selecting a charging
mode.
“low-maintenance“ or “maintenance-free“. This
battery type is designed to quickly transfer energy (e.g. starting an engine). “Regular“ batteries
should not be used for “Deep Cycle“ applications.
– 12 V Deep Cycle: These batteries are commonly
also labelled “Deep Cycle“ or “Marine“. This
type of battery is typically larger than other
battery types. It delivers less short-term energy
but transmit energy longer. These batteries withstand numerous discharge cycles.
– 12 V AGM / Gel: The AGM battery type is typi-
cally a good Deep Cycle battery. They provide
9 GB
100683_uls_Kfz-Ladegeraet mit Starthilfefunktion ULG 12 A1_content_CZ.indd 9 29.09.14 12:20
Page 10
Operation
the best “life“ when recharged before being
drained more than 50 %. When fully discharged
they withstand about 300 charging cycles. The
GEL battery type is similar to AGM. The charging voltage is lower than for other lead-acid
batteries. Using the wrong charger for a Gel
battery will result in a reduction in power or a
shorter life.
– 6 V Regular: Select this mode for conventional
6 V batteries.
Charge Start button
3
: Use this button to switch
between the following options
– Fast Charge: charges quickly (recommended in
low outdoor temperatures / winter)
– Normal Charge: normal charging process (nor-
mal speed)
–
Start: briefly delivers 75 ampere to bridge a w
eak
or drained battery to jump start an engine
Attention: This mode can only be exited by unp
ging the mains plug
Jump starting
9
.
lug-
Always make all the connections
as described and in the correct order. The vehicle‘s
electronics may otherwise be damaged.
Proceed against the specifications at your own risk
and responsibility.
Attention: This function is not suitable for batteries
below 45 Ah. This function could damage batteries
below 45 Ah.
Diesel vehicles and large-volume engines in part require amperages above 75 A for jump starting.
Note: The charger features an analysis program
to protect the battery from damage (e.g. sulphation
or rapid voltage drops), particularly during jump
starting. The device will not switch on the jump starter with severely drained or heavily stressed batteries
to protect the battery. During this process the battery
is already being charged with lower currents (Charging lights up). The display continues to read “0“. In
this event the jump start function cannot be used. This
will protect the battery from damage. You should
then first charge the battery. You may also use the
10 GB
“Fast Charge“ or “Normal Charge“ function for
this purpose.
Connect the car charger‘s mains cable 9 to
power.
Connect the red connector clamp 6 to the
positive battery terminal. (The positive terminal
is marked with a “+“ symbol and a red mark.)
Connect the black connector clamp 5 to the
negative battery terminal. (The negative terminal
is marked with a “-“ symbol and a black mark.)
If the connector clamps are connected correctly,
the car charger will automatically select the correct battery type. You may review it in the “Battery Type“ option field and if necessary change
it by pressing the battery type button
2
.
Now select the “Start“ function using the Charge
Start button
3
. The cart charger will now analyse the battery‘s charge level. The display will
now read “0“.
Start the vehicle‘s ignition. The display will now
show a 5 second countdown (of which 2 second
priming / analysis function and 3 second jump
start function at 75 A) when needing the car
charger for jump starting (previously analysed
by the car charger). During this countdown the
car charger will briefly deliver 75 A to bridge
the battery to start the car. This is followed by
a 180 second pause to protect the battery. The
cycle will now restart (2 second priming / analysis function and 3 second jump starting at
75 A / 180 second pause).
To disconnect the device, first remove the termi-
nal clamps (
cord
6
/ 7) and unplug the power
9
.
Note: If the battery is completely drained, the 75 A
will not be sufficient to start all engines (e.g. diesel
vehicles).
In this case, please select the “Fast Charge“
option using the Charge Start button
3
and
charge the battery 60 % (preheating of diesel
engines draws power from the battery. This requires 60 % after preheating).
You can monitor the charging process in the display
by selecting the “Battery %“ option using the digital
display button
1
.
Once 60 % has been reached, jump start again.
100683_uls_Kfz-Ladegeraet mit Starthilfefunktion ULG 12 A1_content_CZ.indd 10 29.09.14 12:20
Page 11
Operation / Maintenance and care / Warranty and service information
Attention: Exit the mode by unplugging the
mains cable
Replacing the fuse
9
.
The car charger fuse can be damaged by e.g. hardware failure, overload, etc.
Unplug the power cord 9 before replacing
the fuse.
Remove the fuse 4 cover by slightly pressing
in the side.
Unscrew the fuse 4 with a fitting open-end
spanner and secure the new fuse.
Then screw it tight and replace the cover 4.
Note: If you need a new fuse, please contact
our service department (see chapter Warranty
and Service Information).
Maintenance and care
A
lways unplug the power cord 9 from the mains
socket before working on the car charger.
The device is maintenance-free. Switch off the
device. Clean the device‘s metal and plastic with
a dry cloth.
Never use solvents or other abrasive cleaners.
Warranty and service
information
Creative Marketing Consulting GmbH
warranty
Warranty terms
The warranty period begins on the date of purchase.
Please retain the original receipt safely.
This document is required as your proof of purchase.
Should this device show any defect in materials or
manufacture within 2 years from the date of purchase,
we will repair or replace it - at our discretion - free
of charge. This warranty is conditional on the defective device and the receipt of purchase being presented within the 2 year warranty period including
a brief written description of the nature of the defect
and of the date it arose.
If the defect is covered by our warranty, we will return the repaired device or replacement thereof. A
repair or exchange of the device does not extend a
new warranty period.
Extent of warranty
The device has been manufactured to strict quality
gui
delines and meticulously examined before delivery.
The warranty applies to faults in material or manufacture. This warranty does not apply to product
parts subject to normal wear and tear and which
can therefore be considered as wear items, or to
damage to fragile parts, e.g. switches, storage batteries or glass parts. This warranty becomes void if
the device has been damaged or improperly used
or maintained. Strictly observe only the instructions
within the original operating instructions for proper
product use. Absolutely avoid any applications and
actions the original operating instructions advise
against.
Dear customer,
the warranty for this device is 2 years from the date
of purchase. In the event of product defects, you
have legal rights against the retailer of this product.
This product is intended for private, non-commercial
use only. Any incorrect or improper use of the device,
use of force and changes not performed by our au-
thorized service branch will void the warranty.
Your statutory rights are not limited in any way by
our warranty detailed below.
Processing of warranty claims
Please follow the instructions below to ensure your
claim is processed quickly:
11 GB
100683_uls_Kfz-Ladegeraet mit Starthilfefunktion ULG 12 A1_content_CZ.indd 11 29.09.14 12:20
Page 12

… / Environmental instructions and disposal information / Declaration of Conformity
When inquiring about your product please have your
receipt and product number (e.g. IAN) ready as
your proof of purchase. The item number can be
found on the type plate, engraving, the cover page
of your instructions (bottom left) or the decal at the
back or bottom. In the event of malfunctions or other
defects, please first contact the service department
below by phone or e-mail.
A product recorded as defective, along with the proof
of purchase (sales receipt) and a description of the
defect and when it occurred, can then be returned fr
of charge to you to the service address provided.
Notice:
Visit www.lidl-service.com to download
this and many other manuals, product
videos and software.
How to contact us:
GB
Name: C. M. C. GmbH
Website: www.cmc-creative.de
E-mail: service.gb@cmc-creative.de
Phone: 0-808-189-0652
(standard German landline
rates apply)
Registered office: Germany
ee
Environmental instructions
and disposal information
Don‘t waste, recycle!
Device, accessories and packaging
should be recycled in an environmentally
friendly manner.
Do not throw the car charger into household rubbish,
fire or into water. If possible, non-operational devic-
es should be recycled. Contact your local retailer for
information.
As the consumer you are legally obligated
(Battery Ordinance) to return any used
batteries. Batteries containing hazardous
substances are marked with these symbols,
indicating the ban on disposal through
household rubbish. The designations of
the determining heavy metal are: Cd =
cadmium, Hg = mercury, Pb = lead.
Return used batteries through your municipal or com-
munity disposal facilities or the retailer. This satisfies
your legal obligations and you are greatly contribut-
ing to protecting the environment.
IAN 100683
Declaration of Conformity
Please note that the following address is not a service address.
Please first contact the service point named above.
Address:
C. M. C. GmbH
Katharina-Loth-Str. 15
66386 St. Ingbert
Germany
12 GB
100683_uls_Kfz-Ladegeraet mit Starthilfefunktion ULG 12 A1_content_CZ.indd 12 29.09.14 12:20
We,
C. M. C. GmbH
Responsible for documentation: Markus Zimmer
Katharina-Loth-Str. 15
66386 St. Ingbert
declare in our sole responsibility the product
Car charger with jump start function
Year of manufacture: 2014 / 44
IAN: 100683
Year of CE mark: 14
Model: CAR CHARGER WITH JUMP START
FUNCTION ULG 12 A1
Page 13

meets the basic safety requirements of European
Directives
EC Low Voltage Directive
2006 / 95 / EC
EC Electromagnetic Compatibility Directive
2004 / 108 / EC
Automotive EMC Directive
(2004 / 104 / EC)
RoHS Directive
(2011 / 65 / EU)
The object of the declaration described above meets
the requirements of Directive 2011 / 65 / EC of the
European Parliament and Council dated 08 June
2011 restricting the use of certain hazardous substances in electrical appliances and electronics.
The conformity assessment is based on the following
harmonised standards:
EN 60335-2-29 / A2:2010
EN 60335-1:2012
EN 62233:2008
EN 50498:2010
EN 55014-1:2006+A1:2009+A2:2011
EN 61000-3-2:2006+A1:2009+A2:2009
EN 61000-3-3:2008
Declaration of Conformity
St. Ingbert, 30.09.2014
Markus Zimmer
- Quality Control Manager -
13 GB
100683_uls_Kfz-Ladegeraet mit Starthilfefunktion ULG 12 A1_content_CZ.indd 13 29.09.14 12:20
Page 14

14
100683_uls_Kfz-Ladegeraet mit Starthilfefunktion ULG 12 A1_content_CZ.indd 14 29.09.14 12:20
Page 15

Seznam obsahu
Úvod
Používání v souladu s určením ........................................................................................................ Strana 16
Popis dílů .......................................................................................................................................... Strana 16
Technické údaje ............................................................................................................................... Strana 16
Obsah dodávky ............................................................................................................................... Strana 17
Bezpečnostní pokyny ........................................................................................................ Strana 17
Obsluha
Vlastnosti výrobku ............................................................................................................................ Strana 18
Připojení ............................................................................................................................................ Strana 19
Odpojení .......................................................................................................................................... Strana 19
Volba nabíjecího režimu ..................................................................................................................Strana 19
Použití funkce pomocného startování ............................................................................................. Strana 20
Výměna pojistky ............................................................................................................................... Strana 21
Údržba a ošetřování .......................................................................................................... Strana 21
Pokyny kzáruce a provádění servisu
Záruční podmínky ............................................................................................................................ Strana 21
Rozsah záruky .................................................................................................................................. Strana 21
Postup v případě uplatňování záruky ............................................................................................. Strana 22
Ekologické pokyny a informace pro odstranění do odpadu .......... Strana 22
EG prohlášení o konformitě ......................................................................................... Strana 22
15 CZ
100683_uls_Kfz-Ladegeraet mit Starthilfefunktion ULG 12 A1_content_CZ.indd 15 29.09.14 12:20
Page 16

Úvod
V tomto originálním návodu k provozu a na přístroji jsou použity následující
piktogramy:
Číst návod k provozu!
Upozornění Pozor! Nebezpečí výbuchu!
Dbejte na výstrahy a řiďte se
bezpečnostními pokyny!
Autonabíječka s funkcí
pomocného startu ULG 12 A1
Úvod
Srdečně blahopřejeme!
Rozhodli jste se pro kvalitní výrobek naší
firmy. Před prvním uvedením do provozu
se seznamte s výrobkem. Přečtěte si k tomu pozorně
n
ásledující originální návod k montáži a bezpečnostn
pokyny. Tento výrobek mohou do provozu uvádět
pouze zaškolené osoby.
Používání v souladu s určením
Ultimate Speed ULG 12 A1 je nabíječka baterií
motorových vozidel s pulzním udržovacím nabíjením
(Chip-Software), vhodná k nabíjení a udržovacímu
nabíjení následujících olovnatých akumulátorů (baterií) s napětím 6 nebo 12 V s elektrolytickým roztokem, AMG baterií, kyselino-olovnatých baterií, Deep
Cycle (člunových baterií) nebo gelových baterií:
• Pro automobilové a motocyklové baterie s napě-
tím 12 V / 6 V a kapacitou 8–180 Ah
Mimo to můžete vybité baterie regenerovat (v závislosti na typu baterie). Nabíječka je vybavena
ochranným zapojením proti jiskření a přehřátí. Každé neodborné použití a jiné použití než ke stanovenému účelu vede ke ztrátě záruky. Za škody vzniklé
při použití k jinému než ke stanovenému účelu nepřevezme výrobce ručení. Přístroj není určen ke komerčnímu použití.
16 CZ
Pozor! Nebezpečí zásahu
elektrickým proudem!
Obal i výrobek odstraňujte do odpadu
ekologicky!
Upozornění: Nabíječkou není možné nabíjet
elektrická vozidla s vestavěnými akumulátorovými
bateriemi.
Popis dílů
1
Tlačítko digitálního displeje
2
Tlačítko typu baterie
3
Tlačítko startu nabíjení
4
í
Pojistka s krytem
5
„+“-připojovací kabel (červený)
6
Svorka „–“ pól (černá)
7
Svorka „+“ pól (červená)
8
„–“-připojovací kabel (černý)
9
Síťový kabel
10
Digitální displej
Technické údaje
Vstupní napětí: 230 V∼ 50 Hz
Zpětný proud*: < 5 mA (žádný AC vstup)
Jmenovité výstupní napětí: 6 V / 12 V
Nabíjecí proud: 2 A, 6 A, 12 A ± 10 %
Typ baterie s: 12 V / 6 V a kapacitou
8–180 Ah
Druh ochrany tělesa: IP 20
* = Zpětný proud je proud, který spotřebovává na-
bíječka z baterie, když není připojená na síť s
elektrickým proudem.
100683_uls_Kfz-Ladegeraet mit Starthilfefunktion ULG 12 A1_content_CZ.indd 16 29.09.14 12:20
Page 17

Úvod / Bezpečnostní pokyny
Obsah dodávky
Ihned po rozbalení zkontrolujte obsah
dodávky, přístroj a všechny díly, jestli nejsou poškozené. Vadný přístroj nebo díly
neuvádějte do provozu.
1 nabíječka Ultimate Speed ULG 12 A1
2 připojovací svorky (1 červená, 1 černá)
1 originální návod k provozu
Bezpečnostní pokyny
VÝROBEK SE NESMÍ DOSTAT DO RUKOU DĚTÍ!
NEBEZPEČÍ! Zabraňte nebezpečí ohrožení
života nebo zranění neodborným použiváním!
POZOR! Nepoužívejte nabíječku s poškozeným
kabelem, síťovým kabelem nebo s poškozenou
zástrčkou. Poškozené síťové kabely znamenají
nebezpečí ohrožení života úrazem elektrickým
proudem.
Poškozený síťový kabel nechte opravit jen auto-
rizovaným a školeným odborným personálem!
V případě potřebné opravy se obraťte na servis
ve Vaší zemi!
NEBEZPEČÍ ZÁSAHU ELEKTRIC-
KÝM PROUDEM! U pevně namon-
tované baterie zajistěte, aby nebylo
vozidlo v provozu! Zaparkujte vozidlo, vypněte
zapalování, zatáhněte ruční brzdu (např. u automobilu) nebo zajistěte lanem (např. elektrický
člun)!
NEBEZPEČÍ ZÁSAHU ELEKTRIC-
KÝM PROUDEM! Odpojte nabí-
ječku od přívodu elektrického proudu.,
dříve než připojíte nebo odpojíte připojovací
svorky od baterie.
Připojte nejdříve svorku, která není připojená na
karoserii.
Připojte druhou svorku na karoserii, pokud mož-
no co nejdále od baterie a rozvodu paliva.
Teprve potom připojte nabíječku na přívod elek-
trického proudu.
Po nabíjení odpojte nabíječku od přívodu elek-
trického proudu.
Potom odpojte svorku od karoserie. Nakonec
odpojte svorku od baterie.
NEBEZPEČÍ ZÁSAHU ELEKTRIC-
KÝM PROUDEM! Dotýkejte se
připojovacího kabelu („–“ und „+“)
jen na izolovaných místech!
NEBEZPEČÍ ZÁSAHU ELEKTRIC-
KÝM PROUDEM! Proveďte připojení na baterii a do zásuvky s elek-
trickým proudem plně chráněné před vlhkostí!
NEBEZPEČÍ ZÁSAHU ELEK-
TRICKÝM PROUDEM! Neprovádějte montáž, údržbu nebo ošetřování
nabíječky pod proudem!
NEBEZPEČÍ ZÁSAHU ELEKTRIC-
KÝM PROUDEM! Po ukončeném
nabíjení a udržovacím nabíjení baterie pevně vestavěné ve vozidle odpojujte vždy
nejdříve záporný připojovací kabel (černý) nabíječky od záporného pólu baterie.
Nenechávejte malé děti s nabíječkou bez do-
hledu!
Děti nemohou odhadnout možná nebezpečí
při zacházení s elektrickými přístroji. Děti mají
být pod dozorem, aby si sartiklem nehrály.
Tento přístroj mohou používat děti starší osmi
let, osoby se sníženými fyzickými, smyslovými
nebo duševními schopnosti nebo s nedostatečn
ými zkušenostmi a znalostmi, jestliže budou po
dohledem nebo byly poučeny o bezpečném
používání přístroje a chápou nebezpečí, která
z jeho používání vyplývají. S přístrojem si nesmějí hrát děti. Děti nesmí provádět čištění a
údržbu bez dohledu.
NEBEZPEČÍ VÝBUCHU! Chraňte
se před výbuchem vysoce výbušného
plynu z baterie! Při nabíjení a udržovacím nabíjením baterií může unikat plynný vodík. Oxyhydrogen je výbušná směs plynného
vodíku a kyslíku. Při kontaktu s otevřeným ohněm
(plameny, žhavé uhlí nebo jiskry) dojde k takzvané třaskavé výbušné reakci! Provádějte nabíjení
a udržovací nabíjení v dobře větrané místnosti,
chráněné před povětrnostními vlivy. Zajistěte, aby
se při nabíjení nebo udržovacím nabíjení nenacházel v blízkosti otevřený oheň (plameny, žhnoucí hmota nebo jiskry)!
d
17 CZ
100683_uls_Kfz-Ladegeraet mit Starthilfefunktion ULG 12 A1_content_CZ.indd 17 29.09.14 12:20
Page 18

Bezpečnostní pokyny / Obsluha
NEBEZPEČÍ VÝBUCHU A POŽÁRU! Zajis-
těte, aby se při použití nabíječky nemohly vznítit
výbušné a hořlavé látky, např. benzín nebo rozpouštědla!
VÝBUŠNÉ PLYNY! Vyloučit plameny a jiskry!
Během nabíjení zajistit dostatečné větrání.
Před nabíjením postavte baterii na dobře větra-
nou plochu. Jinak se váha může poškodit.
NEBEZPEČÍ VÝBUCHU! Zajistěte,
aby se nedostal kabel kladného pólu
do kontaktu s rozvodem paliva (např.
benzínovou trubkou)!
NEBEZPEČÍ POLEPTÁNÍ! Chraňte Vaše oči
a pokožku při zacházení s baterií před poleptáním kyselinou (kyselinou sýrovou)!
Noste ochranné brýle, oblečení a rukavice odo-
lávající kyselině! Při kontaktu očí nebo pokožky
s kyselinou baterií ihned omyjte postižená místa
dostatečným množstvím čisté vody a okamžitě
vyhledejte lékařskou pomoc!
Zabraňte zkratu při připojování nabíječky na
baterii. Připojujte kabel záporného pólu jen na
záporný pól baterie nebo na karoserii. Připojujte
kabel kladného pólu jen na kladný pól baterie!
Před připojením na přívod elektrického proudu
230 V∼ 50 Hz zkontrolujte, jestli je rozvod vybavený uzemněním, pojistkou 16 A a FI jističem!
Jinak se váha může poškodit.
Nevystavujte nabíječku vlivu tepla ohně, žáru
nebo trvalé teplotě přes 50 °C! Při vyšších teplotách automaticky klesá výstupní výkon nabíječky.
Při montáži nabíječky nepoškoďte šrouby roz-
vod paliva, elektrického proudu, hydrauliky, vody
nebo brzdové kapaliny! Nebezpečí ohrožení
života nebo zranění!
Používejte nabíječku jen s dodanými, originálními
díly!
Nezakrývejte nabíječku žádnými předměty! Jinak
se váha může poškodit.
Chraňte kontakty baterie před zkratem!
Používejte nabíječku na nabíjení nebo udržovací
nabíjení jen nepoškozených olovnatých baterií
s napětím 6 resp. 12 V. (s elektrolytem nebo
gelem)! Vopačném případě hrozí nebezpečí
poškození věcí.
Nepoužívejte nabíječku k nabíjení a udržovácí-
mu nabíjení nenabíjecích baterií. Vopačném
případě hrozí nebezpečí poškození věcí.
18 CZ
Nepoužívejte nabíječku k nabíjení a udržovácí-
mu nabíjení poškozených nebo zmrzlých baterií!
Vopačném případě hrozí nebezpečí poškození
věcí.
Informujte se o připojení nabíječky a ošetřování
baterie v originálním návodu k provozu! Jinak
hrozí nebezpečí zranění nebo poškození přístroje.
Informujte se o připojení nabíječky na baterii,
která je trvale připojená ve vozidle, v zájmu
dodržení elektrické bezpečnosti a správné údržby pomocí originálního návodu k provozu! Jinak
hrozí nebezpečí zranění nebo věcných škod.
Nepoužívanou nabíječku odpojte, z důvodu
ochrany životního prostředí, od sítě! Vezměte
na vědomí, že i standby režim spotřebovává
proud.
Dávejte pozor co děláte a buďte stále opatrní.
Postupujte rozumně, neuvádějte nabíječku do
provozu, jestliže jste nekoncentrovaní nebo se
necítíte dobře.
Obsluha
Před prácí na přístroji nejdříve vytáhněte zástrčku
ze zásuvky.
NEBEZPEČÍ ZÁSAHU ELEKTRICKÝM
PROUDEM!
NEBEZPEČÍ VĚCNÉ ŠKODY!
NEBEZPEČÍ ZRANĚNÍ!
Vlastnosti výrobku
Tento přístroj je koncipovaný pro nabíjení různorodých SLA baterií (zapečetěné kyselino-olovnaté
baterie), které jsou převážně používané v osobních
automobilech, motocyklech a jiných vozidlech. Mohou to být např. WET baterie (s tekutým elektrolytem),
gelové baterie (s gelovým elektrolytem) nebo AMG
baterie (s materiály pohlcujícími elektrolyt). Speciální
koncepce přístroje (jmenovaná také třístupňová strategie nabíjení) umožňuje nabití baterie až skoro na
100 % její kapacity. Kromě toho je možné baterii
připojit na nabíječku na delší dobu a tím ji udržovat
v optimálním stavu.
100683_uls_Kfz-Ladegeraet mit Starthilfefunktion ULG 12 A1_content_CZ.indd 18 29.09.14 12:20
Page 19

Obsluha
Připojení
Po ukončeném nabíjení a udržovacím nabíjení
baterie pevně vestavěné ve vozidle odpojujte
vždy nejdříve záporný připojovací kabel (černý)
nabíječky od záporného pólu baterie. Záporný
pól baterie je zpravidla spojený s karoserií vozidla.
Nakonec odpojte záporný připojovací kabel
(červený) vozidla od záporného pólu baterie.
P
řipojte nejdříve kladnou svorku „+“ (červená) 7
nabíječky na kladný pól baterie „+“.
Připojte zápornou svorku „-“ (černá) 6 nabíječ-
ky na záporný pól baterie „-“. Připojte nabíječku kabelem
9
do zásuvky elektrického proudu.
Upozornění: Jestliže jsou svorky správně připojené, ukáže displej hodnotu napětí a objeví se nápis
„connected“. Při neprávném připojení pólů ukáže
displej 0.0 a nápis „connected“ se neobjeví.
Odpojení
Odpojte nabíječku od přívodu elektrického proudu
Odpojte zápornou svorku „-“ (černá) 6 nabí-
ječky od záporného pólu baterie „-“.
Odpojte kladnou svorku „+“ (červená) 7 na-
bíječky od kladného pólu baterie „+“.
Připojte zase připojovací kabel kladného pólu
vozidla na kladný pól baterie.
Připojte zase připojovací kabel záporného pólu
vozidla na záporný pól baterie.
Volba nabíjecího režimu
Můžete navolit různé režimy nabíjení pro nabíjení
různých baterií při rozdílných teplotách okolního
prostředí. Ve srovnání s běžnými nabíječkami má
tento přístroj navíc speciální funkci pro nové použití
vybité baterie nebo akumulátoru. Můžete znovu nabít i úplně vybitou baterii nebo akumulátor. Ochrana
proti chybnému zapojení a zkratu zajišťuje bezpečné nabíjení. Vestavěná elektronika nezapíná nabíječku ihned po připojení baterie, ale teprve až se
navolí nabíjecí režim.
Při spojení svorek s baterií a připojení přístroje na
proud svítí na digitálním displeji
10
nápis „Connected“. Po navolení nabíjecího režimu svítí „Charging“.
Po ukončeném nabíjení svítí „Charged“.
Jestliže digitální displej neustále svítí, ještě než je baterie úplně nabitá, znamená to že došlo k poruše.
V tomto případě ještě jednou zkontrolujte kontakt
6, 7
svorek
s baterií a jestli jste zvolili správný typ baterie. Jestliže i nadále displej svítí, pak
je pravděpodobně vadná baterie.
Tlačítko digitálního displeje
1
: Umožňuje
volbu mezi digitálním zobrazením napětí a průběhu
nabíjení v procentech (Battery %). Použijte toto tlačítko pro volbu následujících zobrazení:
– baterie %: ukazuje stav nabíjení připojené
baterie v procentech.
– napětí: ukazuje napětí připojené baterie.
– alternátor %: výstupní výkon v procentech
Tlačítko typu baterie
2
: toto tlačítko použijte
pro nastavení typu baterie, kterou chcete nabíjet.
Zde můžete volit mezi typy baterií. Před nabíjením
.
je nezbytně nutné nastavit správný typ baterie:
– 12 V Regular: Tyto baterie (kyselino-olovnaté
baterie) jsou používány zpravidla v osobních a
nákladních automobilech i motocyklech. Mají
odvzdušňovací víčka a jsou často označovány
jako „nenáročné na údržbu“ nebo „bezúdržbové“. Tento typ baterie je koncipovaný pro rychlý
přenos energie (např. při startu motoru). „Regular“ baterie se nemají používat pro „Deep Cycle“.
– 12 V Deep Cycle: Tyto baterie jsou značeny jako
„Deep Cycle“ nebo „Marine“. Baterie tohoto
typu jsou zpravidla větší než ostatní typy baterií.
Tyto baterie dodávají nižší krátkodobou energii,
ale zajišťují dlouhodobější přenos energie. Tyto
baterie vydrží mnoho vybíjecích cyklů.
– 12 V AGM / Gel: Baterie typu AMG jsou zpra-
vidla dobré Deep Cycle baterie. Mají nejlepší
„životnost“, jestliže se vždy znovu nabíjí dříve,
než se vybijí na více než 50 %. Při úplném vybíjení vydrží asi 300 nabíjecích cyklů. Baterie
typu GEL je podobná jako baterie typu AGM.
19 CZ
100683_uls_Kfz-Ladegeraet mit Starthilfefunktion ULG 12 A1_content_CZ.indd 19 29.09.14 12:20
Page 20

Obsluha
Při nabití je její napětí nižší než u ostatních kyselino-olovnatých baterií. Jestliže použijete pro
GEL baterii nesprávnou nabíječku, pak má baterie nižší výkon resp. zkrácenou životnost.
– 6 V Regular: Tento režim zvolte pro běžné ba-
terie s napětím 6 V.
Tlačítko startu nabíjení
3
: Použijte toto tlačítko
pro volbu následujících nabíjení:
– Fast Charge: rychlé nabíjení (doporučené při
nízkých venkovních teplotách / v zimě)
– Normal Charge: normální nabíjení (normální
rychlost)
– Start: dodává Vám krátkodobě 75 A, pro pře-
mostění slabě nabité nebo vybité baterie při
startu motoru
Pozor: Režim je možné ukončit vytáhnutím síťového
kabelu 9.
Použití funkce
pomocného startování
Provádějte všechna připojení jak
bylo popsáno a ve správném pořadí. Jinak může dojít k poškození elektroniky vozidla.
Při opačném než popsaném postupu jednáte na
vlastní nebezpečí a zodpovědnost.
Pozor: Tato funkce není vhodná pro baterie menší
než 45 Ah. Baterie menší než 45 Ah může tato funkce poškodit.
Naftová a velkoobsahová vozidla potřebují při startu vyšší proud než 75 Ah.
Poznámka: Nabíječka je vybavena analyzujícím
programem, který chrání baterii, obzvlášť při fukci
pomocného startování, před poškozením (např. sulfatace, přílišný pokles napětí). Přístroj nezapne pomocné startování, jestliže je baterie silně vybitá
nebo namáhaná. Během tohoto postupu se nabíjí
baterie již nizkými proudy (rozsvítí se Charging). Na
displeji zůstává „0“. V tomto případě není funkce
pomocného startování možná. Toto chrání baterii
před poškozením. Baterie se musí potom nejdříve
nabít. K tomu je také možné použít funkci „Fast
Charge“ nebo „Normal Charge“.
Připojte nabíječku kabelem 9 do zásuvky elek-
trického proudu.
Připevněte červenou svorku 6 na kladný pól
Vaší baterie. (Kladný pól je označený „+“ a
červeně).
Připevněte černou svorku 5 na záporný pól
Vaší baterie. (Záporný pól je označený „-“ a
černou barvou).
Jestliže jsou svorky správně připojené zvolí na-
bíječka automaticky i správný typ baterie. Volbu
typu baterie můžete zkontrolovat v políčku „Battery-Type“ a popřípadě změnit tlačítkem pro typ
2
baterie
.
Nyní zvolte tlačítkem Charge-Start 3 funkci
„Start“. Nabíječka začne analyzovat stav baterie. Displej ukáže „0“.
Nyní zapněte zapalování vozidla. Na displeji
se rozeběhne 5 vteřinový countdown, (z toho
2 vteřiny náběhová resp. analyzující funkce a
3 vteřiny funkce pomocného startování s 75 A),
jestliže je zapotřebí podpora startování nabíječkou (tato je nabíječkou předem analyzováno).
Během Countdowns dodává nabíječka krátkodobě 75 A pro přemostění baterie při startování
motoru. Potom následuje přestávka po dobu 180
vteřin pro šetření baterie. Nyní začíná cyklus od
začátku (2 vteřinny náběhová a analyzující funkce, 3 vteřiny funkce pomocného startování s
75 A / 180 vteřin přestávka).
Pro odpojení přístroje sejměte nejdříve svorky
6
(
/ 7) a nakonec vytáhněte síťový kabel 9.
Poznámka: Jestliže je baterie úplně vybitá nestačí
75 A u všech vozidel ke startu motoru (např. u naftových motorů).
V tomto případě, prosíme, navolte tlačítkem star-
tu nabíjení
3
opci „Fast Charge“ a nabijte
baterii na 60 % ( u naftových motorů spotřebovává předžhavení energie z baterie). Zde je
zapotřebí kapacita 60 % po předžhavení).
Průběh nabíjení můžete sledovat na displeji, po navolení „Baterie %“ na displeji pomocí tlačítka pro
digitální displej
1
.
Po dosažení kapacity 60 % zaveďte znovu
fuknci pomcného startování.
20 CZ
100683_uls_Kfz-Ladegeraet mit Starthilfefunktion ULG 12 A1_content_CZ.indd 20 29.09.14 12:20
Page 21

Obsluha / Údržba a ošetřování / Pokyny kzáruce a provádění servisu
Pozor: Ukončete režim vytažením síťového kabelu
9
.
Výměna pojistky
Pojistka nabíječky může být poškozena např. poruchou přístroje, přetížením, atd.
Dříve než začnete vyměňovat pojistku vytáhněte
síťový kabel
9
.
Sejměte kryt pojistky 4 mírným zatlačením na
stranách.
Odšroubujte vhodným otevřeným klíčem pojistku
4
a nasaďte novou pojistku.
Nakonec ji pevně zašroubujte a nasaďte zpátky
4
kryt
.
Poznámka: V případě, že potřebujete novou
pojistku, prosíme, obraťte se na náš servis (viz
kapitola s pokyny k záruce a provádění servisu).
Údržba a ošetřování
Před prací na nabíječce vždy vytáhněte síťový
9
kabel
ze zásuvky.
Přístroj nevyžaduje údržbu. Vypněte přístroj.
Kovové a umělohmotné povrchy přístroje čistěte
suchým hadrem.
V žádném případě nepoužívejte prostředky
obsahující rozpouštědla nebo žíravé čisticí prostředky.
Pokyny kzáruce
a provádění servisu
Záruka od Creative Marketing
Consulting GmbH
Vážená zákaznice,
vážený zákazníku, na tento výrobek dostáváte 2 ro
záruku ode dne zakoupení. V případě závad máte
možnost uplatnění zákonných práv vůči prodejci.
Vaše práva ze zákona nejsou omezena naší níže
uvedenou zárukou.
ky
Záruční podmínky
Záruční lhůta začíná běžet od data zakoupení.
Uschovejte si dobře originál pokladní stvrzenky.
Tuto stvrzenku budete potřebovat jako doklad o zakoupení. Pokud se do dvou let od data zakoupení
tohoto výrobku vyskytne vada materiálu nebo výrobní vada, výrobek vám – podle našeho rozhodnutí
– bezplatně opravíme nebo vyměníme. Předpokladem pro poskytnutí záruky je předložení vadného
výrobku a pokladní stvrzenky během 2 let záruky a
písemný popis závady s dobou, kdy se vyskytla.
Pokud vada spadá do naší záruky, obdržíte od nás
opravený nebo nový výrobek. Opravou ani výměnou
výrobku nezačíná nová záruční lhůta.
Rozsah záruky
Výrobek byl vyroben snejvyšší pečlivostí podle přísných kvalitativních směrnic a před odesláním prošel
výstupní kontrolou.
Záruka platí na vady materiálu a výrobní vady.
Tato záruka se nevztahuje na části výrobku, které
jsou vystaveny běžnému opotřebení a které lze proto chápat jako rychle opotřebitelné součásti, nevztahuje se na poškození rozbitných částí, např. spínačů,
baterií nebo takových, které jsou zhotoveny ze skla.
Tato záruka zaniká, jestliže se výrobek poškodí, neodborně použil nebo neobdržel pravidelnou údržbu
K odbornému používání výrobku je zapotřebí přesně dodržovat pokyny uvedené v originálním návodu
k provozu. Je bezpodmínečně nutné vyhnout se účelům použití a jednáním, od kterých se v návodu k
obsluze odrazuje nebo před kterými návod k obsluze varuje.
Výrobek je určen pouze pro soukromé, nikoliv komerční použití. Vpřípadě nesprávného a neodborného zacházení, použití násilí a zásahů, které nebyly
provedeny našimi autorizovanými servisními provozovnami, záruční nároky zanikají.
.
21 CZ
100683_uls_Kfz-Ladegeraet mit Starthilfefunktion ULG 12 A1_content_CZ.indd 21 29.09.14 12:20
Page 22

… / Ekologické pokyny a informace pro … / EG prohlášení o konformitě
Postup v případě
uplatňování záruky
Pro zajištění rychlého zpracování Vašeho případu
se řiďte následujícími pokyny:
Pro všechny Vaše požadavky si připravte pokladní
stvrzenku a číslo výrobku (např. IAN) jako doklad
o zakoupení. Číslo výrobku naleznete na typovém
štítku, rytině, na titulním stránce návodu (vlevo dole)
nebo na nálepce na zadní nebo spodní straně. Pokud se vyskytnou funkční vady, kontaktujte nejprve
telefonicky nebo e-mailem níže uvedený servis.
Výrobek s registrovanou závadou pak můžete, spolu s pokladní stvrzenkou, popisem závady a údajem
kdy se vyskytla nezplatně zaslat na adresu servisu,
kterou vám sdělilo servisní oddělení.
Upozornění:
Na www.lidl-service.com si můžete stáhnout tento a ostatní manuály, videa výrobku a software.
Takto nás můžete kontaktovat:
CZ
Název: C.M.C. Creative Marketing &
Consulting GmbH Service CZ
Internetová adresa:
E-mail: info@bohemian-dragomans.com
Telefon: +49 (0) 6894 9989752
Sídlo: Německo
www.cmc-creative.de
(běžný tarif německé pevné sítě)
IAN 100683
Vezměte laskavě na vědomí, že následující adresa
není adresa servisu.
Nejprve kontaktujte výše uvedené servisní středisko.
Adresa:
C. M. C. GmbH
Katharina-Loth-Str. 15
66386 St. Ingbert
Německo
Ekologické pokyny a informace
pro odstranění do odpadu
Recyklace surovin místo
odhození do odpadu!
Výrobek, příslušenství a obal
mají být recyklovány.
Neodhazujte nabíječku do domovního odpadu, ohně
nebo do vody. Pokud je to možné, měly by být vadné
nebo nepotřebné výrobky recyklovány. Požádejte o
pomoc Vašeho místního prodejce.
Jako spotřebitel jste podle zákona povinný
(ustanovení k bateriím) všechny upotřebené baterie odevzdávat. Baterie obsahující
škodlivé látky jsou označeny vedle uvedeným symbolem, upozorňujícím na zákaz
jejich odstranění do domácího odpadu.
Označení pro dotyčné těžké kovy jsou:
Cd = kadmium, Hg = rtuť, Pb = olovo.
Odevzdejte použité baterie do sběrny ve Vašem
městě nebo obci anebo je vraťte prodejci. Splníte
tím povinnost ze zákona a přispějete k ochraně životního prostředí.
EG prohlášení o konformitě
My, firma
C. M. C. GmbH
Za dokumentaci zodpovědný pracovník:
Markus Zimmer
Katharina-Loth-Str. 15
66386 St. Ingbert
prohlašujeme na vlastní zodpovědnost, že výrobek
Autonabíječka s funkcí pomocného startu
Rok výroby: 2014 / 44
IAN: 100683
Rok značení zkratkou CE: 14
Model: AUTONABÍJEČKA S FUNKCÍ
POMOCNÉHO STARTU ULG 12 A1
22 CZ
100683_uls_Kfz-Ladegeraet mit Starthilfefunktion ULG 12 A1_content_CZ.indd 22 29.09.14 12:20
Page 23

odpovídá podstatným ochranným požadavkům,
které jsou stanoveny v evropské směrnici
ES Směrnice o nízkém napětí
2006 / 95 / ES
EG směrnice k elektromagnetické
snášenlivosti
2004 / 108 / ES
EMV směrnice pro motorová vozidla
(2004 / 104 / EG)
RoHS směrnice
(2011 / 65 / EG)
Výše popsaný předmět prohlášení splňuje předpisy
ve směrnici 2011 / 65 / EU Evropského parlamentu
a Rady z 08. června 2011 o omezení použití určitých nebezpečných látek v elektrických a elektronických přístrojích
které jsou v obsahu stanoveny.
K posouzení shody byly použité následující
harmonizující normy:
EN 60335-2-29/A2:2010
EN 60335-1:2012
EN 62233:2008
EN 50498:2010
EN 55014-1:2006+A1:2009+A2:2011
EN 61000-3-2:2006+A1:2009+A2:2009
EN 61000-3-3:2008
EG prohlášení o konformitě
St. Ingbert, 30.09.2014
Markus Zimmer
- vedoucí kontroly kvality -
23 CZ
100683_uls_Kfz-Ladegeraet mit Starthilfefunktion ULG 12 A1_content_CZ.indd 23 29.09.14 12:20
Page 24

24
100683_uls_Kfz-Ladegeraet mit Starthilfefunktion ULG 12 A1_content_CZ.indd 24 29.09.14 12:20
Page 25

Inhaltsverzeichnis
Einleitung
Bestimmungsgemäße Verwendung .................................................................................................... Seite 26
Teilebeschreibung ............................................................................................................................... Seite 26
Technische Daten ................................................................................................................................ Seite 26
Lieferumfang ........................................................................................................................................ Seite 27
Sicherheitshinweise ................................................................................................................ Seite 27
Bedienung
Produkteigenschaften .......................................................................................................................... Seite 29
Anschließen ......................................................................................................................................... Seite 29
Trennen ................................................................................................................................................ Seite 29
Lademodus auswählen ....................................................................................................................... Seite 29
Starthilfefunktion verwenden .............................................................................................................. Seite 30
Sicherung wechseln ............................................................................................................................Seite 31
Wartung und Pflege ............................................................................................................... Seite 31
Hinweise zu Garantie und Serviceabwicklung
Garantiebedingungen ........................................................................................................................Seite 32
Garantieumfang .................................................................................................................................. Seite 32
Abwicklung im Garantiefall ................................................................................................................ Seite 32
Umwelthinweise und Entsorgungsangaben ..................................................... Seite 33
EG-Konformitätserklärung ............................................................................................... Seite 33
25 DE/AT/CH
100683_uls_Kfz-Ladegeraet mit Starthilfefunktion ULG 12 A1_content_CZ.indd 25 29.09.14 12:20
Page 26

Einleitung
In dieser Originalbetriebsanleitung / am Gerät werden folgende
Piktogramme verwendet:
Originalbetriebsanleitung lesen! Vorsicht! Stromschlaggefahr!
Hinweis Vorsicht! Explosionsgefahr!
Warn- und Sicherheitshinweise
beachten!
Kfz-Ladegerät mit
Starthilfefunktion ULG 12 A1
Einleitung
Herzlichen Glückwunsch!
Sie haben sich für ein hochwertiges
Produkt aus unserem Haus entschieden.
Machen Sie sich vor der ersten Inbetriebnahme mit
dem Produkt vertraut. Lesen Sie hierzu aufmerksam
die nachfolgende Originalbetriebsanleitung und die
Sicherheitshinweise. Die Inbetriebnahme dieses Produktes darf nur durch unterwiesene Personen erfolgen.
Bestimmungsgemäße
Verwendung
Das Ultimate Speed ULG 12 A1 ist ein Kfz-Ladegerät
mit Pulserhaltungsladung (Chip-Software), das zur
Aufladung und Erhaltungsladung von folgenden
6 V- oder 12 V-Blei-Akkus (Batterien) mit ElektrolytLösung, AMG-Batterien, Säure-Blei-Batterien, Deep
Cycle (Bootsbatterien) oder Gel-Batterien geeignet ist:
• Für Pkw- und Motorradbatterien mit 12 V / 6 V-
und 8–180 Ah Kapazität
Außerdem können Sie entladene Batterien regenerieren
(abhängig vom Batterietyp). Das Kfz-Ladegerät verfügt über eine Schutzschaltung gegen Funkenbil
und Überhitzung. Jeder nicht bestimmungsge
oder unsachgemäße Gebrauch führt zum Garantie
verlust. Für aus bestimmungswidriger Verwendung
standene Schäden übernimmt der Hersteller keine
26 DE/AT/CH
dung
mäße
ent-
Entsorgen Sie Verpackung und
Gerät umweltgerecht!
Haftung. Das Gerät ist nicht für den gewerblichen
Einsatz bestimmt.
Hinweis: Mit dem Kfz-Ladegerät können keine
Elektrofahrzeuge mit eingebautem Akku geladen
werden.
Teilebeschreibung
1
Digital-Display-Taste
2
Battery-Type-Taste
3
Charge-Start-Taste
4
Sicherung mit Abdeckung
5
“+“-Pol-Anschlusskabel (rot)
6
“–“-Pol-Anschlussklemme (schwarz)
7
“+“-Pol-Anschlussklemme (rot)
8
“
–“-Pol-Anschlusskabel (schwarz)
9
Netzkabel
10
digitale Anzeige
Technische Daten
Eingangsspannung: 230 V∼ 50 Hz
Rückstrom*:
< 5 mA (kein AC-Eingang)
Nennausgangsspannung: 6 V / 12 V
Ladestrom: 2 A, 6 A, 12 A ± 10 %
Batterietyp mit: 12 V / 6 V und
8–180 Ah Kapazität
Gehäuseschutzart: IP 20
* = Rückstrom bezeichnet den Strom, den das
-
Ladegerät aus der Batterie verbraucht, wenn
kein Netzstrom angeschlossen ist.
100683_uls_Kfz-Ladegeraet mit Starthilfefunktion ULG 12 A1_content_CZ.indd 26 29.09.14 12:20
Page 27

Einleitung / Sicherheitshinweise
Lieferumfang
Kontrollieren Sie unmittelbar nach dem
Auspacken den Lieferumfang und das
Gerät sowie alle Teile auf Beschädigungen.
Nehmen Sie ein defektes Gerät oder Teile nicht in
Betrieb.
1 Ladegerät Ultimate Speed ULG 12 A1
2 Schnellkontakt-Anschlussklemmen
(1 rot, 1 schwarz)
1 Originalbetriebsanleitung
Sicherheitshinweise
NICHT IN DIE HÄNDE VON KINDERN
KOMMEN LASSEN!
GEFAHR! Vermeiden Sie Lebens- und Verletz
gefahr durch unsachgemäßen Gebrauch!
VORSICHT! Betreiben Sie das Gerät nicht
mit beschädigtem Kabel, Netzkabel oder Netzstecker. Beschädigte Netzkabel bedeuten Lebensgefahr durch elektrischen Schlag.
Lassen Sie das Netzkabel im Beschädigungsfall
nur von autorisiertem und geschultem Fachpersonal reparieren! Setzen Sie sich im Reparaturfall
mit der Servicestelle Ihres Landes in Verbindung!
STROMSCHLAGGEFAHR! Stelle
Sie bei einer fest im Fahrzeug mon-
tierten Batterie sicher, dass das Fahrzeug außer Betrieb ist! Schalten Sie die Zündung
aus und bringen Sie das Fahrzeug in Parkposi
mit angezogener Feststellbremse (z.B. PKW)
festgemachtem Seil (z.B. Elektroboot)!
STROMSCHLAGGEFAHR! Trenne
Sie das Kfz-Ladegerät vom Netz, be-
vor Sie die Anschlussklemmen an der
Batterie anbringen oder diese entfernen.
Schließen Sie die Anschlussklemme, die nicht
an die Karosserie angeschlossen ist, zuerst an.
Schließen Sie die andere Anschlussklemme ent-
fernt von der Batterie und der Benzinleitung an
die Karosserie an.
Schließen Sie das Kfz-Ladegerät erst danach an
das Versorgungsnetz an.
ungs-
tion,
oder
Trennen Sie das Kfz-Ladegerät nach dem Laden
vom Versorgungsnetz.
Entfernen Sie erst danach die Anschlussklemme
von der Karosserie. Entfernen Sie im Anschluss
daran die Anschlussklemme von der Batterie.
STROMSCHLAGGEFAHR! Fassen
Sie die Pol-Anschlusskabel (“–“ und
“+“) ausschließlich am isolierten Be-
reich an!
STROMSCHLAGGEFAHR! Führen
Sie den Anschluss an die Batterie und
an die Steckdose des Netzstroms
vollkommen geschützt vor Feuchtigkeit durch!
STROMSCHLAGGEFAHR! Führen
Sie die Montage, die Wartung und
die Pflege des Kfz-Ladegerätes nur
frei vom Netzstrom durch!
STROMSCHLAGGEFAHR! Trenne
Sie nach Beendigung des Auflade-
Erhaltungsladevorgangs, bei einer
ständig im Fahrzeug angeschlossenen Batterie,
zuerst das Minus-Pol-Anschlusskabel (schwarz)
Kfz-Ladegeräts vom Minus-Pol der Batterie.
Lassen Sie Kleinkinder und Kinder nicht unbe-
aufsichtigt mit dem Kfz-Ladegerät!
Kinder können mögliche Gefahren im Umgang
mit Elektrogeräten noch nicht einschätzen. Kinder
sollten beaufsichtigt werden, um sicherzustellen,
dass sie nicht mit dem Gerät spielen.
Dieses Gerät kann von Kindern ab 8 Jahren und
n
darüber sowie von Personen mit verringerten
physischen, sensorischen oder mentalen Fähigkeiten oder Mangel an Erfahrung und Wissen
benutzt werden, wenn sie beaufsichtigt oder
bezüglich des sicheren Gebrauchs des Gerätes
unterwiesen wurden und die daraus resultierenden Gefahren verstehen. Kinder dürfen nicht
n
mit dem Gerät spielen. Reinigung und BenutzerWartung dürfen nicht von Kindern ohne Beaufsichtigung durchgeführt werden.
EXPLOSIONSGEFAHR! Schützen
Sie sich vor einer hochexplosiven
Knallgasreaktion! Gasförmiger Wasserstoff kann beim Aufladen und Erhaltungsladevorgang von der Batterie ausströmen. Knallgas
ist eine explosionsfähige Mischung von gasförmigem Wasserstoff und Sauerstoff. Beim Kontakt
mit offenem Feuer (Flammen, Glut oder Funken)
n
und
des
27 DE/AT/CH
100683_uls_Kfz-Ladegeraet mit Starthilfefunktion ULG 12 A1_content_CZ.indd 27 29.09.14 12:20
Page 28

Sicherheitshinweise
erfolgt die so genannte Knallgasreaktion! Führen
Sie den Auflade- und Erhaltungsladevorgang in
einem witterungsgeschützten Raum mit guter Belüftung durch. Stellen Sie sicher, dass beim Auflade- und Erhaltungsladevorgang kein offenes
Licht (Flammen, Glut oder Funken) vorhanden ist!
EXPLOSIONS- UND BRANDGEFAHR!
Stellen Sie sicher, dass explosive oder brennbare
Stoffe z.B. Benzin oder Lösungsmittel beim Gebrauch des Kfz-Ladegerätes nicht entzündet werden können!
EXPLOSIVE GASE! Flammen und Funken
vermeiden!
Während des Ladens für ausreichende Belüftung
sorgen.
Stellen Sie die Batterie während des Ladevor-
gangs auf eine gut belüftete Fläche. Andernfalls
kann das Gerät beschädigt werden.
EXPLOSIONSGEFAHR! Stellen
Sie sicher, dass das Plus-Pol-Anschlusskabel keinen Kontakt zu einer Treib-
stoffleitung (z.B. Benzinleitung) hat!
VERÄTZUNGSGEFAHR! Schützen Sie Ihre
Augen und Haut vor Verätzung durch Säure
(Schwefelsäure) beim Kontakt mit der Batterie!
Verwenden Sie: säurefeste Schutzbrille, -beklei-
dung und -handschuhe! Wenn Augen oder Haut
mit der Schwefelsäure in Kontakt geraten sind,
spülen Sie die betroffene Körperregion mit viel
fließendem, klarem Wasser ab und suchen Sie
umgehend einen Arzt auf!
Vermeiden Sie elektrischen Kurzschluss beim An-
schluss des Kfz-Ladegerätes an die Batterie.
Schließen Sie das Minus-Pol-Anschlusskabel
ausschließlich an den Minuspol der Batterie
bzw.
an die Karosserie. Schließen Sie das Plus-PolAnschlusskabel ausschließlich an den Plus-Pol
der Batterie!
Stellen Sie vor dem Netzstromanschluss sicher,
dass der Netzstrom vorschriftsmäßig mit 230 V∼
50 Hz, geerdetem Nullleiter, einer 16 A Sicheru
ng
und einem FI-Schalter (Fehlerstromschutzschalter)
ausgestattet ist! Andernfalls kann das Gerät beschädigt werden.
Setzen Sie das Kfz-Ladegerät nicht der Nähe
von Feuer, Hitze und lang andauernder Temperatureinwirkung über 50 °C aus! Bei höheren
Temperaturen sinkt automatisch die Ausgangsleistung des Kfz-Ladegerätes.
Beschädigen Sie keine Leitungen für Treibstoff,
Elektrizität, Bremsanlagen, Hydraulik, Wasser bei
der Montage des Kfz-Ladegerätes mit Schraube
n!
Andernfalls droht Lebens- und Verletzungsgefahr!
Verwenden Sie das Kfz-Ladegerät nur mit den
gelieferten Originalteilen!
Decken Sie das Kfz-Ladegerät nicht mit Gegen-
ständen ab! Andernfalls kann das Gerät beschädigt werden.
Schützen Sie die Elektrokontaktflächen der
Batterie vor Kurzschluss!
Verwenden Sie das Kfz-Ladegerät ausschließlich
zum Auflade- und Erhaltungsladevorgang von
unbeschädigten 6 V- / 12 V-Blei-Batterien (mit
Elektrolyt-Lösung oder -Gel)! Andernfalls kann
Sachbeschädigung die Folge sein.
Verwenden Sie das Kfz-Ladegerät nicht zum
Auflade- und Erhaltungsvorgang von nicht wiederaufladbaren Batterien. Andernfalls kann
Sachbeschädigung die Folge sein.
Verwenden Sie das Kfz-Ladegerät nicht zum
Auflade- und Erhaltungsladevorgang einer beschädigten oder eingefrorenen Batterie! Andernfalls kann Sachbeschädigung die Folge sein.
Informieren Sie sich vor dem Anschluss des La-
degerätes über die Wartung der Batterie anha
nd
deren Originalbetriebsanleitung! Andernfalls
besteht eine Verletzungsgefahr und / oder die
Gefahr, dass das Gerät beschädigt wird.
Informieren Sie sich vor dem Anschluss des La-
degerätes an eine Batterie, die ständig in einem
Fahrzeug angeschlossen ist, über die Einhaltung
der elektrischen Sicherheit und Wartung anhand
der Originalbetriebsanleitung des Fahrzeugs!
Andernfalls besteht eine Verletzungsgefahr und /
oder die Gefahr, dass Sachschäden entstehen.
Trennen Sie das Kfz-Ladegerät auch aus umwelt-
schutzgründen bei Nichtgebrauch vom Netz
strom!
Bedenken Sie, dass auch der Standby-Betrieb
Strom verbraucht.
Seien Sie stets aufmerksam und achten Sie immer
darauf was Sie tun. Gehen Sie stets mit Vernunft
vor und nehmen Sie das Kfz-Ladegerät nicht in
Betrieb, wenn Sie unkonzentriert sind, oder sich
unwohl fühlen.
28 DE/AT/CH
100683_uls_Kfz-Ladegeraet mit Starthilfefunktion ULG 12 A1_content_CZ.indd 28 29.09.14 12:20
Page 29

Bedienung
Bedienung
Ziehen Sie den Netzstecker immer aus der Steckdose,
bevor Sie Arbeiten am Kfz-Ladegerät durchführen.
STROMSCHLAGGEFAHR!
GEFAHR EINES SACHSCHADENS!
VERLETZUNGSGEFAHR!
Produkteigenschaften
Dieses Gerät ist zum Laden einer Vielfalt von SLABatterien (versiegelter Bleisäure-Batterien) konzipiert,
welche weitestgehend in PKWs, Motorrädern und
einigen anderen Fahrzeugen verwendet werden.
Diese können z.B. WET- (mit flüssigem Elektrolyt),
GEL- (mit gelförmigem Elektrolyt) oder AGM-Batterien
(mit Elektrolyt absorbierenden Matten) sein. Eine
spezielle Konzeption des Gerätes (auch “Drei-StufenLade-Strategie“ genannt) ermöglicht ein Wiederaufladen der Batterie bis auf fast 100 % ihrer Kapazität.
Ferner kann ein Langzeitanschluss der Batterie mit
dem Kfz-Ladegerät erfolgen, um diese möglichst
immer in optimalem Zustand zu halten.
Anschließen
Trennen Sie vor dem Auflade- und Erhaltungs-
ladevorgang, bei einer ständig im Fahrzeug
angeschlossenen Batterie, zuerst das MinusPol-Anschlusskabel (schwarz) des Fahrzeugs
vom Minus-Pol der Batterie. Der Minus-Pol der
Batterie ist in der Regel mit der Karosserie des
Fahrzeugs verbunden.
Trennen Sie anschließend das Plus-Pol-Anschluss-
kabel (rot) des Fahrzeugs vom Plus-Pol der Batterie.
Klemmen Sie erst dann die “+“-Pol Schnellkonta
Anschlussklemme (rot)
7
des Kfz-Ladegeräts
an den “+“-Pol der Batterie.
Klemmen Sie die “–“-Pol-Schnellkontakt-An-
schlussklemme (schwarz)
6
an den “–“-Pol der
Batterie. Schließen Sie das Netzkabel
Kfz-Ladegeräts an die Steckdose an.
Hinweis: Sind die Anschlussklemmen korrekt angeschlossen, zeigt das Display die Spannung an
9
kt-
des
und die Anzeige “connected“ leuchtet auf. Bei einer Verpolung zeigt das Display 0.0 und die Anzeige “connected“ leuchtet nicht auf.
Trennen
Trennen Sie das Gerät vom Netzstrom.
Nehmen Sie die “–“-Pol-Schnellkontakt-Anschluss-
klemme (schwarz)
6
vom “–“-Pol der Batterie.
Nehmen Sie die “+“-Pol-Schnellkontakt-An-
schlussklemme (rot)
7
vom “+“-Pol der Batterie.
Schließen Sie das Plus-Pol-Anschlusskabel des
Fahrzeugs wieder an den Plus-Pol der Batterie an.
Schließen Sie das Minus-Pol-Anschlusskabel
des Fahrzeugs wieder an den Minus-Pol der
Batterie.
Lademodus auswählen
Sie können zum Laden verschiedener Batterien bei
unterschiedlicher Umgebungstemperatur aus verschiedenen Lademodi auswählen. Im Vergleich zu
herkömmlichen Kfz-Ladegeräten verfügt dieses Gerät
über eine spezielle Funktion zum erneuten Verwenden einer leeren Batterie / eines Akkus. Sie können
eine vollständig entladene Batterie / einen Akku
wieder aufladen. Ein Schutz gegen Fehlanschluss
und Kurzschluss gewährleistet den sicheren Ladevorgang. Durch die eingebaute Elektronik setzt sich
das Kfz-Ladegerät nicht unmittelbar nach Anschluss
der Batterie in Betrieb, sondern erst, nachdem ein
Lademodus ausgewählt wurde.
Sind die Anschlussklemmen mit der Batterie verbunden und ist das Gerät am Netzstrom angeschlossen, leuchtet auf der digitalen Anzeige
ge “Connected“ auf. Nachdem Lademodus gewählt
wurde, leuchtet die Anzeige “Charging“ auf. Ist der
Ladevorgang abgeschlossen, leuchtet die Anzeige
“Charged“ auf.
Wenn das digitale Display ständig aufleuchtet, bevor die Batterie komplett geladen ist, besteht ein
Fehler.
Überprüfen Sie in diesem Fall nochmals, ob die
Anschlussklemmen
6, 7
10
die Anzei-
korrekt an der Bat-
29 DE/AT/CH
100683_uls_Kfz-Ladegeraet mit Starthilfefunktion ULG 12 A1_content_CZ.indd 29 29.09.14 12:20
Page 30

Bedienung
terie angebracht sind und ob der Batterietyp
richtig ausgewählt wurde. Sollte das Display
dennoch ständig aufleuchten, liegt wohlmöglich
ein Defekt der Batterie vor.
Digital-Display-Taste
1
: Ermöglicht das Wech-
seln der digitalen Anzeige der Spannung und des
Ladefortschritts in Prozent (Battery %). Verwenden
Sie diese Taste, um zwischen den folgenden Anzeigen zu wechseln:
– Batterie %: zeigt den Ladefortschritt der ange-
schlossenen Batterie in Prozent an.
– Spannung: zeigt die Spannung der angeschlos-
senen Batterie an.
– Alternator %: Ausgangsleistung in Prozent
Battery-Type-Taste
2
: Verwenden Sie diese
Taste, um den Typ der zu ladenden Batterie einzustellen. Sie können hier zwischen Batterietypen
wählen. Der Batterietyp muss zwingend korrekt eingestellt werden, bevor der Ladevorgang beginnt:
– 12 V Regular: Diese Batterien (Blei-Säure Batte-
rien) werden in der Regel in PKW, LKW und
Motorrädern verwendet. Diese haben Entlüftungskappen und sind oft als “wartungsarm“
oder “wartungsfrei“ gekennzeichnet. Der Batterietyp ist dafür ausgelegt, schnell Energie zu übertragen (z.B. Starten eines Motors). “Regular“
Batterien sollten nicht für “Deep Cycle“ Anwendungen benutzt werden.
– 12 V Deep Cycle: Diese Batterien sind normaler-
weise auch als “Deep Cycle“ oder “Marine“
gekennzeichnet. Batterien dieses Typs sind in
der Regel größer als andere Batterietypen.
Diese liefert weniger kurzfristige Energie, aber
dafür eine langfristigere Energieübertragung.
Diese Batterien überstehen eine Vielzahl von
Entladezyklen.
– 12 V AGM / Gel: Der Batterietyp AGM sind in
der Regel gute Deep Cycle Batterien. Sie haben
die beste “Lebensdauer“, wenn sie wieder aufgeladen werden, bevor diese mehr als 50 %
entladen wurden. Bei vollständiger Entladung,
übersteht diese etwa 300 Ladezyklen. Der Batterietyp GEL ist ähnlich dem Baterietyp AGM.
Die Spannung beim Wiederaufladen ist niedriger
als bei anderen Blei-Säure Batterien. Wenn Sie
für eine Gel-Batterie das falsche Ladegerät verwenden, ist eine verringerte Leistung bzw. eine
Verkürzung der Lebenszeit zur erwarten.
– 6 V Regular: Diesen Modus wählen Sie für han-
delsübliche 6 V Batterien.
Charge-Start-Taste 3: Verwenden Sie diese Taste,
um zwischen den folgenden Optionen zu wählen:
– Fast Charge: schnelles Laden (empfohlen bei
niedrigen Außentemperaturen / Winter)
– Normal Charge: normaler Ladevorgang
(normale Geschwindigkeit)
– Start: liefert Ihnen kurzfristig 75 Ampere, um
eine schwach geladene oder leere Batterie zum
Zwecke des Motorstarts zu überbrücken
Achtung: Modus kann nur durch Ziehen des Netz-
9
kabels
beendet werden.
Starthilfefunktion verwenden
Führen Sie zwingend alle Anschlüsse wie beschrieben und in der richtigen Reihenfolge durch. Andernfalls kann die Elektronik des
Fahrzeugs beschädigt werden.
Bei einer Vorgehensweise entgegengesetzt der
beschriebenen Vorgaben, handeln Sie auf eigene
Gefahr und Verantwortung.
Achtung: Diese Funktion ist nicht für Batterien kleiner
45 Ah geeignet. Bei Batterien kleiner 45 Ah könnte
diese Funktion zur Beschädigung der Batterie führen.
Bei Dieselfahrzeugen und großvolumigen Benzinmotoren werden teilweise höhere Stromstärken als
75 A für den Startvorgang benötigt.
Hinweis: Das Ladegerät verfügt über ein Analyseprogramm, welches insbesondere in der Starthilfefunktion die Batterie vor Beschädigungen schützt
(z.B. Sulfatisierung, zu starkes abfallen der Spannung).
Bei sehr stark entladenen oder stark strapazierten
Batterien, schaltet das Gerät zum Schutz der Batterie
die Starthilfe nicht ein. Während dieses Vorgangs
wird die Batterie bereits mit niedrigen Strömen geladen (Charging leuchtet auf). Das Display bleibt
30 DE/AT/CH
100683_uls_Kfz-Ladegeraet mit Starthilfefunktion ULG 12 A1_content_CZ.indd 30 29.09.14 12:20
Page 31

Bedienung / Wartung und Pflege
dann auf “0“ stehen. In diesem Fall ist die Starthilfefunktion nicht möglich. Dies schützt die Batterie vor
Beschädigungen. Die Batterie sollte dann erst gelade
werden. Hierzu kann auch die Funktion “Fast Charge
oder “Normal Charge“ genutzt werden.
Schließen Sie das Netzkabel 9 des Kfz-Lade-
geräts an die Steckdose an.
Befestigen Sie die rote Anschlussklemme 6 am
Pluspol Ihrer Batterie. (Der Pluspol ist durch ein
“+“ und eine rote Markierung gekennzeichnet.)
Befestigen Sie die schwarze Anschlussklemme 5
am Minuspol Ihrer Batterie. (Der Minuspol ist
durch ein “-“ und eine schwarze Markierung
gekennzeichnet.)
Sind die Anschlussklemmen korrekt angeschlos-
sen, wählt das Kfz-Ladegerät automatisch den
richtigen Batterietyp. Diesen können Sie im Optionsfeld “Battery-Type“ kontrollieren und ggf.
durch Drücken der Battery-Type-Taste
2
ändern.
Wählen Sie nun mit der Charge-Start-Taste 3
die Funktion “Start“. Das Kfz-Ladegerät analysiert nun den Ladezustand der Batterie. Das
Display zeigt nun “0“ an.
Betätigen Sie nun die Zündung des Fahrzeugs.
Auf dem Display startet nun ein Countdown
von 5 Sekunden (davon 2 Sekunden Vorlaufbzw. Analysefunktion und 3 Sekunden Starthilfefunktion mit 75 A), wenn eine Startunterstützung durch das Kfz-Ladegerät notwendig ist
(dies wird vorab vom Kfz-Ladegerät analysiert).
Während dieses Countdowns liefert Ihnen das
Kfz-Ladegerät kurzfristig 75 A, um die Batterie
zum Zwecke des Motorstarts zu überbrücken.
Danach folgt zur Schonung der Batterie eine
Pause von 180 Sekunden. Nun beginnt der
Zyklus von neuem (2 Sekunden Vorlauf- bzw.
Analysefunktion und 3 Sekunden Starthilfefunktion mit 75 A / 180 Sekunden Pause).
Zum Trennen des Gerätes entfernen Sie
zunächst die Anschlussklemmen (
ziehen Sie anschließend das Netzkabel
6
/ 7) und
9
.
Hinweis: Ist die Batterie komplett entladen, reichen
die 75 A nicht bei allen Fahrzeugen zum Start des
Motors aus (z. B. Dieselfahrzeuge).
In diesem Fall wählen Sie bitte mit der Charge-
Start-Taste
3
die Option “Fast Charge“ und
laden Sie die Batterie bis 60 % auf (bei Diesel-
motoren entzieht die Vorglühung der Batterie
n
“
Energie. Hier müssen die 60 % nach dem Glüh-
vorgang anliegen).
Den Ladefortschritt können Sie am Display ver
indem Sie mit der Digital Display-Taste
1
“Batterie %“ wählen.
Sind die 60 % erreicht, führen Sie die Starthilfe-
funktion erneut durch.
Achtung: Beenden Sie den Modus durch Ziehen
des Netzkabels
Sicherung wechseln
9
.
Die Sicherung des Kfz-Ladegerätes kann z.B. durch
einen Gerätefehler, Überlast etc. beschädigt werden.
Bevor Sie die Sicherung wechseln, ziehen Sie
zunächst das Netzkabel
9
.
Entfernen Sie die Abdeckung der Sicherung 4,
indem Sie diese seitlich leicht eindrücken.
Schrauben Sie mit einem passenden Maul-
schlüssel die Sicherung
4
ab und befestigen
Sie die neue Sicherung.
Im Anschluss schrauben Sie diese fest und
bringen die Abdeckung
4
wieder an.
Hinweis: Falls Sie eine neue Sicherung
benötigen, kontaktieren Sie bitte unseren Ser-
vice (siehe Kapitel Hinweise zu Garantie und
Serviceabwicklung).
Wartung und Pflege
Ziehen Sie das Netzkabel 9 immer aus der
Steckdose, bevor Sie Arbeiten am Kfz-Ladege-
rät durchführen.
Das Gerät ist wartungsfrei. Schalten Sie das Gerät
aus. Reinigen Sie die Metall- und Kunststoffober-
flächen des Gerätes mit einem trockenen Tuch.
Verwenden Sie keinesfalls Lösungsmittel oder
andere aggressive Reinigungsmittel.
folgen,
die Option
31 DE/AT/CH
100683_uls_Kfz-Ladegeraet mit Starthilfefunktion ULG 12 A1_content_CZ.indd 31 29.09.14 12:20
Page 32

Hinweise zu Garantie und Serviceabwicklung
Hinweise zu Garantie und
Serviceabwicklung
Garantie der Creative Marketing
Consulting GmbH
Sehr geehrte Kundin, sehr geehrter Kunde,
Sie erhalten auf dieses Gerät 2 Jahre Garantie ab
Kaufdatum. Im Falle von Mängeln dieses Produkts
stehen Ihnen gegen den Verkäufer des Produkts gesetzliche Rechte zu. Diese gesetzlichen Rechte werden durch unsere im Folgenden dargestellte Garantie nicht eingeschränkt.
Garantiebedingungen
Die Garantiefrist beginnt mit dem Kaufdatum. Bitte
bewahren Sie den Original Kassenbon gut auf.
Diese Unterlage wird als Nachweis für den Kauf benötigt. Tritt innerhalb von 2 Jahren ab dem Kaufdatu
dieses Produkts ein Material- oder Fabrikationsfehler
auf, wird das Produkt von uns – nach unserer Wahl
– für Sie kostenlos repariert oder ersetzt. Diese
Garantieleistung setzt voraus, dass innerhalb der
2-Jahres-Frist das defekte Gerät und der Kaufbeleg
(Kassenbon) vorgelegt und schriftlich kurz beschrieben wird, worin der Mangel besteht und wann er
aufgetreten ist.
Wenn der Defekt von unserer Garantie gedeckt ist,
erhalten Sie das reparierte oder ein neues Produkt
zurück. Mit Reparatur oder Austausch des Produkts
beginnt kein neuer Garantiezeitraum.
Garantieumfang
Das Gerät wurde nach strengen Qualitätsrichtlinien
sorgfältig produziert und vor Anlieferung gewissenhaft geprüft.
Die Garantieleistung gilt für Material- oder Fabrikationsfehler. Diese Garantie erstreckt sich nicht auf
Produktteile, die normaler Abnutzung ausgesetzt sind
und daher als Verschleißteile angesehen werden
können oder für Beschädigungen an zerbrechlichen
Teilen, z.B. Schalter, Akkus oder solchen, die aus
Glas gefertigt sind. Diese Garantie verfällt, wenn
m
das Produkt beschädigt, nicht sachgemäß benutzt
oder gewartet wurde. Für eine sachgemäße Benutzung des Produkts sind allein der Originalbetriebsanleitung aufgeführten Anweisungen genau einzuhalten. Verwendungszwecke und Handlungen, von
denen in der Originalbetriebsanleitung abgeraten
oder vor denen gewarnt wird, sind unbedingt zu
vermeiden.
Das Produkt ist lediglich für den privaten und nicht
für den gewerblichen Gebrauch bestimmt. Bei missbräuchlicher und unsachgemäßer Behandlung, Gewaltanwendung und bei Eingriffen, die nicht von
unserer autorisierten Service-Niederlassung vorgenommen wurden, erlischt die Garantie.
Abwicklung im Garantiefall
Um eine schnelle Bearbeitung Ihres Anliegens zu
gewährleisten, folgen Sie bitte den folgenden Hinweisen:
Bitte halten Sie für alle Anfragen den Kassenbon
und die Artikelnummer (z.B. IAN) als Nachweis für
den Kauf bereit. Die Artikelnummer entnehmen Sie
bitte dem Typenschild, einer Gravur, dem Titelblatt
Ihrer Anleitung (unten links) oder dem Aufkleber auf
der Rück oder Unterseite. Sollten Funktionsfehler oder
sonstige Mängel auftreten, kontaktieren Sie zunächst
die nachfolgend benannte Serviceabteilung telefonisch oder per E-Mail.
Ein als defekt erfasstes Produkt können Sie dann
unter Beifügung des Kaufbelegs (Kassenbon) und der
Angabe, worin der Mangel besteht und wann er
aufgetreten ist, für Sie portofrei an die Ihnen mitgeteilte Service Anschrift übersenden.
Hinweis:
Auf www.lidl-service.com können Sie d
iese
und viele weitere Handbücher, Produktvideos und Software herunterladen.
32 DE/AT/CH
100683_uls_Kfz-Ladegeraet mit Starthilfefunktion ULG 12 A1_content_CZ.indd 32 29.09.14 12:20
Page 33

... / Umwelthinweise und Entsorgungsangaben / EG-Konformitätserklärung
138180
So erreichen Sie uns:
DE
Name: C. M. C. GmbH
Internetadresse: www.cmc-creative.de
E-Mail: service.de@cmc-creative.de
Telefon: +49 (0) 6894 9989751
(Normal-Tarif dt. Festnetz)
Sitz: Deutschland
IAN 100683
Bitte beachten Sie, dass die folgende Anschrift
keine Serviceanschrift ist.
Kontaktieren Sie zunächst die oben benannte
Servicestelle.
Adresse:
C. M. C. GmbH
Katharina-Loth-Str. 15
66386 St. Ingbert
Deutschland
Umwelthinweise und
Entsorgungsangaben
Rohstoffrückgewinnung statt
Müllentsorgung!
Sie als Endverbraucher sind gesetzlich
(Batterieverordnung) zur Rückgabe aller
gebrauchten Batterien verpflichtet. Schadstoffhaltige Batterien sind mit nebenstehenden Symbolen gekennzeichnet, die auf da
Verbot der Entsorgung über den Hausmüll
hinweisen. Die Bezeichnungen für das ausschlaggebende Schwermetall sind: Cd =
Cadmium, Hg = Quecksilber, Pb = Blei.
Befördern Sie verbrauchte Batterien zu einer Enstorgungseinrichtung in Ihrer Stadt oder Gemeinde, oder
zurück zum Händler. Sie erfüllen damit die gesetzlichen Verpflichtungen und leisten einen wichtigen
Beitrag zum Unweltschutz.
EG-Konformitätserklärung
Wir, die
C. M. C. GmbH
Dokumentenverantwortlicher: Markus Zimmer
Katharina-Loth-Str. 15
66386 St. Ingbert
erklären in alleiniger Verantwortung, dass das
Produkt
Kfz-Ladegerät mit Starthilfefunktion
s
Gerät, Zubehör und Verpackung sollten
einer umweltgerechten Wiederverwertung
zugeführt werden.
Werfen Sie das Kfz-Ladegerät nicht in den Hausmüll,
Herstellungsjahr: 2014 / 44
IAN: 100683
Jahr der CE Kennzeichnung: 14
Modell: KFZ-LADEGERÄT MIT STARTHILFE-
FUNKTION ULG 12 A1
ins Feuer oder ins Wasser. Wenn möglich, sollten
nicht mehr funktionstüchtige Geräte recycelt werden.
Fragen Sie Ihren lokalen Händler um Hilfe.
den wesentlichen Schutzanforderungen genügt, die
in den Europäischen Richtlinien
EG-Niederspannungsrichtlinie
2006 / 95 / EG
EG-Richtlinie Elektromagnetische
Vertraglichkeit
2004 / 108 / EG
EMV-Richtlinie für Kraftfahrzeuge
(2004 / 104 / EG)
33 DE/AT/CH
100683_uls_Kfz-Ladegeraet mit Starthilfefunktion ULG 12 A1_content_CZ.indd 33 29.09.14 12:20
Page 34

EG-Konformitätserklärung
RoHS Richtlinie
(2011 / 65 / EG)
Der oben beschriebene Gegenstand der Erklärung
erfüllt die Vorschriften der Richtlinie 2011 / 65 / EU
des Europäischen Parlaments und des Rates vom
08. Juni 2011 zur Beschränkung der Verwendung
bestimmter gefährlicher Stoffe in Elektro- und Elektronikgeräten
festgelegt sind.
Für die Konformitätsbewertung wurden folgende
harmonisierte Normen herangezogen:
EN 60335-2-29 / A2:2010
EN 60335-1:2012
EN 62233:2008
EN 50498:2010
EN 55014-1:2006+A1:2009+A2:2011
EN 61000-3-2:2006+A1:2009+A2:2009
EN 61000-3-3:2008
St. Ingbert, 30.09.2014
Markus Zimmer
- Leiter Qualitätssicherung -
34 DE/AT/CH
100683_uls_Kfz-Ladegeraet mit Starthilfefunktion ULG 12 A1_content_CZ.indd 34 29.09.14 12:20
Page 35

IAN 100683
C. M. C . GmbH
Katharina-Loth-Str. 15
66386 St. Ingbert
Germany
Last Information Update · Stav informací
Stand der Informationen: 09 / 2014
Ident.-No.: ULG12A1092014-CZ
100683_uls_Kfz-Ladegeraet mit Starthilfefunktion ULG 12 A1_cover_CZ.indd 1 29.09.14 12:20
 Loading...