


Z
77-20SR70I00020
SR
-
L70i
ENGLISH
Hi-Fi Table Radio
OWNER’S MANUAL
MODE D’EMPLOI
FRANÇAIS ESPAÑOL
MANUAL DEL USUARIO
2
CAUTIO N: TO R EDUCE THE RISK OF
ELECTRIC SHOCK, DO NOT REMOVE COVER
(OR BACK). NO USER-SERVICEABLE PARTS
INSIDE. REFER SERVICING TO QUALIFIED
SERVICE PERSONNEL.
The lightning flash with arrowhead
s ymbol, within an e qu il at er al
triangle, is intended to alert the user
to the pr esen ce of un insul ated
“dan gerous volt age” wi thin th e
product’s enclosure that may be of
sufficient magnitude to constitute a
risk of electric shock to persons.
The exclamation point within an
equilateral triangle is intended to
aler t the user to the presence of
i m p o r t a n t o p e r a t i n g a n d
maintenance (servicing) instructions
in the literature accompanying the
appliance.
IMPORTANT SAFETY INSTRUCTIONS
1) Read these instructions.
2) Keep these instructions.
3) Heed all warnings.
4) Follow all instructions.
5) Do not use this apparatus near water.
6) Clean only with dry cloth.
7) Do not block any ventilation openings.
I n s t a l l i n a c c o r d a n c e w i t h t h e
manufacturer’s instructions.
8) Do not install near any heat sources such as
radiators, heat registers, stoves, or other
apparatus (including am plif iers ) tha t
produce heat.
9) Do not defeat the safety purpose of the
polari zed or grou ndi ng- typ e plu g. A
polarized plug has two blades with one
wider than the other. A grounding type
plug has two blades and a third grounding
prong. The wide blade or the third prong
are provided for your safety. If the provided
plug does not fit into your outlet, consult
an elect ricia n for repl acement of the
obsolete outlet.
10) Protect the power cord from being walked
on or pi nched partic ula rl y at pl ugs,
convenience receptacles, and the point
where they exit from the apparatus.
11) Only use attachments/accessories specified
by the manufacturer.
12) Use only with the cart, stand,
t r ip od, b rack e t , or table
specified by the manufacturer,
or so ld wi th th e appara tu s.
When a car t is used, use caution when
moving the cart/apparatus combination to
avoid injury from tip-over.
13) Unplug this apparatus during lightning
storms or when unused for long periods of
time.
14) Refer all servicing to qualified service
personnel. Servicing is required when the
apparatus has been damaged in any way,
su ch as power-su ppl y co rd or pl ug is
damaged, liquid has been spilled or objects
have fa ll en in to the ap pa ra tu s, th e
apparatus has been exposed to rain or
moisture, does not operate normally, or has
been dropped.
CLASS II apparatus with double insulation,
and no protective earth provided.
< Do not expose this apparatus to dripps or
splashes.
< Do not place any objects filled with liquids,
such as vases, on the apparatus.
< Do not install this apparatus in a confined
space such as a book case or similar unit.

ENGLISH
3
< The apparatus draws nominal non-
operating power from the AC outlet with
its POWER or STANDBY/ON switch not in
the ON position.
< The apparatus should be located close
enough to the AC outlet so that you can
easily grasp the power cord plug at any
time.
< The mains plug is used as the disconnect
device, the disconnect device shall remain
readily operable.
< Products with Class I construction are
equipped with a power supply cord that
has a 3-prong grounding plug. The cord of
such a product must be plugged into an
AC outlet that has a protective grounding
connection.
< If the product uses batteries (including a
battery pack or installed batteries), they
should not be exposed to sunshine, fire or
excessive heat.
< CAUTION for products that use replaceable
lit hium ba tte ries: the re is da nge r of
explosion if a battery is replaced with an
incorrect type of battery. Replace only with
the same or equivalent type.
< Caution shou ld be ta ken when usin g
ear ph on es or head ph ones wi th th e
product because excessive sound pressure
(volume) from earphones or headphones
can cause hearing loss.
WARNING: TO PREVENT FIRE OR
SHOCK HAZARD, DO NOT EXPOSE
THIS APPLI ANCE TO RAIN OR
MOISTURE.
CAUTION
< DO NOT REMOVE THE EXTERNAL CASES OR
CABINETS TO EXPOSE THE ELECTRONICS.
NO USER SERVICEABLE PARTS ARE WITHIN.
< IF YOU ARE EXPERIENCING PROBLEMS WITH
THIS PRO DUCT, CONTACT TE AC FOR A
SER VICE REF ERR AL . DO NOT USE THE
PRODUCT UNTIL IT HAS BEEN REPAIRED.
For U.S.A.
This equipment has been tested and found
to comply with the limits for a Class B digital
device, pursuant to Part 15 of the FCC Rules.
Thes e limit s ar e desi gne d to provi de
reas ona ble protec tion ag ainst harmful
interference in a residential installation. This
equipment generates, uses, and can radiate
radio frequency energy and, if not installed
a nd u s ed i n a c cor d an c e w i th t he
instructions, may cause harmful interference
to radio communications. However, there is
no guarantee that interference will not occur
in a particular installation. If this equipment
does cause harmful interference to radio or
television r ece ption, w hi ch c an b e
determined by turning the equipment off
and on, the user is encourage d to try to
correct the interference by one or more of
the following measures:
• Reorient or relocate the equipment and/
or the receiving antenna.
• Increa se the separ ation be tw een th e
equipment and receiver.
• Connect the equipment into an outlet on
a circuit different from that to which the
receiver is connected.
• Consult the dea ler or an experienced
radio/TV technician for help.
CAUTION
Changes or modifications to this equipments
n ot e x pr es sl y ap pr ov e d b y T E AC
CORPORATION for compliance will void the
user’s warranty.
iPod is a trademark of Apple Inc., registered in
the U.S. and other countries.
“M ade for iPo d” means tha t an el ectronic
acce ssory has been design ed to connec t
specifically to iPod and has been certified by
the developer to meet Apple performance
standards.
Apple is not responsible for the operation of
this device or its compliance with safety and
regulatory standards.

4
Contents
Before Using the Unit
Thank you for choosing TEAC. Read this
manual carefully to get the best
performance from this unit.
Before Using the Unit .........................4
Battery Precautions ...........................5
Identifying the Parts (Display) .................5
Identifying the Parts (Main Unit) ..............6
Identifying the Parts (Remote Control Unit) ...8
Remote Control Unit ..........................9
Connections .................................10
Setting the Clock . . . . . . . . . . . . . . . . . . . . . . . . . . . . 12
Basic Operation ..............................13
Listening to an iPod . . . . . . . . . . . . . . . . . . . . . . . . .14
Listening to an External Source . . . . . . . . . . . . . . 17
Listening to the Radio . . . . . . . . . . . . . . . . . . . . . . .18
Preset Tuning ................................19
Timer ........................................20
Troubleshooting .............................24
Specifications . . . . . . . . . . . . . . . . . . . . . . . . . . . . . . .25
Read this before attempting any
operations.
< When the unit is turned on, switching on
the TV may cause lines to appear on the TV
screen, depending on the condition of the
electric waves of the TV broadcast. This is
not a malfunction of the unit or the TV. If
this happens, turn off the unit.
< Since the unit could become warm during
operation, always leave sufficient space
around the unit for ventilation. Do not place
anything on top of the unit.
< The voltage supplied to the unit should
match the voltage that is printed on the rear
panel. If you are in any doubt regarding this
matter, consult an electrician.
< Choose the installation location of your unit
carefully. Avoid placing it in direct sunlight
or close to a source of heat. Als o avoid
locations subject to vibration, excessive
dust, heat, cold or moisture.
< Do not place the unit on an amplifier or
receiver.
< Do no t open the cabinet because this
might result in damage to the circuitry or
electrical shock. If a foreign object should
get into the unit, contac t your dealer or
service company.
< When removing the power plug from the
wall outlet, always pull directly on the plug,
never yank on the cord.
< Do no t attempt to clean th e unit with
chemical solvents as this might damage the
finish. Use a clean, dry or slightly damp
cloth.
< Keep this manual in a safe place for future
reference.
ENGLISH
5
Battery Precautions
A
C
B
D
E
F
G
G
H
I
J
< Be sure to insert the batteries with correct
positive “+” and negative “_” polarities.
< Use batteries of the same type. Never use
different types of batteries together.
< Either rechargeable and non-rechargeable
batteries c an b e used. R ef er to t he
precautions on their labels.
< When the remote control unit is not to be
used for a long time (more than a month),
remove the battery from the remote control
unit to prevent them from leaking.
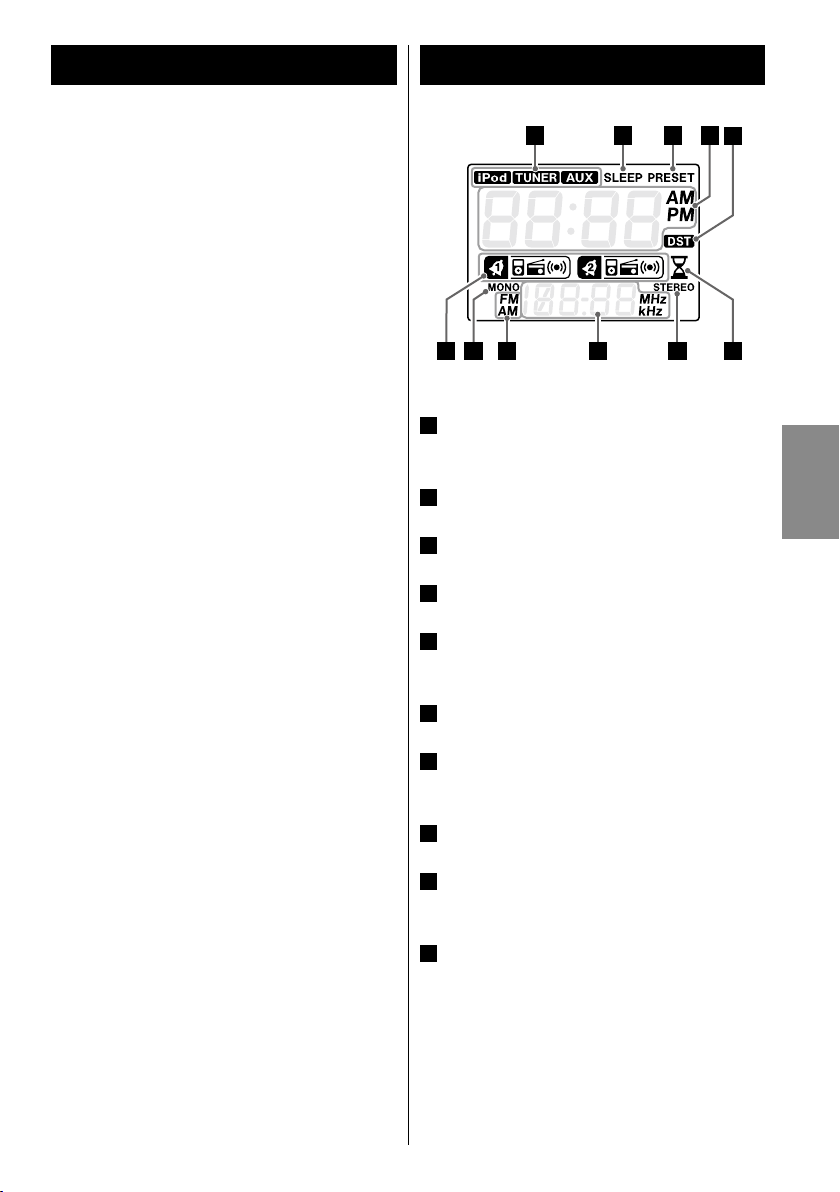
Identifying the Parts (Display)
When the unit is on, one of these indicators
A
lights to show the current source.
< If the batteries leak, wipe away the leakage
inside the battery compartment and replace
the batteries with new ones.
< Do not use any batteries other than those
specified. Do not mix new batteries with old
ones or use different types of batteries
tog ether.
< Do not heat or disassemble batteries and
never throw them in fire or water.
< Do not carry or store batteries with other
me tallic objects. Doing so could caus e
batteries to short circuit, leak or explode.
< Never rech arge a battery unless it is a
verified rechargeable type.
Lights when the Sleep Timer is active.
B
Lights in preset tuning mode.
C
Shows the digital clock or preset channels.
D
Lights when the DST switch on the rear of
E
the unit is ON.
Lights when the Nap Alarm is active.
F
When FM mode is active, shows whether the
G
signal is stereo or monaural.
Shows frequency, volume, etc.
H
Shows FM or AM when receiving a radio
I
signal.
This indicates the source set when the Wake
J
Up Timer is set.

6
A
C
D E
M
L
K
GF
I
H
B
J
Identifying the Parts (Main Unit)
This can be
rotated up to
90º in either
direction.

ENGLISH
7
STANDBY/ON
A
Use this button to turn the unit on or put it
into standby mode.
VOLUME
B
Turn this knob to adjust the volume.
SLEEP
C
Use this bu tton to set the Sle ep Time r
(page 20).
NAP
D
Us e this butto n to set the Na p Alar m
(page 21).
ALARM 1, ALARM 2
E
Hold down these buttons for more than 2
seconds to enter the Wake Up Timer setting
mode.
Use these buttons also to turn the Wake Up
Timer on and off (page 21).
SNOOZE/DIMMER
F
Use this button to dim the display (page 14).
After the timer ON time is reached, use this
button to turn the unit off for 10 minutes
(page 23).
TUNING/SET
G
In TUNER mode, turn this knob to tune in
stations (page 18).
In Wake Up Timer setting mode, turn this
knob to set the hour, minute and source
(page 21).
In clock setting mode, turn this knob to set
the hour and minute (page 12).
AC Outlet
H
This outlet can be used, for example, to
charge a mobile phone.
Caution:
Do not use with devices that use more
than 0.5 A or 60 W. Use of such a device
could cause a blown fuse, fire or electric
shock.
Dock connector
I
Insert an iPod into this dock (page 14).
Display
J
TUNER
K
Us e this button to enter TU NER mode
(page 18).
PHONES
L
To listen with headphones, first lower the
volume level to the minimum. Then insert
the headphones plug into the PHONES jack,
and adju st the vo lume by tu rning the
VOLUME knob.
Th e speakers will make no sound when
headphones are plugged in.
Caution:
Do not turn the unit on or off, or insert
or disconnect headphones from this jack
while wearing headphones. Very loud
sound could be output from the
headphones.
Always lower the volume level to the
m i n i m u m b e f o r e p l u g g i n g i n
headphones.
AVOID DAMAGING YOUR HEARING - Do
not pu t on he adphones un til af te r
plugging them in.
AUX
M
Use this but ton to lis ten to an ex ternal
source conn ect ed to th e AUX IN ja cks
(page 17).
N
iPod (y/J)
Use this button to enter iPod mode.
In iPod mode, use this but ton to start or
pause playback of the iPod (page 14).
Remote Sensor
O
Speakers (Stereo)
P
8
A
B
B
C
Q
M
K
R
W
V
X
S
T
U
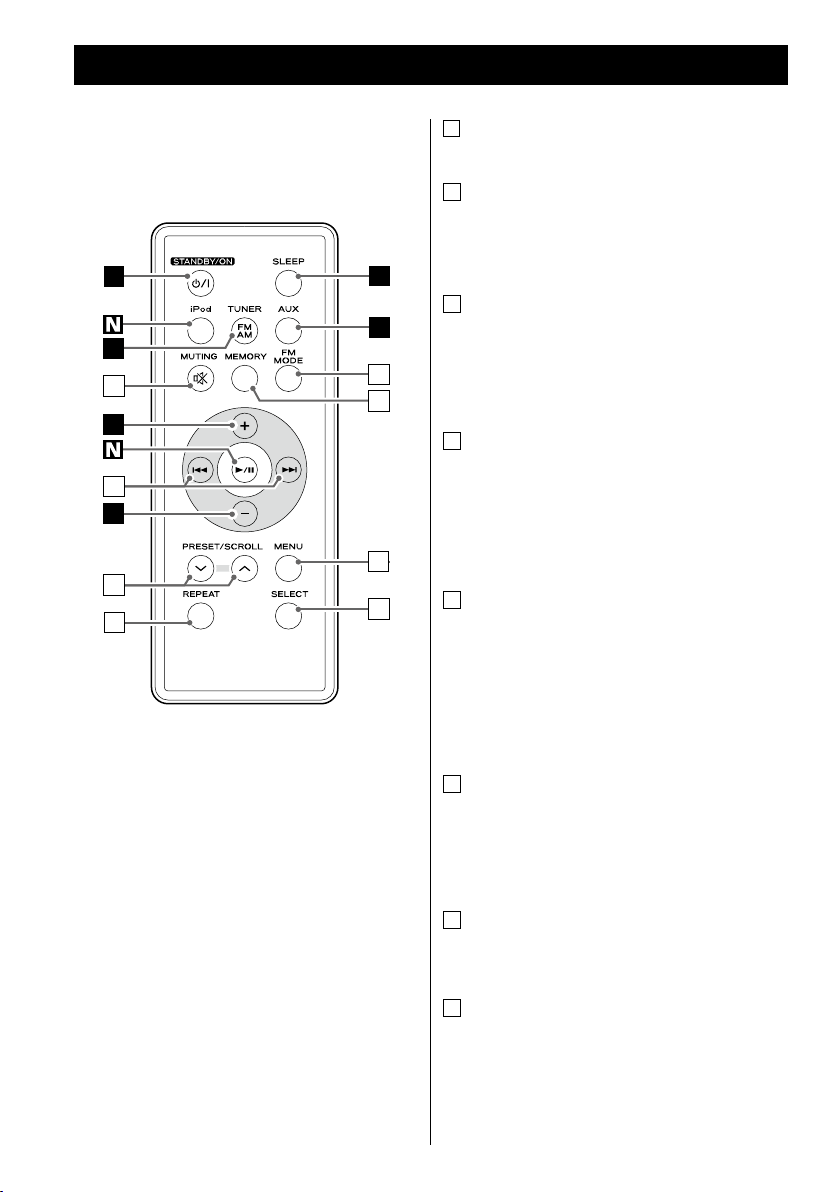
Identifying the Parts (Remote Control Unit)
Q
MUTING
Use this button to mute the sound (page 14).
R
MEMORY
In TUNER mode, use this button to store for
a p rese t the cu rr en tly tun ed sta ti on
(page 19).
S
FM MODE
In TUNER mode, use this button to select
stereo or monaural (page 19).
In iPod mode, use this button to turn on the
shuffle function (page 16).
T
Skip (.//)
In iPod mode, use these buttons to skip to
other tracks. Hold down these buttons to
search for a part of a track (page 15).
In TUNER mode, use these buttons to tune
in stations (page 18).
U
PRESET/SCROLL (‡/°)
In iPod mode, use these buttons to scroll up
and down in a menu (page 16). This button
has the same functions as the click wheel of
iPod.
In TUNER mode, use these buttons to select
a preset station (page 19).
V
MENU
In iPod mode, use this button to go back to
the previous menu (page 16). This button
has th e sam e functions a s i ts i Po d
counterpart.
W
RE PEAT
In iPod mode, use this but ton to set the
repeat function (page 16).
X
SELECT
In iPod mode, use this button to confirm a
selection in a menu (page 16). This button
has the same functions as the center button
of the click wheel of iPod.
ENGLISH
9
Remote Control Unit
The included remote control unit allows the
unit to be operated from a distance.
When using the remote control, point it
towards the remote sensor on the front of the
unit.
< Even if the remote control is used within its
effective operation range, the unit might
not respond to the remote if there are any
obstacles between them.
< The remote control might function
incorrectly if it is operated near other
products that generate infrared rays, or if
ot her remo te contro l devi ce s that use
infrared rays are operated near the unit.
Likewise, the other products might also
operate incorrectly.
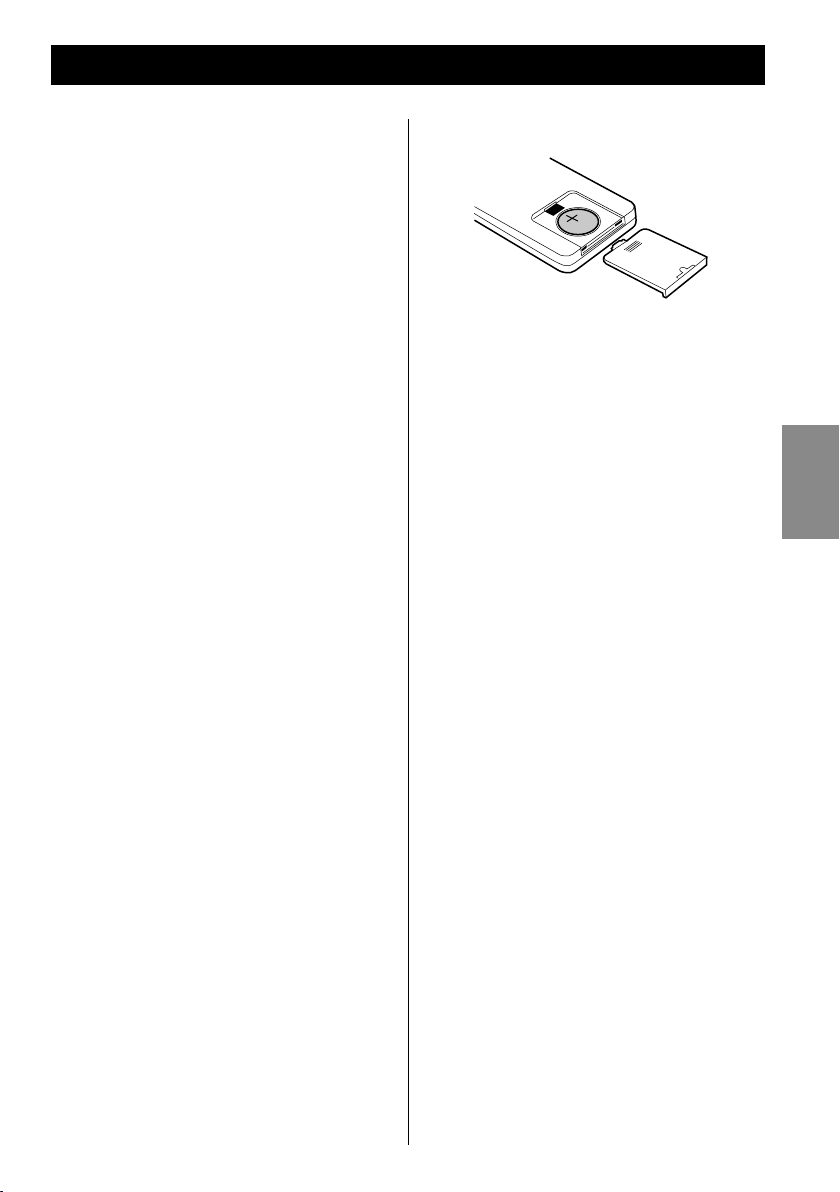
Battery Installation
1. Remove the battery compartment cover.
2. Put in the lithium battery (CR2032, 3V).
3. Close the cover.
Battery Replacement
If the distance to the unit from which the
remote control can be used decreases, the
battery has lost its charge. In this case replace
the battery with a new one.
For more information about the collection of
batteries, please contact your local municipality,
your waste disposal service or the place where
you purchased the items.
10
123
G
H
A
E
D
C
B
F
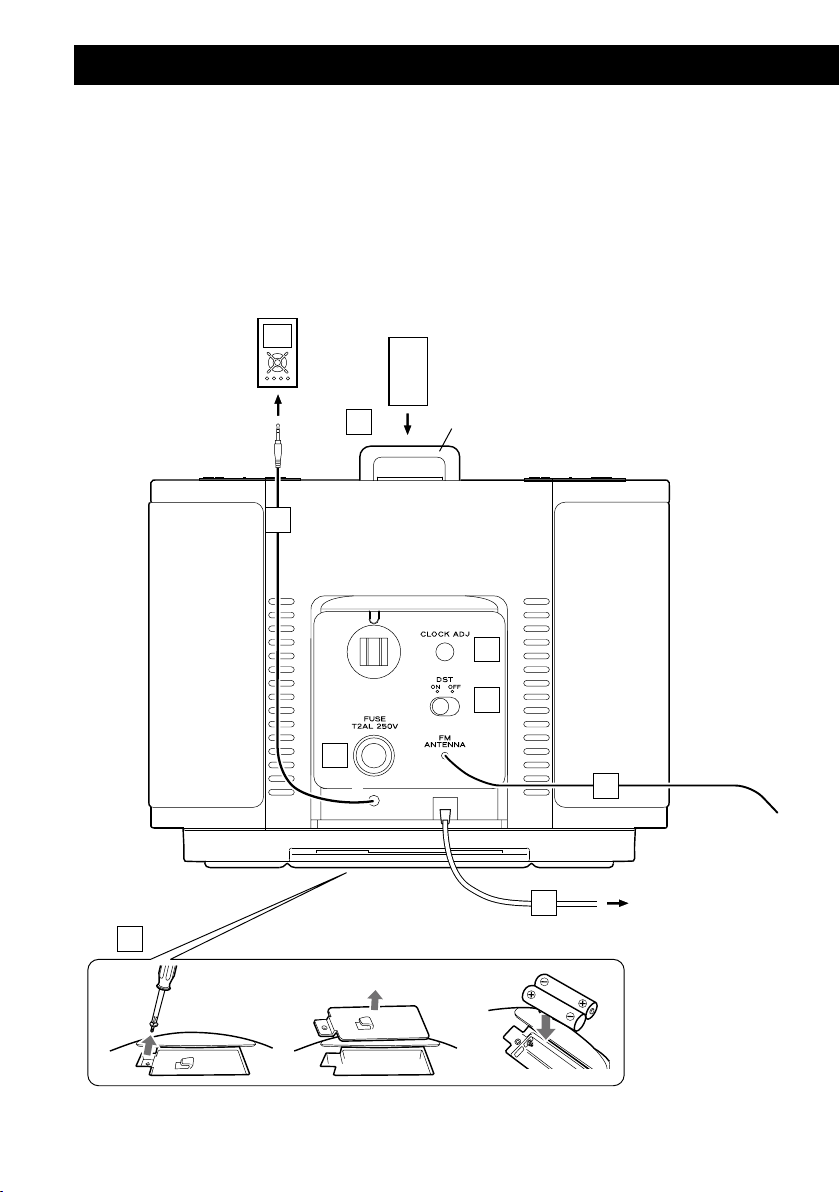
Connections
CAUTION:
< Turn off the power before making connections.
< Read the instructions for each component that you intend to use with this unit.
< Be sure to insert each plug securely. To prevent hum and noise, do not bundle the connection
cords.
iPod (back side)
Adjuster
SR-L70i
AC wall socket

ENGLISH
11
A
AUX in plug
Analog 2-channel audio signals can be
input through this plug. Connect this plug
to the output of an iPo d, CD playe r,
cassette tape deck, etc.
B
Dock connector
Insert an iPod into this dock (page 14).
C
CLOCK ADJ
Use th is butto n to adj ust the cl oc k
(page 12).
D
DST
Use this switch to set daylight saving time
(page 12).
E
FM antenna
While in FM mode, tune in an FM station
and extend the antenna lead to find the
best position for reception. This antenna
might need to be repositioned if you move
the unit to a new location.
H
Battery compartment
Th e bat teries supply backup power to
the built-in clock and memory if the unit
is momentarily disconnec ted from an
AC outlet.
Insert two AAA (R03, SUM-4) batteries.
Make sure that the batteries are inserted
with their positive “+” and negative “_”
poles oriented correctly.
Battery replacement
If the clock starts to show the wrong time,
replace the batteries with new ones.
The total life of a pair of batteries is about
100 hours.
F
AC Power Cord
Plug this AC power cord into an AC wall
socket.
G
FUSE
If the fuse becomes blown, replace it with
a T2 AL 250V fuse.
Caution:
For the sake of safety, disconnect the
power plug before replacing the fuse.
12
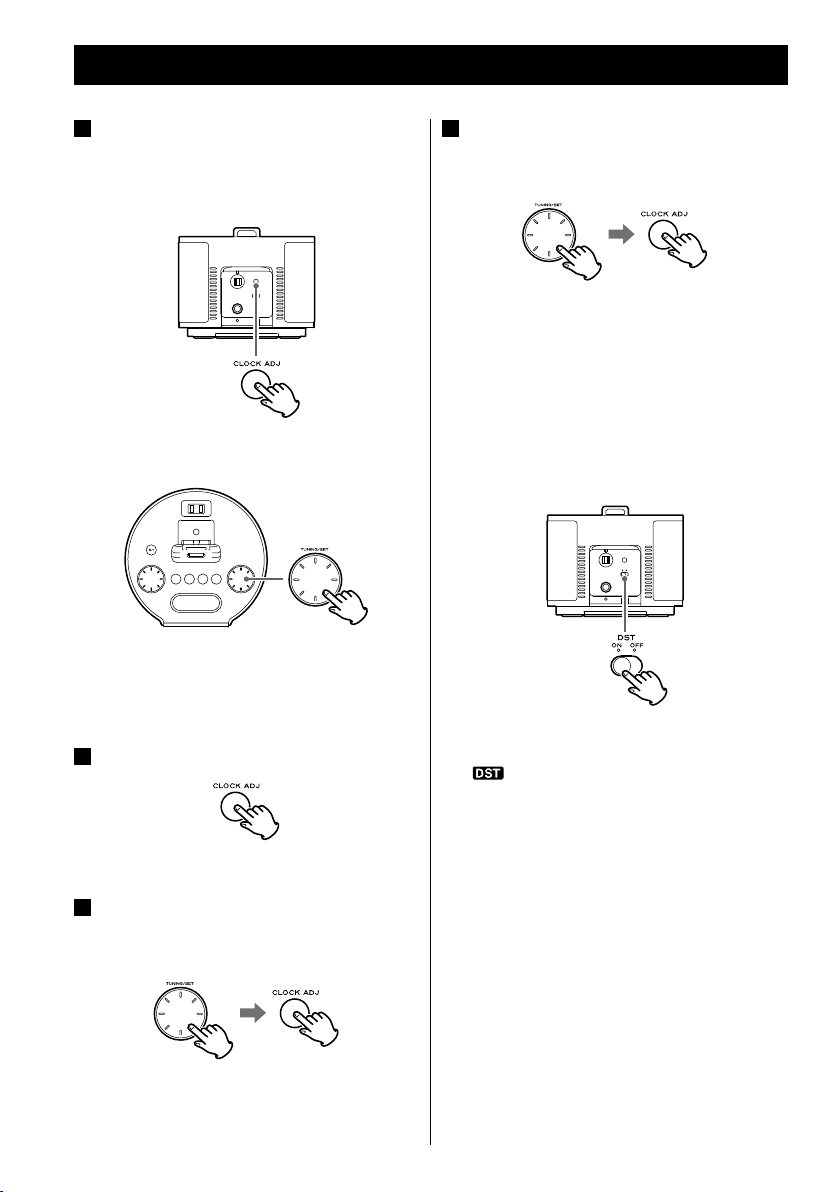
Setting the Clock
Press and hold the CLOCK ADJ button
1
for more than 3 seconds, and release it
when “12 HR” or “24 HR” blinks on the
display.
If you want to change the hour mode, turn
the TUNING/SET knob.
< If you do not turn the knob or press the
button for 8 seconds, timer setting mode
will end.
Press the CLOCK ADJ button again.
2
Turn the TUNING/SET knob to set the
4
cu rrent minute , and then pres s th e
CLOCK ADJ button.
Setting the
clock starts from the 00 second.
clock
is now completed
and the
Setting daylight saving time
To change the clock for daylight saving time,
set the DST switch to ON. The DST indicator
(
) appears on the display.
The “hour” value blinks.
Turn the TUNING/SET knob to set the
3
current hour, and then press the CLOCK
ADJ button.
ENGLISH
13
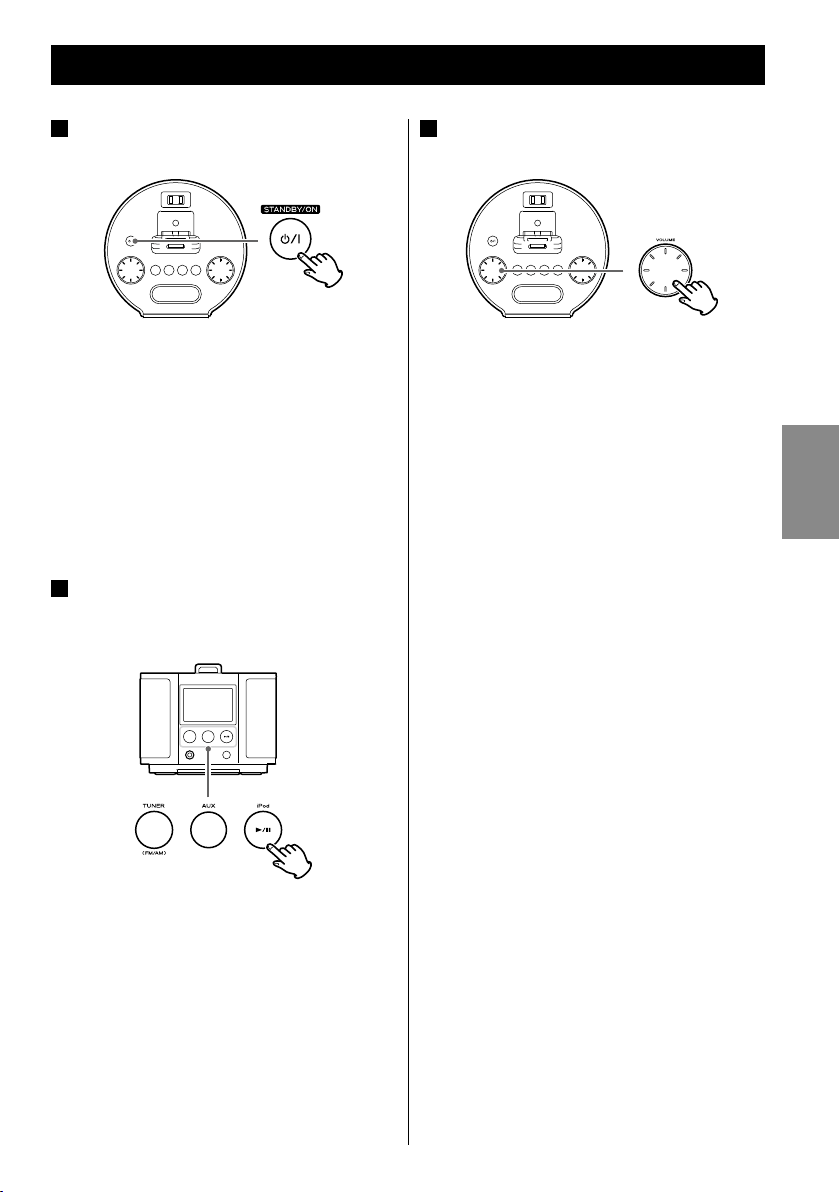
Basic Operation (1)
Press the STANDBY/ON switch to turn
1
the unit on.
< The unit turns on with the source that was
last selected ready to play. If an iPod that is in
playback mode is inserted into the dock, the
SR-L70i automatically turns on and starts
playback of the iPod.
< You can also turn the unit on by pressing the
TUNER button, the AUX button, or the iPod
button (y/J).
Pre ss the TU NER bu tto n, the AU X
2
button, or the iPod button (y/J) to
select the sound source.
Play the source, and adjust the volume
3
using the VOLUME knob.
The volume is adjustable from MIN (00) to
MAX (40).
When you use the remote control unit, hold
down the VOLUME – or + buttons to turn
the volume down or up continuously.
< Select AUX to listen to an external source
connected to the AUX IN plug.
< If you select “iPod” when no iPod is docked,
the iPod indicator on the display blinks.
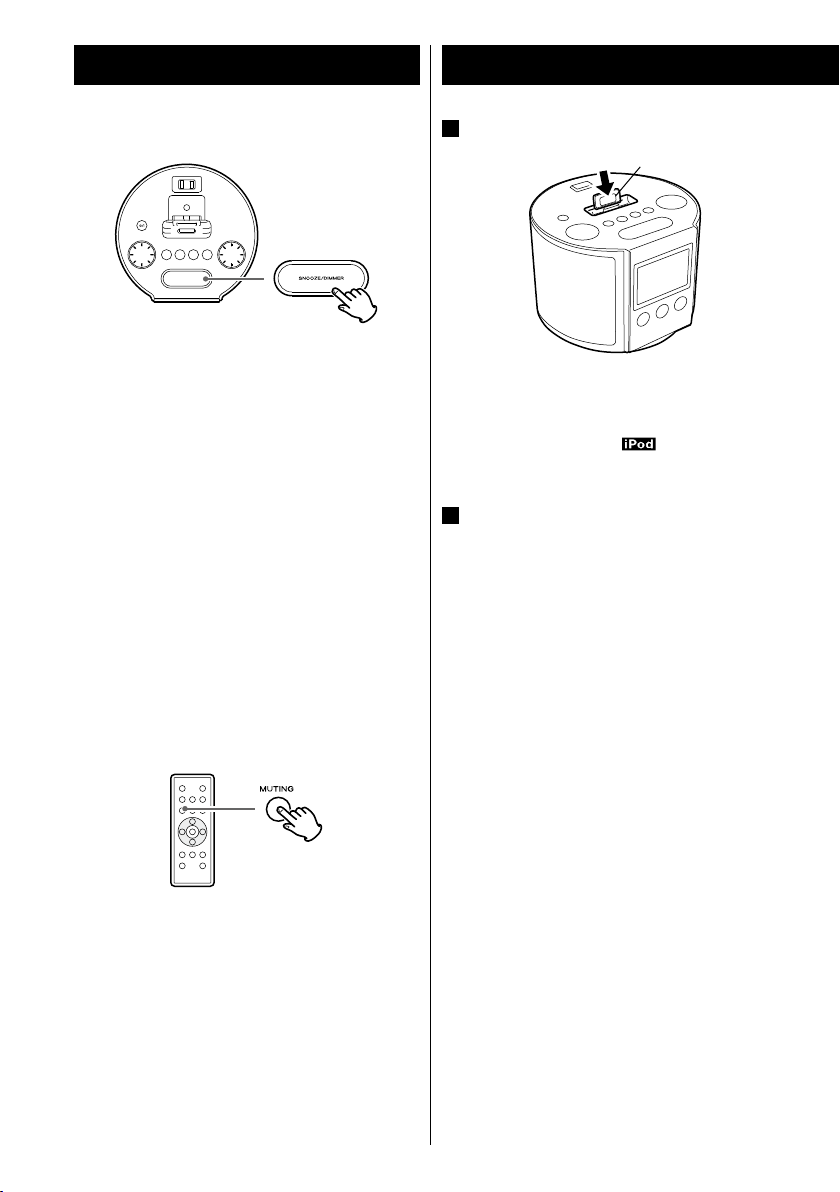
Dimmer
Basic Operation (2)
Listening to an iPod (1)
Insert the iPod into the dock connector.
1
Adjuster
You can change the brightness of the front
panel display. Use the SNO OZE /DIMMER
button to set the brightness to one of three
levels.
If this button is pressed in standby mode,
the disp lay is bri ghte ned for abou t 5
seconds.
< Th is function is c an ce le d w he n the
STANDBY/ON switch is pressed.
Muting
To mute the sound temporarily, press the
MUTING button. Press the MUTING button
again to restore the sound.
< If you change the volume or source when
muted, muting is canceled.
< Af ter inserting the iPod, slide the do ck
adjuster to fit the iPod being used.
The iPod indicator (
dis play.
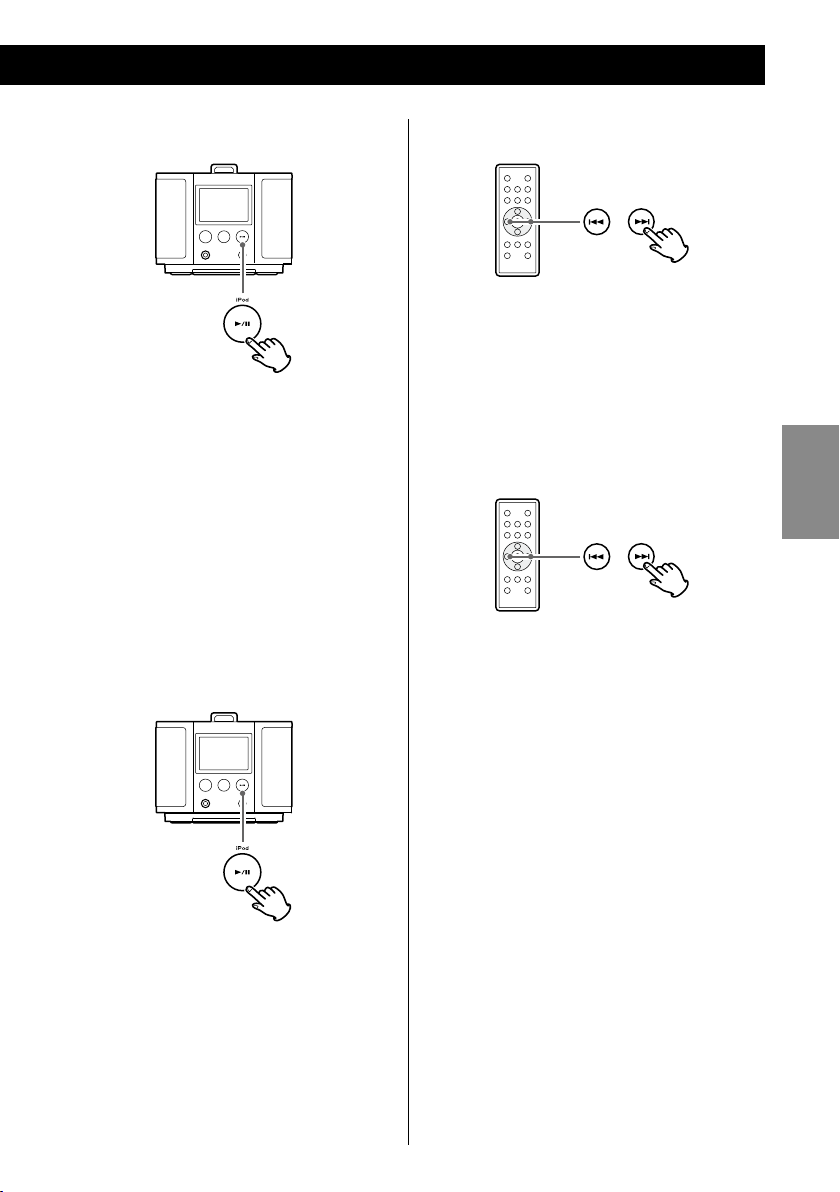
2
Press the Play/Pause button (y/J) on
the iPod or the iPod button (y/J) on
the SR-L70i. The SR-L70i will turn on
and start playing music on the iPod.
< Whenever an iPod is docked and the SR-L70i
is connected to an AC power supply, the
battery of the iPod is recharged until it is full.
However, to avoid noise, the iPod will not be
charged when using the tuner in AM mode.
< When headphones are plugged into the
iPod, sound is output from both the SR-L70i
speakers and the headphones.
) appears on the
Compatible iPod Software
If your iPod will not work with the SR-L70i or
with the remote control, a sof tware update
might solve the problem.
Visit the Apple website and download the latest
iPod Software.
14
http://www.apple.com/ipod/download/
Selecting iPod mode
Press the iPod button (y/J).
If an iPod that is playing is inserted into the
dock, the SR -L70i autom at ically star ts
outputting the sound.
When no iPod is docked, the iPod indicator
on the display blinks.
< You can also use the button on the iPod or
the Play/Pause button (y/J) on the remote
control unit to select the iPod for playback.
Suspending playback temporarily
(pause mode)
Searching for a part of a track
During playback, hold down a Skip button
(. or /) for more than 2 seconds and
release it when the part you want to listen to
is found.
Skipping to a following or
previous track
During playback, repeatedly press a Skip
button (. or /) until the desired track
is found. The selected track will be played
from the beginning.
ENGLISH
Press the iPod button (G/J ) dur ing
playback . Playback stops at the current
position. To resume playback, press the iPod
button (G/J) again.
< You can also use the button on the iPod or
the Play/Pause button (y/J) on the remote
control to pause playback.
< If the . butto n is pre ss ed du ri ng
playback, the track being played will be
played from the beginning. To return to the
beginning of the previous track, press the
. button twice.
15

16
Listening to an iPod (2)
AllOne off
Returning to the previous iPod
menu
Press the MENU button. This button has the
same functions as its iPod counterpart.
Selecting a menu item
Activating the repeat mode
During playback, press the REPEAT button to
change the repeat mode.
Each time the REPEAT button is pressed, the
iPod REPEAT setting is changed as follows:
If the iPod is set to repeat one song, the
repeat once icon (
dis play.
If the iPod is set to repeat all songs, the
repeat icon (
dis play.
) appears on the iPod’s
) appears on the iPod’s
Activating the shuffle mode
Press the PRESET/SCROLL buttons (‡/°) to
scroll to the menu item you want, and then
press the SELECT button.
During playback, pressing the FM MODE
button turns the shuffle mode ON and OFF.
When the iPod is set to shuffle, the shuffle
icon (
) appears on the iPod’s display.
ENGLISH
17
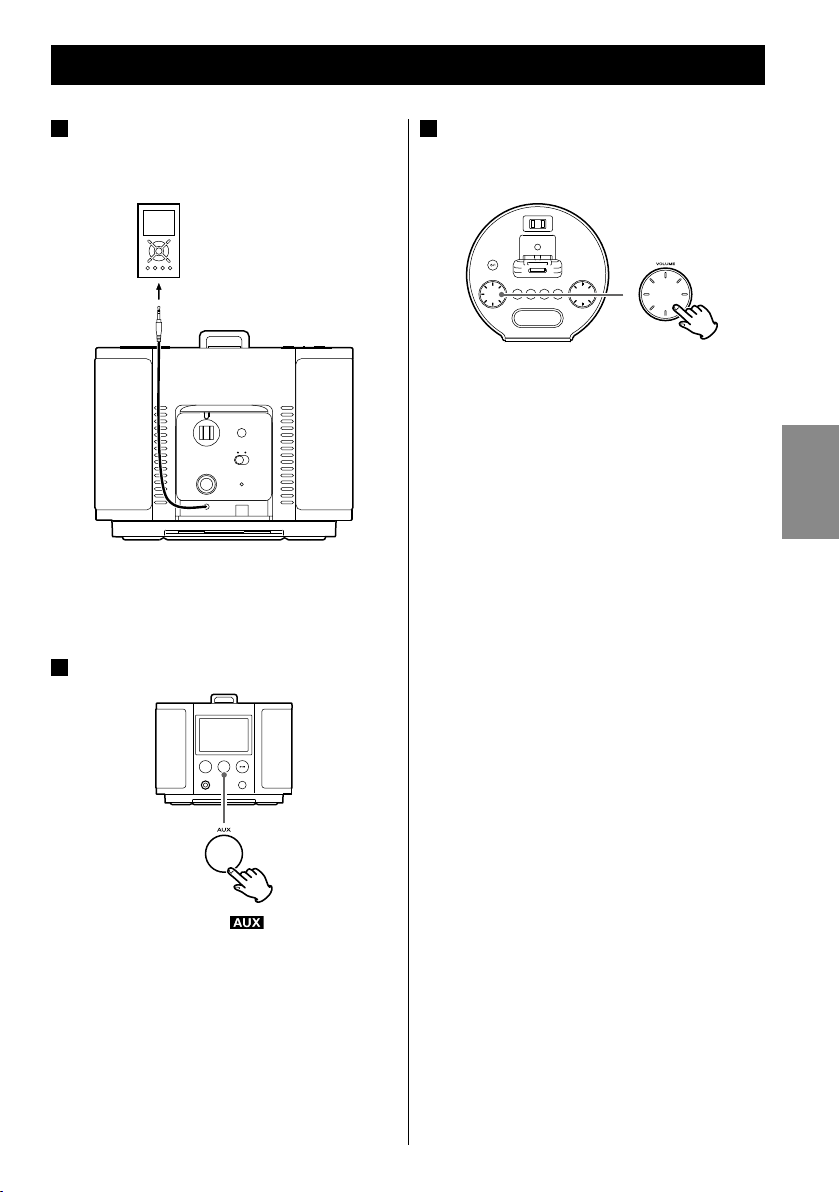
Listening to an External Source
Connect the AUX IN plug of the SR-L70i
1
to the PHONES jack (audio output jack)
of a portable audio player.
You can use this means of connection to
listen to an iPod that do not have dock
connectors.
Press the AUX button.
2
Play the source, and adjust the volume
3
on both the SR -L70 i and th e audio
pl ayer.
When using the PHONES jack of the audio
player, you must adjust its volume or you
might not hear any sound from the SR-L70i.
< Turning the volume of the audio player up
too high may cause the sound from the
SR-L70i to be distorted. If this is the case,
reduce the volume of the audio player until
the distortion stops and then adjust the
volume level of the SR-L70i to a comfortable
listening level.
The AUX indicator ( ) appears on the
dis play.
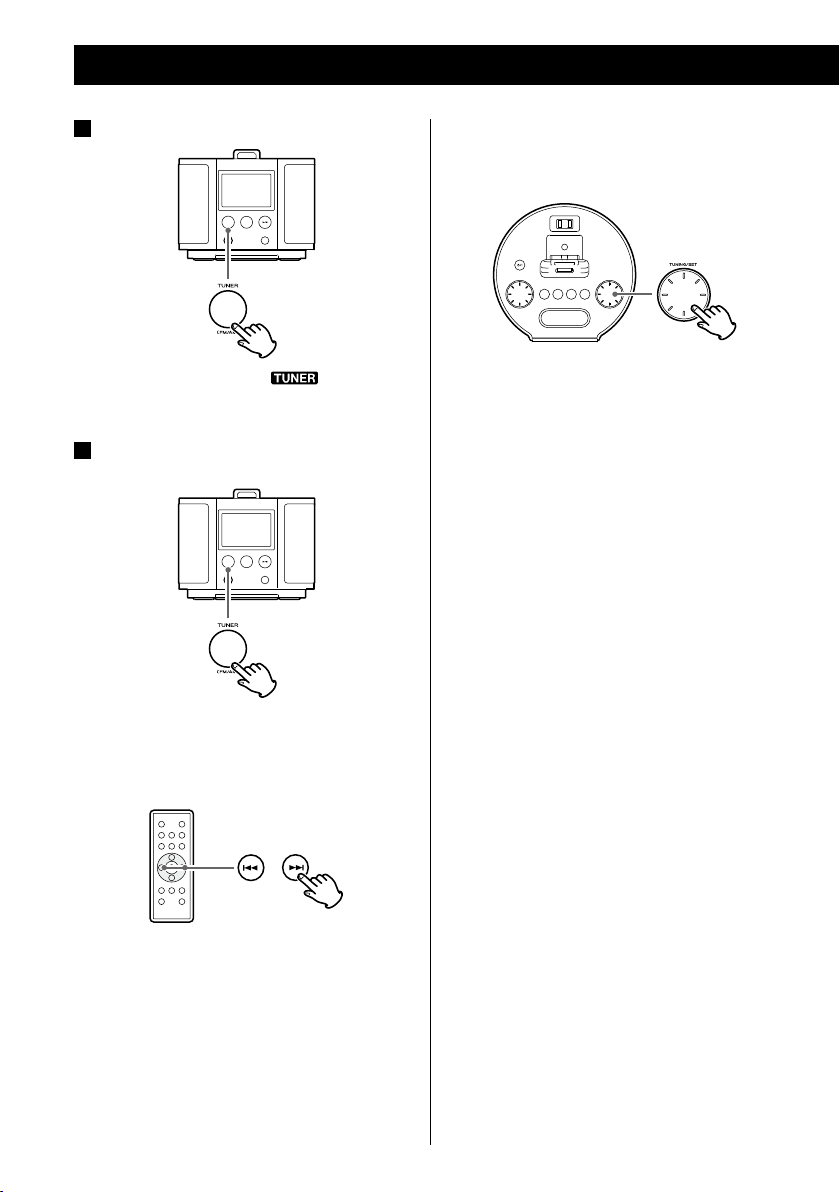
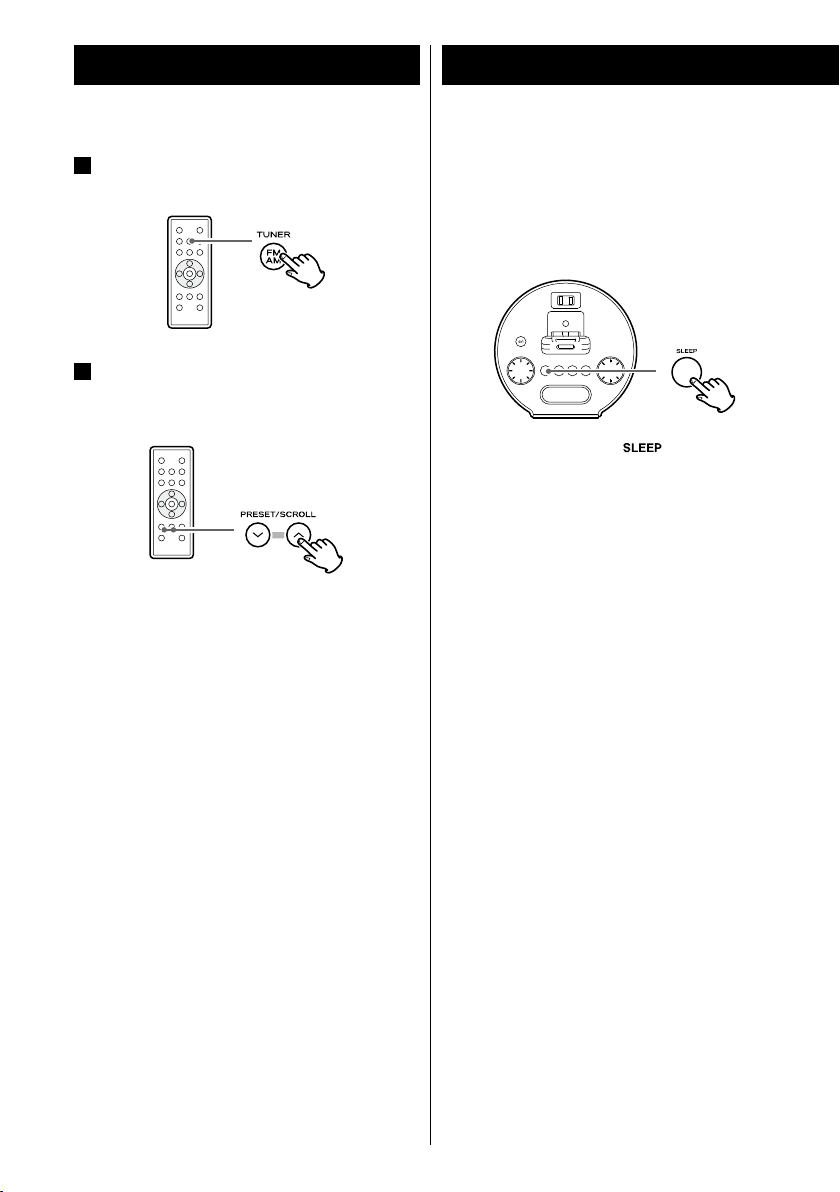
Listening to the Radio
Press the TUNER button.
1
The TUNER indicator ( ) appears on
the display.
Press the TUNER button again to select
2
FM or AM.
Manual selection
Use the TUNING/SET knob to select stations
that cannot be tuned automatically.
< You can also use the Skip buttons (. or
/) on the remote control.
When a Skip button (.or/) is pressed
momentarily the frequency changes by a
fixed step.
Press the Skip button repeatedly until the
station you want to listen to is found.
Selecting a station
Automatic selection
Hold down a Skip button (. or /) for
more than 2 seconds and release it when
the frequency display begins to change.
When a st ati on is tu ned in , the tuning
process will stop automatically.
< To stop automatic selec tion, press a Skip
button (. or /).
18
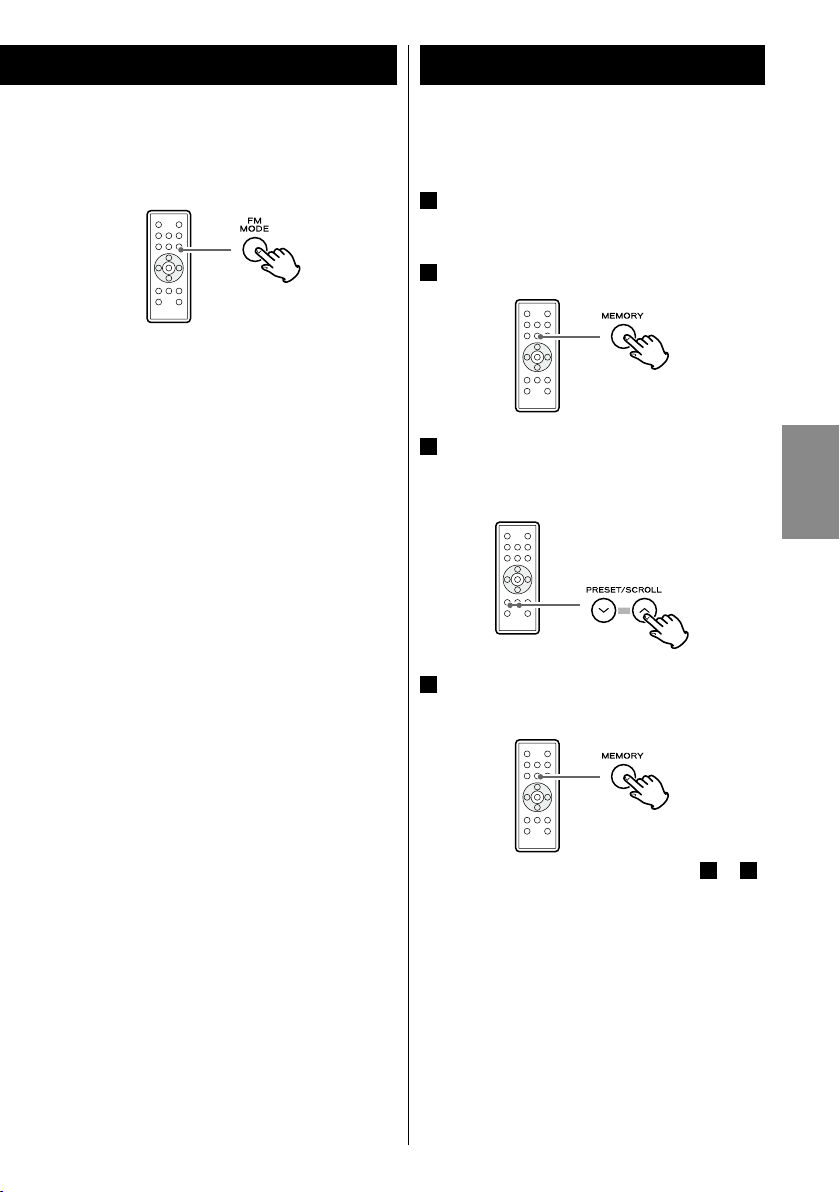
Preset Tuning (1)
FM MODE button
Pressing this but ton alternates between
Stereo mode and Mono mode.
Stereo
When an FM stereo broadcast is received,
the “STEREO” indicator lights on the display.
< If the sound is distorted and the “STEREO”
indicator flashes, the signal is not strong
enough for good stereo reception. In this
case, change to MONO mode.
Mono
To compensate f o r wea k F M ster eo
reception, select this mode. Reception will
be f orce d to be m onau ral , re duc in g
unwante d noise. The “MONO” indicator
appears on the display.
You can program 10 FM and 10 AM channel
presets.
Tune in a station you want to save as a
1
preset (page 18).
Press the MEMORY button.
2
Wit hin 3 seco nds , selec t a pres et
3
channel to store the station using the
PRESET/SCROLL (‡/°) buttons.
Within 10 seconds, press the MEMORY
4
button.
ENGLISH
If the reception is poor
AM broadcast
The AM antenna is built into the main unit.
Rotate or move the unit to find the best
position for AM reception.
FM broadcast
Extend and turn the FM antenna to improve
the reception of a station.
To store more stations, repeat steps 1 to 4.
19
Preset Tuning (2)
Timer (1)
Selecting a preset station
In TUNER mode,
1
button to select FM or AM.
Press the PRESET/SCROLL (‡ /°)
2
buttons repeatedly until the desired
preset station is found.
press the TUNER
Sleep Timer
You can set the Sleep Timer so the unit turns
itself off after a specified amount of time.
Press the SLEEP button repeatedly until the
desired time appears on the display.
The SLEEP indicator ( ) appears on the
dis play.
SLEEP 120, 90, 60, 30 or 15:
Depending on the selection, the power will
be switched to standby after 120, 90, 60, 30
or 15 minutes.
OFF:
The Sleep Timer is OFF.
20
< If you want to check the time remaining until
the unit is switched to standby, press the
SLEEP button once. The remaining time will
be displayed for a few seconds.
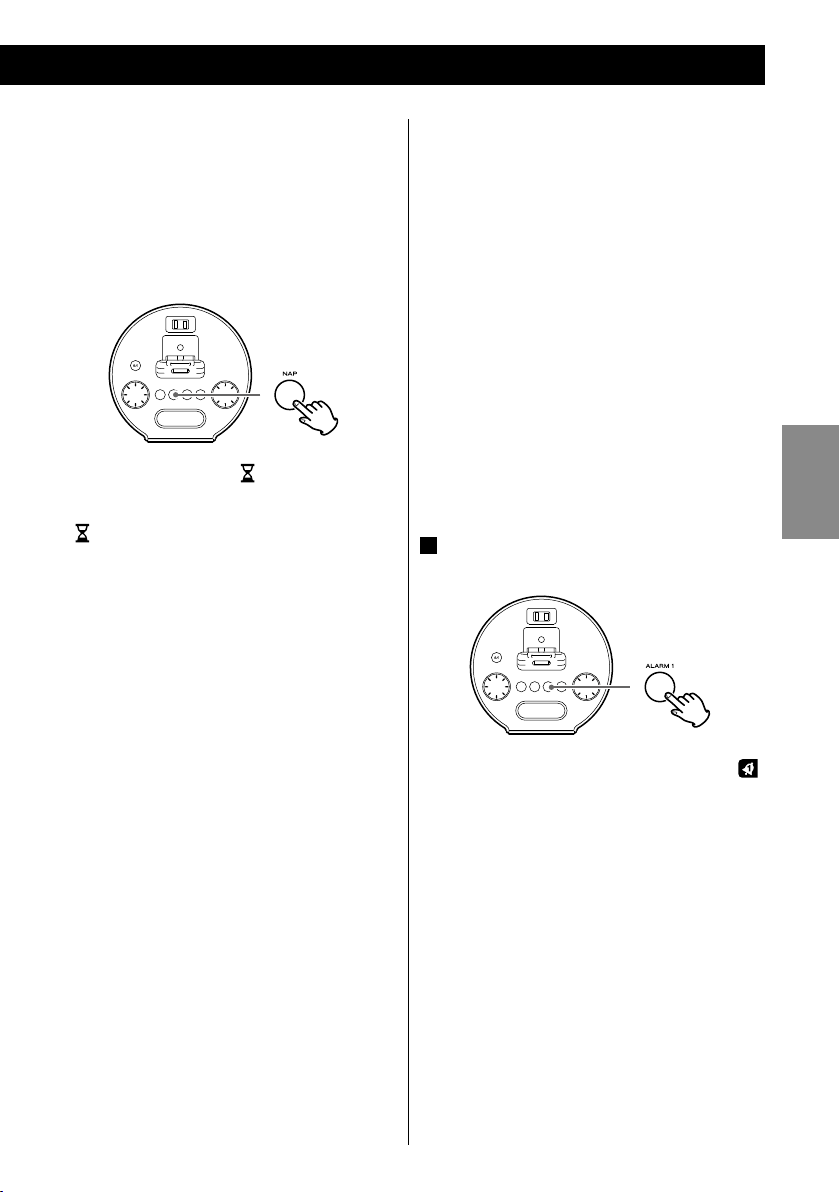
Nap Alarm
You ca n set a Nap Alarm so that a buzzer
sounds after a set amount of time. The buzzer
sounds for 5 minutes.
Press the NAP button repeatedly until the
desired time appears on the display.
The NAP indicator ( ) appears on the
dis play.
Wake Up Timer
The unit can be programmed to turn on at a
specified time.
The unit turns on when the timer reaches the
ON time. Then, after 120 minutes the unit will
switch to standby. Or the buzzer sounds for 5
minutes.
You can set two different timers separately with
ALARM 1 and ALARM 2.
< Adjust the clock before setting the timer
(page 12).
Setting the Wake Up Timer
(When using the Alarm 1 button)
ENGLISH
30, 60, 90, or 120:
Depending on the selection, the buzzer will
sound after 30, 60, 90, or 120 minutes.
OFF:
The Nap Alarm is OFF.
< If you want to check the time remaining until
the nap alarm buzzes, press the NAP button
once. The remaining time will be displayed
for a few seconds.
< Af ter the Nap Alarm has been set, it will
function even if the unit is put into standby
mode.
Caution:
The buzzer sound is loud, so do not use
headphones when the Nap Alarm is on.
To stop the alarm
When the buzzer sounds after the set time
elapses, press the SNOOZE/DIMMER button
to stop the buzzer for 10 minutes. It will
sounds again after 10 minutes.
To turn the Nap Alarm off completely, press
the NAP button again.
Press and hold the ALARM 1 button for
1
more than 2 seconds.
The clock and the timer indicator ( )
appear on the display and blink.
< If no button is pressed for about 8 seconds,
the timer setting mode will be canceled.
At their default settings, Alarm 1 is set for
6:00 AM and Alarm 2 is set for 7:00 AM.
< If you want to restore the unit to the default
facto ry settin gs , pres s and hol d the
SNOOZE/DIMMER button for more than 5
seconds.
21
22
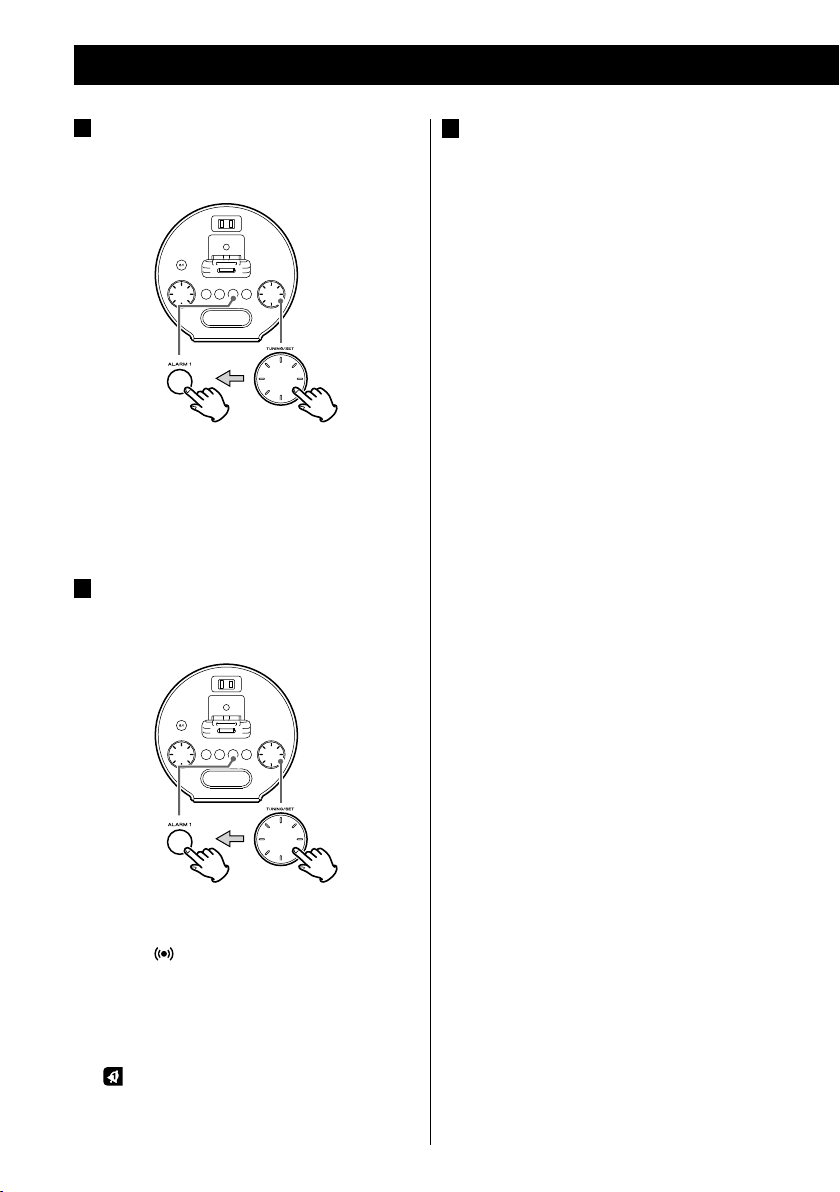
Timer (2)
Turn the TUNING/SET knob to set the
2
hour and minute, and then press the
ALARM 1 button.
The Timer indicator and source indicator
blink.
< The Wake Up Timer can be set by 5 minutes’
step.
Turn the TUNING/SET knob to set the
3
source, and then pre ss the ALARM 1
button.
Prepare the source.
4
When the source is set to “iPod,” insert an
iPod.
When the source is set to “Tuner”, tune in a
station.
< Playb ack volume will gradually increase
when the unit is turned on by timer.
< If the source is set to “iPod” but no iPod is
set, the buzzer will sound.
< If you want to wake up with the buzzer,
select “
< You cannot select “AUX” as a source.
The
(
”.
Clock Timer
) appears on the display.
is now set and
the indicator

ENGLISH
23
Turning off a Wake Up Timer
If you do not want to use a timer, press the
ALARM 1 or ALARM 2 button to turn it off.
The corresponding timer indicator (
) disappears from the display.
Press the ALARM 1 or ALARM 2 button again
to turn it on.
Using the alarm with your iPod Touch
< If you turn the power of an iPod Touch off
("Slide to power off"), you cannot use the
alarm even if it is docked in this system. To
use the alarm, do not select [Slide to
power off ] on the iPod Touch. (The screen
can be turned off without any problem.)
< If Video is displayed on an iPod Touch’s
screen, you cannot use the alarm even if it
is docked in this system. To use the alarm,
select any item other than Video on the
iPod Touch.
Using the Snooze Function
You can use the Snooze function after the ON
time is reached when using the Nap Alarm or
or
Wake Up Timer function.
Press the SNOOZE/DIMMER button and the
unit will turn off for 10 minutes then turn on
again.
You can use this function repeatedly for up
to 2 hours.
When using a timer or snooze function, the
only buttons that work are:
SNOOZE/DIMMER and STANDBY/ON

Troubleshooting
If you have problems with your system, read
this page and try to solve the problem yourself
be fore calling your dealer or TEAC service
center.
General
No power.
e Check the connection to the AC power
supply. Check whether the AC source is a
switched outlet or not and, if it is, that the
switch is turned on. Confirm that there is
pow er to th e AC ou tlet by plu ggi ng
another item such as a lamp or fan into the
outlet.
e The fuse might be blown. Replace it with a
T2 AL 250V fuse. Do not use a different
t ype of fuse . Do in g so co ul d caus e
exce ssiv e he at ge ne rati on or ot he r
ab no rmal behavior that could lead to
malfunction or fire.
No sound from speakers.
e Select the source by pressing the TUNER
button, the AUX button, or the iPod button
(y/J).
e Adjust the volume.
e Remove the headphone plug from the
PHONES jack.
The sound is noisy.
e The unit is too close to a TV or similar
device. Relocate the unit farther away from
such devices, or turn them off.
iPod Player
Cannot insert the iPod.
e Adjust the dock adapter.
e Remove dust or obstacles from the SR-L70i
dock connector and the iPod, and insert
the iPod again.
iPod will not play.
e Remove the iPod from the dock, wait a few
seconds, and insert it again.
e A sof twar e up da te migh t so lv e th e
problem. Visit the Apple website and
download the latest iPod Software.
Cannot operate the iPod.
e Turn off the HOLD switch of the iPod.
Tune r
Cannot listen to any station, or the signal
is too weak.
e Tune in the station properly.
e Move the antenna for FM or the main unit
for AM until you receive stations clearly.
Remote control does not work.
e Press the STANDBY/ON switch to turn the
unit on.
e If the battery is exhausted, replace it with a
new one.
e Use the remote control unit within the
operation range (5 yd) and point it at the
remote sensor on the front panel.
e Remove obstacles between the remote
control unit and the main unit.
e If a bright light is near the unit, turn it off.
24
If normal operation cannot be restored,
unplug the power cord from the outlet
and plug it in again.
Maintenance
If the surface of the unit gets dirty, wipe with a
soft cloth or use a diluted mild liquid soap. Be
sure to remove any excess liquid completely. Do
not use thinner, benzine or alcohol as they
might damage the surface of the unit. Allow the
sur face of the unit to dry completely before
using it.

Specifications
Tuner Section
Frequency Range
FM: 87.5 MHz to 108.0 MHz
AM: 520 kHz to 1,710 kHz
Speaker System Section
Typ e . . . . . . . . . . . . . . . . . . . . . . . . . . . . 51.5 mm x 2
Impedance ..........................4 ohms
General
Total Output Power . . . . . . . . . . . . . . .3 W + 3 W
Power Requirement . . . . . . . . . AC 120 V, 60 Hz
Power Consumption . . . . . . . . . . . . . . . . . . .25 W
Dimensions (W x H x D)
191 x 152 x 196 mm
(7 1/2” x 6” x 7 3/4”)
Weight (Net) . . . . . . . . . . . . . . . . .2.2 kg (4 7/8 lb)
Standard Accessories
Remote control unit (RC-1198) x 1
Battery for remote control unit (CR2032) x 1
Batteries for backup (AAA size) x 2
Owner’s Manual (this document) x 1
Warranty card x 1
ENGLISH
< Design and specifications are subject to
change without notice.
< Weight and dimensions are approximate.
< Illustrations may differ slightly from
production models.
25

ATTENTION
< N ’ e x p os e z p a s c e t a p p a r e il a u
ruissellement ni aux éclaboussures.
< Ne placez aucu n ob jet co nt enant du
liquide, tel qu’un vase, sur l’appareil.
< N’installez pas cet appareil dans un espace
co nf iné co mm e une biblioth èque ou
similaire.
< L’appareil tire un courant nominal de veille
de la prise secteur quand son interrupteur
POWER ou STANDBY/O N n’est pas en
position ON.
< L’appareil doit être placé assez près de la
prise de courant pour que vous puissiez à
tout moment attraper facilement la fiche
du cordon d’alimentation.
< La fi che sec teur est uti lisée co mme
dispositif de déconnexion et doit donc
toujours rester disponible.
< Les produits ayant une construction de
Classe I son t équi pés d'u n co rd on
d'alimentation avec une fiche de terre à
trois broches. Le cordon d'un tel produit
doit être branché dans une prise secteur
avec terre de sécurité.
< Si le produit utilise des piles/batteries (y
compris un pack de batteries ou des piles
installé es), el les ne doive nt pas êt re
exposées au soleil, au feu ou à une chaleur
excessive.
< PRÉCAUTION pour les produits qui utilisent
des batteries remplaçables au lithium :
remplacer une batterie par un mo dèle
incorrect entraîne un risque d'explosion. Le
mo dè le de remplacement doit être le
même ou l'équivalent.
< Des précautions doivent être prises en cas
d'utilisation d'écouteurs ou d'un casque
avec le produit car une pression sonore
exce ssive (volum e trop fort) da ns le s
écouteurs ou dans le casque peut causer
une perte auditive.
Sommaire
Nous vous remercions d’avoir choisi TEAC.
Lisez ce ma nuel avec at te ntion po ur
obtenir le s meil leures pe rf orma nces
possibles de cet appareil.
Avant l’utilisation . . . . . . . . . . . . . . . . . . . . . . . . . . . .27
Précautions à observer concernant les piles . . 27
Identification des parties (Unité principale) ...28
Identification des parties (Télécommande) ...30
Identification des parties (Écran) . . . . . . . . . . . . . 31
Boîtier de télécommande ....................31
Connexions . . . . . . . . . . . . . . . . . . . . . . . . . . . . . . . . .32
Réglage de l’horloge . . . . . . . . . . . . . . . . . . . . . . . .34
Fonctionnement de base ....................35
Écoute de l’iPod . . . . . . . . . . . . . . . . . . . . . . . . . . . . .36
Écoute d’une source externe .................39
Écoute de la radio . . . . . . . . . . . . . . . . . . . . . . . . . . .40
Préréglage de stations .......................41
Minuterie ....................................42
Dépannage ..................................46
Caractéristiques techniques . . . . . . . . . . . . . . . . .47
26

Avant l’utilisation
Précautions à observer concernant les piles
Lire ce qui suit avant d’utiliser l’appareil.
< Qu and l’appareil est all um é, mettre en
servic e un tél év is eu r peu t ent raî ne r
l’apparition de lignes sur l’écran de celui-ci,
en fonction des ondes éle ctriques de la
dif fusion T V. Ce n’e st pa s un mau vai s
fonctionne ment de l ’a pp are il ni du
téléviseur. Dans ce cas, éteignez l’appareil.
< Il est possible que l’appareil devienne chaud
durant l’utilisation, laissez donc toujours un
espace suffisant autour de l’appareil pour la
ventilation. NE placez RIEN sur l’appareil.
< La tension d’alimentation doit correspondre
à la tension imprimée sur le panneau arrière.
Si vous ave z des dout es co nc er na nt
l’alimentation de l’appareil, consultez un
électricien.
< Choisissez soigneusement l’emplacement de
l’appareil. Évitez de l’exposer directement
au x rayons solaires ou à un e source de
chaleur. Évitez aussi les endroits sujets aux
vibrations, à une poussière excessive, à la
chaleur, au froid et à l’humidité.
< N’installez pas l’appareil au dessus d’un
amplificateur/récepteur.
< Pl acez bien les pile s en resp ecta nt les
polarités plus “+” et moins “_” .
< Utilisez des piles du même type. N’utilisez
jamais des types de pile différents ensemble.
< Des piles ou des batteries peuvent être
utilisées. Référez-vous à leurs étiquettes pour
les précautions à respecter.
< Si la télécommande ne doit pas être utilisée
durant une période prolongée (plus d’un
mois), retirez ses piles pour éviter qu’elles ne
coulent.
< Si les piles coulent, essuyez le liquide dans le
compar timent des piles et remplacez les
piles par des neuves.
< N’utilise z pas d’autr es piles que cell es
sp écif iées . Ne mélang ez pas de s pi les
neuves avec des anciennes et n’utilisez pas
ensemble des types de pile différents.
< Ne chauffez pas et ne démontez pas les piles
et ne les jetez jamais dans un feu ou dans de
l’eau.
FRANÇAIS
< N’o uvre z pa s le bo ît ier ca r ce la peu t
endommager le circuit ou causer un choc
élec tr iq ue . Si un obj et pé nè tre da ns
l’appareil, consultez votre revendeur ou un
SAV TEAC.
< Quand vous débranchez l’appareil, tirez
toujours par la prise, jamais par le cordon
d’alimentation.
< N’essayez pas de nettoyer l’appareil avec des
d iss ol v an t s c h im i qu e s, c ela p eu t
endommager la finition. Utilisez un chiffon
propre et sec.
< Conservez ce livret dans un endroit sûr pour
référence ultérieure.
< Ne conservez et ne transportez pas les piles
avec d’autres objets métalliques. Une pile
pourrait entrer en court-circuit, couler ou
exploser.
< Ne rechargez jamais une batterie sans avoir
vérifié qu’elle peut l’être.
27

A
C
D E
M
L
K
GF
I
H
B
J
Identification des parties (Unité principale)
Peut tourner
à 90º dans
les deux
directions.
28

STANDBY/ON
A
Utilisez cette touche pour allumer l’appareil
ou le mettre en veille (standby).
VOLUME
B
Tournez cette molette pour régler le volume.
SLEEP
C
Utilisez cette touche pour régler la minuterie
d'extinction (page 42).
NAP
D
Utilisez cette touche pour régler le minuteur
de réveil (page 43).
ALARM 1, ALARM 2
E
Gardez ces touches enfoncées plus de 2
secondes pour passer en mode de réglage
du réveil.
Utilisez aussi ces touches p our met tre le
réveil en/hors service (page 43).
SNOOZE (sommeil/rappel de réveil)
F
/DIMMER (atténuateur)
Utili se z cette touch e p ou r attén uer
l’affichage (page 36).
Une fois l’heure de réveil atteinte, utilisez
cet te tou che pou r éte ind re l’ap pareil
pendant 10 minutes (page 45).
TUNING/SET
G
En mode TUNER, utilisez cette molette pour
changer les stations (page 40).
En mode de réglage du réveil, tournez cette
molette pour régler les heures, les minutes
et la source (page 43).
En mode de réglage d'h orloge, tournez
cette molette pour régler les heures et les
minutes (page 34).
Prise d'alimentation
H
Ce tte prise peut serv ir, par exemple, à
charger un téléphone portable.
Attention :
Ne l'employez pas pour des appareils
tira nt plu s de 0,5 A ou 60 W. Ce la
causerait une rupture d u fusible, un
incendie ou un choc électrique.
Connecteur du dock
I
Insérez un iPod dans ce dock (page 36).
Affichage
J
TUNER
K
Utilisez cette touche pour passer en mode
TUNER (page 40).
PHONES
L
Pour une écoute privée, commencez par
régler le volume au minimum. Insérez alors
la fiche du casque d’écoute dans la prise
PHONES, puis réglez le volume en tournant
la molet te VO LUME. Quand un casque
d’écoute est branché, le son des enceintes
est coupé.
Attention :
N’allumez/n’éteignez pas l’appareil et ne
branchez/débranchez pas le casque
alors que vous portez ce dernier.
Des sons ayant un volume excessif
pourraient être produits par le casque.
Baissez toujours le niveau de volume au
minimum avant de brancher un casque.
ÉPA RGNE Z V OT RE AUDIT ION - Ne
portez pas le casque avant de l'avoir
branché.
AUX
M
Ut ilisez cette touche pour écouter un e
source externe branchée en entrée AUX IN
(page 39).
N
iPod (y/J)
Utilisez cette touche pour passer en mode
iPod.
Utilisez cette touche pour lancer ou mettre
en pause la lecture de l’iPod (page 36).
Capteur de télécommande
O
Enceintes (stéréo)
P
FRANÇAIS
29

A
B
B
C
Q
M
K
R
W
V
X
S
T
U
Identification des parties (Télécommande)
Q
MUTING (Neutralisation)
Utilisez cette touche pour couper le son
(page 36).
R
MEMORY (Mémorisation)
En mode TUNER, utilisez cette touche pour
prérégler (mémoriser) des stations (page 41).
S
FM MODE
En mode TUNER, utilisez cette touche pour
sélectionner stéréo ou mono (page 41).
En mode iPod, utilisez cette touche pour
mettre en service la fonction shuffle (lecture
aléatoire) (page 38).
T
(.//)
Saut
En mode iPod, utilisez ces touches pour
changer de plage (piste). Maintenez une de
ces touches enfoncée pour rechercher une
partie dans une plage (page 37).
En mode TUNER, utilisez ces touches pour
changer les stations (page 40).
U
PRESET/SCROLL (‡/°)
En mode iPod, utilisez ces touches pour faire
défiler le menu vers le haut ou vers le bas
(page 38). Ces touche s ont les même s
fonctions que la molette cliquable de l'iPod.
En mode TUNER, utilisez ces touches pour
sélectionner une station préréglée (page 41).
V
MENU
En mode iPod, utilisez cette touche pour
revenir au menu précédent (page 38). Cette
to uche a les même fo ncti ons que so n
homologue de l’iPod.
W
RE PEAT
En mode iPod, utilisez cette touche pour
régler la répétition de morceaux (page 38).
X
SELECT
En mode iPod, utilisez cette touche pour
confirmer votre sélection dans des menus
(pa ge 38). Ce tt e touch e a les mêmes
fonctions qu e le bout on centra l de la
molette cliquable de l'iPod.
30

Identification des parties (Écran)
A
C
B
D
E
F
G
G
H
I
J
Quand l’appareil es t allumé, un de ces
A
indicateurs s’allume pour signaler la source
actuelle.
S'allume quand la minuterie d'extinction est
B
activée.
S’ al lu me e n mo de d e s y ntoni sat ion
C
préréglée.
Boîtier de télécommande
Le boîtier de télécommande fourni permet la
commande à distance de l’appareil. Pour utiliser
le boîtier de télécommande, pointez-le vers le
détecteur de télécommande du panneau avant
de l’appareil.
< Même si le boîtier de télécommande est
employé à portée de fonctionnement, la
commande à distance peut être impossible
s’il y a des obstacles entre le lecteur et le
boîtier de télécommande.
< Si le boîtier de télécommande est employé à
proximité d’autres appareils générant des
r ay o n s i nf r arou g es, ou si d’aut r e s
tél éco mm an des util is an t des rayo ns
infrarouges sont utilisées près du lecteur, le
lecteur peut ne pas bien fonctionner. Dans la
sit uat ion inverse , les autr es ap pareils
peuvent ne pas bien fonctionner.
Mise en place de la pile
FRANÇAIS
Présente l’horloge numérique ou les canaux
D
préréglés.
S'allume quand le sélecteur DST (heure
E
d'été) est sur à l'arrière de l'unité.
S'allume quand le minuteur de réveil est
F
activé.
Quand le mode FM est activé, indique si le
G
signal est stéréo ou mono.
Présente la fréquence, le volume etc.
H
Affiche FM ou AM à réception d'un signal
I
radio.
Indique la source choisie quand le réveil est
J
réglé.
1. Retirez le couvercle du compartiment de la
pile.
2. Insérez une pile lithium-ion (CR2032, 3 V).
3. Refermez le couvercle.
Remplacement de la pile
Si vous remarquez que la distance entre le
boîtier de télécommande et le lecteur devient
plus courte pour un fonctionnement correct,
cela indique que la pile est usée.
Dans ce cas, remplacez la pile par une neuve.
Pour plus d’informations sur la collecte des piles
usagées, veuillez contacter votre mairie, votre
service d’ordures ménagères ou le point de
vente dans lequel vous avez acheté les articles.
31

123
G
H
A
E
D
C
B
F
Connexions
Attention :
< Coupez l’alimentation de tous les appareils avant d’effectuer les raccordements.
< Lisez les instructions qui accompagnent chaque appareil que vous avez l’intention d’utiliser en
association avec cet appareil-ci.
< Veillez à ce que chaque fiche soit soigneusement insérée. Pour éviter les ronflements et les
bruits parasites, évitez d’attacher ensemble les câbles d’interconnexion.
iPod (Arrière)
Adaptateur
SR-L70i
32
Prise secteur

A
Fiche d'entrée AUX IN
Des signaux audio analogiques à 2 canaux
peuv en t être re çu s p ar cette fi ch e.
Branchez-la à la sortie d'un iPod, lecteur de
CD, platine cassette, etc.
B
Connecteur du dock
Insérez un iPod dans ce dock (page 36).
C
CLOCK ADJ
Utilisez cette touche pour régler l'horloge
(page 34).
D
DST
Utilisez ce sélecteur pour régler l'heure
d'été (page 34).
E
Antenne FM
En mode FM, réglez-vous sur la station FM
et étendez le fil d’antenne pour trouver la
meilleure position de réception. Cette
antenne peut devoir être repositionnée si
vous déplacez votre appareil.
H
Logement des piles
Les piles fournissent le courant de secours
à l’hor loge intég rée et à la mémo ire
lorsque l’appareil est momentanément
déconnecté de la prise de courant.
In sérez deux piles “AAA” (R 03, UM-4).
A ss u re z -v ous q ue l es p ile s s o nt
correctement insérées et respectent les
polarités plus “+” et moins “_”.
Remplacement des piles
Si l’horloge affiche une heure erronée,
remplacez les piles par des neuves.
La durée de vie des piles est d’environ 100
heures en tout.
FRANÇAIS
F
Cordon d’alimentation
Branchez ce cordon d’alimentation dans
une prise secteur.
G
FUSE
Si le fusible saute, remplacez-le par un
modèle T2 AL 250 V.
Attention :
Pour votre sécurité, débranchez la
f ic he d ' ali men tat ion ava nt d e
remplacer le fusible.
33

34
Réglage de l’horloge
Ap puye z sur la to uche CL OCK ADJ,
1
m ainte nez- la p r essé e p l us d e 3
secondes et relâchez-la quand “12 HR”
ou “24 HR” clignote à l'écran.
Si vous désirez changer le cycle de l’horloge,
tournez la molette TUNING/SET.
< Si vo us ne tour ne z pas la mol ette ou
n'appuyez pas sur la touche dans les 8
secondes suivantes, le mode de réglage
d'horloge est abandonné.
Appuyez encore une fois sur la touche
2
CLOCK ADJ.
Tournez la molette TUNING/SET pour
4
spécifier la minute, puis appuyez sur la
touche CLOCK ADJ.
Le réglage de l'horloge est alors terminé et
l'horloge démarre de la seconde
00.
Pour régler l’heure d’été
Pou r pass er en he ure d'été , ré gle z le
sélec te ur DS T sur ON. L'indi cate ur DS T
(
) apparaît à l'écran.
La valeur de l’heure clignote.
Tournez la molette TUNING/SET pour
3
spécifier l’heure, puis appuyez sur la
touche CLOCK ADJ.

FRANÇAIS
35
Fonctionnement de base (1)
Appuyez sur l’interrupteur STANDBY/
1
ON pour allumer l’appareil.
< L’appareil s’allume avec la dernière source
sélectionnée. Si un iPod en mode lecture est
inséré dans le Dock, le SR-L70i se mettra
automatiquement sous tension et entamera
la lecture de l’iPod.
< Vous pouvez aussi utiliser la touche TUNER,
la touche AUX ou la touche iPod (y/J )
pour allumer l’appareil.
Appuyez sur la touche TUNER, la touche
2
AUX ou la touche iPod (y/J ) pour
sélectionner une source.
Fa it es jo ue r la so ur ce et rég le z le
3
volume avec la molette VOLUME.
Le volume se règle de MIN (00) à MAX (40).
Maintenez les touches VOLUME – ou + de la
télécommande pour réduire ou augmenter
le volume de façon continue.
< Sélectionnez AUX pour écouter une source
externe branchée à la fiche d'entrée AUX IN.
< Si vous sélectionnez “iPod” alors qu’aucun
iPod n’est sur le dock, l’indicateur iPod de
l’afficheur clignote.

Fonctionnement de base (2)
Dimmer (atténuateur)
Écoute de l’iPod (1)
Insérez l’iPod dans le dock du SR-L70i.
1
Adaptateur
Vous pouvez mo difier la luminosité de
l’affichage de la face avant. Utilisez la touche
S N OOZ E /DI M MER po u r c han ger la
luminosité entre trois niveaux.
Si cette touche est enfoncée en mode de
vei ll e, l’a f fi cheu r s’écl ai re pend ant 5
secondes environ.
< Cette fonction sera annulée si l’on appuie sur
l’interrupteur STANDBY/ON.
Neutralisation (MUTING)
Pou r co up er tem po ra iremen t l e s on,
appuyez sur la touche MUTING. Appuyer à
nouveau sur la touche MUTING restaure le
son.
< Après av oir inséré l'iPod , faites glis ser
l'adaptateur de dock correspondant à la taille
de l'iPod utilisé.
L'indicateur iPod (
Appuyez sur la touche Lecture/Pause
2
(y/J ) de l'iPod ou sur la touche iPod
(y/J) du SR-L70i. Le SR-L70i s'allumera
et entamera la lecture de musique sur
l'iPod.
< La batteri e de l’iPod est re chargé e au
maximum quand l’iPod est mis sur le dock et
que le SR-L70i est connecté au secteur.
Toutefois, pour éviter du bruit, l'iPod ne se
rechargera pas si le tuner est employé en
mode AM.
< Quand des écouteurs sont branchés à l’iPod,
le son vient à la fois des haut-parleurs du
SR-L70i et des écouteurs.
) apparaît à l'écran.
< Si vous changez le volume ou la source alors
que le son est co up é, la coupu re est
annulée.
36
Logiciel iPod compatible
Au cas où votre iPod ne fonctionnerait pas avec
le SR-L70i ou sa télécommande, une mise à jour
du logiciel peut résoudre le problème.
Visitez le site web Apple et téléchargez le
dernier logiciel pour iPod.
http://www.apple.com/ipod/download/

Sélectionner le mode iPod
Appuyez sur la touche iPod (y/J).
Si un iPod en lecture est inséré dans le dock,
le SR-L70i commence automatiquement la
reproduction du son.
S’il n’y a pas d’iPod sur le dock, l’indicateur
iPod de l’afficheur clignote.
< Vous pouvez aussi utiliser la touche sur l'iPod
ou la touche Lecture/Pause (y/J ) de la
télécommande pour sélectionner l'iPod en
vue de la lecture.
Suspendre temporairement la
lecture (mode pause)
Rechercher une partie dans une
plage
Durant la lec ture, maintenez enfoncée la
touche Saut (. ou /) durant plus de 2
secondes et relâchez-la quand la partie que
vous voulez écouter est atteinte.
Sauter à la plage suivante ou
précédente
FRANÇAIS
Durant la lecture, appuyez répétitivement
sur la touche Saut (. ou /) jusqu’à
obtention de la plage désirée. La plage
sélectionnée sera lue depuis son début.
Appuyez sur la touche iPod (G/J) durant la
lecture. La lecture s’arrête sur la position
actuelle. Pour la repr endre, appu yez à
nouveau sur la touche iPod (G/J).
< Vous pouvez aussi utiliser la touche sur l'iPod
ou la touche Lecture/Pause (y/J ) de la
télécommande pour mettre en pause.
< Quand on appuie sur la touche . durant
la lecture, la plage lue reprend à son début.
Po u r reven i r au débu t de la p la g e
précédente, appuyez deux fois sur la touche
..
37

38
Écoute de l’iPod (2)
AllOne off
Pour revenir au menu précédent
Appuyez sur la touche MENU. Cette touche a
les même fonctions que celle de l’iPod.
Sélection d'un élément de menu
Pour activer le mode de lecture
répétitive
Pendant la lecture, appuyez sur la touche
REPEAT.
A chaque pression sur la touche, le réglage
de lect ure ré pétiti ve de l’ iPo d ch ange
comme suit :
Quand l’iPod est configuré pour répéter un
seul morceau, l’icône Répéter un seul (
apparaît sur l’afficeur de l’iPod.
Quand l’iPod est configuré pour répéter tous
les morceaux, l’icône Répéter tous (
apparaît sur l’afficheur de l’iPod.
)
)
Appuyez sur les touches PRESET/SCROLL
(‡/°) pour faire défiler jusqu’à l’élément.
Et puis appuyez sur la touche SELECT.
Activation du mode aléatoire
Durant la lecture, appuyer sur la touche FM
MODE met le mode aléatoire (shuffle) en/
hors service.
Quand l'iPod est en mode aléatoire, l'icône
correspondante (
écran.
) apparaît dans son

FRANÇAIS
39
Écoute d’une source externe
Branchez la fiche d'entrée AUX IN du
1
SR-L70i à la prise casque (prise de sortie
audio) d'un lecteur audio portable.
Vous pouvez employer cette méthode de
co nnex ion po ur écout er un iPod sans
connecteur pour dock ou dont l’adaptateur
pour dock n’est pas disponible.
Appuyez sur la touche AUX.
2
Mettez la source en lecture et réglez le
3
volume sonore du SR-L70i et du lecteur
audio.
Si vous ut ilisez la prise pour écou teur s
(PHONES) de votre mini-lecteur, vous devez
régler son volume ou vous n’entendrez pas
de son sur le SR-L70i.
< Trop monter le volume du mini-lecteur peut
entraîner de la distorsion dans votre SR-L70i.
Si c’est le cas, réduisez le volume du minilecteur jusqu’à disparition de la distorsion
puis réglez le niveau de volume du SR-L70i
pour une écoute confortable.
L'indicateur AUX ( ) apparaît à l'écran.

Écoute de la radio
Appuyez sur la touche TUNER.
1
L'indicateur TUNER ( ) appara ît à
l'écran.
App uy ez à nouv ea u sur la tou ch e
2
TUNER pour sélectionner FM ou AM.
Recherche manuelle
Uti lisez la mo le t te TUN ING/SE T po ur
sélec tionner les stations qui ne sont pas
automatiquement syntonisées.
< Vous pouvez aussi utiliser la touche Saut
(. ou /) sur la télécommande.
Quand on appuie momentanément sur la
touche Saut (.ou/), la fréquence
change par paliers fixes.
Appuyez répétitivement sur la touche Saut
jusqu’à ce que la station que vous voulez
écouter soit trouvée.
Sélection d'une station
Recherche automatique
Maintenez enfoncée la touche Saut
(.ou/) durant plus de 2 secondes et
relâchez-la quand l’affichage de fréquence
commence à changer.
Quand une station est trouvée, le processus
de syntonisation s’arrête automatiquement.
< Pour stopper la recherche automatique,
appuyez sur la touche Saut (. ou /).
40

Préréglage de stations (1)
Touche FM MODE
Appuyez sur la touche FM MODE fait alterner
entre les modes STEREO et MONO.
Stéréo
Les émissions FM stéréo sont reçues en
stéréo et le tém oin “STEREO” s’allume à
l’é cran.
< Si le son souffre de distorsion et si le témoin
“STEREO” clignote, c’est que le signal n’est
pas assez fort pour une bonne réception
stéréo. Dans ce cas, passez en mode MONO.
Mono
Pour compenser une faible réception FM
stéréo, sélectionnez ce mode. La réception
sera forcée en mono, réduisant les parasites
indésirables. Le témoin “MONO” s’allume à
l’é cran.
Vous po uv ez prérégler (“programmer” ) 10
stations FM et 10 stations AM.
Calez-vous sur une station que vou s
1
voulez sauvegarder comme préréglage
(page 40).
Appuyez sur la touche MEMORY.
2
Dans les 3 secondes, sélectionnez avec
3
la touche PRESET/SCROLL (‡/°) une
mé moire (“preset ”) où conser ver la
station.
Dans les 10 secondes, appuyez sur la
4
touche MEMORY.
FRANÇAIS
Si la réception est faible
Transmission AM
L'antenne AM est intégrée à l'a ppareil.
Tournez ou déplacez l'appareil pour trouver
la meilleure position de réception AM.
Transmission FM
Étendez et tournez l’antenne FM afin
d’obtenir une bonne réception des stations.
Pour mémoriser d’autres stations, répétez les
étapes
1
à 4.
41

Préréglage de stations (2)
Minuterie (1)
Comment rappeler des stations
préréglées
En mode TUNER, appuyez sur la touche
1
TUNER pour sélectionner FM ou AM.
Appuyez répétitivement sur la touche
2
PRESET/SCROLL (‡ /°) jusqu’à
obt en ti on de la sta ti on pr ér ég lé e
(preset) voulue.
Minuterie d’extinction
Vous pouvez régler une minuterie d’extinction
pour que l’appareil s’éteigne tout seul après un
temps donné.
Appuyez répétitivement sur la touche SLEEP
jusqu’à ce que la durée voulue s’affiche.
L'indicateur SLEEP ( ) apparaît à l'écran.
SLEEP 120, 90, 60, 30 ou 15 :
Selon la sélection, l'alimentation basculera
en veille après 120, 90, 60, 30 ou 15 minutes.
OFF :
La minuterie d’extinction est désactivée.
< Pour contrôler le temps restant, appuyez une
fois sur la touche SLEEP. Le temps restant
sera affiché durant quelques secondes.
42

Minuteur de réveil
Vous pouve z programmer un minuteur de
réveil pour qu'il sonne après un temps donné.
La sonnerie retentira pendant 5 minutes.
Appuyez répétitivement sur la touche NAP
jusqu’à ce que la durée voulue s’affiche.
L'indicateur NAP ( ) apparaît à l'écran.
Réveil
L’appareil peut être programmé pour s’allumer à
une heure donnée.
L'appareil s'allume quand l'h orlo ge atteint
l'heure réglée. Puis, après 120 minutes, il passe
en veille. Ou la sonnerie retentira pendant 5
minutes.
Vous po uvez ré gler deux heures de réveil
différentes avec ALARM 1 et ALARM 2.
< Réglez l’horloge avant de régler le réveil
(page 34).
Réglage du réveil
(quand la touche Alarm 1 est employée)
30, 60, 90, ou 120 :
Selon la sélection, la sonnerie retentira
après 30, 60, 90, ou 120 minutes.
OFF :
Le minuteur de réveil est désactivé.
< Si vous voulez vérifier le temps restant
avant la sonnerie du minuteur de réveil,
appuyez une fois sur la touche NAP. Le
temp s restant s'a ffich era quelqu es
secondes.
< Un e fois le minuteur de réveil régl é, il
fonctionne même si l'unité est mise en
veille.
Attention :
La sonnerie est forte aussi n'utilisez
pas de casque quand le minuteur de
réveil est activé.
Pour arrêter la sonnerie
Quand la sonnerie retentit une fois le temps
écoulé, appuyez sur la touche SNOOZE/
DIMMER pour la neutraliser 10 minutes. Elle
retentira de nouveau après 10 minutes.
Pour totalement couper le minuteur de
réveil, appuyez encore sur la touche NAP.
Ap puye z sur la touche AL ARM 1 et
1
maintenez-la enfoncée pendant plus de
2 secondes.
L’horloge et l’indicateur de réveil ( )
clignotent dans l’afficheur.
< Si aucun touche n’es t employée durant
environ 8 secondes, le mode de réglage de
réveil est abandonné.
Par défaut, Alarm 1 est réglé sur 6:00 AM et
Alarm 2 sur 7:00 AM.
< Si vous voulez restaurer les réglages d'usine
de l'a pp ar ei l, ap pu ye z sur la tou ch e
SNOOZE/DIMMER et maintenez-la pressée
plus de 5 secondes.
43
FRANÇAIS

44
Minuterie (2)
Tournez la molette TUNING/SET pour
2
régler les heures et les minutes, puis
appuy ez sur la touc he ALARM 1 ou
ALARM 2.
L'indicateur de minuterie et l'indicateur de
source clignotent.
< Le réve il peut être rég lé par pas de 5
minutes.
Sélec ti onnez un e so urce a vec l a
3
molette TUNING/SET, puis appuyez sur
la touche ALARM 1.
Préparez la source.
4
Si la source est réglée sur “iPod”, insérez un
iPod.
Si la source est réglée sur “Tuner ”, réglez
l’appareil sur une station.
< Lors de l’allumage par le réveil, le volume de
lecture monte progressivement.
< Si la so urce est ré glée su r “iPod ” mais
qu’aucun iPod n’est installé, le réveil utilisera
la sonnerie.
< Pour utiliser la sonnerie, sélectionnez “ ”.
< Vous ne pouvez pas séle ctionner “AUX”
comme source.
Le réveil est maintenant réglé et l'
) apparaît à l'écran.
(
indicateur

FRANÇAIS
45
Pour couper le réveil
Si vous n’utilisez pas le réveil, appuyez sur la
to uche AL ARM 1 ou AL ARM 2 pour le
couper.
Comment utiliser la fonction
sommeil
L’indicateur de réveil (
l’afficheur.
Appuyez à nouveau sur la touche ALARM 1
ou ALARM 2 pour réactiver le réveil.
Ut ilisation de l’alarme de votre iPod
touch
< Si vous spécifiez [Slide to power of f]
(glisser pour éteindre) sur votre iPo d
touch, vous ne pouvez pas utiliser l’alarme
même si le iPod touch est sur le Dock de
ce système.
Pour utiliser l’alarme de votre iPod touch,
ne sélectionnez pas [Slide to power off].
(L’écran peut être mis hors service sans
aucun problème.)
< Si une image vidéo est affichée sur l’écran
de votre iPod touch, vous ne pouvez pas
utiliser l’alarme même si l'iPod touch est
sur le Dock de ce système.
Pour utiliser l’alarme sur votre iPod touch,
sélectionner un autre élément que Vidéo.
ou
) disparaît de
Vous pouvez utilis er la fonction so mmeil
(Snooze) une fois l'heure de réveil atteinte, que
ce soit par le minuteur de réveil ou par la
fonction réveil.
Appuyez sur la touche SNOOZE/DIMMER et
l’appareil s’éteindra pour 10 minutes pour
ensuite se remettre en marche.
Vo us pou vez utiliser cette fonct ion à
plus ie ur s rep ri se s pend an t 2 h eure s
maximum.
Quand vous utilisez une minuterie ou la
fon c tio n sommeil, les seu les to uches
fonctionnelles sont :
SNOOZE/DIMMER et STANDBY/ON

Dépannage
En cas d’a no ma li e de foncti on ne me nt ,
consul te z le tabl eau qui sui t et tentez de
résoudre le problème qui se pose à vous avant
de faire appel au revendeur ou au service aprèsvente de TEAC.
Général
Pas d’alimentation.
e Vérifier que l’appareil est bien branché sur
la source d’alimentation secteur. Vérifiez et
assurez-vous que la source d’alimentation
n’est pas une prise commutée, et si c’est le
cas, si elle est en service. Vérifiez que la
prise délivre bien du courant en branchant
un autre appareil électrique, une lampe ou
un ventilateur par exemple.
e
Le fusible peut avoir sauté. Remplacez-le par
un modèle T2 AL 250 V. N'employez pas
d'autre type de fusible. Cela pourrait causer
une chaleur excessive ou d'autres
comportements anormaux faisant risquer
un mauvais fonctionnement ou un incendie.
Pas de son dans les haut-parleurs.
e Sélectionnez la source en appuyant sur la
touche TUNER, la touche AUX ou la touche
iPod (y/J).
e Réglez le volume.
e Retire z la fich e du casque de la pr ise
CASQUE.
Le son est bruyant.
e L’appareil est trop proche d’un téléviseur
ou ap pare il sembla ble . Éloi gnez ce t
appareil ou éteignez les autres appareils.
Lecteur iPod
Impossible d’insérer l’iPod.
e Vérifiez l’adaptateur de dock.
e Retirez la poussière ou les obstacles du
connecteur de dock du SR-L70i et de l’iPod,
et réinsérez l’iPod.
Pas de lecture.
e Retirez l’iPod du dock, attendez quelques
secondes, et réinsérez-le.
e Une mise à jour du logiciel peut résoudre
le problème. Visitez le site web Apple et
téléchargez le dernier logiciel pour iPod.
L’iPod ne répond à aucune commande.
e Relâchez la touche HOLD sur l’iPod.
Syntoniseur (Tuner)
Aucune station ne peut être entendue, ou
le signal est trop faible.
e Régl ez co rrectement l’ap pareil sur la
station.
e Déplacez l'antenne (FM) ou l'appareil (AM)
jusqu'à la réception claire des stations.
La télécommande ne fonctionne pas.
e Appuyez sur la touche STANDBY/ON de
l’appareil pour l’allumer.
e Si les piles sont mortes, changez-les.
e Utilisez la télécommande à portée (5 m /
15 pieds) et pointez-la vers le panneau
avant.
e E nl e v e z l e s o b s t a c l e s e n t re l a
télécommande et l’unité principale.
e S’il y a une lumi ère puissante près de
l’appareil, éteignez-la.
46
Si vo us ne pa rven ez pas à ré tabl ir un
fonctionnement normal, débranchez le
cordon d’alimentation et rebranchez-le.
Entretien
Si la surface de l’unité est sale, essuyez avec un
chiffon doux ou utilisez un savon liquide doux
dilué. Veillez à enlever tout excès. N’utilisez pas
de diluant, benzine ou alcool car ils peuvent
endommager la surface de l’appareil. Attendez
que la surface soit sèche avant utilisation.

Caractéristiques techniques48Indice
Section SYNTONISEUR
Plage de fréquences
FM : 87,50 MHz à 108,00 MHz
AM : 520 kHz à 1.710 kHz
Section SYSTÈME DE HAUT-PARLEURS
Typ e . . . . . . . . . . . . . . . . . . . . . . . . . . . . 51,5 mm x 2
Impédance ..........................4 ohms
Générales
Puissance totale de sortie ..........3 W + 3 W
Puissance requise . . . . . . . . . . . . CA 20 V, 60 Hz
Consommation électrique ..............25 W
Dimensions (L x H x P)
191 x 152 x 196 mm
Poids (net) .............................2,2 kg
Accessoires fournis
Télécommande
Pile pour télécommande (CR2032) x 1
Piles pour sauvegarde (taille AAA) x 2
Mode d’emploi (ce document) x 1
Carte de garantie x 1
(RC-1198) x 1
FRANÇAIS
< Conception et caractéristiques techniques
sujettes à des changements sans préavis.
< Poids et dimensions sont approximatifs.
< Les illustrations peuvent être légèrement
différentes des modèles de production.
47

PREC AUCIÓN
< No permita que ningún líquido se derrame
o salpique este aparato.
< No co loque obj etos que co nten gan
líquidos, como jarrones, encima de este
aparato.
< No instale este aparato confinado en un
espa ci o re du ci do , co mo pu ed e ser
encastrado en una estantería o similar.
< Este aparato recibe energía nominal no
operativa desde la toma de corriente aun
cuando su interruptor POWER o STANDBY/
ON no está en la posición ON.
< D e b e c o l o c a r e s t e a p a r a t o l o
suficientemente cerca de la salida de
corriente como para poder acceder al
enchufe en cualquier momento.
< El ench ufe pri ncipal se util iza como
sistema de desconexión, por lo que debe
colocar la unidad de forma que siempre
pueda acceder a él.
< Los aparatos pertenecientes a la Clase I
están equipados con un cable de corriente
con enchufe de tres bornes con toma de
tierr a. Este tipo de ca bles de ben se r
conectados en salidas de corriente alterna
que dispongan de una toma de tierra de
protección.
< Si este aparato utiliza pilas (tanto un pack
exterior como pilas instaladas), no debe
exponerlas a la luz solar directa, fuego o
fuentes de calor excesivas.
< PRECAUCION relativa a los productos que
usen pilas de litio recambiables: existe el
riesgo de explosión si la pila es sustituida
por otra de tipo incorrecto. Sustituya la pila
solo por otra de idénticas características.
< Tenga cuidado al usar este aparato con
auriculares dado que una presión sonora
elevada (volumen) a través de ellos puede
dar lugar a problemas de sordera..
Enhorabuena por escoger un TEAC. Lea
det enid am ente este manu al a fin de
ob ten er el mejor ren dim iento de esta
unidad.
Antes de usar esta unidad . . . . . . . . . . . . . . . . . . .49
Precauciones con las pilas . . . . . . . . . . . . . . . . . . .49
Identificación de las partes
(unidad principal) ............................50
Identificación de las partes
(mando a distancia) ..........................52
Identificación de las partes
(pantalla) . . . . . . . . . . . . . . . . . . . . . . . . . . . . . . . . . . . .53
Mando a distancia ...........................53
Conexiones ..................................54
Puesta en hora del reloj ......................56
Funcionamiento básico ......................57
Escucha de un iPod ..........................58
Escucha de una fuente externa . . . . . . . . . . . . . .61
Escucha de la radio ..........................62
Presets . . . . . . . . . . . . . . . . . . . . . . . . . . . . . . . . . . . . . .63
Temporizador . . . . . . . . . . . . . . . . . . . . . . . . . . . . . . .64
Resolución de problemas ....................68
Especificaciones .............................69

Antes de usar esta unidad Precauciones con las pilas
Lea esto antes de realizar cualquier
operación.
< Si esta unidad está encendida, es posible
que, al encender la televisión aparezcan
líneas en la pantalla, depe ndiendo del
estado de las ondas eléctricas de la emisora
de TV. No se trata de una avería de esta
unidad ni de la televisión. En este caso,
apague la unidad.
< Dado que esta unidad puede calentarse
durante el funcionamiento, debe dejar un
espacio suficiente alrededor de la misma
para permitir una correcta ventilación. NO
coloque nada encima de la unidad.
< Debe conectar esta unidad a una salida de
corriente de las mismas características que
las que aparecen indicadas en el panel
trasero. Si tiene alguna duda respecto a este
asunto, consulte a un electricista.
< Elija con cuidado el lugar donde vay a a
ubi ca r esta unida d. Evi te que quede
expuesta directamente al sol o cerca de una
fuente de calo r. Evite tam bién lu gares
sujetos a vibraciones y niveles de polvo,
calor, frío o humedad excesivos.
< N o c o l oq u e l a u n id a d s o br e u n
amplificador/ receptor.
< No abra la carcasa dado que esto puede dar
lu gar a daño s en lo s circ uitos o a una
descarga eléctrica. Si se introduce un objeto
extraño en el aparato, póngase en contacto
con su distribuidor o con el servicio técnico.
< Asegúrese de introducir las pilas con sus
polaridades positiva “+” y negativa “_ ”
correctas.
< Utilice pilas del mismo tipo. Nunca utilice
diferentes tipos de pilas juntas.
< Puede utilizar tanto pilas recargables como
no recargables. Consulte las precauciones en
sus etiquetas.
< Cu ando no vaya a util izar el man do a
distancia durante un periodo largo (más de
un mes), extraiga las pilas para evitar
posibles fugas.
< Si se produce una fuga del electrolito, limpie
el interior del compartimento y sustituya las
pilas por otras nuevas.
< No utilice ninguna otra pila diferente a las
indicadas. No mezcle pilas nuevas con otras
viejas ni utilice distintos tipos de pilas juntas.
< No caliente ni desmonte las pilas y nunca las
arroje al agua o al fuego.
< No transporte ni guarde pilas con otros
objetos metálicos. Po drían produci rse
cortocircuitos, fugas o explosiones.
< Nunca recargue una pila no recargable.
ESPAÑOL
< A la hora d e e x tr aer e l en chu fe d e
alimentación de la salida de corriente, tire
siempre directamente del enchufe, nunca
del cable.
< No intente limpiar la unidad con disolventes
qu ímicos, ya que esto po dría dañ ar el
acabado. Use un trapo seco y limpio.
< Conserve el manual en un lugar seguro para
cualquier consulta en el futuro.
49

A
C
D E
M
L
K
GF
I
H
B
J
Identificación de las partes (unidad principal)
Puede girarlo
hasta 90º en
ambos
sentidos.
50

STANDBY/ON
A
Utilice este botón para encender o apagar la
unidad.
VOLUME
B
Use estos botones para ajustar el volumen.
SLEEP
C
Use este botón para ajustar el temporizador
de la función Sleep. (pág. 64)
NAP
D
Utilice este botón para ajustar la alarma de
siesta. (pág. 65)
ALARM 1, ALARM 2
E
Mantenga pulsados estos botones durante
más de 2 segundos para acceder al modo de
configuración del despertador.
Utilice también estos botones para activar o
desactivar el despertador. (pág. 65)
SNOOZE/DIMMER
F
Utilice este botón para atenuar la pantalla.
(pág. 58)
Después de que se haya llegado a la hora
prefijada con el temporiza do r, use es te
botón para apagar la unidad durante 10
minutos. (pág. 67)
TUNING/SET
G
En el modo TUNER, use estos botones para
sintonizar emisoras. (pág. 62)
En el modo de ajuste del despertador, gire
este mando para ajustar la hora, minuto y
fuente. (pág. 65). En el modo de ajuste del
reloj, gire este mando para ajustar la hora y
el minuto. (pág. 56)
Salida de corriente
H
Puede utilizar esta salida, por ejemplo, para
recargar un teléfono móvil.
PREC AUCIÓN:
No utilice esta salida con dispositivos
que utilicen más de 0.5 A ó 60 W. El uso
de este tipo de aparatos puede hacer
que se queme el fusible, o se produzca
un incendio o descarga eléctrica.
Conector para base (Dock)
I
Coloque un iPod en este dock. (pág. 58)
Pantalla
J
TUNER
K
Us e este botón para acce der al mo do
TUNER. (pág. 62)
PHONES
L
Para una escucha en privado, primero
reduzca el volumen al mínimo, conecte
después unos auriculares a la salida
PHONES y ajuste el volumen girando el
mando VOLUME. Los altavoces quedarán
anulados mientras esté usando auriculares.
PREC AUCIÓN:
No apague ni encienda la unidad, ni
introduzca o extraiga el enchufe de los
auriculares con ellos puestos. El hacer
eso podría dar lugar a la emisión de
algún ruido potente.
Reduzca siempre al mínimo el nivel del
volumen antes de conectar unos
auriculares.
EVITE DAÑARSE LOS OIDOS - Nunca se
coloque los auriculares hasta que no
estén ya conectados.
AUX
M
Use este botón para escuchar una fuente
exterior cone ctada a las tomas AUX IN.
(pág. 61)
N
iPod (y/J)
Use este botón para acceder al modo iPod.
En ese modo, este botón sirve para iniciar la
reproducción o activar la pausa del iPod.
(pág. 58)
Sensor del mando a distancia
O
Altavoces (stereo)
P
ESPAÑOL
51

A
B
B
C
Q
M
K
R
W
V
X
S
T
U
Identificación de las partes (mando a distancia)
Q
MUTING
Utilice este botón para anular el sonido.
(pág. 58)
R
MEMORY
En el modo TUNER , use este botón para
prefijar emisoras (presets). (pág. 63)
S
FM MODE
En el modo TUNER , use este botón para
sel ecci onar entr e los modos ste reo o
monoaural. (pág. 63)
En el modo iPod, use este botón para activar
la función aleatoria o shuffle. (pág. 60)
T
U
V
W
X
(.//)
Salto
En el modo iPod, utilice este botón para
saltar pistas. Mantenga pulsado el botón
para buscar una parte concreta de la pista.
(pág. 59)
En el modo TUNER, use estos botones para
elegir las emisoras. (pág. 62)
PRESET/SCROLL (‡/°)
En modo iPod, utilice estos botones para
desplazarse por el menú. (pág. 60). Este
botón tiene las mismas funciones que la
rueda de muescas del iPod.
En modo TUNER, use estos botones para
seleccionar una emisora prefijada. (pág. 63).
MENU
Utilice este botón para retroceder al menú
anterior. (pág. 60). Este botón tie ne las
mismas funciones que el mismo botón del
iPod.
RE PEAT
En el modo iPod, utilice este botón para
configurar el modo de repetición. (pág. 60).
SELECT
En el modo iPod, utilice este botón para
con firm ar la se le cció n en lo s menús.
(pág. 60). Este bo tó n ti ene las mismas
funciones que el botón central de la rueda
de muescas del iPod.
52

Identificación de las partes (pantalla)
A
C
B
D
E
F
G
G
H
I
J
Con la unidad encendida, un o de estos
A
indicadores se ilumina para identificar la
fuente seleccionada.
Se ilumina cuando el temporizador de la
B
función Sleep está activo.
Se i lu mi na en e l mo do d e em is ora s
C
prefijadas (presets).
Mando a distancia
El mando a distanc ia incluido le perm ite
controlar el aparato a distancia.
Cuando utilice el mando a distancia, diríjalo
hacia el SENSOR DEL MANDO A DISTANCIA del
panel frontal del aparato.
< Aunque utilice el mando a distancia dentro
de su margen operativo, es posible que no
funcion e s i ha y obstácu los entr e e l
reproductor y el mando a distancia.
< Si utiliza el mando a distancia cerca de otros
aparatos que generen rayos infrarrojos o si
emplea cerca de es ta unidad mandos a
distancia por infrarrojos de otros aparatos, es
posible que éste no funcione correctamente.
Del mismo modo, es posible que los otros
aparatos tampoco funcionen correctamente.
Instalación de las pilas
Visualiza el re loj digita l o los canales
D
prefijados.
Se i lu mi na cuando está a ctiva do e l
E
interruptor DST de la parte trasera.
Se ilumina cuando está activa la alarma de
F
siesta.
Cuando esté activo el modo FM, indica si la
G
señal es stereo o monaural.
Información de frecuencia, volumen, etc.
H
Indica FM o AM en la recepción de señal de
I
radio.
Indica la fuente cuando haya activado el
J
despertador.
1. Extraiga la tapa del compartimento de las
pilas.
2. Introduzca la pila de litio (CR2032, 3 V).
3. Cierre la tapa.
Cambio de pilas
Si observa que se reduce la distancia operativa
del mando a distancia, eso querrá decir que las
pilas están gastadas. En ese caso, sustitúyalas
por unas nuevas.
Para más info rma ci ón ace rc a de cómo
deshacerse de las pilas, póngase en contacto
co n la empr esa de reco gida/rec iclaj e de
residuos de su ciudad o con el comercio el que
adquirió el producto.
ESPAÑOL
53

123
G
H
A
E
D
C
B
F
Conexiones
PREC AUCIÓN:
< Apague todos los componentes antes de realizar las conexiones.
< Lea las instrucciones de todos los componentes que vaya a utilizar con la unidad.
< Asegure firmemente cada uno de los conectores. Para evitar zumbidos y ruidos, no permita
que los cables audio queden junto con los cables de alimentación de CA.
iPod (Parte trasera)
Pestaña de dock
SR-L70i
54
Toma de CA

A
Entrada AUX IN
Pued e dar ent ra da a señal es au di o
analógicas de 2 canales a través de esta
toma. Conéctela a la salida de un iPod,
reproductor de CD, pletina, etc.
B
Conector para base (Dock)
Coloque un iPod en esta base. (pág. 58)
C
CLOCK ADJ
Use este botón para poner en hora o
ajustar el reloj. (pág. 56).
D
DST
Use este interruptor para elegir el modo de
horario de verano. (pág. 56)
E
Antena de FM
En el modo FM, sintonice una emisora de
frecuencia modulada y despliegue el cable
hasta lograr la mejor recepción. Si cambia
la unidad de emplazamiento quizá deba
reorientar la antena.
H
Compartimento de la pila
Estas pilas son un sistema de seguridad
para el funci onami ento del reloj y la
memoria internos en caso de que la
u n i d a d q u e d e t e m p o r a l m e n t e
desconectada de la corriente.
Introduzca las pilas. (tipo AAA)
Asegúrese de introducir las pilas con las
polaridades positiva “+” y negativa “_”
correctas.
Recambio de las pilas
Si el reloj indica una hora incorr ect a,
cambie las pilas por una nueva.
La vida de la pila es de unas 100 horas.
F
Cable de alimentación de CA
Enchufe este cable de alimentación en una
salida de corriente alterna.
G
FUSIBLE
Si este fusible se quema o salta, sustitúyalo
por otro de tipo T2AL 250V.
PREC AUCIÓN:
Por motivos de seguridad, desconecte
el enchufe antes de cambiar el fusible.
ESPAÑOL
55

56
Puesta en hora del reloj
Mantenga pulsado el botón CLOCK ADJ
1
durante más de 3 segundos y deje de
pulsarlo cuando en pantalla parpadee
la indicación “12 HR” o “24 HR”.
Si quiere cambiar el modo de indicación de
la hora, gire el mando TUNING/SET.
< Si no gi ra el mando ni pulsa el bo tón
durante 8 segundos, el modo de puesta en
hora se desactivará.
Pulse el botón CLOCK ADJ una vez más.
2
Gire de nuevo el mando TUNING/SET
4
para ajustar en este caso los minutos y
vuelva a pulsar el botón CLOCK ADJ.
El proceso de puesta en hora habrá
terminado y el reloj se pondrá en marcha
desde
la posición 00 de los segundos..
Para ajustar el horario de verano
Para cambiar la hora del reloj para el horario
de verano, ajuste el interruptor DST a ON. El
indicador DST (
pantalla.
) apar ece rá en la
Parpadeará el valor de ”hora”.
Gire el mando TUNING/SET para ajustar
3
las hora s y de spué s puls e el botó n
CLOCK ADJ.

ESPAÑOL
57
Funcionamiento básico (1)
Pulse el interruptor STANDBY/ON para
1
encender la unidad.
< La unidad se encenderá con la última fuente
de sonido activa seleccionada. Si introduce
en e l dock un i Po d con el m od o de
reproducción activo, el SR-L70i se encenderá
a uto m áti c am e nte y co m en z ar á l a
reproducción del iPod.
< También puede usar los botones TUNER,
AUX o iPod (y/J) para encender la unidad.
Pulse el botón TUNER, AUX o el botón
2
iPod (y/J ) p ara e leg ir la fuent e de
sonido.
Ponga en marcha la fuente y ajuste el
3
volumen con los botones VOLUME
Puede ajustar el volumen entre MIN (00) y
MAX (40).
Cua ndo ut ilice el man do a dis tanci a,
mantenga pulsado el botón VOLUME – o + si
quiere reducir o aumentar el volumen de
forma continua .
< Elija AUX si quiere escuchar una fuente
exterior conectada a la entrada AUX IN.
< Si elige “iPod” sin ningún iPod en el dock, el
indicador iPod de la pantalla parpadeará.

Funcionamiento básico (2)
Intensidad luminosa
Escucha de iPod (1)
Introduzca el iPod en el dock del SR-L70i.
1
Pestaña del dock
Puede cambiar el brillo del panel frontal.
U tili c e e l b o tó n S N OOZE /DI M MER
(atenuación) para cambiar el brillo entre tres
niveles.
Si pulsa este botón en el modo de reposo, la
pantalla se iluminará durante 5 segundos.
< Esta función quedará cancelada en cuanto
pulse el interruptor STANDBY/ON.
Anulación
Para anular el sonido de forma momentánea,
pulse el botón MUTING. Pulse de nuevo
MUTING para restablecer el sonido
< Si ca mbia el volume n o la fu ente , esta
anulación quedará cancelada.
< Tras colocar el iPod, deslice la pestaña del
dock para adaptarlo al tipo de iPod que esté
usando.
En la pantalla aparecerá entonces el
indicador iPod (
Pulse el botón de reproducción/pausa
2
(y/J) en el iPod o el botón iPod (y/J)
del SR-L70i. El SR-L70i se encenderá y
comenzará a reproducir la música del
iPod.
< Siempre que el iPo d esté colocado en el
dock y el SR-L70i esté conectado a la
corriente, la batería del iPod se recargará
hasta que quede al máximo.
No obstante, para evitar ruidos, el iPod no se
cargará cuando esté usando el sintonizador
en el modo AM.
< Si conecta unos auriculares al iPod, el sonido
se emitirá por los altavoces del SR-L70i y por
los auriculares.
).
Software de iPod compatible
Si el iPod no funciona con el SR-L70i o con el
man do a dis ta nc ia , es pos ib le que una
actualización de software resuelva el problema.
Visite el sitio web de Apple y descárguese el
software de iPod más reciente.
58
http://www.apple.com/ipod/download/

Selección del modo iPod
Pulse el botón iPod (y/J).
Si en el dock hay colocado un iPod que esté
reproduciendo datos, el SR-L70i empezará
automáticamente a dar salida al sonido.
Si no hay un iPod en el dock, el indicador
iPod de la pantalla parpadeará.
< También puede usar el botón del iPod o el
botón de reproducción/pausa (y/J ) del
mando a distancia para elegir el iPod para la
reproducción.
Para interrumpir momentáneamente
la reproducción (pausa)
Búsqueda de un fragmento de la
pista
Durante la reproducción, mantenga pulsado
durante más de dos segundos el botón de
salto (. o /) y deje de pul sarlo
cuando llegue al fragmento que quiera oír.
Para saltar a la pista siguiente o
anterior
D u r an te l a r e p ro d u c c i ó n , p u l s e
repetidamente el botón de salto (. o
/) hasta localizar la pista deseada. La
pista seleccionada será reproducida desde el
principio.
ESPAÑOL
Pulse el botón iPod (G /J ) durante la
reproducción para que quede en pausa en la
posición actual. Para reanudar la reproducción,
pulse de nuevo el botón iPod (G/J).
< También puede usar el botón del iPod o el
botón de reproducción/pausa (y/J ) del
mando a distancia para activar la pausa.
< Si pulsa el botón . d u ran t e l a
rep r o du cción, la p ista en c urso se
rep ro du ci rá de sd e el prin ci pi o. Pa ra
retroceder al principio de la pista anterior,
pulse dos veces el botón ..
59

60
Escucha de iPod (2)
AllOne off
Para retroceder al menú anterior
Pulse el botón MENU. Este botón tiene las
mismas funciones que el mismo botón del
iPod.
Selección de un elemento de menú
Para activar el modo de repetición
Durante la reproducción normal, pulse el
botón REPEAT para cambiar el modo de
repetición.
Cada vez que pulse el botón, el modo de
repetición cambiará de la siguiente forma:
Si configura el iPod al modo de repetición
de una canción, el icono de repetición de
una sola canción (
pantalla del iPod.
Si configura el iPod al modo de repetición
de t o das l as cancio nes , e l ic on o de
repetición (
iPod.
) aparecerá en la pantalla del
) apar ecerá en la
Pulse los botones PRESET/SCROLL (‡/°)
para desplazarse hasta la opción que quiera
elegir y pulse el botón SELECT.
Activación del modo aleatorio o
shuffle
Durante la reproducción, el pulsar el botón
FM MODE activa o desactiva el modo de
reproducción aleatorio o shuffle.
Cuando el iPod esté ajustado a este modo, el
icono shuffle (
del iPod.
) aparecerá en la pantalla

ESPAÑOL
61
Escucha de una fuente externa
Conecte la entrada AUX IN del SR-L70i a
1
la salida PHONES (conector de salida
a ud i o) de un r epr od u ctor a ud io
portátil.
Pu ede usar es te mé to do si su iPod no
dispone de conec to r d ock o de u n
adaptador adecuado para el conector que
tenga.
Reprodu zca l a f ue nte y ajust e e l
3
volumen tanto en el SR-L70i como en el
reproductor audio.
C u and o u se la s a lid a P H ONE S d e l
reproductor, deberá ajustar el volumen de
dicha salida o es posible que no oiga el
sonido en el SR-L70i.
< Si el eva d em asi ado e l volumen d el
reproductor, es posible que distorsione el
sonido del SR-L70i. En tal caso, reduzca el
nivel hasta que desaparezca la distorsión y
después ajuste el volumen adecuado en el
SR-L70i.
Pulse el botón AUX.
2
El indicador AUX ( ) aparecerá en la
pantalla..

Escucha de la radio
Pulse el botón TUNER.
1
El indicador TUNER ( ) aparecerá en la
pantalla.
Pulse de nuevo el botón TUNER para
2
elegir entre FM o AM.
Sintonización manual
Us e el mando TUNING/SET pa ra el egir
emisoras que no puedan ser sintonizadas de
forma automática.
< También puede usar los botones de salto
(. o /) del mando a distancia.
Cada vez que pulse de forma momentánea
uno de los botones de salto (.o/), la
frecuencia cambiará en pasos fijos.
Pulse el botón de salto de forma repetida
hasta localizar la emisora que esté buscando.
Selección de una emisora
Sintonización automática
Mantenga pulsado durante más de dos
segundos el botón de salto (.o/) y
deje de pulsar tan pronto como la indicación
de frecuencia comience a cambiar.
En cuanto la unidad localiza una emisora, la
búsqueda se detiene automáticamente.
< Para detener la selección automática, pulse
el botón de salto (. o /).
62

Emisoras prefijadas (1)
Botón FM MODE
Pulse este botón para cambiar entre los
modos stereo y monofónico.
Stereo
Las emisiones de FM stereo se reciben en
stereo y el indicador “STEREO” se ilumina en
la pantalla.
< Si el sonido se recibe distorsionado y el
indicador “STEREO” parpadea, eso indica que
la señal no tiene suficiente intensidad para
una correcta recepción stereo. En tal caso,
elija el modo MONO.
Mono
Seleccione este modo si la recepción de FM
stereo es débil. El sonido será monofónico y
con menos ruido. En la pantalla aparecerá el
indicador “MONO”.
Puede almacenar emisoras de FM y AM en los
canales prefijados (presets) del 1 al 10.
Sintonice la emisora que quiera grabar
1
en uno de estos presets. (pág. 62)
Pulse el botón MEMORY.
2
An te s de 3 se gu ndos , el ij a con lo s
3
botones PRESET/SCROLL (‡/° ) el
número de preset al que quiera asignar
esa emisora.
Antes de 10 segundos, pulse el botón
4
MEMORY.
ESPAÑOL
Si la recepción es deficiente
Emisión AM
En esta unidad, la antena de AM es interna.
Gire o desplace a otro luga r la unidad
completa para localizar la mejor ubicación
para la recepción de AM.
Emisión FM
Extienda y ajuste la posición de la antena FM
hasta obtener la mejor recepción de las
emisoras.
Para almacenar otras emisoras, repita los
pasos
1
a 4.
63

Emisoras prefijadas (2)
Temporizador (1)
Cómo seleccionar presets
En el mo do TUN ER , pulse el bo tón
1
TUNER para seleccionar FM o AM.
Pulse el botón PRESET/SCROLL (‡/°)
2
de for ma rep etida has ta loc alizar el
preset de la emisora que quiera.
Desconexión programada
Puede programar esta unidad par a que se
desconecte después de un periodo de tiempo
especificado.
Pulse el botón SLEEP repetidas veces hasta
que aparezca el valor de tiempo que quiera.
El indicador SLEEP ( ) aparecerá en la
pantalla.
SLEEP 120, 90, 60, 30 ó 15:
Dependiendo de su elección, la unidad
quedará en reposo tras 120, 90, 60, 30 ó 15
minutos.
OFF:
Desactiva el temporizador de desconexión
automática o Sleep.
64
< Si quiere saber el tiempo que falta para la
desconexión, pulse una vez el botón SLEEP.
El tiempo res tante hasta la desconexión
ap arecerá en pantalla durante algunos
segundos.

Alarma de siesta
Puede configurar una alarma de siesta para
que suene un zumbido tras un periodo de
tiempo determina do . El zumbador suena
durante 5 minutos.
Pulse el botón NAP repetidas veces hasta
que aparezca el valor de tiempo que quiera.
Despertador
Pue de pr ogra ma la uni da d pa ra qu e se
encienda a una hora determinada.
L a uni dad s e e nc enderá e n c u anto e l
tempor izador lle gu e al tiempo fijado. 120
mi nutos despué s de dicho en ce ndido, la
uni da d pasa rá al modo de repos o. O el
zumbador suena durante 5 minutos.
Puede configurar dos despertadores distintos
con ALARM 1 y ALARM 2.
< Ponga el reloj en hora antes de programar el
temporizador. (pág. 56)
El indicador NAP ( ) aparecerá en la
pantalla.
30, 60, 90 ó 120:
Dependiendo de su selección, la alarma
sonará tras 30, 60, 90 ó 120 minutos.
OFF:
La alarma de siesta quedará desactivada.
< Si quiere saber cuanto tiempo queda hasta
que suene la alarma de siesta, pulse una vez
el botón NAP. El tiempo restante aparecerá
en pantalla durante unos segundos.
< Una vez qu e configure es ta alarma de
siesta, seguirá operativa incluso aunque la
unidad quede en reposo.
PREC AUCIÓN:
La alarma suena bastante fuerte, por
lo que no use auriculares cuando
active esta alarma de siesta.
Para detener la alarma
Una vez que suene la alarma, pulse el botón
SNOOZE/DIMMER para hacer que deje de
sonar durante 10 minutos. Tras ese periodo,
la alarma volverá a sonar.
Par a des ac tivar co mplet ame nte es ta
alarma, pulse el botón NAP de nuevo.
Configuración del despertador
(Cuando use el botón Alarm 1)
Mantenga pulsado durante más de 2
1
segundos el botón de ALARM 1.
El reloj y el indicador del temporizador ( )
parpadearán en la pantalla.
< Si no pulsa ningún botón en los 8 segundos
s i guien t e s, e l m o do de ajus te del
despertador quedará cancelado.
Por defecto, Alarm 1 está ajustada a las 6:00
AM y Alarm 2 a las 7:00 AM.
< Si quiere restaurar la unidad a los valores de
fábri ca , mant enga pul sa do el botó n
SNOOZ E/DIM MER durant e más d e 5
segundos.
65
ESPAÑOL

66
Temporizador (2)
Gire el mando TUNING/SET para ajustar
2
las horas y minutos y pulse después el
botón ALARM 1 o ALARM 2.
El indicador de temporizador y el de fuente
parpadearán.
< Puede ajustar el despertador en pasos de 5
minutos.
Elija un a fu ente de so ni do co n lo s
3
botones TUNING/SET y a continuación
pulse ALARM 1.
Prepare la fuente de sonido.
4
Si la fuente seleccionada es “iPod”, coloque
un iPod en el dock de la unidad.
Si la fuente seleccionada es “ Tun er ”, sintonice
una emisora.
< Cuando el temporizador encienda la unidad,
el volumen de reproducción irá subiendo
gradualmente.
< Si la fuente elegida es “iPod”, pero no hay
ningún iPod configurado, la unidad usará el
sonido del zumbador.
< Para usar el ruido convencional de
despertador o "zumbador", elija “
< No puede elegir “AUX” como fuente.
El despertador estará ahora ajustado y el
) aparecerá en la pantalla.
indicador
(
”.

ESPAÑOL
67
Para desactivar el despertador
Si no va a usar el despertador, pulse el botón
ALARM 1 o ALARM 2 para desactivarlo.
Cómo utilizar la función Snooze
(zumbador)
El indicador de temporizador (
desaparecerá de la pantalla.
Pulse de nuevo el botón ALARM 1 o ALARM
2 para reactivar el despertador.
Uso de la alarma con su iPod touch
< Si apaga su iPod touch [Slide to power
off], no podrá utilizar la alarma, incluso
aunque el iPod touch esté conectado al
dock. Para utilizar la alarma, no elija [Slide
to power off ] en el iPod touch. (Puede
desactivar la pantalla sin problemas).
< Si está visualizando un video en la pantalla
del iPod touch, no podrá utilizar la alarma,
inc lu so aunq ue el iPod touc h es té
conectado al dock. Para utilizar la alarma,
elija cualquier elemento distinto a Video
en el iPod touch.
o
)
Puede usar la función Snooze una vez que la
unidad ya h aya l legado a l t iempo d e
encendido, cuando esté usando la función de
alarma de siesta o el despertador.
Pulse el botón SNOOZE/DIMMER para que la
un idad se apague du rante 10 minutos
adicionales y después se vuelva a encender.
Puede usar esta función varias veces durante
un máximo de 2 horas.
Cuando utilice un temporizador o la función
snooze, los únicos botones operativos serán::
SNOOZE/DIMMER y STANDBY/ON

Resolución de problemas
Si surge algún problema con la unidad, consulte
la siguiente tabla y pruebe a solucionarlo antes
de ponerse en contacto con su distribuidor o
con el servicio técnico de TEAC.
General
No se enciende.
e Verifique la conexión con la salida de
corriente alterna. Si dicha salida es una
regleta con interruptor, asegúrese de que
el interruptor esté encendido. Conecte una
lámpara, ventilador u otro elemento para
comprobar que hay corriente en la salida.
e Pu ed e que el f us ib le ha ya sal tad o.
Sustitúyalo por otro de tipo T2AL 250V.
Nunca utilice otro de un tipo distinto. El
hacerlo podría producir que la unidad se
recalentase o que la unidad actuase de
forma incorrecta, lo que podría dar lugar a
averías o incendios.
No hay sonido en los altavoces.
e Elija la fuente pulsando el botón TUNER,
AUX o el botón iPod (y/J).
e Ajuste el volumen.
e Desconecte los auriculares de la toma
PHONES.
El mando a distancia no funciona.
e Pulse el interruptor STANDBY/ON para
encender la unidad.
e Si las pilas están gastadas, cámbielas.
e Utilice el mando a distancia dentro de su
rango operativo (5 m) y apunte hacia el
sensor del panel frontal.
e Asegúrese de que no haya obstáculos
entre el mando a distancia y la unidad
principal.
e Si hay una luz muy brillante cerca de esta
unidad, apáguela.
68
Sonido con ruidos.
e La unidad está demasiado cerca de un
televisor o aparato similar. Aleje la unidad o
apague el dispositivo que interfiere.
Reproductor iPod
No puede introducir el iPod.
e Compruebe el adaptador del dock.
e Li mp ie o d es pe je de obstá cu los el
conector dock del SR-L70i y el iPod, e
inténtelo de nuevo.
El iPod no reproduce datos.
e Retire el iPod de l dock , espere un os
segundos y vuelva a colocarlo.
e Una ac tua li zación de software puede
resolver el problema. Visite el sitio web de
Apple y descárguese el software de iPod
más reciente.
No puede controlar el iPod.
e Desactive el interruptor HOLD del iPod.
Sintonizador
No se recibe ninguna emisora o la señal es
muy débil.
e Sintonice bien la emisora.
e Mueva la antena (en el caso de FM) o toda
la unidad (en el caso de emisoras AM)
hasta que la recepción sea limpia.
Si no puede restaurar el funcionamiento
norm al , desen chu fe la unid ad de la
corriente y vuélvala a conectar.
Mantenimiento
Si la superficie de la unidad se ensucia, límpiela
con un trapo suave y seco o ligeramente
humedecido en jabón líquido suave diluido.
Asegúrese de secar completamente la
superficie. No use disolventes, gasolina o
alcohol, ya que esto podría dañar la superficie
de la unidad. Es pere a que se se que po r
completo la superficie de la unidad antes de
utilizarla.

Especificaciones
Sección de sintonizador
Rango de frecuencias
FM: 87.5-108.0 MHz
AM: 520-1,710 kHz
Sección de altavoces
Tipo .............................51.5 mm x 2
Impedancia . . . . . . . . . . . . . . . . . . . . . . . .4 ohmios
General
Potencia de salida total ............3 W + 3 W
Alimentación ................120 V CA, 60 Hz
Consumo . . . . . . . . . . . . . . . . . . . . . . . . . . . . . . 25 W
Dimensiones (anch. x alt. x prof.)
191 x 152 x 196 mm
Peso (neto) ............................2.2 kg
Elementos incluidos
Mando a distancia
Pila del mando a distancia (CR2032) x 1
Pilas de mantenimiento de memoria (tipo
AAA) x 2
Manual de instrucciones (este documento) x 1
Tarjeta de garantía x 1
(RC-1198) x 1
< El diseño y las especificaciones están sujetos
a cambios sin previo aviso.
< Las dimensiones y pesos son aproximados.
< Las ilustra ciones y pantallas pueden ser
ligeramente distintos en los modelos reales.
ESPAÑOL
69

70

71

Z
TEAC CORPORATION
TEAC AMERICA, INC. 7733 Telegraph Road, Montebello, California 90640, U.S.A. Phone: (323) 726-0303
TEAC CANADA LTD. 5939 Wallace Street, Mississauga, Ontario L4Z 1Z8, Canada Phone: (905) 890-8008
TEAC MEXICO, S.A. de C.V.
Phone: (5255)5010-6000
TEAC UK LIMITED Unit 19 & 20, The Court yards, Hatters Lane, Watford, Hertfordshire, WD18 8TE, U.K. Phone: (0845) 130-2511
TEAC EUROPE GmbH Bahnst rasse 12, 6 5205 Wiesbade n-Erbenheim , Germany Phone: 06 11-71580
1-47 Ochiai, Tama-shi, Tokyo 206-8530, Japan Phone: (042) 356-9156
Río Churubusco 364, Colonia Del Carmen, Delegación Coyoacàn, CP 04100, México DF, México
This appliance has a serial number located on the rear panel. Please record the
model number and serial number and retain them for your records.
Model number Serial number
0509.MA-1471A
 Loading...