


Pixie Plus
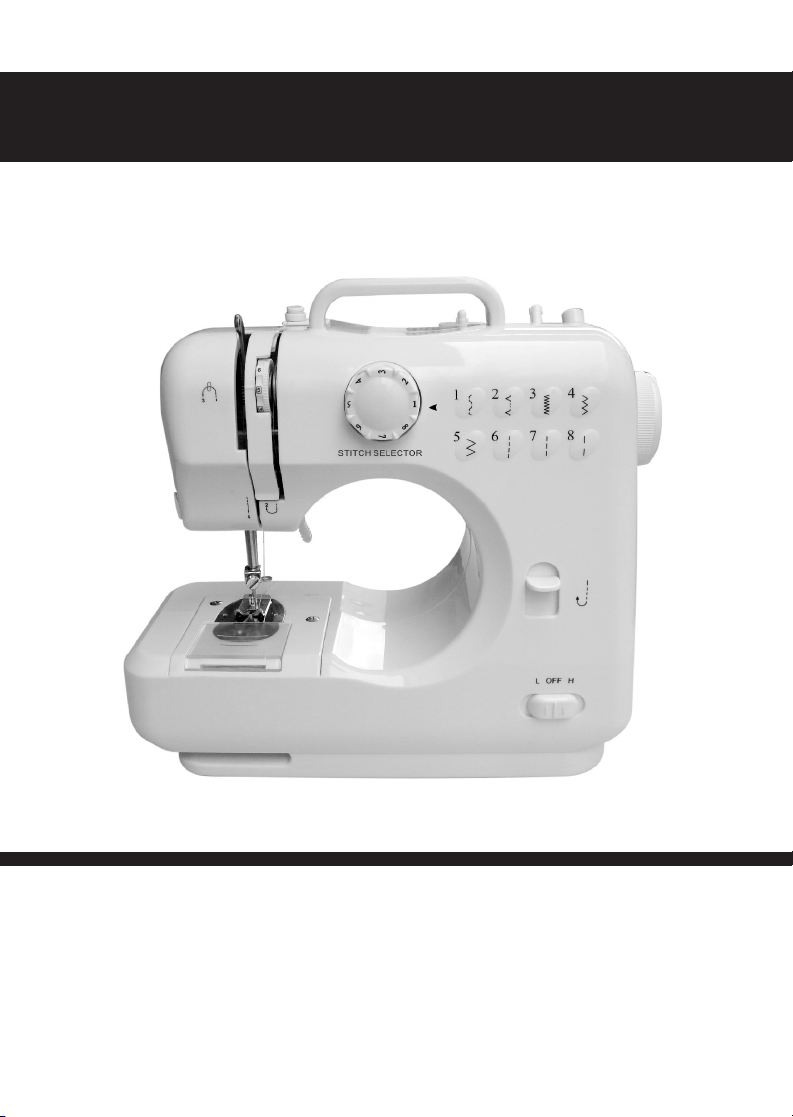
Mini Multi-Purpose Crafting & Mending Machine
Mini máquina para reparaciones y manualidades de usos múltiples
Mini machine à coudre tout-usage
New & Improved Instruction Manual!
¡Nuevo manual de instrucciones actualizado!
Nouveau manuel d’instructions amélioré!
Please read all instructions carefully before operating this machine. Keep this manual in a safe place for
future use. This machine is for household use only.
Sírvase leer todas las instrucciones cuidadosamente antes de poner la máquina en funcionamiento.
Guarde este manual en un lugar seguro para uso futuro. Esta máquina es para uso hogareño solamente.
Veuillez lire attentivement toutes les instructions avant d’utiliser cette machine. Conservez ce manuel
d’instructions en lieu sûr pour consultation future. Cette machine est réservée à un usage exclusivement
domestique.

The machine must be switched off and the power
adaptor unplugged when:
threading the needle•
changing the needle•
changing the bobbin•
changing parts•
cleaning the machine•
after each use•
when removing/installing batteries, to prevent •
the Power Off/Speed Switch from being
activated
Important:
Never leave the machine unattended in the •
presence of children.
When operating the machine, keep your hands •
away from the needle, handwheel and pattern
selection dial.
To clean the machine, simply wipe it with a •
soft cloth and never use any harsh chemical
solutions.
This machine is suitable for domestic use only. •
Do not use this machine outdoors.
La máquina debe apagarse y el adaptador de
energía debe desenchufarse cuando:
se enhebra la aguja•
se cambia la aguja•
se cambia la bobina•
se cambian piezas•
se limpia la máquina•
luego de cada uso•
al retirar/instalar baterías, para evitar que el •
interruptor de Apagado/Velocidad se active
Importante:
Nunca deje la máquina sola al alcance de niños.•
Al hacer funcionar la máquina, mantenga sus •
manos lejos de la aguja, la manivela y el disco
de selección de patrón.
Para limpiar la máquina, simplemente frote con •
un paño suave y nunca utilice líquidos químicos
abrasivos.
Esta máquina es para uso hogareño solamente. •
No utilice esta máquina en espacios exteriores
abiertos.
La machine doit être déconnectée et l’adaptateur
de courant débranché pour:
Enfiler l’aiguille•
Changer l’aiguille•
Changer la cannette du bas•
Remplacer des pièces.•
Nettoyer la machine•
Après chaque utilisation•
Important:
Ne laissez jamais la machine à coudre sans •
surveillance en présence d’enfants.
Lorsque vous utilisez la machine à coudre, •
gardez vos mains loin de l’aiguille, du volant,
des leviers qui tirent le fil et du cadran de
sélection de motif.
Pour nettoyer la machine à coudre, essuyez-la •
simplement avec un chiffon doux et n’utilisez
jamais de solutions chimiques.
2
IMPORTANT SAFETY INSTRUCTIONS
INSTRUCCIONES DE SEGURIDAD IMPORTANTES
DIRECTIVES DE SÉCURITÉ IMPORTANTES
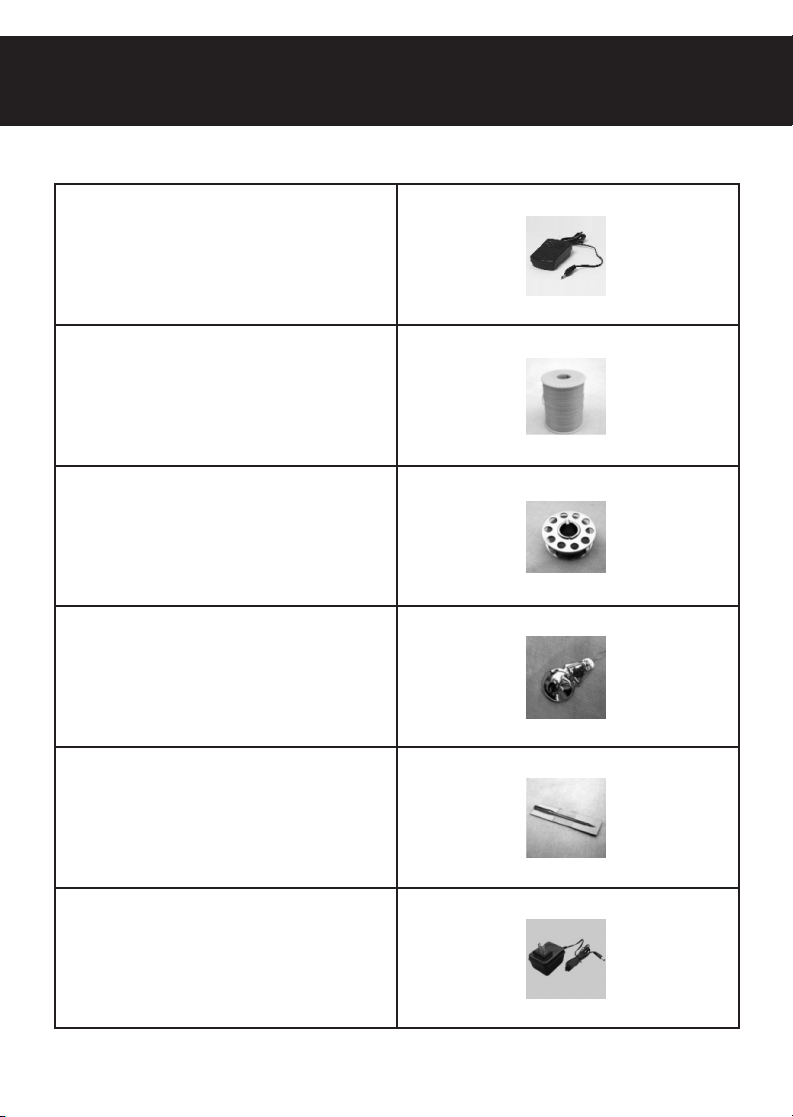
1 Foot Controller
1 Controlador de pie
Pédale (réhostat) x 1
2 Thread Spools
2 Carretes para hilo
Bobines de fil x 2
2 Bobbins
2 Bobinas
Canettes de fil x 2
1 Needle Threader
1 Enhebrador de agujas
Enfile-aiguille x 1
1 Extra Needle
1 Aguja adicional
Aiguille supplémentaire x 1
1 Power Adaptor
1 Adaptador de energía
1 Adaptateur de courant
3
ACCESSORIES
ACCESORIOS
ACCESSOIRES
4
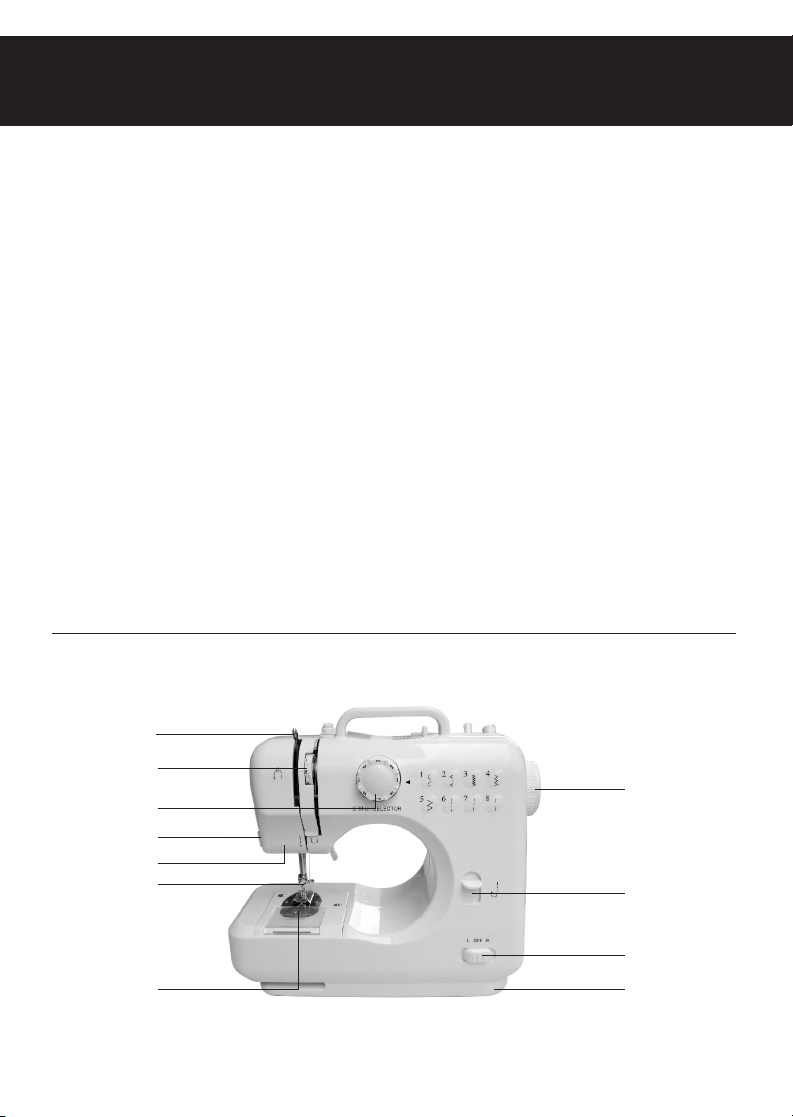
PARTS OF THE MACHINE – Front view
PARTES DE LA MÁQUINA – Vista de frente
NOM DES PIÈCES – Vue de L’avant
Releveur de fil1.
Bouton de tension du fil de 2.
dessus
Cadran sélecteur du point3.
Coupe-fils4.
Lumière5.
Vis du pince-aiguille6.
Canette du dessous7.
Volant8.
Bouton de marche arrière9.
Interrupteur et contrôle de 10.
vitesse
Tiroir11.
Take up lever1.
Upper thread tension dial2.
Pattern selection dial3.
Thread cutter4.
Light5.
Needle clamp screw6.
Bobbin7.
Handwheel8.
Reverse button9.
Power off & speed switch10.
Drawer11.
Palanca del prensatelas1.
Disco selector de tensión del 2.
hilo superior
Disco de selección de patrón3.
Cortahilos4.
Luz5.
Tornillo del sujetador de la 6.
aguja
Bobina7.
Manivela8.
Botón de reversa9.
Interruptor de apagado y de 10.
velocidad
Cajón11.
1
2
3
4
5
6
7
8
9
10
11

5
1
2
3
4
5
6
7
PARTS OF THE MACHINE – Back view
PARTES DE LA MÁQUINA – Vista de atrás
NOM DES PIÈCES – Vue de L’arrière
Tige du bobineur1.
Arrêt du bobineur2.
Entrée de l’adaptateur de 3.
courant
Disque de tension du 4.
bobineur
Relève-presseur5.
Pied-presseur 6.
Entrée de la prise de la 7.
pédale (réhostat)
Bobbin winder pin1.
Bobbin winder stop2.
Power adaptor input3.
Bobbin winder tension disk4.
Presser foot lifter5.
Presser foot6.
Foot pedal input7.
Portacarrete para bobina1.
Tope del portacarrete para 2.
bobina
Entrada del adaptador de 3.
energía
Disco de tensión del 4.
portacarrete para bobina
Palanca del prensatelas5.
Prensatelas6.
Entrada del pedal de pie7.
6
CONNECTING MACHINE TO MAIN POWER SUPPLY
CÓMO CONECTAR LA MÁQUINA AL SUMINISTRO DE ENERGÍA PRINCIPAL
BRANCHER LE BLOC D’ALIMENTATION À LA MACHINE À COUDRE
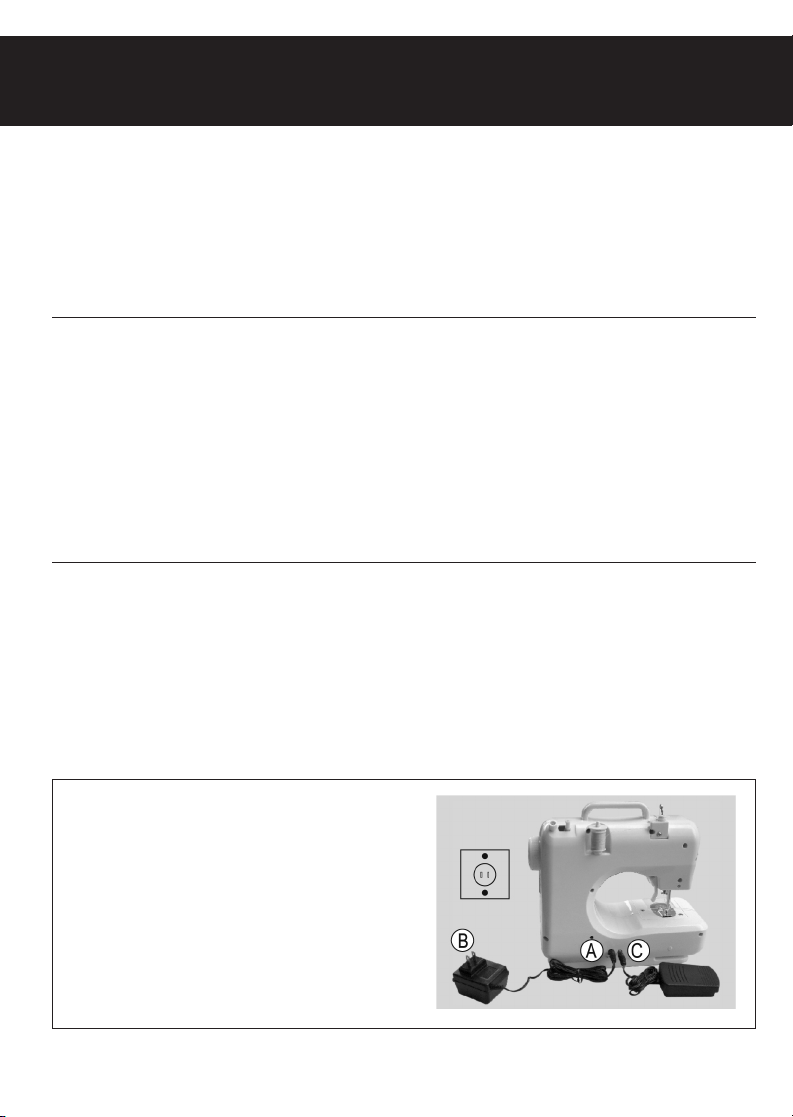
1. Make sure the Power Off/Speed Switch on the
front of the machine is in the OFF position.
2. Connect the jack (A) to the input socket on the
back of the machine. Connect the plug (B) into the
main power supply.
3. Connect the foot pedal (C) to the machine by
inserting the power jack into the foot pedal input
socket on the back of the machine.
4. There are two ways to operate the machine. You
can either use the foot pedal for operation (when
the Power Off/Speed Switch is in OFF position), OR,
you can set the Power Off/Speed Switch to the left
or to the right to run the machine without the foot
pedal once you have installed four AA batteries.
The left setting (L) is lower speed, while the right
setting (H) is higher speed.
1. Asegúrese que el interruptor de Apagado/Velocidad
que se encuentra en el frente de la máquina esté
en la posición APAGADO (OFF).
2. Conecte la clavija (A) en la entrada que se
encuentra en el lado posterior de la máquina.
Conecte el enchufe (B) en el suministro de energía
principal.
3. Conecte el pedal de pie (C) a la máquina
insertando la clavija de alimentación en la entrada
del pedal de pie que se halla en el lado posterior
de la máquina.
4. Existen dos formas de operar esta máquina. Usted
puede usar el pedal de pie para el funcionamiento
(cuando el interruptor de Apagado/Velocidad se
encuentra en posición APAGADO - OFF), O puede
colocar el interruptor de Apagado/Velocidad a la
izquierda o a la derecha para operar la máquina
sin el pedal de pie una vez que haya colocado
cuatro baterías AA. La posición hacia la izquierda
(L) es la velocidad baja, mientras que la posición
hacia la derecha (H) es la velocidad alta.
1. Assurez-vous que l’interrupteur power off/speed
situé sur le devant de la machine est à la position
OFF.
2. Branchez la fiche (A) dans la prise d’entrée CC
au dos de la machine et branchez la prise à
deux tiges (B) dans le bloc mural d’alimentation
principal.
3. Branchez la fiche “C” à la machine à coudre
en l’insérant dans la prise pour à l’arrière de la
machine à coudre.
4. Pour faire fonctionner la machine à coudre, vous
pouvez utiliser soit la pédale (l’interrupteur power
off/speed doit être en position OFF) pour faire
fonctionner avec le pied, OU vous pouvez faire
glisser l’interrupteur power off / speed vers la
gauche (L) ou vers la droite (H). Notez que les
deux réglages alimenteront la machine à coudre
et permettront le fonctionnement automatique.
Le réglage de vitesse bas (L) est lent, alors que le
celui haut (H) est rapide.
CAUTION: Whenever the machine is not in use,
make sure it is switched off and unplugged from
the main power supply.
PRECAUCIÓN: Siempre que la máquina no esté en
uso, asegúrese que esté apagada y desenchufada
del suministro de energía principal.
AVERTISSEMENT : Lorsque la machine à coudre
n’est pas utilisée, assurez-vous que l’interrupteur
est à “OFF” (arrêt) et débranchez la machine du
bloc mural d’alimentation principal.
7
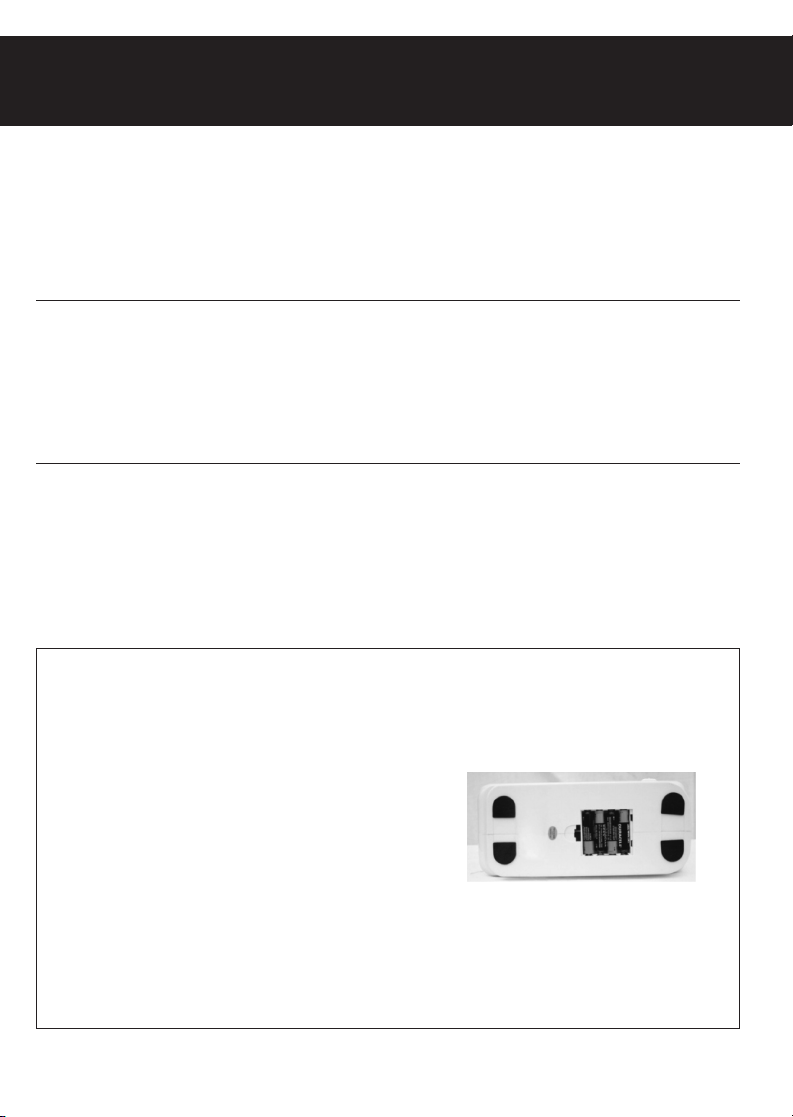
INSTALLING THE BATTERIES
CÓMO COLOCAR LAS BATERÍAS
INSTALLATION DES PILES
1. Make sure the Power Off/Speed Switch is in the OFF position.
2. Turn the machine over onto a flat surface and remove the battery compartment cover.
3. Insert four AA batteries into the compartment and then replace the battery cover.
1. Asegúrese que el interruptor de Apagado/Velocidad se encuentre en la posición APAGADO (OFF).
2. Recueste la máquina sobre una superficie plana y retire la tapa del compartimento de las baterías.
3. Inserte cuatro baterías AA en el compartimento y luego vuelva a colocar la tapa del compartimento.
1. Assurez-vous que l’interrupteur «power off/ speed » est à la position “Off”.
2. Retournez la machine à coudre sur une surface plane et enlevez le couvercle du compartiment des
piles.
3. Insérez 4 piles AA dans le compartiment et replacez le couvercle du compartiment des piles.
CAUTION: To prevent accidental start up of the
machine, always make sure the Power Off/Speed
Switch is in the OFF position when inserting or
changing the batteries.
PRECAUCIÓN: A fin de evitar el encendido accidental
de la máquina, siempre asegúrese que el interruptor
de Apagado/Velocidad esté en la posición APAGADO
(OFF) al insertar o cambiar las baterías.
AVERTISSEMENT : Pour prévenir le démarrage
accidentel de la machine à coudre, assurez-vous
toujours que l’interrupteur “power off/speed” est
dans la position “OFF” lorsque vous insérez ou
changez les piles.

8
WINDING THE BOBBIN
CÓMO BOBINAR EL CARRETE
EMBOBINAGE DE LA CANETTE
NOTE: Bobbins and thread spools may be stored in
the small drawer on the side of the machine.
(Fig. 1)
1. Turn the machine so that you are facing the back
of it.
2. Place a spool of thread on the spool pin.
3. Guide the thread to the right of the bobbin winder
tension disk and slip it into the disk securely.
(Fig. 2)
4. Place the empty bobbin onto the bobbin winder
pin and push it to the left.
5. Wrap the end of the thread counter-clockwise
around the bobbin several times. (Fig. 3)
6. Set the Power Off/Speed Switch to the left (or set
the switch to the OFF position and press the foot
pedal) to start winding. (Fig. 4)
7. Stop winding after the desired amount of thread
is wound onto the bobbin. (Fig. 5)
8. Push the bobbin winder and bobbin back to the
right.
9. Remove the bobbin from the bobbin winder pin
and then cut the thread.
REMARQUE : Sur le côté de la machine à coudre
(vers l’arrière) vous découvrirez un tiroir pratique
pour le remisage des accessoires. (Fig. 1)
1. Tournez la machine de manière à faire face à
l’arrière de cette dernière.
2. Installez une bobine de fil sur la broche porte-
bobine.
3. Placez le fil à la droite du disque de tension du
bobineur de canette. (Fig.2)
4. Poussez la canette sur la tige du bobineur de
canette et déplaceza la vers la gauche.
5. Enroulez le fil plusieurs tours dans le sens des
aiguilles d’une montre. (Fig. 3)
6. Ouvrir l’interrupteur de vitesse pour commencer
à remplir. (Fig. 4)
7. Arrêtez le remplissage lorsque le volume de fil
enroulé sur la canette est suffisant. (Fig. 5)
8. Repoussez le bobineur et la bobine à droite.
9. Enlevez la canette de l’axe et coupez le fil.
NOTA: las bobinas y los carretes pueden guardarse
en el cajón inferior pequeño en el lado de la
máquina. (Fig. 1)
1. Dé vuelta la máquina de modo que usted quede
de frente al lado posterior.
2. Coloque un carrete de hilo en el portacarrete.
3. Lleve el hilo hacia la derecha del disco de
tensión del bobinador de carrete y deslícelo en el
disco en forma segura. (Fig. 2)
4. Coloque la bobina vacía en el bobinador y
empújela hacia la izquierda.
5. Envuelva el extremo del hilo en el sentido
contrario de las agujas del reloj alrededor de la
bobina varias veces. (Fig. 3)
6. Coloque el interruptor de Apagado/Velocidad
hacia la izquierda (o coloque el interruptor en la
posición APAGADO (OFF) y presione el pedal de
pie) para comenzar a bobinar. (Fig. 4)
7. Detenga el bobinado luego de que la cantidad de
hilo deseada haya sido bobinada en el carrete.
(Fig. 5)
8. Empuje el dispositivo de bobinado de carrete y la
bobina hacia la derecha.
9. Retire la bobina del portacarrete de bobinado y
luego corte el hilo.
 Loading...