

IAN 96126
HAIR & BEARD TRIMMER SHBS 5 A1
HAAR- UND BARTSCHNEIDER
Bedienungsanleitung
HAIR & BEARD TRIMMER
Operating instructions
APARAT DE TUNS PĂRUL ŞI BARBA
Instrucţiuni de utilizare
ΚΟΥΡΕΥΤΙΚΗ ΜΗΧΑΝΗ ΓΙΑ
ΜΑΛΛΙΑ ΚΑΙ ΓΕΝΙΑ
Οδηүίες χρήσης
APARAT ZA ŠIŠANJE
Upute za upotrebu
CV_96126_SHBS5A1_LB7.indd 2CV_96126_SHBS5A1_LB7.indd 2 23.01.14 08:1423.01.14 08:14
GB / CY Operating instructions Page 1
HR Upute za upotrebu Stranica 19
RO Instrucţiuni de utilizare Pagina 37
GR / CY Οδηүίες χρήσης Σελίδα 55
DE / AT / CH Bedienungsanleitung Seite 73
Before reading, unfold the page containing the illustrations and familiarise yourself with all functions of the device.
Prije nego što pročitate tekst, otvorite stranicu sa slikama i upoznajte se na osnovu toga sa svim funkcijama uređaja.
Înainte de a citi instrucţiunile, priviţi imaginile şi familiarizaţi-vă cu toate funcţiile aparatului.
Πριν ξεκινήσετε την ανάγνωση, ανοίξτε τη σελίδα με τις εικόνες και εξοικειωθείτε με όλες τις λειτουργίες της συσκευής.
Klappen Sie vor dem Lesen die Seite mit den Abbildungen aus und machen Sie sich anschließend mit allen Funktionen des Gerätes vertraut.
CV_96126_SHBS5A1_LB7.indd 3CV_96126_SHBS5A1_LB7.indd 3 23.01.14 08:1423.01.14 08:14

D E F
C
A
B
CV_96126_SHBS5A1_LB7.indd 4CV_96126_SHBS5A1_LB7.indd 4 23.01.14 08:1423.01.14 08:14
Contents
Introduction . . . . . . . . . . . . . . . . . . . . . 2
Information concerning these operating
instructions . . . . . . . . . . . . . . . . . . . . . . . . . . . . 2
Copyright . . . . . . . . . . . . . . . . . . . . . . . . . . . . . 2
Limitation of liability . . . . . . . . . . . . . . . . . . . . . 2
Intended use . . . . . . . . . . . . . . . . . . . . . . . . . . 2
Warnings used . . . . . . . . . . . . . . . . . . . . . . . . . 3
Safety. . . . . . . . . . . . . . . . . . . . . . . . . . 4
Basic safety instructions . . . . . . . . . . . . . . . . . . 4
Cleaning the ear/nose hair trimmer
attachment . . . . . . . . . . . . . . . . . . . . . . . . . . . 14
Disposal . . . . . . . . . . . . . . . . . . . . . . . 15
Disposal of the appliance . . . . . . . . . . . . . . . 15
Disposal of batteries . . . . . . . . . . . . . . . . . . . 16
Appendix . . . . . . . . . . . . . . . . . . . . . . 17
Technical details. . . . . . . . . . . . . . . . . . . . . . . 17
Notes on the Declaration of Conformity . . . . 17
Warranty . . . . . . . . . . . . . . . . . . . . . . . . . . . . 17
GB
CY
Package contents . . . . . . . . . . . . . . . . 7
Spare Parts . . . . . . . . . . . . . . . . . . . . . . . . . . . 8
Disposal of packaging . . . . . . . . . . . . . . . . . . . 8
Appliance description . . . . . . . . . . . . . 8
Before fi rst use . . . . . . . . . . . . . . . . . . 9
Charging the batteries . . . . . . . . . . . . . . . . . . . 9
Operation with the mains power adapter . . . . 9
Oiling the cutting attachments . . . . . . . . . . . . 10
Handling and use . . . . . . . . . . . . . . . 10
Attaching/changing the cutter attachments . . 10
Attaching/changing the comb attachments . . 10
Hair trimmer attachment . . . . . . . . . . . . . . . . 11
Beard trimmer attachment . . . . . . . . . . . . . . . 12
Precision trimmer attachment . . . . . . . . . . . . . 12
Ear/nose hair trimmer attachment . . . . . . . . . 12
Shaver attachment . . . . . . . . . . . . . . . . . . . . . 12
Service . . . . . . . . . . . . . . . . . . . . . . . . . . . . . . 18
Importer . . . . . . . . . . . . . . . . . . . . . . . . . . . . . 18
Cleaning and care . . . . . . . . . . . . . . . 13
Cleaning the shaver attachment . . . . . . . . . . 14
SHBS 5 A1
IB_96126_SHBS5A1_LB7.indb 1IB_96126_SHBS5A1_LB7.indb 1 21.01.14 15:3721.01.14 15:37
1

GB
CY
Introduction
Information concerning these operating instructions
Congratulations on the purchase of your new appliance.
You have selected a high-quality product. The operating instructions are a constituent of this product.
They contain important information about safety, use and disposal. Before using the product,
familiarise yourself with all operating and safety instructions. Use this product only as described
and only for the specifi ed areas of application. Retain these instructions for future reference.
Please also pass these operating instructions on to any future owner(s).
Copyright
This documentation is subject to copyright protection.
Any copying or reproduction, including extracts thereof, and the reproduction of images (even in
a modifi ed state), is only permitted with the written authorisation of the manufacturer.
Limitation of liability
All technical information, data and information for installation, connection and operation contained in these operating instructions corresponds to the latest state at the time of printing and
takes into account our previous experience and our best available knowledge.
Intended use
2
No claims can be derived from the details, illustrations and descriptions in these instructions.
The manufacturer assumes no responsibility for damage caused by failure to observe these
instructions, improper use, incompetent repairs, making unauthorised modifi cations or for using
unapproved replacement parts.
This appliance is intended for use only in private environments, not for commercial purposes.
This appliance is only intended for cutting natural hair. It may only be used with human hair,
not with artifi cial or animal hair.
It is not intended for any other use or for uses extending beyond those stated. Claims of any
kind for damage arising as a result of non-intended use will not be accepted. The user is the
sole bearer of the risk.
SHBS 5 A1
IB_96126_SHBS5A1_LB7.indb 2IB_96126_SHBS5A1_LB7.indb 2 21.01.14 15:3721.01.14 15:37
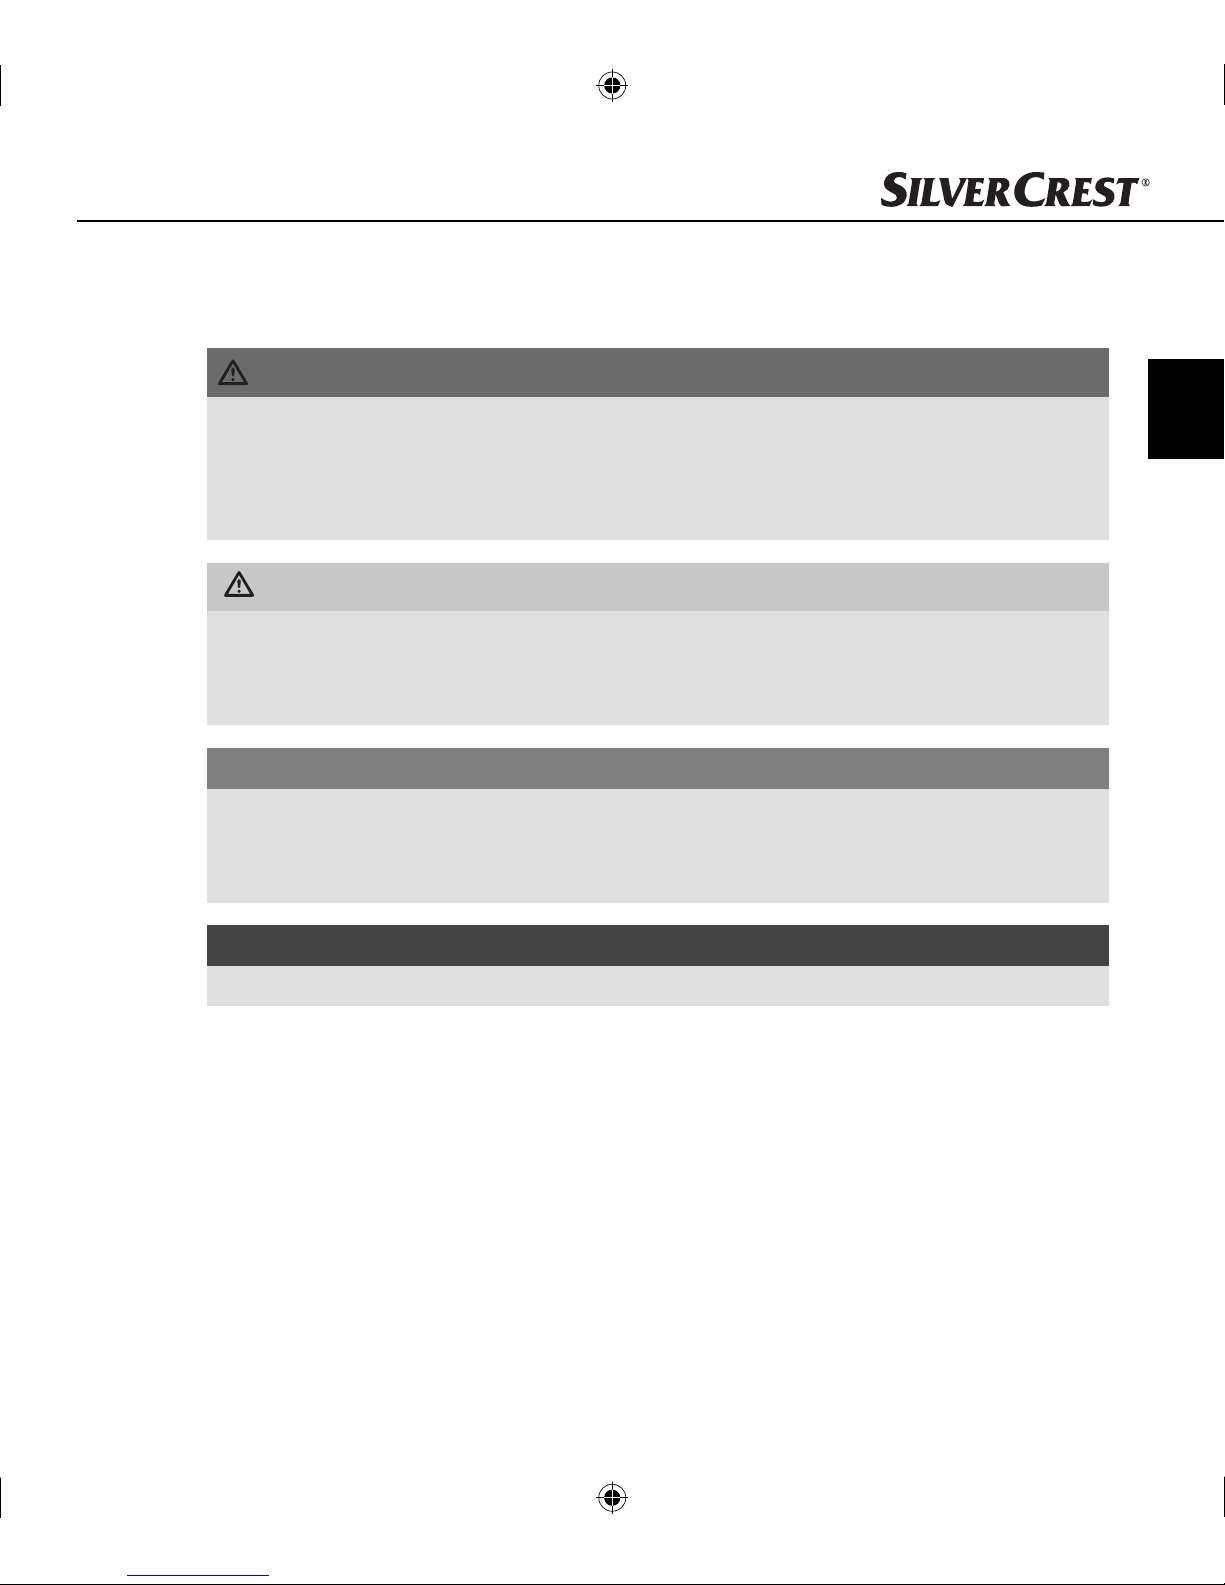
Warnings used
The following warnings are used in these operating instructions:
DANGER
A warning at this risk level indicates an imminently hazardous situation.
If the hazardous situation is not avoided, it could lead to death or serious physical injury.
► Follow the instructions in this warning to avoid a fatality or serious personal injury.
WARNING
A warning of this risk level indicates a potentially hazardous situation.
Failure to avoid this hazardous situation could result in physical injury.
► Follow the instructions in this warning to prevent physical injury.
CAUTION
A warning of this risk level indicates potential damage to property.
Failure to avoid this situation could result in damage to property.
► Follow the instructions in this warning to prevent damage to property.
GB
CY
NOTE
A note indicates additional information that will assist you in handling the appliance.
►
SHBS 5 A1
IB_96126_SHBS5A1_LB7.indb 3IB_96126_SHBS5A1_LB7.indb 3 21.01.14 15:3721.01.14 15:37
3

GB
CY
Safety
This section provides you with important safety information regarding
handling of the appliance. The appliance complies with the statutory
safety regulations. Incorrect usage can lead to personal injury and
property damage.
Basic safety instructions
For safe handling of the appliance, follow the safety information below:
■ This appliance may be used by children aged 8 over and by persons
with reduced physical, sensory or mental capabilities or lack of experience and knowledge, provided that they are under supervision or
have been told how to use the appliance safely and are aware of the
potential risks. Children must not play with the appliance. Cleaning and
user maintenance tasks must not be carried out by children unless they
are supervised.
■ Before use, check the appliance for externally visible damage. Never
4
operate an appliance that is damaged. There is a risk of electrocution.
■ The appliance may no longer be used if there is any damage to the cable,
to the mains power adapter, the housing or any other components.
■ All repairs must be carried out by authorised specialist companies or
the Customer Service department. Improper repairs can pose signifi cant
risks to the user. Warranty claims also become void.
■ Do not use the appliance with a defective cutter attachment or defective
comb attachment, since these may have sharp edges. There is a risk of
personal injury!
SHBS 5 A1
IB_96126_SHBS5A1_LB7.indb 4IB_96126_SHBS5A1_LB7.indb 4 21.01.14 15:3721.01.14 15:37

■ Defective components must always be replaced with original replacement
parts. Compliance with safety requirements can only be guaranteed if
original replacement parts are used.
■ Never operate the appliance unsupervised, and only in accordance
with the information on the nameplate.
■ Use only the mains power adapter provided when using mains power.
■ Remove the mains power adapter from the wall socket
- if a defect occurs,
- before cleaning the appliance,
- if you do not intend using the appliance for long periods,
- after every use.
When doing so, pull the mains power adapter itself and not the cable.
■ ATTENTION! Keep the appliance dry.
■ Do not use the appliance while taking a bath. Risk of fatal electrical
shocks!
GB
CY
SHBS 5 A1
■ Never submerge the appliance or the cable with mains power adapter
in water or other liquids.
■ If the appliance falls into the water, it is imperative that you pull the
mains power adapter out of the power socket before you reach into
the water.
■ Never touch the mains power adapter with wet hands, especially when
plugging it in or unplugging it. Risk of fatal electrical shocks!
5
IB_96126_SHBS5A1_LB7.indb 5IB_96126_SHBS5A1_LB7.indb 5 21.01.14 15:3721.01.14 15:37

GB
CY
■ The installation of a residual current circuit breaker with a rated tripping
current of no more than 30 mA off ers further protection from electric
shocks. Have the installation carried out only by a qualifi ed electrician.
■ Check the mains power adapter and the hair and beard trimmer regu-
larly for any possible mechanical defects.
■ Ensure that the cable does not get jammed in cupboard doors or pulled
over hot surfaces. If this occurs, the cable insulation may be damaged.
■ Only plug the mains power adapter into an easily reachable power
socket so that you can pull the mains power adapter out of the power
socket quickly in an emergency.
■ Do not cover the mains power adapter to avoid impermissible warming.
6
IB_96126_SHBS5A1_LB7.indb 6IB_96126_SHBS5A1_LB7.indb 6 21.01.14 15:3721.01.14 15:37
SHBS 5 A1
Package contents
This appliance is supplied with the following components as standard:
▯ Hair and beard trimmer
▯ Charging station
▯ Mains power adapter
▯ Hair trimmer attachment
▯ Beard trimmer attachment
▯ Precision trimmer attachment
▯ Ear/nose hair trimmer attachment
▯ Shaver attachment
▯ Comb attachment for the hair trimmer attachment
▯ Comb attachment for the beard trimmer attachment
▯ Cleaning brush
▯ Scissors
▯ Comb
▯ Blade oil
GB
CY
SHBS 5 A1
▯ Storage pouch
▯ This operating manual
NOTE
Check the delivery for completeness and for signs of visible damage.
►
► If the delivery is incomplete, or is damaged due to defective packaging or through transpor-
tation, contact the Service Hotline (see chapter Service).
♦ Remove all appliance parts from the carton.
♦ Remove all packaging materials from the appliance.
DANGER
► Packaging material must not be used as a plaything. There is a risk of suff ocation.
7
IB_96126_SHBS5A1_LB7.indb 7IB_96126_SHBS5A1_LB7.indb 7 21.01.14 15:3721.01.14 15:37
GB
CY
Spare Parts
You can also contact the Service Hotline if you need replacement parts (see chapter
Service).
Disposal of packaging
The packaging protects the appliance from transport damage.
Returning the packaging to the material cycle conserves raw materials and reduces the amount of
waste that is generated. Dispose of packaging material which is no longer needed in accordance
with applicable local regulations.
Appliance description
Figure A:
Hair trimmer attachment
2
Slide switch for cut length fi ne adjustment
3
On/off switch
4
Charging indicator lamp
5
Charging station/holder with connecting socket for mains power adapter
8
Figure B:
6
Mains power adapter
Figure C:
7
Beard trimmer attachment
8
Precision trimmer attachment
9
Ear/nose hair trimmer attachment
10
Shaver attachment
11
Comb attachment for the hair trimmer attachment
12
Comb attachment for the beard trimmer attachment
SHBS 5 A1
IB_96126_SHBS5A1_LB7.indb 8IB_96126_SHBS5A1_LB7.indb 8 21.01.14 15:3721.01.14 15:37
Before fi rst use
The hair and beard trimmer can be used as a battery-powered or mains-powered appliance.
Charging the batteries
The battery for the hair and beard trimmer should be charged for at least 90 minutes before fi rst use.
♦ Connect the mains power adapter cable 6 to the hair and beard trimmer charging station 5.
♦ Avoid damaging the appliance! Ensure that the appliance is switched off before charging the
battery.
♦ Plug the mains power adapter 6 (wide-range voltage 100–240 V) in a power socket complying
with the appliance specifi cations.
♦ The charging progress is indicated by the charging indicator lamp 4.
– charging indicator lamp fl ashes red: the battery is discharged
– charging indicator lamp illuminates red: battery is being charged
– charging indicator lamp illuminates green: battery is fully charged
♦ Once the battery is fully charged, you can use the appliance for around 60 minutes without
connecting it to the power supply.
Operation with the mains power adapter
GB
CY
SHBS 5 A1
If your hair and beard trimmer stops working during shaving due to a discharged or weak battery,
6
you can continue shaving by plugging in the mains power adapter
♦ Plug the mains power adapter plug 6 into the socket on the underside of the hair and beard
trimmer.
♦ To avoid injuries and damage to the appliance, always switch the appliance off before con-
necting it to the power supply.
♦ Plug the mains power adapter 6 (wide-range voltage 100–240 V) in a power socket complying
with the appliance specifi cations.
♦ After 1–2 seconds, you can switch the appliance on by pressing the ON/OFF switch 3.
If the appliance does not start immediately, switch it off again and wait around 1 minute
before switching it on again.
♦ If you want to charge the battery without using the charging station 5 in this manner you can
only do this when the appliance is switched off .
.
9
IB_96126_SHBS5A1_LB7.indb 9IB_96126_SHBS5A1_LB7.indb 9 21.01.14 15:3721.01.14 15:37
GB
CY
Oiling the cutting attachments
We recommend that you oil the hair trimmer , beard trimmer 7 and precision trimmer attachments 8 before fi rst use and after cleaning to ensure full mobility.
♦ To do this, simply apply a couple of drops of blade oil (accessory) between the blades, and
then distribute it evenly.
♦ Wipe off any access oil with a soft cloth. Use only non-corrosive oils such as sewing machine oil.
Handling and use
Attaching/changing the cutter attachments
WARNING
► Switch off the appliance before attaching or changing the cutter attachments.
There is a risk of personal injury!
♦ Press your thumbs forwards against the cutter attachment to release it from its holder
(see Fig. D). Then remove the cutter attachment from the appliance.
♦ To attach the cutter attachment, insert the lower plug-in tab into the opening on the appliance
(see Fig. E).
♦ Then press the upper part of the cutter attachment onto the appliance until it audibly clicks into
place and is fi rmly seated (see Fig. F).
Attaching/changing the comb attachments
Comb attachment for the hair trimmer attachment
The comb attachment 11 has settings for 6 diff erent cut lengths (13 mm/15 mm/17 mm/
19 mm/21 mm/23 mm).
♦ Attach the comb attachment 11 from the front onto the hair trimmer attachment and press
the rear end fi rmly until it clicks into place.
♦ To remove the comb attachment 11, release the lower end and pull it forwards off the appliance.
10
SHBS 5 A1
IB_96126_SHBS5A1_LB7.indb 10IB_96126_SHBS5A1_LB7.indb 10 21.01.14 15:3721.01.14 15:37
Comb attachment for the beard trimmer attachment
The comb attachment 12 has settings for 6 diff erent cut lengths (4 mm/6 mm/9 mm/12 mm/
15 mm/18 mm).
♦ Attach the comb attachment 12 from the front onto the beard trimmer attachment 7 and press
it down.
♦ To remove the comb attachment 12 press it forwards off the appliance.
Hair trimmer attachment
NOTE
Any hair to be cut should be clean and dry.
►
► Brush the hair carefully through to remove any knots.
► Place a hairdressing cape or cloth around your neck and throat to avoid cut hair ends
falling inside your collar.
► Start by setting the comb attachment 11 to a longer length and reduce this in stages while
cutting the hair.
► Please note that the corresponding cut length will only be achieved if the slide switch 2
is set to position 3 and the appliance is being held at right angles to the skin surface.
GB
CY
SHBS 5 A1
♦ Switch the hair and beard trimmer on by pressing the ON/OFF switch 3.
♦ Run the hair and beard trimmer slowly through your hair.
♦ Hold the appliance so that the comb attachment 11 is as fl at as possible.
♦ Always cut from your neck towards the top of your head, or from your forehead and temples
upwards towards the middle of your head.
♦ Use the hair trimmer attachment without the comb attachment 11 to cut the hair very short.
♦ You can use the slide switch 2 to fi nely adjust the cut length in three steps.
11
IB_96126_SHBS5A1_LB7.indb 11IB_96126_SHBS5A1_LB7.indb 11 21.01.14 15:3721.01.14 15:37
GB
CY
Beard trimmer attachment
NOTE
Comb the beard in the direction of growth to remove any knots.
►
► Start by setting the comb attachment 12 to a longer length and reduce this in stages while
cutting the hair.
► Please note that the corresponding cut length will only be achieved if the slide switch 2 is
set to position 3 and the appliance is being held at right angles to the skin surface.
♦ Cut the beard against the beard growth direction (upwards from chin to ear). Trim fi rst one
side and then other.
♦ Use the beard trimmer attachment 7 without the comb attachment 12 to cut the beard very
short or to add shape or trim a moustache.
♦ You can use the slide switch 2 to fi nely adjust the cut length in three steps.
Precision trimmer attachment
♦ Use the precision trimmer attachment 8 to add shape to a moustache, mutton chops, sideburns
or eyebrows.
♦ Lay the edge of the precision trimmer attachment 8 at the required level of the hair growth
and move the appliance downwards.
Ear/nose hair trimmer attachment
♦ Use the ear/nose hair trimmer 9 if you want to remove ear or nose hair.
♦ Guide the metal end of the ear/nose hair trimmer attachment 9 slowly into the nostril or ear.
♦ Move the appliance slowly in a circular motion to cut the hair.
Shaver attachment
♦ Use the shaver attachment 10 for a dry shave.
♦ Hold the appliance at right angles to the skin surface and move it gently over your face.
♦ Shave in the opposite direction to the beard growth. In complicated areas, such as the chin,
pull the skin tight to achieve a better result.
12
IB_96126_SHBS5A1_LB7.indb 12IB_96126_SHBS5A1_LB7.indb 12 21.01.14 15:3721.01.14 15:37
SHBS 5 A1

Cleaning and care
DANGER
Danger to life due to electric shock!
► Pull the mains power adapter 6 out of the power socket before cleaning the appliance.
► Never touch the mains power adapter 6 with wet hands, especially when plugging it in or
unplugging it.
► Always keep the mains power adapter 6 and the cable dry.
CAUTION
Possible damage to the appliance.
► The hair and beard trimmer may never be immersed in water or other liquids for cleaning,
since the appliance is not watertight. If this is done, live parts (batteries) can be damaged.
► Do not use aggressive or abrasive cleaning agents, as these can damage the upper surfaces.
► Clean the housing only with a soft damp cloth and a mild detergent.
♦ Switch the hair and beard trimmer off by pressing the ON/OFF switch 3.
♦ Disconnect the cable from the appliance and pull the mains power adapter 6 out of the
power socket.
GB
CY
SHBS 5 A1
♦ If any comb attachment (11 or 12) is attached, remove this fi rst.
♦ Wash the comb attachment (11 or 12) if required under running water.
♦ Dry the comb attachment (11 or 12) thoroughly afterwards.
♦ Press your thumbs against the cutter attachment to release it from its holder (see Fig. D).
♦ Use the cleaning brush supplied to remove any hair residue from the cutter attachment.
♦ Once you have completed cleaning, plug the cutter attachment plug-in tab back into the
mounting opening on the appliance (see Fig. E).
♦ Push the cutter attachment back onto the appliance by pressing lightly from above (see Fig. F).
NOTE
In order to reduce friction, occasionally apply a couple of drops of blade oil (accessory)
►
between the blades, and then distribute it evenly. You can also use any non-corrosive oil
(e.g. sewing machine oil). Wipe off any access oil with a soft cloth.
13
IB_96126_SHBS5A1_LB7.indb 13IB_96126_SHBS5A1_LB7.indb 13 21.01.14 15:3721.01.14 15:37
GB
CY
Cleaning the shaver attachment
CAUTION
Possible damage to the appliance.
► Do not remove the shaving foil from the foil holder and do not clean this with the cleaning brush.
♦ Remove the shaver attachment 10 from the appliance.
♦ Press the buttons at the side of the shaver attachment 10 and pull off the shaving foil holder.
Hold the shaving foil holder only by the sides and do not press on the foil itself.
♦ Clean the cutting blades with the supplied cleaning brush.
♦ Clean the shaving foil in the shaving foil holder by holding it under running water and allow
it to dry off completely before reattaching it to the shaver attachment 10.
♦ Replace the shaving foil holder onto the shaver attachment 10. During replacement ensure that
the fi xing tabs on the shaving foil holder are inserted into the corresponding openings on the
shaver attachment 10, and then press the shaving foil holder gently down until it audibly clicks
into place.
NOTE
Every now and again, apply a couple of drops of blade oil (accessory) between the blades,
►
and then distribute it evenly. Attach the shaver attachment 10 to the appliance and allow the
appliance to run for a few seconds without using it. Wipe off any access oil with a soft cloth.
Cleaning the ear/nose hair trimmer attachment
♦ Remove the ear/nose hair trimmer attachment 9 from the appliance.
♦ Clean the ear/nose hair trimmer attachment 9 under running water and allow it to dry
completely before using it again.
14
IB_96126_SHBS5A1_LB7.indb 14IB_96126_SHBS5A1_LB7.indb 14 21.01.14 15:3721.01.14 15:37
SHBS 5 A1
Disposal
Disposal of the appliance
Never dispose of the appliance in the normal domestic waste. This product is
subject to the provisions of European Directive 2012/19/EU (Waste Electrical
and Electronic Equipment).
Dispose of the appliance via an approved disposal company or your municipal waste facility.
Please observe the currently applicable regulations. Please contact your waste disposal centre
if you are in any doubt.
NOTE
Before disposing of the appliance it is essential to fi rst remove the battery.
►
CAUTION
Removal of the battery requires a certain amount of manual dexterity; otherwise there is a
►
risk of injury! If you have no experience in using tools, you should entrust the task to some-
one who is competent to do the job properly.
► Ensure that the battery does not get damaged during removal. There is a risk of fi re!
► The removed battery may not be reused.
► Never short-circuit the battery. The contacts on the removed battery should not be connected
by an metallic objects. The battery can overheat and explode.
► WARNING! Only remove the battery for disposal of the appliance. Removal will destroy the
appliance. Never operate an appliance that has been dismantled.
GB
CY
♦ Disconnect the appliance from the power supply.
♦ Switch on the appliance and let it run until the battery is fully discharged.
♦ Remove the cutter attachment from the appliance (see chapter Attaching/changing the cutter
attachments)
♦ There are three screws on the rear of the appliance. Two of the screws are in the mounting
opening of the appliance.
♦ Loosen both the screws with a Philips screwdriver.
SHBS 5 A1
IB_96126_SHBS5A1_LB7.indb 15IB_96126_SHBS5A1_LB7.indb 15 21.01.14 15:3821.01.14 15:38
15

GB
CY
♦ Remove the rear side of the appliance.
♦ Use a diagonal cutter/fl at-head screwdriver to disconnect the battery from the circuit board.
Remove the battery. Take the battery and the appliance separately to appropriate disposal
facilities.
Disposal of batteries
Used batteries may not be disposed of in household waste. All consumers are statutorily required
to dispose of batteries at a collection point provided by their local community or at a retail store.
The purpose of this obligation is to ensure that batteries are disposed of in a non-polluting manner.
Only dispose of batteries when they are fully discharged.
16
IB_96126_SHBS5A1_LB7.indb 16IB_96126_SHBS5A1_LB7.indb 16 21.01.14 15:3821.01.14 15:38
SHBS 5 A1
Appendix
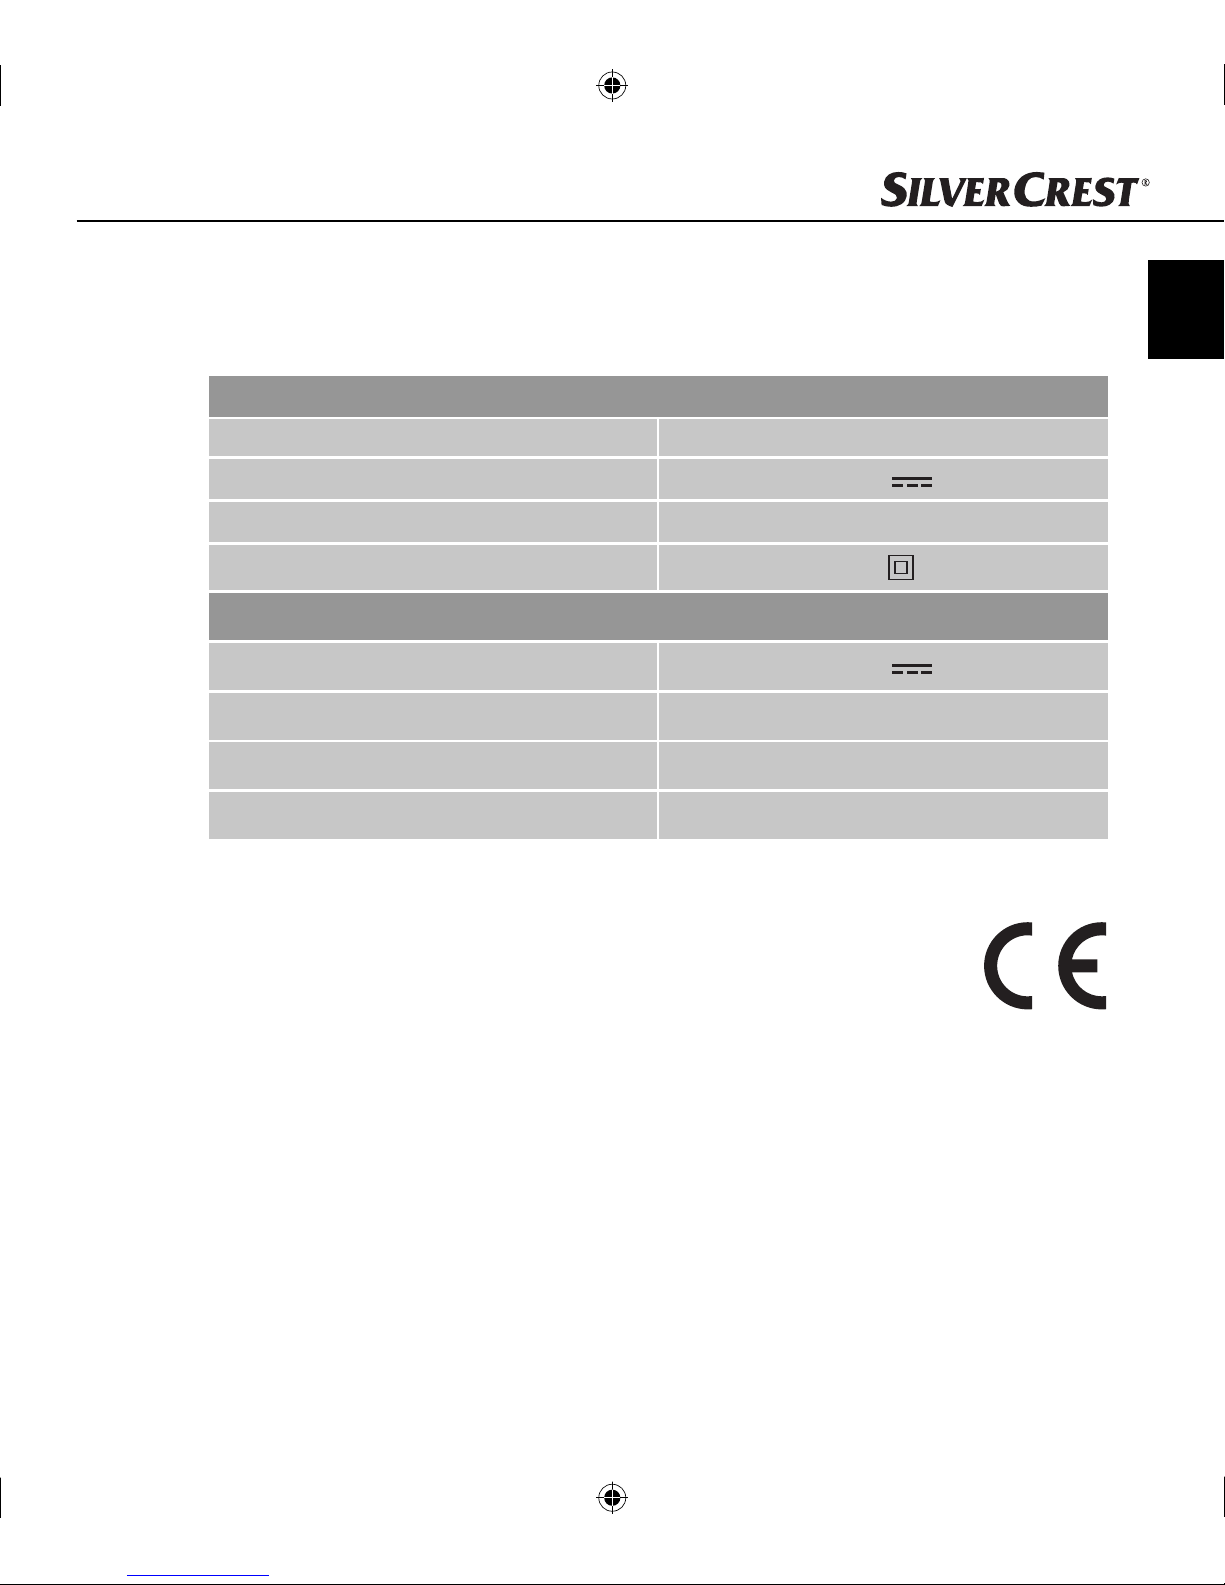
Technical details
Mains power adapter PTB-045100EU
Input voltage 100–240 V ∼, 50/60 Hz
Output voltage 4.5 V
Output current 1000 mA
GB
CY
Protection class
Hair and beard trimmer
Input voltage 4.5 V
Input current 1000 mA
Rechargeable battery 3.7 V/700 mAh Li-ion battery
Environmental temperature 5°C up to 35°C
Notes on the Declaration of Conformity
With regard to conformity with essential requirements and other relevant provisions, this appliance complies with the guidelines of the Electromagnetic Compatibility Directive 2004/108/EC and the Low Voltage Directive 2006/95/EC.
The full original Declaration of Conformity is available from the importer.
Warranty
The warranty for this appliance is for 3 years from the date of purchase. The appliance has been
manufactured with care and meticulously examined before delivery.
II /
Please retain your receipt as proof of purchase. In the case of a warranty claim, please make
contact by telephone with our Customer Service Department. Only in this way can a post-free
despatch for your goods be assured.
SHBS 5 A1
IB_96126_SHBS5A1_LB7.indb 17IB_96126_SHBS5A1_LB7.indb 17 21.01.14 15:3821.01.14 15:38
17
GB
CY
NOTICE
This product is for domestic use only and is not intended for commercial use. The warranty is void
in the case of abusive and improper handling, use of force and internal tampering not carried out
by our authorised service branch.
Your statutory rights are not restricted in any way by this warranty. The warranty period is not
extended by repairs made under the warranty. This applies also to replaced and repaired parts.
Damages and defects extant at the time of purchase must be reported immediately after unpacking, resp. no later than two days after the date of purchase.
Repairs made after the lapse of the warranty period are subject to charge.
Service
Service Great Britain
Tel.: 0871 5000 720 (£ 0.10/Min.)
E-Mail: kompernass@lidl.co.uk
The warranty covers only claims for material and manufacturing defects, but not for
►
transport damage, wearing parts or for damage to fragile components, e.g. buttons or
batteries.
Importer
18
IAN 96126
CY
Σέρβις Κύπρος
Tel.: 8009 4409
E-Mail: kompernass@lidl.com.cy
IAN 96126
Hotline availability: Monday to Friday 08:00 - 20:00 (CET)
KOMPERNASS HANDELS GMBH
BURGSTRASSE 21
44867 BOCHUM
GERMANY
www.kompernass.com
SHBS 5 A1
IB_96126_SHBS5A1_LB7.indb 18IB_96126_SHBS5A1_LB7.indb 18 21.01.14 15:3821.01.14 15:38
Sadržaj
Uvod . . . . . . . . . . . . . . . . . . . . . . . . . . 20
Informacije o ovim uputama za rukovanje . . . 20
Autorsko pravo . . . . . . . . . . . . . . . . . . . . . . . 20
Ograničenje odgovornosti . . . . . . . . . . . . . . . 20
Namjenska uporaba . . . . . . . . . . . . . . . . . . . 20
Korištena upozorenja . . . . . . . . . . . . . . . . . . . 21
Sigurnost . . . . . . . . . . . . . . . . . . . . . . 22
Opće sigurnosne napomene . . . . . . . . . . . . . 22
Opseg isporuke . . . . . . . . . . . . . . . . . 25
Rezervni djelovi . . . . . . . . . . . . . . . . . . . . . . . 26
Zbrinjavanje ambalaže . . . . . . . . . . . . . . . . . 26
Opis uređaja . . . . . . . . . . . . . . . . . . . 26
Prije uključivanja uređaja . . . . . . . . 27
Punjenje baterije . . . . . . . . . . . . . . . . . . . . . . 27
Uporaba s mrežnim adapterom . . . . . . . . . . . 27
Čišćenje i održavanje . . . . . . . . . . . . 31
Čišćenje nastavka za brijanje . . . . . . . . . . . . 32
Čišćenje nastavka za brijanje dlaka u nosu/
ušima . . . . . . . . . . . . . . . . . . . . . . . . . . . . . . . 33
Zbrinjavanje . . . . . . . . . . . . . . . . . . . 33
Zbrinjavanje uređaja . . . . . . . . . . . . . . . . . . . 33
Zbrinjavanje baterija/akumulatora . . . . . . . . 34
Prilog . . . . . . . . . . . . . . . . . . . . . . . . . 35
Tehnički podaci . . . . . . . . . . . . . . . . . . . . . . . 35
Napomene uz izjavu o sukladnosti . . . . . . . . 35
Jamstvo . . . . . . . . . . . . . . . . . . . . . . . . . . . . . 35
Servis . . . . . . . . . . . . . . . . . . . . . . . . . . . . . . . 36
Uvoznik . . . . . . . . . . . . . . . . . . . . . . . . . . . . . 36
HR
Podmazivanje nastavaka za rezanje . . . . . . . 28
Rukovanje i rad . . . . . . . . . . . . . . . . . 28
Stavljanje/izmjena reznih nastavaka . . . . . . . 28
Stavljanje/izmjena češljastih nastavaka . . . . 28
Nastavak za šišanje kose . . . . . . . . . . . . . . . 29
Nastavak za podrezivanje brade . . . . . . . . . 30
Nastavak za precizno podrezivanje . . . . . . . 30
Nastavak za skraćivanje dlaka u nosu/ušima . 30
Nastavak za brijanje . . . . . . . . . . . . . . . . . . . 30
SHBS 5 A1
IB_96126_SHBS5A1_LB7.indb 19IB_96126_SHBS5A1_LB7.indb 19 21.01.14 15:3821.01.14 15:38
19

HR
Uvod
Informacije o ovim uputama za rukovanje
Srdačno čestitamo na kupnji Vašeg novog uređaja.
Time ste se odlučili za visokovrijedan proizvod. Upute za rukovanje predstavljaju sastavni dio ovog
proizvoda. One sadrže važne napomene za sigurnost, rukovanje i zbrinjavanje. Prije uporabe
uređaja upoznajte se sa svim uputama za uporabu i svim sigurnosnim napomenama. Proizvod
koristite isključivo na opisani način i u navedenim područjima uporabe. Sačuvajte ove upute za
rukovanje. U slučaju predaje proizvoda trećim osobama priložite i predajte i svu dokumentaciju.
Autorsko pravo
Ova je dokumentacija zaštićena autorskim pravima.
Svako umnožavanje odnosno svako naknadno tiskanje, čak i djelomično, kao i reprodukcija slika,
makar i u promijenjenom stanju, dozvoljeni su isključivo uz pismeno odobrenje proizvođača.
Ograničenje odgovornosti
Sve tehničke informacije, svi podaci i sve napomene za priključivanje i posluživanje uređaja sadržani
u ovim uputama za rukovanje odgovaraju najnovijem stanju tehnike u trenutku pripreme za tisak i
navedeni su uz uvažavanje naših dosadašnjih iskustava i saznanja.
Iz navoda, slika i opisa sadržanih u ovim uputama za rukovanje ne mogu biti izvedena nikakva
potraživanja.
Proizvođač ne preuzima odgovornost za štete nastale uslijed nepridržavanja uputa za rukovanje,
nenamjenske uporabe, nestručno izvedenih popravaka, neovlašteno izvršenih izmjena ili uporabe
neodobrenih zamjenskih dijelova.
Namjenska uporaba
Ovaj uređaj namijenjen je samo za privatnu uporabu, i nije dopuštena uporaba u komercijalne
svrhe. Uređaj je predviđen samo za rezanje prirodne kose. Smije se koristiti samo za ljudsku kosu
– nikako za umjetnu kosu ili životinjsku dlaku.
Svaki drugi način uporabe i svaka uporaba koja prelazi navedene okvire smatra se nenamjenskom.
Isključena su sva potraživanja bilo koje vrste na temelju štete nastale uslijed nenamjenske uporabe.
Rizik snosi isključivo sam korisnik.
20
SHBS 5 A1
IB_96126_SHBS5A1_LB7.indb 20IB_96126_SHBS5A1_LB7.indb 20 21.01.14 15:3821.01.14 15:38
Korištena upozorenja
U ovim uputama za rukovanje korištena su sljedeća upozorenja:
OPASNOST
Upozorenje ovog stupnja opasnosti označava prijeteću opasnu situaciju.
Ukoliko ne izbjegnete opasnu situaciju, to može dovesti do smrti ili do teških ozljeda.
► Slijedite naputke navedene u ovom upozorenju kako biste izbjegli opasnost od smrtnog
slučaja ili teških ozljeda osoba.
UPOZORENJE
Upozorenje ovog stupnja opasnosti označava moguću opasnu situaciju.
Ukoliko ne izbjegnete opasnu situaciju, to može dovesti do ozljeda.
► Slijedite naputke navedene u ovom upozorenju, kako biste izbjegli ozljede osoba.
POZOR
Upozorenje ovog stupnja opasnosti označava mogućnost oštećenja imovine.
Ukoliko ne izbjegnete dotičnu situaciju, to može dovesti do oštećenja predmeta.
► Slijedite naputke navedene u ovom upozorenju kako biste izbjegli oštećenje predmeta.
NAPOMENA
► Napomena označava dodatne informacije za jednostavnije rukovanje uređajem.
HR
SHBS 5 A1
IB_96126_SHBS5A1_LB7.indb 21IB_96126_SHBS5A1_LB7.indb 21 21.01.14 15:3821.01.14 15:38
21

Sigurnost
U ovom poglavlju možete pronaći važne sigurnosne napomene za rukovanje uređajem. Ovaj uređaj zadovoljava propisane sigurnosne odredbe.
HR
Nestručna uporaba može uzrokovati ozljede i oštećenja imovine.
Opće sigurnosne napomene
Za sigurno rukovanje uređajem pridržavajte se sljedećih sigurnosnih
napomena:
■ Ovaj uređaj smiju koristiti djeca stara 8 godina ili više, kao i osobe sa
smanjenim fi zičkim, senzornim ili mentalnim sposobnostima ili pomanjkanjem iskustva i/ili znanja, ukoliko su pod nadzorom ili su primile
poduku o sigurnom rukovanju uređajem te su razumjele opasnosti
koje proizlaze iz uporabe uređaja. Djeca se ne smiju igrati uređajem.
Čišćenje i servisiranje ne smiju obavljati djeca bez odgovarajućeg
nadzora.
■ Uređaj prije uporabe provjerite kako biste ustanovili eventualna vidljiva
vanjska oštećenja. Oštećen uređaj ne puštajte u rad. Postoji opasnost
od strujnog udara.
■ Ukoliko ustanovite oštećenje kabela, adaptera s utikačem, kućišta ili
drugih dijelova, uređaj se ne smije nastaviti koristiti.
■ Popravke uređaja smiju obavljati isključivo autorizirana stručna poduzeća
ili servis za kupce. Nestručno obavljeni popravci mogu ozbiljno ugroziti
sigurnost korisnika. Osim toga, u tom se slučaju gubi i pravo na jamstvo.
■ Uređaj ne koristite s oštećenim nastavkom za rezanje ili s oštećenim
nastavkom s češljem jer isti mogu imati oštre bridove. Postoji opasnost
od ozljeda!
22
IB_96126_SHBS5A1_LB7.indb 22IB_96126_SHBS5A1_LB7.indb 22 21.01.14 15:3821.01.14 15:38
SHBS 5 A1

■ Neispravni dijelovi smiju se zamijeniti isključivo originalnim rezervnim
dijelovima. Samo kod takvih dijelova je zajamčeno ispunjavanje sigurnosnih zahtjeva.
■ Uređaj ne ostavljajte da radi bez nadzora i koristite ga samo u skladu
s podacima na tipskoj pločici.
■ Za rad s mrežnim napajanjem koristite isključivo priloženi adapter
s utikačem.
■ Adapter s utikačem izvucite iz utičnice
- ako nastupi smetnja,
- prije čišćenja uređaja,
- ako duže vrijeme ne koristite uređaj,
- nakon svake uporabe.
Pritom povucite izravno za adapter s utikačem a ne za kabel.
■ POZOR! Uređaj mora ostati suh.
■ Uređaj ne koristite za vrijeme kupanja. Postoji opasnost od strujnog udara!
■ Uređaj i adapter s utikačem nikada ne uranjajte u vodu ili druge tekućine.
■ Ukoliko uređaj padne u vodu obavezno najprije izvucite adapter
HR
s utikačem iz utičnice prije nego posegnete u vodu.
■ Adapter s utikačem nikada ne dirajte mokrim rukama, posebice ako ga
stavljate u utičnicu ili izvlačite iz utičnice. Postoji opasnost od strujnog
udara!
■ Ugradnja uređaja za osiguranje od prenapona s jačinom impulsne
aktivirajuće struje ne većom od 30 mA pruža dodatnu zaštitu od strujnog
udara. Ugradnju smije izvršiti isključivo stručni električar.
SHBS 5 A1
IB_96126_SHBS5A1_LB7.indb 23IB_96126_SHBS5A1_LB7.indb 23 21.01.14 15:3821.01.14 15:38
23

■ Redovito provjeravajte mrežni utikač i mašinicu za šišanje kako biste
ustanovili eventualna mehanička oštećenja.
■ Pritom pripazite da kabel ne bude zaglavljen u vratima ormara i da se
HR
ne povlači preko vrućih površina. U protivnom može doći do oštećenja
izolacije kabela.
■ Adapter s mrežnim utikačem priključite samo na lako dostupnu utičnicu
kako biste ga u slučaju kvara mogli brzo izvući iz utičnice.
■ Ne pokrivajte adapter s mrežnim utikačem kako biste izbjegli nedoz-
voljeno zagrijavanje.
24
IB_96126_SHBS5A1_LB7.indb 24IB_96126_SHBS5A1_LB7.indb 24 21.01.14 15:3821.01.14 15:38
SHBS 5 A1
Opseg isporuke
Uređaj se standardno isporučuje sa sljedećim komponentama:
▯ Mašinica za šišanje kose i podrezivanje brade
▯ Stanica za punjenje
▯ Mrežni adapter
▯ Nastavak za šišanje kose
▯ Nastavak za podrezivanje brade
▯ Nastavak za precizno podrezivanje
▯ Nastavak za brijanje dlaka u nosu/ušima
▯ Nastavak za brijanje
▯ Češljasti nastavak za šišanje kose
▯ Češljasti nastavak za podrezivanje brade
▯ Četka za čišćenje
▯ Škare
▯ Češalj
▯ Ulje za oštricu
▯ Vrećica za čuvanje uređaja
▯ Ove upute za uporabu
NAPOMENA
HR
Provjerite cjelovitost opsega isporuke i provjerite postoje li na uređaju vidljiva oštećenja.
►
► U slučaju nepotpune isporuke ili štete uzrokovane nedostatnim pakiranjem, kao i štete nastale
prilikom transporta, nazovite telefon servisne službe (vidi poglavlje Servis).
♦ Sve dijelove uređaja izvadite iz kartona.
♦ S uređaja odstranite svu ambalažu.
OPASNOST
► Ambalaža se ne smije koristiti za igranje. Postoji opasnost od gušenja.
SHBS 5 A1
IB_96126_SHBS5A1_LB7.indb 25IB_96126_SHBS5A1_LB7.indb 25 21.01.14 15:3821.01.14 15:38
25
Rezervni djelovi
Ukoliko su potrebni zamjenski dijelovi za uređaj, također se obratite servisnoj službi
(vidi poglavlje Servis).
HR
Zbrinjavanje ambalaže
Ambalaža štiti uređaj od transportnih oštećenja.
Povrat ambalaže u kružni tok materijala štedi sirovine te smanjuje nakupljanje otpada.
Ambalažu koja Vam više nije potrebna zbrinite u skladu s važećim lokalnim propisima.
Opis uređaja
Slika A:
Nastavak za šišanje kose
2
Klizni prekidač za fi no podešavanje dužine rezanja na
3
Prekidač Uklj / Islj
4
Indikator punjenja
5
Stanica za punjenje / držač s priključnom utičnicom za mrežni adapter
Slika B:
6
Mrežni adapter s utikačem
Slika C:
7
Nastavak za podrezivanje brade
8
Nastavak za precizno podrezivanje
9
Nastavak za brijanje dlaka u nosu/ušima
10
Nastavak za brijanje
11
Češljasti nastavak za šišanje kose
12
Češljasti nastavak za podrezivanje brade
26
IB_96126_SHBS5A1_LB7.indb 26IB_96126_SHBS5A1_LB7.indb 26 21.01.14 15:3821.01.14 15:38
SHBS 5 A1
 Loading...