


FERRO DA STIRO A VAPORE SDB 2200 D2
FERRO DA STIRO A VAPORE
Istruzioni per l‘uso
FERRO DE ENGOMAR A VAPOR
Manual de instruções
STEAM IRON
Operating instructions
IAN 273029
DAMPFBÜGELEISEN
Bedienungsanleitung

Prima di leggere aprire la pagina con le immagini e prendere confi denza con le diverse funzioni
dell’apparecchio.
Antes de começar a ler abra na página com as imagens e, de seguida, familiarize-se com todas as
funções do aparelho.
Before reading, unfold the page containing the illustrations and familiarise yourself with all functions of
the device.
Klappen Sie vor dem Lesen die Seite mit den Abbildungen aus und machen Sie sich anschließend mit
allen Funktionen des Gerätes vertraut.
IT / MT Istruzioni per l‘uso Pagina 1
PT Manual de instruções Página 11
GB / MT Operating instructions Page 21
DE / AT / CH Bedienungsanleitung Seite 31

A
B

INDICE PAGINA
Introduzione 2
Uso conforme alla destinazione 2
Materiale in dotazione 2
Elementi di comando 2
Dati tecnici 2
Avvertenze di sicurezza 3
Prima di utilizzare l'apparecchio per la prima volta 5
Riempimento del serbatoio dell'acqua 5
Collegamento e stiratura 6
Stiratura a vapore 6
Stiratura con getto di vapore 6
Sospensione temporanea del funzionamento del
ferro da stiro a vapore 6
Arresto del funzionamento del ferro da stiro a vapore 7
Funzione antigoccia 7
Spegnimento automatico 7
Pulizia 7
Funzione di autopulizia....................................................................................................................7
Alloggiamento e piastra ..................................................................................................................8
Conservazione 8
Guasti e possibili rimedi 8
Smaltimento 8
Garanzia & assistenza 9
Importatore 9
- 1 -

FERRO DA STIRO
A VAPORE
Introduzione
Congratulazioni per l'acquisto del nuovo apparecchio.
Lei ha scelto un prodotto di alta qualità. Il manuale
di istruzioni è parte integrante del presente prodotto.
Esso contiene importanti indicazioni per la sicurezza,
l'uso e lo smaltimento. Prima di utilizzare il prodotto,
si familiarizzi con tutte le indicazioni relative ai
comandi e alla sicurezza.Utilizzi il prodotto solo
come descritto e per i campi di impiego indicati.
In caso di cessione del prodotto a terzi, consegni
anche tutta la documentazione relativa.
Uso conforme alla destinazione
Elementi di comando
Figura A:
1 Spruzzatore dell'acqua
2 Apertura del serbatoio dell'acqua
3 Regolatore di vapore
4 Tasto per il getto di vapore
5 Tasto spray
6 Spia di controllo per lo spegnimento automatico
7 Spia di controllo per la temperatura
8 Regolatore della temperatura
9 Cavo di rete con guaina antipiega
0 Base
q Piastra
w Tasto di autopulizia
Figura B:
e Misurino
Il ferro da stiro a vapore è destinato esclusivamente
alla stiratura di capi di abbigliamento. È possibile
impiegarlo esclusivamente in ambienti chiusi e per
l'uso domestico privato. Qualsiasi altro impiego è
da ritenersi non conforme. Non utilizzare a fini commerciali!
Materiale in dotazione
Ferro da stiro a vapore
Misurino
Istruzioni per l'uso
Dati tecnici
Tensione di alimentazione: 220 - 240 V
50/60 Hz
Potenza max. assorbita: 2200 W
~
- 2 -

Avvertenze di sicurezza
Pericolo di ustioni!
•Prendere il ferro da stiro a vapore soltanto dall'impugnatura quando è molto
caldo.
•Sorvegliare i bambini per assicurarsi che non giochino con l'apparecchio.
•Non mettere mai le mani nel getto del vapore o su parti in metallo incandescenti.
•Durante il funzionamento non è consentito aprire l'apertura del serbatoio
dell'acqua. Lasciare prima raffreddare il ferro da stiro a vapore e staccare
quindi la spina dalla presa di rete.
•Il ferro da stiro e il relativo cavo di connessione devono trovarsi fuori dalla
portata di bambini di età inferiore agli 8 anni durante l'accensione o il raffreddamento.
Pericolo di ferimento! Pericolo di incendio!
•Non lasciare mai incustodito il ferro da stiro a vapore quando è bollente,
collegato alla rete elettrica o acceso.
•Conservare il ferro da stiro solo quando è freddo.
•Il ferro da stiro a vapore dev'essere utilizzato e collocato su una superficie
stabile.
•Stirare solo con le impostazioni della temperatura indicate nelle istruzioni per
la cura e adatte per il materiale da stirare, altrimenti la biancheria potrebbe
danneggiarsi. Qualora non si fosse a conoscenza delle istruzioni per la cura,
iniziare con la temperatura impostata sul valore più basso.
•Collocare il ferro da stiro solo su una superficie piana e resistente al calore. Il
ferro da stiro si deve trovare in una posizione stabile.
•Se si desidera poggiare il ferro da stiro a vapore, collocarlo solo sulla base.
Pericolo di scossa elettrica!
•La tensione della presa di corrente deve corrispondere ai dati indicati sulla
targhetta dell'apparecchio.
•Fare riparare tempestivamente un apparecchio guasto da un'officina qualificata
oppure rivolgersi al Servizio Assistenza Clienti per evitare situazioni di pericolo.
•Fare sostituire immediatamente la spina o il cavo di rete danneggiato da personale
qualificato autorizzato o dal Servizio Assistenza Clienti per evitare situazioni di
pericolo.
- 3 -

•Per interrompere l'alimentazione, tirare sempre la spina e non il cavo.
•Non piegare o schiacciare il cavo di rete e disporlo in modo tale da non
consentire un contatto con superfici calde e che nessuno possa calpestarlo o
inciamparvi sopra.
•Staccare la spina prima della pulizia prima di riempire il ferro da stiro con acqua e
dopo ogni utilizzo.
•Srotolare sempre completamente il cavo di rete prima di accendere l'apparecchio
e non impiegare prolunghe.
•Non toccare mai il cavo o la spina a mani umide.
•Non è assolutamente consentito utilizzare il ferro da stiro a vapore nelle vicinanze
di acqua contenuta in vasche da ba-gno, docce, lavandini o altri recipienti. La
vicinanza all'acqua rappresenta un pericolo anche ad apparecchio spento.
•Non immergere per alcun motivo il ferro da stiro a vapore in un liquido ed evitare infiltrazioni di liquidi all'interno dell'alloggiamento dell'apparecchio. Non
esporre l'apparecchio a fonti di umidità e non utilizzarlo all'aperto. In caso di
infiltrazioni di liquidi nell'alloggiamento dell'apparecchio, disinserire subito la
spina dalla presa di rete e far riparare l'apparecchio da personale qualificato
autorizzato.
•È vietato aprire l'alloggiamento del ferro da stiro a vapore. Fare riparare
l'apparecchio guasto solo da personale qualificato autorizzato.
•Non utilizzare mai il ferro da stiro a vapore se presenta danni visibili, se è
caduto oppure se fuoriesce acqua. Farlo riparare da personale qualificato
autorizzato.
•Non continuare a utilizzare l'apparecchio in caso di danni alla guaina antipiega del cavo di rete!
•Questo apparecchio può essere utilizzato da bambini di età superiore agli 8
anni e da persone con capacità fisiche, sensoriali o mentali ridotte o privi di
esperienza e/o conoscenze solo se sono stati istruiti riguardo all'uso sicuro
dell'apparecchio e hanno compreso i pericoli da esso derivanti. I bambini non
devono giocare con l'apparecchio. La pulizia e la manutenzione da parte
dell'utente non devono essere eseguite dai bambini in assenza di sorveglianza.
- 4 -

Attenzione! Danni materiali!
• Nel caso in cui le istruzioni per la cura presenti
all'interno dei capi di abbigliamento proibissero
la stiratura (simbolo ), è vietato stirare il
capo. In caso contrario questo si potrebbe
danneggiare.
• Si può versare nel serbatoio dell'acqua
esclusivamente acqua corrente/acqua distillata.
In caso contrario il ferro da stiro si potrebbe
danneggiare.
• Non è consentito lavare il ferro da stiro a vapore
con solventi, alcool o detergenti abrasivi. In caso
contrario il ferro da stiro si potrebbe danneggiare.
Prima di utilizzare l'apparecchio
per la prima volta
• Estrarre il ferro da stiro a vapore dalla confezione.
• Rimuovere tutti gli adesivi e le parti di pellicola
dal ferro da stiro a vapore e dalla piastra q.
Pericolo di soffocamento!
Le buste di plastica possono costituire un pericolo.
Ai fini di evitare il pericolo di soffocamento,
conservare le borse di plastica fuori dalla portata
di neonati e bambini.
• Versare l'acqua nel serbatoio (v. capitolo "Riem-
pimento del serbatoio dell'acqua").
• Inserire la spina in una presa che presenta la
tensione indicata sulla targhetta tipo.
• Posizionare il regolatore della temperatura 8 in
posizione "MAX".
• Riscaldare il ferro da stiro a vapore per alcuni
minuti sul livello massimo di temperatura.
• Azionare il tasto per il getto di vapore 4 un
paio di volte per consentire l'uscita del vapore
dalla piastra q.
• Stirare quindi un pezzo di stoffa di poca impor-
tanza per eliminare eventuali impurità dalla piastra q.
Riempimento del serbatoio
dell'acqua
• Tenere il ferro da stiro in posizione inclinata.
• Aprire il coperchietto dell'apertura del serbatoio
dell'acqua 2.
• Con il misurino e riempire il serbatoio di acqua
non oltre il contrassegno "MAX".
• Chiudere il coperchietto dell'apertura del serbatoio
dell'acqua 2 facendolo scorrere.
Avvertenza:
Nel caso in cui l'acqua di rubinetto nella regione
in cui si risiede fosse troppo dura, si consiglia di
mescolare l'acqua di rubinetto con acqua distillata.
Altrimenti gli ugelli per la funzione getto di vapore
potrebbero calcificarsi precocemente.
Per prolungare in modo ottimale la funzione getto
di vapore, mescolare l'acqua di rubinetto con acqua
distillata seguendo le indicazioni della tabella.
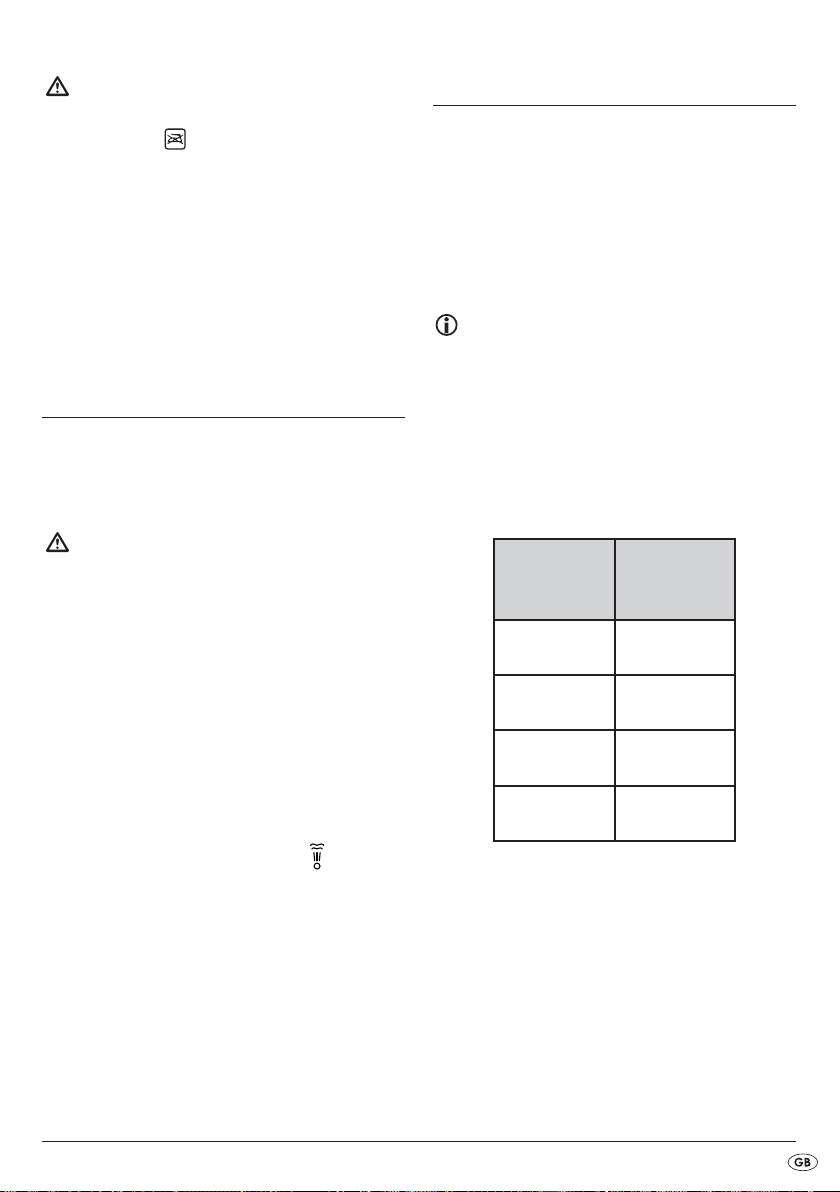
Durezza
dell'acqua
molto dolce/
dolce
media 1 : 1
dura 2 : 1
molto dura 3 : 1
Il grado di durezza dell'acqua può essere richiesto
presso l'acquedotto municipale.
Rapporto acqua
distillata / acqua
di rubinetto
0
- 5 -

Collegamento e stiratura
Si può stirare a secco, senza vapore, a qualsiasi
temperatura; stirare a vapore è possibile soltanto a
partire dal campo di regolazione sul regolatore della temperatura 8.
• Inserire la spina in una presa di corrente.
La spia di controllo per la temperatura 7 si accende. La spia di controllo per la temperatura 7 si
spegne al raggiungimento della temperatura impostata.
• Attendere lo spegnimento della spia di controllo
per la temperatura 7.
• Per umidificare la biancheria premere il tasto
spray 5.
Attenzione! Danni materiali!
Nel caso in cui le avvertenze per la cura all'interno
del capo di abbigliamento vietassero la stiratura
(simbolo ), non è consentito stirare il capo. In
caso contrario il capo di abbigliamento si potrebbe
danneggiare.
• Controllare le istruzioni per la cura sull'etichetta
interna del capo di abbigliamento, sulla quale è
indicato se e a quale temperatura è consigliabile
stirarlo.
Simbolo
regolatore della
temperatura 8
• Impostare la giusta temperatura di stiratura con
il regolatore della temperatura 8.
Tipo di stoffa
Acrilico, rayon
Seta, lana, poliestere
Cotone, lino, viscosa
Questa funzione è adatta per tessuti molto asciutti
e stropicciati.
Stiratura a vapore
• Impostare con il regolatore di vapore 3 la
potenza del vapore desiderata.
• Il regolatore della temperatura 8 deve essere ruotato almeno fino al campo di regolazione .
In caso contrario il ferro non può generare vapore.
Stiratura con getto di vapore
Il getto di vapore è adatto in particolare per lisciare
zone del tessuto difficilmente accessibili.
• Sollevare leggermente il ferro da stiro a vapore.
• Per generare un getto di vapore premere una
volta il tasto per il getto di vapore 4.
Sospensione temporanea del
funzionamento del ferro da
stiro a vapore
Avvertenza:
Durante la fase di riscaldamento appoggiare sempre il ferro da stiro sulla base 0.
Se durante la fase di riscaldamento lasciate il ferro
da stiro appoggiato sulla piastra q e non lo muovete, dopo 30 secondi viene attivato lo spegnimento automatico (vedere capitolo "Spegnimento automatico) e l'apparecchio interrompe il
riscaldamento.
Pericolo d'incendio!
Non lasciare mai incustodito il ferro da stiro a vapore
mentre è bollente, connesso alla rete elettrica o acceso.
• Impostare il regolatore della temperatura 8 sulla
posizione "MIN".
• Appoggiare il ferro da stiro a vapore solo sulla
base 0.
- 6 -

Arresto del funzionamento del
ferro da stiro a vapore
• Staccare la spina dalla presa di corrente.
• Svuotare il serbatoio dell'acqua e pulire la
piastra q.
• Collocare il ferro da stiro a vapore sulla base 0.
Funzione antigoccia
Nei tradizionali ferri da stiro a vapore si può verificare
che, ad una temperatura troppo ridotta, sgoccioli
acqua dalla piastra q. Questo ferro da stiro presenta
una nuova caratteristica, la funzione ANTIGOCCIA.
In caso di basse temperature il ferro da stiro arresta
automaticamente il getto di vapore. Quando la
funzione si attiva, si avverte un "clic". Impostare la
giusta temperatura di stiratura con il regolatore della
temperatura 8. Al raggiungimento della temperatura
appropriata, la produzione del vapore prosegue.
Spegnimento automatico
Il ferro da stiro è dotato di un dispositivo di spegnimento automatico che sospende il riscaldamento
dell'apparecchio.
Quando il ferro da stiro si trova sulla piastra q e
non viene mosso per più di ca. 30 secondi, vengono emessi segnali acustici di avvertimento e la spia
di controllo per lo spegnimento automatico 6 lampeggia. Il riscaldamento del ferro da stiro viene sospeso. Per disattivare lo spegnimento automatico,
sollevare il ferro da stiro e agitarlo leggermente. La
spia di controllo per lo spegnimento automatico 6
si spegne e il ferro da stiro viene di nuovo riscaldato.
Quando il ferro da stiro si trova sulla base 0 e non
viene mosso per più di ca. 8 minuti, vengono emessi
segnali acustici di avvertimento e la spia di controllo
per lo spegnimento automatico 6 lampeggia.
Il riscaldamento del ferro da stiro viene sospeso.
Per disattivare lo spegnimento automatico, sollevare il
ferro da stiro e agitarlo leggermente. La spia di controllo per lo spegnimento automatico 6 si spegne e
il ferro da stiro viene di nuovo riscaldato.
Avvertenza:
Lo spegnimento automatico non equivale al distacco
della spina! Esso serve semplicemente a ridurre il
pericolo d'incendio se l'utente dimentica accidentalmente di spegnere il ferro da stiro!
Pulizia
Funzione di autopulizia
• Riempire il serbatoio dell'acqua fino al contrassegno "MAX".
• Inserire la spina nella presa di rete.
• Posizionare il regolatore della temperatura 8
in posizione "MAX".
• Posizionare il regolatore di vapore 3 sulla
massima potenza vapore.
• Far riscaldare il ferro da stiro a vapore finché la
spia di controllo per la temperatura 7 si spegne
e si accende di nuovo.
• Tenere il ferro da stiro in posizione orizzontale
sopra una vaschetta di raccolta.
• Premere il tasto Self-Clean w e tenerlo premuto.
Spostare leggermente avanti e indietro il ferro
da stiro a vapore. Dai fori di fuoriuscita del vapore che si trovano sulla piastra q fuoriescono
vapore e acqua. In tal modo le impurità eventualmente presenti vengono sciacquate via.
• Rilasciare il tasto di autopulizia w non appena
l'acqua nel serbatoio si è esaurita.
- 7 -

• Pulire accuratamente la piastra q. A questo
scopo far scivolare ripetutamente avanti e indietro
la piastra q su un asciugamano o su un vecchio
pezzo di stoffa.
• Fare raffreddare il ferro da stiro prima di
metterlo via.
Alloggiamento e piastra
Pericolo di morte!
Prima di pulire l'apparecchio, staccare sempre la
spina dalla presa di corrente.
Sussiste il pericolo di scossa elettrica!
Pericolo di lesioni!
Fare raffreddare l'apparecchio prima della pulizia.
In caso contrario sussiste il rischio di ustione!
Guasti e possibili rimedi
Il ferro da stiro a vapore non emette vapore
o ne emette solo una quantità molto ridotta:
la riserva di acqua nel ferro da stiro a vapore è esaurita. Riempire il serbatoio dell'acqua con acqua corrente
(v. "Riempimento del serbatoio dell'acqua").
Il ferro da stiro a vapore non si riscalda:
• Il ferro da stiro non è collegato o non è attivato.
Inserire la spina nella presa di corrente e impostare con il regolatore della temperatura 8 la temperatura desiderata.
• Il ferro da stiro a vapore è guasto. Fare riparare
il ferro da stiro a vapore solo da personale specializzato autorizzato.
Attenzione! Danni materiali!
Non utilizzare detergenti aggressivi, abrasivi o chimici.
Questi possono intaccare la superficie e causare
danni irreparabili sull'apparecchio.
• Pulire l'involucro esclusivamente con un panno
morbido e asciutto.
• Pulire la piastra q con un panno leggermente
inumidito con acqua e un detergente delicato,
non abrasivo.
Conservazione
Riporre l'apparecchio raffreddato in un luogo pulito,
asciutto e privo di polvere.
Smaltimento
Non smaltire per alcun motivo l'apparecchio assieme ai normali rifiuti domestici.
Il presente prodotto è conforme alla
direttiva europea 2012/19/EU.
Smaltire l'apparecchio presso un'azienda autorizzata
o presso l'ente comunale di smaltimento.
Rispettare le prescrizioni attualmente in vigore.
In caso di dubbio, mettersi in contatto con l'ente di
smaltimento competente.
Smaltire tutti i materiali dell'imballaggio in
modo ecologicamente conforme.
- 8 -

Garanzia & assistenza
Questo apparecchio è garantito per 3 anni a partire
dalla data di acquisto. L'apparecchio è stato prodotto
con cura e debitamente collaudato prima della consegna.
Conservare lo scontrino come prova d'acquisto. In
caso di interventi in garanzia, contattare telefonicamente il proprio centro di assistenza. Solo in questo
modo è possibile garantire una spedizione gratuita
della merce.
La garanzia vale solo per i difetti di materiale o
fabbricazione, non per i danni da trasporto, parti
soggette a usura o danni a parti fragili come ad es.
interruttori o accumulatori. Il prodotto è destinato
esclusivamente all'uso domestico e non a quello
commerciale.
La garanzia decade in caso di impiego improprio o
manomissione, uso della forza e interventi non eseguiti dalla nostra filiale di assistenza autorizzata.
Questa garanzia non costituisce alcun limite ai diritti
legali del consumatore.
Il periodo di garanzia non viene prolungato in caso
di un intervento in garanzia. Ciò vale anche per le
componenti sostituite e riparate. I danni e difetti
presenti già all'acquisto devono essere comunicati
immediatamente dopo il disimballaggio, e non oltre
due giorni dalla data di acquisto. Le riparazioni
effettuate dopo la scadenza del periodo di garanzia
sono a pagamento.
Assistenza Italia
Tel.: 02 36003201
E-Mail: kompernass@lidl.it
IAN 273029
Assistenza Malta
Tel.: 80062230
E-Mail: kompernass@lidl.com.mt
IAN 273029
Raggiungibilità della hotline:
dal lunedì al venerdì, dalle 8.00 alle 20.00 (CET)
Importatore
KOMPERNASS HANDELS GMBH
BURGSTRASSE 21
44867 BOCHUM
GERMANY
www.kompernass.com
- 9 -

- 10 -

ÍNDICE PÁGINA
Introdução 12
Utilização correta 12
Material fornecido 12
Elementos de comando 12
Dados técnicos 12
Indicações de segurança 13
Antes da primeira utilização 15
Encher o depósito de água 15
Ligar e engomar 16
Engomar a vapor 16
Engomar com emissão de vapor 16
Pousar temporariamente o ferro de engomar a vapor 16
Colocar o ferro de engomar a vapor fora de serviço 17
Função de paragem de gotas 17
Desativação automática 17
Limpeza 17
Função de auto-limpeza................................................................................................................17
Estrutura e placa metálica do ferro .............................................................................................18
Guardar 18
Resolver anomalias 18
Eliminação 18
Garantia e Assistência Técnica 19
Importador 19
- 11 -

FERRO DE ENGOMAR
A VAPOR
Introdução
Parabéns pela compra do seu aparelho novo.
Decidiu-se, assim, por um produto de elevada
qualidade. O manual de instruções é constituinte
deste produto. Este contém indicações importantes
relativamente à segurança, utilização e eliminação.
Antes da utilização do produto, familiarize-se com
todas
as indicações de utilização e de segurança. Utilize
o produto apenas como descrito e nas áreas de
aplicação indicadas. Ao entregar o aparelho a
terceiros entregue todos os documentos.
Utilização correta
Elementos de comando
Figura A:
1 Bocal de água
2 Orifício de enchimento do depósito de água
3 Regulador de vaporização
4 Botão para emissão de vapor
5 Botão
de pulverização
6 Luz de controlo para a desativação automática
7 Luz de controlo para a temperatura
8 Regulador da temperatura
9 Cabo de alimentação com espiral de proteção
0 Base
q Placa metálica do ferro
w Botão Selfclean
Figura B:
e Copo de medição
O ferro de engomar a vapor destina-se exclusivamente a engomar vestuário. Deve utilizá-lo apenas
em espaços fechados e para uso privado.. Qualquer outra utilização é considerada indevida. Não
o utilize a nível comercial!
Material fornecido
Ferro de engomar a vapor
Copo de medição
Manual de instruções
Dados técnicos
Tensão de alimentação: 220 - 240 V
50/60 Hz
Consumo máx. de energia: 2200 W
- 12 -
~

Indicações de segurança
Perigo de queimaduras!
•Segure o ferro de engomar a vapor apenas pela pega, quando este está
quente.
•As crianças devem ser supervisionadas, de modo a garantir que não brincam
com o aparelho.
•Nunca coloque as suas mãos no jato de vapor ou nas peças metálicas quentes.
•Não deve abrir o orifício de enchimento do depósito de água durante a utili-
zação. Primeiro deixe o ferro de engomar a vapor arrefecer e retire a ficha de
alimentação da tomada.
•O ferro de engomar e o seu cabo de ligação devem, durante a conexão ou o
arrefecimento, encontrar-se fora do alcance de crianças com idade inferior a 8
anos.
Perigo de ferimentos! Perigo de incêndio!
•Nunca deixe o ferro de engomar a vapor sem supervisão, enquanto este estiver
quente, em funcionamento ou ligado à corrente.
•Guarde o ferro de engomar a vapor apenas quando estiver totalmente frio.
•O ferro de engomar a vapor deve ser utilizado e colocado em cima de uma
superfície estável.
•Engome apenas com as temperaturas aconselhadas nas instruções de tratamento
e adequadas ao material. Caso contrário, poderá danificar o vestuário. Caso
não tenha conhecimento de quaisquer instruções de tratamento, inicie com a temperatura mais baixa.
•Coloque o ferro de engomar apenas sobre uma superfície plana e resistente ao
calor. O ferro de engomar deve estar estável.
•Caso pretenda pousar o ferro de engomar a vapor, coloque-o apenas na base.
Perigo de choque elétrico!
• A tensão da fonte de alimentação tem de coincidir com as indicações na pla-
ca de identificação do aparelho.
• Um aparelho avariado deve ser reparado imediatamente por uma oficina
qualificada ou contacte a assistência técnica para evitar perigos.
- 13 -

• Fichas de rede ou cabos de alimentação danificados devem ser imediatamen-
te substituídos por técnicos autorizados ou pela Assistência Técnica, de modo
a evitar perigos.
• Puxe sempre pela ficha de rede, nunca pelo cabo.
• Não dobre nem esmague o cabo de alimentação e coloque-o de forma que
este não entre em contacto com super-fícies quentes, e que ninguém pise ou
tropece no mesmo.
• Antes da limpeza, durante o abastecimento com água canalizada e após
cada utilização, retire a ficha de rede.
• Desenrole sempre totalmente o cabo de alimentação antes da ligação e não uti-
lize extensões.
• Nunca agarre o cabo ou a ficha de rede com as mãos húmidas.
• Nunca utilize o ferro de engomar a vapor próximo da água que se encontra em
banheiras, duche, lavatórios e outros recipientes. A proximidade de água representa um perigo para o aparelho, mesmo se este se encontrar desligado.
• Nunca mergulhe o ferro de engomar a vapor em líquidos e nunca deixe que se in-
filtrem líquidos na sua estrutura. Não deve expor o aparelho a qualquer humidade
nem utilizá-lo ao ar livre. No entanto, caso algum líquido se infiltre, alguma vez, na
estrutura do aparelho, retire imediatamente a ficha de rede do aparelho da tomada e providencie a sua reperação por pessoal técnico qualificado.
• Não abra a estrutura do ferro de engomar a vapor. A reparação do ferro de en-
gomar a vapor apenas deve ser realizada por pessoal técnico qualificado.
• Nunca utilize o ferro de engomar a vapor, se este apresentar danos visíveis,
tenha caído ou verter água. Este deve ser primeiro reparado por pessoal técnico qualificado.
• Não continue a utilizar o aparelho, se a espiral de proteção no cabo de alimen-
tação estiver danificada!
• Este aparelho pode ser utilizado por crianças a partir dos 8 anos e por pessoas
com capacidades reduzidas a nível físico, sensorial ou mental ou com falta de experiência e/ou conhecimentos, quando supervisionadas ou instruídas acerca da
utilização segura do aparelho e se tiverem compreendido os perigos daí resultantes. As crianças não podem brincar com o aparelho. A limpeza e a manutenção
do utilizador não podem ser realizadas por crianças sem supervisão.
- 14 -

Atenção! Danos materiais!
• Caso as instruções de tratamento do vestuário
indiquem que este não pode ser engomado
(símbolo ), não o faça. Caso contrário, poderá
danificar a peça de vestuário.
• Deve encher o depósito de água apenas com água
canalizada/destilada. Caso contrário, poderá
danificar o ferro de engomar a vapor.
• Não deve limpar o ferro de engomar a vapor
com solventes, álcool ou produtos de limpeza
abrasivos. Caso contrário, poderá danificá-lo.
Antes da primeira utilização
• Retire o ferro de engomar a vapor da embalagem.
• Remova todos os autocolantes e películas do
ferro de engomar a vapor e da placa metálica
do ferro q.
Perigo de asfixia!
Os sacos de plástico podem representar perigo.
Para evitar perigo de asfixia, mantenha os sacos de
plástico fora do alcance de bebés e crianças.
• Coloque água no depósito de água (ver capítulo
"Encher o depósito de água").
• Insira a ficha de rede numa tomada que
corresponda à tensão indicada na placa de
identificação.
• Coloque o regulador de temperatura 8 na
posição "MAX".
• Deixe o ferro de engomar a vapor aquecer
durante alguns minutos no nível máximo.
• Pressione várias vezes o botão para emissão de
vapor 4 para que saia vapor pela placa metálica do ferro q.
• De seguida, engome um pedaço de tecido do
qual já não necessite, para remover eventuais
impurezas da placa metálica do ferro q.
Encher o depósito de água
• Segure o ferro de engomar na diagonal.
• Abra a tampa do orifício de enchimento do
depósito de água 2.
• Com o copo de medição e encha água canalizada para o depósito de água até, no máximo,
à marcação "MAX".
• Feche a tampa do orifício de enchimento do
depósito de água 2.
Nota:
Caso a água canalizada da sua área de residência
seja demasiada dura, recomenda-se a mistura da
água canalizada com água destilada. Caso contrário,
os bocais para a função ótima de vaporização podem ganhar calcário prematuramente.
Para prolongar a função ótima de vaporização,
misture a água canalizada com água destilada, de
acordo com a tabela.
Percentagem de
Dureza da
água
muito
suave/suave
média 1: 1
dura 2: 1
muito dura 3: 1
Pode verificar o grau de dureza da água junto da
estação de tratamento de água local.
água destilada
para água
canalizada
0
- 15 -

Ligar e engomar
Pode engomar a seco sem vapor a qualquer temperatura, engomar a vapor só é possível a partir
do intervalo de regulação no regulador de
temperatura 8.
• Insira a ficha de rede numa tomada.
Atenção! Danos materiais!
Caso as instruções de tratamento do vestuário indiquem que este não pode ser engomado (símbolo
), não deve engomar a peça de vestuário. Caso
contrário, poderá danificar a peça de vestuário.
• Verifique nas instruções de tratamento das etiquetas do vestuário, se e a que temperatura a
peça de vestuário pode ser engomada.
Símbolo
Regulador da
temperatura 8
Tipo de tecido
Fibra acrílica, seda
artificial
Seda, lã, tecidos mistos
de poliéster
Algodão, linho, viscose
A luz de controlo para a temperatura 7 acende-se.
Assim que a temperatura pretendida é atingida, a
luz de controlo 7 apaga-se.
• Aguarde até que a luz de controlo para a
temperatura 7 se apague.
• Para humedecer o vestuário, prima o botão de
pulverização 5.
Esta função destina-se a vestuário muito seco e com
muitos vincos.
Engomar a vapor
• Ajuste a intensidade de vaporização pretendida
com o regulador de vaporização 3.
• O regulador da temperatura 8 tem de estar
rodado até ao intervalo de regulação .
Caso contrário, não se pode formar vapor.
Engomar com emissão de vapor
A emissão de vapor é especialmente indicada para
alisar áreas de difícil acesso do vestuário.
• Levante ligeiramente o ferro de engomar a
vapor.
• Prima o botão para emissão de vapor 4
para um jato de vapor.
• Ajuste a temperatura adequada com o regulador
da temperatura 8.
Nota:
Durante o aquecimento, coloque sempre o ferro de
engomar na base 0.
Se, durante o aquecimento, colocar o ferro de engomar na placa metálica do ferro q e não o mo-
ver, após 30 segundos a desativação automática é
ativada (ver capítulo "Desativação automática") e o
aparelho para o aquecimento.
Pousar temporariamente o ferro
de engomar a vapor
Perigo de incêndio!
Nunca deixe o ferro de engomar a vapor quente,
ligado à rede elétrica ou em funcionamento sem
vigilância.
• Coloque o regulador de temperatura 8 na
posição "MIN".
• Pouse o ferro de engomar a vapor apenas na
base 0.
- 16 -

Colocar o ferro de engomar
a vapor fora de serviço
• Retire a ficha de rede da tomada.
• Esvazie o depósito de água e limpe a placa
metálica do ferro q.
• Coloque o ferro de engomar a vapor já frio na
base 0.
Se o ferro de engomar estiver na base 0 e não for
utilizado durante 8 minutos, soam sinais de aviso e a
luz de controlo para a desativação automática 6 fica
intermitente. O ferro de engomar termina o aquecimento. Para desligar a desactivação automática,
levante o ferro de engomar e desloque-o para trás e
para a frente. A luz de controlo para a desativação
automática 6 apaga-se e o ferro de engomar aquece
novamente.
Função de paragem de gotas
Nos ferros de engomar a vapor convencionais pode
acontecer que, a temperaturas demasiado reduzidas,
pingue água da placa metálica do ferro q. Este
ferro de engomar apresenta, no entanto, uma nova
característica de equipamento, a função de
PARAGEM DE GOTAS. O ferro de engomar desliga
automaticamente a emissão de vapora temperaturas
reduzidas. Quando tal acontece, ouve-se um "clique".
Depois ajuste a temperatura adequada com o regulador de temperatura 8. Assim que essa temperatura for alcançada, a vaporização continua.
Desativação automática
O ferro de engomar está equipado com uma desativação automática. Esta para o aquecimento do ferro de
engomar.
Se o ferro de engomar estiver sobre a base metálica
do ferro q e não for utilizado durante 30 segundos,
soam sinais de aviso e a luz de controlo para a desativação automática 6 fica intermitente. O ferro de engomar termina o aquecimento. Para desligar a desativação automática, levante o ferro de engomar e
desloque-o para trás e para a frente. A luz de controlo
para a desativação automática 6 apaga-se e o ferro
de engomar aquece novamente.
Nota:
A desativação automática não substitui a necessidade
de retirar a ficha. Essa destina-se apenas à redução
do perigo de incêndio, se o ferro de engomar não
for desligado por engano!
Limpeza
Função de auto-limpeza
• Encha o depósito de água até à marcação
"MAX".
• Insira a ficha de rede na tomada.
• Coloque o regulador de temperatura 8 na
posição "MAX".
• Ajuste o regulador de vaporização 3 para a
intensidade máxima de vaporização.
• Deixe o ferro de engomar a vapor aquecer até
que a luz de controlo para a temperatura 7
apague e volte acender.
• Mantenha o ferro de engomar a vapor na
horizontal sobre um recipiente de recolha.
• Prima o botão Selfclean w e mantenha-o premido. Desloque o ferro de engomar um pouco
para a frente e para trás.
Sai vapor e água a ferver dos orifícios de saída
de vapor na placa metálica do ferro q.
Quaisquer tipos de sujidade eventualmente existentes são assim expelidos.
• Solte o botão Selfclean w, logo que a água no
reservatório de água tenha sido consumida.
- 17 -

• Seque bem a placa metálica do ferro q. Para
isso, passa a placa metálica do ferro q algumas
vezes sobre um lenço de pano ou um pedaço de
tecido antigo.
• Deixe o ferro de engomar a vapor arrefecer antes
de guardá-lo.
Resolver anomalias
O jato de vapor do ferro de engomar a
vapor está fraco ou não funciona:
A reserva de água no ferro de engomar a vapor
já foi consumida. Encha o depósito de água com
água canalizada (ver "Encher o depósito de água").
Estrutura e placa metálica do ferro
Perigo de morte!
Antes da limpeza, retire a ficha da tomada.
Perigo de choque elétrico!
Perigo de ferimentos!
Deixe o aparelho arrefecer antes de o limpar.
Caso contrário, existe perigo de queimaduras!
Atenção! Danos materiais!
Não utilize produtos de limpeza agressivos, abrasivos ou químicos.
Estes podem danificar a superfície e provocar danos irreparáveis no aparelho.
• Limpe a estrutura com um pano macio e seco.
• Limpe a placa metálica do ferro q com um
pano ligeiramente humedecido com água e um
produto de limpeza suave, não abrasivo.
Guardar
O ferro de engomar a vapor não aquece:
• O ferro não se encontra conectado ou ligado.
Insira a ficha de rede na tomada e ajuste a
temperatura pretendida com o regulador de
temperatura 8.
• O ferro de engomar a vapor deve ser reparado
por pessoal técnico qualificado.
Eliminação
Nunca elimine o aparelho juntamente
com o lixo doméstico comum. Este
produto está em conformidade com
a Diretiva Europeia 2012/19/EU.
Elimine o aparelho através de uma instituição de
recolha de resíduos autorizada ou através da instituição de recolha do seu município.
Respeite os regulamentos atualmente em vigor. Em
caso de dúvidas, entre em contacto com a entidade
de eliminação de resíduos.
Elimine todos os materiais da embalagem
de forma ecológica.
Guarde o aparelho já frio num local seco, sem pó e
limpo.
- 18 -

Garantia e Assistência Técnica
Importador
Este aparelho tem 3 anos de garantia a partir da
data de compra. Este aparelho foi fabricado com o
máximo cuidado e escrupulosamente testado antes
da sua distribuição.
Guarde o talão de compra como comprovativo da
compra. Em caso de reivindicação da garantia,
entre em contacto com o seu serviço de assistência
técnica por telefone. Apenas deste modo pode ser
garantido um envio gratuito do seu produto.
A garantia abrange apenas defeitos de material ou
de fabrico, não incluindo danos provocados pelo
transporte, peças de desgaste ou danos em peças
frágeis, por ex. interruptores ou baterias. O produto
destina-se apenas ao uso privado e não ao uso
comercial.
Em caso de utilização incorreta ou indevida, exercício
de força excessiva e de intervenções não efetuadas
pelo nosso representante autorizado de assistência
técnica, perderá o direito à garantia. Os seus direitos
legais não são limitados por esta garantia.
O período de garantia não é prolongado em caso
de reivindicação. Isto também se aplica às peças
substituídas e reparadas. Danos e falhas eventualmente já existentes na altura da compra devem ser
comunicados imediatamente após o desempacotamento, o mais tardar, no entanto, dois dias após a
data de aquisição. As reparações realizadas após
o final do período de garantia comportam custos.
KOMPERNASS HANDELS GMBH
BURGSTRASSE 21
44867 BOCHUM
GERMANY
www.kompernass.com
Assistência Portugal
Tel.: 70778 0005 (0,12 EUR/Min.)
E-Mail: kompernass@lidl.pt
IAN 273029
Horário de atendimento da linha de apoio:
Segunda a sexta das 8:00 horas – 20:00 horas
(HEC)
- 19 -

- 20 -

CONTENT PAGE
Introduction 22
Intended use 22
Scope of delivery 22
Operating elements 22
Technical data 22
Safety instructions 23
Before initial use 25
Filling the water tank 25
Plugging in and ironing 26
Steam ironing 26
Ironing with steam blast 26
Temporarily setting the steam iron aside 26
Turning off the steam iron 27
Drip-stop function 27
Automatic switch-off 27
Cleaning 27
Self-cleaning function.....................................................................................................................27
Housing and sole of the iron ........................................................................................................28
Storage 28
Troubleshooting 28
Disposal 28
Warranty and service 29
Importer 29
- 21 -
STEAM IRON
Introduction
Congratulations on the purchase of your new appliance.
You have clearly decided in favour of a quality
product. These operating instructions are a constituent of this product. They contain important information with regard to safety, use and disposal.
Before using the product, familiarise yourself with all
of these operating and safety instructions. Use the
product only as described and only for the specified
areas of application. Please also pass these documents on to any future owner, together with the product.
Intended use
Operating elements
Figure A:
1 Water jet
2 Filler opening for the water tank
3 Steam regulator
4 Button for steam blast
5 Button for fine water spray
6 Automatic switch-off indicator lamp
7 Temperature control lamp
8 Thermostat
9 Power cable with anti-kink protection
0 Appliance base
q Ironing sole
w Self-clean button
Figure B:
e Measuring beaker
The steam iron is exclusively intended for ironing
textiles. The iron may only be used indoors and in
private households. Any other use is deemed
improper. The apparatus is not intended for commercial use!
Scope of delivery
Steam Iron
Measuring beaker
Operating instructions
Technical data
Power supply voltage: 220 - 240 V
50/60 Hz
max. power consumption: 2200 W
- 22 -
~

Safety instructions
Risk of Burns!
•Always hold the steam iron by the handle when it is hot.
•Children should be supervised to ensure that they do not play with the
appliance.
•Never hold your hand over the steam spray or touch hot metal parts.
•The filler opening of the water reservoir must not be opened while the iron is in
use. First allow the steam iron to cool down and remove the plug from the power socket.
•The iron and its connecting cable must be kept out of the reach of children
younger than 8 years old when it is switched on or cooling down.
Risk of Injury! Risk of fire!
•Never leave a steam iron that is hot, switched on or connected to the mains power supply unattended.
•Do not put the steam iron into storage until it has cooled down completely.
•This steam iron must be used and placed on a stable surface.
•When ironing, only use the temperatures detailed in the garment care instructions, or those suitable for the material. Otherwise, you could damage the textiles. Should care instructions not be given or known, start with the lowest temperature setting.
•Always put the iron on a level, heat-resistant surface.
The iron must be in a stable position.
•Should you wish to put the steam iron down, always put it on the appliance
base.
Risk of electric shock!
• The rating of the local power supply must correspond with the details given on
the rating plate of the appliance.
•To avoid potential risks, arrange for defective appliances to be checked and
possibly repaired by a qualified specialist workshop, or contact our Customer
Service Department.
•Arrange for defective power plugs and/or cables to be replaced immediately
by qualified technicians or our Customer Service Department.
•To disconnect from the power source, only pull the plug itself, not the cable.
- 23 -

•Never bend (kink) or crush the power cable. Arrange it in such a way that it
cannot come into contact with hot surfaces and so that no-one can step on it or
trip over it.
•Remove the plug from the power socket after every use, and before cleaning or
filling with tap water.
•Always unwind the power cable fully before switching on, and do not use an
extension cable.
•Never touch the power cable or the plug with wet hands.
•Never use the steam iron near a bath, shower, wash basin or other vessel containing water. The proximity of moisture presents a danger, even when the appliance is switched off.
•Under no circumstances should you submerge the steam iron in liquid or permit
liquids to penetrate the casing of the steam iron. Do not expose the appliance
to humidity and do not use outdoors. Should liquids enter the casing, unplug the
appliance from the socket immediately and arrange for it to be repaired by a
qualified technician.
•You may not open the casing of the steam iron. Should repairs be necessary,
only allow authorised technicians to repair a defective appliance.
•Under NO circumstance should you use the appliance if it shows visible signs
of damage, has fallen, or is leaking.
Arrange for it to be repaired by qualified specialists.
•Do not use the appliance if the anti-kink protection on the power cable is
damaged!
•This appliance may be used by children aged 8 years or over and by individuals with reduced physical, sensory or mental capabilities, or lack of experience
and/or knowledge if they are supervised or have been instructed in the safe use
of the appliance and have understood the potential risks. Children may not
play with the appliance.
Cleaning and user maintenance should not be carried out by children without
supervision.
- 24 -
Attention! Property Damage!
• Should the clothing care instructions forbid iro-
ning, (symbol ), the clothing item may not be
ironed. If you do so, the clothing item could be
permanently damaged.
• The water tank is to be filled exclusively with tap
water or distilled water. Otherwise, you will damage the steam iron.
• Do not clean the steam iron with solvents, alcohol
or abrasive cleaning agents, since these could
cause damage.
Before initial use
• Remove the steam iron from the packaging.
• Remove all stickers and protective film from the
steam iron and the ironing sole q.
Filling the water tank
• Hold the iron at an angle.
• Open the cover of the filler opening for the
water tank 2.
• Using the measuring beaker e, fill the water
tank to the "MAX" marking.
• Slide the cover of the filler opening for the water
tank 2 back to close it.
Note:
Should the tap water in your area be rated as hard,
it is recommended that you mix tap water with some
distilled water. Otherwise, the jets for the steam
blast function could calcify (become blocked) prematurely.
To extend the optimal steam blast function, mix tap
water with distilled water as follows.
Risk of asphyxiation!
Plastic bags can be dangerous. To avoid the risk of
asphyxiation, keep plastic bags out of the reach of
toddlers and small children.
• Pour water into the water tank (see chapter
"Filling the water tank").
• Insert the plug into a wall power socket supplying an electrical current as detailed on the rating
plate.
• Move the thermostat 8 to the "MAX" position.
• Heat the steam iron up for several minutes at the
highest setting.
• Press the button for the steam blast 4 a few
times until steam exits from the ironing sole q.
• Then iron a scrap piece of material to remove
possible contamination from the ironing sole q.
Ratios - distilled
Water hardness
very soft / soft 0
medium 1 : 1
hard 2 : 1
very hard 3 : 1
The water hardness level can be queried at your
local water works.
water to
tap water
- 25 -

Plugging in and ironing
Dry ironing is possible at all temperatures, steam ironing is possible by adjusting to on the
thermostat 8.
• Insert the plug into a power socket.
Attention! Property Damage!
Should the clothing care instructions forbid ironing,
(symbol ), the clothing item may not be ironed.
If you do so, the clothing item could be permanently
damaged.
• Check the care instructions on the labels in the
garment to see whether it is suitable for being
ironed, and at which temperature setting.
Symbol thermostat 8
Type of material
Acrylic, rayon
Silk, wool, polyester
blended fabrics
• Wait until the temperature control lamp 7
switches off.
• To moisten the laundry, press the button for fine
water spray 5.
This function is suitable for extremely dry and extremely
crumpled garments.
Steam ironing
• Set the steam regulator 3 to the desired steam
setting.
• The thermostat 8 must be moved to at least
adjustment range . Otherwise it cannot
produce any steam.
Ironing with steam blast
The steam blast is especially suitable for smoothing
parts of a garment that are difficult to reach.
• Slightly raise the steam iron.
• For a steam blast, press the steam blast
button 4.
Cotton, linen, viscose
• Select the best suitable temperature setting with
the thermostat 8.
Note:
While it is heating up, always place the iron on the
base 0.
If you place the iron on the ironing sole q and do
not move it, the automatic switch-off will be activated after 30 seconds (see chapter “Automatic
switch-off”) and the appliance stops heating.
The temperature control lamp 7 glows. When the
set temperature has been reached, the temperature
control lamp 7 goes out.
Temporarily setting the steam
iron aside
Risk of fire!
NEVER leave the hot, mains-connected or switched-on
steam iron unattended.
• Set the thermostat 8 to the "MIN" position.
• Always put the steam iron on the appliance
base 0.
- 26 -

Turning off the steam iron
• Remove the plug from the wall socket.
• Empty the water tank and clean the ironing
sole q.
• Put the steam iron on the appliance base 0
after it has cooled down.
Note:
The automatic switch-off is not a substitute for unplugging the apparatus from the power supply! It is
only intended for reducing the risk of fire if the iron
is accidentally left on!
Cleaning
Drip-stop function
With conventional steam irons it can occur that water
drips from the ironing sole q at low temperatures.
However, this iron possesses a new equipment characteristic, the DRIP-STOP function. At low temperatures the iron automatically switches off the steamblast function. When this happens, a "CLICK" is
heard. You must then select a suitable temperature
using the thermostat 8. As soon as this is reached,
steam production continues.
Automatic switch-off
The iron is equipped with an automatic switch-off.
This stops the iron from heating up.
If the iron is standing on its ironing sole q and has
not been moved for approx. 30 seconds, acoustic
warning signals are heard and the automatic switchoff indicator lamp 6 flashes. The iron will no longer
be heated. To deactivate the automatic switch-off,
pick up the iron and move it around a little. The
automatic switch-off indicator lamp 6 will go off
and the iron will heat up again.
Self-cleaning function
• Fill the water tank to the "MAX" marking.
• Insert the plug into a wall socket.
• Move the thermostat 8 to the "MAX" position.
• Adjust the steam regulator 3 to maximum steam
power.
• Allow the steam iron to heat up until the temperature control lamp 7 switches off and once
again glows.
• Hold the steam iron horizontally over a catchment
receptacle.
• Press and hold down the self-clean button w.
Move the steam iron back and forth a little.
Steam and boiling water flows from the steam
exit holes in the ironing sole q.
Impurities that may be present are washed out.
• Release the self-clean button w as soon as all
of the water has exited.
• Thoroughly dry the ironing sole q. For this, slide
the ironing sole q back and forth over a hand
towel or an old piece of material several times.
• Allow the steam iron to cool down before placing
it in storage.
If the iron is standing on its base 0 and has not
been moved for approx. 8 minutes, acoustic warning
signals are heard and the automatic switch-off indicator lamp 6 flashes. The iron is no longer heated.
To deactivate the automatic switch-off, pick up the
iron and move it around a little. The automatic
switch-off indicator lamp 6 will go off and the iron
will heat up again.
- 27 -

Housing and sole of the iron
Disposal
Potentially fatal danger!
Remove the plug before cleaning the device.
There is a risk of electric shock!
Risk of physical injury!
Allow the appliance to cool down before cleaning
it. Otherwise, there is a risk of burns!
Attention! Property Damage!
Do not use abrasive, aggressive or chemical cleaning agents.
They can damage the surface and also lead to irreparable damage to the appliance.
• Clean the housing with a soft, dry cloth only.
• Clean the ironing sole q using a damp cloth
and a mild, non-scouring detergent.
Storage
Store the appliance in a clean, dust-free, and dry
location after it has cooled down.
Do not dispose of the appliance in your
normal domestic waste. This appliance
is subject to the provisions of European
Directive 2012/19/EU.
Dispose of the appliance through an approved disposal centre or at your community waste facility.
Observe the currently applicable regulations.
In case of doubt, please contact your waste disposal
centre.
Dispose of all packaging materials in an
environmentally friendly manner.
Troubleshooting
Steam iron producing little or no steam:
The reserves of water in the steam iron are depleted.
Fill the water tank with tap water (See "Filling the
water tank").
The steam iron does not get hot:
• The steam iron is not plugged in or is not switched
on. Insert the plug into a wall power socket and
adjust the thermostat 8 to the desired ironing
temperature.
• The steam iron is defective. Arrange for the steam
iron to be repaired by qualified specialists.
- 28 -

Warranty and service
Importer
The warranty for this appliance is for 3 years from
the date of purchase. The appliance has been manufactured with care and meticulously examined
before delivery.
Please retain your receipt as proof of purchase. In the
event of a warranty claim, please telephone our
Service Department. This is the only way to ensure
that your goods are dispatched free of charge.
The warranty only covers claims for material and
manufacturing defects, but not for transport damage,
wearing parts or damage to fragile components
such as buttons or batteries. This product is for private
use only and is not intended for commercial use.
The warranty is void in the case of incorrect and improper handling, use of force and internal manipulation that is not carried out by our authorised service
branch. Your statutory rights are not restricted in any
way by this warranty.
The warranty period will not be extended by repairs
made under warranty. This also applies to replaced
and repaired parts. Any damage and defects that
are discovered immediately after purchase must be
reported immediately after unpacking the appliance, no more than two days after the purchase date.
Repairs made after the expiration of the warranty
period are subject to payment.
KOMPERNASS HANDELS GMBH
BURGSTRASSE 21
44867 BOCHUM
GERMANY
www.kompernass.com
Service Great Britain
Tel.: 0871 5000 720 (£ 0.10/Min.)
E-Mail: kompernass@lidl.co.uk
IAN 273029
Service Malta
Tel.: 80062230
E-Mail: kompernass@lidl.com.mt
IAN 273029
Hotline availability:
Monday to Friday 08:00 - 20:00 (CET)
- 29 -

- 30 -

INHALTSVERZEICHNIS SEITE
Einleitung 32
Bestimmungsgemäßer Gebrauch 32
Lieferumfang 32
Bedienelemente 32
Technische Daten 32
Sicherheitshinweise 33
Vor dem ersten Gebrauch 35
Wassertank befüllen 35
Anschließen und Bügeln 36
Dampfbügeln 36
Bügeln mit Dampfstoß 36
Dampfbügeleisen vorübergehend abstellen 36
Dampfbügeleisen außer Betrieb nehmen 37
Tropf-Stop-Funktion 37
Automatische Abschaltung 37
Reinigen 37
Selbstreinigungs-Funktion...............................................................................................................37
Gehäuse und Bügelsohle..............................................................................................................38
Aufbewahren 38
Fehlfunktionen beseitigen 38
Entsorgen 38
Garantie und Service 39
Importeur 39
- 31 -
DAMPFBÜGELEISEN
Einleitung
Herzlichen Glückwunsch zum Kauf Ihres neuen
Gerätes.
Sie haben sich damit für ein hochwertiges Produkt
entschieden. Die Bedienungsanleitung ist Bestandteil dieses Produkts. Sie enthält wichtige Hinweise
für Sicherheit, Gebrauch und Entsorgung. Machen
Sie sich vor der Benutzung des Produkts mit allen
Bedien- und Sicherheitshinweisen vertraut. Benutzen
Sie das Produkt nur wie beschrieben und für die angegebenen Einsatzbereiche. Händigen Sie alle
Unterlagen bei Weitergabe des Produkts an Dritte
mit aus.
Bestimmungsgemäßer
Gebrauch
Bedienelemente
Abbildung A:
1 Wasserdüse
2 Einfüllöffnung für den Wassertank
3 Dampfregler
4 Taste für den Dampfstoß
5 Taste für Sprühfunktion
6 Kontrollleuchte für die
automatische Abschaltung
7 Kontrollleuchte für die Temperatur
8 Temperaturregler
9 Netzkabel mit Knickschutz
0 Sockel
q Bügelsohle
w Selfclean-Taste
Abbildung B:
e Messbecher
Technische Daten
Das Dampfbügeleisen ist ausschließlich zum Bügeln
von Kleidung bestimmt. Sie dürfen es nur innerhalb
geschlossener Räume und in privaten Haushalten
verwenden. Alle anderen Verwendungen gelten als
nicht bestimmungsgemäß. Benutzen Sie es nicht gewerblich!
Lieferumfang
Dampfbügeleisen
Messbecher
Bedienungsanleitung
Versorgungsspannung: 220 - 240 V
50/60 Hz
max. Leistungsaufnahme: 2200 W
- 32 -
~

Sicherheitshinweise
Verbrennungsgefahr!
•Fassen Sie das Dampfbügeleisen nur am Griff an, wenn es heiß ist.
•Kinder sollten beaufsichtigt werden, um sicherzustellen, dass sie nicht mit dem
Gerät spielen.
•Halten Sie niemals Ihre Hände in den Dampfstoß oder an heiße Metallteile.
•Sie dürfen die Einfüllöffnung für den Wassertank während des Gebrauchs nicht
öffnen. Lassen Sie das Dampfbügeleisen zunächst erkalten und ziehen Sie den
Netzstecker aus der Netzsteckdose.
•Das Bügeleisen und dessen Anschlussleitung müssen während des Einschaltens
oder Abkühlens außer Reichweite von Kindern sein, die jünger als 8 Jahre alt
sind.
Verletzungsgefahr! Brandgefahr!
•Lassen Sie das heiße, am Stromnetz angeschlossene oder eingeschaltete
Dampfbügeleisen niemals unbeaufsichtigt.
•Verstauen Sie das Dampfbügeleisen nur im abgekühlten Zustand.
•Das Dampfbügeleisen muss auf einer stabilen Oberfläche benutzt und abge-
stellt werden.
• Bügeln Sie nur mit den auf den Pflegehinweisen angegebenen und für das Material geeigneten Temperatureinstellungen. Sie können die Wäsche andernfalls
beschädigen. Falls Sie keine Pflegehinweise kennen, beginnen Sie mit der niedrigsten Temperatureinstellung.
• Stellen Sie das Bügeleisen nur auf einen ebenen und hitzeunempfindlichen
Untergrund. Das Bügeleisen muss stabil stehen.
• Wenn Sie das Dampfbügeleisen aus der Hand legen wollen, stellen Sie es nur
auf dem Sockel ab.
Gefahr durch elektrischen Schlag!
• Die Spannung der Stromquelle muss mit den Angaben auf dem Typenschild
des Gerätes übereinstimmen.
• Lassen Sie ein defektes Gerät umgehend von einer qualifizierten Fachwerkstatt instandsetzen, oder wenden Sie sich an den Kundenservice, um Gefährdungen zu
vermeiden.
• Lassen Sie beschädigte Netzstecker oder Netzkabel sofort von autorisiertem
Fachpersonal oder dem Kundenservice austauschen, um Gefährdungen zu
vermeiden.
• Ziehen Sie immer nur am Netzstecker, niemals am Kabel.
- 33 -

• Knicken oder quetschen Sie das Netzkabel nicht und verlegen Sie es so, dass
es nicht in Kontakt mit heißen Oberflächen kommt und niemand darauf treten
oder darüber stolpern kann.
• Ziehen Sie vor dem Reinigen, beim Auffüllen mit Leitungswasser und nach jedem Gebrauch den Netzstecker.
• Rollen Sie das Netzkabel vor dem Einschalten immer vollständig ab und verwenden Sie keine Verlängerungskabel.
• Fassen Sie das Kabel oder den Netzstecker niemals mit feuchten Händen an.
• Benutzen Sie das Dampfbügeleisen keinesfalls in der Nähe von Wasser, das in
Badewannen, Duschen, Waschbecken oder anderen Gefäßen enthalten ist.
Die Nähe von Wasser stellt eine Gefahr dar, auch wenn das Gerät
ausgeschaltet ist.
• Sie dürfen das Dampfbügeleisen keinesfalls in eine Flüssigkeit tauchen und keine Flüssigkeiten in das Gerätegehäuse des Dampfbügeleisens gelangen lassen. Sie dürfen das Gerät keiner Feuchtigkeit aussetzen und nicht im Freien
benutzen. Falls doch einmal Flüssigkeit in das Gerätegehäuse gelangt, ziehen
Sie sofort den Netzstecker des Geräts aus der Netzsteckdose und lassen Sie
es von qualifiziertem Fachpersonal reparieren.
• Sie dürfen das Gerätegehäuse des Dampfbügeleisens nicht öffnen. Lassen Sie
das defekte Dampfbügeleisen nur von qualifiziertem Fachpersonal reparieren.
• Benutzen Sie das Dampfbügeleisen auf keinen Fall, wenn es sichtbare Beschädigungen aufweist, heruntergefallen ist, oder Wasser ausläuft. Lassen Sie es
erst von qualifiziertem Fachpersonal reparieren.
• Benutzen Sie das Gerät nicht weiter, wenn der Knickschutz am Netzkabel beschädigt ist!
• Dieses Gerät kann von Kindern ab 8 Jahren und älter und von Personen mit reduzierten physischen, sensorischen oder mentalen Fähigkeiten oder Mangel
an Erfahrung und/oder Wissen benutzt werden, wenn sie beaufsichtigt oder
bezüglich des sicheren Gebrauchs des Gerätes unterwiesen wurden und die
daraus resultierenden Gefahren verstanden haben. Kinder dürfen nicht mit
dem Gerät spielen. Reinigung und Benutzer-Wartung dürfen nicht durch Kinder
ohne Beaufsichtigung durchgeführt werden.
- 34 -

Achtung! Sachschaden!
• Falls die Pflegehinweise in der Kleidung das
Bügeln untersagen (Symbol ), dürfen Sie das
Kleidungsstück nicht bügeln. Sie könnten das
Kleidungsstück andernfalls beschädigen.
• Sie dürfen ausschließlich Leitungswasser/destilliertes Wasser in den Wassertank einfüllen. Andernfalls beschädigen Sie das Dampfbügeleisen.
• Sie dürfen das Dampfbügeleisen nicht mit Lösungsmitteln, Alkohol oder scheuernden Reinigungsmitteln
säubern. Andernfalls könnten Sie es beschädigen.
Vor dem ersten Gebrauch
• Entnehmen Sie das Dampfbügeleisen aus der
Verpackung.
• Entfernen Sie alle Aufkleber und Folienteile vom
Dampfbügeleisen und der Bügelsohle q.
Erstickungsgefahr!
Plastiktüten können eine Gefahr darstellen. Um Erstickungsgefahr zu vermeiden, bewahren Sie die
Plastiktüten außerhalb der Reichweite von Babies
und Kleinkindern auf.
• Füllen Sie Wasser in den Wassertank (siehe Kapitel „Wassertank befüllen“).
• Stecken Sie den Netzstecker in eine Netzsteckdose, die der auf dem Typenschild
angegebenen Spannung entspricht.
• Stellen Sie den Temperaturregler 8 in die
Position „MAX“.
• Heizen Sie das Dampfbügeleisen einige
Minuten auf der höchsten Stufe auf.
• Betätigen Sie die Taste für den Dampfstoß 4
einige Male, so dass Dampf aus der Bügelsohle q austritt.
• Bügeln Sie dann ein nicht mehr benötigtes Stück
Stoff, um eventuelle Unreinheiten von der
Bügelsohle q zu beseitigen.
Wassertank befüllen
• Halten Sie das Bügeleisen schräg in der Hand.
• Öffnen Sie den Deckel der Einfüllöffnung für den
Wassertank 2.
• Füllen Sie mit dem Messbecher e Leitungswas-
ser bis höchstens zur „MAX“-Markierung in den
Wassertank.
• Schließen Sie den Deckel der Einfüllöffnung für
den Wassertank 2.
Hinweis:
Sollte das Leitungswasser Ihres Wohnortes zu hart
sein, empfiehlt es sich, das Leitungswasser mit destilliertem Wasser zu mischen. Ansonsten können die
Düsen für die Dampfstoß-Funktion vorzeitig verkalken.
Zur Verlängerung der optimalen Dampfstoß-Funktion mischen Sie das Leitungswasser mit destilliertem
Wasser entsprechend der Tabelle.
Anteil destillier-
Wasserhärte
sehr
weich/weich
mittel 1 : 1
hart 2 : 1
sehr hart 3 : 1
Die Wasserhärte können Sie beim örtlichem
Wasserwerk erfragen.
tes Wasser zu
Leitungswasser
0
- 35 -

Anschließen und Bügeln
Trockenbügeln ohne Dampf können Sie bei allen
Temperaturen, Dampfbügeln ist erst ab dem Einstellbereich am Temperaturregler 8 möglich.
• Stecken Sie den Netzstecker in eine
Netzsteckdose.
Die Kontrollleuchte für die Temperatur 7 leuchtet.
Wenn die Kontrollleuchte 7 erlischt, ist die
eingestellte Temperatur erreicht.
• Warten Sie, bis die Kontrollleuchte für die
Temperatur 7 erlischt.
• Zum Befeuchten der Wäsche drücken Sie auf
die Taste für die Sprühfunktion 5.
Achtung! Sachschaden!
Falls die Pflegehinweise in der Kleidung das Bügeln
untersagen (Symbol ), dürfen Sie das Kleidungsstück nicht bügeln. Sie könnten das Kleidungsstück
anderenfalls beschädigen.
• Prüfen Sie die Pflegehinweise auf den Schildern
in der Kleidung, ob und bei welcher Temperatureinstellung das Kleidungsstück zum Bügeln geeignet ist.
Symbol
Temperaturregler 8
• Stellen Sie die geeignete Temperatureinstellung
mit dem Temperaturregler 8 ein.
Stoffart
Acryl, Rayon
Seide, Wolle,
Polyestermischgewebe
Baumwolle, Leinen,
Viskose
Diese Funktion ist für sehr trockene, stark knittrige
Wäsche geeignet.
Dampfbügeln
• Stellen Sie mit dem Dampfregler 3 die
gewünschte Dampfstärke ein.
• Der Temperaturregler 8 muss mindestens bis in
den Einstellbereich gedreht sein. Ansonsten kann kein Dampf erzeugt werden.
Bügeln mit Dampfstoß
Der Dampfstoß eignet sich besonders, um schwer
zugängliche Bereiche der Wäsche zu glätten.
• Heben Sie das Dampfbügeleisen leicht an.
• Drücken Sie für einen Dampfstoß die Taste für
den Dampfstoß 4.
Dampfbügeleisen
vorübergehend abstellen
Hinweis:
Stellen Sie das Bügeleisen während des Aufheizens
immer auf den Sockel 0.
Wenn Sie das Bügeleisen während des Aufheizens
auf die Bügelsohle q stellen und nicht bewegen,
wird nach 30 Sekunden die automatische Abschaltung aktiviert (siehe Kapitel “Automatische Abschaltung”) und das Gerät stoppt das Heizen.
Brandgefahr!
Lassen Sie das heiße, am Stromnetz angeschlossene oder eingeschaltete Dampfbügeleisen niemals
unbeaufsichtigt.
• Stellen Sie den Temperaturregler 8 in die
Position „MIN“.
• Stellen Sie das Dampfbügeleisen nur auf dem
Sockel 0 ab.
- 36 -
Dampfbügeleisen außer Betrieb
nehmen
• Ziehen Sie den Netzstecker aus der
Netzsteckdose.
• Leeren Sie den Wassertank und reinigen Sie die
Bügelsohle q.
• Stellen Sie das abgekühlte Dampfbügeleisen auf
den Sockel 0.
Wenn das Bügeleisen auf dem Sockel 0 steht und
es für ca. 8 Minuten nicht bewegt wird, erklingen
Warnsignale und die Kontrollleuchte für die automatische Abschaltung 6 blinkt. Das Heizen des Bü-
geleisens wird gestoppt. Um die automatische Abschaltung zu deaktivieren, heben Sie das
Bügeleisen an und schwenken Sie es leicht hin und
her. Die Kontrollleuchte für die automatische Abschaltung 6 erlischt und das Bügeleisen heizt wieder auf.
Tropf-Stop-Funktion
Bei herkömmlichen Dampfbügeleisen kann es vorkommen, dass bei zu geringer Bügeltemperatur
Wasser aus der Bügelsohle q tropft. Dieses Bügeleisen weist jedoch ein neues Ausstattungsmerkmal,
die TROPF-STOP-Funktion auf. Das Bügeleisen
schaltet den Dampfstoß bei niedrigen Temperaturen
automatisch ab. Wenn dies geschieht, ist ein „Klick”
zu hören. Stellen Sie dann mit dem Temperaturregler 8 die geeignete Temperatur ein. Sobald
diese erreicht ist, wird die Dampferzeugung
fortgesetzt.
Automatische Abschaltung
Das Bügeleisen ist mit einer automatischen Abschaltung ausgestattet. Diese stoppt das Heizen des Bügeleisens.
Wenn das Bügeleisen auf der Bügelsohle q steht
und es für ca. 30 Sekunden nicht bewegt wird, erklingen Warnsignale und die Kontrollleuchte für die
automatische Abschaltung 6 blinkt. Das Heizen
des Bügeleisens wird gestoppt. Um die automatische Abschaltung zu deaktivieren, heben Sie das
Bügeleisen an und schwenken Sie es leicht hin und
her. Die Kontrollleuchte für die automatische Abschaltung 6 erlischt und das Bügeleisen heizt wieder auf.
Hinweis:
Die automatische Abschaltung ersetzt nicht das Ziehen des Netzsteckers! Sie dient lediglich der Reduzierung der Brandgefahr, wenn das Bügeleisen versehentlich nicht ausgeschaltet wird!
Reinigen
Selbstreinigungs-Funktion
• Füllen Sie den Wassertank bis zur Markierung
„MAX“.
• Stecken Sie den Netzstecker in die Netzsteckdose.
• Stellen Sie den Temperaturregler 8 auf Position
„MAX“.
• Stellen Sie den Dampfregler 3 auf maximale
Dampfstärke.
• Lassen Sie das Dampfbügeleisen aufheizen, bis
die Kontrollleuchte für die Temperatur 7 erlischt
und erneut aufleuchtet.
• Halten Sie das Dampfbügeleisen waagerecht
über eine Auffangschüssel.
• Drücken Sie die Taste Selfclean w und halten
Sie diese gedrückt. Bewegen Sie das Dampfbügeleisen dabei ein wenig hin und her.
Dampf und kochendes Wasser tritt aus den
Dampfaustrittslöchern in der Bügelsohle q aus.
Eventuell vorhandene Verunreinigungen werden
dabei herausgespült.
• Lassen Sie die Taste Selfclean w los, sobald das
Wasser im Wassertank aufgebraucht ist.
- 37 -

• Trocknen Sie die Bügelsohle q gründlich. Führen Sie dazu die Bügelsohle q einige Male
über ein Handtuch oder altes Stück Stoff hin und
her.
• Lassen Sie das Dampfbügeleisen abkühlen,
bevor Sie es zur Seite stellen.
Gehäuse und Bügelsohle
Lebensgefahr!
Ziehen Sie vor der Reinigung den Netzstecker. Es
besteht die Gefahr eines elektrischen Schlages!
Verletzungsgefahr!
Lassen Sie das Gerät vor dem Reinigen abkühlen.
Ansonsten besteht Verbrennungsgefahr!
Achtung! Sachschaden!
Benutzen Sie keine aggressiven, scheuernden oder
chemischen Reinigungsmittel. Diese können die
Oberfläche angreifen und zu irreparablen Schäden
am Gerät führen.
• Reinigen Sie das Gehäuse nur mit einem
weichen, trockenem Tuch.
• Reinigen Sie die Bügelsohle q mit einem leicht
mit Wasser befeuchtetem Tuch und einem milden, nicht scheuerndem Reinigungsmittel.
Aufbewahren
Fehlfunktionen beseitigen
Das Dampfbügeleisen stößt keinen oder sehr
wenig Dampf aus:
Der Vorrat an Leitungswasser im Dampfbügeleisen
ist erschöpft. Füllen Sie den Wassertank mit
Leitungswasser (Siehe „Wassertank befüllen“).
Das Dampfbügeleisen erhitzt sich nicht:
• Das Bügeleisen ist nicht angeschlossen oder
nicht eingeschaltet. Stecken Sie den Netzstecker
in die Netzsteckdose und stellen mit dem Temperaturregler 8 die gewünschte Temperatur ein.
• Das Dampfbügeleisen ist defekt. Lassen Sie das
Dampfbügeleisen von qualifiziertem Fachpersonal reparieren.
Entsorgen
Werfen Sie das Gerät keinesfalls in den
normalen Hausmüll. Dieses Produkt
unterliegt der europäischen Richtlinie
2012/19/EU.
Entsorgen Sie das Gerät über einen zugelassenen
Entsorgungsbetrieb oder über Ihre kommunale
Entsorgungseinrichtung.
Beachten Sie die aktuell geltenden Vorschriften.
Setzen Sie sich im Zweifelsfall mit Ihrer Entsorgungseinrichtung in Verbindung.
Bewahren Sie das abgekühlte Gerät an einem sauberen, staubfreien und trockenem Ort auf.
Führen Sie alle Verpackungsmaterialien
einer umweltgerechten Entsorgung zu.
- 38 -

Garantie und Service
Sie erhalten auf dieses Gerät 3 Jahre Garantie ab
Kaufdatum. Das Gerät wurde sorgfältig produziert
und vor Anlieferung gewissenhaft geprüft.
Bitte bewahren Sie den Kassenbon als Nachweis
für den Kauf auf. Bitte setzen Sie sich im Garantiefall mit Ihrer Servicestelle telefonisch in Verbindung.
Nur so kann eine kostenlose Einsendung Ihrer Ware
gewährleistet werden.
Die Garantieleistung gilt nur für Material- oder
Fabrikationsfehler, nicht aber für Transportschäden,
Verschleißteile oder für Beschädigungen an zerbrechlichen Teilen, z. B. Schalter oder Akkus. Das
Produkt ist lediglich für den privaten und nicht für
den gewerblichen Gebrauch bestimmt.
Bei missbräuchlicher und unsachgemäßer Behandlung, Gewaltanwendung und bei Eingriffen, die
nicht von unserer autorisierten Service-Niederlassung vorgenommen wurden, erlischt die Garantie.
Ihre gesetzlichen Rechte werden durch diese
Garantie nicht eingeschränkt.
Die Garantiezeit wird durch die Gewährleistung
nicht verlängert. Dies gilt auch für ersetzte und reparierte Teile. Eventuell schon beim Kauf vorhandene
Schäden und Mängel müssen sofort nach dem
Auspacken gemeldet werden, spätestens aber zwei
Tage nach Kaufdatum. Nach Ablauf der Garantiezeit anfallende Reparaturen sind kostenpflichtig.
Service Deutschland
Tel.: 0800 5435 111
(Kostenfrei aus dem dt. Festnetz/Mobilfunknetz)
E-Mail: kompernass@lidl.de
IAN 273029
Service Österreich
Tel.: 0820 201 222 (0,15 EUR/Min.)
E-Mail: kompernass@lidl.at
IAN 273029
Service Schweiz
Tel.: 0842 665566 (0,08 CHF/Min.,
Mobilfunk max. 0,40 CHF/Min.)
E-Mail: kompernass@lidl.ch
IAN 273029
Erreichbarkeit Hotline:
Montag bis Freitag von 8:00 Uhr - 20:00 Uhr (MEZ)
Importeur
KOMPERNASS HANDELS GMBH
BURGSTRASSE 21
44867 BOCHUM
GERMANY
www.kompernass.com
- 39 -

KOMPERNASS HANDELS GMBH
BURGSTRASSE 21
44867 BOCHUM
DEUTSCHLAND / GERMANY
www.kompernass.com
Versione delle informazioni · Estado das informações
Last Information Update · Stand der Informationen:
08 / 2015 · Ident.-No.: SDB2200D2-072015-1
IAN 273029
5
 Loading...