

Page 1

STEAM MOP SDM 1500 D2
STEAM MOP
Operating instructions
DAMPFMOPP
Bedienungsanleitung
IAN 331382_1907
ΣΦΟΥΓΓΑΡΊΣΤΡΑ ΑΤΜΟΥ
Οδηүίες χρήσης
Page 2

Before reading, unfold the page containing the illustrations and familiarise yourself with all functions of
the device.
Πριν ξεκινήσετε την ανάγνωση, ανοίξτε τη σελίδα με τις εικόνες και εξοικειωθείτε με όλες τις λειτουργίες
της συσκευής.
Klappen Sie vor dem Lesen die Seite mit den Abbildungen aus und machen Sie sich anschließend mit allen
Funktionen des Gerätes vertraut.
GB / IE / NI / CY Operating instructions Page 1
GR / CY Οδηүίες χρήσης Σελίδα 19
DE / AT / CH Bedienungsanleitung Seite 37
Page 3

A
B
C
Page 4

Contents
Introduction ....................................................2
Information concerning these operating instructions ...............................2
Copyright ................................................................2
Intended use .............................................................2
Safety instructions ..............................................3
Operating components ...........................................6
Unpacking and installation .......................................7
Safety instructions .........................................................7
Package contents and transport inspection ......................................7
Unpacking ...............................................................7
Disposal of packaging materials ..............................................8
Assembling the appliance ........................................8
Handling and operation ..........................................9
Filling with water ..........................................................9
Operation ..............................................................10
After use. . . . . . . . . . . . . . . . . . . . . . . . . . . . . . . . . . . . . . . . . . . . . . . . . . . . . . . . . . . . . . . . 12
Cleaning and care ............................................. 12
Maintenance/changing the filter ................................. 13
Troubleshooting .............................................. 13
Storage ..................................................... 14
Disposal ..................................................... 14
Appendix .................................................... 14
Technical data ...........................................................14
Kompernass Handels GmbH warranty ........................................15
Service .................................................................17
Importer ................................................................17
Ordering spare parts ......................................................18
SDM 1500 D2
GB│IE│NI│CY
│
1 ■
Page 5

Introduction
Information concerning these operating instructions
Congratulations on the purchase of your new appliance.
You have selected a high-quality product. The operating instructions are part of
this product. They contain important information on safety, usage and disposal.
Before using the product, familiarise yourself with all operating and safety
instructions. Use the product only as described and for the specified areas of
application. Please also pass on these operating instructions to any future owner.
Copyright
This documentation is protected by copyright.
Any copying or reproduction, including in the form of extracts, or any
reproduction of images (even in a modified state), is permitted only with the
written authorisation of the manufacturer.
Intended use
This appliance is intended exclusively for cleaning indoor floors. The appliance is
not intended for any other purpose, nor for use beyond the scope described. The
appliance is not intended for use in commercial or industrial environments.
The manufacturer accepts no responsibility for damage caused by failure to
observe these instructions, improper use or repairs, unauthorised modifications or
the use of unapproved replacement parts. The operator bears sole liability.
■ 2 │ GB
│IE│NI│
CY SDM 1500 D2
Page 6

Safety instructions
RISK OF ELECTRIC SHOCK!
► Connect the appliance only to mains power sockets
supplying a mains power voltage of 220 – 240V ∼,
50/60 Hz.
► In the event of operating malfunctions, and before cleaning
the appliance, disconnect the plug from the mains power
socket.
► To disconnect the power cable, always pull the plug from
the socket, do not pull the power cable itself.
► Do not kink or crush the power cable, and route the cable
so that it cannot be stepped on or tripped over.
► To avoid risks, arrange for defective plugs and/or power
cables to be replaced at once by qualified technicians or
our Customer Service Department.
► Make sure that the power cable does not become wet or
damp during use. Route the cable in such a way that it
cannot be crushed or damaged.
► To prevent risks, stop using the appliance immediately if it is
damaged.
► Disconnect the appliance from the mains power socket before
filling it with water, changing accessories or cleaning it.
Use the appliance only in dry indoor areas, not
outdoors.
► Never submerse the appliance in water or other liquids!
► Never aim the steam jet directly at electrical appliances or
equipment which contains electrical components, such as
the interior of ovens.
► Operate the appliance only with dry hands and never
without shoes (i.e. not barefoot). This will help reduce the
effect of an electric shock in the event of a malfunction.
► Never aim the appliance at moisture-sensitive objects.
SDM 1500 D2
GB│IE│NI│CY
│
3 ■
Page 7

RISK OF ELECTRIC SHOCK!
► This appliance may be used by persons with limited
physical, sensory or mental capabilities or lack of
experience and knowledge, provided that they are under
supervision or have been told how to use the appliance
safely and are aware of the potential risks. Children must
not use the appliance as a plaything. Cleaning and user
maintenance tasks may not be carried out by children unless
they are supervised.
WARNING! RISK OF INJURY!
► Some parts of the appliance may become hot during use!
There is a risk of scalding!
► Allow the accessories used to cool down before dismantling
them.
► Use only the original accessory parts for this appliance.
Other accessories may not meet the safety requirements.
► The appliance may not be used if it has been dropped, if there
are any obvious signs of physical damage or if it is leaking.
► The appliance must be kept out of the reach of children if it
is switched on or is cooling down.
► Never direct the steam at people or animals. Hot steam can
cause serious injuries!
► Always pull the plug out of the power socket during each
break in use, as well as after use and before any cleaning.
RISK OF BURNS!
Caution! Hot surface!
This symbol warns you about escaping steam.
Please follow the safety instructions!
■ 4 │ GB
│IE│NI│
CY SDM 1500 D2
Page 8

CAUTION! MATERIAL DAMAGE!
► Use the appliance only on floors made of marble, stone,
tile, parquet flooring or hardwood that have been treated
and are impervious to water.
► Never use the appliance …
– … on untreated or permeable floors,
– … on glass surfaces,
– … on soft plastic surfaces,
– … on floors that have been treated with wax,
– … on carpets with wool content.
► Always comply with the cleaning instructions of the carpet
manufacturer. Before cleaning, check also whether the
carpet is suitable for steam cleaning. Use the appliance
only on parquet floors if they have been hard-sealed.
► Do not leave the appliance standing on wooden floors for
any length of time while it is switched on. This might cause
the wood to swell.
► Do not operate the appliance with an empty water tank.
Otherwise, the pump could run dry and overheat.
► Do not use an external timer switch or a separate remote
control system to operate the appliance.
► Do not fill the water tank with any cleaning agents or other
additives.
► Never leave the appliance unattended during operation.
► Do not use the appliance outdoors.
► Ensure that the appliance, the power cable and the plug do
not come into contact with heat sources such as hotplates or
naked flames.
SDM 1500 D2
GB│IE│NI│CY
│
5 ■
Page 9

Operating components
Figure A:
1 “Handle” release button
2 Carrying handle
3 Main unit
4 Connection nozzle
5 Steam foot
6 Pad (white)
7 Filter
8 Water tank
9 “Water tank” release button
0 POWER control lamp
q Red control lamp “high steam level”
w Green control lamp “low steam level”
e MODE button
r “Steam” button
Figure B:
t Notch
z Upper cable hook
u On/off switch
i Lower cable hook
Figure C:
o Pad (blue)
p Carpet ring
a Carpet ring release aid
■ 6 │ GB
│IE│NI│
CY SDM 1500 D2
Page 10

Unpacking and installation
Safety instructions
WARNING!
During the first use of the appliance there is a risk
of injury and/or damage to property!
To avoid risks, observe the following safety instructions:
► Do not allow children to play with packaging materials.
There is a risk of suffocation.
Package contents and transport inspection
The appliance is supplied with the following components as standard (see
fold-out page):
● Main unit
● Steam foot
● Carpet cleaning ring
● 2 pads (blue and white)
● Operating instructions
NOTE
► Check the package for completeness and for signs of visible damage.
► If the delivery is incomplete or damage has occurred as a result of defective
packaging or during transport, contact the service hotline (see section
Service).
Unpacking
♦ Remove all parts of the appliance and the operating instructions from the box.
♦ Remove all packaging materials and any films and labels.
SDM 1500 D2
GB│IE│NI│CY
│
7 ■
Page 11

Disposal of packaging materials
The packaging materials have been selected for their environmental friendliness
and ease of disposal and are therefore recyclable.
Dispose of packaging materials that are no longer needed in accordance with
applicable local regulations.
Dispose of the packaging in an environmentally friendly manner.
Note the labelling on the packaging and separate the packaging material
components for disposal if necessary. The packaging material is labelled with
abbreviations (a) and numbers (b) with the following meanings:
1–7: Plastics,
20–22: Paper and cardboard,
80–98: Composites.
Assembling the appliance
♦ Push the main unit 3 onto the connection nozzle 4 on the steam foot 5 and
press the main unit 3 down until the round catch clicks into place.
♦ Select the appropriate pad 6/o for the surface being cleaned:
– the blue pad o for carpets and sensitive surfaces, such as parquet flooring,
– the white pad 6 for more robust surfaces, such as tiled floors.
♦ Attach a pad 6/o from below onto the steam foot 5.
NOTE
► If you intend to clean carpeting with the steam mop, fit the blue pad o and
place the steam foot 5 on the carpet ringp. Ensure that the carpet ring
unlocking aid a is in line with the connection nozzle 4. Push the steam
foot 5 onto the carpet ring p so that it clicks audibly into place. This will
allow the blue pado to glide over the carpet.
► To remove the carpet ring p, press your foot onto the carpet ring release
aid a and pull the steam foot 5 carefully off the carpet ring p.
■ 8 │ GB
│IE│NI│
CY SDM 1500 D2
Page 12

Handling and operation
This section provides you with important information on handling and using the
appliance.
Filling with water
CAUTION! PROPERTY DAMAGE!
► Never operate the appliance without water in the water tank 8!
The pump could overheat and be damaged!
► Do not fill the water tank 8 with any cleaning agents or other additives.
1) Push the “Water tank” release button 9 upwards and simultaneously
remove the water tank 8.
2) Turn the water tank 8 and unscrew the cap.
3) Fill the water tank 8 with tap water up to the MAX mark.
NOTE
If the mains water in your location is rated as hard, it is recommended
that you mix the mains water with some distilled water. Otherwise, the
jets for the steam blast function could calcify (become blocked)
prematurely.
To extend the optimal steam blast function, mix mains water with distilled
water according to the table:
4) Attach and hand-tighten the clamp.
5) Turn the water tank 8 around again and place it back onto the main unit 3:
SDM 1500 D2
Water hardness
very soft/soft 0
medium 1:1
hard 2:1
very hard 3:1
The water hardness level can be queried at your local water works.
First fit the lower part into the main unit 3 and then flip the top part into the
device. Push it firmly into place so that the water tank 8 audibly clicks into
place and sits firmly on the main unit 3.
Ratio of distilled
water to tap water
GB│IE│NI│CY
│
9 ■
Page 13

Operation
CAUTION! PROPERTY DAMAGE!
NOTE
1) Flip the handle upwards so that the “Handle” release button 1 clicks into
2) If not already done: Completely unwind the power cable from the cable
3) Run the cable through the notch t on the rear of the handle so that the
4) Insert the plug into the mains power socket.
5) Set the on/off switch u to “I”. The on/off switch u lights up, the red
6) Use the MODE button e to select the desired level of steam generation:
►
If you are not sure whether the floor is suitable for cleaning, please carry
out a tolerance test using a concealed part of the floor.
► Always comply with the cleaning instructions of the carpet manufacturer.
Before cleaning, check also whether the carpet is suitable for steam
cleaning.
► Never use the appliance without a pad 6/o on the steam foot 5.
Otherwise the floor could get scratched!
► Use the carpet ring p only for cleaning carpets. Do not use the carpet
ring p to clean hard floors.
► Never operate the appliance without water in the water tank 8!
The pump could overheat and be damaged!
► Before you clean the floor with the steam mop, we recommend that you
vacuum the floor to remove any loose particles of dirt.
Once the appliance is assembled and filled with water:
place.
hooks z/i. To facilitate the unwinding of the cable, you can flip down the
upper cable hook z by pulling it out a little and turning it at the same time.
cable does not hang down into the working area.
POWER control lamp 0 flashes. As soon as the appliance has warmed up
(after approx. 25 seconds), the red POWER control lamp 0 lights up
continuously.
– Press 1 x: low steam level, green control lamp w lights up.
– Press 2 x: high steam level, red control lamp q lights up.
– Press 3 x: no steam, standby, POWER control lamp 0 lights up.
■ 10 │ GB
│IE│NI│
CY SDM 1500 D2
Page 14

NOTE
►
We recommend the high steam level especially for moisture- and
heat-resistant floor coverings, such as tiles.
► We recommend the low steam level especially for moisture- and
heat-sensitive floor coverings, such as parquet flooring.
7) Press the “Steam” button r. The appliance starts generating steam and,
after a short time, steam is emitted through the pad 6/o.
8) Wipe over the desired area.
NOTE
► Once the water tank 8 has been pumped empty, the pump will continue
running a little while until the empty water tank 8 is indicated by the
simultaneous flashing of the red control lamp q, the green control lamp w
and POWER control lamp 0.
If the water tank 8 becomes empty during use:
– Press the “Steam” button r again to stop steam production.
– Set the on/off switch u to “O”.
– Remove the water tank 8, fill it and replace the water tank 8 as
described in the section “Filling with water”.
– Set the on/off switch u to “I”.
– Select the desired steam level as described above and press the
“Steam” button r.
9) When you are finished treating all of the surfaces, press the “Steam”
button r to stop steam production.
10) Set the on/off switch u to “O”. The POWER control lamp 0 goes out.
11) Remove the power plug from the mains power socket.
NOTE
► If you see streaks on the floor after cleaning with the appliance, this may be
due to the previously used cleaning fluids. Simply clean the floor again
using the steam mop. The smears should now be gone.
SDM 1500 D2
GB│IE│NI│CY
│
11 ■
Page 15

After use
1) Allow the appliance to cool down.
2) Remove the pad 6/o.
3) Remove the water tank 8 from the appliance and empty it.
4) Pull the upper cable hook z out a little and turn it back upwards.
Wind the cable back around the two cable hooks z/i.
Fix the end of the power cable using the cable clip located on the cable.
Cleaning and care
RISK OF ELECTRIC SHOCK!
► Always remove the mains power plug before cleaning the appliance!
WARNING! RISK OF INJURY!
► Allow the appliance to cool down before cleaning it. Risk of burns!
CAUTION! PROPERTY DAMAGE
► When cleaning the surfaces use neither abrasive or chemical cleaners,
nor sharp or scratchy objects.
■ Empty the water tank 8 after every use.
■ After each use, remove the pad 6/o from the steam foot 5 and wash it out.
■ Note the following washing instructions when you wash the pad 6/o in
the washing machine:
■ 12 │ GB
Wash at max. 60°C
Do not bleach
Do not tumble dry
Do not iron
■ If necessary, wipe the appliance with a damp cloth. For stubborn soiling use
a mild detergent on the cloth.
│IE│NI│
CY SDM 1500 D2
Page 16

Maintenance/changing the filter
After 4 – 6 months or approximately 100 cleaning cycles (one cycle corresponds
to one water tank filling), you will need to change the filter 7. Please contact
our Service Department for replacement filters.
RISK OF ELECTRIC SHOCK!
► Before changing the filter 7, always pull out the mains plug!
1) To remove the filter 7, first remove the water tank 8 from the appliance.
2) Pull the filter 7 upwards out of the appliance.
3) Insert the new filter 7.
4) Replace the water tank 8.
Troubleshooting
Programme Possible causes Possible solutions
The appliance is not working.
The appliance
produces no steam.
The pump makes unusually
loud noises.
A whitish edge forms on the
floor when the appliance stops
briefly during operation.
The plug is not
connected.
The "Steam" button r
has not been pressed.
There is no water in the
water tank 8.
The filter 7 is blocked. Change the filter 7.
No steam setting has
been selected.
There is no water in the
water tank 8.
Lime has collected.
Connect the appliance to a
mains power socket.
Press the "Steam" button r.
Fill the water tank 8 with tap
water.
Use the MODE button e to
select the desired level of steam.
Fill the water tank 8 with tap
water.
Wipe the limescale away with a
damp cloth. If necessary, add a
little descaler onto the cloth.
SDM 1500 D2
GB│IE│NI│CY
│
13 ■
Page 17

Storage
■ Fold the handle by pressing the “Handle” release button 1.
■ Pull the upper cable hook z out a little and turn it back upwards.
Wind the cable back around the two cable hooks z/i.
■ Carry the appliance using the carrying handle 2.
■ Store the appliance in a dry and dust-free location.
Disposal
Under no circumstances should you dispose of the appliance
with the normal household waste. This product is subject to the
provisions of European Directive 2012/19/EU-WEEE (Waste
Electrical and Electronic Equipment).
Dispose of the appliance via an approved waste disposal company or your
municipal waste disposal facility. Please observe applicable regulations. Please
contact your waste disposal facility if you are in any doubt.
Your local community or municipal authorities can provide information on how to
dispose of the worn-out product.
Appendix
Technical data
■ 14 │ GB
Voltage supply 220 – 240 V ∼ (alternating current), 50/60 Hz
Power consumption 1370 –1630 W
Protection rating
│IE│NI│
CY SDM 1500 D2
IPX4 (Protected against water splashes from any
direction.)
Page 18

Information on the pads 6/o
Material composition
White pad 6: 100% polyester
Blue pad o: 80% polyester, 20% cotton
Wash at max. 60°C
Do not bleach
Do not tumble dry
Do not iron
Kompernass Handels GmbH warranty
Dear Customer,
This appliance has a 3-year warranty valid from the date of purchase. If this
product has any faults, you, the buyer, have certain statutory rights. Your
statutory rights are not restricted in any way by the warranty described below.
Warranty conditions
The warranty period starts on the date of purchase. Please keep your receipt in a
safe place. This will be required as proof of purchase.
If any material or manufacturing fault occurs within three years of the date of
purchase of the product, we will either repair or replace the product for you or
refund the purchase price (at our discretion). This warranty service requires that
you present the defective appliance and the proof of purchase (receipt) within
the three-year warranty period, along with a brief written description of the fault
and of when it occurred.
If the defect is covered by the warranty, your product will either be repaired or
replaced by us. The repair or replacement of a product does not signify the
beginning of a new warranty period.
Warranty period and statutory claims for defects
The warranty period is not prolonged by repairs effected under the warranty.
This also applies to replaced and repaired components. Any damage and
defects present at the time of purchase must be reported immediately after
unpacking. Repairs carried out after expiry of the warranty period shall be
subject to a fee.
SDM 1500 D2
GB│IE│NI│CY
│
15 ■
Page 19
Scope of the warranty
This appliance has been manufactured in accordance with strict quality
guidelines and inspected meticulously prior to delivery.
The warranty covers material faults or production faults. The warranty does not
extend to product parts subject to normal wear and tear or to fragile parts which
could be considered as consumable parts such as switches, batteries or parts
made of glass.
The warranty does not apply if the product has been damaged, improperly used
or improperly maintained. The directions in the operating instructions for the
product regarding proper use of the product are to be strictly followed. Uses and
actions that are discouraged in the operating instructions or which are warned
against must be avoided.
This product is intended solely for private use and not for commercial purposes.
The warranty shall be deemed void in cases of misuse or improper handling, use
of force and modifications / repairs which have not been carried out by one of
our authorised Service centres.
Warranty claim procedure
To ensure quick processing of your case, please observe the following instructions:
■ Please have the till receipt and the item number (e.g. IAN12345) available
as proof of purchase.
■ You will find the item number on the type plate on the product, an engraving
on the product, on the front page of the operating instructions (below left) or
on the sticker on the rear or bottom of the product.
■ If functional or other defects occur, please contact the service department
listed either by telephone or by e-mail.
■ You can return a defective product to us free of charge to the service address
that will be provided to you. Ensure that you enclose the proof of purchase
(till receipt) and information about what the defect is and when it occurred.
You can download these instructions along with many other manuals,
product videos and installation software at www.lidl-service.com.
This QR code will take you directly to the Lidl service page
(www.lidl-service.com) where you can open your operating instructions
by entering the item number (IAN) 123456.
■ 16 │ GB
│IE│NI│
CY SDM 1500 D2
Page 20
Service
Service Great Britain
Service Ireland
CY
Service Cyprus
Importer
Tel.: 0800 404 7657
E-Mail: [email protected]
Tel.: 1890 930 034
(0,08 EUR/Min., (peak))
(0,06 EUR/Min., (off peak))
E-Mail: [email protected]
Tel.: 8009 4409
E-Mail: [email protected]
IAN 331382_1907
Please note that the following address is not the service address. Please use the
service address provided in the operating instructions.
KOMPERNASS HANDELS GMBH
BURGSTRASSE 21
44867 BOCHUM
GERMANY
www.kompernass.com
SDM 1500 D2
GB│IE│NI│CY
│
17 ■
Page 21
Ordering spare parts
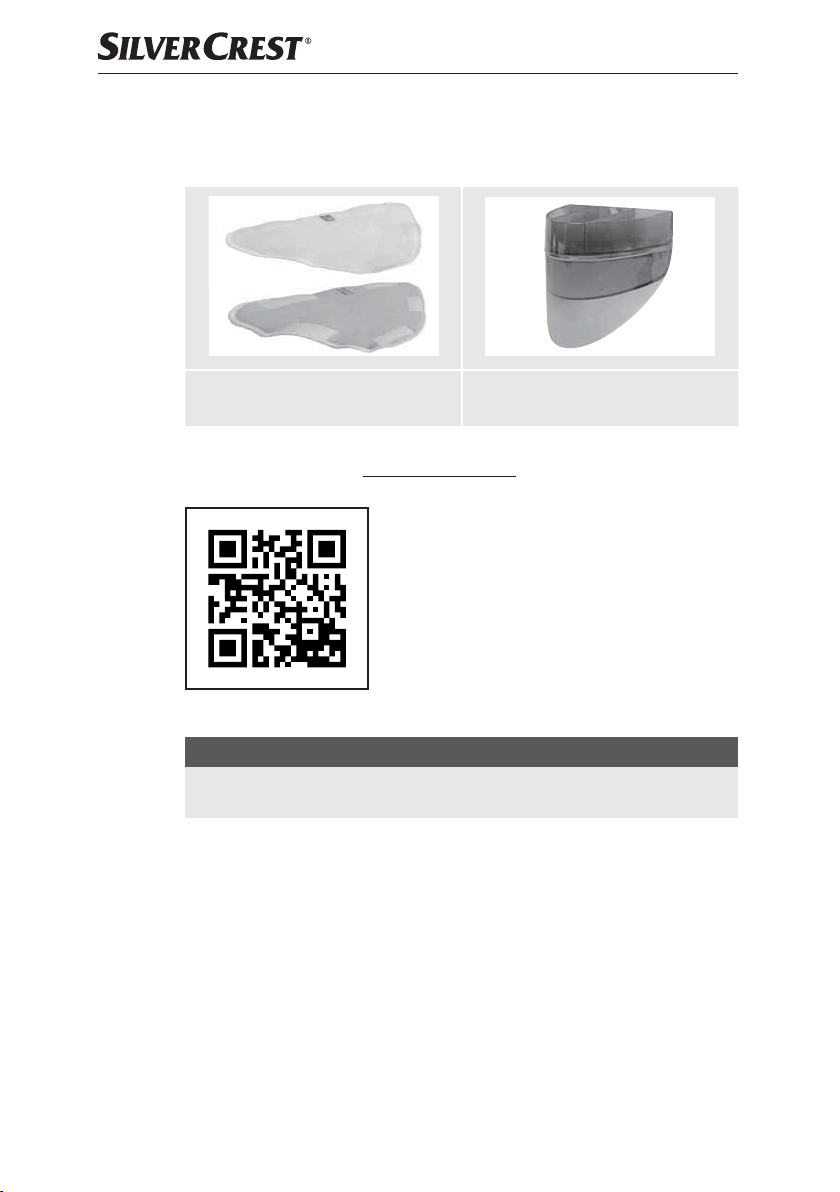
You can order the following replacement parts for product SDM 1500 D2:
► 2 x Replacement pad
(blue and white)
Order the replacement parts via the Service Hotline (see section Service) or
simply visit our website at www.kompernass.com.
NOTE
► Have the IAN number of the appliance ready (can be found on the cover of
these operating instructions) when you place your order.
► 1 x Filter
■ 18 │ GB
│IE│NI│
CY SDM 1500 D2
Page 22
Περιεχόμενα
Εισαγωγή .................................................... 20
Πληροφορίες για αυτές τις οδηγίες χρήσης ....................................20
Πνευματικά δικαιώματα ....................................................20
Προβλεπόμενη χρήση .....................................................20
Υποδείξεις ασφαλείας .......................................... 21
Στοιχεία χειρισμού ............................................ 24
Αποσυσκευασία και σύνδεση ................................... 25
Υποδείξεις ασφαλείας .....................................................25
Παραδοτέος εξοπλισμός και έλεγχος μεταφοράς ...............................25
Αποσυσκευασία ..........................................................25
Απόρριψη της συσκευασίας ................................................26
Συναρμολόγηση συσκευής ..................................... 26
Χειρισμός και λειτουργία ....................................... 27
Πλήρωση με νερό ........................................................27
Χειρισμός ...............................................................28
Μετά τη χρήση ...........................................................30
Καθαρισμός και φροντίδα ...................................... 30
Συντήρηση/Αλλαγή φίλτρου .................................... 31
Διόρθωση σφαλμάτων ......................................... 31
Φύλαξη ..................................................... 32
Απόρριψη ................................................... 32
Παράρτημα .................................................. 32
Τεχνικά χαρακτηριστικά ....................................................32
Εγγύηση της Kompernass Handels GmbH .....................................33
Σέρβις .................................................................35
Εισαγωγέας .............................................................35
Παραγγελία ανταλλακτικών .................................................36
SDM 1500 D2
GR│CY
│
19 ■
Page 23

Εισαγωγή
Πληροφορίες για αυτές τις οδηγίες χρήσης
Συγχαρητήρια για την αγορά της νέας σας συσκευής.
Αποφασίσατε έτσι για την απόκτηση ενός προϊόντος υψηλής ποιότητας.
Οι οδηγίες χρήσης είναι τμήμα αυτού του προϊόντος. Περιέχουν σημαντικές
υποδείξεις για την ασφάλεια, τη χρήση και την απόρριψη. Πριν από τη χρήση
του προϊόντος, εξοικειωθείτε με όλες τις υποδείξεις χειρισμού και ασφάλειας.
Χρησιμοποιείτε το προϊόν μόνο όπως περιγράφεται και για τους αναφερόμενους
τομείς χρήσης. Παραδώστε όλα τα έγγραφα σε περίπτωση παράδοσης του
προϊόντος σε τρίτους.
Πνευματικά δικαιώματα
Αυτές οι οδηγίες έχουν προστασία πνευματικών δικαιωμάτων.
Κάθε ανατύπωση ή επανέκδοση, ακόμη και αποσπασματική, καθώς και η αναπα-
ραγωγή των εικόνων, ακόμα και σε τροποποιημένη κατάσταση, επιτρέπεται μόνο
με γραπτή έγκριση του κατασκευαστή.
Προβλεπόμενη χρήση
Αυτή η συσκευή προορίζεται αποκλειστικά για τον καθαρισμό δαπέδων σε εσωτερικό χώρο. Μία άλλη ή διαφορετική χρήση από τα ανωτέρω αναφερόμενα
ισχύει ως μη σύμφωνη με τους κανονισμούς. Η συσκευή δεν προορίζεται για
χρήση σε βιομηχανικούς ή εργοστασιακούς χώρους.
Απαιτήσεις οποιουδήποτε είδους λόγω ζημιών από μη σύμφωνη με τους κανονισμούς χρήση, από ακατάλληλες επισκευές, μη επιτρεπόμενες διεξαχθείσες τροποποιήσεις ή από χρήση μη εγκεκριμένων ανταλλακτικών, αποκλείονται.
Την ευθύνη φέρει αποκλειστικά ο χρήστης.
■ 20 │ GR
│
CY SDM 1500 D2
Page 24
Υποδείξεις ασφαλείας
ΚΙΝΔΥΝΟΣ ΑΠΟ ΗΛΕΚΤΡΟΠΛΗΞΙΑ!
► Συνδέετε τη συσκευή μόνο σε μία σύμφωνα με τις προδια-
γραφές εγκατεστημένη πρίζα με τάση δικτύου 220 – 240V ∼,
50/60 Hz.
► Σε περίπτωση δυσλειτουργιών και πριν από τον καθαρισμό
της συσκευής τραβάτε το βύσμα από την πρίζα.
► Τραβάτε το καλώδιο τροφοδοσίας από την υποδοχή κρα-
τώντας πάντα το βύσμα και ποτέ το ίδιο το καλώδιο.
► Μην τσακίζετε ή συμπιέζετε το καλώδιο και τοποθετείτε το
κατά τέτοιο τρόπο, ώστε να μην μπορεί κανείς να το πατήσει
ή να σκοντάψει σε αυτό.
► Τα βύσματα ή τα καλώδια που έχουν υποστεί βλάβη πρέπει
να αντικαθίστανται αμέσως από εξουσιοδοτημένο εξειδικευμένο προσωπικό ή από το τμήμα εξυπηρέτησης πελατών,
ώστε να αποφεύγονται κίνδυνοι.
► Προσέχετε ώστε κατά τη λειτουργία το καλώδιο τροφοδοσί-
ας να μην βρέχεται ή υγραίνεται. Περνάτε το κατά τέτοιο
τρόπο, ώστε να μην πιάνεται ή φθείρεται.
► Εάν η συσκευή έχει βλάβη, μην τη χρησιμοποιήσετε ξανά,
ώστε να αποφύγετε κινδύνους.
► Τραβήξτε πρώτα το βύσμα από την πρίζα, πριν γεμίσετε τη
συσκευή με νερό, πριν την καθαρίσετε ή πριν αλλάξετε
εξαρτήματα.
Χρησιμοποιείτε τη συσκευή μόνο σε στεγνούς και
όχι σε εξωτερικούς χώρους.
► Ποτέ μη βυθίζετε τη συσκευή σε νερό ή σε άλλα υγρά!
► Ποτέ μην κατευθύνετε τον ατμό απευθείας σε ηλεκτρικές συ-
σκευές ή διατάξεις, οι οποίες περιλαμβάνουν ηλεκτρικά
εξαρτήματα, όπως για παράδειγμα στον εσωτερικό χώρο
φούρνων.
SDM 1500 D2
GR│CY
│
21 ■
Page 25
ΚΙΝΔΥΝΟΣ ΑΠΟ ΗΛΕΚΤΡΟΠΛΗΞΙΑ!
► Χρησιμοποιείτε τη συσκευή μόνο με στεγνά χέρια και όχι χω-
ρίς υποδήματα (όχι ξυπόλυτοι). Έτσι μειώνετε, σε περίπτωση
σφάλματος, επικίνδυνα ρεύματα κρούσης.
► Ποτέ μην κατευθύνετε τη συσκευή σε αντικείμενα με ευαισθη-
σία στην υγρασία.
► Μπορεί να γίνεται χρήση αυτής της συσκευής από άτομα
με μειωμένες φυσικές, αισθητηριακές ή νοητικές ικανότητες ή
με έλλειψη εμπειρίας και/ή γνώσεων, εφόσον επιτηρούνται ή
έχουν εκπαιδευτεί αναφορικά με την ασφαλή χρήση της συσκευής και κατανοούν τους επακόλουθους κινδύνους. Τα
παιδιά δεν επιτρέπεται να παίζουν με τη συσκευή. Ο καθαρισμός και η συντήρηση χρήστη δεν επιτρέπεται να διεξάγονται από παιδιά, χωρίς επιτήρηση.
ΠΡΟΕΙΔΟΠΟΙΗΣΗ! ΚΙΝΔΥΝΟΣ ΤΡΑΥΜΑΤΙΣΜΟΥ!
► Ορισμένα τμήματα της συσκευής είναι καυτά κατά τη χρήση!
Υπάρχει κίνδυνος εγκαύματος!
► Αφήνετε τα χρησιμοποιούμενα εξαρτήματα πρώτα να κρυώ-
νουν πριν τα απομακρύνετε.
► Χρησιμοποιείτε μόνο τα γνήσια αξεσουάρ για αυτή τη συ-
σκευή. Άλλα εξαρτήματα πιθανώς να μην είναι επαρκώς
ασφαλή.
► Η συσκευή δεν επιτρέπεται να χρησιμοποιείται όταν έχει πέσει
κάτω, όταν υπάρχουν ορατές ζημιές ή εάν δεν είναι στεγανή.
► Η συσκευή πρέπει να παραμένει μακριά από παιδιά όταν
είναι ενεργοποιημένη ή κρυώνει.
► Ποτέ μην κατευθύνετε τον ατμό σε ανθρώπους ή ζώα.
Ο καυτός ατμός μπορεί να προκαλέσει σοβαρούς τραυματισμούς!
► Σε κάθε διακοπή ή μετά το τέλος χρήσης και πριν τον καθα-
ρισμό, αποσυνδέετε το βύσμα από την πρίζα.
■ 22 │ GR
│
CY SDM 1500 D2
Page 26
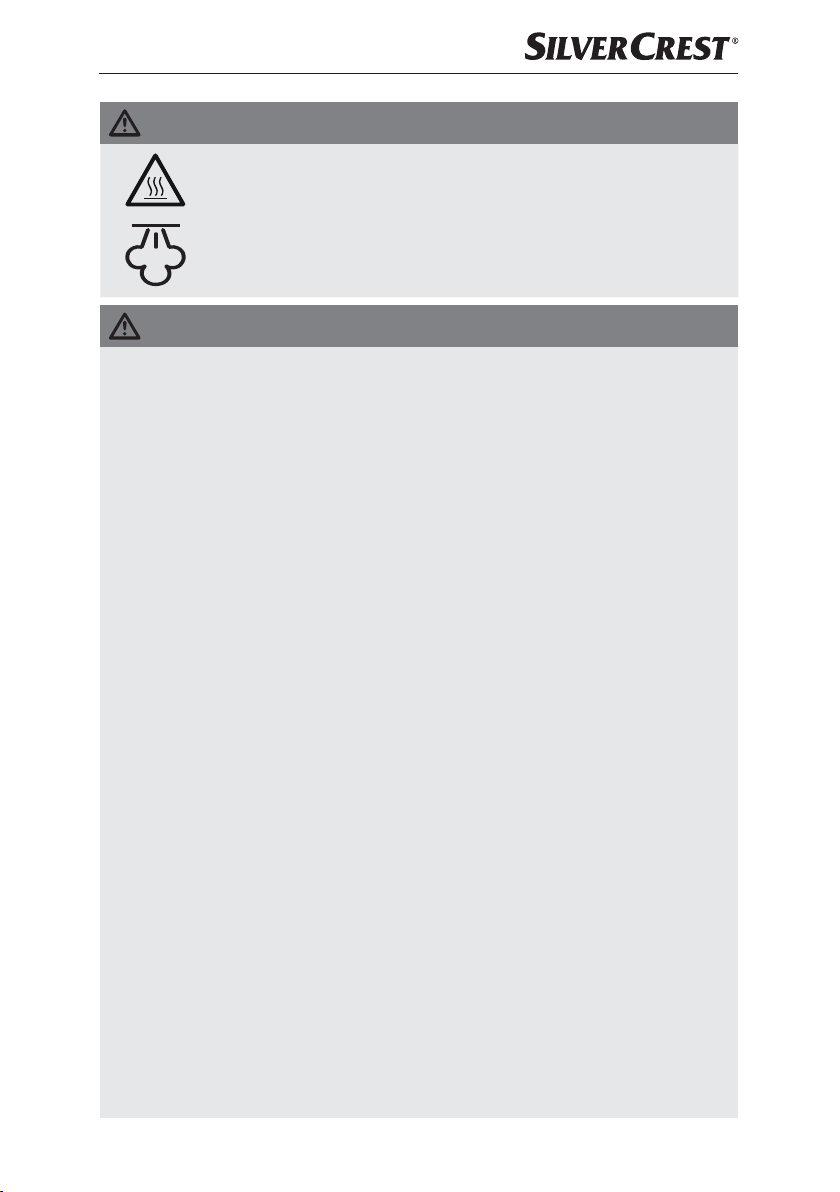
ΚΙΝΔΥΝΟΣ ΕΓΚΑΥΜΑΤΟΣ!
Προσοχή! Καυτή επιφάνεια!
Αυτό το σύμβολο σας προειδοποιεί για εξερχόμε-
νο ατμό. Προσέχετε τις υποδείξεις ασφαλείας!
ΠΡΟΣΟΧΗ! ΥΛΙΚΕΣ ΖΗΜΙΕΣ!
► Χρησιμοποιείτε τη συσκευή αποκλειστικά σε δάπεδα από
μάρμαρο, πέτρα, πλακάκια, παρκέ ή σκληρό ξύλο, στα
οποία έχει γίνει επεξεργασία και είναι αδιάβροχα.
► Ποτέ μη χρησιμοποιείτε τη συσκευή …
– … σε μη επεξεργασμένα ή υδατοπερατά δάπεδα,
– … σε γυάλινες επιφάνειες,
– … σε μαλακές επιφάνειες συνθετικής ύλης,
– … σε δάπεδα, στα οποία έχει γίνει επεξεργασία με κερί,
– … σε χαλιά που περιέχουν και μαλλί.
► Προσέχετε πάντα τις υποδείξεις καθαρισμού του κατασκευ-
αστή χαλιού. Πριν την έναρξη του καθαρισμού ελέγχετε επιπρόσθετα εάν το χαλί ενδείκνυται για καθαρισμό με ατμό.
► Να χρησιμοποιείτε τη συσκευή μόνο σε πατώματα παρκέ με
ανθεκτική επίστρωση.
► Μην αφήνετε τη συσκευή ενεργοποιημένη σε ξύλινα δάπεδα
για μεγάλα χρονικά διαστήματα. Μπορεί να προκληθεί διαβροχή του ξύλου.
► Μη λειτουργείτε τη συσκευή με άδειο δοχείο νερού. Αλλιώς
η αντλία θα λειτουργήσει εν κενώ και θα υπερθερμανθεί.
► Μην προσθέτετε καθαριστικά μέσα ή άλλα πρόσθετα στο
δοχείο νερού.
► Μη χρησιμοποιείτε εξωτερικό χρονοδιακόπτη ή ξεχωριστό
τηλεχειριστήριο για να χρησιμοποιήσετε τη συσκευή.
► Ποτέ μην αφήνετε τη συσκευή ανεπιτήρητη κατά τη διάρκεια
της λειτουργίας.
SDM 1500 D2
GR│CY
│
23 ■
Page 27
ΠΡΟΣΟΧΗ! ΥΛΙΚΕΣ ΖΗΜΙΕΣ!
► Μη χρησιμοποιείτε τη συσκευή σε εξωτερικούς χώρους.
► Βεβαιώνεστε ότι η συσκευή, το καλώδιο ή το βύσμα δεν
έρχονται σε επαφή με πηγές θερμότητας, όπως μάτια
κουζίνας ή φλόγες.
Στοιχεία χειρισμού
Εικόνα A:
1 Πλήκτρο απασφάλισης „Λαβaή“
2 Λαβή μεταφοράς
3 Κύρια μονάδα
4 Στόμιο σύνδεσης
5 Βάση ατμού
6 Μαλακό τμήμα (λευκό)
7 Φίλτρο
8 Δοχείο νερού
9 Πλήκτρο απασφάλισης „Δοχείο νερού“
0 Λυχνία ελέγχου ισχύος POWER
q Κόκκινη λυχνία ελέγχου „υψηλή ισχύς ατμού“
w Πράσινη λυχνία ελέγχου „ελάχιστη ισχύς ατμού“
e Πλήκτρο MODE
r Πλήκτρο „Ατμός“
Εικόνα B:
t Εγκοπή
z Άνω άγκιστρο καλωδίου
u Διακόπτης on/off
i Κάτω άγκιστρο καλωδίου
Εικόνα C:
o Μαλακό τμήμα (μπλε)
p Δακτυλίδι για χαλιά
a Βοήθεια απασφάλισης δαχτυλιδιού για χαλιά
■ 24 │ GR
│
CY SDM 1500 D2
Page 28
Αποσυσκευασία και σύνδεση
Υποδείξεις ασφαλείας
ΠΡΟΕΙΔΟΠΟΙΗΣΗ!
Κατά τη θέση σε λειτουργία της συσκευής μπορεί να
προκληθούν σωματικοί τραυματισμοί και υλικές
ζημιές!
Τηρείτε τις ακόλουθες υποδείξεις ασφαλείας, ώστε να
αποφεύγετε κινδύνους:
► Τα υλικά συσκευασίας δεν επιτρέπεται να χρησιμοποιούνται
για παιχνίδι. Υπάρχει κίνδυνος ασφυξίας.
Παραδοτέος εξοπλισμός και έλεγχος μεταφοράς
Η συσκευή παραδίδεται κανονικά με τα εξής στοιχεία (βλ. αναδιπλούμενη
σελίδα):
● Κύρια μονάδα
● Βάση ατμού
● Δακτυλίδι καθαρισμού χαλιών
● 2 μαλακά τμήματα (μπλε και λευκό)
● Οδηγίες χρήσης
ΥΠΟΔΕΙΞΗ
► Ελέγξτε τον παραδοτέο εξοπλισμό ως προς την πληρότητα και για εμφα-
νείς φθορές.
► Σε περίπτωση ελλιπούς παραδοτέου εξοπλισμού ή ζημιών λόγω ελλιπούς
συσκευασίας ή λόγω μεταφοράς, απευθυνθείτε στην ανοικτή τηλεφωνική
γραμμή εξυπηρέτησης (βλ. κεφάλαιο Σέρβις).
Αποσυσκευασία
♦ Αφαιρέστε όλα τα εξαρτήματα της συσκευής και τις οδηγίες χρήσης από το
κουτί.
♦ Απομακρύνετε όλα τα υλικά συσκευασίας, ενδεχόμενες μεμβράνες και
αυτοκόλλητα.
SDM 1500 D2
GR│CY
│
25 ■
Page 29
Απόρριψη της συσκευασίας
Tα υλικά συσκευασίας έχουν επιλεγεί σύμφωνα με τους κανόνες προστασίας του
περιβάλλοντος και τις τεχνικές απόρριψης και, ως εκ τούτου, είναι ανακυκλώσιμα.
Απορρίπτετε τα υλικά συσκευασίας που δεν χρησιμοποιούνται πλέον σύμφωνα
με τους κατά τόπους ισχύοντες κανονισμούς.
Απορρίπτετε τη συσκευασία με φιλικό τρόπο προς το περιβάλλον. Λαμβάνετε
υπόψη τη σήμανση στα διαφορετικά υλικά συσκευασίας και, εφόσον απαιτείται,
ξεχωρίζετέ τα. Τα υλικά συσκευασίας φέρουν σήμανση με συντομογραφίες (a)
και ψηφία (b) με την εξής σημασία:
1–7: Πλαστικά,
20–22: Χαρτί και χαρτόνι,
80–98: Συνθετικά υλικά.
Συναρμολόγηση συσκευής
♦ Ωθήστε την κύρια μονάδα 3 στο στόμιο σύνδεσης 4 στη βάση ατμού 5 και
πιέστε την κύρια μονάδα 3 κάτω, μέχρι να κουμπώσει η στρογγυλή ασφάλιση.
♦ Επιλέξτε το αντίστοιχο μαλακό τμήμα 6/o για την επιφάνεια που θα
καθαριστεί:
– το μπλε μαλακό τμήμα o για χαλιά και ευαίσθητες επιφάνειες, π.χ. παρκέ
– το λευκό μαλακό τμήμα 6 για πιο ανθεκτικές επιφάνειες, π.χ. πλακάκια.
♦ Κολλήστε ένα μαλακό τμήμα 6/o από κάτω στη βάση ατμού 5.
ΥΠΟΔΕΙΞΗ
► Εάν θέλετε να καθαρίσετε μοκέτες με την σφουγγαρίστρα ατμού, τοποθετήστε
το μπλε μαλακό τμήμα o και τοποθετήστε τη βάση ατμού 5 στο δαχτυλίδι
για χαλιάp. Προσέξτε τότε ώστε η απασφάλιση δαχτυλιδιού για χαλιά a
να είναι σε μια ευθεία με το στόμιο σύνδεσης 4. Πιέστε τη βάση ατμού 5
έτσι στο δαχτυλίδι για χαλιά p, ώστε να κουμπώσει αισθητά. Κατά αυτόν
τον τρόπο, το μπλε μαλακό τμήμαo μπορεί να ολισθαίνει επάνω στο χαλί.
► Για να απομακρύνετε το δαχτυλίδι για χαλιά p πιέστε με το πόδι σας στη
βοήθεια απασφάλισης δαχτυλιδιού για χαλιά a και τραβήξτε τη βάση
ατμού 5 προσεκτικά από το δαχτυλίδι για χαλιά p.
■ 26 │ GR
│
CY SDM 1500 D2
Page 30
Χειρισμός και λειτουργία
Σε αυτό το κεφάλαιο λαμβάνετε σημαντικές υποδείξεις για το χειρισμό και τη
λειτουργία της συσκευής.
Πλήρωση με νερό
ΠΡΟΣΟΧΗ! ΥΛΙΚΕΣ ΖΗΜΙΕΣ!
► Ποτέ μη λειτουργείτε τη συσκευή χωρίς νερό στο δοχείο νερού 8!
Αλλιώς η αντλία μπορεί να υπερθερμανθεί και να πάθει ζημιά!
► Μην προσθέτετε καθαριστικά μέσα ή άλλα πρόσθετα στο δοχείο νερού8.
1) Ωθήστε το πλήκτρο απασφάλισης «Δοχείο νερού» 9 προς τα επάνω και
αφαιρέστε ταυτόχρονα το δοχείο νερού 8.
2) Γυρίστε από την άλλη το δοχείο νερού 8 και ξεβιδώστε την ασφάλεια.
3) Γεμίστε με νερό βρύσης έως τη σήμανση ΜΑΧ στο δοχείο νερού 8.
ΥΠΟΔΕΙΞΗ
Εάν το νερό βρύσης της περιοχής σας είναι πολύ σκληρό, προτείνεται να
αναμίξετε το νερό δικτύου με αποσταγμένο νερό. Αλλιώς τα ακροφύσια για την
ώθηση ατμού μπορεί να γεμίσουν πρόωρα με άλατα.
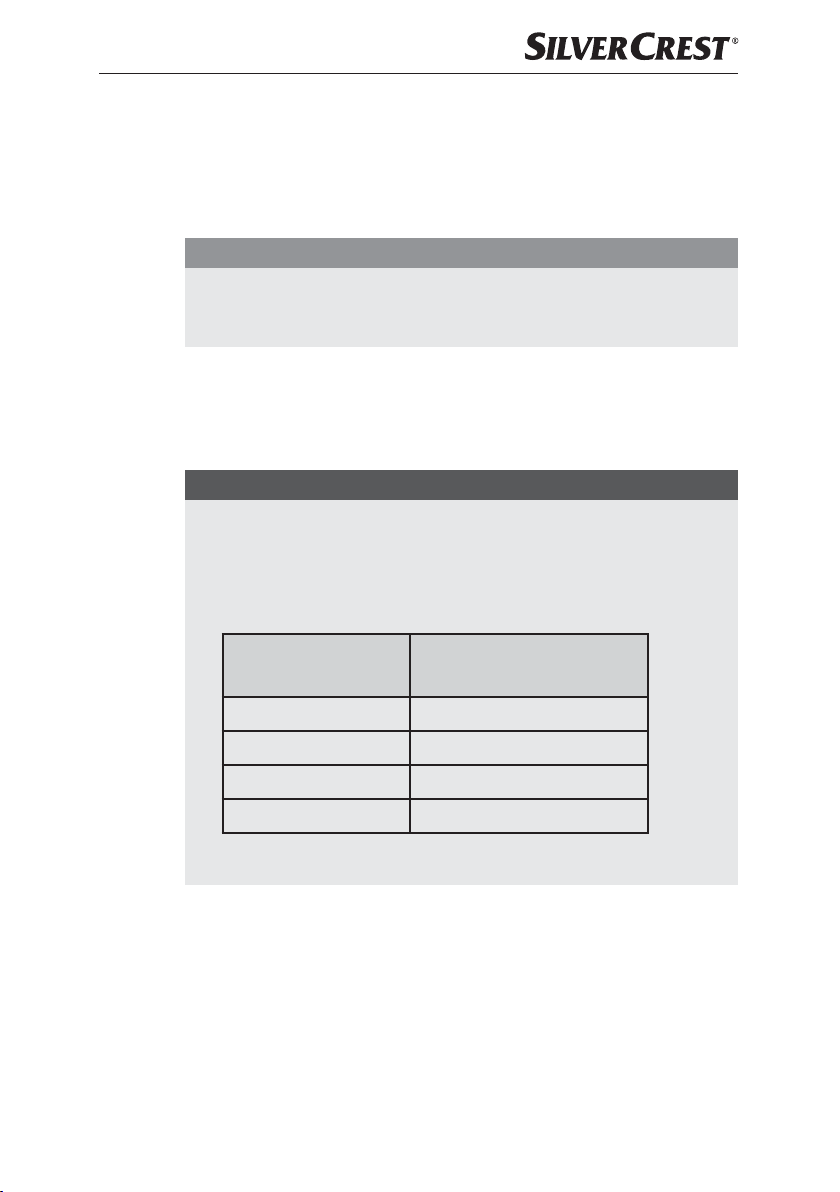
Για την παράταση της άψογης λειτουργίας ώθησης ατμού αναμίξτε το
νερό βρύσης με αποσταγμένο νερό σύμφωνα με τον πίνακα:
4) Βιδώστε καλά την ασφάλιση.
5) Γυρίστε το δοχείο νερού 8 πάλι και τοποθετήστε το στην κύρια μονάδα 3:
SDM 1500 D2
Σκληρότητα νερού
πολύ μαλακό/μαλακό 0
μέτριο 1:1
σκληρό 2:1
πολύ σκληρό 3:1
Μπορείτε να μάθετε για τη σκληρότητα νερού στην τοπική εγκατάσταση
ύδρευσης.
Τοποθετήστε πρώτα το κάτω τμήμα στην κύρια μονάδα 3 και γείρετε στη συνέχεια
το άνω τμήμα στη συσκευή. Πιέστε το καλά, έτσι ώστε το δοχείο νερού 8 να
κουμπώσει αισθητά και να εδράζεται σφιχτά στην κύρια μονάδα 3.
Αναλογία αποσταγμένου
νερού προς νερό βρύσης
GR│CY
│
27 ■
Page 31

Χειρισμός
1) Σηκώστε τη λαβή προς τα επάνω, ώστε το πλήκτρο απασφάλισης «Λαβή» 1
2) Εάν δεν έχει συμβεί ακόμα: Ξετυλίξτε το καλώδιο δικτύου πλήρως από το
3) Περάστε το καλώδιο δικτύου μέσα από την εγκοπή t στην πίσω πλευρά της
4) Βάλτε το βύσμα στην πρίζα.
5) Θέστε το διακόπτη on/off u στο „I“. Ο διακόπτης on/off u ανάβει, η
6) Επιλέξτε με το πλήκτρο MODE e την επιθυμητή ένταση της δημιουργίας ατμού:
ΠΡΟΣΟΧΗ! ΥΛΙΚΕΣ ΖΗΜΙΕΣ!
►
Εάν δεν είστε σίγουροι εάν το δάπεδο ενδείκνυται για τον καθαρισμό, δοκιμάστε προηγουμένως τη συμβατότητα σε ένα κρυφό σημείο.
► Προσέχετε πάντα τις υποδείξεις καθαρισμού του κατασκευαστή χαλιού.
Πριν την έναρξη του καθαρισμού ελέγχετε επιπρόσθετα εάν το χαλί ενδείκνυται για καθαρισμό με ατμό.
► Ποτέ μη χρησιμοποιείτε τη συσκευή χωρίς μαλακό τμήμα 6/o στη βάση
ατμού 5. Αλλιώς γδέρνονται τα δάπεδα!
► Χρησιμοποιείτε το δαχτυλίδι για χαλιά p μόνο για τον καθαρισμό χαλιών.
Μη χρησιμοποιείτε το δαχτυλίδι για χαλιά p για τον καθαρισμό σκληρών
δαπέδων.
► Ποτέ μη λειτουργείτε τη συσκευή χωρίς νερό στο δοχείο νερού 8!
Αλλιώς η αντλία μπορεί να υπερθερμανθεί και να πάθει ζημιά!
ΥΠΟΔΕΙΞΗ
► Προτού καθαρίσετε το δάπεδο με τη σφουγγαρίστρα ατμού, συστήνουμε
προηγουμένως να καθαρίσετε το δάπεδο με ηλεκτρική σκούπα, ώστε να
απομακρύνετε χαλαρά σωματίδια ρύπων.
Όταν η συσκευή συναρμολογηθεί και έχει γεμίσει με νερό:
να ασφαλίσει με τον χαρακτηριστικό ήχο.
άγκιστρο καλωδίου z/i. Για μια εύκολη εκτύλιξη του καλωδίου μπορείτε
να γυρίσετε το άνω άγκιστρο καλωδίου z προς τα κάτω, τραβώντας το
λίγο έξω και ταυτόχρονα περιστρέφοντάς το.
λαβής, έτσι ώστε το καλώδιο δικτύου να μην κρέμεται στην περιοχή εργασίας.
κόκκινη λυχνία ελέγχου POWER 0 αναβοσβήνει. Μόλις επιτευχθεί η θερμοκρασία λειτουργίας της συσκευής μετά από περ. 25 δευτερόλεπτα, η
κόκκινη λυχνία ελέγχου POWER 0 παραμένει αναμμένη.
– 1 φορά πίεση: λίγη δημιουργία ατμού, η πράσινη λυχνία ελέγχου w ανάβει.
– 2 φορές πίεση: υψηλή δημιουργία ατμού, η κόκκινη λυχνία ελέγχου q
ανάβει.
– 3 φορές πίεση: χωρίς δημιουργία ατμού, λειτουργία ετοιμότητας, η
λυχνία ελέγχου POWER 0 ανάβει.
■ 28 │ GR
│
CY SDM 1500 D2
Page 32

ΥΠΟΔΕΙΞΗ
►
Η βαθμίδα ατμού με την υψηλή δημιουργία ατμού συστήνεται κυρίως για
επενδύσεις δαπέδων χωρίς ευαισθησία στην υγρασία και τη θερμότητα
όπως είναι τα πλακάκια.
► Η βαθμίδα ατμού με την ελάχιστη δημιουργία ατμού συστήνεται για επενδύ-
σεις δαπέδων με ευαισθησία στην υγρασία και τη θερμότητα όπως είναι π.χ.
το δάπεδο παρκέ.
7) Πιέστε το πλήκτρο „Ατμός“ r. Η συσκευή ξεκινάει με τη δημιουργία ατμού
και μετά από σύντομο χρόνο εμφανίζεται ατμός από το μαλακό τμήμα 6/o.
8) Σκουπίστε πάνω από τις επιθυμητές επιφάνειες.
ΥΠΟΔΕΙΞΗ
► Όταν το δοχείο νερού 8 αδειάσει με άντληση, η αντλία συνεχίζει να λει-
τουργεί ακόμα λίγο έως ότου φανεί ότι το δοχείο νερού 8 έχει αδειάσει
μέσω ταυτόχρονου αναβοσβήσματος της κόκκινης λυχνίας ελέγχου q, της
πράσινης λυχνίας ελέγχου w και της λυχνίας ελέγχου POWER 0.
Εάν κατά τη διάρκεια της χρήσης αδειάσει το δοχείο νερού 8:
– Πιέστε εκ νέου το πλήκτρο „Ατμός“ r, για να σταματήσετε τη λειτουργία
ατμού.
– Θέστε το διακόπτη on/off u στο „Ο“.
– Απομακρύνετε το δοχείο νερού 8, γεμίστε το και τοποθετήστε πάλι το
δοχείο νερού 8, όπως περιγράφεται στο κεφάλαιο „Πλήρωση νερού“.
– Θέστε το διακόπτη on/off u στο „I“.
– Επιλέξτε την επιθυμητή ισχύ ατμού όπως περιγράφεται παραπάνω και
πιέστε το πλήκτρο „Ατμός“ r.
9) Όταν τελειώσετε με την επεξεργασία όλων των επιφανειών, πιέστε το πλήκτρο
„Ατμός“ r για να σταματήσετε τη δημιουργία ατμού.
10) Θέστε το διακόπτη on/off u στο „Ο“. Η λυχνία ελέγχου POWER 0
σβήνει.
11) Τραβήξτε το βύσμα από την πρίζα.
ΥΠΟΔΕΙΞΗ
► Εάν μετά τον καθαρισμό με τη συσκευή φαίνονται γραμμές στο δάπεδο,
μπορεί αυτό να οφείλεται στα προηγούμενα απορρυπαντικά που χρησιμοποιήθηκαν. Απλά καθαρίστε το δάπεδο ξανά με τη σφουγγαρίστρα ατμού.
Οι γραμμές θα πρέπει μετά να έχουν εξαφανιστεί.
SDM 1500 D2
GR│CY
│
29 ■
Page 33
Μετά τη χρήση
1) Αφήστε τη συσκευή να κρυώσει.
2) Απομακρύνετε το μαλακό τμήμα 6/o.
3) Αφαιρέστε το δοχείο νερού 8 από τη συσκευή και αδειάστε το.
4) Τραβήξτε λίγο έξω το άνω άγκιστρο καλωδίου z και γυρίστε το πάλι προς τα
επάνω. Τυλίξτε το καλώδιο δικτύου γύρω από τα δύο άγκιστρα καλωδίου z/i.
Στερεώστε το άκρο του καλωδίου δικτύου με τη βοήθεια του κλιπ καλωδίου,
το οποίο βρίσκεται στο καλώδιο.
Καθαρισμός και φροντίδα
ΚΙΝΔΥΝΟΣ ΑΠΟ ΗΛΕΚΤΡΟΠΛΗΞΙΑ!
► Πριν από κάθε καθαρισμό τραβάτε το βύσμα!
ΠΡΟΕΙΔΟΠΟΙΗΣΗ! ΚΙΝΔΥΝΟΣ ΤΡΑΥΜΑΤΙΣΜΟΥ!
► Αφήνετε πρώτα τη συσκευή να κρυώνει καλά πριν την καθαρίσετε. Κίνδυνος
εγκαύματος!
ΠΡΟΣΟΧΗ! ΥΛΙΚΕΣ ΖΗΜΙΕΣ
► Για τον καθαρισμό των επιφανειών μη χρησιμοποιείτε ούτε αιχμηρά τριβικά
ή χημικά απορρυπαντικά, ούτε και μυτερά αντικείμενα ή αντικείμενα που
γρατζουνάνε.
■ Αδειάζετε μετά από κάθε χρήση το δοχείο νερού 8.
■ Μετά από κάθε χρήση απομακρύνετε το μαλακό τμήμα 6/o από τη βάση
ατμού 5 και πλένετέ το.
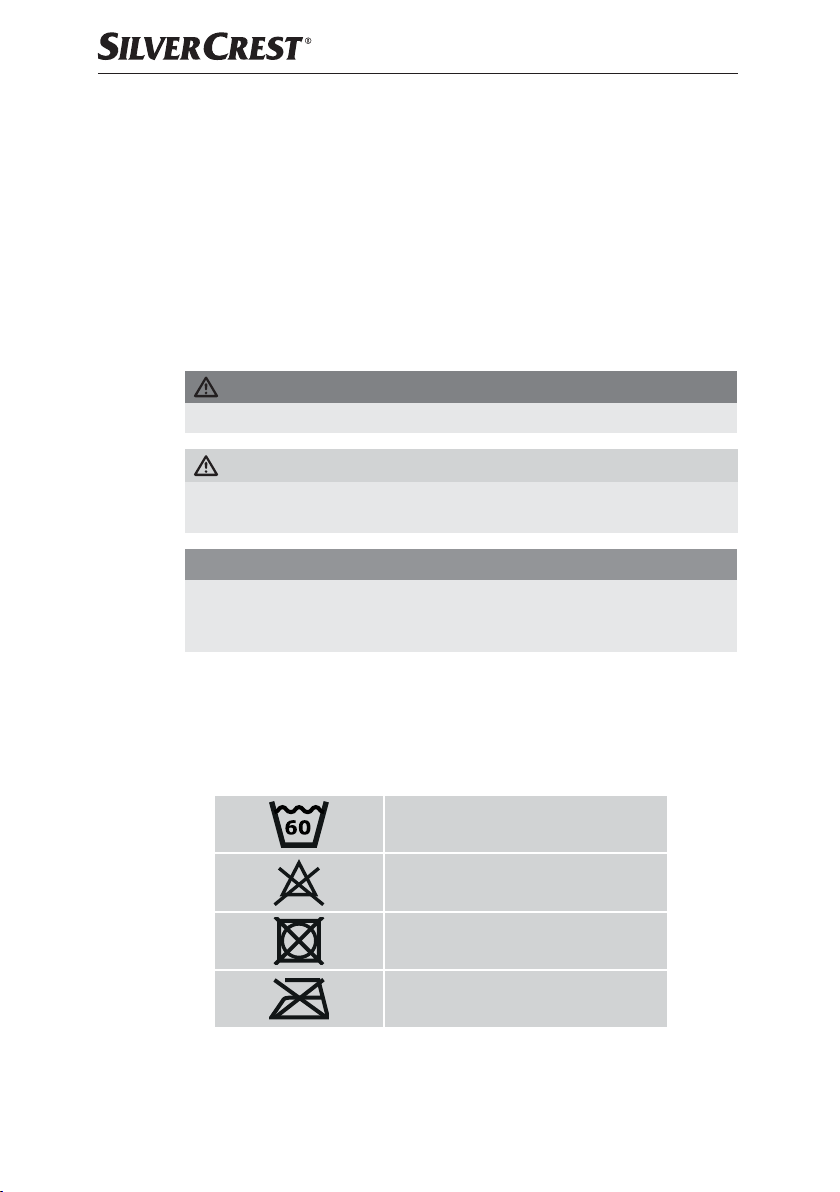
■ Λαμβάνετε υπόψη τις ακόλουθες οδηγίες πλύσης όταν καθαρίζετε το μαλακό
τμήμα 6/o στο πλυντήριο ρούχων:
■ 30 │ GR
πλένετε το μέγ. στους 60 °C
μην χρησιμοποιείτε λευκαντικό
μη στεγνώνετε στο στεγνωτήριο
μη σιδερώνετε
■ Εάν απαιτείται σκουπίζετε τη συσκευή με ένα νωπό πανί. Σε περίπτωση
σκληρών ακαθαρσιών ρίξτε λίγο ήπιο απορρυπαντικό επάνω στο πανί.
│
CY SDM 1500 D2
Page 34
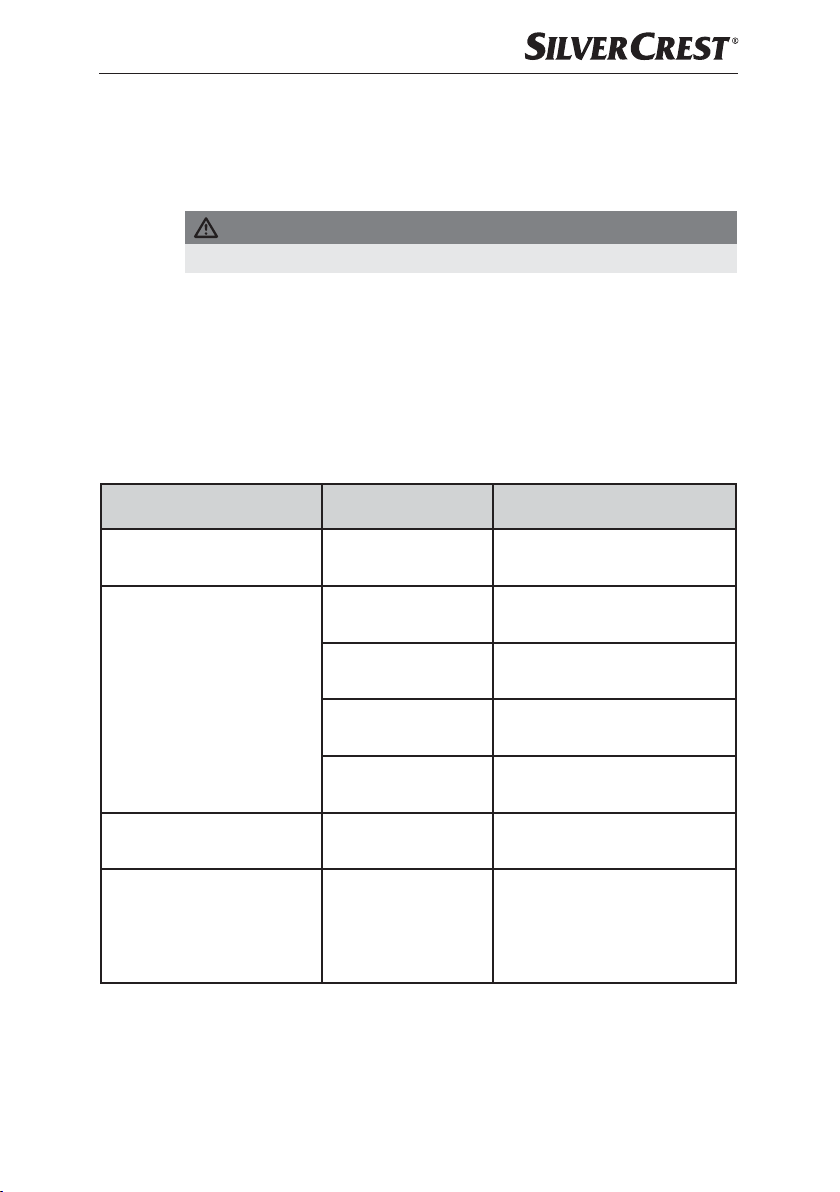
Συντήρηση/Αλλαγή φίλτρου
Μετά από 4 – 6 μήνες ή περ. 100 κύκλους καθαρισμού (ένας κύκλος αντιστοιχεί σε μια πλήρωση δοχείου νερού), το φίλτρο 7 πρέπει να αντικατασταθεί. Για
ανταλλακτικά φίλτρα να απευθύνεστε στο σέρβις μας.
ΚΙΝΔΥΝΟΣ ΑΠΟ ΗΛΕΚΤΡΟΠΛΗΞΙΑ!
► Πριν από την αντικατάσταση του φίλτρου 7 αποσυνδέετε το βύσμα!
1) Για την απομάκρυνση του φίλτρου 7, απομακρύνετε πρώτα το δοχείο
νερού 8 από τη συσκευή.
2) Τραβήξτε το φίλτρο 7 προς τα επάνω και έξω από τη συσκευή.
3) Τοποθετήστε το νέο φίλτρο 7.
4) Τοποθετήστε το δοχείο νερού 8.
Διόρθωση σφαλμάτων
Πρόγραμμα Πιθανές αιτίες Πιθανές λύσεις
Η συσκευή δε λειτουργεί.
Η συσκευή δεν δημιουργεί
ατμό.
Η αντλία δημιουργεί ασυνήθιστα δυνατούς θορύβους.
Δημιουργήθηκε ένα περιθώριο
άσπρου χρώματος στο δάπεδο,
στο σημείο όπου η συσκευή
σταμάτησε για λίγο κατά τη
διάρκεια της λειτουργίας.
Το βύσμα δικτύου δεν
έχει συνδεθεί.
Το πλήκτρο "Ατμός"r
δεν έχει πατηθεί.
Δεν υπάρχει νερό
στο δοχείο νερού 8.
Το φίλτρο 7 έχει
βουλώσει.
Δεν έχει επιλεγεί ισχύς
ατμού.
Δεν υπάρχει νερό στο
δοχείο νερού 8.
Έγινε μικρή εναπόθεση
αλάτων.
Συνδέστε τη συσκευή σε μια
πρίζα.
Πιέστε το πλήκτρο "Ατμός" r.
Γεμίστε το δοχείο νερού 8 με
νερό.
Αντικαταστήστε το φίλτρο 7.
Επιλέξτε με το πλήκτρο MODE e
την επιθυμητή ισχύ ατμού.
Γεμίστε το δοχείο νερού 8 με
νερό.
Σκουπίστε και απομακρύνετε τις
εναποθέσεις αλάτων με ένα νωπό
πανί. Εάν απαιτείται προσθέστε
λίγο προϊόν αφαίρεσης αλάτων
στο πανί.
SDM 1500 D2
GR│CY
│
31 ■
Page 35
Φύλαξη
■ Διπλώστε τη λαβή, πιέζοντας το πλήκτρο απασφάλισης „Λαβή“ 1.
■ Τραβήξτε λίγο έξω το άνω άγκιστρο καλωδίου z και γυρίστε το πάλι
προς τα επάνω. Τυλίξτε το καλώδιο δικτύου γύρω από τα δύο άγκιστρα
καλωδίου z/i.
■ Μεταφέρετε τη συσκευή από τη λαβή μεταφοράς 2.
■ Φυλάτε τη συσκευή σε ένα στεγνό χώρο χωρίς σκόνη.
Απόρριψη
Σε καμία περίπτωση μην απορρίπτετε τη συσκευή στα οικιακά
απορρίμματα. Αυτό το προϊόν υπόκειται στην Ευρωπαϊκή Οδηγία
2012/19/EU-WEEE (Waste Electrical and Electronic Equipment –
Απόρριψη ηλεκτρικών και ηλεκτρονικών συσκευών).
Απορρίπτετε τη συσκευή μέσω μιας εγκεκριμένης επιχείρησης απόρριψης ή μέσω
της κοινοτικής επιχείρησης απόρριψης. Τηρείτε τους ισχύοντες κανονισμούς.
Σε περίπτωση αμφιβολιών επικοινωνείτε με την αρμόδια επιχείρηση απόρριψης.
Για πληροφορίες σχετικά με τις δυνατότητες απόρριψης του προϊόντος που δεν
χρησιμοποιείται πλέον, απευθυνθείτε στις αρμόδιες υπηρεσίες της κοινότητας ή
του δήμου σας.
Παράρτημα
Τεχνικά χαρακτηριστικά
Τροφοδοσία τάσης 220 – 240 V ∼ (εναλλασσόμενο ρεύμα), 50/60 Hz
Κατανάλωση ισχύος 1370 –1630 W
Είδος προστασίας
■ 32 │ GR
│
CY SDM 1500 D2
IPX4 (Προστασία από εκτοξευόμενο νερό από όλες
τις κατευθύνσεις)
Page 36
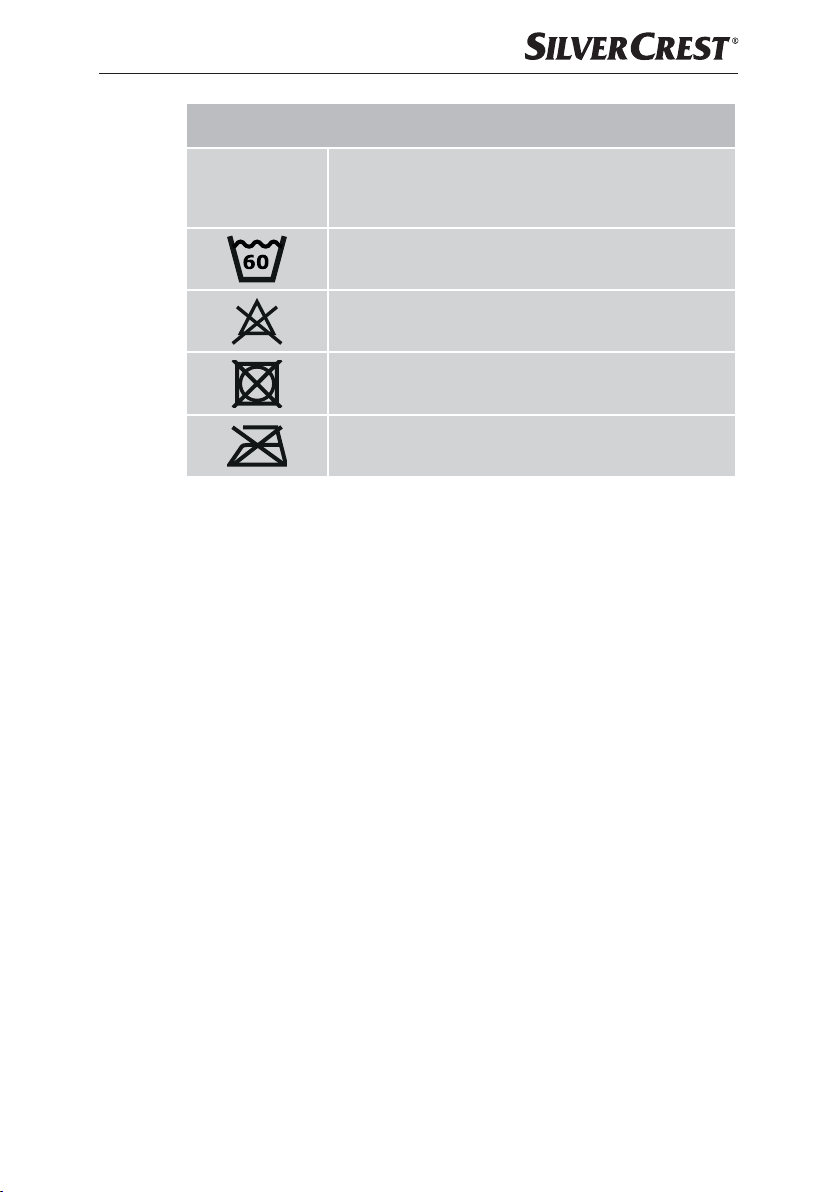
Πληροφορίες για τα μαλακά τμήματα 6/o
Σύνθεση υλικού
Λευκό μαλακό τμήμα
Μπλε μαλακό τμήμα
πλένετε το μέγ. στους 60 °C
μην χρησιμοποιείτε λευκαντικό
μη στεγνώνετε στο στεγνωτήριο
6: 100% πολυεστέρας
o: 80% πολυεστέρας,
20% βαμβάκι
μη σιδερώνετε
Εγγύηση της Kompernass Handels GmbH
Αξιότιμη πελάτισσα, αξιότιμε πελάτη,
Η παρούσα συσκευή διαθέτει 3 χρόνια εγγύηση από την ημερομηνία αγοράς.
Στην περίπτωση ελλείψεων στο προϊόν έχετε νομικά δικαιώματα έναντι του πωλητή του προϊόντος. Αυτά τα νομικά δικαιώματα δεν περιορίζονται μέσω της κατωτέρω αναφερόμενης εγγύησης.
Προϋποθέσεις εγγύησης
Η περίοδος εγγύησης ξεκινά την ημερομηνία αγοράς. Φυλάσσετε την απόδειξη
αγοράς. Απαιτείται ως αποδεικτικό αγοράς.
Εάν, εντός τριών ετών από την ημερομηνία αγοράς, παρατηρηθεί κάποιο σφάλμα υλικού ή κατασκευής στο προϊόν, θα επισκευάσουμε ή θα αντικαταστήσουμε
(κατόπιν κρίσης μας) το προϊόν δωρεάν ή θα σας επιστραφεί το ποσό αγοράς.
Η παρούσα εγγύηση προϋποθέτει ότι η ελαττωματική συσκευή και η απόδειξη
αγοράς θα υποβληθούν μαζί με μια σύντομη περιγραφή αναφορικά με το πού
βρίσκεται η έλλειψη και πότε παρατηρήθηκε, εντός της περιόδου των τριών ετών.
Εάν το ελάττωμα καλύπτεται από την εγγύησή μας, θα λάβετε το επισκευασμένο ή
ένα νέο προϊόν.
Περίοδος εγγύησης και νομικές απαιτήσεις λόγω ελλείψεων
Ο χρόνος εγγύησης δεν παρατείνεται μέσω της παροχής εγγύησης. Αυτό ισχύει
και για εξαρτήματα, τα οποία έχουν αντικατασταθεί και επισκευαστεί. Ενδεχόμενες ήδη υπάρχουσες ζημιές και ελλείψεις κατά την αγορά πρέπει να γνωστοποιούνται αμέσως μετά την αποσυσκευασία. Μετά τη λήξη του χρόνου εγγύησης,
τυχόν εμφανιζόμενες επισκευές χρεώνονται.
SDM 1500 D2
GR│CY
│
33 ■
Page 37
Εύρος εγγύησης
Η συσκευή κατασκευάστηκε σύμφωνα με αυστηρές οδηγίες ποιότητας και ελέγχθηκε προσεκτικά πριν από την αποστολή.
Η εγγύηση ισχύει για σφάλματα υλικού ή κατασκευής. Η παρούσα εγγύηση δεν
καλύπτει εξαρτήματα του προϊόντος που υπόκεινται σε φυσιολογική φθορά και,
ως εκ τούτου, θεωρούνται αναλώσιμα εξαρτήματα ή ζημιές σε εύθραυστα εξαρτήματα, π.χ. διακόπτες, συσσωρευτές ή γυάλινα εξαρτήματα.
Η παρούσα εγγύηση ακυρώνεται εάν προκληθεί ζημιά στο προϊόν, εάν δεν γίνεται σωστή χρήση ή συντήρηση. Για μια σωστή χρήση του προϊόντος πρέπει να
τηρούνται επακριβώς οι αναφερόμενες υποδείξεις στις οδηγίες χειρισμού. Σκοποί χρήσης και χειρισμοί που δεν συνιστώνται ή για τους οποίους υπάρχει προειδοποίηση πρέπει απαραίτητα να αποφεύγονται.
Το προϊόν προορίζεται μόνο για ιδιωτική και όχι για επαγγελματική χρήση. Σε
περίπτωση κακής μεταχείρισης και ακατάλληλης χρήσης, χρήσης βίας και παρεμβάσεων, οι οποίες δεν διεξήχθησαν από το εξουσιοδοτημένο μας τμήμα
σέρβις, η εγγύηση παύει να ισχύει.
Διαδικασία σε περίπτωση εγγύησης
Για την εξασφάλιση γρήγορης επεξεργασίας του ζητήματός σας, τηρείτε τις
ακόλουθες υποδείξεις:
■ Για όλες τις ερωτήσεις έχετε έτοιμη την απόδειξη αγοράς και τον κωδικό
προϊόντος (π.χ.ΙΑΝ12345) ως απόδειξη για την αγορά.
■ Για τον κωδικό προϊόντος, ανατρέξτε στην πινακίδα τύπου στο προϊόν, σε
μια ετικέτα στο προϊόν, στο εξώφυλλο των οδηγιών χρήσης (κάτω αριστερά)
ή σε ένα αυτοκόλλητο στην πίσω ή κάτω πλευρά του προϊόντος.
■ Εάν προκύψουν σφάλματα λειτουργίας ή άλλες ελλείψεις, επικοινωνήστε κατ’
αρχήν με το ακόλουθο αναφερόμενο τμήμα σέρβις τηλεφωνικά ή
μεE-Mail.
■ Ένα προϊόν που θεωρείται ελαττωματικό μπορείτε να το αποστείλετε ατελώς
στην αναφερόμενη διεύθυνση του σέρβις επισυνάπτοντας την απόδειξη αγοράς (απόδειξη ταμείου) και αναφέροντας που βρίσκεται η έλλειψη και πότε
εμφανίστηκε.
■ 34 │ GR
Στην ιστοσελίδα www.lidl-service.com μπορείτε να πραγματοποιήσετε λήψη
των παρόντων ή άλλων οδηγιών χρήσης, βίντεο προϊόντων και λογισμικού.
Με αυτόν τον κωδικό QR μεταβαίνετε απευθείας στη σελίδα εξυπηρέτησης
Lidl (www.lidl-service.com) και εισαγάγοντας τον κωδικό προϊόντος (IAN)
123456 μπορείτε να ανοίξετε τις αντίστοιχες οδηγίες χρήσης.
│
CY SDM 1500 D2
Page 38
Σέρβις
Σέρβις Ελλάδα
Tel.: 801 5000 019 (0,03 EUR/Min.)
E-Mail: [email protected]
CY
Σέρβις Κύπρος
Tel.: 8009 4409
E-Mail: [email protected]
IAN 331382_1907
Εισαγωγέας
Η ακόλουθη διεύθυνση δεν είναι διεύθυνση σέρβις. Επικοινωνήστε, κατ’ αρχήν,
με την αναφερόμενη υπηρεσία σέρβις.
KOMPERNASS HANDELS GMBH
BURGSTRASSE 21
44867 BOCHUM
ΓΕΡΜΑΝΙΑ
www.kompernass.com
SDM 1500 D2
GR│CY
│
35 ■
Page 39
Παραγγελία ανταλλακτικών
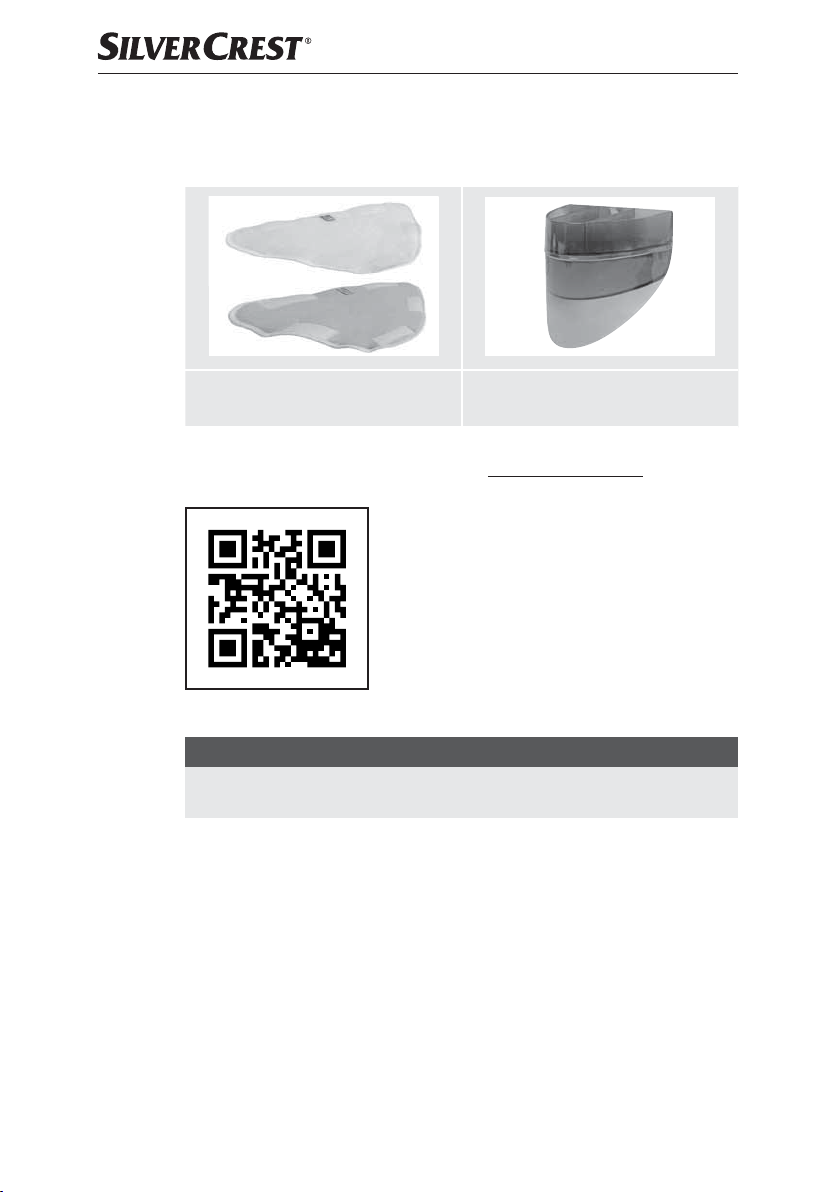
Μπορείτε να παραγγείλετε τα ακόλουθα ανταλλακτικά για το προϊόν SDM 1500 D2:
► 2 x Εφεδρικό μαλακό τμήμα (μπλε
και λευκό)
Παραγγείλτε τα ανταλλακτικά μέσω της ανοιχτής γραμμής σέρβις (βλ. Κεφάλαιο
Σέρβις) ή άνετα μέσω της ιστοσελίδας μας www.kompernass.com.
ΥΠΟΔΕΙΞΗ
► Για την παραγγελία σας να έχετε έτοιμο τον αριθμό ΙΑΝ που θα βρείτε στο
κάλυμμα αυτών των οδηγιών χρήσης.
► 1 x Φίλτρο
■ 36 │ GR
│
CY SDM 1500 D2
Page 40
Inhaltsverzeichnis
Einführung ................................................... 38
Informationen zu dieser Bedienungsanleitung ...................................38
Urheberrecht ............................................................38
Bestimmungsgemäße Verwendung ...........................................38
Sicherheitshinweise ........................................... 39
Bedienelemente .............................................. 42
Auspacken und Anschließen .................................... 43
Sicherheitshinweise .......................................................43
Lieferumfang und Transportinspektion .........................................43
Auspacken ..............................................................43
Entsorgung der Verpackung ................................................44
Gerät montieren .............................................. 44
Bedienung und Betrieb ......................................... 45
Wasser auffüllen .........................................................45
Bedienen ...............................................................46
Nach dem Gebrauch .....................................................48
Reinigung und Pflege .......................................... 48
Wartung/Filter wechseln ....................................... 49
Fehlerbehebung .............................................. 49
Aufbewahren ................................................ 50
Entsorgung. . . . . . . . . . . . . . . . . . . . . . . . . . . . . . . . . . . . . . . . . . . . . . . . . . . 50
Anhang ..................................................... 50
Technische Daten .........................................................50
Garantie der Kompernaß Handels GmbH .....................................51
Service .................................................................53
Importeur ...............................................................53
Ersatzteile bestellen .......................................................54
SDM 1500 D2
DE│AT│CH
│
37 ■
Page 41

Einführung
Informationen zu dieser Bedienungsanleitung
Herzlichen Glückwunsch zum Kauf Ihres neuen Gerätes.
Sie haben sich damit für ein hochwertiges Produkt entschieden. Die Bedienungs-
anleitung ist Bestandteil dieses Produkts. Sie enthält wichtige Hinweise für
Sicherheit, Gebrauch und Entsorgung. Machen Sie sich vor der Benutzung
des Produkts mit allen Bedien- und Sicherheitshinweisen vertraut. Benutzen Sie
das Produkt nur wie beschrieben und für die angegebenen Einsatzbereiche.
Händigen Sie alle Unterlagen bei Weitergabe des Produkts an Dritte mit aus.
Urheberrecht
Diese Dokumentation ist urheberrechtlich geschützt.
Jede Vervielfältigung, bzw. jeder Nachdruck, auch auszugsweise sowie die
Wiedergabe der Abbildungen, auch im veränderten Zustand ist nur mit schriftlicher Zustimmung des Herstellers gestattet.
Bestimmungsgemäße Verwendung
Dieses Gerät dient ausschließlich dem Reinigen von Fußböden im Innenbereich.
Eine andere oder darüber hinausgehende Benutzung gilt als nicht bestimmungsgemäß. Das Gerät ist nicht zur Verwendung in gewerblichen oder industriellen
Bereichen vorgesehen.
Ansprüche jeglicher Art wegen Schäden aus nicht bestimmungsgemäßer Verwendung, unsachgemäßen Reparaturen, unerlaubt vorgenommener Veränderungen
oder Verwendung nicht zugelassener Ersatzteile sind ausgeschlossen. Das Risiko
trägt allein der Betreiber.
■ 38 │ DE
│AT│
CH SDM 1500 D2
Page 42
Sicherheitshinweise
GEFAHR DURCH ELEKTRISCHEN SCHLAG!
► Schließen Sie das Gerät nur an eine vorschriftsmäßig
installierte Netzsteckdose mit einer Netzspannung von
220 – 240V ∼, 50/60 Hz an.
► Ziehen Sie bei Betriebsstörungen, und bevor Sie das Gerät
reinigen, den Netzstecker aus der Netzsteckdose.
► Ziehen Sie das Netzkabel stets am Netzstecker aus der
Netzsteckdose, ziehen Sie nicht am Kabel selbst.
► Knicken oder quetschen Sie das Netzkabel nicht und ver-
legen Sie das Netzkabel so, dass niemand darauf treten
oder darüber stolpern kann.
► Lassen Sie beschädigte Netzstecker oder Netzkabel sofort
von autorisiertem Fachpersonal oder dem Kundenservice
austauschen, um Gefährdungen zu vermeiden.
► Achten Sie darauf, dass im Betrieb das Netzkabel nicht
nass oder feucht wird. Führen Sie es so, dass es nicht eingeklemmt oder beschädigt werden kann.
► Sollte das Gerät beschädigt sein, benutzen Sie dieses nicht
weiter, um Gefährdungen zu vermeiden.
► Ziehen Sie erst den Stecker aus der Steckdose, bevor Sie
das Gerät mit Wasser befüllen, reinigen oder Zubehörteile
wechseln.
Verwenden Sie das Gerät nur in trockenen Räumen,
nicht im Freien.
► Tauchen Sie das Gerät niemals in Wasser oder andere
Flüssigkeiten ein!
► Richten Sie den Dampf niemals direkt auf elektrische Geräte
oder Einrichtungen, die elektrische Bauteile enthalten, wie
zum Beispiel den Innenraum von Öfen.
SDM 1500 D2
DE│AT│CH
│
39 ■
Page 43
GEFAHR DURCH ELEKTRISCHEN SCHLAG!
► Verwenden Sie das Gerät nur mit trockenen Händen und
nicht ohne Schuhe (nicht barfuß). Damit verringern Sie im
Fehlerfall gefährliche Körperströme.
► Richten Sie das Gerät nie auf feuchteempfindliche Gegen-
stände.
► Dieses Gerät kann von Personen mit verringerten physischen,
sensorischen oder mentalen Fähigkeiten oder Mangel an
Erfahrung und Wissen benutzt werden, wenn sie beaufsichtigt oder bezüglich des sicheren Gebrauchs des Gerätes
unterwiesen wurden und die daraus resultierenden Gefahren
verstehen. Kinder dürfen nicht mit dem Gerät spielen. Reinigung und Benutzer-Wartung dürfen nicht von Kindern ohne
Beaufsichtigung durchgeführt werden.
WARNUNG! VERLETZUNGSGEFAHR!
► Einige Teile des Gerätes werden bei Verwendung heiß!
Es besteht Verbrühungsgefahr!
► Lassen Sie die verwendeten Zubehörteile erst abkühlen,
bevor Sie diese abnehmen.
► Verwenden Sie nur die Original-Zubehörteile zu diesem
Gerät. Andere Teile sind dafür möglicherweise nicht ausreichend sicher.
► Das Gerät darf nicht verwendet werden, wenn es herunter-
gefallen ist, wenn offensichtliche Beschädigungen sichtbar
sind oder wenn es undicht ist.
► Das Gerät ist von Kindern fernzuhalten, wenn es einge-
schaltet ist oder sich abkühlt.
► Richten Sie niemals den Dampf auf Menschen oder Tiere.
Heißer Dampf kann erhebliche Verletzungen bewirken!
► Ziehen Sie bei jeder Unterbrechung sowie nach Beenden
des Gebrauchs und vor jeder Reinigung den Netzstecker
aus der Steckdose.
■ 40 │ DE
│AT│
CH SDM 1500 D2
Page 44
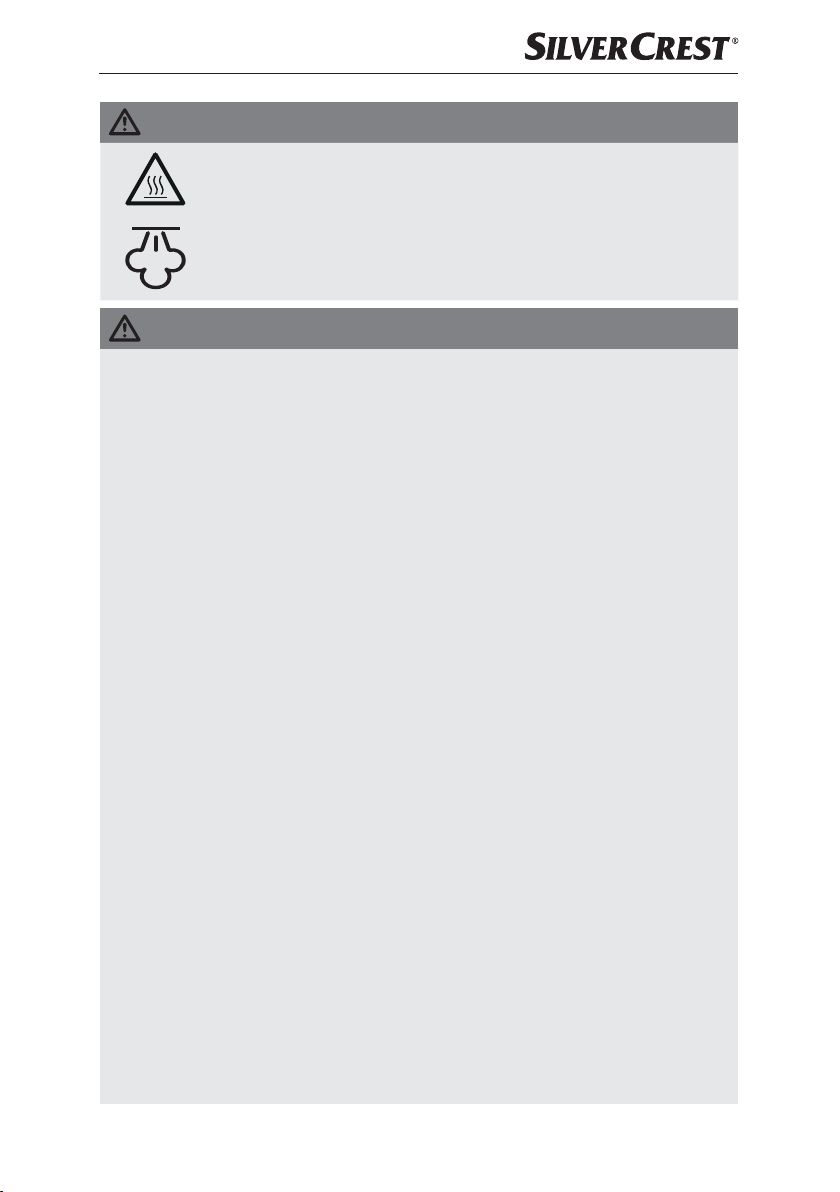
VERBRENNUNGSGEFAHR!
Achtung! Heiße Oberfläche!
Dieses Symbol warnt Sie vor austretendem
Dampf. Beachten Sie die Sicherheitshinweise!
ACHTUNG! SACHSCHADEN!
► Benutzen Sie das Gerät ausschließlich auf Fußböden aus
Marmor, Stein, Fliesen, Parkett oder Hartholz, welche behandelt und wasserundurchlässig sind.
► Benutzen Sie das Gerät niemals …
– … auf unbehandelten oder wasserdurchlässigen Fußböden,
– … auf Glasoberflächen,
– … auf weichen Kunststoffoberflächen,
– … auf Böden, die mit Wachs behandelt sind,
– … auf Teppichen mit Wollanteil.
► Beachten Sie stets die Reinigungshinweise des Teppich-
herstellers. Prüfen Sie vor Beginn der Reinigung zusätzlich,
ob der Teppich für die Dampfreinigung geeignet ist.
► Benutzen Sie das Gerät nur auf Parkettboden, wenn dieser
hartversiegelt ist.
► Lassen Sie das Gerät nicht längere Zeit eingeschaltet auf
Holzfußböden stehen. Das Holz könnte quellen.
► Betreiben Sie das Gerät nicht mit leerem Wassertank.
Ansonsten kann die Pumpe leerlaufen und überhitzen.
► Füllen Sie keine Reinigungsmittel oder andere Zusätze in
den Wassertank.
► Benutzen Sie keine externe Zeitschaltuhr oder ein separates
Fernwirksystem, um das Gerät zu betreiben.
► Lassen Sie das Gerät während des Betriebes niemals un-
beaufsichtigt.
SDM 1500 D2
DE│AT│CH
│
41 ■
Page 45
ACHTUNG! SACHSCHADEN!
► Benutzen Sie das Gerät nicht im Freien.
► Stellen Sie sicher, dass das Gerät, das Netzkabel oder der
Netzstecker nicht mit heißen Quellen, wie Kochplatten oder
offenen Flammen, in Berührung kommen.
Bedienelemente
Abbildung A:
1 Entriegelungstaste „Griff“
2 Tragegriff
3 Haupteinheit
4 Verbindungstülle
5 Dampffuß
6 Pad (weiß)
7 Filter
8 Wassertank
9 Entriegelungstaste „Wassertank“
0 Kontrollleuchte POWER
q rote Kontrollleuchte „hohe Dampfstärke “
w grüne Kontrollleuchte „geringe Dampfstärke“
e Taste MODE
r Taste „Dampf“
Abbildung B:
t Einkerbung
z oberer Kabelhaken
u Ein-/Aus-Schalter
i unterer Kabelhaken
Abbildung C:
o Pad (blau)
p Teppichring
a Teppichring-Entriegelungshilfe
■ 42 │ DE
│AT│
CH SDM 1500 D2
Page 46
Auspacken und Anschließen
Sicherheitshinweise
WARNUNG!
Bei der Inbetriebnahme des Gerätes können
Personen- und Sachschäden auftreten!
Beachten Sie die folgenden Sicherheitshinweise, um die Gefahren zu vermeiden:
► Verpackungsmaterialien dürfen nicht zum Spielen verwendet
werden. Es besteht Erstickungsgefahr.
Lieferumfang und Transportinspektion
Das Gerät wird standardmäßig mit folgenden Komponenten geliefert
(siehe Ausklappseite):
● Haupteinheit
● Dampffuß
● Teppichreinigungsring
● 2 Pads (blau und weiß)
● Bedienungsanleitung
HINWEIS
► Prüfen Sie die Lieferung auf Vollständigkeit und auf sichtbare Schäden.
► Bei einer unvollständigen Lieferung oder Schäden infolge mangelhafter
Verpackung oder durch Transport wenden Sie sich an die Service-Hotline
(siehe Kapitel Service).
Auspacken
♦ Entnehmen Sie alle Teile des Gerätes und die Bedienungsanleitung aus der Ver-
packung.
♦ Entfernen Sie sämtliches Verpackungsmaterial und eventuelle Folien und Aufkleber.
SDM 1500 D2
DE│AT│CH
│
43 ■
Page 47
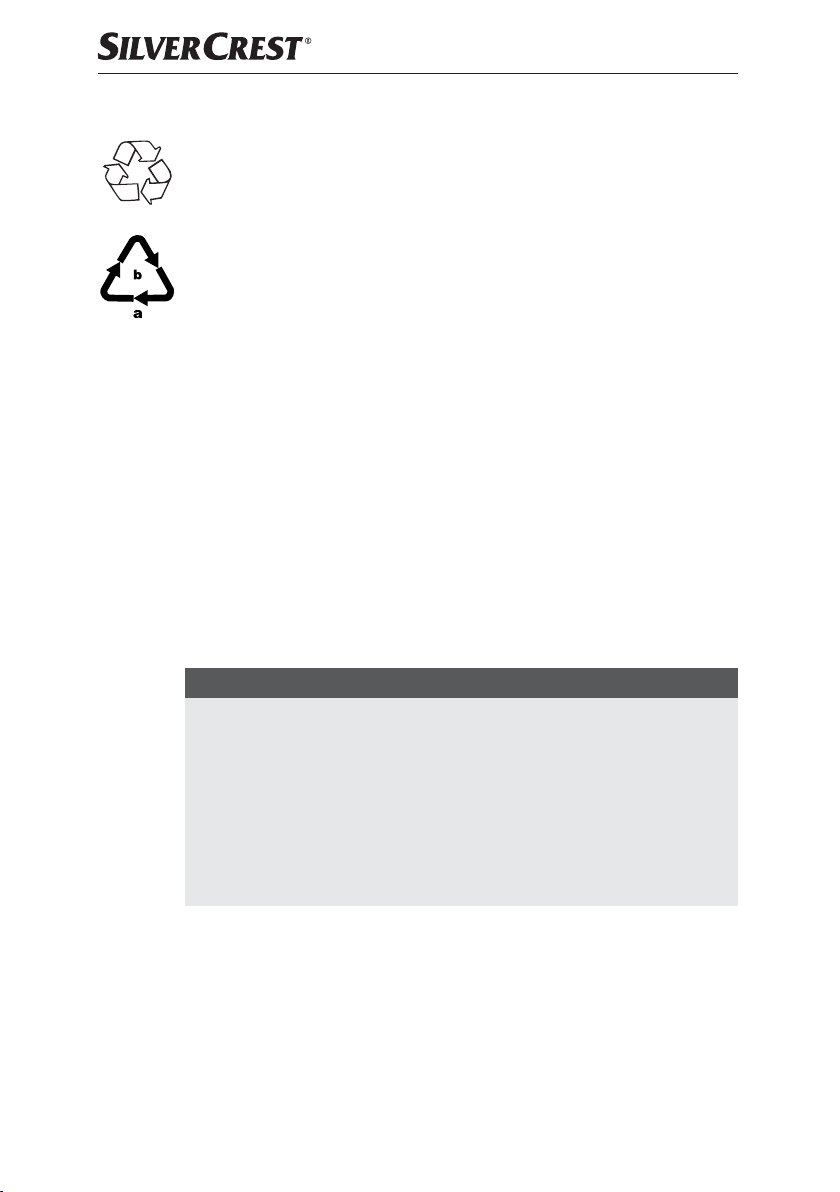
Entsorgung der Verpackung
Die Verpackungs materialien sind nach umweltverträglichen und entsorgungstechnischen Gesichtspunkten ausgewählt und deshalb recyclebar.
Entsorgen Sie nicht mehr benötigte Verpackungsmaterialien gemäß den örtlich
geltenden Vorschriften.
Entsorgen Sie die Verpackung umweltgerecht.
Beachten Sie die Kennzeichnung auf den verschiedenen Verpackungsmaterialien
und trennen Sie diese gegebenenfalls gesondert. Die Verpackungsmaterialien sind
gekennzeichnet mit Abkürzungen (a) und Ziffern (b) mit folgender Bedeutung:
1–7: Kunststoffe,
20–22: Papier und Pappe,
80–98: Verbundstoffe.
Gerät montieren
♦ Schieben Sie die Haupteinheit 3 in die Verbindungstülle 4 am Dampffuß 5
und drücken Sie die Haupteinheit 3 soweit herunter, dass die runde Arretierung
einrastet.
♦ Wählen Sie das passende Pad 6/o zu der zu reinigenden Oberfläche:
– das blaue Pad o für Teppiche und für empfindliche Oberflächen,
z. B. Parkett,
– das weiße Pad 6 für robustere Oberflächen, z. B. Fliesen
♦ Kletten Sie ein Pad 6/o von unten auf den Dampffuß 5.
HINWEIS
► Wenn Sie Teppichböden mit dem Dampfmopp reinigen wollen, montieren
Sie das blaue Pad o und setzen Sie den Dampffuß 5 auf den Teppichringp. Achten Sie dabei darauf, dass die Teppichring-Entriegelungshilfea
in einer Linie mit der Verbindungstülle 4 liegt. Drücken Sie den Dampf-
fuß5 so auf den Teppichring p, sodass dieser spürbar einrastet. So kann
das blaue Pado über den Teppich gleiten.
► Um den Teppichring p zu entfernen, drücken Sie Ihren Fuß auf die Teppich-
ring-Entriegelungshilfe a und ziehen Sie den Dampffuß 5 vorsichtig vom
Teppichring p ab.
■ 44 │ DE
│AT│
CH SDM 1500 D2
Page 48
Bedienung und Betrieb
In diesem Kapitel erhalten Sie wichtige Hinweise zur Bedienung und Betrieb des
Gerätes.
Wasser auffüllen
ACHTUNG! SACHSCHADEN!
► Betreiben Sie das Gerät niemals ohne Wasser im Wassertank 8!
Die Pumpe kann ansonsten heißlaufen und beschädigt werden!
► Füllen Sie keine Reinigungsmittel oder andere Zusätze in den Wassertank8.
1) Schieben Sie die Entriegelungstaste „Wassertank“ 9 nach oben und
entnehmen Sie gleichzeitig den Wassertank 8.
2) Drehen Sie den Wassertank 8 um und schrauben Sie den Verschluss ab.
3) Füllen Sie Leitungswasser bis zur Markierung MAX auf dem Wassertank 8 ein.
HINWEIS
Sollte das Leitungswasser Ihres Wohnortes zu hart sein, empfiehlt es sich,
das Leitungswasser mit destilliertem Wasser zu mischen. Ansonsten können
die Düsen für die Dampfstoß-Funktion vorzeitig verkalken.
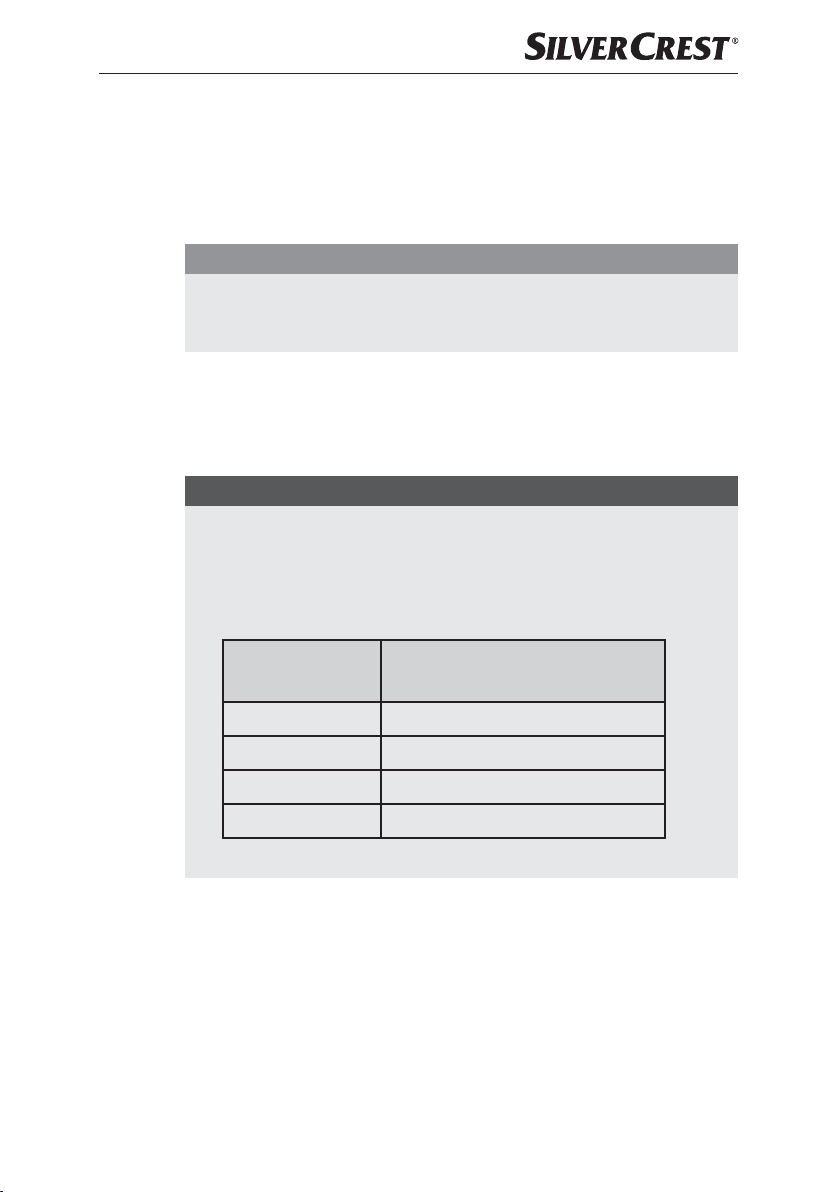
Zur Verlängerung der optimalen Dampfstoß-Funktion mischen Sie das
Leitungswasser mit destilliertem Wasser entsprechend der Tabelle:
4) Schrauben Sie den Verschluss handfest auf.
5) Drehen Sie den Wassertank 8 wieder um setzen Sie diesen in die Haupt-
SDM 1500 D2
Wasserhärte
sehr weich / weich 0
mittel 1:1
hart 2:1
sehr hart 3:1
Die Wasserhärte können Sie beim örtlichen Wasserwerk erfragen.
einheit 3 ein: Setzen Sie zuerst den unteren Teil in die Haupteinheit 3 und
kippen Sie dann den oberen Teil in das Gerät. Drücken Sie ihn fest an, so
dass der Wassertank 8 spürbar einrastet und fest in der Haupteinheit 3
sitzt.
Anteil destilliertes Wasser
zu Leitungswasser
DE│AT│CH
│
45 ■
Page 49

Bedienen
ACHTUNG! SACHSCHADEN!
►
Wenn Sie nicht sicher sind, ob der Fußboden für die Reinigung geeignet ist,
testen Sie die Verträglichkeit vorab an einer unauffälligen Stelle.
► Beachten Sie stets die Reinigungshinweise des Teppichherstellers. Prüfen Sie
vor Beginn der Reinigung zusätzlich, ob der Teppich für die Dampfreinigung
geeignet ist.
► Benutzen Sie das Gerät niemals ohne Pad 6/o auf dem Dampffuß 5.
Ansonsten werden die Fußböden verkratzt!
► Benutzen Sie den Teppichring p nur zur Reinigung von Teppichen. Benutzen
Sie den Teppichring p nicht zur Reinigung von Hartböden.
► Betreiben Sie das Gerät niemals ohne Wasser im Wassertank 8!
Die Pumpe kann ansonsten heißlaufen und beschädigt werden!
HINWEIS
► Bevor Sie den Fußboden mit dem Dampfmopp reinigen, empfehlen wir den
Fußboden zu saugen, um lose Schmutzpartikel zu beseitigen.
Wenn das Gerät fertig montiert und Wasser eingefüllt ist:
1) Klappen Sie den Griff nach oben, so dass die Entriegelungstaste „Griff“ 1
spürbar einrastet.
2) Falls noch nicht geschehen: Wickeln Sie das Netzkabel vollständig von
den Kabelhaken z/i. Zum leichten Abwickeln des Kabels können Sie
den oberen Kabelhaken z nach unten klappen, indem Sie diesen etwas
herausziehen und gleichzeitig drehen.
3) Führen Sie das Netzkabel durch die Einkerbung t an der Rückseite des
Griffs, so dass das Netzkabel nicht im Arbeitsbereich hängt.
4) Stecken Sie den Netzstecker in die Netzsteckdose.
5) Stellen Sie den Ein-/Aus-Schalter u auf „I“. Der Ein-/Aus-Schalter u
leuchtet, die rote Kontrollleuchte POWER 0 blinkt. Sobald das Gerät nach
ca. 25 Sekunden aufgeheizt ist, leuchtet die rote Kontrollleuchte POWER 0
durchgehend.
6) Wählen Sie mit der Taste MODE e die gewünschte Intensität der Dampf-
erzeugung:
– 1 x drücken: wenig Dampferzeugung, die grüne Kontrollleuchte w leuchtet.
– 2 x drücken: hohe Dampferzeugung, die rote Kontrollleuchte q leuchtet.
– 3 x drücken: keine Dampferzeugung, Bereitschaftsbetrieb, die Kontroll-
leuchte POWER 0 leuchtet.
■ 46 │ DE
│AT│
CH SDM 1500 D2
Page 50
HINWEIS
►
Die Dampfstufe mit der hohen Dampferzeugung empfehlen wir vor allem für
feuchtigkeits- und hitzeunempfindliche Bodenbeläge wie Fliesen.
► Die Dampfstufe mit der geringen Dampferzeugung empfehlen wir für
feuchtig keits- und hitzeempfindlichere Bodenbeläge wie z. B. Parkett.
7) Drücken Sie die Taste „Dampf“ r. Das Gerät beginnt mit der Dampferzeugung und nach kurzer Zeit tritt Dampf durch das Pad 6/o.
8) Wischen Sie über die gewünschten Flächen.
HINWEIS
► Wenn der Wassertank 8 leer gepumpt ist, läuft die Pumpe noch einige Zeit
nach, bis der leere Wassertank 8 durch gleichzeitiges Blinken der roten
Kontrollleuchte q, der grünen Kontrollleuchte w und der Kontrollleuchte
POWER 0 angezeigt wird.
Wenn während der Benutzung der Wassertank 8 leer ist:
– Drücken Sie erneut die Taste „Dampf“ r, um die Dampfproduktion zu
stoppen.
– Stellen Sie den Ein-/Aus-Schalter u auf „O“.
– Entnehmen Sie den Wassertank 8, befüllen Sie diesen und setzen
Sie den Wassertank 8 wieder ein, wie im Kapitel „Wasser auffüllen“
beschrieben.
– Stellen Sie den Ein-/Aus-Schalter u auf „I“.
– Wählen Sie die gewünschte Dampfstärke wie oben beschrieben und
drücken Sie die Taste „Dampf“ r.
9) Wenn Sie mit der Bearbeitung aller Flächen fertig sind, drücken Sie die
Taste „Dampf“ r, um die Dampferzeugung zu stoppen.
10) Stellen Sie den Ein-/Aus-Schalter u auf „O“. Die Kontrollleuchte POWER 0
erlischt.
11) Ziehen Sie den Netzstecker aus der Netzsteckdose.
HINWEIS
► Wenn nach der Reinigung mit dem Gerät auf dem Boden Schlieren zu
sehen sind, kann das an den zuvor verwendeten Reinigungsmitteln liegen.
Reinigen Sie den Boden einfach erneut mit dem Dampfmopp. Die Schlieren
sollten dann verschwunden sein.
SDM 1500 D2
DE│AT│CH
│
47 ■
Page 51
Nach dem Gebrauch
1) Lassen Sie das Gerät abkühlen.
2) Entfernen Sie das Pad 6/o.
3) Nehmen Sie den Wassertank 8 aus dem Gerät und entleeren Sie diesen.
4) Ziehen Sie den oberen Kabelhaken z ein wenig heraus und drehen Sie
diesen wieder nach oben. Wickeln Sie das Netzkabel um die beiden
Kabelhaken z/i.
Fixieren Sie das Ende des Netzkabels mithilfe des Kabelclips, welcher sich
am Kabel befindet.
Reinigung und Pflege
GEFAHR DURCH ELEKTRISCHEN SCHLAG!
► Ziehen Sie vor jeder Reinigung den Netzstecker!
WARNUNG! VERLETZUNGSGEFAHR!
► Lassen Sie das Gerät erst abkühlen, bevor Sie es reinigen.
Verbrennungsgefahr!
ACHTUNG! SACHSCHADEN
► Benutzen Sie zur Reinigung der Oberflächen weder scharfe Scheuer- oder
chemischen Reinigungsmittel, noch spitze oder kratzende Gegenstände.
■ Entleeren Sie nach jedem Gebrauch den Wassertank 8.
■ Nehmen Sie nach jedem Gebrauch das Pad 6/o vom Dampffuß 5 und
waschen Sie es aus.
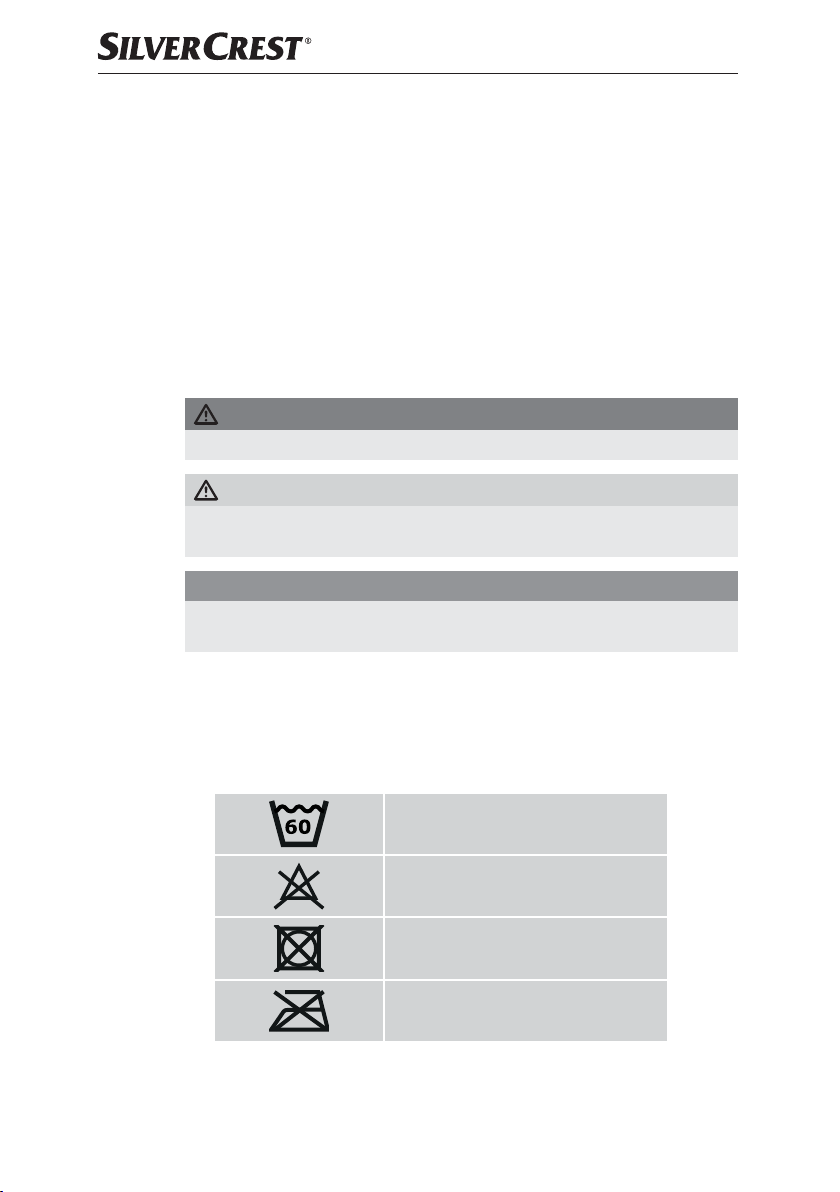
■ Beachten Sie folgende Waschanweisungen, wenn Sie das Pad 6/o in der
Waschmaschine reinigen:
■ 48 │ DE
max. bei 60 °C waschen
nicht bleichen
nicht im Trockner trocknen
nicht bügeln
■ Wischen Sie bei Bedarf das Gerät mit einem feuchten Tuch ab. Bei hart-
näckigeren Verschmutzungen geben Sie ein mildes Spülmittel auf das Tuch.
│AT│
CH SDM 1500 D2
Page 52
Wartung/Filter wechseln
Nach 4 – 6 Monaten oder ca. 100 Reinigungszyklen (ein Zyklus entspricht einer
Wassertankfüllung), muss der Filter 7 gewechselt werden. Bitte wenden Sie sich
für Ersatzfilter an unseren Service.
GEFAHR DURCH ELEKTRISCHEN SCHLAG!
► Ziehen Sie vor dem Wechsel des Filters 7 den Netzstecker!
1) Zum Entfernen des Filters 7 nehmen Sie zuerst den Wassertank 8 aus
dem Gerät.
2) Ziehen Sie den Filter 7 nach oben aus dem Gerät.
3) Setzen Sie den neuen Filter 7 ein.
4) Setzen Sie den Wassertank 8 ein.
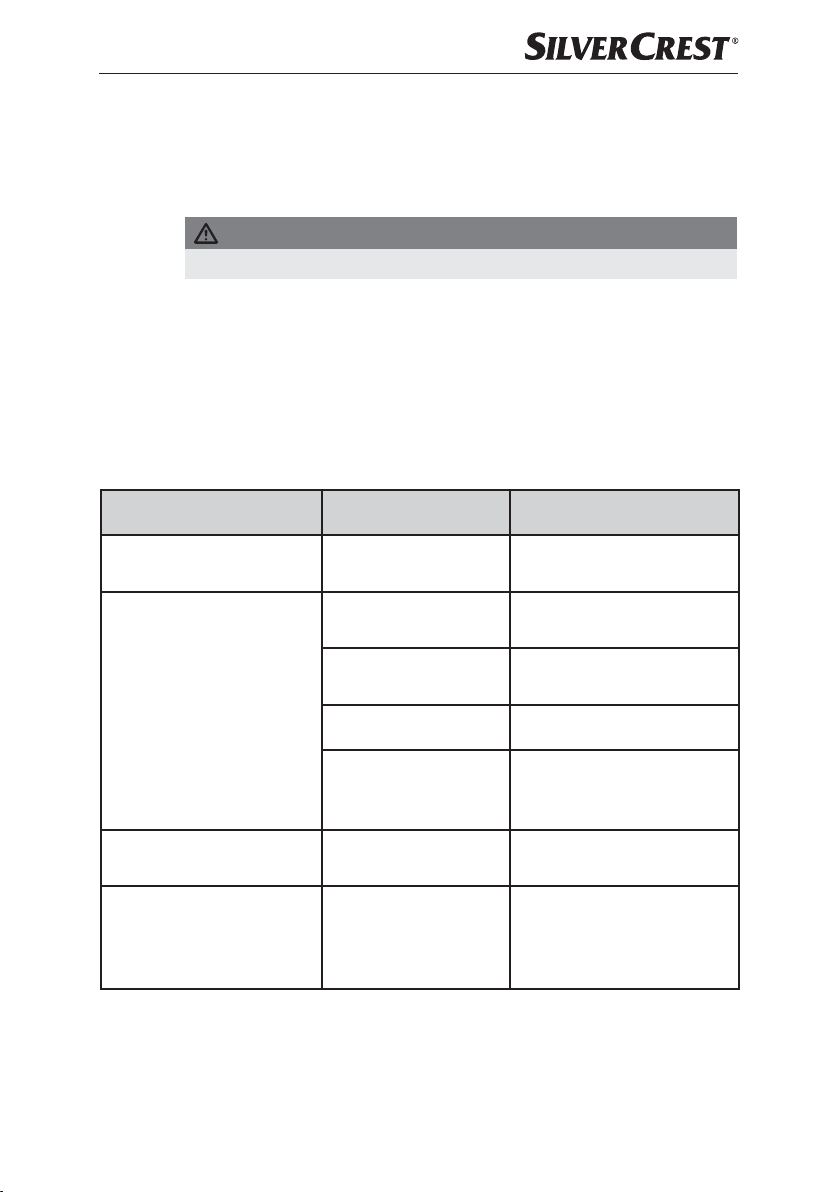
Fehlerbehebung
Programm Mögliche Ursachen Mögliche Lösungen
Das Gerät funktioniert nicht.
Das Gerät erzeugt keinen
Dampf.
Die Pumpe erzeugt ungewöhnlich laute Geräusche.
Es hat sich ein weißlicher Rand
auf dem Fußboden gebildet,
wo das Gerät während des
Betriebes kurz stehen blieb.
Der Netzstecker ist nicht
angeschlossen.
Die Taste „Dampf“ r
ist nicht gedrückt.
Es ist kein Wasser
im Wassertank 8.
Der Filter 7 ist verstopft. Wechseln Sie den Filter 7.
Es ist keine Dampfstärke
ausgewählt.
Es ist kein Wasser im
Wassertank 8.
Es hat sich etwas Kalk
abgelagert.
Schließen Sie das Gerät an
eine Netzsteckdose an.
Drücken Sie die Taste
„Dampf“r.
Füllen Sie Wasser in den
Wassertank 8.
Wählen Sie mit der Taste
MODE e die gewünschte
Dampfstärke.
Füllen Sie Wasser in den
Wassertank 8.
Wischen Sie die Kalkablagerungen mit einem feuchten Tuch
weg. Geben Sie, falls nötig,
etwas Entkalker auf das Tuch.
SDM 1500 D2
DE│AT│CH
│
49 ■
Page 53
Aufbewahren
■ Klappen Sie den Griff ein, indem Sie die Entriegelungstaste „Griff“ 1
drücken.
■ Ziehen Sie den oberen Kabelhaken z ein wenig heraus und drehen Sie
diesen wieder nach oben. Wickeln Sie das Netzkabel um die beiden
Kabelhaken z/i.
■ Tragen Sie das Gerät am Tragegriff 2.
■ Bewahren Sie das Gerät an einem trockenen und staubfreien Ort auf.
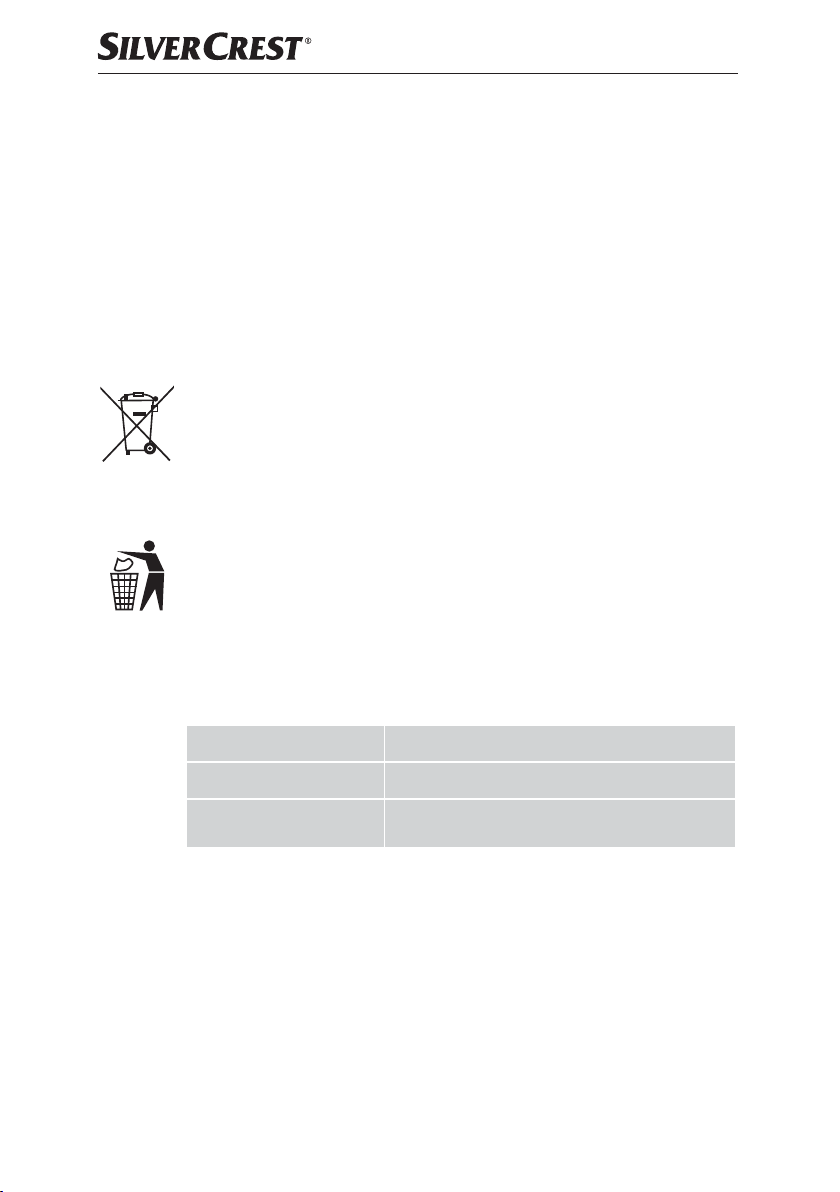
Entsorgung
Werfen Sie das Gerät keinesfalls in den normalen Hausmüll.
Dieses Produkt unterliegt der europäischen Richtlinie
2012/19/EU-WEEE (Waste Electrical and Electronic Equipment).
Entsorgen Sie das Gerät über einen zugelassenen Entsorgungsbetrieb oder
über Ihre kommunale Entsorgungseinrichtung. Beachten Sie die aktuell geltenden
Vorschriften. Setzen Sie sich im Zweifelsfall mit Ihrer Entsorgungseinrichtung in
Verbindung.
Möglichkeiten zur Entsorgung des ausgedienten Produkts erfahren Sie bei Ihrer
Gemeinde- oder Stadtverwaltung.
Anhang
Technische Daten
Spannungsversorgung 220 – 240 V ∼ (Wechselstrom), 50/60 Hz
Leistungsaufnahme 1370 – 1630 W
Schutzart
■ 50 │ DE
│AT│
CH SDM 1500 D2
IPX4 (Schutz gegen Spritzwasser aus allen
Richtungen)
Page 54
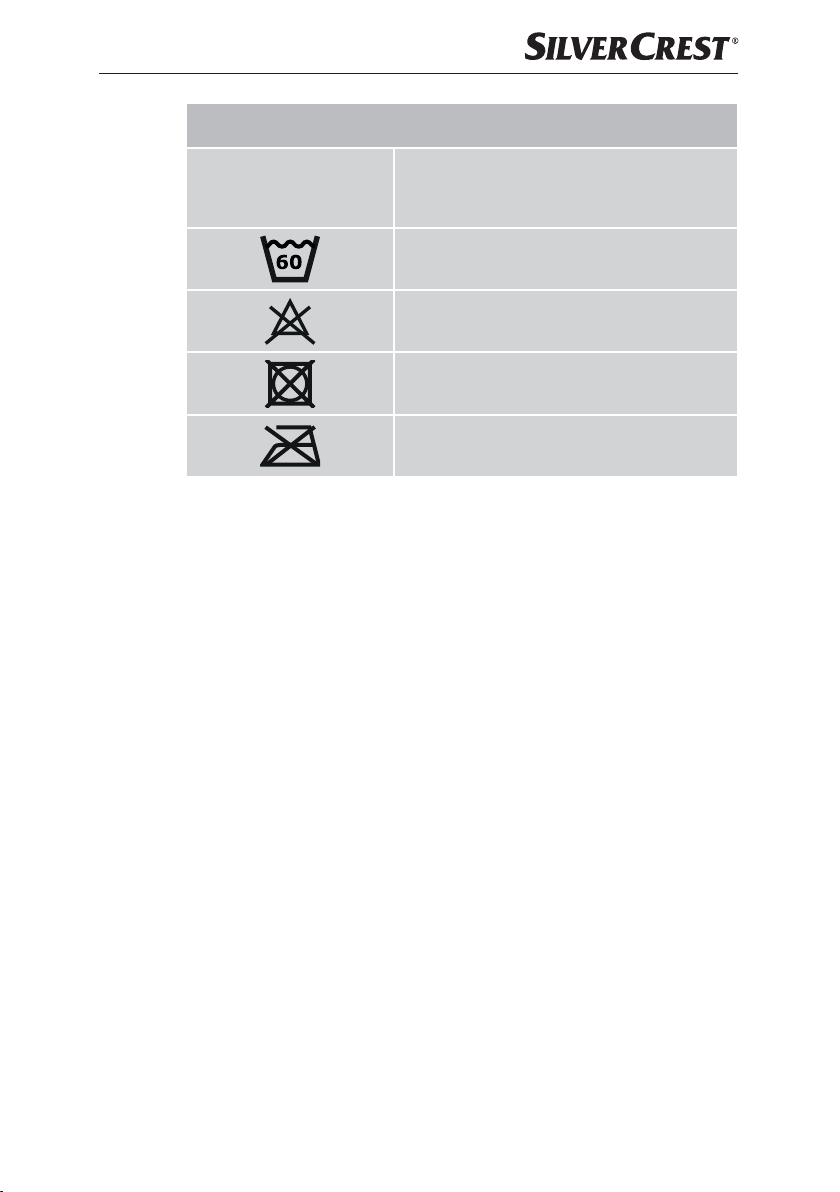
Informationen zu den Pads 6/o
Materialzusammensetzung
Pad weiß
Pad blau
6: 100% Polyester
o: 80% Polyester, 20% Baumwolle
max. bei 60 °C waschen
nicht bleichen
nicht im Trockner trocknen
nicht bügeln
Garantie der Kompernaß Handels GmbH
Sehr geehrte Kundin, sehr geehrter Kunde,
Sie erhalten auf dieses Gerät 3 Jahre Garantie ab Kaufdatum. Im Falle von
Mängeln dieses Produkts stehen Ihnen gegen den Verkäufer des Produkts gesetzliche Rechte zu. Diese gesetzlichen Rechte werden durch unsere im Folgenden
dargestellte Garantie nicht eingeschränkt.
Garantiebedingungen
Die Garantiefrist beginnt mit dem Kaufdatum. Bitte bewahren Sie den Kassenbon
gut auf. Dieser wird als Nachweis für den Kauf benötigt.
Tritt innerhalb von drei Jahren ab dem Kaufdatum dieses Produkts ein Materialoder Fabrikationsfehler auf, wird das Produkt von uns – nach unserer Wahl – für
Sie kostenlos repariert, ersetzt oder der Kaufpreis erstattet. Diese Garantieleistung setzt voraus, dass innerhalb der Dreijahresfrist das defekte Gerät und der
Kaufbeleg (Kassenbon) vorgelegt und schriftlich kurz beschrieben wird, worin
der Mangel besteht und wann er aufgetreten ist.
Wenn der Defekt von unserer Garantie gedeckt ist, erhalten Sie das reparierte
oder ein neues Produkt zurück. Mit Reparatur oder Austausch des Produkts
beginnt kein neuer Garantiezeitraum.
Garantiezeit und gesetzliche Mängelansprüche
Die Garantiezeit wird durch die Gewährleistung nicht verlängert. Dies gilt auch
für ersetzte und reparierte Teile. Eventuell schon beim Kauf vorhandene Schäden
und Mängel müssen sofort nach dem Auspacken gemeldet werden. Nach Ablauf
der Garantiezeit anfallende Reparaturen sind kostenpflichtig.
SDM 1500 D2
DE│AT│CH
│
51 ■
Page 55
Garantieumfang
Das Gerät wurde nach strengen Qualitätsrichtlinien sorgfältig produziert und vor
Auslieferung gewissenhaft geprüft.
Die Garantieleistung gilt für Material- oder Fabrikationsfehler. Diese Garantie
erstreckt sich nicht auf Produktteile, die normaler Abnutzung ausgesetzt sind und
daher als Verschleißteile angesehen werden können oder für Beschädigungen an
zerbrechlichen Teilen, z. B. Schalter, Akkus oder Teile, die aus Glas gefertigt sind.
Diese Garantie verfällt, wenn das Produkt beschädigt, nicht sachgemäß benutzt
oder gewartet wurde. Für eine sachgemäße Benutzung des Produkts sind alle
in der Bedienungsanleitung aufgeführten Anweisungen genau einzuhalten.
Verwendungszwecke und Handlungen, von denen in der Bedienungsanleitung
abgeraten oder vor denen gewarnt wird, sind unbedingt zu vermeiden.
Das Produkt ist nur für den privaten und nicht für den gewerblichen Gebrauch
bestimmt. Bei missbräuchlicher und unsachgemäßer Behandlung, Gewaltanwendung und bei Eingriffen, die nicht von unserer autorisierten Serviceniederlassung
vorgenommen wurden, erlischt die Garantie.
Abwicklung im Garantiefall
Um eine schnelle Bearbeitung Ihres Anliegens zu gewährleisten, folgen Sie bitte
den folgenden Hinweisen:
■ Bitte halten Sie für alle Anfragen den Kassenbon und die Artikelnummer
(z.B.IAN123456) als Nachweis für den Kauf bereit.
■ Die Artikelnummer entnehmen Sie bitte dem Typenschild am Produkt, einer
Gravur am Produkt, dem Titelblatt der Bedienungsanleitung (unten links) oder
dem Aufkleber auf der Rück- oder Unterseite des Produktes.
■ Sollten Funktionsfehler oder sonstige Mängel auftreten, kontaktieren Sie
zunächst die nachfolgend benannte Serviceabteilung telefonisch oder
per E-Mail.
■ Ein als defekt erfasstes Produkt können Sie dann unter Beifügung des Kaufbelegs
(Kassenbon) und der Angabe, worin der Mangel besteht und wann er aufgetreten ist, für Sie portofrei an die Ihnen mitgeteilte Serviceanschrift übersenden.
Auf www.lidl-service.com können Sie diese und viele weitere Handbücher,
Produktvideos und Installationssoftware herunterladen.
Mit diesem QR-Code gelangen Sie direkt auf die Lidl-Service-Seite
(www.lidl-service.com) und können mittels der Eingabe der Artikelnummer
(IAN) 123456 Ihre Bedienungsanleitung öffnen.
■ 52 │ DE
│AT│
CH SDM 1500 D2
Page 56
Service
Service Deutschland
Tel.: 0800 5435 111 (kostenfrei aus dem dt. Festnetz/Mobilfunknetz)
E-Mail: [email protected]
Service Österreich
Tel.: 0820 201 222 (0,15 EUR/Min.)
E-Mail: [email protected]
Service Schweiz
Tel.: 0842 665566 (0,08 CHF/Min., Mobilfunk max. 0,40 CHF/Min.)
E-Mail: [email protected]
IAN 331382_1907
Importeur
Bitte beachten Sie, dass die folgende Anschrift keine Serviceanschrift ist.
Kontaktieren Sie zunächst die benannte Servicestelle.
KOMPERNASS HANDELS GMBH
BURGSTRASSE 21
44867 BOCHUM
DEUTSCHLAND
www.kompernass.com
SDM 1500 D2
DE│AT│CH
│
53 ■
Page 57
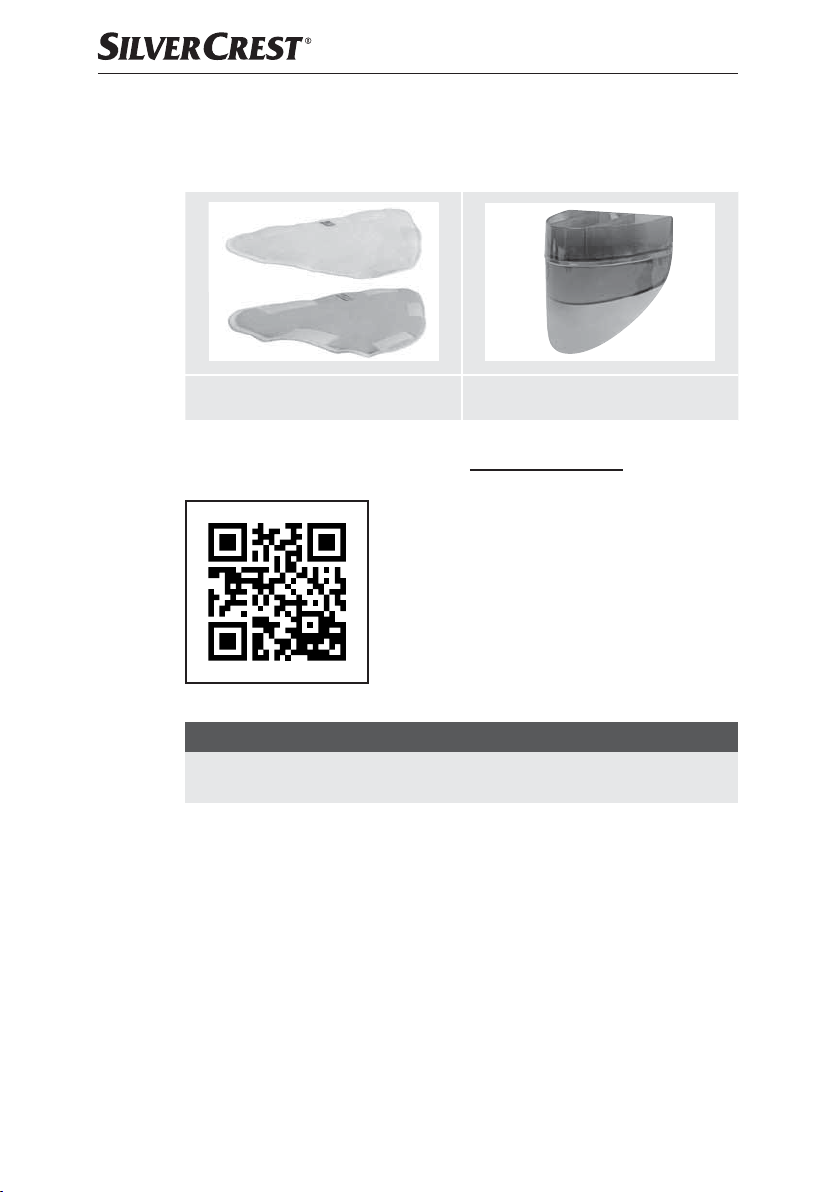
Ersatzteile bestellen
Folgende Ersatzteile können Sie zum Produkt SDM 1500 D2 bestellen:
► 2 x Ersatzpads (blau und weiß) ► 1 x Filter
Bestellen Sie die Ersatzteile über unsere Service-Hotline (siehe Kapitel Service)
oder bequem auf unserer Webseite unter www.kompernass.com.
■ 54 │ DE
HINWEIS
► Halten Sie die IAN-Nummer, die Sie auf dem Umschlag dieser Bedienungs-
anleitung finden, für Ihre Bestellung bereit.
│AT│
CH SDM 1500 D2
Page 58

KOMPERNASS HANDELS GMBH
BURGSTRASSE 21
44867 BOCHUM
GERMANY
www.kompernass.com
Last Information Update · Έκδοση των πληροφοριών
Stand der Informationen:
11 / 2019 · Ident.-No.: SDM1500D2-102019-2
IAN 331382_1907
 Loading...