


USB MICROPHONE
MV5
USER GUIDE
Le Guide de l’Utilisateur Bedienungsanleitung Guia del Usuario
Guida dell’Utente Manual do Usuário
Руководство пользователя
繁體中文
Panduan Pengguna
© 2015 Shure Incorporated 27A24499 (Rev. 2)
Printed in U.S.A.

USB Microphone
Quick Setup
1.Connect the microphone to a computer or mobile device. Use the appropriate cable (USB or Lightning).
The Green status LED indicates a successful connection.
Note: When using apps like Voice Memo, the LED will not light until Record is engaged.
2.Confirm that the MV5 is the selected audio device.
Most computers and mobile devices automatically detect the MV5 and assign it as the primary audio device. If your
computer settings default to another device, open the sound control panel and select the MV5. To quickly verify that the device is recognized, plug headphones into the MV5 audio output and play an audio track. If you can hear sound, the microphone is functioning properly.
Connections and Controls
Mode Selection Button
Press to switch between preset modes
Mute Button
Press to mute the microphone input
Headphone Volume Control
Adjusts the headphone volume
Headphone Output
Plug in any headphones with a 3.5 mm (1/8 inch) connector
Micro USB Port
Use the appropriate cable (USB or Lightning) to connect the MV5 to a computer or mobile device
Note: When the MV5 is assigned as the audio device, all monitoring and playback from the recording software goes to the headphone output of the MV5.
3.Use the MODE button to select the preset mode that fits your application.
If the audio is too quiet or causes distortion, gain can be manually configured. However, the modes typically do not require additional gain adjustments. Refer to the "Adjusting Microphone Level" topic in this guide for details.
4.In your recording application, select the MV5 as the input source.
See your software user guide for information on assigning input sources.
5.Record.
The microphone is ready to use!
Voice Mode
The LED indicator illuminates when this mode is selected
Status Indicator |
|
|
|
LED Behavior |
Status |
|
Green |
Active USB or |
|
|
Lightning connection |
|
Flashing Red (all |
Muted |
|
3 LEDs) |
|
Instrument Mode
The LED indicator illuminates when this mode is selected
Note: Flat Mode is engaged when both mode LEDs are off.
3
Placement
This section suggests microphone placement for typical use cases. Keep in mind that there are many effective ways to record a given source. Experiment with microphone placement and settings to find what works best.
Podcast and Voice Recording
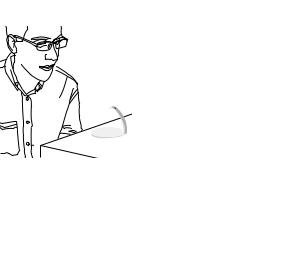
Set the microphone to the Voice mode. Speak directly into the front of the microphone, 2-12 inches (5-30 cm) away. Speaking closer to the microphone results in more bass response, similar to voices on a radio broadcast. Make additional gain adjustments if necessary.
Bands and Louder Sources
To record a band with drums, amplified instruments, or any other loud sources, start with Instrument mode for best results. Aim the microphone towards the group at a distance of 6 to 15 feet (1.83 to 4.6 m). Placement of the microphone depends on the size of the room, number of people, and instrument volume. If possible, walk around the room and listen to find where it sounds best. Make additional gain adjustments if necessary.
2-12 in (5-30 cm)
6-15 ft (2-4 m)
For a single electric guitar amplifier, aim the microphone towards the center of the speaker at a distance of 0 to 18 inches (0 to 45 cm).
Music, Singing, and Acoustic Instruments
To capture acoustic sources, such as singing, acoustic guitar, soft percussion, or other musical instruments, use a close microphone placement. Start with Instrument mode for best results.
Aim the microphone directly at the sound source. For a single source, such as a string instrument or a vocalist, place the microphone 6 to 12 inches (15 to 30 cm) away. For a small group
or a performer who is singing and playing an instrument simultaneously, use a distance of 2 to 10 feet (0.6m to 3 m). Placing the microphone farther away results in more ambient room sound. Make additional gain adjustments if necessary.
0-18 in (0-45 cm)
Additional Tips
Shure offers additional educational publications on recording techniques for specific instruments and applications. Visit www.shure.com for more information.
4
 Loading...