


v i d e o c a s s e t t e r e c o r d e r
V H R - H 7 9 0 E
PAL NTSC4.43
Instruction
Manual
Please read carefully to ensure you get the best from this product.
!
DANGER:
This VCR contains live parts.
Do not remove the cabinet.
WARNING:
To prevent fire or shock hazard, do not expose this product to rain or moisture.
CAUTION:
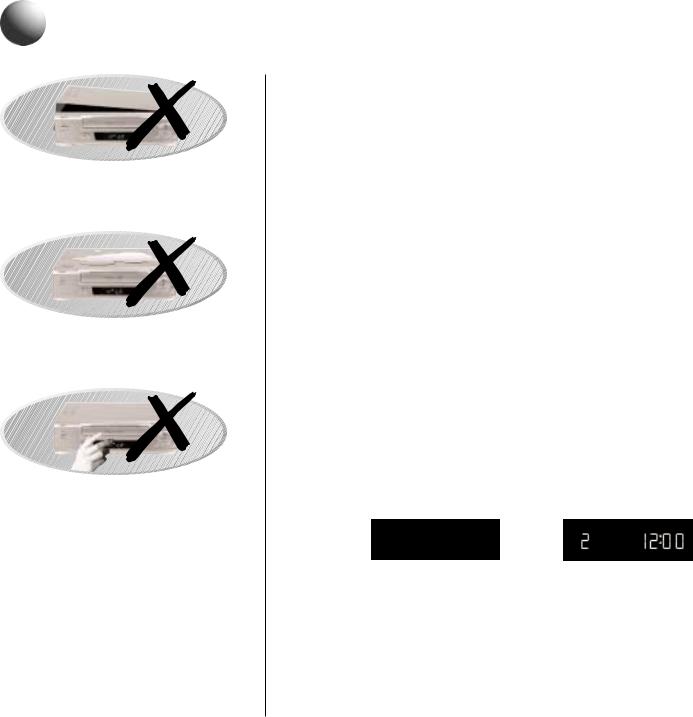
Do not put your hand or other objects in the cassette loading slot because of the risk of injury or an accident.
Keep small children away from the VCR.
DEW/CONDENSATION CAUTION
Condensation can form inside the VCR when it is suddenly moved from a cold place to a warm or humid environment.
In any such circumstance do not use this VCR for 11⁄2 to 2 hours allowing complete elimination of any condensation.
OPERATING PRECAUTIONS
●Place the VCR on a flat, stable, level surface. Never subject it to violent shaking or any other shock or impact.
●Do not expose the unit to high temperatures. Excessive heat (heat sources such as heaters, ovens, closed car on hot days, etc.) may damage the unit.
●This VCR should only be used within a temperature range of 50C to 400C (410F to 1050F) and at less than 80% humidity.
●Do not use the unit under the following conditions:
-in locations with high humidity
-in presence of excessive dirt or dust
-in areas subject to strong vibrations
-near strong magnetic fields (e.g. transmitting antennas, motors, fluorescent lights, etc.)
●Do not stack anything on top of your VCR, or block the air vents, to prevent overheating or damage.
●Do not place anything, except VHS video cassette tapes, in the unit.
●Do not allow rain, steam, dew, salt water, sand, oily smoke, metal objects, etc. to enter the unit.
●Clean with a dry and soft cloth, or soft cloth slightly moistened with a mild detergent solution.
●Do not use any type of solvent, such as alcohol or benzine.
POWER ON/STANDBY MODE
Power is switched on/off by pressing the 1 button.
VCR display: |
Standby mode |
Power on mode |
LR
I 2:O O
"Standby mode" is the condition in which only the time is displayed.
●Do not forget that even in the power off state there is an electrical voltage inside the VCR as long as it is connected to a wall socket.
●Disconnect the mains lead from the wall socket if the VCR is not to be used for a long time.
Note: Only video cassette tapes marked  can be used with this VCR.
Note: If the unit does not operate properly, switch it off, refer to "TROUBLE SHOOTING" (see page 34) or contact your Sanyo authorised service agent.

FOR PROTECTION OF THE ENVIROMENT
When the time comes to dispose of this product, please take it to a recycling collection centre or facility. Thank you for your co-operation.
VIDEO Plus+ and PlusCode are registered trademarks of Gemstar Development Corporation.
VIDEO Plus+ system is manufactured under license from Gemstar Development Corporation.
c o n t e n t s
controls |
1 - 2 |
|
|
plug & play - connections |
3 - 4 |
|
|
plug & play - auto setup |
5 - 8 |
|
|
a-using scart connections |
|
|
|
b-using aerial output cable connections |
|
|
|
rf output channel adjustment |
9 |
|
|
additional tuning |
10 - 11 |
|
|
sorting tv stations & fine tuning |
|
|
|
manual tuning & skip function |
|
|
|
vcr presetting |
12 |
|
|
auto & manual clock adjustment |
|
|
|
function setup |
13 |
|
|
childlock |
|
|
|
playback |
14 - 18 |
|
|
variable playback modes |
|
|
|
ntsc tape playback |
|
|
|
picture adjustments |
|
|
|
endless play & remaining tape duration function |
|
|
|
return to zero & index search |
|
|
|
recording tv programmes |
19 - 20 |
|
|
setting the recording type |
|
|
|
quick start recording |
|
|
|
timer recording using video plus+® |
21 - 22 |
|
|
manual on-screen timer recording |
23 - 24 |
|
|
timer recording without the remote |
25 |
|
|
recording functions |
26 |
|
|
just rec. & pdc function |
|
|
|
tape library deluxe system |
27 - 31 |
|
|
timer recording & automatic playback |
|
|
|
tape copying |
32 |
|
|
error messages guide |
33 |
|
|
trouble shooting |
34 |
|
|
rf output deactivation |
35 |
|
|
specifications |
|
|
|
|
36 |
|
|
|
|
|
|
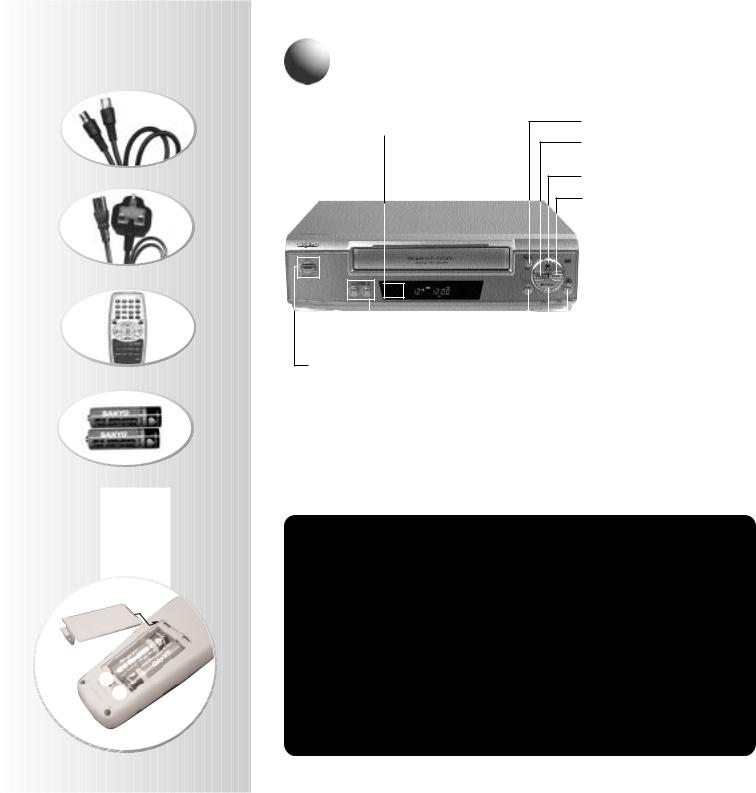
Accessories
Aerial output cable
Mains lead
Remote control
2 AA(IEC R6)size,
1.5-volt batteries
Inserting the
batteries
+
-
1
vcr front panel
Remote control sensor
Operate the remote control unit within a range of approx. 30o and approx. 6m (20ft.) from the front of the VCR.
PAUSE Recording Pause
REW Rewind, reverse search during playback
PLAY Playback
FFFast-forward, forward search during playback
|
|
|
|
TAPE LIBRARY |
Recording |
CHANNEL + , - Programme selection |
|
|
|||
|
|
||||
|
|
|
|
||
|
Picture adjustment |
|
|
STOP/EJECT |
Tape stop, cassette ejection |
|
|
|
|||
1 Power on/standby mode |
|
|
REC |
Recording |
|
|
|
||||
Energy saving eco mode
The ECO mode reduces the electricity consumption by turning off the VCR display and other components while the VCR is in standby mode.
To set the ECO mode:
1.Press the 1 button to switch the VCR to standby mode.
2.Press and hold the 1 button for more than 3 seconds.
●The ECO mode indicator will light up.
●The VCR display will be blank.
●ECO mode is cancelled when the VCR is turned on.
NOTES:
●When a timer recording is programmed the ECO mode cannot be set.
●When watching TV, do not set the ECO mode. If the ECO mode is set, the aerial output from the VCR will deteriorate giving very poor TV reception.
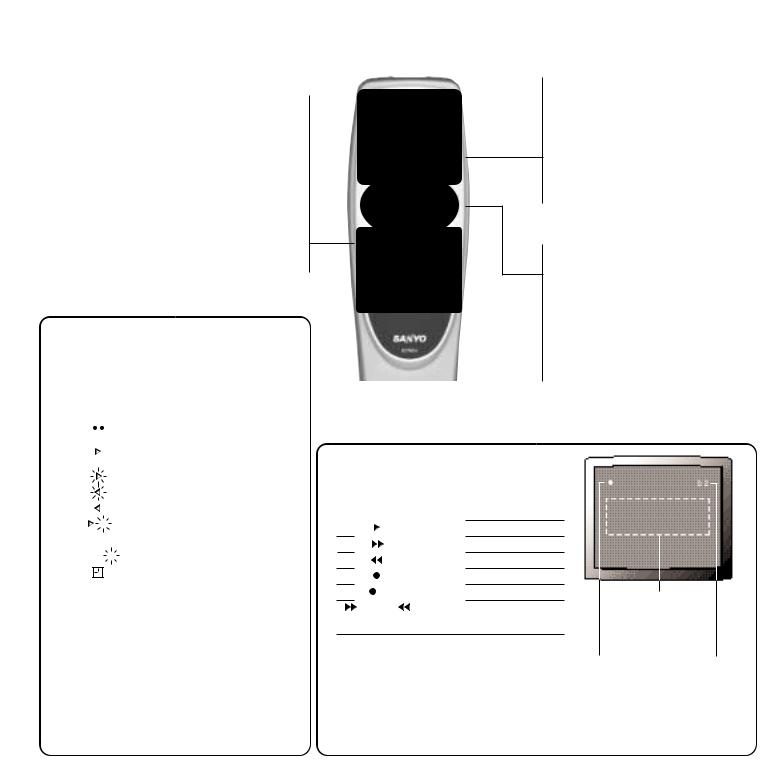
remote control
REC |
Recording |
x2 |
Double speed playback |
SLOW |
Slow motion |
VIDEO Plus+ |
VIDEO Plus+ programme timer setting |
TYPE |
Recording type setting |
SP/LP |
Recording tape speed selection |
DPC•PDC |
Programme Delivery Control on/off |
|
Digital Picture Control on/off |
INDEX |
Index search |
REMAIN |
Tape remaining time |
RESET |
Counter reset |
0 |
Counter zero (“0:00:00”) return |
DISPLAY |
Programme position, day/time display |
AUDIO |
Sound track selection |
vcr display
|
|
|
|
|
|
ST BIL LR |
REC |
SP |
|
|
|
|
|
|
|
2 |
l 2 : 0 0 |
|
|||
|
|
|
|
|
|
PDC |
LP |
|
||
display |
|
mode |
|
|
|
|
||||
|
|
|
|
|
||||||
|
|
|
|
|
|
CASSETTE IN |
|
|
|
|
|
|
|
|
|
|
|
|
|
||
|
|
|
|
|
|
PLAYBACK, X2 PLAYBACK |
|
|||
|
|
|
|
|
|
FORWARD SEARCH, SLOW MOTION |
||||
|
|
|
|
|
|
FAST-FORWARD |
|
|
|
|
|
|
|
|
|
|
REWIND |
|
|
|
|
|
|
|
|
|
|
REVERSE SEARCH |
|
|
|
|
|
|
|
|
|
|
STILL PICTURE |
|
|
|
|
|
|
|
|
|
|
|
|
|
||
|
|
|
|
|
|
|
|
|
||
REC |
|
RECORD |
|
|
|
|
||||
REC |
|
|
|
RECORD PAUSE |
|
|
|
|||
|
|
|
|
|
||||||
|
|
|
|
|
||||||
|
|
|
|
|
|
TIMER ON |
|
|
|
|
1- 88 |
|
|
PROGRAMME POSITION NUMBER |
|||||||
L1 |
|
EXTERNAL INPUT (EURO-AV1) |
|
|||||||
L2 |
|
EXTERNAL INPUT (EURO-AV2) |
||||||||
Id P:1 |
|
INDEX SEARCH |
|
|
|
|
||||
PDC |
|
PDC SIGNAL INDICATOR |
|
|
|
|||||
LR |
|
SOUND TRACK |
|
|
|
|
||||
ST, BIL |
|
STEREO/BILINGUAL PROGRAMME |
||||||||
LP, EP |
|
TAPE SPEED MODE* |
|
|
|
|||||
*SP: Best image & sound quality. (NO DISPLAY)
LP: Recording & playback times are double SP mode.
EP: NTSC playback times are triple SP mode.
0 - 9 |
Direct programme selection, |
|
various input |
1Power on/standby mode
CH + , - |
Tuning, programme selection, |
|
tracking adjustment |
PRESET |
Tuner preset |
INPUT |
External input mode selection |
OK |
Data/settings entry |
MENU |
On-screen menu operation |
CLEAR |
Clears data |
PLAY Playback
FFFast-forward, forward search during playback
REW |
Rewind, reverse search |
|
during playback |
PAUSE/STILL |
Recording pause, still picture |
STOP |
Tape stop |
ON-SCREEN MENU OPERATION BUTTONS |
|
SET |
To store data in the menu |
×ØÙÚ |
Cursor keys |
tv screen display
When pressing the buttons shown below, the mode is displayed on-screen for 2 seconds.
tape mode
PLAYBACK FAST-FORWARD REWIND RECORDING RECORDING PAUSE
0:00:00 |
RETURN TO ZERO |
|
DISPLAYED IN CENTRE OF SCREEN |
programme position mode
|
|
|
0188 |
PROGRAMME POSITION NUMBER |
|
L1 |
EXTERNAL INPUT (EURO-AV1) |
|
L2 |
EXTERNAL INPUT (EURO-AV2) |
|
Error message
Tape |
Programme |
mode |
position mode |
error message
If you make an error when controlling the VCR, warning messages indicating the problem are displayed for about 3 seconds. See page 33 for details.
2
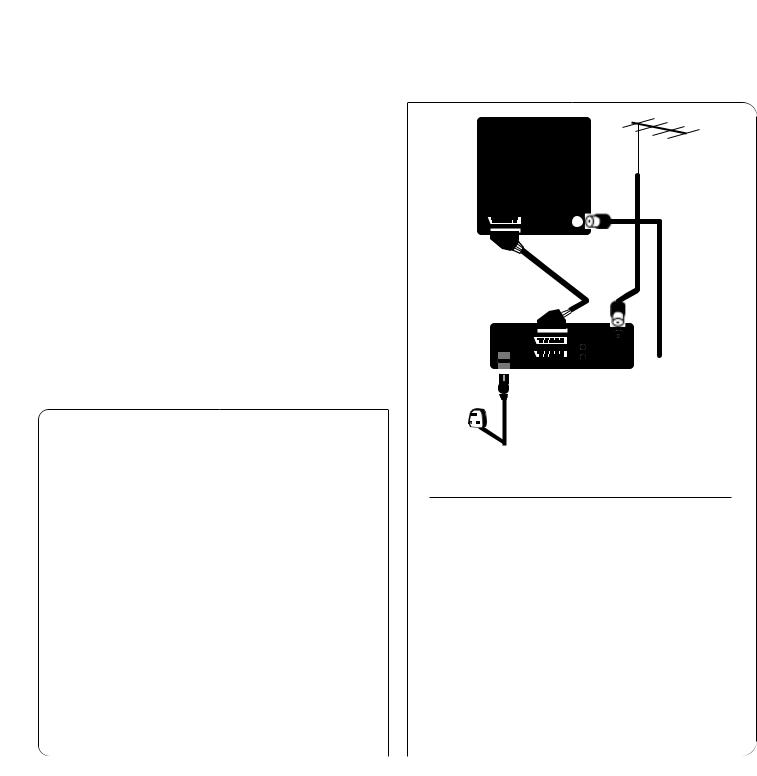
 plug & play - connections
Connect all your equipment together according to the illustrations shown in this section. Be sure you have all leads and remote control batteries correctly installed before proceeding to the next section.
Mains lead connections
●If the plug supplied with this appliance is not suitable for the wall socket in your home, it should be cut off and the correct type fitted.
The wires in the mains lead are coloured according to the following
code: |
|
Blue: Neutral |
Brown: Live |
If the colours of the wires do not correspond with the colour markings identifying the terminals in your plug, proceed as follows.
●The wire which is coloured blue must be connected to the terminal which is marked with the letter N or coloured blue or black.
●The wire which is coloured brown must be connected to the terminal which is marked with the letter L or coloured brown or red.
Disposal of plug
If the non rewireable plug is to be cut off, the removed plug should be disposed of carefully as there is a shock hazard should the plug be inserted into a live socket.
Replacing the fuse
The detachable fuse cover must be replaced after changing the fuse. Only a 3A fuse should be used, it should comply with BS1362, and should carry the ASTA mark.
TV
Aerial
|
|
|
|
|
|
|
|
|
|
|
|
|
|
Aerial |
|
|
|
|
|
|
|
|
|
|
|
|
|
|
|
|
|
|
|
|
|
|
|
|
|
|
|
|
|
|
|
|
|
|
|
|
|
|
|
|
|
|
|
|
|
|
|
|
|
|
|
|
|
|
|
|
|
|
|
|
|
|
|
|
|
|
|
|
|
|
|
|
|
|
|
|
|
|
|
|
|
|
|
|
|
|
|
|
|
|
SCART lead |
|
|
|
|
|
|
|
|
|
output |
||||
(optional/not |
|
|
|
|
|
|
|
|
|
cable |
||||
|
|
|
|
|
|
|
|
|
|
|
|
|
|
(supplied) |
|
|
|
|
|
|
|
|
|
|
|
|
|
|
|
|
|
|
|
|
|
|
|
|
|
|
|
|
|
|
VCR |
AV1 |
IN |
|
OUT

To a wall socket
Mains lead (supplied)
aerial output cable (rf) connection & additional scart/av connection
Connect your equipment together using the aerial output cable (supplied).
Connect an additional SCART/AV lead (not supplied) between the VCR and TV as shown above to obtain better quality picture and sound during playback.
When using a SCART lead connection the TV will automatically switch to AV mode whenever the PLAY or VIDEO Plus+ button is pressed.
To access any of the VCR’s screen menus switch your TV to AV mode.
3

TV |
TV |
Aerial |
Aerial |
|
|
Satellite, |
|
|
|
|
Cable |
|
|
|
output cable |
or Digital |
|
Aerial output cable |
|
set top box |
|
||
|
(supplied) |
|
||
|
|
|
(supplied) |
|
|
|
|
|
|
SCART |
|
|
|
|
(optional/not |
|
|
|
Hi-Fi |
|
|
Aerial |
|
|
VCR |
|
VCR |
|
|
IN |
output |
IN |
||
AV2 |
OUT |
(not supplied) |
AV2 |
OUT |
To a wall |
To a wall |
Audio lead (not supplied) |
socket |
socket |
Mains lead |
Mains lead |
(supplied) |
(supplied) |
satellite, cable or digital set |
hi-fi connection |
|
top box connection |
|
|
Connect your satellite, cable or digital set top box receiver |
Connecting your Hi-Fi to the VCR as shown above you can |
|
as shown above. |
obtain a dynamic sound output when you playback a tape |
|
If you have connected a standard satellite or cable box, |
recorded in Hi-Fi stereo on this VCR. |
|
|
||
switch the unit on and select SKY1. The programme will |
Please refer to your Hi-Fi instructions for connection lead |
|
then be stored in programme position number 6 during |
details. |
|
the Auto Setup procedure. |
|
|
Due to the digital broadcast signal being different to terrestrial analogue broadcast signals, the VCR will not be able to store the signal from your set top box during the Auto setup process.
Please refer to your satellite/cable/digital instructions for detailed information on connection.
4
Notes on auto setup:
●Do not press any buttons or controls during the AUTO SETUP process.
●The process is not possible if the VCR is set to external input mode.
●The skip function will automatically be set for all programme position numbers where no TV station has been preset.
●Due to possible changes made by broadcasts, TV stations may not always be sorted in the correct order (e.g. BBC1 may be set to programme position 7 or higher).
This VCR is equipped with a Plug & Play function, which automatically enters necessary settings before the VCR is used for the first time. The following settings will be set:
auto tuning
The VCR will automatically search and preset all available TV stations in the area of use to programme position numbers (1 to 88).
auto sorting of the tv stations
The TV stations available in your area will be automatically sorted and placed in order starting from programme position number “1” to programme position number “6”, as follows:
Programme Position |
1 |
2 |
3 |
4 |
5 |
6 |
|
|
|
|
|
|
|
TV Station |
BBC1 |
BBC2 |
ITV |
C4 |
*CH5 |
*1 or *SKY1 |
*CH5, if available in your area.
*1, for areas where there is a satellite broadcasting service, the TV station with the lowest frequency will be preset to this programme position. (select SKY1 on the Satellite/Cable box). *SKY1, to ensure that your satellite receiver is preset to programme position number 6 during AUTO SETUP, make sure it is switched on and that SKY1 is selected.
auto rf output/video channel setting
The VCR will automatically search for an available channel location between (21 - 69) to set the video output channel for RF connection.
auto clock setting
The date and time on the VCR will be set automatically.
Every Sunday at 3am or 6pm the clock is checked and adjusted, therefore the manual setting of summer/standard time is not necessary.
5

a
1 POWER ON/Standby
SET
CHANNEL – & +
Scart connections:
The TV will automatically switch to show a VCR tape picture in playback mode.
To access any of the VCR’s on-screen menus switch the TV to AV mode.
scart connector users only
If you have connected your equipment using only the supplied aerial output cable, please go to AUTO SETUP B (page 7).
1Turn on the TV and set it to AV mode.
2Press the 1 button.
The message screen is displayed for about 5 seconds.
●If this does not appear, or “NO SIGNAL” appears press both CHANNEL (+ , -) buttons on theVCR for at least 3 seconds.
ê
●The AUTO SETUP process will start automatically and may take a few minutes. Please be patient.
ê
●When the AUTO SETUP process is complete, press the SET button.
This completes the initial setup of your VCR. You do not need to complete Auto setup B on pages 7 & 8.
Please read carefully through the rest of this manual to find out about the features and functions that this VCR incorporates.
6
b
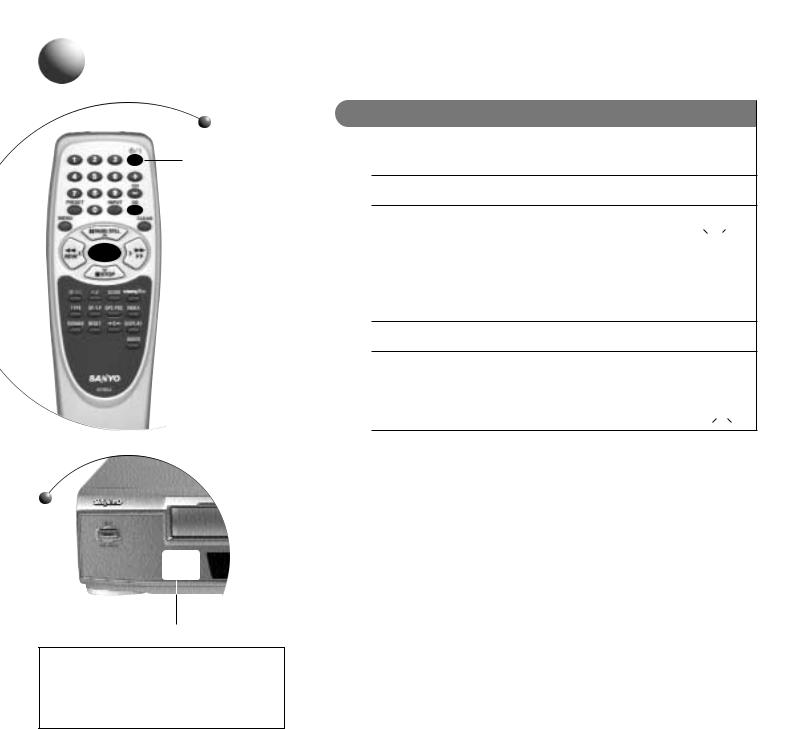
1 POWER ON/Standby
OK
SET
CHANNEL – & +
Note:
The RF output numbers you see on your VCR display may differ from those shown, depending on the area you live in.
aerial output cable (rf) connections
Proceed through this section if you have connected your TV to the VCR using just the supplied aerial output cable (RF connection).
Switch off your TV as you will only be using the VCR display for the moment.
1 Press the 1button. |
|
|
AUTO SETUP will start automatically. |
LR |
AUTO |
The VCR display will show... |
2 l |
R F |
If this does not appear, press both CHANNEL (+ and –) buttons on the VCR for at least 3 seconds.
PDC
The Auto setup process will take a few minutes, please be patient.
2When the AUTO SETUP is complete,
OK will flash in the VCR display... |
LR |
|
Press the SET button. |
52 R F |
|
OK |
||
|
|
|
To complete the initial setup of your VCR you now need to tune your TV to the VCR in order that you can view a video tape in playback. You may use either method illustrated on the opposite page.
7
b tuning the tv to the vcr
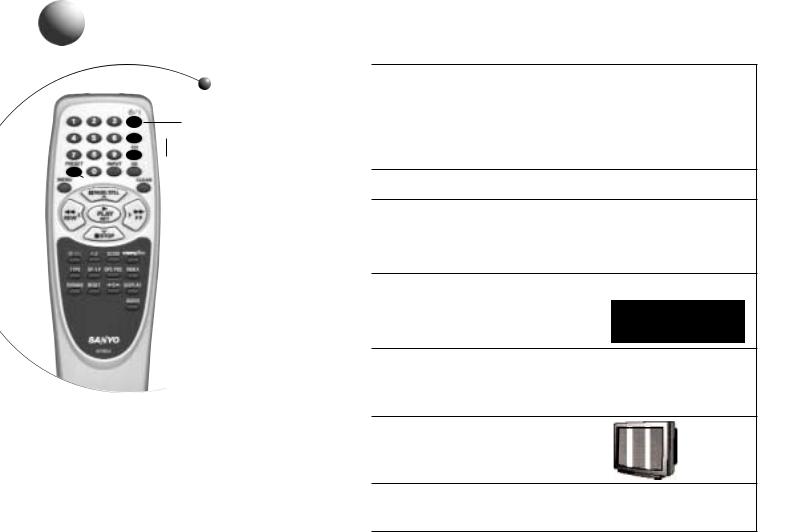
PRESET
PLAY
STOP
Test pattern tuning notes:
TV programmes are broadcast in a similar way to that of radio programmes. To receive a radio station you need to tune the radio to a particular frequency.
For the TV to receive the signal from the VCR you need to tune the TV to a particular output channel. Auto Setup automatically selects a free output channel between 21 & 69.
When tuning, you are searching on the TV tuner for the output channel signal from the VCR. In this example it is channel 52.
TV TUNER EXAMPLE
|
BBC1 |
BBC2 |
ITV |
C4 |
C5 |
VCR Output channel/ |
|
|
Test screen signal |
|
|||||
21 |
26 |
31 |
36 |
41 |
46 |
52 |
69 |
tuning the tv using the test pattern
1Turn on your TV.
Select a spare programme position not currently used, or a specific VCR programme position, (on modern TVs it is normally 0, on older ones 8).
2Make sure the VCR is in standby mode, using the 1 button.
3Press and hold the PRESET button for at least 3 seconds.
The video output channel number (e.g.52)
will show in the VCR display...
4Tune the TV until you see the test screen, which in this instance is channel 52.
Refer to your TV instructions for tuning.
5STORE this programme position on your TV.
Set theTV to this programme position whenever you want to playback a tape.
6Press the PRESET button when you have finished. The VCR will return to standby mode.
tuning the tv to the vcr using a tape
1Turn on your TV.
Select a spare programme position not currently used, or a specific VCR programme position, (on modern TVs it is normally 0, on older ones 8).
2Insert a prerecorded video cassette and press PLAY to playback the tape.
3Tune the TV until you see the picture from the video tape.
Refer to your TV instructions for tuning.
4STORE this programme position on your TV.
Set theTV to this programme position whenever you want to playback a tape.
5Press STOP when you have finished.
8
1 POWER ON/Standby
CH +,-
PRESET
Proceed through this section if you are having trouble tuning the TV to the VCR. This may be due to the area you live, whereby the Auto Setup has selected an available output channel but a TV station output channel is clashing with it.
To change the RF output channel follow the steps below:
1Switch the VCR to standby mode.
2Press and hold the PRESET button for at least 3 seconds.
The VCR display will show the current |
LR |
RF output channel number. e.g... |
2 l R F |
3Enter a new number between 21 & 69 using the NUMBER BUTTONS
or use the CH(+ , –) button to
change the current number, e.g...
4Turn on your TV and select a spare programme position not currently used, or a specific VCR programme position, (on modern TVs it is normally 0, on older ones 8).
5Tune the TV until you see the test screen.
Refer to your TV instructions for tuning.
6STORE this programme position on your TV.
Set theTV to this programme position whenever you want to playback a tape.
7 Press the PRESET button to return the VCR to standby mode.
9
 Loading...