

Page 1

OWIM GmbH &
Co. KG
Stiftsbergstraße 1
D-74167 Neckarsulm
Model No.: Z32118
Version: 04 / 2014
IAN 40115
5
Page 2

TRANSPORTADOR DE ÁNGULOS DIGITAL
GONIOMETRO DIGITALE
TRANSPORTADOR DE ÁNGULOS DIGITAL
Instrucciones de utilización y de seguridad
GONIOMETRO DIGITALE
Indicazioni per l’uso e per la sicurezza
MEDIDOR DE ÂNGULOS DIGITAL
Instruções de utilização e de segurança
DIGITAL ANGLE FINDER
Operation and Safety Notes
DIGITALER WINKELMESSER
Bedienungs- und Sicherheitshinweise
IAN 40115
Page 3

ES Instrucciones de utilización y de seguridad Página 5
IT / MT Indicazioni per l’uso e per la sicurezza Pagina 12
PT Instruções de utilização e de segurança Página 19
GB / MT Operation and Safety Notes Page 26
DE / AT / CH Bedienungs- und Sicherheitshinweise Seite 33
Page 4

A
1 3
B
2
658
7
4
3
Page 5

C
2
65
D
2
65
4
Page 6

Introducción ......................................................Página 6
Uso conforme a su finalidad .................................Página 6
Volumen de suministro ............................................Página 6
Descripción de las partes ......................................Página 6
Datos técnicos .........................................................Página 6
Indicaciones de seguridad ...................Página 7
Indicaciones de seguridad sobre las pilas ...........Página 8
Antes de la puesta en servicio .........Página 9
Inserta r / Cambiar la pila ......................................Página 9
Puesta en servicio .......................................Página 9
Cómo usar la regla con medidor de ángulos ......Página 9
Subsanar errores ....................................................Página 9
Mantenimiento y limpieza ..................Página 10
Eliminación ........................................................Página 10
Garantía ..............................................................Pág in a 11
ES
5
Page 7

TRANSPORTADOR DE ÁNGULOS DIGITAL
Q
Introducción
Q
Uso conforme a su finalidad
Sólo para uso privado.
No para uso comercial.
Q
Volumen de suministro
1 x Regla con medidor de ángulos
1 x Batería
1 x instrucciones de uso
Q
Descripción de las partes
1
Regla para medir
2
Perilla de bloqueo
3
Pantalla LCD
4
Botón del compartimiento de la batería
5
Botón ENCENDIDO / APAGADO ( ON / OFF)
6
Botón ZERO
7
Receptáculo de la batería
8
Agujero para colgar
Q
Datos técnicos
Unidad de la magnitud
a medir: grados (°)
Campo de medida: 0 - 999,9°
Resolución: 0,1°
Exactitud: ± 0,3°
Sistema de medida: sistema CAP lineal,
sin contacto
Indicador: Pantalla LCD
Temperatura de
funcionamiento: +5 °C - +40 °C
Influencia por humedad
ambiental: entre 0 % y 80 %
humedad relativa es irrelevante
Pila: 3 V CR2032(incluida en
el suministro)
ES
6
Page 8

Indicaciones de seguridad
¡LEER EL MANUAL DE INSTRUCCIONES
ANTES DE UTILIZAR EL PRODUCTO!
¡CONSERVAR CUIDADOSAMENTE EL
MANUAL DE INSTRUCCIONES!
¡CUIDADO! ¡PELIGRO DE
LESIONES!
J
EL PRODUCTO NO DEBE
CAER EN MANOS
DE
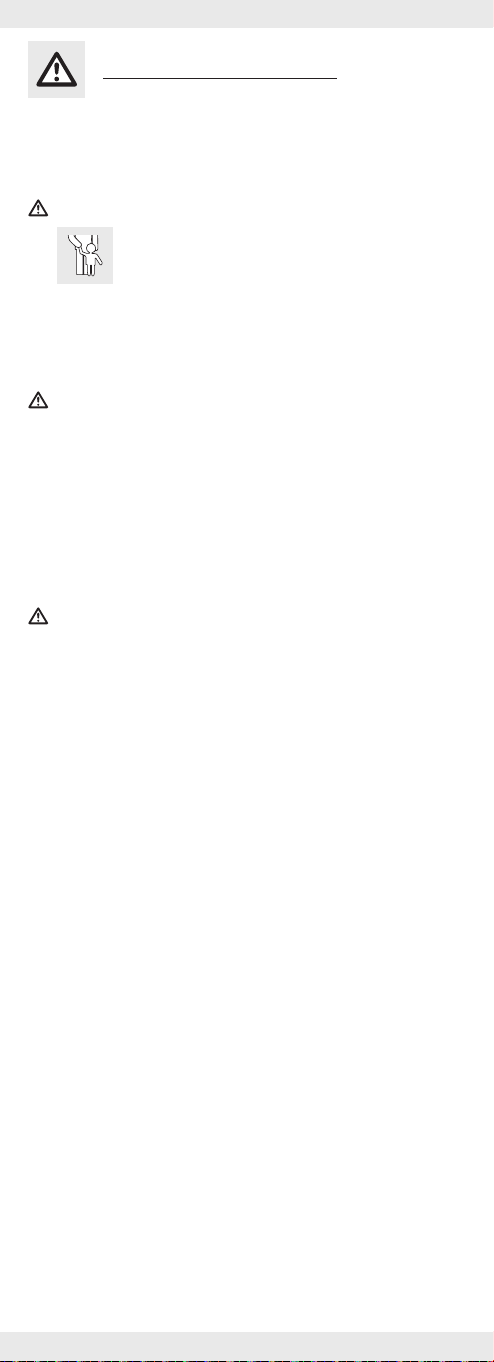
NIÑOS. ¡ESTE PRODUCTO
NO ES UN JUGUETE! Este producto
no debe ser empleado por niños cuando
estén sin vigilancia.
¡PELIGRO DE MUERTE Y
ACCIDENTES PARA BEBÉS Y
NIÑOS! Nunca deje a los niños sin
vigilancia con el material de embalaje.
J Existe peligro de asfixia por el material
de embalaje. Los niños suelen subestimar
los peligros. Mantenga siempre a los
niños alejados del producto.
¡PELIGRO DE MUERTE! Las pilas
pueden ser ingeridas, lo cual puede ser
mortal. Acuda inmediatamente a un
médico en caso de que una batería
haya sido ingerida.
J Este producto puede ser utilizado por
niños mayores de 8 años, así como por
personas con capacidades físicas,
sensoriales o mentales reducidas o que
cuenten con poca experiencia y/o falta
de conocimientos, siempre y cuando se
les haya enseñado cómo utilizar el
aparato de forma segura y hayan
comprendido los peligros que pueden
resultar de un mal uso del mismo. No
permita que los niños jueguen con el
aparato. La limpieza y el mantenimiento
no podrán llevarse a cabo por niños sin
vigilancia.
J Nunca exponga al producto a elevadas
temperaturas ni a humedad ya que el
producto se puede dañar.
J No coloque la regla con medidor de
ángulos bajo presión. Esto podría dañar
el chip de la regla.
J Mantenga la regla limpia y seca. Los
fluidos podrían dañar a la regla con
medidor de ángulos.
ES
7
Page 9

Indicaciones de seguridad
sobre las pilas
J
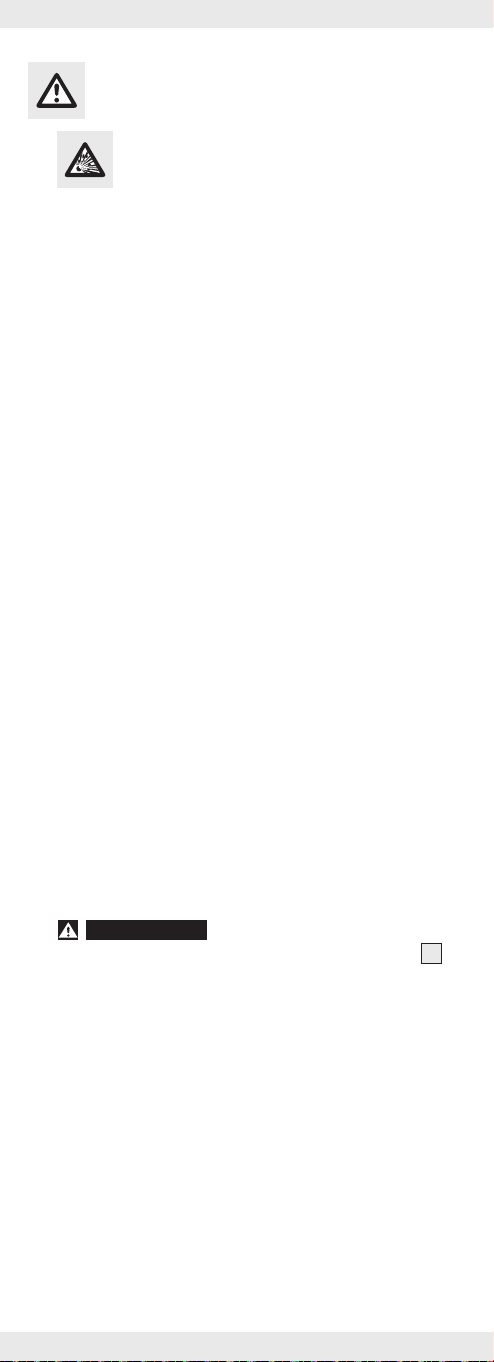
¡CUIDADO! ¡PELIGRO DE
EXPLOSIÓN! ¡Nunca recargue
las pilas!
J Las pilas no deben ser cortocircuitadas.
Esto puede ocasionar
sobrecalentamiento, peligro de incendio
o explosión.
J Retire inmediatamente la pila agotada
del producto. ¡Existe elevado peligro de
derrame!
J Mantenga las pilas alejadas de los
niños, no las eche al fuego, no las ponga
en cortocircuito, ni las desarme.
J Asegúrese de que la polaridad sea la
correcta (+ y -).
J Emplee únicamente el tipo de pila
indicado.
J El no cumplimiento de las indicaciones
puede ocasionar que la pila se
descargue más allá de su tensión final.
Esto ocasionará riesgo de derrame. ¡Si
la pila se hubiese derramado en su
artefacto, retírela inmediatamente a fin
de evitar daños en el producto!
J ¡Emplear guantes de protección!
Las pilas derramadas o averiadas
pueden ocasionar quemaduras al entrar
contacto con la piel; por ello emplee
necesariamente en este caso guantes de
protección apropiados.
J Evite el contacto con la piel, los ojos y
las mucosas. ¡En caso de contacto con el
ácido de la pila, enjuague la zona
afectada con abundante agua y / o
consulte a un médico!
J
¡ADVERTENCIA!
Desconecte el
producto antes de insertar la pila
(Pantalla LCD debe 3 estar apagado).
J Retire la batería del artefacto si va a
dejar de emplearlo por largo tiempo.
J Nunca ponga en cortocircuito a los
polos de conexión.
ES
8
Page 10

Q
Antes de la puesta en servicio
Q
Insertar / Cambiar la pila
Consejo: El símbolo de bajo voltaje en la pantalla LCD 3
indica que la batería está descargada / agotada.
Consejo: Al cargar la batería, la pantalla LCD 3 podría
experimentar fallas. Saque la batería y vuelva a colocarla.
j
Presione el botón del compartimiento de la batería 4 y
saque el receptáculo de la batería 7 (consulte la Fig. B).
j Saque la batería antigua.
j
Inserte el receptáculo de la batería con la batería nueva en
el compartimiento y asegúrese de que la polaridad sea la
correcta (+ y -). Asegúrese de que el terminal más apunte
hacia afuera.
j
Presione completamente el receptáculo de la batería 7 en
(consulte la Fig. B).
Q
Puesta en servicio
Q
Cómo usar la regla con medidor de
ángulos
j
Presione el botón ON/OFF para encender la pantalla
LCD 3.
j
Suelte la perilla de bloqueo 2 girándola en sentido
contrario a las manecillas del reloj.
j
Colóquela en una superficie plana. Asegúrese de que ambas
reglas 1
Fig. C) y luego presione el botón ZERO 6
datos en cero.
j
Gire la regla para medir el ángulo. Nota: La perilla de
bloqueo 2 se puede apretar girándola en el sentido de
las manecillas del reloj, para mantener a la regla en un
ángulo ya medido.
j
También puede abrir las 2 reglas en 180° alineadas con
la superficie (consulte la Fig. D) y luego presionar el botón
ZERO 6 para colocarla en cero. Gire la regla para medir
el ángulo.
estén alineadas con la superficie (consulte la
para colocar los
Q
Subsanar errores
El artefacto contiene piezas electrónicas sensibles. Por ello es
posible que artefactos de radiotransmisión ubicados en inmediata
cercanía produzcan interferencias. Si aparecen errores en la
pantalla, aleje tales dispositivos de las cercanías de la regla.
Las descargas electrostáticas pueden ocasionar fallas en el
funcionamiento.
j
En caso de tales fallas retire la pila y colóquela nuevamente.
ES
9
Page 11

Error Causa Ayuda
Símbolo de bajo
voltaje en la
pantalla LCD 3.
El Pantalla LCD
3
no sigue con-
tando.
Ninguna indica-
ción en el Pantalla LCD 3.
El voltaje de la
pila es inferior a
2,7 V.
Conexión equivocada.
1. El Pantalla LCD
está desconectado.
Cambie la pila según
el capítulo „Insertar /
cambiar la pila“.
Retirar la pila y volverla
a insertar luego de
30 segundos.
1. Encienda el Pantalla LCD pulsando el
botón encender /
2. La pila no tiene
contacto correcto o ha
sido colocada
al revés.
3. El voltaje de la
pila es inferior
a 2,4 V.
2. Retire la pila e insértela siguiendo
la polaridad y el
capítulo „Insertar /
cambiar la pila“ de
tal forma que ésta
toque todos los
contactos.
3. Cambie la pila según el capítulo
„Insertar / cambiar
la pila“.
Q
Mantenimiento y limpieza
5
apagar.
j Limpie la regla antes y después de usarla.
j
No sumerja la regla en agua. Los líquidos pueden dañar a
la regla con medidor de ángulos.
j
Para la limpieza de la carcasa emplee un paño seco y en
ningún caso bencina, disolventes o depuradores.
j
Apague siempre la pantalla LCD 3 cuando no esté
usando la regla con medidor de ángulos. Esto aumentará
la vida de la batería.
j
Mantenga la regla alejada de la corriente eléctrica y
lápices con carga eléctrica a fin de evitar daños al chip.
Q
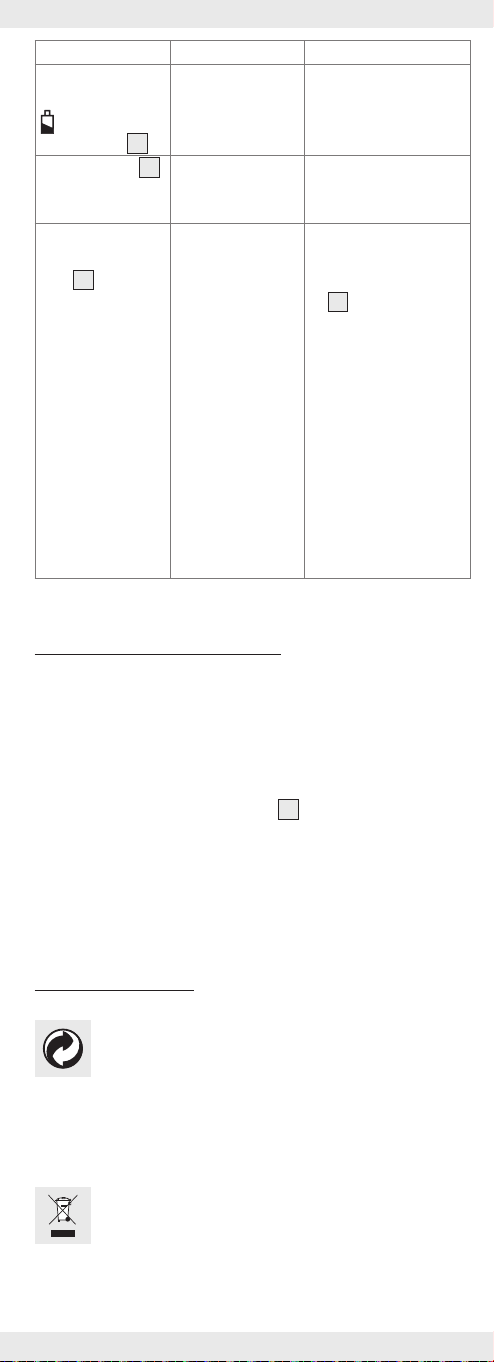
Eliminación
El embalaje se compone de materiales que respetan
el medio ambiente que podrá desechar en los
puntos locales de reciclaje.
Para deshacerse del producto una vez terminada su vida útil
pregunte a las autoridades locales o municipales.
En beneficio del medio ambiente, cuando el
producto ya no le sea útil, no lo arroje a la basura
doméstica y deséchelo correctamente. Diríjase a la
administración competente para obtener información
sobre los puestos de recogida de desechos y sus
horarios.
ES
10
Page 12

Las baterías defectuosas o usadas deben ser recicladas según
lo indicado en la directiva 2006 / 66 / EC. Para ello devuelva
la batería o el aparato en los puntos de recogida indicados.
Se pueden producir daños
medioambientales como consecuencia de
una eliminación incorrecta de las pilas.
Las pilas usadas no deben desecharse en la basura doméstica.
Pueden contener metales pesados venenosos y requieren de un
tratamiento de basura especial. Los símbolos químicos de los
metales pesados son los siguientes: Cd = cadmio, Hg = mercurio,
Pb = plomo. Por ello, entregue las pilas usadas en un punto de
recogida municipal.
Q
Garantía
El aparato ha sido fabricado cuidadosamente siguiendo
exigentes normas de calidad y ha sido probado antes de su
entrega. En caso de defecto del producto, usted tiene derechos
legales frente al vendedor del mismo. Nuestra garantía (abajo
indicada) no supone una restricción de dichos derechos
legales.
Este aparato tiene una garantía de 3 años a partir de la fecha
de compra. El plazo de garantía comienza a partir de la fecha
de compra. Por favor, conserve adecuadamente el justificante
de compra original. Este documento se requerirá como prueba
de que se realizó la compra.
Si en el plazo de tres años a partir de la fecha de compra se
produce un fallo de material o fabricación en este producto,
repararemos el producto o lo sustituiremos gratuitamente por un
producto nuevo (según nuestra elección). La garantía quedará
anulada si el producto resulta dañado o es utilizado o
mantenido de forma inadecuada.
La garantía cubre defectos de materiales o de fabricación. Esta
garantía no cubre aquellos componentes del producto
sometidos a un desgaste normal y que, por ello, puedan
considerarse piezas de desgaste (por ej. las pilas). Tampoco
cubre daños de componentes frágiles como, por ejemplo, los
interruptores, baterías y piezas de cristal.
ES
11
Page 13

Introduzione .................................................. Pagina 13
Utilizzo determinato ............................................. Pag ina 13
Volume di spedizione ........................................... Pagina 13
Descrizione dei pezzi .......................................... Pagi na 13
Dati tecnici ............................................................Pagina 13
Misure di sicurezza .................................. Pagina 14
Misure di sicurezza per le pile ............................ Pagina 15
Prima della messa in funzione ....... Pa gina 16
Inserite / so stituite le pile ...................................... Pag ina 16
Messa in funzione .....................................Pagina 16
Uso del goniometro .............................................. Pagina 16
Rimuovere l’errore ................................................. Pagina 16
Manutenzione e cura ............................. Pagina 17
Smaltimento ................................................... Pa g i n a 17
Garanzia ........................................................... Pagina 18
IT/MT
12
Page 14

GONIOMETRO DIGITALE
Q
Introduzione
Q
Utilizzo determinato
Solo per uso privato.
Non è adatto per l‘uso professionale.
Q
Volume di spedizione
1x goniometro
1x batteria
1x Istruzioni per l’uso
Q
Descrizione dei pezzi
1
Righello di misurazione
2
Manopola di blocco
3
Display LCD
4
Pulsante vano batterie
5
Pulsante ON/OFF
6
Pulsante ZERO
7
Alloggiamento batterie
8
Foro di attacco
Q
Dati tecnici
Unità di misura: gradi (°)
Ambito di misurazione: 0 - 999,9°
Risoluzione: 0,1°
Precisione: ± 0,3°
Sistema di misurazione: lineare, senza contatto
Sistema di misurazione CAP
Display: display LCD
Temperatura di esercizio: +5 °C - +40 °C
Influsso per via
dell‘umidità ambiente: entro 0 % a 80 %
umidità ambiente relativa irrilevante
Pile: 3 V CR2032 (comprese
nell‘acquisto)
IT/MT
13
Page 15
Misure di sicurezza
LEGGERE L‘ISTRUZIONE D‘USO PRIMA
DELL‘UTILIZZO! CONSERVARE PER BENE
L‘ISTRUZIONE D‘USO!
ATTENZIONE! PERICOLO DI LESIONE!
J IL PRODOTTO NON È
ADATTO PER ANDARE IN
MANO AI BAMBINI.
QUESTO PRODOTTO NON È UN
GIOCATTOLO! Questo prodotto non
può essere usato dai bambini se non in
presenzai di adulti.
PERICOLO DI VITA E D‘INFORTUNI
PER INFANTI E BAMBINI! Non
lasciate mai i Vostri bambini inosservati
con il materiale d‘imballaggio.
J
Persiste pericolo di soffocamento per via
dei materiali d‘imballaggio. I bambini
sottovalutano spesso i pericoli. Tenete
sempre lontano il prodotto dalla portata
dei bambini.
PERICOLO DI VITA! Le pile possono
essere ingerite, il che può costituire
pericolo di vita. Interpellate subito un
medico, se è stata ingerita una pila.
J
Quest’apparecchio può essere utilizzato
da bambini di età superiore agli 8 anni,
da persone con capacità fisiche,
sensoriali o mentali ridotte o da persone
inesperte solo se supervisionate o
preventivamente istruite sull’utilizzo in
sicurezza del prodotto e solo se
informate dei pericoli legati al prodotto
stesso. Non lasciare che i bambini
giochino con l’apparecchio. La pulizia e
la manutenzione non devono essere
eseguite dai bambini senza supervisione.
J
Non sottoponete mai il prodotto a
temperature elevate e all‘ umidità,
altrimenti potrebbe danneggiarsi.
J Non sottoporre il goniometro a
sollecitazioni. Ciò potrebbe danneggiare
il chip al suo interno.
J Mantenere il goniometro asciutto e
pulito. I liquidi potrebbero danneggiarlo.
IT/MT
14
Page 16
Misure di sicurezza per le pile
J ATTENZIONE! PERICOLO
D‘ESPLOSIONE! Non ricaricate
mai le pile!
J
Le pile non possono essere mai messe
sotto cortocircuito. Surriscaldamento,
pericolo di fuoco o scoppi ne possono
essere la conseguenza.
J
Togliete subito una pila scarica dal
prodotto. Persiste pericolo d‘uscita del
liquido dalle pile!
J
Tenete le pile lontano dalla portata dei
bambini, non gettatele nel fuoco, non
mettetele sotto cortocircuito e non
smontatele.
J
Badate alla giusta polarità (+ e -).
J
Utilizzate solo il tipo di pile indicato.
J
In caso di inosservanza delle avvertenze,
le pile si possono scaricare per via dela
tensione finale. Persiste poi il pericolo di
fuoruscita. In caso in cui, dalle pile
fuoriesca il liquido mentre si trovano
nell‘apparecchio, rimuovetele subito per
evitare danni al prodotto!
J
Utilizzate i guanti di protezione!
Pile scariche o danneggiate possono
essere corrosive a contatto con la pelle,
quindi in questi casi usate assolutamente
guanti di protezione adatti.
J
Evitate il contatto con la pelle, gli occhi e
la mucosa. In caso di contatto con
l‘acido delle pile, sciacquate subito la
parte colpita con abbondante acqua
e/o contattate un medico!
J
ATTENZIONE!
Disinnestate il prodotto
prima di inserire le pile (display LCD 3 è
spento).
J
Togliete le pile dall‘apparecchio, in caso
non lo usiate per lungo tempo.
J
Non mettete sotto cortocircuito i poli di
collegamento.
IT/MT
15
Page 17
Q
Prima della messa in funzione
Q
Inserite / sostituite le pile
Suggerimento: il simbolo di bassa tensione sul
display LCD 3 indica una batteria scarica / in esaurimento.
Suggerimento: alla sostituzione della batteria, il
display LCD 3 potrebbe
restituire un errore. Rimuovere la batteria e inserirla
nuovamente.
j
Premere il pulsante del vano batterie 4 , quindi estrarre
l’alloggiamento batterie 7 (vedere la Fig. B).
j
Rimuovere la vecchia batteria.
j
Inserire l’alloggiamento contenente la nuova batteria
nell’apposito vano, osservando la giusta polarità (+ e –).
Assicurarsi che il terminale positivo sia rivolto verso
l’esterno.
j
Inserire completamente l’alloggiamento batterie 7
(vedere la Fig. B).
Q
Messa in funzione
Q
Uso del goniometro
j
Premere il pulsante ON/OFF per accendere il display
LCD 3.
j
Allentare la manopola di blocco 2 ruotando in senso
anti-orario.
j
Posizionare su una superficie piana. Assicurarsi che ambo i
righelli 1
premere il pulsante ZERO 6
j
Ruotare il righello per misurare l’angolo. Nota: la
siano allineati alla superficie (vedere la Fig. C), quindi
per impostare i dati sullo zero.
manopola di blocco 2 può essere stretta con una
rotazione in senso orario, in modo da mantenere uno
specifico angolo misurato.
j
È inoltre possibile aprire i 2 righelli a 180° allineandoli
alla superficie (vedere la Fig. D), quindi premere il pulsante
ZERO 6 per impostare lo zero. Ruotare il righello per
misurare l’angolo.
Q
Rimuovere l’errore
L‘apparecchio contiene componenti elettronici sensibili. Per cui
è possibile che venga disturbato da apparecchi
radiotrasmittenti nelle vicinanze. Se compare un errore di
indicazione sul display, rimuovere i dispositivi vicini al
goniometro.
Scariche elettrostatiche possono portare a disturbi di
funzionamento.
j
In caso di tali disturbi rimuovete per un breve tempo le pile
e inseritele nuovamente.
IT/MT
16
Page 18
Errore Causa Aiuto
Simbolo “di
bassa tensione”
mostrato sul
display LCD 3 .
Il display LCD 3
non continua a
La tensione della
pila è sotto i
2,7 V.
Collegamento
errato.
Sostituite le pile secondo il capitolo „inserimento / sostituzione
delle pile“.
Togliete le pile e reinseritele dopo 30 secondi.
misurare.
Nessun‘indicazio-
ne sul display
LCD 3.
1.
Il display LCD è
spento.
2. Le pile non
h
anno un giusto
contatto oppure sono state
inserite nella
posizione
contraria.
3. La tensione
della pila è
sotto i 2,4 V.
1. Accendete il display LCD, premendo il tasto ON/OFF
2. Rimuovete le pile
ed inseritele secondo la polarità ed il
capitolo „inserimento / sostituzione
delle pile“, in modo
che tocchino tutti i
contatti.
3. Sostituite le pile
secondo il capitolo
„inserimento/sostituzione delle pile“.
5
.
Q
Manutenzione e cura
j
Pulire il goniometro prima e dopo l’uso.
j
Non immergere il goniometro in acqua. I liquidi potrebbero
danneggiarlo.
j
Per pulire il corpo utilzzate un panno asciutto e in alcun
caso della benzina, solventi o detersivi.
j
Spegnere sempre il display LCD 3 in caso di inutilizzo del
goniometro. Questo consente di allungare il tempo di vita
della batteria.
j
Tenere lontano da corrente elettrica e penne elettriche, al
fine di prevenire danni al chip.
Q
Smaltimento
La confezione è prodotta in materiale riciclabile e
biodegradabile, smaltibile nei luoghi di raccolta
differenziati.
Potete informarvi sulle possibilità di smaltimento del prodotto
consumato dall‘amministrazione comunale e cittadina.
Per la salvaguardia della tutela ambientale, quando il
vostro prodotto non funziona più, non gettatelo nei
rifiuti domestici bensì nei luoghi adatti di raccolta.
Potete informarvi sui luoghi di raccolta e i loro orari di
apertura dall‘amministrazione competente.
IT/MT
17
Page 19

Batterie difettose o usate devono essere riciclate ai sensi della
Direttiva 2006 / 66 / EC. Smaltire le batterie e / o
l’apparecchio presso i punti di raccolta indicati.
Vi possono essere conseguenze negative
per l’ambiente a seguito di uno
smaltimento non corretto delle batterie!
Le batterie non devono essere smaltite nella spazzatura
domestica. Esse possono contenere metalli pesanti velenosi e
devono essere trattate quali rifiuti speciali. I simboli chimici dei
metalli pesanti sono i seguenti: Cd = Cadmio, Hg = mercurio,
Pb = piombo. Consegnare quindi le batterie usate ad un punto
di raccolta comunale.
Q
Garanzia
L‘apparecchio è stato prodotto secondo severe direttive di
qualità e controllato con premura prima della consegna. In
caso di difetti del prodotto, l‘acquirente può far valere i propri
diritti legali nei confronti del venditore. Questi diritti legali non
vengono limitati in alcun modo dalla garanzia di seguito
riportata.
Se entro tre anni dalla data di acquisto di questo prodotto si
rileva un difetto di materiale o di fabbricazione, il prodotto
verrà riparato o sostituito gratuitamente, a nostra discrezione. Il
termine di garanzia ha inizio a partire dalla data di acquisto.
Conservare lo scontrino di acquisto originale in buone
condizioni. Questo documento servirà a documentare
l‘avvenuto acquisto.
l‘apparecchio da Lei acquistato dà diritto ad una garanzia di
3 anni a partire dalla data di acquisto. La presente garanzia
decade nel caso di danneggiamento del prodotto, di utilizzo o
di manutenzione inadeguati.
La prestazione di garanzia vale sia per difetti di materiale che
per difetti di fabbricazione. La presente garanzia non si estende
a parti del prodotto soggette a normale usura e che possono
essere identificate, pertanto, come parti soggette a usura
(p. es., le batterie), né a danni su parti staccabili, come
interruttore, batterie o simili, realizzate in vetro.
IT/MT
18
Page 20

Introdução .......................................................... Página 20
Utilização adequada ..............................................Página 20
Material fornecido ..................................................Página 20
Descrição das peças ...............................................Página 20
Dados técnicos ........................................................Página 20
Indicações de segurança ........................Página 21
Indicações de segurança
relacionadas com a pilha .......................................Página 22
Antes da colocação em
funcionamento ................................................ Página 23
Colocar / Sub stituir a pilha ..................................... Página 23
Colocação em funcionamento ........... Página 23
Utilizar a régua de ângulo ..................................... Página 23
Eliminação de avarias .............................................Página 23
Manutenção e limpeza ............................ Página 24
Eliminação ........................................................... Página 24
Garantia ............................................................... Página 25
PT
19
Page 21
MEDIDOR DE ÂNGULOS DIGITAL
Q
Introdução
Q
Utilização adequada
Indicado apenas para o uso privado.
Não é adequado a uma utilização comercial.
Q
Material fornecido
1 x Régua de Ângulo
1 x Bateria
1 x Instruções de utilização
Q
Descrição das peças
1
Régua de medição
2
Botão de bloqueio
3
Ecrã LCD
4
Botão do compartimento da bateria
5
Botão LIGAR / DESLIGAR ( ON / OFF)
6
Botão ZERO
7
Receptáculo da bateria
8
Orifício de suporte
Q
Dados técnicos
Medida de grandeza: graus (°)
Intervalo de medição: 0 - 999,9°
Resolução: 0,1°
Precisão: ± 0,3°
Sistema de medição: linear, sem contacto
Sistema de medição CAP
Monitor: ecrã LCD
Temperatura de funcionamento: +5 °C - +40 °C
Influência através da
humidade do ar: no intervalo de 0 % até 80 %
a humidade relativa do ar
não é considerável
Pilha: 3 V CR2032 (incluída no
material fornecido)
PT
20
Page 22

Indicações de segurança
ANTES DE UTILIZAR, LEIA O MANUAL
DE INSTRUÇÕES! CONSERVE
CUIDADOSAMENTE O MANUAL DE
INSTRUÇÕES!
CUIDADO! PERIGO DE FERIMENTOS!
J O ARTIGO NÃO DEVE SER
UTILIZADO POR
CRIANÇAS. ESTE ARTIGO
NÃO É NENHUM BRINQUEDO!
Este artigo não pode ser utilizado por
crianças sem uma devida vigilância.
PERIGO DE VIDA E DE ACIDENTE
PARA BEBÉS E CRIANÇAS! Nunca
deixe crianças juntamente com o
material da embalagem sem a devida
vigilância.
J
Existe perigo de asfixia através do
material da embalagem. As crianças
subestimam frequentemente os perigos.
Mantenha as crianças sempre afastadas
do artigo.
PERIGO DE VIDA! As pilhas podem
ser engolidas, podendo isso colocar a
respectiva vida em perigo. Consulte
imediatamente um médico, se alguma
pilha tiver sido engolida.
J
Ente aparelho pode ser utilizado por
crianças a partir dos 8 anos, assim como
por pessoas com capacidades físicas,
sensoriais ou mentais reduzidas ou
deficiências na experiência e.ou
conhecimento se for vigiadas ou
instruídas em relação ao uso seguro do
aparelho e se compreenderem os
perigos que daí possam resultar. As
crianças não devem brincar com o
aparelho. A limpeza e a manutenção de
utilização não devem ser realizadas por
crianças sem vigilância.
J
Nunca submeta o artigo a altas
temperaturas e à humidade, caso
contrário ele poderá danificar-se.
J Não coloque a régua de ângulo sob de
qualquer tensão. Isto poderá danificar o
chip na régua de ângulo.
J Mantenha a régua de ângulo limpa e
seca. Os líquidos podem danificar a
régua de ângulo.
PT
21
Page 23

Indicações de segurança
relacionadas com a pilha
J
CUIDADO! PERIGO DE
EXPLOSÃO! Nunca recarregue
as pilhas!
J
As pilhas não podem ser sujeitas a curtocircuito. Como consequência, as pilhas
podem sobreaquecer, explodir ou
verificar-se um perigo de incêndio.
J
Remova imediatamente a pilha gasta do
interior do artigo. Existe um perigo
agravado da pilha deixar escorrer
ácido!
J
Mantenha a pilha afastada das crianças,
não a jogue para o fogo, não a sujeite a
curto-circuito e não a abra.
J
Tenha atenção à respectiva polaridade
(+ e -).
J
Utilize unicamente o tipo de pilhas
indicado.
J
O não seguimento destas indicações
poderá originar o descarregamento da
pilha através das suas extremidades.
Existe o perigo de a pilha derramar
ácido. Se a pilha derramar ácido no seu
aparelho, remova-a imediatamente, a fim
de se evitarem danos no artigo!
J
Use luvas de protecção! Pilhas
derramadas ou danificadas podem
causar irritações na pele; por essa razão
e caso isso se verifique, use sempre luvas
de protecção adequadas.
J
Evite o contacto com a pele, olhos e
mucosas. Se o ácido da pilha entrar em
contacto com as referidas zonas, lave
bem a zona afectada e / ou procure um
médico!
J
AVISO!
DESLIGUE o artigo, antes de
colocar a pilha (o ecrã LCD 3 está
desligado).
J
Se não utilizar o aparelho por um
período de tempo mais prolongado,
remova a pilha do seu interior.
J
Nunca sujeite o pólo de ligação a curtocircuito.
PT
22
Page 24

Q
Antes da colocação em funcionamento
Q
Colocar / Substituir a pilha
Dica: Símbolo de baixa voltagem exibido no ecrã LCD 3
e que indica uma bateria descarregada/vazia.
Dica: Quando mudar a bateria, o ecrã LCD 3 poderá
experienciar erros. Retire a bateria e volte a colocá-la.
j
Empurre o botão do compartimento da bateria 4 e
depois puxe o receptáculo da bateria 7 (consulte a
imagem B).
j Retire a bateria antiga.
j
Insira o receptáculo da bateria que contém a nova bateria
no compartimento da bateria e verifique a polaridade
(+ e –). Certifique-se que o terminal mais aponta para fora.
j
Empurre o receptáculo da bateria 7 na totalidade em
(consultar Imagem B).
Q
Colocação em funcionamento
Q
Utilizar a régua de ângulo
j
Prima o botão ON/OFF para ligar o ecrã LCD 3.
j
Liberte o botão de bloqueio 2 rodando-o no sentido
contrário ao dos ponteiros do relógio.
j
Coloque numa superfície plana. Certifique-se que ambas as
réguas 1
imagem C) e depois prima o botão ZERO 6
dados para zero.
j
Rode a régua para medir o ângulo. Observação: O botão
de bloqueio 2 pode ser apertado rodando-o no sentido
dos ponteiros do relógio para obter o ângulo de medição
desejado.
j
Poderá ainda abrir 2 réguas a 180° directamente
alinhadas com a superfície (consultar imagem D) e depois
prima botão ZERO 6 para colocar a zero. Rode a régua
para medir o ângulo.
estão alinhadas com a superfície (consultar
para definir os
Q
Eliminação de avarias
O aparelho contém peças electrónicas sensíveis. Por essa
razão é possível que elas sejam afectadas por aparelhos de
transmissão de ondas de rádio nas suas proximidades. Se
surgirem quaisquer erros de indicação no ecrã, retire tais
dispositivos da proximidade da régua de ângulo.
As descargas de energia electroestática podem causar avarias
de funcionamento.
j
Em caso de se verificarem falhas de funcionalidade,
remova a pilha por alguns momentos e coloque-a de novo.
PT
23
Page 25

Avaria Causa Solução
Símbolo de baixa
voltagem exibido no ecrã LCD
3
.
O ecrã LCD 3
não continua a
medir.
Não existe nenhuma mensagem no
ecrã LCD 3.
A corrente da pilha situa-se abaixo dos 2,7 V.
Ligação incorrecta.
1.
O ecrã LCD
está
desligado.
2. A pilha não
está devidamente em
contacto ou foi
colocada erradamente.
3. A corrente da
pilha situa-se
abaixo dos
2,4 V.
Substitua a pilha de
acordo com o capítulo
„Colocar / Substituir
pilha“.
Remover a pilha e
voltar a colocá-la
novamente após 30
segundos.
1. Ligue o ecrã LCD,
carregando no botão LIGAR /
DESLIGAR 5.
2. Remova a pilha e
coloque-a de novo,
tendo em conta
a respectiva polaridade e de acordo
com o capítulo „Colocar / Substituir
pilha“, de forma a
que ela toque em
todos os contactos.
3. Substitua a pilha de
acordo com o capítulo „Colocar /
Substituir a pilha“.
Q
Manutenção e limpeza
j Limpe a régua de ângulo antes e depois de a utilizar.
j
Não submerja a régua de ângulo em água. Os líquidos
podem danificar a régua de ângulo.
j
Para limpar a estrutura, utilize um pano seco e de forma
alguma gasolina, solventes ou produtos de limpeza.
j
Desligue sempre o ecrã LCD 3 quando não estiver a
utiliza a régua de ângulo. Isto irá aumentar a duração da
bateria.
j
Mantenha longe da corrente eléctrica e de pens
carregadas electricamente para evitar danos no chip.
Q
Eliminação
A embalagem é composta por materiais recicláveis,
que pode eliminar nos pontos de reciclagem locais.
Pode obter informações relativas à eliminação do produto
usado através dos responsáveis legais pela reciclagem.
Não deposite o produto utilizado no lixo doméstico,
a favor da protecção do ambiente. Elimine-o de
forma responsável. Pode obter informações sobre os
pontos de recolha e os respectivos horários junto da
administração responsável.
PT
24
Page 26
As baterias avariadas ou gastas têm de ser recicladas de
acordo com a directiva 2006 / 66 / EC. Entregue a bateria
e / ou o aparelho nos locais específicos destinados à sua
recolha.
Danos ambientais devido à eliminação
incorrecta das pilhas!
As pilhas não podem ser eliminadas no lixo doméstico. Estas
podem conter metais pesados tóxicos e são consideradas
resíduos perigosos. Os símbolos químicos dos metais pesados
são os seguintes: Cd = cádmio, Hg= mercúrio, Pb = chumbo.
Por isso, deposite as pilhas usadas num ponto de recolha
adequado no seu município.
Q
Garantia
O aparelho foi cuidadosamente fabricado segundo rigorosas
directivas de qualidade e meticulosamente testado antes da
sua distribuição. Em caso de falhas deste aparelho, possui
direitos legais relativamente ao vendedor do aparelho. Os seus
direitos legais não estão limitados pela garantia representada
de seguida.
Tem sobre este aparelho 3 anos de garantia a partir da data
de compra. A validade da garantia inicia-se com a data de
compra. Guarde o talão da caixa como comprovativo da
compra. Esse documento é necessário para comprovar a
compra.
Caso num espaço de tempo de 3 anos a partir da data da
compra deste aparelho surja um erro de material ou de fabrico,
o aparelho será reparado ou substituído por nós – segundo a
nossa escolha – e sem qualquer custo. Esta garantia expira se
o aparelho estiver danificado, se não for devidamente utilizado
ou se não for efectuada a devida manutenção.
A garantia é válida em caso de defeitos de material ou de
fabrico. Esta garantia não é extensível a componentes do
produto que se desgastam com o uso e que, por isso, podem
ser consideradas peças de desgaste (por ex.º pilhas) ou a
danos em peças frágeis, por ex.º interruptores, baterias ou
peças de vidro.
PT
25
Page 27

Introduction ..........................................................Page 27
Intended use ................................................................Page 27
Scope of delivery .......................................................Page 27
Description of parts ....................................................Page 27
Technical data .............................................................Page 27
Safety instructions .......................................... Page 28
Safety instructions for batteries .................................Page 29
Before start of operation .......................... Page 30
Insert / replace battery ...............................................Page 30
Starting up the device..................................Page 30
Using the angle ruler ..................................................Page 30
Troubleshooting ..........................................................Page 30
Cleaning and maintenance ..................... Pa g e 31
Disposal ....................................................................Page 31
Warranty ................................................................Page 32
GB/MT
26
Page 28

DIGITAL ANGLE FINDER
Q
Introduction
Q
Intended use
Only for private use.
Not for commercial use.
Q
Scope of delivery
1 x Angle Ruler
1 x Battery
1 x Instruction for use
Q
Description of parts
1
Measuring ruler
2
Locking knob
3
LCD display
4
Battery compartment button
5
ON/OFF button
6
ZERO button
7
Battery receptacle
8
Hanging hole
Q
Technical data
Measurement unit: degrees (°)
Measuring range: 0 - 999.9°
Resolution: 0.1°
Accuracy: ± 0.3°
Measuring system: Liner capacitive measuring system
Display: LCD display
Operating temperature: +5 °C - +40 °C
Influence of humidity: within a range from 0 % to 80 %
relative humidity irrelevant
Battery: 3 V CR2032 (included)
GB/MT
27
Page 29

Safety instructions
BEFORE USING THIS DEVICE, PLEASE
READ THE DIRECTIONS FOR USE!
PLEASE KEEP THE DIRECTIONS FOR USE
IN A SAFE PLACE!
CAUTION! RISK OF INJURY!
J KEEP THE PRODUCT OUT
OF THE REACH OF
CHILDREN. THIS PRODUCT
IS NOT A TOY! This product should
never be used by children unsupervised.
DANGER TO LIFE AND RISK OF
ACCIDENT FOR TODDLERS AND
CHILDREN! Never leave children alone
and unsupervised with the packaging
material.
J There is a risk of suffocation from the
packaging material. Children often
underestimate risks. Always keep children
away from the product.
DANGER TO LIFE! Batteries could be
swallowed and pose a lethal hazard.
Consult a doctor immediately if anyone
swallows a battery.
J This appliance can be used by children
aged from 8 years and above and
persons with reduced physical, sensory
or mental capabilities or lack of
experience and knowledge if they have
been given supervision or instruction
concerning use of the appliance in a safe
way and understand the hazards
involved. Children shall not play with the
appliance. Cleaning and user
maintenance shall not be made by
children without supervision.
J Never expose the product to high
temperatures, water or moisture as this
may damage the product.
J Do not put the angle ruler under any
strain. This may damage the chip in the
angle ruler.
J Keep the angle ruler clean and dry.
Fluids could damage the angle ruler.
GB/MT
28
Page 30
Safety instructions for
batteries
J CAUTION! RISK OF
EXPLOSION! Never recharge
the batteries!
J Batteries must not be short-circuited. This
could result in over-heating and risk of
fire or explosion.
J Remove a depleted battery from the
product immediately; otherwise there is
an increased risk of leakage!
J Keep batteries out of the reach of
children; do not throw them into fire; do
not short-circuit them; and do not take
them apart.
J Ensure polarity is correct (+ and –).
J Only use the recommended battery
type.
J If these instructions are not complied
with, the battery may be discharged
beyond its cut-off voltage. There is then a
risk of leakage. If the battery has leaked
into your device, please remove it
immediately in order to prevent any
damage to the product!
J Wear protective gloves! If they
come into contact with skin, leaked or
damaged batteries could cause chemical
burns; you should therefore wear suitable
protective gloves at all times if such an
event occurs.
J Avoid contact with skin, eyes, and
mucous membranes. If you come into
contact with battery acid, rinse the
affected spot with plenty of water
and / or consult a doctor immediately!
J
WARNING!
Switch the product OFF
before inserting the battery (LCD
display 3 is off.)
J Remove the battery from the device if it is
not in use for a long period of time.
J Do not, on any account, short-circuit the
terminals.
GB/MT
29
Page 31
Q
Before start of operation
Q
Insert / replace battery
Tip: Low voltage symbol showing in the LCD display 3
indicate a discharged / flat battery.
Tip: When changing the battery, the LCD display 3 may
experience faults. Remove the battery and insert it again.
j
Push the battery compartment button 4 , and then pull out
the battery receptacle 7 (see fig B).
j
Remove the old battery.
j
Insert battery receptacle containing the new battery into the
battery compartment and ensure correct polarity (+ and –).
Make sure that the plus terminal points outwards.
j
Push the battery receptacle 7 fully in (see Fig. B).
Q
Starting up the device
Q
Using the angle ruler
j
Press the ON/OFF button to switch the LCD display 3 on.
j
Loosen the locking knob 2 by turning it anti-clockwise.
j
Put on a flat surface. Make sure both rulers 1
the surface (see fig. C), and then press ZERO button 6
are aligned with
to set
data to zero.
j
Rotate the ruler to measure the angle. Note: The locking
knob 2 can be tightened by turning it clockwise, so as to
hold a desired measured angle.
j
You may also open the 2 rulers 180° straight aligned with
the surface (see fig. D), and then press ZERO button 6 to
set zero. Rotate the ruler to measure the angle.
Q
Troubleshooting
The device contains sensitive electronic components. That is why
it experiences interference when in close proximity to radio
transmission devices. If any indication errors appear in the
display, remove such devices out of the proximity of the angle
ruler.
Electrostatic discharge could result in malfunctions.
j
When such malfunctions occur, remove the battery for a
short while and re-insert.
Failure Cause Solution
Low voltage
symbol
shown on LCD
display 3 .
GB/MT
30
The battery voltage
is lower than 2.7 V.
Replace the battery
in line with the chapter on “Inserting /
replacing battery”.
Page 32
Failure Cause Solution
The LCD dis-
play 3 does
not continue to
Faulty wiring or
circuit
Remove battery
and re-insert after
30 seconds.
count.
Nothing is dis-
played on the
LCD display 3.
1. LCD display is
switched off.
2. Battery is the wrong
way round or the
battery contact is
poor.
3. The battery voltage
is lower than 2.4 V.
1. Switch the LCD
display on by
pressing the ON /
OFF key 5.
2. Remove the battery and insert /
replace it in line
with the terminals
and the chapter
“Inserting / replacing the battery”
so that it touches
all contacts.
3. Replace the battery in line with
the chapter “Inserting / replacing the battery”.
Q
Cleaning and maintenance
j
Clean the angle ruler before and after using it.
j
Do not immerse the angle ruler into water. Liquids can
damage the angle ruler.
j
Use a dry cloth to clean the casing; never use petrol,
solvents or cleaning agents
j
Always switch the LCD display 3 off when not using the
angle ruler. This will extend the life of the battery.
j
Keep away from electrical current and electrically charged
pens to prevent damage to the chip.
Q
Disposal
The packaging is made entirely of recyclable
materials, which you may dispose of at local
recycling facilities.
Contact your local refuse disposal authority for more details of
how to dispose of your worn-out product.
To help protect the environment, please dispose of the
product properly when it has reached the end of its
useful life and not in the household waste. Information
on collection points and their opening hours can be
obtained from your local authority.
GB/MT
31
Page 33

Faulty or used batteries must be recycled in accordance with
Directive 2006 / 66 / EC. Please return the batteries and / or
the device to the available collection points.
Environmental damage through incorrect
disposal of the batteries!
Batteries may not be disposed of with the usual domestic waste.
They may contain toxic heavy metals and are subject to
hazardous waste treatment rules and regulations. The chemical
symbols for heavy metals are as follows: Cd = cadmium,
Hg= mercury, Pb = lead. That is why you should dispose of
used batteries at a local collection point.
Q
Warranty
The device has been manufactured to strict quality guidelines
and meticulously examined before delivery. In the event of
product defects you have legal rights against the retailer of this
product. Your legal rights are not limited in any way by our
warranty detailed below.
The warranty for this device is 3 years from the date of
purchase. Should this device show any fault in materials or
manufacture within three years from the date of purchase, we
will repair or replace it - at our choice - free of charge to you.
The warranty period begins on the date of purchase. Please
keep the original sales receipt in a safe location. This document
is required as your proof of purchase. This warranty becomes
void if the device has been damaged or improperly used or
maintained.
The warranty applies to faults in material or manufacture. This
warranty does not cover product parts subject to normal wear,
thus possibly considered consumables (e.g. batteries) or for
damage to fragile parts, e.g. switches, rechargeable batteries
or glass parts.
GB/MT
32
Page 34

Einleitung ................................................................Seite 34
Bestimmungsgemäße Verwendung ...........................Seite 34
Lieferumfang ...............................................................Seite 34
Teilebeschreibung .......................................................Seite 34
Technische Daten ........................................................Seite 34
Sicherheitshinweise .......................................Seite 35
Sicherheitshinweise zu Batterien ...............................Seite 36
Vor der Inbetriebnahme ............................ Seite 37
Batterie einsetzen / austauschen ...............................Seite 37
Inbetriebnahme ................................................Seite 37
Gebrauch des Winkelmessers ...................................Seite 37
Fehler beheben ...........................................................Seite 37
Wartung und Reinigung ............................Seite 38
Entsorgung ............................................................Seite 38
Garantie...................................................................Seite 39
DE/AT/CH
33
Page 35
DIGITALER WINKELMESSER
Q
Einleitung
Q
Bestimmungsgemäße Verwendung
Nur zur privaten Nutzung.
Nicht für den gewerblichen Einsatz.
Q
Lieferumfang
1 x Digitaler Winkelmesser
1 x Batterie
1 x Bedienungsanleitung
Q
Teilebeschreibung
1
Digitaler Winkelmesser
2
Feststellknopf
3
LCD-Anzeige
4
Taste Batteriefach
5
Taste ON/OFF (EIN/AUS)
6
Taste ZERO (NULL)
7
Batteriehalterung
8
Aufhängung
Q
Technische Daten
Messgrößeneinheit: Grad (°)
Messbereich: 0 - 999,9°
Auflösung: 0,1°
Genauigkeit: ± 0,3°
Messsystem: lineares, kontaktloses
CAP-Messsystem
Anzeige: LCD-Anzeige
Betriebstemperatur: +5 °C bis +40 °C
Einfluss durch Luftfeuchtigkeit: innerhalb von 0 % bis 80 %
relative Luftfeuchtigkeit unerheblich
Batterie: 3 V CR2032 (im
Lieferumfang enthalten)
DE/AT/CH
34
Page 36

Sicherheitshinweise
VOR GEBRAUCH BITTE DIE
BEDIENUNGSANLEITUNG LESEN!
BEDIENUNGSANLEITUNG BITTE
SORGFÄLTIG AUFBEWAHREN!
VORSICHT!
VERLETZUNGSGEFAHR!
J DAS PRODUKT GEHÖRT
NICHT IN KINDERHÄNDE.
DIESES PRODUKT IST KEIN
SPIELZEUG! Dieses Produkt sollte von
Kindern nicht ohne Aufsicht benutzt
werden.
LEBENS- UND UNFALLGEFAHR FÜR
KLEINKINDER UND KINDER!
Lassen Sie Kinder niemals unbeaufsichtigt
mit dem Verpackungsmaterial.
J
Es besteht Erstickungsgefahr durch
Verpackungsmaterial. Kinder
unterschätzen häufig die Gefahren.
Halten Sie Kinder stets vom Produkt fern.
LEBENSGEFAHR! Batterien können
verschluckt werden, was lebensgefährlich
sein kann. Nehmen Sie sofort ärztliche
Hilfe in Anspruch, wenn eine Batterie
verschluckt wurde.
J
Dieses Gerät kann von Kindern ab
8 Jahren und darüber sowie von
Personen mit verringerten physischen,
sensorischen oder mentalen Fähigkeiten
oder Mangel an Erfahrung und Wissen
benutzt werden, wenn sie beaufsichtigt
oder bezüglich des sicheren Gebrauchs
des Gerätes unterwiesen wurden und die
daraus resultierenden Gefahren
verstehen. Kinder dürfen nicht mit dem
Gerät spielen. Reinigung und
Benutzerwartung dürfen nicht von
Kindern ohne Beaufsichtigung
durchgeführt werden.
J
Setzen Sie das Produkt niemals hohen
Temperaturen und Feuchtigkeit aus, da
sonst das Produkt Schaden nehmen kann.
J
Belasten Sie den Winkelmesser nicht.
Anderenfalls könnte der Chip im
Winkelmesser beschädigt werden.
J
Halten Sie den Winkelmesser sauber und
trocken. Flüssigkeiten können den
Winkelmesser beschädigen.
DE/AT/CH
35
Page 37

Sicherheitshinweise zu
Batterien
J
VORSICHT!
EXPLOSIONSGEFAHR!
Laden Sie Batterien niemals
wieder auf!
J
Batterien dürfen nicht kurzgeschlossen
werden. Überhitzung, Brandgefahr oder
Platzen können die Folge sein.
J
Entfernen Sie eine erschöpfte Batterie
umgehend aus dem Produkt. Es besteht
erhöhte Auslaufgefahr!
J
Halten Sie die Batterie von Kindern fern,
werfen Sie sie nicht ins Feuer, schließen
Sie sie nicht kurz und nehmen Sie sie
nicht auseinander.
J
Achten Sie auf die richtige Polarität
(+ und –).
J
Verwenden Sie nur eine Batterie des
empfohlenen Typs.
J
Bei Nichtbeachtung der Hinweise kann
die Batterie über ihre Endspannung
hinaus entladen werden. Es besteht dann
die Gefahr des Auslaufens. Falls die
Batterie in Ihrem Gerät ausgelaufen sein
sollte, entnehmen Sie diese sofort, um
Schäden am Produkt vorzubeugen!
J
Schutzhandschuhe tragen!
Ausgelaufene oder beschädigte
Batterien können bei Berührung mit der
Haut Verätzungen verursachen; tragen
Sie deshalb in diesem Fall unbedingt
geeignete Schutzhandschuhe.
J
Vermeiden Sie den Kontakt mit Haut,
Augen und Schleimhäuten. Bei Kontakt
mit Batteriesäure spülen Sie die
betroffene Stelle mit reichlich Wasser ab
und / oder suchen Sie einen Arzt auf!
J
WARNUNG!
Schalten Sie das Produkt
AUS, bevor Sie die Batterie einlegen
(LCD-Anzeige 3 ist aus).
J
Entnehmen Sie die Batterie bei längerer
Nichtbenutzung aus dem Gerät.
J
Schließen Sie die Anschlusspole auf
keinen Fall kurz.
36
DE/AT/CH
Page 38

Q
Vor der Inbetriebnahme
Q
Batterie einsetzen / aus tauschen
Hinweis: Das Symbol „niedriger Batterieladestatus“
erscheint in der LCD-Anzeige
3
, wenn die Batterie leer /
verbraucht ist.
Hinweis: Nach dem Austauschen der Batterie kann es
vorkommen, dass die LCD-Anzeige 3 nicht richtig funktioniert.
Entfernen Sie die Batterie und setzen Sie sie um sie erneut ein.
j Drücken Sie auf die Taste des Batteriefachs
4
und ziehen
Sie dann die Batteriehalterung 7 heraus (siehe Abb. B).
j
Entnehmen Sie die alte Batterie.
j Schieben Sie die Batteriehalterung mit der neuen Batterie
zurück in das Batteriefach. Beachten Sie beim Einlegen der
Batterie die richtige Polarität (+ und –).
j Schieben Sie die Batteriehalterung
7
vollständig hinein
(siehe Abb. B).
Q
Inbetriebnahme
Q Gebrauch des Winkelmessers
j Drücken Sie die ON/OFF-Taste zum Einschalten der LCD-
Anzeige 3.
j Lösen Sie den Feststellknopf
drehen.
j Legen Sie den Winkelmesser auf eine flache Oberfläche.
Sorgen Sie dafür, dass beide Lineale 1 an der Oberfläche
ausgerichtet sind (siehe Abb. C). Drücken Sie dann die
Taste ZERO
6
, um die Daten auf Null zu setzen.
j Drehen Sie das Lineal zum Messen des Winkels. Hinweis:
Sie können den Feststellknopf 2 durch Rechtsdrehung
festziehen, um einen bestimmten Messwinkel beizubehalten.
j Sie können die 2 Lineale auch bis auf 180° öffnen und mit
der Oberfläche ausrichten (siehe Abb. D). Drücken Sie
dann die Taste ZERO 6 , um die Daten auf Null zu setzen.
Drehen Sie das Lineal zum Messen des Winkels.
2
, indem Sie ihn links herum
Q
Fehler beheben
Das Gerät enthält empfindliche elektronische Bauteile. Daher ist es
möglich, dass es durch Funkübertragungsgeräte in unmittelbarer
Nähe gestört wird. Treten Fehlanzeigen im Display auf, entfernen
Sie solche Geräte aus der Umgebung des Gerätes.
Elektrostatische Entladungen können zu Funktionsstörungen führen.
j
Entfernen Sie bei solchen Funktionsstörungen kurzzeitig die
Batterie und setzen Sie sie erneut ein.
Fehler Ursache Abhilfe
Symbol „niedriger
Batterieladestatus“
erscheint im
LCD-Display 3.
Die Batteriespannung liegt
unter 2,7 V.
Tauschen Sie die Batterie gemäß Kapitel
„Batterie einsetzen /
austauschen“ aus.
DE/AT/CH
37
Page 39
Fehler Ursache Abhilfe
Die LCD-Anzeige
3
zählt nicht
weiter.
Keine Anzeige
auf der LCD-Anzeige 3.
Fehlerhafte Schaltung.
1.
LCD-
Anzeige
ist
ausgeschaltet.
2. Batterie hat k
nen richtigen
Kontakt oder
ist falsch herum
eingesetzt.
3. Die Batteriespannung liegt
unter 2,4 V.
Batterie herausnehmen
und nach 30 Sekunden wieder einsetzen.
1. Schalten Sie die
LCD-Anzeige ein,
ei-
indem Sie die
EIN- / AUS-Taste 5
drücken.
2. Entnehmen Sie die
Batterie und setzen
Sie sie gemäß
Polung und Kapitel
„Batterie einsetzen /
austauschen“ so
ein, dass sie alle
Kontakte berührt.
3. Tauschen Sie die
Batterie gemäß
Kapitel „Batterie
einsetzen / austauschen“ aus.
Q
Wartung und Reinigung
j
Reinigen Sie den Winkelmesser vor und nach dem
Gebrauch.
j
Den Winkelmesser nicht in Wasser tauchen. Flüssigkeiten
können den Winkelmesser beschädigen.
j
Verwenden Sie zur Reinigung des Gehäuses ein trockenes
Tuch und keinesfalls Benzin, Lösungsmittel oder Reiniger.
j
Schalten Sie die LCD-Anzeige 3 immer aus, wenn der
Winkelmesser nicht verwendet wird. So verlängern Sie die
Betriebsdauer der Batterie.
j
Setzen Sie den Winkelmesser nicht unter Spannung und
halten Sie ihn von elektrischen Stiften fern. Anderenfalls kann
der Chip im Winkelmesser beschädigt werden.
Q
Entsorgung
Die Verpackung besteht aus umweltfreundlichen
Materialien, die Sie über die örtlichen
Recyclingstellen entsorgen können.
Möglichkeiten zur Entsorgung des ausgedienten Produkts erfahren
Sie bei Ihrer Gemeinde- oder Stadtverwaltung.
Werfen Sie Ihr Gerät, wenn es ausgedient hat, im
Interesse des Umweltschutzes nicht in den Hausmüll,
sondern führen Sie es einer fachgerechten Entsorgung
zu. Über Sammelstellen und deren Öffnungszeiten
können Sie sich bei Ihrer zuständigen Verwaltung
informieren.
DE/AT/CH
38
Page 40

Defekte oder verbrauchte Batterien müssen gemäß Richtlinie
2006 / 66 / EG recycelt werden. Geben Sie Batterien
und / oder das Gerät über die angebotenen
Sammeleinrichtungen zurück.
Umweltschäden durch falsche
Entsorgung der Batterien!
Batterien dürfen nicht über den Hausmüll entsorgt werden. Sie
können giftige Schwermetalle enthalten und unterliegen der
Sondermüllbehandlung. Die chemischen Symbole der
Schwermetalle sind wie folgt: Cd = Cadmium, Hg =
Quecksilber, Pb = Blei. Geben Sie deshalb verbrauchte
Batterien bei einer kommunalen Sammelstelle ab.
Q
Garantie
Das Produkt wurde nach strengen Qualitätsrichtlinien sorgfältig
produziert und vor Anlieferung gewissenhaft geprüft. Im Falle
von Mängeln dieses Produkts stehen Ihnen gegen den
Verkäufer des Produkts gesetzliche Rechte zu. Diese
gesetzlichen Rechte werden durch unsere im Folgenden
dargestellte Garantie nicht eingeschränkt.
Sie erhalten auf dieses Gerät 3 Jahre Garantie ab Kaufdatum.
Die Garantiefrist beginnt mit dem Kaufdatum. Bitte bewahren
Sie den Original Kassenbon gut auf. Diese Unterlage wird als
Nachweis für den Kauf benötigt.
Tritt innerhalb von drei Jahren ab dem Kaufdatum dieses
Produkts ein Material- oder Fabrikationsfehler auf, wird das
Produkt von uns – nach unserer Wahl – für Sie kostenlos
repariert oder ersetzt. Diese Garantie verfällt, wenn das Produkt
beschädigt, nicht sachgemäß benutzt oder gewartet wurde.
Die Garantieleistung gilt für Material- oder Fabrikationsfehler.
Diese Garantie erstreckt sich nicht auf Produktteile, die normaler
Abnutzung ausgesetzt sind (z. B. Batterien) und daher als
Verschleißteile angesehen werden können oder für
Beschädigungen an zerbrechlichen Teilen, z. B. Schalter, Akkus
oder die aus Glas gefertigt sind.
DE/AT/CH
39
 Loading...