

Page 1
®
Eaton Fuller
AutoShift Gen II Models
®
®
Automated Transmissions
Quick Reference Guide TRMT-0062
March 2000
For the most current information, visit the Roadranger web site at www.roadranger.com
Page 2
General Warnings:
Before starting a vehicle:
• Sit in the driver’s seat
• Place shift lever in neutral
• Set the parking brake
Before working on a vehicle or
leaving the cab wit
• Place shift lever in neutral
• Set the parking brake
• Block the wheels
h engine running:
O.E. Tool & Equipment Group/KentMoore SPX Corporatio
n
1 (800) 520-2584
Kent-Moore
. Description
Part No
5505027 Volt/Ohm Meter (Standard
commercially available VOM)
5505030 Hydraulic Test Kit
O.E. Tool & Equipment Group/KentMoore SPX Corporatio
n
1 (800) 328-6657
Do not release the parking brake or
attempt to select a gear until the air
pressure is at the correct level.
When parking the vehicle or leaving
the
cab:
• Place shift lever in neutral
• Set the parking brake
To avoid damage to the transmis-
during towing:
sion
• Place shift lever in neutral
• Lift the drive wheels off of the
ground or disconnect the driveline
Do not operate vehicle if alternator
lamp is lit or if gauges indicate low
voltage.
Suggested Tools:
Pressure Gauges:
• 0-100 PSI Air Pressure Gauge
Kent-Moore
Part No. Description
8 Eaton Test Adapter Kit
J-4331
J-38351-
J-4266
B Serial Link Adapter Kit
(RP-1202)
0 Parallel Data Module
(RP-1210A)
Eaton Service Parts
1 (888) 880-0970 Ext. 1
Part No. Description
MF-KIT-04 Data Link Tester
TBD Service Ranger PC Based
Service Tool Software
Related Publications
AutoShift
Installation Guid
Installation Guide AS
Service Manua
AutoShift
Driver Instructions Eaton TRDR-0062
Driver Instructions AS
Autoshift II Direct Parts
Shipment
e Eaton TRIG-0062
T Eaton TRIG-0092
l Eaton TRSM-0062
T Eaton TRDR-0092
Program Eaton TRIP-0062
2
For additional help 1-888-880-0970
Page 3
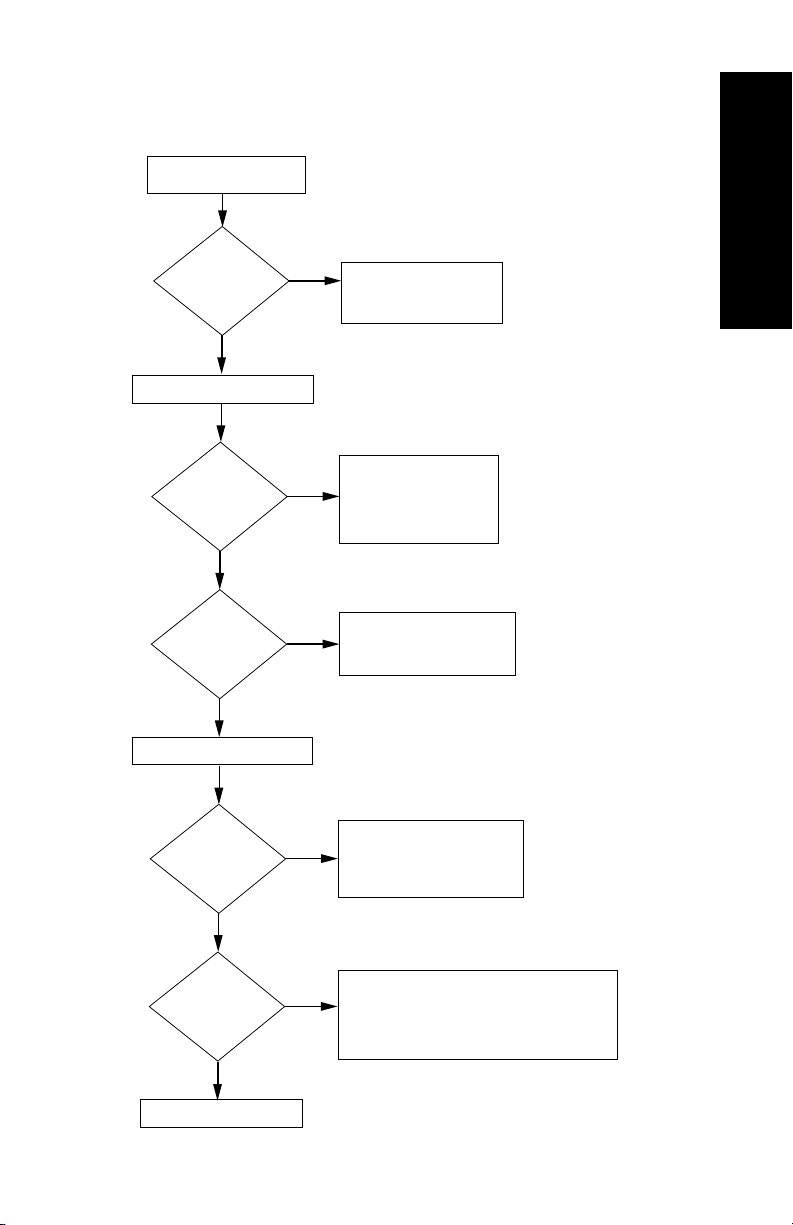
Diagnostics Procedure
Key on.
Introduction
If service lamp
lights for one
second and
turns off.
YES
Retrieve active codes.
Active codes?
NO
Is the "N" solid
on the gear display
and the "N" lit up
on the shift
control?
YES
Retrieve inactive codes.
Inactive codes?
• Verify OEM wiring is OK.
• Perform Electrical Pretest.
NO
• Refer to Troubleshooting
Guide
• Verify OEM wiring is OK.
• Perform Electrical Pretest.
• Perform Air Pretest
YES
NO
YES
(if required)
• Refer to Troubleshooting
Guide
• Verify OEM wiring is OK.
• Perform Electrical Pretest.
• Refer to Troubleshooting
Guide
• Verify OEM wiring is OK.
• Perform Electrical Pretest.
• Perform Air Pretest (if required)
• Refer to Troubleshooting
Guide
NO
Symptom?
NO
Test complete.
• Verify OEM wiring is OK.
• Perform Electrical Pretest.
• Perform Air Pretest (if required)
YES
• Verify ECU has correct software, use ServiceRanger
• Refer to Troubleshooting
Guide
3
Page 4
Step A Procedure Condition Action
1. Key on.
2. If service lamp lights
for one second and then
turns off.
Note: Some vehicle
configurations do not
have service lamps. In
this case Go to Step B.
If service lamp lights for
one second and turns
off.
Go to Step B.
If service lamp never
comes on
The fuse for the ignition
power may be blown or
the AutoShift may have a
bad ground. Do the
Electrical Pretest.
If Service lamp is
Flashing
The AutoShift has
detected an active
component code. Verify
the wiring is totally
correct on the vehicle
first. You may have to
refer to OEM drawings.
Then refer to the
Troubleshooting Guide.
Do not go straight to the
Troubleshooting Guide
before you verify the
vehicle wiring or you may
replace the incorrect
component.
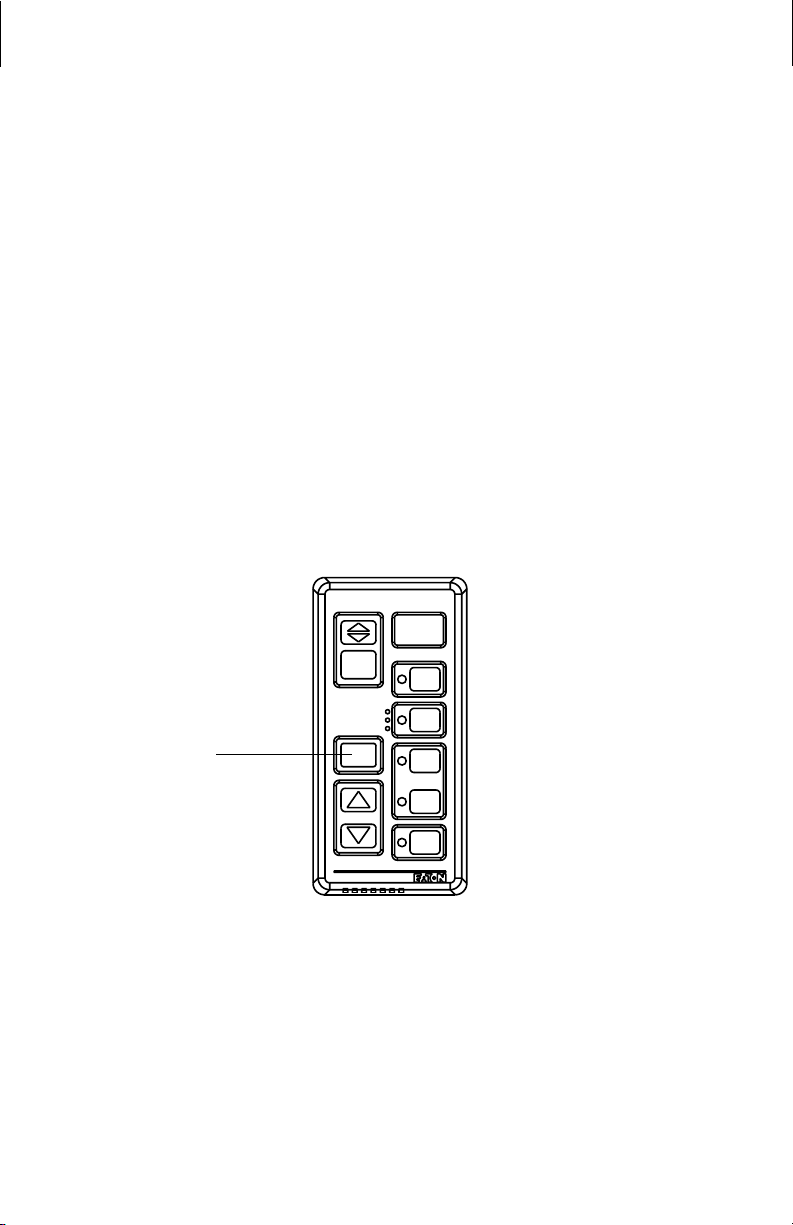
Replace the Push Button
Shift Control.
Service
Lamp
OPTIONS
CONTROL
R
N
SERVICE
SHIFT
EATON FULLER
TRANSMISSIONS
If the service lamp is on
steady
D
H
L
Note: Some vehicles are
equipped with an Eaton
shift lever or a OEM
shift lever. In this case
the software in the Push
Button Shift Control will
cause the service light
to be on steady. This is
4
normal.
Page 5
Step B Procedure Condition Action
1. Key on.
2. Make sure shift lever
is in Neutral.
3. Observe Gear display
Note: The Gear
Display may go through
serveral displays before it
stops.
If the Gear Display shows:
Blank Gear Display:
Transmission ECU and
the Push Button Shift
control are not communicating. Check the wiring
between the Transmission ECU and the Push
Button Shift Control.
Gear Display Lamp
check:
This is OK.
18
System Check
—
Dash on the Gear
Display:
Transmission ECU and
the Push Button Shift
control are communicating. The transmission is
trying to verify Neutral
and it can't. It may be
torque locked in gear. Or
bad Powers and
Grounds. The engine will
not start in this mode.
5
Page 6
Step B Procedure Condition Action
If the Gear Display shows:
"N" on the gear display:
This is good. The
AutoShift is powered up
N
F
completely. If the engine
does not start check the
start enable circuit.
Go to Step C.
Flashing "F":
The AutoShift has
detected an active
component code. Verify
the wiring it totally
correct on the vehicle
first. You may have to
refer to OEM drawings.
Then refer to the
Troubleshooting Guide.
Do not go straight to the
Troubleshooting Guide
before you verify the
vehicle wiring or you
may replace the
incorrect component.
6
Page 7

Step C Procedure Condition Action
1. Key on.
2. Depress the master clutch.
3. Start engine.
4. Release the clutch pedal.
5. Depress the clutch fully to
the floor.
6. Select "D".
7. Observe the Gear Display
If the Gear Display shows.
Solid "N" on the Gear
Display:
The AutoShift has not
N
seen Input Shaft Speed.
Make sure you have
released the Clutch pedal
fully.
Make sure the lamp for
"D" is lit up on the Shift
Control. If not the shift
control may need to be
replace.
System Check
OPTIONS
CONTROL
SERVICE
SHIFT
EATON FULLER
TRANSMISSIONS
R
Lamp for "D"
N
D
H
L
7
Page 8

Step C Procedure Condition Action
If the Gear Display shows:
Down arrows with a
flashing "2":
The input shaft turning
2
2
faster than 150 rpm.
Make sure that the
Clutch is fully depressed. If problem
continues the Clutch is
not adjusted correctly.
Flashing "2":
The sliding clutch is
butting. Release the
clutch pedal slightly.
Solid "2":
The AutoShift is
engaged in gear and is
ready to go.
8
Page 9

Problem Possible Cause
The AutoShift will not shift until
you lift off the throttle.
The Autoshift will not shift
across the Dyno.
The AutoShfit is upshifting
automatically in "H" or manual
mode.
The OEM shift lever does not
work.
The AutoShift will not make
Automatic shifts even after
lifting off the throttle pedal.
The engine will not start.
The engine will start in any
gear.
J1939 data link is not working. Check to see if the
engine J1939 is turned on. Check the J1939 data
link harness, terminataing resistors. This is an OEM
issue.
Place the AutoShift in "D" and button up the
Maximum Start Gear. Then try it. If the AutoShift
still does not shift the dyno has too much drag. The
AutoShift needs to have the rolling inertia from the
vehicle. If the dyno has too much drag the rear
wheels slow down to fast. This is why the AutoShift
will not shift.
The only time the AutoShift will shift automatically
is when the input shaft speed is 300 rpm over rated
speed of the engine. The AutoShift may have the
incorrect engine configuration downloaded into the
Push Button Shift Control. This is corrected by
downloading the correct configuration into the
Push Button Shift Control, using VEPS or
ServiceRanger.
The Push Button Shift Control may not have the
correct software. The easiest way to tell is if the
Service Lamp is on solid, it is correct. The OEM
shift lever or the OEM wiring may be the problem.
The AutoShift has what is called RPM/Load based
shifting. Simply push the upshift button while the
shift control is still in "D". For more information
read the Drivers Instruction Guide.
Make sure there is an "N" on the Gear Display. The
problem is with the Start Enable circuit. Refer to
OEM wiring diagrams.
The problem is with the Start Enable circuit. Refer
to OEM wiring diagrams.
When the key is turned off the AutoShift seems to
calibrate forever. (X-Y Shifter) Several issues could
cause this.
• OEM wiring. Verify the OEM interface
harnesses.
• Bad Power and Ground. Perform the Electrical
Pretest.
• The incorrect transmission ECU. This can be
verified using ServiceRanger.
• The X-Y Shifter. The sensors could be bad.
Troubleshooting
9
Page 10

Problem Possible Cause
Miscellaneous AutoShift
complaints
After retrieving fault codes
the Gear Display that is
integrated in the dash is
displaying fault code 5.
There is no fault code 5.
There is an active fault code
44. Fault code 44 is for the
Inertia Brake. This
transmission does not have
an Inertia Brake.
There are active fault codes
present.
• Always verify the OEM wiring first.
• Check the installation of the AutoShift second.
• Check the AutoShift transmission third.
It is not fault code 5, it is fault code 25, which
means no code. The start up procedure for the dash
panel does not allow the 2 to be displayed.
Attempt to clear the code. If fault code 44 comes
right back the Transmission ECU may have been
configured for a transmission that requires an
Inertia Brake. This must be confirmed using Service
Ranger. If this is the case the Transmission ECU
will need to be replaced.
Record the fault codes. Clear the fault codes. If the
fault codes come right back as active codes.
• Always verify the OEM wiring first.
• Check the installation of the AutoShift second.
• Check the AutoShift transmission third.
10
Page 11

The following charts have what is supplied from Eaton as the default and what must
be re-calibrated by the OEM. VEPS or ServiceRanger can accomplish the re-calibration.
tluafeD
deriuqeR
For indicated transmission model - no need to touch
Re-calibration for this combination
enignE
ronrevoG
kaeP
euqroT
XSA-6
2noitareneGtfihSotuA
0071
0081
0091
0021
A/N
0002
0012
00220031
0032
dradnatSMPR0042
00410042
0052
00620061
enignE
ronrevoG
kaeP
euqroT
dradnatSMPR0062
2noitareneGtfihSotuA
XSA-7
Software Configuration
0071
0081
0091
0002
0012
0032
00620061
0021
A/N
dradnatSMPR001200220031
00410042
dradnatSMPR00420052
11
Page 12

enignE
ronrevoG
kaeP
euqroT
2SA-01
2noitareneGtfihSotuA
0071
0081
0091
0002
0012
00220031
0032
0042
0052
00620061
enignE
ronrevoG
0071
0081
0091
0021
dradnatSytuDyvaeH
dradnatSMPR0012
0041
dradnatSMPR0042
kaeP
euqroT
2SA-81
2noitareneGtfihSotuA
A/N
dradnatSMPR0081
0021
12
0002
0012
00220031
0032
0052
00620061
dradnatSMPR0002
dradnatSMPR0012
00410042
A/N
Page 13

Model Number
The model number gives basic information about the transmission and is explained
below. Use this number when calling for service assistance or replacement parts.
Model Number
6 Speed
Torque x 100
Design Level
7 Speed
Twin Countershaft
Torque x 100
Design Level
10 Speed
Roadranger
Twin Countershaft
Overdrive
Torque x 100
Design Level
18 Speed
Roadranger
Twin Countershaft
Low Inertia
Overdrive
Torque x 100
Design Level
Fuller
Overdrive
Overdrive
®
®
FO 84 6A0- X-XAS
®
T O 11 076- B-AS
R
TO-
T
LO-R
14 107 B-AS
18 189 A-AS
Inertia Brake
AutoShift™
Gear Ratio
Forward Speeds
X - Inertia Brake
AutoShift™
Gear Ratio
Forward Speeds
2
AutoShift™ II
(Second Generation)
AutoShift™
Gear Ratio
Forward Speeds
2
2-AutoShift™ II
(Second Generation)
AutoShift™
Gear Ratio
Forward Speeds
PREFIX KEY
®
F = Fuller
L = Low Inertia
O = Overdrive
R = Roadranger
T = Twin Countershaft
®
SUFFIX KEY
AS = AutoShift™
X = Inertia Brake
W = Wet Clutch
T = Torque Converter
2 = AutoShift™ II
(Second Generation)
13
Page 14

Retrieving and Clearing Fault Codes
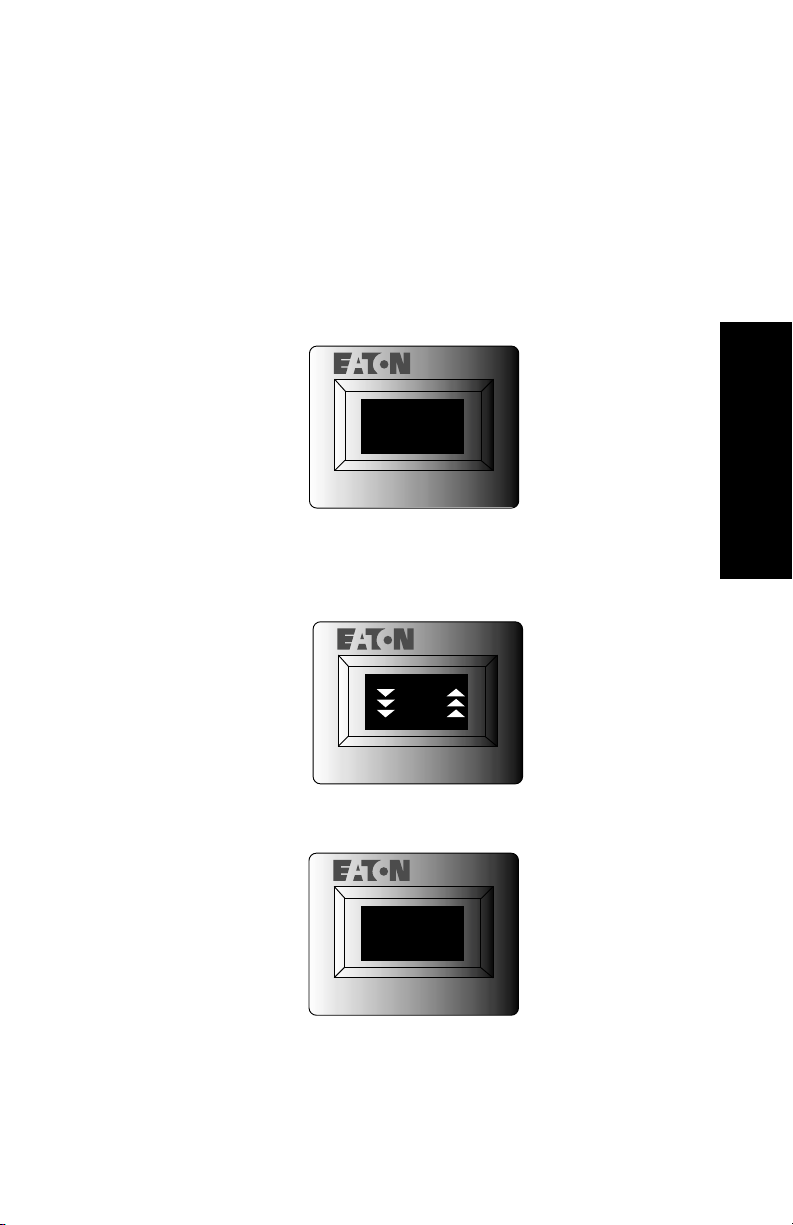
During power-up, the service light will come on and go off. This is normal operation.
But, if the service light comes on and stays on or comes on while driving, it means the
transmission has detected a fault and you’ll want to get to a service facility as soon as
possible.
In the event there is a problem with the transmission, there are three primary tasks the
driver should perform.
• Driving Conditions: Note the driving condition under which the problem
occurred.
• Transmission Conditions: Note the condition of the transmisison under which
the problem occurred.
• Retrieve Codes / Reset System: Record fault codes and reset the transmission
as described below.
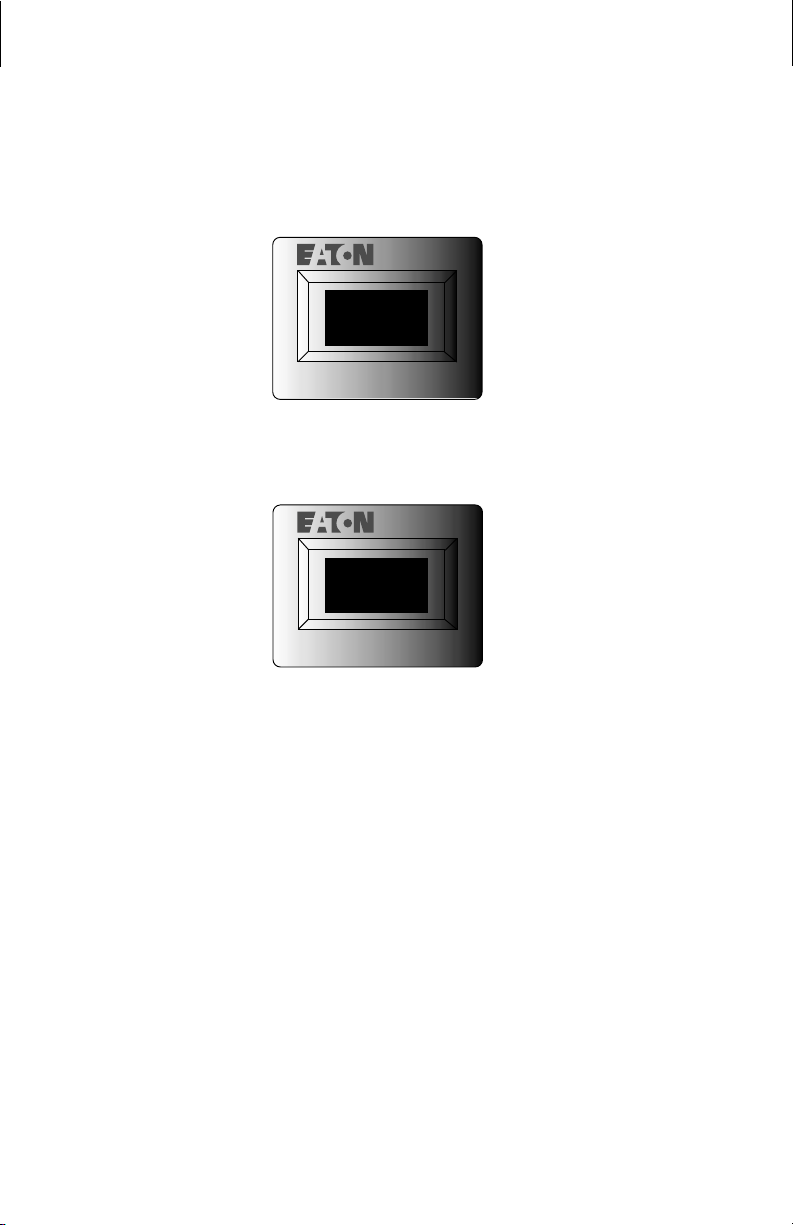
Retrieving Fault Codes
Retrieve transmission fault codes by enabling the transmission system’s selfdiagnostic mode.
Note: You can also use a PC-based service tool, such as the ServiceRanger, to retrieve
transmission fault codes.
1. Place the shift lever in neutral.
2. Set the parking brake.
3. Turn the ignition key on but do not start the engine. If the engine is already
running, you may still retrieve codes, however, do not engage the starter if
engine stalls.
4. To Retrieve Active Codes: Start with the key in the on position.
Turn the key off and on two times within five seconds ending
with the key in the on position. After five seconds, the service
off
lamp begins flashing two-digit fault codes. If no codes are
active, the service light will flash code 25 (no codes).
To Retrieve Inactive Codes: Start with the key in the on
position. Turn the key off and on four times within five seconds
ending with the key in the on position. After five seconds, the
off
service lamp begins flashing two-digit fault codes. If no codes
are active, the service light will flash code 25 (no codes).
14
2 times
on
4 times
on
Page 15

5. Observe the sequence of flashes on the indicator lamp and record the
codes. A one to two second pause separates each stored code, and the
sequence automatically repeats after all codes have been flashed.
1 Flash
SERVICE
Short
pause
(1/2 sec)
3 Flashes
SERVICE SERVICE
SERVICE
Code 13 Code 21
SERVICE
Long Pause
(3-4 sec)
2 Flashes
SERVICE
1 Flash
SERVICE
Short
pause
(1/2 sec)
Clearing Fault Codes
The following procedure clears all inactive fault codes from the ECU’s memory.
(Active fault codes are automatically cleared when the fault has been corrected.)
Note: You can also use a PC-based service tool, such as the ServiceRanger, to clear
transmission fault codes.
1. Place the shift lever in neutral.
2. Set the parking brake.
3. Turn the ignition key on but do not start the engine.
4. Start with the key in the on position. Turn the key off and on six times within
five seconds, ending with the key in the on position.
6 times
off
on
Code Retrieving / Clearing
Note: If the codes have been successfully cleared, the service lamp will come
on and stay on for five seconds.
5. Turn key off and allow system to power down.
15
Page 16

Fault Code Description
11 Shift Control
12 Transmission Controller
16 Eaton Proprietary Link (EPL)
17 Start Enable Relay Coil
21 Interrupt Clutch Solenoid
22 Lock-up Clutch Solenoid
24 Hydraulic System Fault
25 No Code
32 Switched System Voltage
33 Battery Voltage Supply
35 J-1939 Data Link
41 Range Failed to Engage
42 Splitter Failed to Engage
43 Range Solenoid Valve
44 Inertia Brake Solenoid Coil
46 Splitter Valve
51 Rail Select Sensor
52 Gear Select Sensor
56 Input Shaft Speed Sensor
57 Main Shaft Speed Sensor
58 Output Shaft Speed Sensor
61 Rail Select Motor
63 Gear Select Motor
65 Logic Power
71 Stuck Engaged
72 Failed to Select Rail
73 Failed to Engage Gear
74 Failed to Synchronize
83 Shift Lever Missing
16
Page 17

Page 18

Page 19

Page 20

Copyright Eaton and Dana
Corporation, 2002. EATON AND
DANA CORPORATION hereby
grants its customers, vendors, or
distributors permission to freely
copy, reproduce and/or distribute
this document in printed format.
THIS INFORMATION IS NOT
INTENDED FOR SALE OR RESALE, AND THIS NOTICE MUST
REMAIN ON ALL COPIES.
The Roadranger® System is an unbeatable combination of the
best products from Eaton and Dana – partnering to provide you
the most advanced, most trouble-free drivetrain in the industry.
And it’s backed by the Roadrangers – the most experienced, most
expert, most accessible drivetrain consultants in the business.
For spec’ing or service assistance, call 1-800-826-HELP (4357)
24 hours a day, 7 days a week, (Mexico: 001-800-826-HELP
(4357)) for more time on the road. Or visit our web site at
www.roadranger.com.
TRMT-0062
3/00 PDF
Printed in USA
 Loading...