

Parkside PBSG 95 C4 Translation Of The Original Instructions

DRILL BIT SHARPENER PBSG 95 C4
DRILL BIT SHARPENER
Translation of the original instructions
BRUSILNI APARAT ZA SVEDRE
Prevod originalnega navodila za uporabo
BRÚSKA NA VRTÁKY
Preklad pôvodného návodu na použitie
IAN 315568
FÚRÓÉLEZŐ GÉP
Eredeti használati utasítás fordítása
BRUSKA NA VRTÁKY
Překlad původního návodu k používání
BOHRERSCHÄRFGERÄT
Originalbetriebsanleitung

GB Translation of the original instructions Page 5
HU Eredeti használati utasítás fordítása Oldal 13
SI Prevod originalnega navodila za uporabo Stran 22
CZ Překlad původního návodu k používání Strana 31
SK Preklad pôvodného návodu na použitie Strana 39
DE / AT / CH Originalbetriebsanleitung Seite 47

A B
3
2
3
1
2
3
4
C D
5 6 7 8
E
10
11
9


List of pictograms used .............................................................................................Page 6
Introduction ........................................................................................................................Page 6
Intended use .............................................................................................................................Page 6
Parts description .......................................................................................................................Page 6
Scope of delivery .....................................................................................................................Page 7
Technical data ..........................................................................................................................Page 7
General safety instructions ...................................................................................Page 7
Safe operation .........................................................................................................................Page 7
Before use ............................................................................................................................Page 9
Initial use ..............................................................................................................................Page 9
Grinding drills ...........................................................................................................................Page 9
Replacing the brick ..................................................................................................................Page 9
Maintenance and cleaning ....................................................................................Page 10
Disposal .................................................................................................................................Page 10
Service ....................................................................................................................................Page 11
Warranty claim procedure ......................................................................................................Page 11
Service ......................................................................................................................................Page 11
Warranty ..............................................................................................................................Page 11
Translation of original conformity declaration ....................................Page 12
5 GB
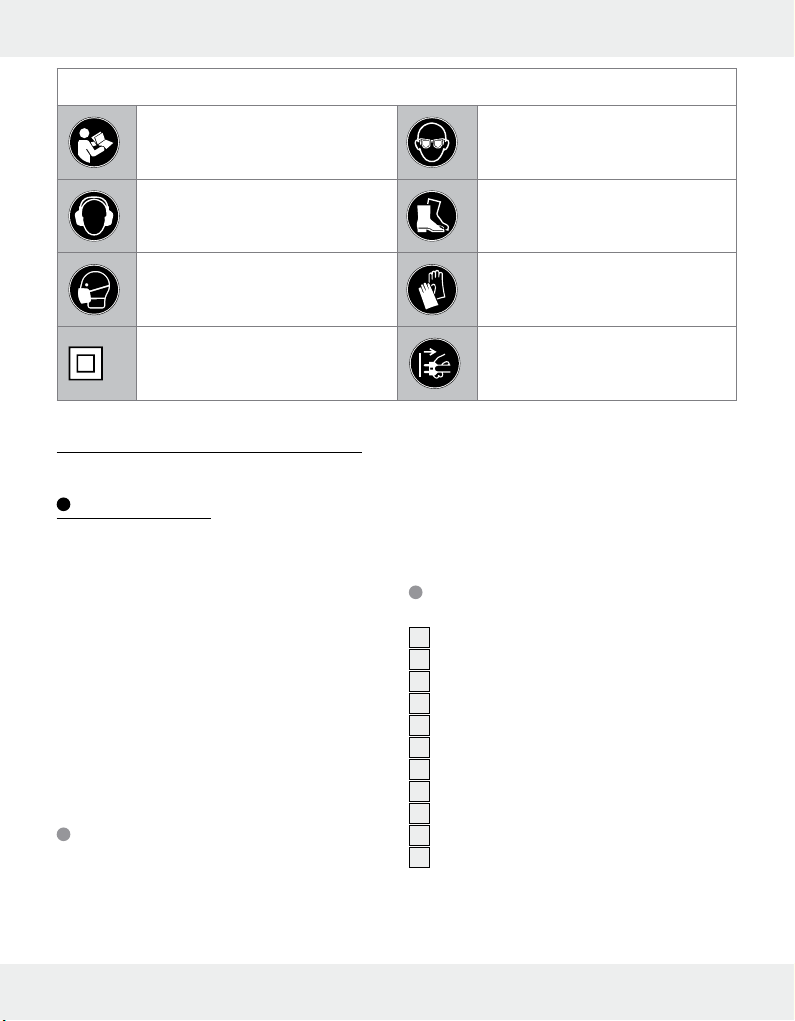
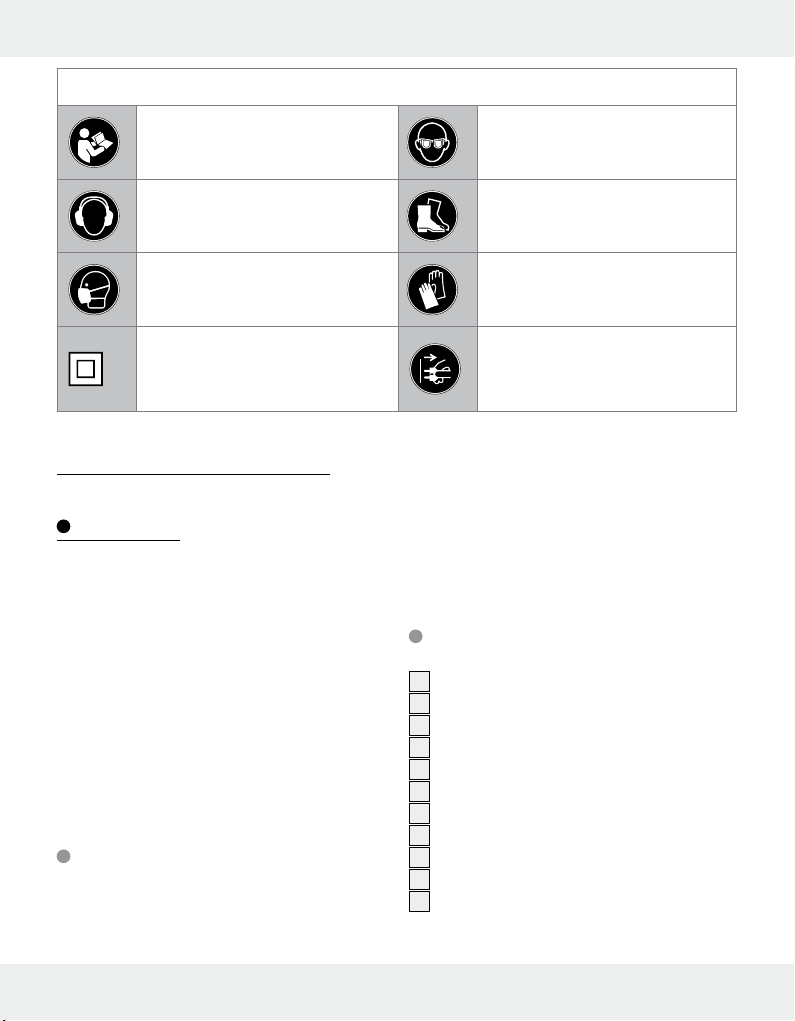
List of pictograms used
Read the instruction manual. Wear eye protection.
Wear hearing protection.
Wear a dust mask. Wear protective gloves.
Protection class II
(double insulation)
Drill bit sharpener PBSG 95 C4
Introduction
We congratulate you on the purchase of your
new product. You have chosen a high quality
product. The instructions for use are part of the
product. They contain important information
concerning safety, use and disposal. Before using the product, please familiarise yourself with
all of the safety information and instructions for
use. Only use the product as described and for
the specified applications. If you pass the product on to anyone else, please ensure that you
also pass on all the documentation with it.
Intended use
This product is intended for sharpening steel
drill bits according to DIN 338, DIN 340, DIN
345, DIN 1869 and DIN 1897 (style Type N).
Carbide drills must not be sharpened. Any other
Wear protective, slip-resistant
footwear.
Risk of electric shock! Unplug the
mains plug from the socket prior to
performing maintenance or repairs.
use or modification of the product shall be considered as improper use and could give rise to
considerable dangers. The manufacturer assumes no liability for damages due to improper
use. Not intended for commercial use.
Parts description
1
Dial („STONE“ = brick)
2
Brick cover
3
Screw, brick cover
4
ON/OFF switch
5
Brick
6
Metal ring
7
Screw connection
8
Brick holder
9
Spring
10
Louvres
11
Drill guide
6 GB
Scope of delivery
1 Drill sharpener PBSG 95 C4
2 Replacement bricks
1 Instructions for use
Technical data
Dimensions: 115 x 128 x 175 mm
(W x D x H)
Total weight: 945 g
Brick: 46 g
Rated voltage: 220–240 V∼ (AC)
50 Hz
Rated power: 95 W
Rated idle
speed: n
1350 min
0
-1
For drill Ø: 3–13 mm
Protection class: II /
Noise emission value:
The A-rated noise level of the power tool is
typically:
Load (grinding):
Noise level L
Uncertainty K
Sound power level L
Uncertainty K
: 61.2 dB (A)
pA
: 3 dB
pA
WA
: 74.2 dB (A)
WA
: 3 dB
General safety
instructions
WARNING! When using electric tools basic
safety precautions should always be followed
to reduce the risk of fire, electric shock and personal injury including the following. Read all
these instructions before attempting to operate
this product and save these instructions
Safe operation
1. Keep work area clear
Cluttered areas and benches invite injuries.
2. Consider work area environment
Do not expose tools to rain.
Do not use tools in damp or wet locations.
Keep work area well lit.
Do not use tools in the presence of flamma-
ble liquids or gases.
3. Guard against electric shock
Avoid body contact with earthed or
grounded surfaces (e.g. pipes, radiators,
ranges, refrigerators).
4. Keep other persons away
Do not let persons, especially children, not
involved in the work touch the tool or the
extension cord and keep them away from
the work area.
5. Store idle tools
When not in use, tools should be stored in
a dry locked-up place, out of reach of
children.
6. Do not force the tool
It will do the job better and safer at the rate
for which it was intended.
7. Use the right tool
Do not force small tools to do the job of a
heavy duty tool.
Do not use tools for purposes not intended;
for example do not use circular saws to cut
tree limbs or logs.
8. Dress properly
Do not wear loose clothing or jewellery,
they can be caught in moving parts.
7 GB

Non-skid footwear is recommended when
working outdoors.
Wear protective hair covering to contain
long hair.
9. Use protective equipment
Use safety glasses.
Use face or dust mask if working operations
create dust.
10. Connect dust extraction equipment
If the tool is provided for the connection of
dust extraction and collecting equipment,
ensure these are connected and properly
used.
11. Do not abuse the cord
Never yank the cord to disconnect it from
the socket. Keep the cord away from heat,
oil and sharp edges.
12. Secure work
Where possible use clamps or a vice to hold
the work. It is safer than using your hand.
13. Do not overreach
Keep proper footing and balance at all
times.
14. Maintain tools with care
Keep cutting tools sharp and clean for
better and safer performance.
Follow instruction for lubricating and chang-
ing accessories.
Inspect tool cords periodically and if dam-
aged have them repaired by an authorized
service facility.
Inspect extension cords periodically and
replace if damaged.
Keep handles dry, clean and free from oil
and grease.
15. Disconnect tools
When not in use, before servicing and
when changing accessories such as blades,
bits and cutters, disconnect tools from the
power supply.
16. Remove adjusting keys and
wrenches
Form the habit of checking to see that keys
and adjusting wrenches are removed from
the tool before turning it on.
17. Avoid unintentional starting
Ensure switch is in “off’ position when
plugging in.
18. Use outdoor extension leads
When the tool is used outdoors, use only
extension cords intended for outdoor use
and so marked.
19. Stay alert
Watch what you are doing, use common
sense and do not operate the tool when
you are tired.
20. Check damaged parts
Before further use of tool, it should be
carefully checked to determine that it will
operate properly and perform its intended
function.
Check for alignment of moving parts,
binding of moving parts, breakage of parts,
mounting and any other conditions that
may affect its operation.
A guard or other part that is damaged
should be properly repaired or replaced by
an authorized service centre unless otherwise indicated in this instruction manual.
Have defective switches replaced by an
authorized service centre.
Do not use the tool if the switch does not
turn it on and off.
21. WARNING!
The use of any accessory or attachment
other than one recommended in this instruction manual may present a risk of personal
injury.
8 GB
22. Have your tool repaired by a
qualified person
This electric tool complies with the relevant
safety rules. Repairs should only be carried
out by qualified persons using original
spare parts, otherwise this may result in
considerable danger to the user.
Before use
Note: Remove all packaging material from the
product.
The operator should stand in front and stay
close to the power tool to prevent overreach.
In case of blockage, switch off the appli-
ance and unplug from the mains. Then clear
the jam.
grinding pressure the brick applies to the
drill. The more the dial
1
is turned in the
UP ▲ direction, the greater the grinding
pressure. Be sure not to raise the brick too
high. The brick may otherwise get in contact
with the housing.
Loosely and quickly rotate the drill back
and forth about 10 times between the left
and right stop, applying light pressure
(small drills about 5 times).
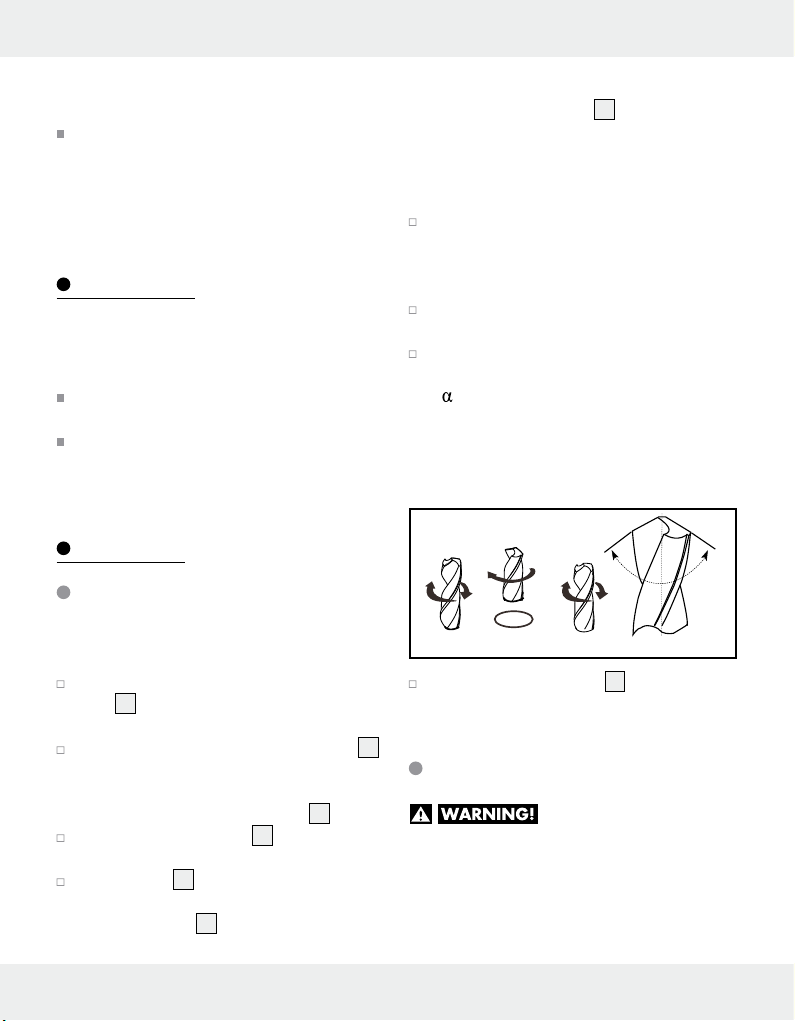
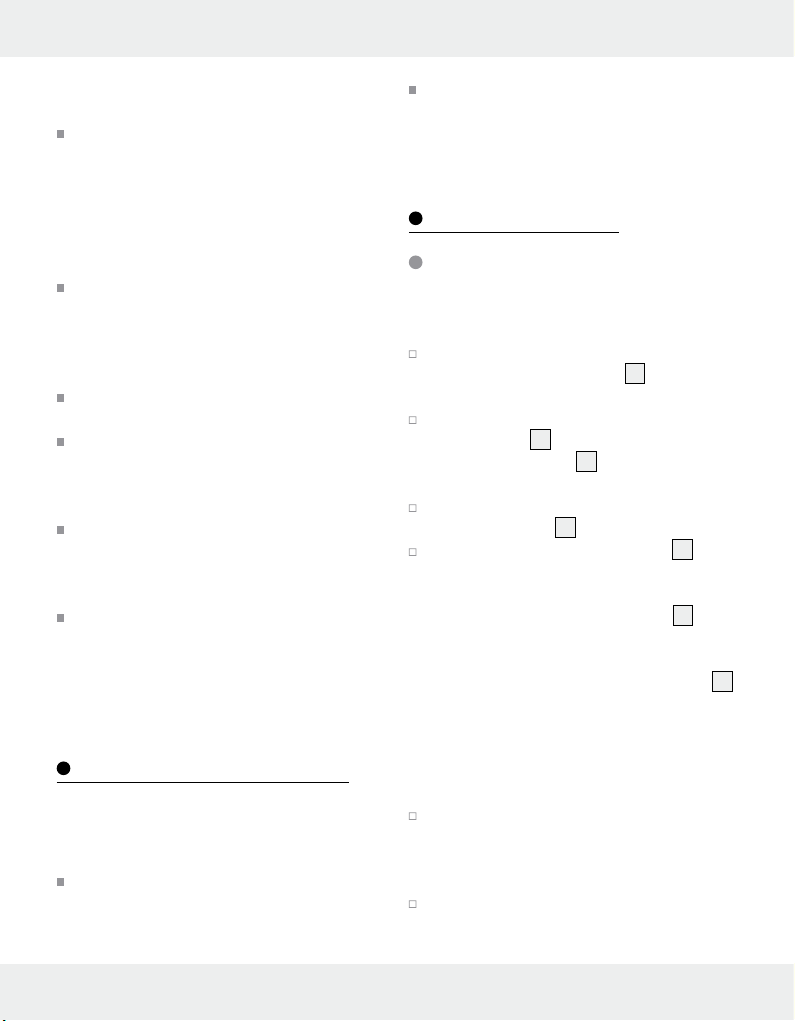
Slightly pull out the drill, turn 180° around
its own axis and reinsert up to the brick.
If necessary, repeat the entire process until
both faces are sharp. Polish so the angle
(
) between the two cutting edges (b) is
118°. Both cutting edges (b) must have the
same angle to the drilling axle (a) and have
the same length for the drill to run centred
(see images below).
(b)
(b)
Initial use
Grinding drills
Note: First rough grind severely damaged
drills with a grinding block.
Fully lower the brick. To do so, turn the
1
dial
all the way in the DOWN ▼
direction.
Insert the drill into the smallest drill guide 11
on the sharpener it will fit. Please refer to
the markings (3 to 13) for the exact sizes
(Ø) of the respective drill guides
Set the ON/OFF switch 4 to position „I“
to switch on the product.
Turn the dial 1 in the UP ▲ direction until
you hear a grinding noise.
Note: The dial
1
controls the position of
the brick inside the grinding head, thus the
11
.
21 3
180
0
(a)
0
α =
118
Set the ON/OFF switch 4 to position „0“
to switch off the product.
Replacing the brick
RISK OF INJURY!
Always unplug from the mains before working
on the product. Replace a worn or damaged
brick (diminished, uneven grinding, broken brick).
You will need a phillips head screwdriver for this
step.
9 GB
Unscrew the 4 screws 3 on the brick cover
2
and remove the cover 2 (see Fig. A).
Remove the brick 5.
Loosen the screw connection 7 keeping
the brick
5
in the brick holder 8 with a
27 mm open-end spanner (not included) or
a nut driver (see Fig. B).
Note: Turn counter-clockwise to open!
Remove the metal ring 6.
Secure the new brick in the brick holder 8
with the flattened edge down and reinstall
the metal ring
6
.
Tighten the screw connection with a 27 mm
open-end spanner.
Note: Turn clockwise to close!
Be sure the spring 9 is installed in the
product as shown in Fig. D and insert the
brick into the product. Turn the brick until it
is again precisely fitted as shown in Fig. A
or the brick cover
2
will not fit.
Reattach the brick cover 2 and fasten in
place with the 4 screws
3
.
RISK OF INJURY! Never
open the product except to replace the
brick. Always have repairs or parts replacements performed at the service centre or by
an electrician. If the input lead on this product is damaged, it must be replaced with a
specially prepared power cord at the
service centre.
Disposal
The packaging is made entirely of recyclable
materials, which you may dispose of at local recycling facilities.
Observe the marking of the packag-
b
ing materials for waste separation,
a
which are marked with abbreviations
(a) and numbers (b) with following
meaning: 1–7: plastics / 20–22: paper and fibreboard / 80–98: composite materials.
Maintenance and cleaning
This product is maintenance-free except for
replacing the bricks.
RISK OF
ELECTRIC SHOCK! Unplug the
mains plug from the socket prior
to performing maintenance or repairs.
Clean the product regularly, preferably
immediately after every use.
Use a dry cloth to clean the housing. Never
use petrol, solvents or cleaning agents that
attack plastic.
10 GB
The product and packaging materials are recyclable, dispose of it separately for better waste treatment. The
Triman logo is valid in France only.
Contact your local refuse disposal
authority for more details of how to
dispose of your worn-out product.
To help protect the environment,
please dispose of the product properly when it has reached the end of
its useful life and not in the household waste. Information on collection
points and their opening hours can
be obtained from your local authority.

Service
Have your product repaired at the service
centre or an electrician, using only original
manufacturer parts. This will maintain the
safety of this product.
Always have a plug or power cord
replaced by the product manufacturer or its
service centre. This will maintain the safety
of this product.
Warranty claim procedure
To ensure quick processing of your case, please
observe the following instructions:
Service
Service Great Britain
Tel.: 0800 404 7657
E-Mail: owim@lidl.co.uk
IAN 315568
Warranty
The product has been manufactured to strict quality guidelines and meticulously examined before delivery. In the event of product defects you
have legal rights against the retailer of this product. Your legal rights are not limited in any way
by our warranty detailed below.
Please have the till receipt and the item number
(e.g. IAN 123456) available as proof of
purchase.
You will find the item number on the type plate,
an engraving on the front page of the instructions (bottom left), or as a sticker on the rear or
bottom of the appliance.
If functional or other defects occur, please contact the service department listed either by telephone or by e-mail.
You can return a defective product to us free of
charge to the service address that will be provided to you. Ensure that you enclose the proof of
purchase (till receipt) and information about
what the defect is and when it occurred.
The warranty for this product is 3 years from the
date of purchase. Should this product show any
fault in materials or manufacture within 3 years
from the date of purchase, we will repair or replace it – at our choice – free of charge to you.
The warranty period begins on the date of
pu
rchase. Please keep the original sales receipt
in a safe location. This document is required as
your proof of purchase. This warranty becomes
void if the product has been damaged, or used
or maintained improperly.
The warranty applies to defects in material or
manufacture. This warranty does not cover product parts subject to normal wear, thus possibly
considered consumables (e.g. batteries) or for
damage to fragile parts, e.g. switches, rechargeable batteries or glass parts.
11 GB

Translation of original
conformity declaration
We, OWIM GmbH & Co. KG, Stiftsbergstraße
1, DE-74167 Neckarsulm, GERMANY, hereby
declare under our sole responsibility that the
product: Drill Bit Sharpener PBSG 95 C4,
Model No.: HG04874, Version: 04 / 2019, to
which this declaration refers, complies with the
standards / normative documents of
2006/42/EC, 2014/30/EU, 2011/65/EU.
Applied harmonised standards:
EN 61029-1:2009+A11
EN ISO 12100:2010
EN 55014-1:2006+A1+A2
EN 55014-2:2015
EN 61000-3-2:2014
EN 61000-3-3:2013
EN 50581:2012
Serial number: IAN 315568
Tobias König
Division Manager / Responsible for documentation
OWIM GmbH & Co. KG, Stiftsbergstraße 1,
DE-74167 Neckarsulm, GERMANY
The object of the declaration described above
satisfies the provisions of Directive 2011/65/EU
of the European Parliament and the Council of
8 June 2011 on limiting the use of certain
harmful substances in electrical and electronic
appliances.
Neckarsulm, 23.02.2019
The declaration of conformity can also be viewed
at: www.owim.com.
12 GB

Az alkalmazott piktogramok jelmagyarázata ................................. Oldal 14
Bevezető ............................................................................................................................. Oldal 14
Rendeltetésszerű használat ................................................................................................... Oldal 14
Alkatrészleírás ........................................................................................................................ Oldal 14
A csomagolás tartalma .......................................................................................................... Oldal 15
Műszaki adatok ..................................................................................................................... Oldal 15
Általános biztonsági utasítások ..................................................................... Oldal 15
Biztonságos munkavégzés .................................................................................................... Oldal 15
Az üzembe helyezés előtt .................................................................................... Oldal 17
Üzembe helyezés ........................................................................................................ Oldal 17
Fúróélezés .............................................................................................................................. Oldal 17
A csiszolókő cseréje............................................................................................................... Oldal 18
Karbantartás és tisztítás ....................................................................................... Oldal 18
Mentesítés ......................................................................................................................... Oldal 19
Szerviz .................................................................................................................................. Oldal 19
Garanciális ügyek lebonyolítása .......................................................................................... Oldal 19
Szerviz .................................................................................................................................... Oldal 20
Garancia ............................................................................................................................. Oldal 20
Az eredeti Megfelelőségi Nyilatkozat fordítása ............................. Oldal 20
13 HU
Az alkalmazott piktogramok jelmagyarázata
Olvassa el a Használati utasítást. Viseljen szemvédőt.
Viseljen hallásvédőt. Viseljen csúszásmentes védőcipőt.
Viseljen porvédő álarcot. Viseljen védőkesztyűt.
Védelmi osztály II
(kettős szigetelés)
Fúróélező gép PBSG 95 C4
Bevezető
Gratulálunk új termékének vásárlása alkalmából.
Ezzel a döntésével vállalatunk értékes terméke
mellett döntött. A használati utasítás ezen termék
része. A biztonságra, a használatára és a megsemmisítésre vonatkozó fontos tudnivalókat tartalmazza. A termék használata előtt ismerje meg az
összes használati és biztonsági tudnivalót. A terméket csak a leírtak szerint és a megadott felhasználási területeken alkalmazza. A termék harmadik
személy számára való továbbadása esetén kézbesítse vele annak a teljes dokumentációját is.
Rendeltetésszerű használat
A termék DIN 338, DIN 340, DIN 345, DIN
1869 és DIN 1897 szerinti acélfúrók élezésére
való (N-típusú kivitel). Nehézfémből készült
Áramütés általi veszély áll fenn!
Karbantartási- és javítási munkálatok
előtt húzza ki a hálózati csatlakozó
dugót a konnektorból.
fúrót nem szabad élezni. Minden más jellegű
használat vagy a termék megváltoztatása nem
rendeltetésszerűnek minősül és rendkívül balesetveszélyes. A rendeletetésétől eltérő használatból eredő károkért a gyártó nem felel. Nem
közületi felhasználásra készült.
Alkatrészleírás
1
Kapcsológomb („STONE“ = csiszolókő)
2
Csiszolókő-burkolat
3
Csiszolókő-burkolatának csavarja
4
BE-/KI-kapcsoló
5
Csiszolókő
6
Fémgyűrű
7
Csavarozás
8
Csiszolókő-foglalat
9
Rugó
10
Szellőzőnyílás
11
Fúróvezető
14 HU
A csomagolás tartalma
1 Fúróélező gép PBSG 95 C4
2 Tartalék csiszolókő
1 Kezelési utasítás
Műszaki adatok
Mérete: 115 x 128 x 175 mm
(Sz x Mé x Ma)
Összsúly: 945 g
Csiszolókő: 46 g
Mérési feszültség: 220–240 V∼
(váltóáram) 50 Hz
Mérési felvétel: 95 W
Mérési üresjáratifordulatszám: n
1350 min
0
-1
Az alábbi fúró-Ø-hoz: 3–13 mm
Védelmi osztály: II /
Zajkibocsátási érték:
Az elektromos készülék A-minősítésű
zajkibocsátási szintje jellemzően a következő:
Terhelés (élezés):
Hangnyomásszint: L
Bizonytalanság K
Hangteljesítményszint L
Bizonytalanság K
: 61,2 dB (A)
pA
: 3 dB
pA
: 74,2 dB (A)
WA
: 3 dB
WA
Általános biztonsági
utasítások
FIGYELEM! Elektromos készülékek használata
során gondoskodni kell az áramütés elleni védelem
érdekében a következő biztonsági intézkedések
betartásáról. Olvassa el mindegyik útmutatást,
mielőtt használni kezdi az elektromos készüléket
és őrizze meg jól a Biztonsági utasításokat.
Biztonságos munkavégzés
1. Tartsa rendben a munkaterületet
A munkaterületen lévő rendetlenség balesetek
kockázatát rejti.
2. Vegye figyelembe a környezeti
befolyásokat
Ne hagyja kint az esőben az elektromos
készülékeket.
Ne használja az elektromos készüléket
nedves környezetben.
Gondoskodjon a munkaterület jó megvilágí-
tásáról.
Ne használja az elektromos készüléket tűz-,
vagy robbanásveszélyes helyen.
3. Védje magát az elektromos áramütéstől
Kerülje a földelt berendezésekkel (pl. csövek,
radiátorok, elektromos sütők, hűtőszekrények).
való érintkezést.
4. Más személyeket tartson távol
Ne hagyja, hogy más személyek, különösen
gyerekek érjenek az elektromos készülékhez,
vagy a vezetékhez. Tratsa őket távol a
munkaterülettől.
5. Tárolja biztonságosan az elektromos
készülékeket
A használaton kívüli elektromos készülékeket
tárolja egy száraz, magason lévő, vagy
zárt helyen, gyermekektől távol.
6. Ne terhelje túl az elektromos
készüléket
Jobban és biztosabban dolgozhat a
megadott teljesítménytartományban.
15 HU

7. A megfelelő elektromos készüléket
használja
Ne használjon gyenge teljesítményű gépet
nehéz munkákhoz.
Ne használja az elektromos készüléket nem
rendeltetésszerű célokra. Ne használjon
például kézi körfűrészt építőanyagok, vagy
tüzifa vágásához.
8. Viseljen megfelelő ruházatot
Ne viseljen bő ruházatot, vagy olyan ék-
szert, amit a mozgó alkatrszek magukkal
ránthatnak.
A szabadban történő munkavégzéshez
csúszásmentes cipő javasolt.
Hosszú hajra tegyen hajhálót.
9. Viseljen védőfelszerelést
Viseljen védőszemüveget.
Porral járó munkálatokhoz használjon
védőmaszkot.
10. Csatlakoztassa a porelszívóberendezést
Amennyiben a porelszívás csatlakozásai és
felfogóberendezése rendelkezésre áll, bizonyosodjon meg róla, hogy ezek megfelelően vannak-e csatlakoztatva és használva.
11. Ne használja a vezetéket
rendeltetésétől eltérő célokra
Ne a vezetéknél fogva húzza ki a dugót a
konnektorból. Védje a vezetéket hőtől,
olajtól és az éles szélektől.
12. Biztosítsa a munkadarabot
Használjon feszítőberendezéseket, vagy
egy satut a munkadarab rögzítéséhez.
Azokkal biztosabban tudja a munkadarabot tartani mint a kezével.
13. Kerülje a rendellenes testtartást
Gondoskodjon a biztos állásról és folyama-
tosan tartsa meg az egyensúlyát.
14. Gondosan ápolja szerszámait
A vágóeszközöket tartsa élesen és tisztán a
jobb és biztonságosabb munkavégzéshez.
Kövesse a zsírozásra és a szerszámcserére
vonatkozó előírásokat.
Rendszeresen ellenőrizze az elektromos
készülék csatlakozóvezetékét és sérülés
esetén egy elismert szakemberrel javíttassa
ki azt.
Rendszeresen ellenőrizze a hosszabbítót és
sérülés esetén cserélje ki azt.
Tartsa a markolatot szárazon, tisztán,
valamint olaj- és zsírmentesen.
15. Húzza ki a dugót a konnektorból
Ha nem használja az elektromos készüléket,
karbantartás s szerszámcsere, pl. fűrészlap,
fúrófej, marófej cseréje előtt.
16. Ne hagyja bedugva a szerszámkulcsot
A bekapcsolás előtt ellenőrizze, hogy a
kulcs és a beállítószerszámok el lettek-e
távolítva.
17. Kerülje a véletlen bekapcsolást
A dugó konnektorba való bedugása előtt
bizonyosodjon meg róla, hogy a kapcsoló
ki van-e kapcsolva.
18. Kültéren használjon hosszabbítóvezetéket
A szabadban csak az oda jóváhagyott és
ennek megfelelően jelölt hosszabbítót
használjon.
19. Legyen körültekintő
Ügyeljen arra, mit tesz. Körültekintéssel
kezdjen a munkához. Ne használja a
szerszámot, ha nem képes koncentrálni.
20. Minden használat előtt ellenőrizze
az elektromos készülék esetleges
sérüléseit
Az elektromos készülék további használata
előtt gondosan ellenőrizni kell a védőbe-
16 HU
rendezések, vagy a könnyebben sérült részek
kifogástalan és rendeltetésszerű működését.
Ellenőrizze, hogy a mozgó részek kifogás-
talanul működnek, nincsenek becsípődve,
vagy hogy az alkatrészek nem sérültek. Az
egyes részeket helyesen kell összeszerelni
és minden olyan feltételnek meg kell felelniük,
ami az elektromos szerszám kifogástalan
működését biztosítja.
A sérült védőberendezéseket és alkatrészeket
egy elismert szakembernek kell rendeltetésszerűen kijavítania, vagy kicserélnie,
amennyiben a Használati útmutató nem
rendelkezik ettől eltérően.
A sérült kapcsolót az ügyfélszolgálati szer-
vízben kell kicseréltetni.
Ne használjon olyanelektromos szerszámot,
amelynek a kapcsolója nam képes be- és
kikapcsolni azt.
21. FIGYELEM!
Más cserealkatrész és tartozék használata
sérülés veszélyét rejti Önre nézve.
22. Az elektromos készüléket elektromossági szakemberrel javíttassa
Ez az elektromos készülék megfelel a vonat-
kozó biztonsági rendelkezéseknek. A javításokat csak elektromossági szakember végezheti
eredeti alkatrészek felhasználásával; egyéb
esetben a használót baleset érheti.
Az üzembe helyezés előtt
Tudnivaló: Távolítsa el teljesen a csomago-
lóanyagot.
A kezelést végző személy a használat
során álljon közel a termékhez, hogy ezzel
elkerülje a test felesleges feszítését és ezzel
a bizonytalan állást.
Ha a termék lefékeződik, kapcsolja ki azt
és húzza ki a hálózati csatlakozót a konnektorból. Csak ezt követően oldja fel a
blokkolást.
Üzembe helyezés
Fúróélezés
Tudnivaló: A súlyosan károsodott fúrót
először durván csiszolja át egy satun.
Süllyessze le teljesen a csiszolókövet. Ehhez
fordítsa a kapcsológombot
DOWN ▼.irányába.
Vezesse a fúrót a legkisebb még illeszkedő
fúróvezetőbe
11
a fúróélező-készüléken.
Az adott fúróvezető
a feliratról olvashatók le (3‒13).
A termék bekapcsolásához nyomja a
BE / KI-kapcsolót
4
Fordítsa addíg a kapcsológombot 1 az
UP ▲ irányába, amíg csiszolás hengját nem
hallja.
Tudnivaló: A kapcsológombbal
bályozhatja a csiszolókő helyzetét és ezzel
annak a fúróra gyakorolt nyomóerejét. Minél jobban elfordítja a kapcsológombot
az UP ▲ dirányábam annál inkább nő a kifejtett nyomás. Ügyeljen arra, hogy a
csiszolókövet ne fordítsa túlságosan fölfelé.
Különben a csiszolókő nekiütközhet a burkolatnk.
Fordts fúrót enyhe nyomással lzán és gyor-
san a bal és jobb ütköző között nagyjából
10-szer (kisebb fúró esetén nagyjából 5-ször)
oda és vissza.
Húzza ki egy kicsit a fúrót, fordítsa el 180°-
kal a saját tengelye körül és tolja be ismét a
köszörűkőig.
1
ütközésig a
11
pontos méretei (Ø)
„I“-helyzetbe.
1
sza-
1
17 HU
 Loading...