

Page 1

MANUAL
Page 2

The information in this document is subject to change without notice and does not represent a
commitment on the part of Native Instruments GmbH. The software described by this document is subject to a License Agreement and may not be copied to other media. No part of this
publication may be copied, reproduced or otherwise transmitted or recorded, for any purpose,
without prior written permission by Native Instruments GmbH, hereinafter referred to as Native
Instruments.
“Native Instruments”, “NI” and associated logos are (registered) trademarks of Native Instruments GmbH.
Mac, Mac OS, GarageBand, Logic, iTunes and iPod are registered trademarks of Apple Inc.,
registered in the U.S. and other countries.
Windows, Windows Vista and DirectSound are registered trademarks of Microsoft Corporation
in the United States and/or other countries.
All other trade marks are the property of their respective owners and use of them does not imply any affiliation with or endorsement by them.
Document authored by: Adam Hanley
Software version: 1.0 (06/2018)
Disclaimer
Special thanks to the Beta Test Team, who were invaluable not just in tracking down bugs, but
in making this a better product.
Page 3

Contact
NATIVE INSTRUMENTS GmbH
Schlesische Str. 29-30
D-10997 Berlin
Germany
www.native-instruments.de
NATIVE INSTRUMENTS K.K.
YO Building 3F
Jingumae 6-7-15, Shibuya-ku,
Tokyo 150-0001
Japan
www.native-instruments.co.jp
NATIVE INSTRUMENTS FRANCE SARL
113 Rue Saint-Maur
75011 Paris
France
www.native-instruments.com
NATIVE INSTRUMENTS North America, Inc.
6725 Sunset Boulevard
5th Floor
Los Angeles, CA 90028
USA
www.native-instruments.com
NATIVE INSTRUMENTS UK Limited
18 Phipp Street
London EC2A 4NU
UK
www.native-instruments.co.uk
SHENZHEN NATIVE INSTRUMENTS COMPANY Limited
203B & 201B, Nanshan E-Commerce Base Of
Innovative Services
Shi Yun Road, Shekou, Nanshan, Shenzhen
China
www.native-instruments.com
© NATIVE INSTRUMENTS GmbH, 2018. All rights reserved.
Page 4

Table of Contents
Table of Contents
1 Welcome to DISCOVERY SERIES: MIDDLE EAST ...........................................................
1.1 What is DISCOVER SERIES: MIDDLE EAST? ................................................................................. 6
1.2 Document Conventions ............................................................................................................... 6
2 The DISCOVERY SERIES: MIDDLE EAST Library ............................................................
2.1 Included Instruments ................................................................................................................. 8
2.1.1 Percussion ................................................................................................................. 8
2.1.2 Melodic ...................................................................................................................... 9
3 Using the Instruments ................................................................................................
3.1 Navigation .................................................................................................................................. 11
3.2 Sound Presets .............................................................................................................................11
3.3 ModWheel ................................................................................................................................... 12
3.4 Mapping ..................................................................................................................................... 13
3.5 Patterns and Phrases ................................................................................................................. 16
3.6 Mixer ...........................................................................................................................................27
3.7 Options ....................................................................................................................................... 33
3.5.1 Pattern Selection and Playback ................................................................................. 16
3.5.2 MIDI Export ................................................................................................................ 18
3.5.3 Performance Controls ................................................................................................ 19
3.5.4 Browsing and Editing Patterns .................................................................................. 20
3.5.5 Selecting and Editing Scales ..................................................................................... 23
3.6.1 Instrument Channels ................................................................................................. 27
3.6.2 Reverb ....................................................................................................................... 29
3.6.3 Master ....................................................................................................................... 31
3.7.1 Melodic Options ......................................................................................................... 33
6
8
11
DISCOVERY SERIES MIDDLE EAST - Manual - 4
Page 5

Table of Contents
3.7.2 Percussion Options .................................................................................................... 36
4 Credits ......................................................................................................................
38
DISCOVERY SERIES MIDDLE EAST - Manual - 5
Page 6
Welcome to DISCOVERY SERIES: MIDDLE EAST
What is DISCOVER SERIES: MIDDLE EAST?
1 Welcome to DISCOVERY SERIES: MIDDLE EAST
Thank you for purchasing DISCOVERY SERIES: MIDDLE EAST. On behalf of the Native Instruments team, we hope this new KONTAKT library truly inspires you.
DISCOVERY SERIES: MIDDLE EAST adds a selection of exclusively sampled percussion and
melodic instruments that integrate into the latest versions of KONTAKT 5 or the free KONTAKT PLAYER. These instruments have been carefully crafted to be both authentic and easy to
use. Creating the atmosphere of a Middle Eastern musical ensemble is now as easy as it gets,
even if you are not deeply familiar with the musical style.
This manual will introduce you to the different instruments that have been sampled for this
collection, and explain how to use the KONTAKT instruments.
1.1 What is DISCOVER SERIES: MIDDLE EAST?
Continuing Native Instruments' Discovery Series of sounds from around the world, DISCOVERY
SERIES: MIDDLE EAST is a collection of multi-sampled instruments from the respective region. Based on traditional techniques, this library is designed to add authentic Middle Eastern
flavors to your music productions.
1.2 Document Conventions
This document uses particular formatting to point out special facts and to warn you of potential issues. The icons introducing the following notes let you see what kind of information can
be expected:
The speech bubble icon indicates a useful tip that may often help you to solve a task more efficiently.
The exclamation mark icon highlights important information that is essential for the given context.
DISCOVERY SERIES MIDDLE EAST - Manual - 6
Page 7

Welcome to DISCOVERY SERIES: MIDDLE EAST
Document Conventions
The red cross icon warns you of serious issues and potential risks that require your full attention.
Furthermore, the following formatting is used:
▪ Text appearing in (drop-down) menus (such as Open…, Save as… etc.) in the software and
paths to locations on your hard disk or other storage devices is printed in italics.
▪ Text appearing elsewhere (labels of buttons, controls, text next to checkboxes etc.) in the
software is printed in blue. Whenever you see this formatting applied, you will find the
same text appearing somewhere on the screen.
▪ Important names and concepts are printed in bold.
▪ References to keys on your computer’s keyboard you’ll find put in square brackets (e.g.,
“Press [Shift] + [Enter]”).
► Single instructions are introduced by this play button type arrow.
→ Results of actions are introduced by this smaller arrow.
DISCOVERY SERIES MIDDLE EAST - Manual - 7
Page 8

The DISCOVERY SERIES: MIDDLE EAST Library
Included Instruments
2 The DISCOVERY SERIES: MIDDLE EAST Library
The DISCOVERY SERIES: MIDDLE EAST library is split into three main sections:
Ensembles
The Ensembles are single KONTAKT Instruments that contain a number of percussion or melodic instruments that produce the sound of a full traditional Middle Eastern musical ensemble.
Three ensembles are included: an ensemble featuring five melodic instruments, a percussion
ensemble, and an ensemble featuring a complete string group.
Percussion
The Percussion Instruments each contain a single Middle Eastern percussion instrument, mapped in more detail than the Percussion Ensemble. These instruments contain patterns, fills,
rolls, and single hits.
Melodic
The Melodic Instruments each contain a single Middle Eastern melodic instrument. These instruments can be played normally, and include a number of key-switches for ornaments as well
as authentic patterns.
2.1 Included Instruments
2.1.1 Percussion
The following percussion instruments are included in this library:
Goblet drums
Darbuka: A small goblet drum, made from aluminium and used often in Turkish music.
DISCOVERY SERIES MIDDLE EAST - Manual - 8
Page 9

The DISCOVERY SERIES: MIDDLE EAST Library
Included Instruments
Doumbek: A single-headed goblet drum made of metal. This collection features two Egyptianstyle doumbeks – one slightly larger drum, usually referred to as sombaty, and a classic doumbek.
Dohola: A large goblet drum similar to the darbuka and doumbek, but capable of producing
deeper tones because of its larger size.
Tombak: A wooden goblet drum – the primary drum used in Persian music. The tombak has a
more pronounced goblet shape than the other drums in this collection, with a head that
stretches over the rim.
Frame drums
Bendir: A large frame drum used in both Arabic and Turkish music. The instrument in this collection is made with natural skin and without snares.
Daire: A medium-sized frame drum with jingles, used in Arabic and Turkish music. Similar to a
riq, but larger.
Daf: A large Persian frame drum with jingles attached to the inside of the shell.
Davul: A large Turkish double-headed drum, similar to an Indian dhol, and played with mallets.
Duff: A simple Arabic frame drum with a larger shell and without jingles.
Katem: An Arabic frame drum, without jingles. This collection includes two katems with differ-
ent diameters.
Kudüm: A pair of small Turkish kettle drums, played with mallets.
Riq: A small, tambourine-like frame drum with jingles. This instrument collection features two
different riq models.
Zil: A pair of Arabic finger cymbals (these are only available in the percussion ensemble).
2.1.2 Melodic
The following melodic instruments are included in this library:
Kanun: A Turkish zither, used mostly in classical music.
Kemençe: A small, bowed three-string Turkish fiddle. The instrument in this collection is a
pear-shaped kemençe, used in classical music.
DISCOVERY SERIES MIDDLE EAST - Manual - 9
Page 10

The DISCOVERY SERIES: MIDDLE EAST Library
Included Instruments
Ney: A long end-blown flute, used in all kinds of middle-eastern music.
Oud: A short-necked fretless lute used in Turkish and Arabic music and one of the main melod-
ic instruments in the Middle East.
Saz: A long-necked fretted lute, used in Turkish folk music. This collection features three different saz models, the medium sized tambura, the smaller cura and the large divan saz.
Tanbur: A long-necked fretted Turkish lute, used in Turkish classical music.
Zurna: A medium-sized Turkish oboe, used in folk music.
String Ensemble: A string group with two violins, viola, and cello; recorded by a renowned Turk-
ish ensemble.
DISCOVERY SERIES MIDDLE EAST - Manual - 10
Page 11
Using the Instruments
3 Using the Instruments
Although the exact features of the included instruments differ, there are many common elements that will be found in most, if not all, of the instruments. As such the controls of the
instruments will be covered as one, with exceptions being pointed out along the way.
3.1 Navigation
All instruments contain four control pages, which are accessible from the tabs at the bottom of
the instruments interface:
▪ Perform: Contains the instrument options, a key-map, and the pattern controls.
▪ Mixer: Contains the mixer controls and effects.
▪ Mapping: Displays the key mapping for the Instrument.
▪ Options: Contains a number of performance and MIDI customization options.
► To open a control page, click on the respective tab.
Navigation
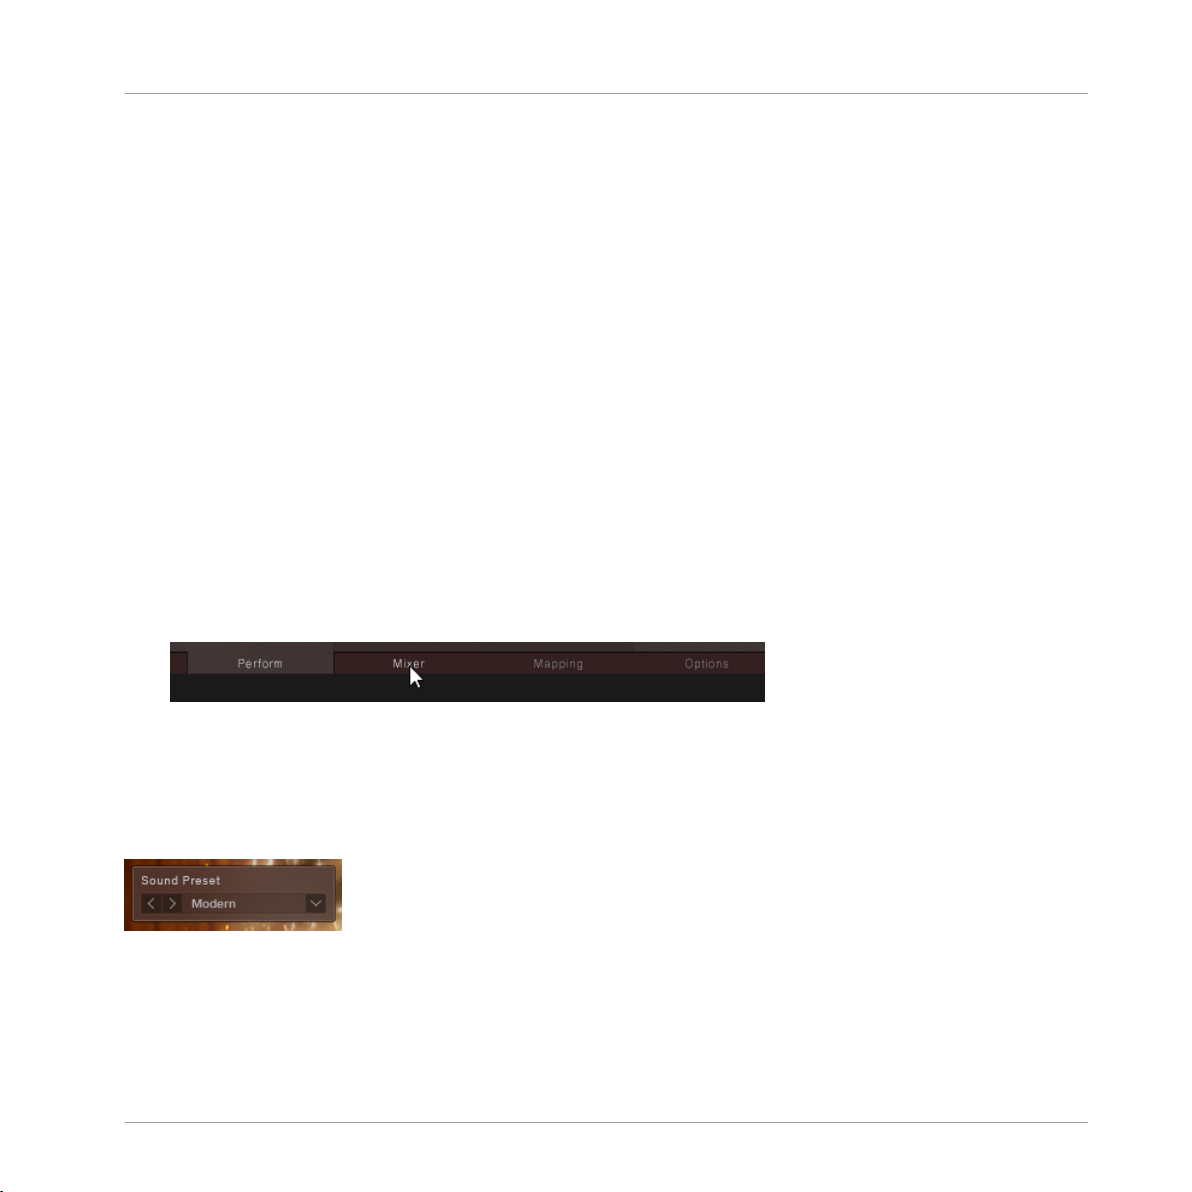
3.2 Sound Presets
To the top right of all of the interfaces, you will see the Sound Preset menu.
The Sound Preset Menu
From here, you can browse through presets that affect the mix of the Instrument.
You can select a Sound Preset in one of two ways:
DISCOVERY SERIES MIDDLE EAST - Manual - 11
Page 12

From the Menu
1. Click on the menu to view all available Sound Presets.
2. Click on a Sound Preset.
→ The Preset will be loaded and the sound of the Instrument will change.
From the Cycle Buttons
Using the Instruments
ModWheel
► Click on the buttons to the left of the menu to cycle through the Sound Presets one at a
time.
3.3 ModWheel
The function of the MIDI ModWheel is relative to the Instrument type you have loaded:
▪ Percussion Ensemble: The ModWheel controls the balance between the low instruments and
the high instruments.
▪ Percussion: The ModWheel controls the speed of the fills.
▪ Melodic: The ModWheel adjusts the automatic ornaments.
DISCOVERY SERIES MIDDLE EAST - Manual - 12
Page 13

Using the Instruments
For all Instrument types, the ModWheel has a display in the top left corner of the interface.
The ModWheel Control of the Percussion Ensemble
This area not only shows the current value of the ModWheel, but can also be used to control
the ModWheel from the interface, in case you are working without a MIDI controller.
Note that MIDI control of the ModWheel parameter can be turned on or off from the Options
Page.
3.4 Mapping
► Click on the Mapping navigation tab to open the Mapping Page.
The Mapping Page shows how the various articulations and patterns are arranged on the MIDI
keyboard.
Mapping
DISCOVERY SERIES MIDDLE EAST - Manual - 13
Page 14

Percussion
Using the Instruments
Mapping
The Mapping Page of a Percussion Instrument
For the Percussion Instruments and the Percussion Ensemble Instrument, this page will show
a full breakdown of how the different elements are mapped to the keyboard.
Below the keyboard is a small window that displays the name of the last played Instrument and
Articulation.
The last played key will also be highlighted with a red dot on the virtual keyboard.
DISCOVERY SERIES MIDDLE EAST - Manual - 14
Page 15

Using the Instruments
Melodic
For the Melodic Instruments and Ensemble Instruments (other than the Percussion Ensemble),
this page displays a rough guide to where the phrases, key switches, and the main playable
range are mapped, as well as a detailed view of which articulations are mapped to the key
switches.
Mapping
The Mapping Page of the Middle East Ensemble
A breakdown of the full keyboard is not required as these instruments are played melodically,
with each key playing a different note of the same articulation.
The melodic playback of these instruments does not have to be chromatic, you can use the
KEY MODE menu on the Options Page to define whether or not the notes on the keyboard
should be chromatic or constrained to a scale. For more information, please refer to ↑3.7.1,
Melodic Options and ↑3.5.5, Selecting and Editing Scales
DISCOVERY SERIES MIDDLE EAST - Manual - 15
Page 16

Using the Instruments
Patterns and Phrases
3.5 Patterns and Phrases
For all Instruments the lowest mapped octave (marked in red on the KONTAKT virtual keyboard) contains a selection of 12 Patterns/Phrases. These are MIDI sequences of authentic
phrases which can be loaded and manipulated by the Discovery Series engine.
The controls for the Patterns are accessed from the Perform page.
In the rest of this document the terms Pattern and Phrase may be used interchangeably, but within
the context of the Instruments, Pattern will refer to rhythmic patterns, and Phrase will refer to a
melodic phrase.
3.5.1 Pattern Selection and Playback
The pattern selection is displayed in the central window in the lower section of the interface.
The Pattern Selection Controls for a Percussion Instrument
Melodic Instruments have additional Scale and Root controls, but these will be described in
↑3.5.5, Selecting and Editing Scales
1. Patterns can be selected by using the lowest mapped octave of MIDI keys (marked in red
on the virtual keyboard).
2. Alternatively, they can be selected by clicking on the arrow buttons to the right of the pattern name display.
DISCOVERY SERIES MIDDLE EAST - Manual - 16
Page 17

Using the Instruments
Patterns and Phrases
The main options for pattern playback are located in the area to the left of the pattern selection display.
The Pattern Playback Controls
Here you will find a number of options that allow you to tailor how the patterns are played:
▪ Sync: Synchronizes the pattern to the host tempo.
▪ 1/2 and x2: Alter the playback speed relative to the selected tempo.
▪ Play: The play button can always be used to start and stop pattern playback.
▪ Tempo: The bottom right section, beside the play button, contains the tempo selector. If
Sync is off, you can click and drag here to set the tempo.
For Percussion Instruments it is possible to change the way pattern playback is triggered via
the TRIGGER PATTERN controls on the Options Page (for more information see ↑3.7.2, Per-
cussion Options)
Tempo and Snapshots
The sync setting is not saved with Snapshots, so you can browse Snapshots without losing
these settings. The tempo setting is stored in Snapshots, so if Sync is off when you load a
Snapshot, the tempo will update to the setting saved in that Snapshot.
All of the Snapshots in this library have been saved with a tempo that best matches the patterns included in the Snapshot.
DISCOVERY SERIES MIDDLE EAST - Manual - 17
Page 18

3.5.2 MIDI Export
It is possible to export the selected pattern as MIDI via drag and drop:
1. Click on the icon to the left of the Edit button.
2. While holding down the mouse button, drag the pattern to your file system or DAW.
3. Release the mouse button to copy the MIDI to the specified location.
Using the Instruments
Patterns and Phrases
→ The MIDI file of the selected pattern will appear in your file system or DAW.
Groove, Feel, Intensity, and the solos and mutes are always written into the MIDI file, so the pattern
you hear will always be the pattern you export.
DISCOVERY SERIES MIDDLE EAST - Manual - 18
Page 19

Using the Instruments
Patterns and Phrases
3.5.3 Performance Controls
To the right of the pattern display there are controls that allow you to define the way the selected pattern is played. The controls are different depending on whether you have a Melodic
Instrument or a Percussion Instrument loaded.
Melodic
Performance Controls for the Melodic Instruments
▪ Tuning: Adjusts the tuning of the notes in the Phrase and played notes. When turned all
the way down, no additional tuning is applied; in the middle position the tuning will be as
it is defined in the selected scale; at the maximum position the tuning will be double the
tuning amount specified by the scale.
▪ Feel: Controls the precision of the performance. Settings to the left will be more rigid
sounding, and settings to the right will sound more relaxed.
▪ Intensity: Controls the dynamic level of the performance.
Percussion
Performance Controls for the Percussion Instruments
▪ Groove: Controls the complexity of the pattern. At its lowest setting, only the main beats
will be heard. At its highest setting, all of the additional embellishments in the pattern will
be heard.
▪ Feel: Controls the precision of the performance. Settings to the left will be more rigid
sounding, and settings to the right will sound more relaxed.
DISCOVERY SERIES MIDDLE EAST - Manual - 19
Page 20

Using the Instruments
Patterns and Phrases
▪ Intensity: Controls the dynamic level of the performance.
The Kudüm Instrument has a slightly different control set, since it is a tuned percussion instrument.
Its three controls are:
▪ Tune Low: Sets the note to be played by the low drum.
▪ Tune High: Sets the note to be played by the high drum.
▪ Intensity: This is the same control as found in the other Percussion Instruments.
3.5.4 Browsing and Editing Patterns
► Click on the Edit button in the main pattern display.
→ The Pattern Browser and Editor window will open over the instrument/ensemble picture.
The Pattern Editor will have a slightly different layout depending on the Instrument you have
loaded. The Melodic Instruments all have the same layout, whereas the Percussion Instruments will have slightly different layouts, but with the same general control set.
The Percussion Pattern Editor
The Percussion Pattern Editor
DISCOVERY SERIES MIDDLE EAST - Manual - 20
Page 21

Using the Instruments
Patterns and Phrases
The Percussion Pattern Editor has two main sections:
▪ In the top section is a selection of tracks (the exact number will depend on the loaded in-
strument). You can edit the pattern in this area.
▪ In the lower section is the Pattern Browser where you can browse and load patterns.
These sections will be described in more detail later in the chapter.
The Melodic Phrase Editor
The Melodic Phrase Editor
Like the Percussion Pattern Editor, the lower section of the Melodic Phrase Editor is the
Phrase Browser.
Above the Pattern Browser are four controls which define some general playback options for
the phrase:
▪ Start: Adjusts the phrase start position.
▪ End: Adjusts the phrase end position.
▪ Volume: Controls the volume of the phrase.
▪ Transpose: Shifts the notes of the phrase up or down within the selected scale.
DISCOVERY SERIES MIDDLE EAST - Manual - 21
Page 22

Using the Instruments
Patterns and Phrases
Above those controls is a single track representing the phrase (Melodic Instruments will not
have multiple tracks like the Percussion Instruments)
At the top of the page are two tabs for changing the contents of the page. By default the
Phrase Editor will be selected. Clicking on the Scale tab will display the Scale Editor, which is
described in more detail here: ↑3.5.5, Selecting and Editing Scales
Loading Pattern Presets
In all Instrument types the lower part of the Pattern Editor window is the Pattern Browser. You
can use this to browse through an extensive collection of patterns.
To load a pattern:
1. Browse through the folder system until you find the *.mid file you wish to load.
2. Double-click on the file name.
→ The pattern will be loaded into the currently selected pattern slot.
There are six variations for each pattern included with the library. Generally the first pattern is
the main version, and the patterns get progressively busier with each variation.
Editing Patterns
You can edit the pattern from the upper half of the window, in the Pattern Editor.
The patterns can be quite complex, so for ease of use, their representation has been simplified
to a series of dots, each one representing a beat in the pattern.
▪ If a dot is black, it contains no information.
▪ If a dot is light grey, it does contain pattern data.
DISCOVERY SERIES MIDDLE EAST - Manual - 22
Page 23

Using the Instruments
Patterns and Phrases
1. Click on a grey dot to deactivate the pattern data for that beat.
2. Click on the dot again to re-activate that data.
Some of the patterns will allow you to edit 8th notes rather than just full beats. You can see
the resolution of the Pattern Editor by looking at the note at the top of the Pattern Editor.
The Pattern Resolution Indicator
Snapshots
All of the included patterns have been saved as Snapshots, with different pattern variations assigned to each of the pattern keys.
The Snapshots included with the library are all saved with the tempo that works best with the
included patterns.
3.5.5 Selecting and Editing Scales
All Melodic Instruments have controls for selecting scales. These controls are located under
the Phrase selection controls.
The Phrase Selection Controls with Scale and Root Options
▪ You can select from a selection of scales with the Scale menu.
▪ The root note of the scale can then be defined by the Root control.
The Scale and Root selections will define the notes and tunings used when playing back a
Phrase.
DISCOVERY SERIES MIDDLE EAST - Manual - 23
Page 24

Using the Instruments
Patterns and Phrases
The selections can also remap the MIDI of the playback range of the keyboard, depending on
the setting of the KEY MODE menu on the Options Page (for more details see: ↑3.7.1, Melodic
Options)
The Scale Editor
To open the Scale Editor
1. Open the Phrase Editor by clicking on the Edit button in the Phrase selection area.
2. At the top of the Phrase Editor, click on the Scale tab.
The Scale Editor
Each scale has eight degrees (or slots), which you can define in the top section of the Scale
Editor.
The Scale Degree Editor
DISCOVERY SERIES MIDDLE EAST - Manual - 24
Page 25

Using the Instruments
Patterns and Phrases
► To select a scale degree to edit, click on the Roman numeral representing that degree.
For each degree you can define the following parameters:
▪ Note: Using the Select Note menu you can define the Western note for the scale degree.
Note that the first degree must be the root note.
▪ Ornament: Each degree can have an assigned ornament. This is used when automatic orna-
ments are activated with the ModWheel (for additional information see: ↑3.3, ModWheel)
▪ Tuning: Each degree can be tuned in cent via the Scale Tuning control. The tuning is repre-
sented as its deviation from the Western Equal Temperament.
Below the Scale Degree Editor is an area labelled Root.
The Root Menus
This area contains two menus for defining more than just the root note of the scale.
In the top menu you have two options:
▪ Global: The Scale will use the root note defined by the Root control in the Phrase Selector.
▪ Scale: The Scale will use its own root note as specified by the bottom menu, ignoring the
global root setting.
In Middle Eastern music it is common for the scale and root note to change during a musical
performance, this is called “modulation from one maqam to another” and is not unlike tonal
modulation as we know it in classical western music. Selecting the Scale option in the the top
menu will allow you to achieve this effect.
Browsing and Loading Scales
To the right of the Root menus is the Scale Browser where you can brose and load preset
scales.
DISCOVERY SERIES MIDDLE EAST - Manual - 25
Page 26

The Scale Browser
To load a scale:
1. Browse through the folder system until you find the *.nka file you wish to load.
2. Double-click on the file name.
→ The scale will be loaded into the currently selected slot.
Using the Instruments
Patterns and Phrases
DISCOVERY SERIES MIDDLE EAST - Manual - 26
Page 27

Using the Instruments
3.6 Mixer
The Mixer Page is where you alter the sound of the Instrument by controlling volume levels and
effect parameters.
Mixer
The Mixer Page of the Percussion Ensemble
Although each Instrument will contain different channels in the Mixer, the functionality will remain the same.
3.6.1 Instrument Channels
The Melodic and Percussion Instruments will have two Instrument Channels, the Ensemble Instruments will have more.
DISCOVERY SERIES MIDDLE EAST - Manual - 27
Page 28

Using the Instruments
Navigation
If the Ensemble contains more than 5 channels, the channels are spread over two pages. Navigation for these pages is available as tabs above the main body of the mixer.
► Click on the tabs to change the displayed channels.
Channel Strip
Mixer
A Channel Strip
The controls for each of the channel strips are as follows:
▪ Send: Controls the auxiliary send level to the reverb effect.
▪ Pan: Controls the instruments position in the stereo field.
▪ S (Solo): Mutes all the other channels that do not have solo active so that you can hear
only a specific selection of instruments.
▪ M (Mute): Mutes the channel so no audio can be heard.
▪ Level fader: Controls the output level.
DISCOVERY SERIES MIDDLE EAST - Manual - 28
Page 29

Using the Instruments
Effects and Options
► Click on the channel name to display the effects and options for that channel.
→ The channel effects and options will appear below the mixer.
The Channel Effects and Options
There are 3 effects available for each channel:
▪ EQ: A 4-band fixed EQ. You can set the gain for each band by using the 4 available knobs.
▪ Drive: Controls the saturation amount.
Mixer
▪ Sound: Applies a lowpass filter when turned to the left, and a highpass filter when turned
to the right.
To the right of the effects is the channel output option:
▪ Output: Sets the output of the selected channel. Routing the channel to anything other
than Default will cause the channel to bypass the Master Bus effects and settings.
The Output setting is not saved with Snapshots.
3.6.2 Reverb
The Reverb channel is a convolution based reverb effect. It accurately simulates real spaces (or
equipment) by using an impulse response sample, which is kind of like a sonic fingerprint.
DISCOVERY SERIES MIDDLE EAST - Manual - 29
Page 30

Using the Instruments
The Reverb channel lacks the Send and Pan controls of the instrument channels, but works in
the same way in every other regard.
► Click on the Reverb button to display the Reverb selection options.
→ The lower section of the Mixer will display a series of images, each representing a differ-
ent reverb type.
The Reverb Selection
For the DISCOVERY SERIES: MIDDLE EAST library there are five different spaces available.
► Click on an image to select the respective reverb.
Mixer
→ The reverb character will change to the selected space.
DISCOVERY SERIES MIDDLE EAST - Manual - 30
Page 31

Using the Instruments
3.6.3 Master
The channel strip on the far right is the Master Bus. It is the final stage of the mixer before the
sound reaches the main Instrument output.
Channel Strip
Mixer
The Master Bus Strip
The Master Bus strip has four main controls:
▪ Send: Controls the amount of signal sent from the Master Bus to the Reverb effect.
▪ Width: Controls the stereo width of the Master Bus, i.e. how far to the left or right an in-
strument can be panned.
▪ Stereo Invert: Activating this button will switch the left and right channels, effectively
changing the listener position.
▪ Level fader: Controls the output level.
DISCOVERY SERIES MIDDLE EAST - Manual - 31
Page 32

Using the Instruments
Master Effects
► Click on the Master button to display the Master Effects controls.
→ The lower section of the Mixer will display the Master Effects.
The Master Effects
There are 5 Master Effects:
▪ EQ: A 4-band fixed EQ. You can set the gain for each band by using the 4 available knobs.
▪ Ambience: Controls the level of a very small reverb effect, this can be used to add distance
to the sound but without making it sound like it is in as large a space as the Reverb effect.
Mixer
▪ Punch: Turning this knob to the right will emphasize the transient peaks in the sound,
making it more percussive and punchy.
▪ Comp: Controls the amount of compression applied to the Master Bus.
▪ Tape: Controls the amount of Tape saturation applied to the Master Bus.
DISCOVERY SERIES MIDDLE EAST - Manual - 32
Page 33

Using the Instruments
3.7 Options
The Options Page contains a number of performance and MIDI customization options. The
controls available on this page will differ depending whether you have a melodic instrument/
ensemble loaded, or a percussion instrument/ensemble.
3.7.1 Melodic Options
Options
The Options Page of a Melodic Instrument
The Melodic Options Page is split into three sections. Each section is described below.
DISCOVERY SERIES MIDDLE EAST - Manual - 33
Page 34

Using the Instruments
Controller
In the CONTROLLER section you can define how certain common MIDI controller should interact with the instrument.
There are four options in this section, presented as menus:
▪ ModWheel: This menu is used to toggle the ModWheel control of the ornaments on or off.
▪ Sustain Pedal: Selects the sustain pedal behavior:
◦ Off: The sustain pedal will control nothing.
◦ Sustain: The sustain pedal will act like a traditional sustain pedal for the playable
range of the instrument.
◦ Latch Phrase: The sustain pedal can be used to latch the pattern trigger keys, but will
not affect the main playable key range of the instrument.
▪ Pitch Bend: Selects the intensity of pitch modulation provided by the Pitch Bend control-
ler.
▪ Aftertouch: Selects the intensity of pitch modulation provided by MIDI Aftertouch.
Options
Perform
In the PERFORM section you can define the playing style for the instrument/ensemble.
There are four controls in this section:
▪ Playing Style: Defines the playing style of the main playable keyboard range:
◦ Polyphonic: Multiple notes can be played simultaneously as chord, regardless of
whether or not that is possible on the real instrument.
◦ Legato: Notes can only be played one at a time. In certain instruments (like the Ney),
sample variations will be used to create a more realistic performance. Note that this
option is not available on all instruments.
▪ Tightness: Controls the sample start position to set the tightness (or responsiveness) of the
sound. This control also controls the tightness of the various instruments playing together
in the ensemble.
DISCOVERY SERIES MIDDLE EAST - Manual - 34
Page 35

Using the Instruments
▪ Randomize: Controls the amount of randomness applied to parameters like tightness, ve-
locity, and sample variation (i.e. round robin). The middle position will have a subtle natural sound, the full left position will potentially sound mechanical.
▪ Decay: Controls the decay time of the instrument. Turning this all the way up will play the
full length of the recorded sample, and turning it down can be used to tighten the decay.
This control is not available in all instruments.
Key Mode
The KEY MODE menu defines how the notes from your keyboard should be played according to
the scale select on the Perform Page.
There are three options:
▪ Guide: The notes of the scale are highlighted on KONTAKT’s virtual keyboard, and on the
KOMPLETE KONTROL light guide, but the notes you play will be unaffected.
▪ Mapped: Similar to the Guide setting, but notes you play that are outside of the scale will
be transposed so that they are in the scale.
▪ Easy: You will be able to play the notes of the scale using the white keys of the keyboard,
regardless of the scale selection.
Options
For more information on defining scales, see ↑3.5.5, Selecting and Editing Scales
DISCOVERY SERIES MIDDLE EAST - Manual - 35
Page 36

3.7.2 Percussion Options
Using the Instruments
Options
The Options Page of a Percussion Instrument
The Percussion instruments have a different selection of Options controls, but like the Melodic
instruments, the Options Page is split into three sections.
Controller
In the CONTROLLER section you can define how certain common MIDI controller should interact with the instrument.
There are four options in this section, presented as menus:
▪ ModWheel: This menu is used to toggle the ModWheel control on or off.
DISCOVERY SERIES MIDDLE EAST - Manual - 36
Page 37

Using the Instruments
▪ Sustain Pedal: When Latch Pattern is selected, the sustain pedal can be used to latch the
pattern trigger keys. Otherwise the sustain pedal will do nothing.
▪ Pitch Bend: Selects how the Pitch Bend controller should be used. In most instruments
you can use the Pitch Bend controller to adjust the velocity of any rolls while they are playing.
▪ Aftertouch: Selects how Aftertouch should be used. In most instruments this can be as-
signed to roll velocity, like the Pitch Bend controller.
Perform
In the PERFORM section you can define the playing style for the instrument/ensemble.
There are four controls in this section:
▪ Tightness: Controls the sample start position to set the tightness (or responsiveness) of the
sound. This control also controls the tightness of the various instruments playing together
in the ensemble.
▪ Randomize: Controls the amount of randomness applied to parameters like tightness, ve-
locity, and sample variation (i.e. round robin). The middle position will have a subtle natural sound, the full left position will potentially sound mechanical.
Options
▪ Decay: Controls the decay time of the instrument. Turning this all the way up will play the
full length of the recorded sample, and turning it down can be used to tighten the decay.
This control is not available in all instruments.
▪ Low Tune: Adjusts the tuning of the low articulations. Note that this control is not available
for all instruments.
Trigger Pattern
There are two options here for selecting how Patterns should be triggered:
▪ Keys (C1 – B1): The lowest MIDI keys in the mapping will both select and trigger the pat-
terns.
▪ Host Transport: The pattern will start and stop with the host transport, and stay in sync
with the song position. The MIDI keys C1 – B1 are used only to select patterns.
DISCOVERY SERIES MIDDLE EAST - Manual - 37
Page 38

4 Credits
Product Design and Concept: Nikolas Jeroma
Product Owner: Christian Wachsmuth
User Interface Design: Fabian Ruf
Sample Editing: Jonathan Kranz
KSP and KONTAKT Programming: Nikolas Jeroma
Sound Design: Stewart Walker, Jonathan Kranz, Sebastian Müller, Tommaso de Donatis
Quality Assurance: Konstantin Fichtner
Documentation: Adam Hanley
MIDI Programming: Thomas Seher, Sebastian Flaig, Jonathan Kranz, Timo Preece, Gilbert
Trezger
Players: İstanbul Strings, Khader Ahmad, Yavuz Akalın, Şeref Dalyanoğlu, Duygu Dürüst, Sebastian Flaig, Ayşe Küey, Mohammad Reza Mortazavi, Ozan Pars, Emre Sinanmis
Credits
All samples recorded by Native Instruments.
Istanbul Recording Session:
Session Contractor: Murat Ertel
Recording Studio: A2 Studio İstanbul
Recording Engineer: Aras Tüysüz
DISCOVERY SERIES MIDDLE EAST - Manual - 38
 Loading...