How it Works
Log In / Sign Up
0
My Files
0
My Downloads
329068
History
Account Settings
Log Out
Buy Points
How it Works
FAQ
Contact Us
Questions and Suggestions
Users
Logitech
Loading...
#
970194
960-001102
2
960-001227
981-000593
981-000668
981-000744
981-000854
981-000875
984-000193
989-000171
961144-0403 - Quickcam Cordless Web Camera
970114-0403 - X 530 5.1-CH PC Multimedia Home Theater Speaker Sys
980399-0403 - Mobile Traveller Headset
A
A 00006
A-00008
A00023
A-00026
A-00027
A-00031
A00032
A-00044
A0363A
Alert
Alert 700e
Alert 700n
ALTO CONNECT
ALTO CORDLESS
ALTO CORDLESS NOTEBOOK STAND
Attack 3
AudioStation
B
B100
B175
B525
BCC950
Blok
BLUETOOTH
Bluetooth Audio Adapter
Brio
Brio Stream Edition
C
C100
C120
C160
C260
C270
3
C270 HD-Webcam
C290
C310
C505 HD
C510
c525
C615
2
C905
C910
2
C920
3
C920E
C920 HD PRO
C920 HD Pro Webcam
C920 Pro
C920s
C925e
C930e
ClickSmart 310
ClickSmart 420
ConferenceCam Connect
Conference Cam GROUP
Cordless Desktop
CORDLESS DESKTOP S520
Cordless Desktop Wave
CORDLESS HEADSET FOR PC AND MOBILE PHONES
CORDLESS KEYBOARD FOR WII
CORDLESS MEDIABOARD PRO
Cordless Mini Optical Mouse
Cordless Rumblepad II
CORDLESS VANTAGE HEADSET
Cordless Vantage Headset PS3
Craft
C-RJ63
C-RL66
CUBC34
D
diNovo
DINOVO EDGE
2
DINOVO KEYBOARD
diNovo Media Desktop
diNovo Media Desktop 2.0
DINOVO MINI
Driving Force GT
3
Driving Force Pro
Driving Force Shifter
DS-861
Dual Action
E
E 1000
E2500
E3500
ELITE
EX100
EX 110
Extreme 3D Pro
3
F
F00001
F00005
F-0408A
Loading...
Loading...
Nothing found
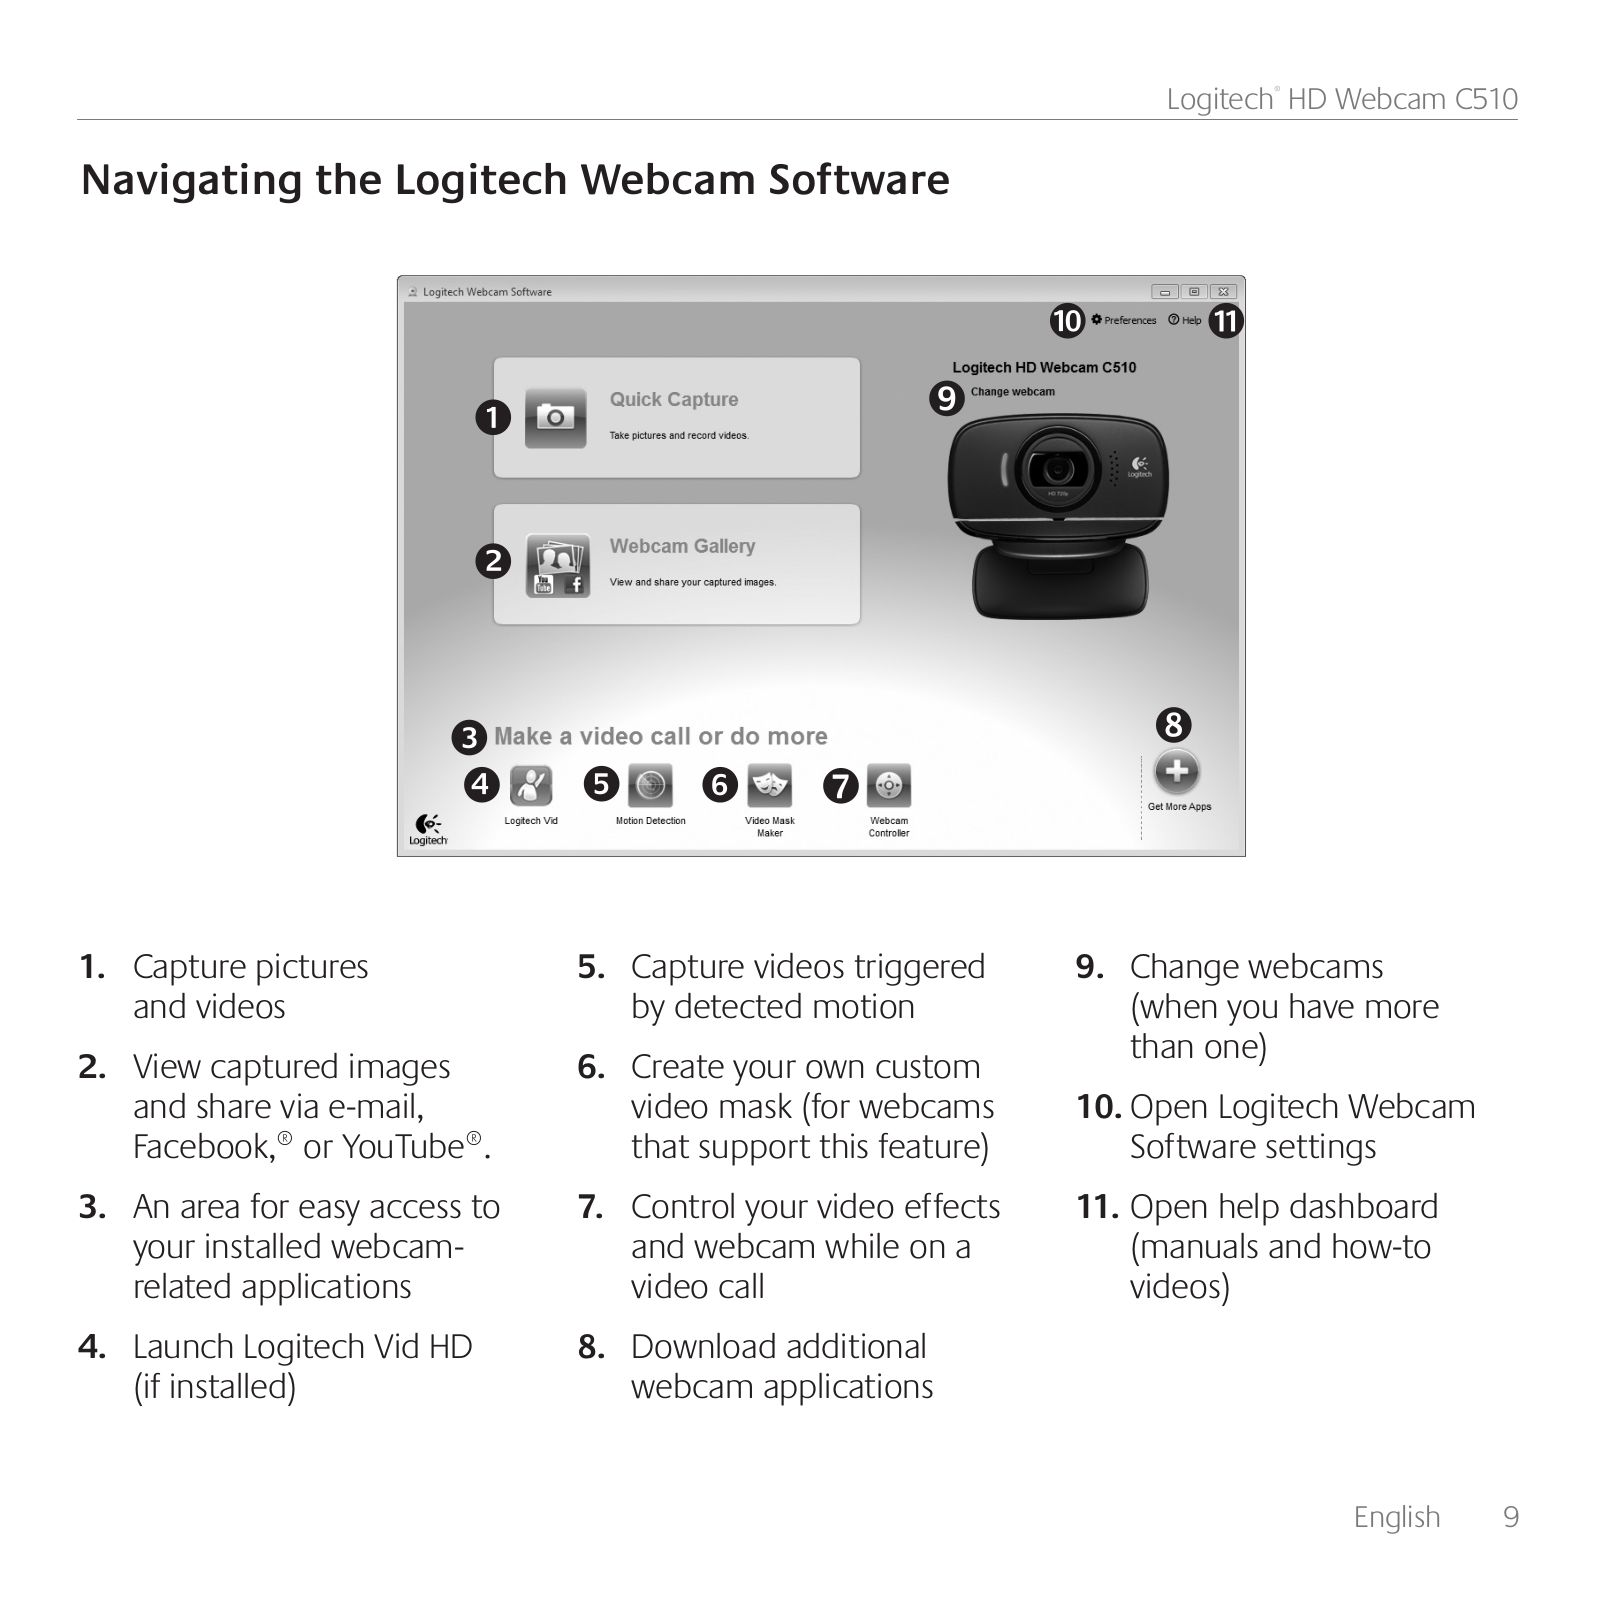
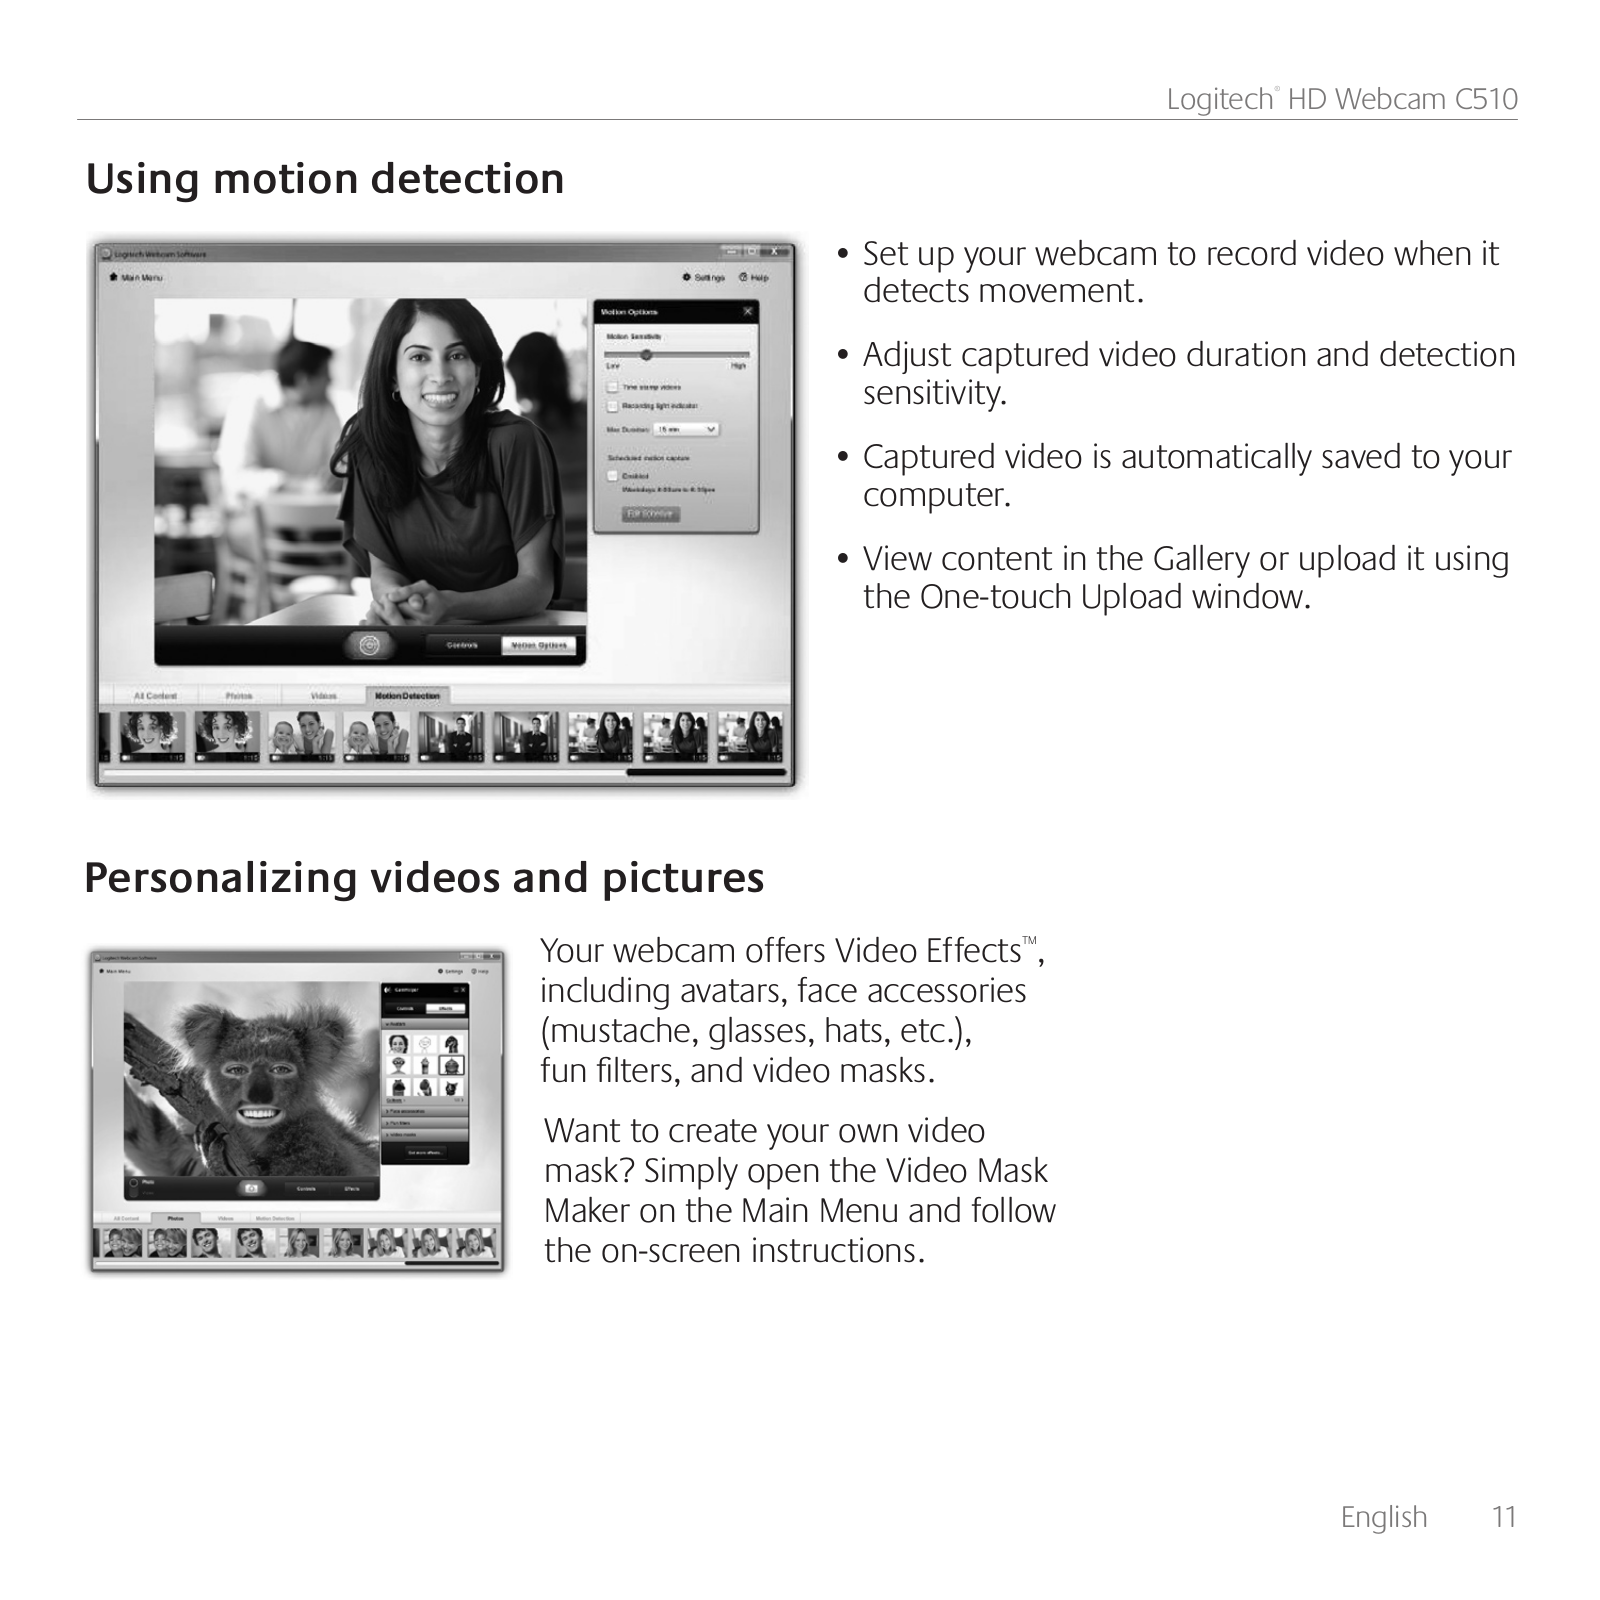
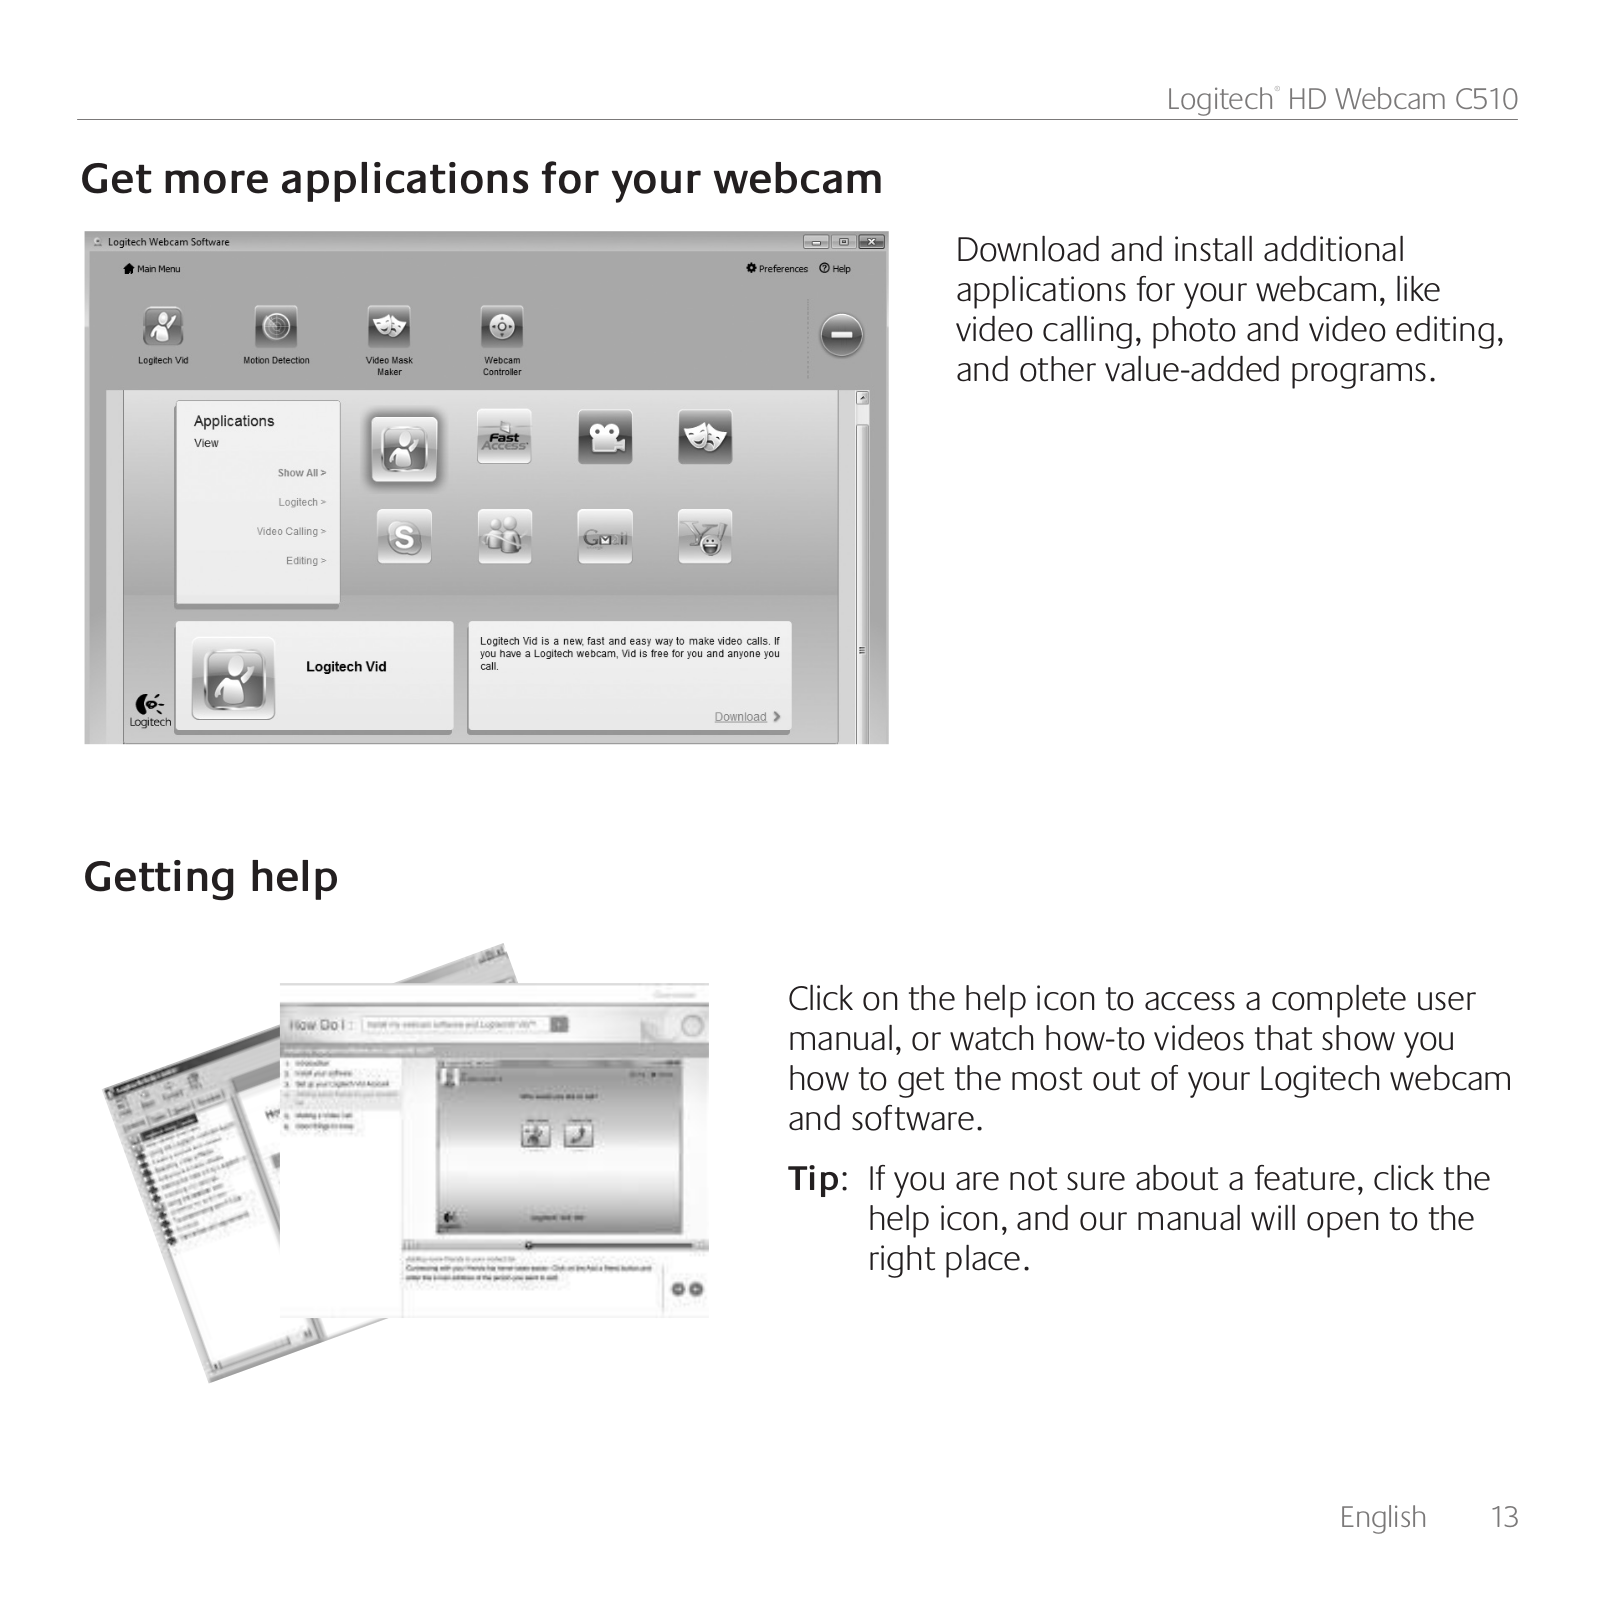
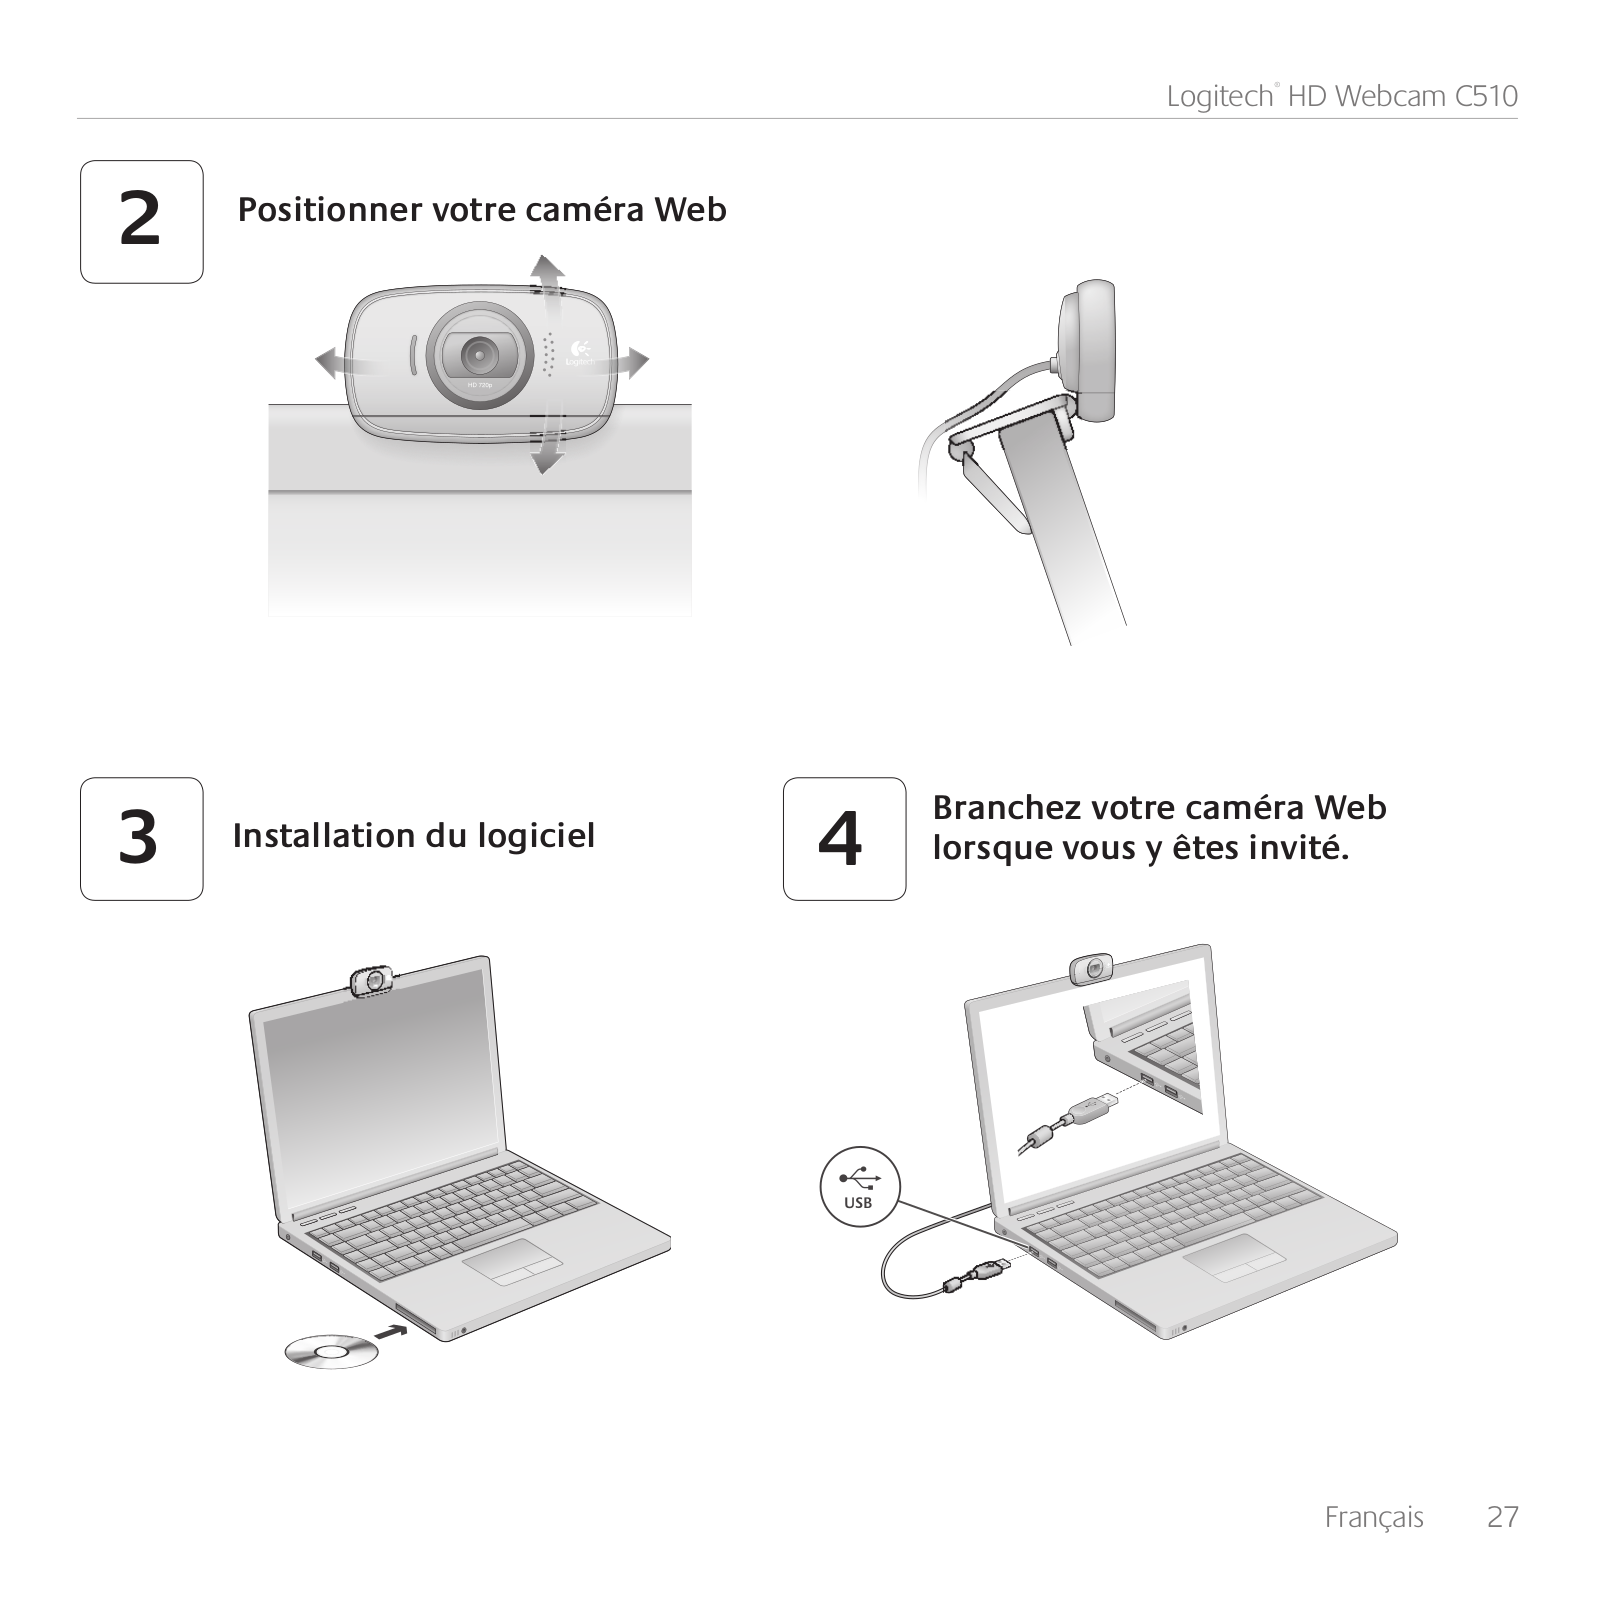
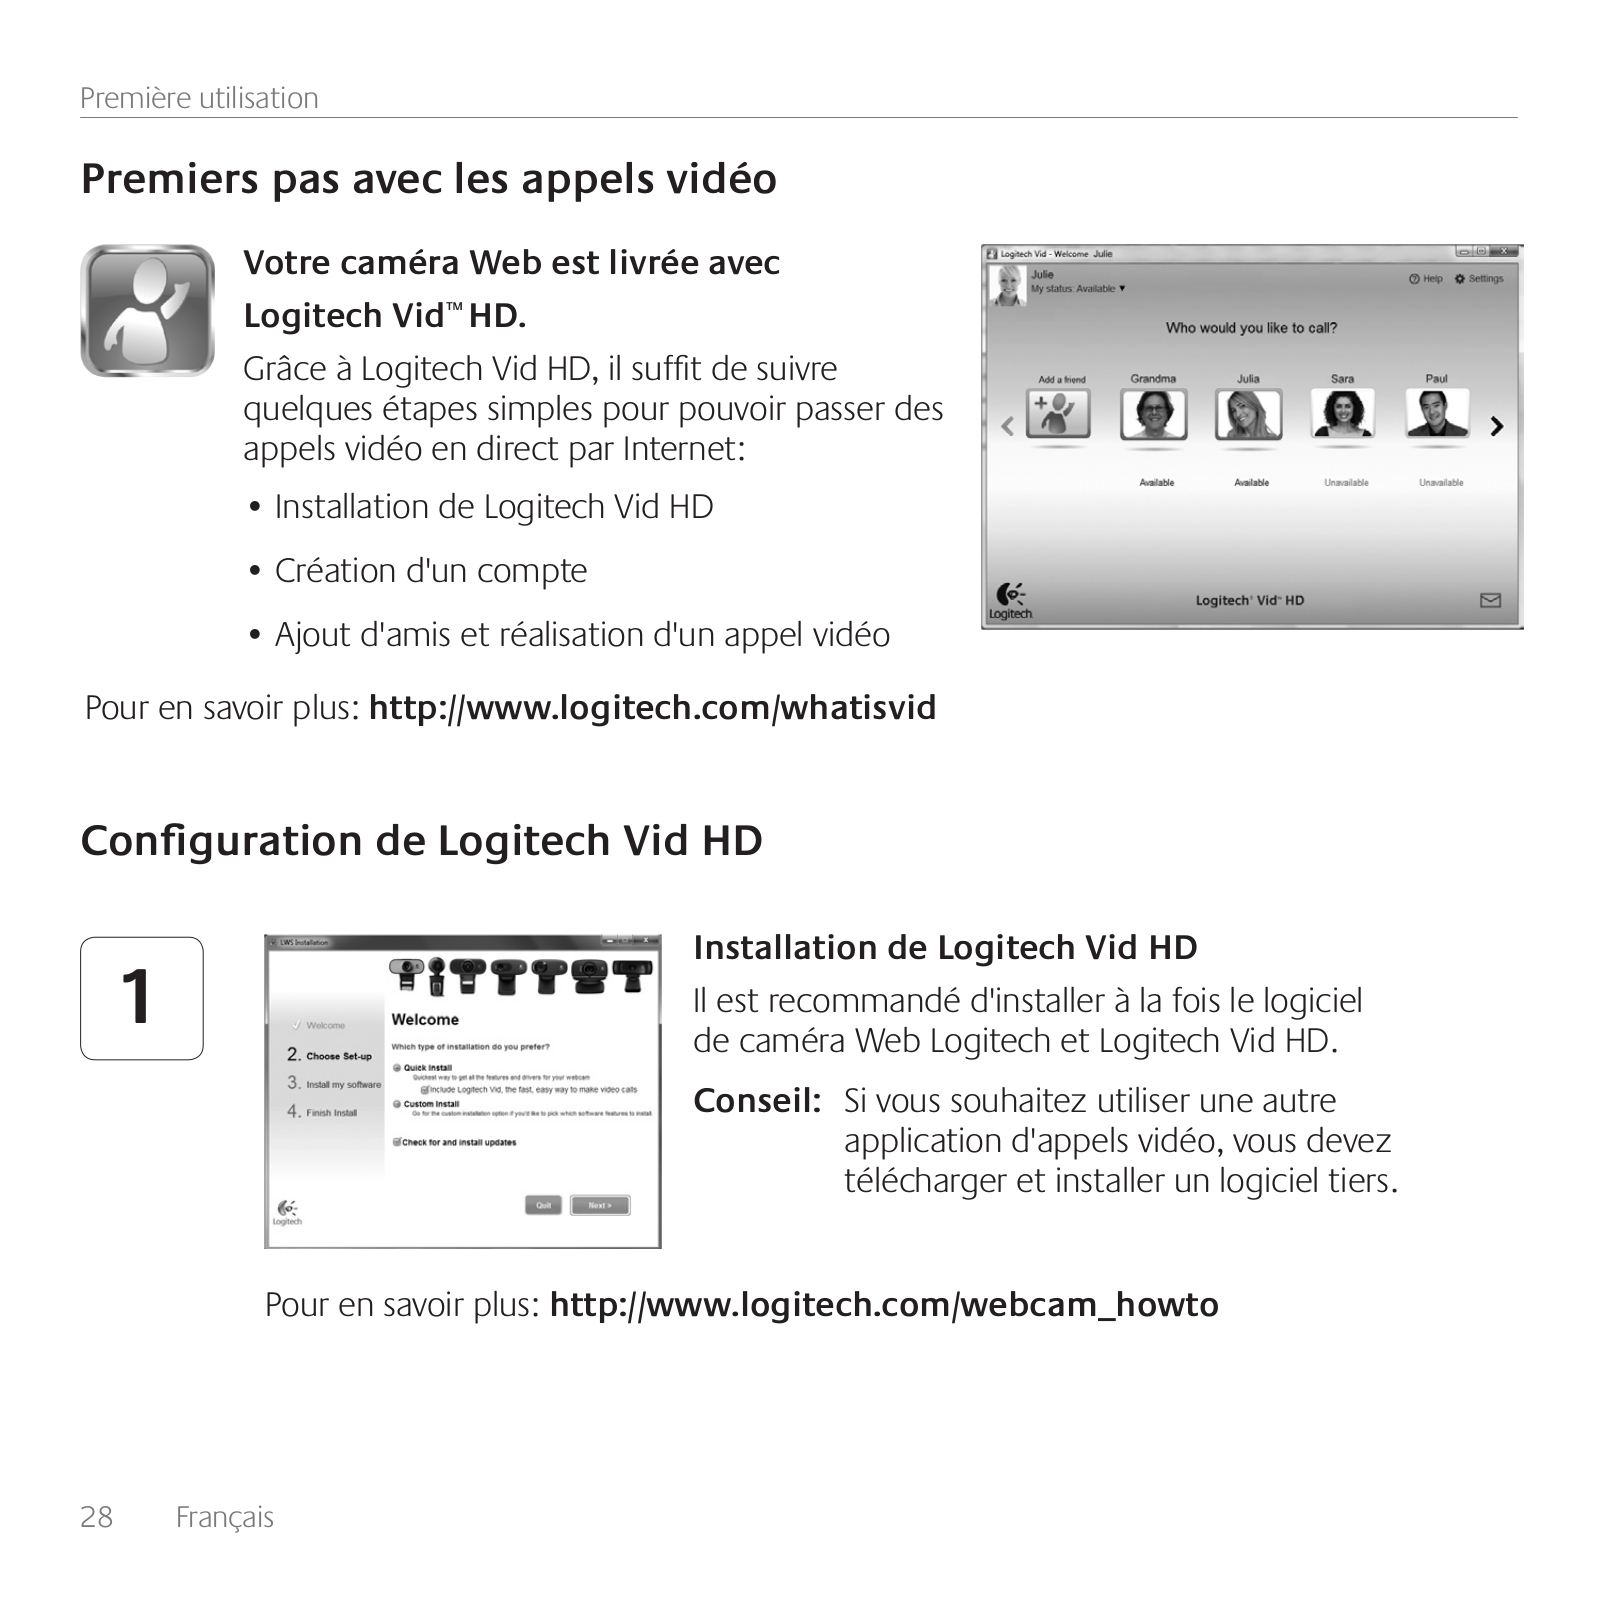
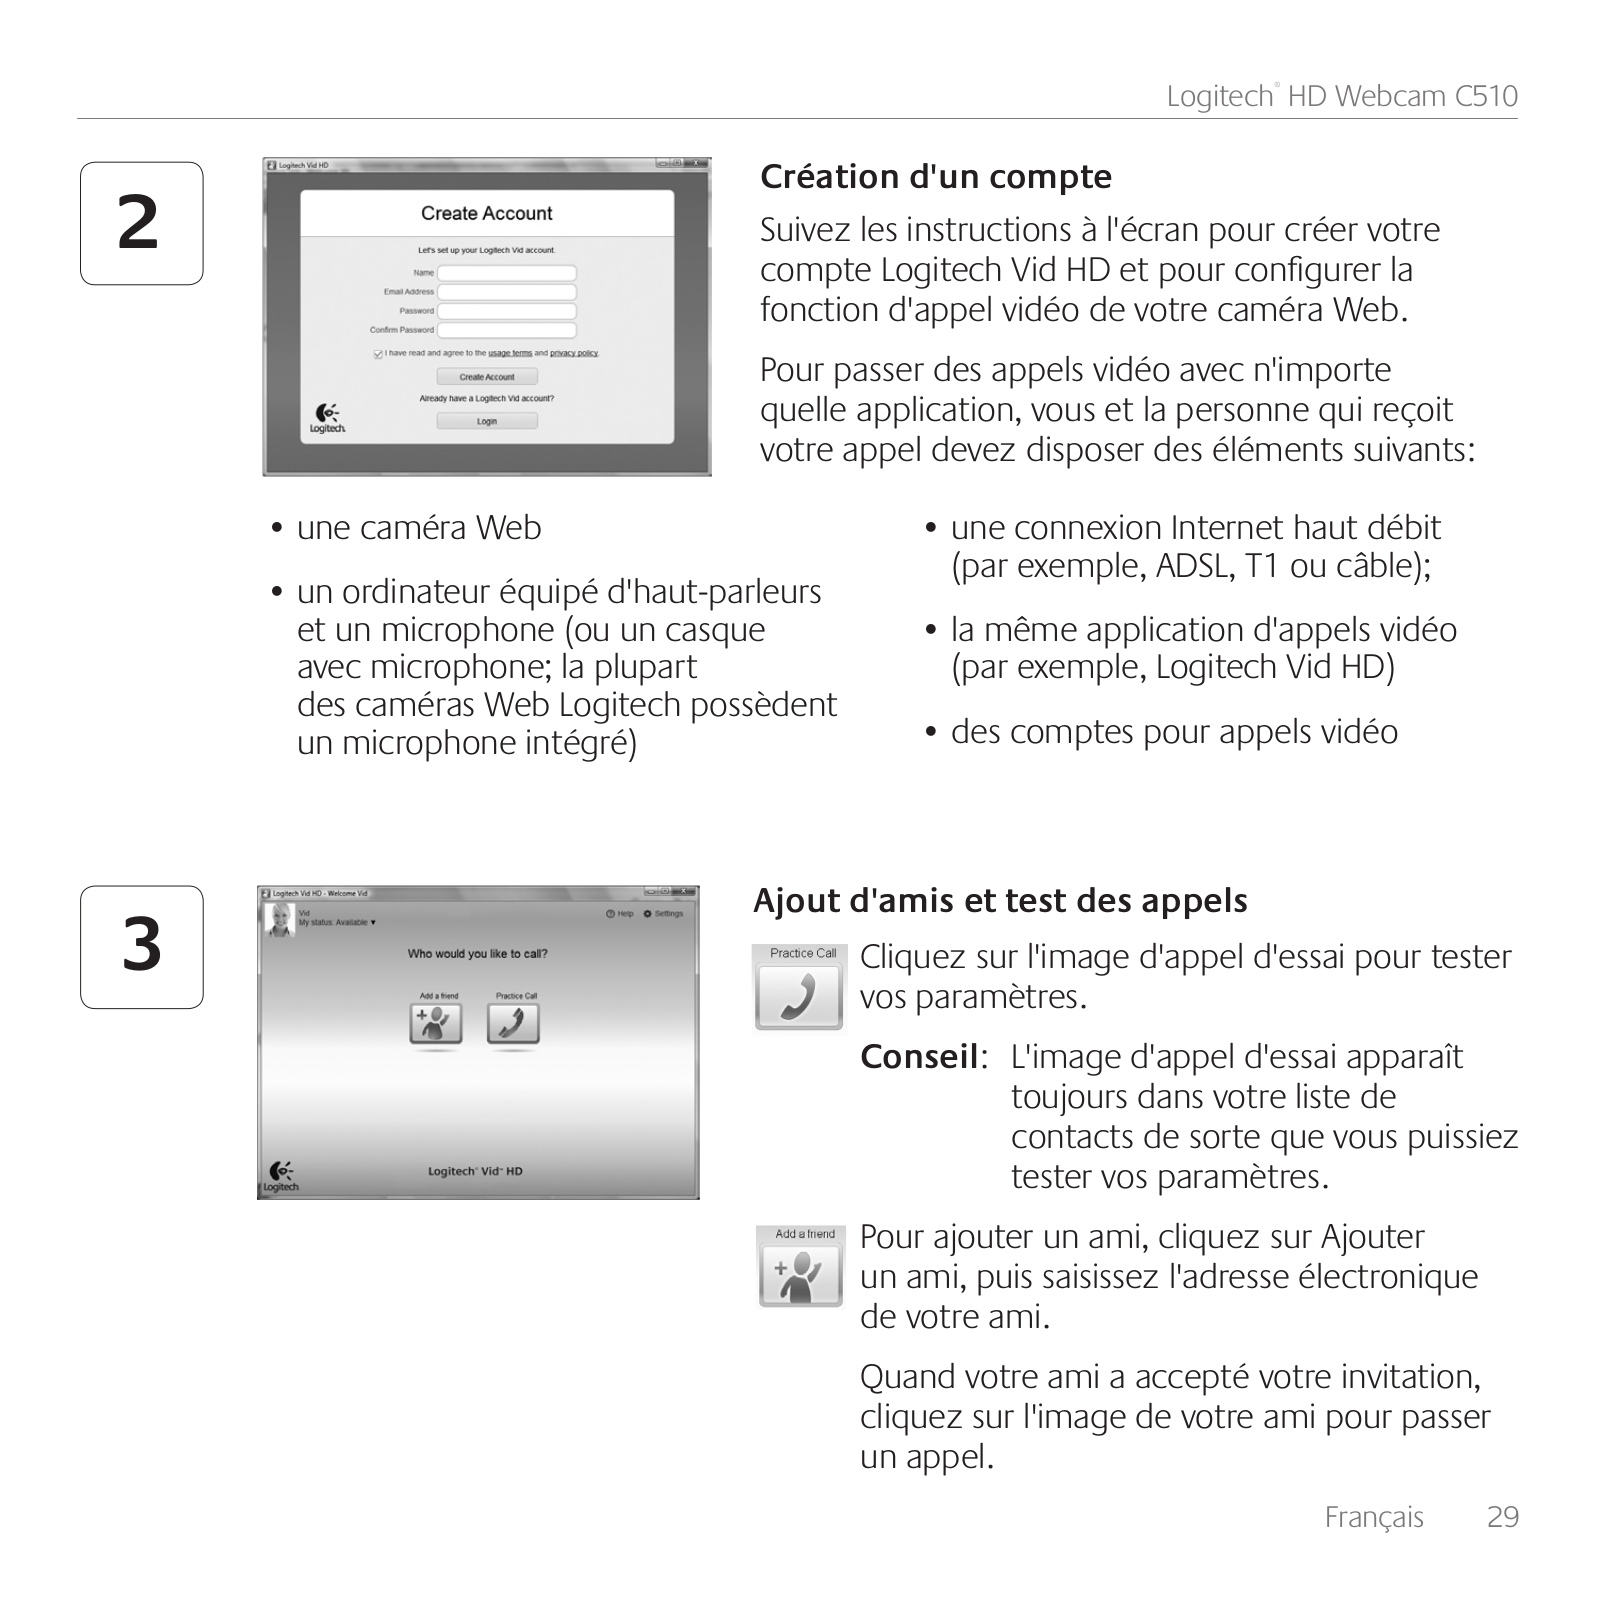
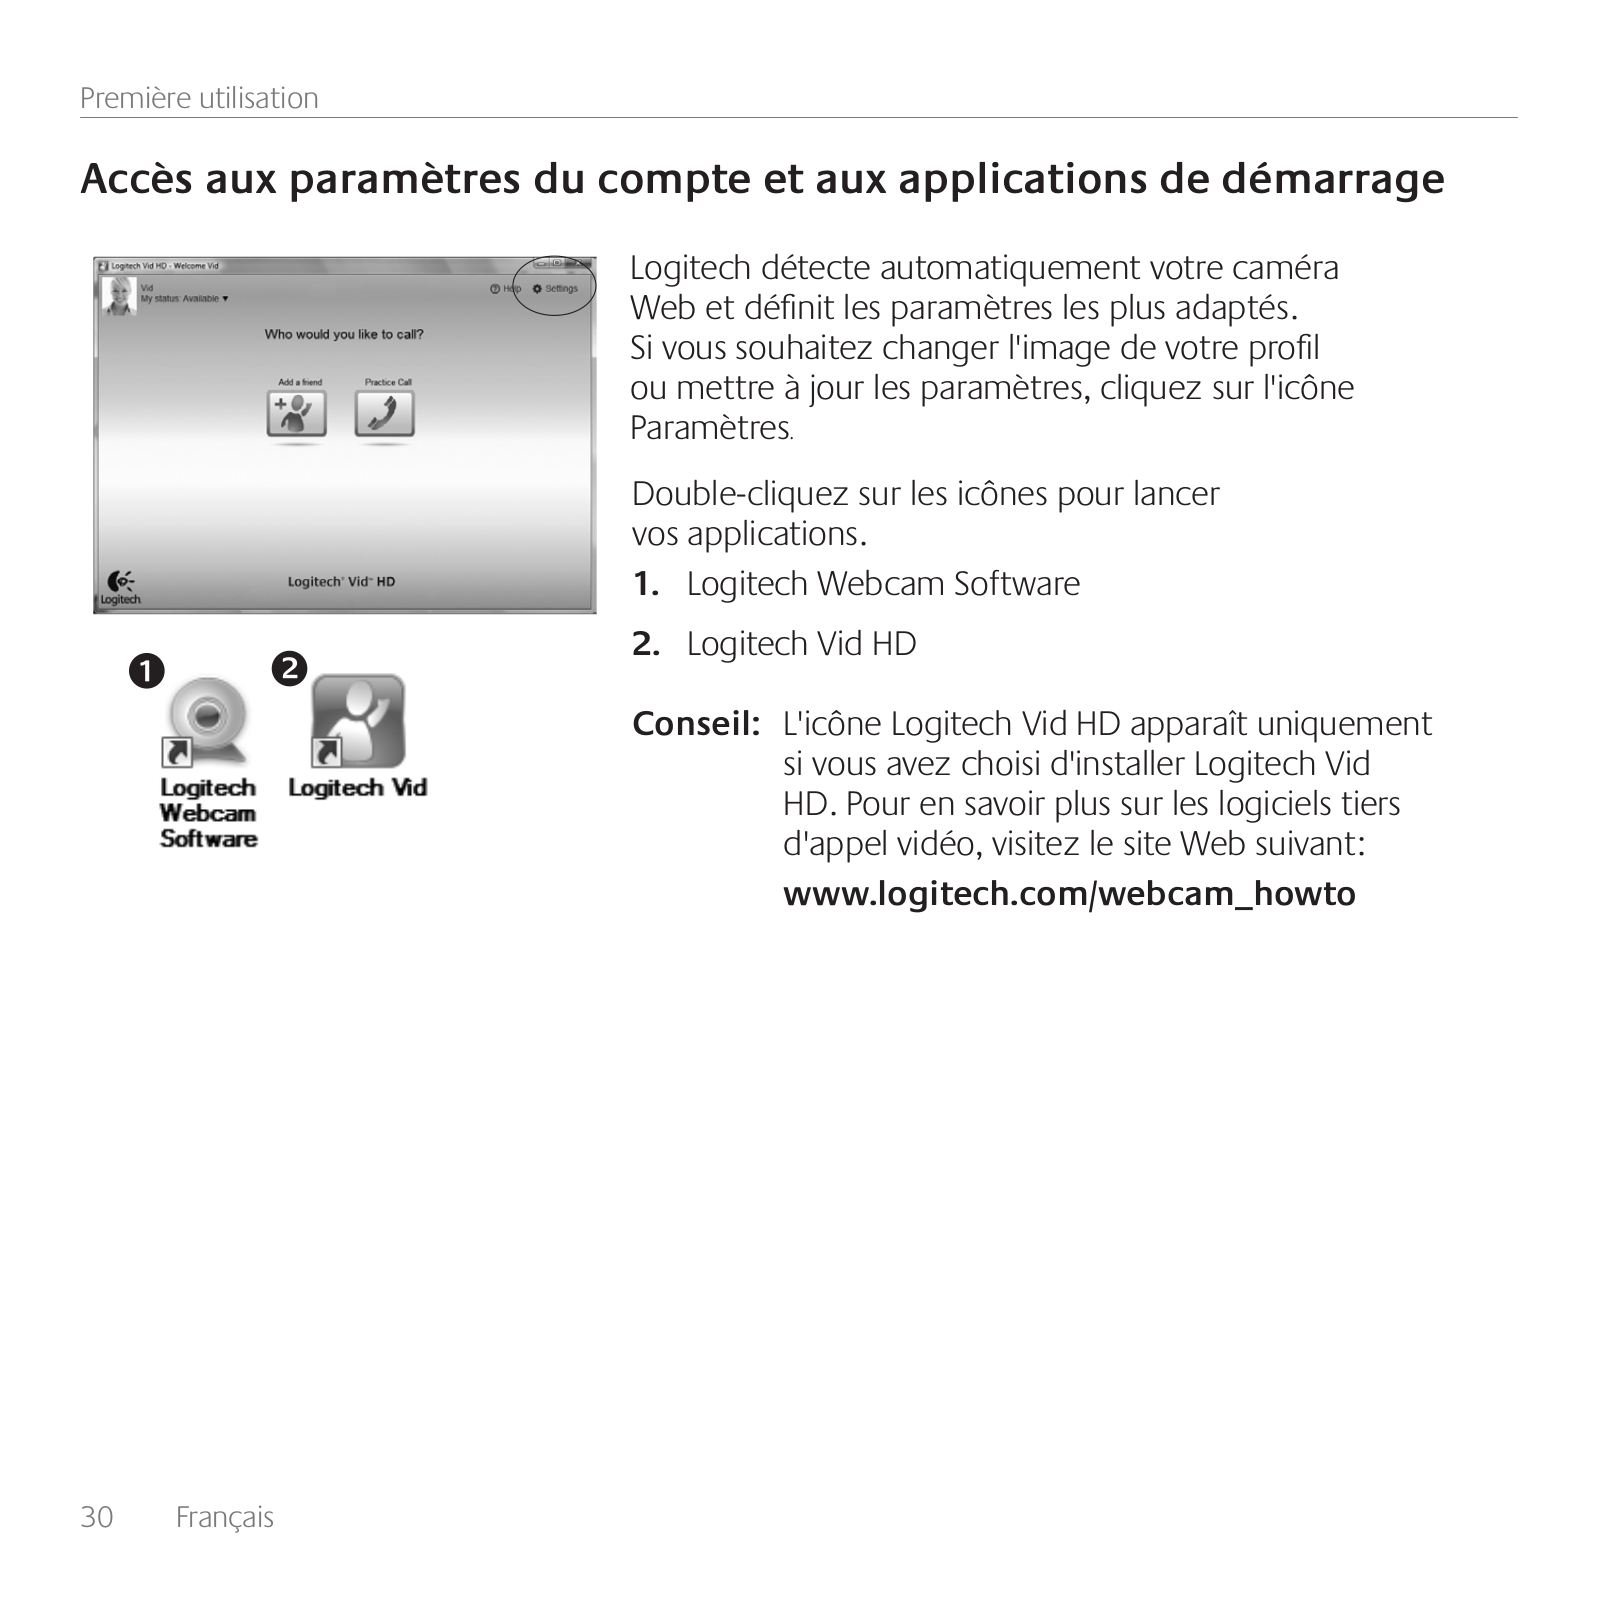
C510
User Manual
160 pgs
10.64 Mb
0
Getting Started
8 pgs
2.13 Mb
0
User Manual
48 pgs
4.51 Mb
0
User Manual
15 pgs
2.52 Mb
0
QUICK START GUIDE [cz]
114 pgs
8.32 Mb
0
QUICK START GUIDE [bg]
104 pgs
7.92 Mb
0
QUICK START GUIDE [ja]
1 pgs
2.64 Mb
0
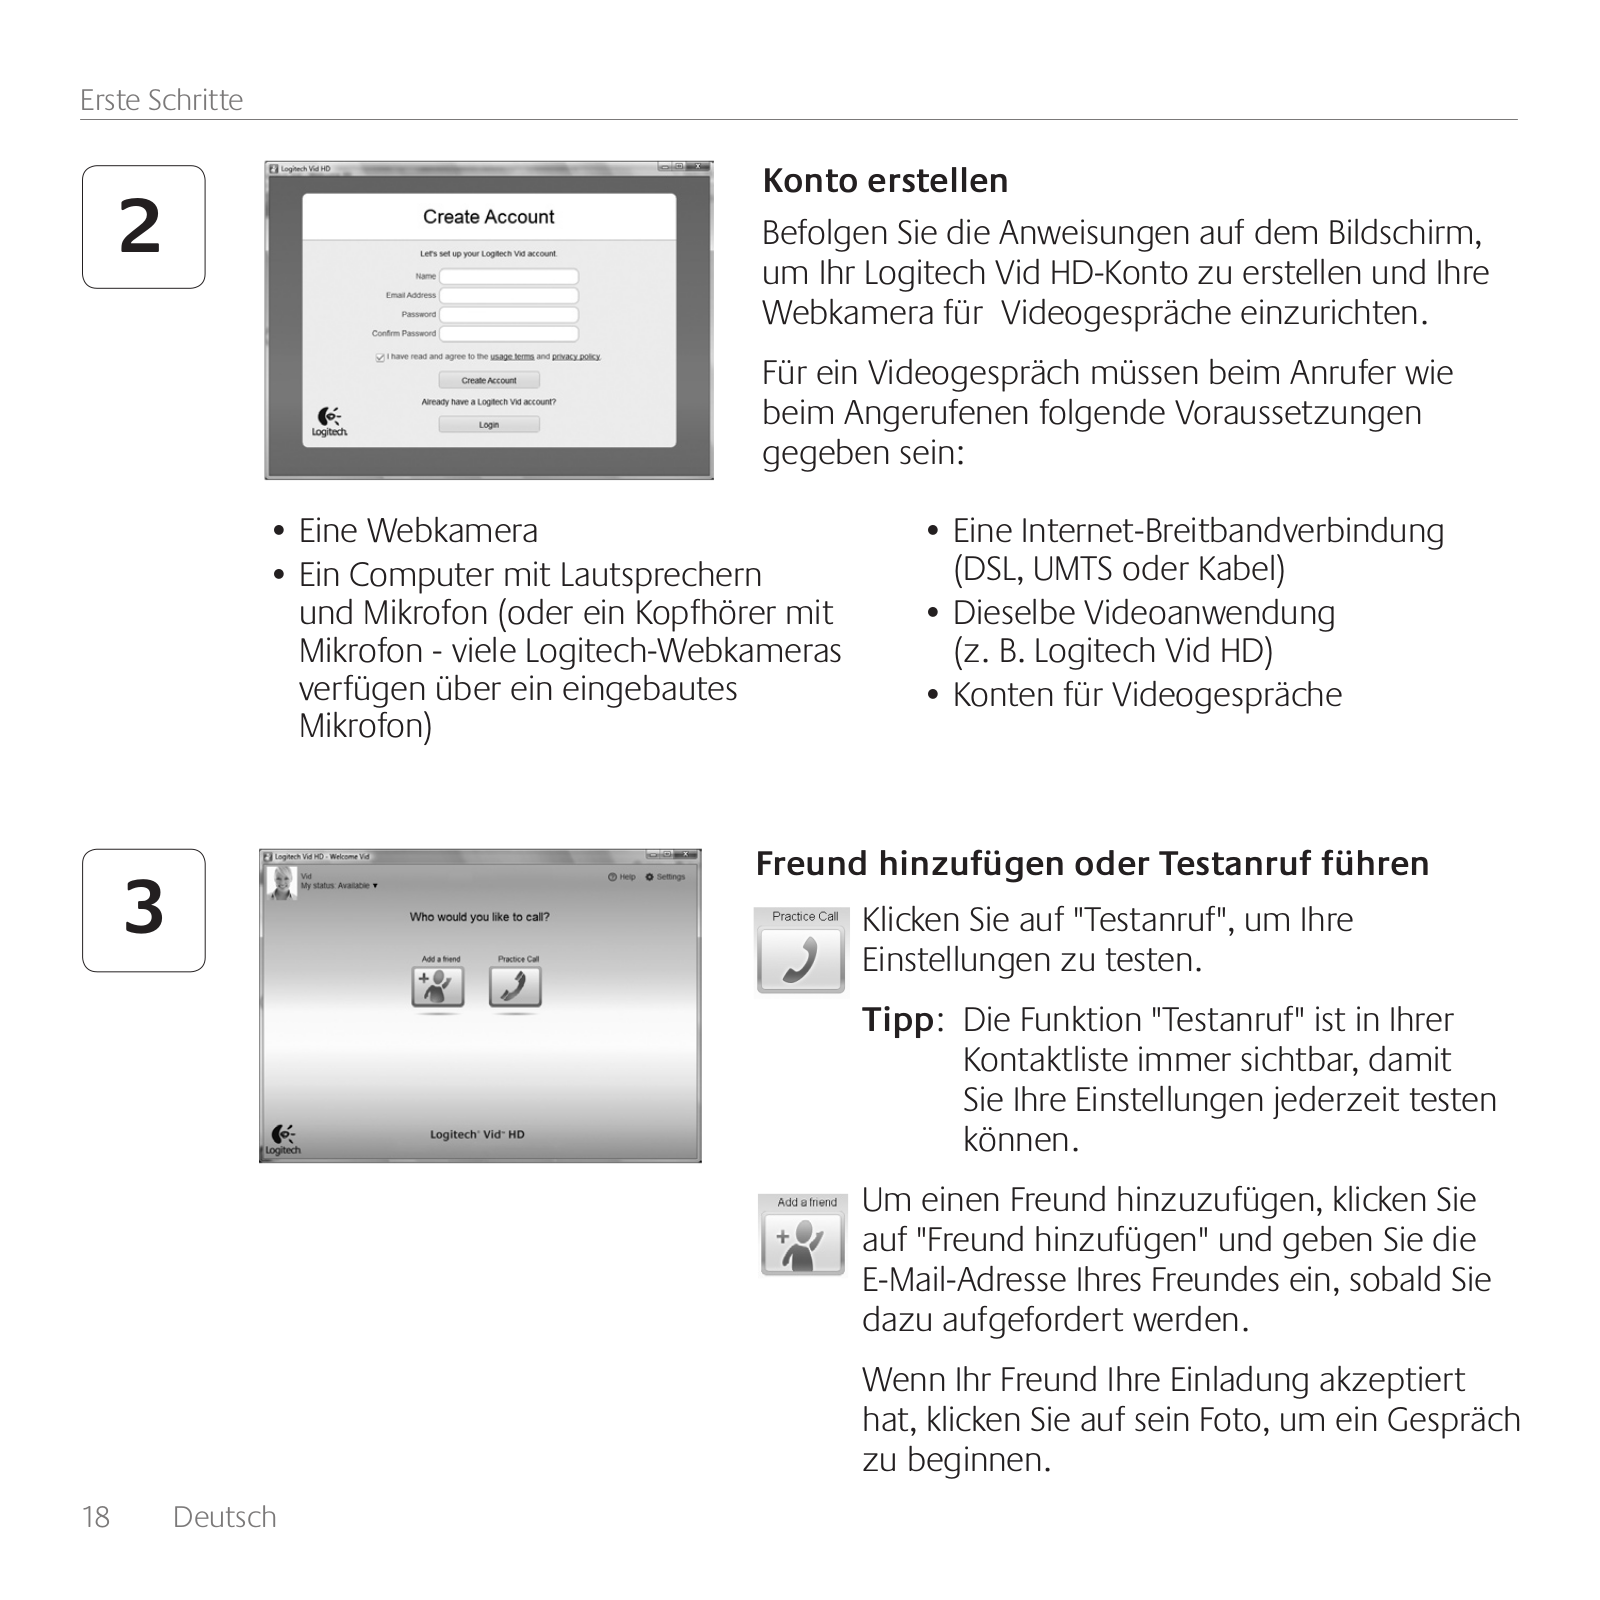
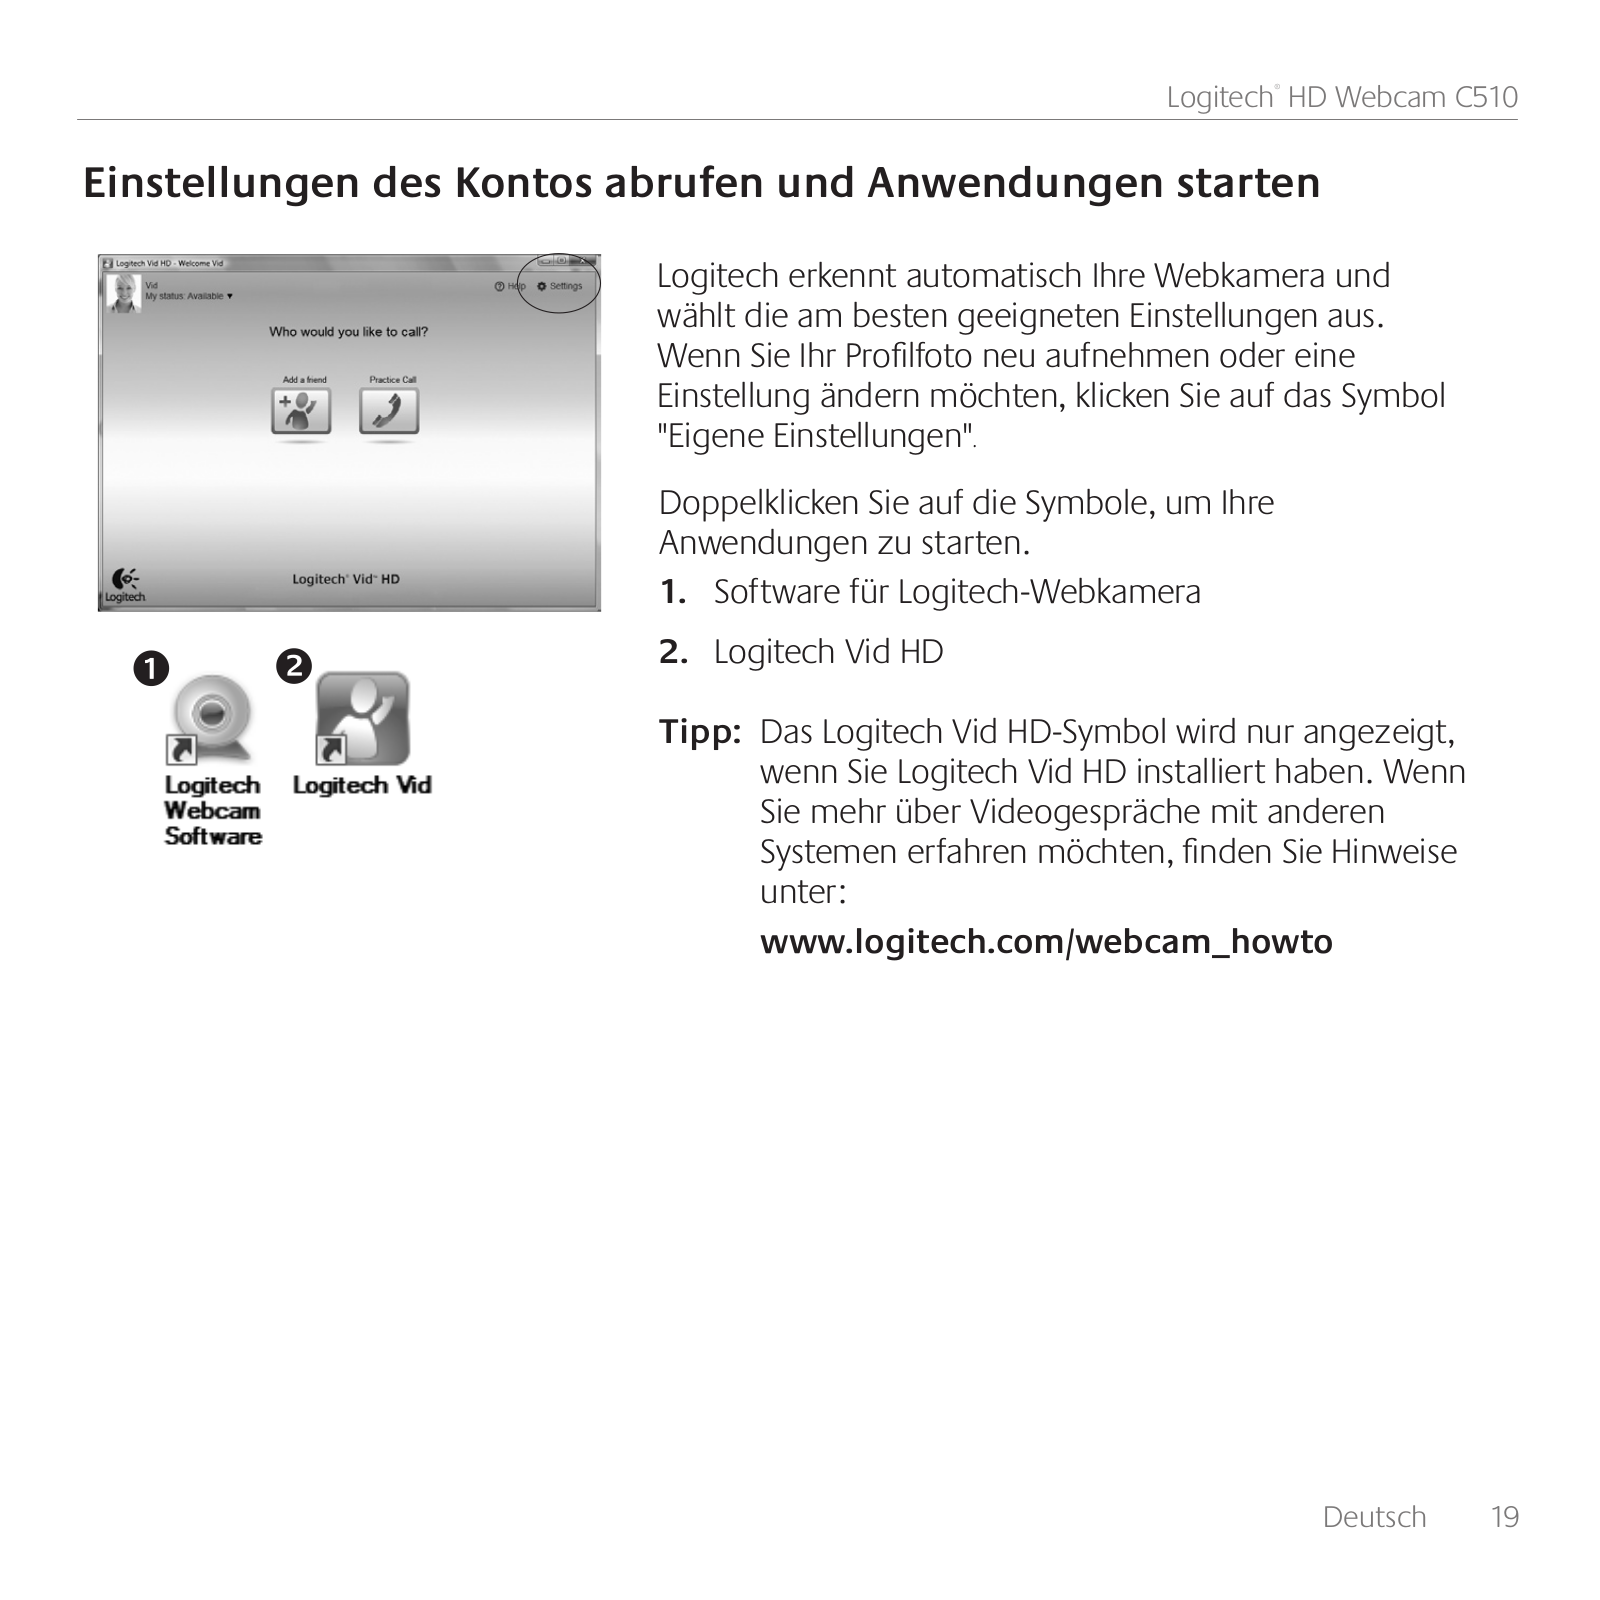
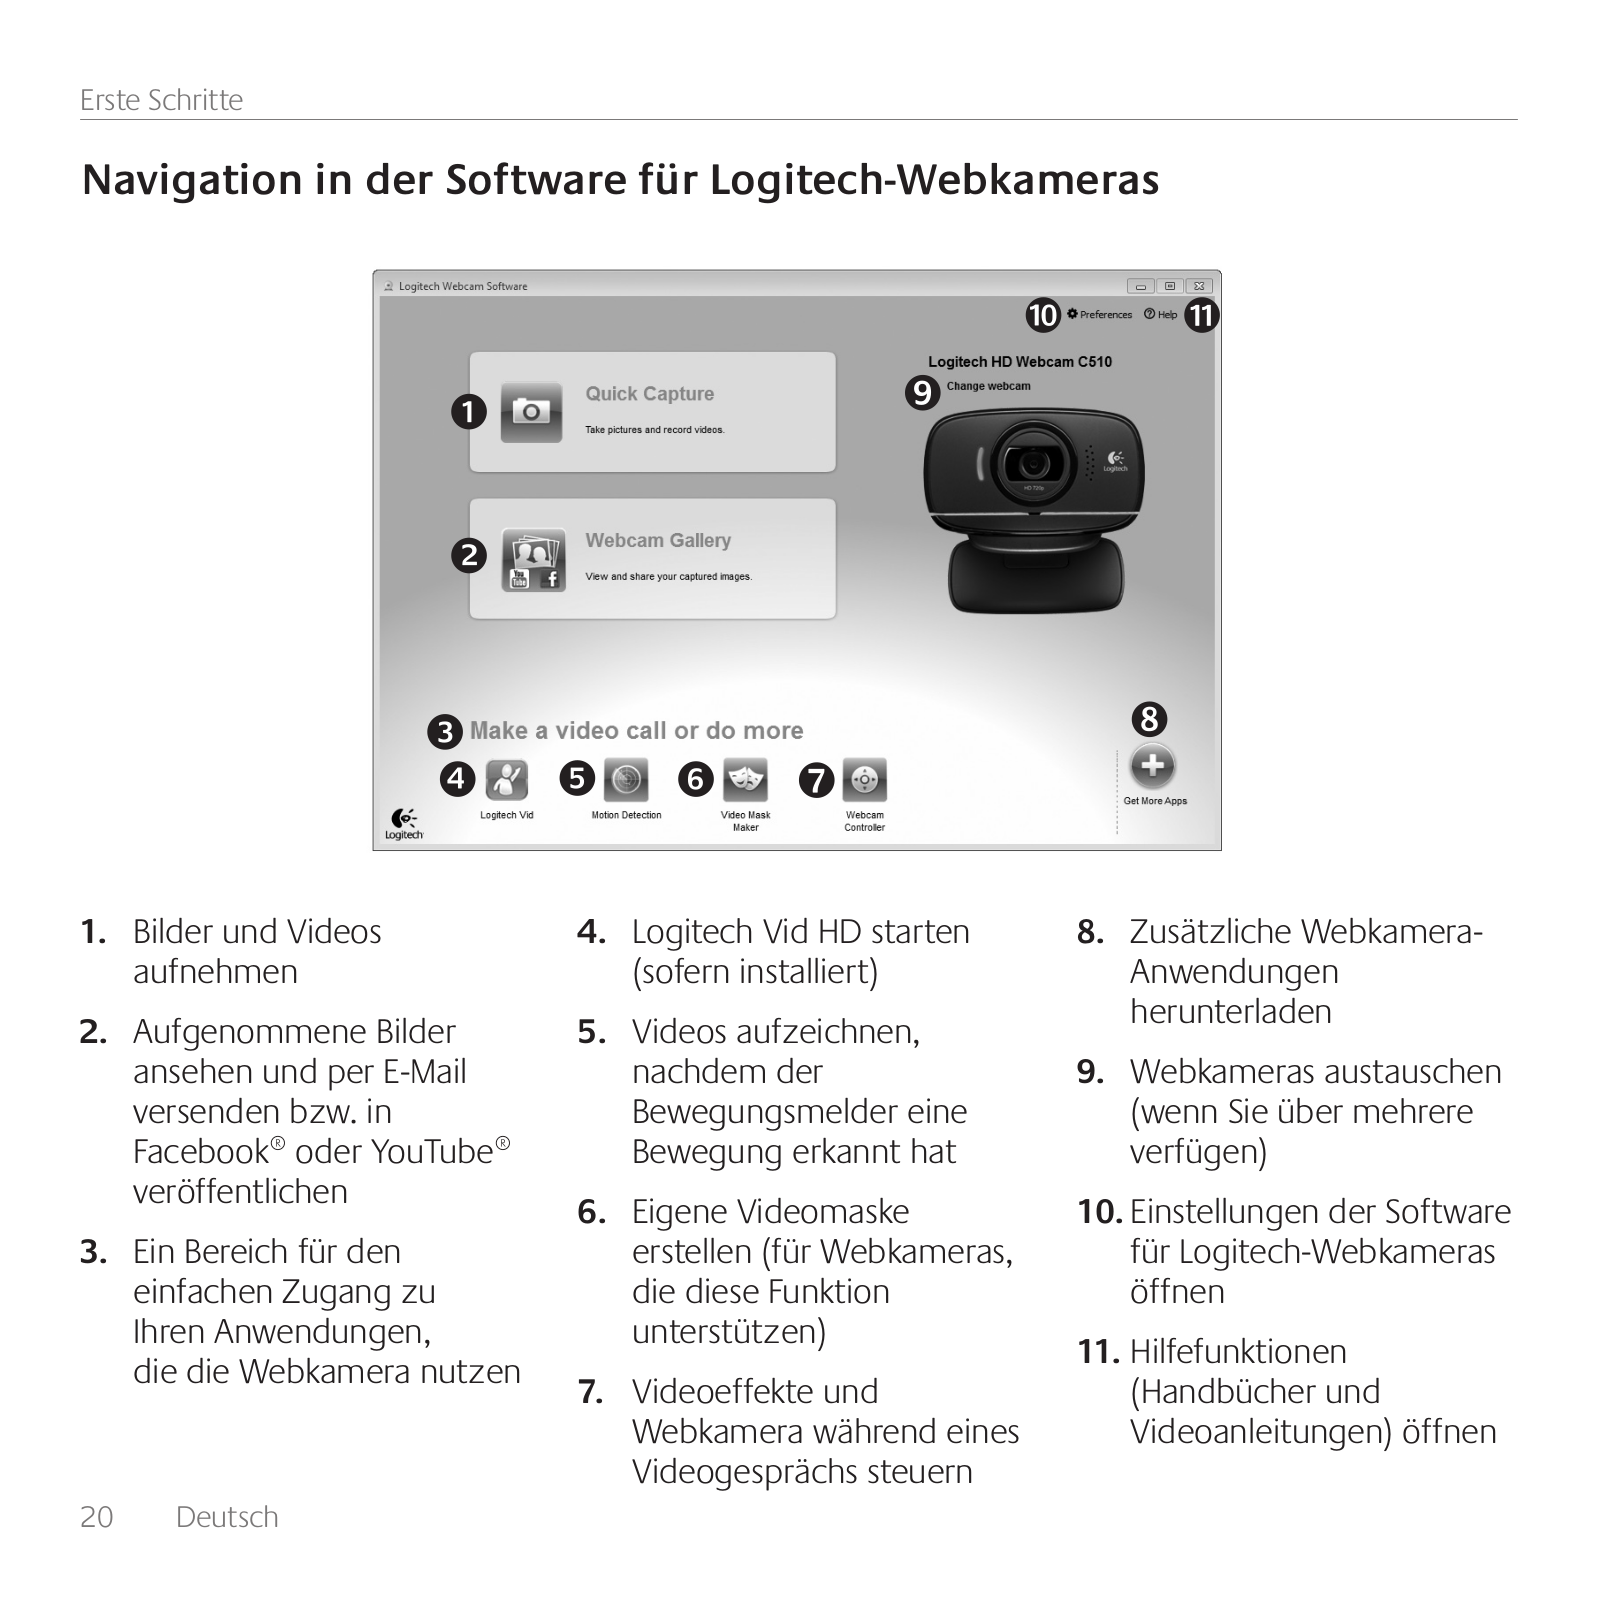
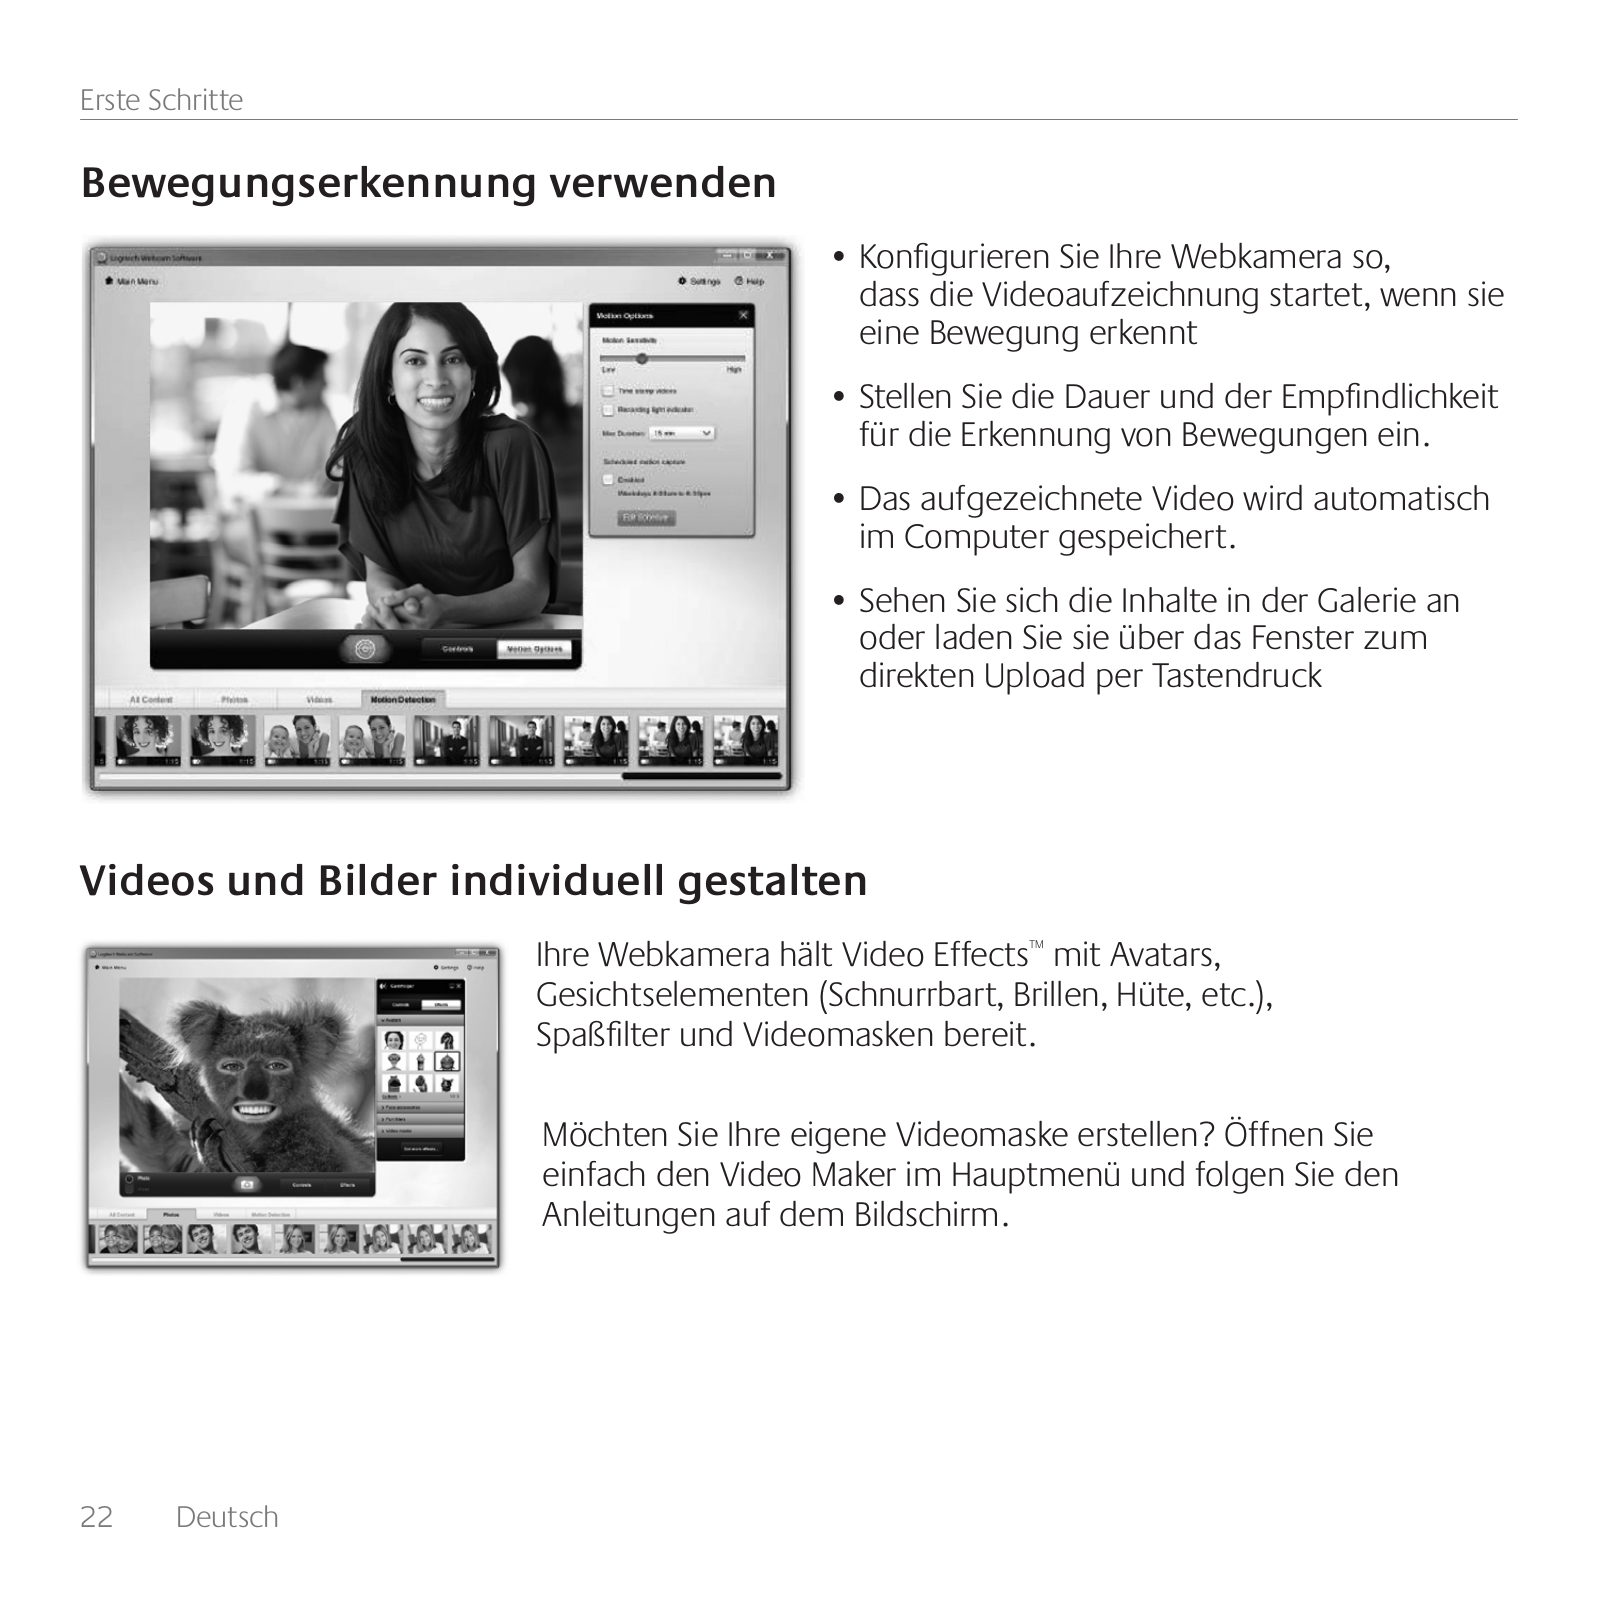
Table of contents
Loading...
Logitech C510 User Manual
...
Logitech User Manual
Download
Loading...
+
130
hidden pages
Unhide
You need points to download manuals.
1 point = 1 manual.
You can buy points or you can get point for every manual you upload.
Buy points
Upload your manuals
 Loading...