How it Works
Log In / Sign Up
Buy Points
How it Works
FAQ
Contact Us
Questions and Suggestions
Users
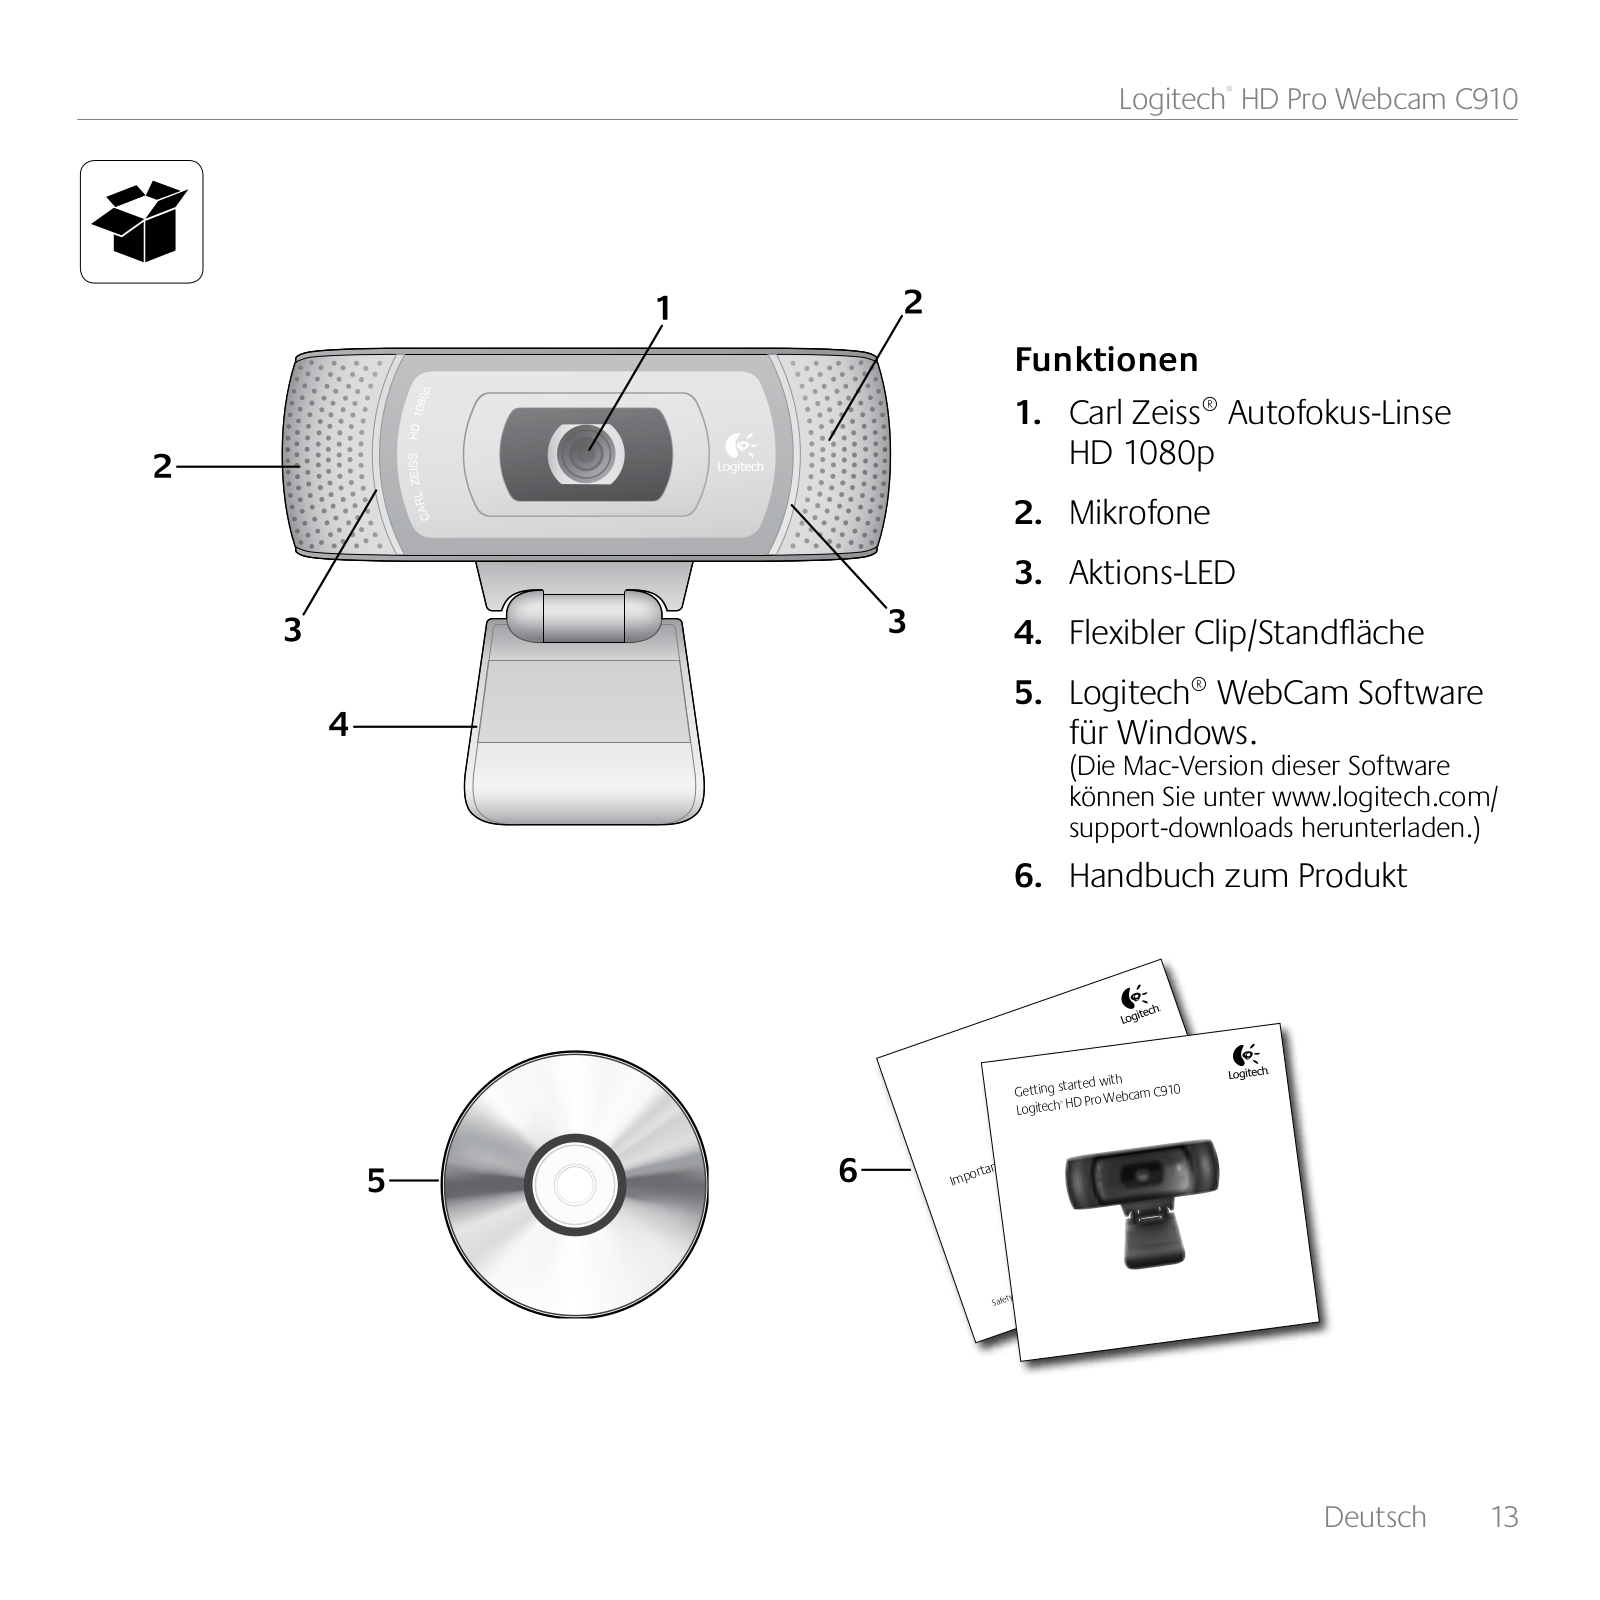
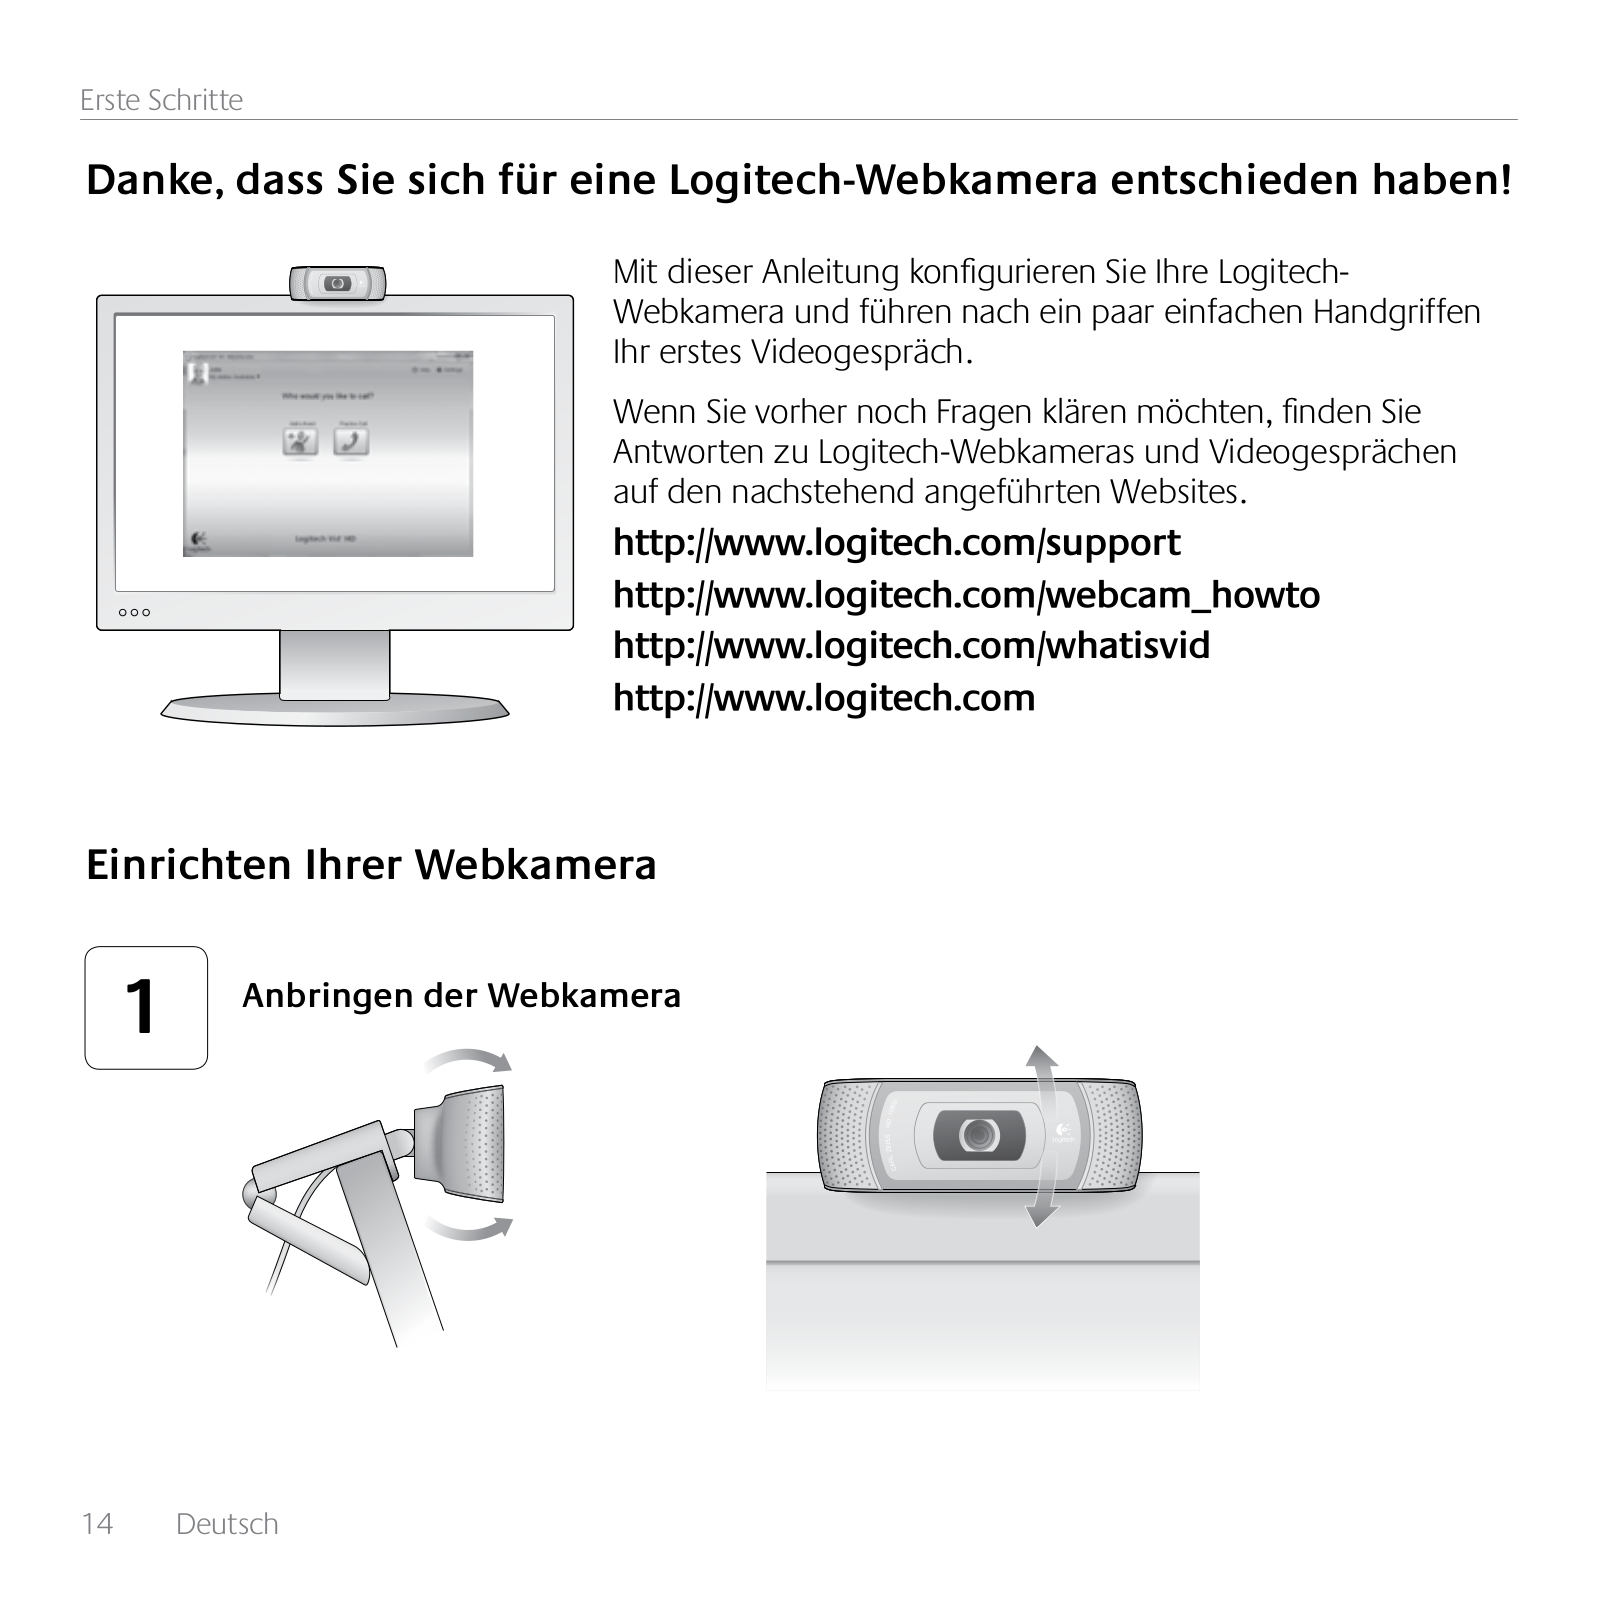
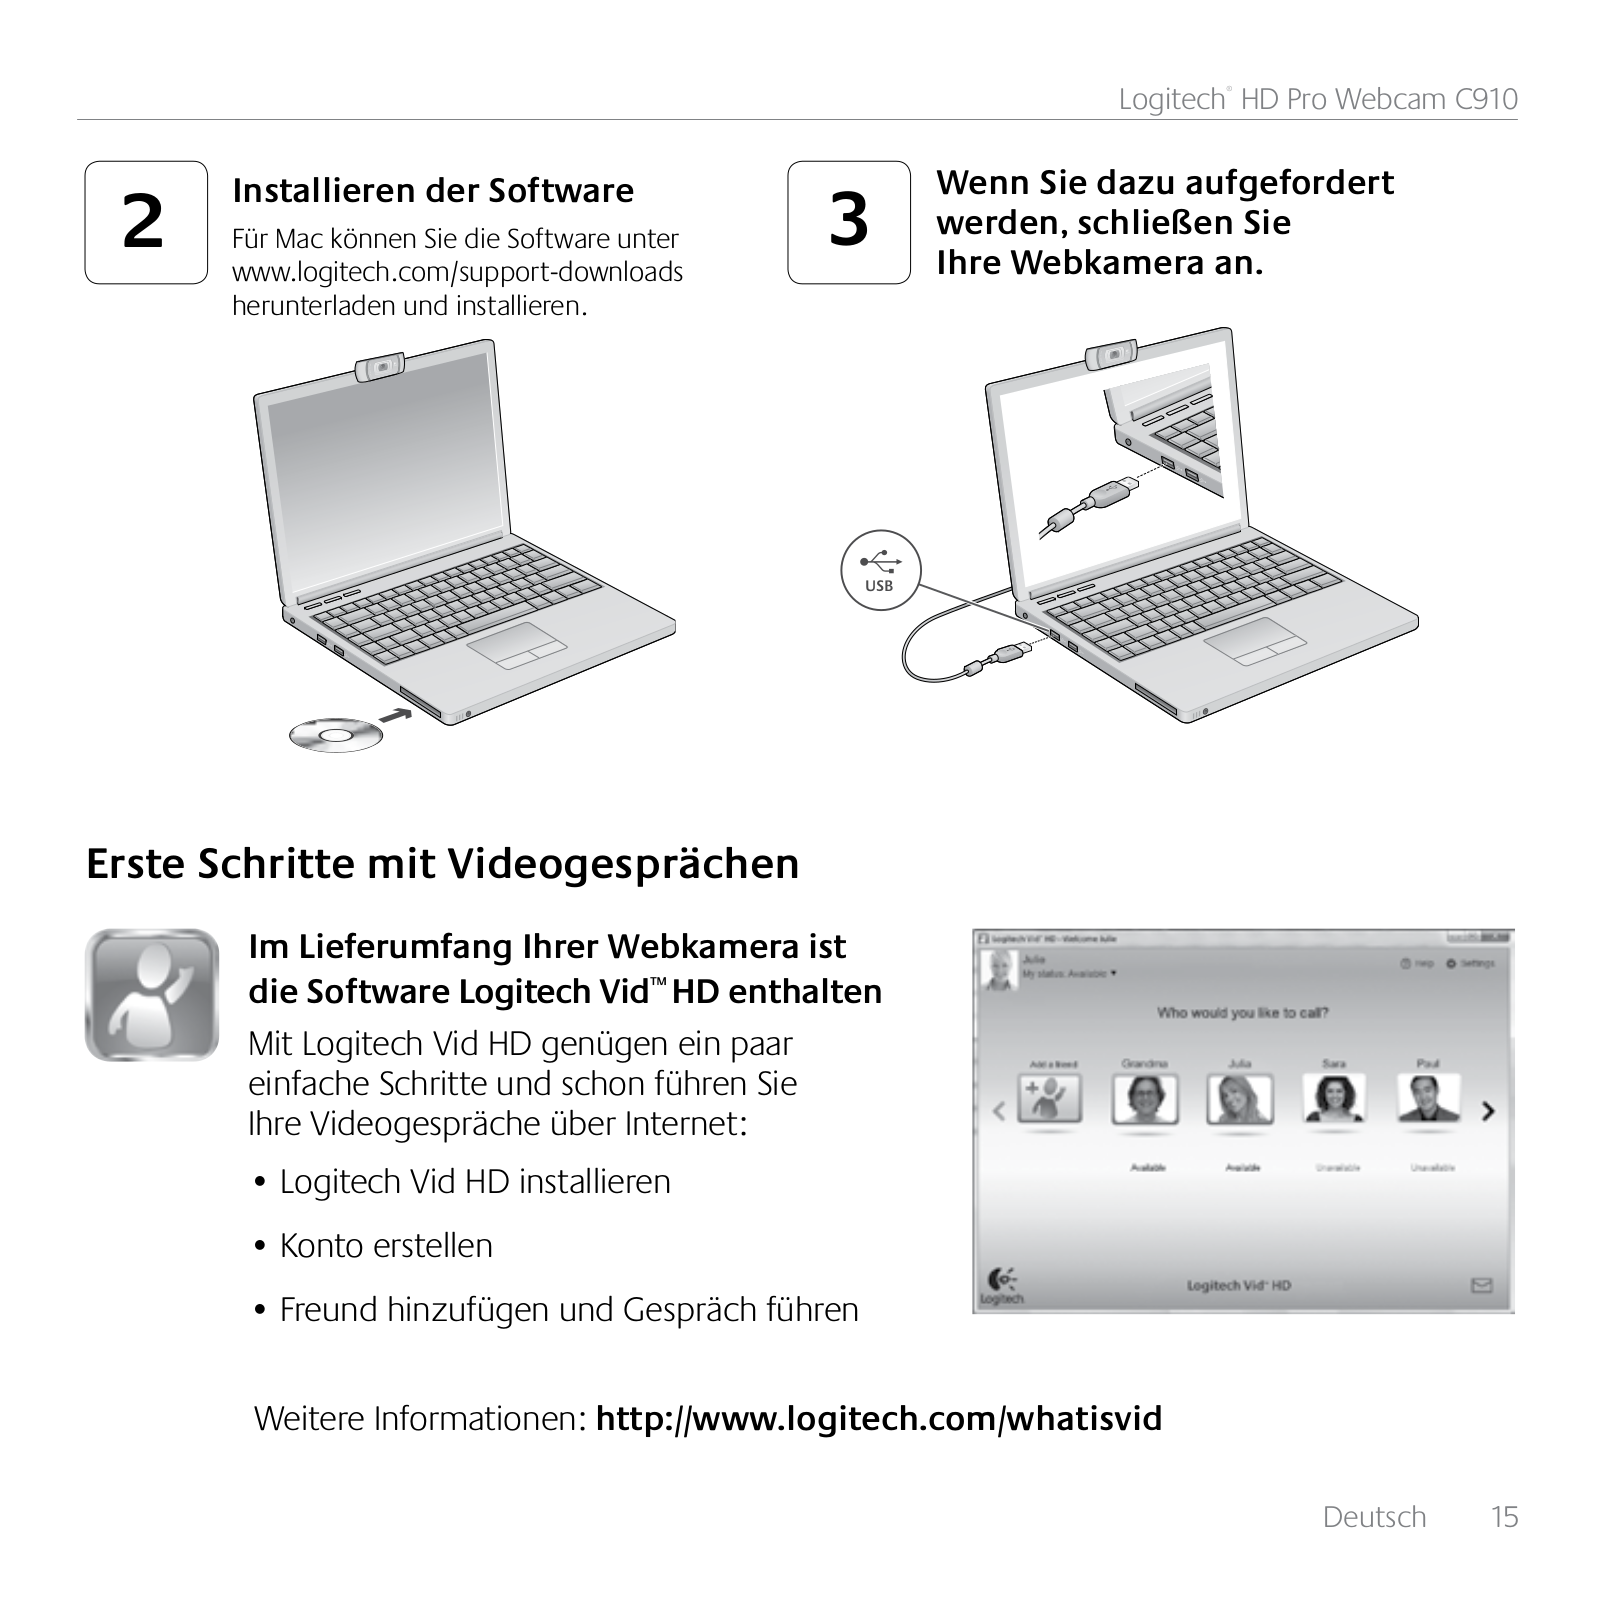
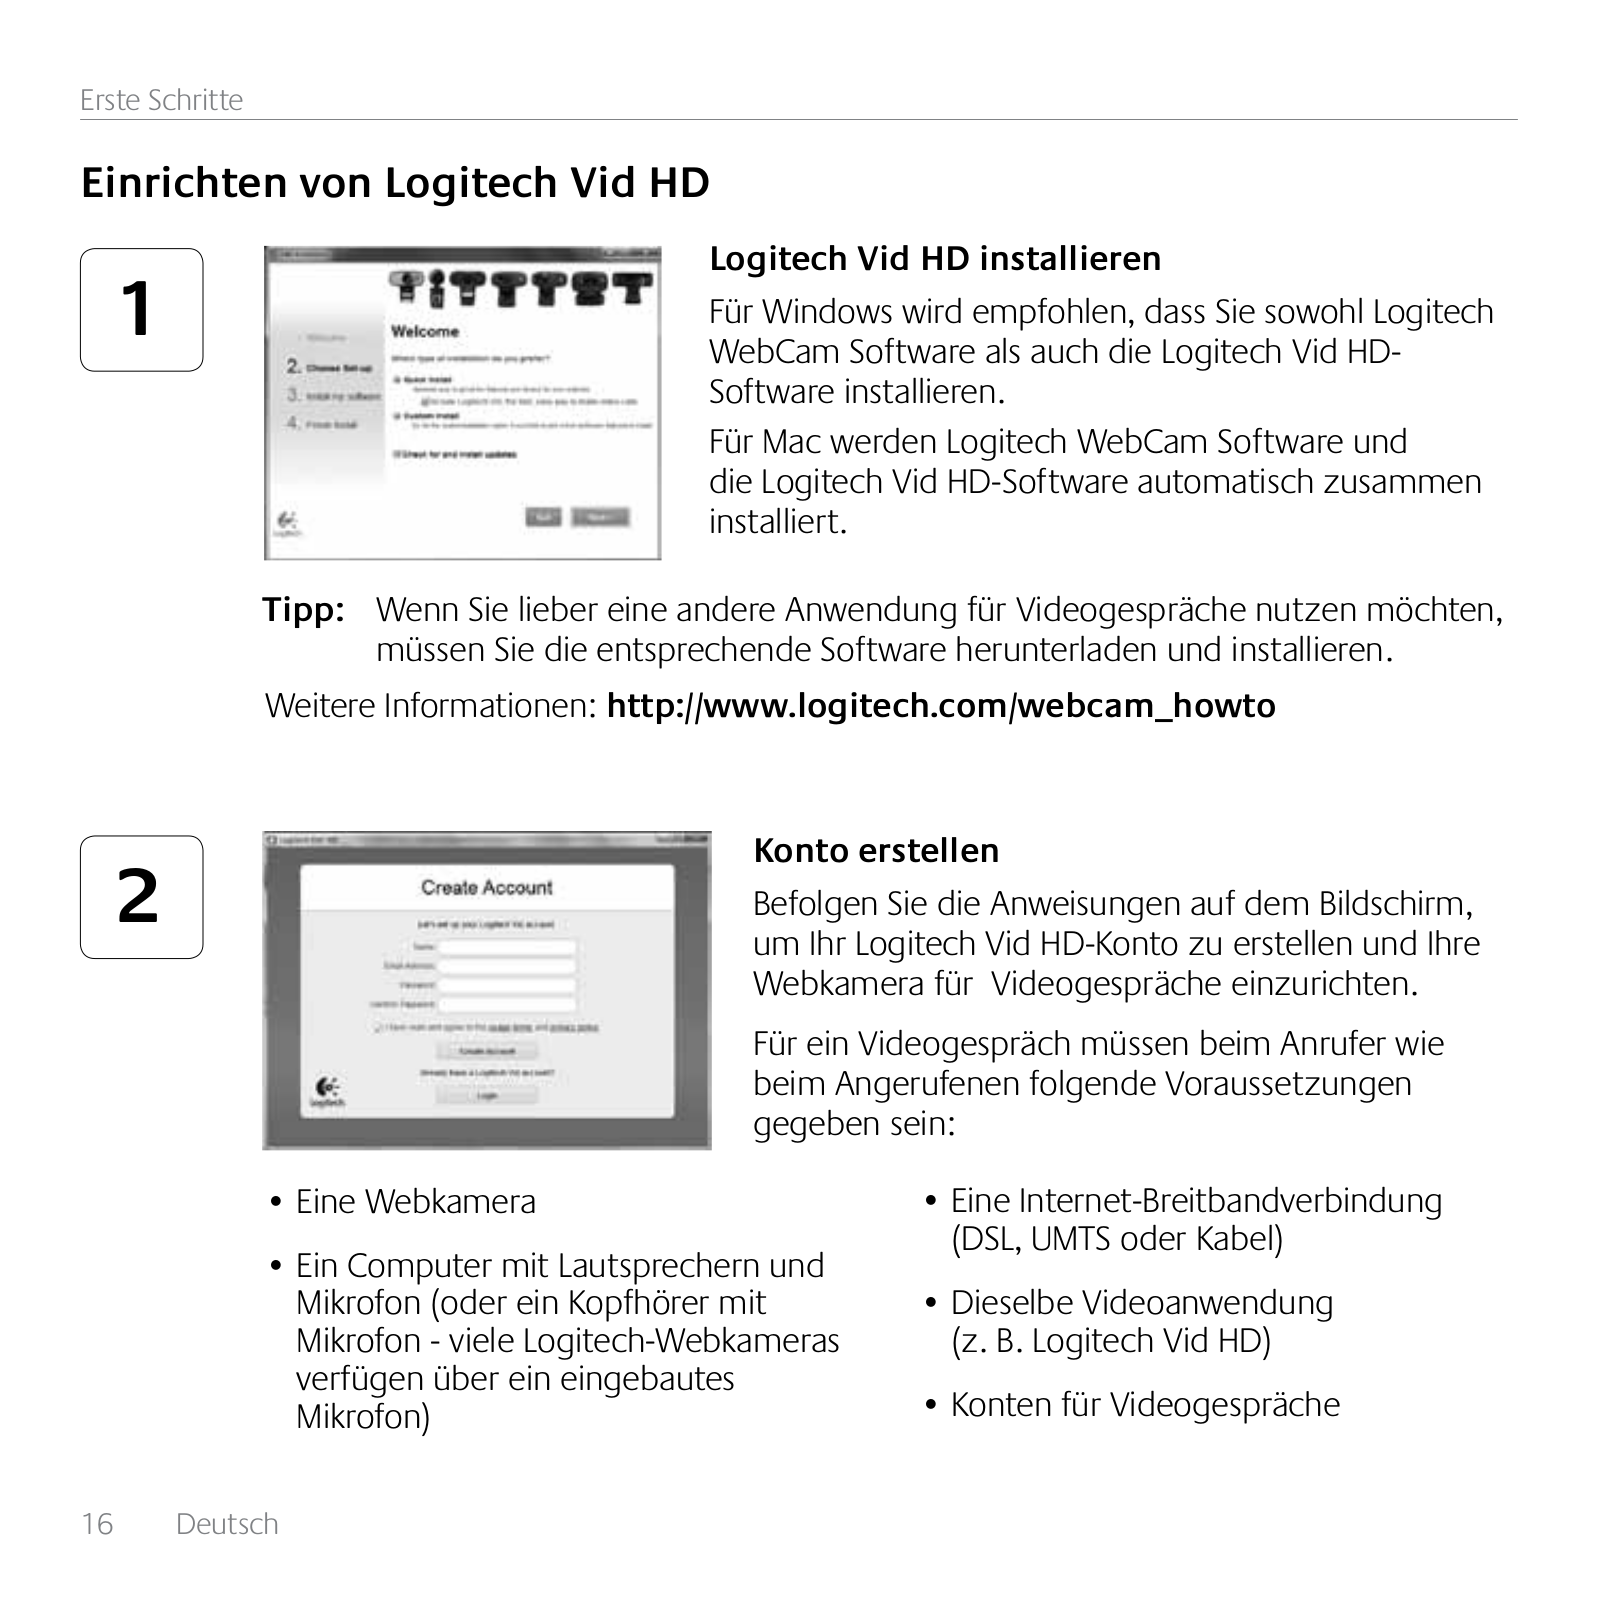
Logitech
Loading...
B
BH970
2
Big Bang
Blok
3
BLUETOOTH
Bluetooth Audio
Bluetooth Audio Adapter
4
Bluetooth Headset
Bluetooth® Illuminated Keyboard K811
Bluetooth wireless hub
Bluetooth Wireless Speaker
Boombox
BRIO
7
Brio 100 webcam 2 MP 1920 x 1080 Pixel USB Grafite
Brio 500
Brio Stream (960-001194)
Brio Stream Edition
BRIO ULTRA HD PRO
3
Broadcaster Wi-Fi Webcam
BSP420
BSP420-M
BT
C
C100
5
C110
5
C120
8
C160
7
C170
13
C200
7
C210
7
C250
6
C260
C270
20
C270 HD
C270 HD-Webcam
C290
C300
2
C310
16
C310 HD
C500
5
C505E
3
C505e HD
C505 HD
2
C510
7
C525
10
C615
9
C905
C910
8
C920
11
C920-C
C920E
2
C920 HD PRO
C920 HD Pro Webcam
C920 Pro
C920s
2
C920s PRO
2
C920s Pro HD Webcam
C922
5
C922 PRO
3
C922 Pro Stream
C925e
6
C930E
23
CANVAS
3
CARD FOR MICROSOFT TEAMS
Case
2
case+ energy
CC3000e
10
CCCON
Chillstream
2
CIRCLE 2
9
Classic K100
CLASSIC KEYBOARD
Classic Keyboard 200
ClearChat Comfort USB
ClearChat PC Wireless
ClearChat Pro
CLEARCHAT PRO USB
ClearChat Stereo
CLEARCHAT STYLE
3
Click
ClickSmart 310
ClickSmart 420
2
ClickSmart 510
ClickSmart 820
Clock Radio Dock S400i
COMBO TOUCH
Comfort Laser
Comfort Wave 450
ConferenceCam Connect
19
Conference Cam GROUP
2
CONFERENCECAM KIT
ConferenceCam PTZ Pro 2
Cooling Pad N120
Cooling Pad N200
CORDLES OPTICAL TRACKMAN
Cordless 2.4 GHz
cordless action
C-RH63
C-RJ63
C-RL65
C-RL66
C-RM66
Loading...
Loading...
Nothing found
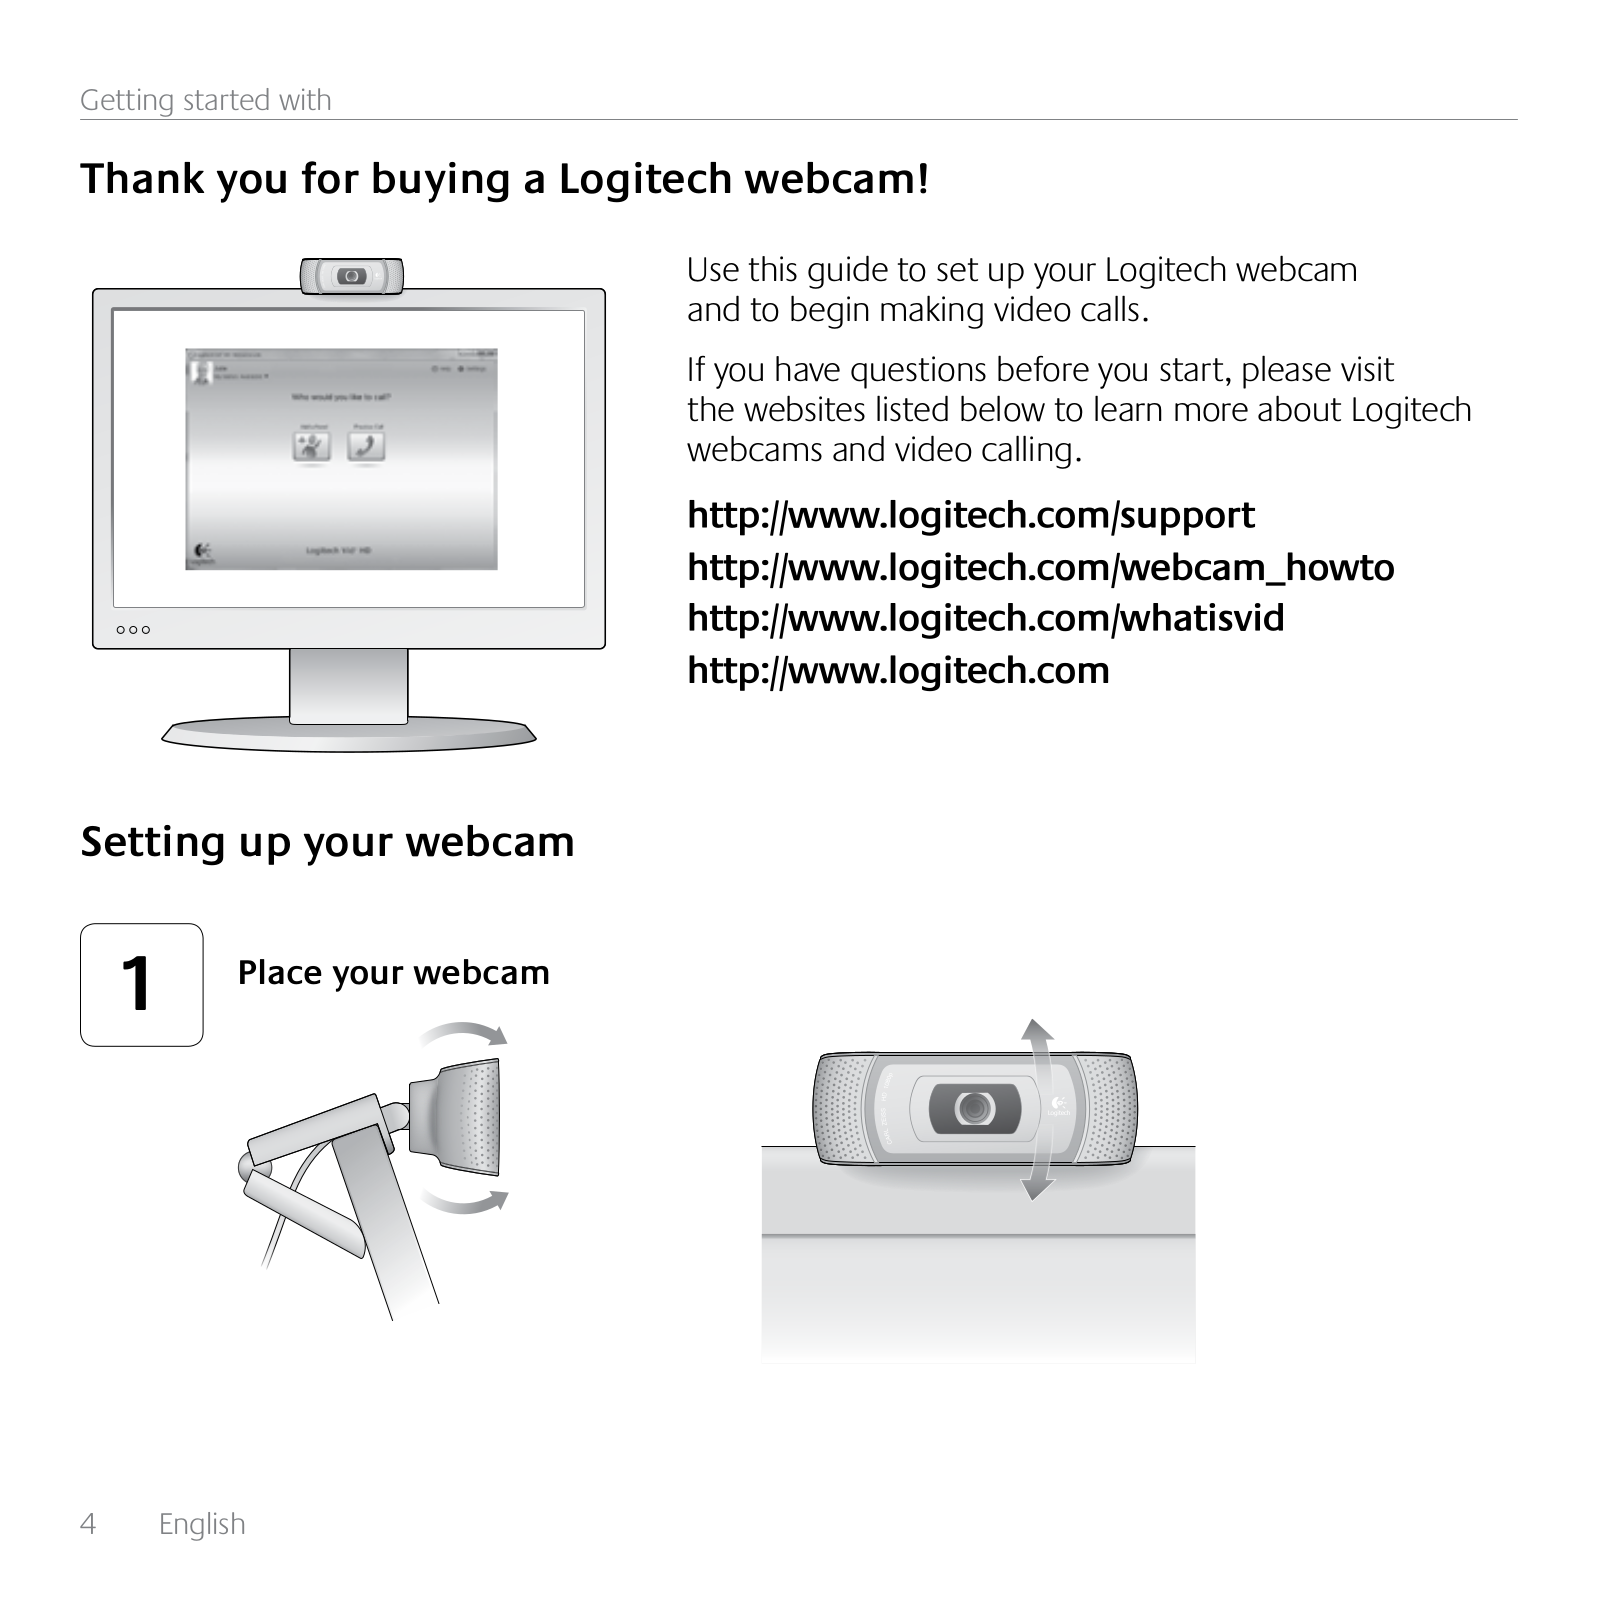
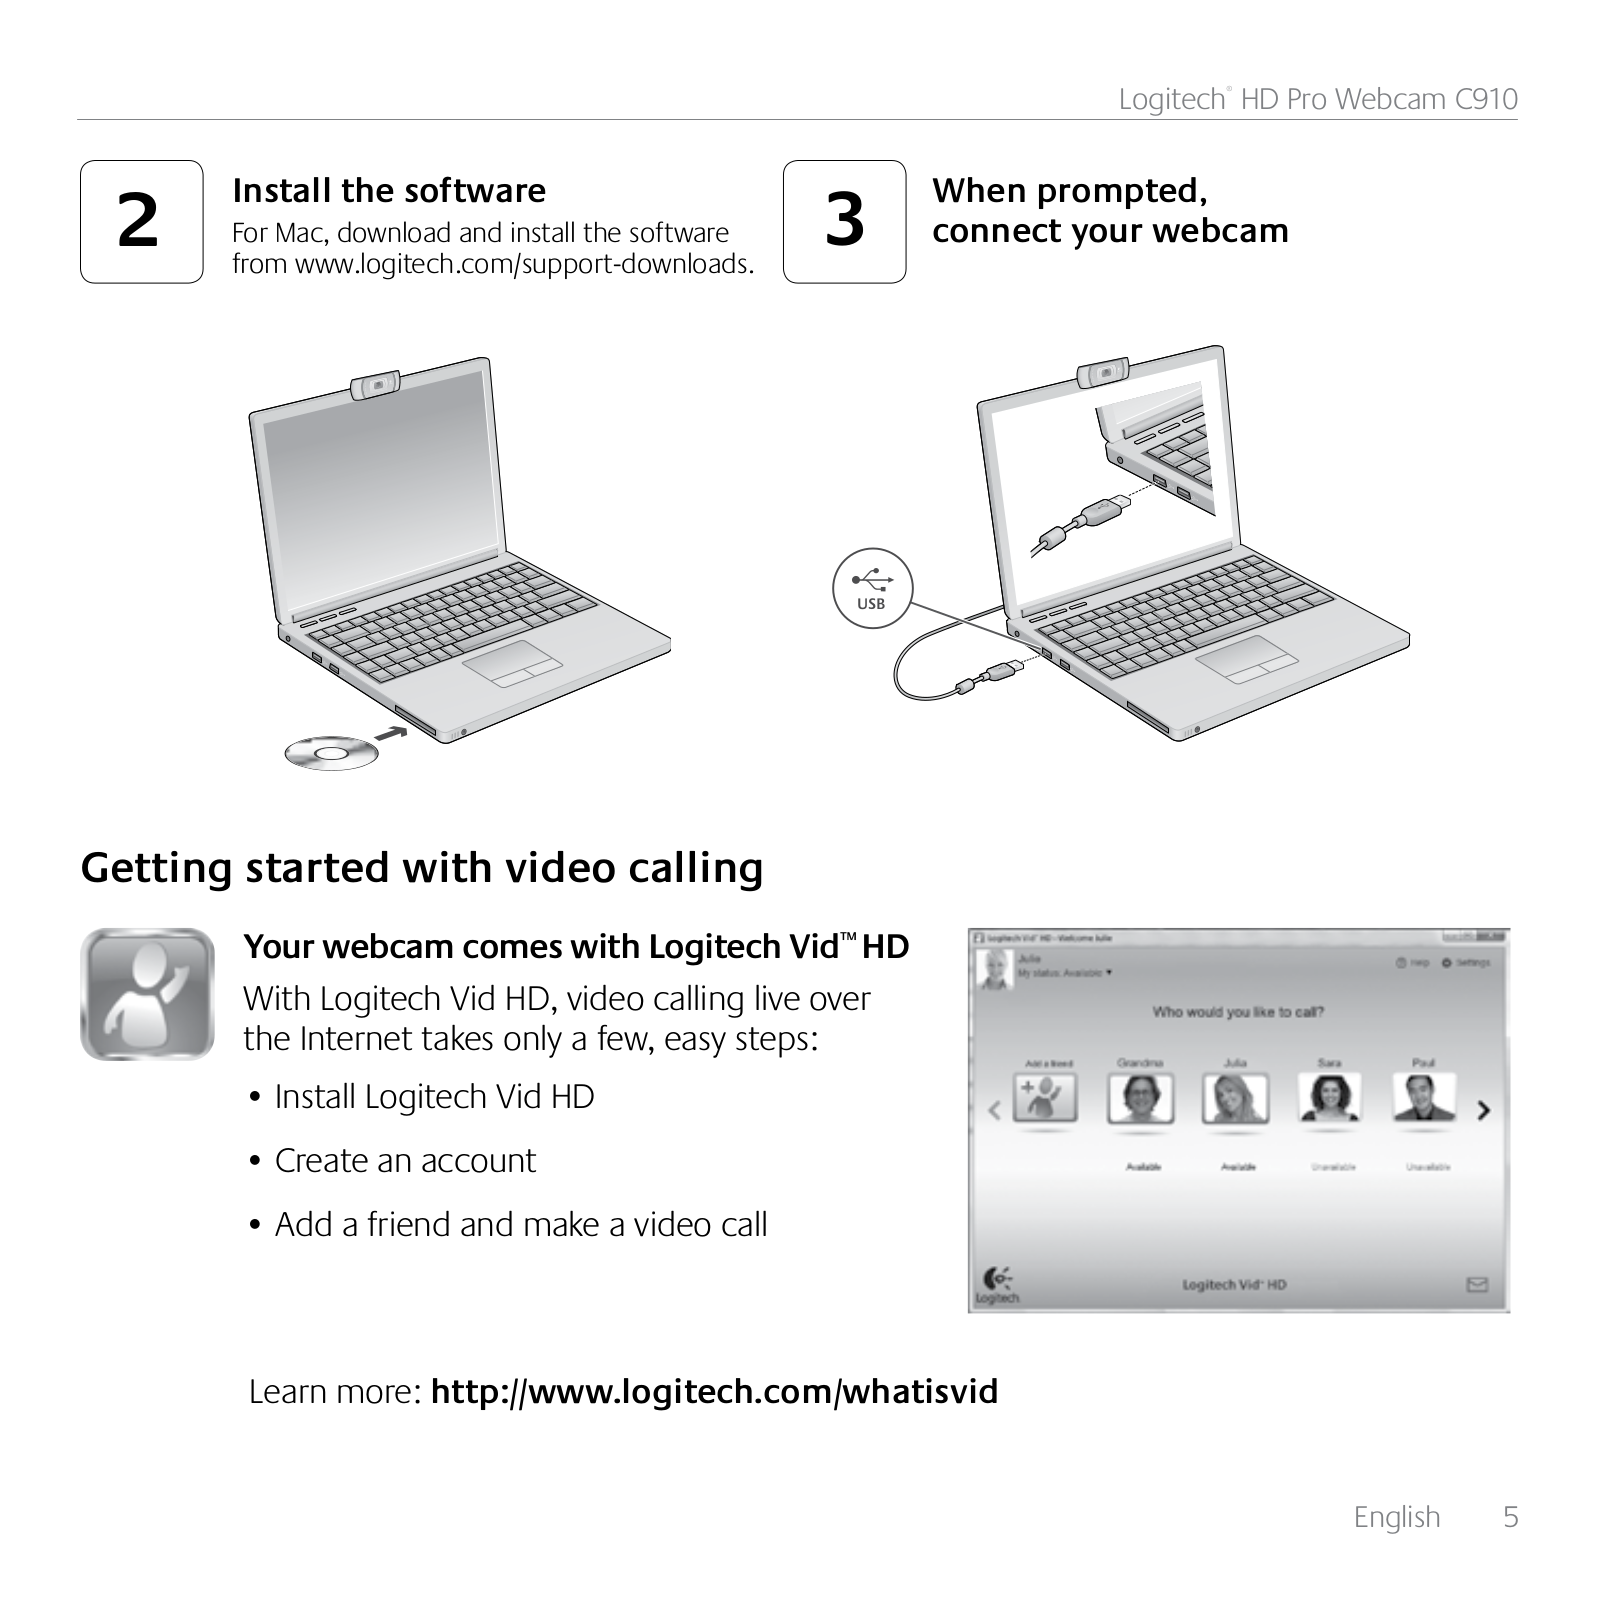
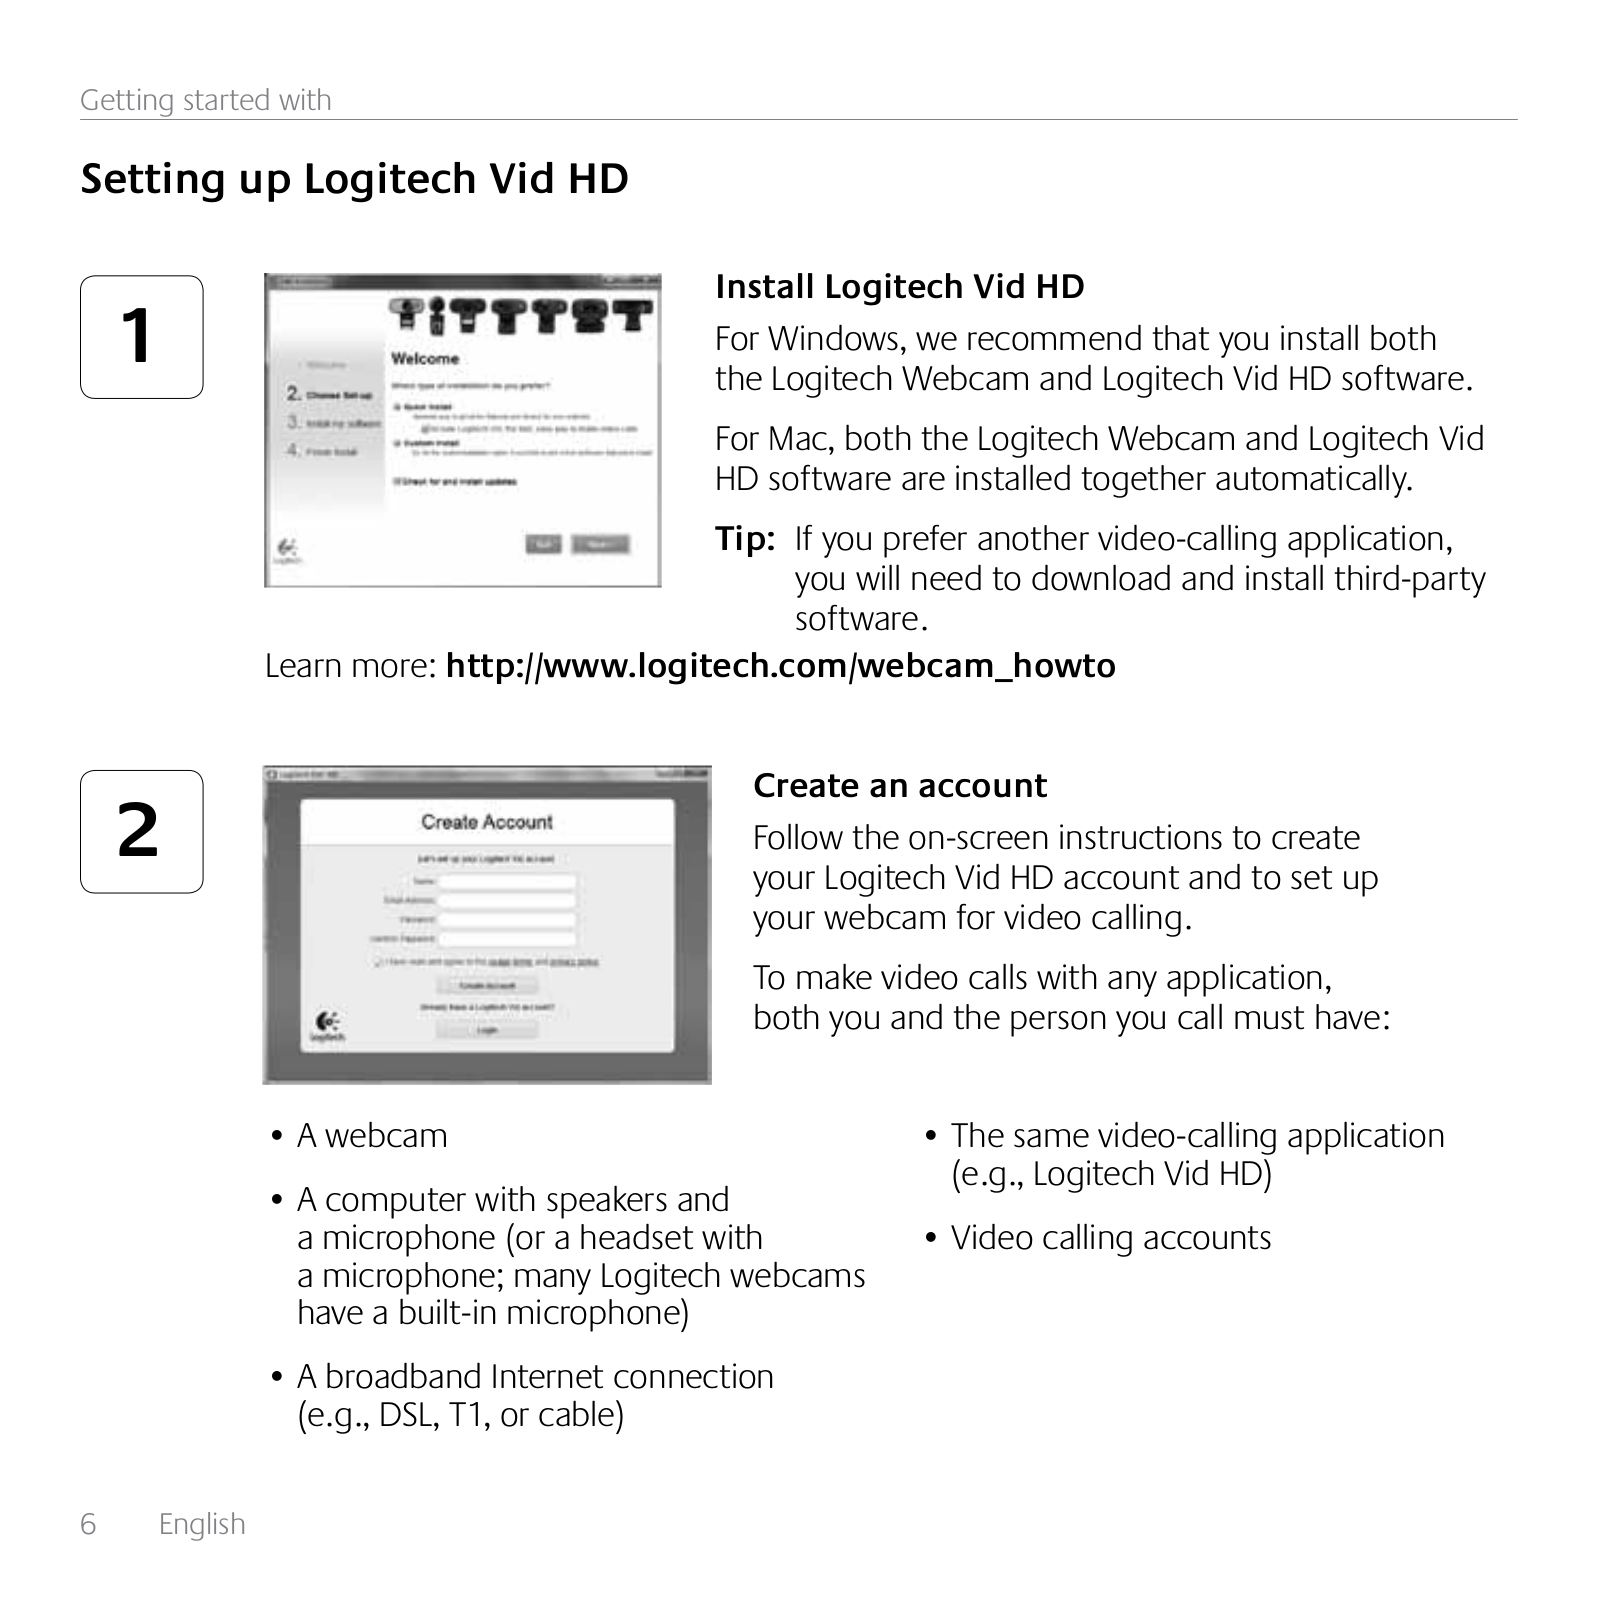
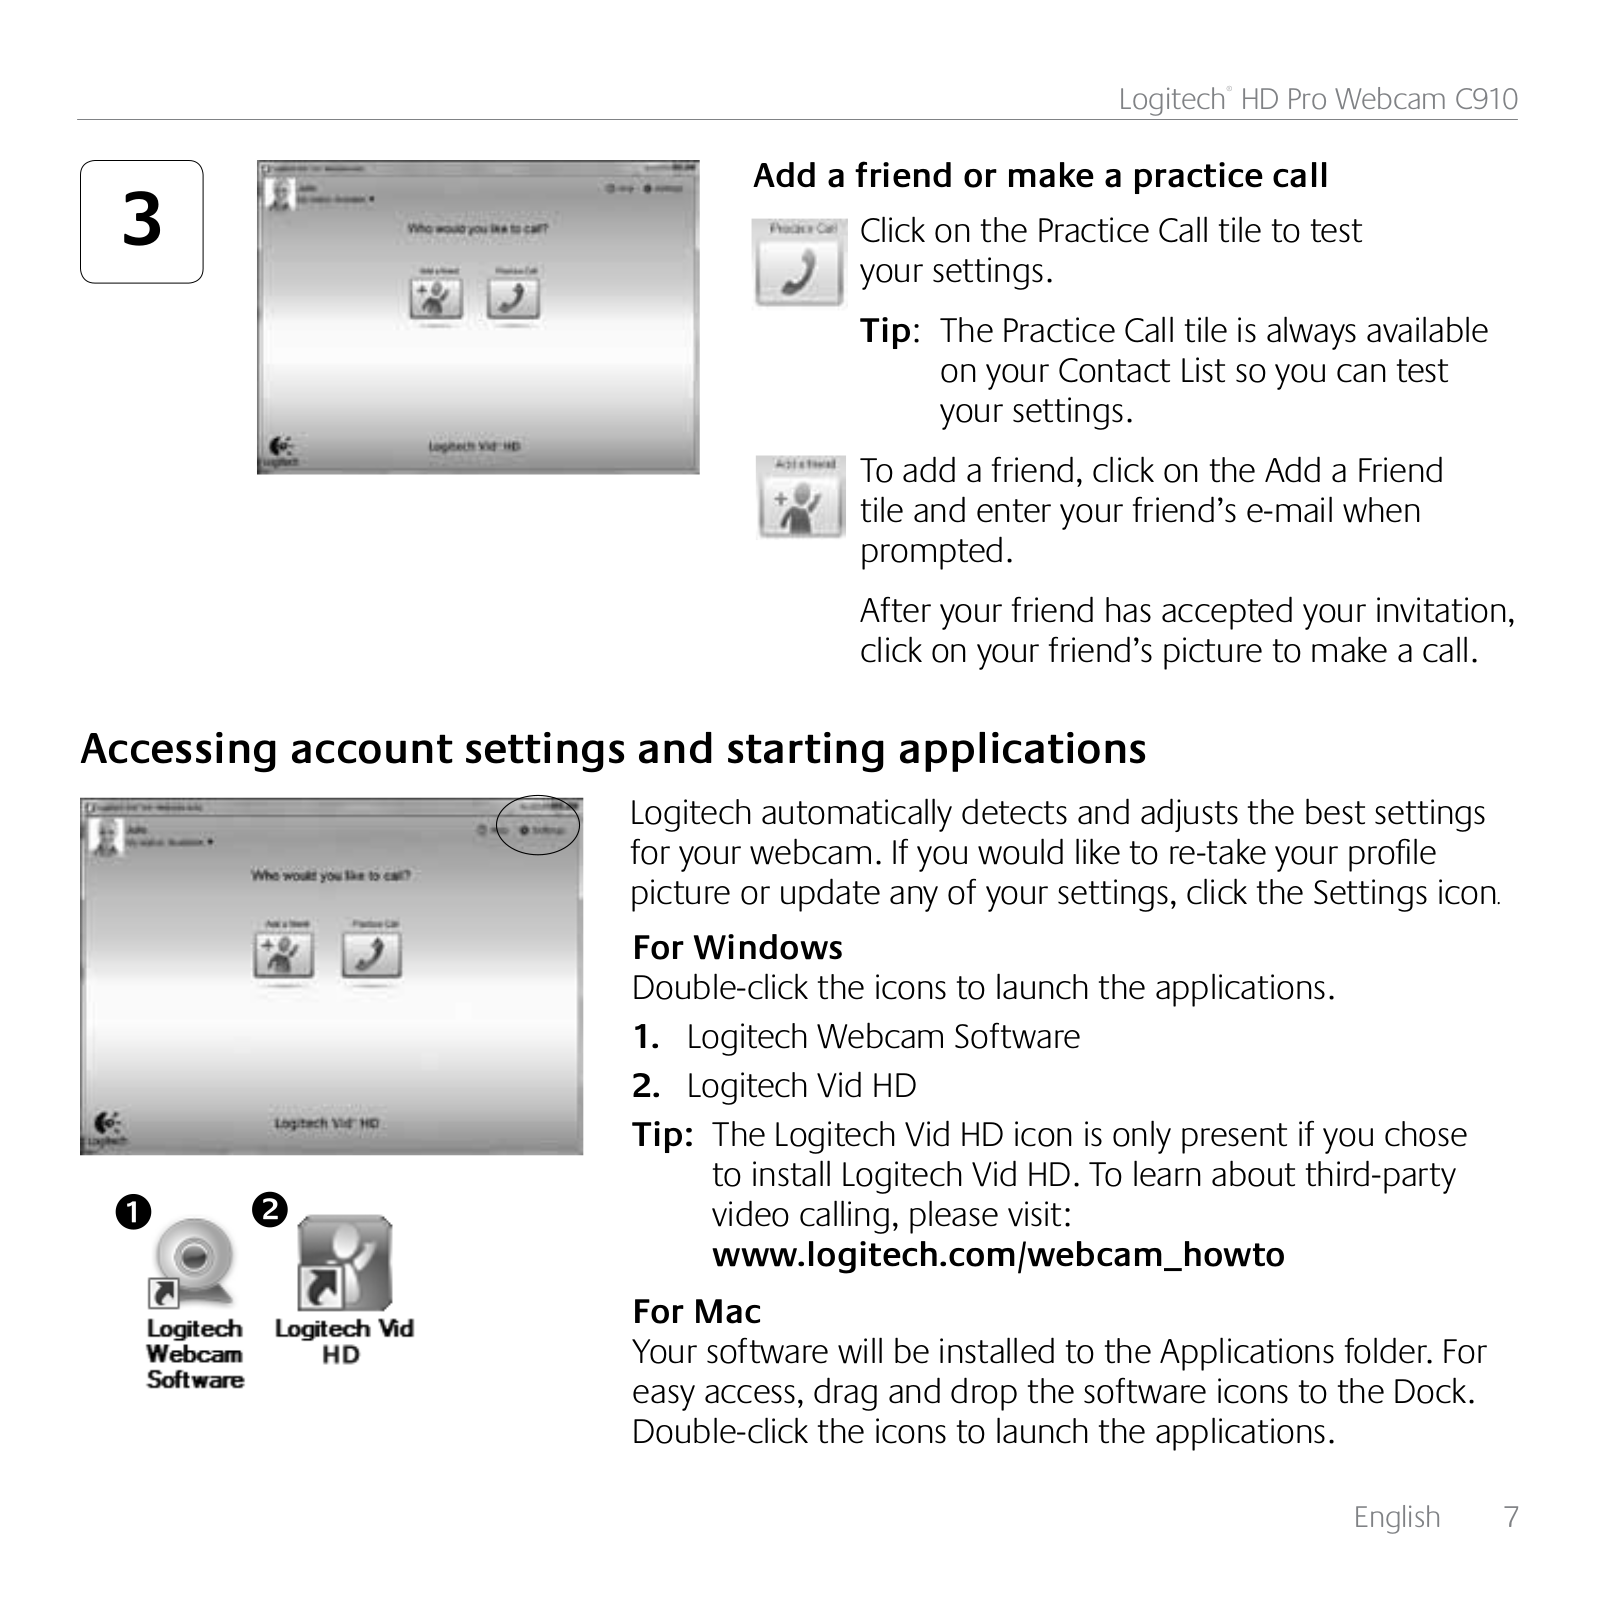
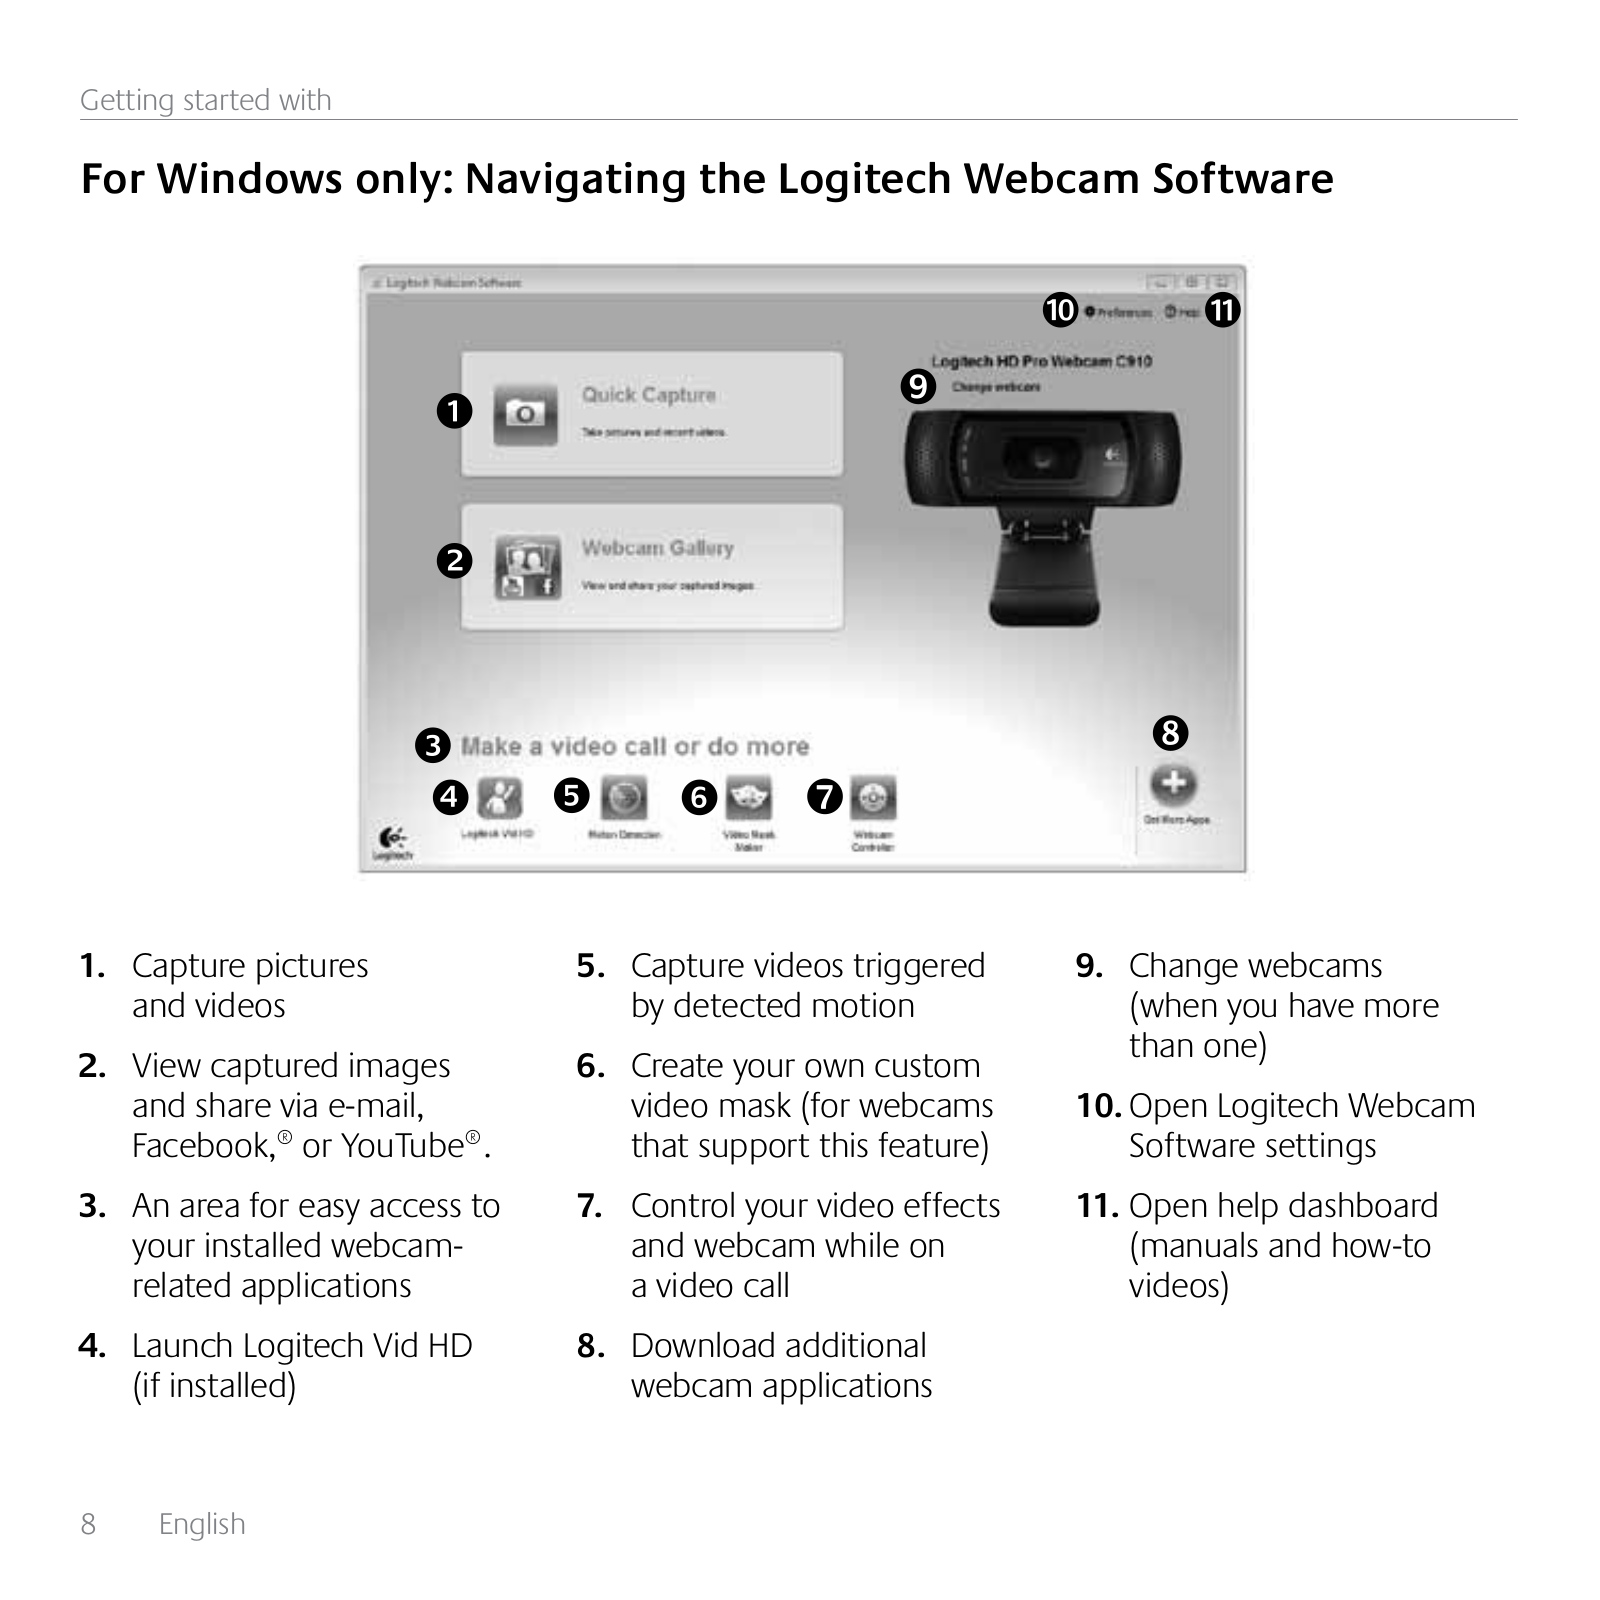
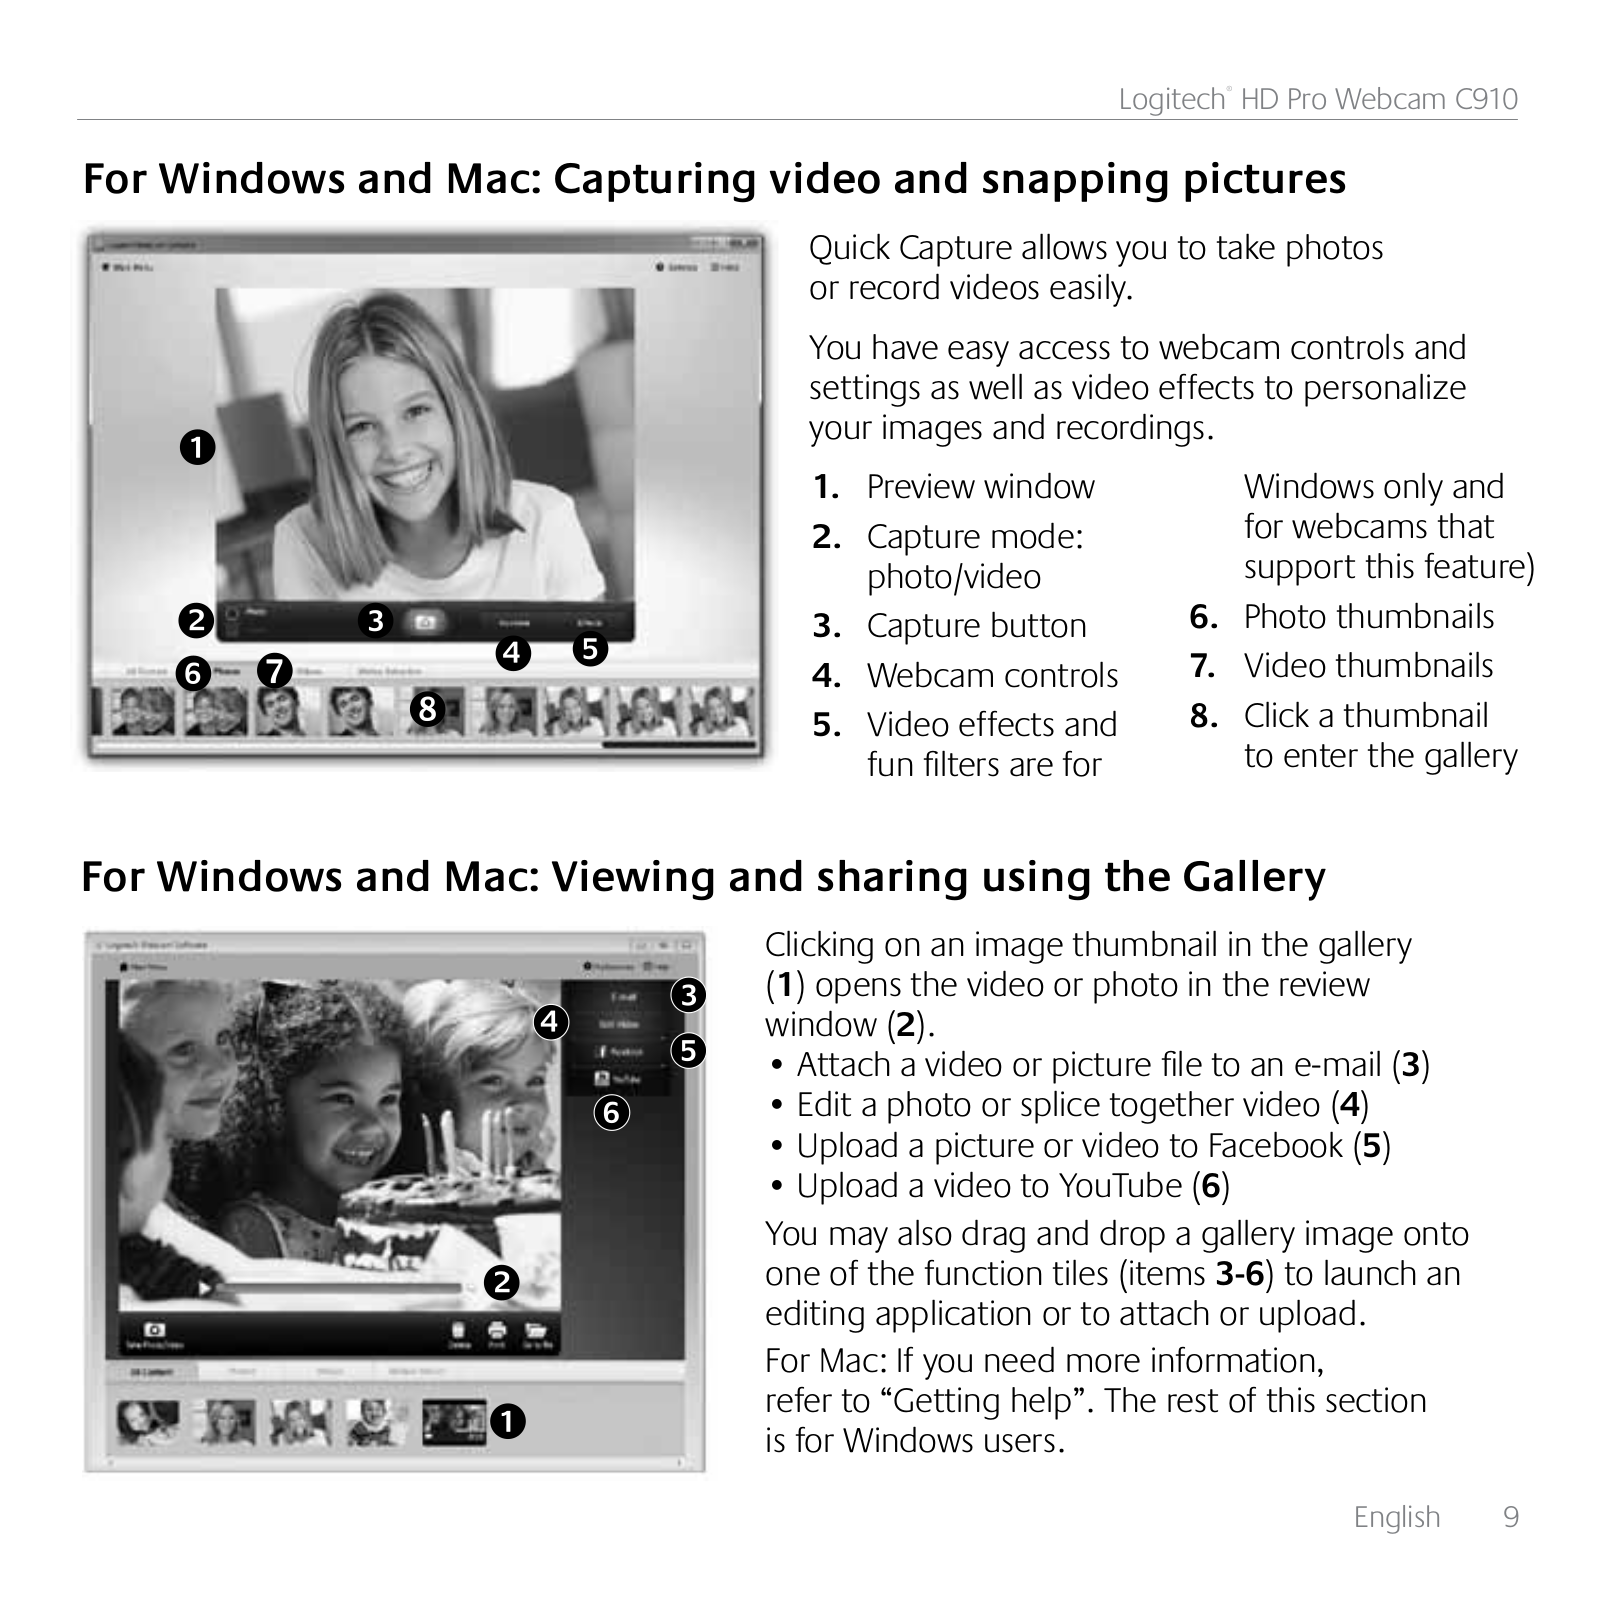
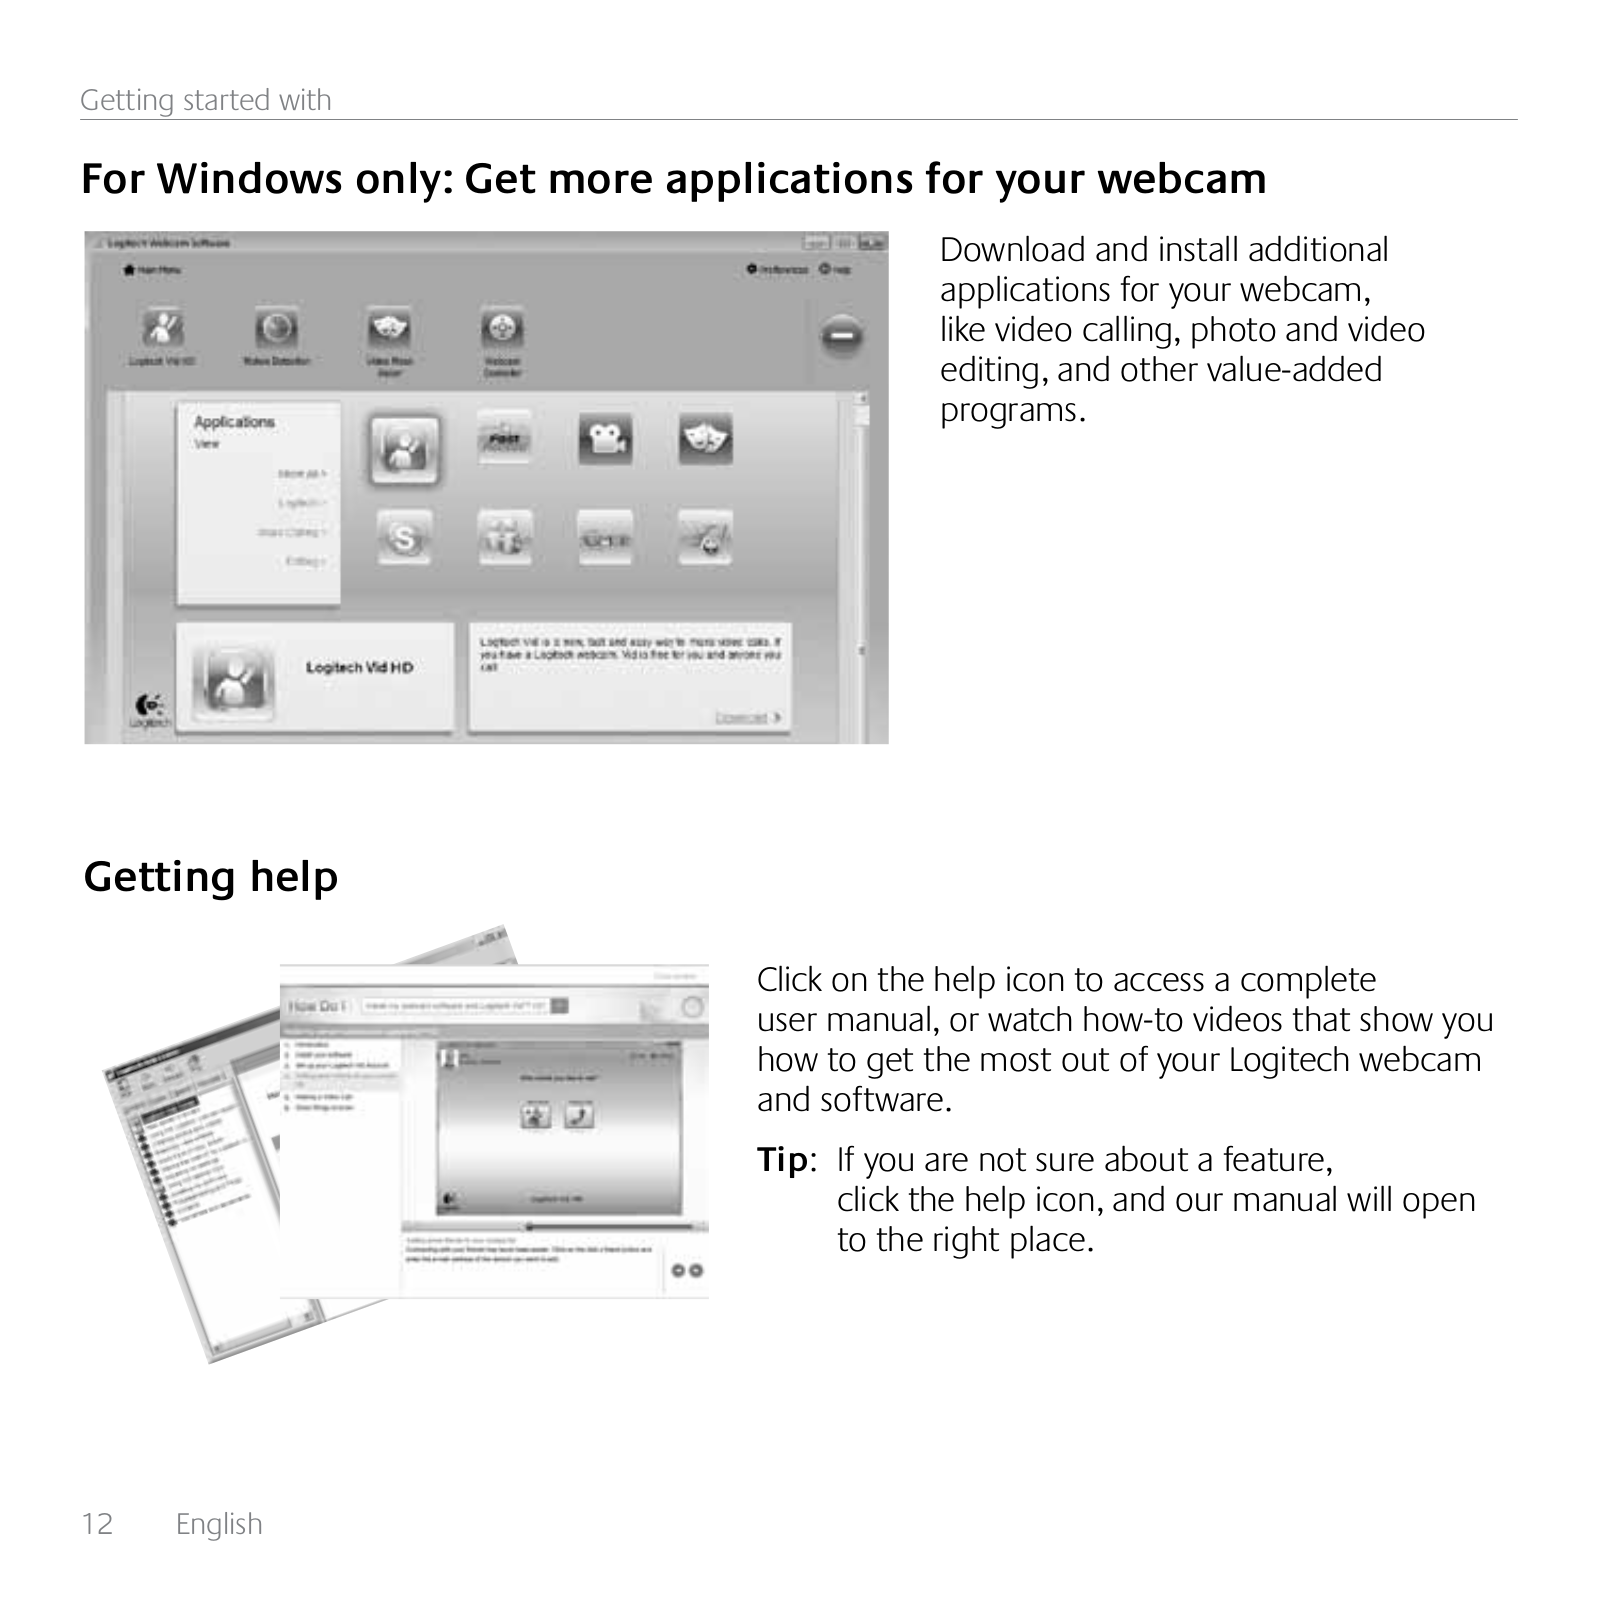
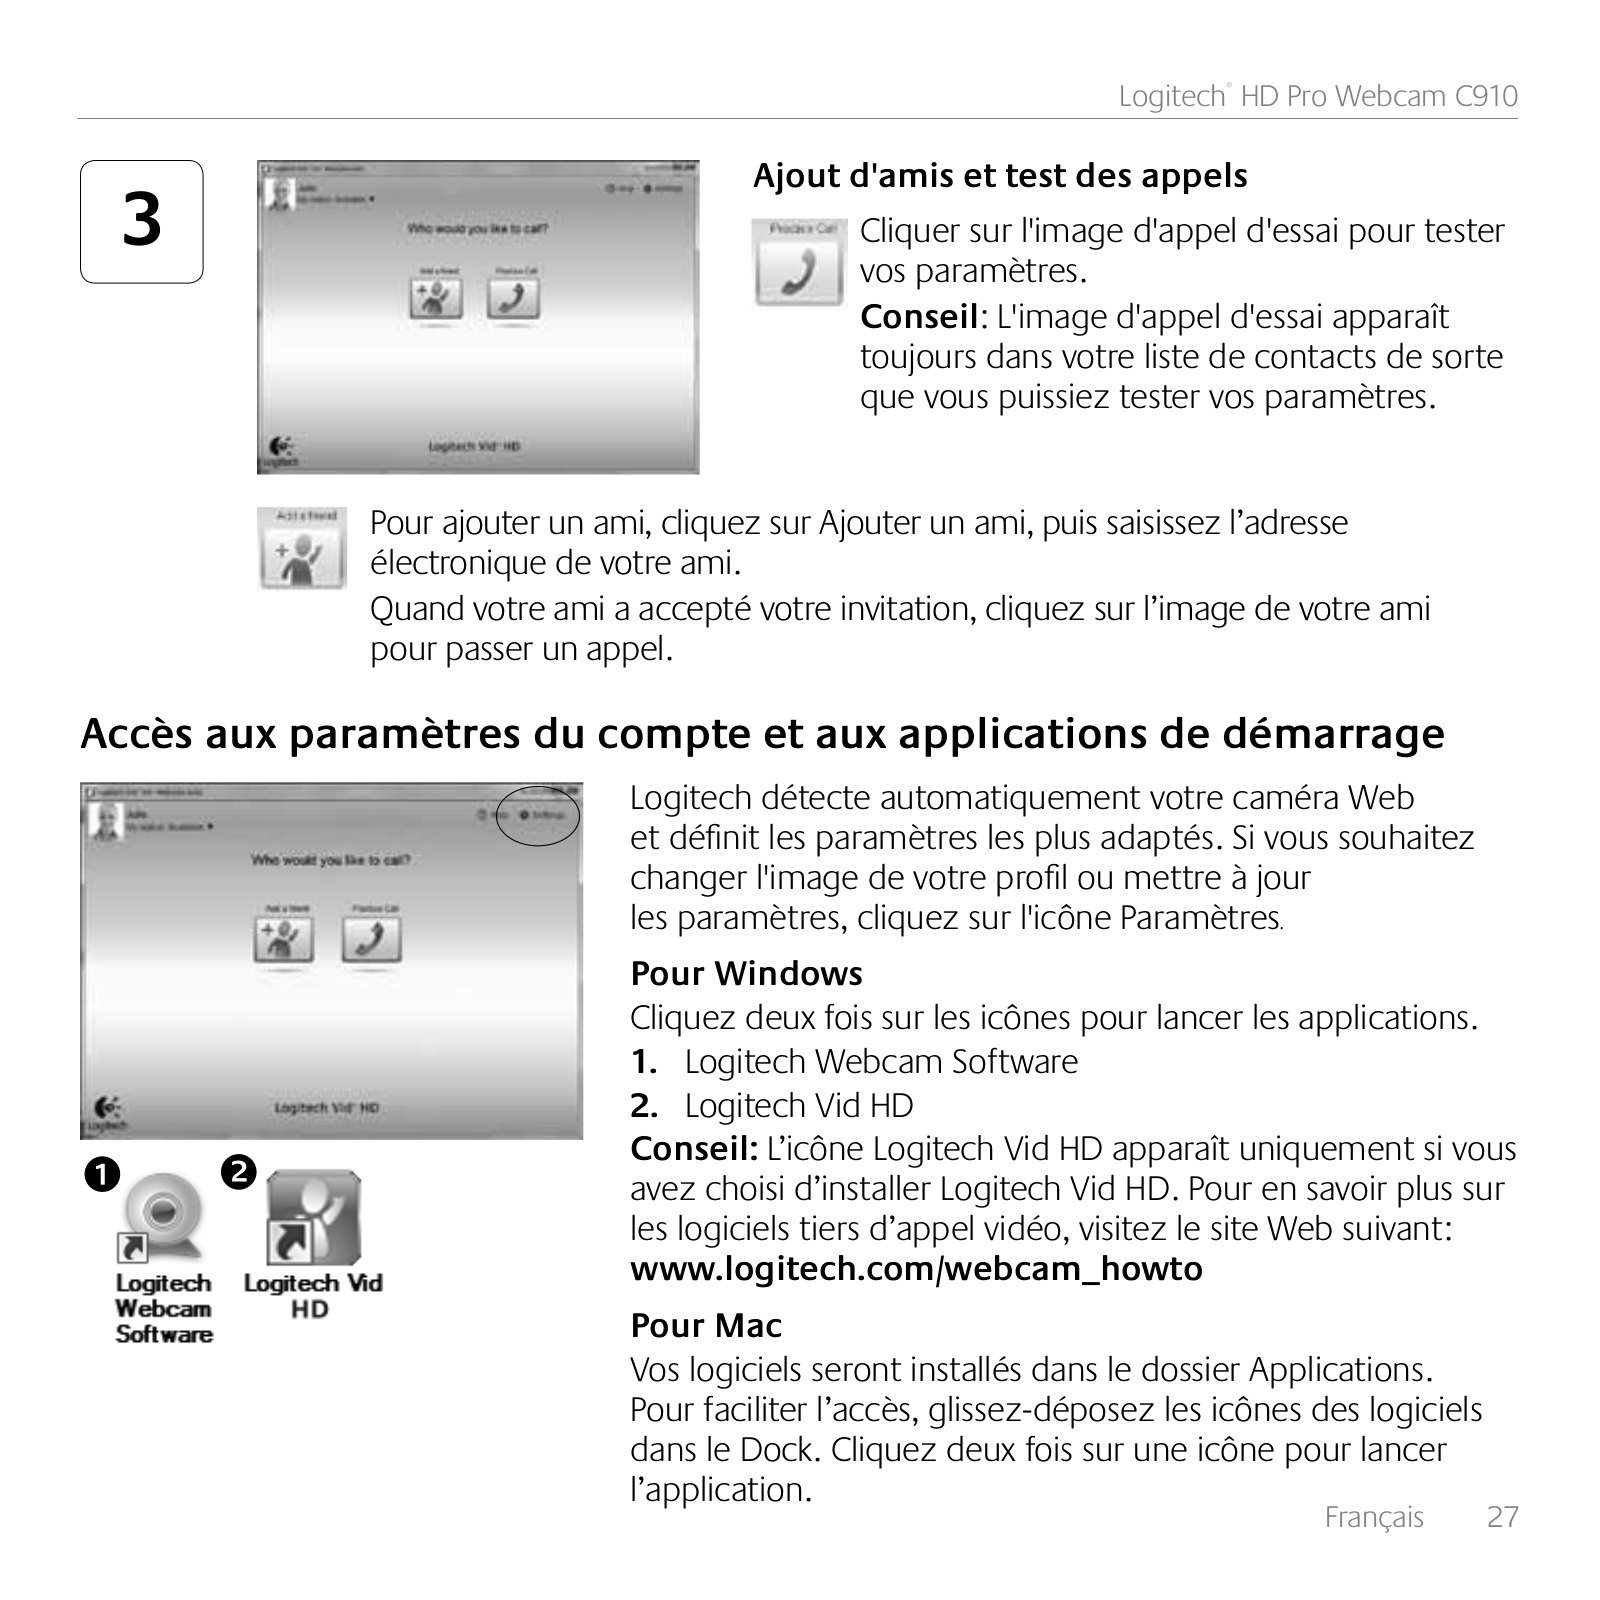
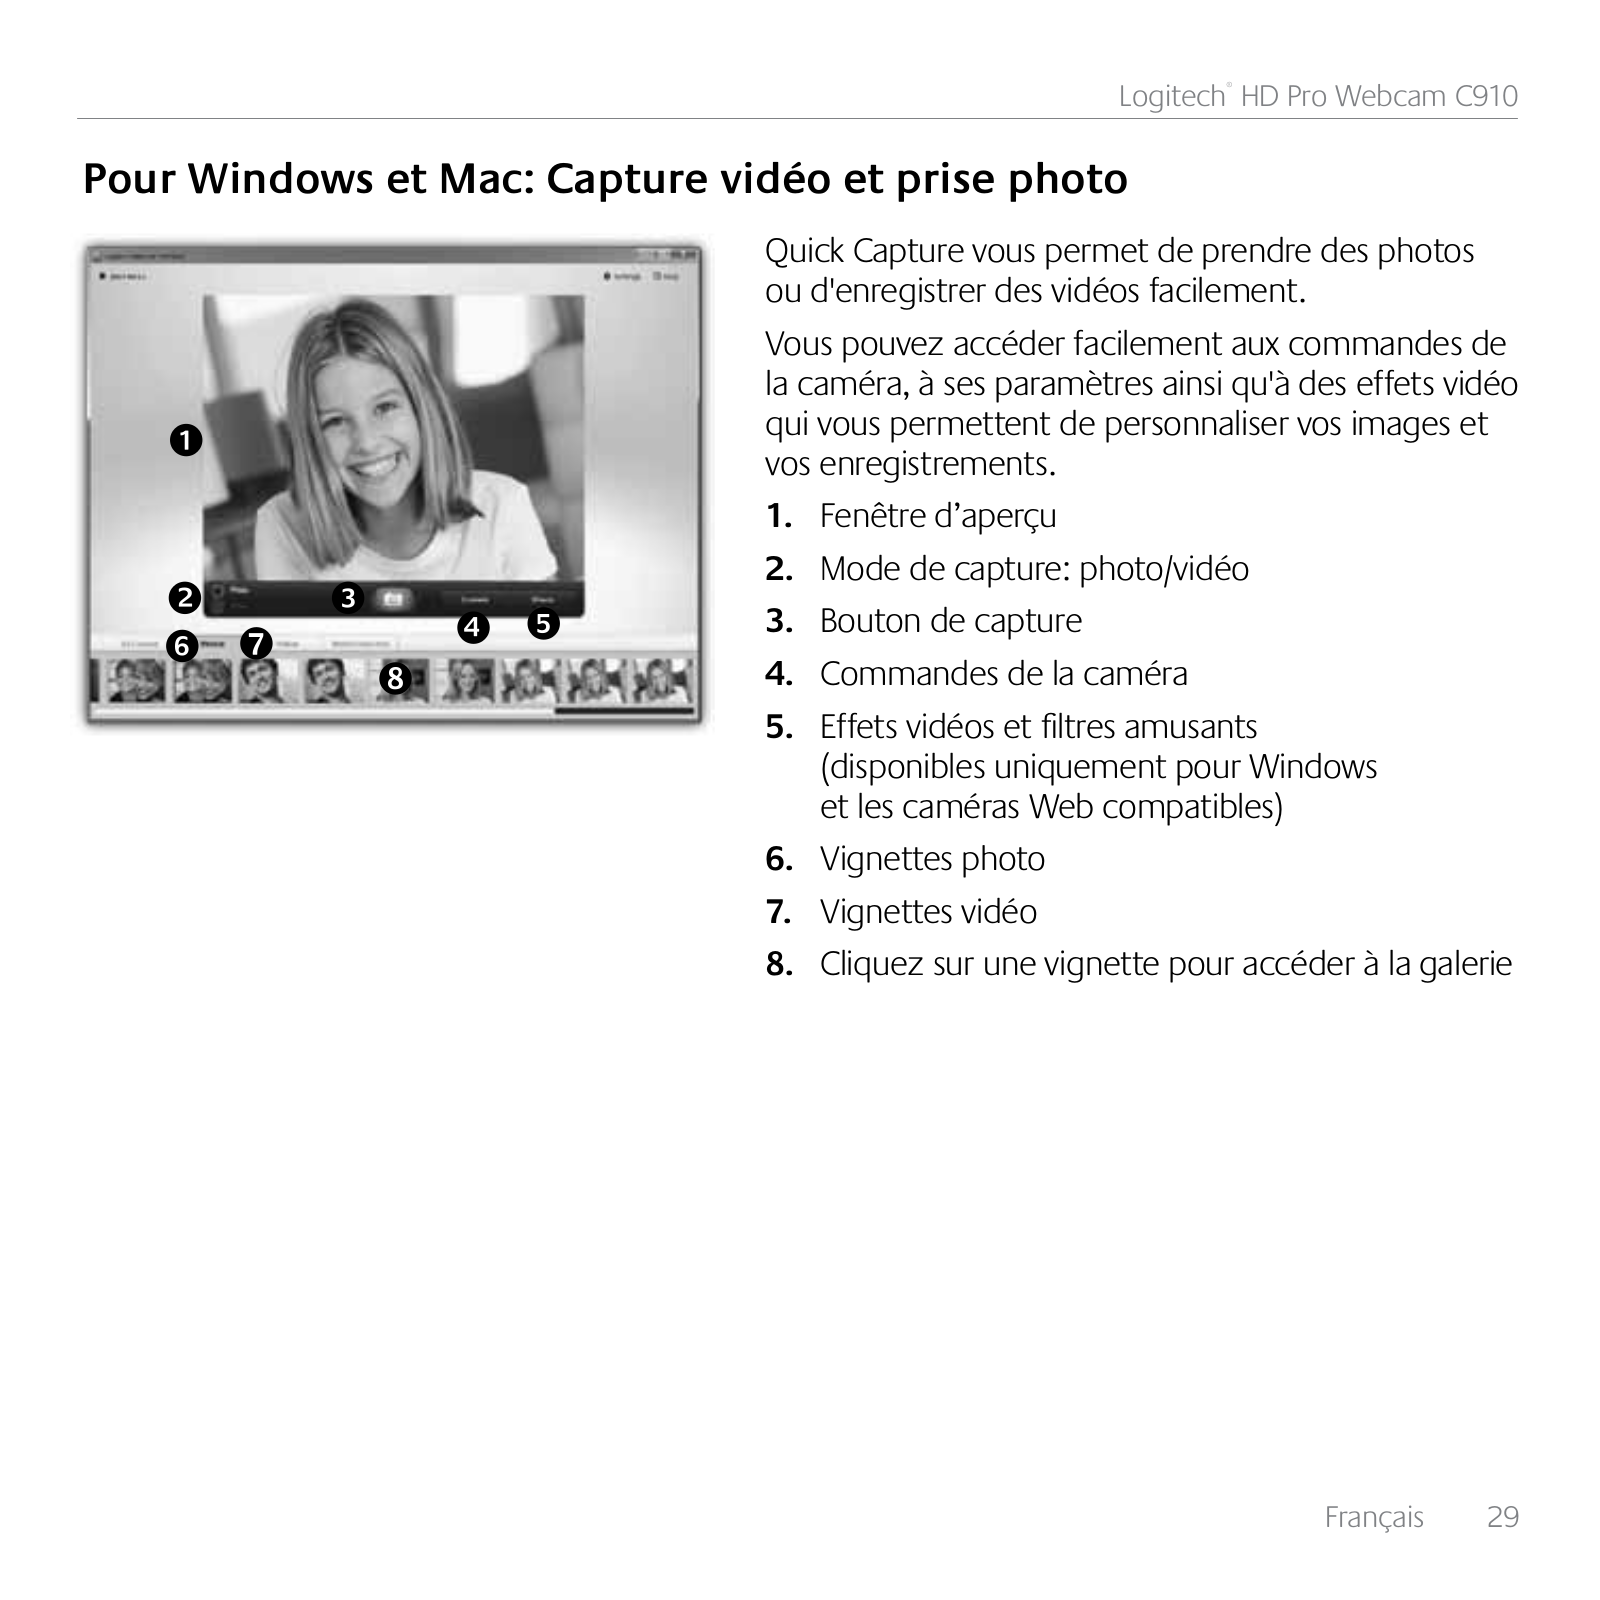
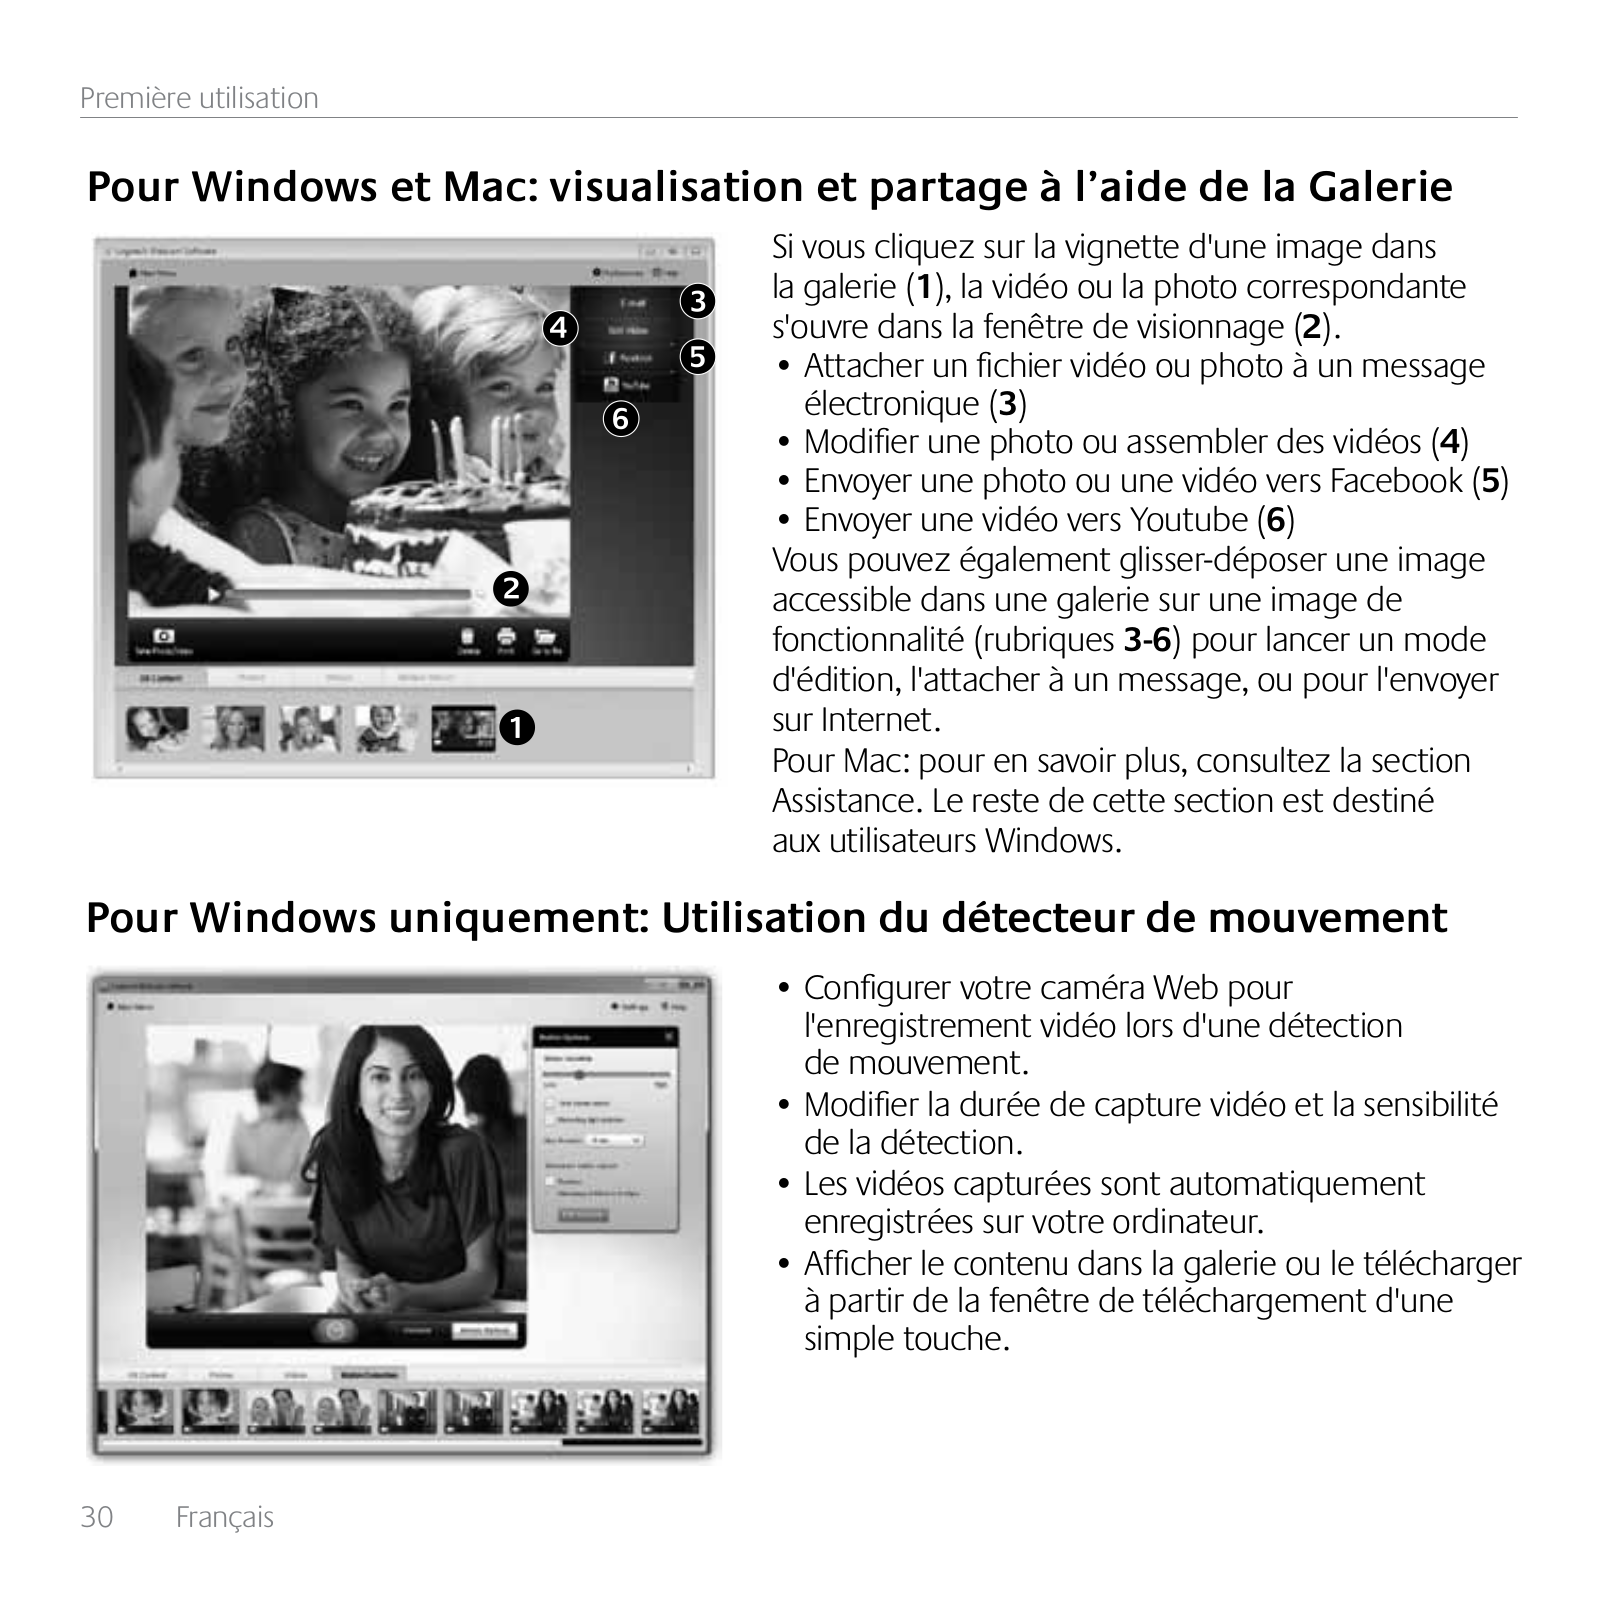
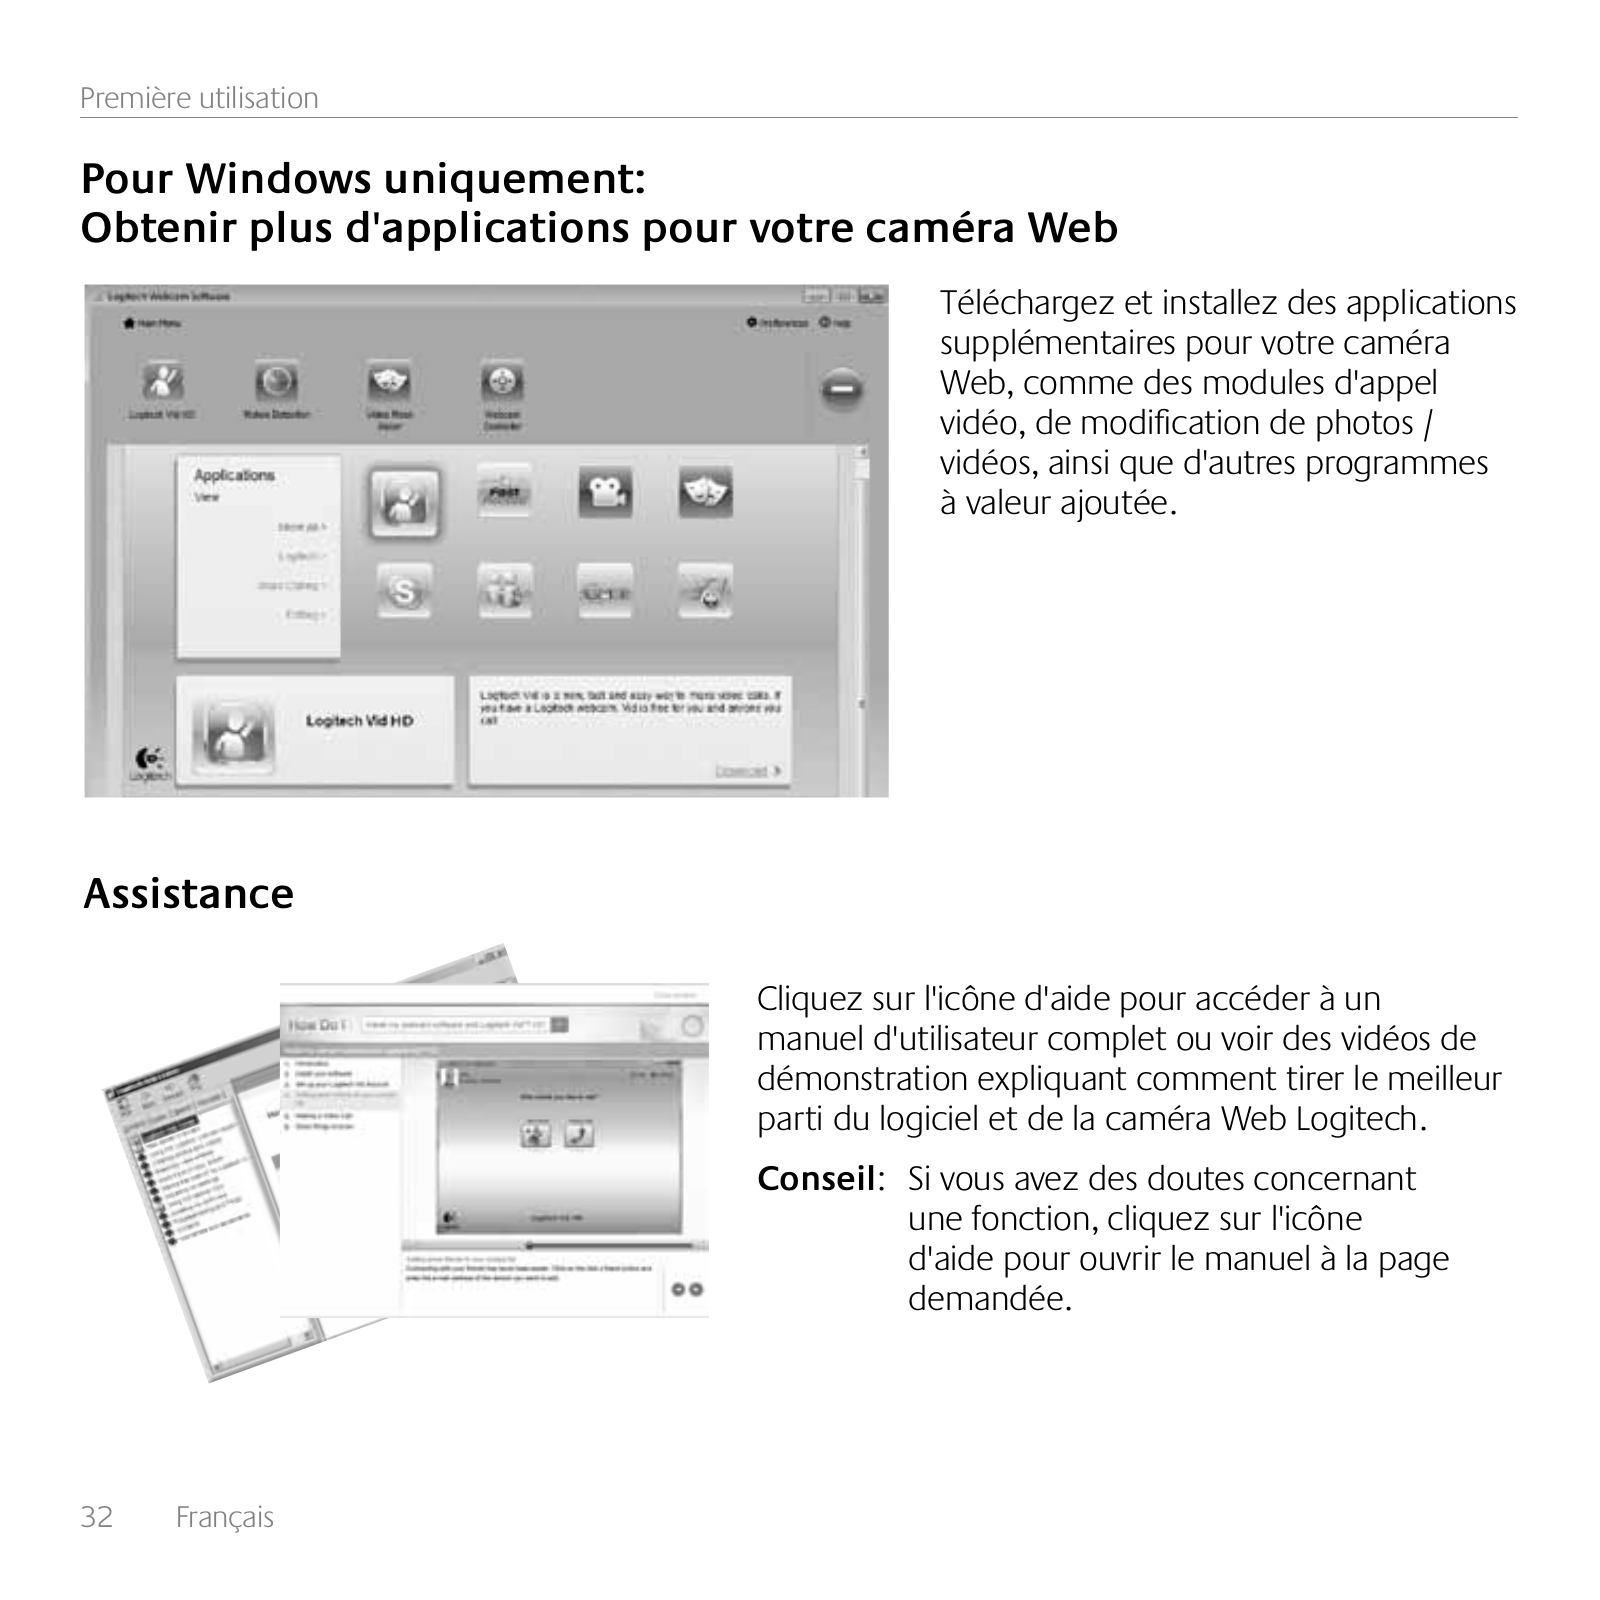
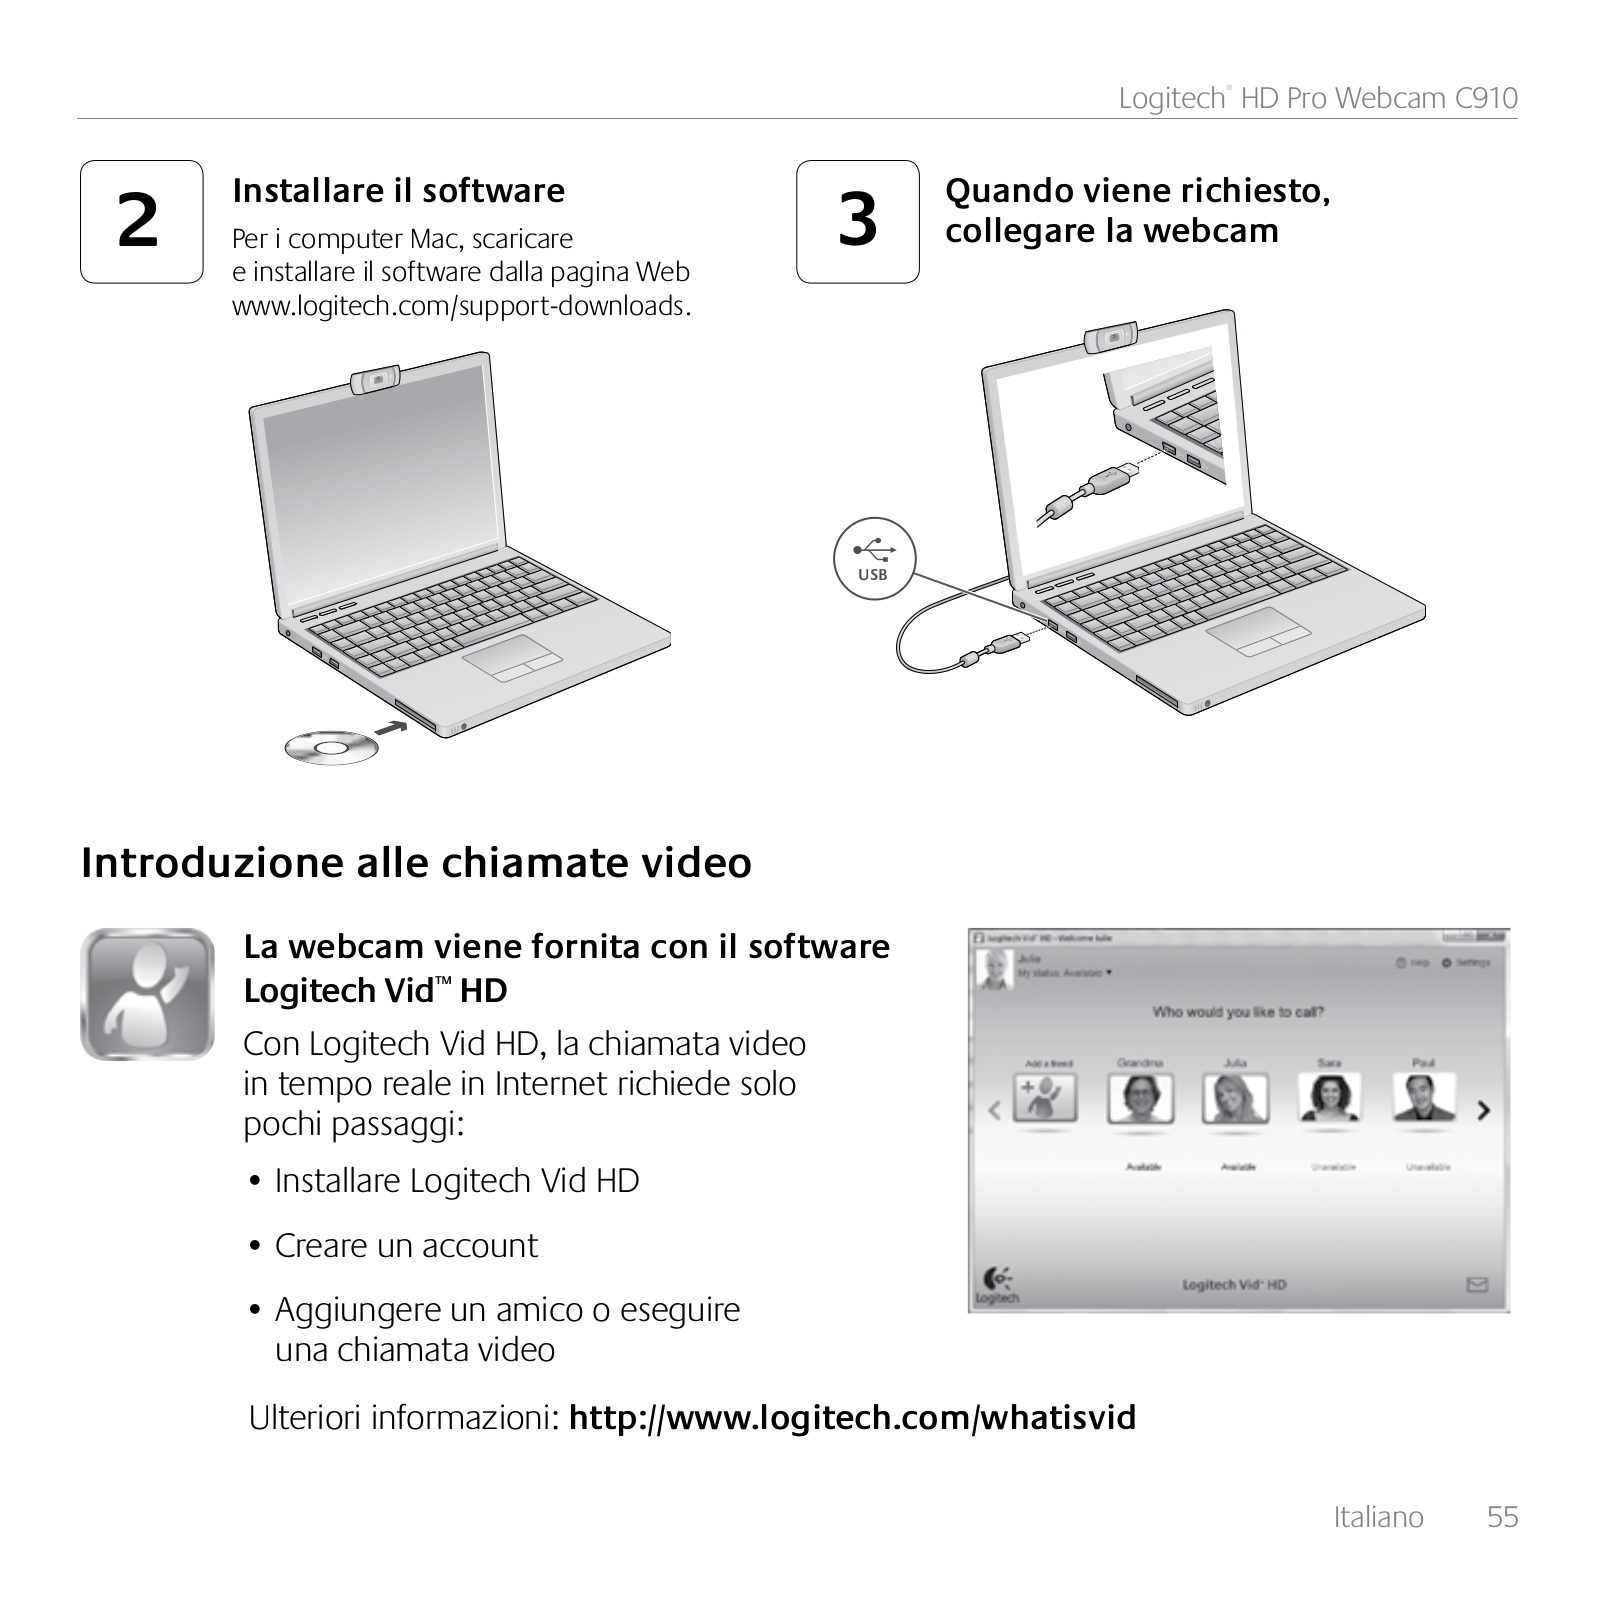
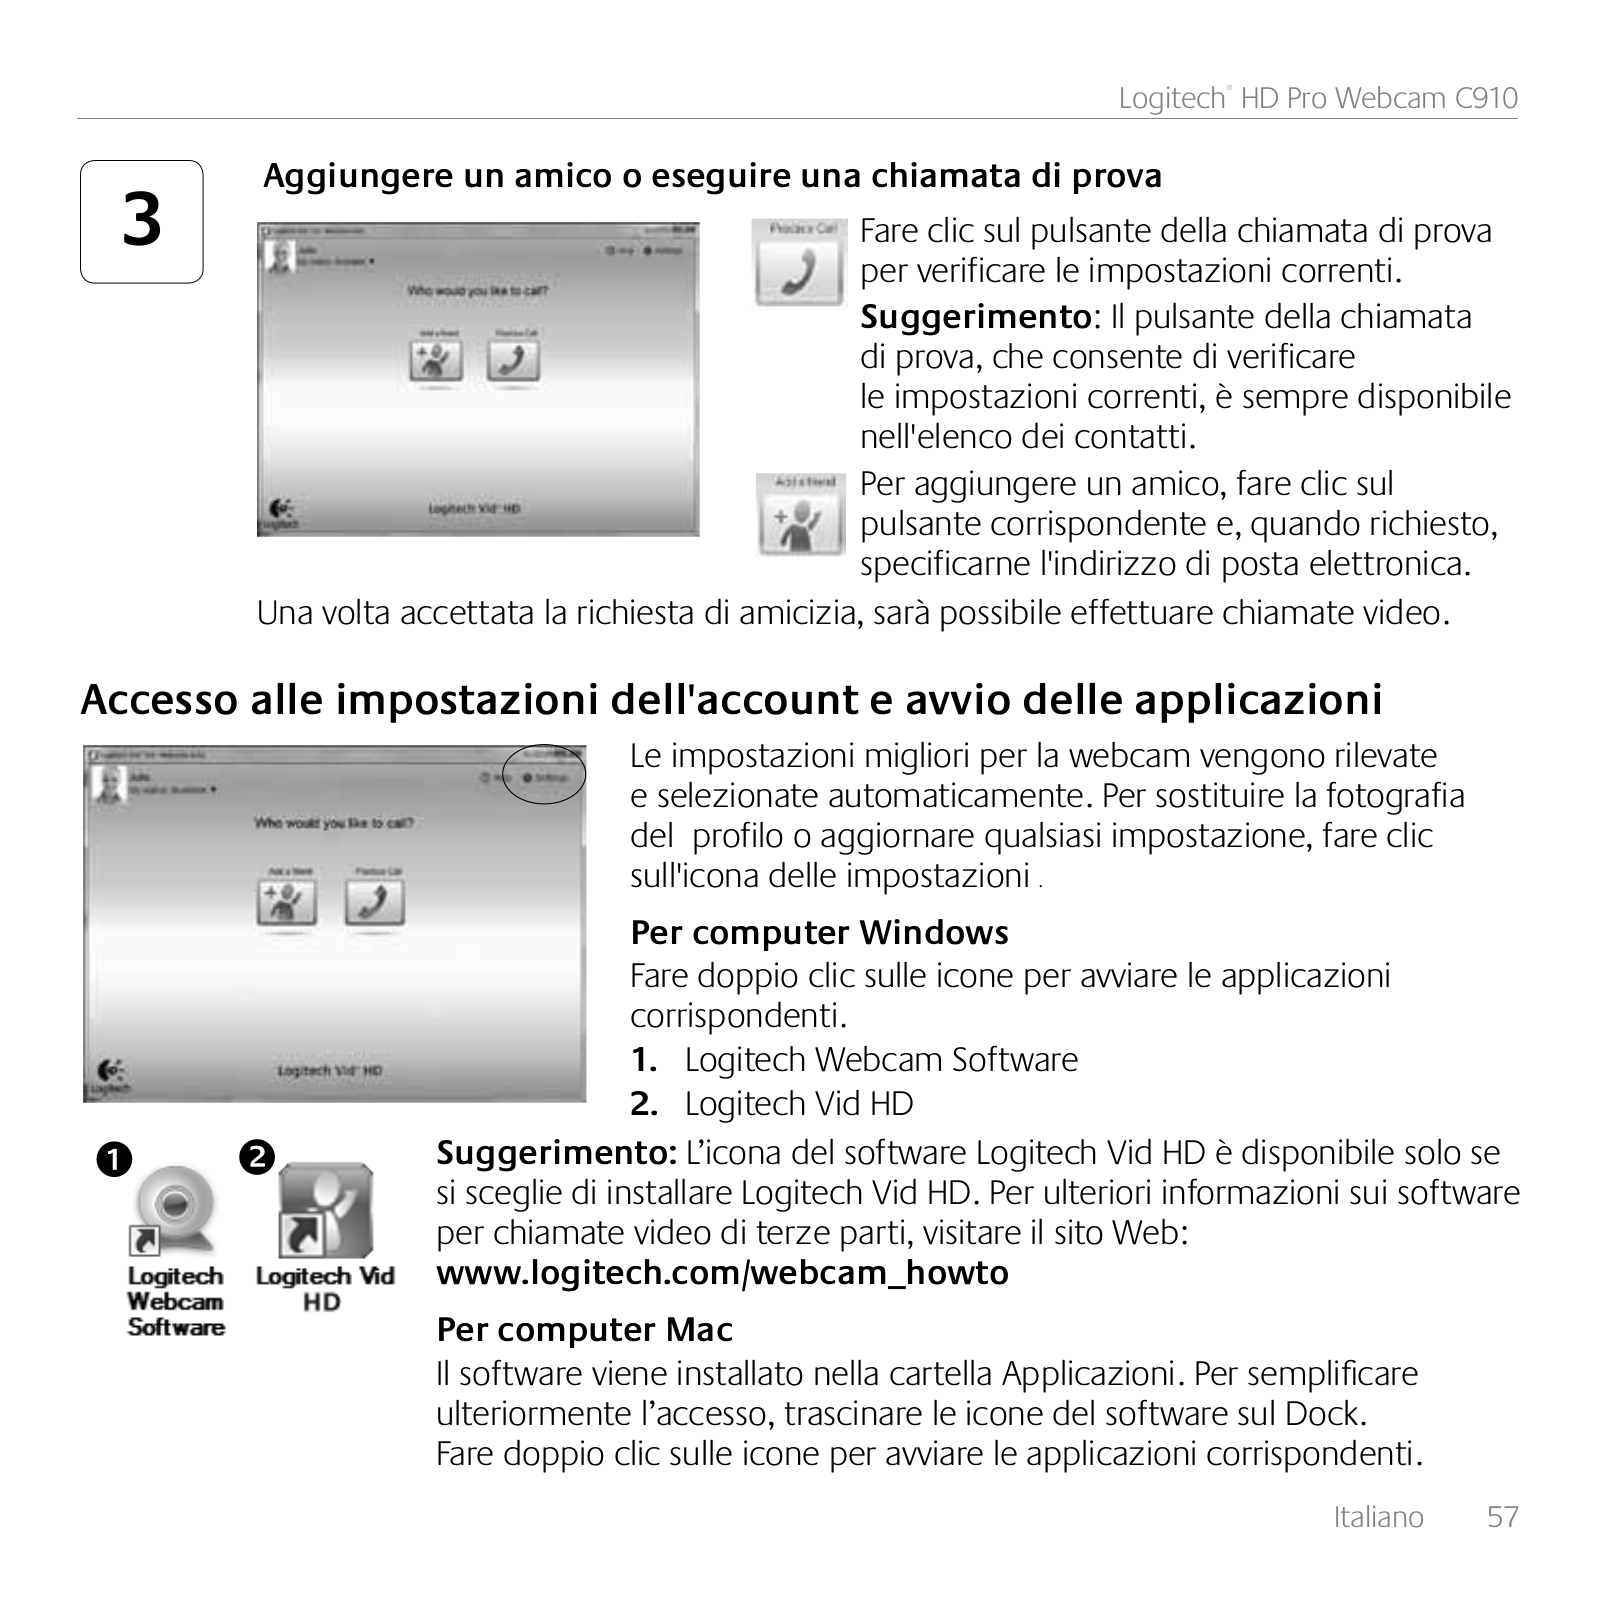
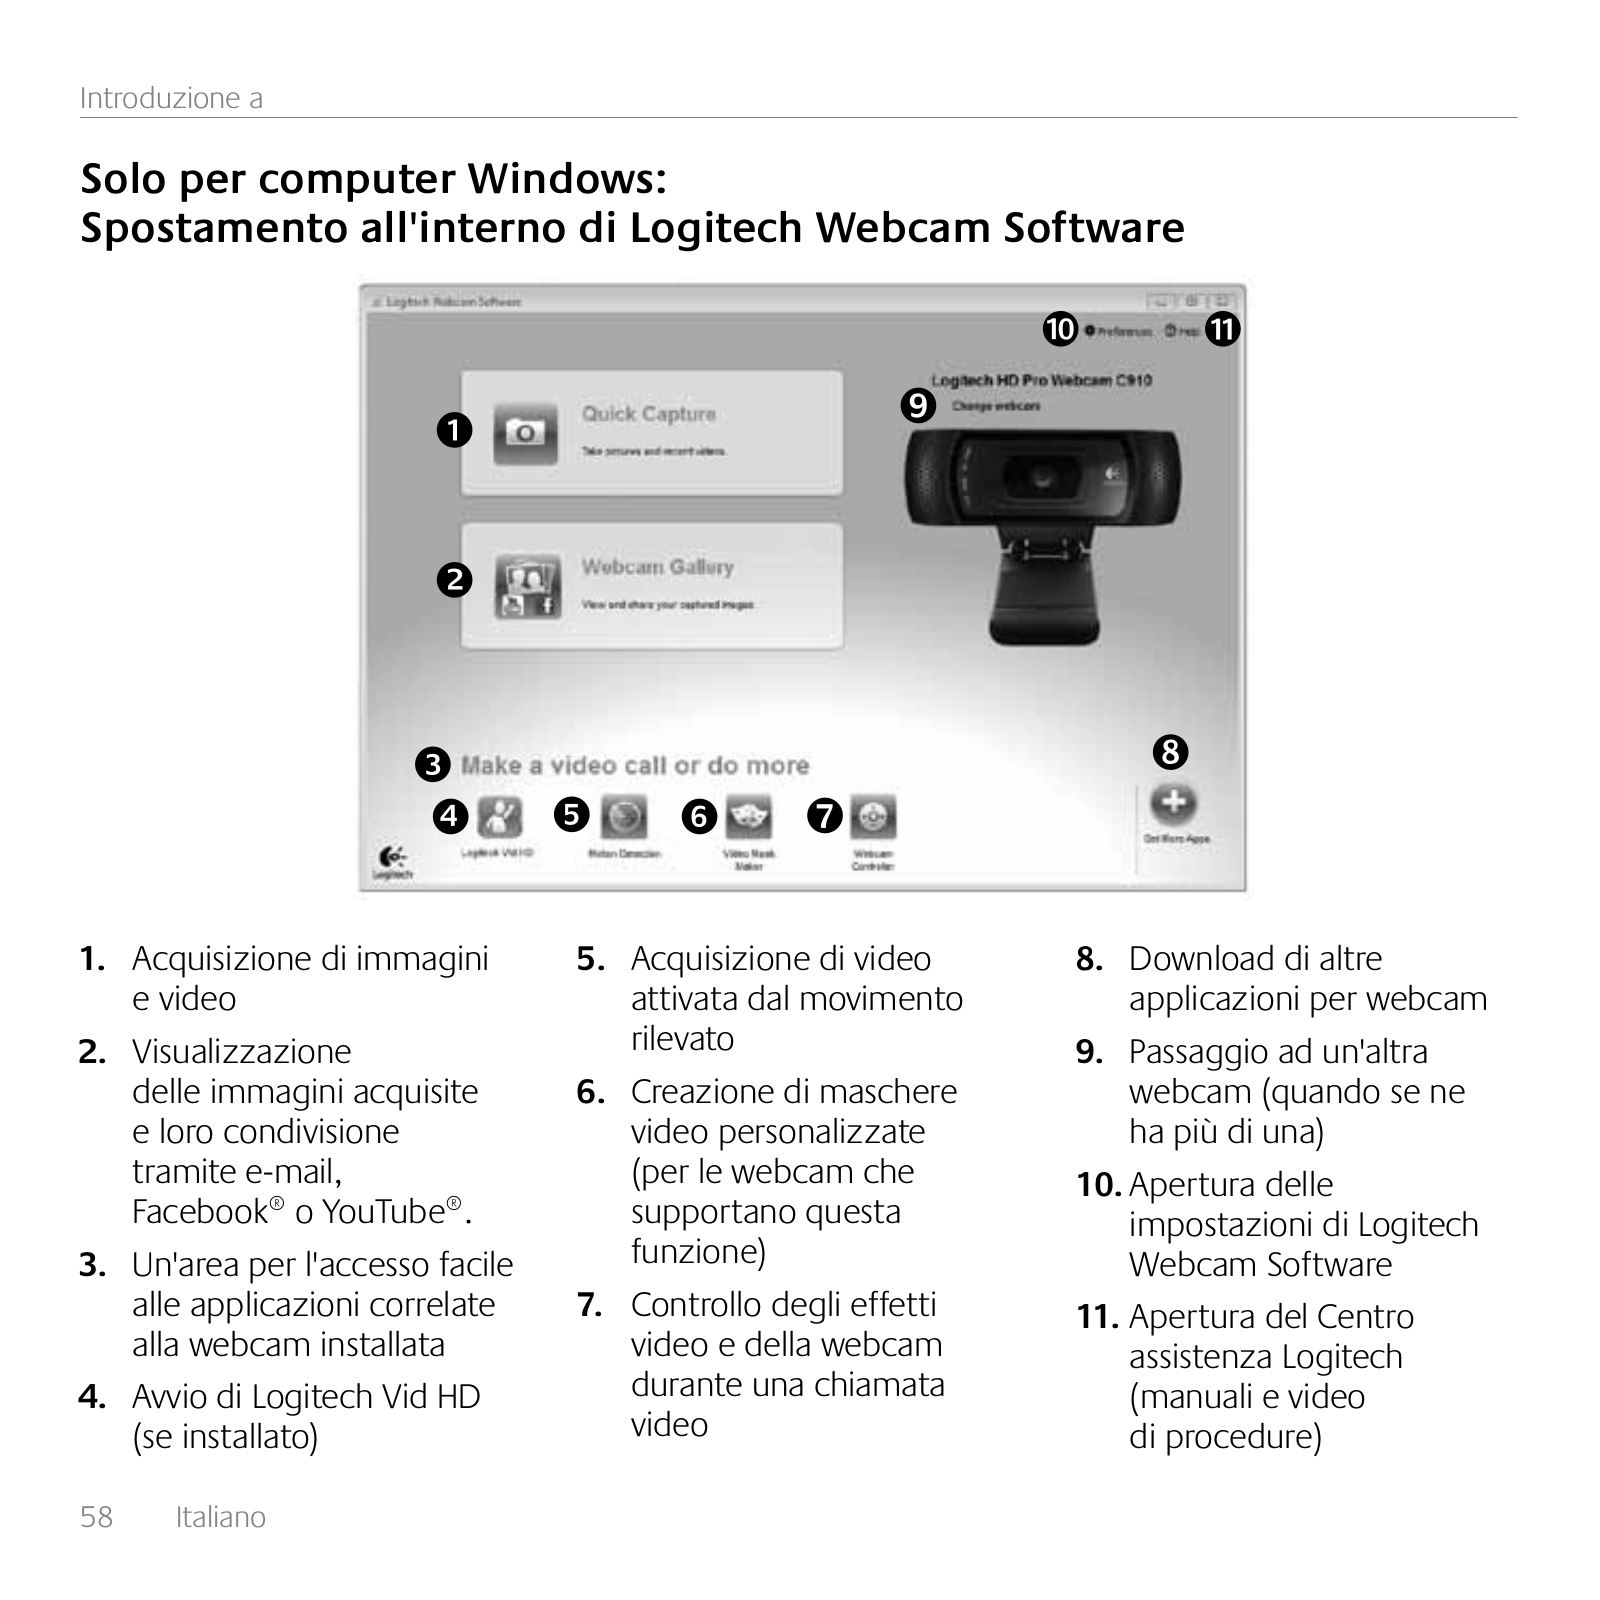
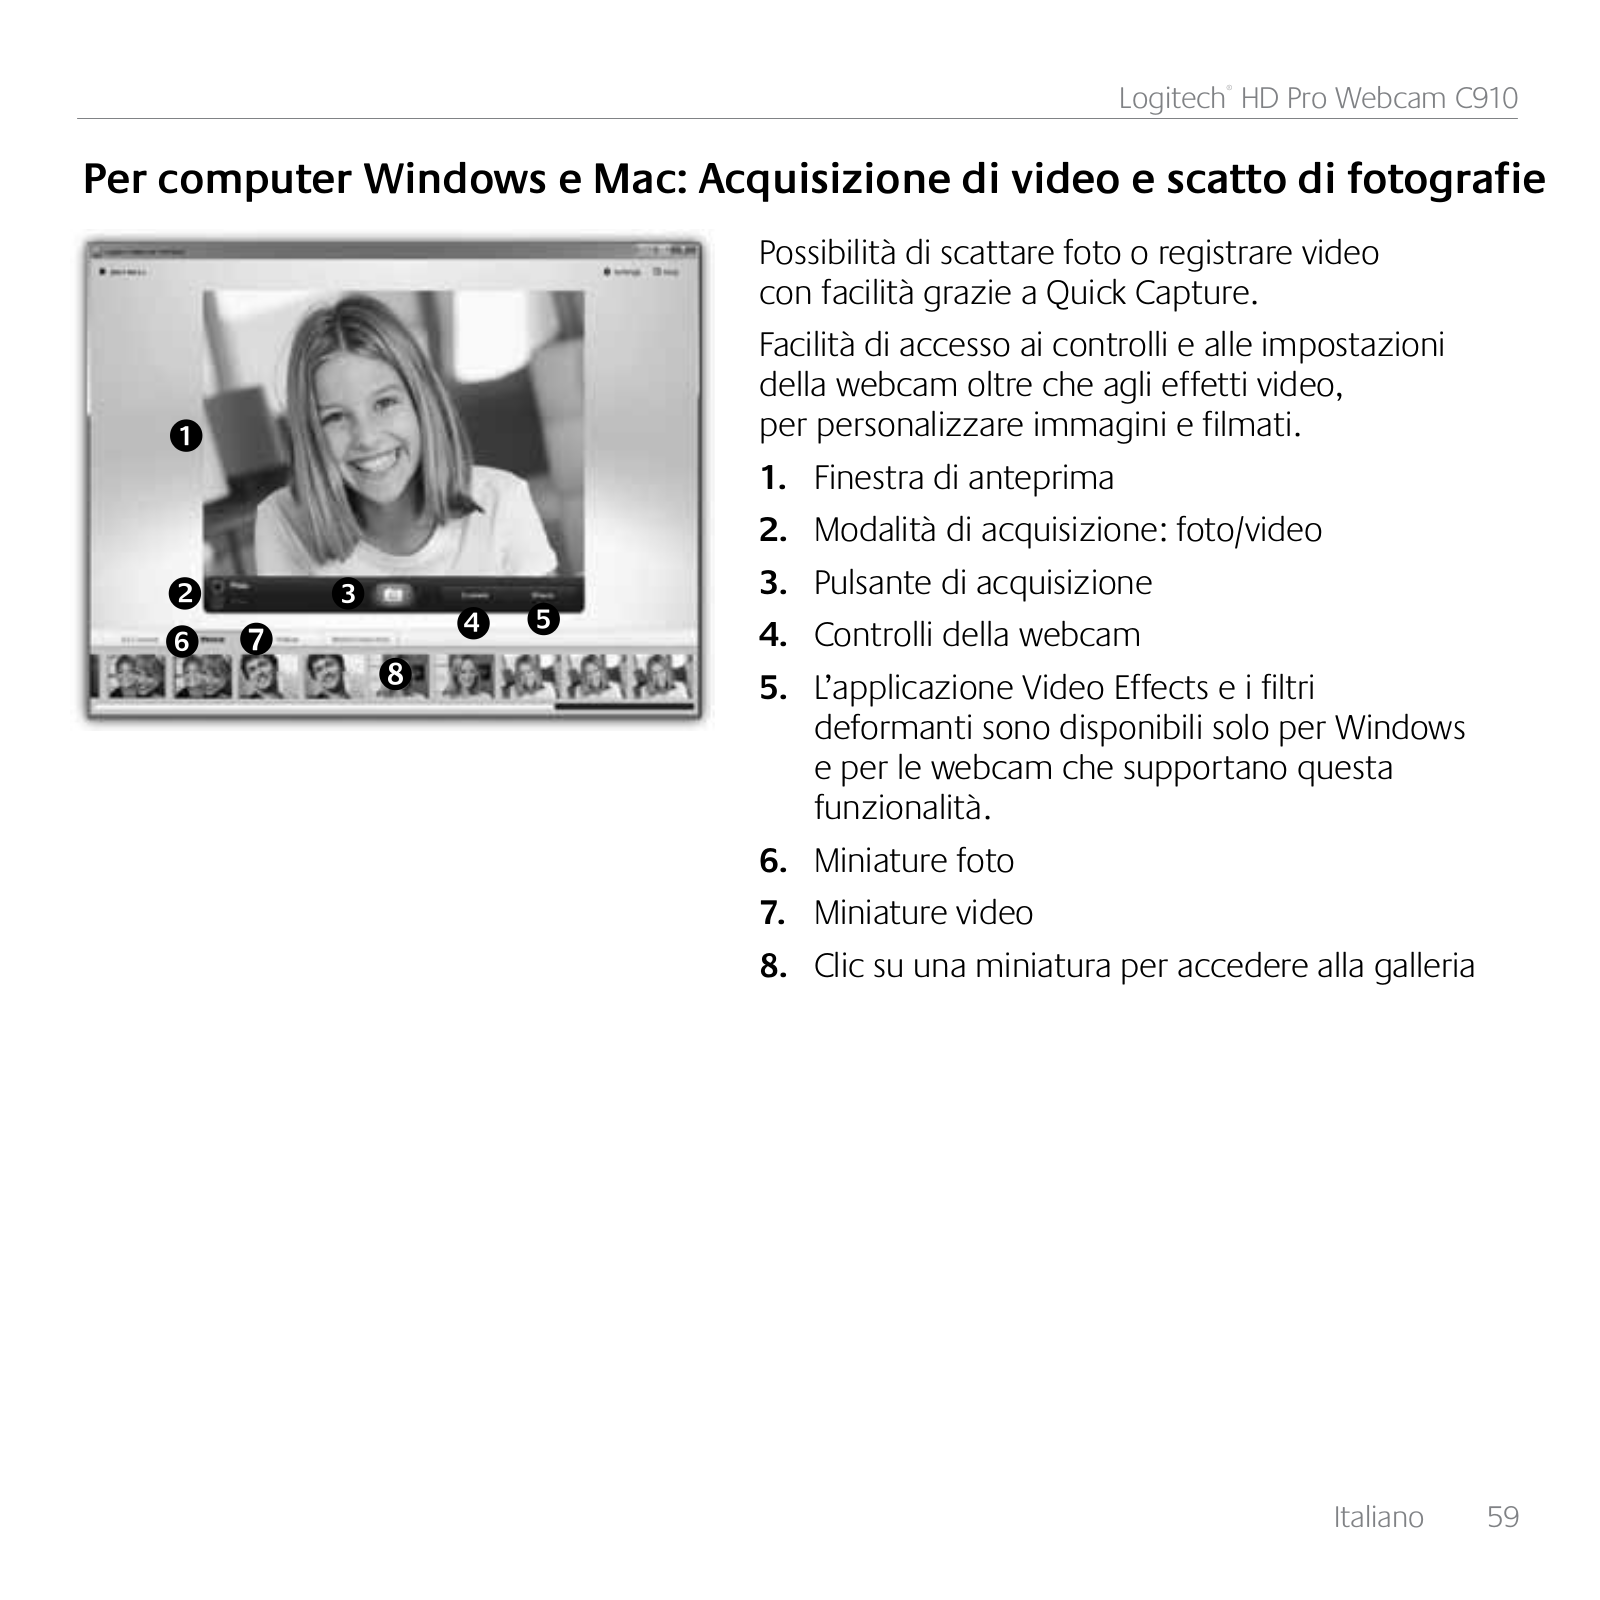
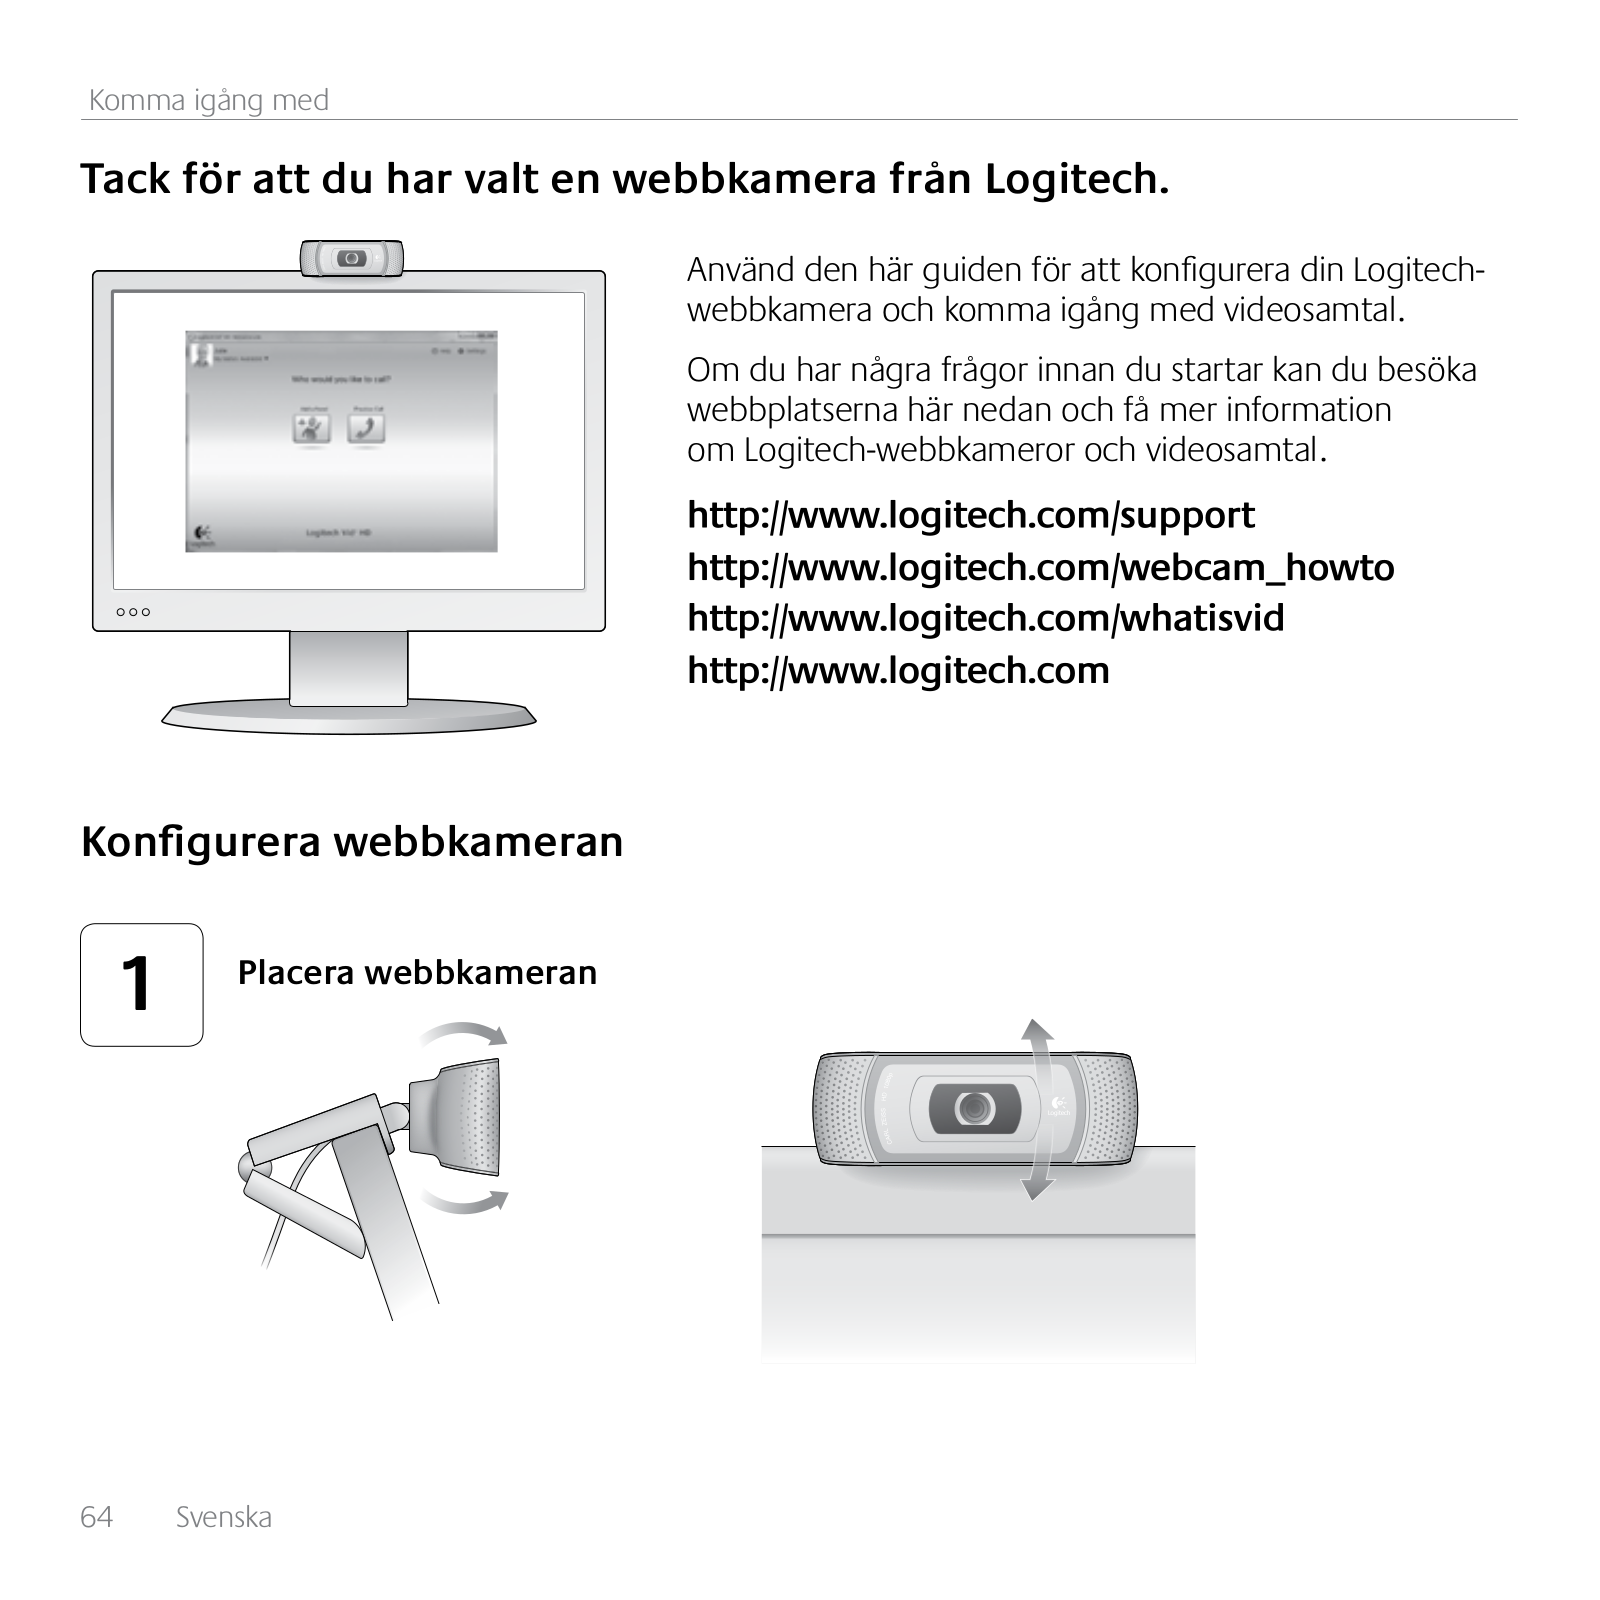
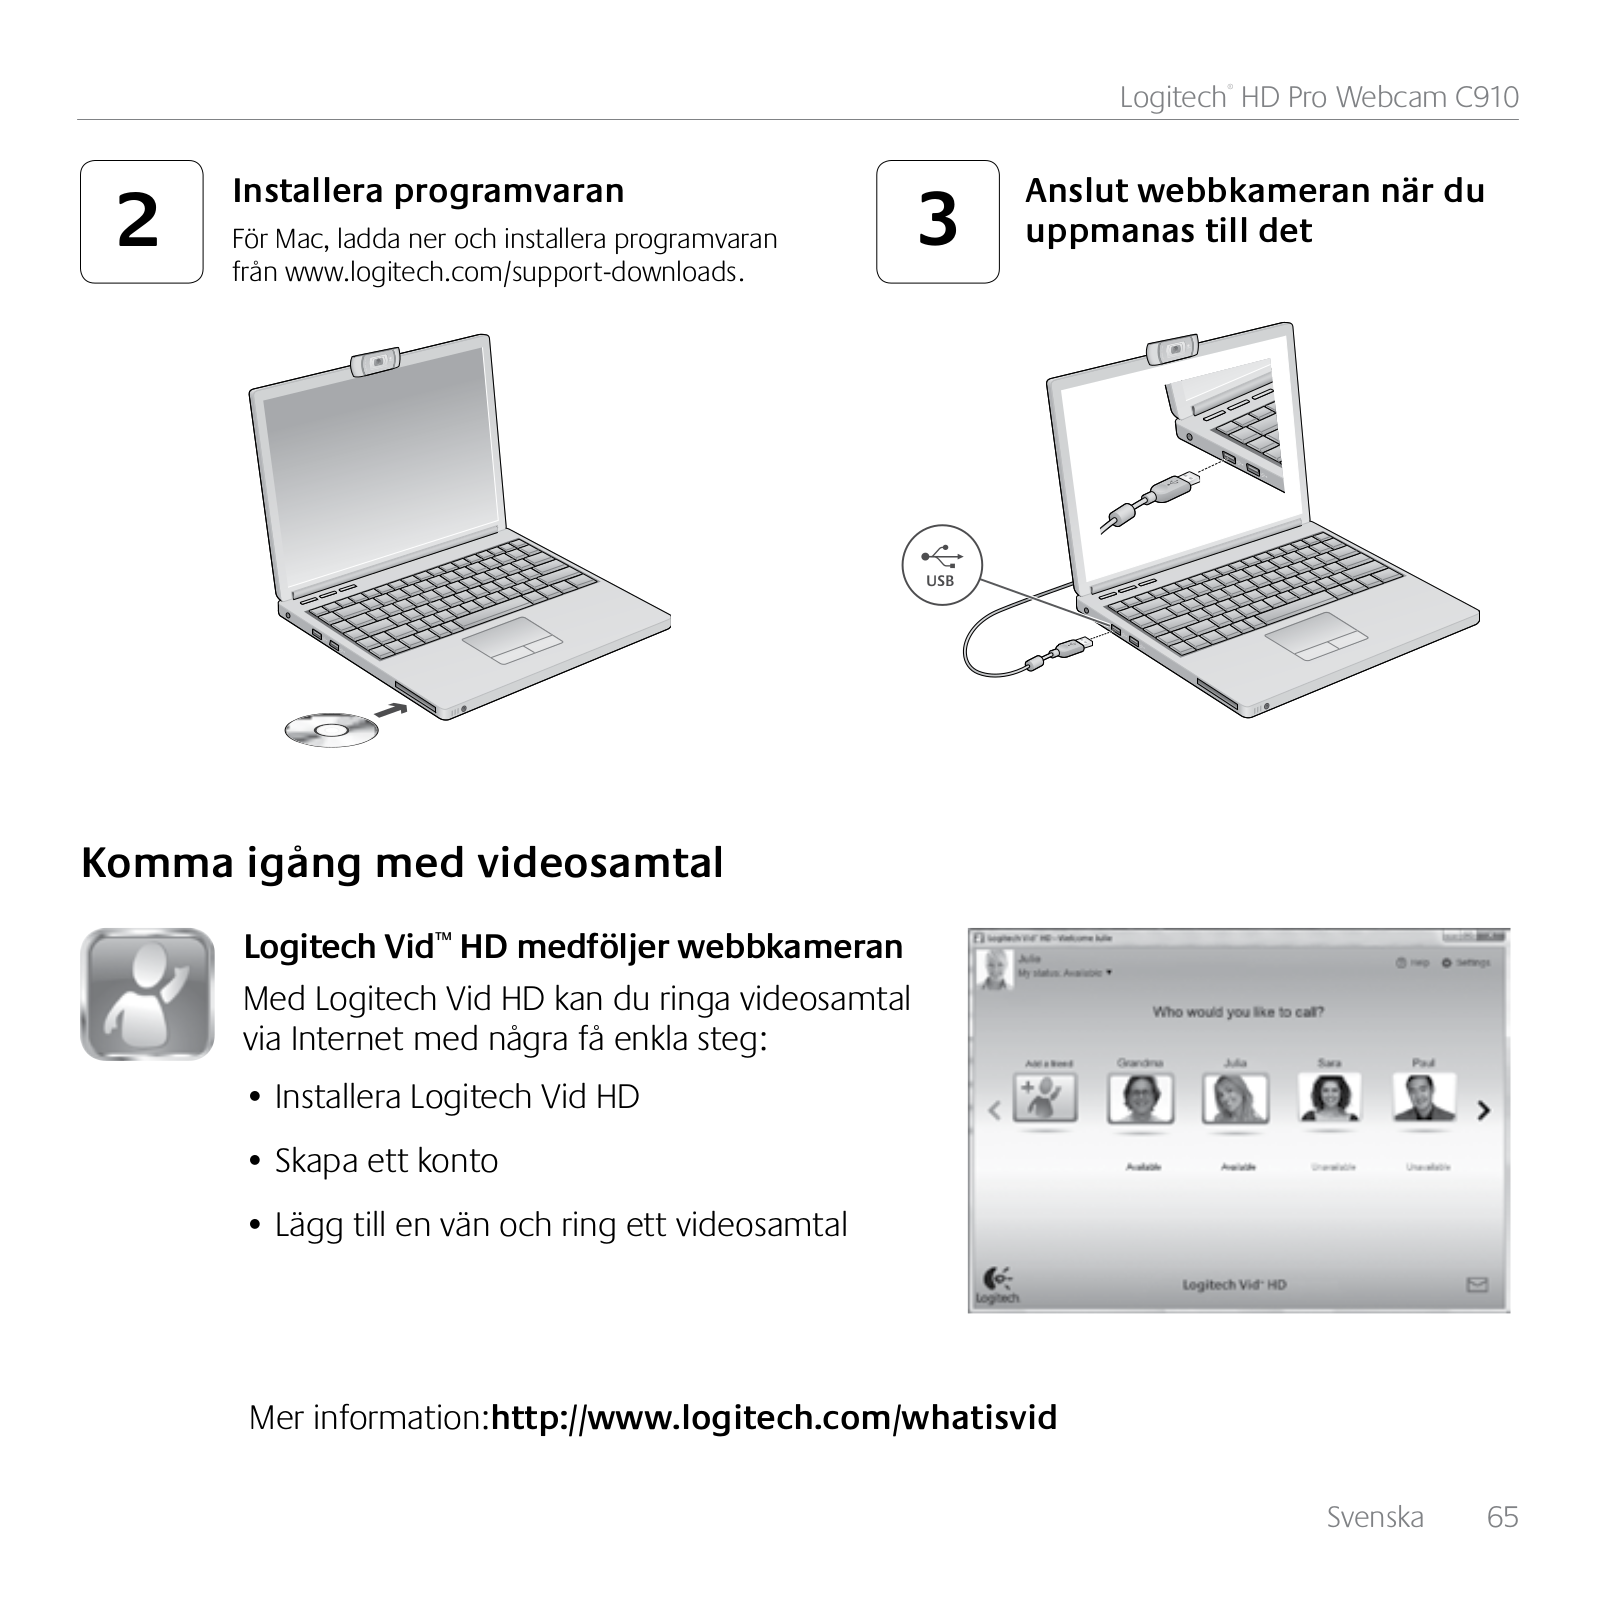
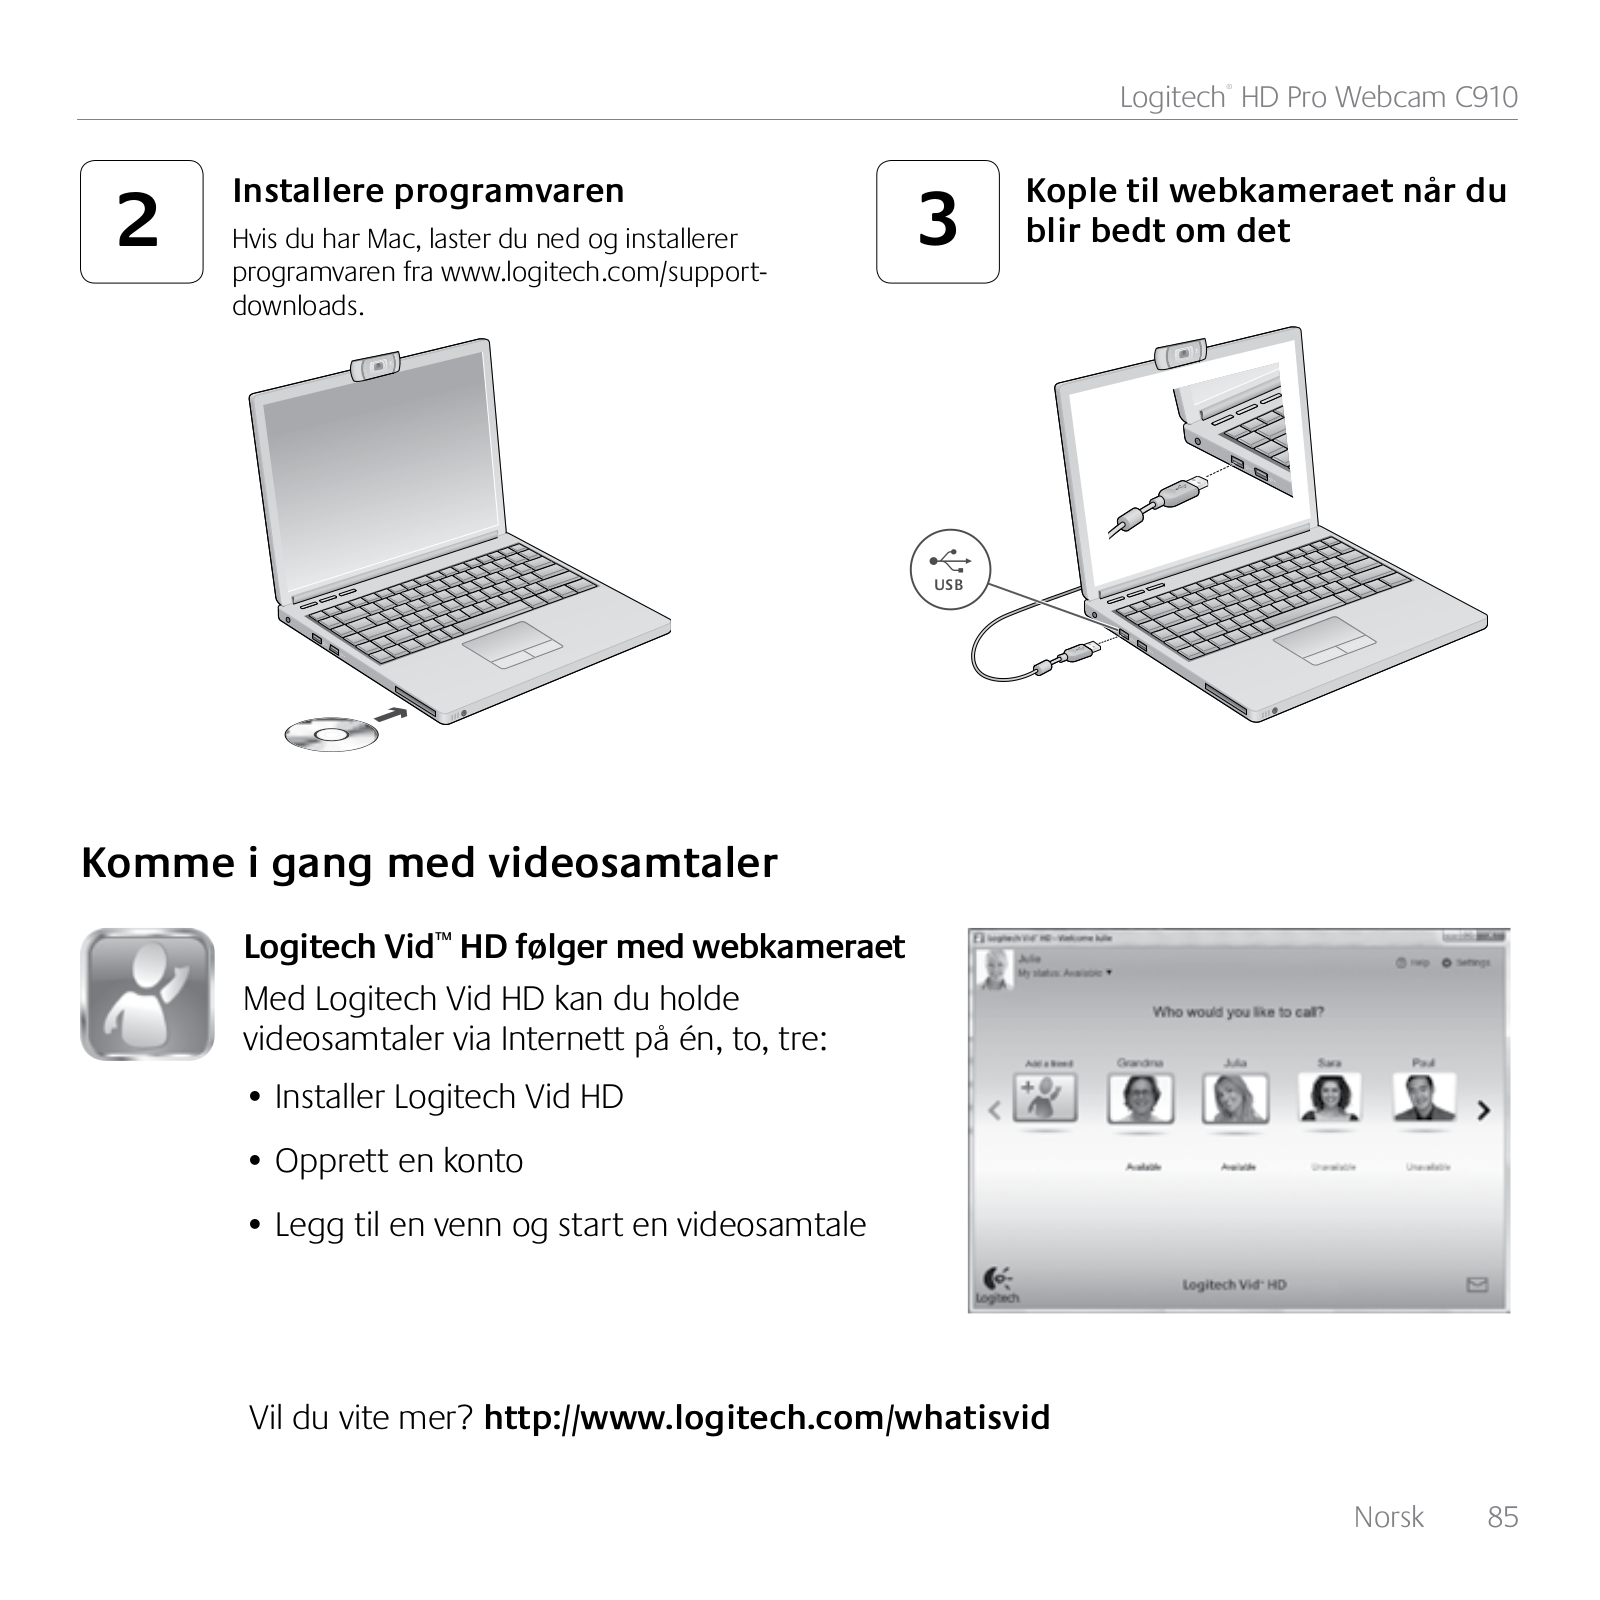
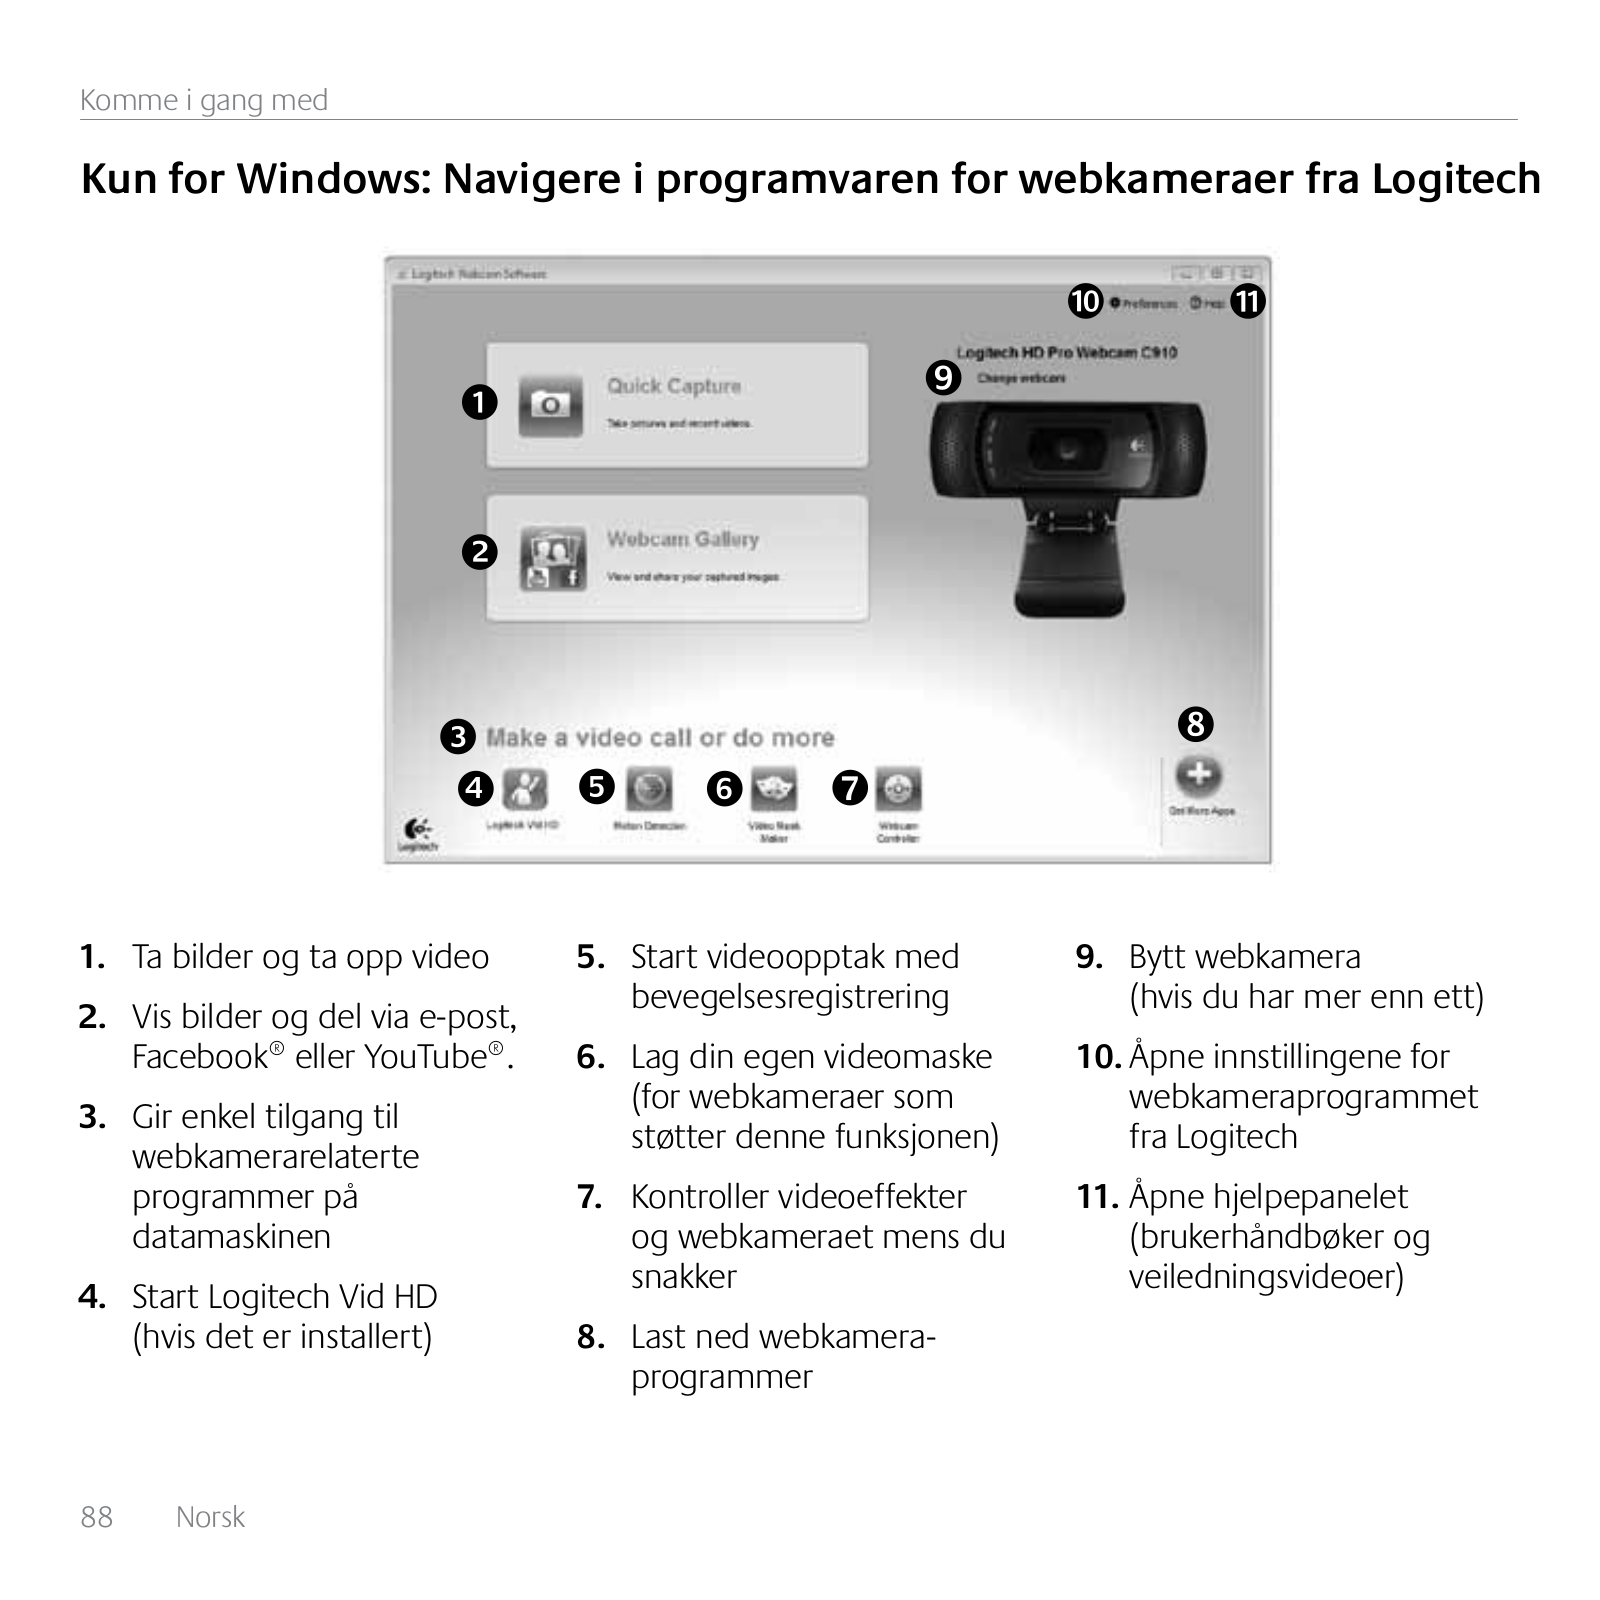
C910
Getting Started Manual
44 pgs
5.43 Mb
0
Getting Started With
44 pgs
4.16 Mb
0
QUICK START GUIDE [ja]
1 pgs
2.5 Mb
0
QUICK START GUIDE [ru]
96 pgs
10.64 Mb
0
QUICK START GUIDE [sk]
104 pgs
11.69 Mb
0
User Manual
144 pgs
16.54 Mb
0
User Manual
44 pgs
5.47 Mb
0
User Manual [ru]
14 pgs
2.51 Mb
0
Table of contents
Loading...
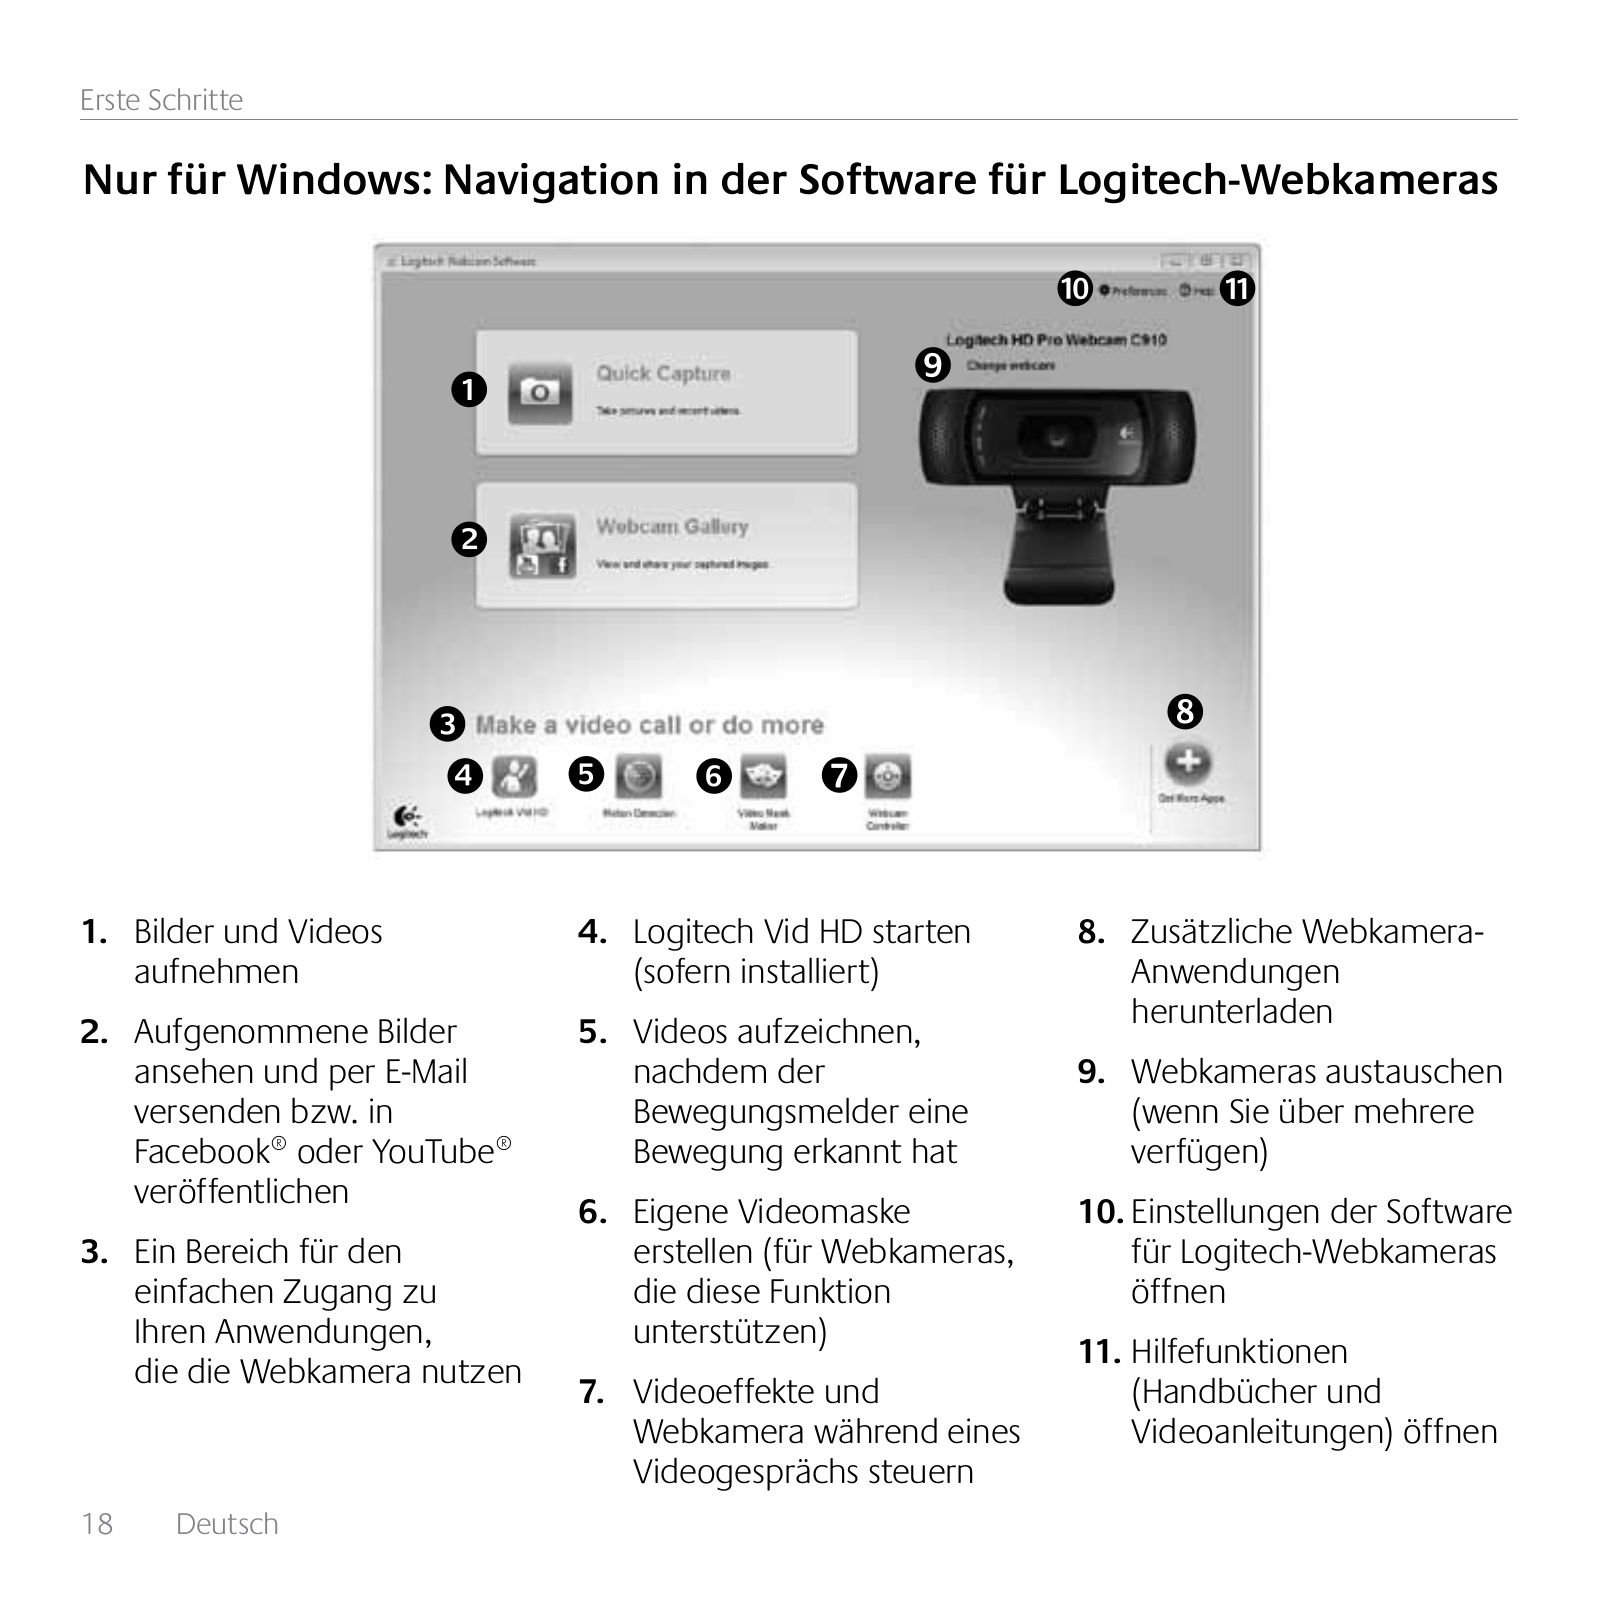
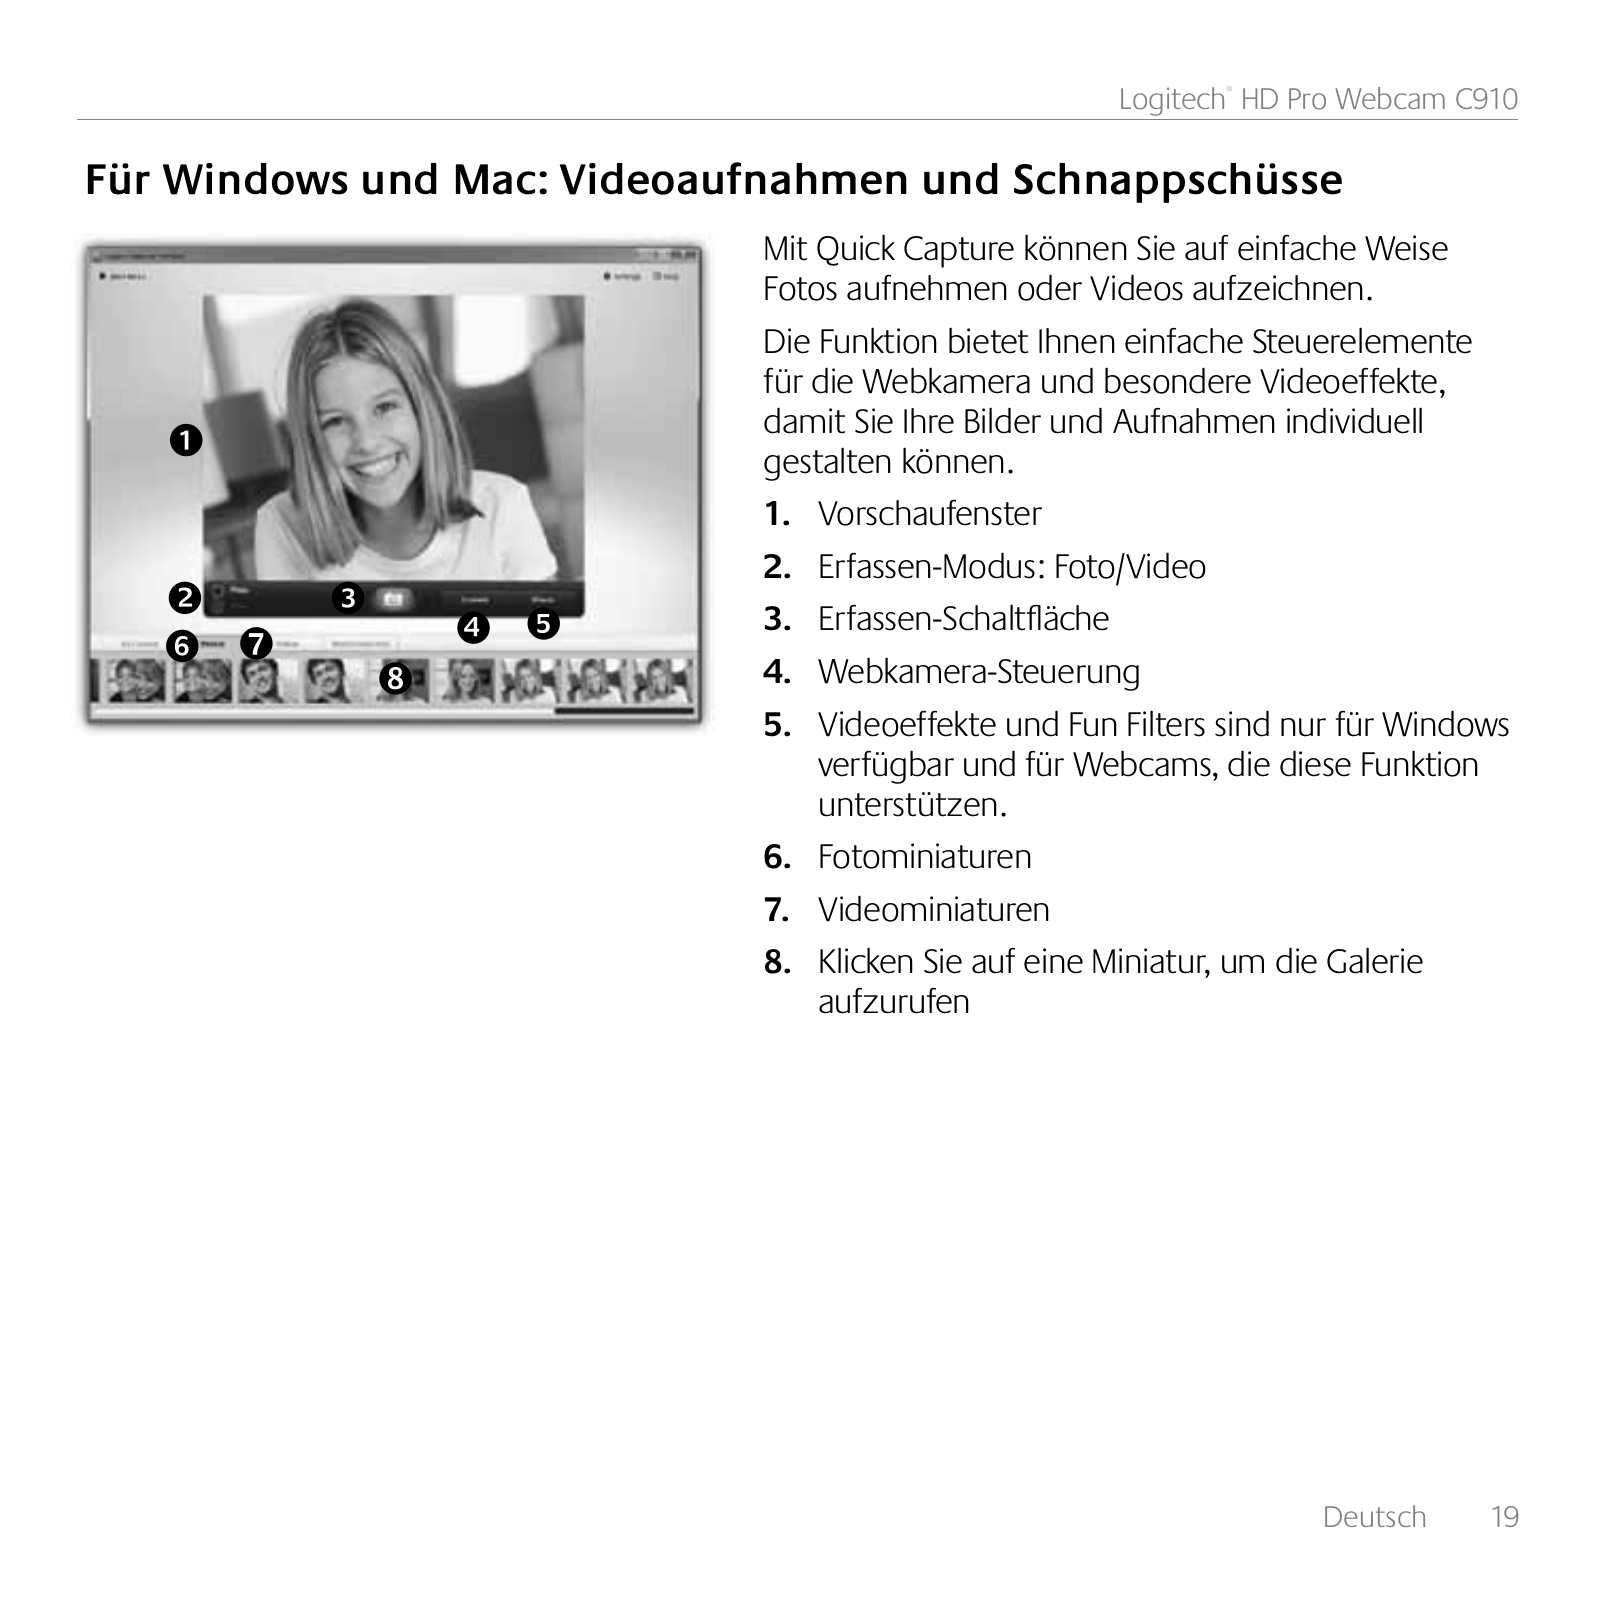
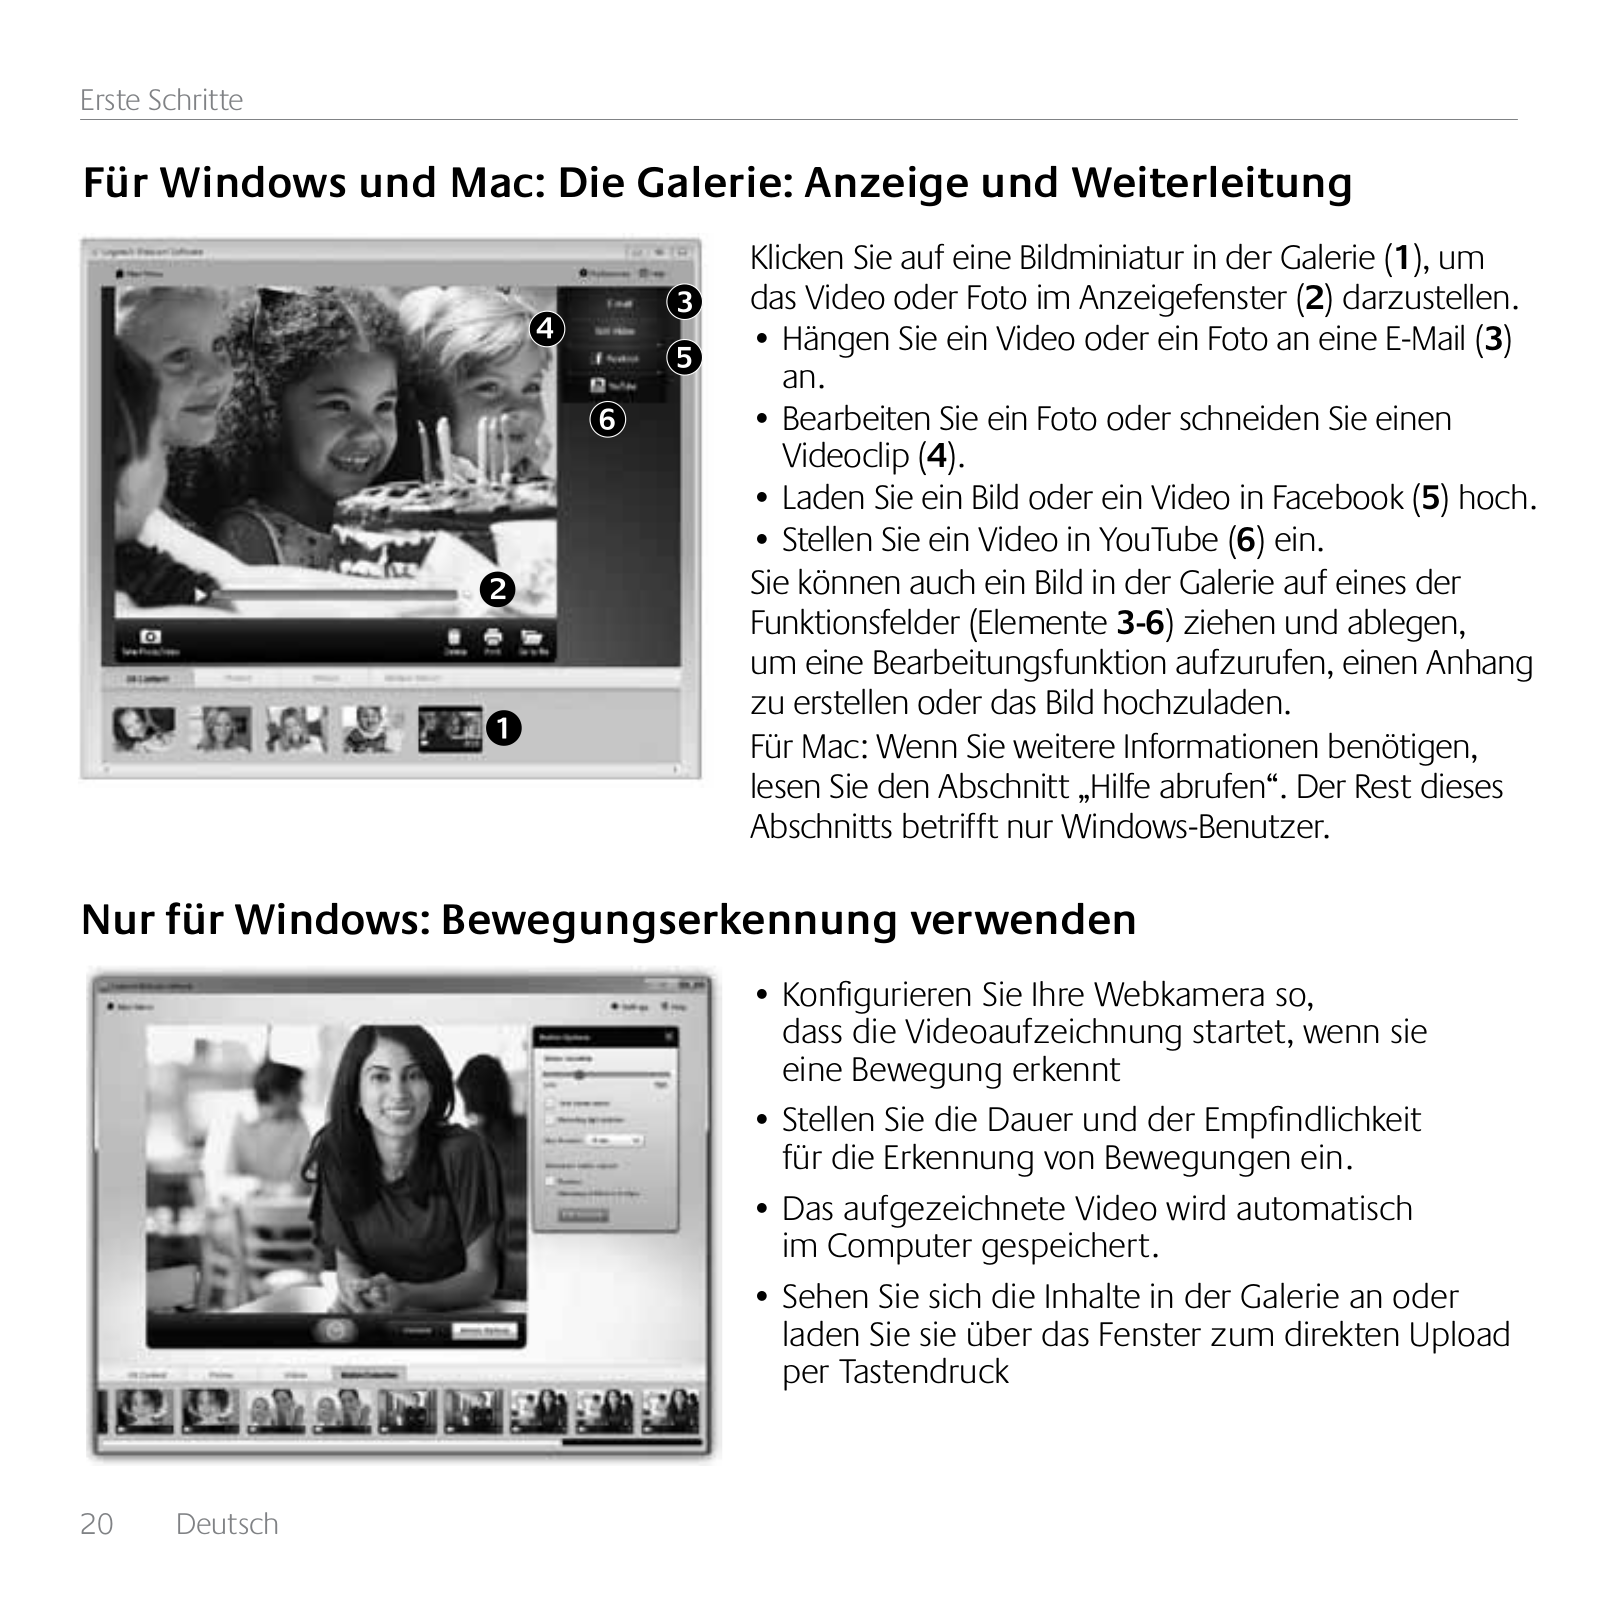
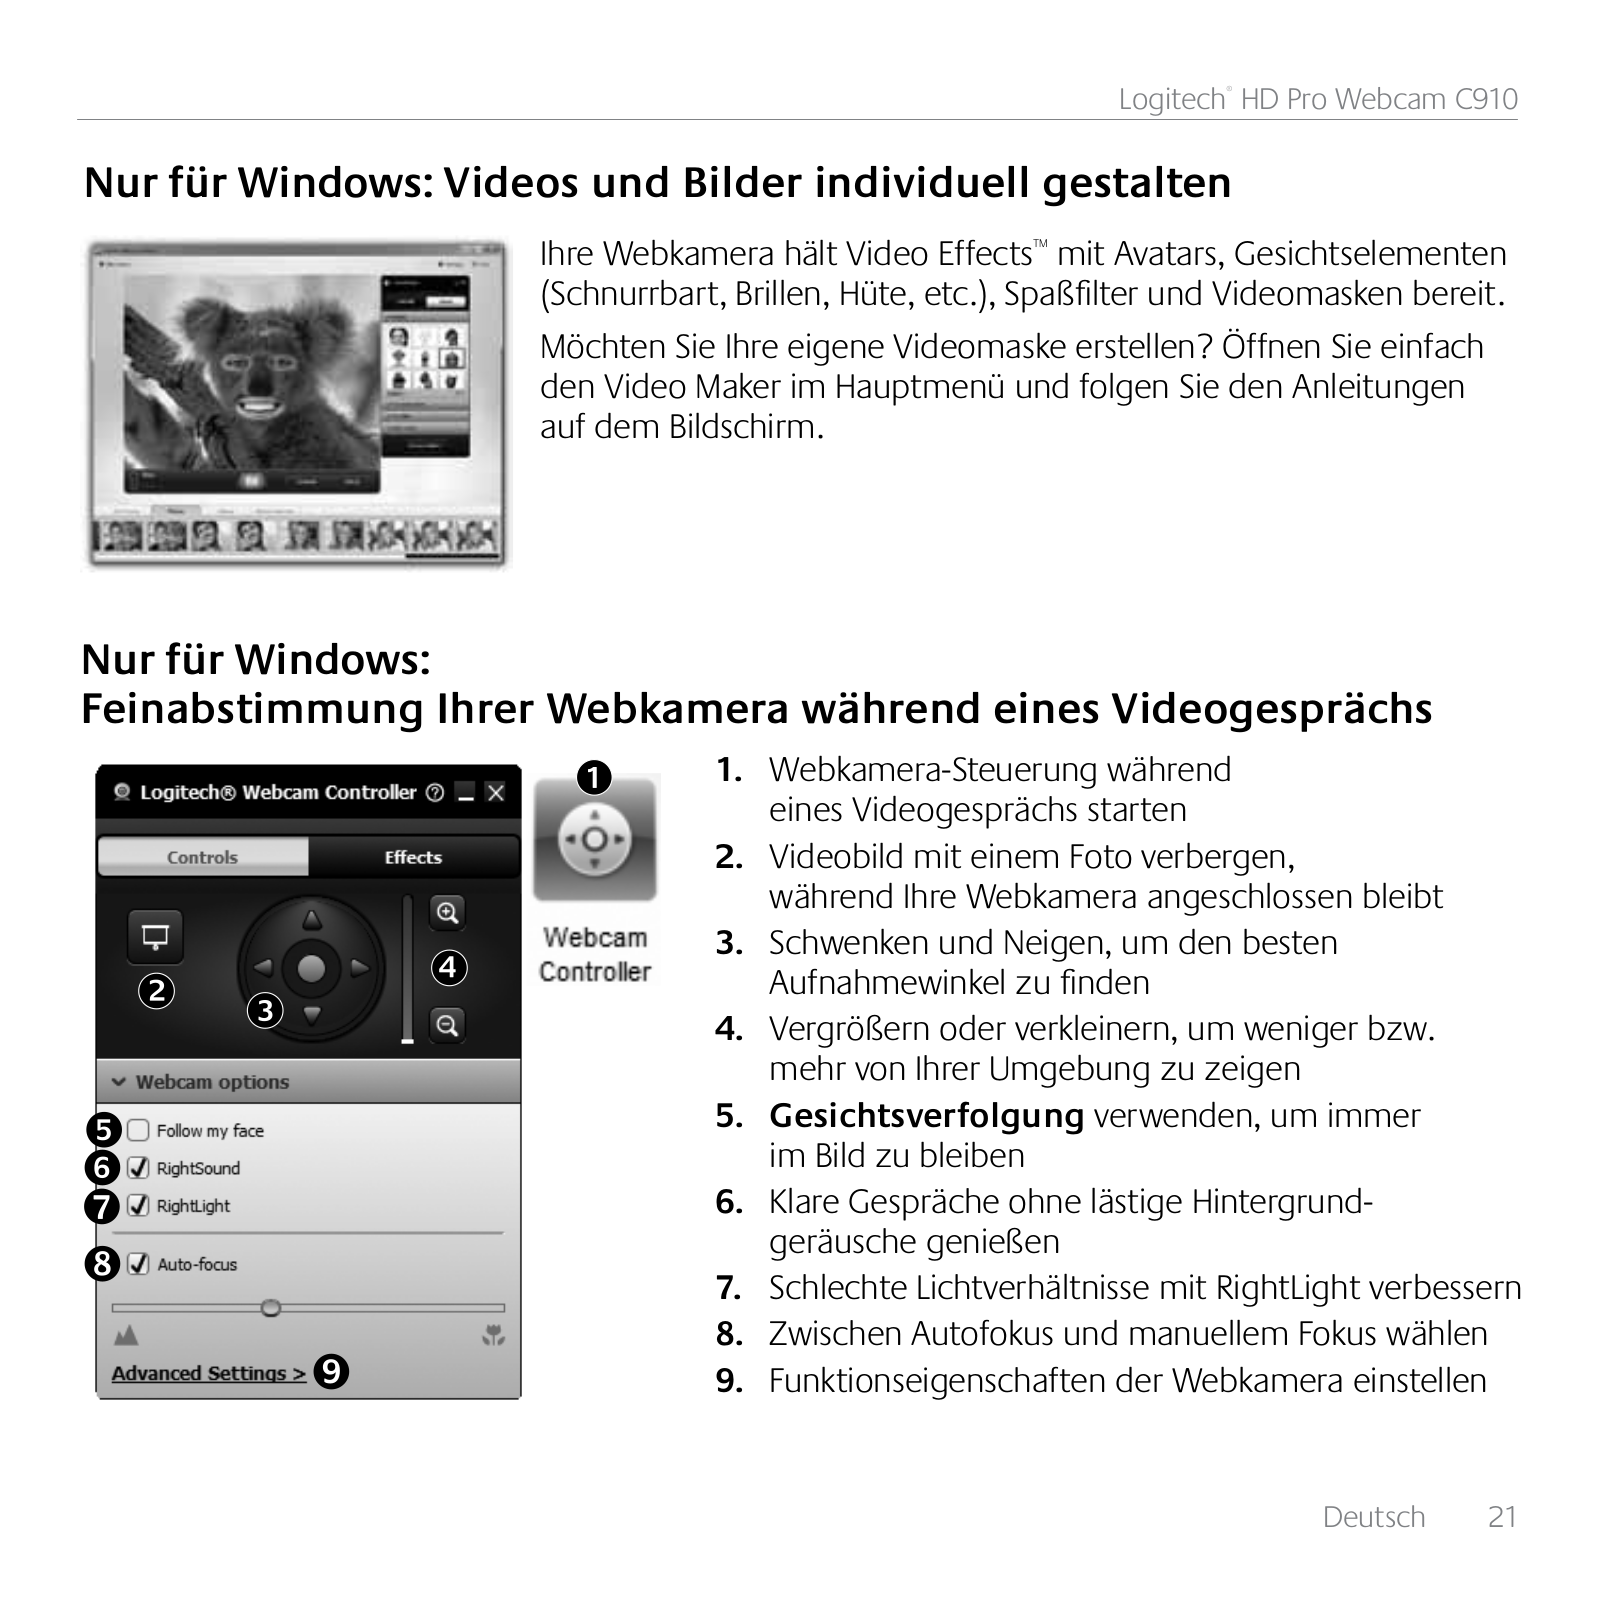
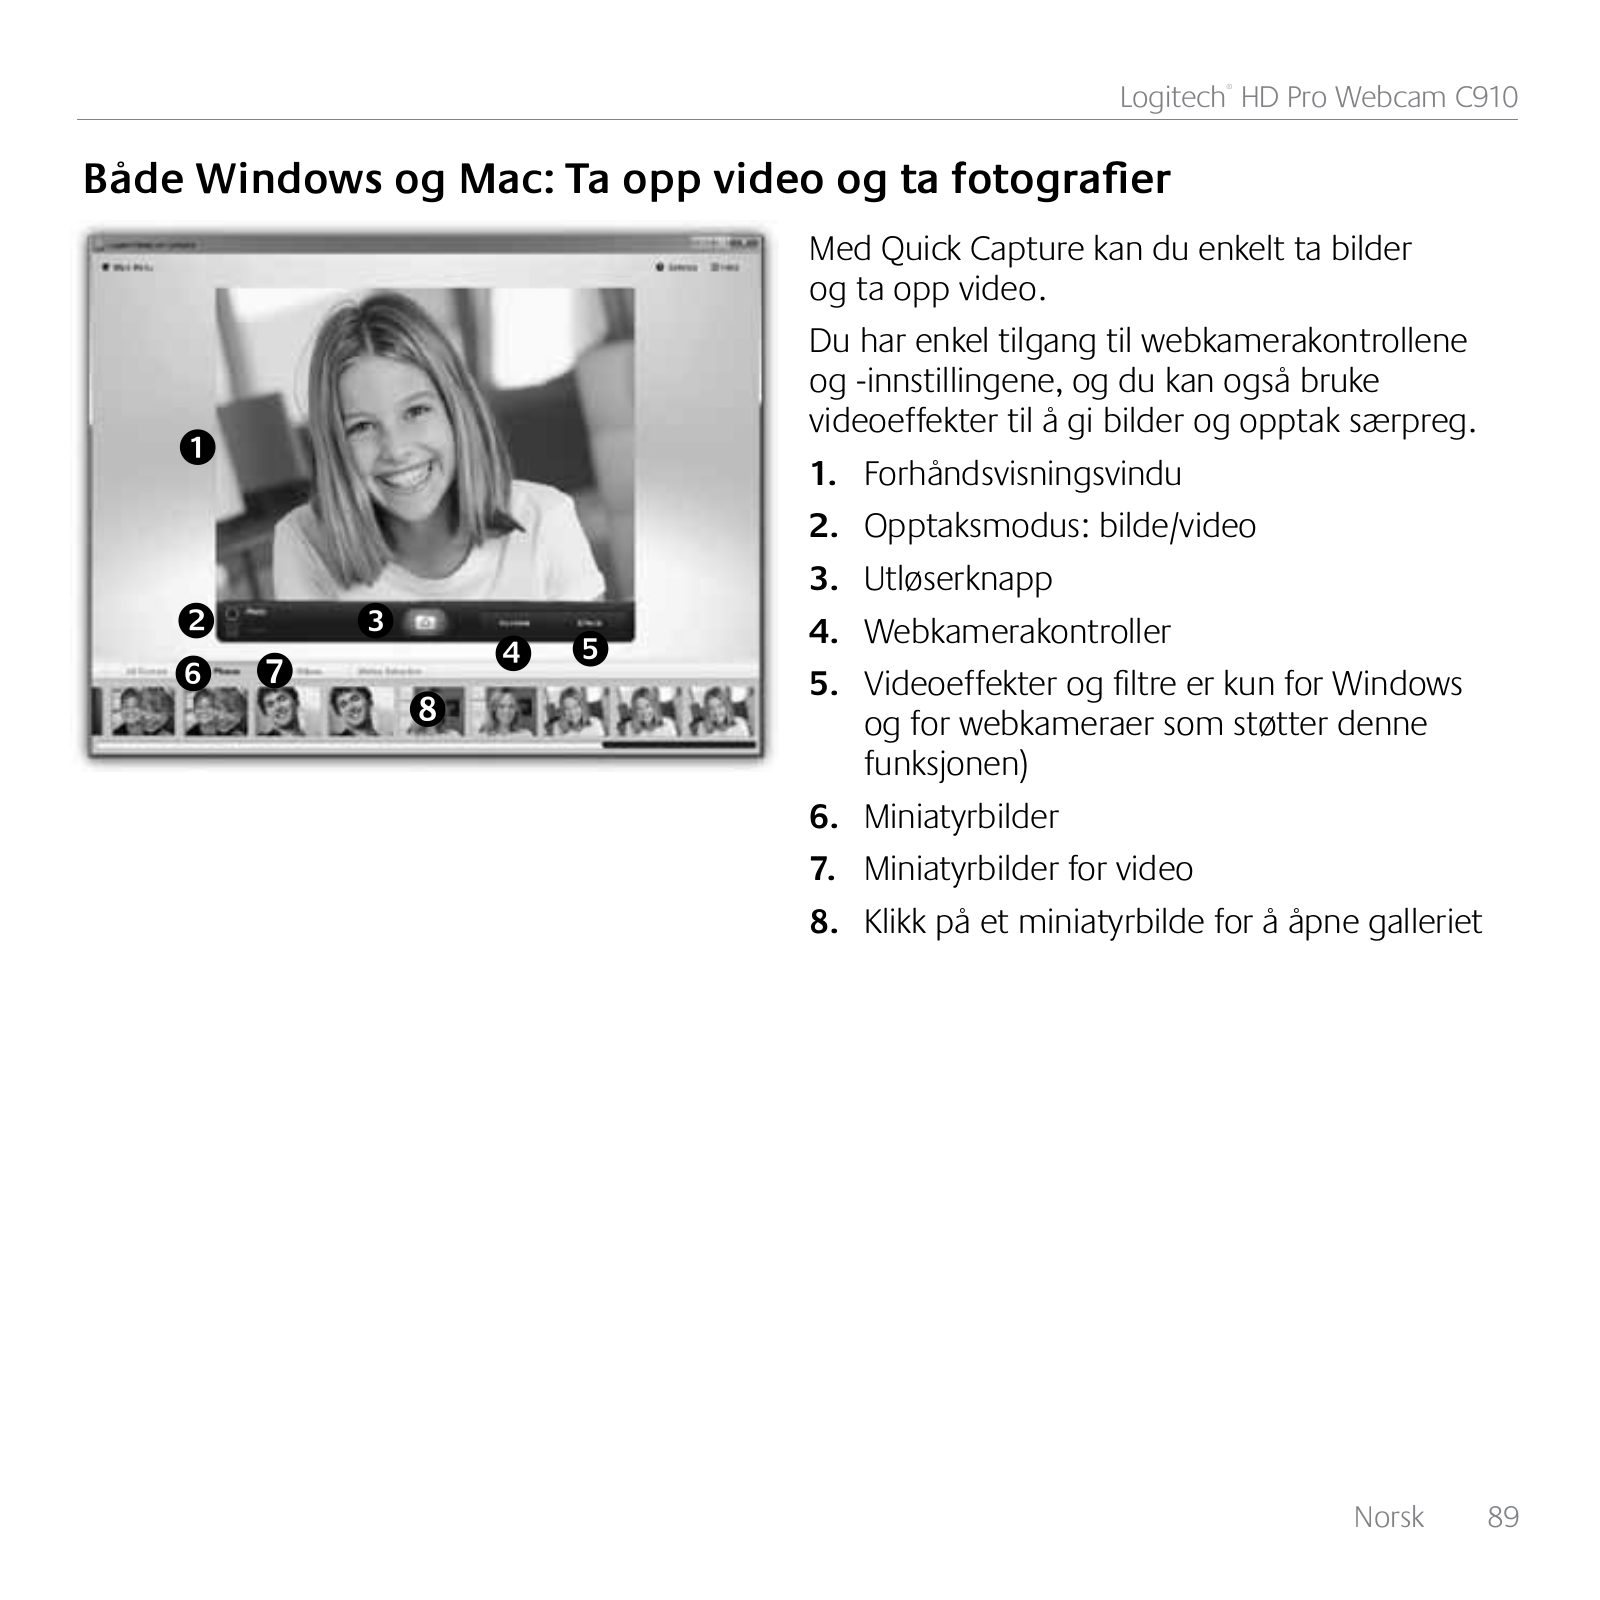
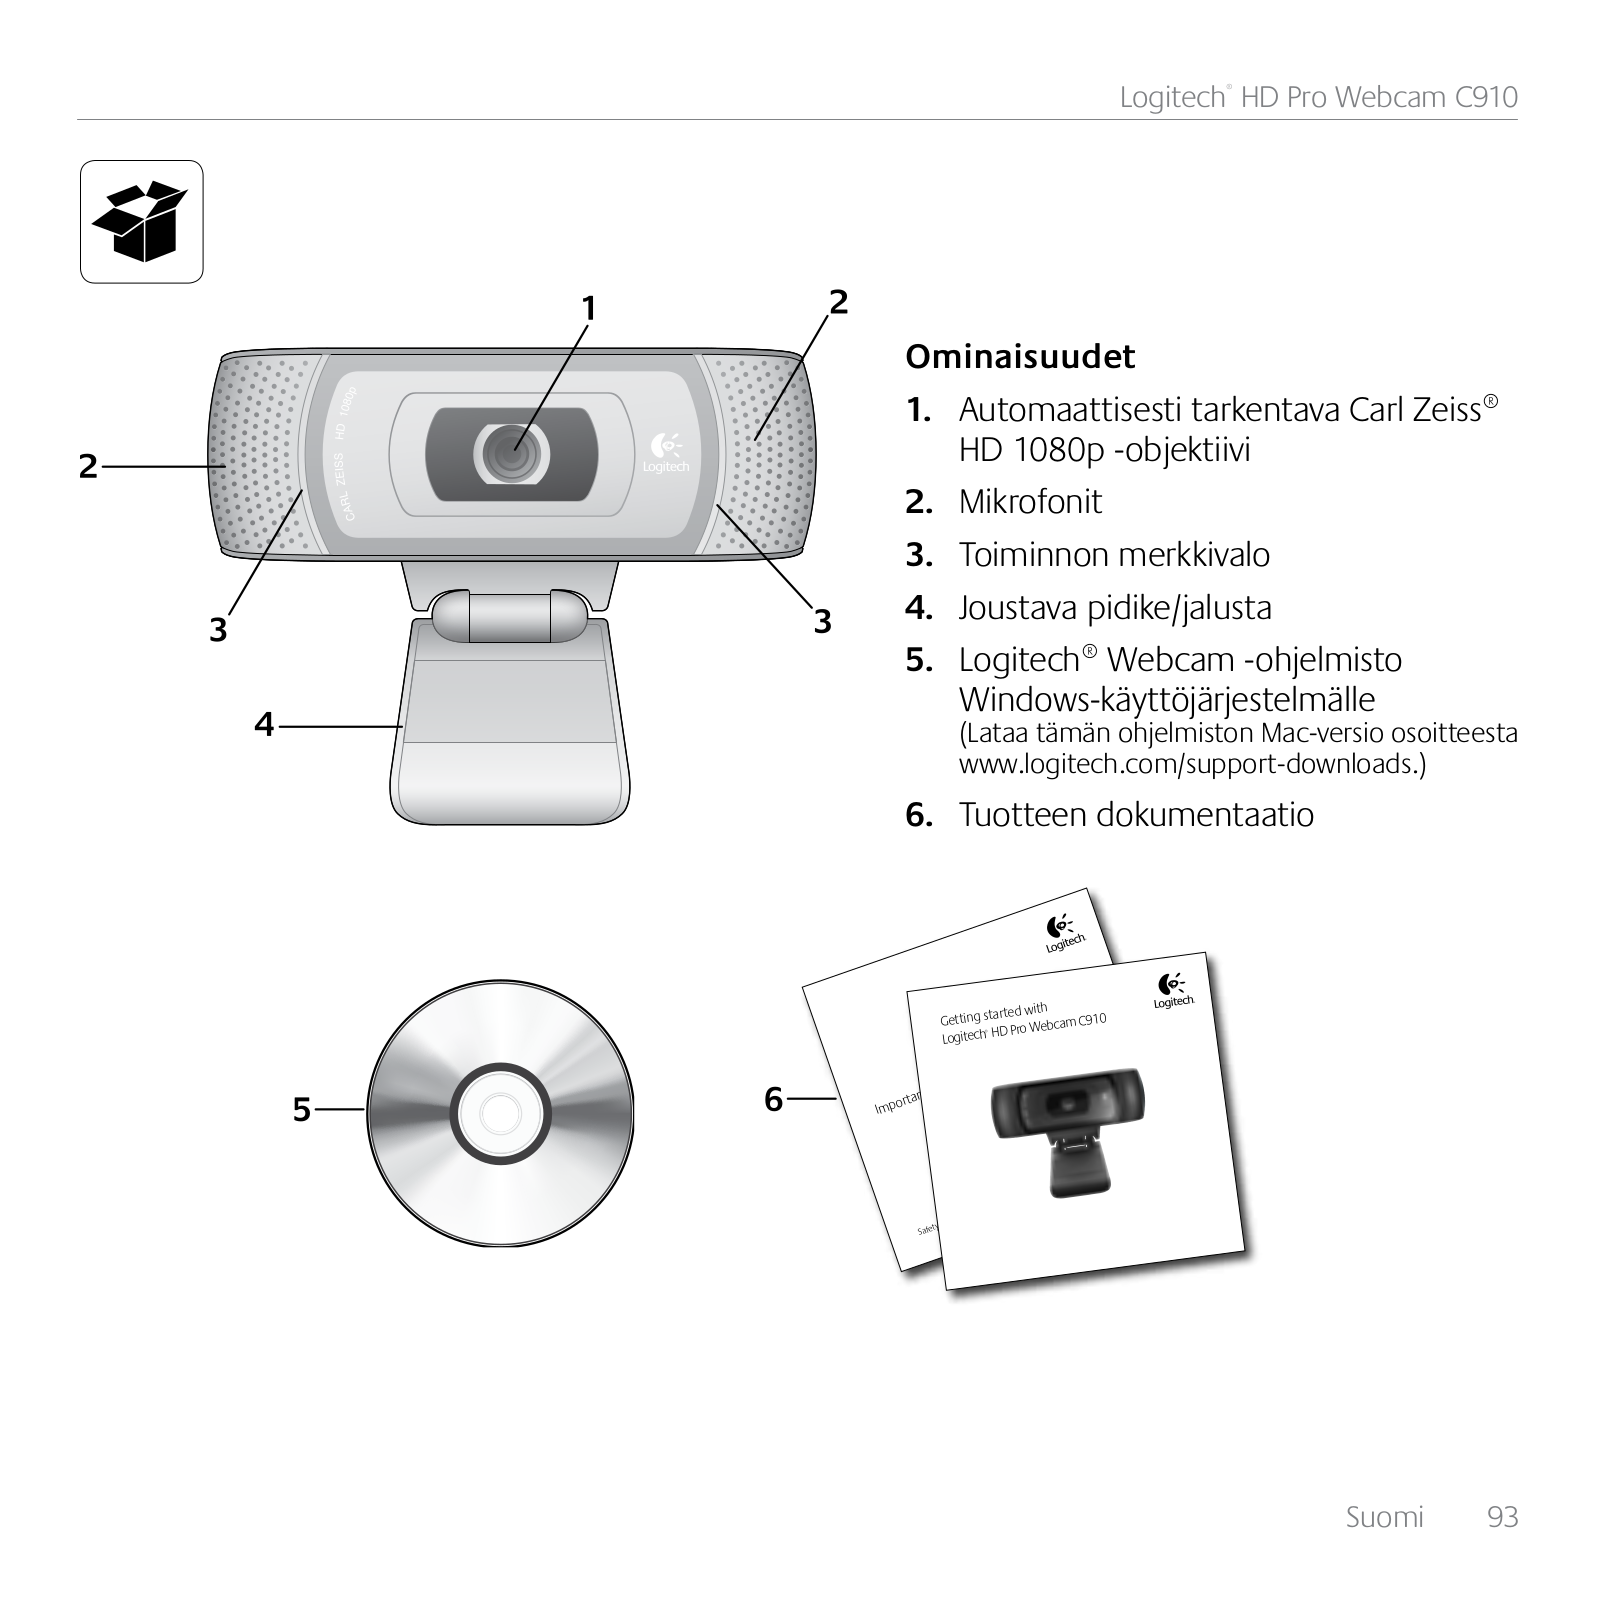
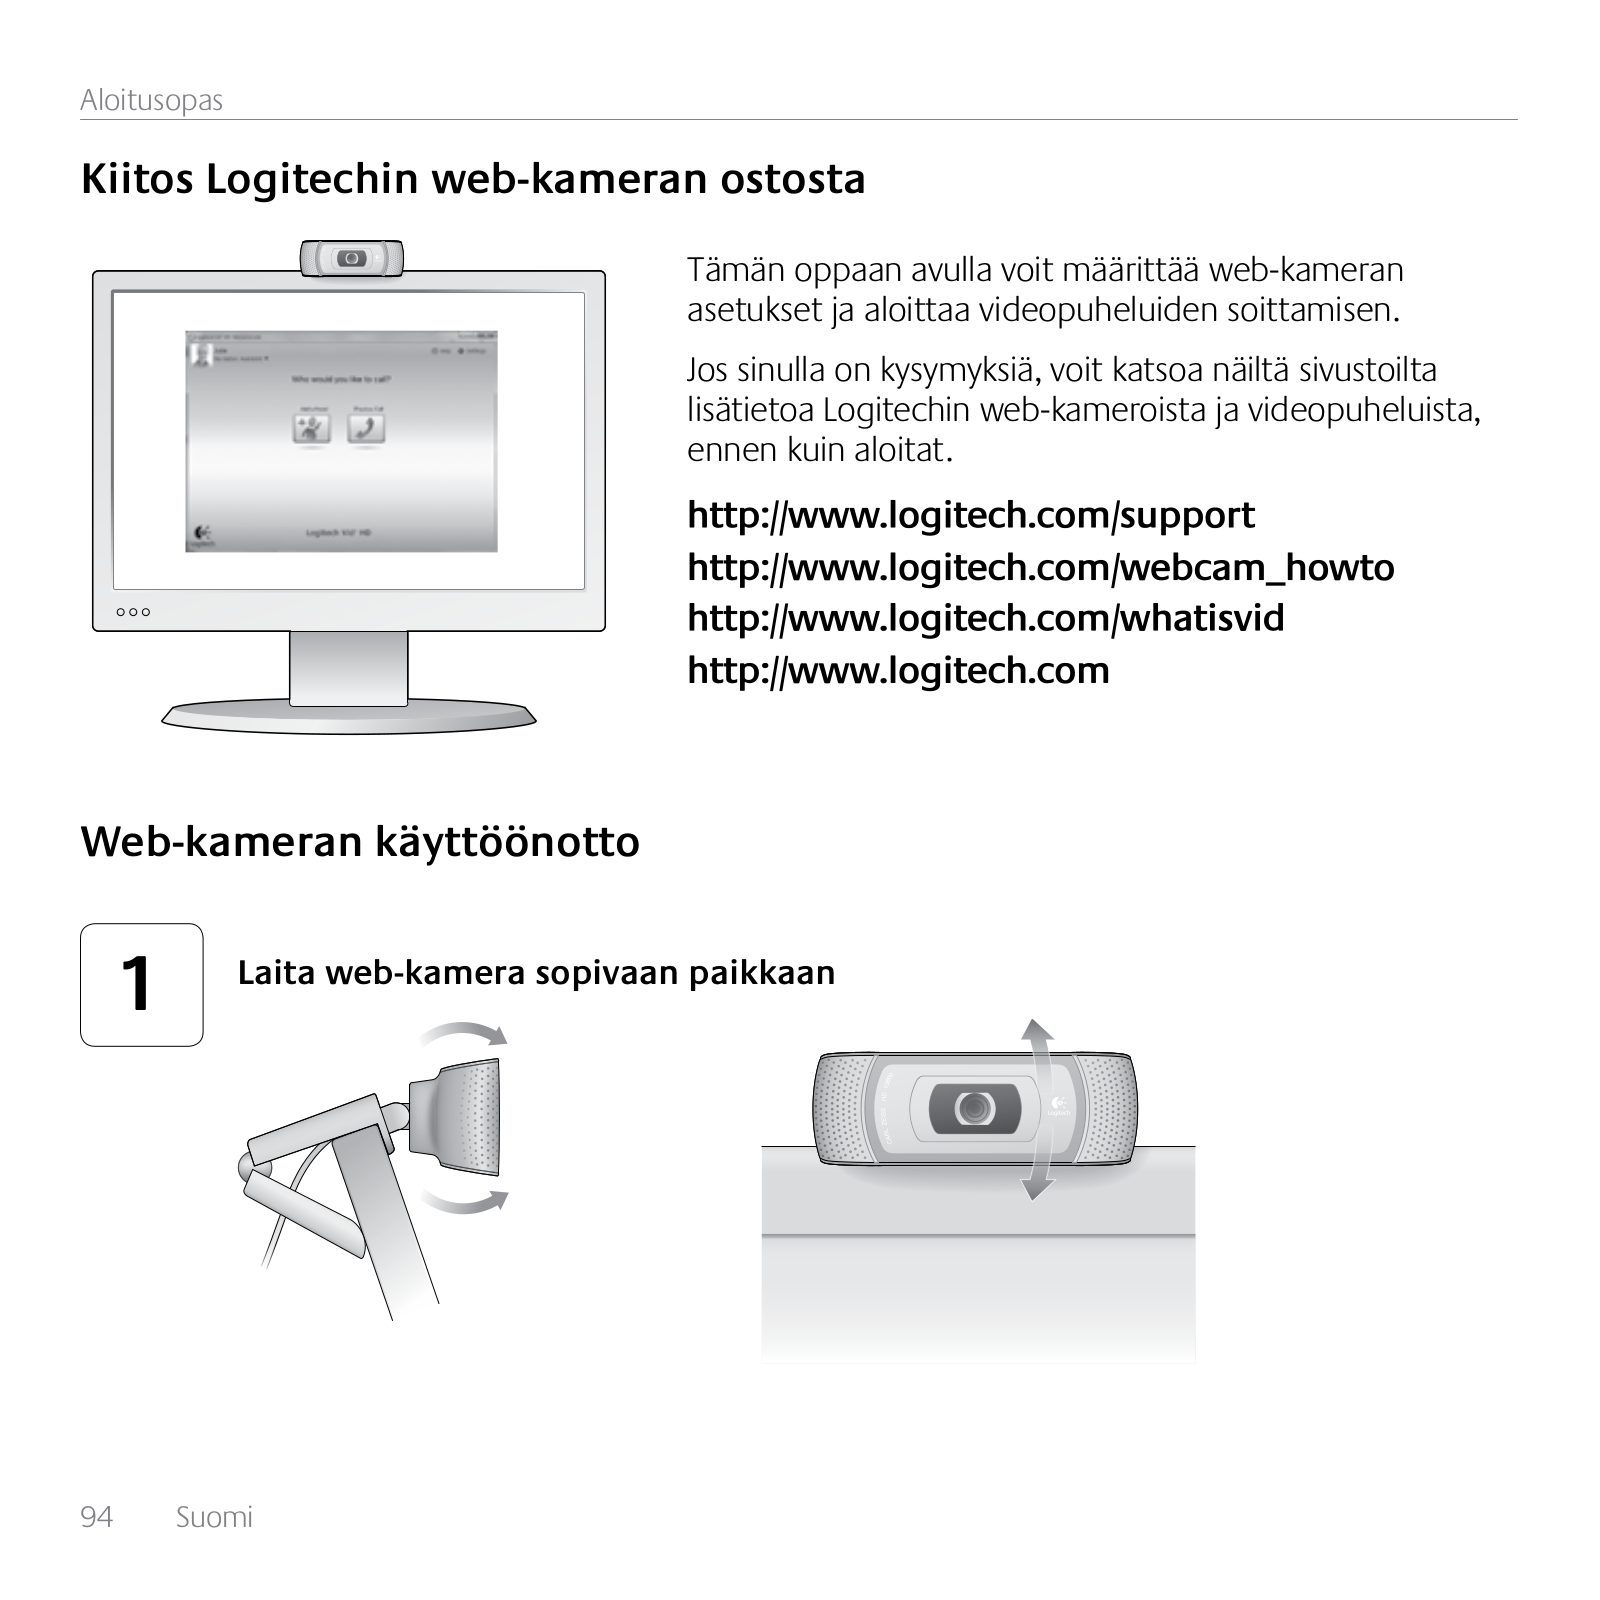
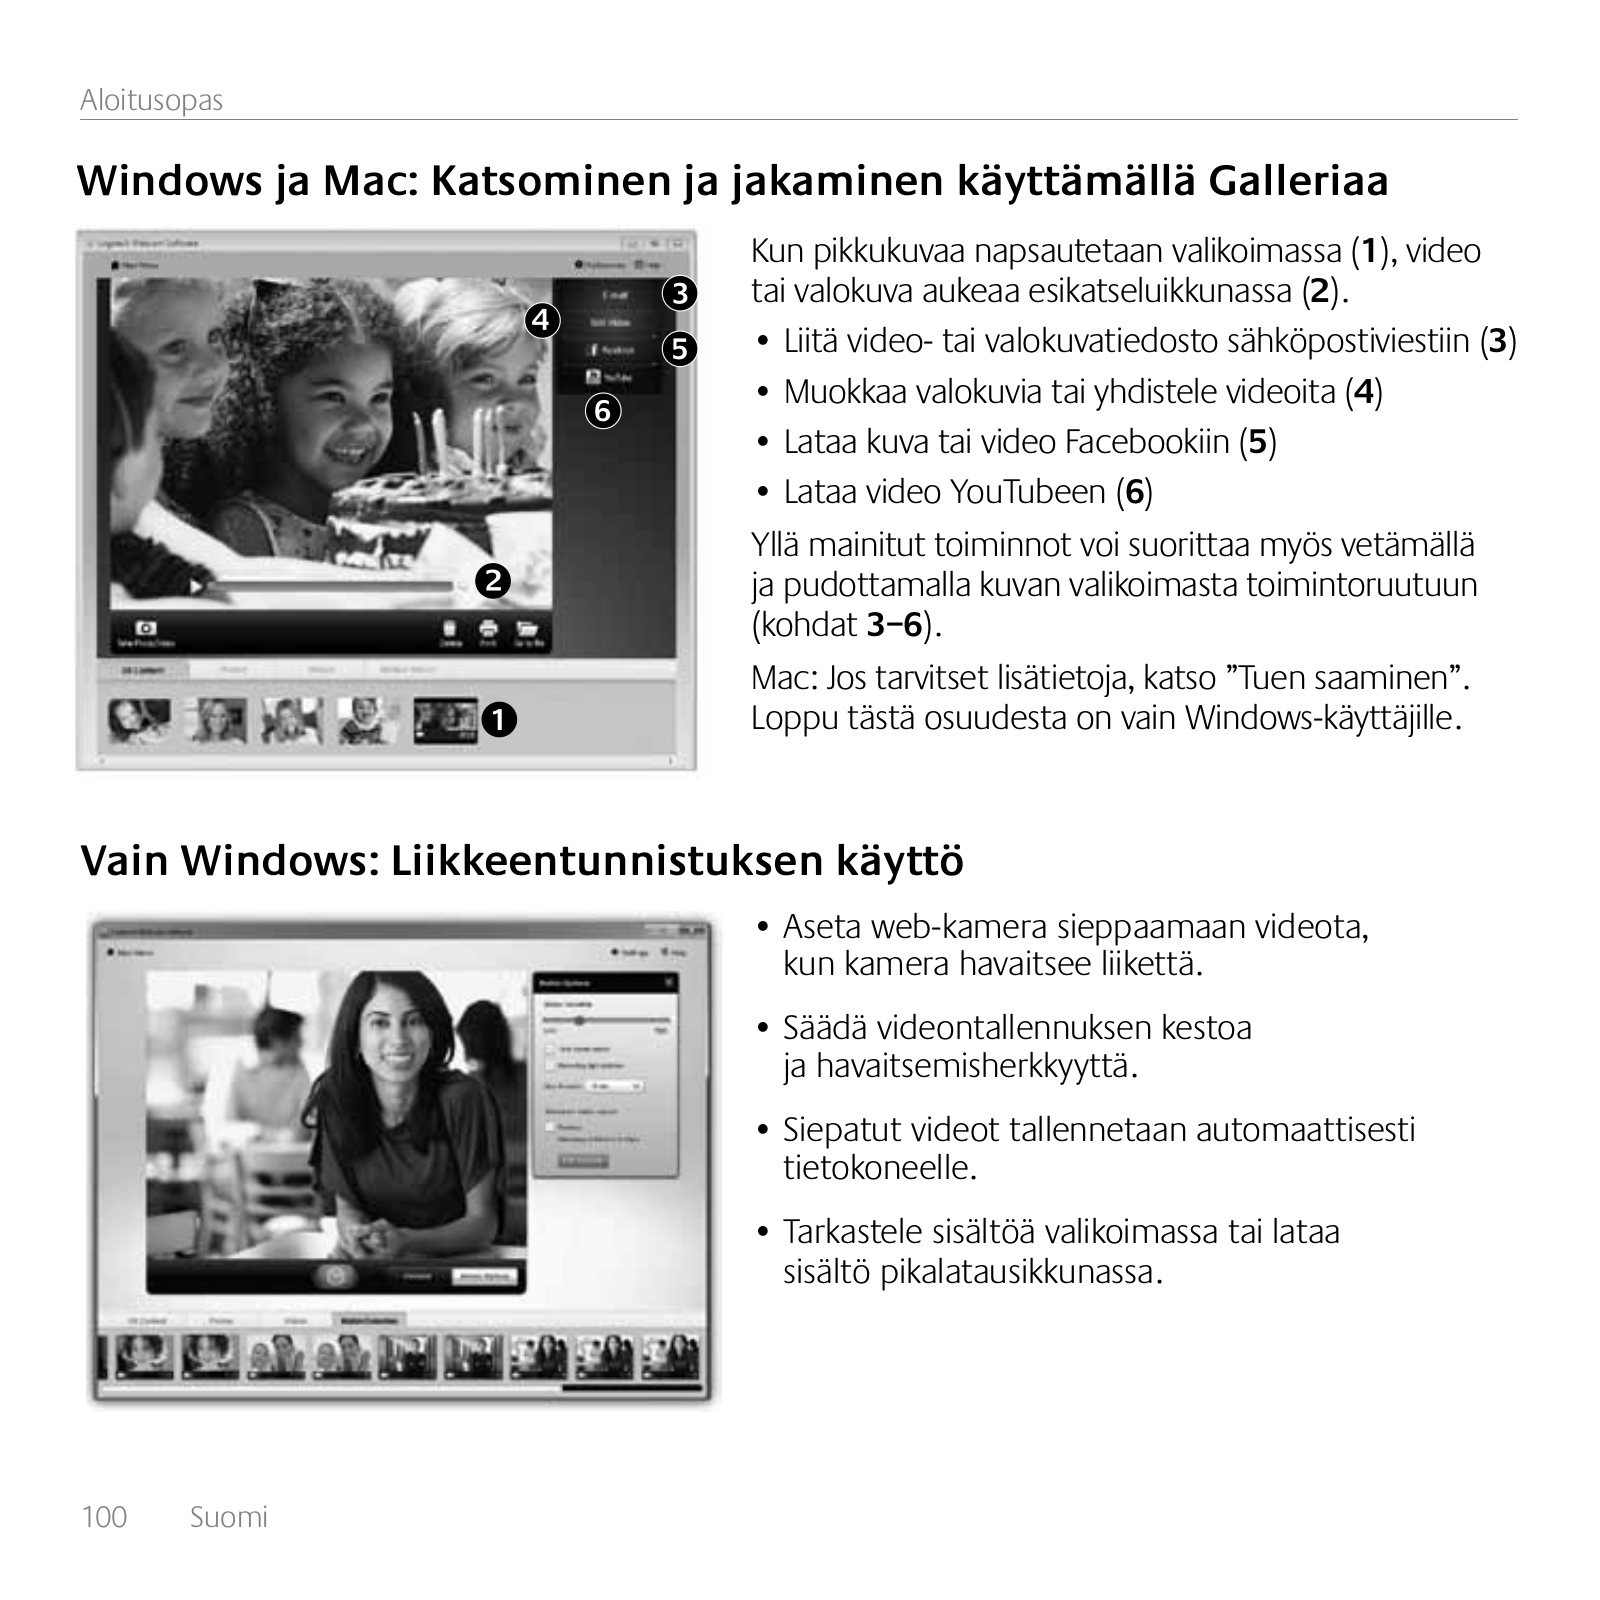
Logitech C910 User Manual
...
Logitech User Manual
Download
Specifications and Main Features
Frequently Asked Questions
User Manual
Download
Loading...
+
hidden pages
Unhide
You need points to download manuals.
1 point = 1 manual.
You can buy points or you can get point for every manual you upload.
Buy points
Upload your manuals
 Loading...