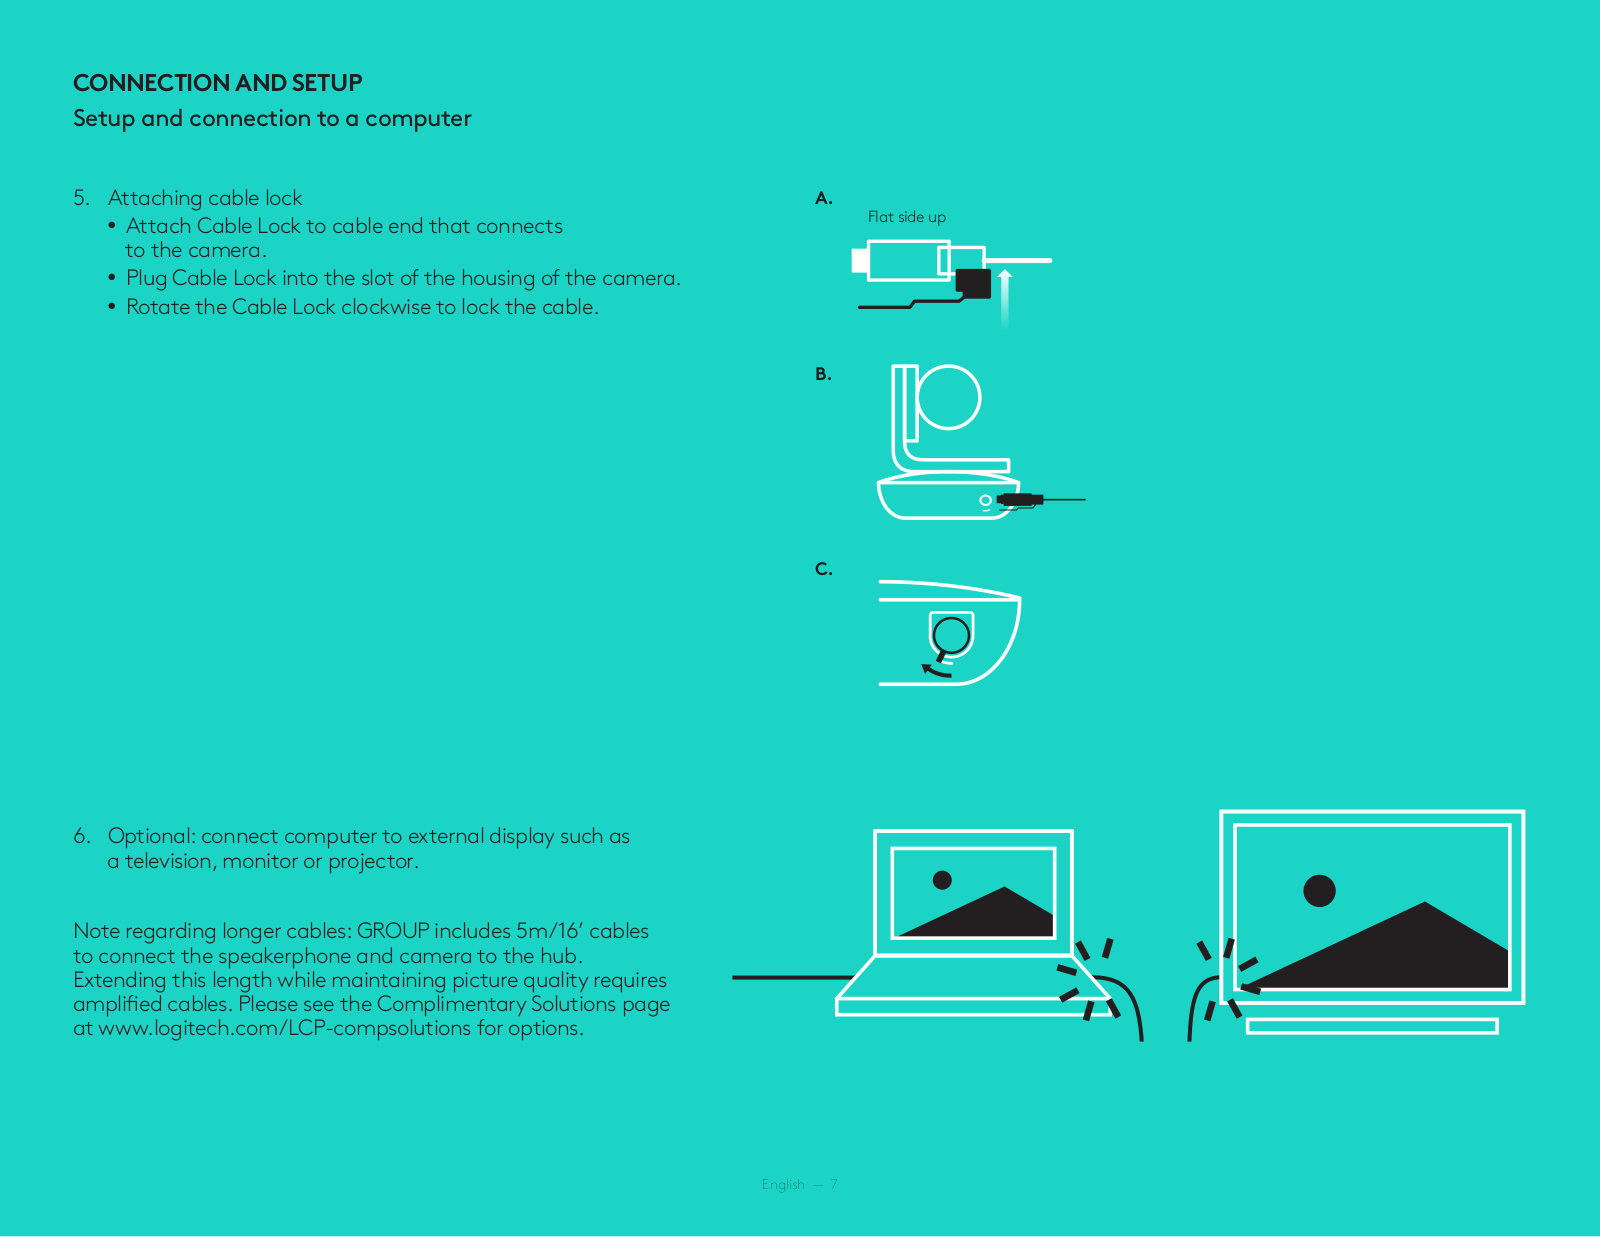
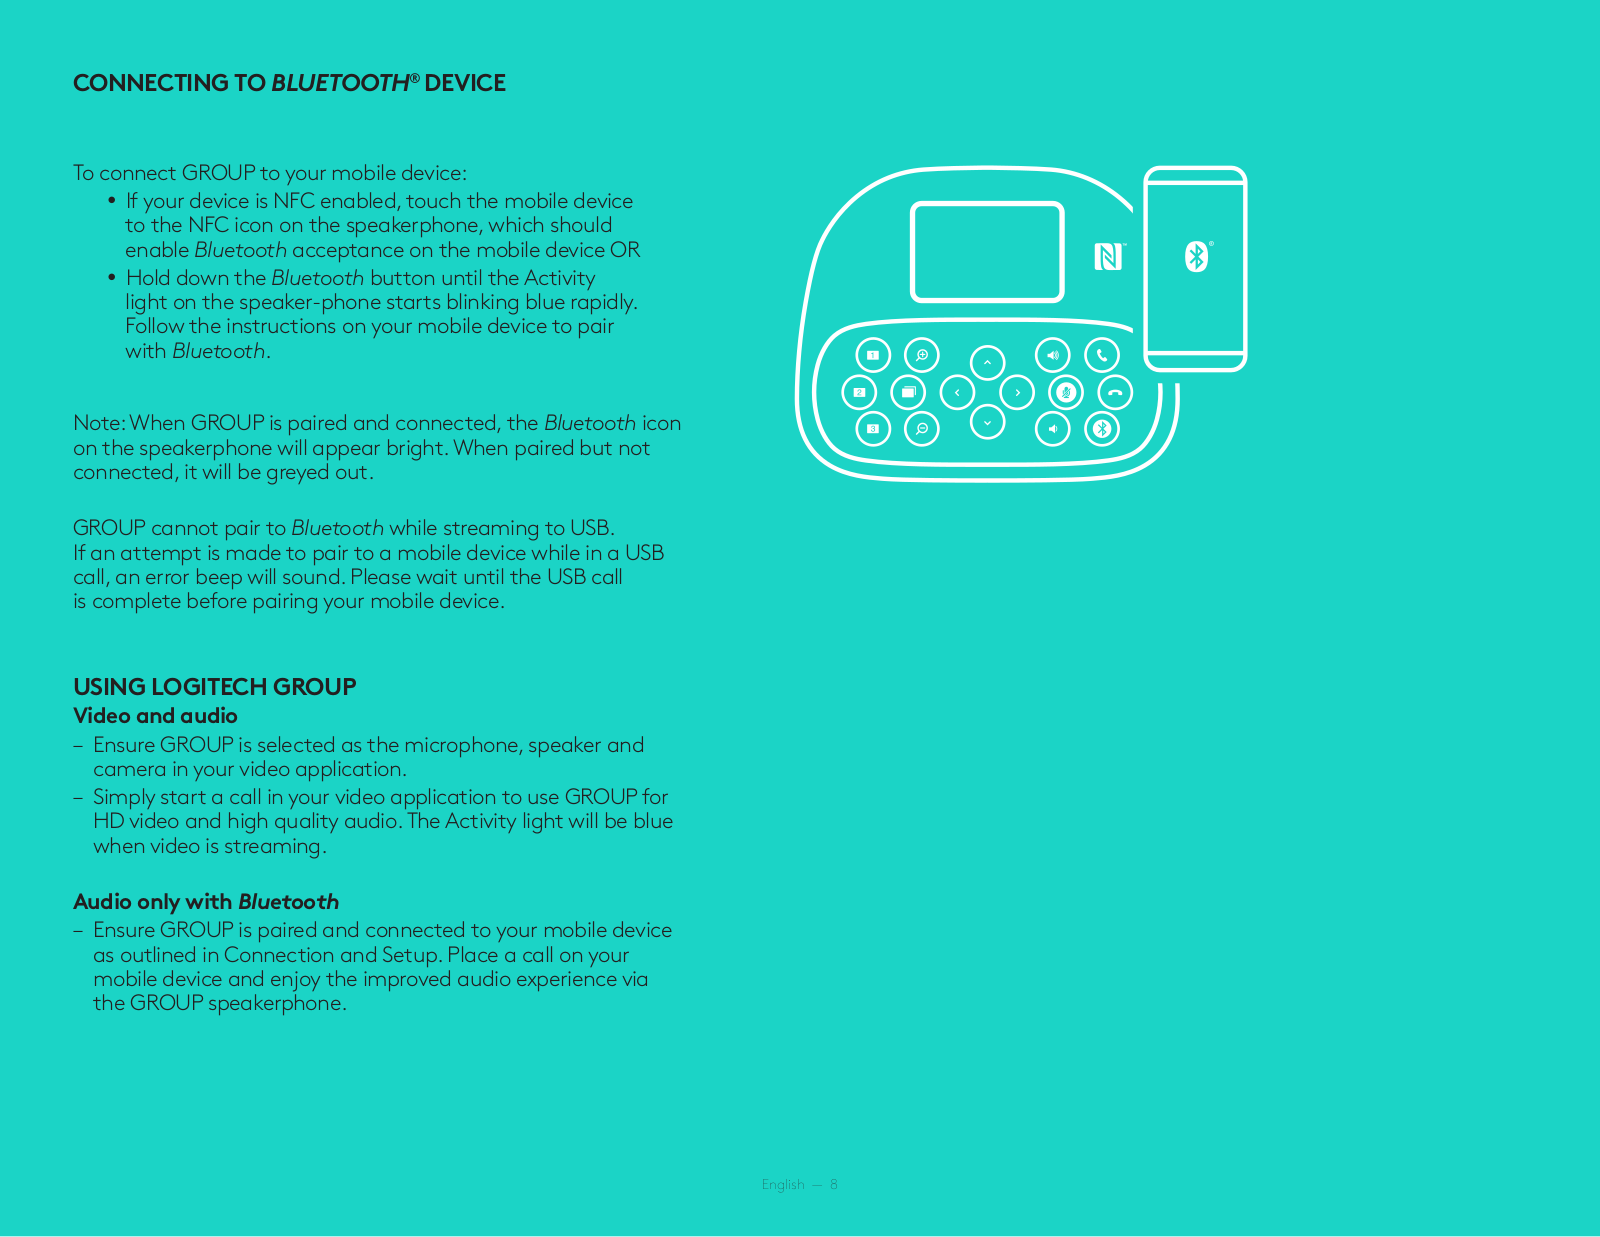
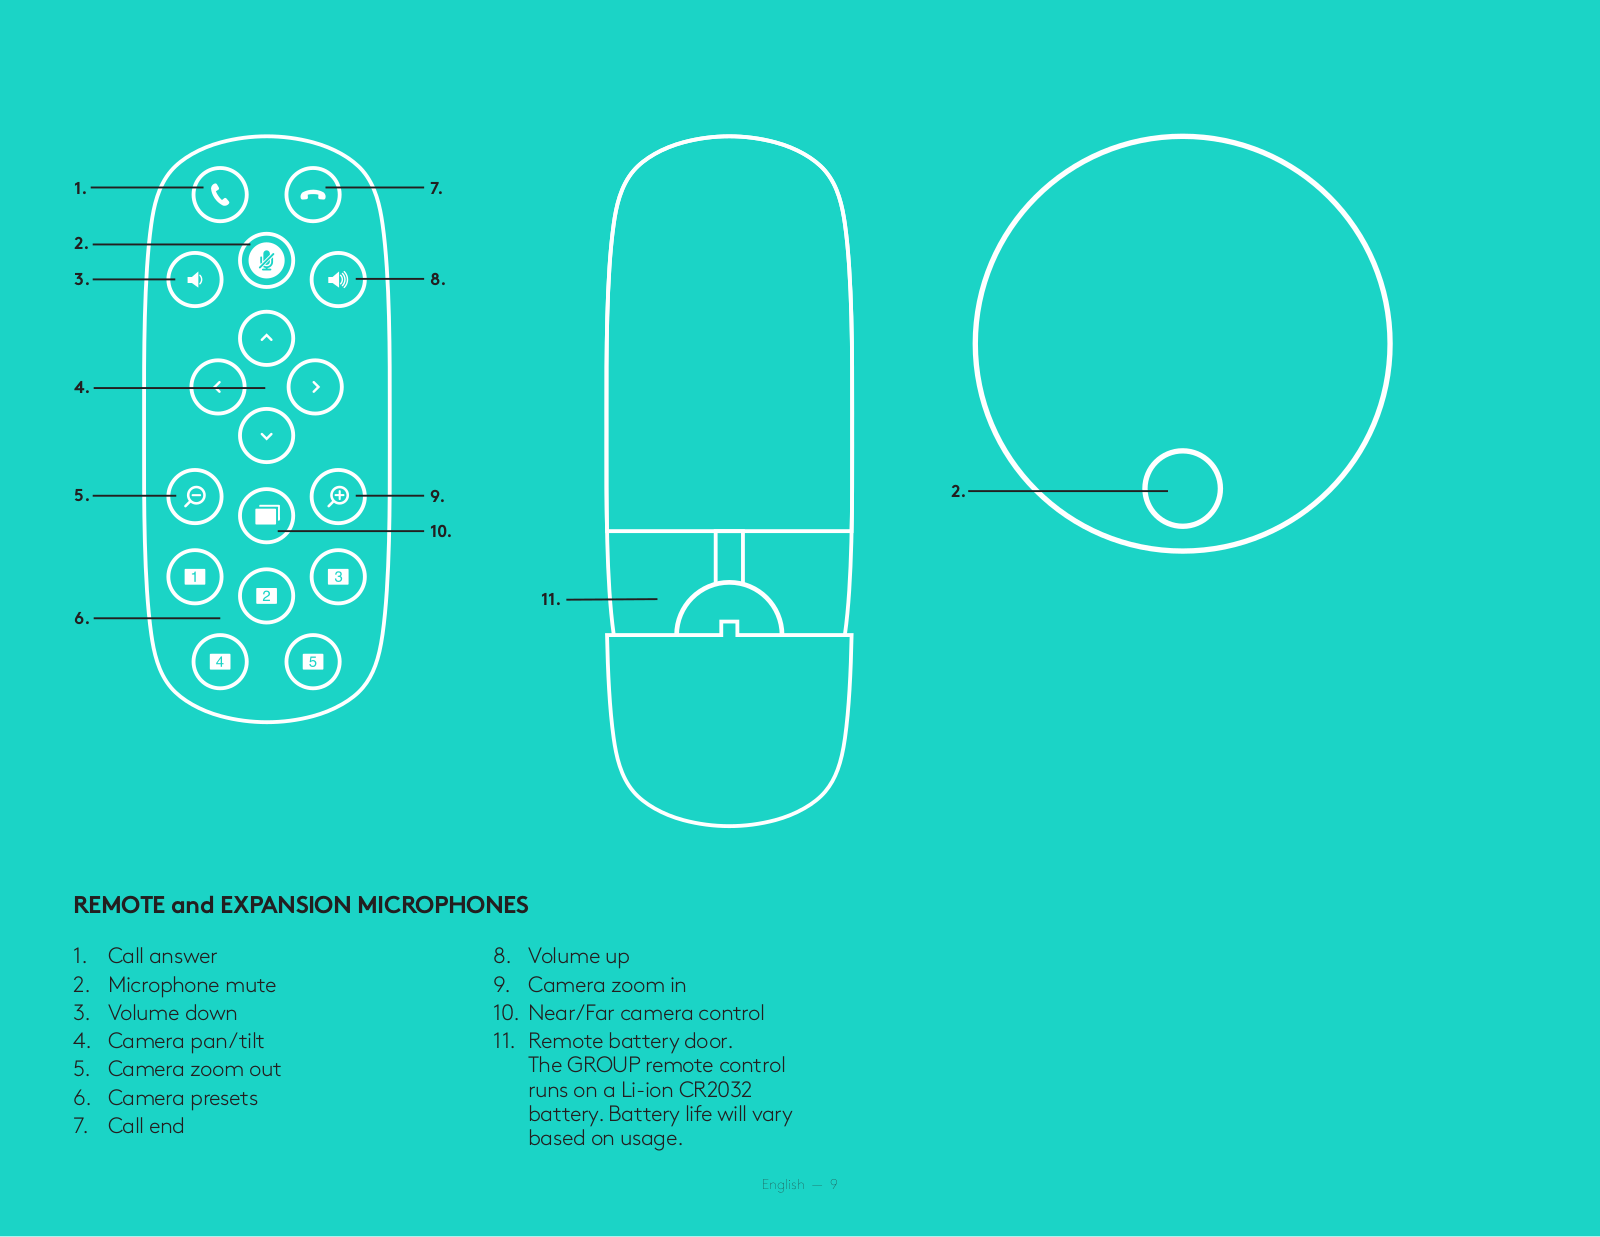
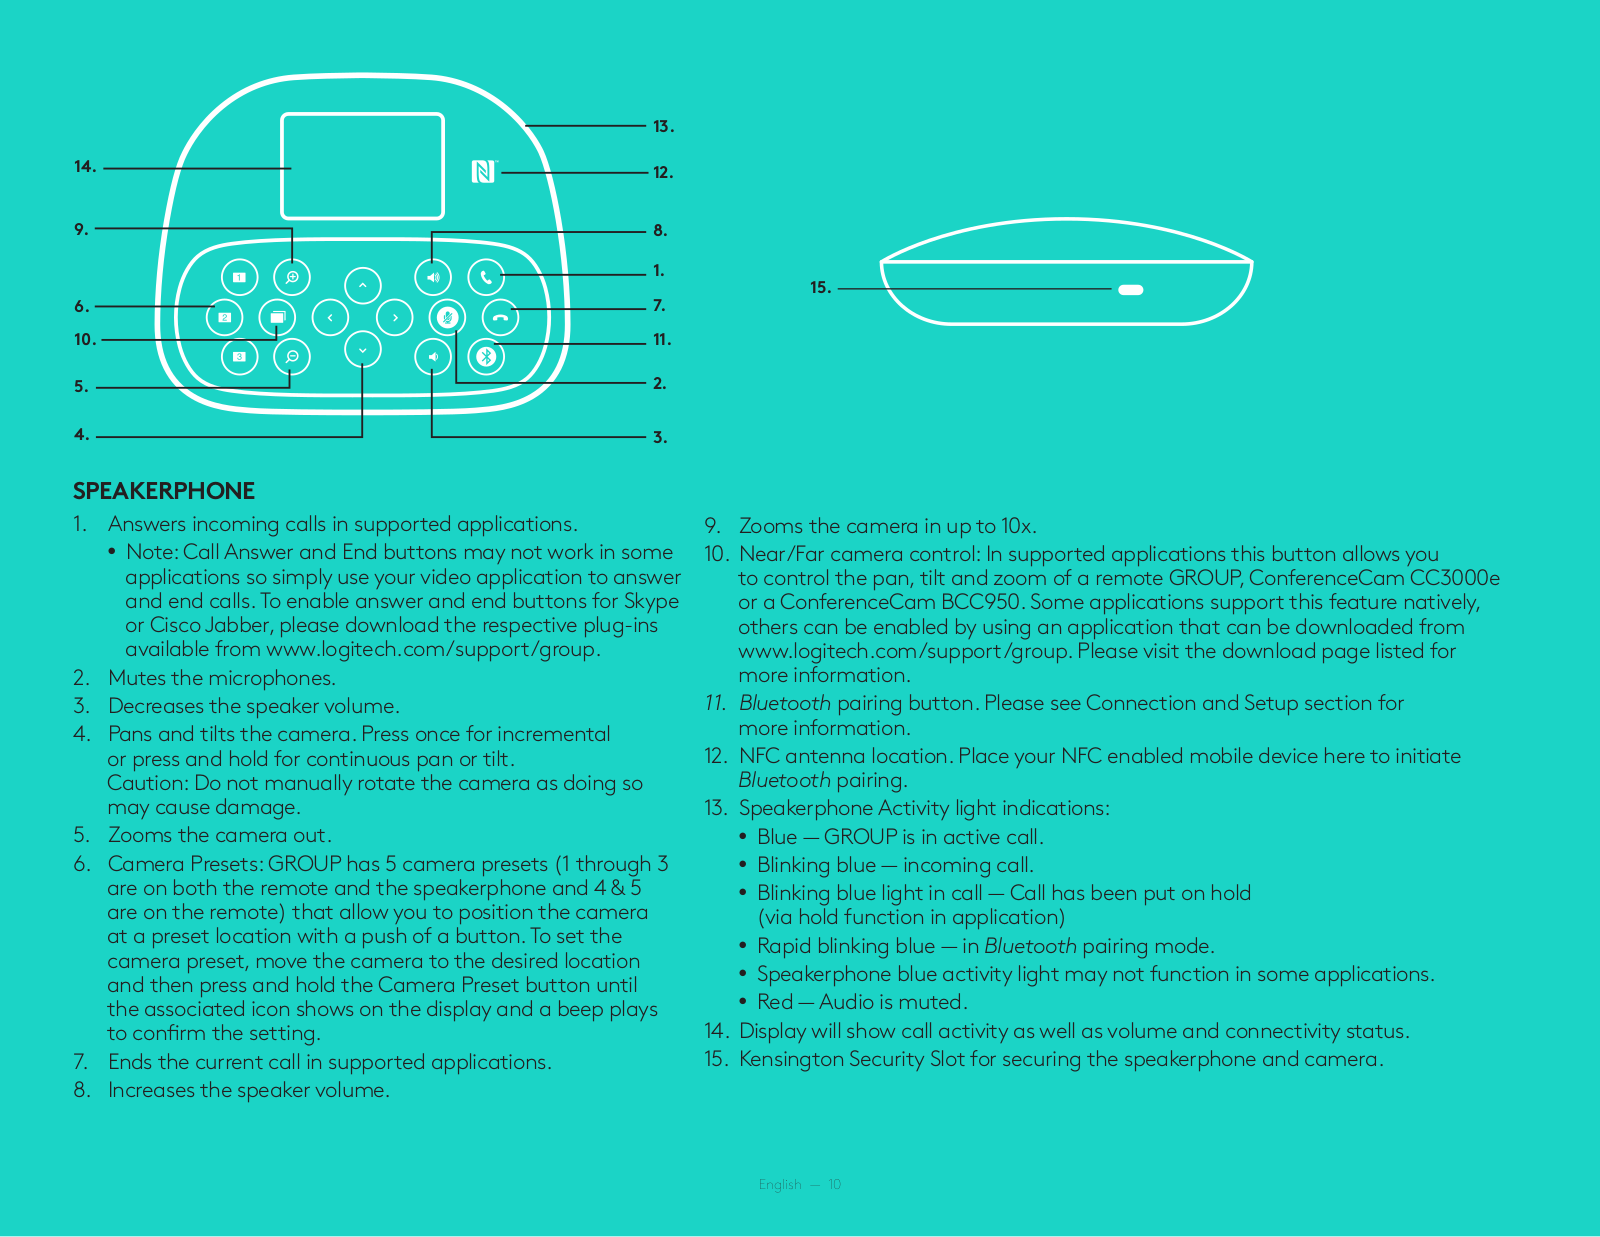
How it Works
Log In / Sign Up
Buy Points
How it Works
FAQ
Contact Us
Questions and Suggestions
Users
LOGITECH
Loading...
C
C310 HD
C500
5
C505E
3
C505e HD
C505 HD
2
C510
7
C525
10
C615
9
C905
C910
8
C920
11
C920-C
C920E
2
C920 HD PRO
C920 HD Pro Webcam
C920 Pro
C920s
2
C920s PRO
2
C920s Pro HD Webcam
C922
5
C922 PRO
3
C922 Pro Stream
C925e
6
C930E
23
CANVAS
3
CARD FOR MICROSOFT TEAMS
Case
2
case+ energy
CC3000e
10
CCCON
Chillstream
2
CIRCLE 2
9
Classic K100
CLASSIC KEYBOARD
Classic Keyboard 200
ClearChat Comfort USB
ClearChat PC Wireless
ClearChat Pro
CLEARCHAT PRO USB
ClearChat Stereo
CLEARCHAT STYLE
3
Click
ClickSmart 310
ClickSmart 420
2
ClickSmart 510
ClickSmart 820
Clock Radio Dock S400i
COMBO TOUCH
Comfort Laser
Comfort Wave 450
ConferenceCam Connect
19
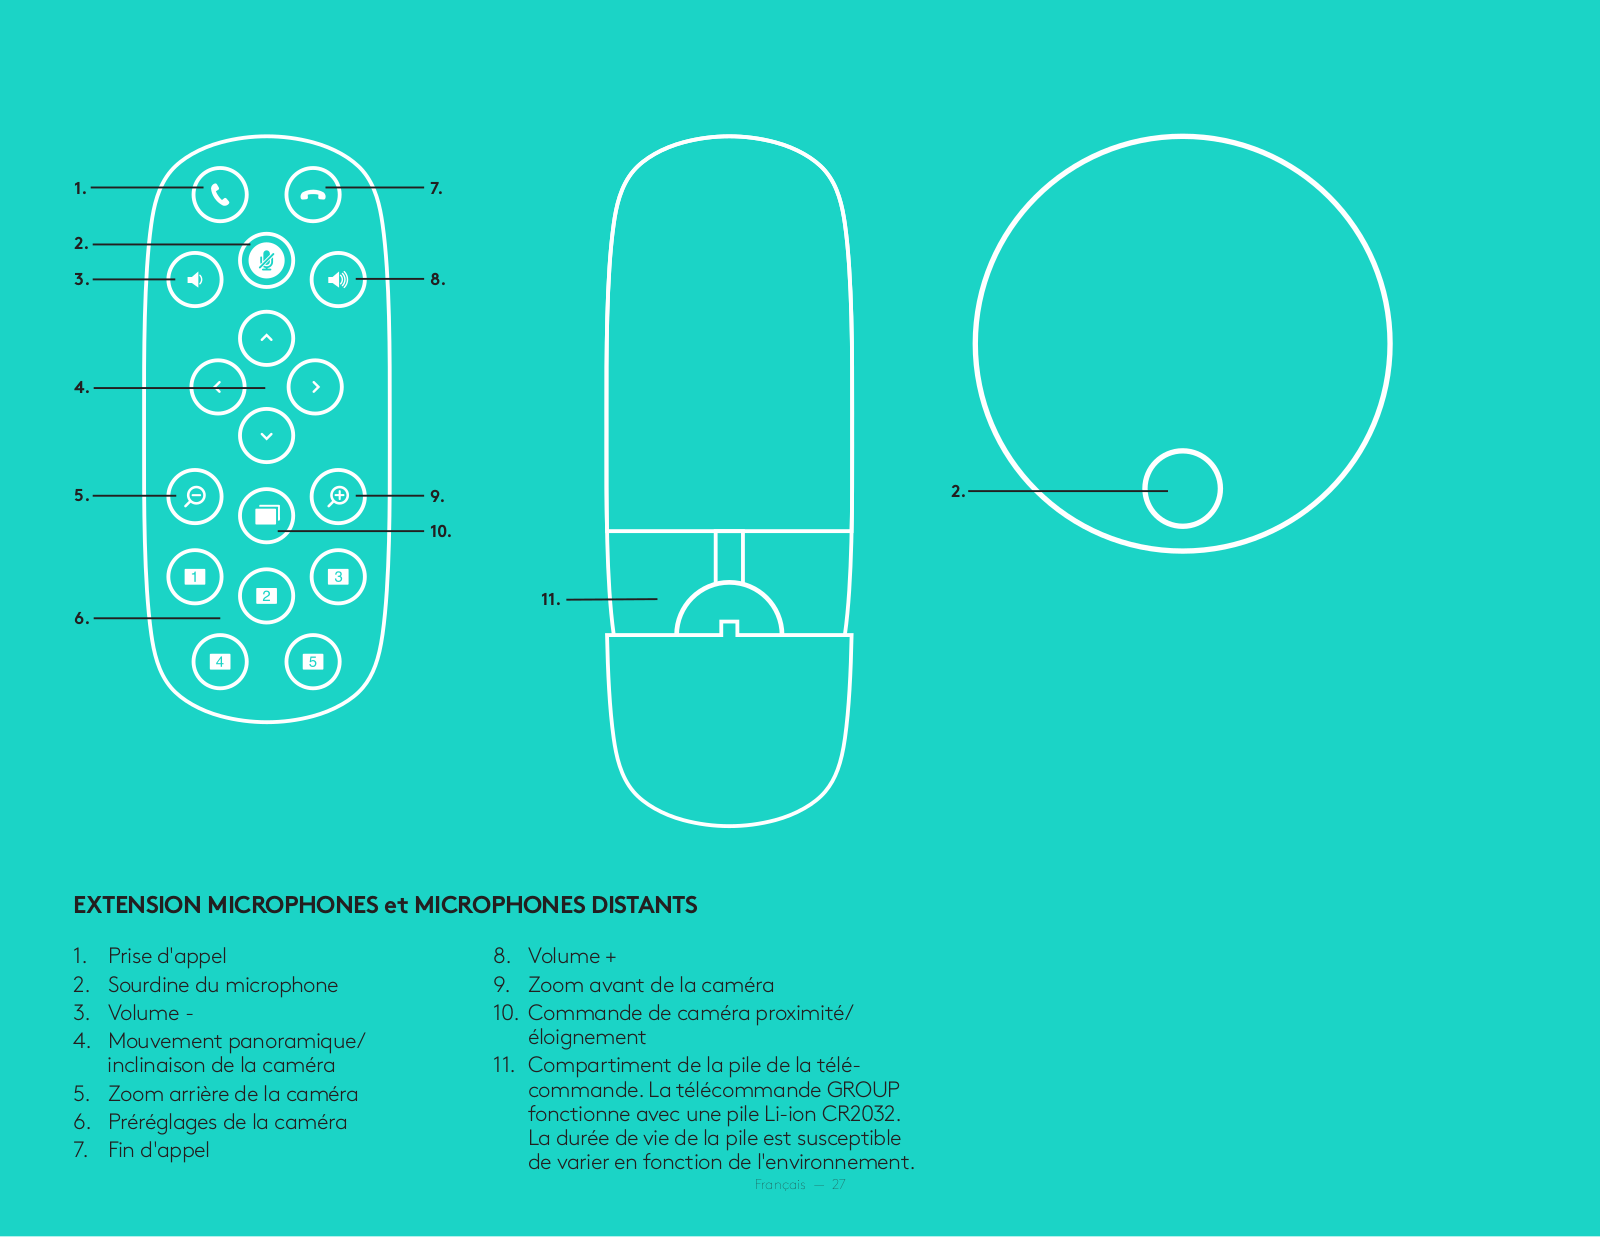
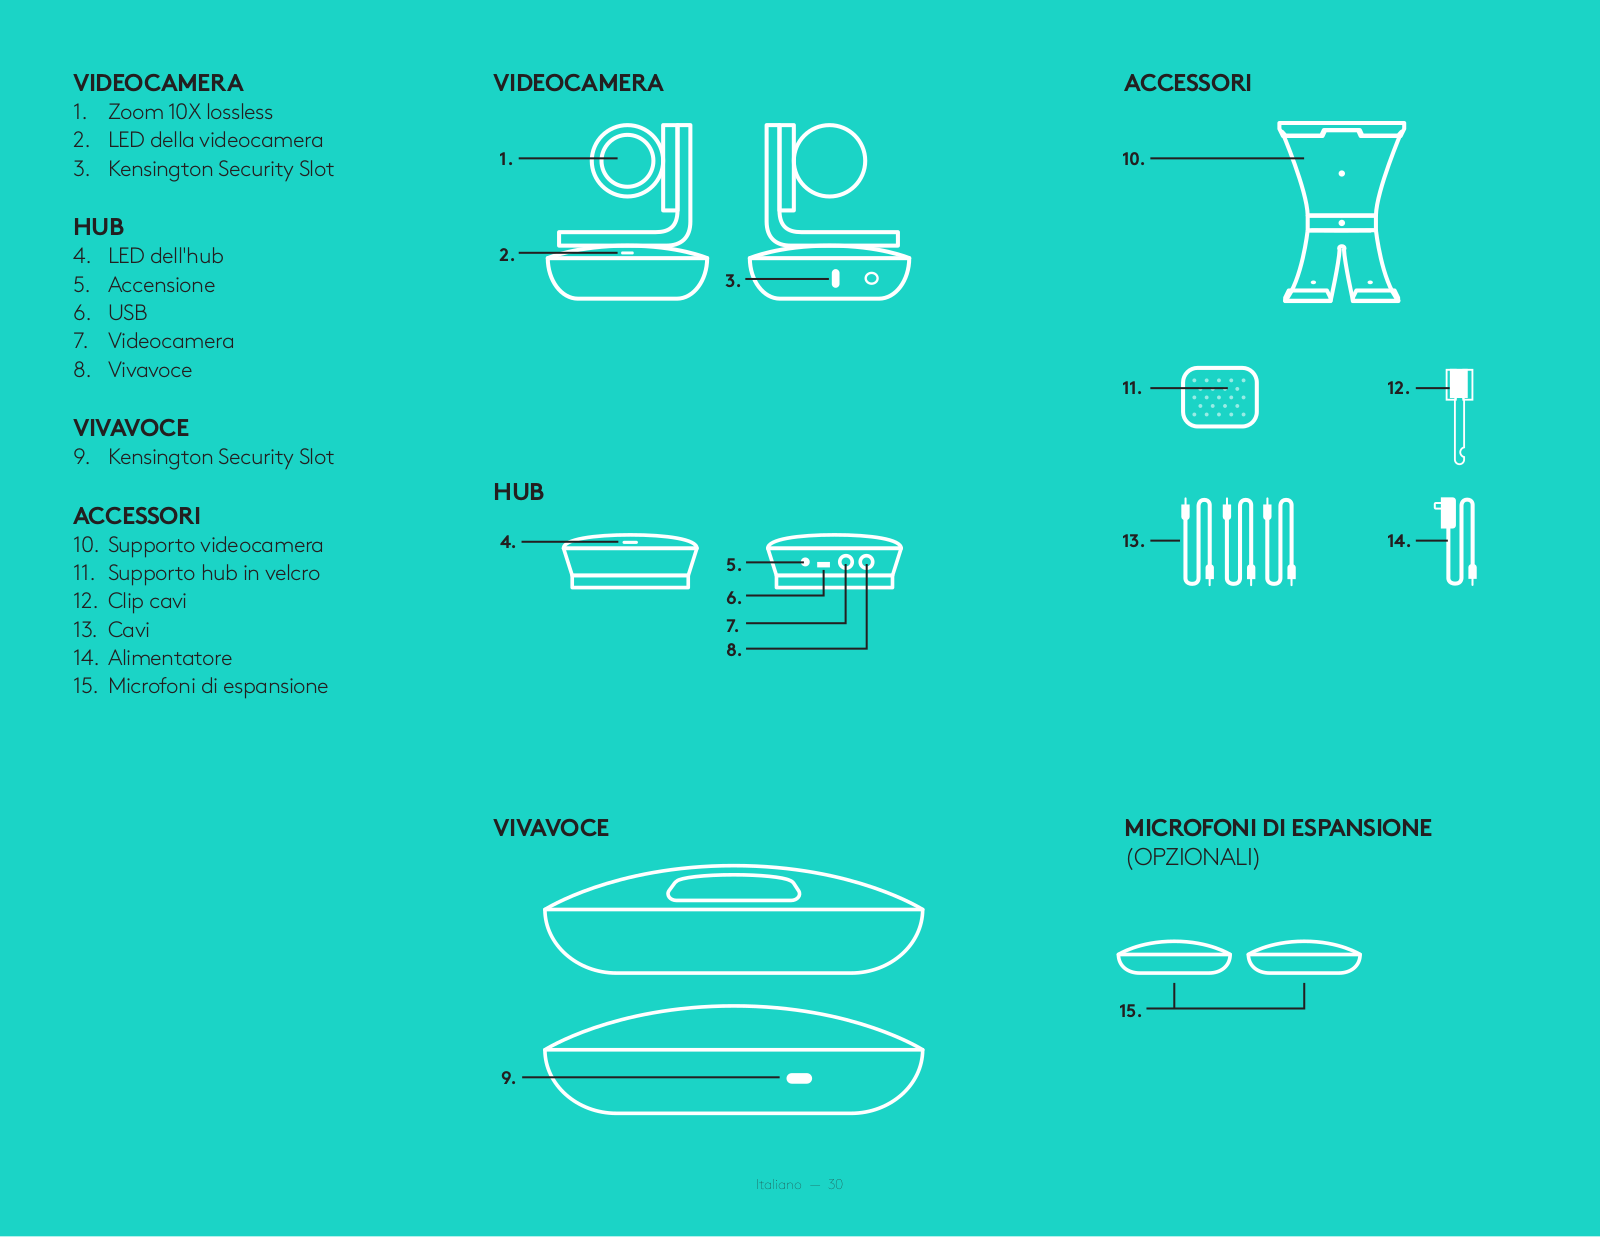
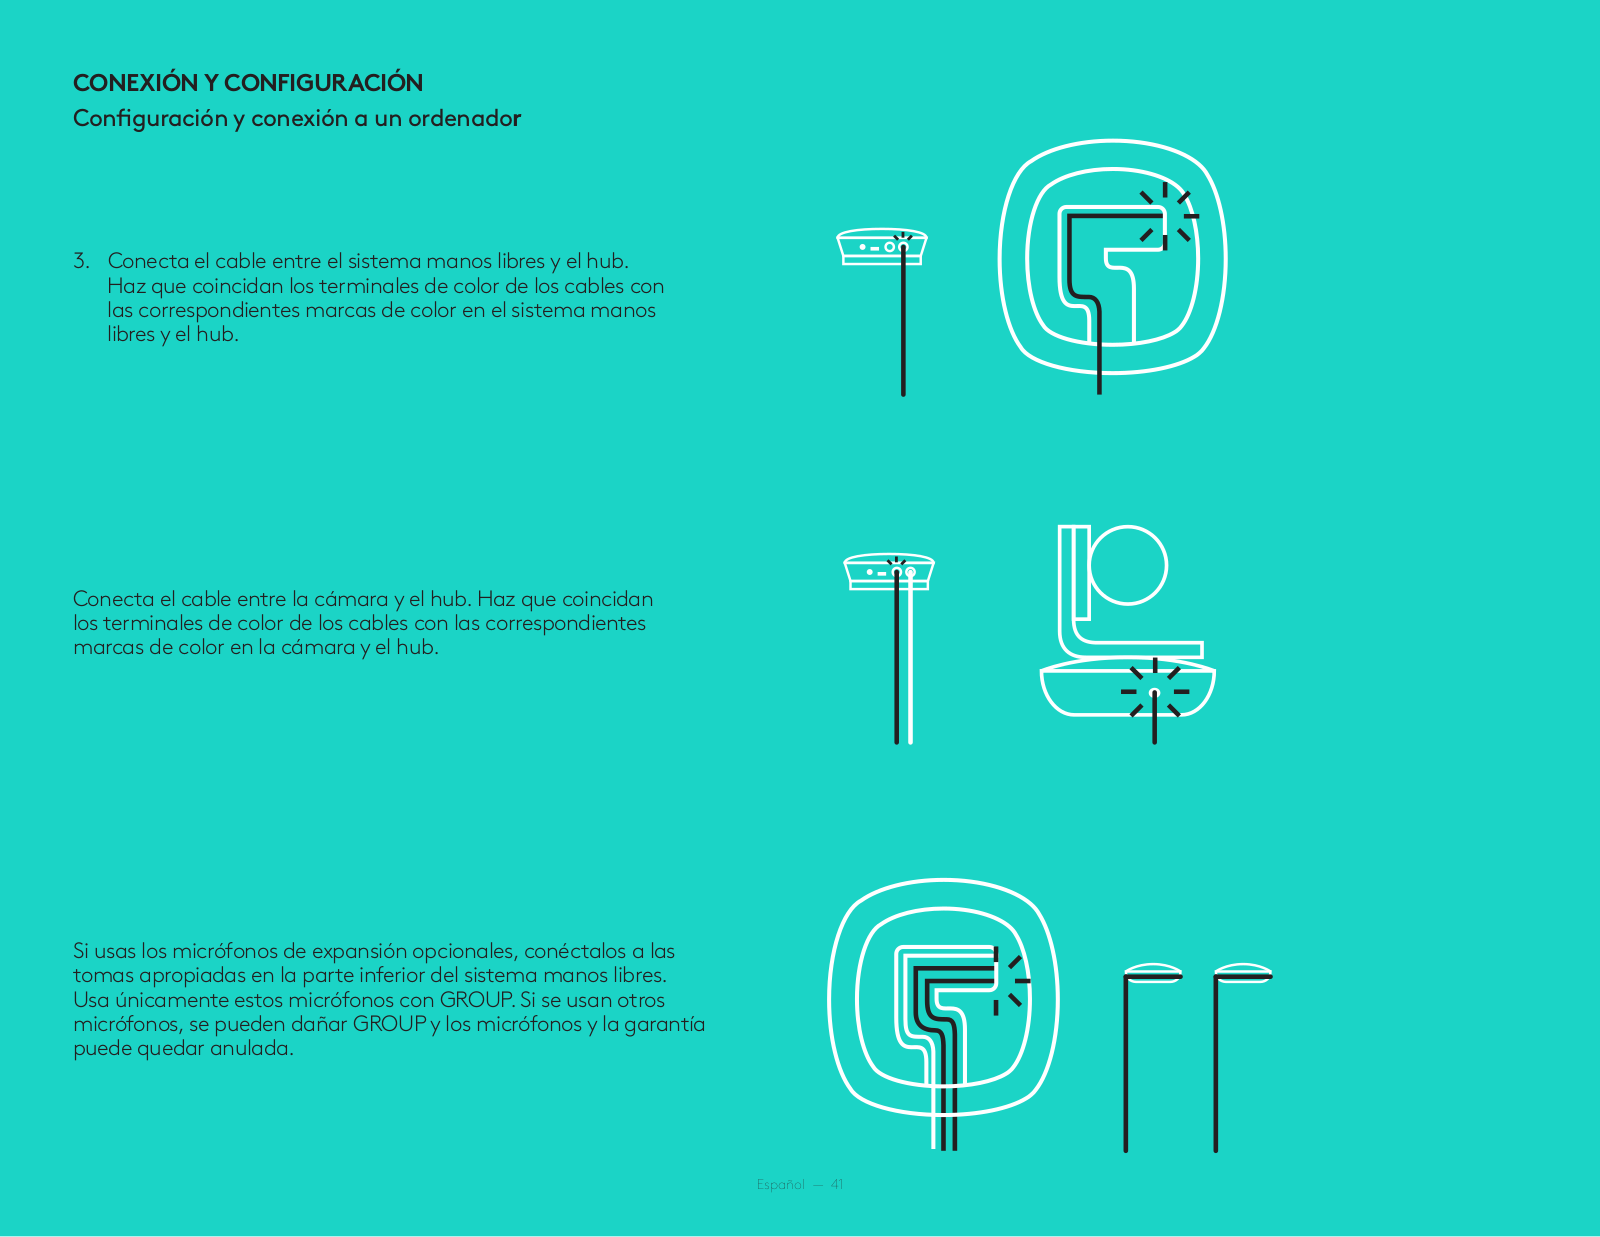
Conference Cam GROUP
2
CONFERENCECAM KIT
ConferenceCam PTZ Pro 2
Cooling Pad N120
Cooling Pad N200
CORDLES OPTICAL TRACKMAN
CORDLESS1500
Cordless 2.4 GHz
cordless action
Cordless Attack
Cordless Click!
CORDLESS COMFORT DUO
Cordless Controller
2
Cordless Desktop
3
Cordless Desktop Express
CORDLESS DESKTOP MUSIC SYSTEM
Cordless Desktop MX
CORDLESS DESKTOP MX FOR BLUETOOTH
2
CORDLESS DESKTOP S520
Cordless Desktop Wave
Cordless Desktop Wave Pro
Cordless Headset
CORDLESS HEADSET FOR PC AND MOBILE PHONES
Cordless Headset For Xbox
Cordless Internet Handset
2
CORDLESS INTERNET HANDSET FOR SKYPE
CORDLESS KEYBOARD FOR WII
CORDLESS MEDIABOARD PRO
2
Cordless Mini Optical Mouse
4
Cordless MX Duo
Cordless Number Pad
CORDLESS NUMBER PAD NOTEBOOKS
Cordless Optical Mouse
Cordless Optical TrackMan
Cordless Precision Controller
Cordless Precision Game Pad
Cordless Presenter
3
Cordless Rumblepad II
Cordless Sans Fill
CORDLESS VANTAGE HEADSET
2
Cordless Vantage Headset PS3
CP8816
Craft
9
Crayon
2
Crayon 914-000052 Szary
Crayon Digital Pen (Velegnet til iPad)
Crayon for iPad
CRAYONO
2
CREATE
Loading...
Loading...
Nothing found
Conference Cam GROUP
User manual
4 pgs
498.8 Kb
0
User Manual [ru]
264 pgs
2.11 Mb
0
Table of contents
Loading...
LOGITECH Conference Cam GROUP User Manual [ru]
...
LOGITECH User Manual [ru]
Download
Specifications and Main Features
Frequently Asked Questions
User Manual
Download
Loading...
+
hidden pages
Unhide
You need points to download manuals.
1 point = 1 manual.
You can buy points or you can get point for every manual you upload.
Buy points
Upload your manuals