


SM1660

Meteoclock
®
Suntime
SM1660 + ASM5
Instruction Manual / Mode d’emploi

2
Français
Meteoclock
®
Suntime
SM1660 + ASM5 - Manuel d’instructions
INTRODUCTION
Nous vous remercions d’avoir acheté cette station MeteoClock
®
Le temps du soleil - SM1660.
Cette station météo digitale Lexibook
®
peut non seulement donner l’heure exacte grâce à son
horloge radio contrôlée mais elle peut également prévoir les conditions climatiques et afcher
l’heure du lever et du coucher du soleil ! Veuillez prendre le temps de lire et de comprendre ce
manuel, vous pourrez ainsi proter de tous les avantages et fonctions que ce produit vous offre.
PRESENTATION DES FONCTIONS
1
2
3
4
5
6
18
8
17
15
16
1314
12
11
10
9
7
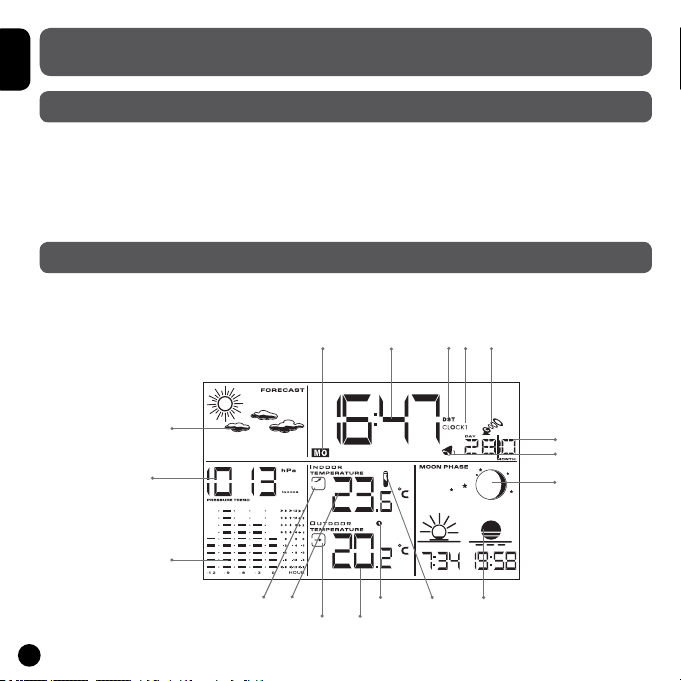
Cette section a pour objectif d’illustrer brièvement les fonctions de la SM1660 en décrivant les
diverses informations afchées à l’écran.

3
Français
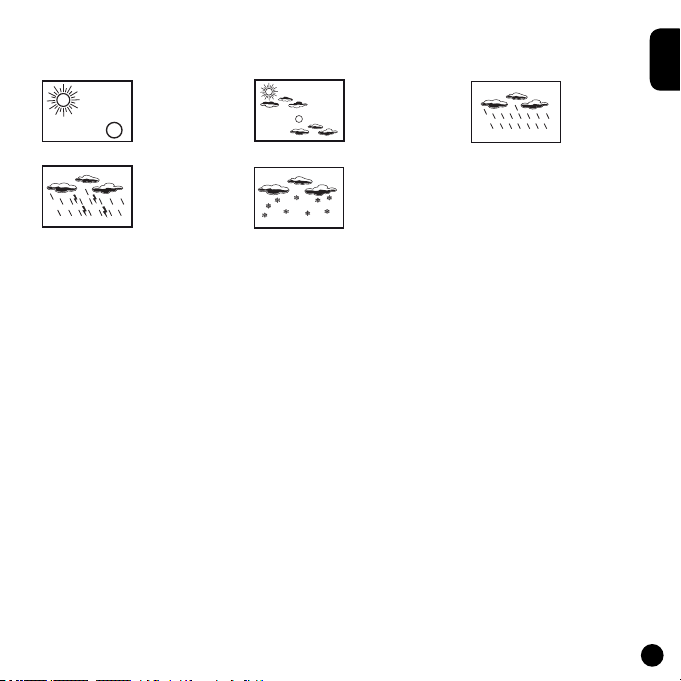
1. Symboles de prévision climatique
Les prévisions météo des prochaines 12 à 24 heures s’afchent à cet endroit au moyen de
symboles animés :
Ensoleillé, Nuageux, Pluvieux,
Orageux, Enneigé (l’icône clignote) ou
alerte de gel (l’icône reste xe).
2. Afchage du jour de la semaine
La SM1660 règle automatiquement le jour de la semaine (en anglais seulement).
3. Afchage de l’heure
Avec la SM1660, plus besoin de régler l’heure et la date ! L’heure est toujours juste et tient même
compte de l’heure d’été. Elle perçoit le signal radio DCF77 de Francfort ou MSF de Greenwich et
peut ainsi synchroniser automatiquement son horloge.
4. Afchage de l’heure d’été
L’icône DST s’afche automatiquement lorsque l’heure d’été est en vigueur en Europe.
5. Afchage Clock 1
La SM1660 offre deux horloges indiquées par les icônes « Clock 1 » et « Clock 2 ». L’horloge 1
(Clock 1) est l’horloge principale, celle qui se règle automatiquement. L’horloge 2 (Clock 2) est utile
si vous êtes souvent en déplacement à l’étranger ou si vous souhaitez régulièrement connaitre
l’heure exacte dans un autre pays. Une fois réglée, cette deuxième horloge vous donnera l’heure
instantanément sans aucun calcul mental !
6. Afchage de l’horloge radio contrôlée
L’icône xe de la tour indique que l’heure radio-contrôlée est activée. La station météo synchronise
l’heure et la date automatiquement.
7. Afchage de la date et du mois
La date (DAY) et le mois (MONTH) s’afchent automatiquement à cet endroit.

4
Français
8. Icône des alarmes 1 et 2
La SM1660 offre 2 alarmes programmables. L’icône de la cloche s’afche à cet endroit lorsqu’une
alarme a été réglée.
9. Afchage de la phase lunaire
La phase lunaire en cours est automatiquement mise à jour à cet endroit selon l’année, le mois et
le jour.
10. Afchage de l’heure du lever et du coucher de soleil
L’heure du lever et du coucher du soleil est automatiquement mise à jour selon le jour de l’année
et la latitude de votre ville. Vous devrez choisir la code la ville la plus près de chez vous pour que
la station météo afche le temps exact.
11. Indicateur de piles faibles
Si les piles du capteur à distance sont faibles, cet icône s’afchera sur l’unité principale. Lorsque
l’éclairage de l’écran LCD de l’unité principale s’estompe, cela signie que les piles sont faibles et
qu’elles doivent être remplacées.
12. Canaux à distance 1, 2, 3, 4
Cette station météo est livrée avec un capteur à distance. Vous pouvez cependant acheter 1, 2
ou 3 capteurs supplémentaires pour mesurer la température et l’humidité dans un autre endroit ou
pièce de la maison. Chaque capteur à distance est associé à un canal. Vous pouvez faire déler
les relevés de chaque capteur à distance à l’aide de la touche « Channel » située sur le dessus de
votre station météo. Le numéro du canal correspondant s’afche à cet endroit.
Remarque: Si vous n’avez pas de capteurs supplémentaires, veuillez ne pas tenir compte de cette
fonction.
13. Afchage de la température et de l’humidité à l’extérieur
Grâce à son capteur sans l, la station peut détecter à distance la température et l’humidité à
l’extérieur. Les relevés sont afchés à cet endroit. La température ambiante et le taux d’humidité
s’afchent automatiquement à tour de rôle.
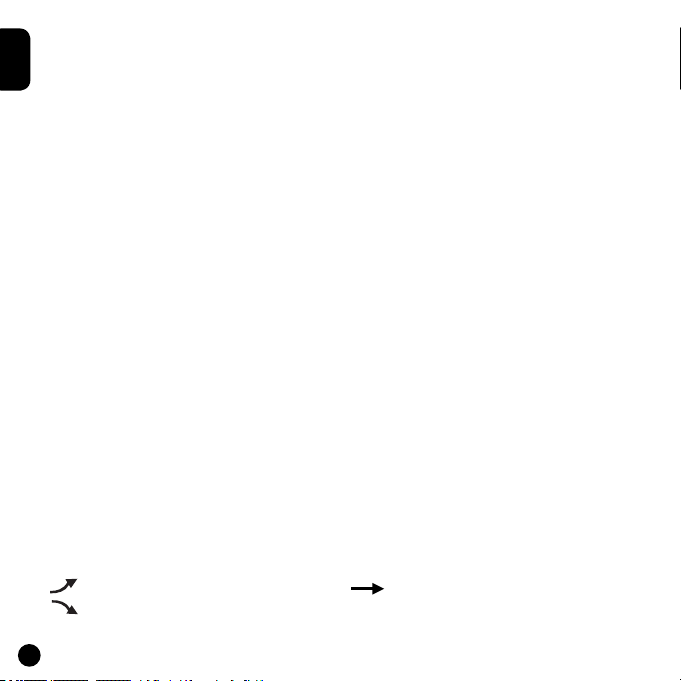
14. Tendance de la température et de l’humidité à l’extérieur
L’icône èche donne les tendances de la température et de l’humidité à l’extérieur dans un
intervalle d’une demi-heure. La èche indique une tendance à la hausse, la èche
indique une tendance stable et la èche indique une tendance à la baisse.

5
Français
15. Afchage de la température et de l’humidité à l’intérieur
Les relevés de la température et de l’humidité à l’intérieur sont captés par l’unité principale et
sont ensuite afchés à cet endroit. La température ambiante et le taux d’humidité s’afchent
automatiquement à tour de rôle.
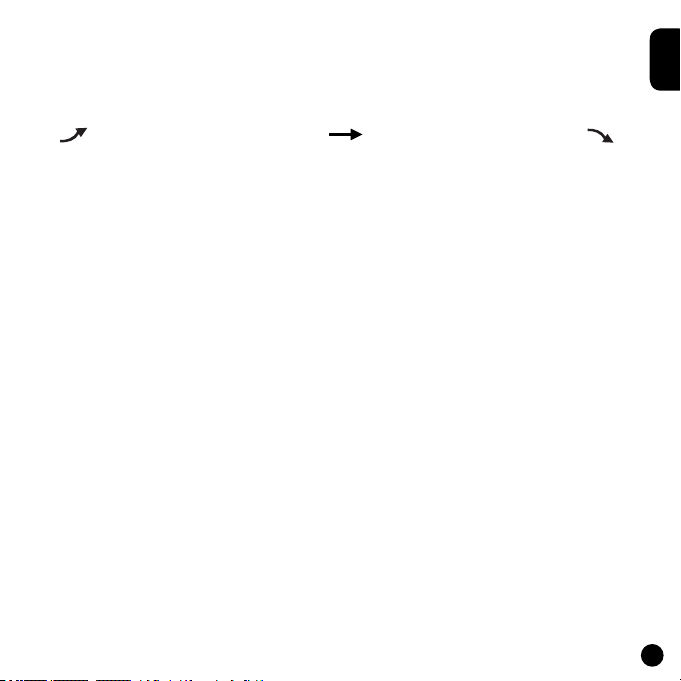
16. Tendance de la température et de l’humidité à l’intérieur
Cet icône donne les tendances de la température et de l’humidité à l’intérieur dans un intervalle
d’une demi-heure. La èche indique une tendance à la hausse, la èche indique une
tendance stable et la èche indique une tendance à la baisse.
17. Graphique historique de la pression
Ce graphique indique la tendance de la pression sur une période de 12 heures. L’échelle de
variation est de +/- 3 hecto pascal (hPa). Pourquoi consulter ce graphique ? En général, le
mauvais temps est associé à une basse pression atmosphérique et le beau temps à une haute
pression atmosphérique. Les prévisions météorologiques de la SM1660, sous forme d’icônes
animés, dépendent donc de l’évolution de la pression atmosphérique. Ainsi, si la station météo
annonce de la pluie et vous observez une soudaine et importante diminution de l’histogramme, la
pluie risque d’être forte et violente.
18. L’afchage de la pression
Cette station météo mesure la pression atmosphérique en hecto pascal et en temps réel.

6
Français
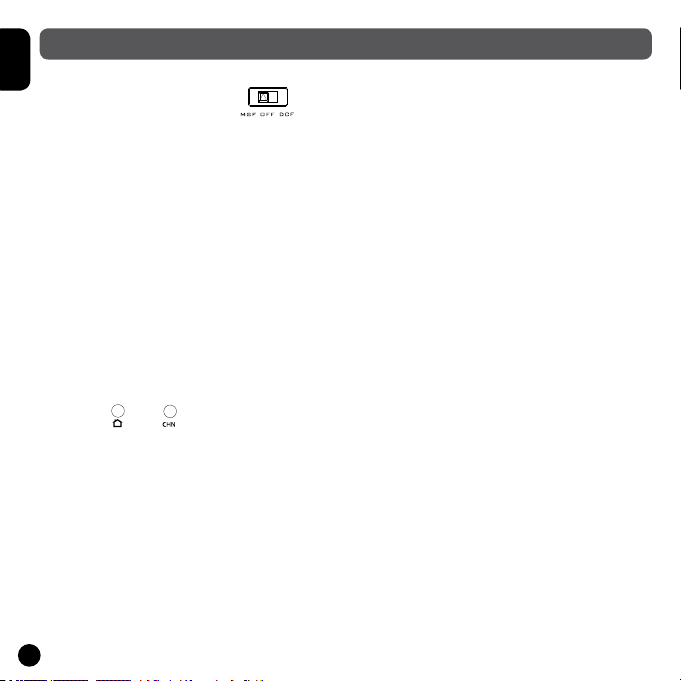
Etape 1 – Réglage de la zone de l’horloge radio-contrôlée
• Réglez l’interrupteur MSF/OFF/DSF situé au dos de l’unité principale sur DSF pour une
utilisation en France, Espagne, Italie, et Allemagne.
• Réglez l’interrupteur sur MSF pour une utilisation au Royaume-Uni, Irlande, Portugal.
• Réglez l’interrupteur sur OFF pour une utilisation en dehors des zones GMT 0 et GMT +1.
Si vous n’habitez pas en Europe (ou en dehors des fuseaux horaires de la France et de
l’Angleterre), la SM1660 ne recevra pas l’heure automatiquement. Vous devrez régler l’heure
manuellement (Voir page 13).
Etape 2 - Insertion des piles
• Insérez 3 piles de types AA/LR6 dans le compartiment à piles situé au dos de l’unité principale.
Refermez le compartiment.
• Dévissez le compartiment des piles situé au dos du capteur sans l. Insérez 2 piles de type
AAA/LR03. Refermez le compartiment à l’aide d’un tournevis.
• Si vous n’avez pas acheté de capteurs supplémentaires, vous n’aurez pas besoin de régler
le capteur à distance. N’appuyez pas sur les touches et . Si vous désirez régler votre unité
principale avec plus d’un capteur, veuillez vous référer au paragraphe « Utilisation avec plusieurs
capteurs ».
Etape 3 - Installation de l’unité principale et du capteur à distance
• Placez le capteur à distance à l’extérieur. Vous pouvez l’accrocher sur un mur grâce au support
mural.
• L’unité principale peut être installée sur une surface lisse grâce au support de table. Elle est
également équipée d’un support mural.
REGLAGES
7
Français
Etape 4 – Réglages de la ville locale et de l’altitude
• Cherchez et notez le code de la ville correspondant à la ville la plus proche de votre domicile.
Veuillez vous référer à la liste des codes de villes située à la n du manuel d’instructions.
• Déterminez et notez l’altitude en mètres de votre ville (par exemple : Paris, 88 mètres).
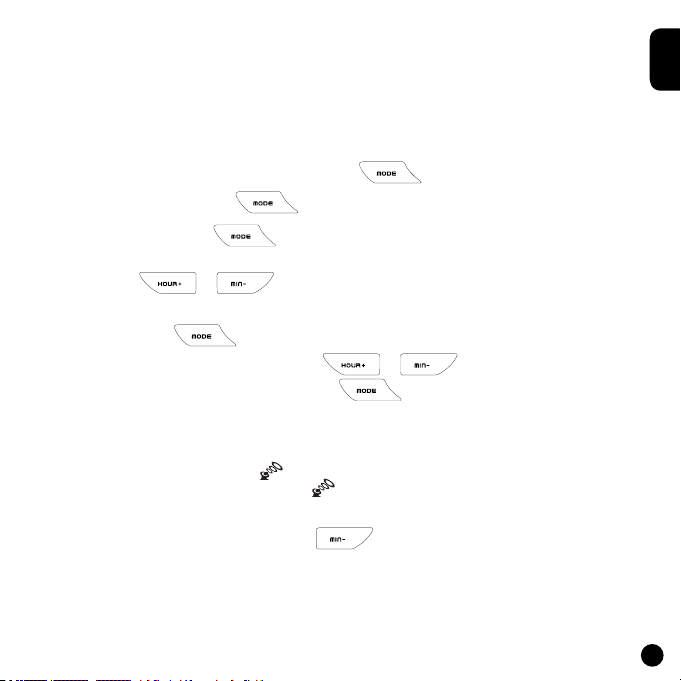
• Assurez-vous que la station météo soit en mode horloge 1 ( CLOCK 1 s’afche à la droite de
l’heure). Sinon, appuyez plusieurs fois sur la touche jusqu’à ce que CLOCK 1 s’afche.
• Appuyez et maintenez la touche durant 3 secondes. L’heure clignote.
• Appuyez 3 fois sur la touche . Le code de la ville clignote au-dessus de l’indicateur
« CITY ».
• Utilisez la touche ou pour faire déler les codes de villes afchés sur l’écran.
Ce réglage est important car il inuera sur l’heure du lever de soleil et du coucher du soleil.
• Appuyez sur la touche pour conrmer le code de la ville.
• Le niveau d’altitude clignote. Utilisez la touche ou pour régler l’altitude
(en mètres) de votre ville. Appuyez sur la touche pour conrmer tous les réglages.
Etape 5 – Horloge radio-contrôlée
• Environ 7 minutes après avoir inséré les piles, l’unité principale lancera la recherche du signal
de l’horloge radio contrôlée. L’icône clignotera pendant quelques minutes durant la recherche
du signal. Lorsque le signal est reçu, l’icône cesse de clignoter et reste xe.
• Vériez que l’’unité principale afche l’heure et la date exacte. Si ce n’est pas le cas, relancez la
recherche du signal en maintenant la touche durant 3 secondes.
Rappel : la SM1660 ne recevra le signal que si vous habitez en Europe (à l’intérieur des fuseaux
horaires de la France et de l’Angleterre).
• Vériez que l’unité principale afche les données de température et d’humidité extérieures
transmises par le capteur. Vous pouvez maintenant utiliser votre nouvelle station météo.
8
Français
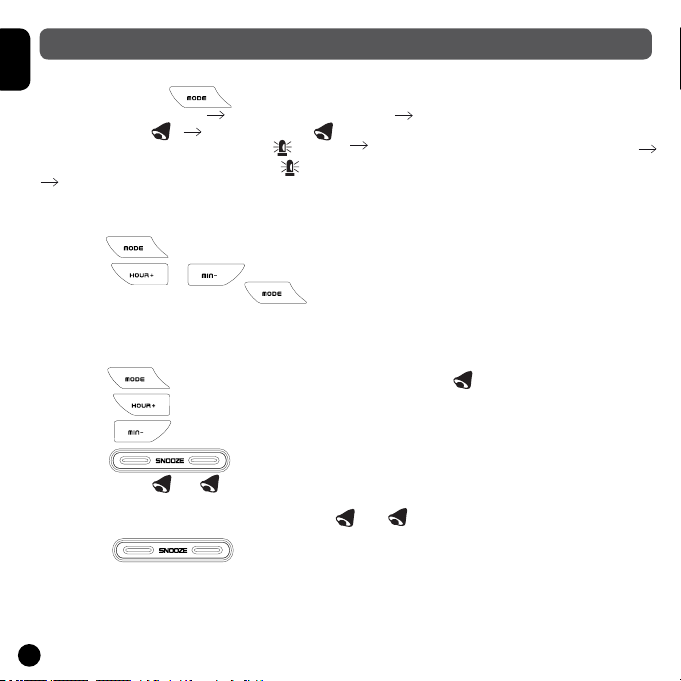
Déler les menus
Lorsque vous appuyez sur la touche le menu délera dans l’ordre suivant :
Mode d’horloge 1 (CLOCK 1) Mode d’horloge 2 (CLOCK 2)
Mode d’alarme 1 1 Mode d’alarme 2 2
Mode d’alarme de température à l’intérieur (l’icône s’afche et la température clignote)
Mode d’alarme de température à l’extérieur (l’icône s’afche et la température clignote)
Mode d’horloge 1.
Réglage de l’horloge 2 (deuxième indication d’heure)
• Appuyez plusieurs fois sur la touche jusqu’à ce que CLOCK 2 s’afche à la droite de
l’heure.
• Appuyez sur la touche ou pour régler l’heure d’un autre fuseau horaire
(en augmentant/diminuant les heures de l’Horloge 1). Appuyez sur pour conrmer.
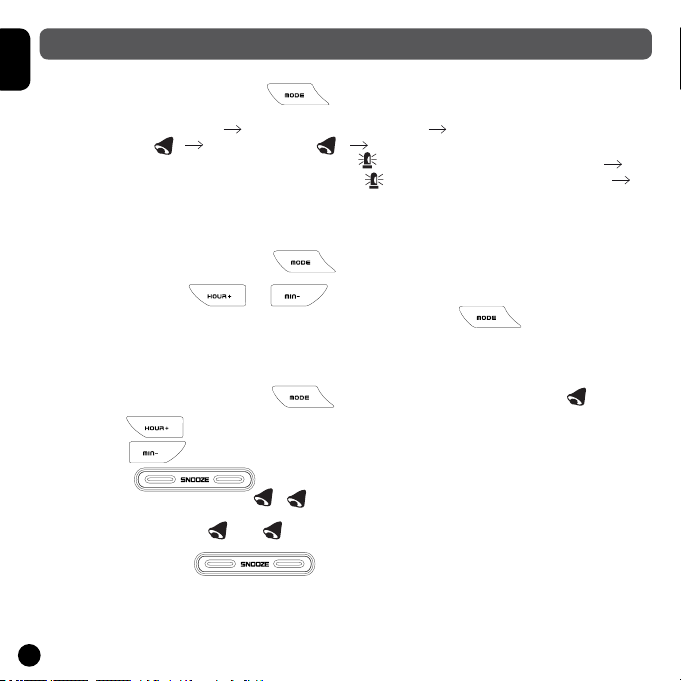
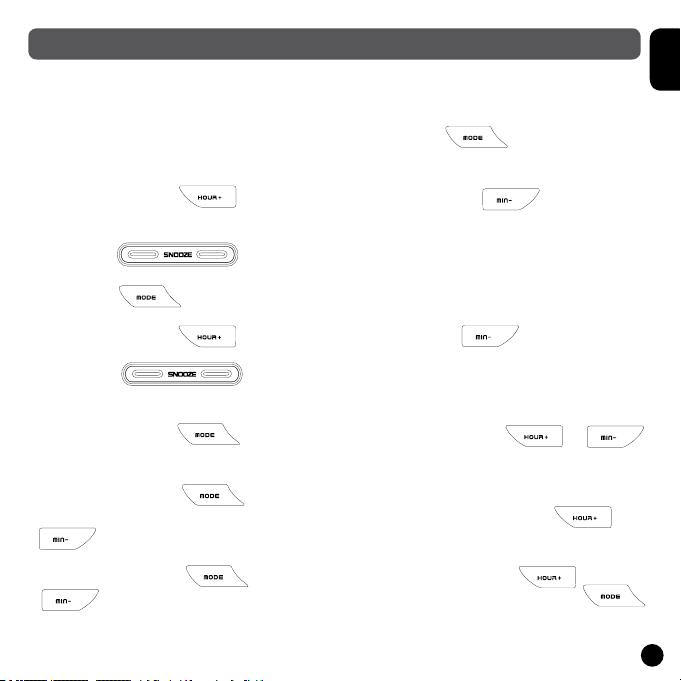
Réglage des alarmes 1 et 2
• Vous pouvez régler 2 alarmes.
• Appuyez plusieurs fois sur la touche jusqu’à ce l’icône de l’alarme 1 ou 2 12
s’afche.
• Appuyez sur pour régler les heures
• Appuyez sur pour régler les minutes.
• Appuyez sur pour activer ou désactiver l’alarme. Lorsque qu’une alarme est
activée, le symbole de la cloche 1/ 2 et l’icône ON apparaîtront.
• Lorsque l’alarme sonne, 1 ou 2 clignotera.
• Appuyez sur la touche pour répéter l’alarme. Elle sonnera de nouveau
5 minutes plus tard.
• Appuyez sur N’IMPORTE QUELLE autre touche pour désactiver l’alarme. Si l’alarme n’est pas
arrêtée manuellement, la sonnerie s’arrêtera automatiquement après une minute.
AUTRES FONCTIONS
9
Français
Rétro éclairage
Appuyez sur la touche pour activer le rétro-éclairage. Il restera allumé durant
environ 10 secondes.
Afchage de température en C° ou F°
En mode d’horloge 2 (Clock 2), appuyez sur la touche pour permuter
l’afchage de la température entre degrés Celsius (C°) et Fahrenheit (F°).
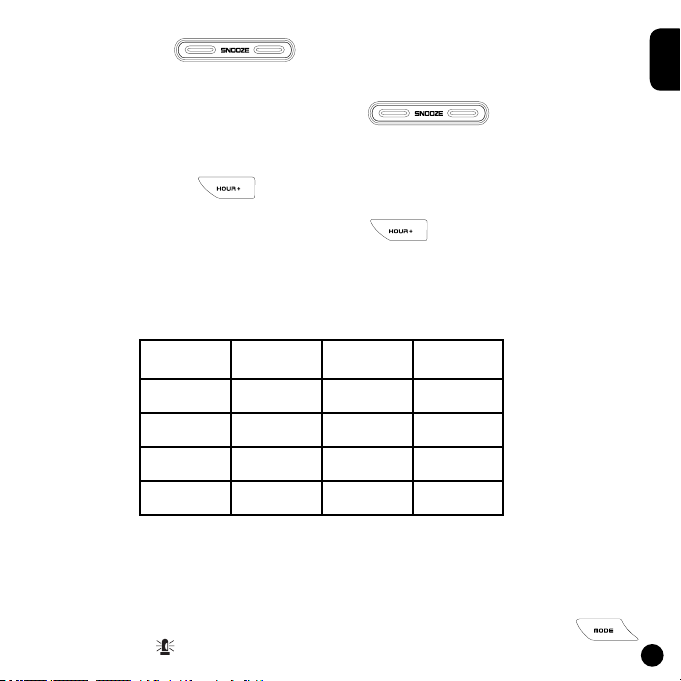
Température Min et Max & Humidité
Appuyez plusieurs fois sur en mode d’horloge 1 (Clock 1) pour faire déler les
enregistrements de température et d’humidité minimum et maximum.
En mode d’horloge 1 (Clock 1), appuyez et maintenez pendant 5 secondes pour
remettre les enregistrements à zéro.
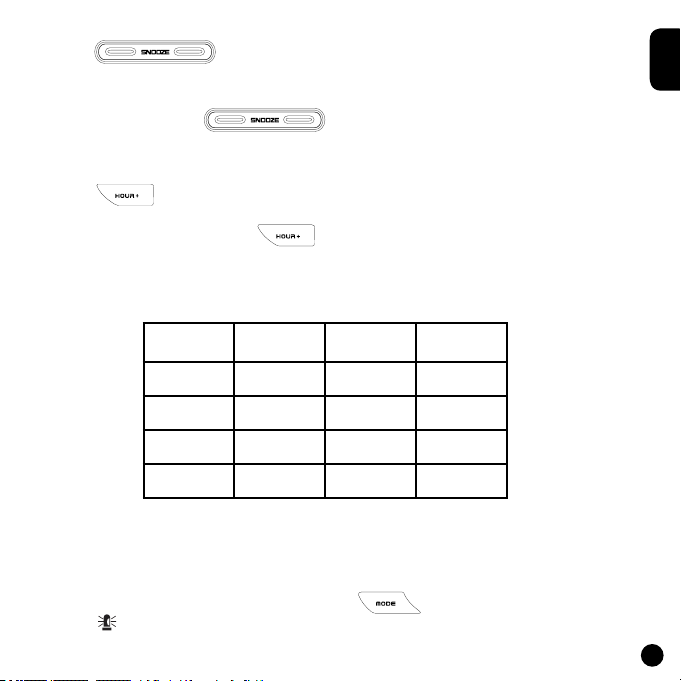
Afchage HI & LO
Lorsque les icônes “HI” et “LO” remplacent les valeurs de température et d’humidité à l’écran
lorsqu’elles sont en dehors de l’échelle de transmission.
Intérieur/
Extérieur
Température Humidité Afchage
Intérieur > +55°C > 95% HI
Intérieur < -20°C < 15% LO
Extérieur > +70°C > 95% HI
Extérieur < - 30°C < 15% LO
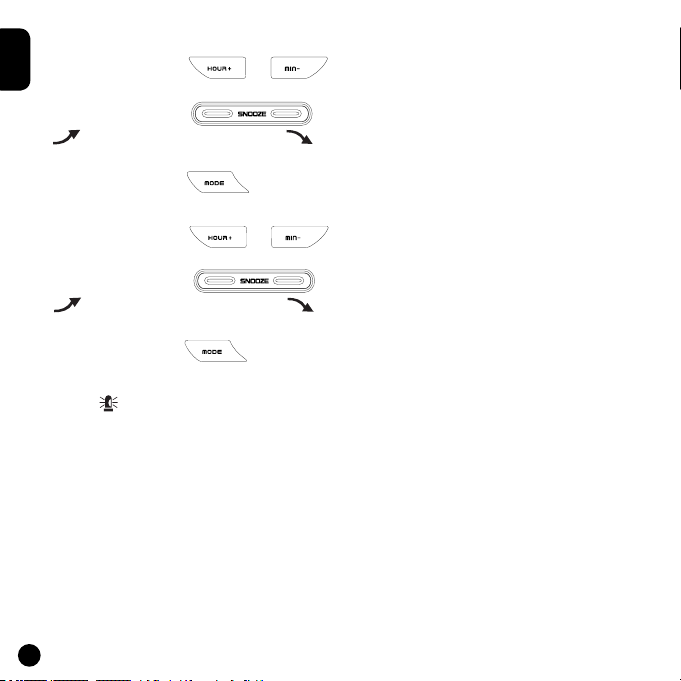
Alarmes de température intérieure et extérieure
Vous pouvez régler des alarmes de température pour un canal local et pour un canal à distance.
Si la température atteint le seuil que vous avez déterminé, une alarme sonnera.
• Sélectionnez le mode d’alarme de température en appuyant plusieurs fois sur la touche .
(Intérieur). L’icône s’afche et la température intérieur clignote.
10
Français
• La valeur par défaut pour la température intérieure (14°C) ou le réglage existant clignotera.
• Appuyez sur la touche ou pour régler la valeur limite de la température à
l’intérieur.
• Appuyez sur la touche pour sélectionner l’alarme de température élevée
, l’alarme de température faible ou pour désactiver la fonction d’alarme (aucun
symbole).
• Appuyez sur la touche pour sauvegarder vos réglages. La valeur par défaut pour la
température extérieure (14°C) ou le réglage existant clignotera.
• Appuyez sur la touche ou pour régler la valeur limite de la température à
l’extérieur.
• Appuyez sur la touche pour sélectionner l’alarme de température élevée
, l’alarme de température faible ou pour désactiver la fonction d’alarme (aucun
symbole).
• Appuyez sur la touche pour sauvegarder vos réglages.
Lorsque l’alarme de température sonne
• L’icône signale que la température a dépassé la limite de température choisie.
• Appuyez sur n’importe quelle touche pour arrêter l’alarme de température.
• Si aucune touche n’est pressée, l’alarme de température s’arrêtera automatiquement après une
minute.
• Une fois enclenchée, l’alarme de température retentit d’un son distinctif, différent de l’Alarme 1 et
de l’Alarme 2.
11
Français
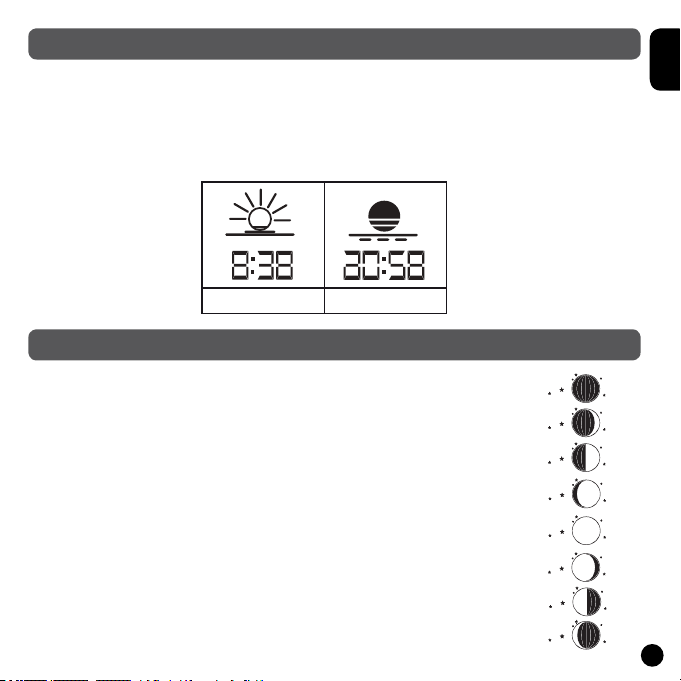
Durant les 28 jours du mois lunaire, l’aspect de la lune change. La lune, étant
de forme sphérique, est toujours éclairée à moitié par le soleil. Puisque la
lune tourne autour de la terre, l’apparence de sa surface éclairée change
continuellement. Ce phénomène crée les phases lunaires. La phase lunaire en
cours est automatiquement mise à jour sur votre station météo selon l’année,
le mois et le jour.
Afchage des Phases Lunaires :
1. Nouvelle Lune
2. Premier Croissant
3. Premier Quartier
4. Lune Gibbeuse
5. Pleine Lune
6. Lune Gibbeuse
7. Dernier Quartier
8. Dernier Croissant
PHASES LUNAIRES
L’HEURE DE LEVER ET DE COUCHER DU SOLEIL
L’heure de lever et de coucher du soleil dépend de l’inclinaison de l’axe de la Terre ainsi que du
mouvement de la planète autour de son orbite.
Votre station MeteoClock
®
SM1660 indique l’heure exacte du lever et du coucher du soleil dans
votre ville ! En effet, cette station météo calcule l’heure de lever et de coucher du soleil en fonction
de la période de l’année ainsi que de la latitude et du fuseau horaire de votre ville.
Pour ces réglages, référez vous à l’étape 4 du Chapitre « Réglages » page 6.
Lever du soleil Coucher du soleil
1)
2)
3)
4)
5)
6)
7)
8)

12
Français
Régler le canal
Si vous avez acheté plusieurs capteurs à distance, vous devez régler chaque capteur sur un canal
différent.
• A l’intérieur du compartiment des piles du capteur à distance, appuyez sur la touche pour
sélectionner un canal (1 à 4).
• Appuyez une fois sur cette touche pour faire permuter le canal sur 2, etc. L’indicateur LED
clignote à chaque fois que vous appuyez sur cette touche.
• Réglez chaque capteur à distance sur un canal différent. Le canal 1 est utilisé pour recevoir les
données de l’extérieur et activer les symboles des prévisions climatiques. Veuillez donc à le
placer à l’extérieur !
Interférences
Si votre station météo détecte d’autres signaux de sources voisines, vous devrez régler le capteur
à distance sur un code maison différent (réglage par défaut = 1).
• A l’intérieur du compartiment des piles du capteur à distance, appuyez sur pour sélectionner
un code maison (2-15). Appuyez une fois sur cette touche pour faire permuter le code maison sur
2, etc. L’indicateur LED clignote à chaque fois que vous appuyez sur cette touche.
• Les capteurs à distance de chaque unité principale doivent être réglés sur le même code maison.
Recherche manuelle (recherche des signaux à distance)
Si un nouveau capteur est ajouté ou si un signal est perdu (l’afchage extérieur clignote), vous
devez lancer manuellement la recherche de chaque capteur.
• Appuyez et maintenez la touche durant 3 secondes.
• Un bip sonore indique que la fonction de recherche a démarré.
• Un bip retentira à chaque fois qu’un capteur à distance est détecté.
• Appuyez sur la touche et vériez si les données de température et d’humidité de
chaque capteur s’afchent à l’écran.
UTILISATION AVEC PLUSIEURS CAPTEURS
13
Français
Si vous n’habitez pas en Europe (en dehors du fuseau horaire de l’Angleterre ou de la France),
vous devez régler l’heure et la date manuellement.
• En mode d’horloge 1 (CLOCK 1), appuyez et maintenez la touche durant 3 secondes.
L’heure clignote.
• Appuyez sur la touche pour régler les heures et appuyez sur pour régler les
minutes.
• Appuyez sur pour permuter l’afchage de l’heure en format 12 ou 24 heures.
• Appuyez sur pour régler la date et le mois.
• Appuyez sur la touche pour régler le mois et sur la touche pour régler la date.
• Appuyez sur pour activer ou désactiver l’heure d’été. L’icône DST s’afche
lorsque l’heure d’été est activée et l’horloge avance d’une heure.
• Appuyez sur la touche , l’année clignotera. Appuyez sur la touche ou
pour régler l’année.
• Appuyez sur la touche pour régler la ville (référez-vous à la liste des abréviations des
villes en n de ce mode d’emploi pour la ville la plus proche). Appuyez sur la touche ou
pour sélectionner la ville.
• Appuyez sur la touche pour régler l’altitude. Appuyez sur la touche ou
pour régler l’altitude et valider vos enregistrements en appuyant sur la touche .
REGLAGES MANUELS DE L’HORLOGE

14
Français
Piles
Si le capteur est exposé à des températures extrêmes durant une longue période, l’étendue de la
transmission des données pourrait être affectée.
Installation du capteur à distance
Le capteur à distance doit être xé sur une surface lisse pour éviter de perturber la portée de
transmission des données. Le capteur et l’unité principale ne doivent pas être installés sur, ou près
d’une large surface métallique. Avant de choisir le lieu d’installation du capteur, vériez que l’unité
principale reçoive les signaux. Il est également recommandé que le capteur soit placé le plus près
possible de l’unité principale an d’éliminer toute interférence.
Prévisions météorologiques
Une précision absolue ne peut pas être garantie en ce qui concerne les prévisions
météorologiques. La fonction de prévision du temps possède un niveau de précision d’environ
75% dû aux divers environnements pour lesquels cette station météo a été conçue.
REMARQUES IMPORTANTES
Problèmes :
1. La station météo ne reçoit pas l’heure automatiquement.
2. La lecture de la température extérieure semble trop élevée.
3. L’unité principale n’afche plus ou ne reçoit plus les signaux de l’émetteur à distance.
4. Une opération anormale a été observée et certaines fonctions ne marchent pas.
Solutions :
1. Placez l’unité loin de tout objet en métal ou d’appareils électriques tels que télévisions,
ordinateurs, moniteurs, etc. Activez le signal de l’heure radio-contrôlée manuellement en
appuyant sur la touche MIN- pendant 3 secondes.
2. Réinitialisez le récepteur en pressant le bouton CHANNEL pendant 3 secondes jusqu’à
entendre un bip. Assurez vous que l’émetteur n’est pas en contact direct avec la lumière du
soleil, et éloigné de toute source de chaleur.
3. Les piles de l’émetteur à distance sont peut être usagées et ont besoin d’être changées. Placez
l’émetteur à distance plus près du récepteur. Des signaux voisins interfèrent avec le signal.
Consultez la section « interférences » à la page 12.
4. Faire un reset en enlevant et remettant les piles dans l’émetteur et le récepteur.
GUIDE DE DÉPANNAGE

15
Français
Émetteurs additionnels :
Mesurez la température et l’hygrométrie dans d’autres lieux !
- à l’étage
- dans une chambre (de bébé par exemple)
- au sous-sol (cave à vins ...)
- dans la véranda
- dans l’abri de jardin, la grange etc...
Pour commander : 0892 23 27 26 (0,34€ TTC/min) Ou www.lexibook.com
ACCESSOIRES
Station météo Récepteur SM1660
Alimentation : Piles 3 X 1.5V LR6/AA
Échelle de température : -20 ºC à +55 ºC
Justesse des mesures : +/- 1 ºC En mesurant des températures
comprises entre 0 et 40 ºC.
Résolution : 0.1 ºC
Échelle du niveau d’humidité : 15% à 95%
Justesse des mesures : +/- 5%
Résolution : 1%
SPECIFICATIONS
Station Météo émetteur ASM5
Type de piles : Piles 2 X1.5V AAA
Échelle de température : -30 ºC à + 70 ºC
Échelle du niveau d’humidité : 15% à 95%
Fréquence de transmission : 433.92MHz
Portée de Transmission : Jusqu’à 40m en terrain découvert

16
Français
Pour nettoyer l’unité, utiliser uniquement un chiffon doux légèrement imbibé d’eau, à l’exclusion de
tout produit détergent. Ne pas exposer l’unité à la lumière directe du soleil ni à toute autre source
de chaleur. Ne pas la mouiller. Ne pas la démonter, ni la laisser tomber. Retirer les piles si le
produit ne va pas être utilisé pendant une longue période.
ENTRETIEN
Ce produit est couvert par notre garantie de deux ans. Pour toute mise en oeuvre de la garantie
ou de service après-vente, vous devez vous adresser à votre revendeur muni de votre preuve
d’achat. Notre garantie couvre les vices de matériel ou de montage imputables au constructeur
à l’exclusion de toute détérioration provenant du non-respect de la notice d’utilisation ou de
toute intervention intempestive sur l’article (telle que démontage, exposition à la chaleur ou à
l’humidité…).
LEXIBOOK S.A, 2, avenue de Scandinavie, 91953 Courtaboeuf Cedex France
Assistance technique : 0892 23 27 26 (0,34 € TTC/Min), www.lexibook.com
Informations sur la protection de l’environnement
Tout appareil électrique usé est une matière recyclable et ne devrait pas faire partie des ordures
ménagères! Nous vous demandons de bien vouloir nous soutenir en contribuant activement au
ménagement des ressources et à la protection de l’environnement en déposant cet appareil dans
les sites de collectes appropriés (si existants).
GARANTIE
17
Français
Nous, Lexibook® S.A.
2, avenue de Scandinavie
91953 Courtaboeuf Cedex
Déclarons sous notre seule responsabilité que le produit :
Désignation: MeteoClock
®
Suntime
Référence / type: SM1660
Marque : Lexibook®
Auquel se réfère cette déclaration est conforme aux exigences essentielles et aux autres
dispositions pertinentes de la directive R&TTE (1999/5/CE)
RADIO : EN 300220-1 (V1.3.1 2000-09), EN300220-3 (V1.1.1 2000-09)
CEM : EN 301489-1 (V1.4.1 2002-08), EN301489-3 (V1.4.1 2002-08 )
Informations supplémentaires :
Organisme notié consulté : CETECOM
Dossier technique disponible chez :
Lexibook, 2 avenue de Scandinavie, 91953 Courtaboeuf cedex
Le 29 mars 2006
Peut-être utilisé dans les pays membres de l’Union Européenne.
Julian Chung
QA Manager
2007
Copyright © 2007 LEXIBOOK®
DECLARATION DE CONFORMITE
0682
18
English
Meteoclock
®
Suntime
SM1660 + ASM5 - User Manual
INTRODUCTION
Thank you for purchasing the MeteoClock
®
Suntime - SM1660 Weather Station. This Lexibook®
digital weather station does not only provide you with the exact time due to its radio controlled
clock, but can also give you the weather forecast and display the time of the sunrise and the
sunset! Please read the following manual carefully so as to be able to benet from all the
advantages and functions offered by this product.
MAIN FUNCTIONS
1
2
3
4
5
6
18
8
17
15
16
1314
12
11
10
9
7
This section will provide you with a brief summary of the main functions of the SM1660 by
explaining the information displayed onscreen.
19
English
1. Symbols representing the weather forecast
Animated symbols representing the weather forecast for the next 12 to 24 hours are displayed in
this section of the screen:
Sun, Clouds, Rain,
Thunder, Snow (icon ashes) or
frost alert (icon remains solid).
2. Day of the week display
The SM1660 automatically sets the day of the week (in English only).
3. Displaying the time
With the SM1660, there is no need to set the time and date! It will always provide you with the
exact time and even takes into account the daylight saving time. It receives the DCF77 radio signal
from Frankfurt or the MSF of Greenwich and can thus automatically synchronize its clock.
4. Displaying the daylight saving icon
The DST icon is automatically displayed when daylight saving is in force in Europe.
5. Displaying Clock 1
The SM1660 offers two clocks represented by the icons “Clock 1” and “Clock 2”. Clock 1 is the
main clock, which is set automatically. Clock 2 is useful if you often travel overseas or if you wish
to know the exact time in another country on a regular basis. Once set, this second clock will
instantaneously provide you with the time, thus not requiring any mental calculations on your part!
6. Displaying the radio controlled clock
The xed icon in the tower indicates that the radio controlled time is activated. The weather station
synchronizes the hour and the date automatically.
7. Displaying the date and month
The date (DAY) and month (MONTH) is automatically displayed here.
20
English
8. Icons of Alarms 1 and 2
The SM1660 offers 2 programmable alarms. When an alarm has been set, an icon representing a
bell is displayed here.
9. Displaying the moon phases
The moon phase is automatically updated here as per the year, month and day.
10. Displaying the time of the sunrise and the sunset
The time of the sunrise and the sunset is automatically updated according to the day of the year
and the latitude of your home town. In order for the weather station to provide you with an
accurate weather forecast, you will need to indicate the code of your town or the city closest to
you.
11. Low battery indicator
If the batteries of the remote sensor are low, this icon will be displayed on the main unit. When the
lighting of the LCD screen of the main unit begins to fade, this indicates that the batteries are low
and must be replaced.
12. Remote channels 1, 2, 3, 4
This weather station is delivered with a remote sensor. You can, however, purchase 1, 2 or 3
additional remote sensors to measure the temperature and humidity in another place or room.
Each remote sensor is linked to a channel. You can access the readings obtained by each remote
sensor by pressing the “Channel” key found at the top of the weather station. The number of the
corresponding channel is displayed here.
Note: If you do not have additional sensors, please do not take this function into account.
13. Outdoor temperature and humidity display
Due to its wireless sensor, the station can detect the temperature and humidity outdoors from a
distance. The readings are displayed here. The room temperature and the rate of humidity are
automatically displayed in turn.
14. Outdoor temperature and humidity trend
The arrow icons provide the outdoor temperature and humidity trends in half-hour intervals. The
arrow indicates an upward trend while the arrow indicates a stable trend and the
arrow indicates a downward trend.
21
English
15. Indoor temperature and humidity display
The readings of outdoor temperature and humidity are recorded by the main unit and displayed
here. The indoor temperature and humidity are automatically displayed in turn.
16. Indoor temperature and humidity trend
This icon indicates the trends of the inside temperature and humidity in half-hour intervals.
The arrow indicates an upward trend; the arrow indicates a stable trend and
indicates a downward trend.
17. Pressure bar graph
This bar chart indicates the atmospheric pressure trend over a 12-hour period. The variation scale
is +/- 3 Hecto Pascal (hPa). Why refer to this bar chart? Generally, bad weather is associated
to a low atmospheric pressure and good weather to a high atmospheric pressure. The weather
forecast provided by the SM1660, using animated icons, thus depends on the evolution of the
atmospheric pressure. Therefore, if the weather station announces rain and you observe a sudden
and signicant fall in the bar chart readings, you can expect the rain to be strong and violent.
18. Displaying the atmospheric pressure
This weather station measures atmospheric pressure in Hecto Pascal and in real time.
22
English
Step 1 – Setting the radio-controlled zone of the clock
• Set the MSF/OFF/DSF switch, found at the back of the main unit, on DSF for use in
France, Spain, Italy and Germany.
• Set the switch on MSF for use in the United-Kingdom, Ireland and Portugal.
• Set the switch on OFF for use outside the GMT 0 and GMT 1 zones. If you do not live in Europe
(or if you live outside of the France and England time zones), the SM1660 will not be able to
receive the time automatically. You will thus need to set the time manually (See page 29).
Step 2 – Inserting the batteries
• Insert 3 AA/LR6 batteries into the battery compartment found at the back of the main unit.
Close the lid of the compartment.
• Unscrew the lid of the battery compartment found at the back of the wireless sensor.
Insert 2 AAA/LR03 batteries. Replace the lid of the compartment using a screwdriver.
• If you have not purchased additional sensors you will not need to set the remote sensor. Do not
press the and keys. If you wish to set more than one sensor onto your main unit, please
refer to the paragraph entitled “Multiple sensor use”.
Step 3 – Setting up the main unit and the remote sensor
• Place the remote sensor outside. It can also be wall-mounted.
• Pull out the main unit’s table stand, and place it on a smooth surface. It can also be
wall-mounted.
SETTINGS

23
English
Step 4 – Setting the local city and the altitude
• Look up and note the code of the city found closest to your home. Please refer to the list of city
codes found at the end of the user manual.
• Determine and note the altitude of your town or city in meters (for example: Paris, 88 meters).
• Ensure that the weather station is in the Clock 1 mode ( is displayed to the right of the time).
You may also press the key several times until CLOCK 1 appears on the display screen.
• Press and hold down the key for 3 seconds. The time will begin to ash.
• Press the key 3 times. The city code will ash above the « CITY » indicator.
• Use the or keys to scroll through the city codes on the screen. This setting is
important as it will affect the time of the sunrise and the sunset.
• Press the key to conrm the city code.
• The altitude level ashes. Use the or keys to set the altitude of your town or
city (in meters). Press the key to validate all these settings.
Step 5 – Radio controlled clock
• Approximately 7 minutes after the batteries have been inserted, the main unit will launch its
search to nd the signal of the radio controlled clock. The icon will ash for a few minutes
while the search is underway. When the signal is received, the icon will stop ashing and will
remain still.
• Ensure that the main unit displays the exact time and date. If this is not so, launch the signal
search once more by holding the key down for 3 seconds.
Reminder: the SM1660 will only receive the signal if you live in Europe (within the France and
England time zones).
• Ensure that the main unit displays the outdoor temperatures and rate of humidity transmitted by
the sensor. Your new weather station is now ready for use.
24
English
Scrolling through the menus
When you press the key, the menu will scroll by in the following order:
Clock 1 mode (CLOCK 1) Clock 2 mode (CLOCK 2)
Alarm 1 mode 1 1 Alarm 2 mode 2 2
Indoor temperature alarm mode (the icon will appear and the temperature will begin to ash)
Outdoor temperature alarm mode (the icon will appear and the temperature will begin to ash)
Clock 1 mode.
Setting Clock 2 (second time indicator)
• Press the key several times until CLOCK 2 appears to the right of the time.
• Press the or to set the time of another time zone (by increasing/decreasing
the time of Clock 1). Press the key to validate time.
Setting Alarms 1 and 2
• You can set 2 alarms.
• Press the key several times until the alarm 1 or 2 icon 12 is displayed.
• Press the key to set the hour of the alarm.
• Press the key to set the minutes of the alarm.
• Press the key to activate or deactivate the alarm. When an alarm is activated,
the bell symbol 1 / 2 and the icon ON will appear.
• When an alarm rings, the corresponding icon 1 or 2 will ash.
• Press the key to repeat the alarm. It will ring again 5 minutes later.
• Press ANY OTHER KEY to deactivate the alarm. If the alarm is not stopped manually, it will
automatically stop ringing after one minute.
OTHER FUNCTIONS
25
English
Backlight
Press the key to activate the back light. It will remain on for approximately
10 seconds.
Displaying the temperature in °C or °F
In Clock 2 mode, press the key to switch the temperature display from
degrees Celsius (°C) to degrees Fahrenheit (F°) and vice versa.
Min and Max temperature and humidity
Press the key several times in Clock 1 mode in order to scroll through the recordings of
the minimum and maximum temperature and humidity.
In Clock 1 mode, press and hold the key during 5 seconds to reset the recordings.
HI & LO Display
The “HI” and “LO” icons replace the temperature and humidity values onscreen when they fall
outside the scale of transmission.
Indoor/
Outdoor
Temperature Humidity Display
Indoor > +55°C > 95% HI
Indoor < -20°C < 15% LO
Outdoor > +70°C > 95% HI
Outdoor < - 30°C < 15% LO
Indoor and Outdoor Temperature Alarms
You may set temperature alarms for a local channel or a remote channel. If the temperature
reaches the threshold you have set, the alarm will go off.
• Select the temperature alarm mode by pressing the key several times. (Indoor).
The icon is displayed and the indoor temperature begins to ash.

26
English
• The default indoor temperature (14°C) or the existing temperature setting will begin to ash.
• Press the or keys to set your chosen limit for the indoor temperature.
• Press the key to select the high temperature alarm option , the low
temperature alarm option or to deactivate the alarm function (no symbol).
• Press the key to save your settings. The default outdoor temperature (14°C) or the
existing temperature setting will begin to ash.
• Press the or keys to set your chosen limit for the outdoor temperature.
• Press the key to select the high temperature alarm option , the low
temperature alarm option or to deactivate the alarm function (no symbol).
• Press the key to save your settings.
When the temperature alarm is triggered
• The icon indicates that the temperature has exceeded the limit of the temperature set.
• Press any key to stop the temperature alarm.
• The alarm will automatically stop after one minute if no keys are pressed.
• The temperature alarm has a distinctive sound when it rings and is different to the sound of
Alarms 1 and 2.

27
English
Throughout the 28 days of the lunar month, the aspect of the moon changes.
Indeed, the moon, being spherical, is always half lightened up by the sun.
As the moon rotates around the Earth, the appearance of its lightened side
changes continuously. This phenomenon creates moon phases. The moon
phase on your MeteoClock is automatically updated according to the
year/ month/day.
Moon Phase Display
1. New Moon
2. Young Crescent
3. First Quarter
4. Waxing Gibbous
5. Full Moon
6. Waning Gibbous
7. Last Quarter
8. Old Crescent
MOON PHASES
TIME OF SUNRISE AND SUNSET
The time of the sunrise and the sunset depends on the angle of the earth’s axis and the movement
of the planet around its orbit. Your MeteoClock
®
SM1660 station provides you with the exact time
of the sunrise and the sunset in your city! This weather station actually calculates the time of the
sunrise and the sunset according to the time of the year as well as the latitude and time zone of
your city.
For these settings, please refer to Step 4 in the “Settings” chapter on page 23.
Sunrise Sunset
1)
2)
3)
4)
5)
6)
7)
8)
28
English
Setting the Channel
If you have purchased several remote sensors, you will need to set each sensor on a different
channel.
• Press the key found inside the battery compartment of the remote sensor to select
a channel (1 to 4).
• Press this key once to switch to the 2nd channel, etc. The LED indicator will ash each time you
press this key.
• Set each remote sensor on a different channel. Channel 1 is used to receive outdoor readings
and to activate weather forecast symbols. Please place it outdoors.
Interferences
If your weather station detects other signals from neighbouring sources you will have to set your
remote sensor on a different house code (default setting = 1).
• Press the key found inside the battery compartment of the remote sensor to select a house
code (2-15). Press this key once to change the house code to 2, etc. The LED indicator will ash
each time you press this key.
• The remote sensors of each main unit must be set on the same house code.
Manual search (search for remote signals)
If a new sensor is added or a signal is lost (outdoor display will ash), you will have to manually
launch the search for each sensor.
• Press and hold down the key for 3 seconds.
• A ‘beep’ will sound to indicate that the search function has been activated.
• Each time a remote sensor is detected a “beep” will sound.
• Press the key and check whether the temperature and humidity readings of each
sensor are displayed on the screen.
MULTIPLE SENSOR USE

29
English
If you do not live in Europe (or fall outside the England or France time zones), you will have to set
the time and date manually.
• In CLOCK 1 mode, press and hold down the key for 3 seconds. The time will begin to
ash.
• Press the key to set the time and press the key to set the minutes.
• Press the key to select the hour format displayed (12 or 24 hours).
• Press the key to set the date and month.
• Press the key to set the month and the to set the date.
• Press the key to activate or deactivate daylight saving time. The DST icon
appears when daylight saving time is activated and the clock will move forward by one hour.
• Press the key, the year will ash. Press the or key to set the year.
• Press the key to set the city (please refer to the list of abbreviations of the cities found
at the end of the manual to nd the city closest to your home). Press the or key
to select the city.
• Press the key to set the altitude. Press the or key to enter the
correct altitude and validate your settings by pressing the key.
CLOCK MANUAL SETTING

30
English
Batteries
If the sensor is exposed to extreme temperatures for an extended period of time, the range of
transmission of the data may be affected.
Setting up the remote sensors
The remote sensors must be xed on a smooth surface to ensure that there are no interferences
in the data transmission range. The sensor and main unit must not be set up on or near a large
metallic surface. Before setting up the sensor at a chosen location, ensure that the main unit
receives the signals from this site. It is also recommended that the sensor be placed as close to
the main unit as possible in order to avoid any interferences.
Weather Forecast
We cannot guarantee absolute precision with regards the weather forecast. The weather forecast
function has a 75% precision rate due to it being created to suit a variety of environments.
IMPORTANT NOTICE
Problem:
1. The main unit cannot receive radio control DCF-77 or MSF signals to update the clock.
2. Temperature reading of outdoor remote sensor seems too high.
3. Receiver is no longer receiving remote sensor signals or display.
4. An abnormal operation has been observed and certain functions do not work.
Solution:
1. Place the clock away from metal objects or electrical appliances such as TVs, computers,
monitors, etc. Trigger the scan manually by holding the MIN- key for 3 seconds.
2. Wait a few minutes to ensure the remote sensor and receiver are in phase. Otherwise,
re-synchronize receiver by holding the CHANNEL key for 3 seconds until a beep is heard.
3. Ensure the remote sensor is out of direct sunlight, and away from sources of heat.
TROUBLESHOOTING
 Loading...