


La Crosse Technology WS-9412U User Manual
WS-9412U
Atomic Clock
Instruction Manual
R
Contents
Language Page
English 2
French 16
Spanish 30
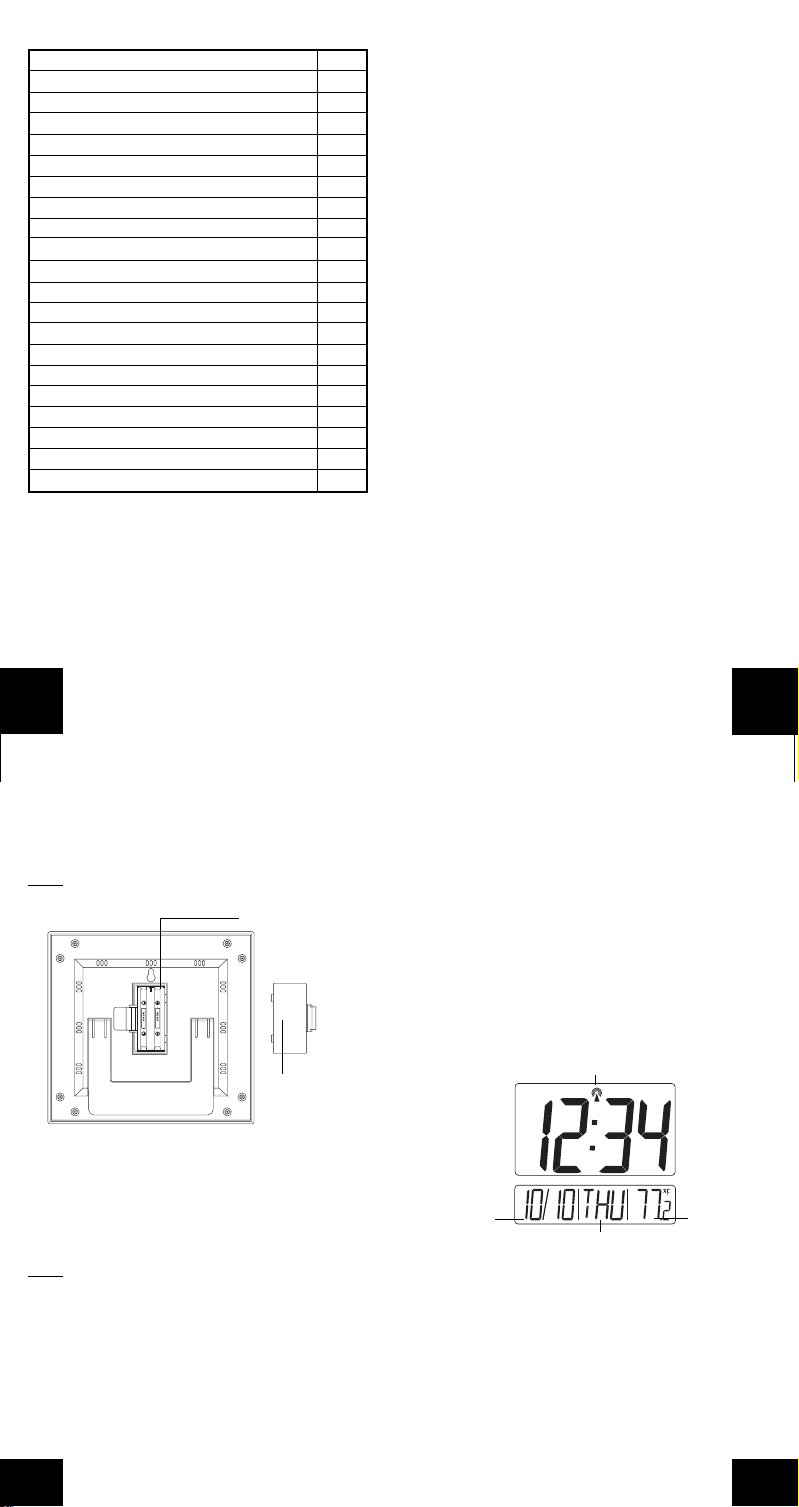
TABLE OF CONTENTS
Topic Page
Inventory of Contents/ Additional Equipment 3
About WWVB 3
Quick Set-Up Guide 3
Detailed Set-Up Guide
Battery Installation 4
Program Mode
Function Buttons 6
Time Zone Setting 6
DST (Daylight Saving Time) Setting 6
Time Setting 7
Calendar Setting 7
Selecting ˚F or ˚C 8
Features & Operations
Displaying the Seconds 8
Indoor T emperature 9
Mounting 9
Maintenance & Care 10
Troubleshooting 11
Specifications 12
Warranty Information 12
INVENTORY OF CONTENTS
1. WS-9412U
2. Instruction manual and warranty card.
ADDITIONAL EQUIPMENT (not included)
1. Two fresh 1.5V AAA batteries.
2. One wall-hanging screw.
3. Appropriate screwdriver for screw.
ABOUT WWVB (Radio Controlled Time)
The NIST (National Institute of Standards and Technology-Time and Frequency Division) WWVB radio station
is located in Ft. Collins, Colorado, and transmits the exact time signal continuously throughout the United States
at 60 kHz. The signal can be receiv ed up to 2, 000 miles
away through the internal antenna in the Atomic Clock.
However, due to the nature of the Earth's Ionosphere,
reception is very limited during daylight hours. The
Atomic Clock will search for a signal every night when
reception is best. The WWVB radio station derives its
signal from the NIST Atomic clock in Boulder, Colorado.
A team of atomic physicists is continually measuring
every second, of every day, to an accuracy of ten billionths of a second per day. These physicists have created an international standard, measuring a second as
9,192,631,770 vibrations of a Cesium-133 atom in a
vacuum. This Atomic Clock regulates the WWVB
transmitter.
QUICK SET-UP GUIDE
1. Insert two AAA batteries into the Atomic Clock.
2. Wait 15 minutes for WWVB reception.
3. If there is no WWVB reception, manually set the time
and date (instructions in the Program Mode).
4. Program the settings.
5. Mount the WS-9412U in a suitable location, where
WWVB signals can be received.
P.2
GB
DETAILED SET-UP GUIDE
I. BATTERY INSTALLATION
Note:
To avoid start-up problems make sure that the bat-
teries do not spring free.
Battery Compartment
Battery Cover
A. ATOMIC CLOCK
1. Remove the battery cover, located on the backside
of the function buttons.
2. Observe the correct polarity, and install 2 AAA
batteries.
3. Replace the battery cover.
Note:
After the batteries have been installed all the LCD's
(Liquid Crystal Display) will briefly light up. Then the
indoor temperature, the date as "1/ 1" and the weekday
as "MON" will be displayed. Also, the time will appear
as "-:--" for approximately 1 minute. Then the WWVB
search is automatically initiated, and a tower icon appears and flashes with the time colon (no tower icon will
appear if the WWVB is too weak to be detected). While
the WWVB search is being conducted various numbers
will appear in the time display. The numbers "0", "1", or
P.3
GB
"8" will appear in the hour position and the seconds will
appear in the minute display. The Atomic Clock will either display the WWVB time, or discontinue the search
after 10 minutes if the time is not found. When the search
is cancelled "-:--"will appear in the time LCD. The Atomic
Clock will conduct a WWVB search every hour until the
first signal is found. Once the WWVB time is found, a
search is automatically conducted nightly at midnight. If
the signal is found at midnight, the tower icon will remain,
if not, another search will take place every hour (up to 6:
00 am) until the signal is found successfully. If no signal
is found during this period, the tower icon will not appear
and the clock will search again at 12:00 am the next night.
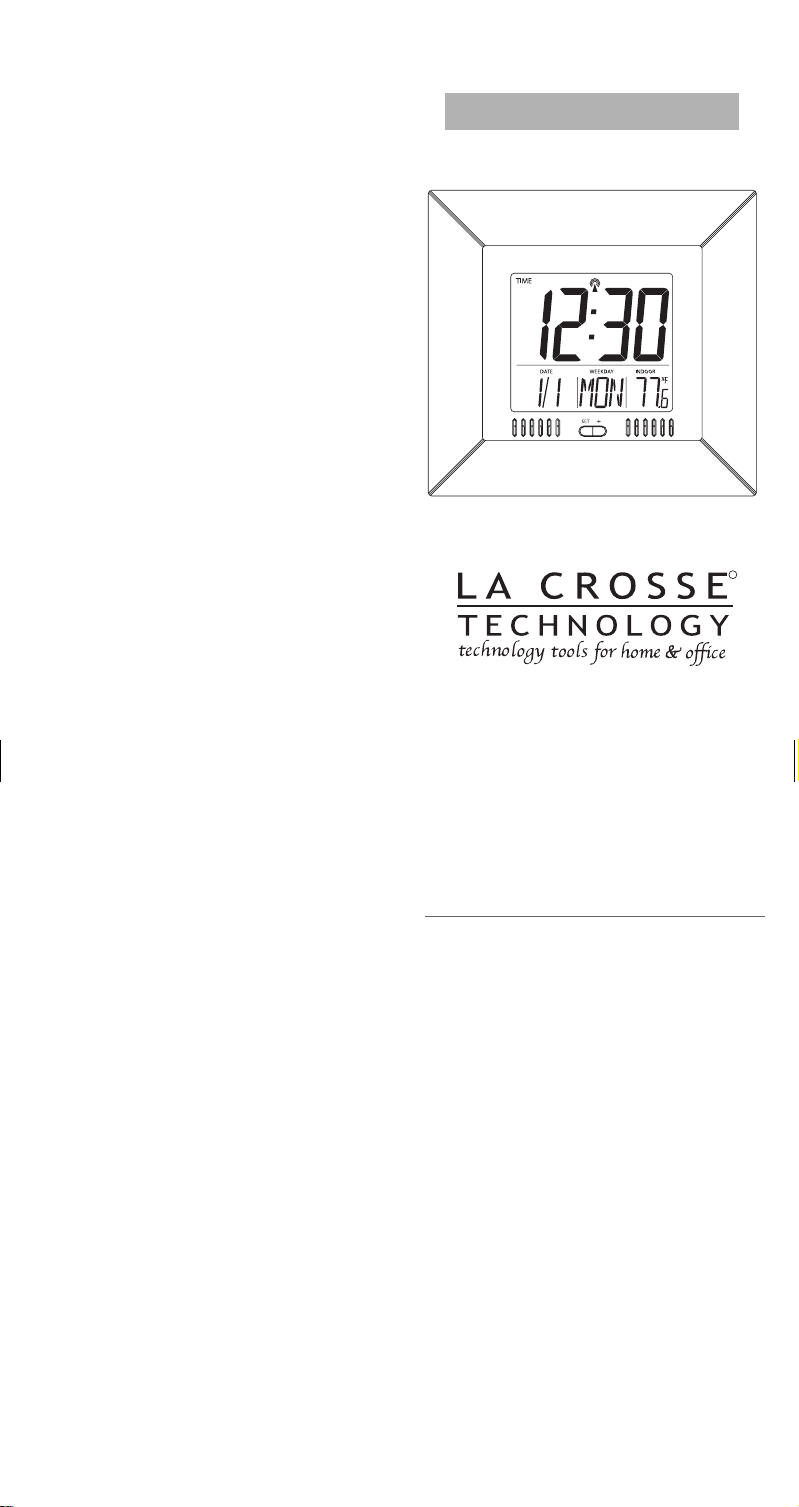
WWVB T ower Icon
Indoor
Month/Date
Weekday
PROGRAM MODE
To enter the Program Mode hold down the "SET" button
for 2 seconds, until the time zone flashes in the Date
LCD. The Program Mode is laid out in a manner that
allows you to program each function separately, or you
can follow the instructions entirely to program the Atomic
Clock. Complete programming is usually done for the
initial set-up, and will require you to skip step 1 of programming sections III through VI. Wait approximately
15 seconds for the Atomic Clock to automatically return
to normal operation after completing the final step.
Temperature
GB
P.4
P.5
GB
I. FUNCTION BUTTONS
There are 2 function buttons located on the front of the
Atomic Clock. The function buttons are labeled: SET
and +.
II. TIME ZONE SETTING
1. Hold down the "SET" button for 2 seconds, the de-
fault setting "EST" will flash in the Date LCD.
2. Press and release the "+" button to select the appro-
priate time zone. There are 13 time z ones to choose
from:
EST(-5) Eastern Time (default setting)
CST(-6) Central Time
MST(-7) Mountain Time
PST(-8) Pacific Time
ALA(-9) Alaskan Time
HAW(-10) Hawaiian Time
-11
-12
GMT Greenwich Mean Time
-1
-2
-3
ATL(-4) Atlantic Time
3. Press and release the "SET" button to confirm the
time zone setting, and to advance to DST (Daylight
Saving Time) setting.
III. DST (DAYLIGHT SAVING TIME) SETTING
Note:
The DST default is "On", meaning that the WWVB
will automatically change the time according to Daylight
Saving Time in the spring and fall. For areas that do not
recognize DST changes (Arizona and parts of Indiana)
turn the DST "OFF".
1. Hold down the "SET" button for 2 seconds (the selected time zone will flash), press the "SET" button
once more until "On" and "DST" alternate flash where
the Weekday normally appears.
2. Press and release the "+" button to turn the DST off,
as will be indicated by the display of "OFF" in the
time LCD.
3. Press and release the "SET" button to confirm the
DST setting, and to advance to select the manual
time setting.
IV.TIME SETTING
Note:
When the WWVB signal is found, that time will
over-ride the manually set time.
1. Hold down the "SET" button for 2 seconds (the selected time zone will flash), press the "SET" button 3
more times, until the hour "12:00" flashes in the time
LCD.
2. Press and release the "+" button to select the hour.
Note:
when setting the hour, "PM" will appear to the left
of the hour display, if it is AM nothing will be displayed.
3. Press and release the "SET" button to confirm the
hour setting, and to shift to select the minutes.
4. Press and release the "+" button to select the minutes.
5. Press and release the "SET" button to confirm the
time setting, and to advance to manually set the
calendar.
V. CALENDAR SETTING
Note:
When the WWVB signal is found, that date will
over-ride the manually set date.
1. Hold down the "SET" button for 2 seconds (the selected time zone will flash), press the "SET" button 4
more times, until the default year "00" flashes in the
date LCD.
P.6
GB
2. Press and release the "+" button to select the year.
3. Press and release the "SET" button to confirm the
year, and to set the month.
4. The default month "1" will flash. Press and release
the "+" button to select the appropriate month.
5. Press and release the "SET" button to confirm the
month, and to set the date.
6. The default date "1" will flash. Press and release the
"+" button to select the appropriate date.
7. Press and release the "SET" button to confirm the
date, and to set the weekday.
8. The default weekday "MON" (depends on selected
language) will flash. Press and release the "+" button to select the appropriate weekday.
9. Press and release the "SET" button to confirm the
calendar settings, and to advance to select either ˚F
or ˚C temperature display.
VI.
SELECTING ˚F OR ˚C
1. Hold down the "SET" button for 2 seconds (the selected time zone will flash), press the "SET" button
10 more times, until the default "˚F" flashes in the
time LCD.
2. Press and release the "+" button to toggle between
˚F and ˚C.
3. Press and release the "SET" button to confirm the ˚F
or ˚C selection, and exit the Program Mode.
FEATURES & OPERATIONS
I. CHANGING DISPLAY MODE (SECONDS, AND
TEMPERATURE)
There are 2 possible display modes to view the day,
seconds, and temperature. The month & date/ weekday/
indoor temperature is the default.
To change the display:
P.7
GB
1. Press and release the "+" button. The display should
now show the month & date/ weekday/ seconds.
2. Press and release the "+" button a 2 time and the
display will return to the normal display.
II. INDOOR TEMPERATURE
The Indoor Temperature appears on the right side of the
Date LCD. The temperature is checked every 10
seconds, and updated whenever there is a change.
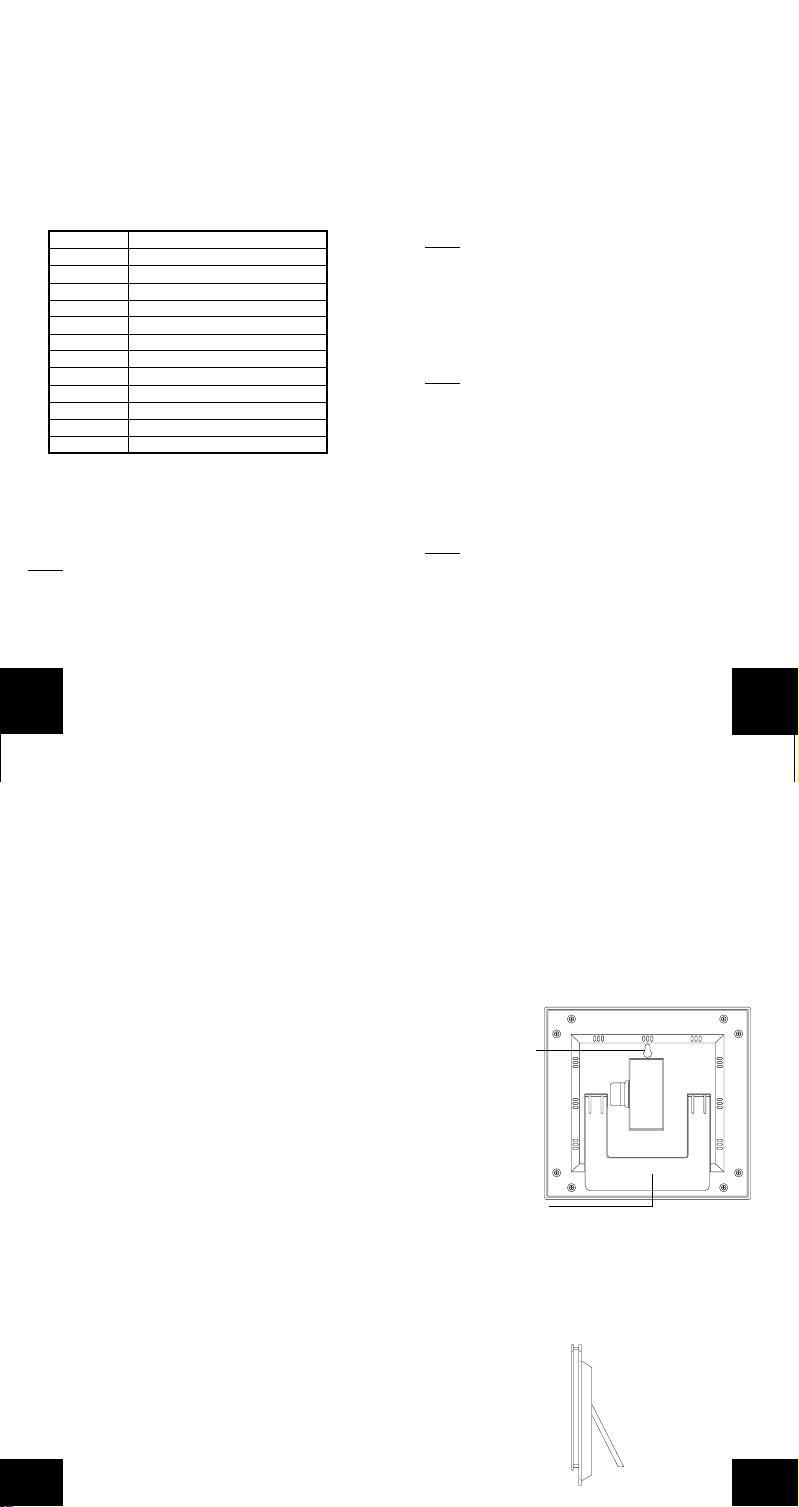
MOUNTING
Hanging Hole
Foldout T ab le Stand
There are two possible ways to mount the atomic clock:
• use of the foldout table stand, or
•wall mounting.
I. FOLDOUT TABLE STAND
GB
P.8
P.9
GB
 Loading...