

Konica Minolta bizhub 652 User Manual

AU-201H Authentication Unit
(HID Proximity Card Type)
User’s Guide

1
1 Introduction
Thank you for choosing this device.
This User’s Guide provides descriptions of the operating procedures and precautions
for using AU-201H Authentication Unit (HID Prox IC Card Type). Carefully read
this User’s Guide before using this device.
The actual screens that appear may be slightly different from the screen images used
in this User’s Guide.
AU-201H Authentication Unit (IC Card Type) is hereafter referred to as “this
device”.
Manual conventions
- Caution: This warns of a possibility of damage to this device.
- Important: This indicates instructions that should be followed to ensure
correct functionality and efficiency of this device.
- Note: This indicates an item of general importance.
- Reminder: This indicates an item of relative importance.
- Detail: This indicates an item of specific importance.
Trademark/copyright acknowledgements
- Microsoft® and Windows® are either registered trademarks or trademarks of
Microsoft Corporation in the United States and/or other countries.
- All other company names and product names mentioned in this User’s Guide
are either registered trademarks or trademarks of their respective companies.
Restrictions
- Unauthorized use or reproduction of this User’s Guide, whether in its entirety
or in part, is strictly prohibited.
- The information contained in this User’s Guide is subject to change without
notice.
Introduction
1.1 Product features
This device is an IC card authentication system that performs user authentication by
IC cards and supports most HID Proximity (125MHz) IC cards. Logon and print job
operations can be authenticated with IC cards when using multifunctional products
with user authentication settings specified.
2 AU-201H

Introduction
1.2 Prerequisites
- HID Prox IC cards compatible with this device must be prepared.
- The optional local interface kit and working table must be installed on the
multifunctional product.
- Refer to Chapter 5 - Specifications.
Note:
In order to use this device, multifunctional product settings must be specified by
the technical representative.
1
AU-201H 3

Using AU-201H Authentication Unit
3 Using AU-201H Authentication Unit
In order to use this device, user IC card IDs must first be registered with the machine.
A registered user can log on to a multifunctional product or print a print job after
completing authentication with their IC card IDs. The following procedures describe
how to specify the necessary settings on the multifunctional product, register users,
and perform the logon and print job operations after completing authentication.
Important
Do not disconnect the USB cable while this device is being used, otherwise the
system may become unstable.
Caution
Do not store the IC card within 1.5 inches (approx.) of the card scanning area.
3.1 Multifunctional product settings
3
Detail:
User authentication on the multifunctional product must be set for machine
authentication.
1 From the control panel of the multifunctional product, press the [Utility/
Counter] button, press [Administrator Settings] and enter the administrator
password, touch [User Authentication/Account Track] on the Administrator
Settings screen, and then touch [General Settings].
AU-201H 5
3
Using AU-201H Authentication Unit
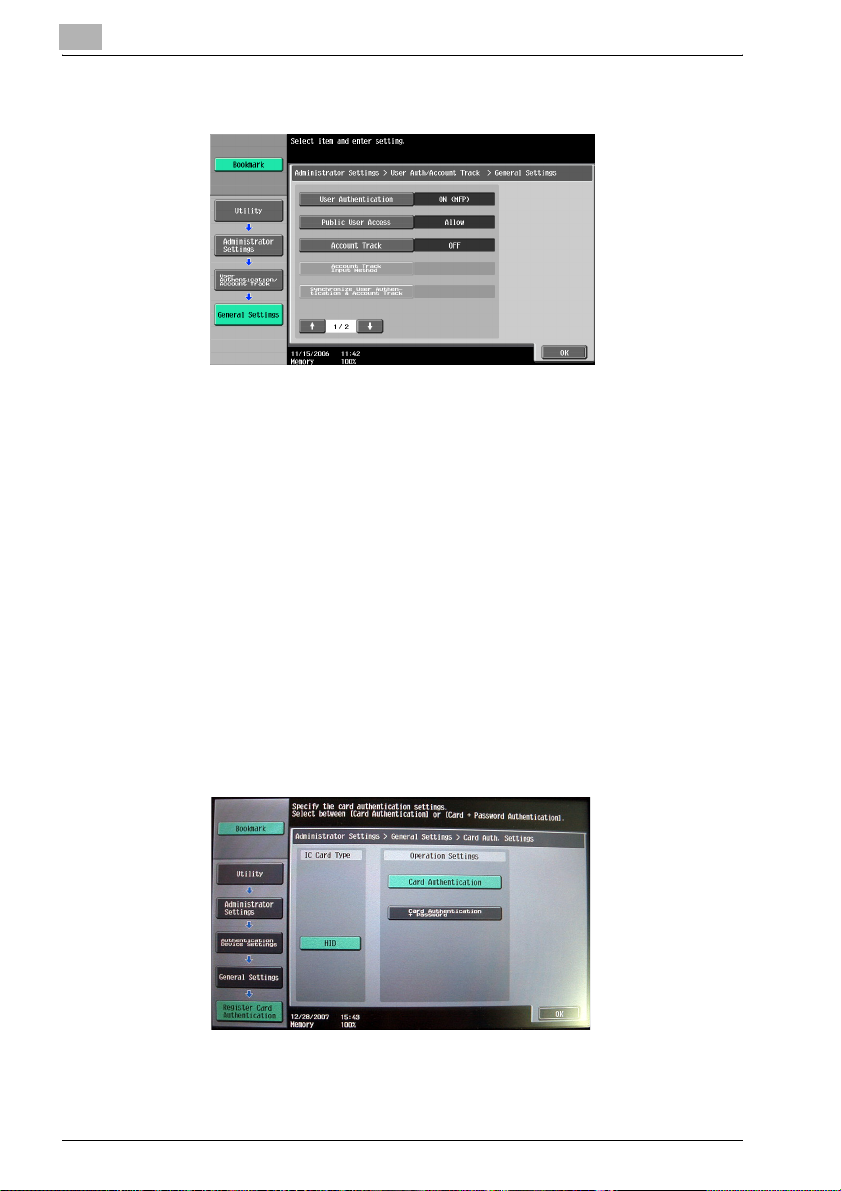
2 Set “User Authentication” to “ON (MFP)”, and then touch [OK].
Reminder:
External server authentication is not supported.
For details on specifying settings for “Public User Access” and “Account
Track”, refer to the User’s Guide [Copy Operations] included with the
multifunctional product.
When combined with account track settings, set “Synchronize User
Authentication & Account Track” to “Synchronize”. If “Do Not Synchronize” is
selected, the Touch & Print function cannot be used.
3 Touch [Authentication Device Settings], then [General Settings], then [Card
Authentication].
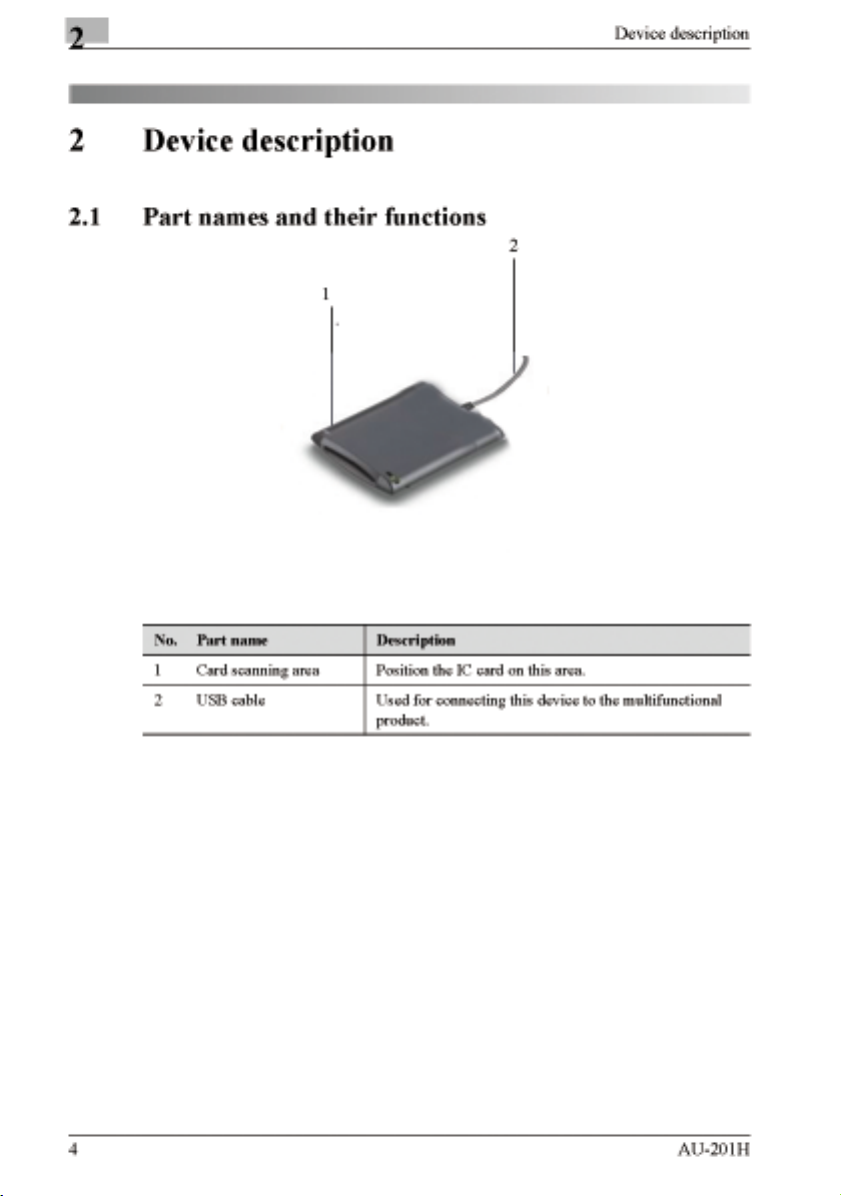
4 Select the desired settings under “IC Card Type” and “Operation Settings”.
– Under “IC Card Type”, select the type of IC card to be used.
6 AU-201H
Using AU-201H Authentication Unit
– Under “Operation Settings”, select the logon method after registration.
Card Authentication: Logon is possible simply by positioning the IC card.
Card Authentication + Password: Logon is possible by positioning the IC
card and entering the password. If users are registered with “Card
Authentication + Password” selected, the Touch & Print function cannot be
used.
– For details on logging on, refer to “Logging on to a multifunctional
product” on page 23.
5 Touch [OK], and then touch [OK] in the next screen that appears.
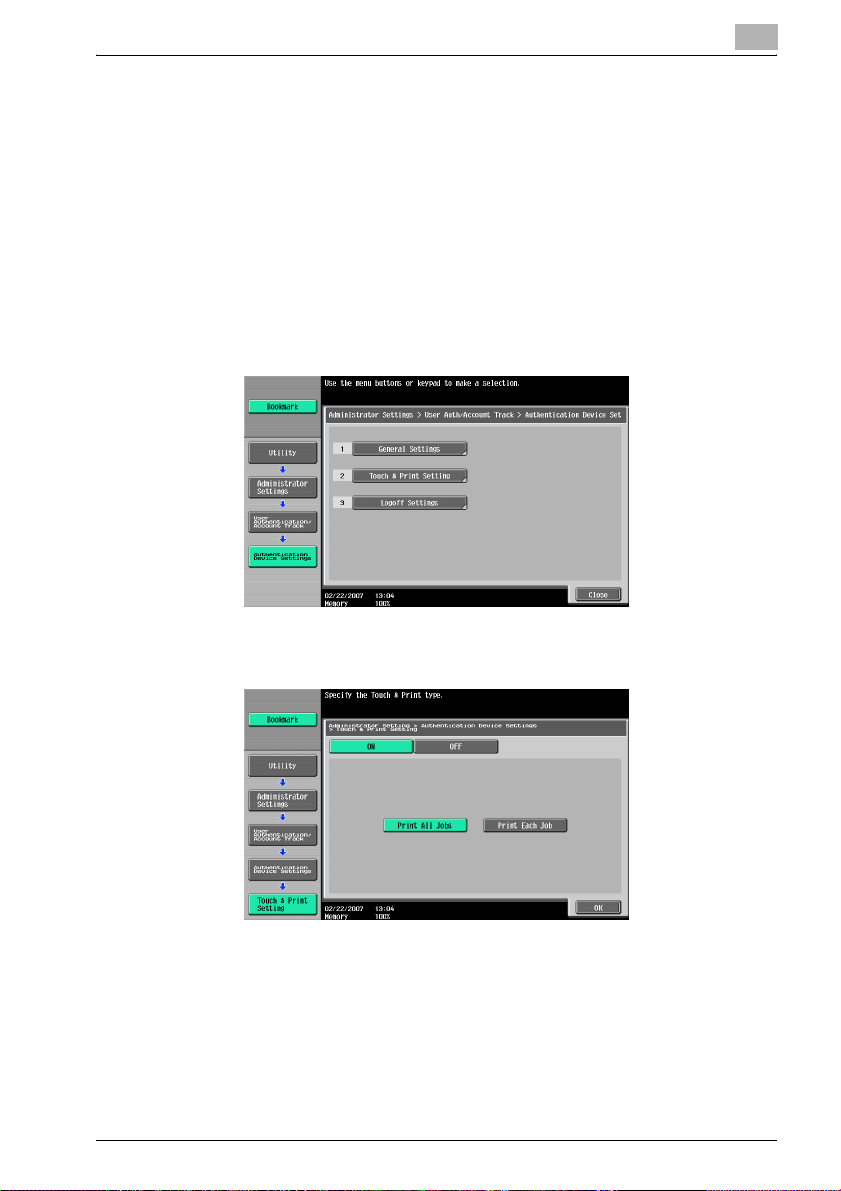
6 Touch [Touch & Print Setting].
3
7 Select the printing method for the Touch & Print function.
– Print All Jobs: Select this setting to print all documents after completed
authentication once when multiple documents are saved in the Touch &
Print user box.
– Print Each Job: Select this setting to print one document saved in the Touch
& Print user box each time authentication is completed.
– If “OFF” is selected, the Touch & Print function cannot be used.
– For details on the Touch & Print function, refer to “Touch & Print
function” on page 25.
AU-201H 7

3
Using AU-201H Authentication Unit
8 Touch [OK].
9 Touch [Logoff Settings].
10 Select whether or not the user is logged off when scanning of the document is
finished after the user has logged on to this machine.
11 Touch [OK].
12 Touch [Close], and then touch [Close] in the next screen that appears.
3.2 Registering users
There are two methods for registering users.
- Connecting this device to the multifunctional product and registering directly
from the multifunctional product
- Connecting this device to a computer and registering using Data
Administrator
Detail:
Registered user data is stored on the hard disk of the multifunctional product. If
the user authentication method on the multifunctional product is changed or the
hard disk is reformatted, the registered user data is erased.
3.2.1 Registering from the control panel of the multifunctional product
1 From the control panel of the multifunctional product, touch [User
Authentication/Account Track] on the Administrator Settings screen, and then
touch [Authentication System], then [User Registration].
8 AU-201H
Using AU-201H Authentication Unit
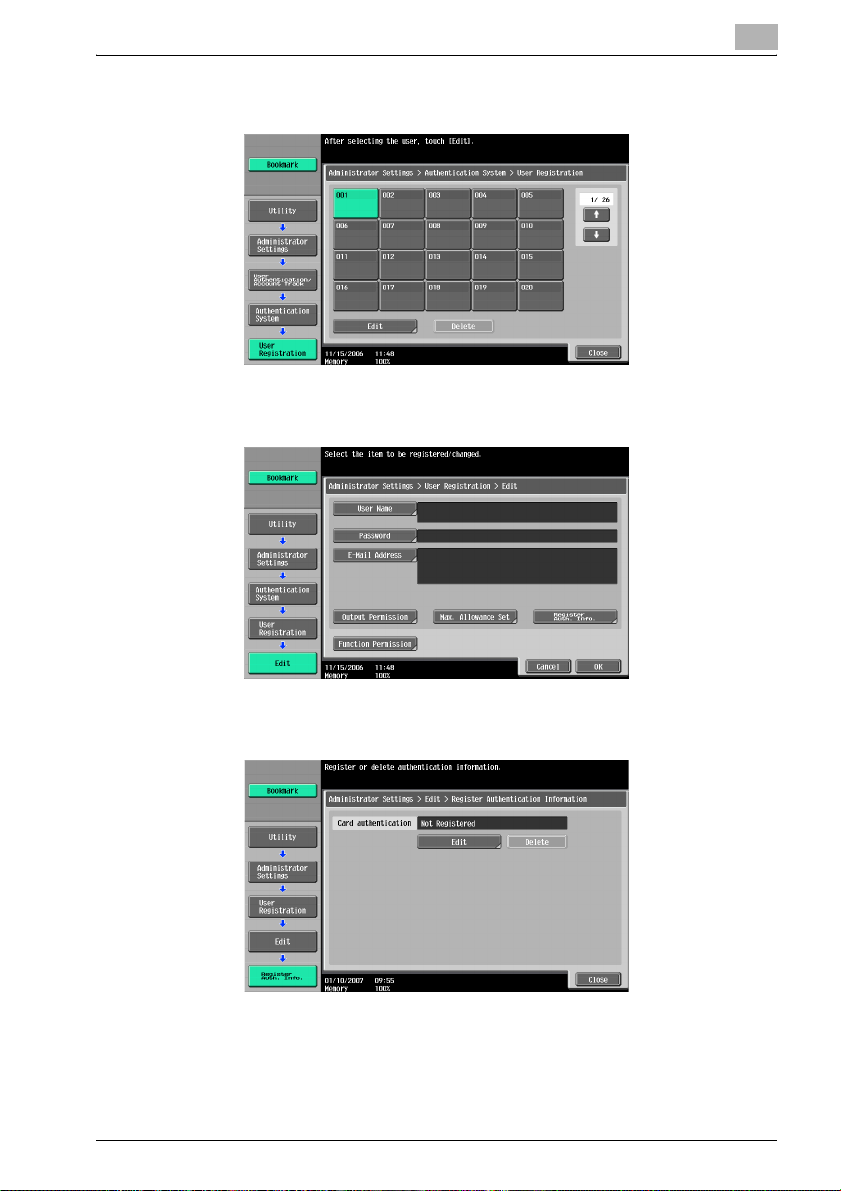
2 Touch the button for a registration number, and then touch [Edit].
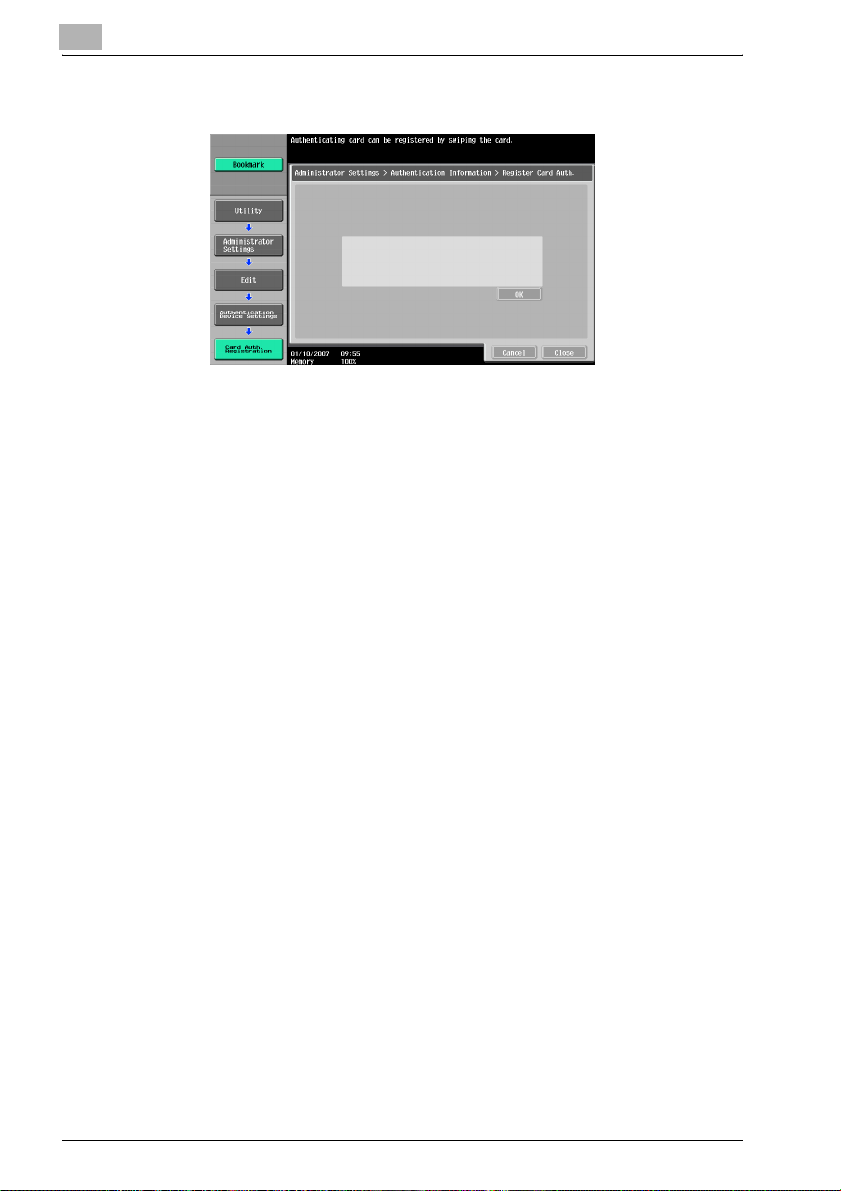
3 Touch [Register Auth. Info.].
3
4 Touch [Edit].
AU-201H 9
3
Using AU-201H Authentication Unit
5 Position the IC card on this device, and then touch [OK].
6 After the message “Registered” appears, touch [Close], and then touch [Close]
in the next screen that appears.
7 Type the user name and the password.
8 If desired, specify the function limitations.
9 Touch [OK].
10 Touch [Close].
10 AU-201H
Using AU-201H Authentication Unit
3.2.2 Registering from Data Administrator
In order to use Data Administrator, settings must be specified on the multifunctional
product and the setup procedure must be performed. The setup procedure includes
installing this device’s IC Card Driver (USB-Driver), then installing Data
Administrator IC Card Plugin.
Reminder:
Data Administrator ver. 3.0 or later must first be installed on the computer. For
details on the operating environment and installation procedure for Data
Administrator, refer to the User’s Guide for the Data Administrator.
Setup
1 Turn off the multifunctional product with the main power switch, and then
disconnect this device from the multifunctional product.
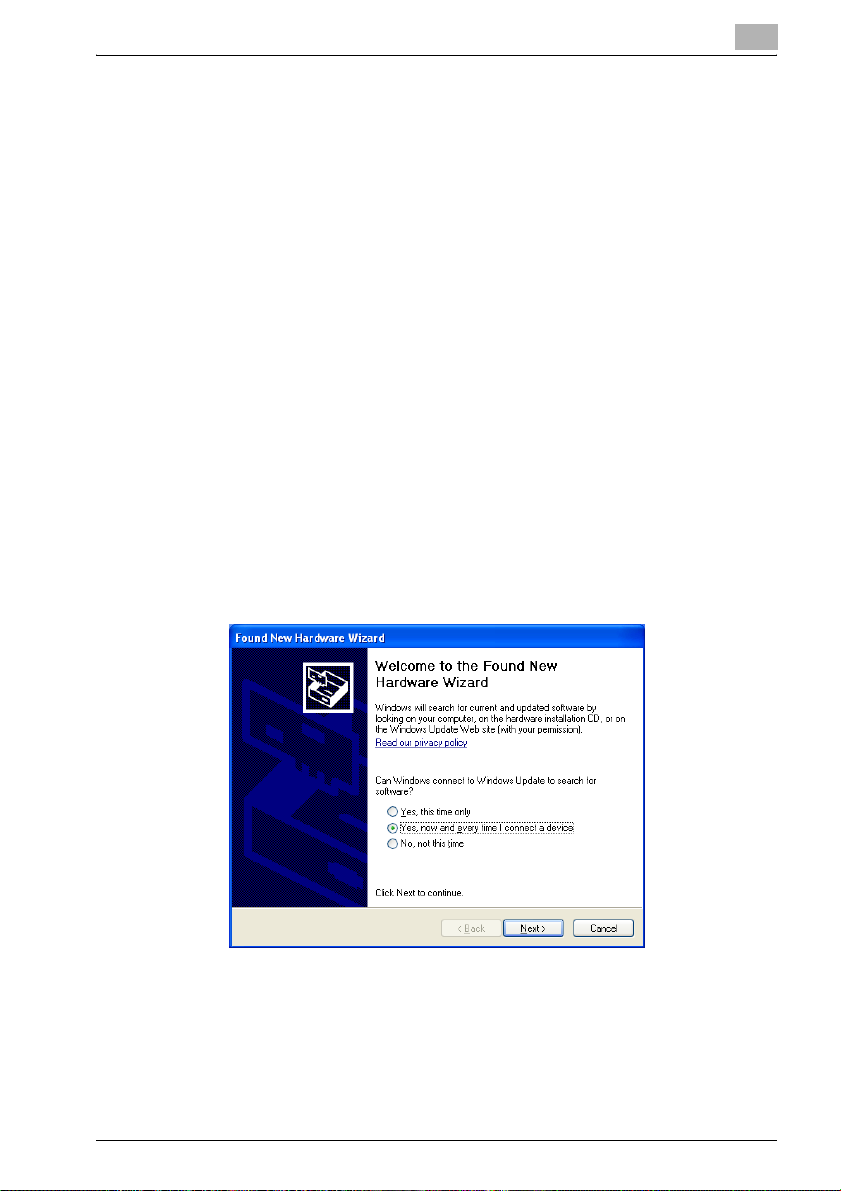
2 Install IC Card Driver (USB-Driver).
Plug the cable from this device into the USB port on the computer.
The Found New Hardware Wizard starts.
3 Select “Yes, now and every time I connect a device”, and then click [Next].
3
4 Insert the application CD-ROM included with this device into the CD-ROM
drive of the computer.
AU-201H 11
3
Using AU-201H Authentication Unit
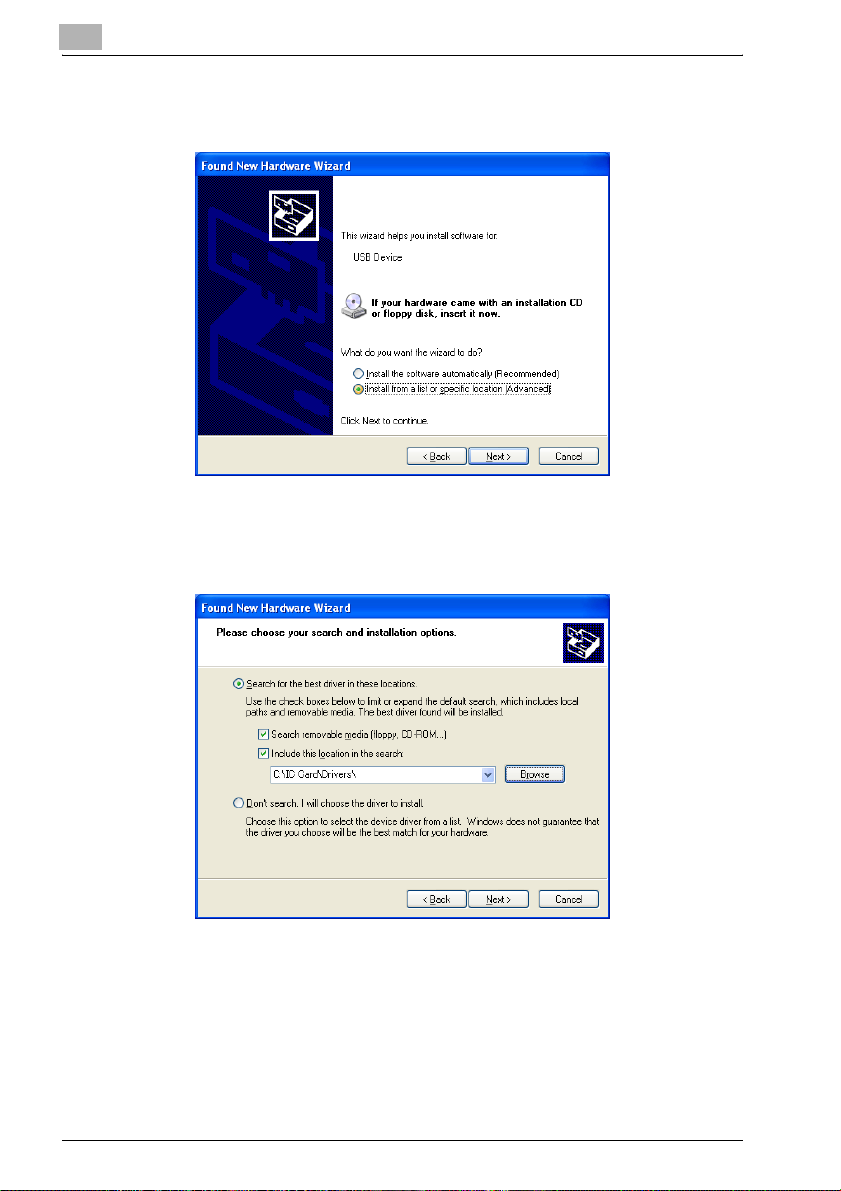
5 Select “Install from a list or specific location (Advanced)”, and then click
[Next].
6 Select the “Include this location in the search” check box, check that the
application CD-ROM appears as a location to be searched, and then click
[Next].
12 AU-201H
 Loading...