

Page 1
User’s Guide [Network Scan/Fax/Network Fax Operations]
Page 2

Introduction
Thank you for purchasing this machine.
This User’s Guide describes the operating instructions, precautions for proper operation, and simple
troubleshooting of the network scan/fax/network fax operations of bizhub C353/C253/C203. In order to allow
functionality of this product fully and to use it effectively, please read this User’s Guide as necessary.
In order to operate the machine safely and properly, be sure to read the Quick Guide
[Copy/Print/Fax/Scan/Box Operations].
For descriptions on trademarks and copyrights, refer to the accompanying [Trademarks/Copyrights].
Illustrations shown in the User’s Guide may differ from actual machine.
C353/C253/C203 x-1
Page 3
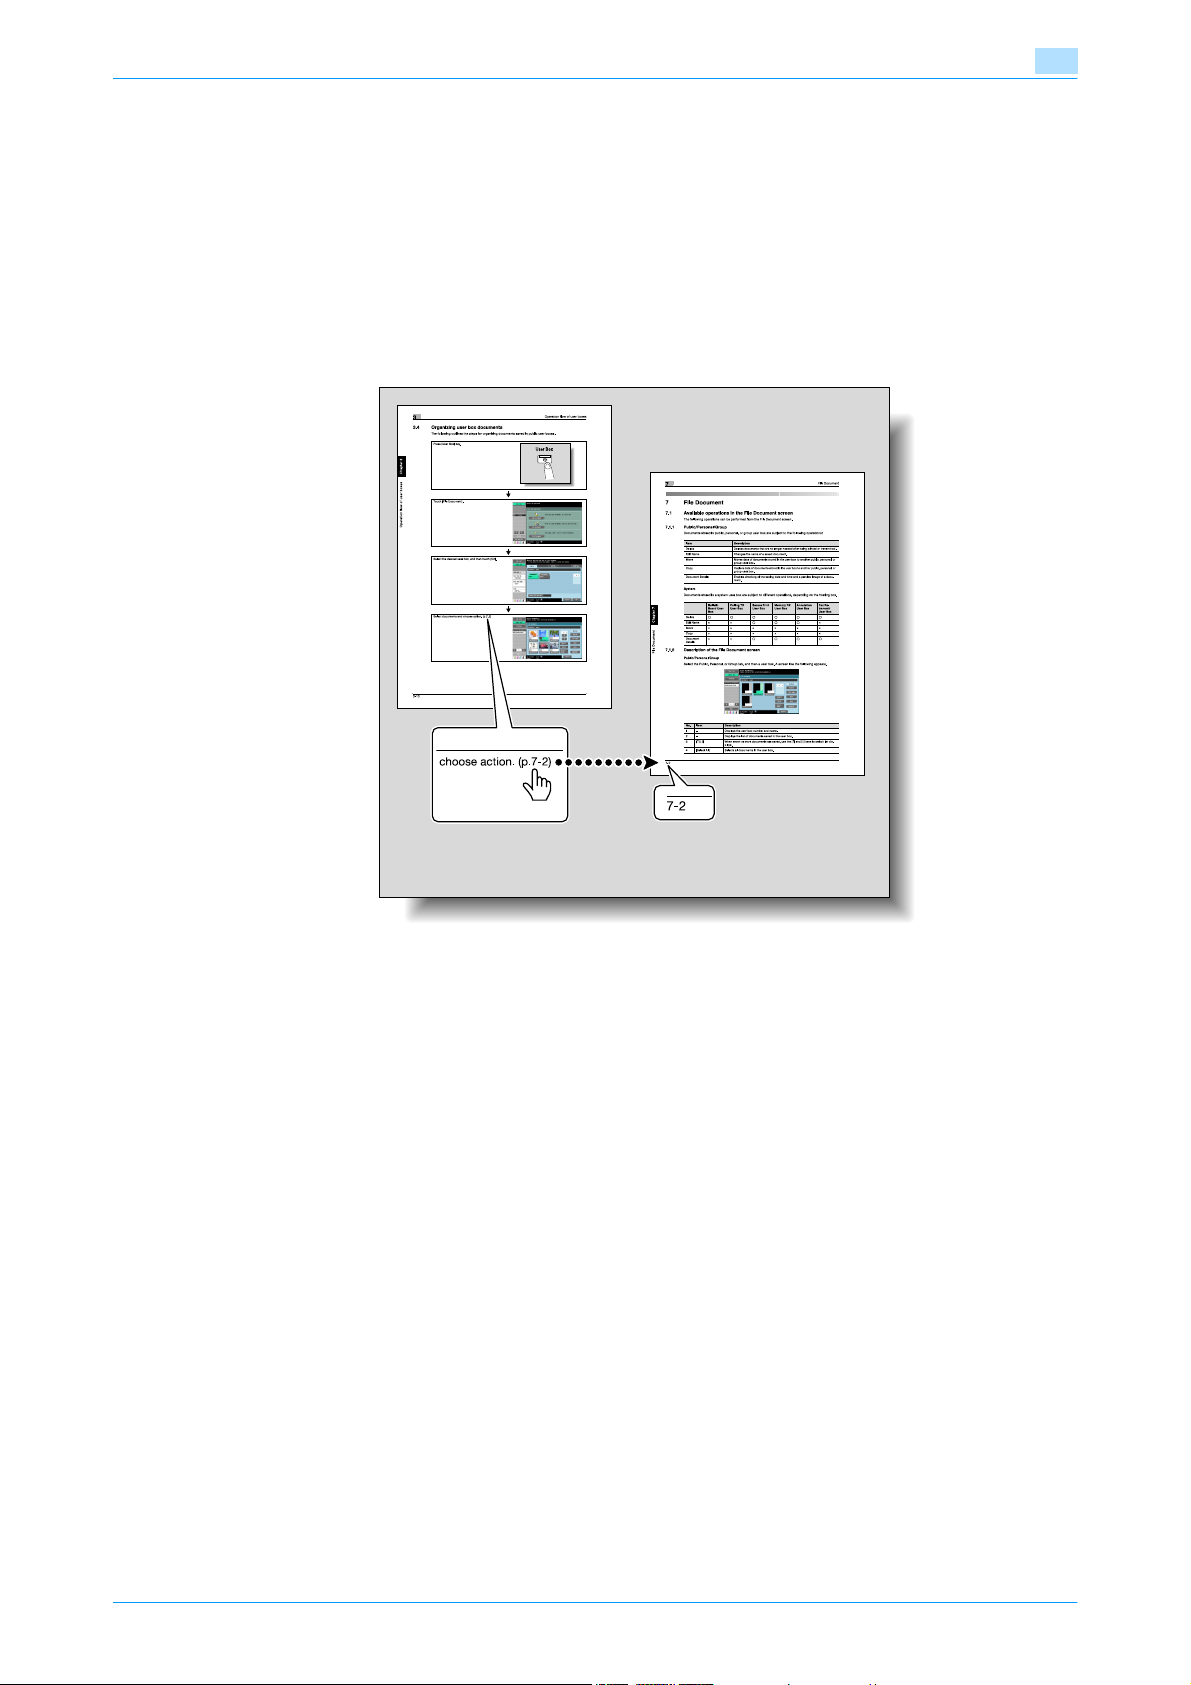
To check on the function you want to use
This manual contains details on setting up the functions.
Understanding general operation flow
This manual provides a separate chapter "Operation flow" to describe how to use the major functions of this
machine. The flow charts in the chapter help to understand the general flow of operations such as scan and
fax transmission.
Clicking the link in the flow chart takes you to the relevant pages of the function to see more details about
the function settings.
C353/C253/C203 x-2
Page 4
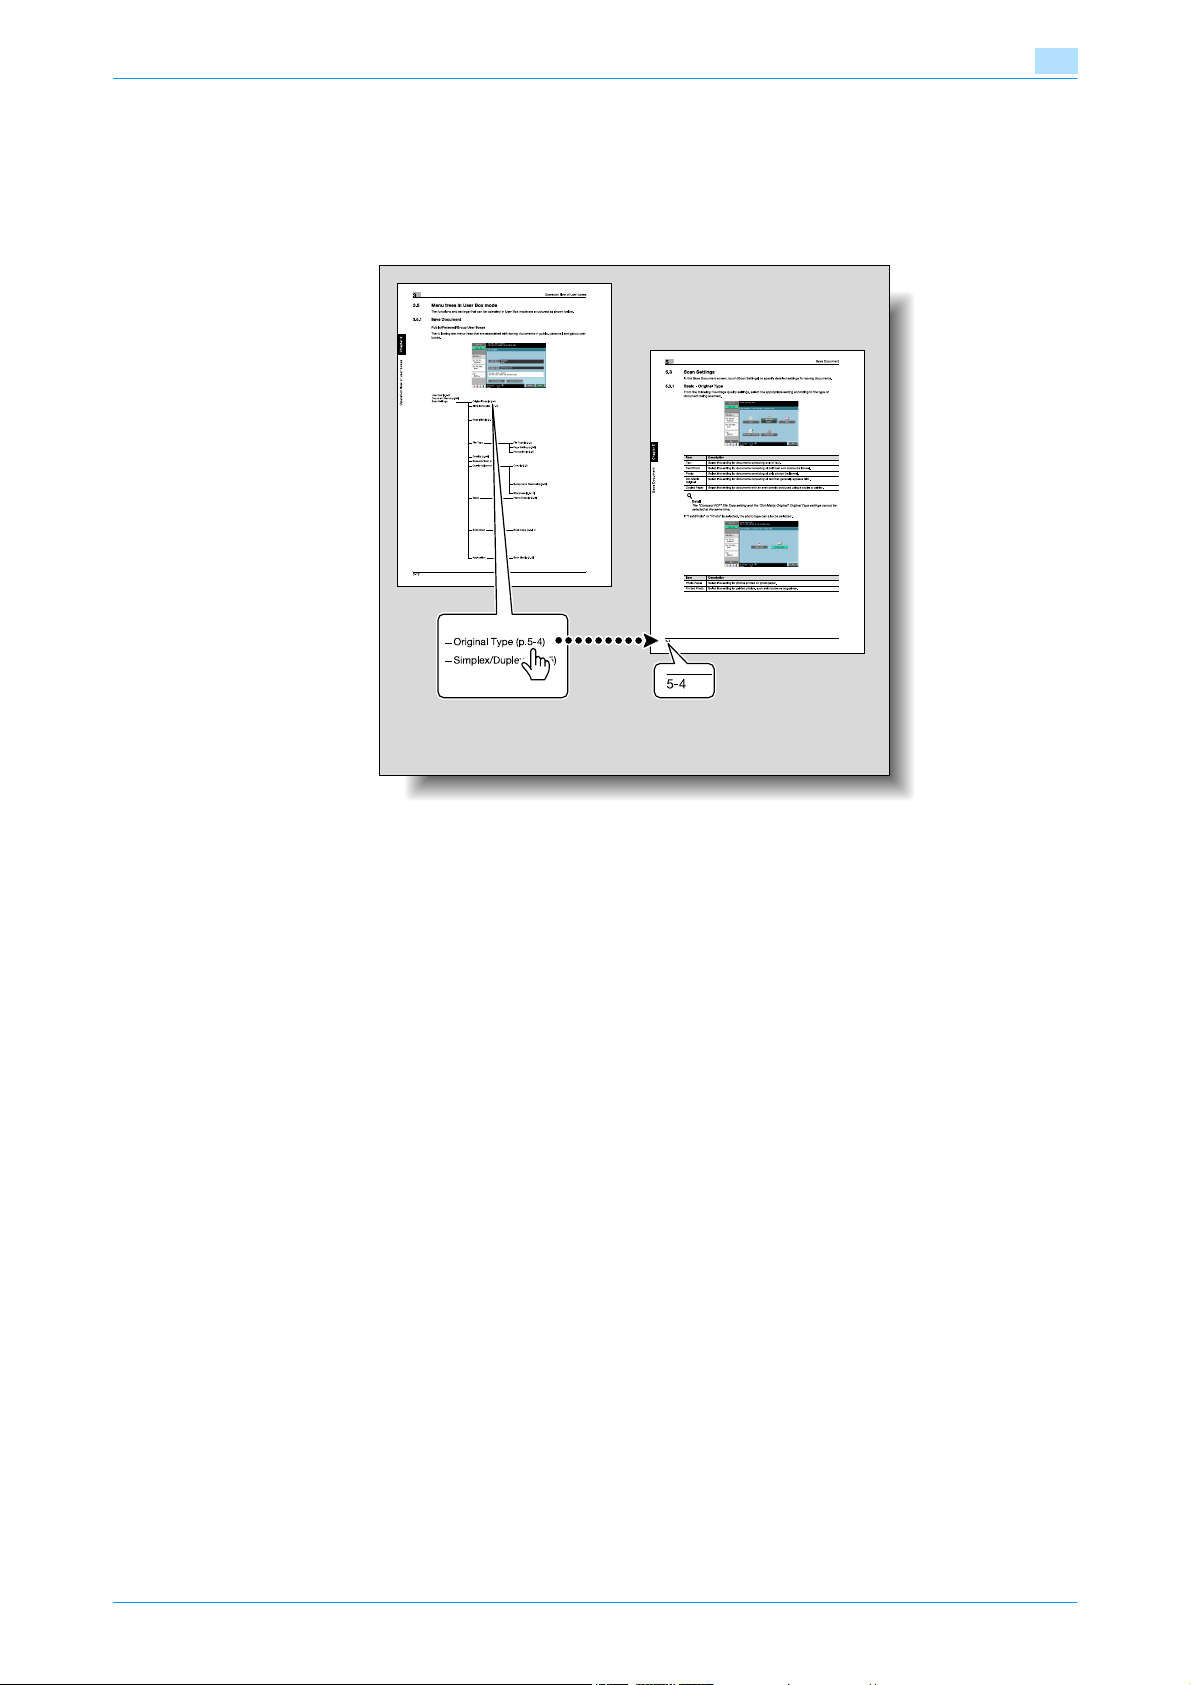
Using menu trees
Various functions can be specified for this machine. To find out the specific setting items under certain
button, or the list of items that can be specified, refer to the "Menu tree" page. On the menu tree pages, there
is a hierarchy of functions under one button. Clicking the link in the menu tree takes you to the relevant pages
of the function to see more details about the function settings.
C353/C253/C203 x-3
Page 5

Contents
Introduction
To check on the function you want to use ...........................................................................................................x-2
Understanding general operation flow ....................................................................................................x-2
Using menu trees .....................................................................................................................................x-3
Contents ..................................................................................................................................................................x-4
About this manual.................................................................................................................................................x-17
Contents ................................................................................................................................................x-17
Functions covered in this manual ..........................................................................................................x-18
Network Scan functions ........................................................................................................................x-18
G3 fax function ......................................................................................................................................x-18
Network Fax function ............................................................................................................................x-18
Representation of product name ...........................................................................................................x-18
Explanation of manual conventions .......................................................................................................x-19
User’s Guides........................................................................................................................................................x-21
Printed manual .......................................................................................................................................x-21
User’s Guide CD manuals .....................................................................................................................x-21
1 Before using Network Scan/Fax/Network Fax functions
1.1 Information before saving documents................................................................................................ 1-2
1.1.1 Transmission functions.............................................................................................................................1-2
Function type............................................................................................................................................1-2
Precautions for using fax function (G3) ....................................................................................................1-2
Precautions for using network fax............................................................................................................1-2
Precautions for using Internet fax.............................................................................................................1-3
Precautions for using IP Address Fax ......................................................................................................1-3
1.1.2 User authentication...................................................................................................................................1-3
Machine authentication ............................................................................................................................1-3
External server authentication ..................................................................................................................1-4
Account track ...........................................................................................................................................1-4
1.1.3 Limitation on file name..............................................................................................................................1-5
1.2 Overview................................................................................................................................................ 1-6
1.2.1 Available Network Scan functions ............................................................................................................1-6
1.2.2 Available Fax functions.............................................................................................................................1-9
1.2.3 Available Network Fax functions ............................................................................................................1-10
Scan to E-Mail ..........................................................................................................................................1-6
FTP TX ......................................................................................................................................................1-6
SMB TX.....................................................................................................................................................1-7
Save in User Box ......................................................................................................................................1-7
WebDAV TX ..............................................................................................................................................1-8
Web Service..............................................................................................................................................1-8
G3 fax transmission/reception..................................................................................................................1-9
Polling .......................................................................................................................................................1-9
Internet Fax.............................................................................................................................................1-10
IP Address Fax .......................................................................................................................................1-10
2 Control panel/touch panel
2.1 Control panel......................................................................................................................................... 2-2
2.2 Touch panel........................................................................................................................................... 2-4
2.2.1 Screen layout............................................................................................................................................2-4
Icons on the touch panel ..........................................................................................................................2-4
2.2.2 Display with/without optional settings......................................................................................................2-5
2.2.3 Display and operation of the left panel .....................................................................................................2-6
C353/C253/C203 x-4
Without fax kit...........................................................................................................................................2-5
With fax kit................................................................................................................................................2-5
Job List .....................................................................................................................................................2-6
Page 6

Job List - Delete .......................................................................................................................................2-7
Job List - Job Details................................................................................................................................2-7
Check Job - Check Job Settings ...........................................................................................................2-11
Check Job - Check Job Settings - Destination Settings........................................................................2-11
Check Job - Check Job Settings - Scan Settings..................................................................................2-12
Check Job - Check Job Settings - Original Settings..............................................................................2-12
Check Job - Check Job Settings - Communication Settings ................................................................2-12
Check Job - Check Job Settings - Check E-Mail Settings ....................................................................2-13
3 Registration of basic information
3.1 To begin operation ............................................................................................................................... 3-2
3.1.1 Required environment and equipment .....................................................................................................3-2
3.1.2 Network connection and settings.............................................................................................................3-2
Network connection .................................................................................................................................3-2
Network settings.......................................................................................................................................3-2
Specifying the E-Mail address of the machine.........................................................................................3-3
3.1.3 Connecting a modular cable ....................................................................................................................3-3
3.2 Address Registration............................................................................................................................ 3-4
3.2.1 Address Book ...........................................................................................................................................3-4
3.2.2 Group........................................................................................................................................................3-4
3.3 Optional settings................................................................................................................................... 3-5
3.4 Using Web services .............................................................................................................................. 3-6
3.4.1 Settings required for using Web services.................................................................................................3-6
3.4.2 Installing the driver of this machine on the computer ..............................................................................3-6
Fax/Scan programs ..................................................................................................................................3-5
Setting display contents...........................................................................................................................3-5
Pre-installation checking ..........................................................................................................................3-6
Installation procedure...............................................................................................................................3-7
4 Transmitting data
4.1 Operation flow....................................................................................................................................... 4-2
4.1.1 Scan/Network fax .....................................................................................................................................4-2
4.1.2 Fax (G3) ....................................................................................................................................................4-4
4.1.3 Recalling a program..................................................................................................................................4-6
4.1.4 Broadcasting ............................................................................................................................................4-9
4.2 Using Advanced Preview ................................................................................................................... 4-11
4.2.1 Preview screen .......................................................................................................................................4-11
Preview - View Pages.............................................................................................................................4-11
Preview - View Pages - Change Setting.................................................................................................4-12
Preview - View Status.............................................................................................................................4-12
4.2.2 Sending using Advanced Preview..........................................................................................................4-13
4.3 Menu tree in Fax/Scan mode............................................................................................................. 4-15
Address Book tab...................................................................................................................................4-15
Direct Input tab.......................................................................................................................................4-15
Job History tab .......................................................................................................................................4-16
Address Search tab................................................................................................................................4-17
Off-Hook tab...........................................................................................................................................4-17
Scan Settings .........................................................................................................................................4-17
Original Settings .....................................................................................................................................4-19
Communication Settings ........................................................................................................................4-20
4.4 Initial screen for fax/scan operations............................................................................................... 4-22
4.4.1 Screen layout..........................................................................................................................................4-22
4.4.2 Address Book .........................................................................................................................................4-23
Group......................................................................................................................................................4-23
Search - Address Type...........................................................................................................................4-23
Search - Index ........................................................................................................................................4-24
Search - Detail Search............................................................................................................................4-25
Detail Search - Search Options..............................................................................................................4-25
C353/C253/C203 x-5
Page 7

4.4.3 Direct Input .............................................................................................................................................4-25
4.4.4 Direct Input - Fax....................................................................................................................................4-26
4.4.5 Direct Input - E-Mail ...............................................................................................................................4-26
4.4.6 Direct Input - User Box...........................................................................................................................4-27
4.4.7 Direct Input - Internet Fax.......................................................................................................................4-27
RX Ability (Destination) ...........................................................................................................................4-27
4.4.8 Direct Input - IP Address Fax .................................................................................................................4-28
4.4.9 Direct Input - PC (SMB) ..........................................................................................................................4-28
Host Name..............................................................................................................................................4-28
File Path..................................................................................................................................................4-28
User Name..............................................................................................................................................4-28
Password................................................................................................................................................4-28
Reference ...............................................................................................................................................4-29
Next Destination .....................................................................................................................................4-29
4.4.10 Direct Input - FTP ...................................................................................................................................4-29
Host Name..............................................................................................................................................4-29
File Path..................................................................................................................................................4-29
User Name..............................................................................................................................................4-29
Password................................................................................................................................................4-29
Detailed Settings ....................................................................................................................................4-30
Next Destination .....................................................................................................................................4-30
4.4.11 Direct Input - WebDAV ...........................................................................................................................4-30
Host Name..............................................................................................................................................4-30
File Path..................................................................................................................................................4-30
User Name..............................................................................................................................................4-30
Password................................................................................................................................................4-30
Detailed Settings ....................................................................................................................................4-31
Next Destination .....................................................................................................................................4-31
4.4.12 Direct Input - Web Service .....................................................................................................................4-31
4.4.13 Job History (G3)......................................................................................................................................4-32
4.4.14 Address Search - Search .......................................................................................................................4-32
4.4.15 Address Search - Advanced Search ......................................................................................................4-33
4.4.16 Off-Hook (G3) .........................................................................................................................................4-34
4.5 Scan Settings ...................................................................................................................................... 4-35
4.5.1 Basic - Original Type ..............................................................................................................................4-35
4.5.2 Basic - Simplex/Duplex ..........................................................................................................................4-36
4.5.3 Basic - Resolution ..................................................................................................................................4-36
4.5.4 File Type .................................................................................................................................................4-37
Detail.......................................................................................................................................................4-31
Search.....................................................................................................................................................4-32
Name ......................................................................................................................................................4-33
E-Mail Addr.............................................................................................................................................4-33
Fax Number ............................................................................................................................................4-33
Last Name ..............................................................................................................................................4-33
First Name ..............................................................................................................................................4-33
City..........................................................................................................................................................4-33
Company Name......................................................................................................................................4-33
Department.............................................................................................................................................4-33
OR/AND/STARTS WITH/ENDS WITH ....................................................................................................4-34
Manual transmission...............................................................................................................................4-34
Text.........................................................................................................................................................4-35
Text/Photo ..............................................................................................................................................4-35
Photo ......................................................................................................................................................4-35
Dot Matrix Original..................................................................................................................................4-35
Copied Paper..........................................................................................................................................4-35
1-Sided ...................................................................................................................................................4-36
2-Sided ...................................................................................................................................................4-36
Cover + 2-Sided .....................................................................................................................................4-36
File Type .................................................................................................................................................4-37
Scan Settings .........................................................................................................................................4-37
Encryption - Encryption Level, Password, Document Permissions, and Detail Settings.......................4-38
Encryption - Password ...........................................................................................................................4-38
C353/C253/C203 x-6
Page 8

Encryption - Document Permissions......................................................................................................4-38
Encryption - Detail Settings - Printing Allowed/Enable copying of text, images and other content ......4-38
Encryption - Detail Settings - Changes Allowed ....................................................................................4-39
Stamp Composition................................................................................................................................4-40
4.5.5 Scan Settings - Density ..........................................................................................................................4-40
4.5.6 Scan Settings - Separate Scan ..............................................................................................................4-41
4.5.7 Quality Adjustment .................................................................................................................................4-41
4.5.8 Erase.......................................................................................................................................................4-43
4.5.9 Book Scan - Book Copy.........................................................................................................................4-43
4.5.10 Application - Scan Size ..........................................................................................................................4-45
4.5.11 Application - Annotation.........................................................................................................................4-47
4.5.12 Application - Stamp/Composition - Date/Time ......................................................................................4-47
4.5.13 Application - Stamp/Composition - Page Number ................................................................................4-49
4.5.14 Application - Stamp/Composition - Stamp ............................................................................................4-51
4.5.15 Application - Stamp/Composition - Header/Footer ...............................................................................4-53
Color (E-Mail/User Box/SMB/FTP/WebDAV/IP).....................................................................................4-41
Auto Color...............................................................................................................................................4-42
Full Color ................................................................................................................................................4-42
Gray Scale ..............................................................................................................................................4-42
Black.......................................................................................................................................................4-42
Background Removal .............................................................................................................................4-42
Sharpness...............................................................................................................................................4-42
Frame Erase............................................................................................................................................4-43
Book Spread...........................................................................................................................................4-43
Separation ..............................................................................................................................................4-44
Front Cover.............................................................................................................................................4-44
Front + Back Covers...............................................................................................................................4-44
Book Erase - Frame Erase......................................................................................................................4-44
Book Erase - Center Erase .....................................................................................................................4-44
Binding Position......................................................................................................................................4-45
Standard .................................................................................................................................................4-45
Custom Size ...........................................................................................................................................4-46
Photo Size ..............................................................................................................................................4-46
Selecting an annotation user box...........................................................................................................4-47
Date Format............................................................................................................................................4-47
Time Format............................................................................................................................................4-47
Pages......................................................................................................................................................4-47
Text Color ...............................................................................................................................................4-48
Text Size .................................................................................................................................................4-48
Print Position - Print Position..................................................................................................................4-48
Print Position - Fine-Tune.......................................................................................................................4-49
Starting Page Number ............................................................................................................................4-49
Starting Chapter Number .......................................................................................................................4-49
Page Number Type.................................................................................................................................4-49
Text Color ...............................................................................................................................................4-50
Text Size .................................................................................................................................................4-50
Print Position - Print Position..................................................................................................................4-50
Print Position - Fine-Tune.......................................................................................................................4-51
Stamp Type/Preset Stamps ...................................................................................................................4-51
Pages......................................................................................................................................................4-51
Text Color ...............................................................................................................................................4-52
Text Size .................................................................................................................................................4-52
Print Position - Print Position..................................................................................................................4-52
Print Position - Fine-Tune.......................................................................................................................4-53
Recall Header/Footer..............................................................................................................................4-53
Check/Change Temporarily....................................................................................................................4-54
Check/Change Temporarily - Header Settings/Footer Settings.............................................................4-54
Check/Change Temporarily - Header Settings/Footer Settings - Text ..................................................4-54
Check/Change Temporarily - Header Settings/Footer Settings - Date/Time.........................................4-55
Check/Change Temporarily - Header Settings/Footer Settings - Other ................................................4-55
Check/Change Temporarily - Pages ......................................................................................................4-55
Check/Change Temporarily - Text Color................................................................................................4-56
Check/Change Temporarily - Text Size..................................................................................................4-56
C353/C253/C203 x-7
Page 9

4.5.16 Application - Send & Print ......................................................................................................................4-56
Send & Print............................................................................................................................................4-56
Copies.....................................................................................................................................................4-57
Simplex/Duplex ......................................................................................................................................4-57
Staple......................................................................................................................................................4-57
Staple - Position Setting.........................................................................................................................4-57
4.5.17 Application - TX Stamp (G3/IP/I-FAX) ....................................................................................................4-57
TX Stamp ................................................................................................................................................4-57
Printing a TX stamp ................................................................................................................................4-58
4.5.18 Document Name (E-Mail/User Box/SMB/FTP/WebDAV/I-FAX) .............................................................4-58
4.6 Original Settings ................................................................................................................................. 4-59
4.6.1 Special Original - Mixed Original ............................................................................................................4-59
4.6.2 Special Original - Z-Folded Original .......................................................................................................4-59
4.6.3 Special Original - Long Original..............................................................................................................4-59
4.6.4 Direction Settings - Original Direction ....................................................................................................4-59
4.6.5 Direction Settings - Binding Position......................................................................................................4-60
4.6.6 Total # of Pages (Quick Memory TX) (G3) ..............................................................................................4-60
4.6.7 Despeckle...............................................................................................................................................4-61
4.7 Communication Settings ................................................................................................................... 4-62
4.7.1 Line Settings (G3) ...................................................................................................................................4-62
Overseas TX ...........................................................................................................................................4-62
ECM OFF ................................................................................................................................................4-62
V. 34 OFF................................................................................................................................................4-62
Check Dest. & Send ...............................................................................................................................4-63
Select Line ..............................................................................................................................................4-63
4.7.2 E-Mail Settings (E-Mail/I-FAX) ................................................................................................................4-63
About E-Mail settings .............................................................................................................................4-63
Document Name.....................................................................................................................................4-63
Subject....................................................................................................................................................4-64
From .......................................................................................................................................................4-64
Body .......................................................................................................................................................4-65
4.7.3 URL Notification Setting (FTP/SMB/WebDAV) .......................................................................................4-65
URL notification ......................................................................................................................................4-65
Detail Search ..........................................................................................................................................4-66
Direct Input .............................................................................................................................................4-66
4.7.4 Communication Method Settings (G3) ...................................................................................................4-66
4.7.5 E-Mail Encryption (E-Mail) ......................................................................................................................4-71
4.7.6 Adding Digital Signature (E-Mail)............................................................................................................4-72
4.7.7 Fax Header Settings (G3/IP/I-FAX).........................................................................................................4-72
4.8 Redialing (G3/IP) ................................................................................................................................. 4-73
4.8.1 Redial......................................................................................................................................................4-73
4.8.2 Manual redialing .....................................................................................................................................4-73
4.8.3 Fax Retransmit (G3)................................................................................................................................4-73
Quick Memory TX ...................................................................................................................................4-67
Polling RX - Normal ................................................................................................................................4-67
Polling RX - Bulletin ................................................................................................................................4-68
Timer TX..................................................................................................................................................4-69
Password TX...........................................................................................................................................4-69
Polling TX - Normal............................................................................................................
Polling TX - Bulletin ................................................................................................................................4-70
F-Code TX ..............................................................................................................................................4-71
.....................4-70
5 Receiving data (G3/IP/I-FAX)
5.1 Receiving data (G3: When the external phone is not connect) ........................................................ 5-2
5.1.1 Auto RX (fax only) .....................................................................................................................................5-2
5.2 Receiving data (G3: When the external phone is connect)............................................................... 5-3
5.2.1 Manual RX (phone only)............................................................................................................................5-3
5.3 Receiving data (I-FAX).......................................................................................................................... 5-4
C353/C253/C203 x-8
Automatic reception .................................................................................................................................5-4
Page 10

Manual reception......................................................................................................................................5-4
5.4 Receiving data (IP)................................................................................................................................ 5-5
5.5 In-memory proxy reception ................................................................................................................. 5-6
5.5.1 In-memory proxy reception ......................................................................................................................5-6
5.5.2 Forwarding jobs stored in the memory (G3).............................................................................................5-6
5.6 Recording data upon reception .......................................................................................................... 5-7
5.6.1 To output in reduced printing ...................................................................................................................5-7
5.6.2 To output in reduced printing according to the paper size ......................................................................5-7
Step 1: Selecting the optimal paper size..................................................................................................5-8
Step 2: Selecting paper for actual printing...............................................................................................5-8
Printing limitations ..................................................................................................................................5-10
5.6.3 To output in full size................................................................................................................................5-11
5.6.4 Recording method for received data......................................................................................................5-12
5.7 Reception information........................................................................................................................ 5-13
Printed inside the original .......................................................................................................................5-13
Printed outside the original.....................................................................................................................5-13
6 Useful functions (G3/IP/I-FAX)
6.1 Memory RX (GS3/IP/I-FAX).................................................................................................................. 6-2
6.2 PC-FAX reception (G3) ......................................................................................................................... 6-3
6.3 TSI distribution (G3).............................................................................................................................. 6-4
6.4 Confidential communication (G3)........................................................................................................ 6-5
6.5 Relay distribution (G3).......................................................................................................................... 6-6
6.5.1 Relay distribution......................................................................................................................................6-6
6.5.2 To enable relay distribution ......................................................................................................................6-6
6.5.3 Transmitting faxes to a relay distribution station......................................................................................6-7
6.6 Polling TX/RX (G3) ................................................................................................................................ 6-8
6.6.1 Polling TX..................................................................................................................................................6-8
6.6.2 Polling RX .................................................................................................................................................6-8
6.7 Bulletin (G3) ........................................................................................................................................... 6-9
6.8 Sending/receiving data using extension lines (G3) ......................................................................... 6-10
6.9 Forwarding fax (G3) ............................................................................................................................ 6-11
Settings necessary for confidential reception ..........................................................................................6-5
Performing confidential reception ............................................................................................................6-5
Performing confidential transmission .......................................................................................................6-5
7 Explanation of reports/lists
7.1 Types of reports/lists ........................................................................................................................... 7-2
7.1.1 Reports .....................................................................................................................................................7-2
7.1.2 List ............................................................................................................................................................7-3
7.2 Common lists ........................................................................................................................................ 7-4
7.2.1 Address Book List ....................................................................................................................................7-4
7.2.2 Group List .................................................................................................................................................7-5
7.2.3 Program List .............................................................................................................................................7-6
7.3 Reports/lists common to G3/IP/I-FAX................................................................................................ 7-8
7.3.1 Activity report ...........................................................................................................................................7-8
C353/C253/C203 x-9
To print it out ............................................................................................................................................7-4
Output example ........................................................................................................................................7-4
Items to be printed out .............................................................................................................................7-5
To print it out ............................................................................................................................................7-5
Output example ........................................................................................................................................7-6
Items to be printed out .............................................................................................................................7-6
Output example ........................................................................................................................................7-7
Items to be printed out .............................................................................................................................7-7
Output example ........................................................................................................................................7-8
Items to be printed out .............................................................................................................................7-8
Page 11

7.3.2 TX Result report........................................................................................................................................7-9
7.3.3 Broadcasting TX report ..........................................................................................................................7-10
7.3.4 Job Settings List.....................................................................................................................................7-10
7.4 Reports output in G3 Fax operations................................................................................................ 7-14
7.4.1 Polling TX report .....................................................................................................................................7-14
7.4.2 Polling RX report.....................................................................................................................................7-14
7.4.3 Sequential polling RX report...................................................................................................................7-14
7.4.4 TX reservation report ..............................................................................................................................7-15
7.4.5 Polling TX reservation report ..................................................................................................................7-15
7.4.6 Broadcasting TX reservation report........................................................................................................7-15
7.4.7 One-destination polling RX reservation report .......................................................................................7-16
7.4.8 Sequential polling RX reservation report ................................................................................................7-16
7.4.9 Confidential RX report ............................................................................................................................7-16
7.4.10 Bulletin TX report....................................................................................................................................7-17
7.4.11 Relay report ............................................................................................................................................7-17
7.4.12 Relay request filing report.......................................................................................................................7-17
7.4.13 PC-FAX TX error report ..........................................................................................................................7-18
7.5 Reports output in Internet fax operations........................................................................................ 7-19
7.5.1 Network fax RX error report....................................................................................................................7-19
7.5.2 Print MDN Message................................................................................................................................7-19
7.5.3 Print DSN Message ................................................................................................................................7-20
7.5.4 Normally received message body ..........................................................................................................7-20
7.5.5 E-Mail Subject/Text List .........................................................................................................................7-21
7.6 Reports output in IP operations........................................................................................................ 7-22
7.6.1 Network fax RX error report....................................................................................................................7-22
To print it out ..........................................................................................................................................7-10
Fax settings list.......................................................................................................................................7-11
Relay list .................................................................................................................................................7-12
RX user box by sender (TSI) ...................................................................................................................7-12
List of confidential and bulletin user boxes ............................................................................................7-13
To print it out ..........................................................................................................................................7-21
Output example ......................................................................................................................................7-21
8 User mode settings
8.1 Menu trees in User mode..................................................................................................................... 8-2
8.1.1 One-Touch/User Box Registration ...........................................................................................................8-2
8.1.2 User Settings ............................................................................................................................................8-5
8.1.3 Recall Scan/Fax Program.........................................................................................................................8-6
8.2 One-Touch/User Box Registration...................................................................................................... 8-7
8.2.1 Displaying the One-Touch/User Box Registration screen........................................................................8-7
8.2.2 Address Book - E-Mail .............................................................................................................................8-7
No. ............................................................................................................................................................8-8
Name ........................................................................................................................................................8-8
E-Mail Address .........................................................................................................................................8-8
Index .........................................................................................................................................................8-9
Icon...........................................................................................................................................................8-9
8.2.3 Address Book - User Box.......................................................................................................................8-10
No. ..........................................................................................................................................................8-10
Name ......................................................................................................................................................8-10
User Box.................................................................................................................................................8-11
Index .......................................................................................................................................................8-11
Icon.........................................................................................................................................................8-11
8.2.4 Address Book - Fax................................................................................................................................8-12
No. ..........................................................................................................................................................8-13
Name ......................................................................................................................................................8-13
Address...................................................................................................................................................8-13
Line Settings...........................................................................................................................................8-14
Index .......................................................................................................................................................8-15
C353/C253/C203 x-10
Page 12

Icon.........................................................................................................................................................8-15
8.2.5 Address Book - PC (SMB)......................................................................................................................8-16
No. ..........................................................................................................................................................8-17
Name ......................................................................................................................................................8-17
User ID....................................................................................................................................................8-17
Password................................................................................................................................................8-17
Host Address ..........................................................................................................................................8-17
File Path..................................................................................................................................................8-18
Reference ...............................................................................................................................................8-18
Index .......................................................................................................................................................8-18
Icon.........................................................................................................................................................8-19
8.2.6 Address Book - FTP ...............................................................................................................................8-19
8.2.7 Address Book - WebDAV .......................................................................................................................8-23
8.2.8 Address Book - IP Address Fax .............................................................................................................8-26
8.2.9 Address Book - Internet Fax...................................................................................................................8-29
8.2.10 Group......................................................................................................................................................8-32
8.2.11 E-Mail Settings - E-Mail Subject (E-Mail/I-FAX) .....................................................................................8-34
8.2.12 E-Mail Settings - E-Mail Body (E-Mail/I-FAX).........................................................................................8-35
8.2.13 Scan/Fax Program..................................................................................................................................8-35
No. ..........................................................................................................................................................8-20
Name ......................................................................................................................................................8-20
Host Address ..........................................................................................................................................8-21
File Path..................................................................................................................................................8-21
User ID....................................................................................................................................................8-21
Password................................................................................................................................................8-21
anonymous .............................................................................................................................................8-21
PASV.......................................................................................................................................................8-21
Proxy.......................................................................................................................................................8-21
Port Number ...........................................................................................................................................8-21
Index .......................................................................................................................................................8-22
Icon.........................................................................................................................................................8-22
No. ..........................................................................................................................................................8-24
Name ......................................................................................................................................................8-24
User ID....................................................................................................................................................8-24
Password................................................................................................................................................8-24
Host Address ..........................................................................................................................................8-24
File Path..................................................................................................................................................8-25
Proxy.......................................................................................................................................................8-25
SSL Settings ...........................................................................................................................................8-25
Port Number ...........................................................................................................................................8-25
Index ..........................................................................................................................
Icon.........................................................................................................................................................8-25
No. ..........................................................................................................................................................8-27
Name ......................................................................................................................................................8-27
IP Address ..............................................................................................................................................8-27
Port Number ...........................................................................................................................................8-27
Destination Machine Type ......................................................................................................................8-27
Index .......................................................................................................................................................8-28
Icon.........................................................................................................................................................8-28
No. ..........................................................................................................................................................8-30
Name ......................................................................................................................................................8-30
E-Mail Address .......................................................................................................................................8-30
RX Ability (Destination) ...........................................................................................................................8-30
Index .......................................................................................................................................................8-31
Icon.........................................................................................................................................................8-31
Name ......................................................................................................................................................8-32
Select Group...........................................................................................................................................8-32
Icon.........................................................................................................................................................8-33
Check Program Settings ........................................................................................................................8-33
Subject....................................................................................................................................................8-34
Body .......................................................................................................................................................8-35
Register Scan/Fax Program ...................................................................................................................8-36
Register Program - Name.......................................................................................................................8-36
.............................8-25
C353/C253/C203 x-11
Page 13

Register Program - Address...................................................................................................................8-36
Register Program - URL Notif. Destination ............................................................................................8-37
Check Program Settings ........................................................................................................................8-37
Check Program Settings - Check Address ............................................................................................8-37
Check Program Settings - Check Scan Settings ...................................................................................8-38
Check Program Settings - Check Original Settings ...............................................................................8-38
Check Program Settings - Communication Settings .............................................................................8-38
Check Program Settings - Check E-Mail Settings .................................................................................8-39
Check Program Settings - Check URL Notif. Destination ......................................................................8-39
Delete......................................................................................................................................................8-39
8.2.14 Create User Box - Confidential User Box (G3).......................................................................................8-40
8.2.15 Create User Box - Bulletin Board User Box (G3)....................................................................................8-40
8.2.16 Create User Box - Relay User Box (G3) .................................................................................................8-40
8.2.17 Limiting Access to Destinations - Apply Levels/Groups to Destinations ...............................................8-40
Address Book .........................................................................................................................................8-40
Group......................................................................................................................................................8-41
Program ..................................................................................................................................................8-41
8.3 User Settings....................................................................................................................................... 8-42
8.3.1 Displaying the User Settings screen.......................................................................................................8-42
8.3.2 Custom Display Settings - Scan/Fax Settings .......................................................................................8-42
Default Tab .............................................................................................................................................8-42
Program Default......................................................................................................................................8-43
Address Book Index Default...................................................................................................................8-43
Shortcut Key 1/Shortcut Key 2...............................................................................................................8-43
Default Address Book.............................................................................................................................8-44
8.3.3 Custom Display Settings - FAX Active Screen (G3/IP/I-FAX).................................................................8-44
TX Display...............................................................................................................................................8-44
RX Display ..............................................................................................................................................8-45
8.3.4 Custom Display Settings - Search Option Settings (E-mail/Box/SMB/FTP/WebDAV/G3/IP/I-FAX)......8-45
8.3.5 Scan/Fax Settings ..................................................................................................................................8-46
JPEG Compression Level (E-Mail/Box/SMB/FTP/WebDAV/Web Service/IP)........................................8-46
Black Compression Level.......................................................................................................................8-46
TWAIN Lock Time...................................................................................................................................8-47
Default Scan/Fax Settings......................................................................................................................8-47
Compact PDF/XPS Compression Level (E-Mail/Box/SMB/FTP/WebDAV)............................................8-47
Color TIFF Type (E-Mail/User Box/SMB/FTP/WebDAV) ........................................................................8-48
9 Administrator mode settings
9.1 First specify these settings.................................................................................................................. 9-2
9.1.1 E-Mail........................................................................................................................................................9-2
Administrator’s E-Mail address ................................................................................................................9-2
TCP/IP setting...........................................................................................................................................9-2
E-Mail TX (SMTP)......................................................................................................................................9-2
9.1.2 User boxes................................................................................................................................................9-2
9.1.3 SMB TX.....................................................................................................................................................9-2
9.1.4 FTP TX ......................................................................................................................................................9-2
9.1.5 G3 FAX......................................................................................................................................................9-2
9.1.6 Internet Fax...............................................................................................................................................9-3
Create User Box .......................................................................................................................................9-2
TCP/IP setting...........................................................................................................................................9-2
SMB Client Setting ...................................................................................................................................9-2
TCP/IP setting...........................................................................................................................................9-2
FTP Settings .............................................................................................................................................9-2
Header Information...................................................................................................................................9-2
Line Parameter Setting .............................................................................................................................9-3
Network Fax Function Setting ..................................................................................................................9-3
Header Information...................................................................................................................................9-3
E-Mail address of the machine.................................................................................................................9-3
Machine Setting........................................................................................................................................9-3
TCP/IP setting...........................................................................................................................................9-3
C353/C253/C203 x-12
Page 14

E-Mail Settings .........................................................................................................................................9-3
9.1.7 IP Address Fax .........................................................................................................................................9-3
Network Fax Function Setting ..................................................................................................................9-3
Header Information...................................................................................................................................9-3
TCP/IP setting...........................................................................................................................................9-3
SMTP TX/RX Settings...............................................................................................................................9-3
9.2 Menu tree in Administrator mode ....................................................................................................... 9-4
9.2.1 System Settings........................................................................................................................................9-4
9.2.2 Fax Settings..............................................................................................................................................9-5
9.2.3 Security Settings.......................................................................................................................................9-7
9.3 Administrator Settings (E-Mail/User Box/SMB/FTP/WebDAV) ........................................................ 9-8
9.3.1 Displaying the Administrator Settings screen...........................................................................................9-8
9.3.2 System Settings - Restrict User Access...................................................................................................9-8
Restrict Access to Job Settings - Changing Job Priority .........................................................................9-8
Restrict Access to Job Settings - Change the "From" Address (E-Mail) .................................................9-9
Restrict Operation - Restrict Broadcasting ..............................................................................................9-9
9.3.3 System Settings - Reset Settings - Job Reset - NEXT JOB - Reset Data After Job................................9-9
9.3.4 System Settings - Stamp Settings - Header/Footer Settings ................................................................9-10
Name ......................................................................................................................................................9-10
Header Settings/Footer Settings ............................................................................................................9-10
Header Settings/Footer Settings - Text..................................................................................................9-11
Header Settings/Footer Settings - Date/Time ........................................................................................9-11
Header Settings/Footer Settings - Other................................................................................................9-11
Pages......................................................................................................................................................9-12
Text Color ...............................................................................................................................................9-12
Text Size .................................................................................................................................................9-12
9.3.5 Security Settings - Security Details ........................................................................................................9-13
Manual Destination Input........................................................................................................................9-13
9.4 Administrator Settings (G3) ............................................................................................................... 9-14
9.4.1 System Settings - Power Save Settings - Enter Power Save Mode ......................................................9-14
9.4.2 System Settings - Output Settings - Print/Fax Output Settings - Fax ...................................................9-14
9.4.3 System Settings - Restrict User Access.................................................................................................9-14
Restrict Access to Job Settings - Changing Job Priority .......................................................................9-14
Restrict Operation - Restrict Broadcasting ............................................................................................9-14
9.4.4 System Settings - Stamp Settings - Fax TX Settings.............................................................................9-15
9.4.5 Fax Settings - Header Information .........................................................................................................9-15
9.4.6 Fax Settings - Header/Footer Position ...................................................................................................9-16
9.4.7 Fax Settings - Line Parameter Setting....................................................................................................9-18
9.4.8 Fax Settings - TX/RX Settings ................................................................................................................9-20
Sender ....................................................................................................................................................9-15
Sender Fax No........................................................................................................................................9-16
Header Position ......................................................................................................................................9-16
Footer Position .......................................................................................................................................9-17
Dialing Method........................................................................................................................................9-18
Receive Mode.........................................................................................................................................9-18
Number of RX Call Rings........................................................................................................................9-19
Number of Redials..................................................................................................................................9-19
Redial Interval .........................................................................................................................................9-19
Line Monitor Sound ................................................................................................................................9-20
Line Monitor Sound Vol. .........................................................................................................................9-20
Duplex Print (RX).....................................................................................................................................9-20
Letter/Ledger over A4/A3 .......................................................................................................................9-21
Print Paper Selection..............................................................................................................................9-21
Print Paper Size ......................................................................................................................................9-22
Incorrect User Box No. Entry..................................................................................................................9-22
Tray Selection for RX Print .....................................................................................................................9-23
Min. Reduction for RX Print....................................................................................................................9-23
Print Separate Fax Pages.......................................................................................................................9-24
File After Polling TX ................................................................................................................................9-24
No. of Sets (RX) ......................................................................................................................................9-24
C353/C253/C203 x-13
Page 15

9.4.9 Fax Settings - Function Settings ............................................................................................................9-25
Function ON/OFF Setting - F-Code TX ..................................................................................................9-25
Function ON/OFF Setting - Relay RX .....................................................................................................9-25
Function ON/OFF Setting - Relay Printing .............................................................................................9-26
Function ON/OFF Setting - Destination Check Display Function ..........................................................9-26
Function ON/OFF Settings - Confirm Address (TX) (G3) ........................................................................9-26
Function ON/OFF Settings - Confirm Address (Register) (G3)...............................................................9-27
Memory RX Setting.................................................................................................................................9-27
Closed Network RX ................................................................................................................................9-28
Forward TX Setting.................................................................................................................................9-28
Incomplete TX Hold ................................................................................................................................9-29
PC-Fax RX Setting..................................................................................................................................9-30
TSI User Box Setting ..............................................................................................................................9-30
TSI User Box Setting - TSI User Box Registration .................................................................................9-31
TSI User Box Setting - TSI User Box Registration - TSI use box settings.............................................9-31
9.4.10 Fax Settings - PBX Connection Setting .................................................................................................9-32
9.4.11 Fax Settings - Report Settings ...............................................................................................................9-32
Activity Report ........................................................................................................................................9-32
TX Result Report.....................................................................................................................................9-33
Sequential TX Report..............................................................................................................................9-33
Timer Reservation TX Report..................................................................................................................9-33
Confidential RX Report...........................................................................................................................9-34
Bulletin TX Report...................................................................................................................................9-34
Relay TX Result Report...........................................................................................................................9-34
Relay Request Report.............................................................................................................................9-35
PC-Fax TX Error Report..........................................................................................................................9-35
Broadcast Result Report ........................................................................................................................9-35
TX Result Report Check .........................................................................................................................9-36
9.4.12 Fax Settings - Job Settings List .............................................................................................................9-36
9.4.13 Fax Settings - Multi Line Settings...........................................................................................................9-36
Line Parameter Setting - Dialing Method ...............................................................................................9-37
Line Parameter Setting - Number of RX Call Rings................................................................................9-37
Line Parameter Setting - Line Monitor Sound........................................................................................9-37
Function Settings - PC-FAX TX Setting..................................................................................................9-38
Multi Line Setting....................................................................................................................................9-38
Sender Fax No........................................................................................................................................9-38
9.4.14 Security Settings - Security Details ........................................................................................................9-39
Manual Destination Input........................................................................................................................9-39
Restrict Fax TX .......................................................................................................................................9-39
Hide Personal Information ......................................................................................................................9-39
Display Activity Log ................................................................................................................................9-40
9.5 Administrator Settings (IP/I-FAX)...................................................................................................... 9-41
9.5.1 System Settings - Power Save Settings - Enter Power Save Mode ......................................................9-41
9.5.2 System Settings - Output Settings - Print/Fax Output Settings - Fax ...................................................9-41
9.5.3 System Settings - Restrict User Access.................................................................................................9-41
Restrict Access to Job Settings - Changing Job Priority .......................................................................9-41
Restrict Access to Job Settings - Change the "From" Address ............................................................9-41
Restrict Operation - Restrict Broadcasting ............................................................................................9-41
9.5.4 System Settings - Stamp Settings - Fax TX Settings.............................................................................9-41
9.5.5 Fax Settings - Header Information .........................................................................................................9-41
9.5.6 Fax Settings - Header/Footer Position ...................................................................................................9-41
9.5.7 Fax Settings - Line Parameter Setting (IP) .............................................................................................9-41
Number of Redials..................................................................................................................................9-41
Redial Interval .........................................................................................................................................9-41
9.5.8 Fax Settings - TX/RX Settings ................................................................................................................9-42
9.5.9 Fax Settings - Function Settings ............................................................................................................9-42
Function ON/OFF Setting - Destination Check Display Function ..........................................................9-42
Memory RX Setting.................................................................................................................................9-42
9.5.10 Fax Settings - Report Settings - Output Settings...................................................................................9-42
Activity Report ........................................................................................................................................9-42
TX Result Report.....................................................................................................................................9-42
Sequential TX Report..............................................................................................................................9-42
C353/C253/C203 x-14
Page 16

Broadcast Result Report ........................................................................................................................9-42
TX Result Report Check .........................................................................................................................9-42
Network Fax RX Error Report.................................................................................................................9-42
MDN Message (I-FAX) ............................................................................................................................9-43
DSN Message (I-FAX).............................................................................................................................9-43
Print E-Mail Message Body (I-FAX) ........................................................................................................9-43
9.5.11 Fax Settings - Job Settings List .............................................................................................................9-43
9.5.12 Fax Settings - Network Fax Settings......................................................................................................9-44
9.5.13 Security Settings - Security Details ........................................................................................................9-45
Black Compression Level.......................................................................................................................9-44
Internet Fax Self RX Ability (I-FAX) .........................................................................................................9-44
Internet Fax Advanced Settings (I-FAX)..................................................................................................9-45
Manual Destination Input........................................................................................................................9-45
Restrict Fax TX .......................................................................................................................................9-45
Hide Personal Information ......................................................................................................................9-45
Display Activity Log ................................................................................................................................9-45
10 PageScope Web Connection
10.1 Using PageScope Web Connection.................................................................................................. 10-2
10.1.1 Operating environment...........................................................................................................................10-2
10.1.2 Accessing PageScope Web Connection................................................................................................10-2
10.1.3 Web browser cache................................................................................................................................10-3
With Internet Explorer.............................................................................................................................10-3
With Netscape Navigator........................................................................................................................10-3
With Mozilla Firefox ................................................................................................................................10-3
10.1.4 Structure of pages..................................................................................................................................10-4
10.2 Logging on and logging off................................................................................................................ 10-6
10.2.1 Login and logout operations...................................................................................................................10-6
When user authentication and account track settings are not specified ...............................................10-6
When user authentication and account track settings are specified .....................................................10-7
10.2.2 Logout.....................................................................................................................................................10-8
10.2.3 Login.......................................................................................................................................................10-9
10.3 Overview of User mode.................................................................................................................... 10-13
10.3.1 Information............................................................................................................................................10-13
10.3.2 Job........................................................................................................................................................10-14
10.3.3 Box .......................................................................................................................................................10-14
10.3.4 Direct Print............................................................................................................................................10-15
10.3.5 Store Address.......................................................................................................................................10-16
10.4 Overview of Administrator mode .................................................................................................... 10-17
10.4.1 Maintenance .........................................................................................................................................10-17
10.4.2 Security.................................................................................................................
10.4.3 Box .......................................................................................................................................................10-19
10.4.4 Print Setting ..........................................................................................................................................10-20
10.4.5 Store Address.......................................................................................................................................10-21
10.4.6 Network ................................................................................................................................................10-22
Options that can be selected when logged on to PageScope Web Connection...................................10-9
Logging on as a public user .................................................................................................................10-10
Logging on as a registered user ...........................................................................................................10-10
Logging on to Administrator mode.......................................................................................................10-11
Logging on as a user box administrator...............................................................................................10-12
................................10-18
11 Fax/Scan function troubleshooting
11.1 Cannot send data ............................................................................................................................... 11-2
11.1.1 G3 Fax ....................................................................................................................................................11-2
11.1.2 Internet fax/IP address fax/network fax/scan transmission
C353/C253/C203 x-15
(E-Mail/SMB/FTP/WebDAV/Web service) ..............................................................................................11-2
Page 17

11.2 Cannot receive data ........................................................................................................................... 11-4
11.2.1 G3 Fax ....................................................................................................................................................11-4
11.2.2 Internet fax/IP address fax .....................................................................................................................11-5
11.3 Displaying an error message............................................................................................................. 11-6
11.3.1 G3 Fax ....................................................................................................................................................11-6
11.3.2 If the HDD Ready indicator indicates an HDD malfunction: ...................................................................11-6
11.3.3 Network fax error code table..................................................................................................................11-6
Transmission System Error Code...........................................................................................................11-6
Reception system error code .................................................................................................................11-7
11.4 When the message "Contact your Service Rep." appears (Service Call)...................................... 11-8
12 Appendix
12.1 Product specifications ....................................................................................................................... 12-2
12.1.1 Scanning functions .................................................................................................................................12-2
12.1.2 Fax functions ..........................................................................................................................................12-2
12.2 Tips....................................................................................................................................................... 12-3
12.2.1 About the number of pages stored in the memory.................................................................................12-3
12.2.2 Giving a scan command from a computer (Web service) ......................................................................12-3
12.3 Entering text........................................................................................................................................ 12-5
12.3.1 Enlarging the keyboard...........................................................................................................................12-6
12.3.2 To type text.............................................................................................................................................12-7
12.3.3 List of Available Characters....................................................................................................................12-7
12.4 Scanning glossary .............................................................................................................................. 12-8
12.5 Internet fax glossary......................................................................................................................... 12-13
12.6 Fax glossary ...................................................................................................................................... 12-14
13 Index
13.1 Index .................................................................................................................................................... 13-2
C353/C253/C203 x-16
Page 18

About this manual
This document is a User’s Guide on the network scan, fax and network fax operations of bizhub
C353/C253/C203.
The following describes the contents of this manual and representation of the product name.
This manual is intended for persons with basic knowledge of computers and this machine. For details on the
Windows or Macintosh operating systems, or software applications, refer to the respective manuals.
Contents
This manual consists of the following chapters:
Chapter 1 Before using Network Scan/Fax/Network Fax functions
This chapter describes topics to be kept in mind before using the fax/scan functions of the machine.
Chapter 2 Control panel/touch panel
This chapter describes the function of keys on the control panel and usage of the touch panel.
Chapter 3 Registration of basic information
This chapter describes the registration procedure required before using the fax/scan functions of the
machine.
Chapter 4 Transmitting data
This chapter describes the flow of operations for sending network-scanned data, G3 faxes, and network
faxes, as well as available setting items. Flow charts are used to explain key operations. Refer to the flow
chart for flow of each operation. It also introduces the menu tree of items that can be specified to use the
fax/scan function. Clicking the link of the menu tree displays the page that describes the setting screen.
Chapter 5 Receiving data (G3/IP/I-FAX)
This chapter provides an overview of G3 fax and network fax reception.
Chapter 6 Useful functions (G3/IP/I-FAX)
This chapter describes useful G3 fax and network fax functions.
Chapter 7 Explanation of reports/lists
This chapter introduces reports automatically printed when the fax/scan functions are used as well as lists
that can be printed in the Utility mode.
Chapter 8 User mode settings
This chapter describes setting items in User mode among settings in Utility mode that are related to the
fax/scan functions. In User mode, destination registrations and related items can be specified. Clicking the
link described at the beginning of the chapter displays the page that describes the Utility mode.
Chapter 9 Administrator mode settings
This chapter describes setting items in Administrator mode among settings in Utility mode that are related to
the fax/scan functions. In Administrator mode, line parameters and others can be specified. Clicking the link
described at the beginning of the chapter displays the page that describes the Utility mode.
Chapter 10 PageScope Web Connection
This chapter describes the overview of the utility software that allows you to configure the machine using a
Web browser from a computer on a network.
Chapter 11 Fax/Scan function troubleshooting
This chapter covers action for handling error messages and transmission failure.
Chapter 12 Appendix
This chapter provides a glossary as well as instructions for entering text.
Chapter 13 Index
This chapter describes the specifications of the machine and the characters which can be entered on the
control panel.
C353/C253/C203 x-17
Page 19

Functions covered in this manual
Network Scan functions
This function transmits image data scanned on the machine via a network. The following transmission
methods are available for the Network scan functions.
- Scan to E-Mail
- Scan to SMB
- Scan to FTP
- Scan to WebDAV
- Save in User BOX
- Web Service
G3 fax function
This function transmits image data scanned on the machine via a telephone line.
Network Fax function
This function transmits image data scanned on the machine via a network. Like the G3 fax function, data
transmission/reception is performed mostly between compatible devices. Similar functionality can be used
with less communication cost by communicating via a network connection. The following transmission
methods are available for the Network Fax functions.
- Internet Fax
- IP Address Fax
Representation of product name
Product name Representation
bizhub C353/C253/C203 This machine, C353/C253/C203
Microsoft Windows NT 4.0 Windows NT 4.0
Microsoft Windows 2000 Windows 2000
Microsoft Windows XP Windows XP
Microsoft Windows Vista Windows Vista
Combination of OS Windows NT 4.0/2000/XP
In this manual, an abbreviation for the applicable transmission method appears after a function name used
as a headline.
Transmission method Abbreviation
G3 fax G3
Internet Fax I-FAX
IP Address Fax IP
Scan to E-Mail E-Mail
Scan to FTP FTP
Scan to SMB SMB
Scan to WebDAV WebDAV
Save in User BOX BOX
When the G3 fax, IP address fax, and Internet fax functions are cited in combination
G3/IP/I-FAX
C353/C253/C203 x-18
Page 20
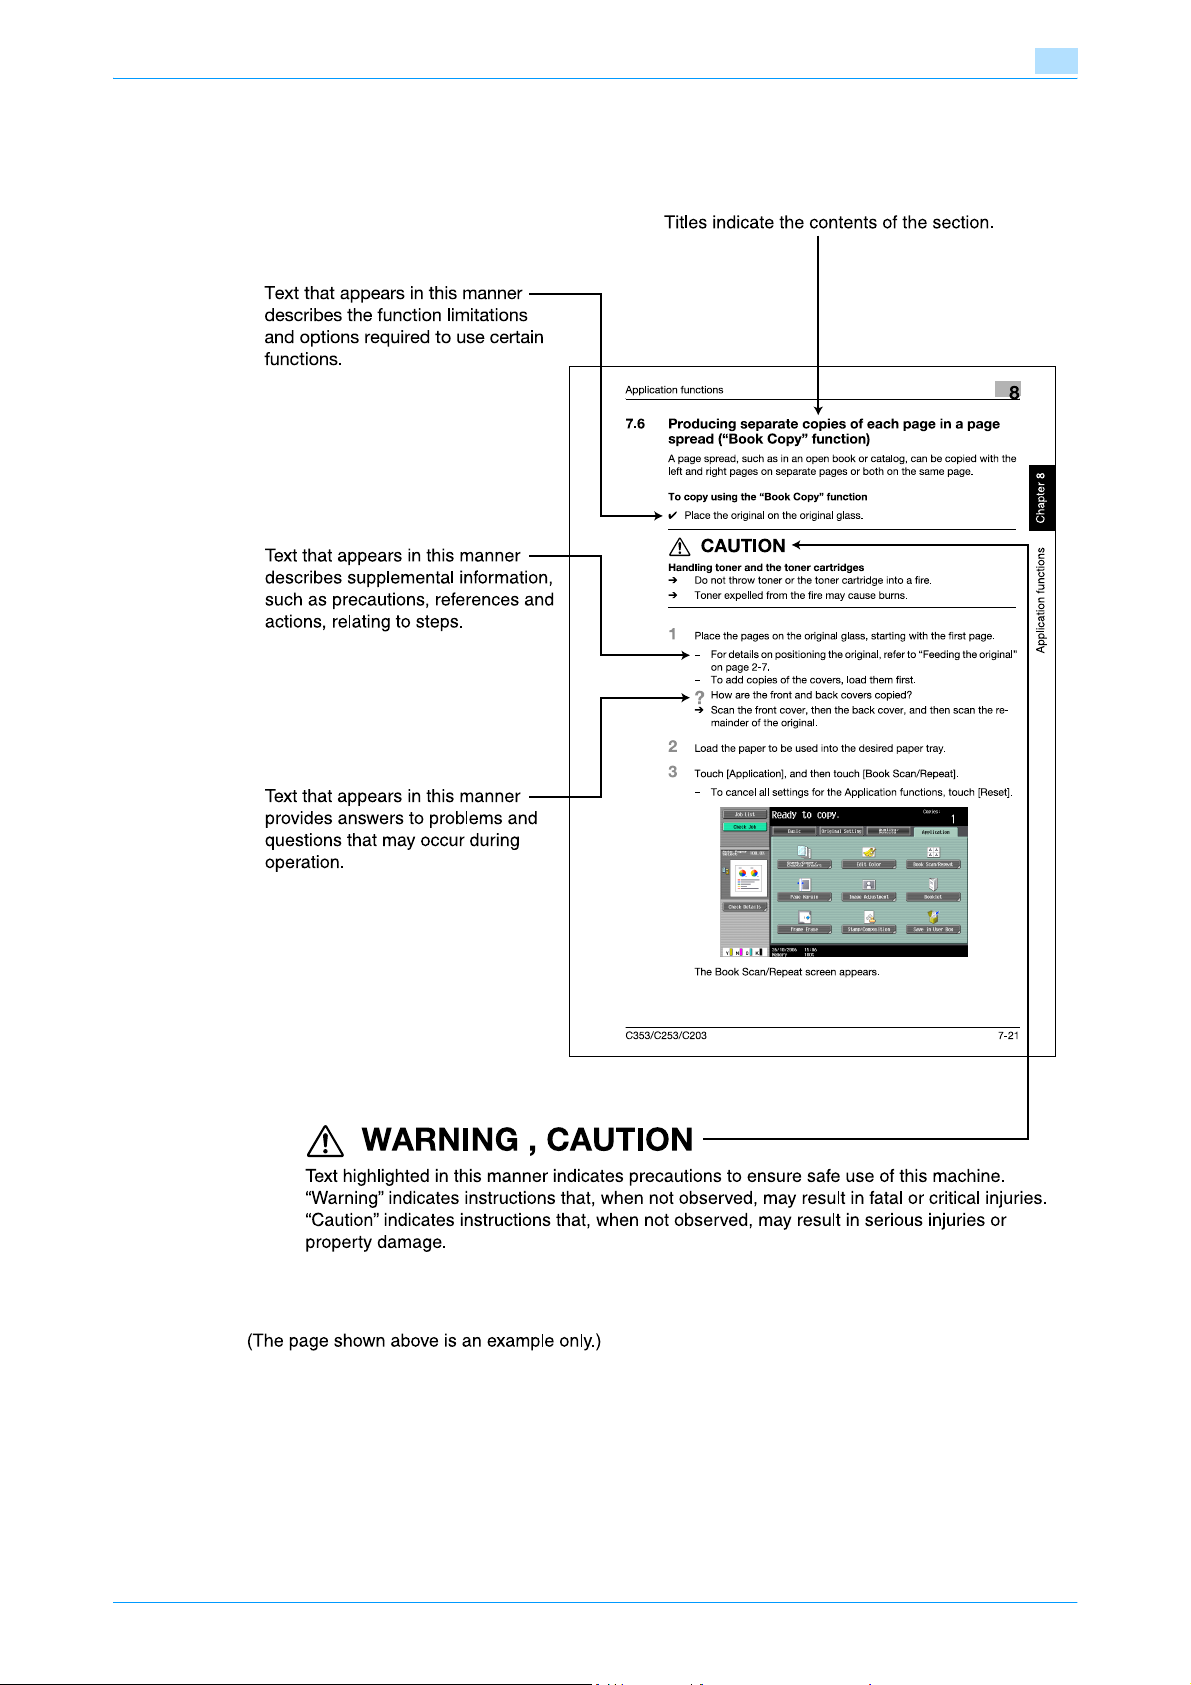
Explanation of manual conventions
C353/C253/C203 x-19
Page 21
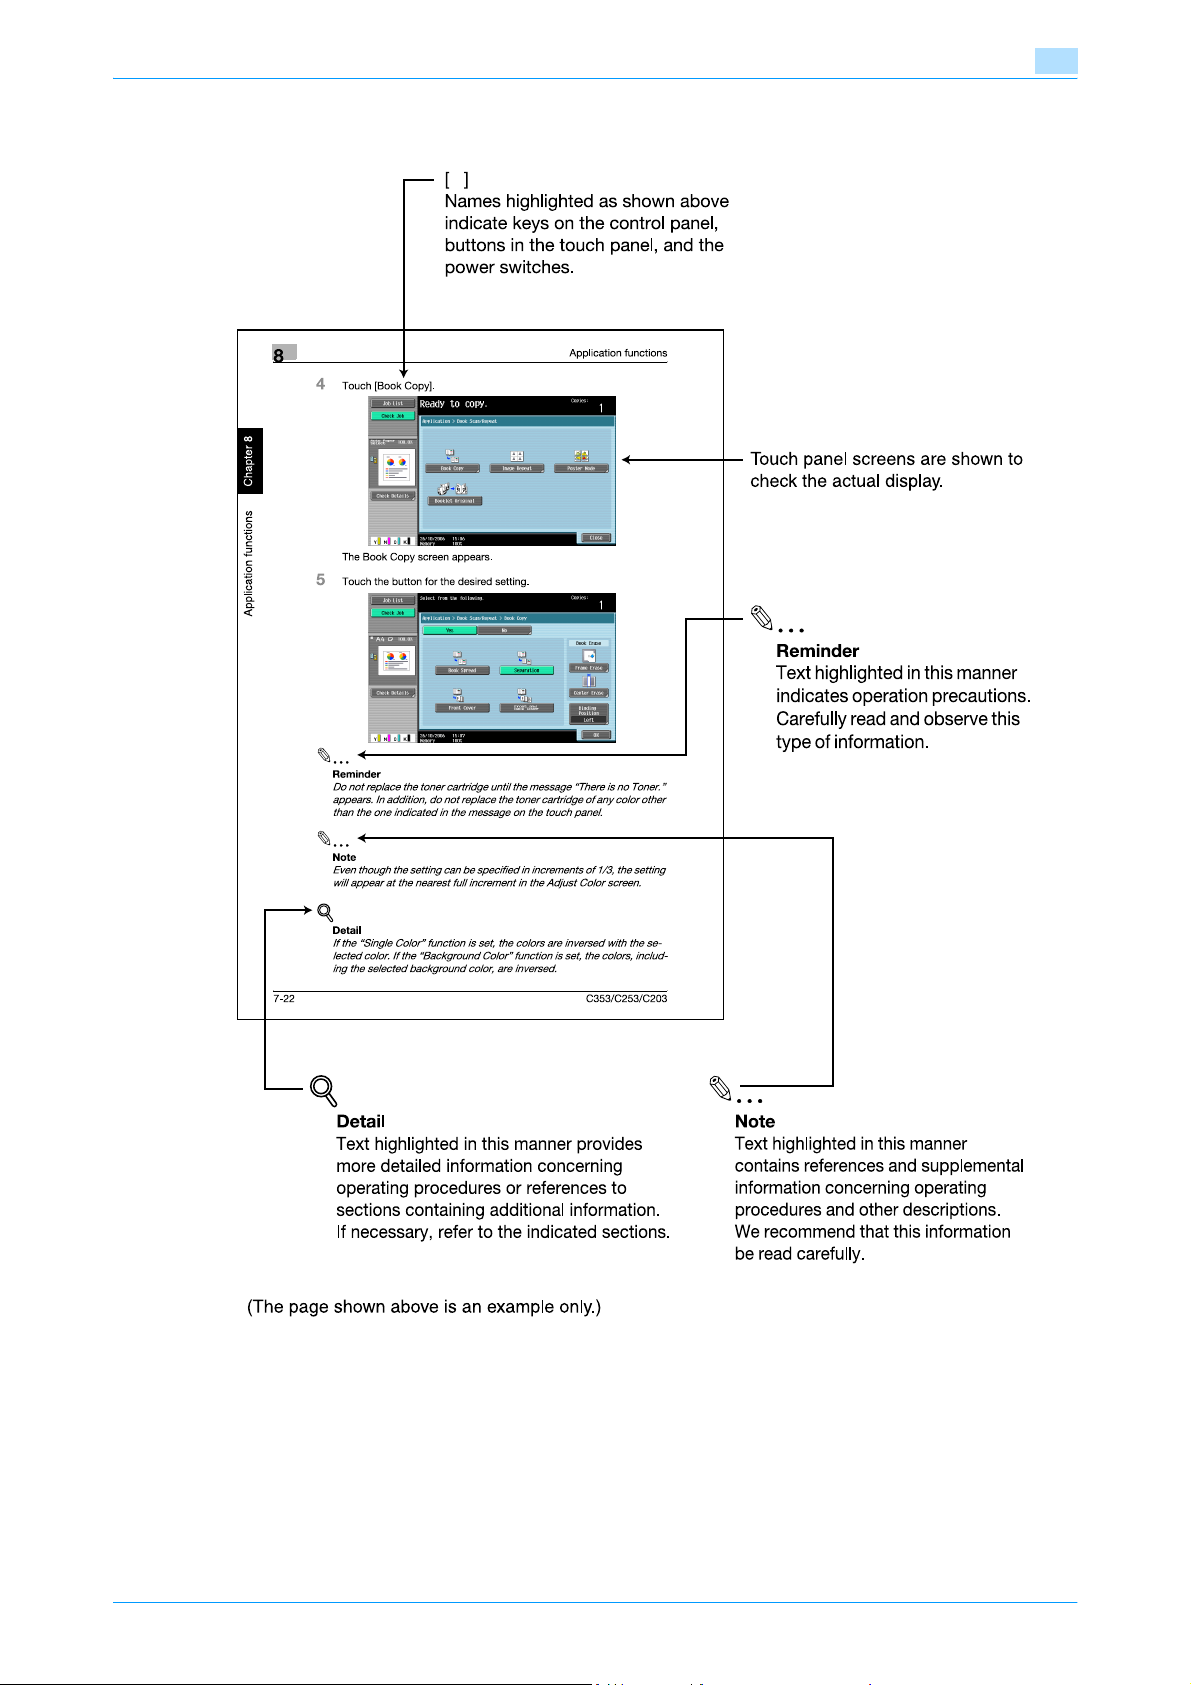
C353/C253/C203 x-20
Page 22

User’s Guides
This machine is provided with printed manuals and PDF manuals on the User’s Guide CD.
Printed manual
Quick Guide [Copy/Print/Fax/Scan/Box Operations]
This manual contains operating procedures and descriptions of the most frequently used functions, allowing
the machine to immediately be used.
In addition, this manual contains notes and precautions that should be followed for safe use of the machine.
Be sure to read this manual before using the machine.
User’s Guide CD manuals
User’s Guide [Copy Operations]
This manual contains descriptions of the Copy mode operations and machine maintenance.
Refer to this manual for details on the paper and originals, copy procedures using convenient Application
functions, replacing consumables, and troubleshooting operations such as clearing paper misfeeds.
User’s Guide [Enlarge Display Operations]
This manual contains details on operating procedures in Enlarge Display mode.
Refer to this manual for details on using copy, scanner, G3 fax, and network fax operations in Enlarge Display
mode.
User’s Guide [Print Operations]
This manual contains details of the printing functions that can be specified with the standard built-in printer
controller.
Refer to this manual for operating procedures on using the printing functions.
User’s Guide [Box Operations]
This manual contains operating procedures for using the user boxes on the hard disk.
Refer to this manual for details on saving data in user boxes, retrieving data from user boxes and transferring
data.
User’s Guide [Network Scan/Fax/Network Fax Operations] (this manual)
This manual contains details on the network scan, G3 fax, and network fax operations.
Refer to this manual for details on using network scan function by E-Mail or FTP, G3 fax, Internet fax and IP
address fax operations.
In order to use the fax functions, the optional fax kit must be purchased separately.
User’s Guide [Fax Driver Operations]
This manual contains details of the fax driver functions that can be used to send a fax directly from a
computer.
Refer to this manual for operating procedures on using the PC-FAX functions.
In order to use the fax functions, the optional fax kit must be purchased separately.
User’s Guide [Network Administrator]
This manual contains descriptions on setting methods for each function utilizing network connection, mainly
using the PageScope Web Connection.
Refer to this manual for details on using network functions.
User’s Guide [Advanced Function Operations]
This User’s Guide describes overview and usage of functions that become available by registering the
optional license kit and enabling its function, and functions that become available by connecting the MFP
with applications.
In order to use the functions effectively, please read this User’s Guide.
The following models support the advanced function.
bizhub C650/C550/C451/C353/C253/C203
C353/C253/C203 x-21
Page 23

Trademarks/Copyrights
This manual contains descriptions on trademarks and copyrights.
Be sure to read this manual before using the machine
C353/C253/C203 x-22
Page 24

1
Before using Network
Scan/Fax/Network Fax
functions
Page 25

Before using Network Scan/Fax/Network Fax functions
1 Before using Network Scan/Fax/Network Fax functions
1.1 Information before saving documents
1.1.1 Transmission functions
Function type
This machine can send and receive scanned images over the network or telephone line. This User’s Guide
contains descriptions of the following functions.
1
Network Scan functions • Scan to E-Mail
Fax function • G3 fax transmission/reception
Network Fax function • Internet fax (I-FAX)
• FTP TX
•SMB TX
• Save in User Box
•WebDAV TX
•Web Service
•Polling
• IP Address Fax
2
Reminder
When turning off the [main power switch] and turning it on again, wait for 10 seconds or longer after
power-off, and then turn on the power again. The machine may not operate correctly if it is turned on
immediately after being turned off.
Precautions for using fax function (G3)
This machine cannot send/receive faxes in color.
The telephone line types which can be connected to this machine are as follows:
- Subscribed telephone line (Including fax network)
- PBX (two-wire private branch exchange)
Check the telephone line for the following:
- You cannot connect a business phone as an external telephone.
- If a digital dedicated line is multiplexed in an enterprise network, fax transmission speed may be limited,
or the Super G3 fax may not be available.
With the factory default settings, a communication error occurs at rare conditions. This is caused by the
multiplexed device being set to the lowest possible band for voice transmission. These limitations vary
depending on network configurations. For details, contact your network administrator.
2
Note
To use the fax function, an optional Fax kit must be installed.
Precautions for using network fax
The following conditions are required to use the network fax function.
- The machine is connected to the network. (required)
The machine can be used in a TCP/IP network connection. First, connect the cable for connecting to the
network.
For details, refer to "Network connection and settings" on page 3-2. To use this machine on a network,
settings such as the IP address of the machine must be specified. For details, refer to the User’s Guide
[Network Administrator].
C353/C253/C203 1-2
Page 26

Before using Network Scan/Fax/Network Fax functions
Precautions for using Internet fax
The following conditions are required to use the Internet Fax function.
- This machine is connected to a network, enabling to send/receive E-Mail messages.
- In "Network Fax Function Setting" of Administrator Settings, the Network Fax function is set to "ON".
When an E-Mail message is sent, the attachment file may be damaged depending on the network conditions.
Always check the attached file for damage.
Even if the TX Result screen or Activity Report screen indicates "----", due to a problem in an Internet
pathway, the E-Mail message may not be delivered to the recipient. "----" indicates that a message is sent
to the server successfully. If the machine receives a message disposition notification (MDN), "OK" appears
in the TX Result screen or the Activity Report screen. To send/receive an important data, use the G3 fax
function.
!
Detail
To use the Internet Fax function, setting by a service engineer is required. For details, contact your
service representative.
2
Note
For details on "Network Fax Function Settings", refer to the User’s Guide [Network Administrator].
1
2
Note
To use the IP address fax function, an optional Fax kit must be installed.
Precautions for using IP Address Fax
You cannot add an extension telephone line if the IP Address Fax function is used.
The IP Address Fax function is available only between the compatible models of Konica Minolta. We cannot
guarantee proper operation other than the compatible models.
!
Detail
To use the IP Address Fax function, setting by a service engineer is required. For details, contact your
service representative.
1.1.2 User authentication
This machine can be set so that an account or user name and a password must be entered in order to use
the machine. Contact the administrator for authorized account or user name.
Machine authentication
Enter the user name and password, and then touch [Login] or press the [Access] key.
C353/C253/C203 1-3
Page 27
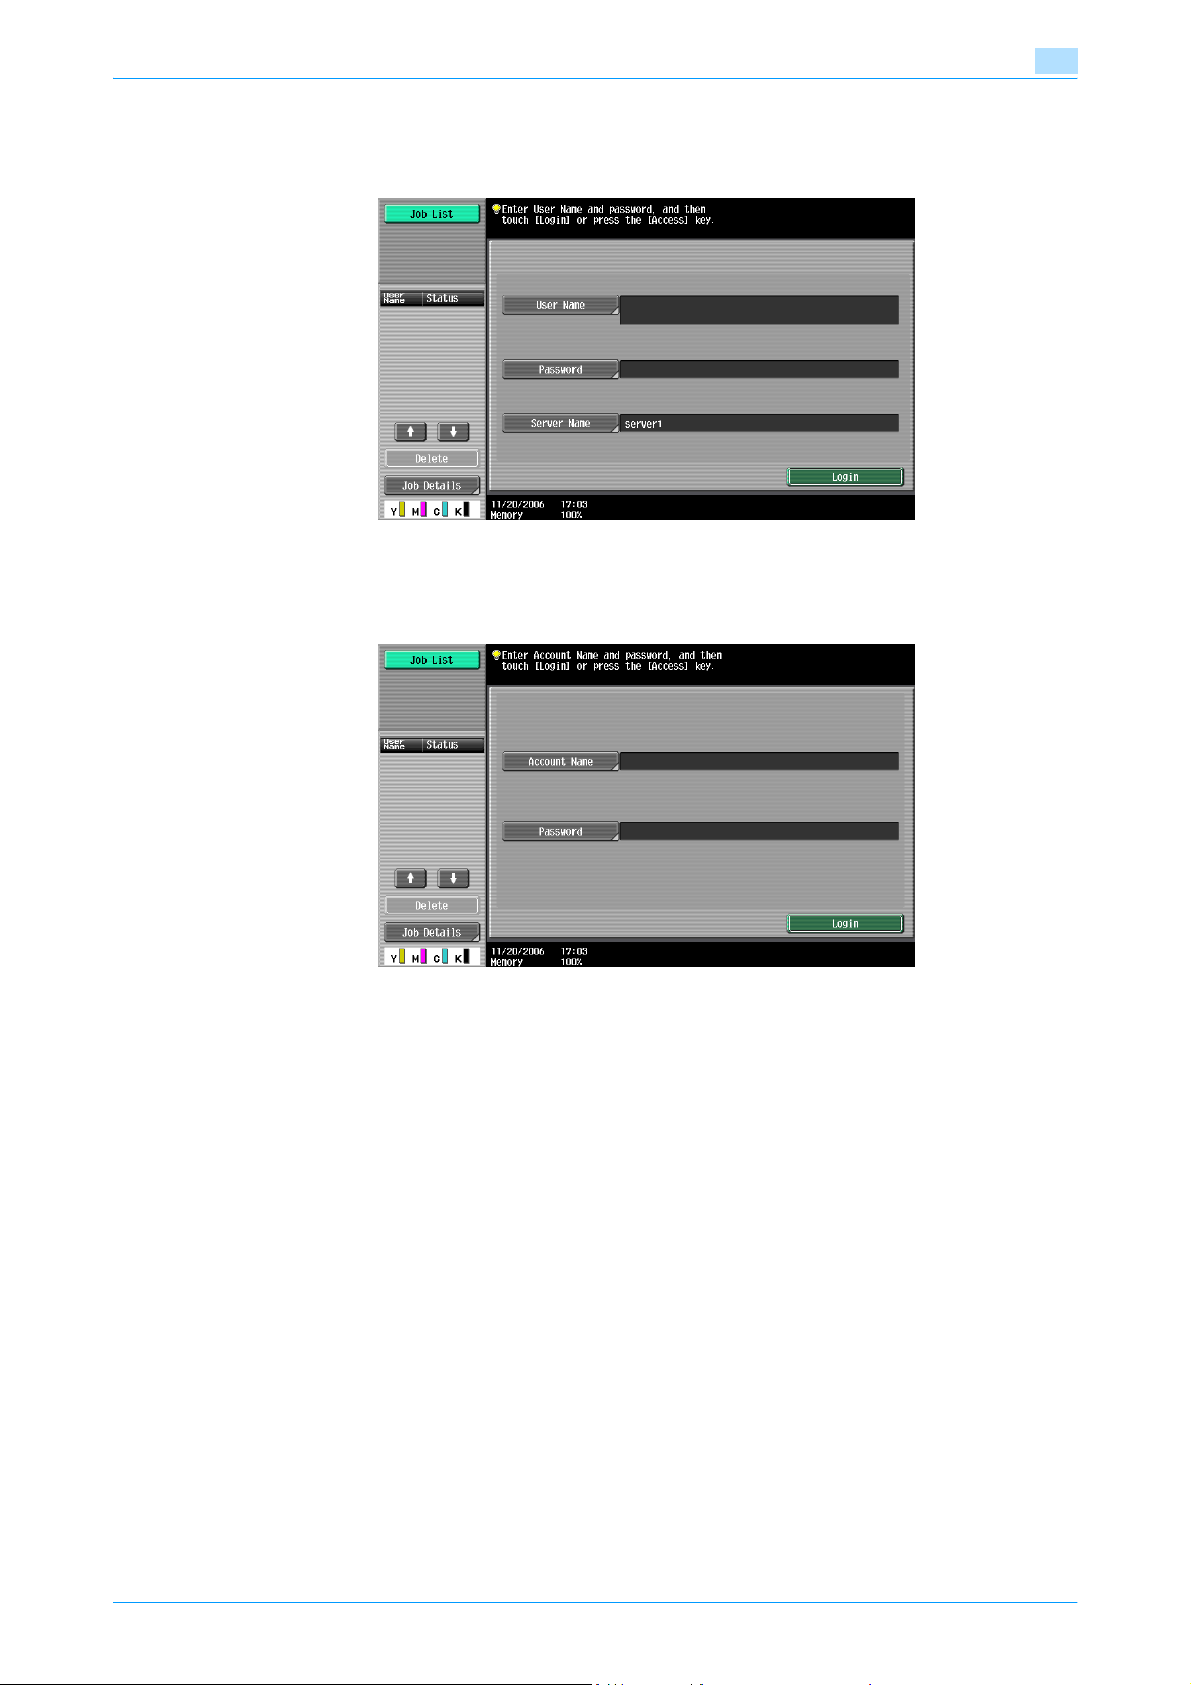
Before using Network Scan/Fax/Network Fax functions
External server authentication
Specify the user name, password and authenticating server, and then touch [Login] or press the [Access] key.
Account track
Enter the account name and password, and then touch [Login] or press the [Access] key.
1
!
Detail
If "Prohibit Functions When Auth. Error" in Administrator mode is set to "Mode 2" and a user enters an
incorrect password the specified number of times, that user is locked out and can no longer use the
machine. Contact the administrator to cancel operation restrictions.
If authentication is performed with PageScope Authentication Manager, contact your server
administrator for log on.
C353/C253/C203 1-4
Page 28

Before using Network Scan/Fax/Network Fax functions
1.1.3 Limitation on file name
Document data to be saved can be named.
A name can contain a maximum of 30 characters.
The name can also be changed after it is saved.
The name can be specified when the data is saved; however, if the data is saved without a name specified,
a preset name is applied.
Preset names are created by combining the following elements.
As an example, the name "CKMBT_C35308102315230" is used.
Item Description
C This letter indicates the mode when the document was saved.
C: Copy
S: Fax/Scan
P: Print
KMBT_C353 This represents the name of the device that scanned the data. The factory default is
"KMBT_(product name)". This name can be changed with the "Device Name" parameter in the "Administrator/Machine Settings" in Administrator Settings. A name of up
to 10 characters can be specified.
08102315230 This indicates the year (last two digits of A.D.), month, day, hour and minutes when the
data was scanned. The last digit is a serial number if the document is part of a series
of scans.
_0001 This indicates the page when multi-page data is scanned. This number does not ap-
pear in "File Name" indication; however, it is added automatically as part of the name
when the file is transmitted. Consider this when creating a file name so that it meets
the naming requirements of the server receiving the files, for example, when data is
sent by FTP.
.TIF This is the extension for the specified data format. This text does not appear in "File
Name"; however, it is added automatically as part of the name when the file is transmitted.
1
!
Detail
"S" appears for documents saved in the Fax/Scan mode screen or the User Box screen.
C353/C253/C203 1-5
Page 29
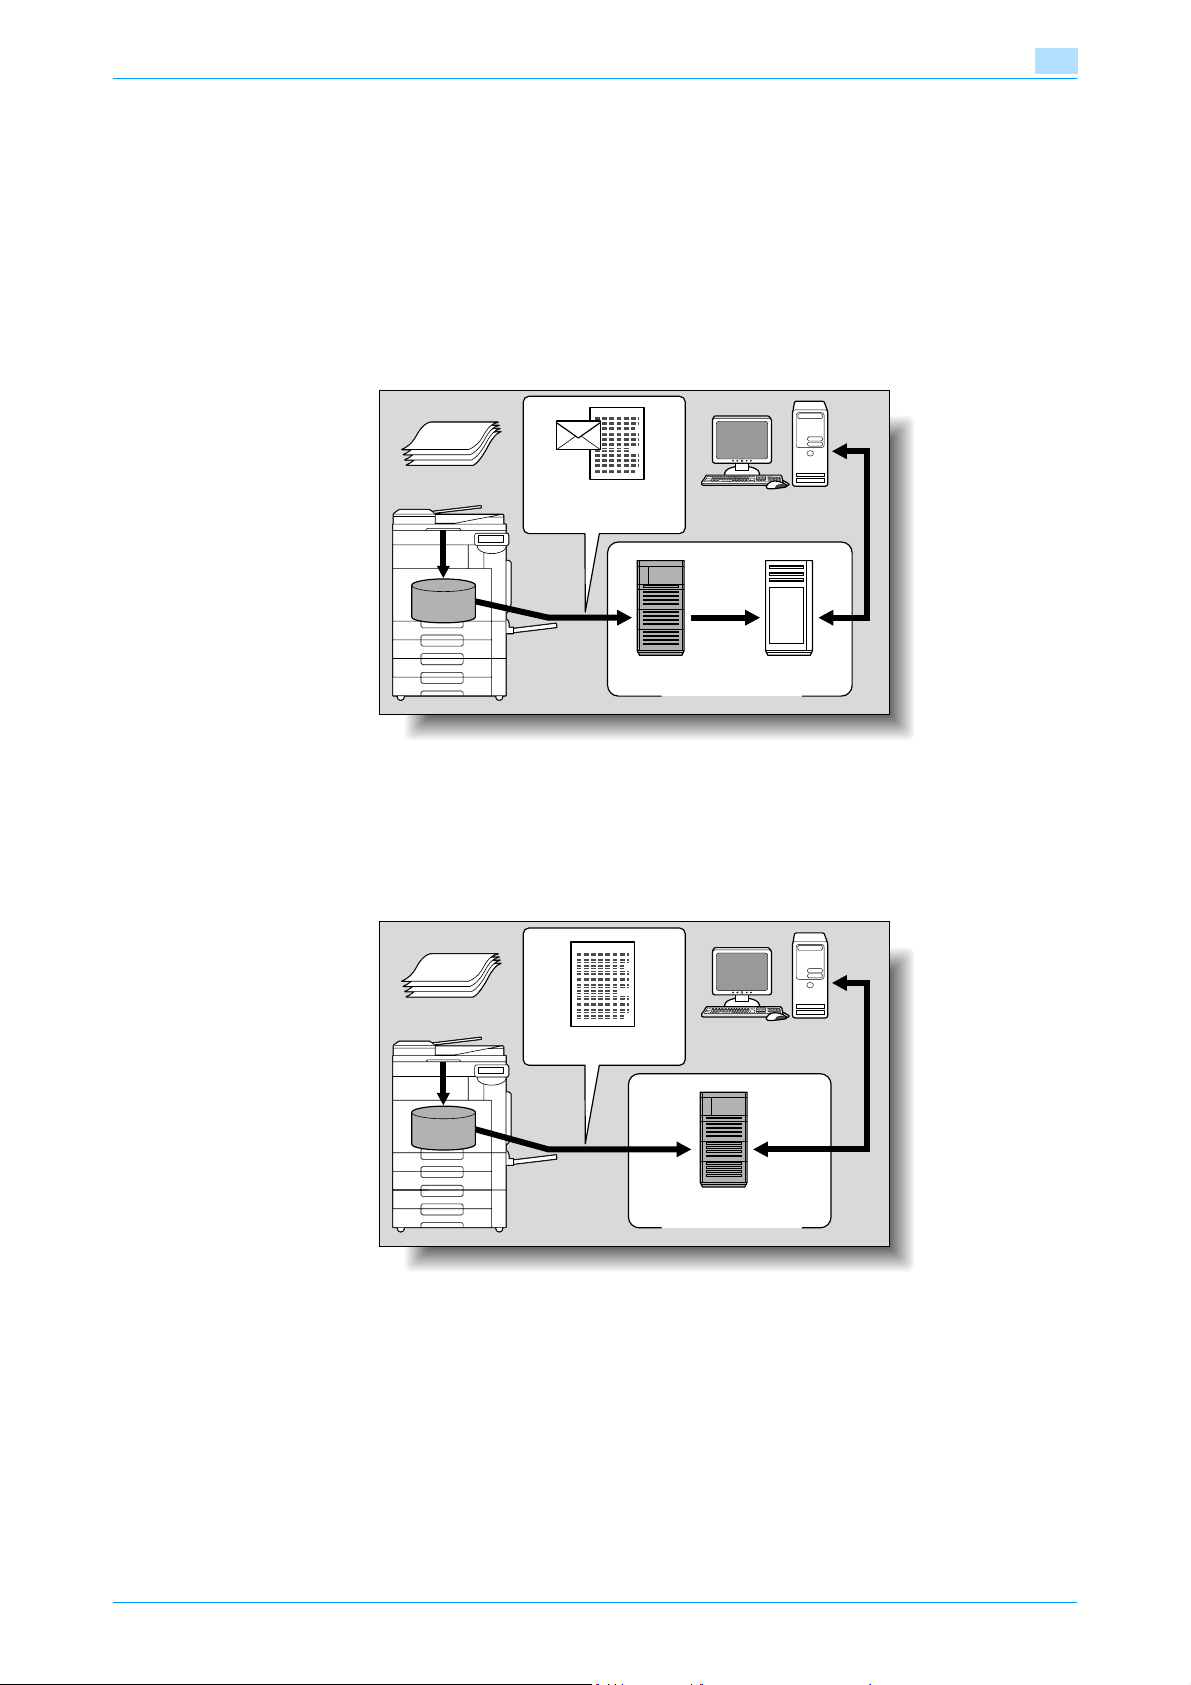
Before using Network Scan/Fax/Network Fax functions
1.2 Overview
1.2.1 Available Network Scan functions
"Scanning" refers to the operation of reading images of an original fed through the ADF or placed on the
original glass. The Scan functions can be used to temporarily store the scan data on the internal memory of
the machine and transmit the data over the network.
Scan to E-Mail
Scanned data can be sent to a specified E-Mail address. Select the destinations from the touch panel of the
machine for sending the scanned data as an E-Mail attachment.
Original
1
Machine
E-Mail and scan data
Memory
SMTP server POP server
E-Mail reception
Internet
FTP TX
Scanned data can be uploaded to a specified FTP server. Enter the FTP server address, login password and
other information from the touch panel of this machine.
The data uploaded to the FTP server can be downloaded from a computer on the network.
Original
Machine
Scan data
Download
Memory
FTP server
Internet
C353/C253/C203 1-6
Page 30
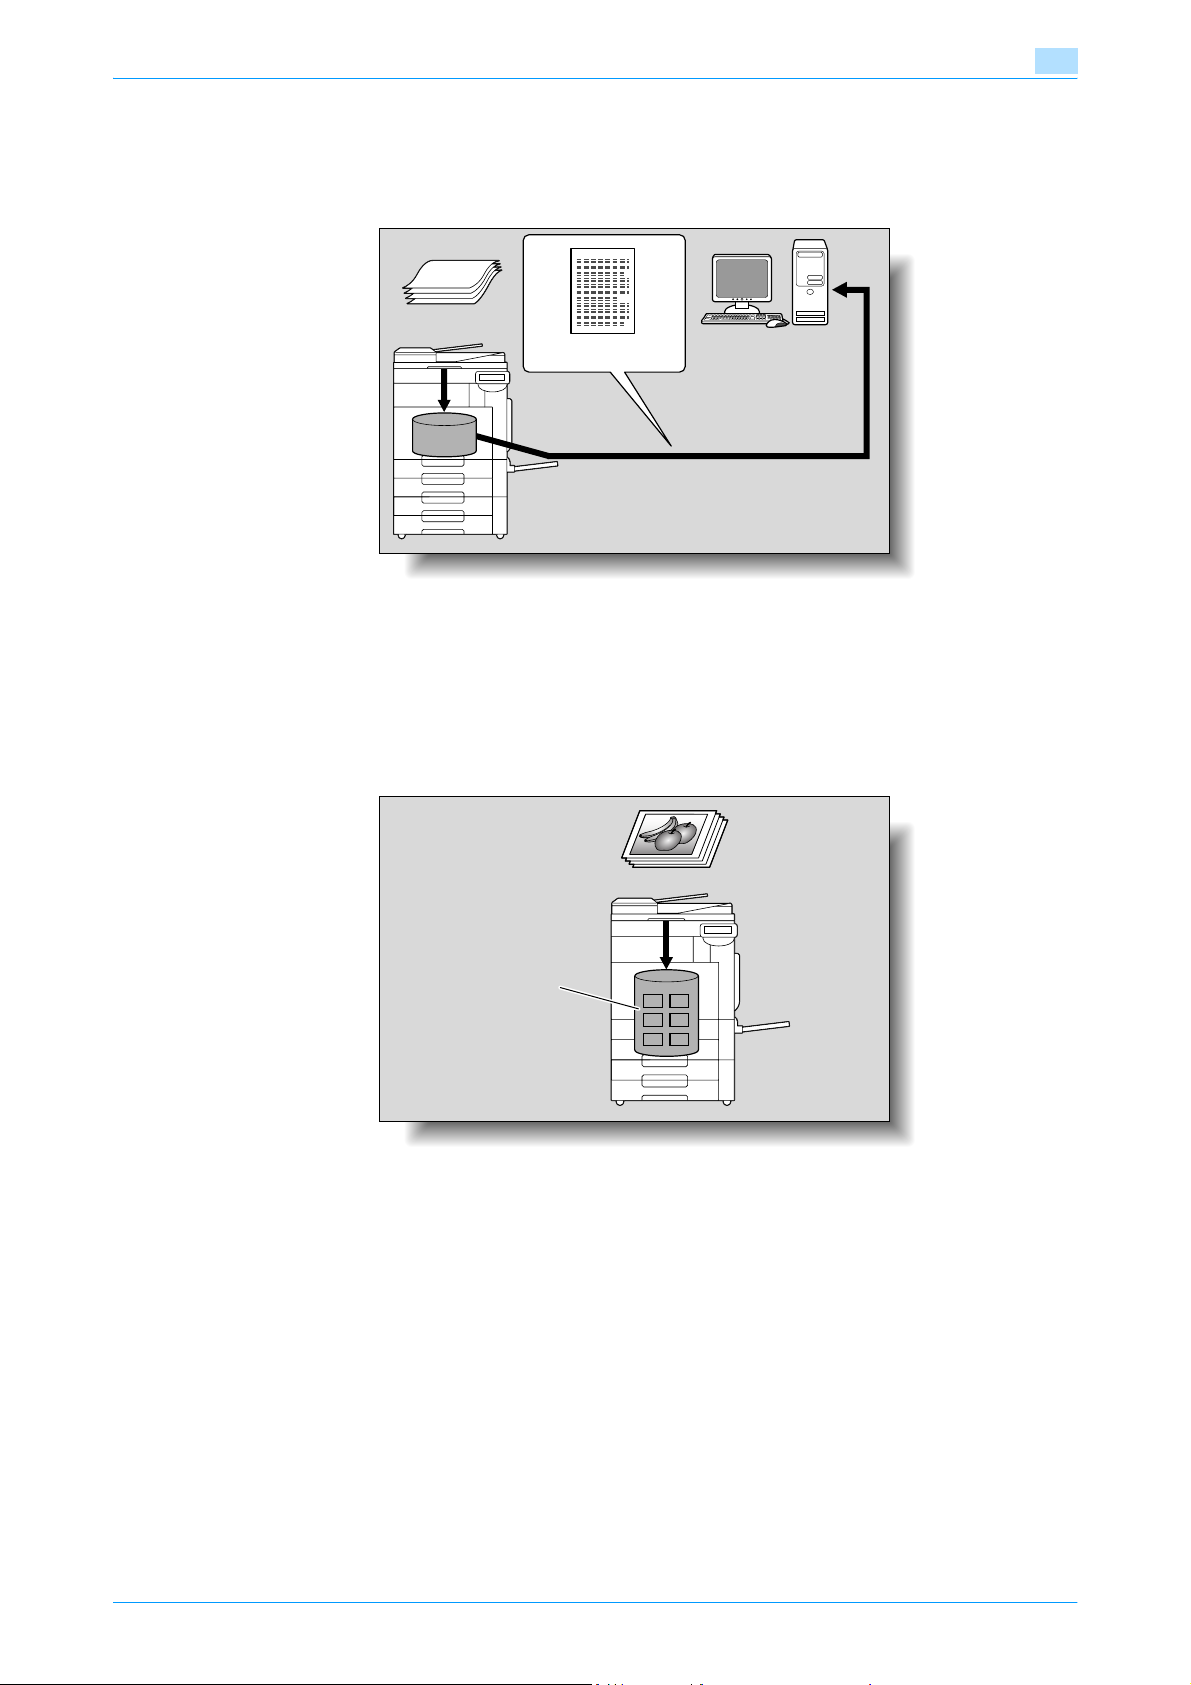
Before using Network Scan/Fax/Network Fax functions
SMB TX
Scanned data can be sent to a shared folder on a specified computer. Enter the host name, file path and
other information from the touch panel of the machine.
Original
Machine
1
Scan data
Memory
Save to a shared folder
Save in User Box
Scanned data can be saved in a user box created on the hard disk of this machine, allowing the data to be
reused. The file name can be entered from the touch panel of this machine when the data is saved.
Other data such as received fax data can also be stored in user boxes. For details, refer to the User’s Guide
[Box Operations].
Machine
Hard disk
C353/C253/C203 1-7
Page 31
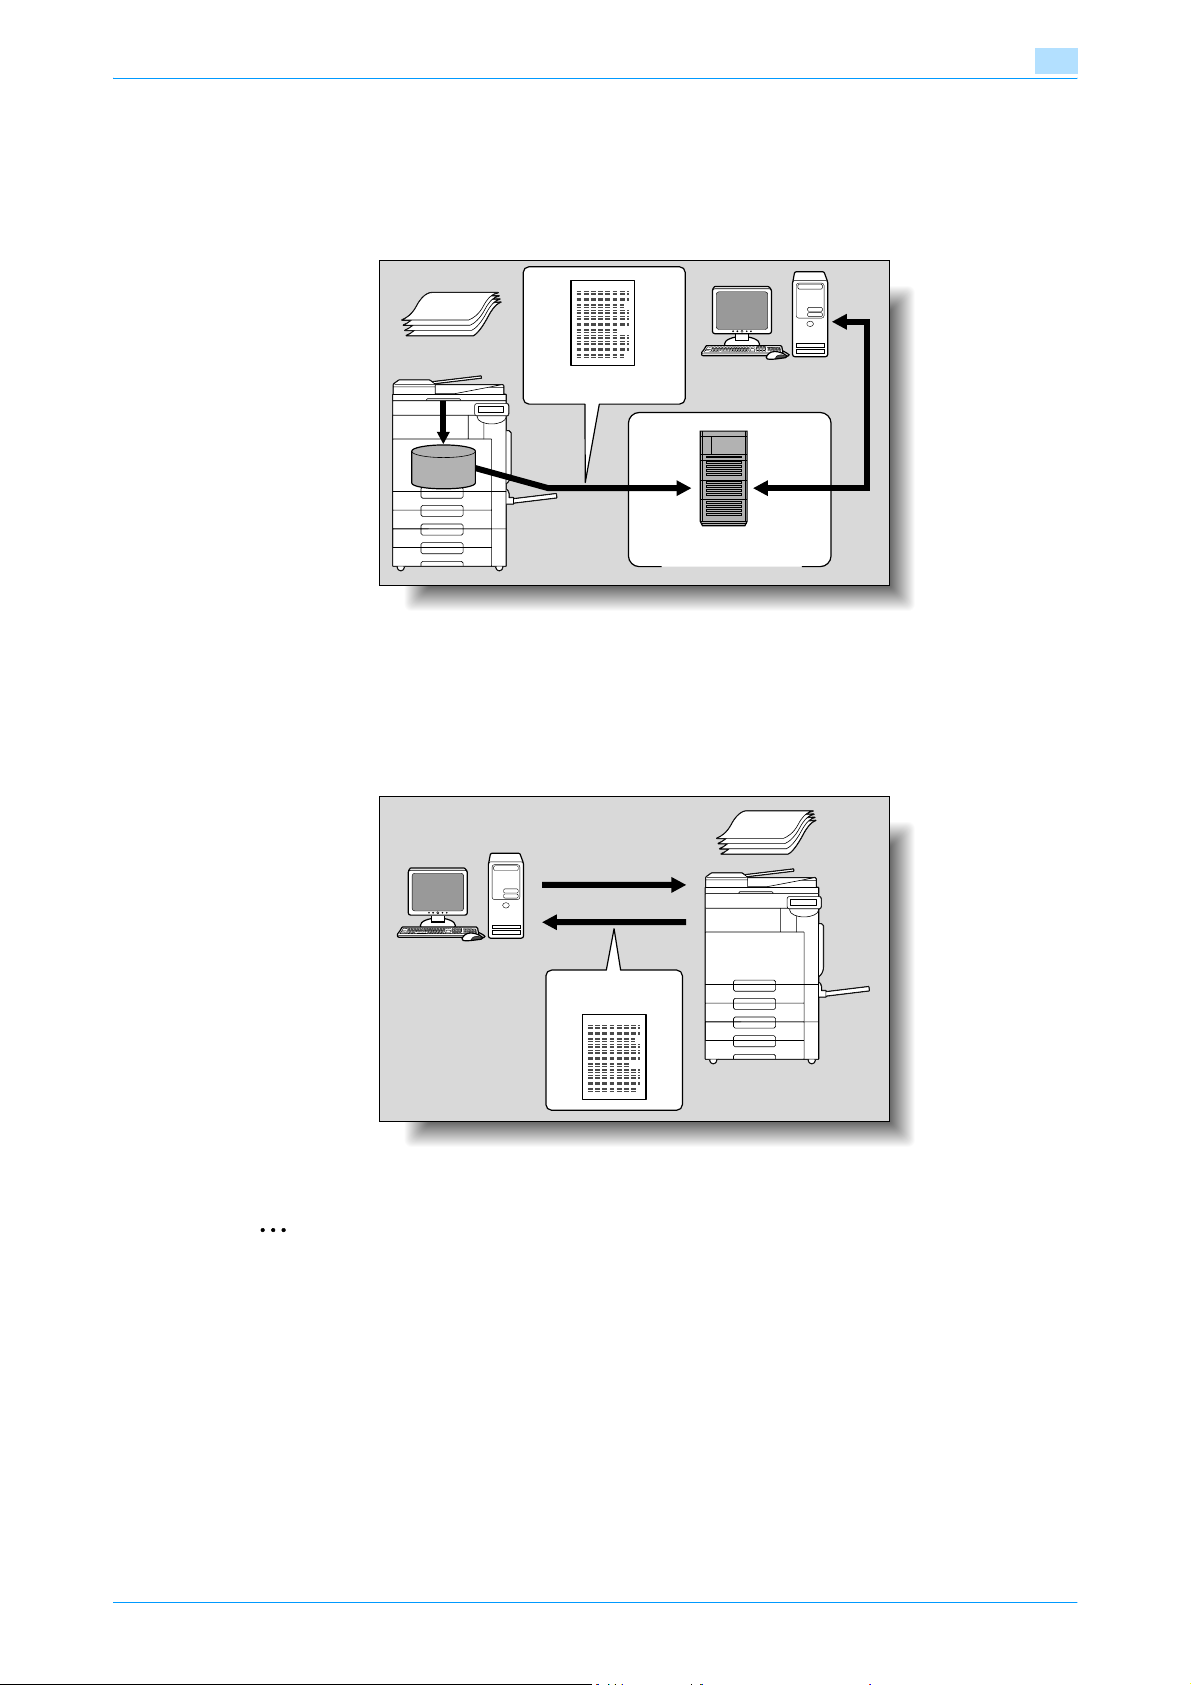
Before using Network Scan/Fax/Network Fax functions
WebDAV TX
Scanned data can be uploaded to a specified server. Enter the server address, login password and other
information from the touch panel of the machine.
The data uploaded to the server can be downloaded from a computer on the network.
Original
1
Machine
Scan data
Memory
Web Service
If a driver is installed with the machine recognized by a computer on the network (Windows Vista), it is
possible to give a scan command from the computer or to perform scanning according to the purpose from
the machine and to send the scanned data to the computer.
Scanning instruction
Download
Server
Internet
Original
Windows Vista
Scan data
2
Note
If optional image controller IC-409 has been installed this function is not available.
C353/C253/C203 1-8
Page 32
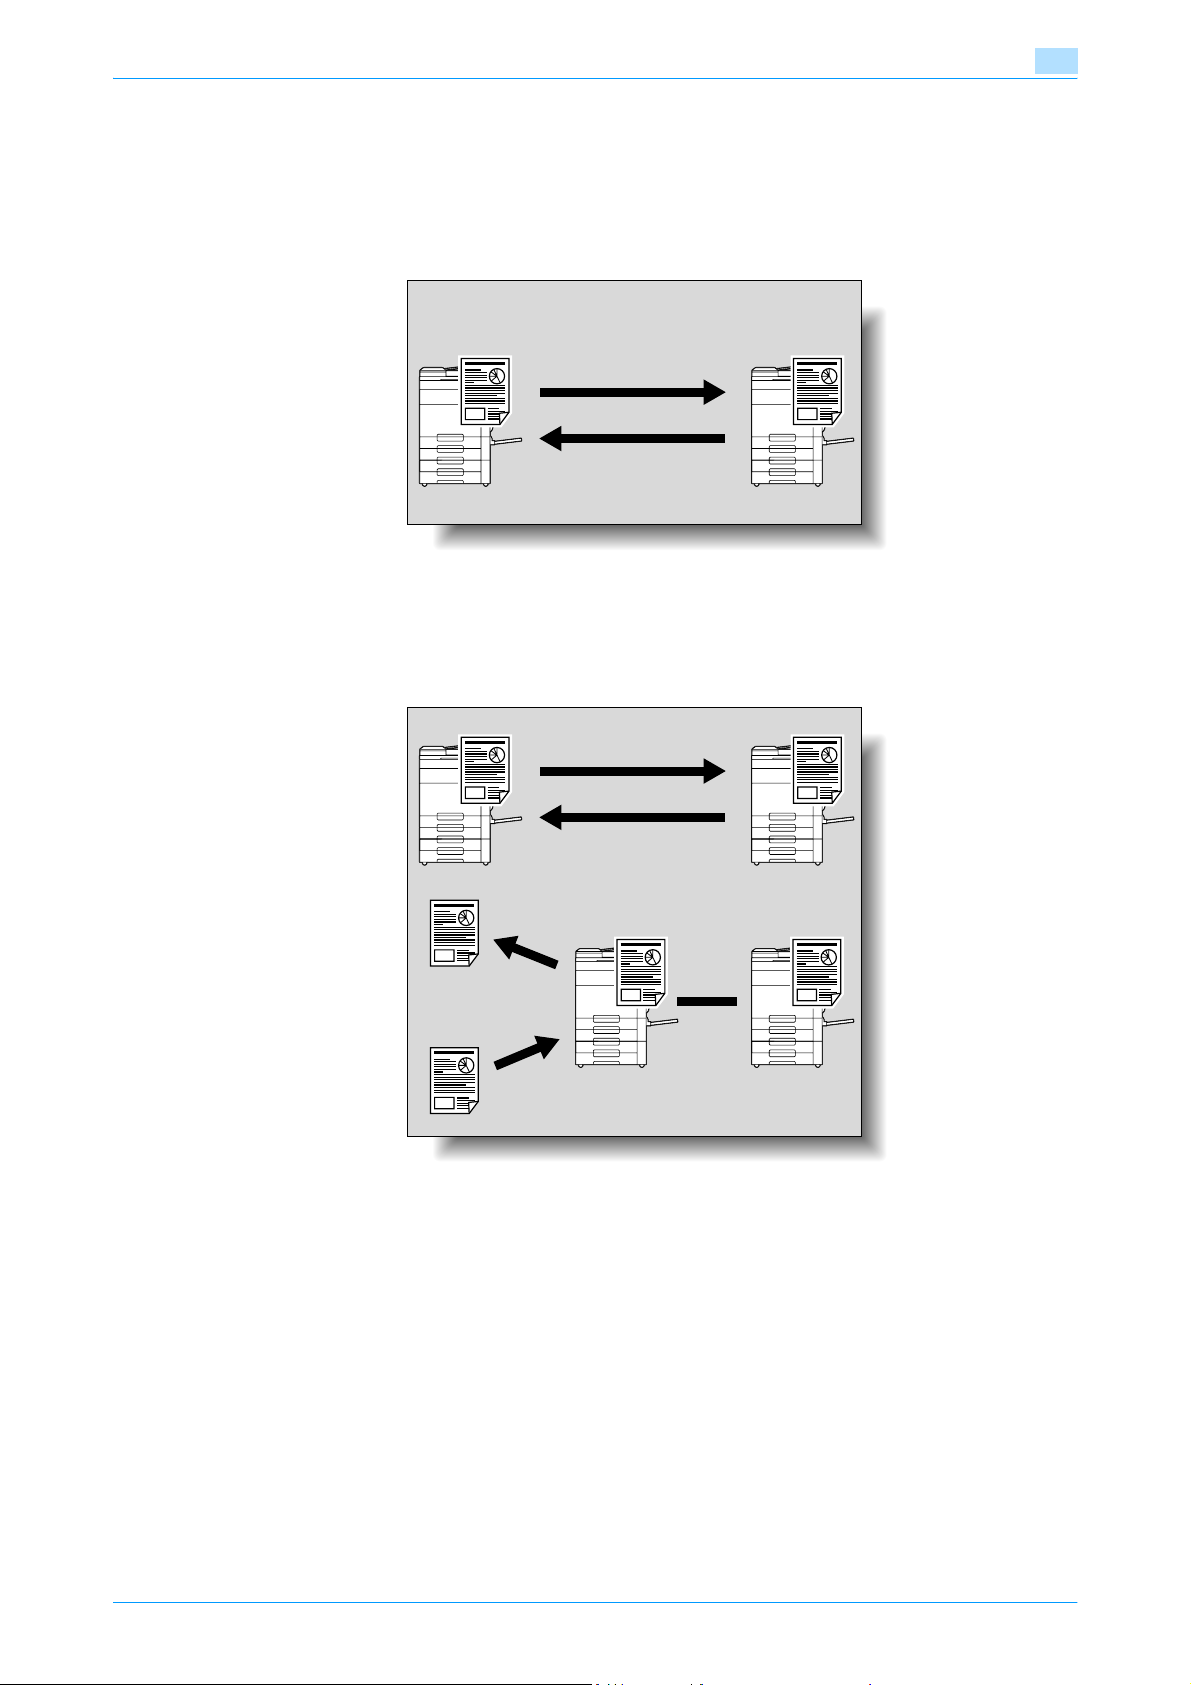
Before using Network Scan/Fax/Network Fax functions
1.2.2 Available Fax functions
G3 fax transmission/reception
This machine can send/receive G3 fax. Select the destinations from the touch panel of the machine for
broadcast the data. It is possible to add some of the available edit functions with scan transmission and send
the data.
Receiver Sender
Polling
By sending a polling command, you can receive original data from other fax machines (polling RX). Also, you
can save original data to be transmitted upon receiving polling command from other fax machines (polling
TX). You can save data to either the Polling TX User Box or Bulletin Board User Box for polling TX.
1
Receiver Sender
Viewing
Registering
Bulletin board
Polling
C353/C253/C203 1-9
Page 33
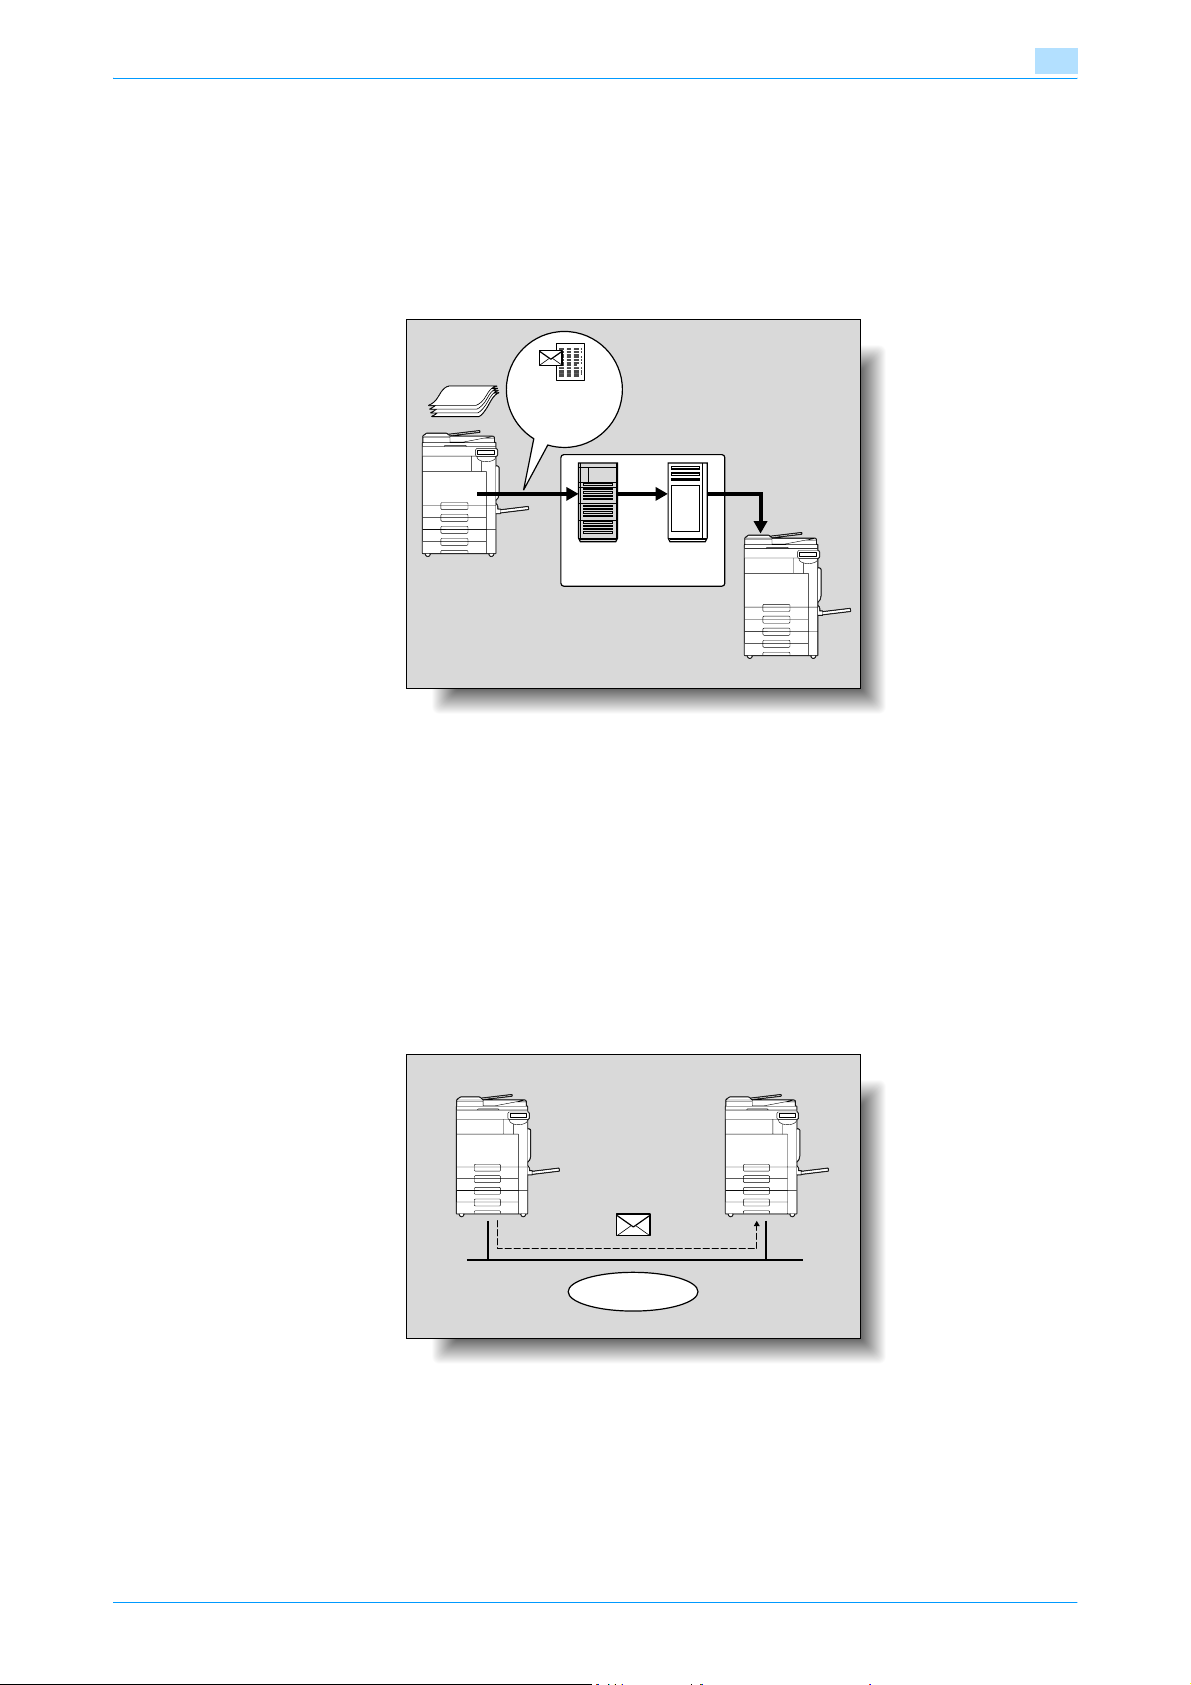
Before using Network Scan/Fax/Network Fax functions
1.2.3 Available Network Fax functions
Internet Fax
The Internet Fax function sends and receives scanned originals as an attached file (TIFF format) via the
intranet (enterprise networks) or Internet. This communication via intranet or internet largely reduces the
communication cost as compared with general fax messages. Specify the destination E-Mail address to send
the E-Mail message.
Original
E-Mail +
attached file
(TIFF format)
1
Intranet/Internet
Internet
receiving
SMTP
server
POP
server
IP Address Fax
This function enables fax transmission over an IP network. Specify the destination host name or IP address
to send a fax.
The differences between IP Address fax and G3 fax or Internet fax are as follows.
- The SMTP protocol is used for sending and receiving of the image data.
- Available only within an intranet (enterprise networks).
- Unlike Internet fax, no mail server is required.
- Available to send/receive faxes in color.
SMTP
Intranet
Transmitting a fax by specifying an IP address or host name of the destination.
C353/C253/C203 1-10
Page 34

2
Control panel/touch panel
Page 35
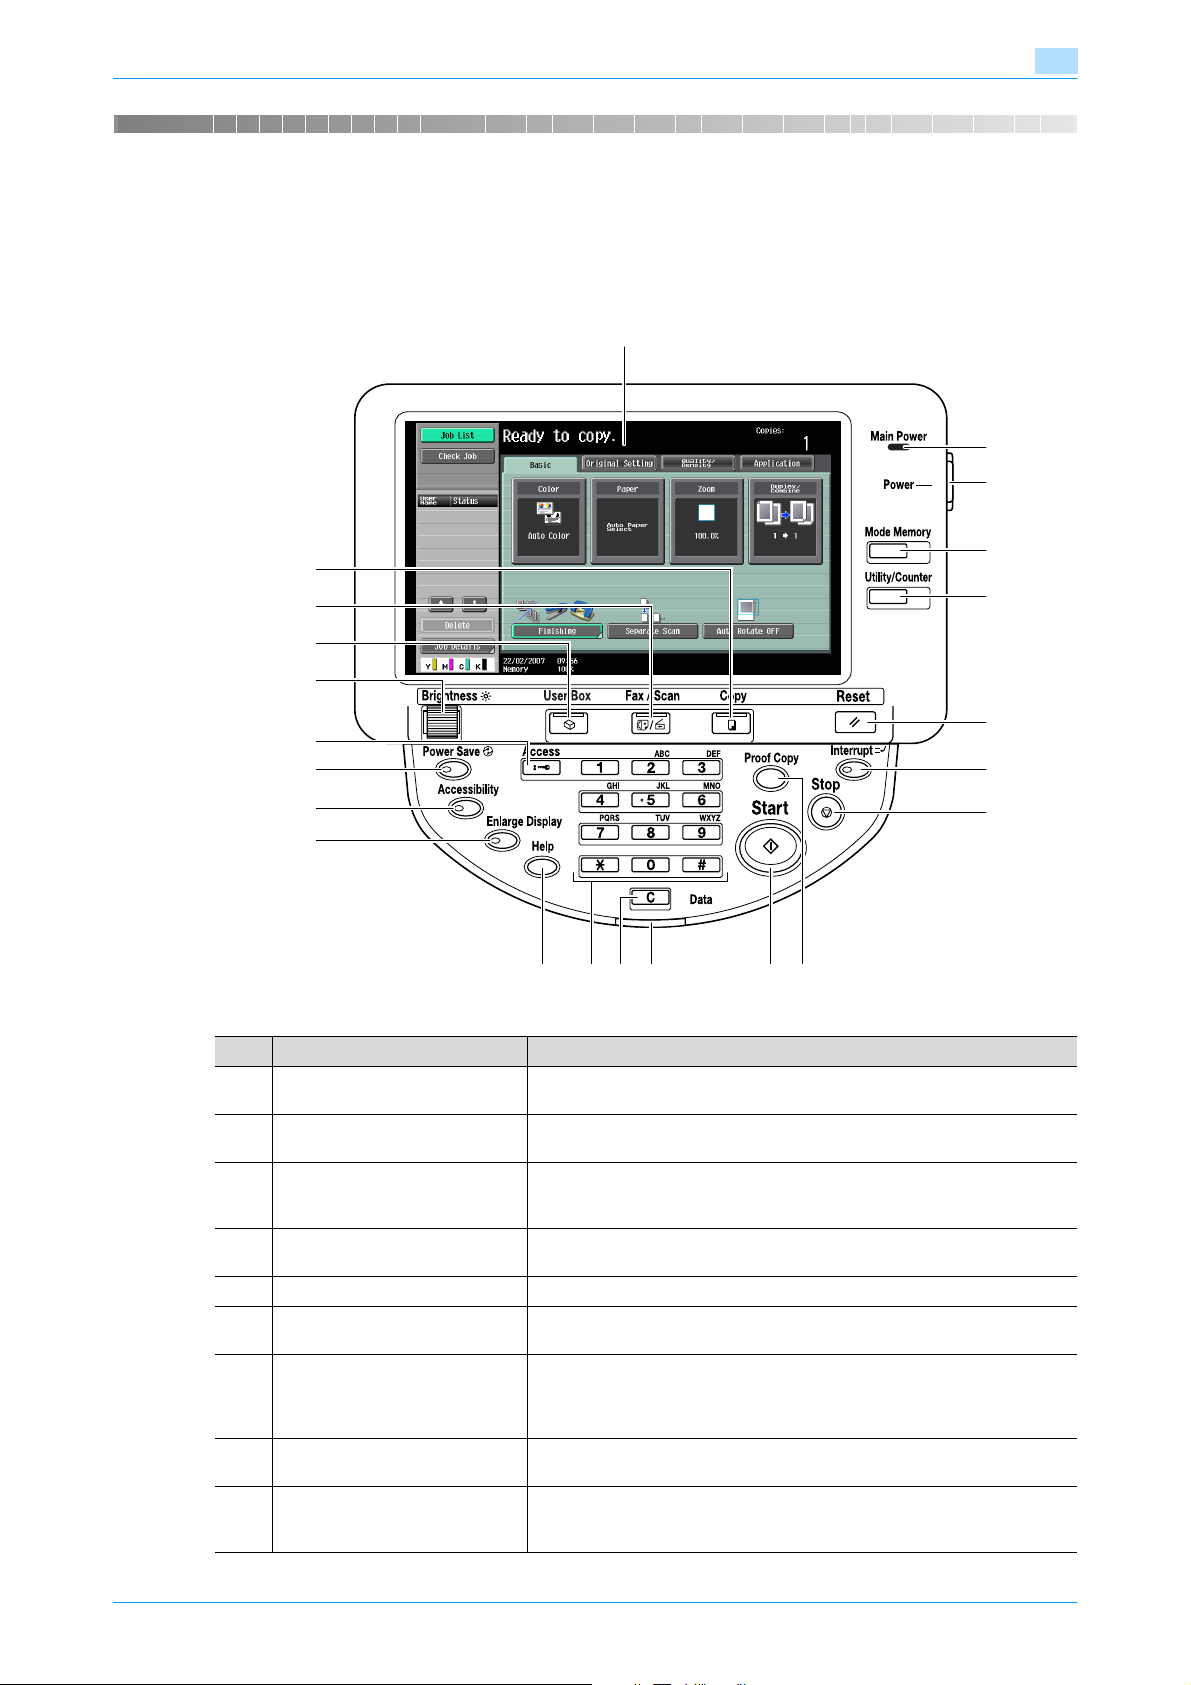
Control panel/touch panel
2 Control panel/touch panel
2.1 Control panel
Use the control panel for fax/scan operation. The following describes the keys and switches provided on the
control panel.
2
1
2
3
22
4
21
5
20
19
6
18
17
16
7
8
15
12 9
1314
No. Part name Description
1 Touch panel Displays various setting screens and messages. Specify the various set-
tings by directly touching the panel.
2 Main power indicator Lights up in green when the machine is turned on with the main power
switch.
3 Sub power switch Press to turn on/off machine operations, for example, copying, printing or
scanning. When turned off, the machine enters a state where it conserves
energy.
4 [Mode Memory] key Press to register (store) a desired copy/scan setting mode or to recall the
registered copy/scan mode.
5 [Utility/Counter] key Press to display the Utility mode and the Meter Count screen.
6 [Reset] key Press to clear all settings (except registered settings) entered in the control
panel and touch panel.
7 [Interrupt] key Press to enter the Interrupt mode. While the machine is in the Interrupt
mode, the indicator on the [Interrupt] key lights up in green and the message "Now in Interrupt mode." appears on the touch panel. To cancel the
Interrupt mode, press the [Interrupt] key again.
8 [Stop] key Pressing the [Stop] key during scanning temporarily stops the scan oper-
ation.
9 [Proof Copy] key Press to print a single proof copy to be checked before printing a large
number of copies. By pressing the [Proof Copy] key before scanning or
copying, the result can be viewed on the touch panel.
11 10
C353/C253/C203 2-2
Page 36

Control panel/touch panel
No. Part name Description
10 [Start] key Press to start scanning. When the machine is ready to start scanning, the
11 Data indicator Flashes in blue while a print job is being received.
12 [C] key Press to erase a value (such as the number of copies, a zoom ratio, or a
13 Keypad Use to enter the number of copies to be printed.
14 [Help] key Press to display the Help screen. The Help screen can display description
15 [Enlarge Display] key Press to enter Enlarge Display mode. If authentication is performed with
16 [Accessibility] key Press to display the screen for specifying settings for user accessibility
17 [Power Save] key Press to enter Power Save mode. While the machine is in Power Save
18 [Access] key In order to use this machine while the user authentication or account track
19 [Brightness] dial Use to adjust the brightness (contrast) of the touch panel.
20 [User Box] key Press to enter User Box mode.
21 [Fax/Scan] key Press to enter Fax/Scan mode.
22 [Copy] key Press to enter Copy mode. (As a default, the machine is in Copy mode.)
2
indicator on the [Start] key lights up in blue. If the indicator on the [Start]
key lights up in orange, scanning cannot be started.
Press to restart a stopped job.
Lights up in blue when data is being printed.
size) entered using the keypad.
Use to enter the zoom ratio.
Use to enter the various settings.
and operating procedure of each function.
PageScope Authentication Manager, it does not enter Enlarge Display
mode.
functions.
mode, the indicator on the [Power Save] key lights up in green and the
touch panel goes off. To cancel Power Save mode, press the [Power Save]
key again.
settings are applied, enter the user name and password (for user authentication) or the account name and password (for account track), and then
press this key. Also press this key to log off.
While the machine is in User Box mode, the indicator on the [User Box] key
lights up in green. Refer to the User’s Guide [Box Operations].
While the machine is in Fax/Scan mode, the indicator on the [Fax/Scan]
key lights up in green.
While the machine is in Copy mode, the indicator on the [Copy] key lights
up in green. For details, refer to the User’s Guide [Copy Operations].
7 CAUTION
Do not apply extreme pressure to the touch panel, otherwise it may be scratched or damaged.
% Never push down on the touch panel with force, and never use a hard or pointed object to make a
selection on the touch panel.
C353/C253/C203 2-3
Page 37
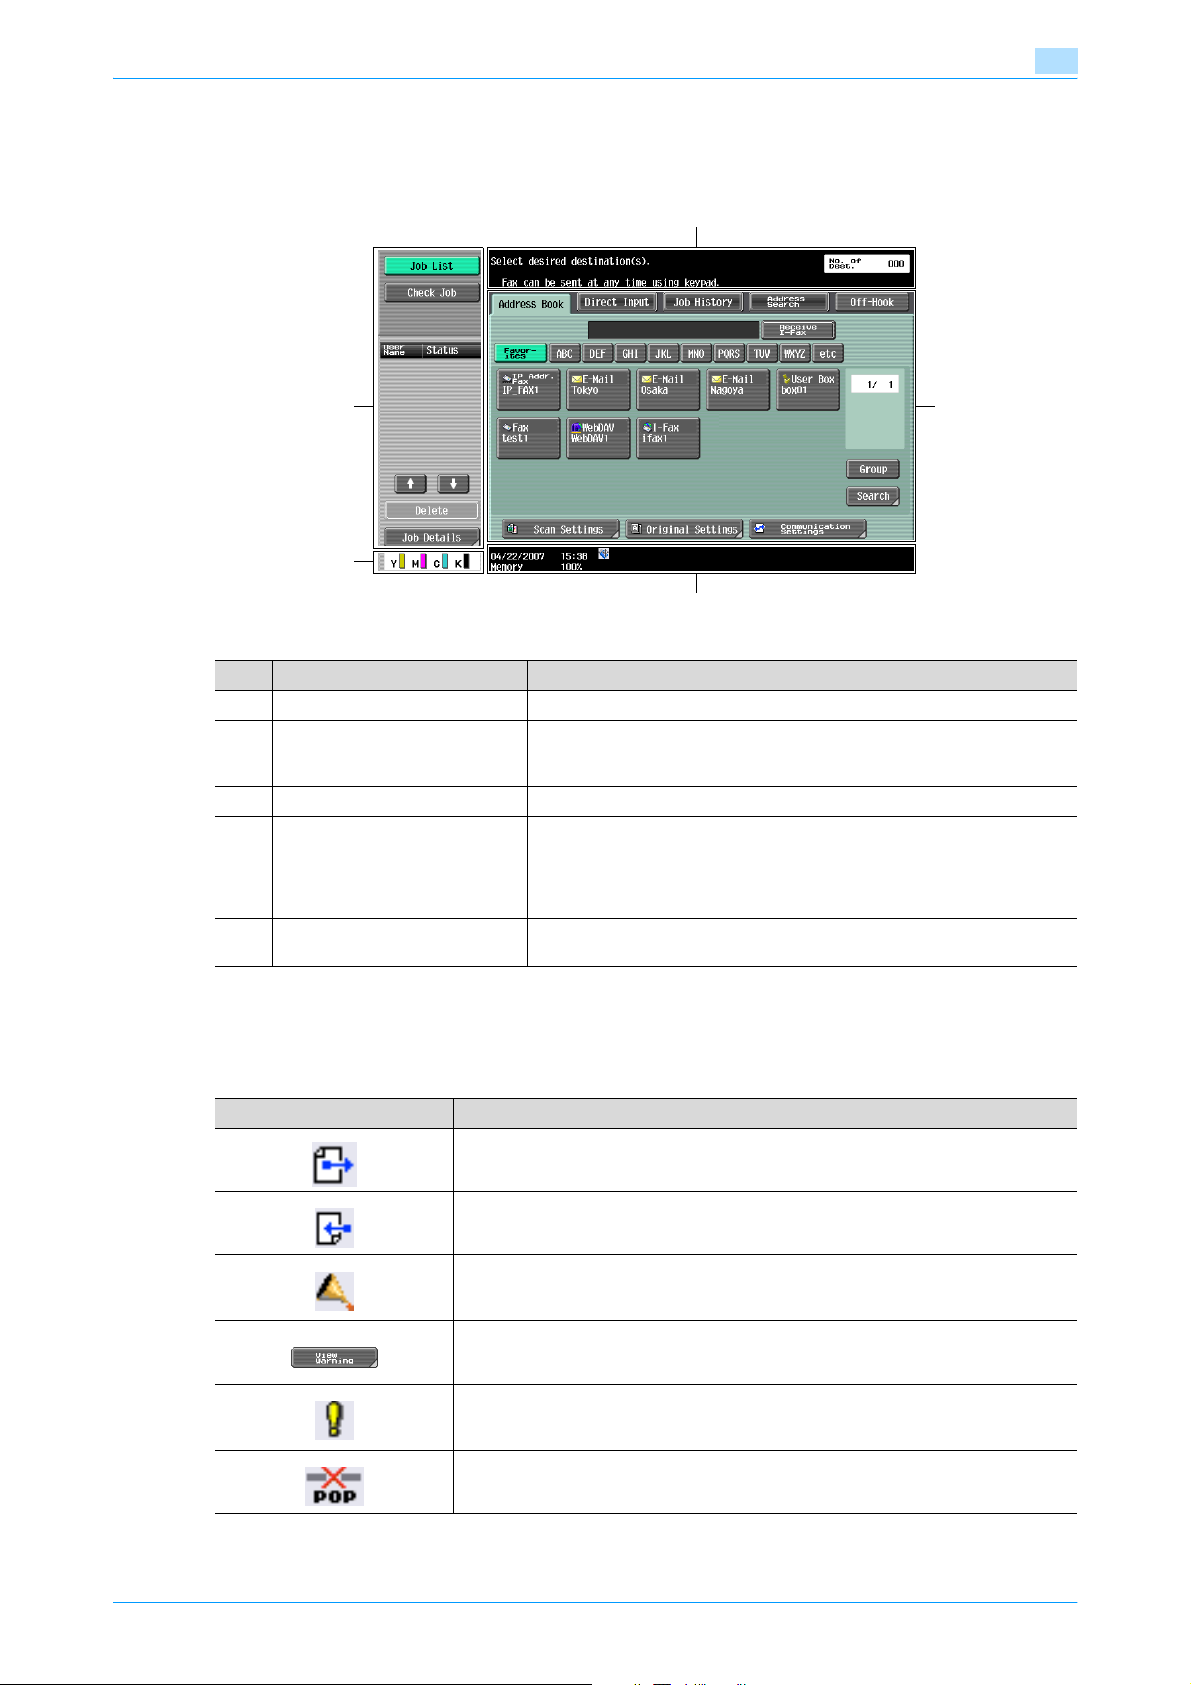
Control panel/touch panel
2.2 Touch panel
2.2.1 Screen layout
2
1
4
5
3
No. Part name Description
1 Message display area Displays the status of the machine and details on operations.
2 Functions/settings display area Displays softkeys to select functions. This area is for specifying the set-
tings of various functions. Touch softkeys to display the corresponding
screen for specifying the settings.
3 Icon display area Displays icons indicating the status of jobs and the machine.
4 Left pane The softkeys, such as [Job List] showing the jobs being processed or to
be processed, and [Check Job] showing the result of the specified settings, appear in this area.
For details on the left pane, refer to "Display and operation of the left
panel" on page 2-6.
5 Toner supply indicators Displays the amount of toner remaining for yellow (Y), magenta (M), cyan
(C), and black (K).
2
Icons on the touch panel
The status of the machine may appear in the icon display area. The following are the icons that appear on the
touch panel.
Icon Description
Indicates that data is being sent from the machine, regardless of the current mode.
Indicates that data is being received by the machine, regardless of the current mode.
Indicates that an error has occurred during an image stabilization operation, a print
operation or a scan operation.
Touch this icon to view a screen containing a warning code.
If the warning screen was closed when a warning occurred, touch this button to display the warning screen again.
Appears when there is a message indicating that consumables must be replaced or
the machine requires maintenance. Touch this icon to display the message, and then
perform the replacement or maintenance procedure.
Appears when an error occurs with the connection to the POP server.
C353/C253/C203 2-4
Page 38
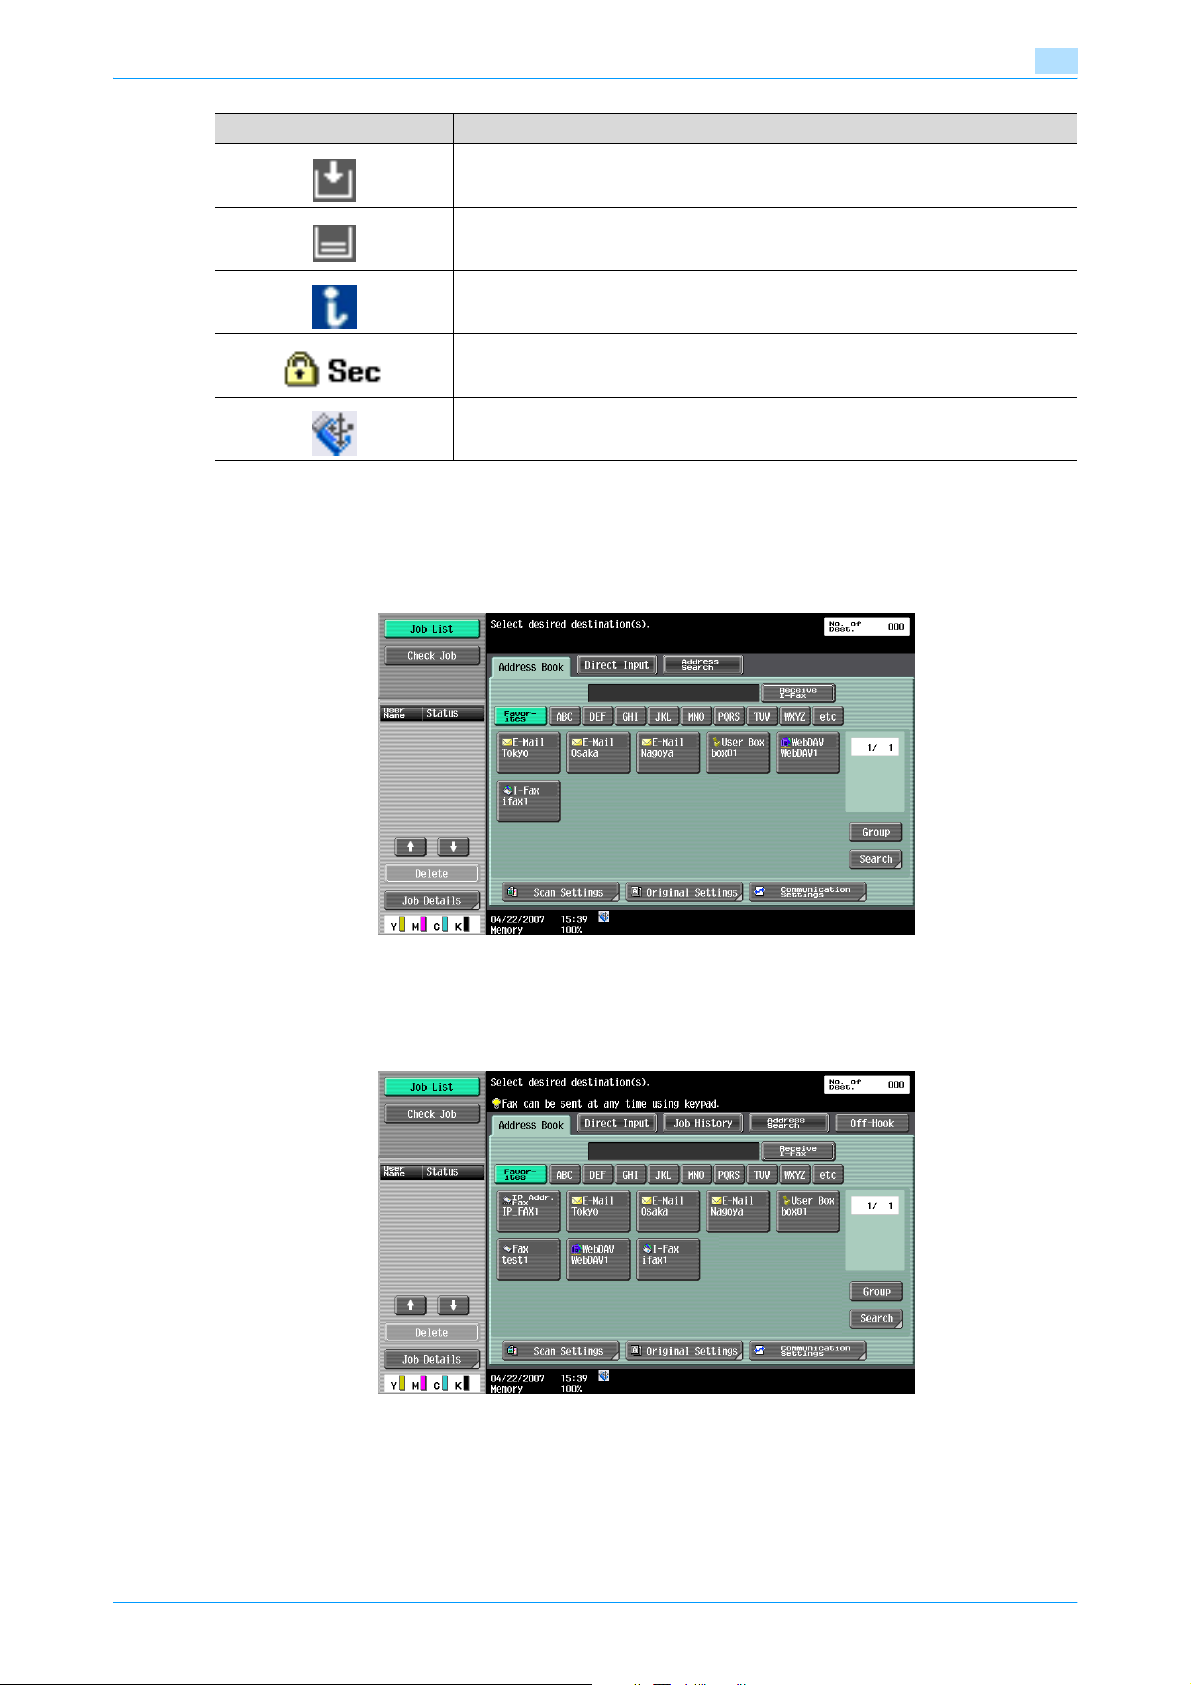
Control panel/touch panel
Icon Description
Indicates that paper is not loaded in the paper tray.
Indicates that very little paper remains in the paper tray.
If the optional image controller is installed, touch this icon to display the setting
screen for the image controller.
Indicates that Enhanced Security mode is set to ON.
Indicates that an external memory is installed.
2.2.2 Display with/without optional settings
Items appear in the screen vary depending on with or without optional fax kit installed to the machine.
Without fax kit
2
No fax address or fax menu appears.
With fax kit
The Job History tab appears to enable selection from destinations in the transmission history. Also, the OffHook tab appears, enabling dialing in off-hook mode. Also you can specify the fax transmission settings in
the Direct Input tab and [Communication Settings].
C353/C253/C203 2-5
Page 39
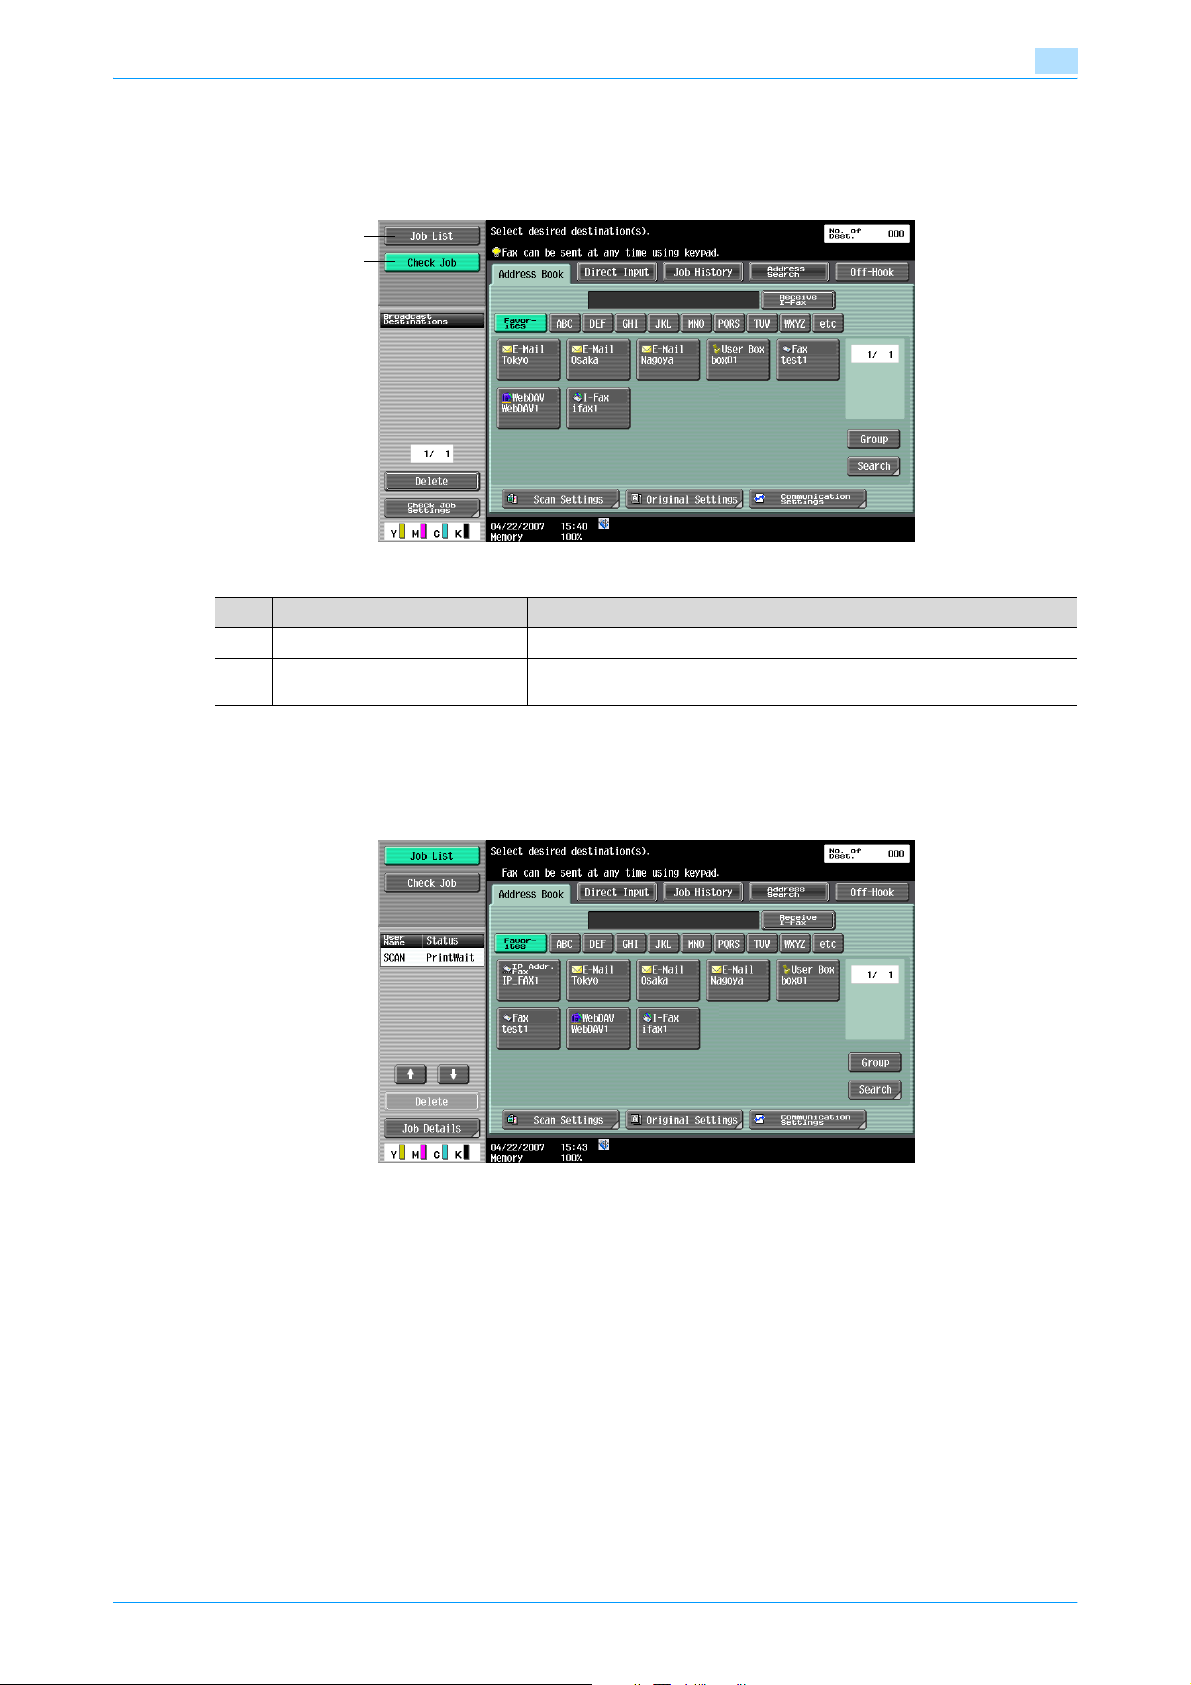
Control panel/touch panel
2.2.3 Display and operation of the left panel
In the left pane of the touch panel, the keys to check the job status and settings appear. The following are
the keys that appear in the left panel in Fax/Scan mode.
1
2
No. Part name Description
1 [Job List] Jobs that are being processed and the job history can be checked.
2 [Check Job] Information on the selected user box, scan, printing and transmission set-
tings of documents can be checked.
2
Job List
Queued operation, such as saving document data to a user box or printing/sending documents, is called a
job. Touch [Job List] to display the jobs being processed.
C353/C253/C203 2-6
Page 40
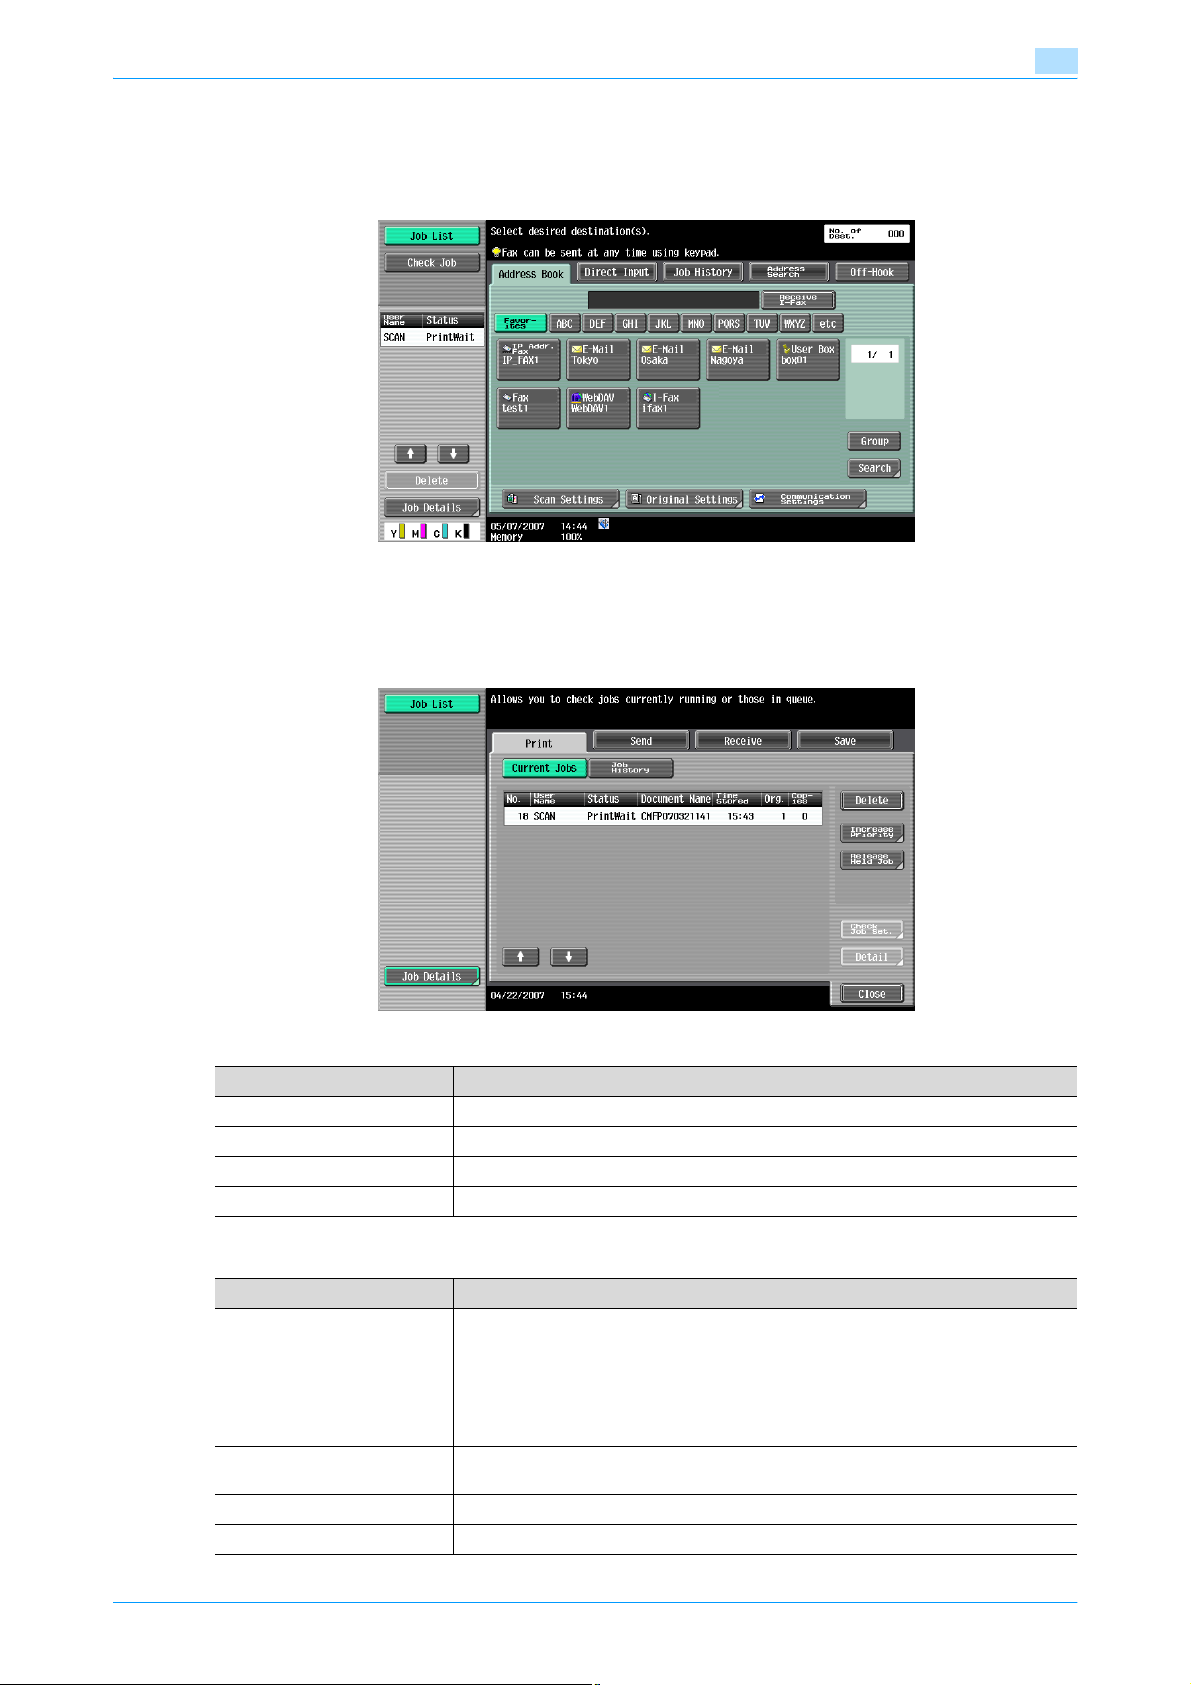
Control panel/touch panel
Job List - Delete
A job being processed can be cancelled by deleting it from the list. Select the job from the job list, and then
touch [Delete]. Check the message that appears, and then delete the job.
Job List - Job Details
Touch [Job Details], and a history list appears in the right area, along with a list of jobs being processed.
Check job details as necessary. Jobs are classified into the following four categories:
2
Item Description
[Print] Lists print jobs for copying, printing from a computer, and printing received faxes.
[Send] Lists fax and scan transmission jobs.
[Receive] Lists fax reception jobs.
[Save] Lists jobs for saving documents in user boxes.
Current Jobs in the Print page
Item Description
List items No.: Job identification number assigned when the job is queued.
[↑] [↓]Touch [↑] [↓] to switch pages when there are more jobs than seven that can be dis-
[Delete] Deletes the selected job.
[Increase Priority] Allows to change printing job priority.
User Name: User or account name who queued the job.
Status: Job status (Receiving, PrintWait, Printing, StopPrint, Print Err, Job Stored)
Document Name: File name to be printed.
Time Stored: Time when the job is queued.
Org.: Number of originals.
Copies: The number of copies to be printed.
played at one time.
C353/C253/C203 2-7
Page 41

Control panel/touch panel
Item Description
[Release Held Job] Allows to change settings of a stored job, or print or delete the job.
[Check Job Set.] Allows to view the settings of the selected job. Touch either [← Back] or [Forward →]
[Detail] Allows to check the job status, user name, document name, output tray, queued
!
Detail
If user authentication settings have been applied, the document name cannot be viewed by other users.
Document names do not appear on the screen for secured documents.
If Change Job Priority in Administrator settings is set to "Restrict", the print job priority control is not
available.
If interruption is enabled in Change Job Priority setting, touching this softkey interrupts the printing job
to print another job with the higher priority. The interrupted job is automatically printed once the
interrupting job is finished.
Job History in the Print page
The history of printed jobs is displayed.
2
to check the settings.
time, number of original pages, and number of copies to be printed. Touch [Delete]
to delete the job.
Item Description
List items No.: Job identification number assigned when the job is queued.
[↑] [↓]Touch [↑] [↓] to switch pages when there are more jobs than seven that can be dis-
[Deleted Jobs]/[Finished
Jobs]/[Active Jobs]
[Detail] Displays the results of the job, error details, user name, document name, output tray,
User Name: User or account name who queued the job.
Document Name: File name to be printed.
Time Stored: Time when the job is queued.
Org.: Number of originals.
Copies: The number of copies to be printed.
Result: Result of a job (Job Complete, Deleted Due To Error, Deleted by User, Reset
Modes).
played at one time.
Touch the softkey to display each category of job.
queued time, number of original pages, and number of copies to be printed.
!
Detail
If user authentication settings have been applied, the document name cannot be viewed by other users.
Document names do not appear on the screen for secured documents.
Current Jobs in Send page
Item Description
List items No.: Job identification number assigned when the job is queued.
[↑] [↓]Touch [↑] [↓] to switch pages when there are more jobs than seven that can be dis-
[Timer TX Job] Displays the status of the reserved transmission in the memory. Touch [Delete] to de-
[L1] [L2] These softkeys appear if the optional fax multi line has been installed. Displays the
[Delete] Deletes the selected job.
Address type: Type of the destination (fax, E-Mail, FTP, PC (SMB), WebDAV, TWAIN,
others).
Status: Job status (Transferring, Waiting, Dialing, Waiting To Redial)
Destination: Fax number, E-Mail address and user box name of the recipient.
Time Stored: Time when the job is queued.
Org.: Number of originals.
played at one time.
lete the job.
list of the selected line.
C353/C253/C203 2-8
Page 42

Control panel/touch panel
Item Description
[Redial] Select the job marked "Waiting To Redial" status for redialing.
[Check Job Set.] Allows to view the settings of the selected job. Touch either [← Back] or [Forward →]
[Detail] Displays the job status, user name, document name, destination type, destination,
!
Detail
If user authentication settings have been applied, the document name cannot be viewed by other users.
Document names do not appear on the screen for secured documents.
The external server information in [Detail] is available only if the external server authentication is applied.
"TWAIN" is indicated for jobs sent by the Web service.
Job History in the Send page
The history of fax-transmitted and scan-transmitted jobs is displayed.
Item Description
List items No.: Job identification number assigned when the job is queued.
[↑] [↓]Touch [↑] [↓] to switch pages when there are more jobs than seven that can be dis-
[Deleted Jobs]/[Finished
Jobs]/[All Jobs]
[Comm. List] Displays the Scan list, Fax TX list, and Fax RX list. At each list screen, the activity re-
[Detail] Displays the job results, error details, user name, document name, destination type,
2
to check the settings.
queued time, transmission time, number of original pages, and external server information. Touch [Delete] to delete the job.
Address type: Type of the destination (fax, E-Mail, FTP, PC (SMB), WebDAV, TWAIN,
others).
Destination: Fax number, E-Mail address and user box name of the recipient.
Time Stored: Time when the job is queued.
Org.: Number of originals.
Result: Result of a job (Job Complete/Deleted Due To Error/Deleted by User).
played at one time.
Touch the softkey to display each category of job.
port, TX report, and RX report can be printed.
queued time, transmission time, number of original pages, and external server information.
!
Detail
If user authentication settings have been applied, the document name cannot be viewed by other users.
Document names do not appear on the screen for secured documents.
The external server information in [Detail] is available only if the external server authentication is applied.
"TWAIN" is indicated for jobs sent by the Web service.
The jobs that have been forwarded or relayed after having been received by fax are also listed in the
[Send] list.
Current Jobs in the Receive page
Item Description
List items No.: Job identification number assigned when the job is queued.
[↑] [↓]Touch [↑] [↓] to switch pages when there are more jobs than seven that can be dis-
[Delete] Deletes the selected job.
User Name: User or account name who queued the job.
Status: Job status (Receiving, Dialing (only with polling reception), Print Wait, Printing, StopPrint, Print Err, Saving to Memory)
Document name: Displays the name of the received or saved document.
Time Stored: Time when the job is queued.
No. of Originals: The number or original pages received.
played at one time.
C353/C253/C203 2-9
Page 43
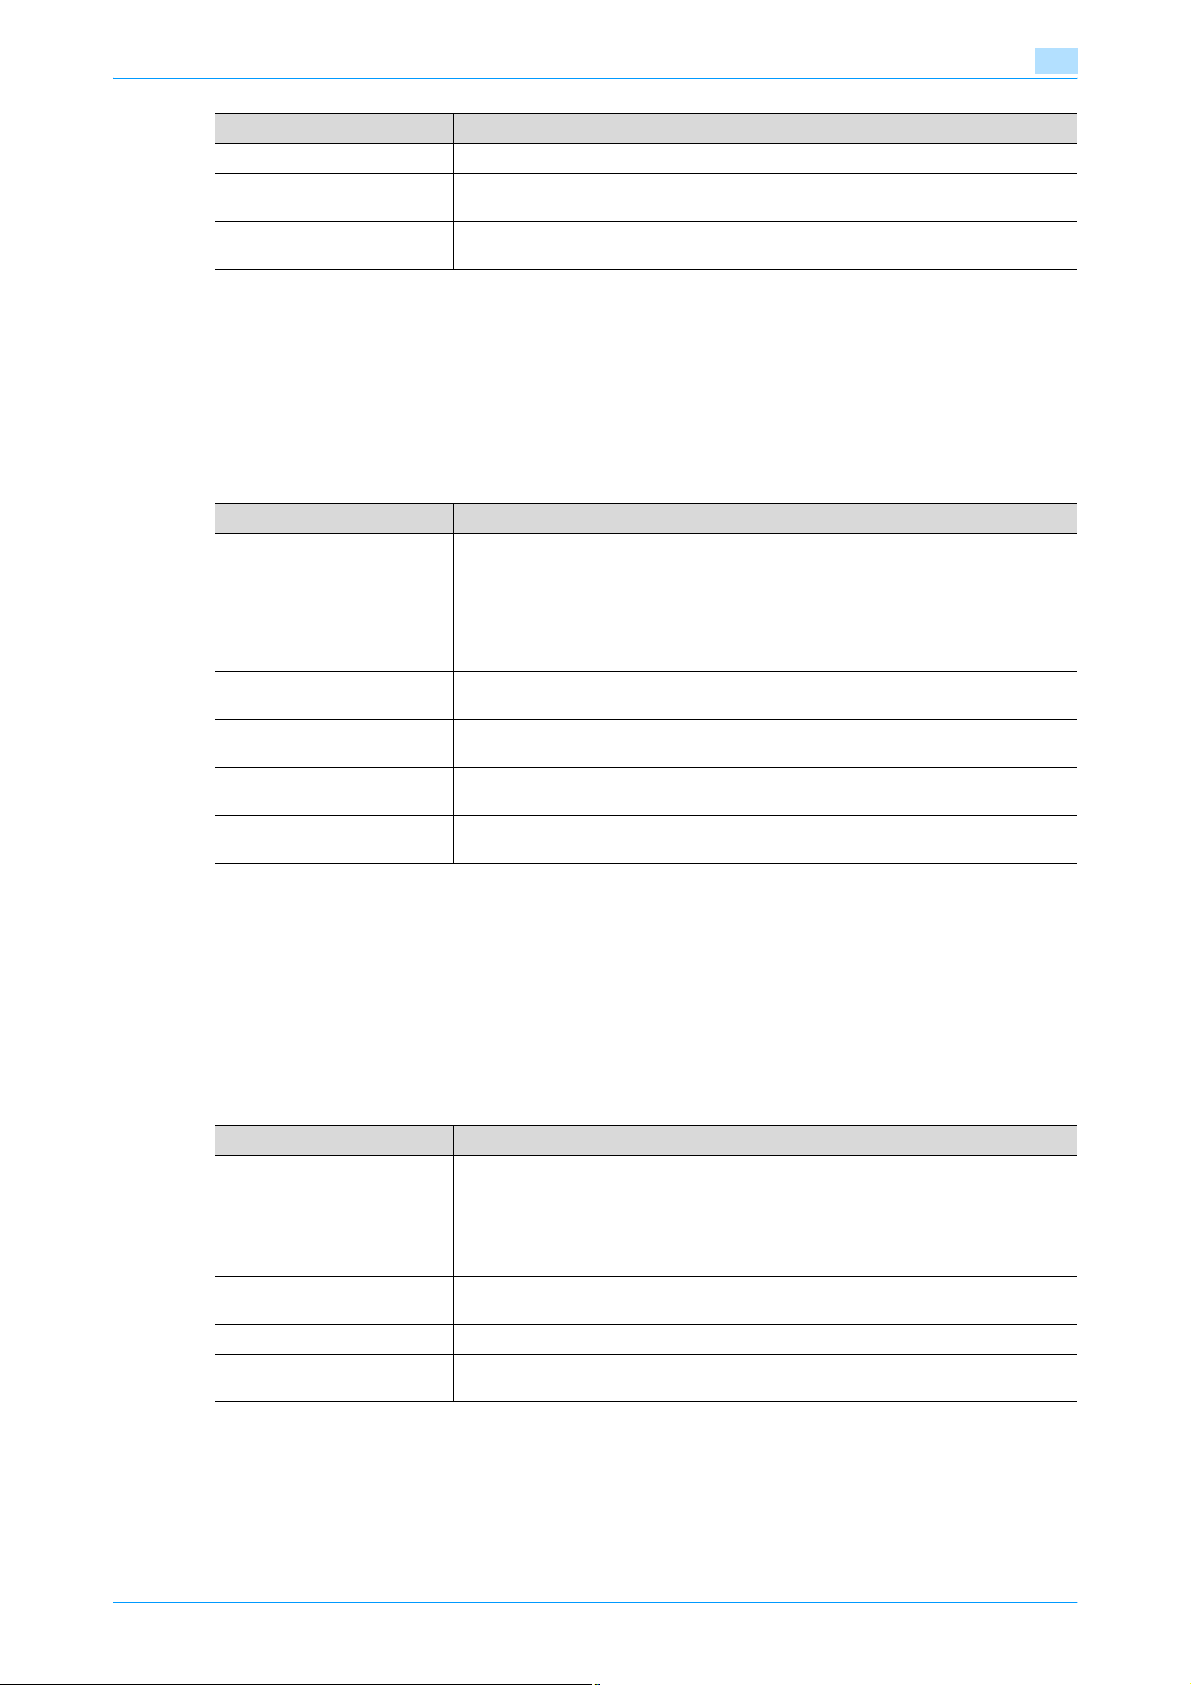
Control panel/touch panel
Item Description
[Redial] Select the job marked "Waiting To Redial" status for redialing.
[Forward] Forwards the fax which has been received and stored in the memory. Specify the re-
[Detail] Displays the job status, user name, document name, output tray, queued time, trans-
!
Detail
If user authentication settings have been applied, the document name cannot be viewed by other users.
Document names do not appear on the screen for secured documents.
Job History in the Receive page
The history of jobs received by fax, forwarded or relayed is displayed.
Item Description
List items No.: Job identification number assigned when the job is queued.
[↑] [↓]Touch [↑] [↓] to switch pages when there are more jobs than seven that can be dis-
[Deleted Jobs]/[Finished
Jobs]/[All Jobs]
[Comm. List] Displays the Scan list, Fax TX list, and Fax RX list. At each list screen, the activity re-
[Detail] Displays the results of the job, error details, user name, document name, output tray,
2
cipient either by selecting from the address book or by entering them directly.
mission time, and number of original pages. Touch [Delete] to delete the job.
User Name: User or account name who queued the job.
Document name: Displays the name of the received or saved document.
Time Stored: Time when the job is queued.
Org.: Number of originals.
Result: Result of a job (Job Complete/Deleted Due To Error/Deleted by User/Reset
Modes).
played at one time.
Touch the softkey to display each category of job.
port, TX report, and RX report can be printed.
queued time, transmission time, and number of original pages.
!
Detail
If user authentication settings have been applied, the document name cannot be viewed by other users.
Document names do not appear on the screen for secured documents.
The jobs that have been printed after having been received by fax are listed in the [Print] list, instead of
the [Receive] list.
Current Jobs in the Save page
Item Description
List items No.: Job identification number assigned when the job is queued.
[↑] [↓]Touch [↑] [↓] to switch pages when there are more jobs than seven that can be dis-
[Delete] Deletes the selected job.
[Detail] Displays the job status, user name, document name, user box, queued time, and
User Name: User or account name who queued the job.
Status: Job status (Receiving, Saving to Memory).
Document Name: Displays the name of the saved document.
Time Stored: Time when the job is queued.
Org.: Number of originals.
played at one time.
number of original pages. Touch [Delete] to delete the job.
!
Detail
If user authentication settings have been applied, the document name cannot be viewed by other users.
Document names do not appear on the screen for secured documents.
C353/C253/C203 2-10
Page 44
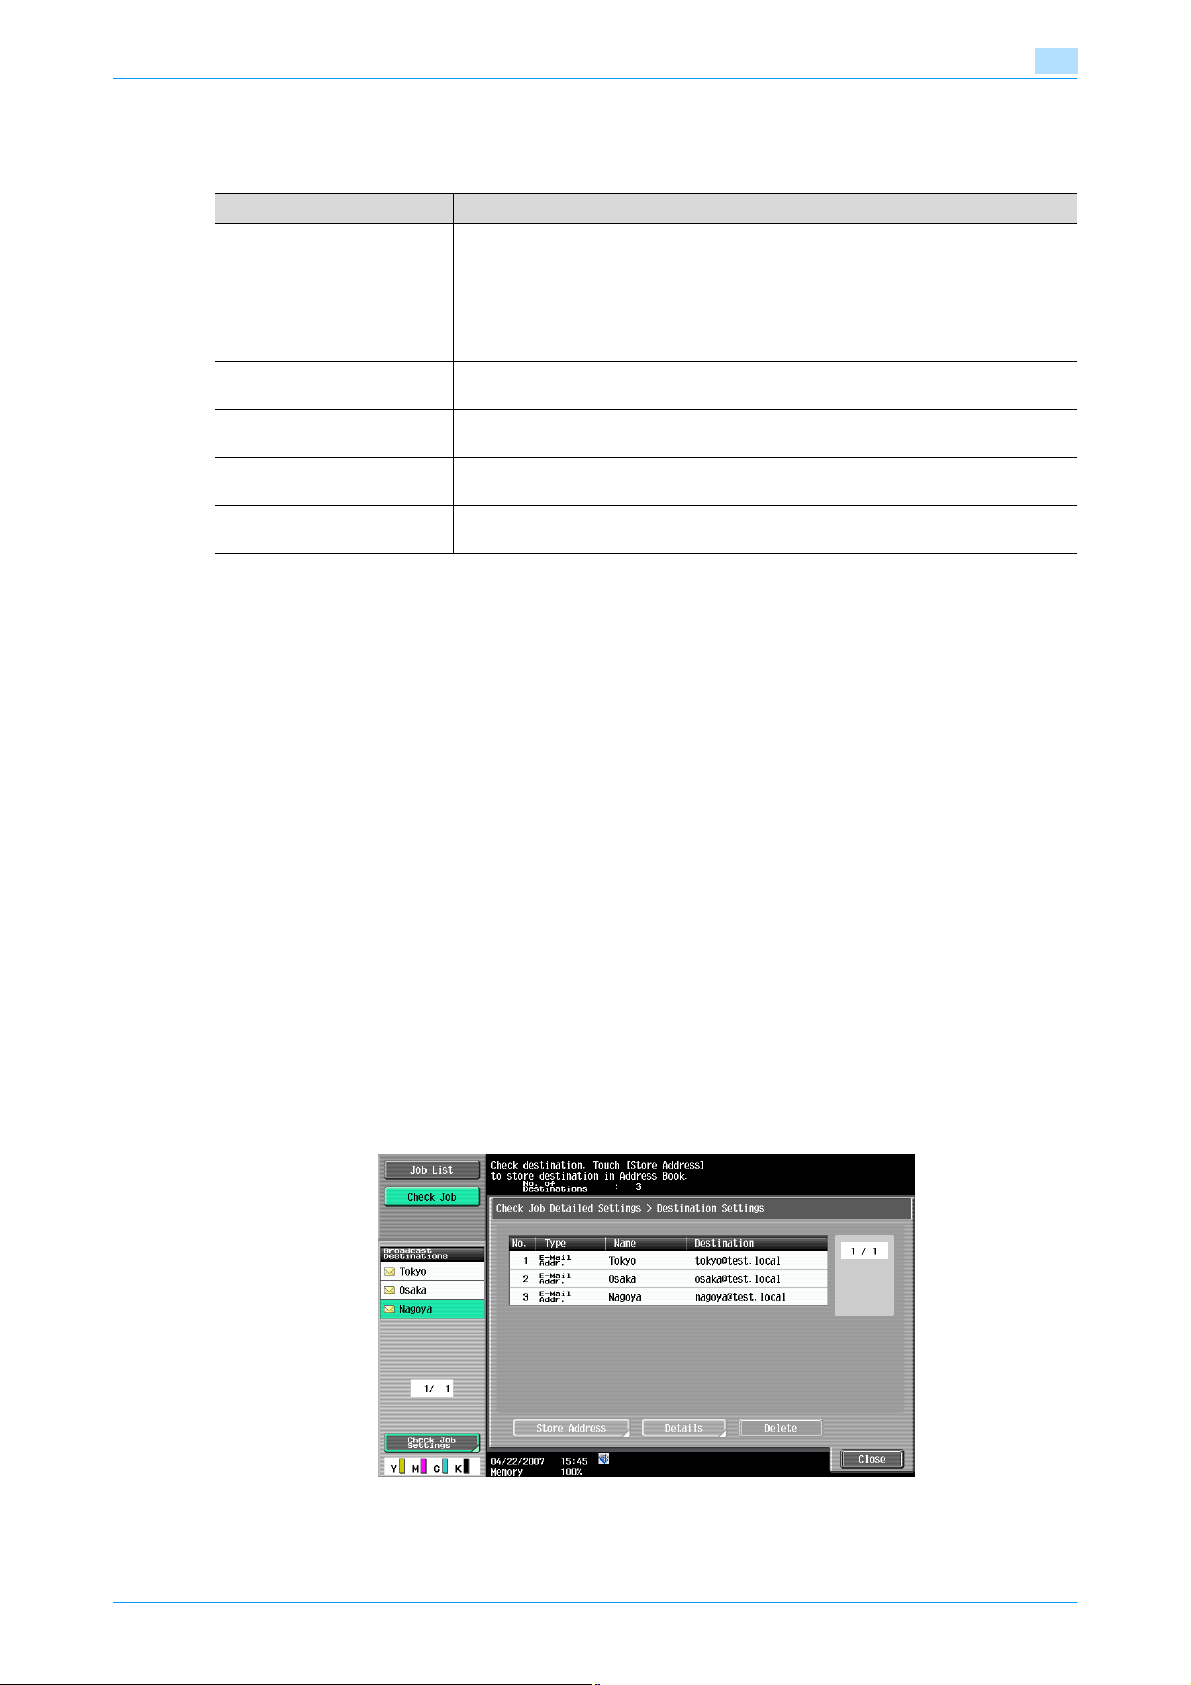
Control panel/touch panel
Job History in the Save page
The history of jobs saved in the user box is displayed.
Item Description
List items No.: Job identification number assigned when the job is queued.
[↑] [↓]Touch [↑] [↓] to switch pages when there are more jobs than seven that can be dis-
[Deleted Jobs]/[Finished
Jobs]/[Active Jobs]
[Communication List] Displays the Scan list, Fax TX list, and Fax RX list. At each list screen, the activity re-
[Detail] Displays the job result, error details, user name, document name, user box queued
!
Detail
If user authentication settings have been applied, the document name cannot be viewed by other users.
2
User Name: User or account name who queued the job.
Document Name: Displays the name of the saved document.
Time Stored: Time when the job is queued.
Org.: Number of originals.
Result: Result of a job (Job Complete/Deleted Due To Error/Deleted by User/Reset
Modes).
played at one time.
Touch the softkey to display each category of job.
port, TX report, and RX report can be printed.
time, and number of original pages.
Document names do not appear on the screen for secured documents.
The faxes received as Memory RX or Confidential RX are listed in the [Save] list.
Check Job - Check Job Settings
When touch [Check Job], [Check Job Settings] appears.
Touch [Check Job Settings] to check the following settings:
- Destination Settings
- Scan Settings
- Original Settings
- Communication Settings
- Check E-Mail Settings
Check Job - Check Job Settings - Destination Settings
This screen displays the list of registered destinations.
- To add a destination to the list by directly entering it, select the destination and touch [Store Address].
- To view the details of the destination on the screen, select the destination, and then touch [Details].
- To delete a destination, select the destination, and then touch [Delete].
C353/C253/C203 2-11
Page 45
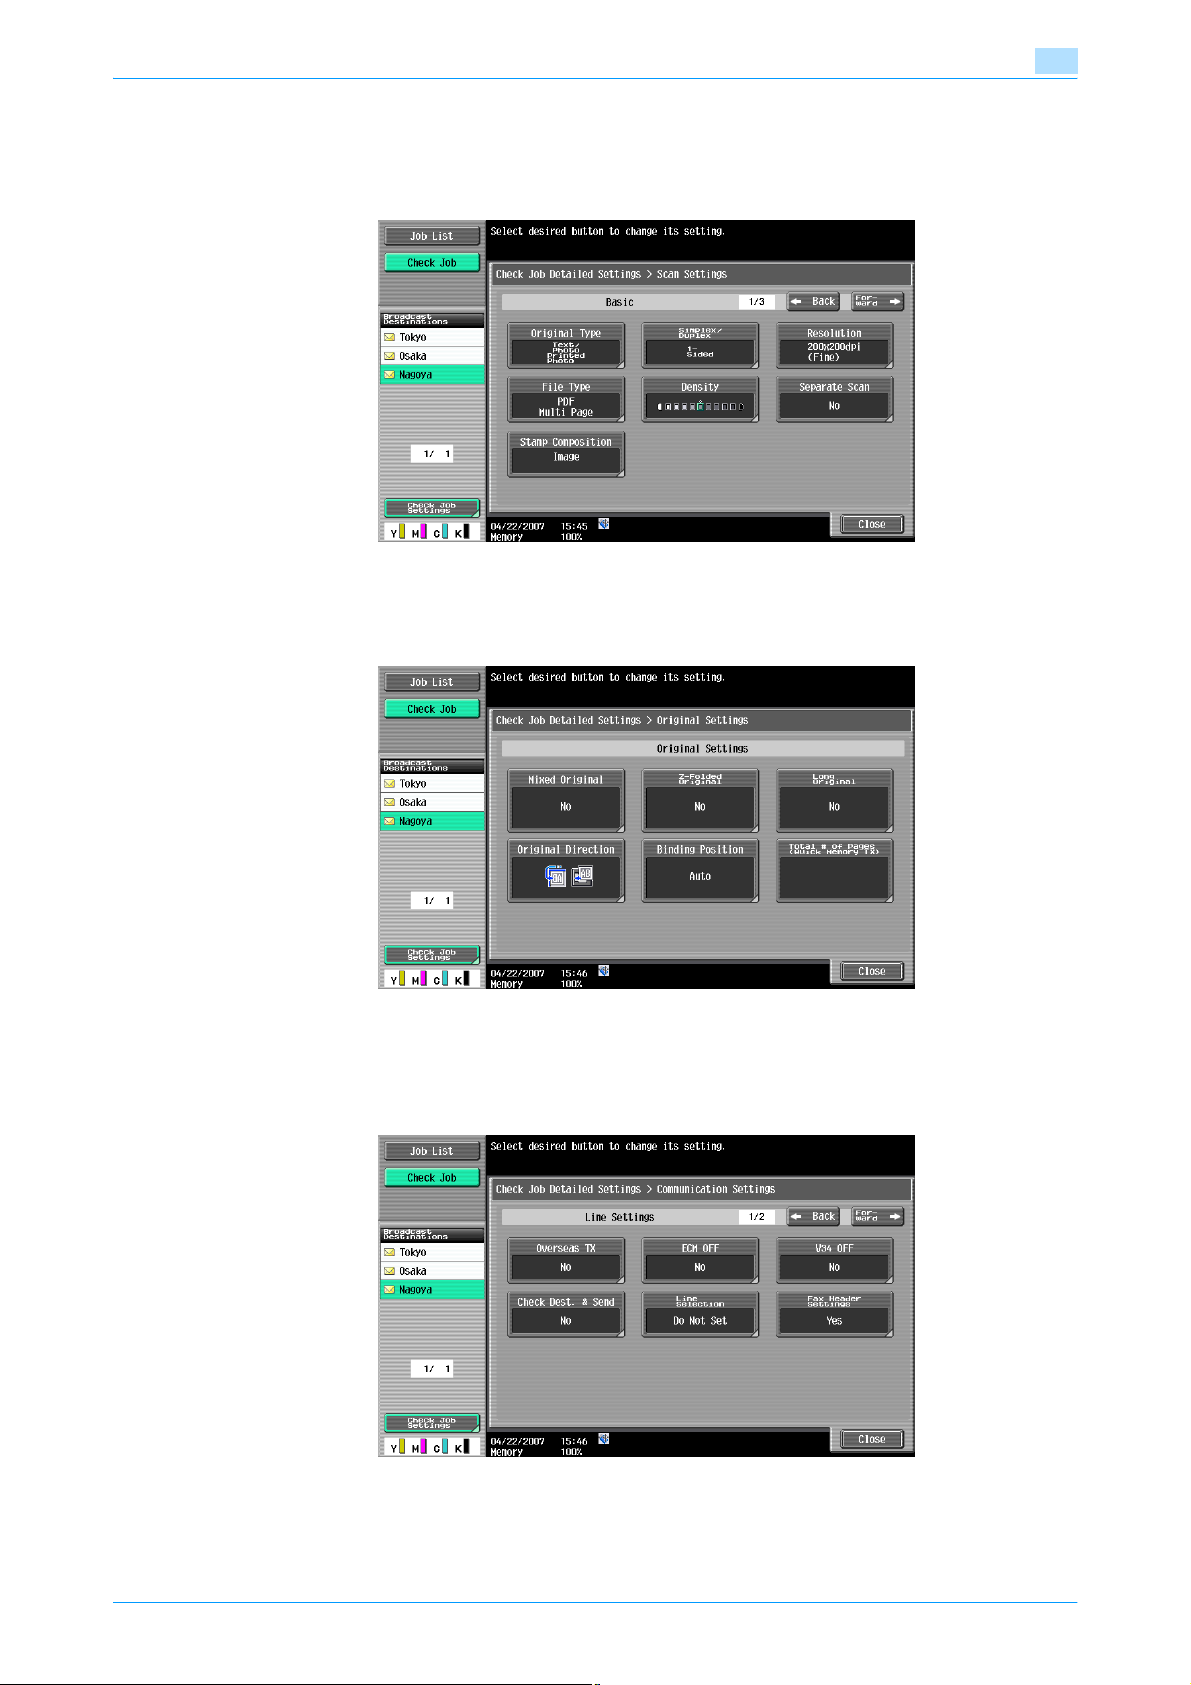
Control panel/touch panel
Check Job - Check Job Settings - Scan Settings
The basic scan setting, scan settings, and application settings can be checked. Touch either [← Back] or
[Forward →] to check the settings.
Check Job - Check Job Settings - Original Settings
The original settings can be checked.
2
Check Job - Check Job Settings - Communication Settings
The line setting and transmission method settings can be checked. Touch either [← Back] or [Forward →] to
check the settings.
C353/C253/C203 2-12
Page 46
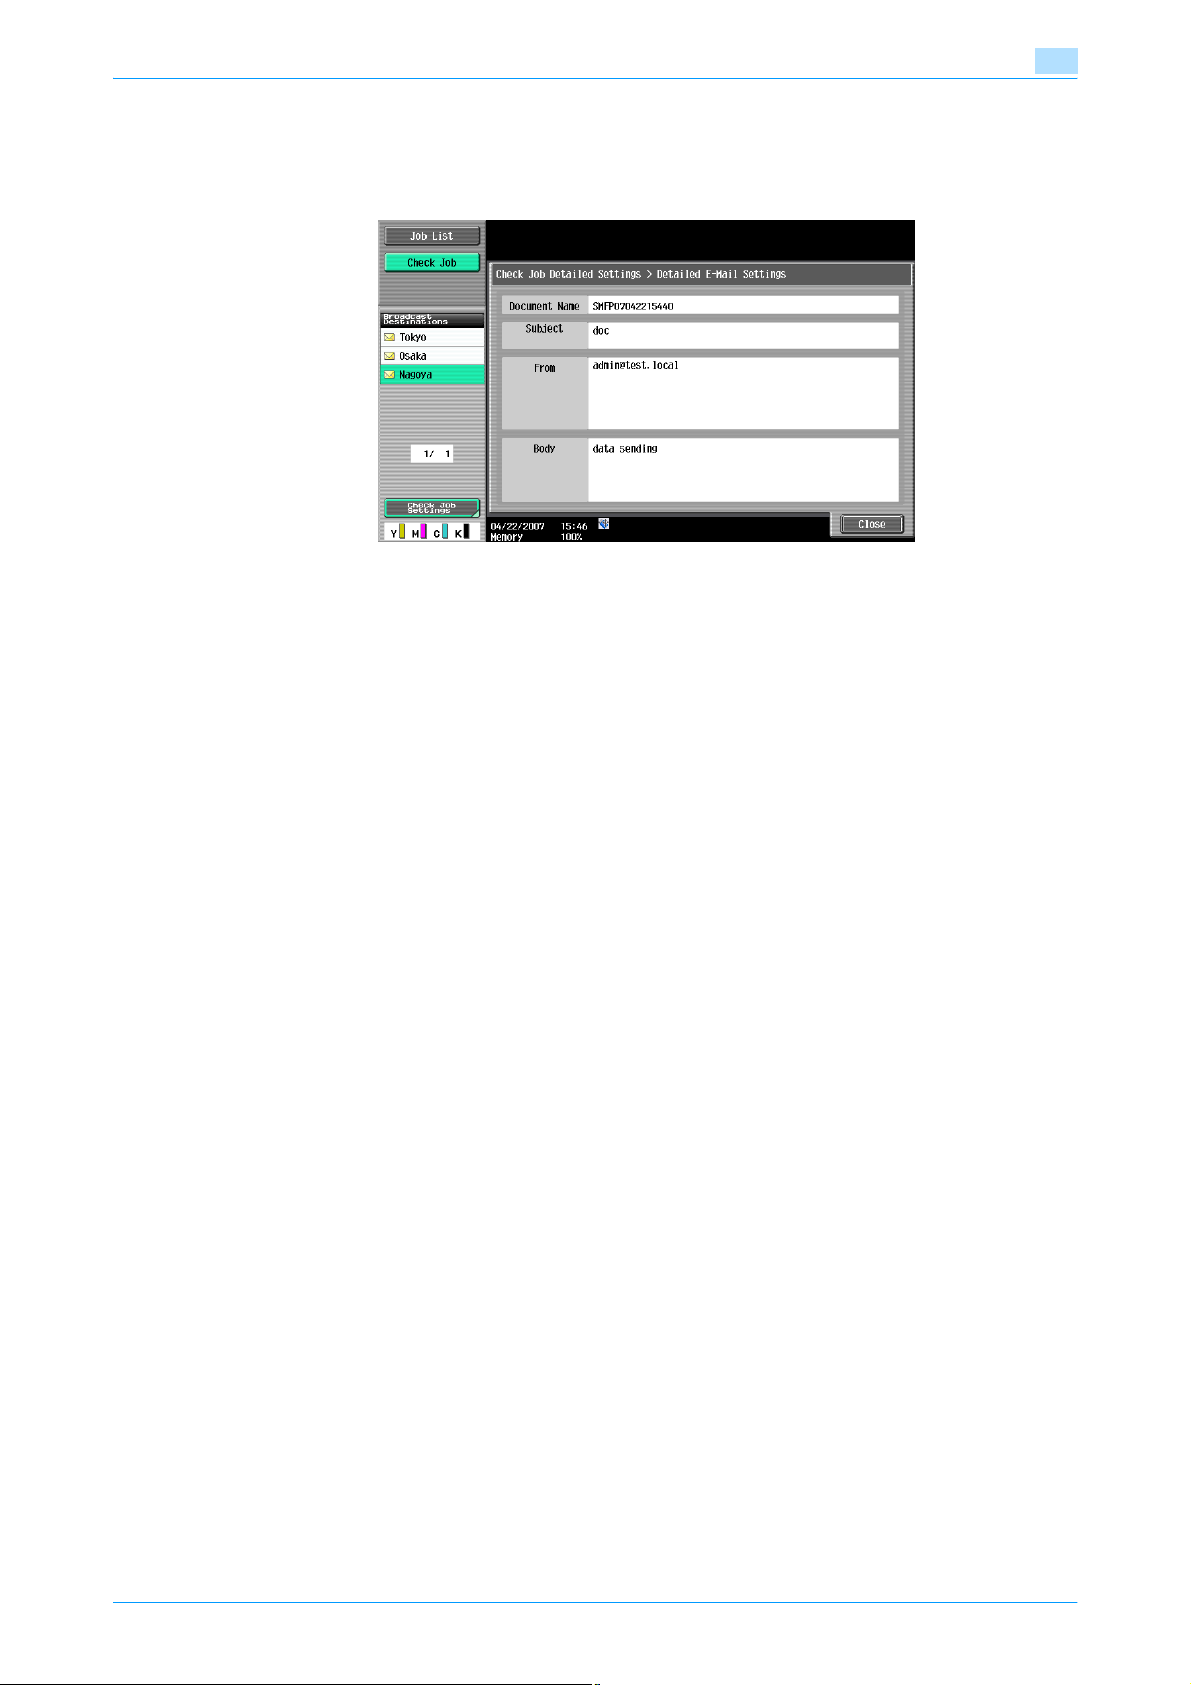
Control panel/touch panel
Check Job - Check Job Settings - Check E-Mail Settings
The document name, subject, From address and message body for sending E-Mail messages can be
checked.
2
C353/C253/C203 2-13
Page 47

3
Registration of basic
information
Page 48
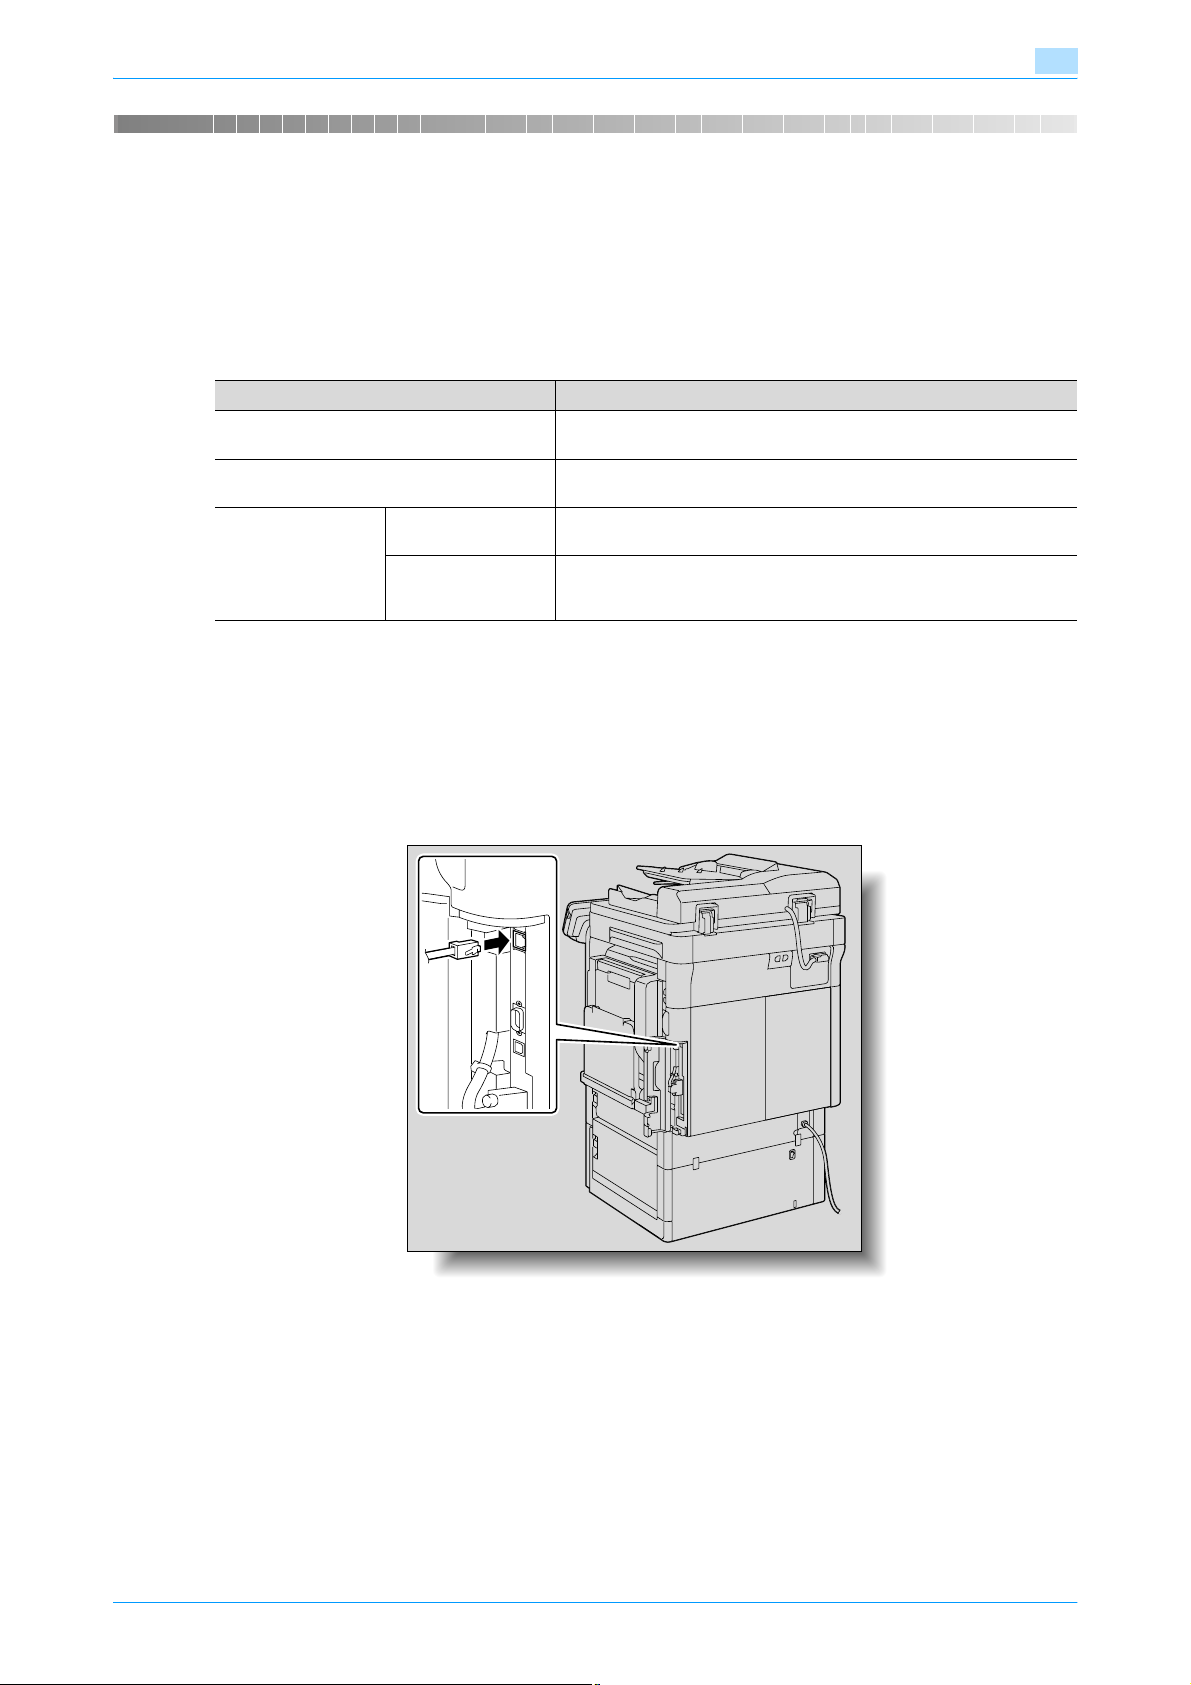
Registration of basic information
3 Registration of basic information
3.1 To begin operation
When starting operation of the product for the first time, register the following.
3.1.1 Required environment and equipment
The following table shows environment and equipment required to enable respective functions.
Description Environment and equipment
Network scan function • Network connection
G3 fax function • Installation of the fax kit (optional)
Network fax function
Internet fax • Network connection
IP address fax • Installation of the fax kit (optional)
• Network settings
• Connecting a modular cable
• Network settings
• Network connection
• Network settings
3
3.1.2 Network connection and settings
To use the function to transmit image data via a network connection such as network scan and network fax
functions, connecting this machine to the network and settings for network use are required.
Network connection
Connect a UTP cable (category 5 or later recommended) from the network to the Ethernet connector on the
machine.
Network settings
Assign an IP address to the machine and complete settings for the SMTP server, etc. For details, refer to the
User’s Guide [Network Administrator].
C353/C253/C203 3-2
Page 49

Registration of basic information
Specifying the E-Mail address of the machine
To send scanned data as an E-Mail message or to use the Internet fax function, register the E-Mail address
on the machine beforehand. This E-Mail address is used when sending and receiving data. Generally, it is
recommended that the E-Mail address registered for the administrator be used.
If the E-Mail address registered for the administrator is not specified, the E-Mail address of the sender must
be entered for each Scan to E-Mail operation. Scan to E-Mail operations are not possible without address
entry.
!
Detail
When user authentication is enabled, the E-Mail address specified for each user is used as the sender’s
address.
For details on specifying the E-Mail address of this machine, refer to the User’s Guide [Network
Administrator].
3.1.3 Connecting a modular cable
When sending/receiving faxes via a phone line, modular cable connection is needed. To use the G3 fax
function, an optional fax kit must be installed. Also, to use two lines, the optional fax multi line must be
installed.
Connect a modular cable connected to the phone line to a specified connector. For the connector location
for cable connection, refer to the User’s Guide [Copy Operations].
3
C353/C253/C203 3-3
Page 50

Registration of basic information
3.2 Address Registration
Register the destination (address) of scanned/faxed data. Use one of the following registration methods.
- Using the touch panel of the machine
- Using PageScope Web Connection from a computer on the network
3.2.1 Address Book
The following types of destination information can be registered in the Address Book. For details on
registering destinations in Address Book, refer to "One-Touch/User Box Registration" on page 8-7.
- E-Mail
- User Box
- Fax
- PC (SMB)
- FTP
- WebDAV
- IP Address Fax
- Internet Fax
!
Detail
Destinations in Address Book cannot be registered by Web service. Specify the destination by directly
entering the address.
3
3.2.2 Group
A set of addresses registered in the Address Book can be registered as a group. Group registration is useful
for sending a message to more than one address at the same time.
C353/C253/C203 3-4
Page 51

Registration of basic information
3.3 Optional settings
Depending on the use, additional settings are also available.
Fax/Scan programs
The destination and scan settings can be registered together as a single program. This is convenient for
frequently scanning documents and sending data under the same conditions. Use the touch panel of the
machine to specify the settings.
2
Note
For details, refer to "Scan/Fax Program" on page 8-35.
Setting display contents
Set the contents to be displayed when the [Fax/Scan] key is touched on the control panel.
2
Note
For details, refer to "Custom Display Settings - Scan/Fax Settings" on page 8-42.
3
C353/C253/C203 3-5
Page 52
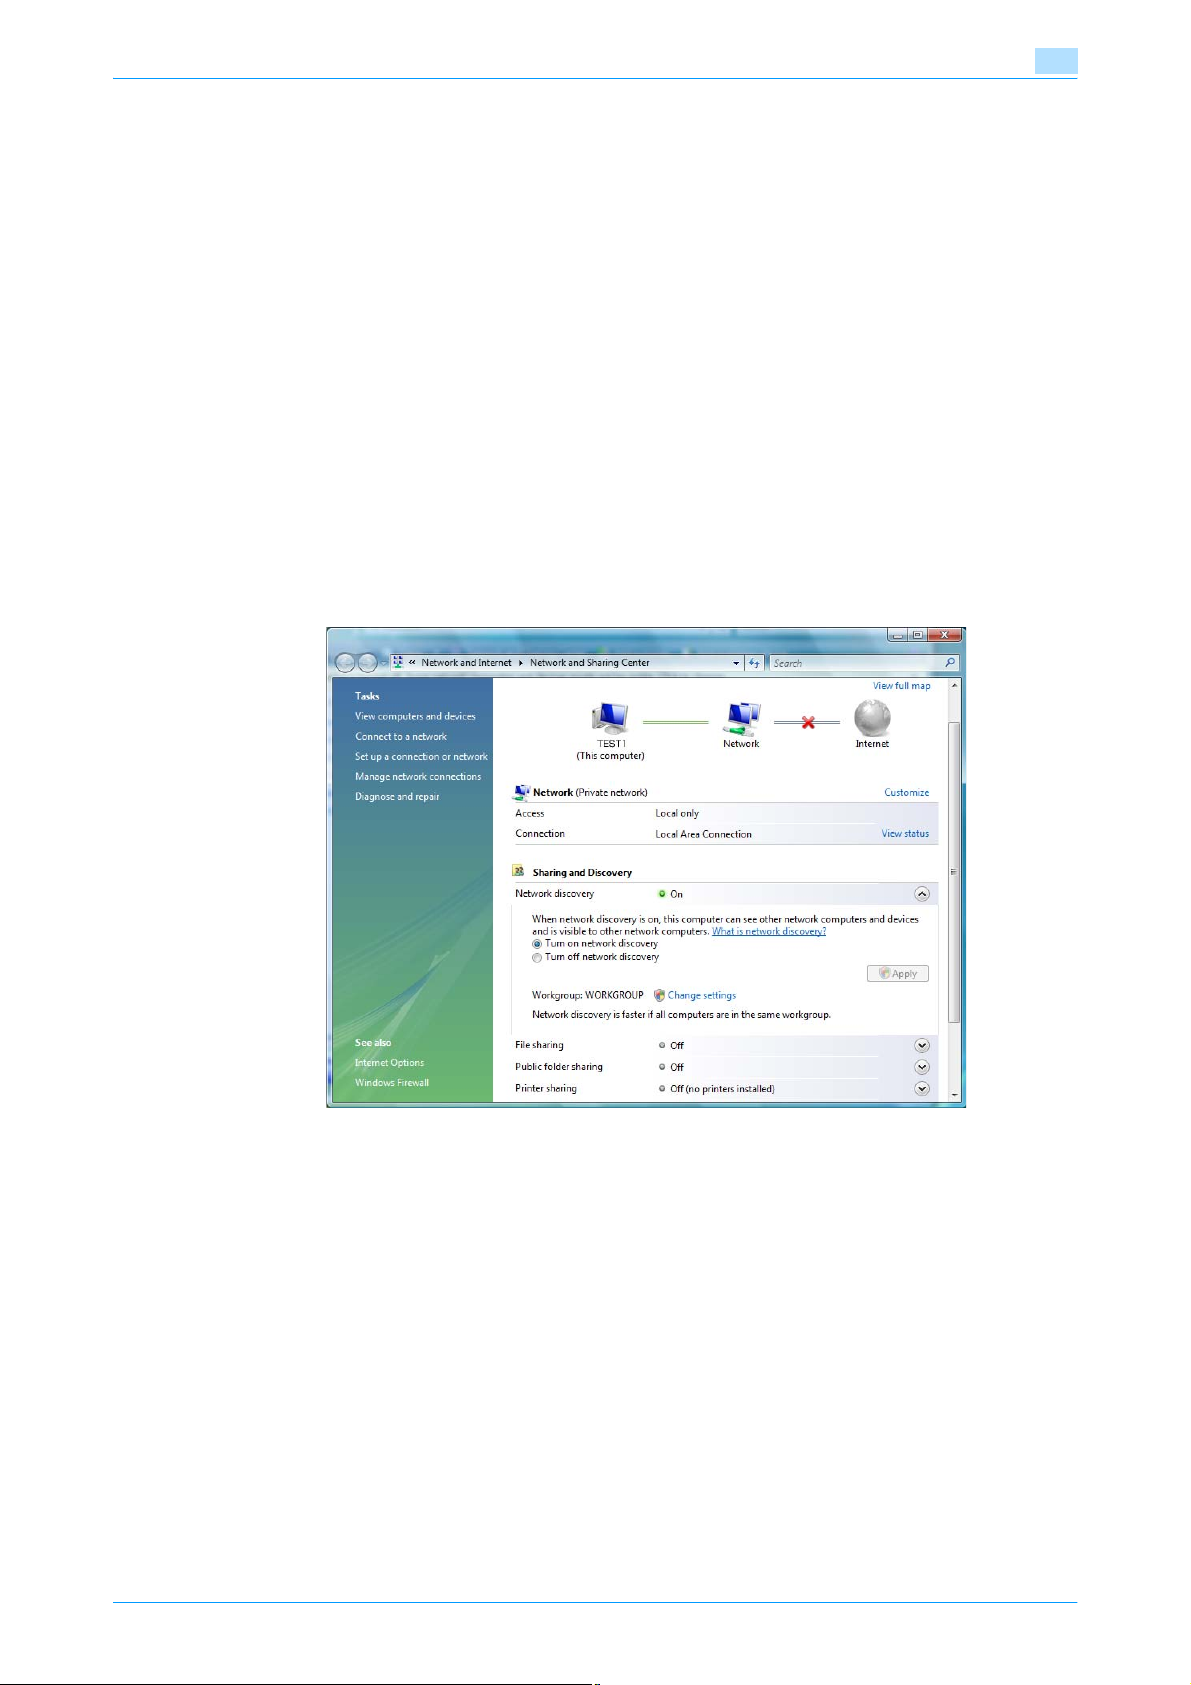
Registration of basic information
3.4 Using Web services
It is possible to give a scan command from a computer (Windows Vista) on the network or to perform
scanning according to the purpose from the machine and to send the scanned data to the computer. This
section describes settings that should be specified on the computer in advance.
3.4.1 Settings required for using Web services
The following settings are required for using Web services:
- Install the driver of the machine on the computer.
- Specify settings for Web services on the machine.
!
Detail
Settings for Web services on this machine can be specified in the Administrator Settings screen. For
details, refer to the User’s Guide [Network Administrator].
3.4.2 Installing the driver of this machine on the computer
Pre-installation checking
Before installation, check that "Network discovery" is enabled in [Network and Sharing Center] accessed
from [Control Panel].
3
C353/C253/C203 3-6
Page 53
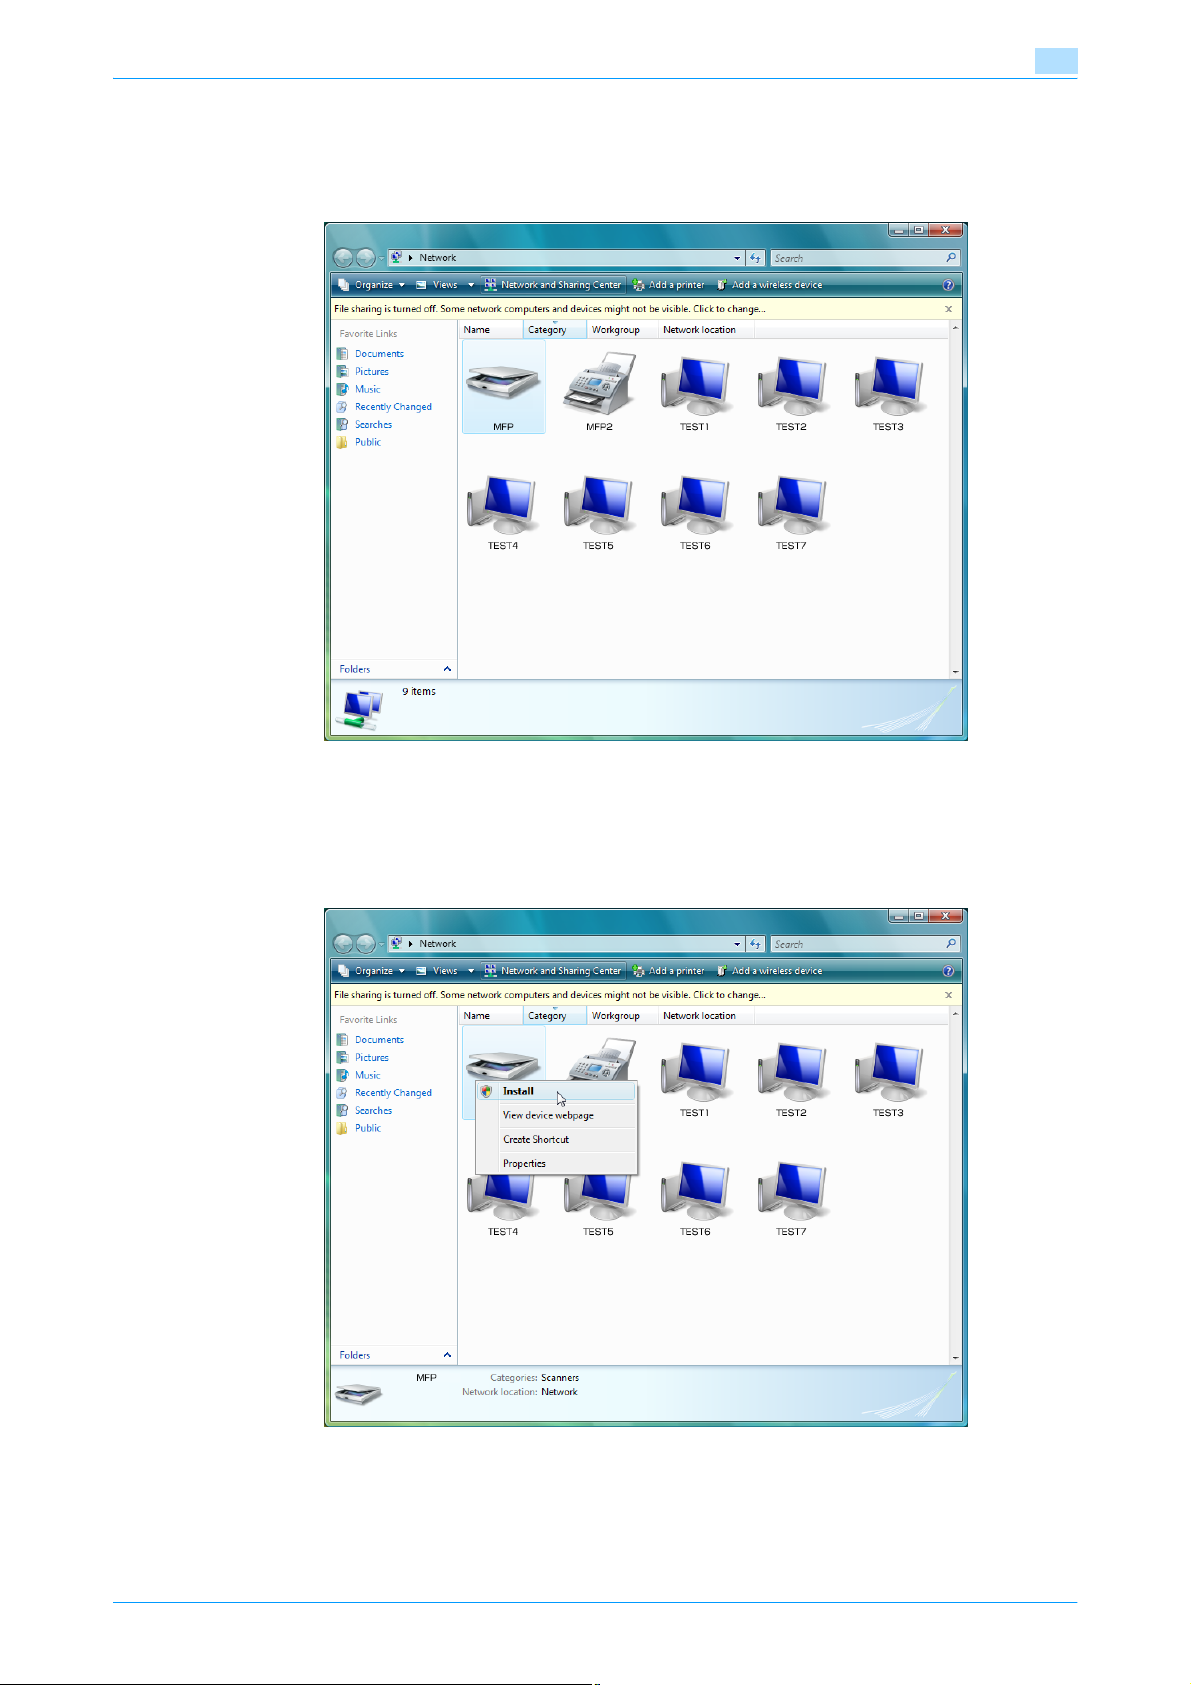
Registration of basic information
Installation procedure
1 Click the [Start] button, and then select [Network].
Devices connected to the network are listed.
3
2 Right-click the scanner icon on the machine, and then select [Install].
– Depending on the settings on the computer, the UAC (User Account Control) dialog box may
appear. Check the contents, and then continue.
– When both the scan and printing functions of the Web service are enabled for this machine, this
machine is displayed as printer icon.
C353/C253/C203 3-7
Page 54
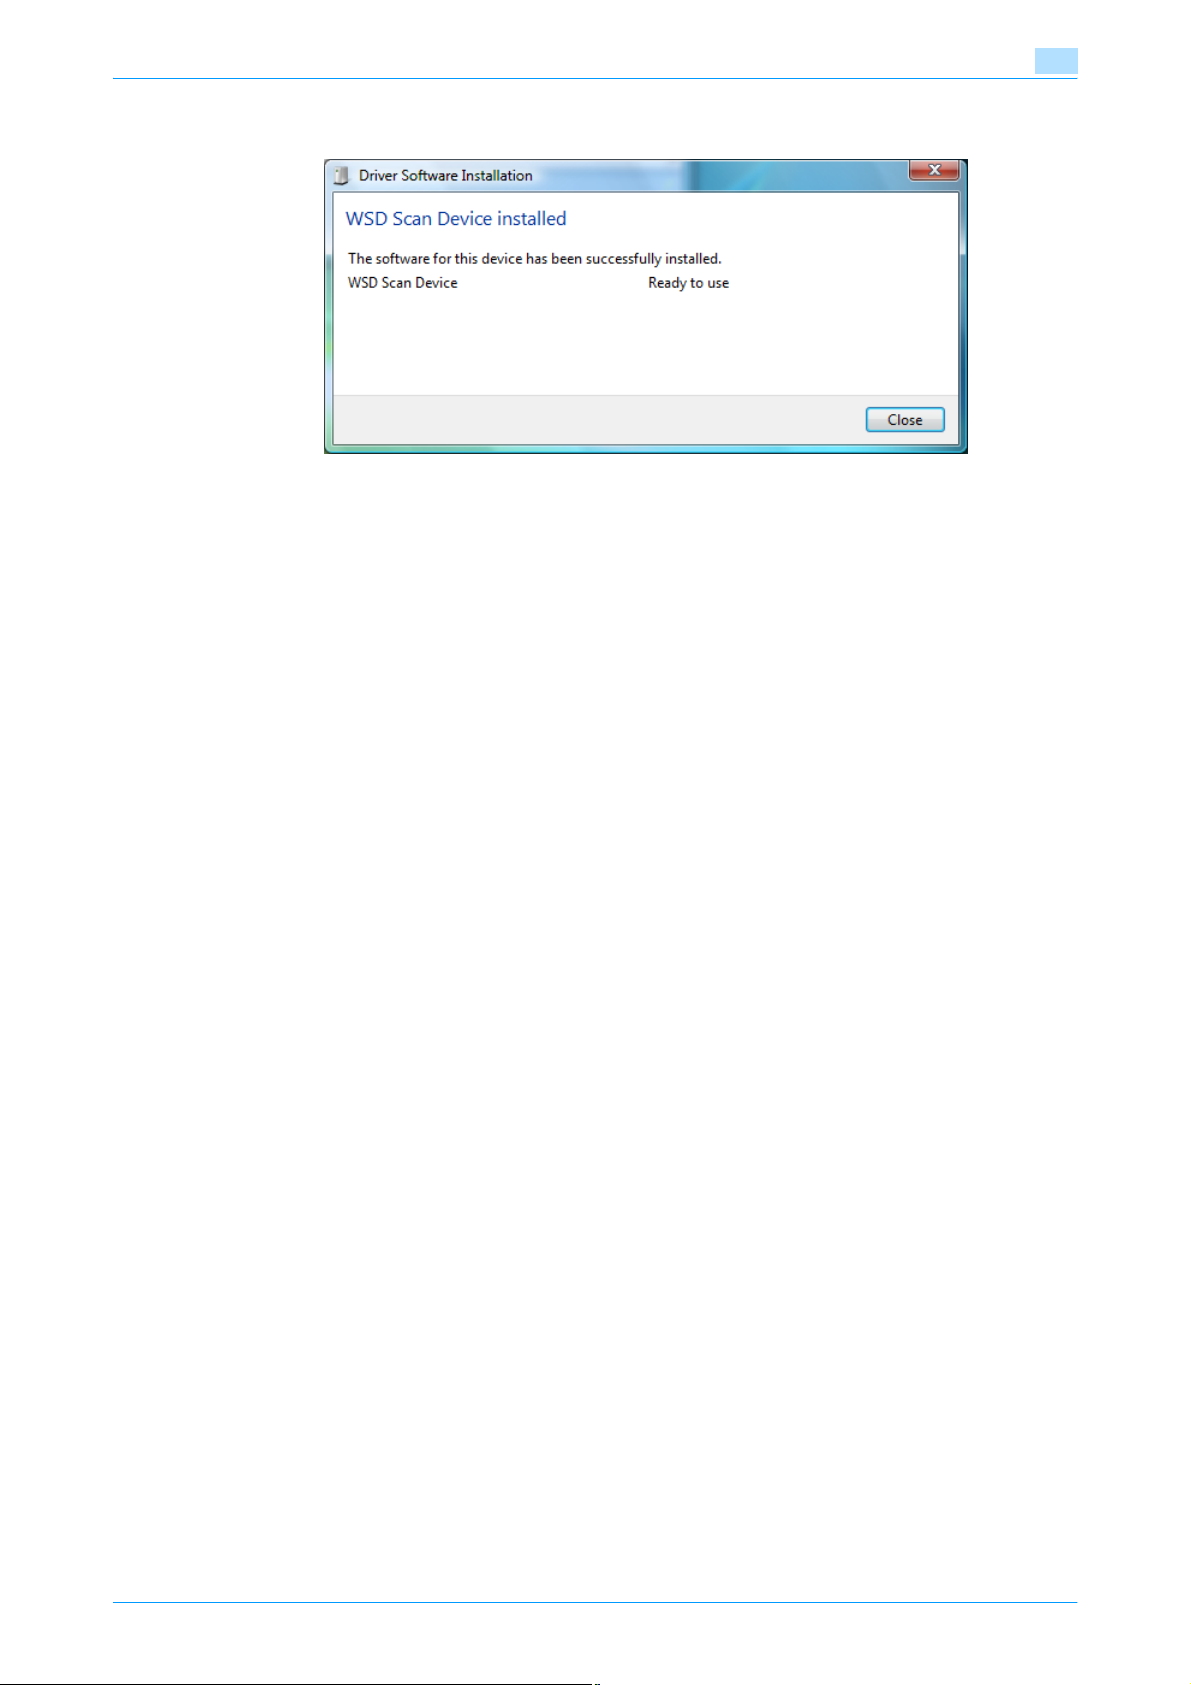
Registration of basic information
– The driver software is installed automatically. When the confirmation dialog box appears, click the
[Close] button.
3 On the control panel of the machine, select [Web Service] and check that the connection destination is
displayed.
3
C353/C253/C203 3-8
Page 55

4
Transmitting data
Page 56
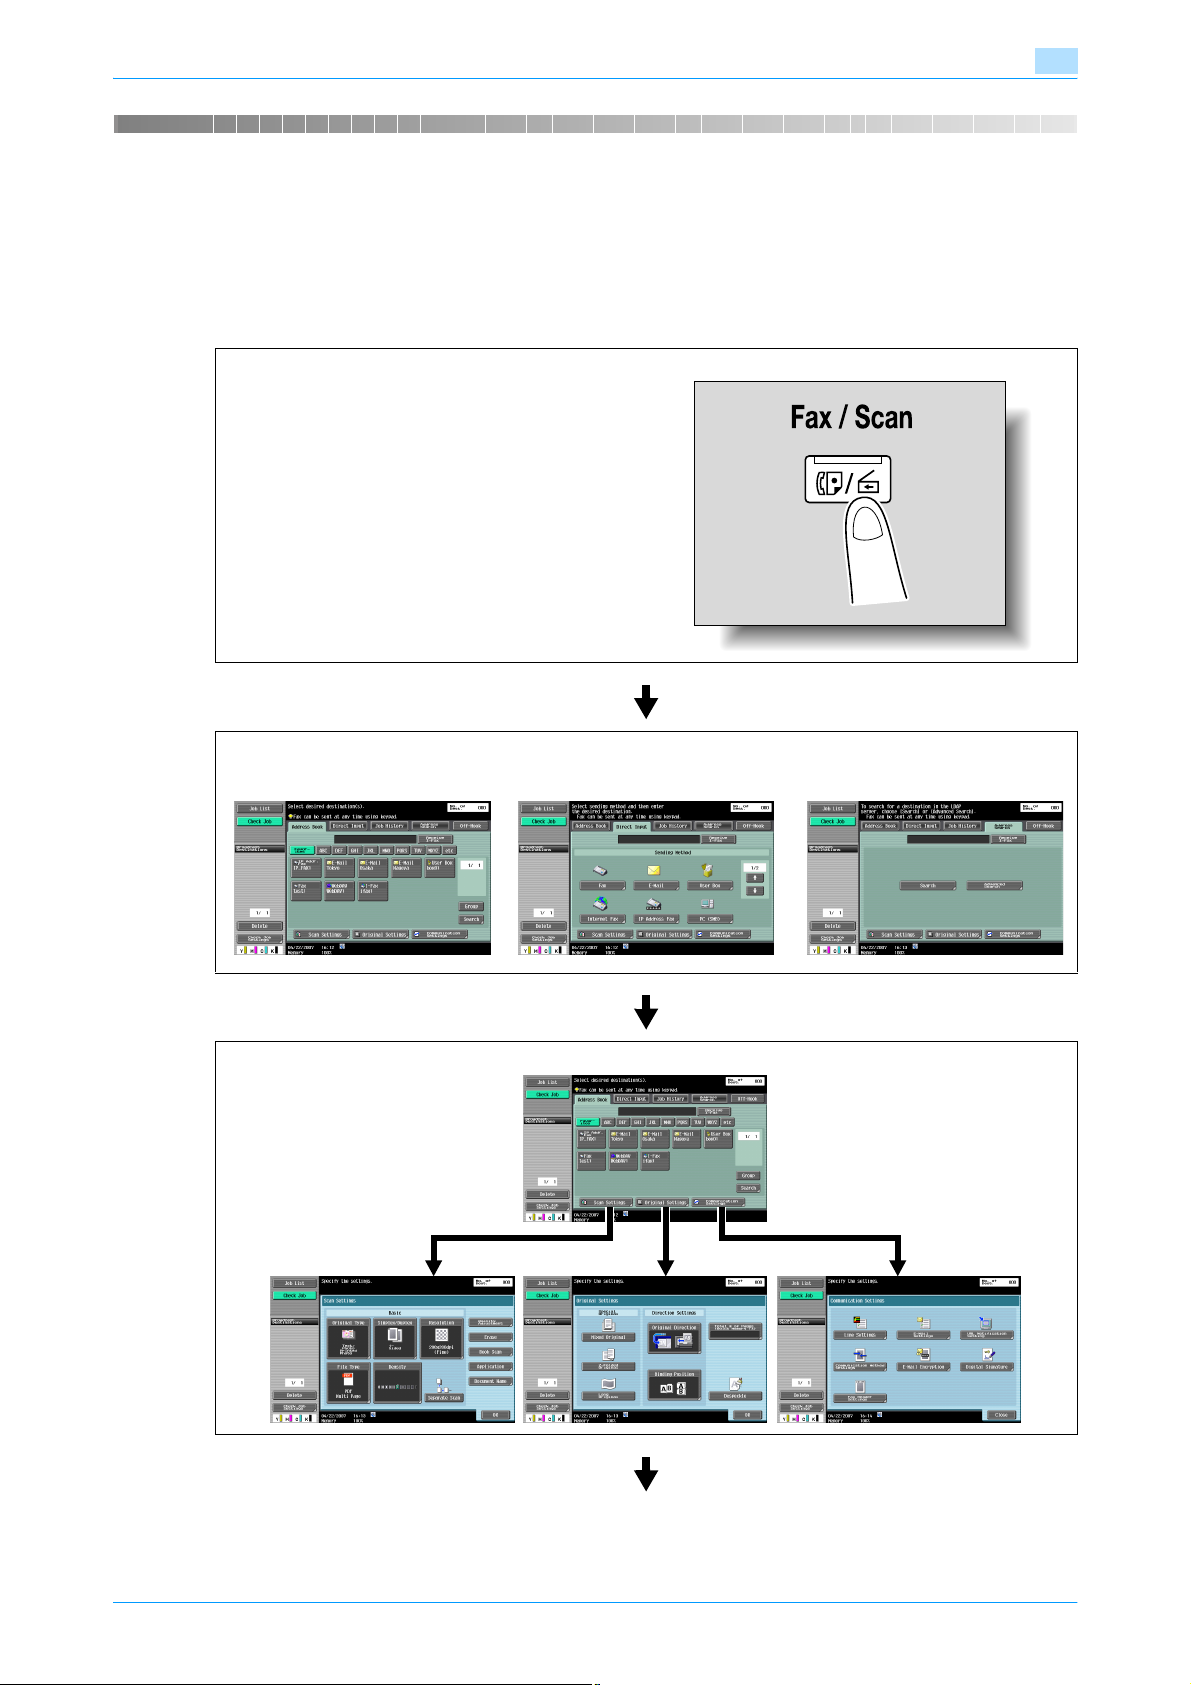
Transmitting data
4 Transmitting data
4.1 Operation flow
4.1.1 Scan/Network fax
This section describes the flow of steps for sending scanned data and using Internet fax operations.
Press the [Fax/Scan] key.
4
Specify a recipient.
On the Address Book tab (p. 4-23) On the Direct Input tab (p. 4-25) On the Address Search tab (p. 4-32)
Specify scan settings (p. 4-35), original settings (p. 4-59), and communication settings (p. 4-62).
C353/C253/C203 4-2
Page 57
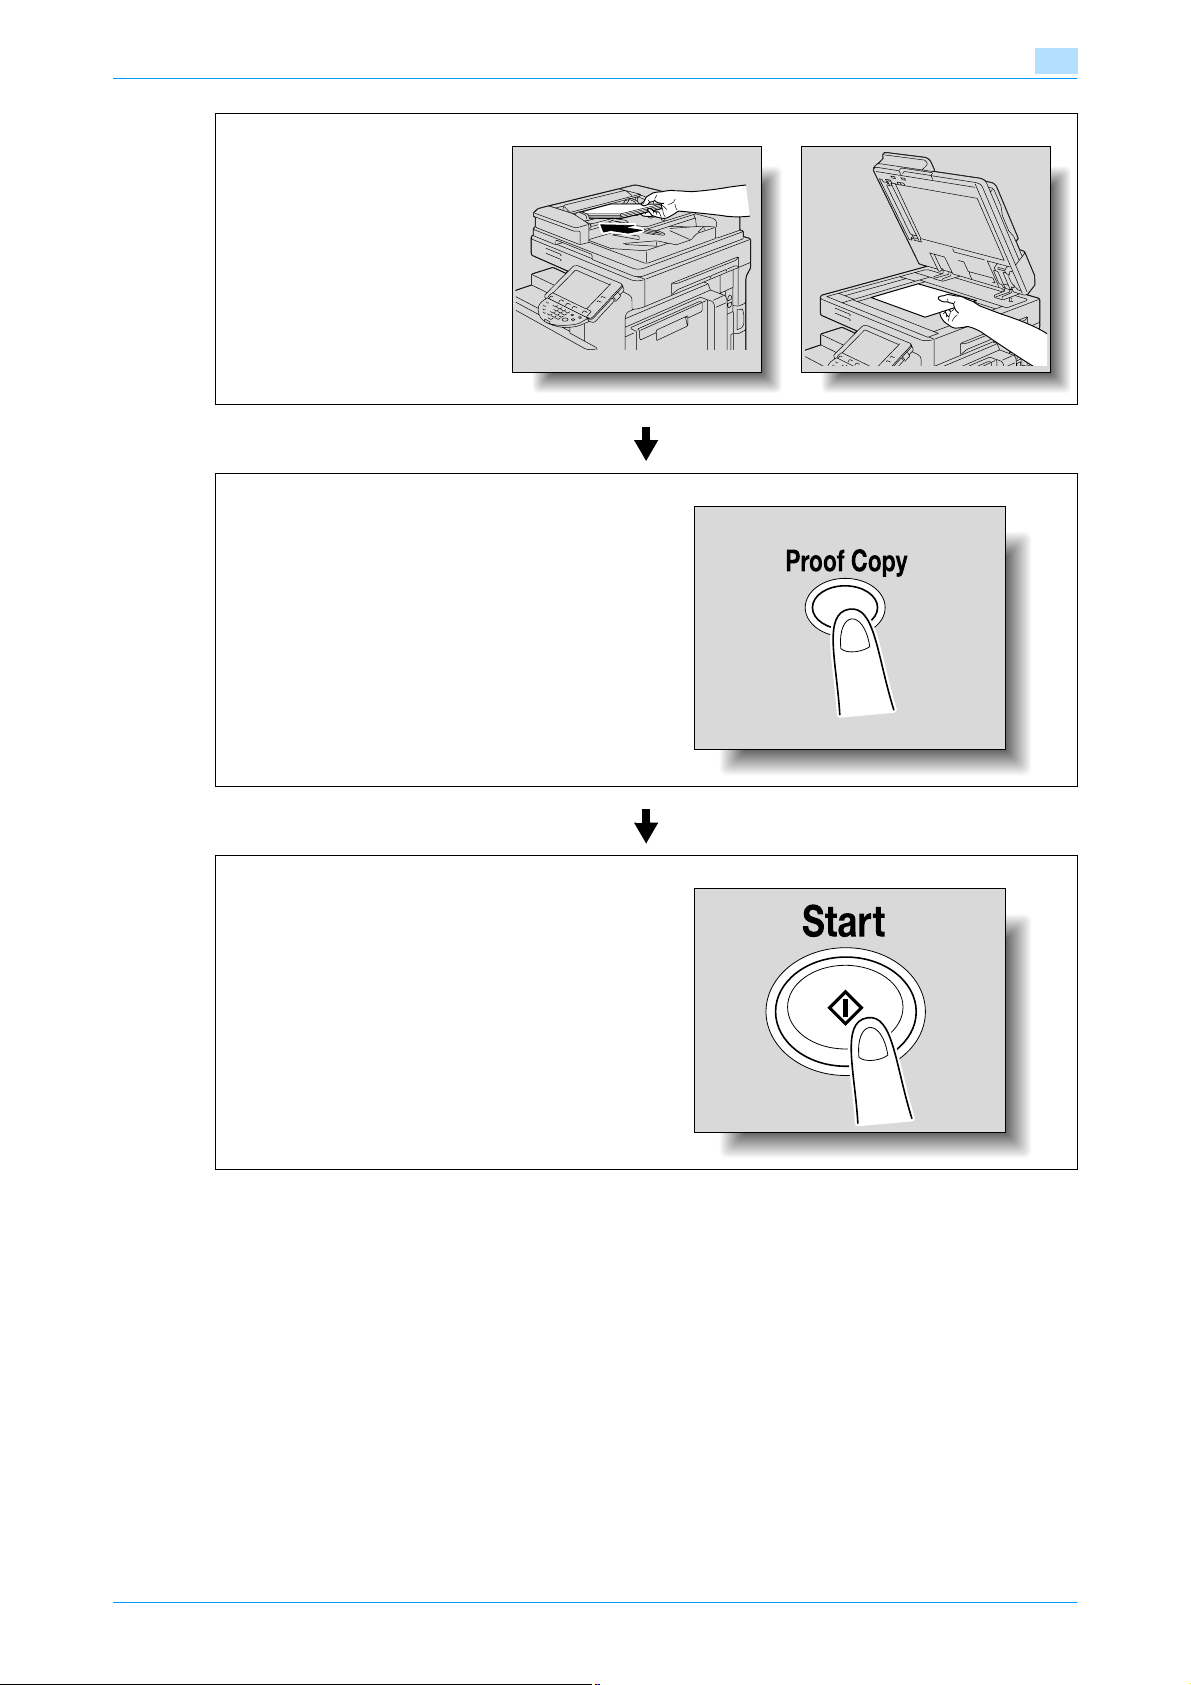
Transmitting data
Position the original.
To check the advance preview, press the [Proof Copy] key. (p. 4-11)
4
Press the [Start] key.
C353/C253/C203 4-3
Page 58
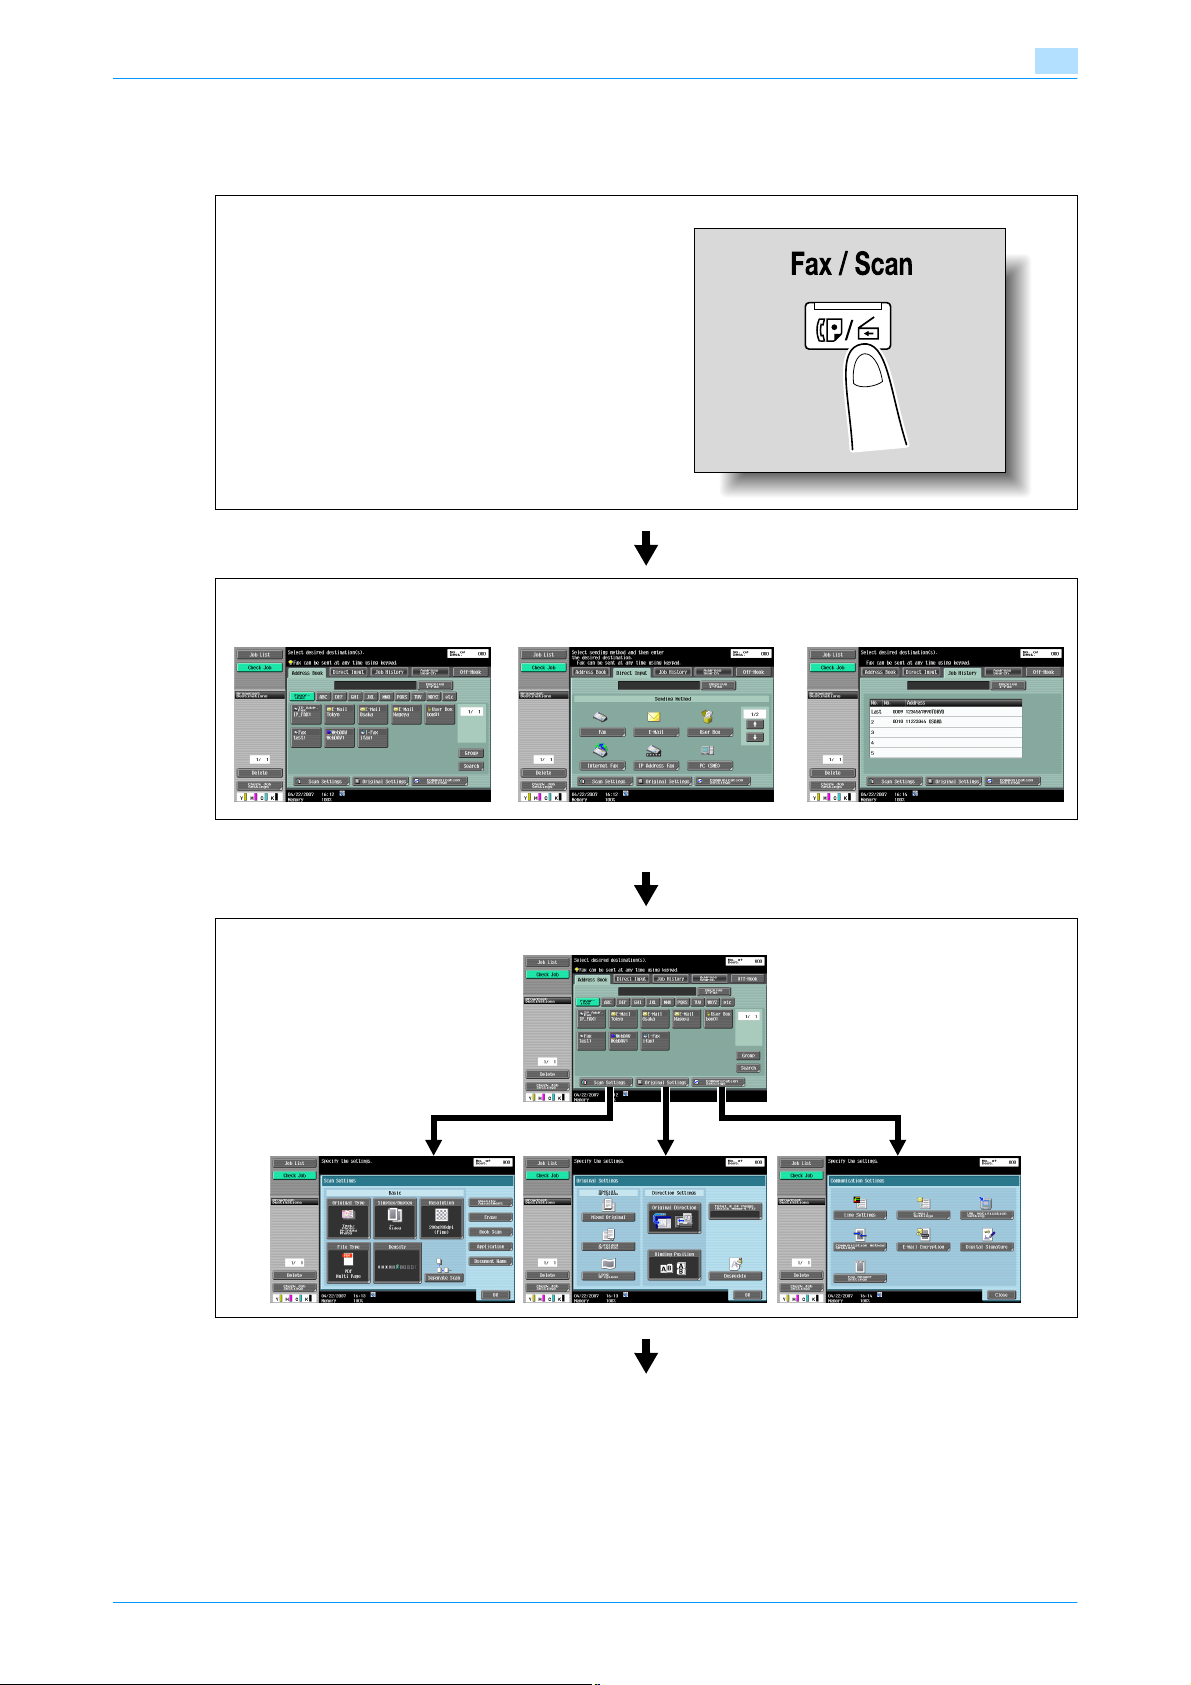
Transmitting data
4.1.2 Fax (G3)
This section describes the flow of steps for using G3 fax operations.
Press the [Fax/Scan] key.
Specify a recipient.
On the Address Book tab (p. 4-23) On the Direct Input tab (p. 4-25) On the Job History tab (p. 4-32)
4
Specify scan settings (p. 4-35), original settings (p. 4-59), and communication settings (p. 4-62).
C353/C253/C203 4-4
Page 59
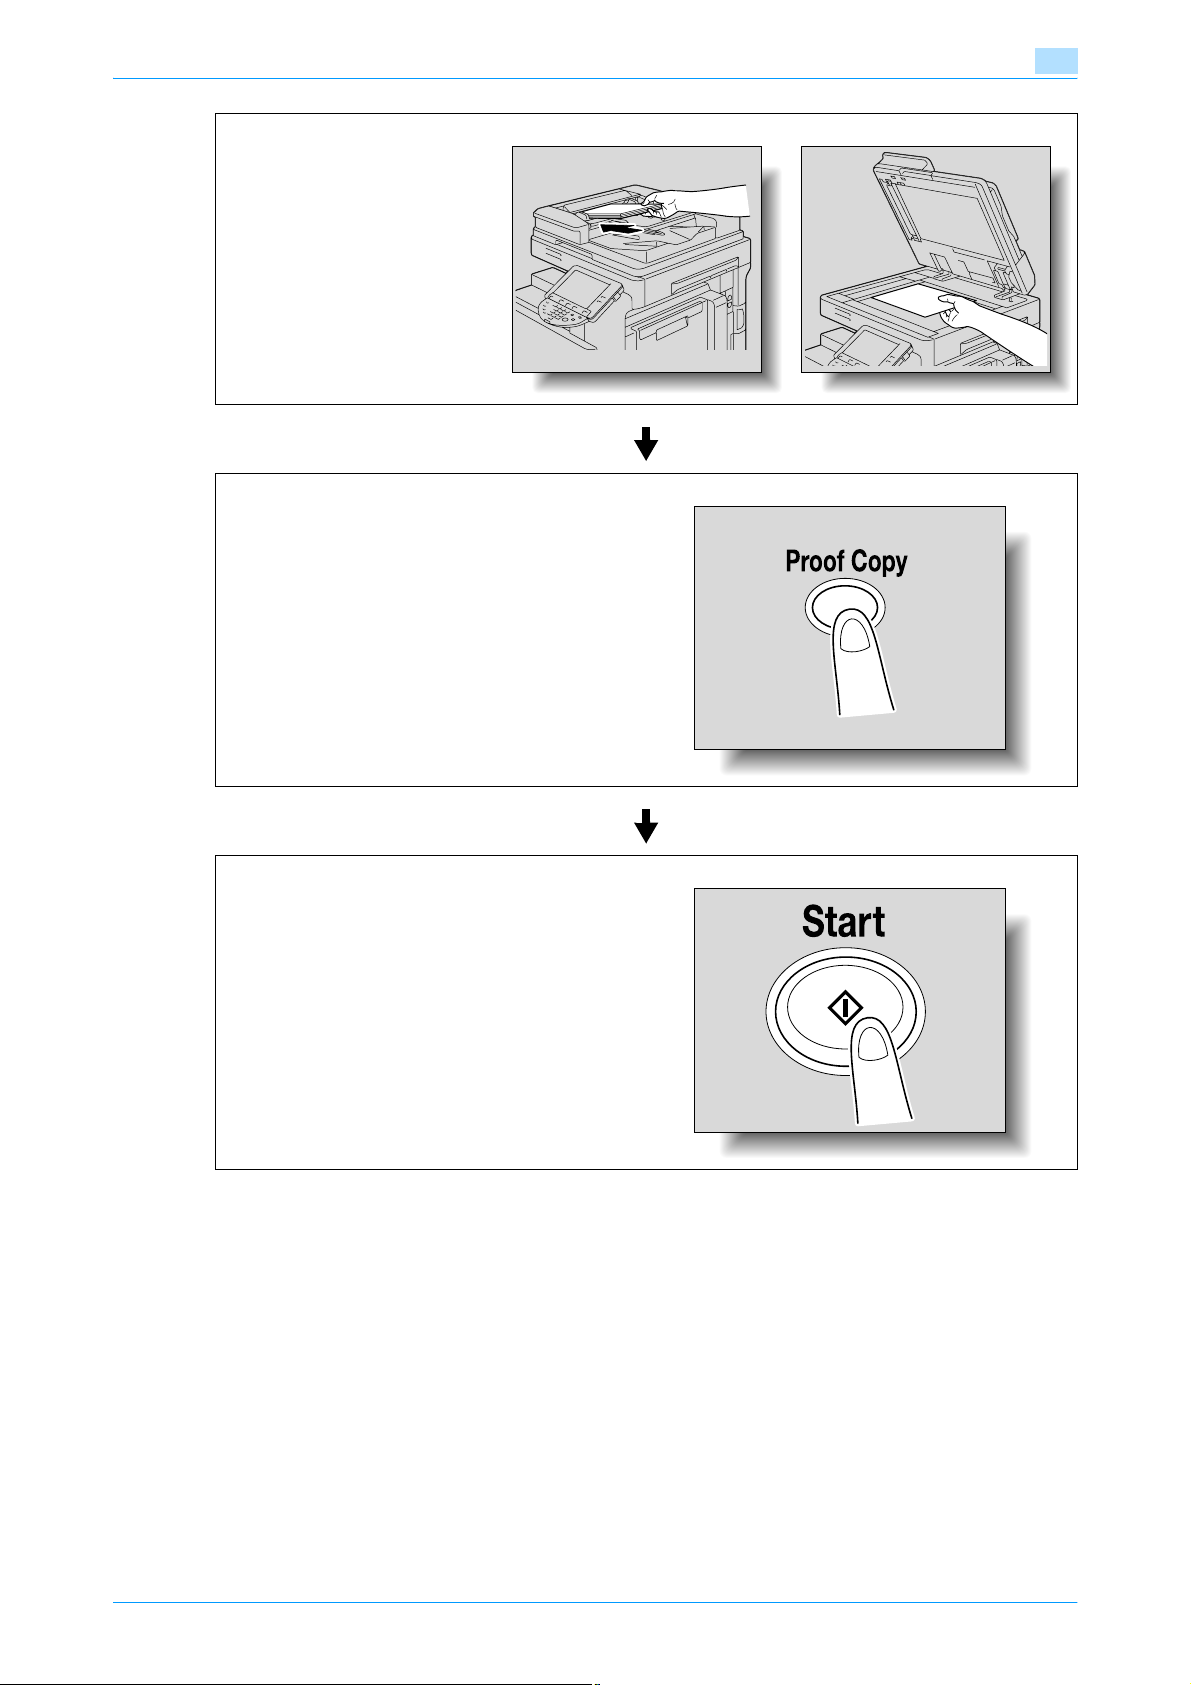
Transmitting data
Position the original.
To check the advance preview, press the [Proof Copy] key. (p. 4-11)
4
Press the [Start] key.
C353/C253/C203 4-5
Page 60
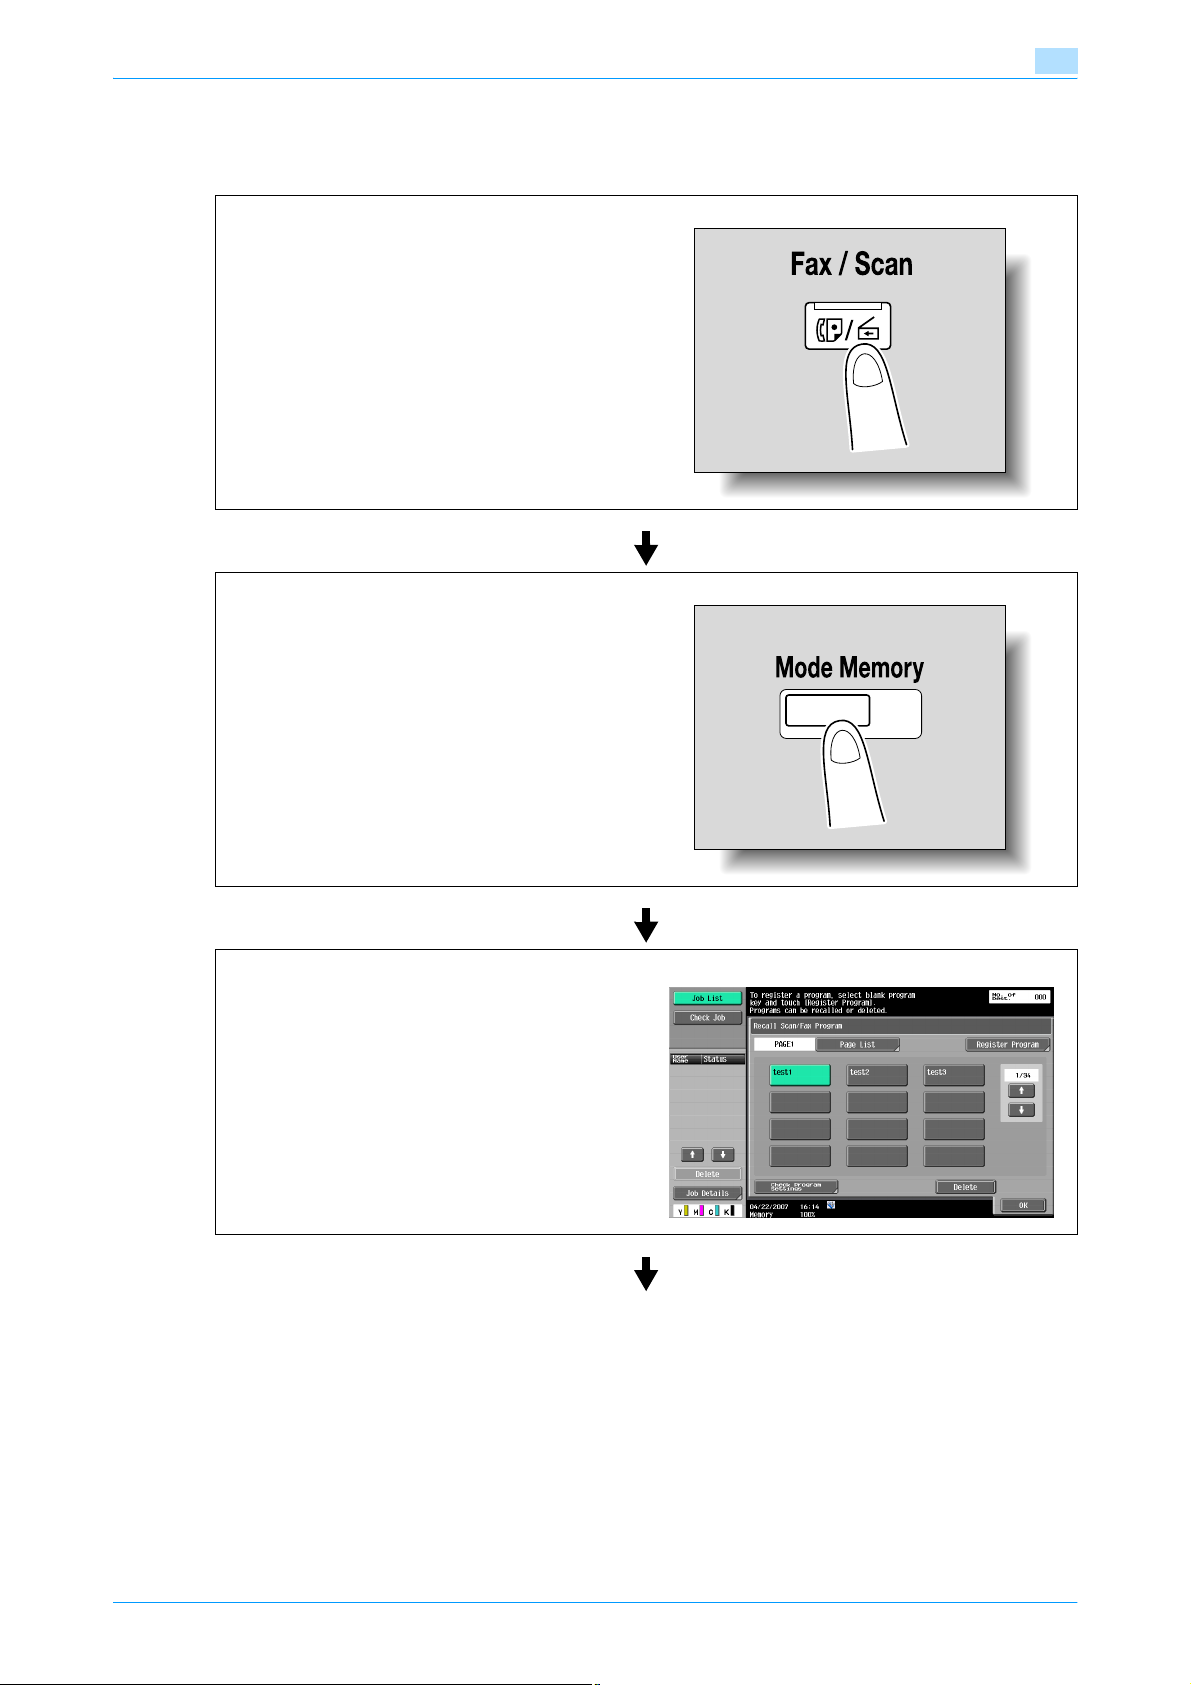
Transmitting data
4.1.3 Recalling a program
This section describes the flow of steps for recalling a registered fax/scan program.
Press the [Fax/Scan] key.
Press the [Mode Memory] key.
4
Select a program, and then touch [OK].
C353/C253/C203 4-6
Page 61
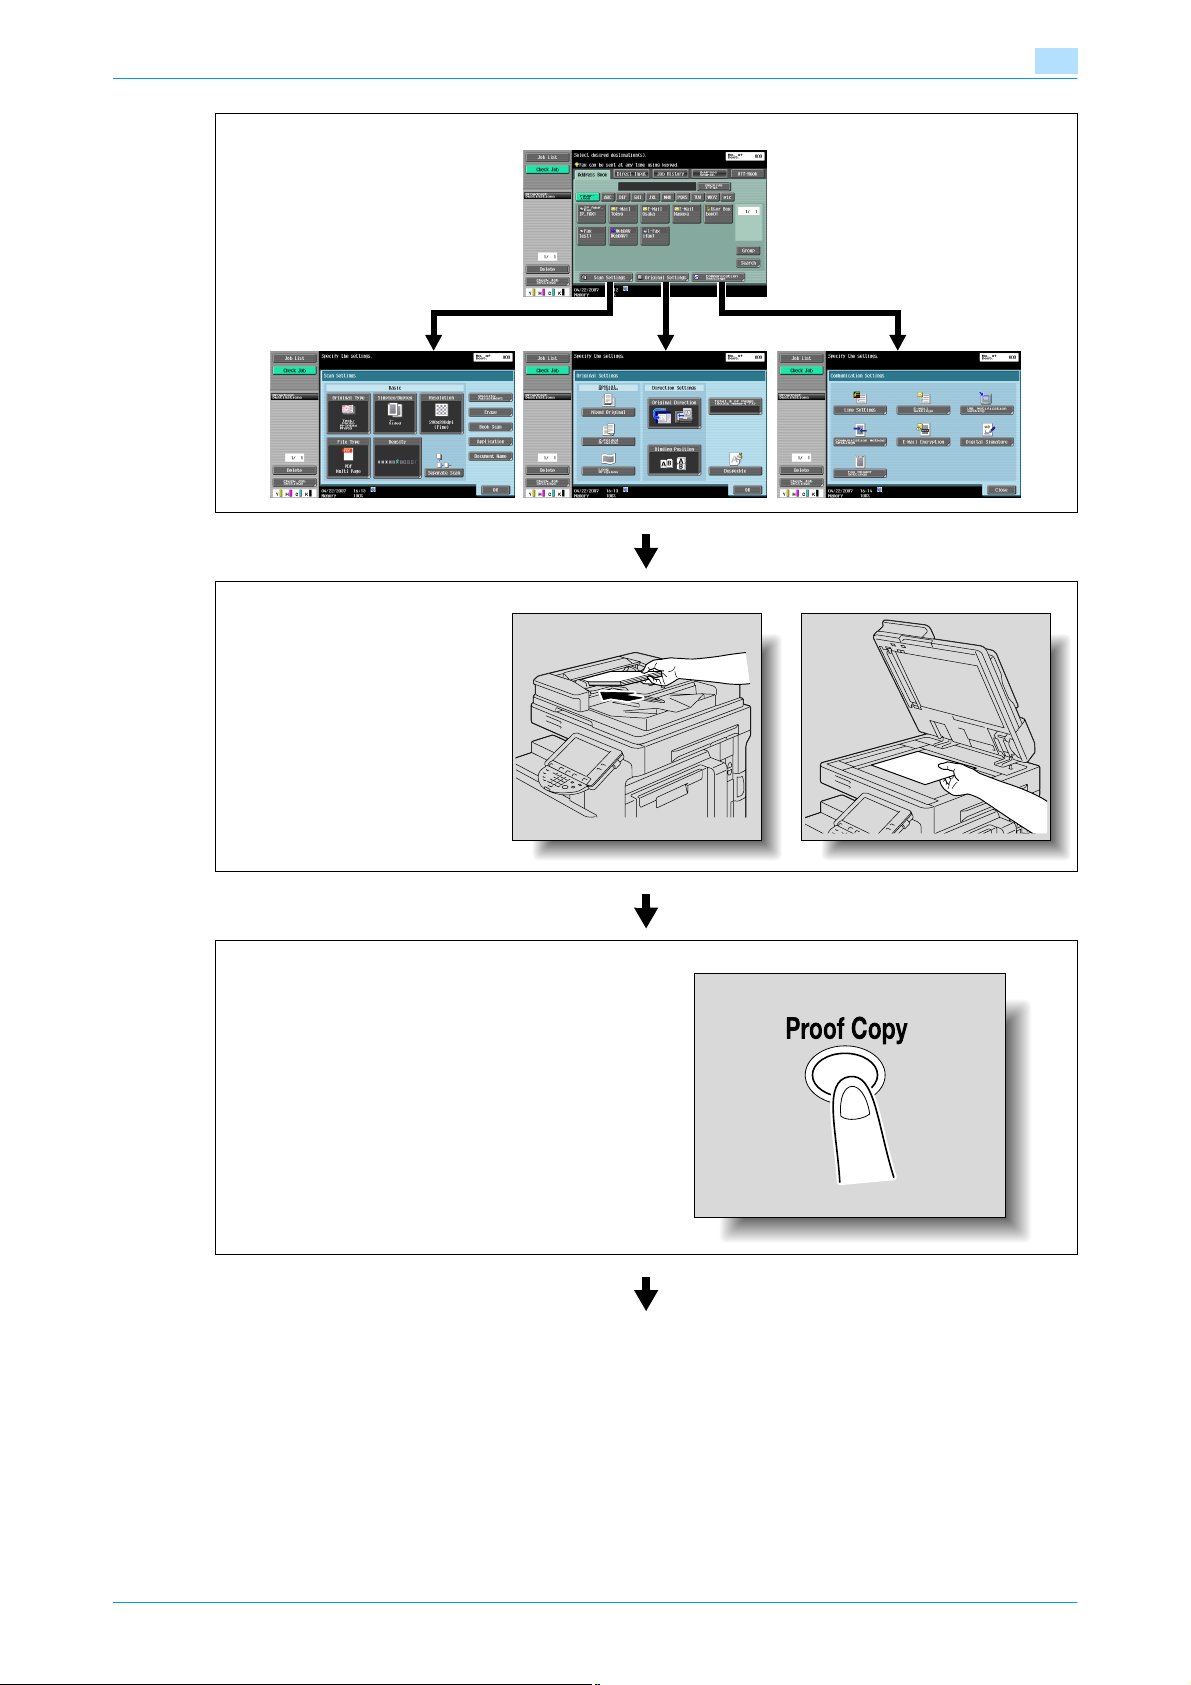
Transmitting data
Specify scan settings (p. 4-35), original settings (p. 4-59), and communication settings (p. 4-62).
Position the original.
4
To check the advance preview, press the [Proof Copy] key. (p. 4-11)
C353/C253/C203 4-7
Page 62

Transmitting data
Press the [Start] key.
2
4
Note
For details and the procedure of program registration, refer to "Register Scan/Fax Program" on
page 8-36.
C353/C253/C203 4-8
Page 63
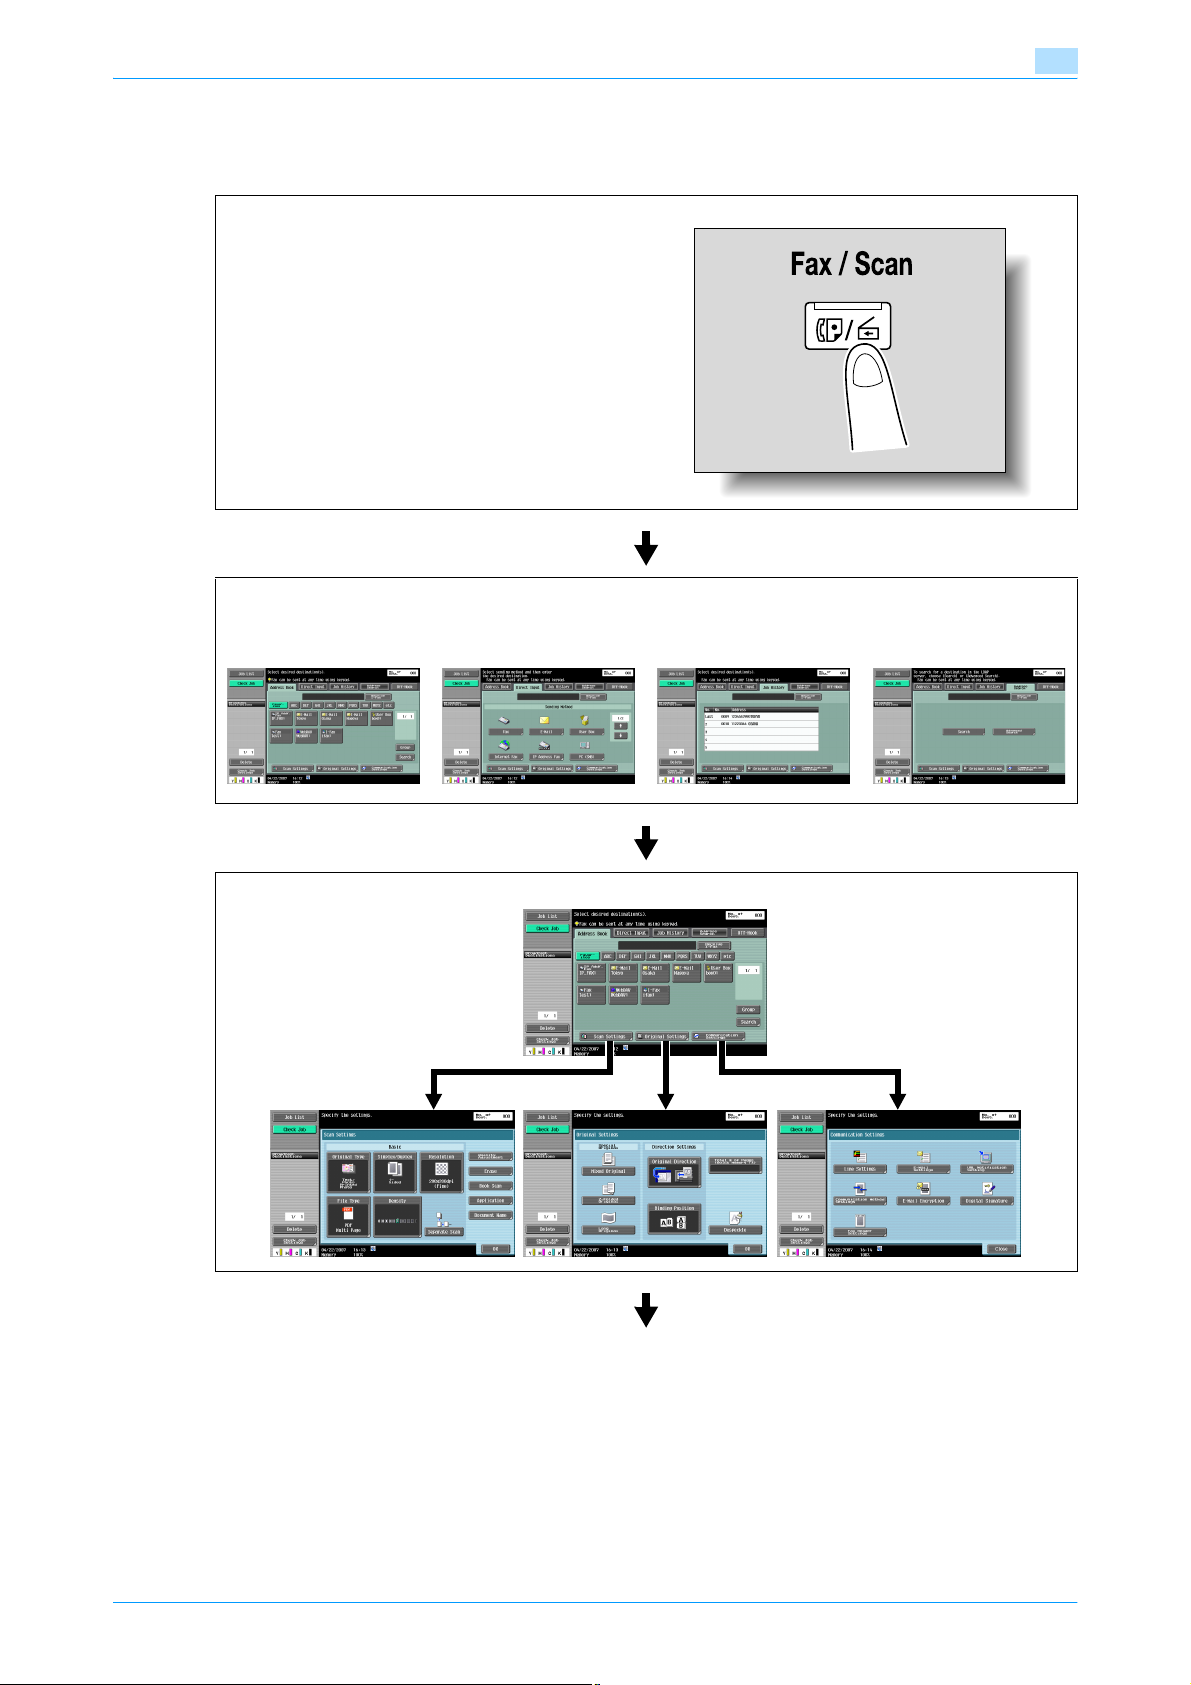
Transmitting data
4.1.4 Broadcasting
This section describes the procedure for transmitting data to multiple recipients at the same time.
Press the [Fax/Scan] key.
Specify two or more recipients.
On the Address Book tab
(p. 4-23)
On the Direct Input tab
(p. 4-25)
On the Job History tab
(p. 4-32)
4
On the Address Search
tab (p. 4-32)
Specify scan settings (p. 4-35), original settings (p. 4-59), and communication settings (p. 4-62).
C353/C253/C203 4-9
Page 64
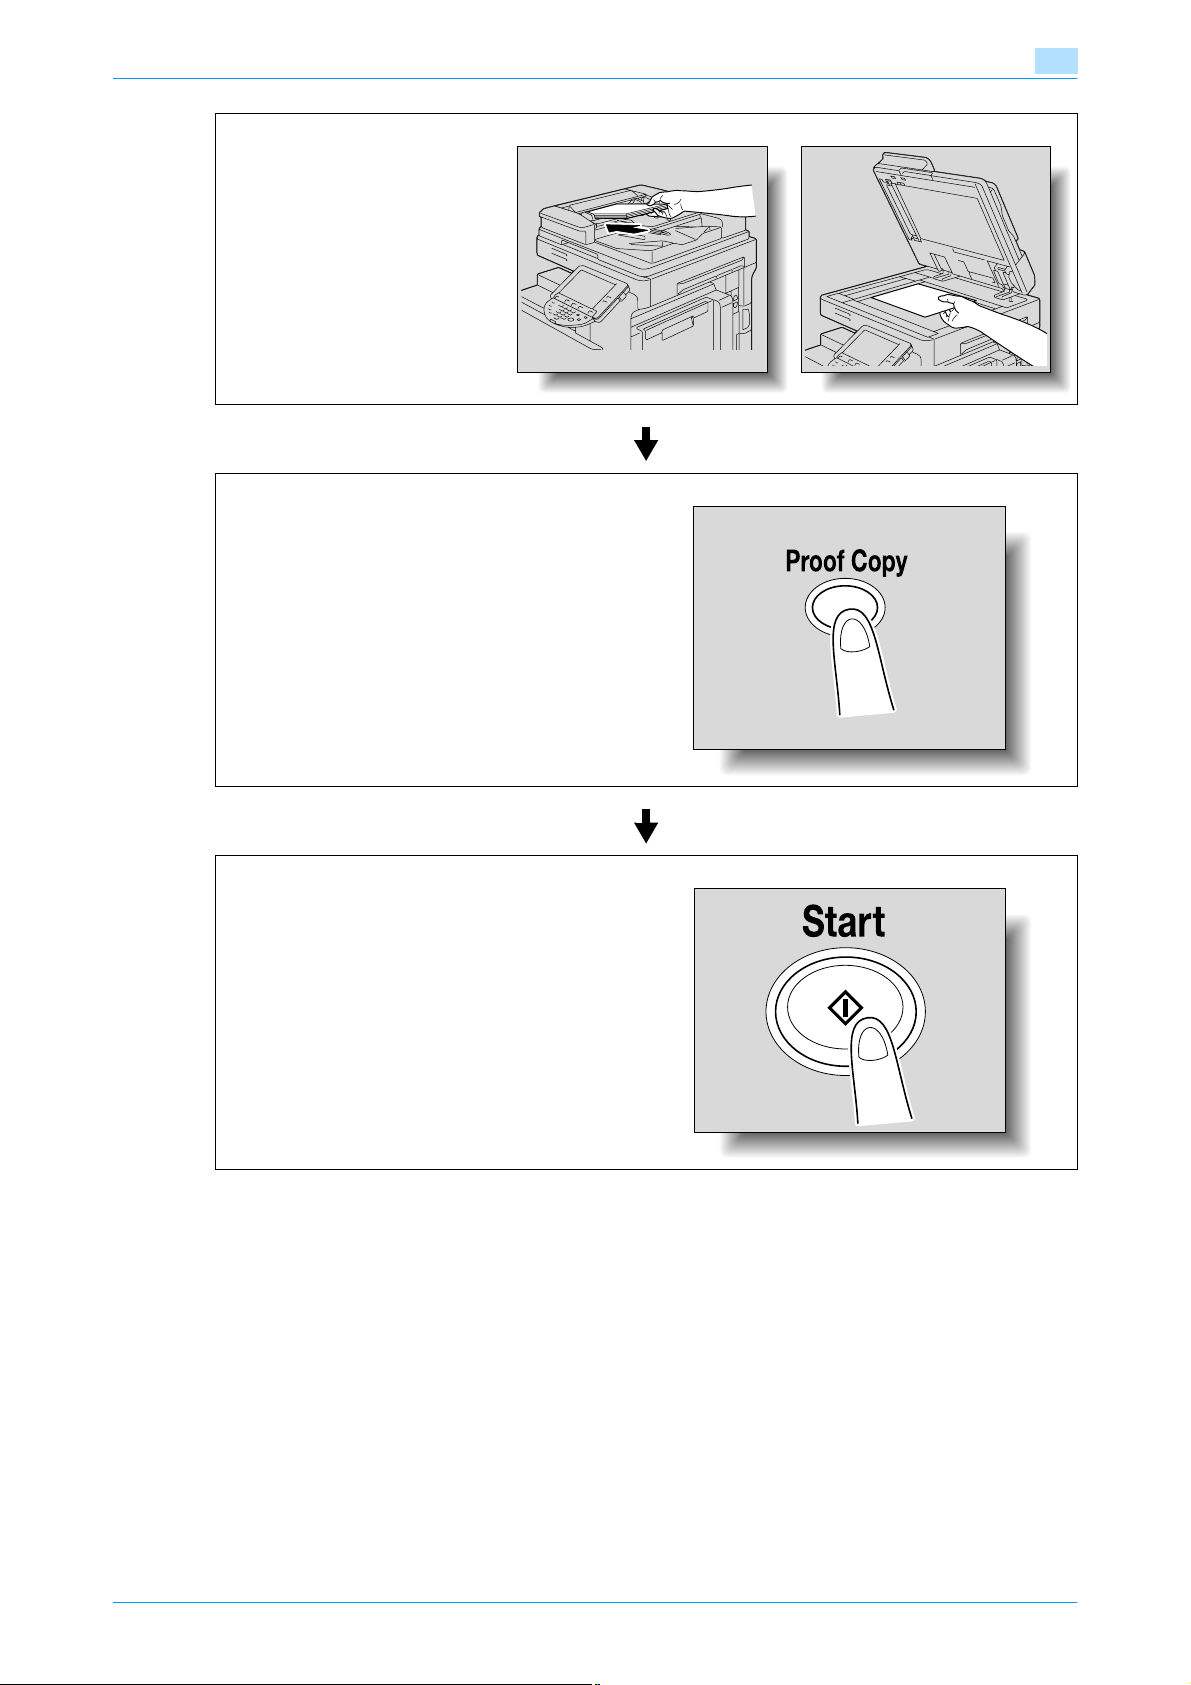
Transmitting data
Position the original.
To check the advance preview, press the [Proof Copy] key. (p. 4-11)
4
Press the [Start] key.
C353/C253/C203 4-10
Page 65
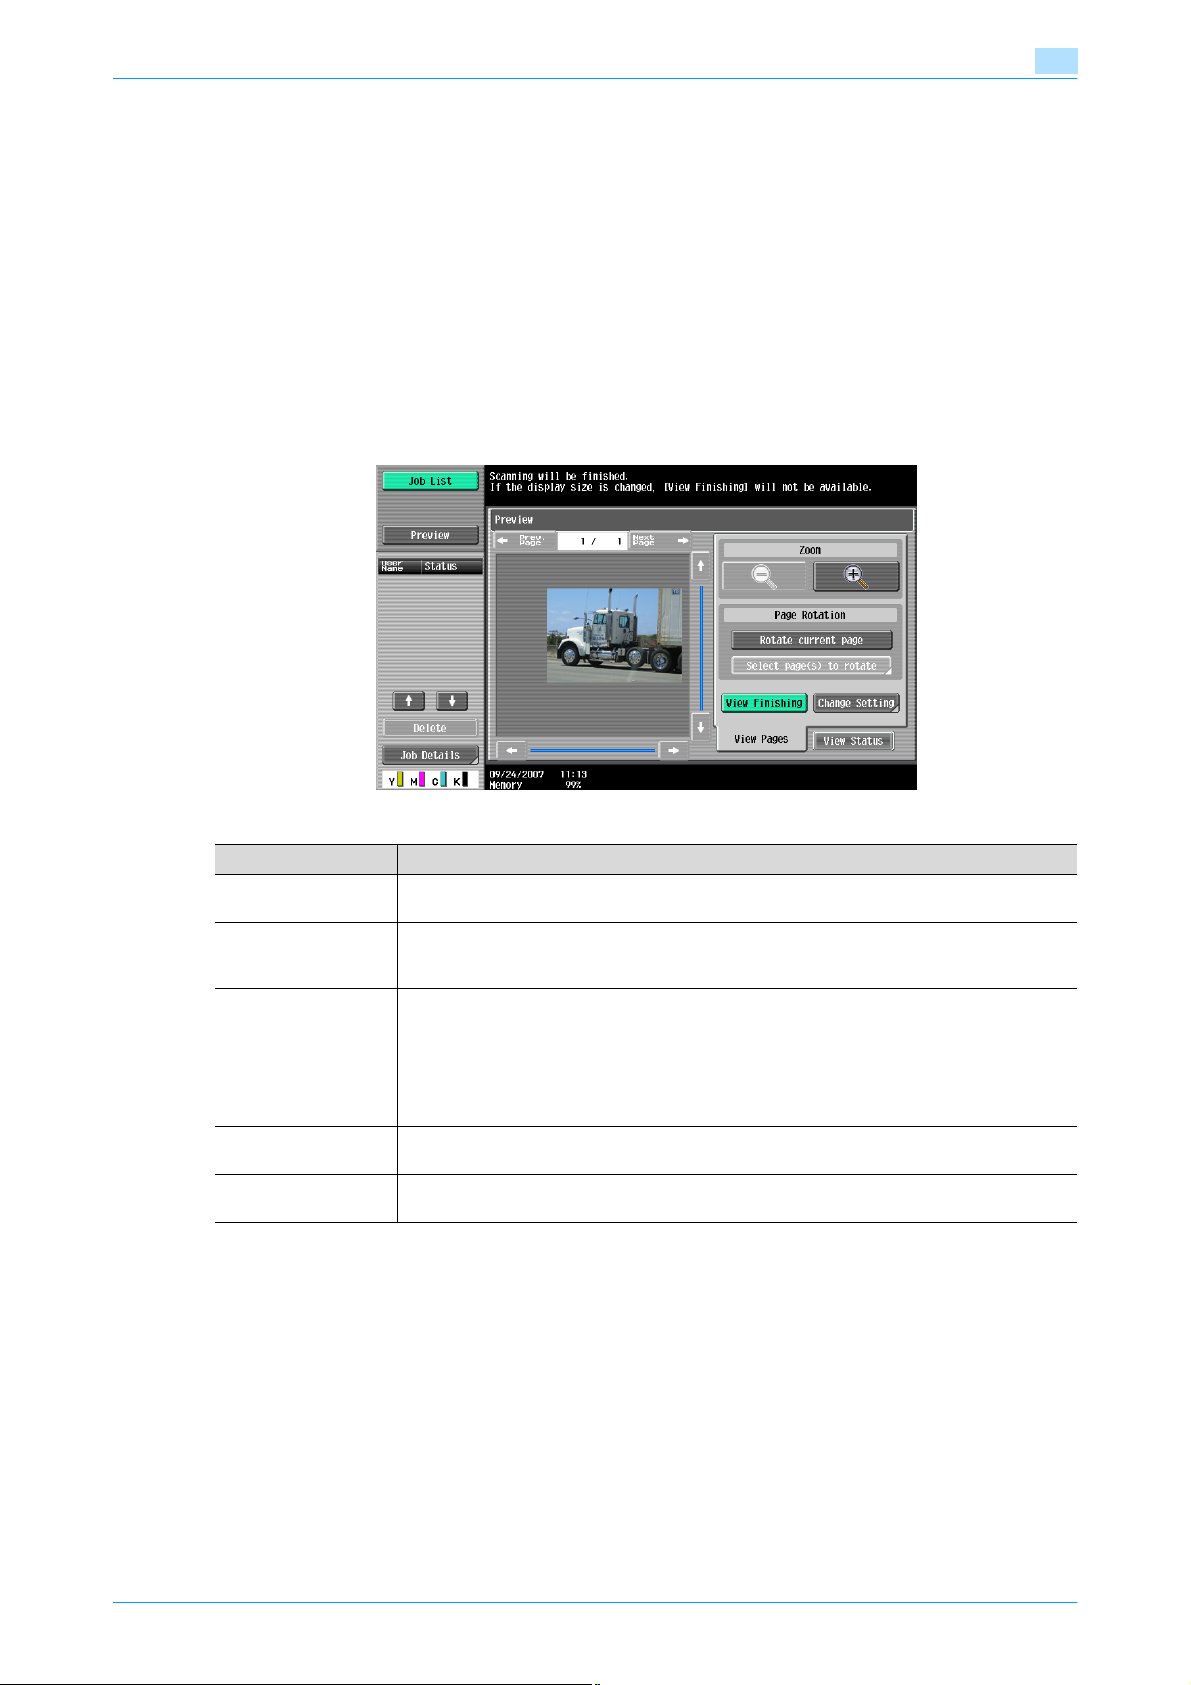
Transmitting data
4.2 Using Advanced Preview
By pressing the [Proof Copy] key after positioning the original for fax or scan transmission, the finishing status
can be previewed on the control panel. In the Preview screen, direction of the scanned original can be
checked and settings can be changed.
!
Detail
Documents encrypted and loaded cannot be previewed.
4.2.1 Preview screen
Preview - View Pages
Displays the scanned image.
4
Item Description
[Prev. Page]/[Next
Page]
Zoom The document can be viewed at full size or at a size of 2, 4 or 8 times the normal size. Select
Page Rotation [Rotate current page]: Touch this key to rotate the page currently displayed by 180 degrees.
[View Finishing] Touch this key to display the specified settings in the preview image by icons and text. When
[Change Setting] Some of the settings specified before scanning the original can be changed. For details, refer
If stored document contains multiple pages, touch [Prev. Page]/[Next Page] to move to the
previous/next page on the preview image.
the display size, and use the scroll bars in the right end and bottom end of the image to view
the desired section of the image.
[Select page(s) to rotate]: This key appears when the stored document contains multiple pages. List of scanned pages appears. Select the desired page to rotate by 180 degrees. The
rotation options in the list of scanned page are as follows:
[Select Odd]: Rotates the images for odd number of pages by 180 degrees.
[Select Even]: Rotates the images for even number of pages by 180 degrees.
[Select All]: Rotates the images for all of pages by 180 degrees.
[View Finishing] is cancelled, the only image is displayed without icons or text.
to"Preview - View Pages - Change Setting" on page 4-12.
!
Detail
When selecting on the page directly, the image of the selected page is rotated by 180 degrees.
C353/C253/C203 4-11
Page 66
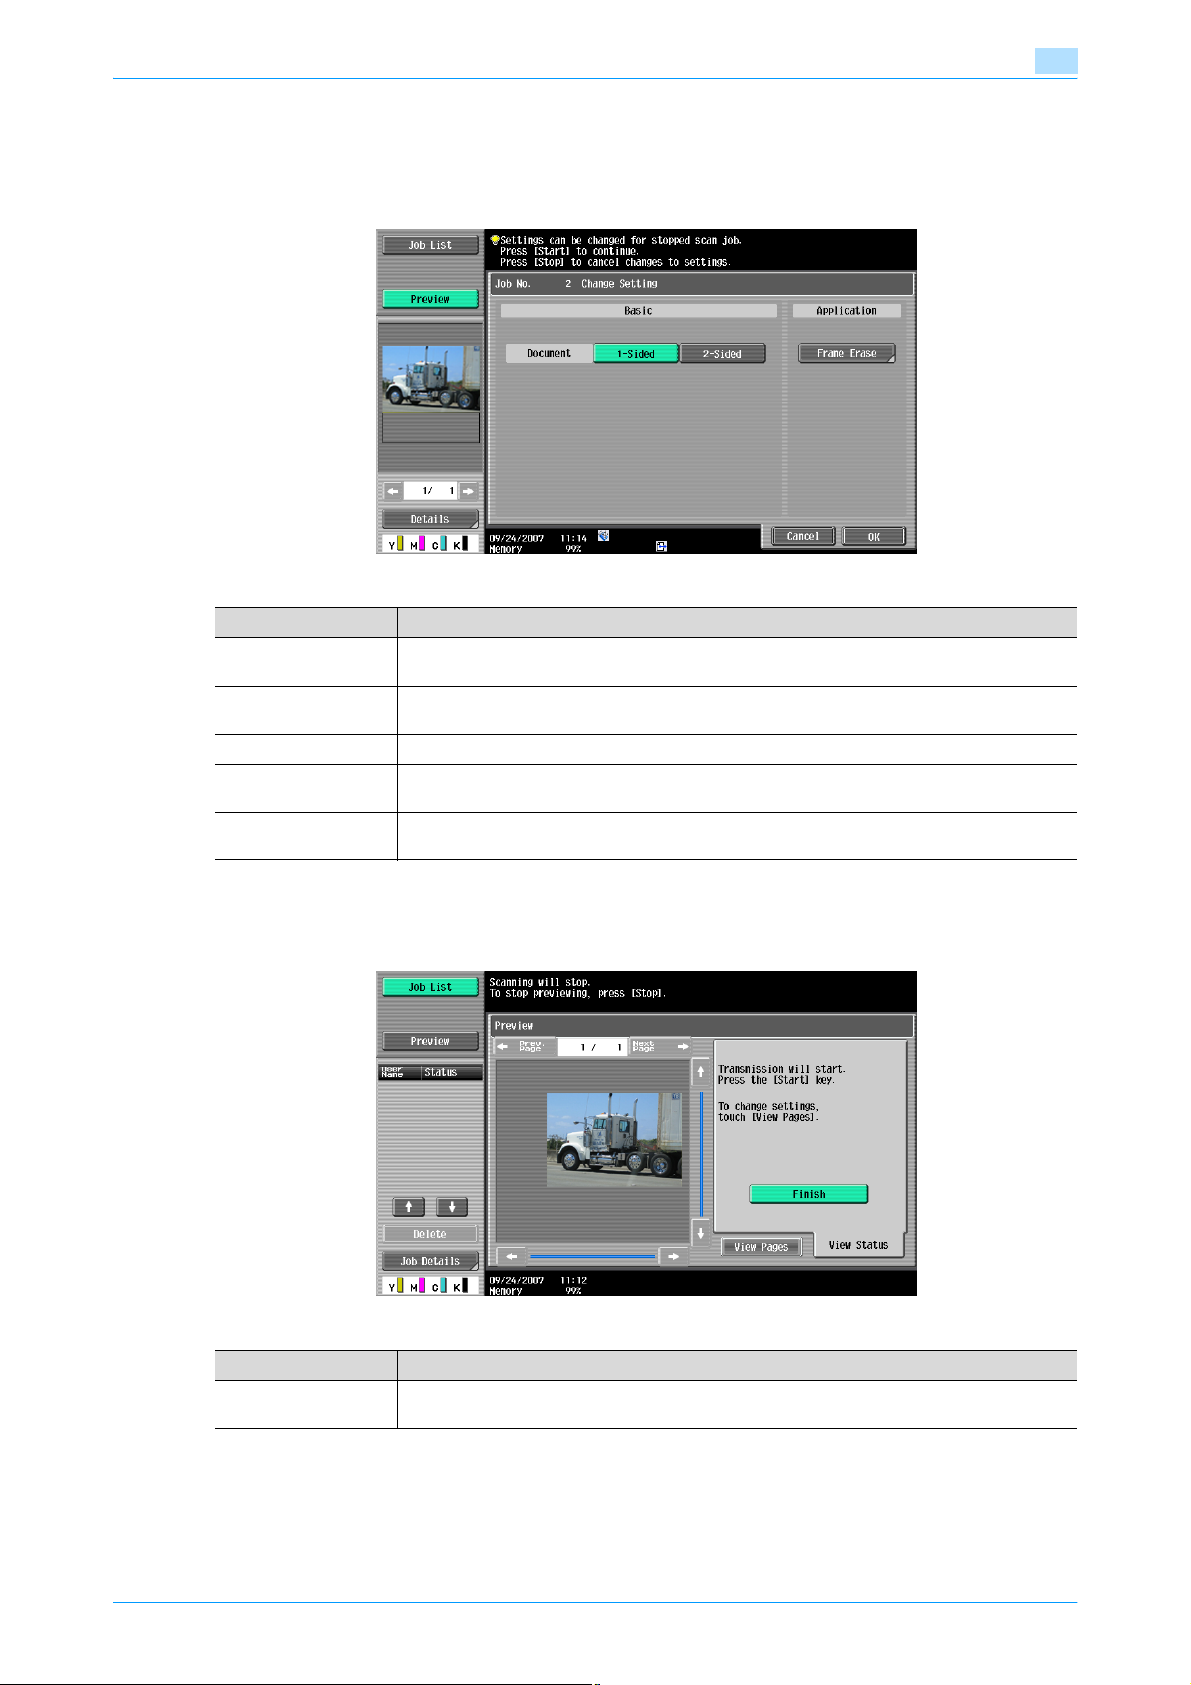
Transmitting data
Preview - View Pages - Change Setting
The following settings specified before scanning the original can be changed.
The new settings are applied to the originals scanned after the change of setting.
Item Description
Basic - Document Select either 1-sided or 2-sided. If the "Cover + 2-Sided" is specified, [Cover + 2-Sided] also
Basic - Binding Position
Basic - Original Size This item can be selected when "Mixed Original" is specified.
Application - Frame
Erase
Application - Center
Erase
4
appears.
This item can be selected when the destination of "E-Mail", "User Box", "FTP", "SMB" or
"WebDAV" is specified and "Book Copy" is not selected.
Specify settings for the "Frame Erase" function.
When [Center Erase] appears and is able to be selected, Center Erase can be specified.
Preview - View Status
Select whether or not to continue scanning.
Item Description
[Finish] To continue scanning after the currently displayed original, make sure that [Finish] is not se-
lected.
C353/C253/C203 4-12
Page 67
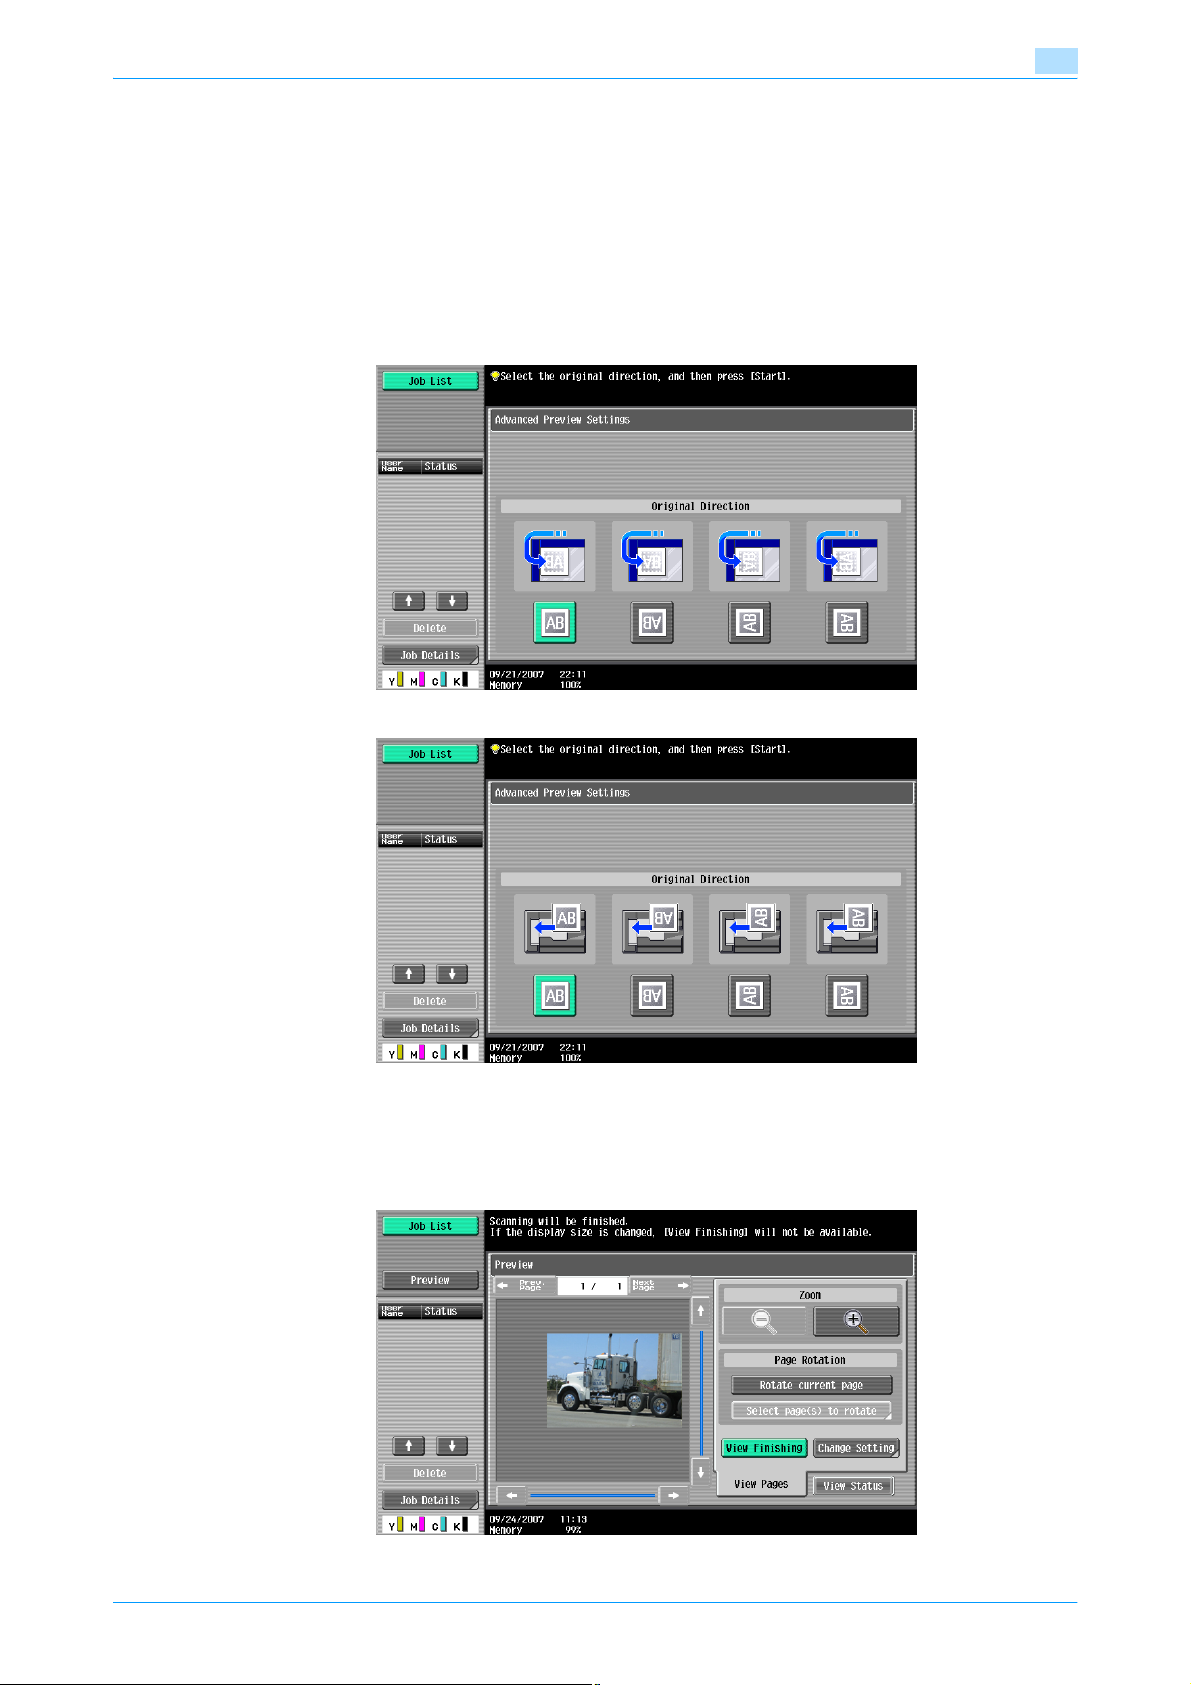
Transmitting data
4.2.2 Sending using Advanced Preview
Operation procedure after positioning the original is described below. For details on fax and scan
transmission procedure, refer to "Operation flow" on page 4-2.
1 Position the document to be copied.
2 Press the [Proof Copy] key.
3 Select the original direction.
– When the original is placed on the original glass:
4
– When the original is loaded into the ADF:
4 Press the [Start] key.
The original is scanned, and the Preview screen appears.
5 Check the preview image, and rotate the image or change settings if necessary.
C353/C253/C203 4-13
Page 68
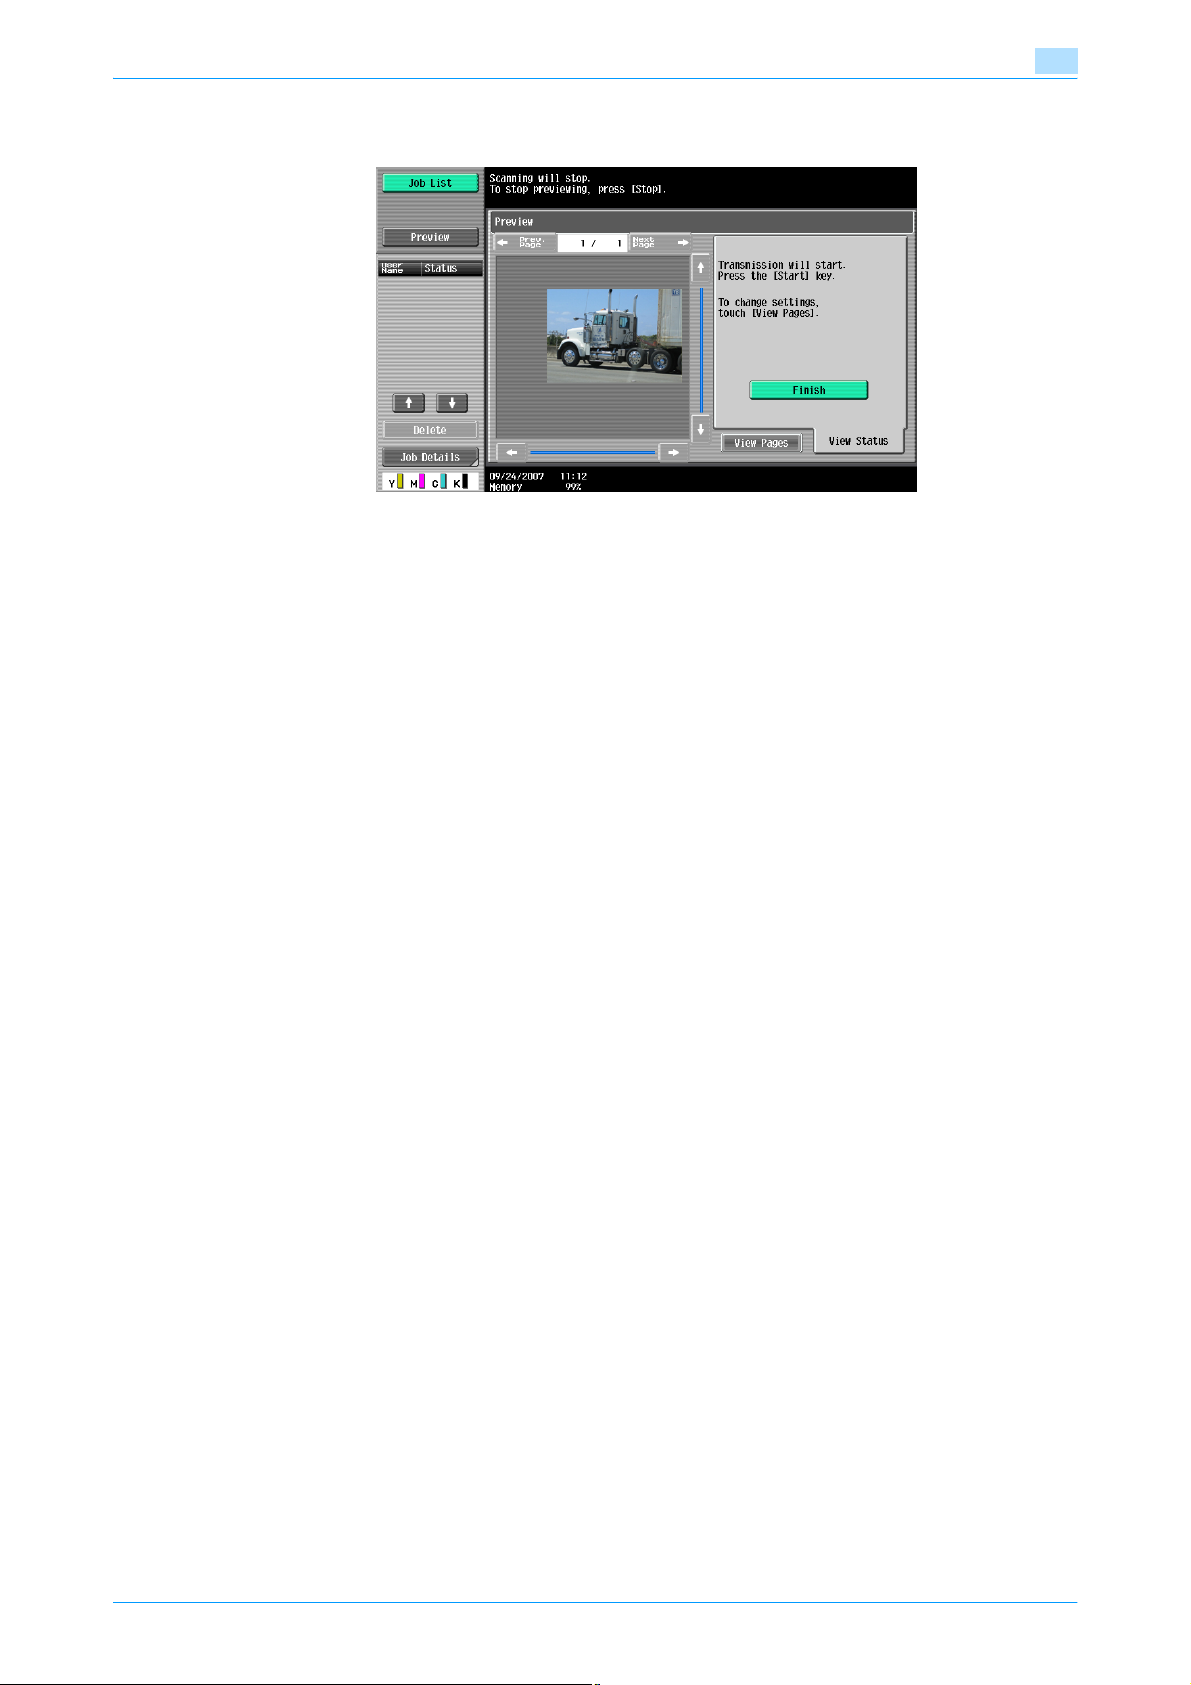
Transmitting data
6 Press the [Start] key.
4
– To continue to scan more originals, touch the View Status tab, clear the selection of [Finish], and
position the next original.
Sending starts.
C353/C253/C203 4-14
Page 69
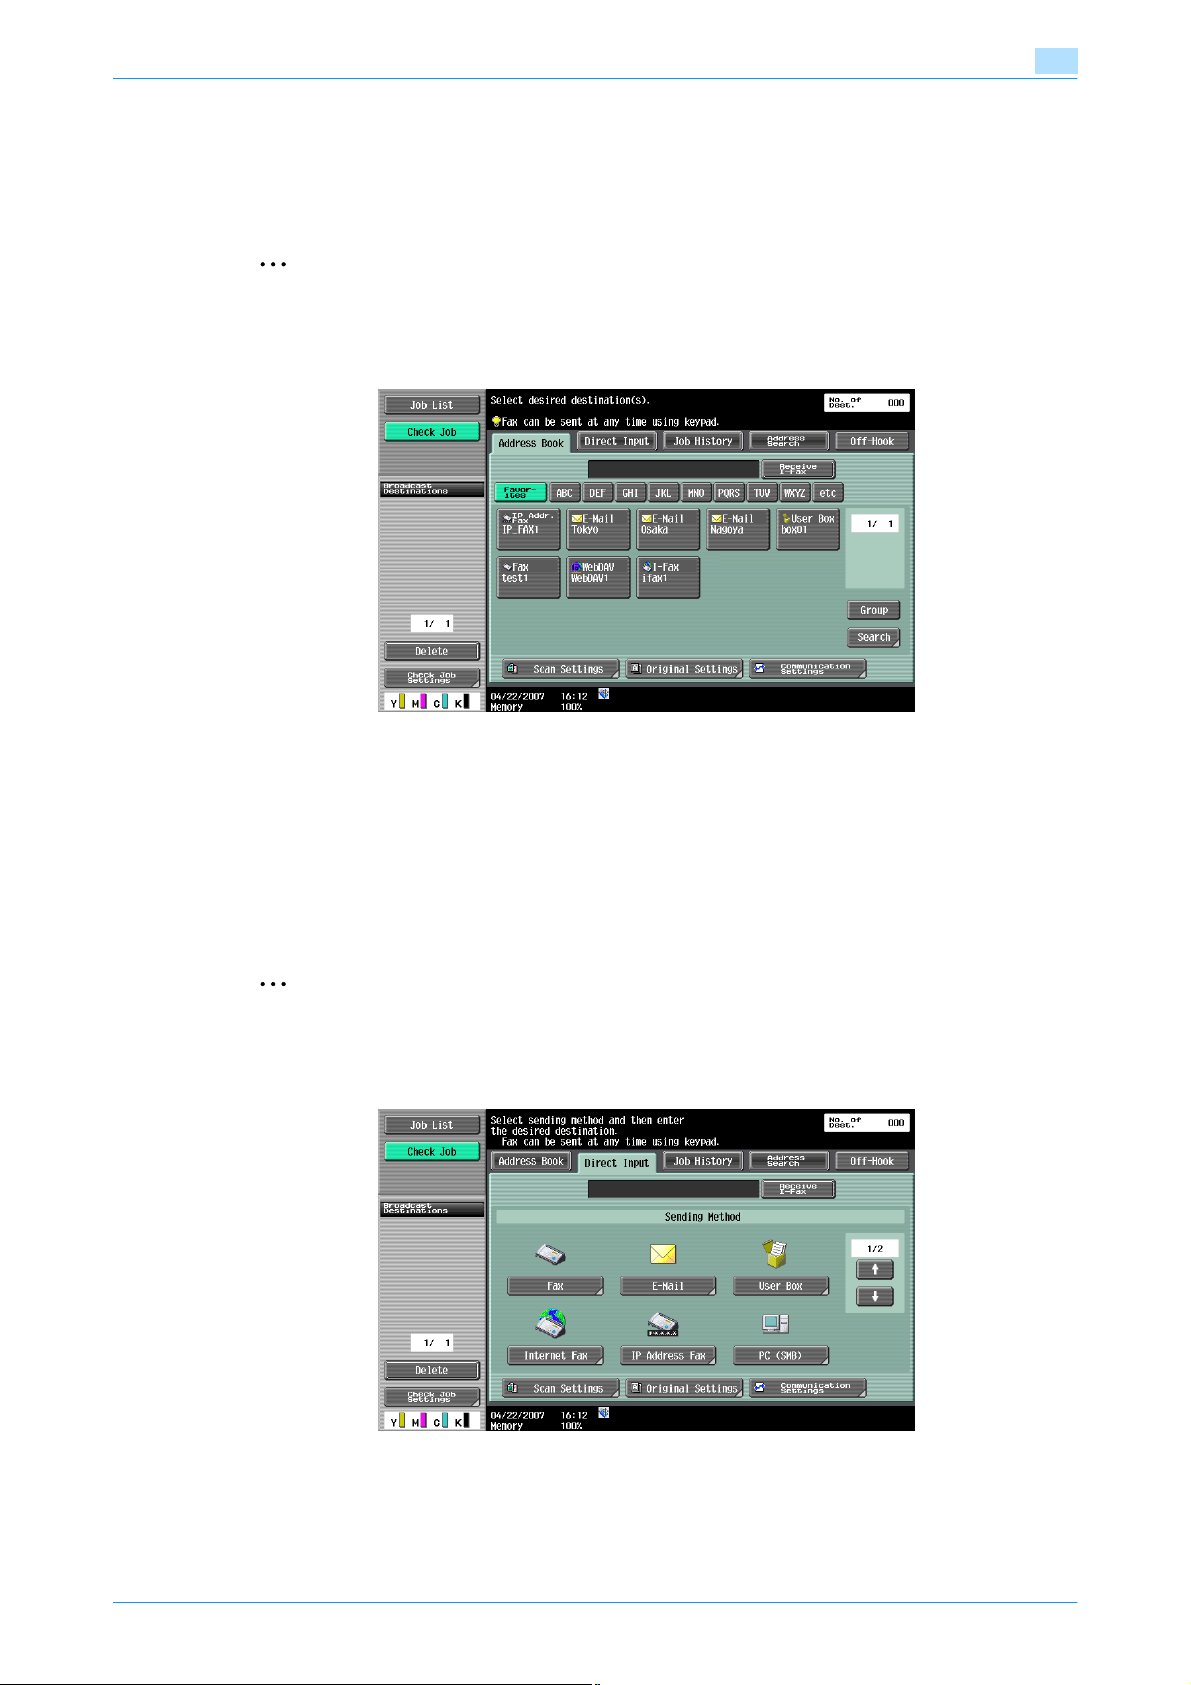
Transmitting data
4.3 Menu tree in Fax/Scan mode
The functions and settings that can be operated in Fax/Scan mode are structured as shown below.
Address Book tab
2
Note
For details, refer to "Address Book" on page 4-23.
Operations available on the Address Book tab are as follows:
4
Search (p. 4-23)
Scan Settings (p. 4-35)
Original Settings (p. 4-59)
Communication Settings (p. 4-62)
Direct Input tab
2
Note
For details, refer to "Direct Input" on page 4-25.
Operations available on the Direct Input tab are as follows:
Fax (p. 4-26)
E-Mail (p. 4-26)
C353/C253/C203 4-15
Page 70
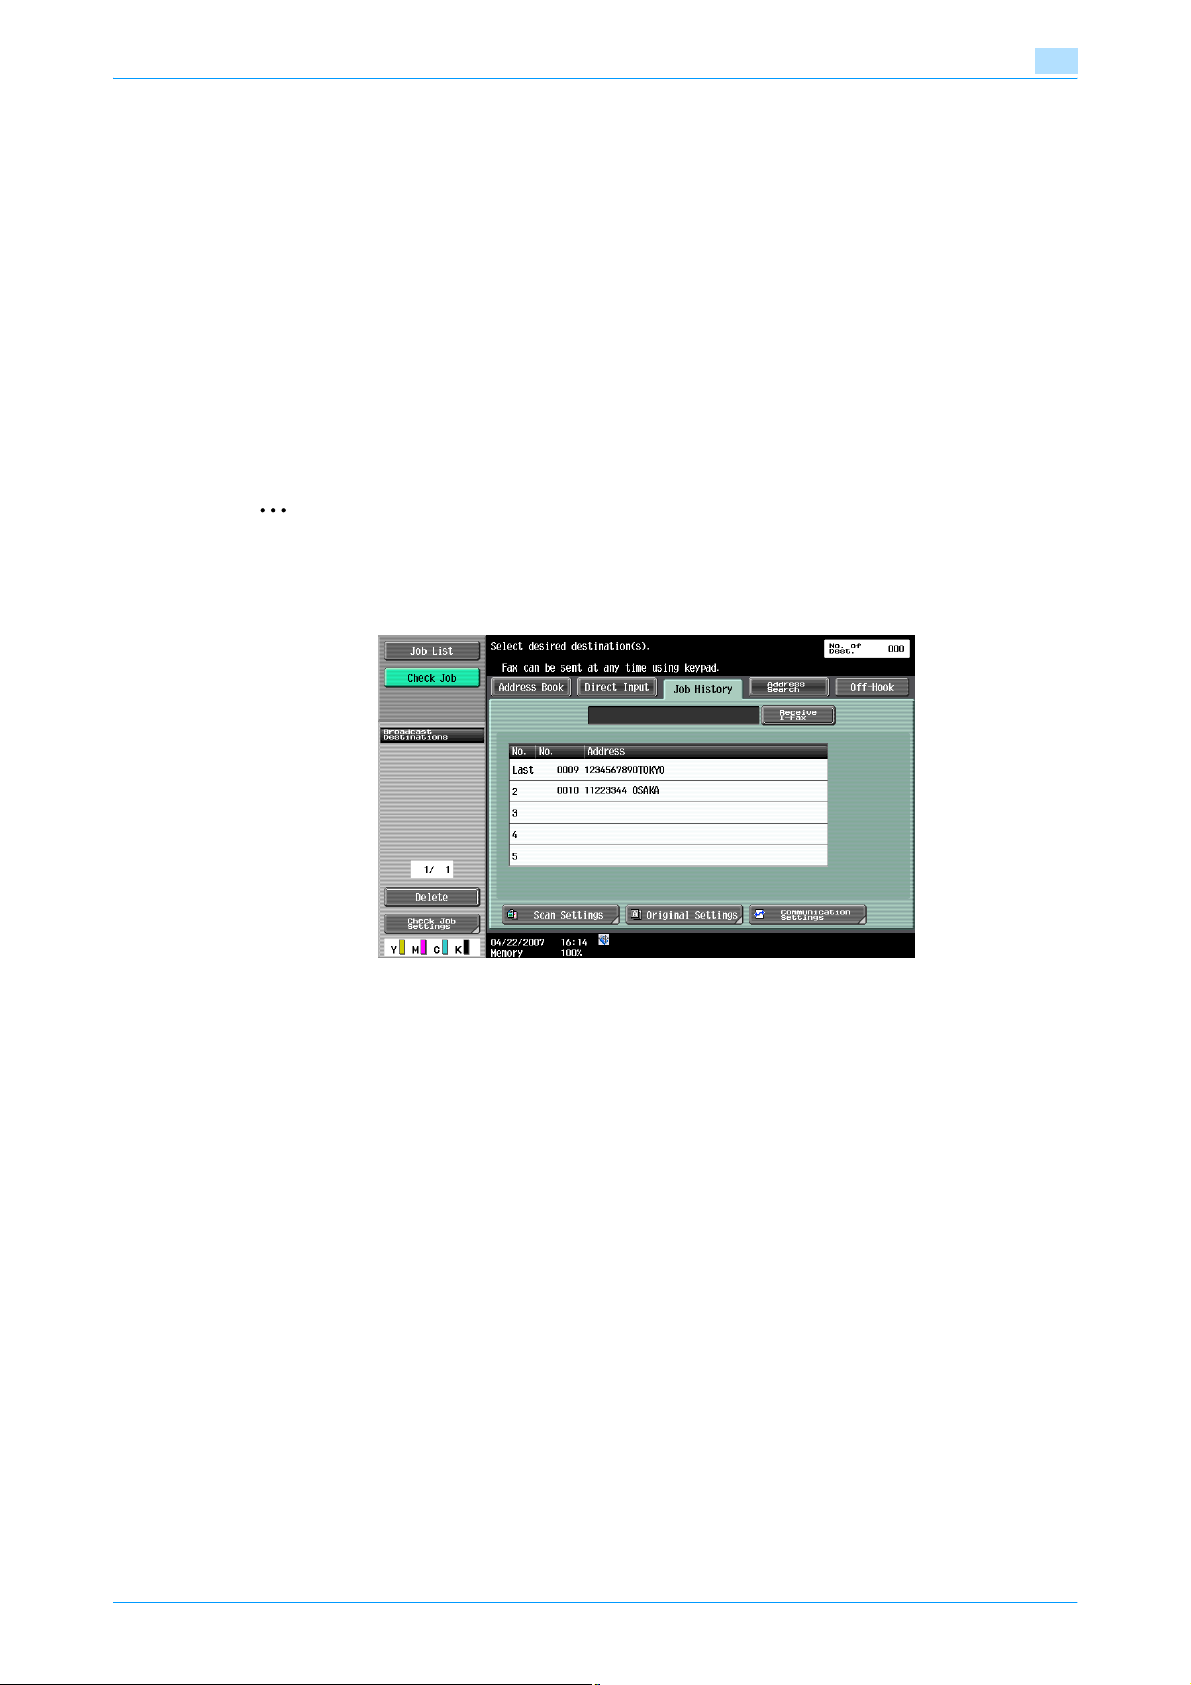
Transmitting data
User Box (p. 4-27)
Internet Fax (p. 4-27)
IP Address Fax (p. 4-28)
PC (SMB) (p. 4-28)
FTP (p. 4-29)
WebDAV (p. 4-30)
Web Service (p. 4-31)
Scan Settings (p. 4-35)
Original Settings (p. 4-59)
Communication Settings (p. 4-62)
Job History tab
2
Operations available on the Job History tab are as follows:
4
Note
For details, refer to "Job History (G3)" on page 4-32.
Job History (p. 4-32)
Scan Settings (p. 4-35)
Original Settings (p. 4-59)
Communication Settings (p. 4-62)
C353/C253/C203 4-16
Page 71
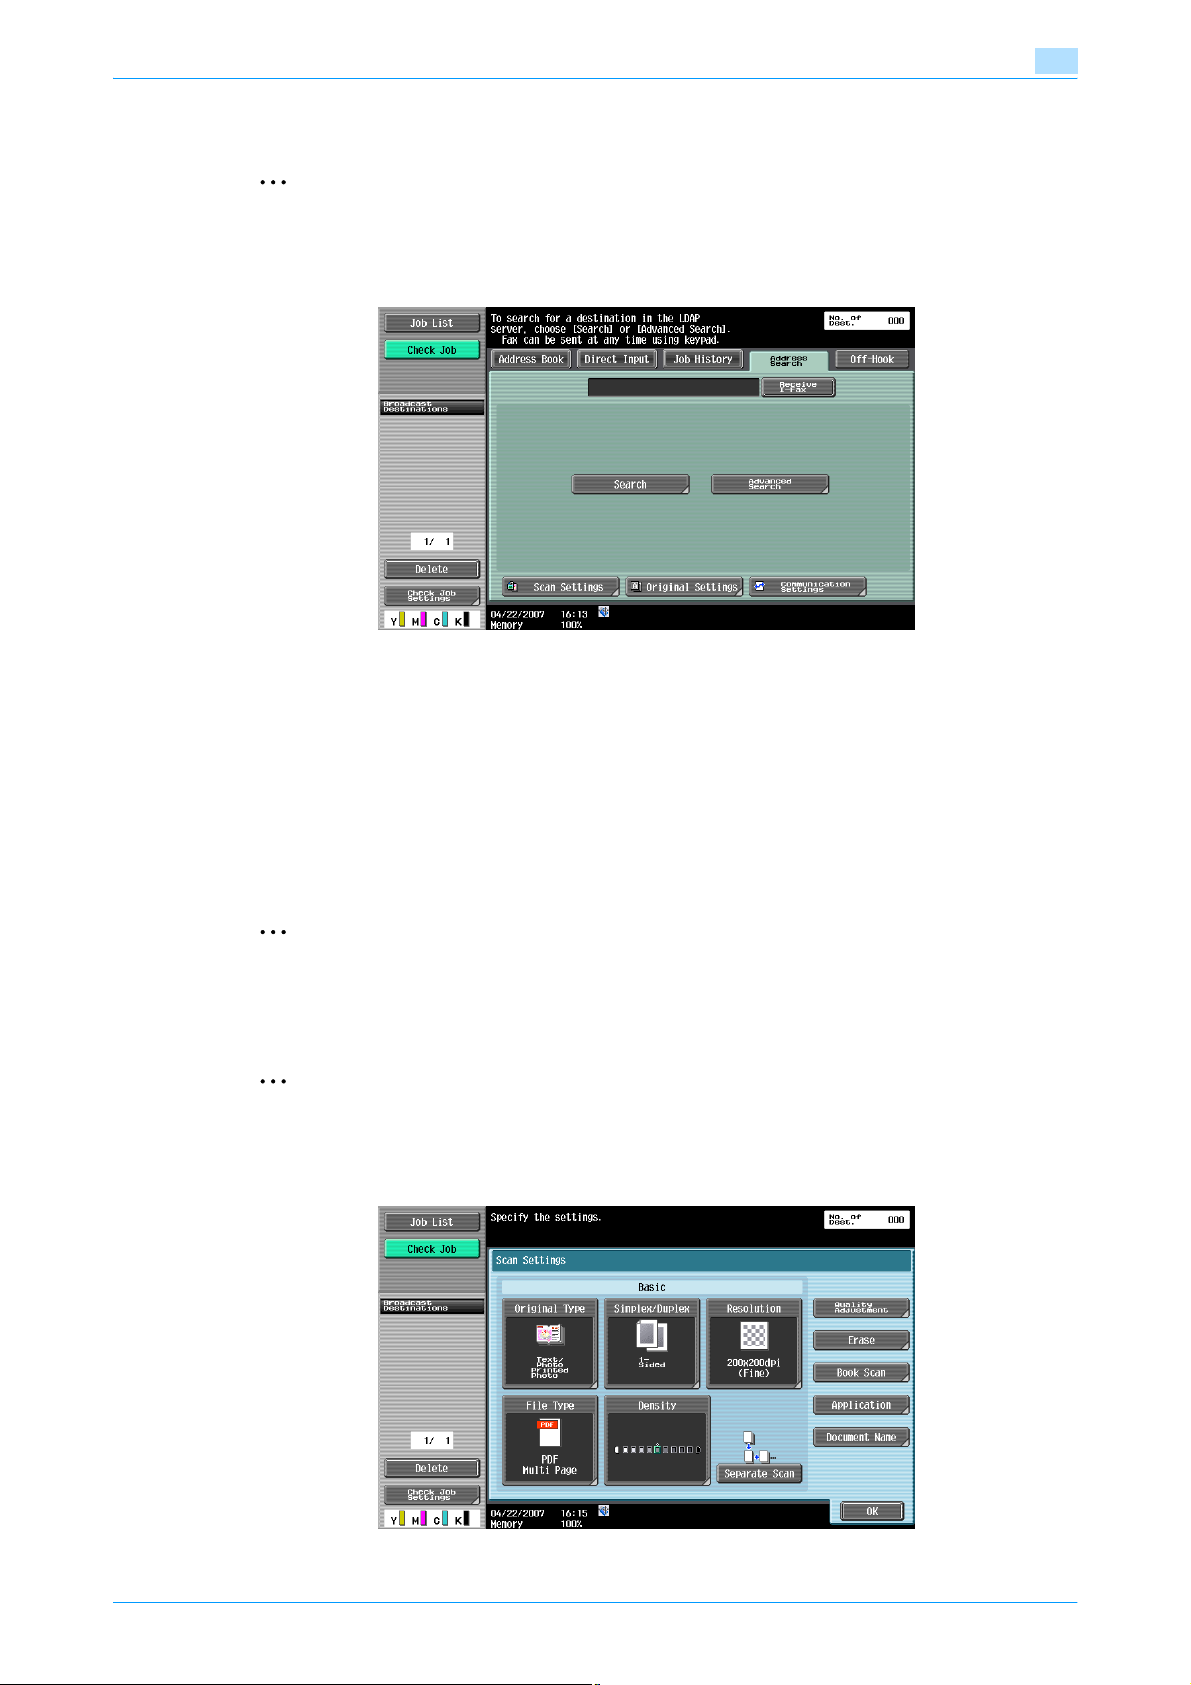
Transmitting data
Address Search tab
2
Operations available on the Address Search tab are as follows:
4
Note
For details, refer to "Address Search - Search" on page 4-32.
Search (p. 4-32)
Advanced Search (p. 4-33)
Scan Settings (p. 4-35)
Original Settings (p. 4-59)
Communication Settings (p. 4-62)
Off-Hook tab
2
Note
For details, refer to "Off-Hook (G3)" on page 4-34.
Scan Settings
2
Note
For details, refer to "Scan Settings" on page 4-35.
Operations available on the Scan Settings screen are as follows:
C353/C253/C203 4-17
Page 72
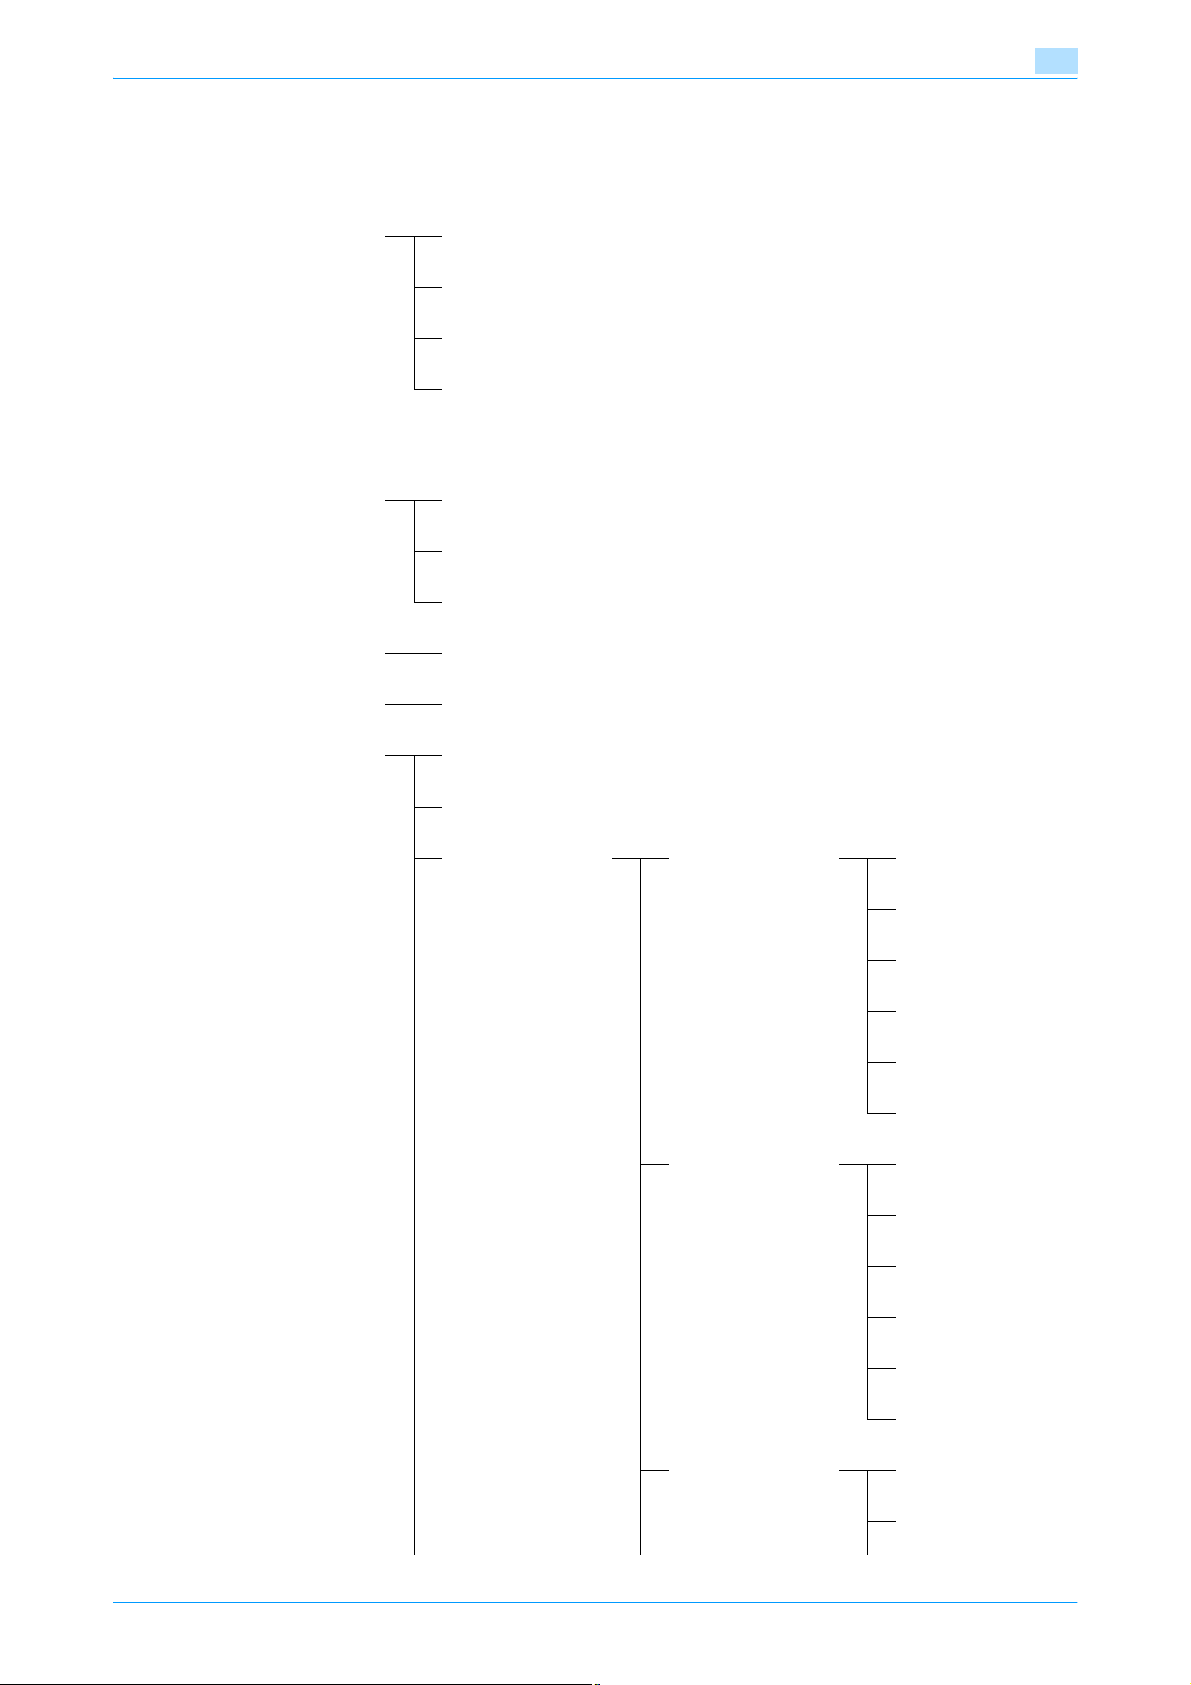
Transmitting data
Original Type (p. 4-35)
Simplex/Duplex (p. 4-36)
Resolution (p. 4-36)
File Type (p. 4-37)File Type (p. 4-37)
Density (p. 4-40)
Separate Scan (p. 4-41)
Quality Adjustment
(p. 4-41)
4
Scan Setting (p. 4-37)
Encryption (p. 4-38)
Stamp Composition (p. 4-40)
Color (p. 4-41)
Background Removal (p. 4-42)
Sharpness (p. 4-42)
Erase (p. 4-43) Frame Erase (p. 4-43)
Book Scan Book Copy (p. 4-43)
Application Scan Size (p. 4-45)
Annotation (p. 4-47)
Stamp/Composition
Date/Time (p. 4-47) Date Format
Time Format
Pages
Text Size
Text Color
Print Position
Page Number
(p. 4-49)
Starting Page
Number
Starting Chapter
Number
Page Number Type
Text Color
Text Size
Print Position
Stamp (p. 4-51)
Stamp Type/Preset
Stamps
Pages
C353/C253/C203 4-18
Page 73
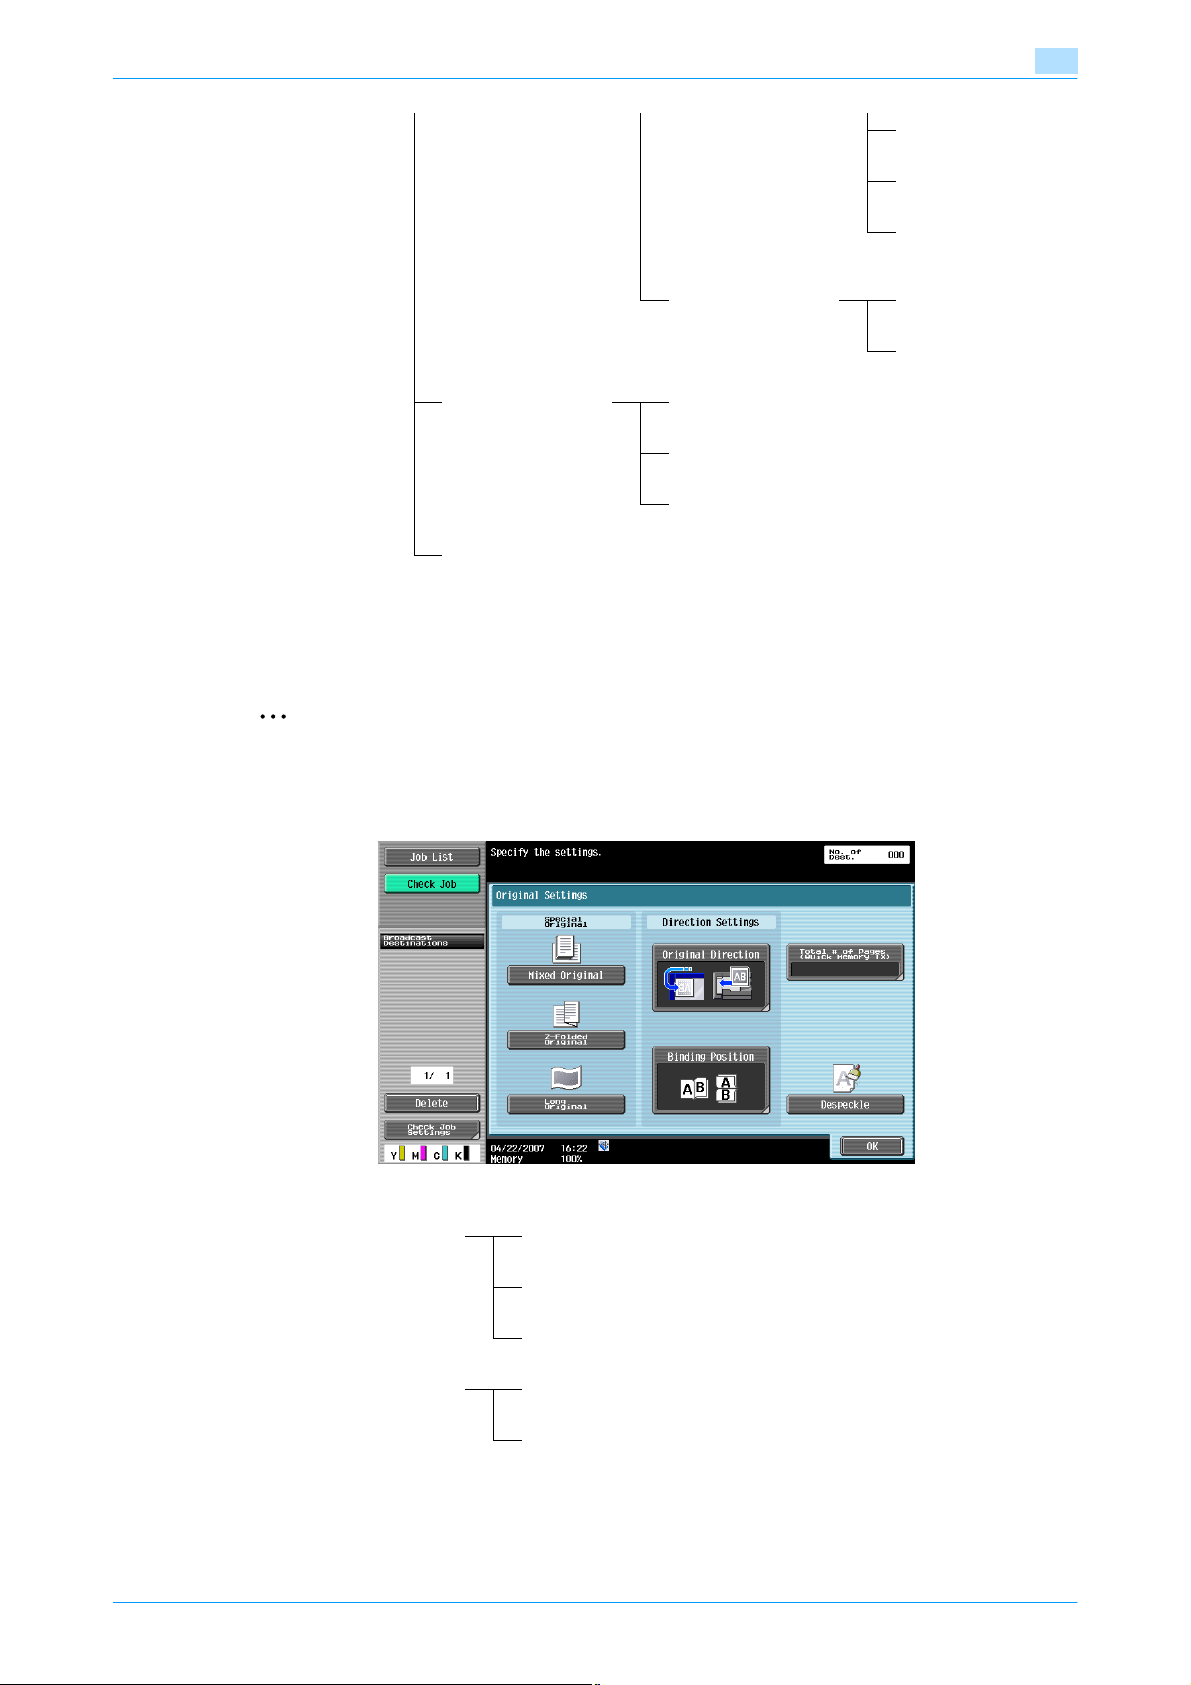
Transmitting data
4
Text Size
Text Color
Print Position
Header/Footer
(p. 4-53)
Send & Print
(p. 4-56)
TX Stamp (p. 4-57)
Document Name (p. 4-58)
Copies
Simplex/Duplex
Staple
Original Settings
2
Note
For details, refer to "Original Settings" on page 4-59.
Operations available on the Original Settings screen are as follows:
Recall Header/Footer
Check/Change Temporarily
Special Original (p. 4-59) Mixed Original (p. 4-59)
Z-Folded Original (p. 4-59)
Long Original (p. 4-59)
Direction Settings (p. 4-59) Original Direction (p. 4-59)
Binding Position (p. 4-60)
Total # of Pages (Quick Memory TX) (p. 4-60)
Despeckle (p. 4-61)
C353/C253/C203 4-19
Page 74
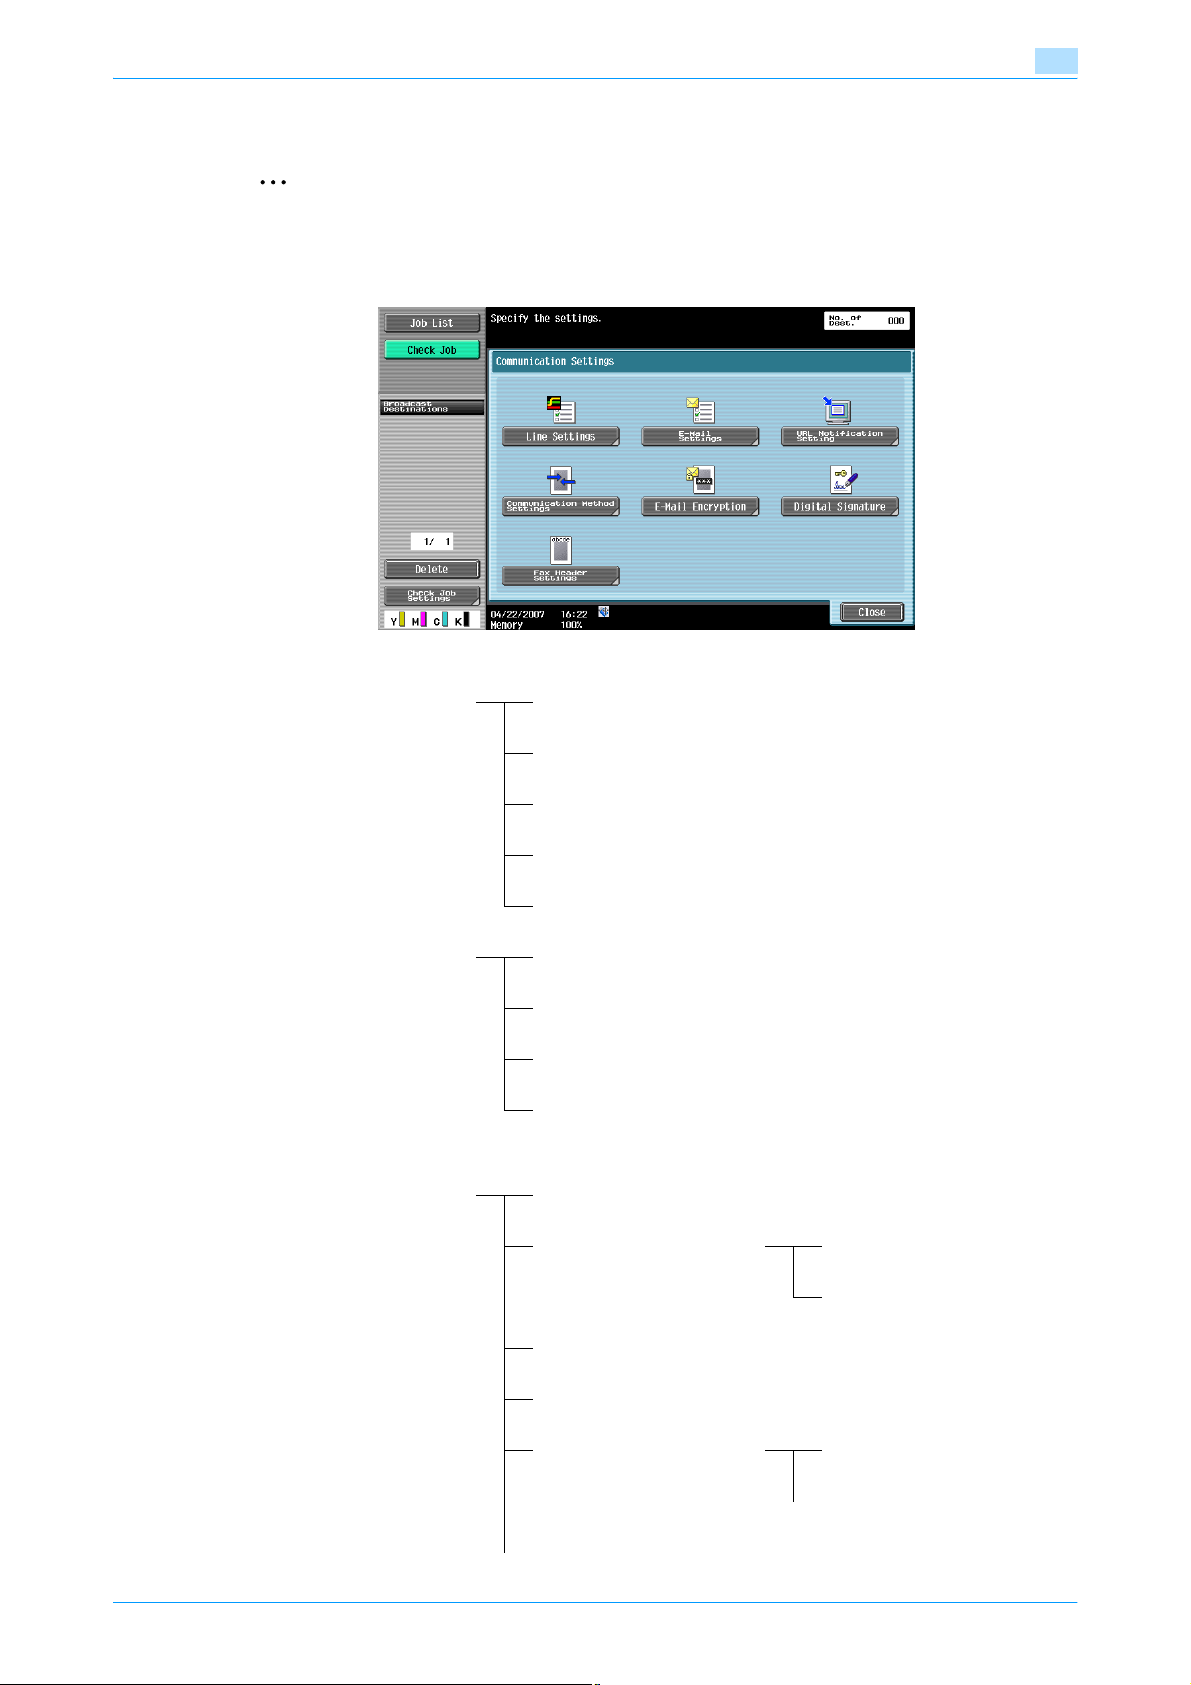
Transmitting data
Communication Settings
2
Operations available on the Communication Settings screen are as follows:
4
Note
For details, refer to "Communication Settings" on page 4-62.
Line Settings (p. 4-62) Overseas TX (p. 4-62)
ECM OFF (p. 4-62)
V. 34 OFF (p. 4-62)
Check Dest. & Send (p. 4-63)
Select Line (p. 4-63)
E-Mail Settings (p. 4-63)Document Name (p. 4-63)
Subject (p. 4-64)
From (p. 4-64)
Body (p. 4-65)
URL Notification Setting (p. 4-65)
Communication Method Settings
(p. 4-66)
Quick Memory TX (p. 4-67)
Polling RX Normal (p. 4-67)
Bulletin (p. 4-68)
Timer TX (p. 4-69)
Password TX (p. 4-69)
Polling TX Normal (p. 4-70)
Bulletin (p. 4-70)
C353/C253/C203 4-20
Page 75

Transmitting data
E-Mail Encryption (p. 4-71)
Digital Signature (p. 4-72)
Fax Header Settings (p. 4-72)
4
F-Code TX (p. 4-71) SUB Address
Password
C353/C253/C203 4-21
Page 76
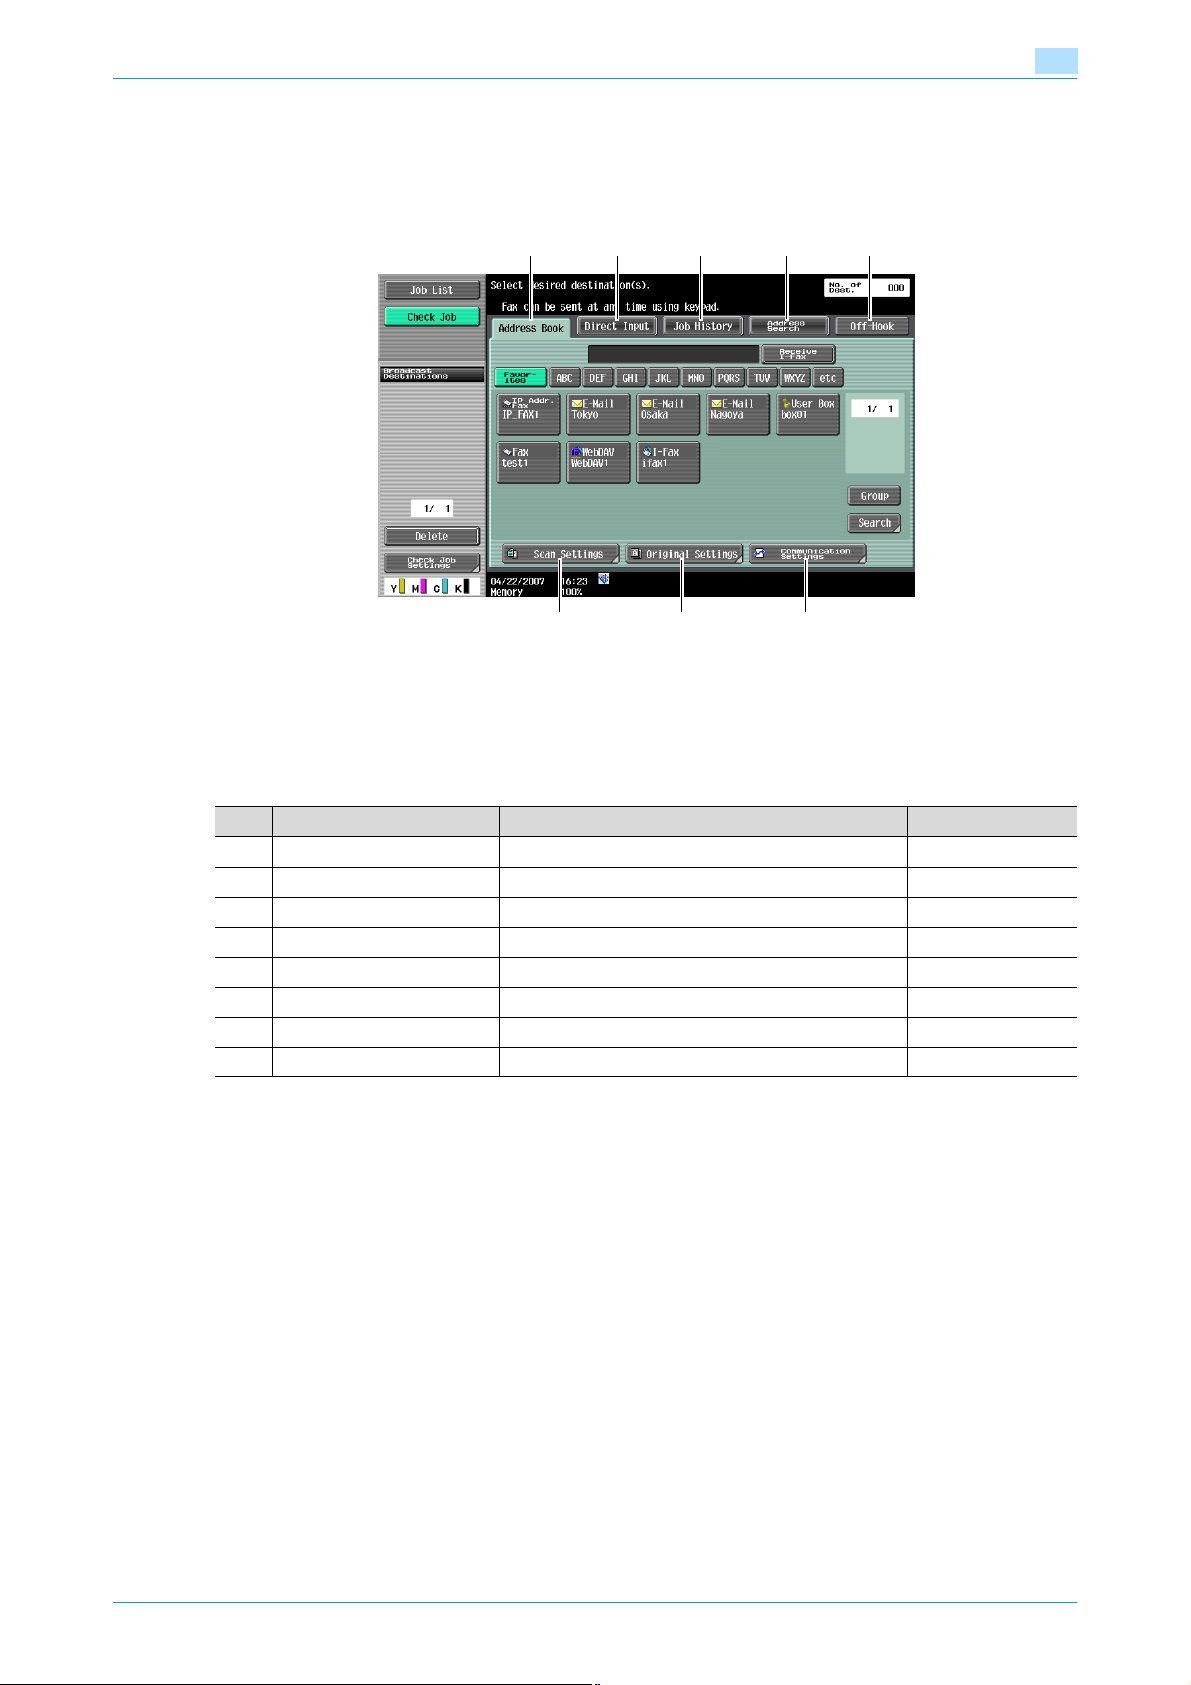
Transmitting data
4.4 Initial screen for fax/scan operations
4.4.1 Screen layout
Touching [Fax/Scan] displays the following screen.
12345
678
4
!
Detail
If manual destination input is restricted by "Security Settings" in Administrator mode, [Direct Input],
[Address Search] does not appear.
No. Item Description Refer to
1 [Address Book] Select a recipient from the registered destinations. p. 4-23
2 [Direct Input] Enter and specify an unregistered destination directly. p. 4-25
3 [Job History] Select one from the fax destination history. p. 4-32
4 [Address Search] Search the LDAP server memory for the destination. p. 4-32
5 [Off-Hook] Enables off-hook dialing. p. 4-34
6 [Scan Settings] Specify details for scanning documents. p. 4-35
7 [Original Settings] Specify the type and orientation of the original. p. 4-59
8 [Communication Settings] Specify settings for communications operations. p. 4-62
!
Detail
For details on the LDAP server settings, refer to "Enabling LDAP" in the User’s Guide [Network
Administrator].
The display position of [Address Search] varies depending on the user settings. For details, refer to
"Default Address Book" on page 8-44.
When "Confirm Address (TX)" is specified, [Job History] and [Off-Hook] do not appear. For details on
the Confirm Address function, refer to "Function ON/OFF Settings - Confirm Address (TX) (G3)" on
page 9-26.
C353/C253/C203 4-22
Page 77
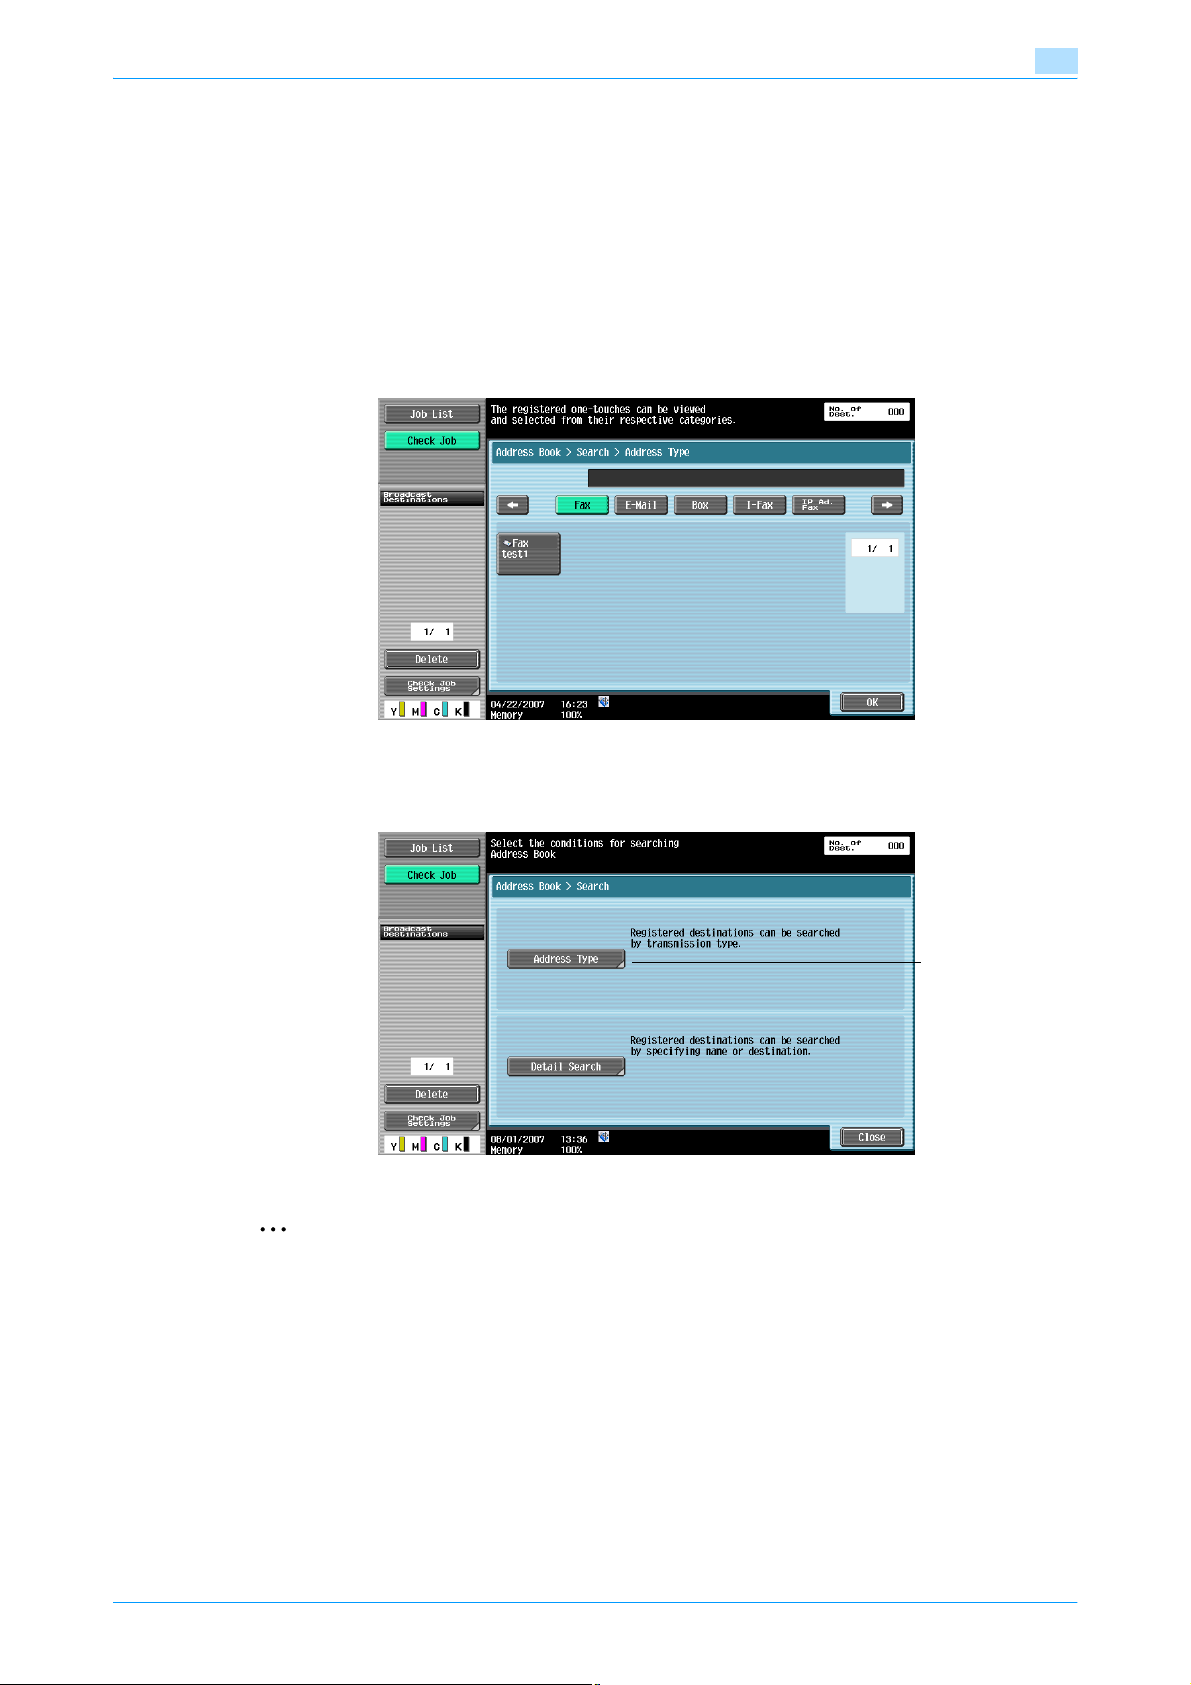
Transmitting data
4.4.2 Address Book
The destination address can be searched. Search for the registered destination according to the following
method.
Group
The registered groups are displayed.
Search - Address Type
The destination types can be searched based on the type that was specified when the destination was
registered.
4
[Address Type] appears by touching [Search] if [Default Address Book] (displayed by touching [Custom
Display Settings] - [Scan/Fax Settings] on the [User Settings]) is set to "Index".
[Address Type]
appears.
2
Note
For details on settings, refer to "Default Address Book" on page 8-44.
For the method to register destinations in Address Book, refer to "One-Touch/User Box Registration"
on page 8-7.
C353/C253/C203 4-23
Page 78
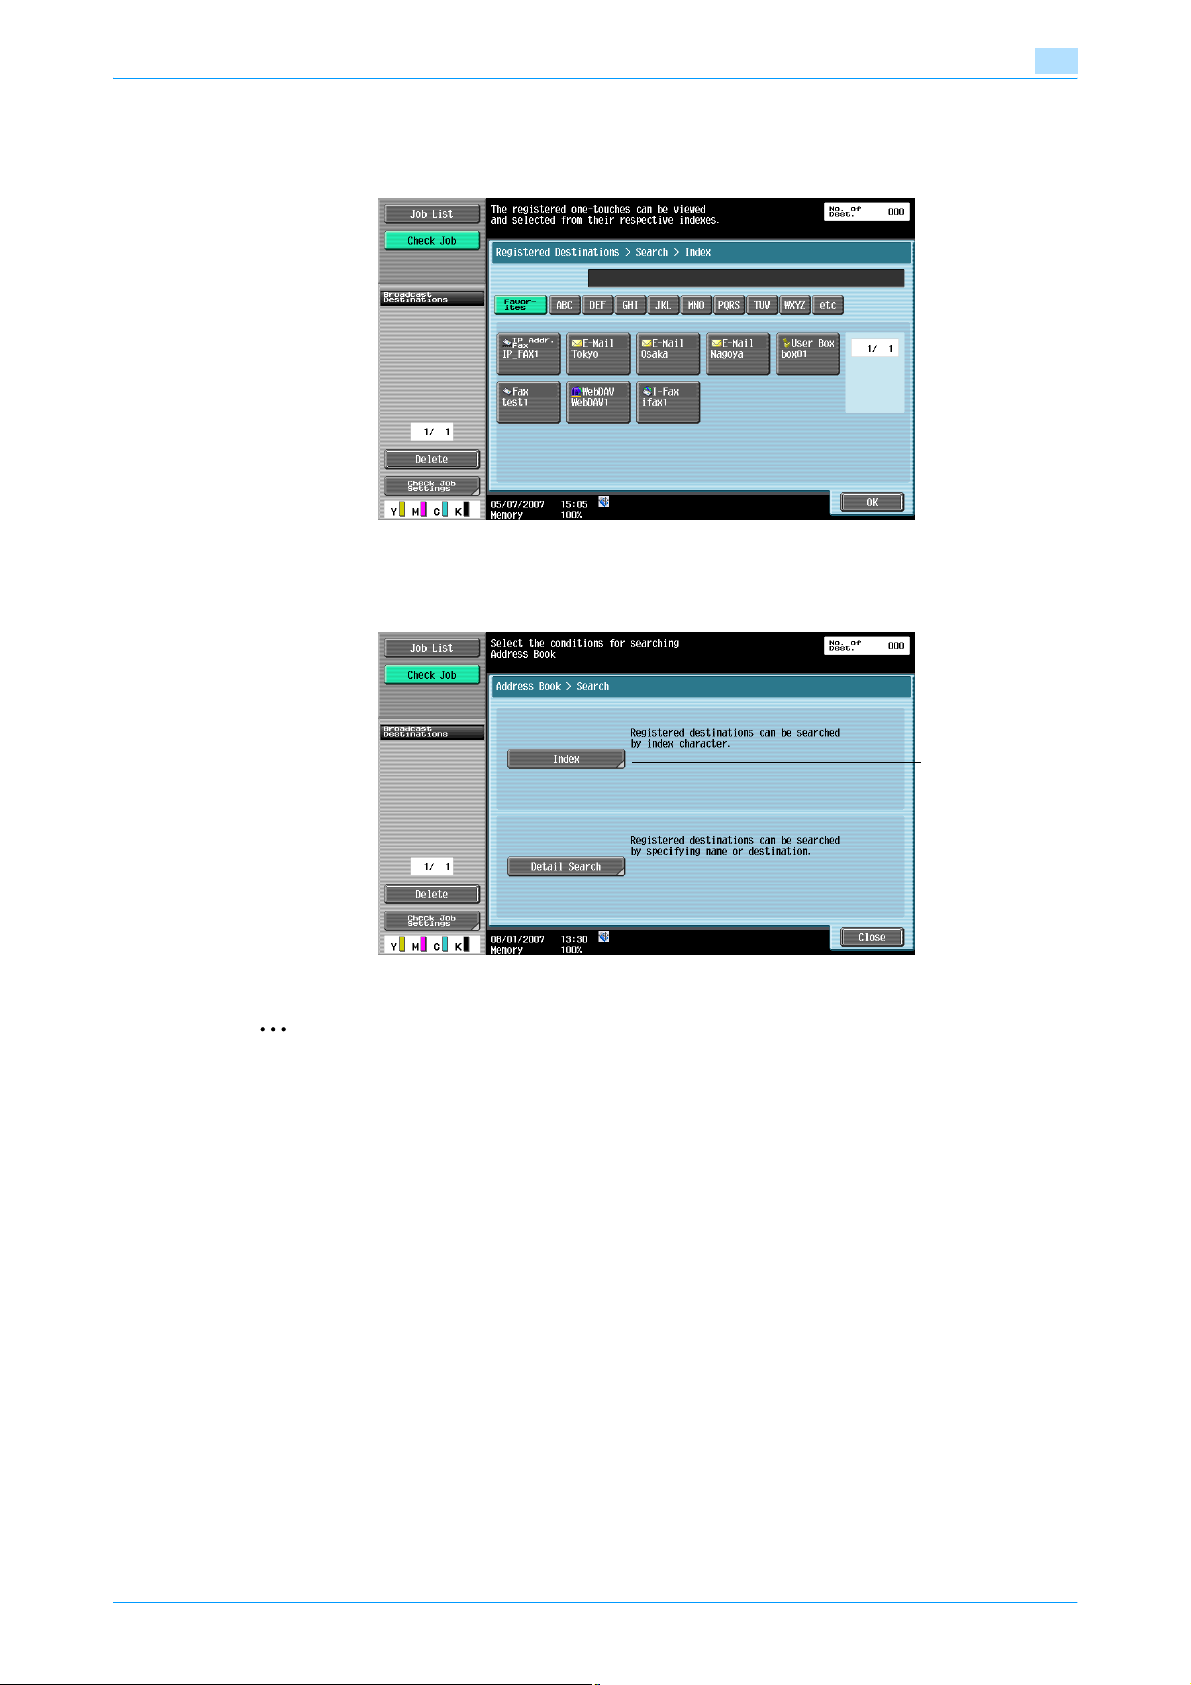
Transmitting data
Search - Index
The index is displayed based on the index that was specified when the destination was registered.
[Index] appears by touching [Search] if [Default Address Book] (displayed by touching [Custom Display
Settings] - [Scan/Fax Settings] on the [User Settings]) is set to "Address Type".
4
[Index]
appears.
2
Note
For details on settings, refer to "Default Address Book" on page 8-44.
For the method to register destinations in Address Book, refer to "One-Touch/User Box Registration"
on page 8-7.
C353/C253/C203 4-24
Page 79
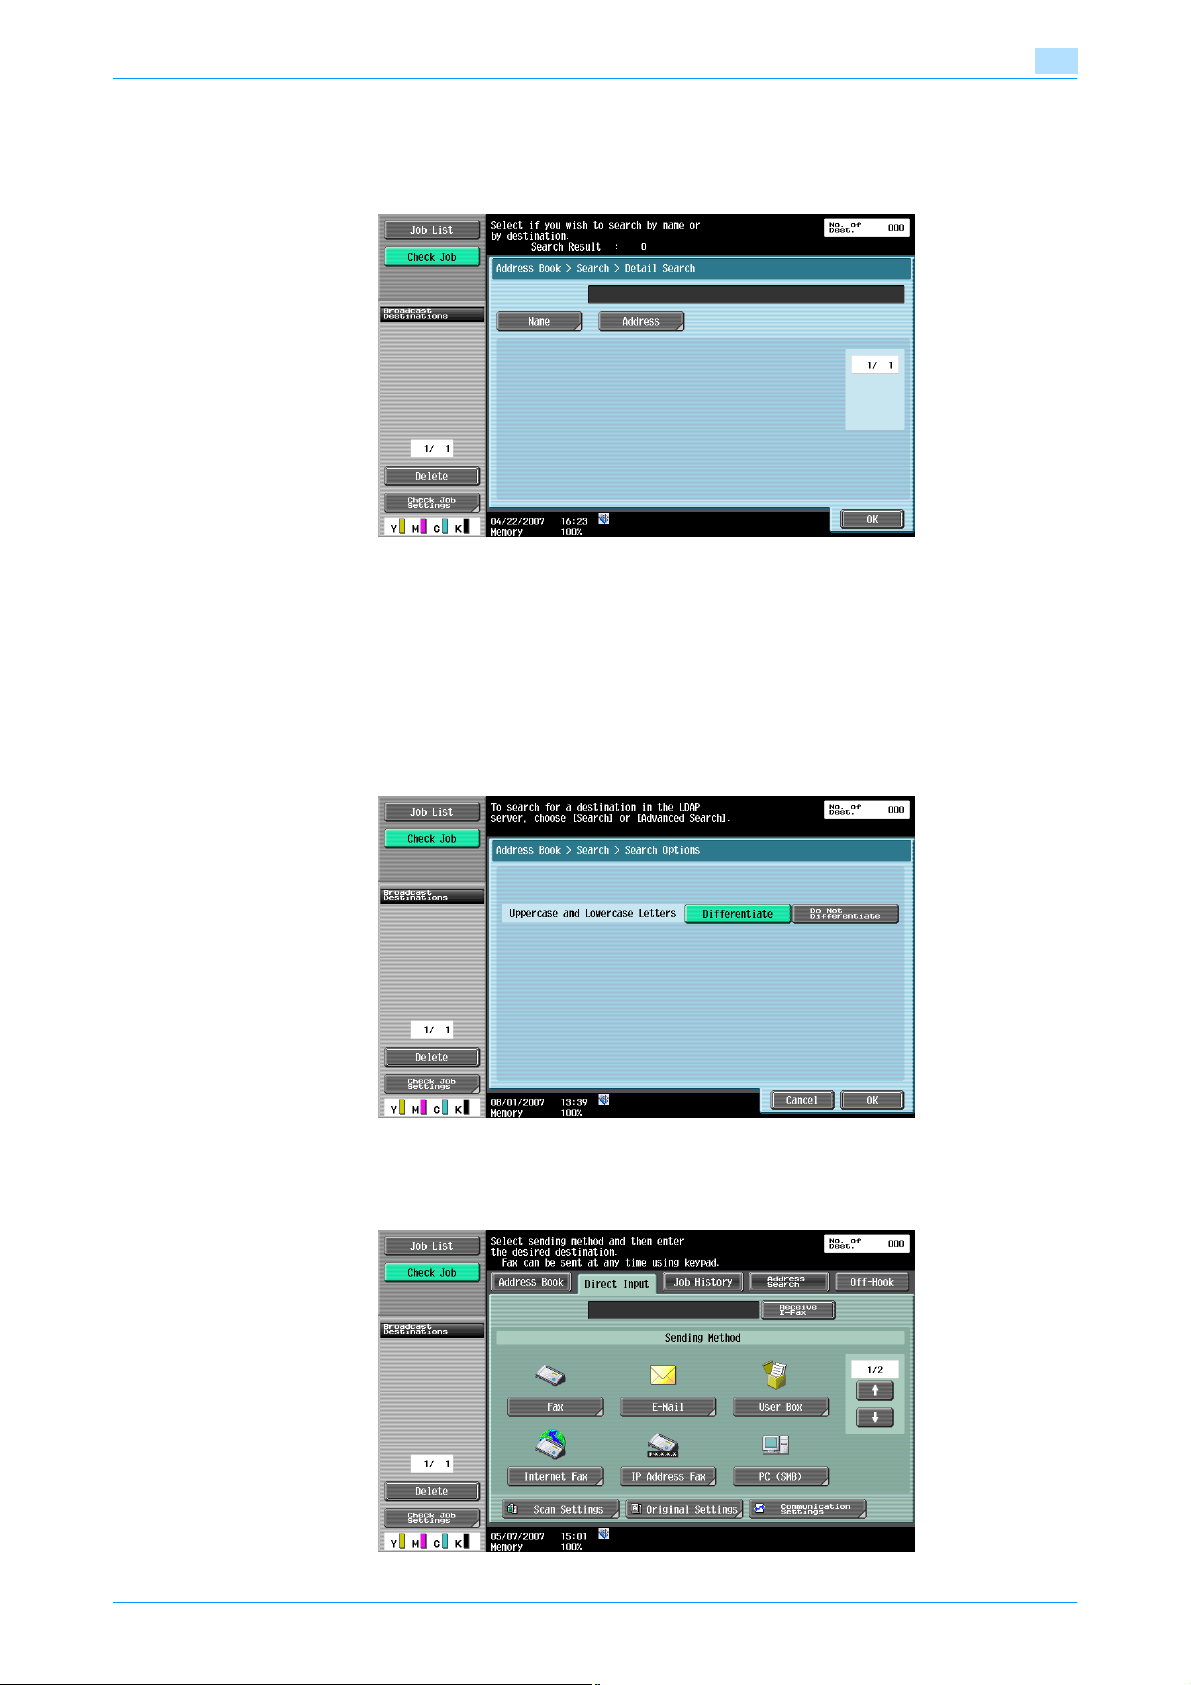
Transmitting data
Search - Detail Search
Enter the destination name or part of the address to search for the corresponding address. Select [Name] or
[Address] and enter the search text.
Detail Search - Search Options
When a condition is selected in the Detail Search screen, search options appear. Select options to be added
for the search, and then touch [OK].
4
!
Detail
Display of the Search Options screen and contents of the items to be displayed can be specified in
"Search Option Settings" in the Utility mode. For details, refer to "Custom Display Settings - Search
Option Settings (E-mail/Box/SMB/FTP/WebDAV/G3/IP/I-FAX)" on page 8-45.
4.4.3 Direct Input
An unregistered destination can be specified by directly entering it.
C353/C253/C203 4-25
Page 80
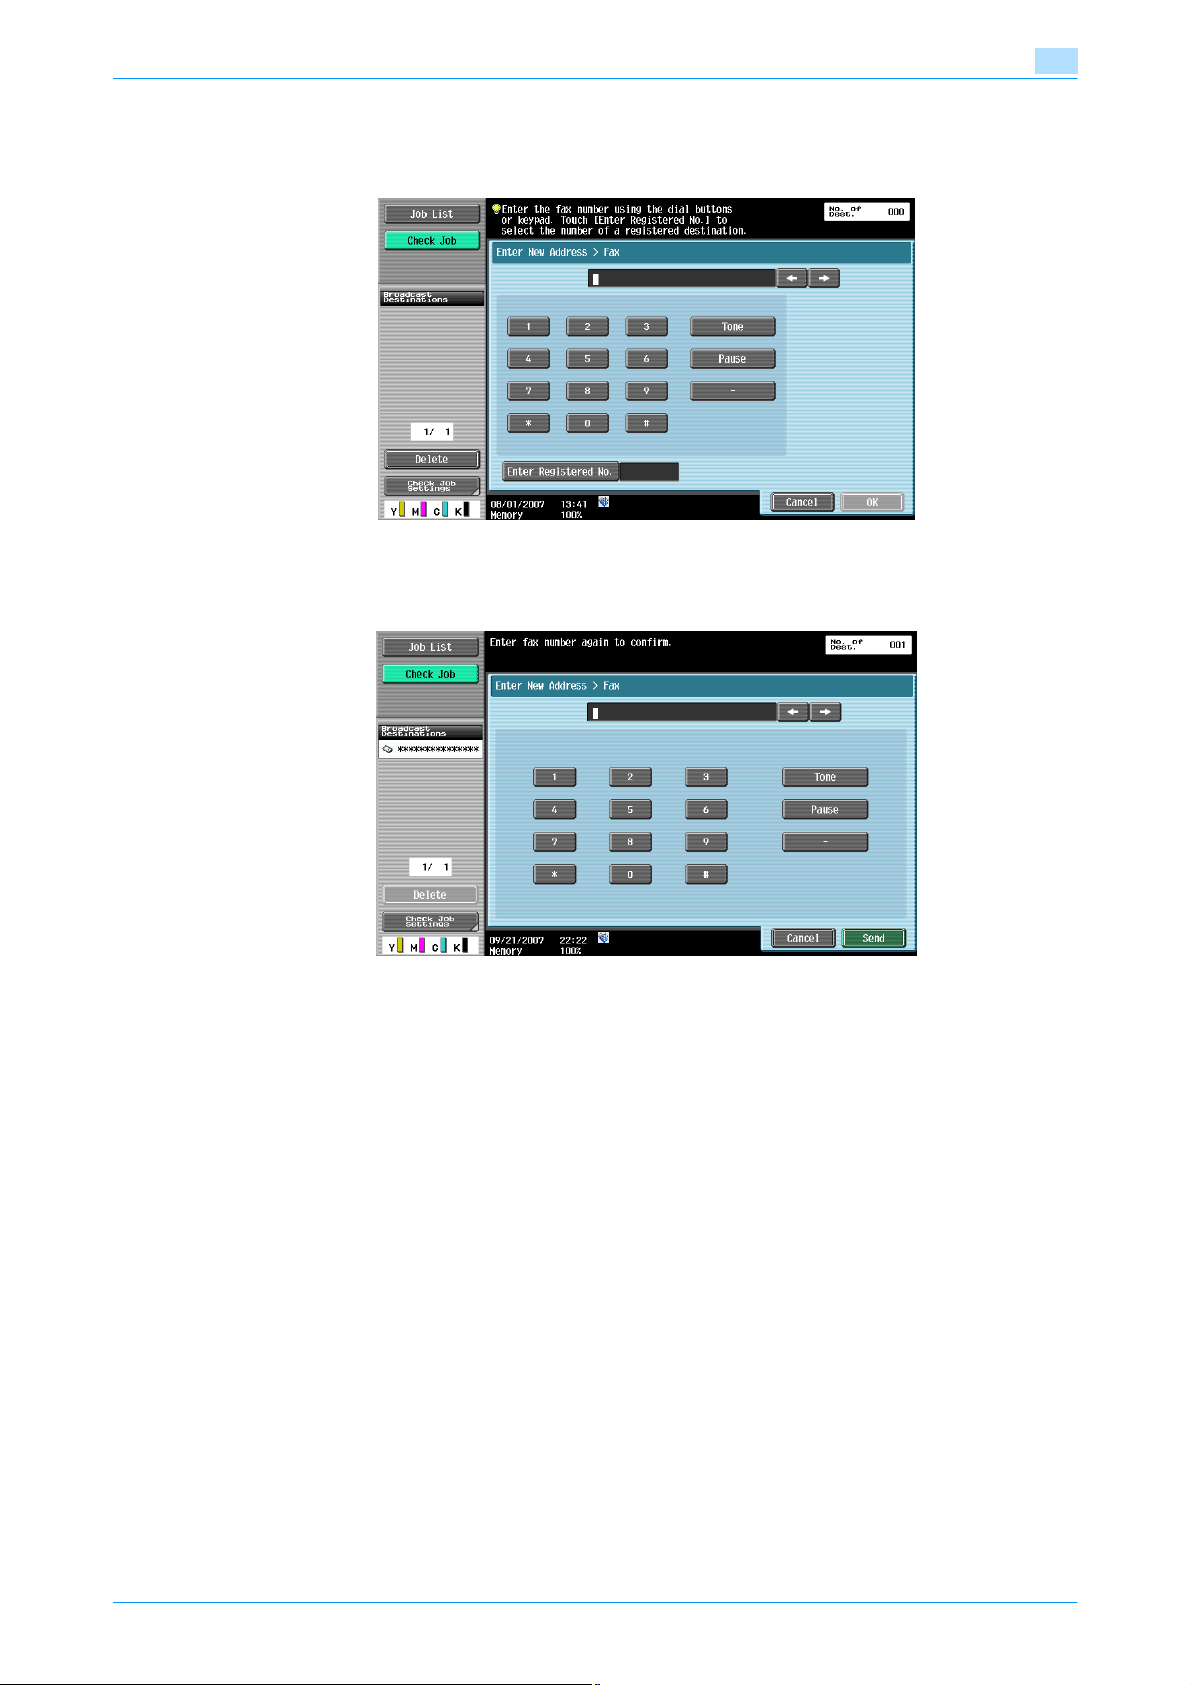
Transmitting data
4.4.4 Direct Input - Fax
Enter a Fax number from the touch panel.
If the "Confirm Address (TX)" is specified, after touching [OK], a screen appears prompting you to enter the
fax number again. Enter the fax number, and then touch [Send].
4
!
Detail
For details on the Confirm Address function, refer to "Function ON/OFF Settings - Confirm Address
(TX) (G3)" on page 9-26.
4.4.5 Direct Input - E-Mail
Enter an E-Mail address from the touch panel.
C353/C253/C203 4-26
Page 81
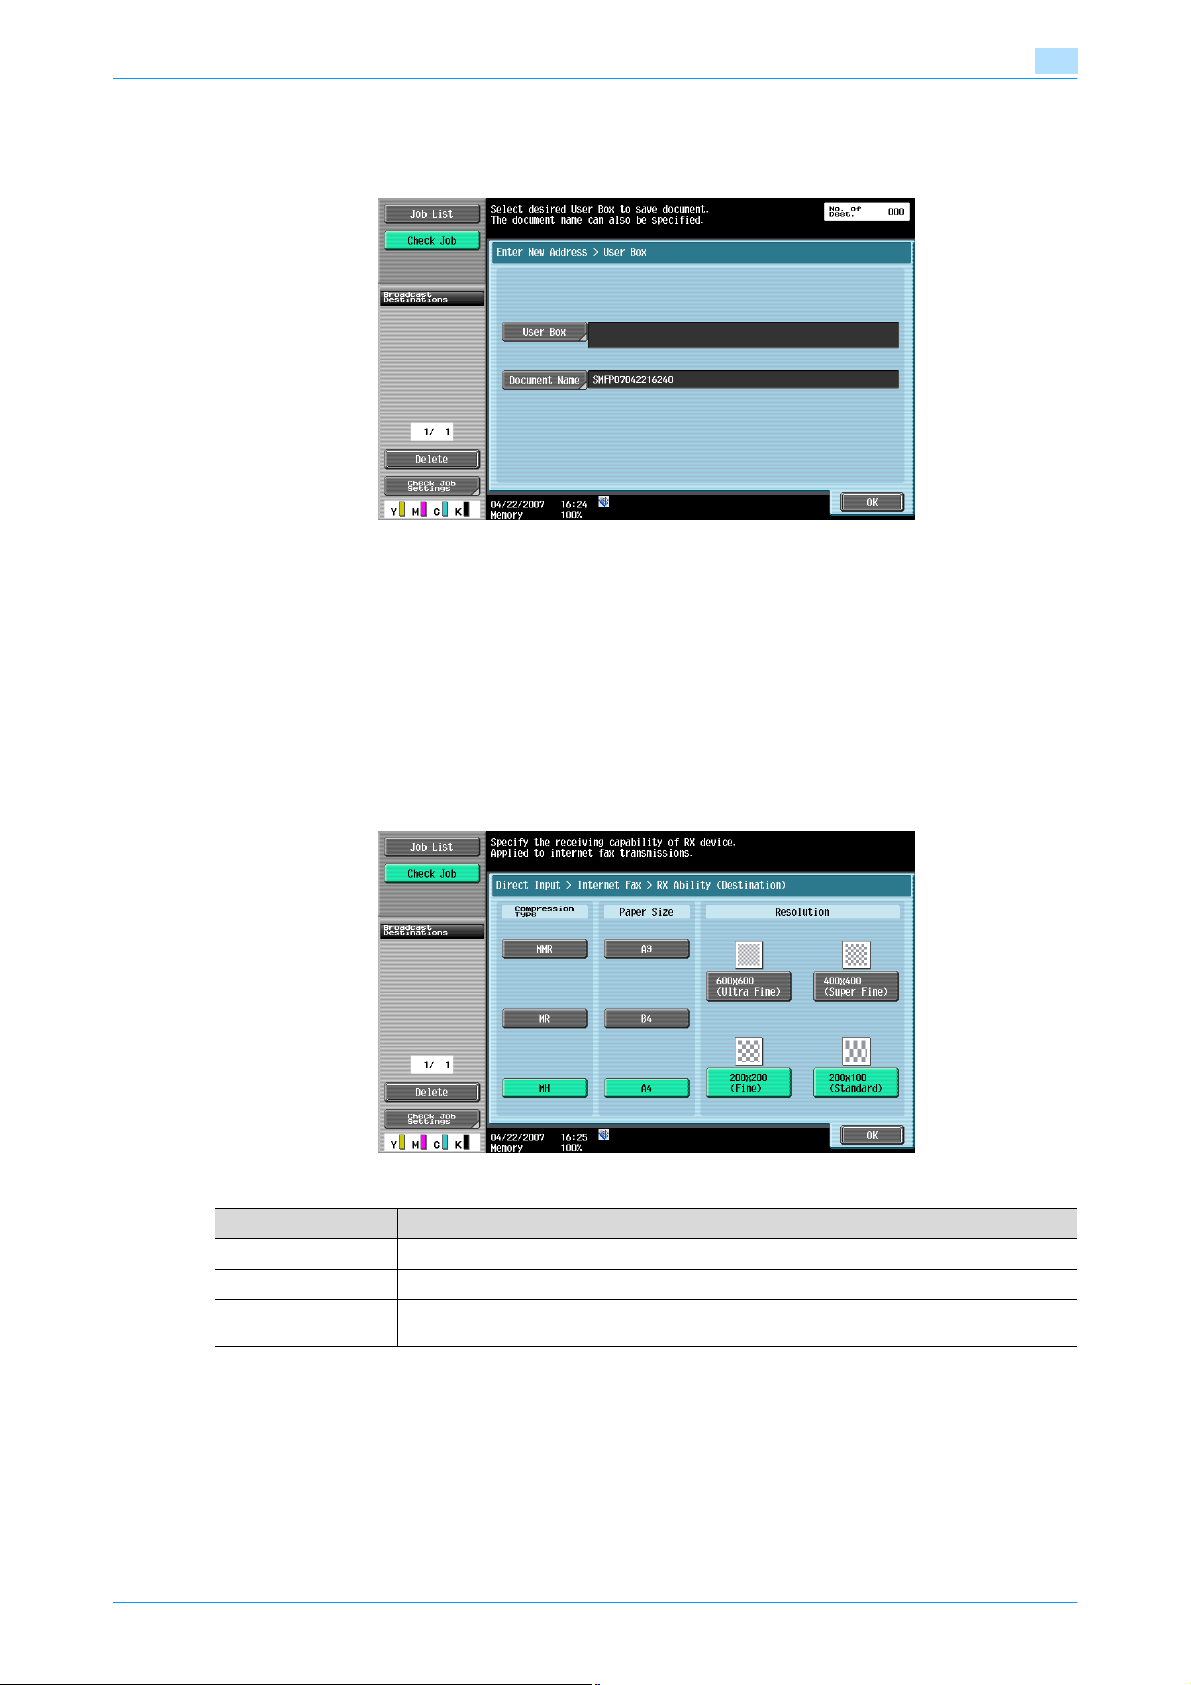
Transmitting data
4.4.6 Direct Input - User Box
Select a user box type, and then specify a user box for saving the document.
!
Detail
For details on operating data saved in user boxes, refer to the User’s Guide [Box Operations].
4
4.4.7 Direct Input - Internet Fax
Enter an E-Mail address from the touch panel.
RX Ability (Destination)
Select a receivable setting at the Internet fax destination. You can select multiple receivable settings.
Item Description
Compression Type MMR, MR, and MH can be selected.
Paper Size A3, B4, and A4 can be selected.
Resolution 600 × 600 dpi (ultra fine), 400 × 400 dpi (super fine), 200 × 200 dpi (fine), and 200 × 100 dpi
(standard) can be selected.
C353/C253/C203 4-27
Page 82
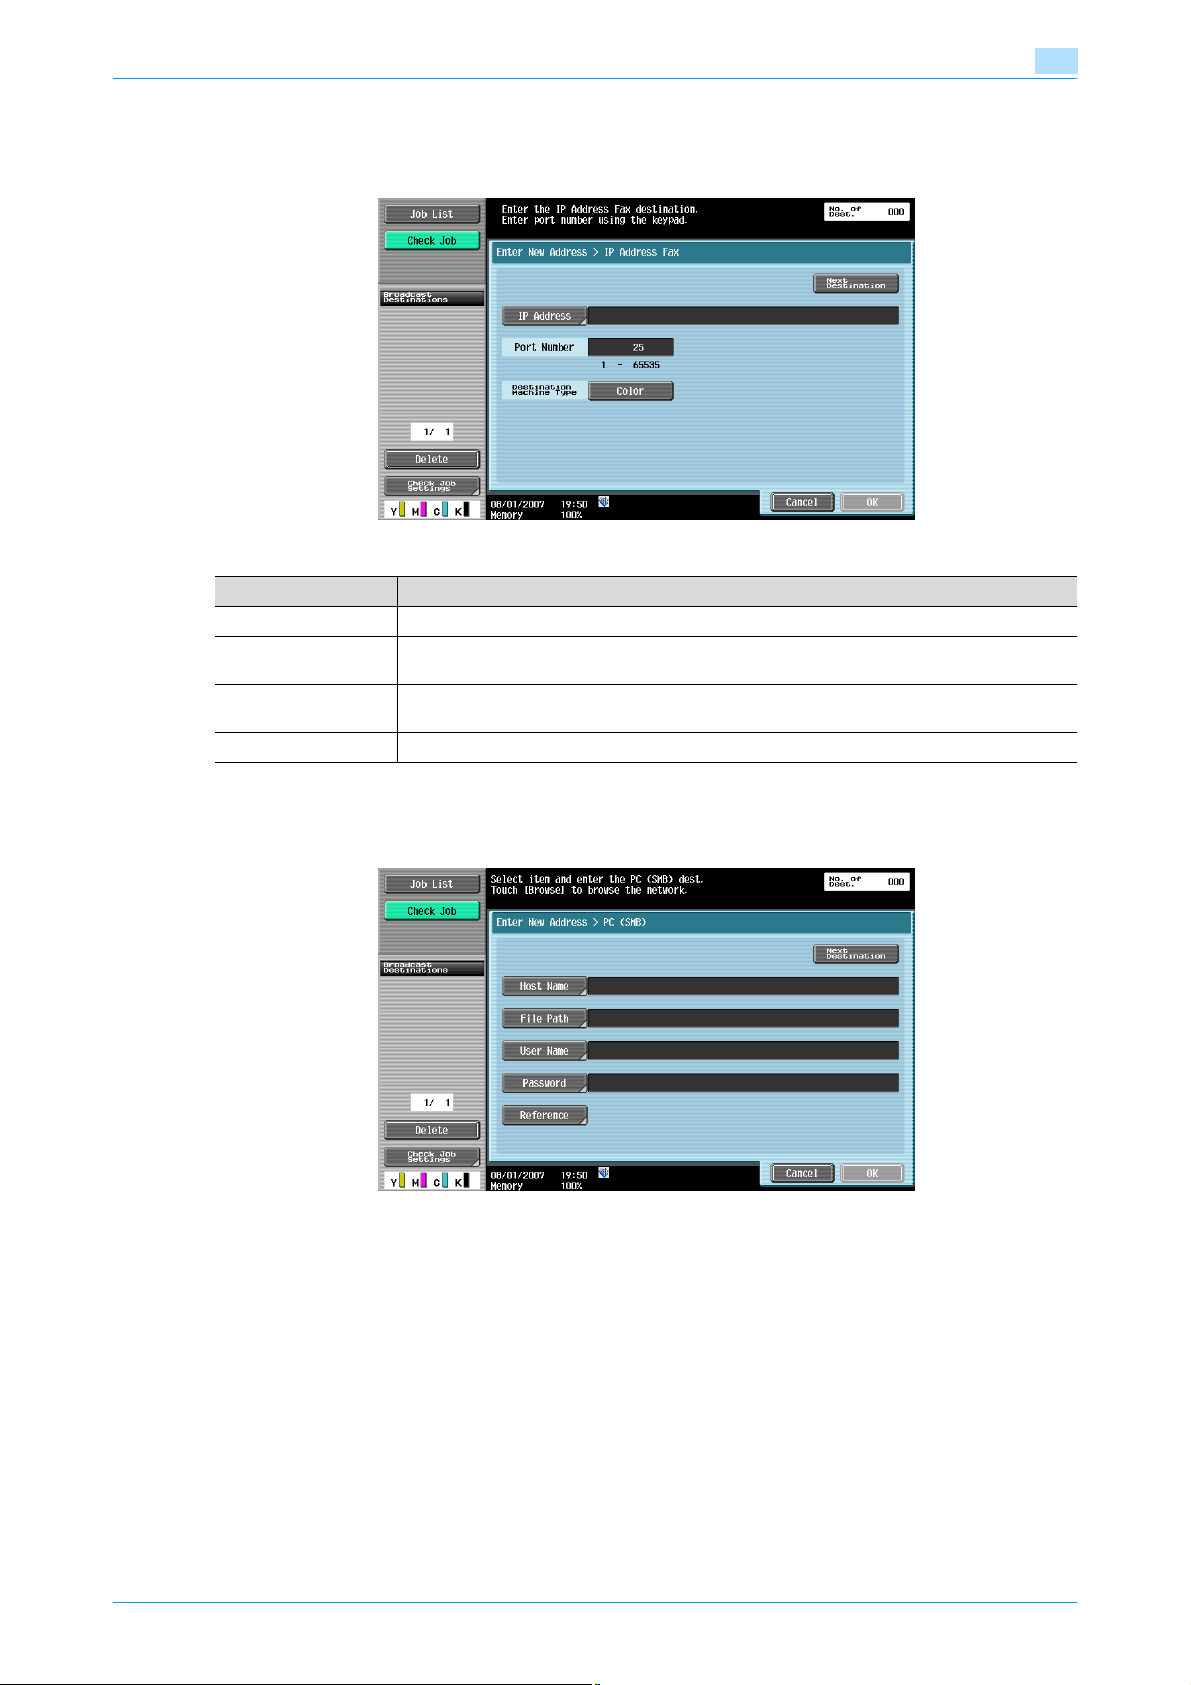
Transmitting data
4.4.8 Direct Input - IP Address Fax
Specify the IP address fax destination.
Item Description
IP Address Specify the host name or IP address for the destination.
Port Number Enter the port number to be used for transmission with the numeric keypad (range: 1 to
Destination Machine
Type
[Next Destination] Touch this button to add other destinations.
65535).
Select [Color] if the machine type of the destination is a color machine.
4
4.4.9 Direct Input - PC (SMB)
Specify the PC (SMB) address directly.
Host Name
Specify the host name (in uppercase letters) or IP address for the destination from the touch panel.
File Path
Type the path to the destination folder in uppercase letters from the touch panel.
User Name
Type the user name to log in from the touch panel.
Password
Type the login password from the touch panel.
C353/C253/C203 4-28
Page 83
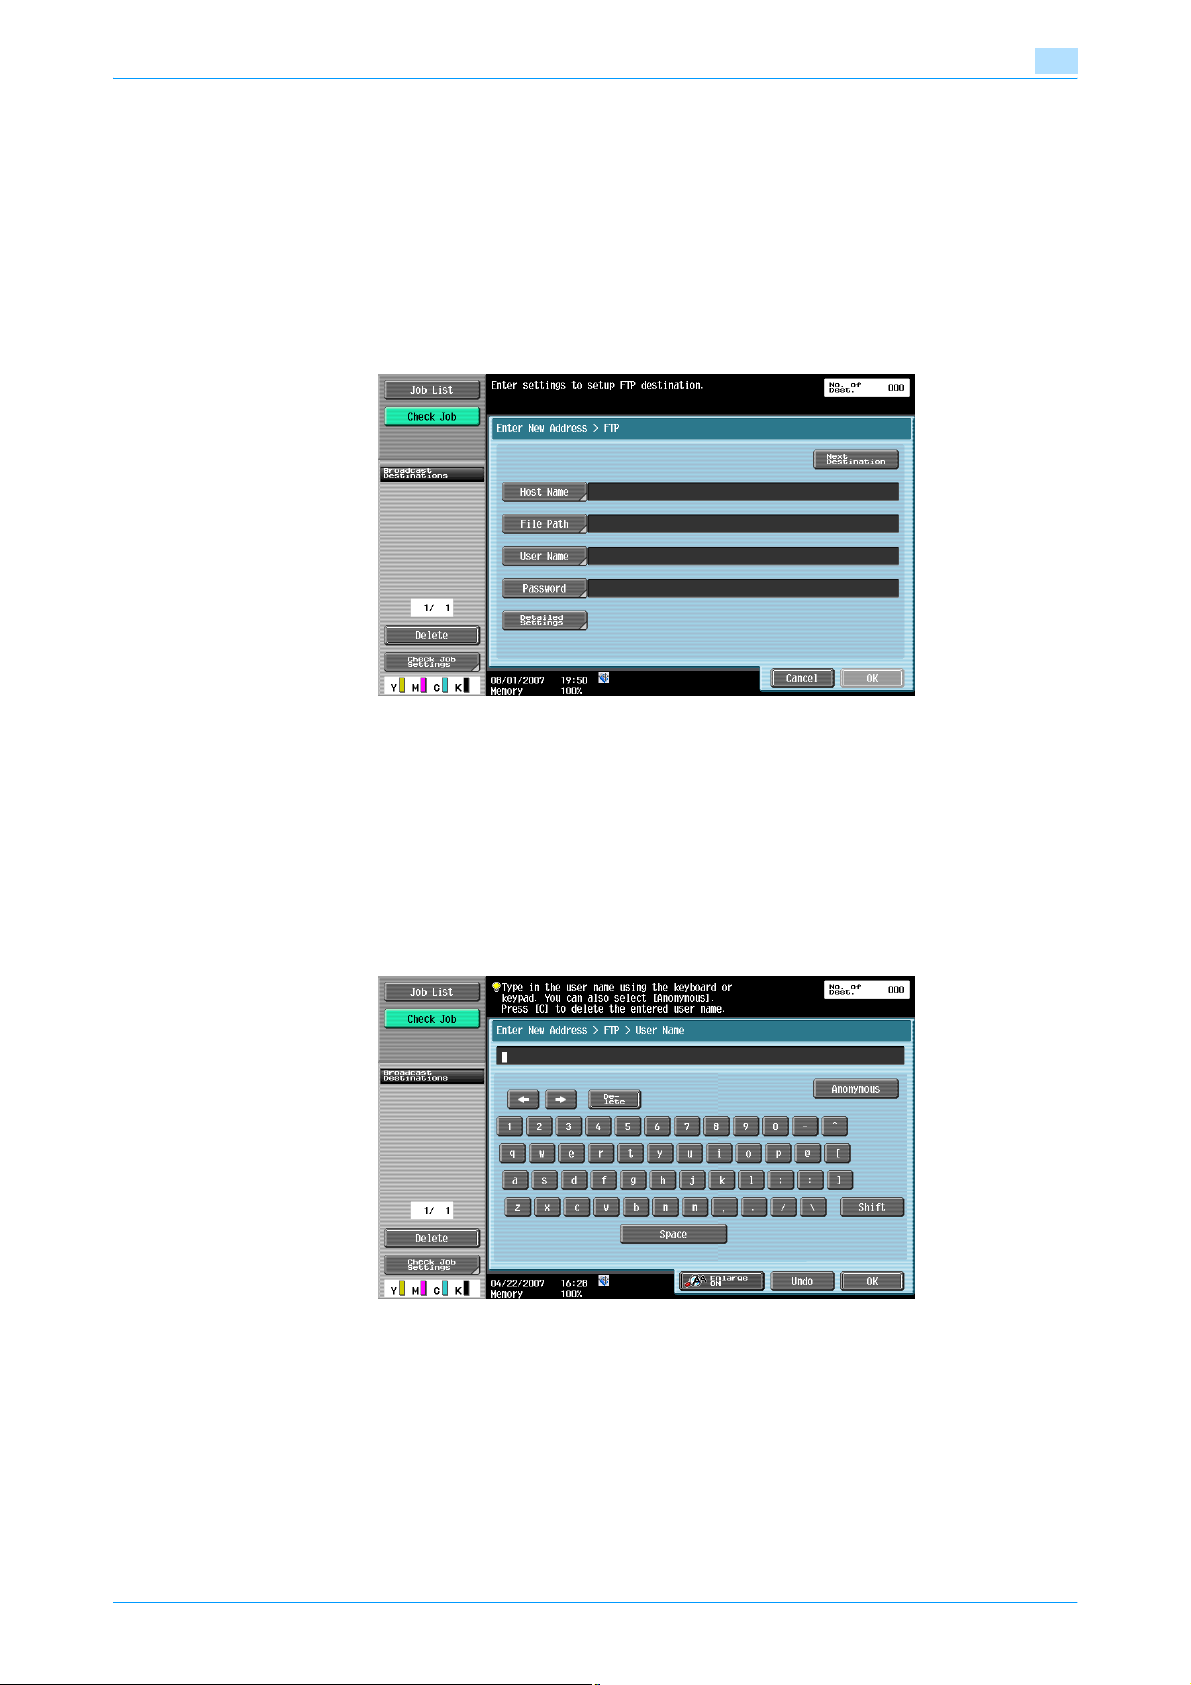
Transmitting data
Reference
The structure of the folders on the destination computer can be checked. This can be used to directly specify
the destination folder.
Next Destination
Touch this button to add other destinations.
4.4.10 Direct Input - FTP
Specify the FTP address directly.
4
Host Name
Specify the host name or IP address for the destination from the touch panel.
File Path
Specify the path to the destination folder from the touch panel.
User Name
Type the user name to log in from the touch panel. Touching [Anonymous] inputs "anonymous".
Password
Type the login password from the touch panel.
C353/C253/C203 4-29
Page 84
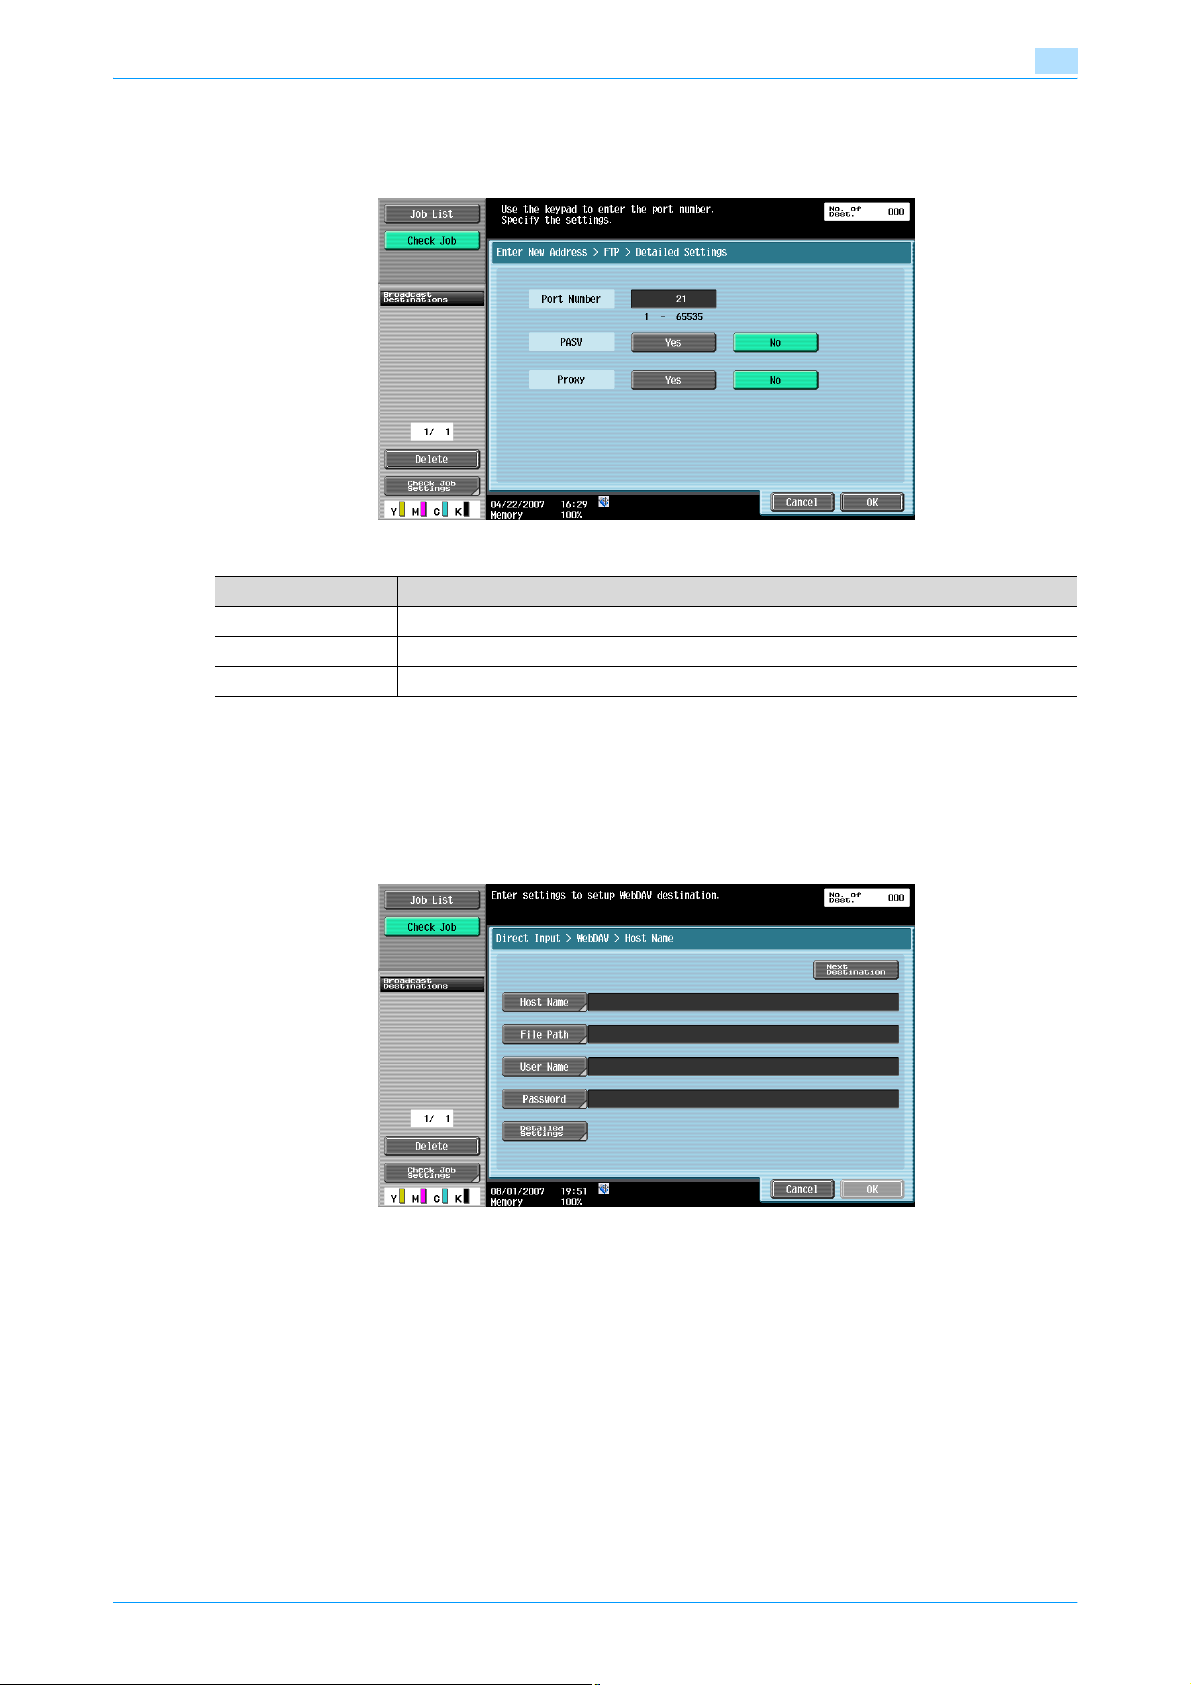
Transmitting data
Detailed Settings
Specify more detailed settings.
Item Description
Port Number Enter the port number.
PASV Specify whether or not the PASV mode is used.
Proxy Specify whether or not a proxy server is used.
4
Next Destination
Touch this button to add other destinations.
4.4.11 Direct Input - WebDAV
Specify the WebDAV address directly.
Host Name
Specify the host name or IP address for the destination from the touch panel.
File Path
Specify the path to the destination folder from the touch panel.
User Name
Type the user name to log in from the touch panel.
Password
Type the login password from the touch panel.
C353/C253/C203 4-30
Page 85
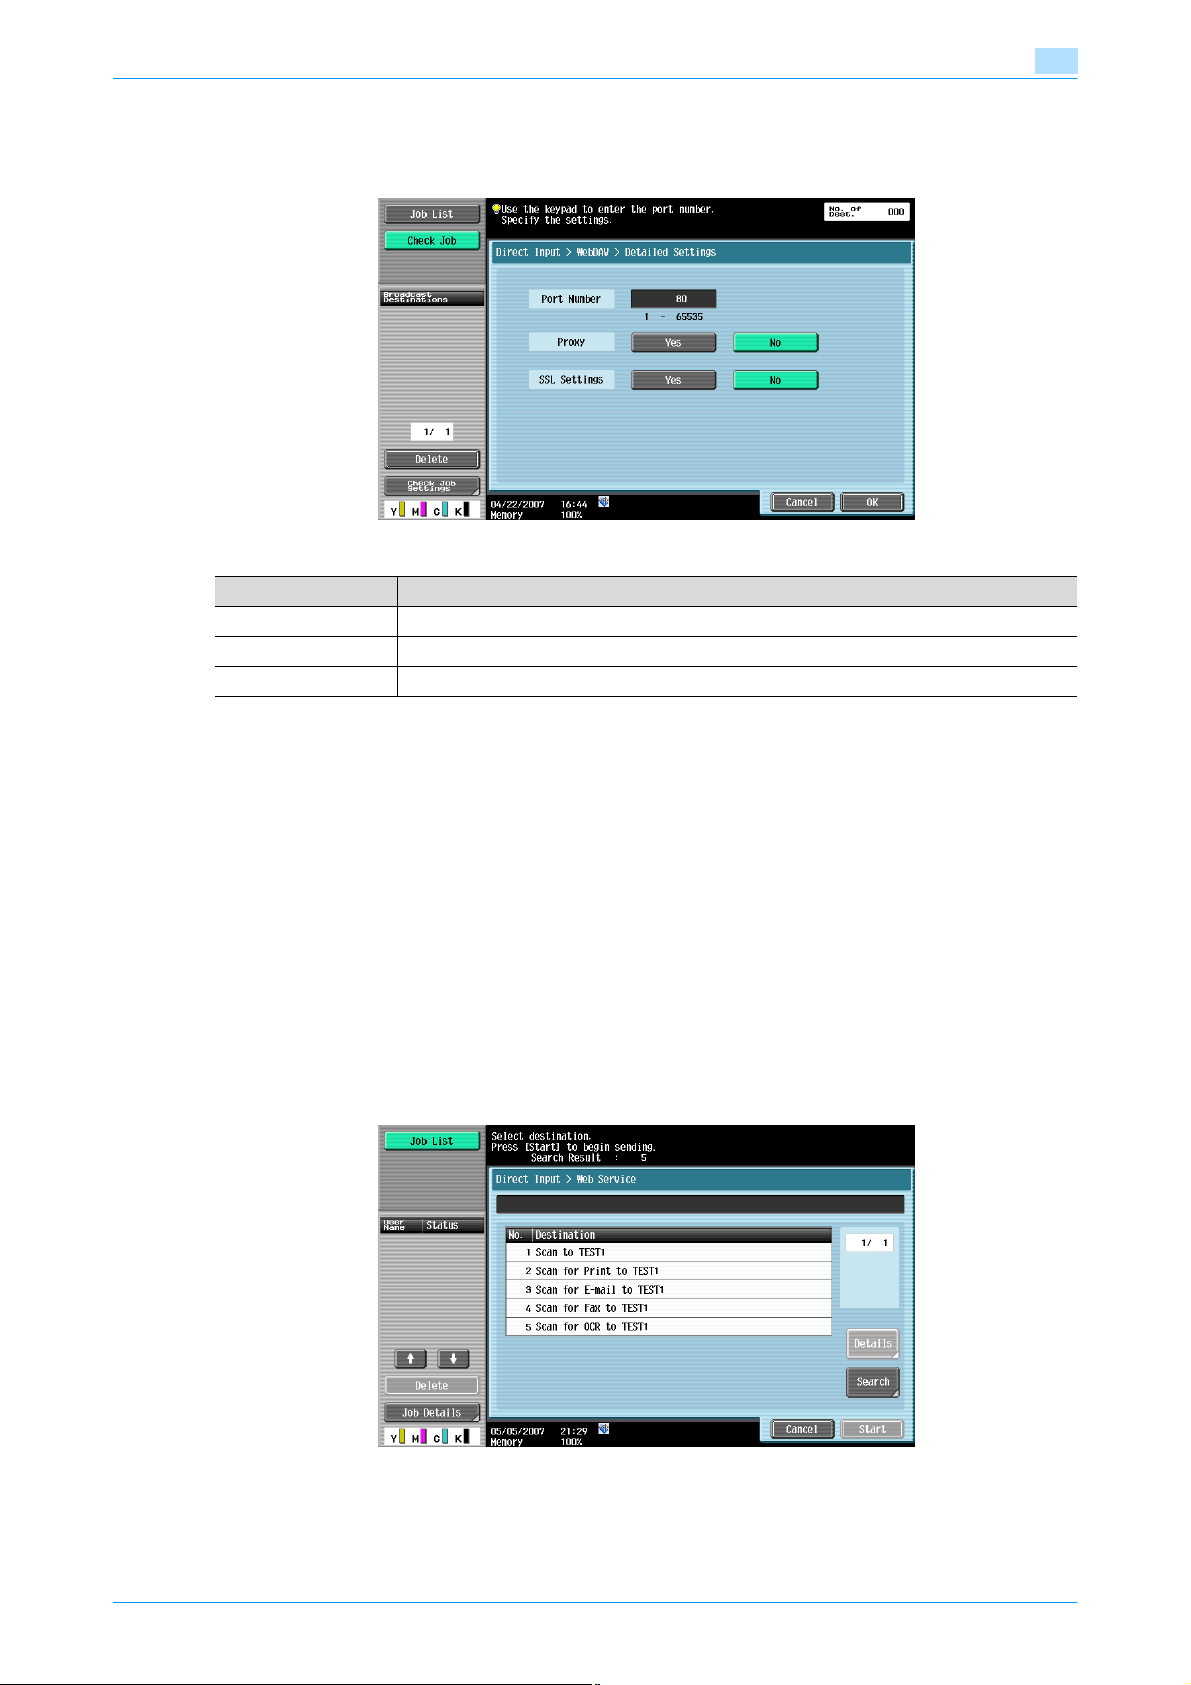
Transmitting data
Detailed Settings
Specify more detailed settings.
Item Description
Port Number Enter the port number.
Proxy Specify whether or not a proxy server is used.
SSL Settings Specify whether or not SSL is used for transmission.
4
Next Destination
Touch this button to add other destinations.
4.4.12 Direct Input - Web Service
This function sends scan data to a computer registered in advance on the network.
!
Detail
For details on settings to be specified in advance, refer to "Using Web services" on page 3-6.
It is also possible to give a scan command from the computer to the machine and save the data. For
details on the procedure, refer to "Giving a scan command from a computer (Web service)" on
page 12-3.
Computers on the network in which the machine is registered as a Web service scanner are listed on the
screen as available destinations. Select a destination.
Detail
Displays the name of the destination and its URL.
C353/C253/C203 4-31
Page 86
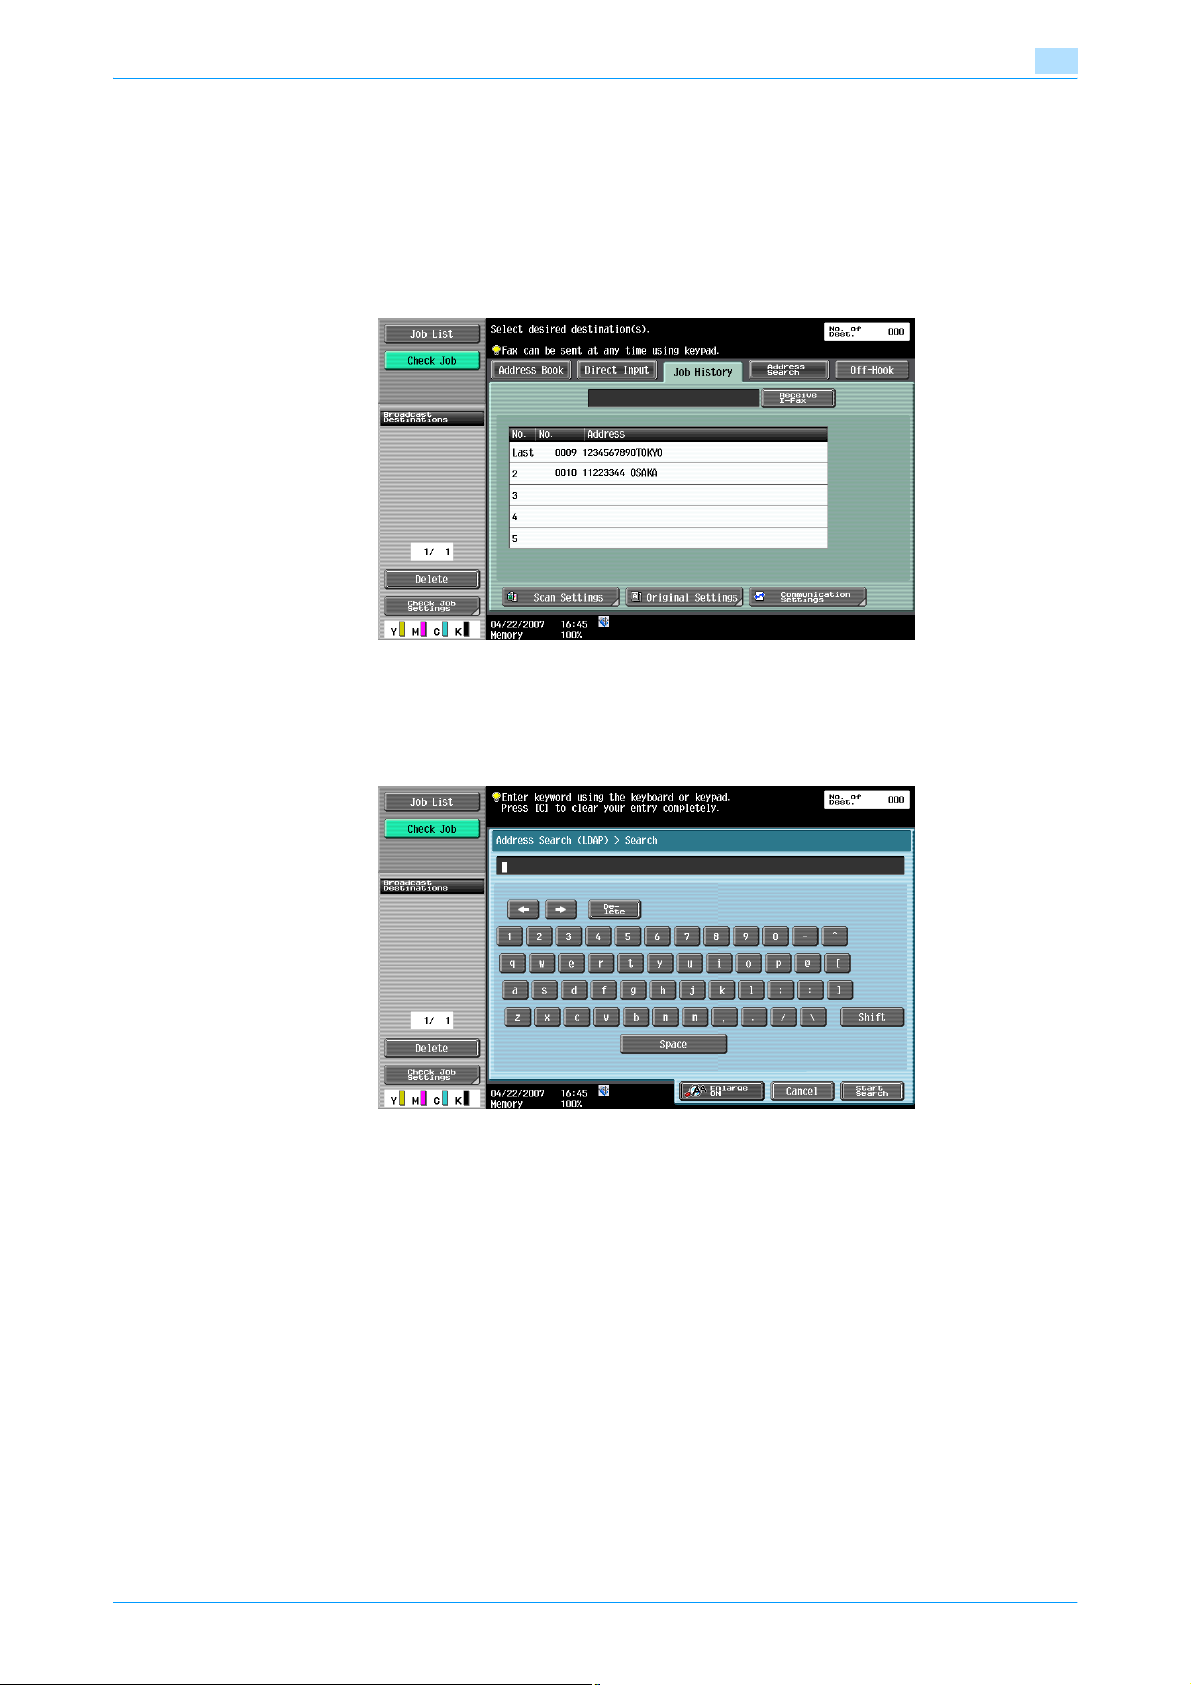
Transmitting data
Search
Enter a keyword that is included in the destination name from the touch panel, and then search for the
destination.
4.4.13 Job History (G3)
The destinations of the five latest fax transmissions are displayed. You can select a destination from this
history.
4
4.4.14 Address Search - Search
Enter a search keyword, and then touch [Start Search] to search data in the specified LDAP server for the
relevant address.
C353/C253/C203 4-32
Page 87
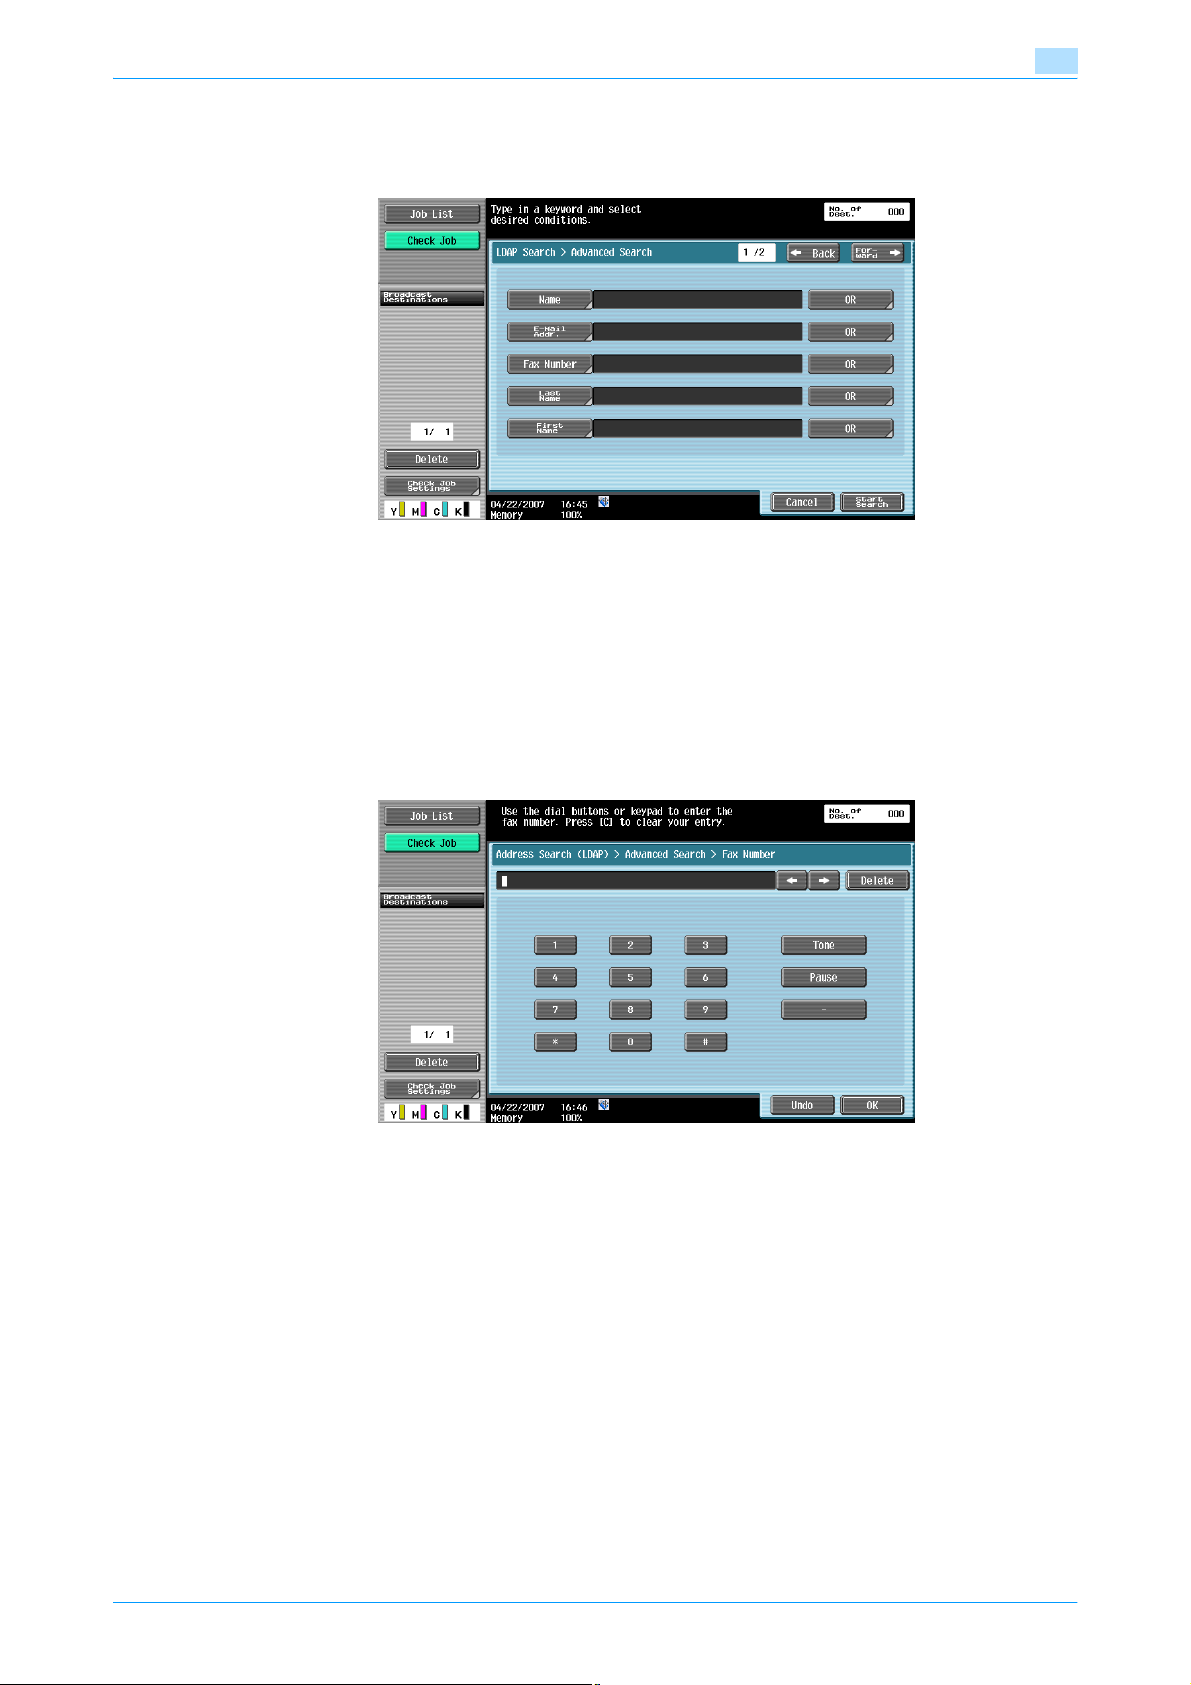
Transmitting data
4.4.15 Address Search - Advanced Search
Specify multiple search conditions to search for the target address.
Name
Enter the name from the touch panel.
4
E-Mail Addr.
Enter the E-Mail address from the touch panel.
Fax Number
Enter the Fax number from the touch panel.
Last Name
Enter the last name from the touch panel.
First Name
Enter the first name from the touch panel.
City
Enter the city name from the touch panel.
Company Name
Enter the company name from the touch panel.
Department
Enter the department name from the touch panel.
C353/C253/C203 4-33
Page 88
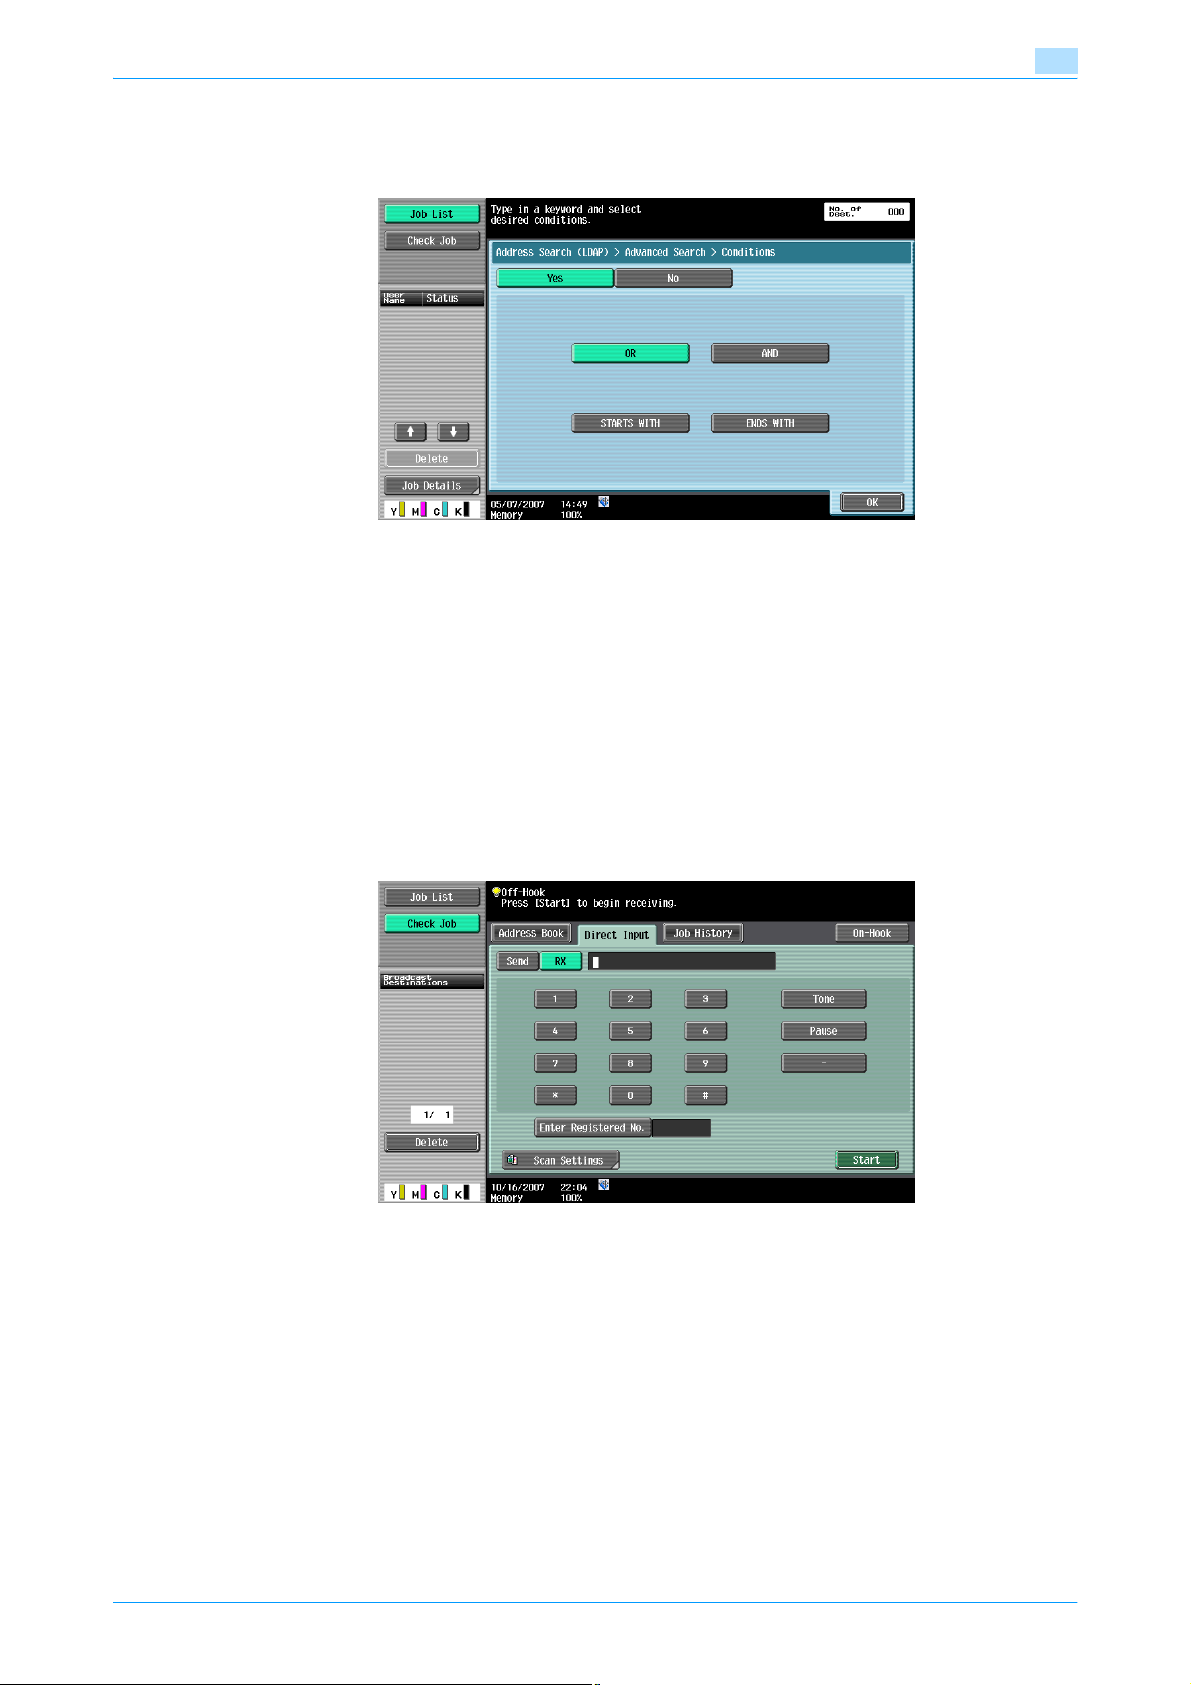
Transmitting data
OR/AND/STARTS WITH/ENDS WITH
Select search conditions from [OR], [AND], [STARTS WITH], and [ENDS WITH].
4.4.16 Off-Hook (G3)
Use this button for manual transmission.
4
!
Detail
When using off-hook operations, memory transmission is disabled.
When "Confirm Address (TX)" is specified, the Off-Hook function is not available.
Manual transmission
Set the original in place and specify settings for scanning as needed. Touching [Off-Hook] hooks up and
displays a screen for specifying the destination.
Touch [Send], specify the destination, and then touch [Start].
!
Detail
To specify the destination, select from [Address Book], [Direct Input], [Job History], or [Program].
C353/C253/C203 4-34
Page 89
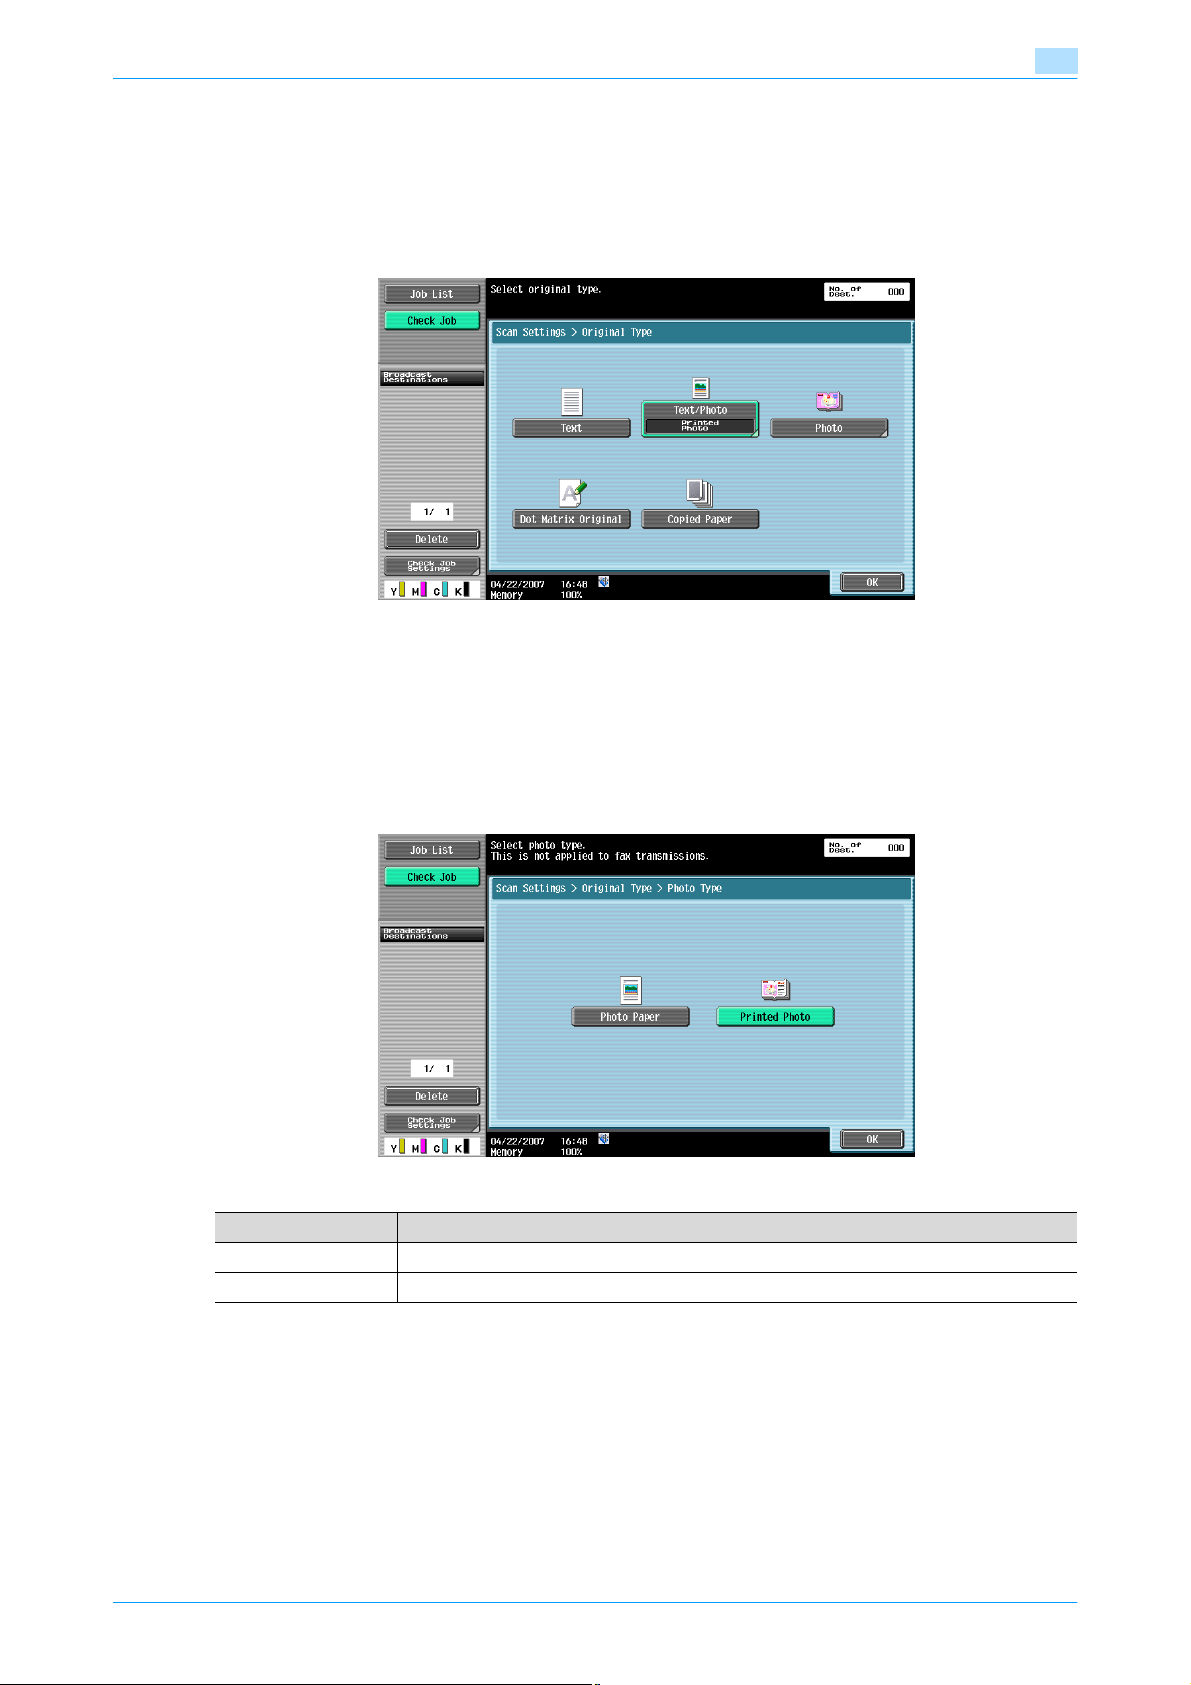
Transmitting data
4.5 Scan Settings
Touch [Scan Settings] to specify detailed settings for scanning.
4.5.1 Basic - Original Type
Select the type according to the contents of the original. The original type can be selected from the following:
4
Text
Select this setting for a text-only original.
Text/Photo
Select this setting for originals consisting of both text and photos (halftones).
If "Text/Photo" or "Photo" is selected, the photo type can also be selected.
Item Description
Photo Paper Select this setting for photos printed on photo paper.
Printed Photo Select this setting for printed photos, such as in books or magazines.
Photo
Select this setting for originals consisting of only photos (halftones).
Dot Matrix Original
Select this setting for originals consisting of text that generally appears faint.
Copied Paper
Select this setting for originals with an even density produced using a copier or printer.
C353/C253/C203 4-35
Page 90
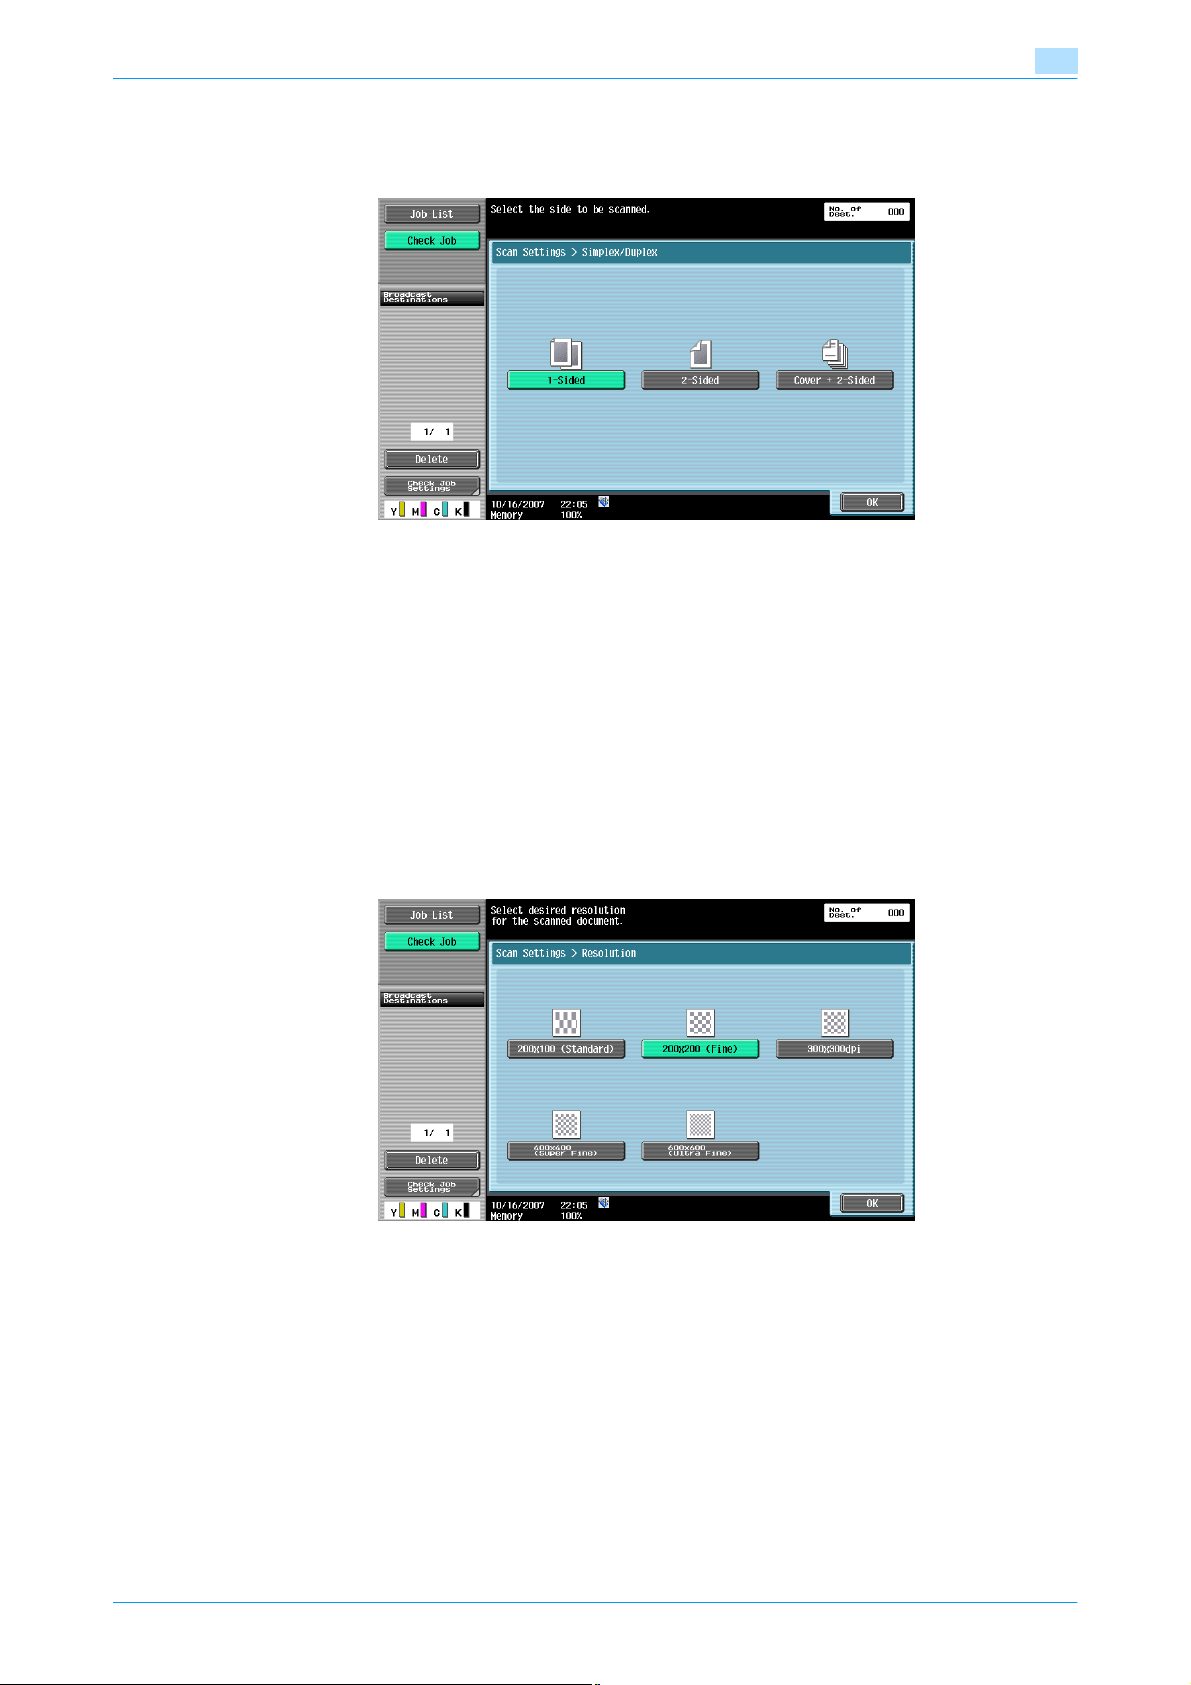
Transmitting data
4.5.2 Basic - Simplex/Duplex
Select a scanning mode to either scan one side or both sides of the original.
1-Sided
Select this setting to scan one side of the original.
4
2-Sided
Select this setting to scan both sides of the original.
Cover + 2-Sided
Select this setting to scan one side of the first page as the cover page, and scan both sides of the remaining
pages.
4.5.3 Basic - Resolution
Select the resolution for scanning.
!
Detail
If [300 × 300 dpi] is selected for G3 fax or Internet fax transmission, the data is sent with converting to
200 × 200 dpi automatically.
C353/C253/C203 4-36
Page 91
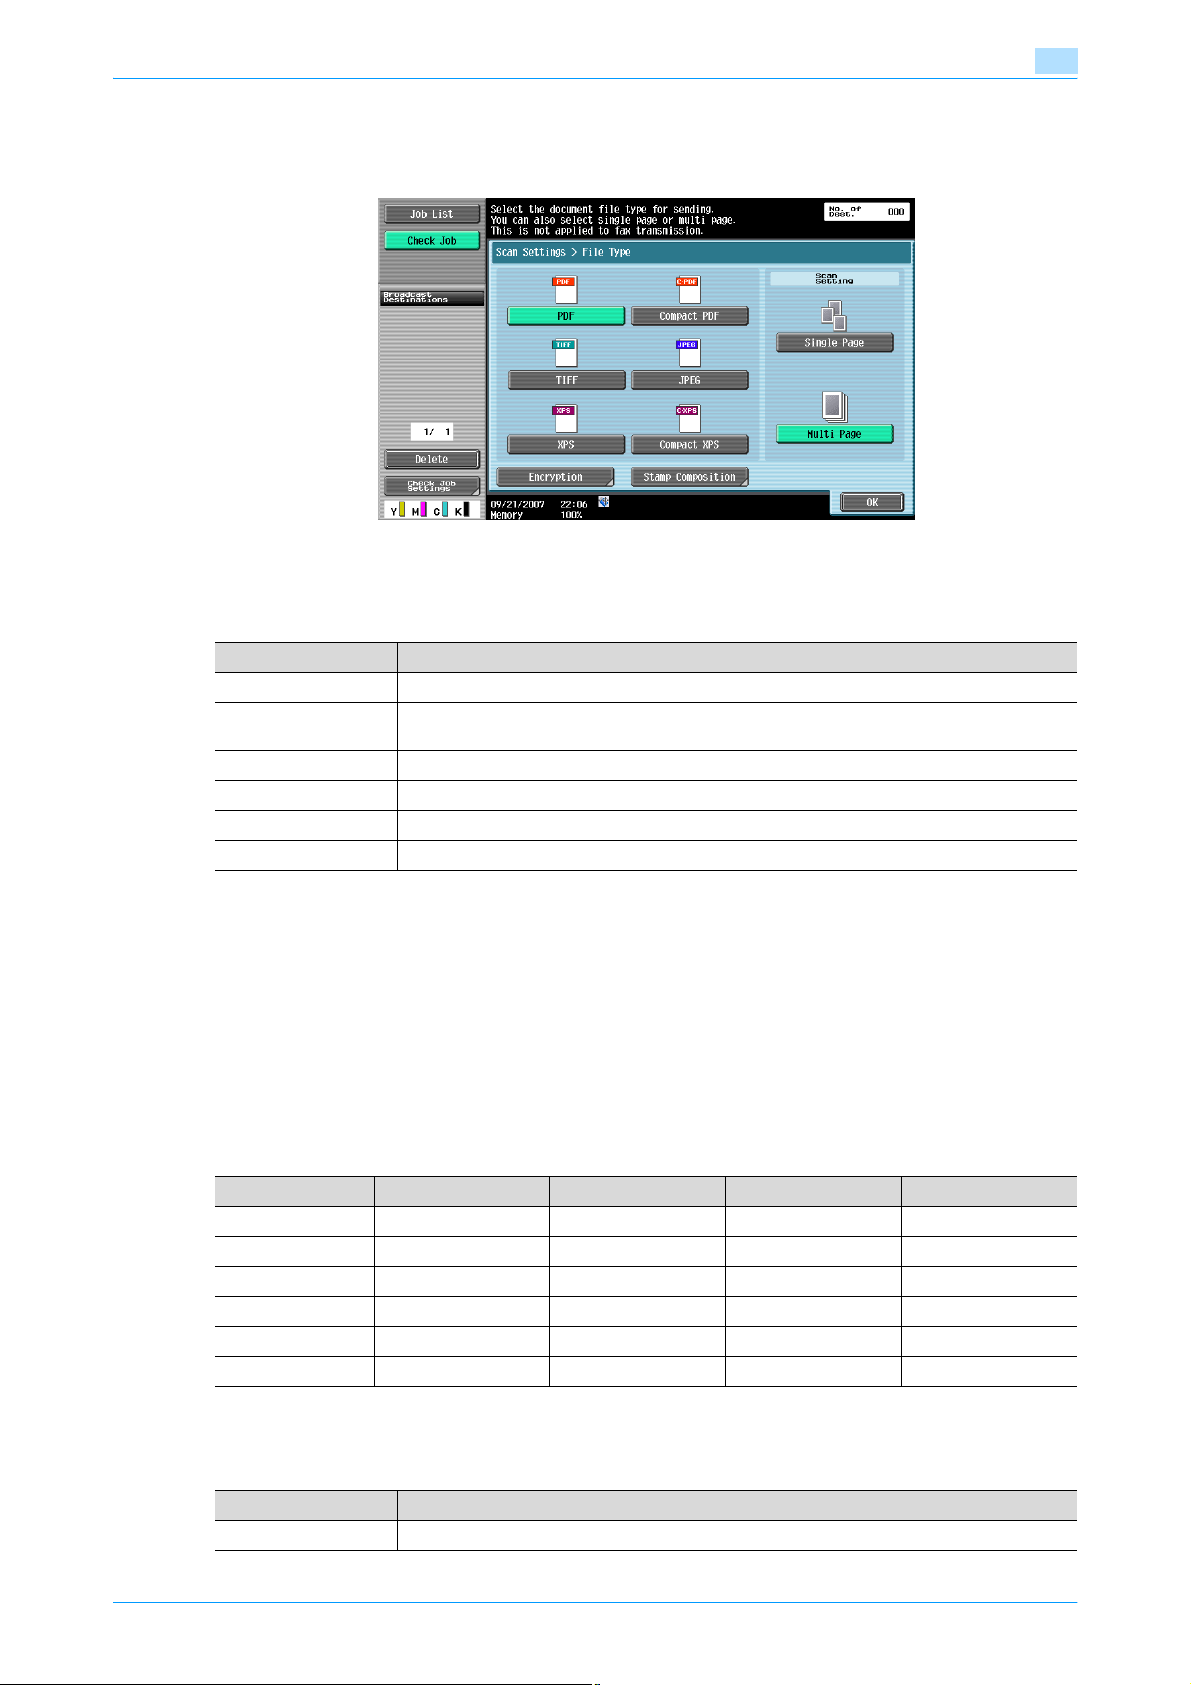
Transmitting data
4.5.4 File Type
Select the file type for saving the scan data.
File Type
The following file types are available.
4
Item Description
PDF Saves the data in the PDF format.
Compact PDF Saves the data by compressing at a level higher than in the PDF format. This is used for full-
TIFF Saves the data in the TIFF format.
JPEG Saves the data in the JPEG format.
XPS Saves the data in the XPS format.
Compact XPS Select this setting to compress the data more than the XPS format and save.
color scan data.
!
Detail
Even if a file type is selected when saving a document in a user box, the file type must be specified
when downloading the data.
The compression format can be specified when saving a TIFF file in color. For details, refer to "Color
TIFF Type (E-Mail/User Box/SMB/FTP/WebDAV)" on page 8-48.
If "JPEG" is selected, "Single Page" is selected automatically for page setting.
Some file type settings may not be available, depending on the setting for "Color". The possible combinations
of the "File Type" and "Color" settings are shown below.
Auto Color Full Color Gray Scale Black
PDF oooo
Compact PDF ooo×
TIFF oooo
JPEG ooo×
XPS oooo
Compact XPS ooo×
Scan Settings
In addition, the grouping of the saved data can be specified.
Item Description
Single Page Creates a file in a format that allows data to be saved for each page when downloading data.
C353/C253/C203 4-37
Page 92
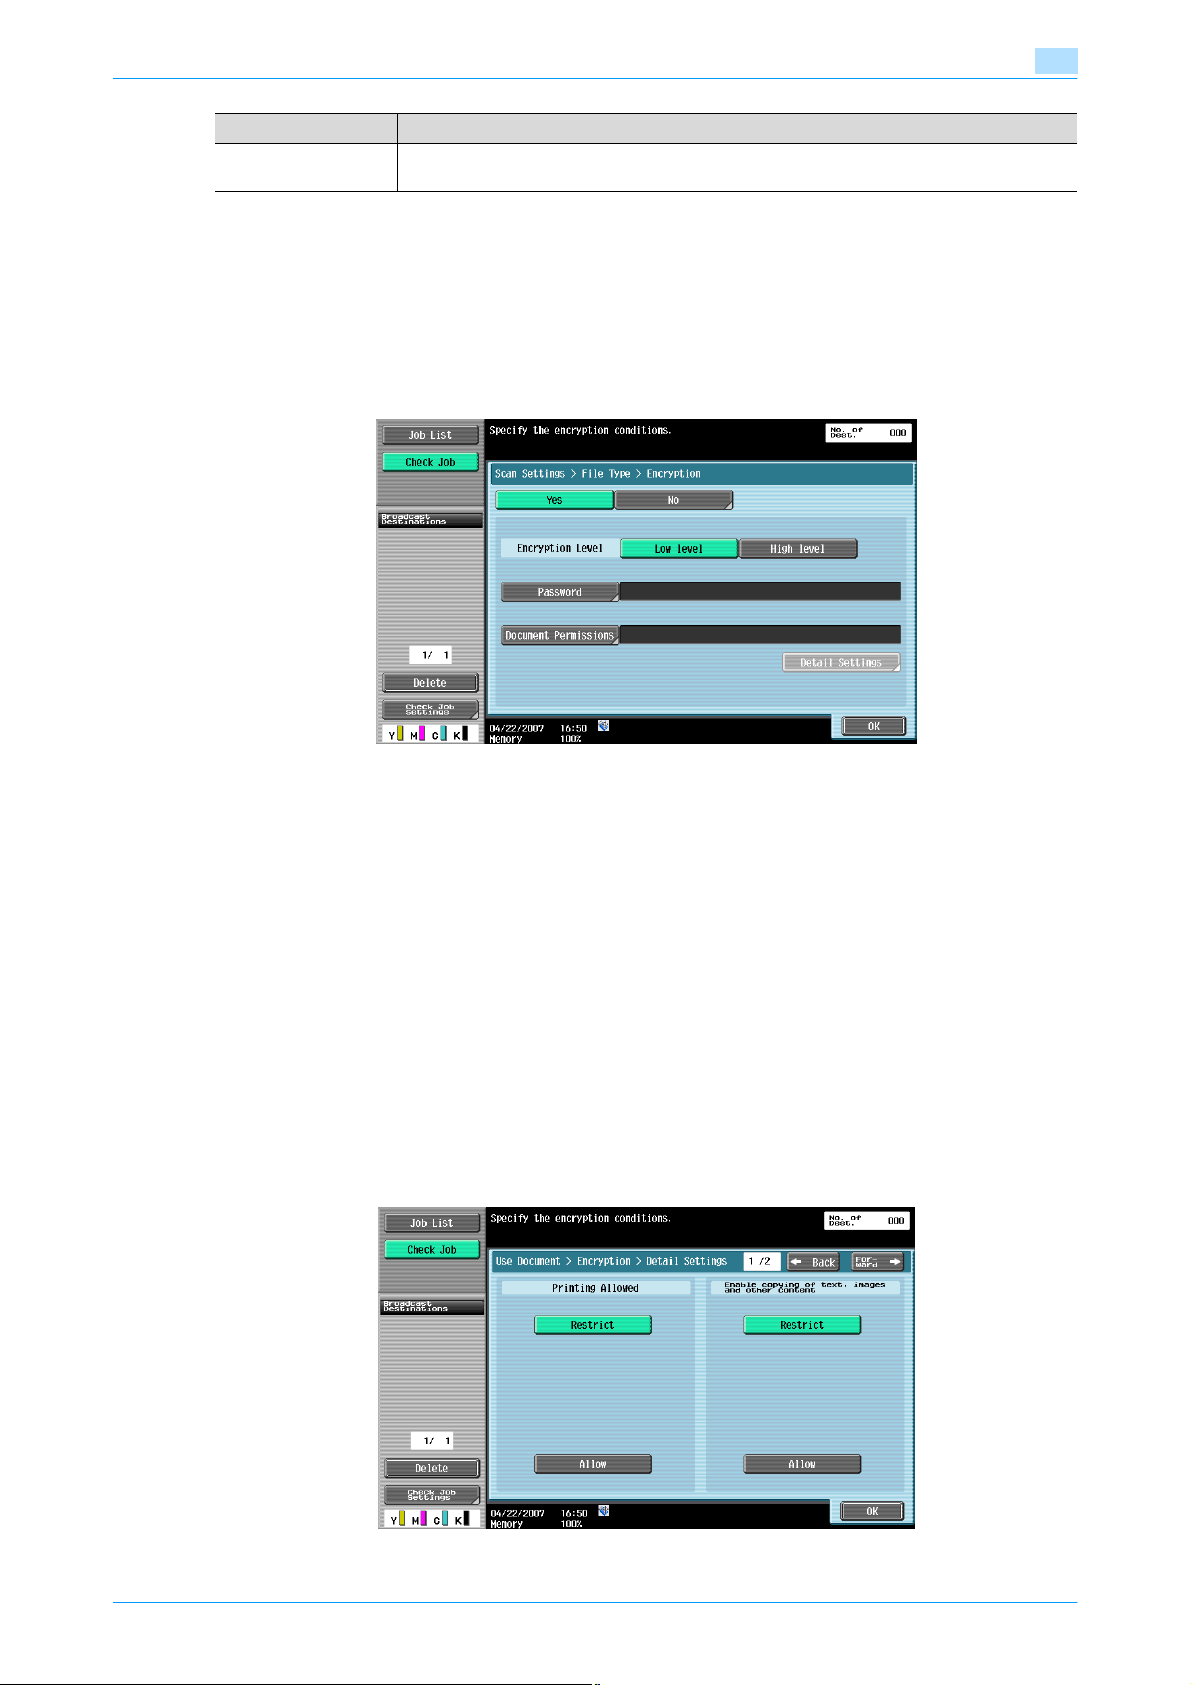
Transmitting data
Item Description
Multi Page Creates a single file from the entire scanned document. This setting cannot be selected if
!
Encryption - Encryption Level, Password, Document Permissions, and Detail Settings
If the "PDF" or "Compact PDF" is selected for "File Type", the encryption level can be specified.
4
"JPEG" is selected for [File Type].
Detail
Even if "Single Page" is selected when saving a document in a user box, a page must be specified when
downloading the data.
Encryption - Password
Enter the password necessary to open encrypted data (within 32 characters). For confirmation, enter the
password twice.
Encryption - Document Permissions
Enter the password necessary to change document permissions (within 32 characters). For confirmation,
enter the password twice.
Encryption - Detail Settings - Printing Allowed/Enable copying of text, images and other content
When "Document Permissions" is selected under "Encryption", details of the permission can be specified.
Under "Printing Allowed", select whether or not data printing should be allowed.
When you specify [High Level] for the encryption level, [Low Resolution] appears.
Under [Enable copying of text, images and other content], select whether or not to allow copying of text,
images and other content.
If [Low Level] is selected
C353/C253/C203 4-38
Page 93
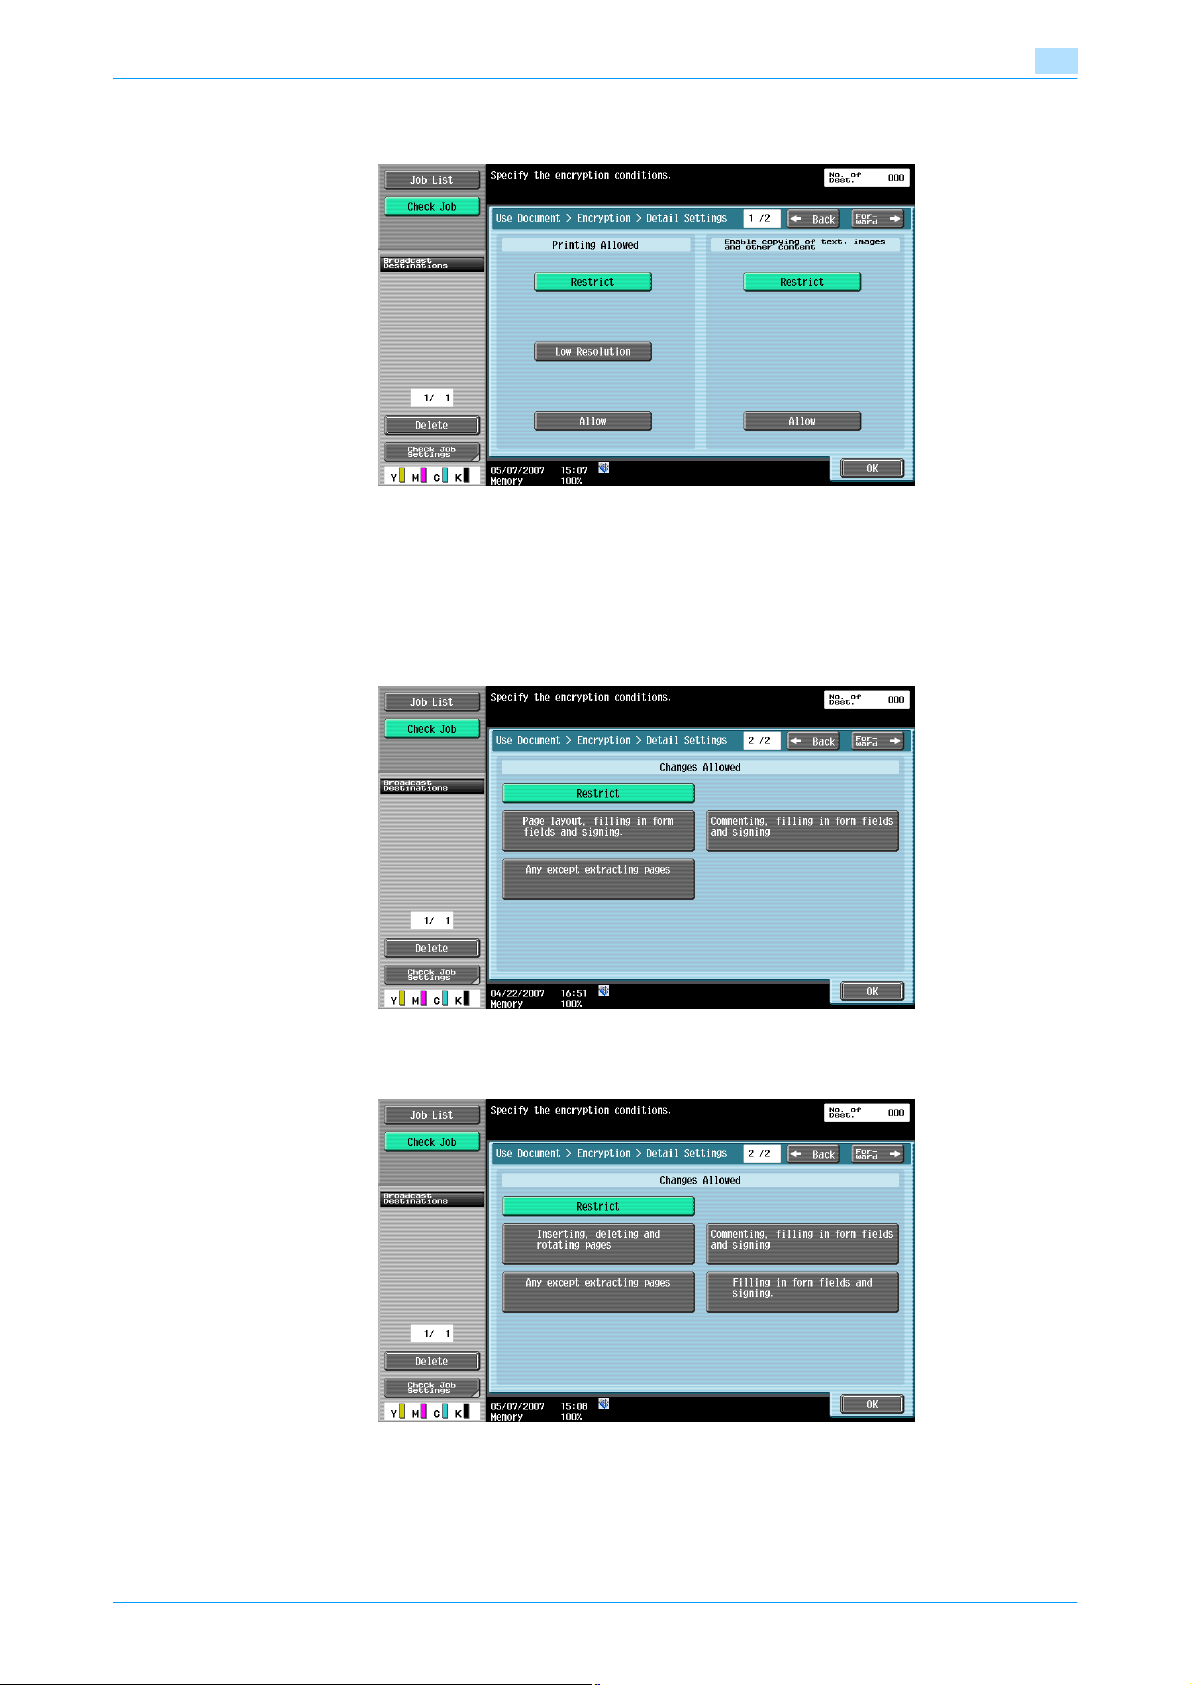
Transmitting data
If [High Level] is selected
Encryption - Detail Settings - Changes Allowed
In the Detail Settings screen, touch [Forward →] to select details of the changes allowed. Under "Changes
Allowed", select the appropriate permission level for document changes including data signature, inputs, and
remarks.
If [Low Level] is selected
4
If [High Level] is selected
C353/C253/C203 4-39
Page 94
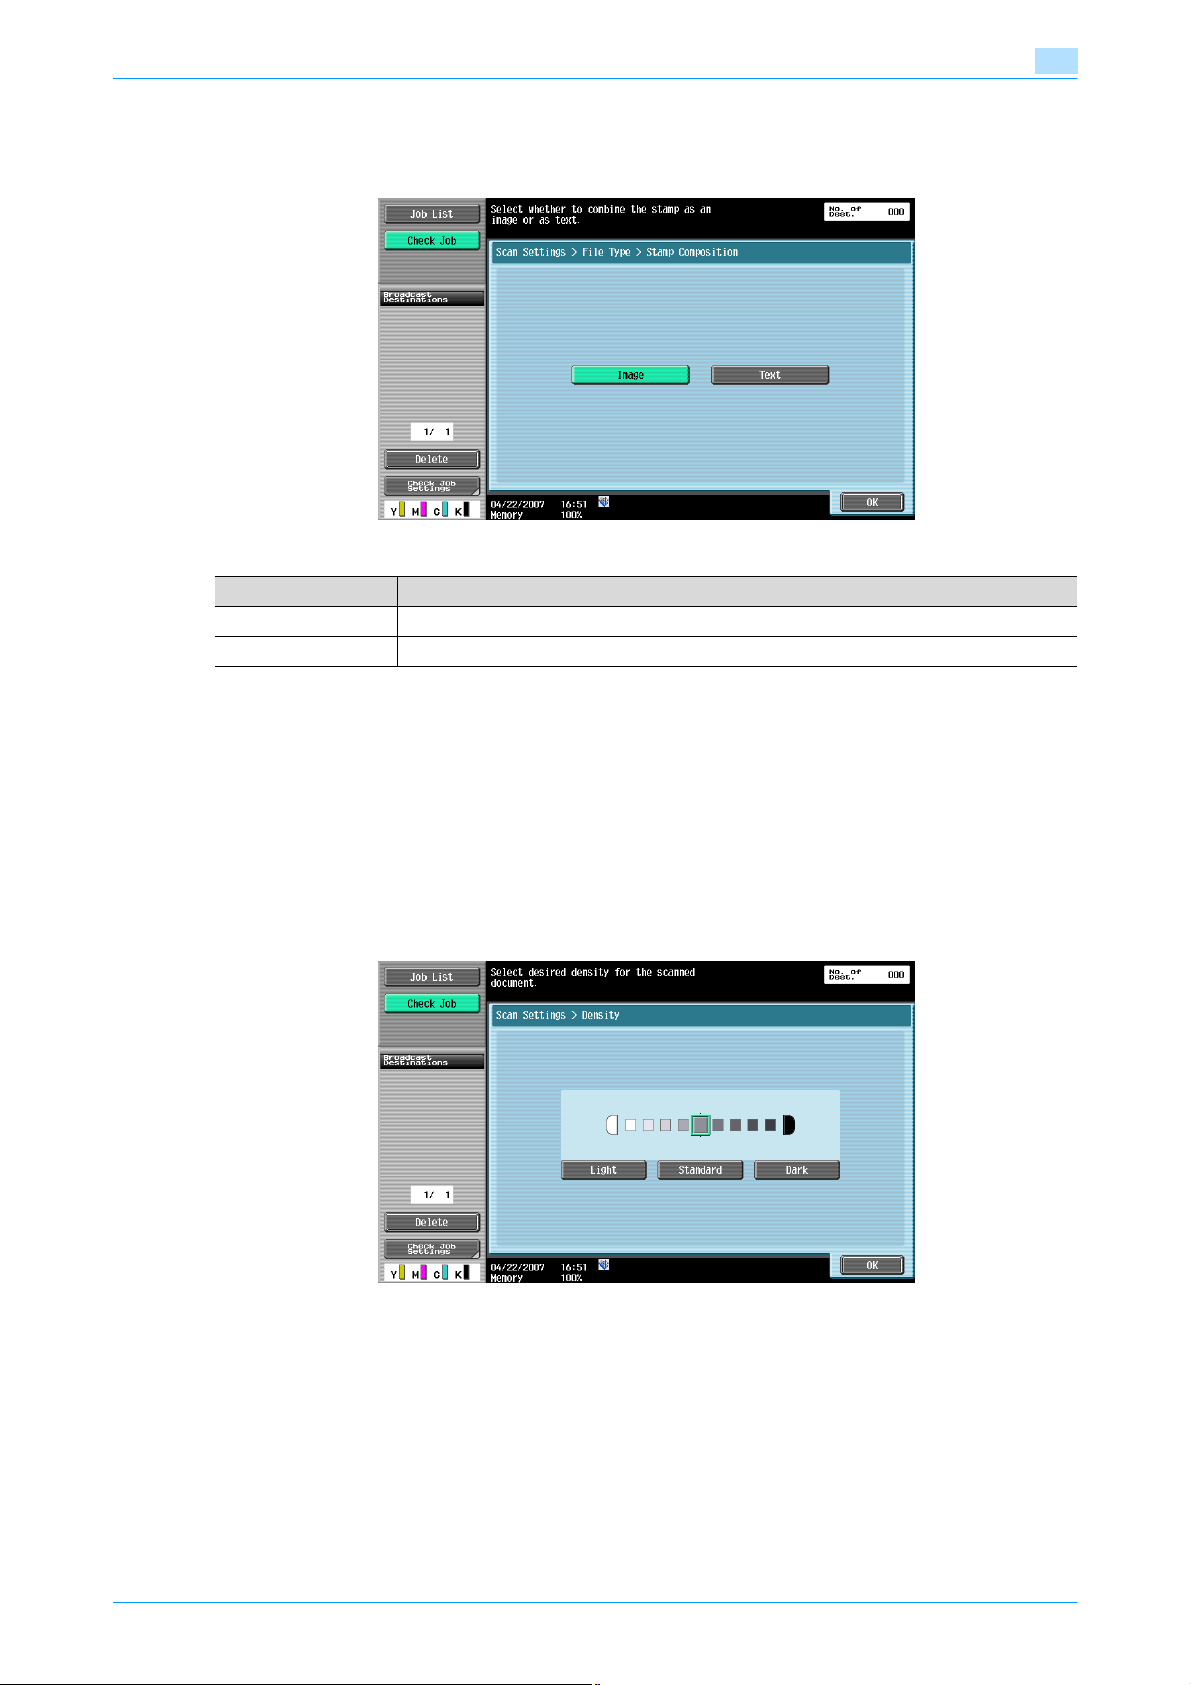
Transmitting data
Stamp Composition
Select a method for composing contents to be added by stamp/page print.
Item Description
Image Inserts the text as an image.
Text Insert the text as text.
4
!
Detail
The date/time, page number, and header/footer can be combined as text.
Stamps are combined as images.
4.5.5 Scan Settings - Density
Adjust the density for scanning.
- To adjust the density, touch [Light] or [Dark].
- Touch [Standard] to reset the setting to its default.
C353/C253/C203 4-40
Page 95
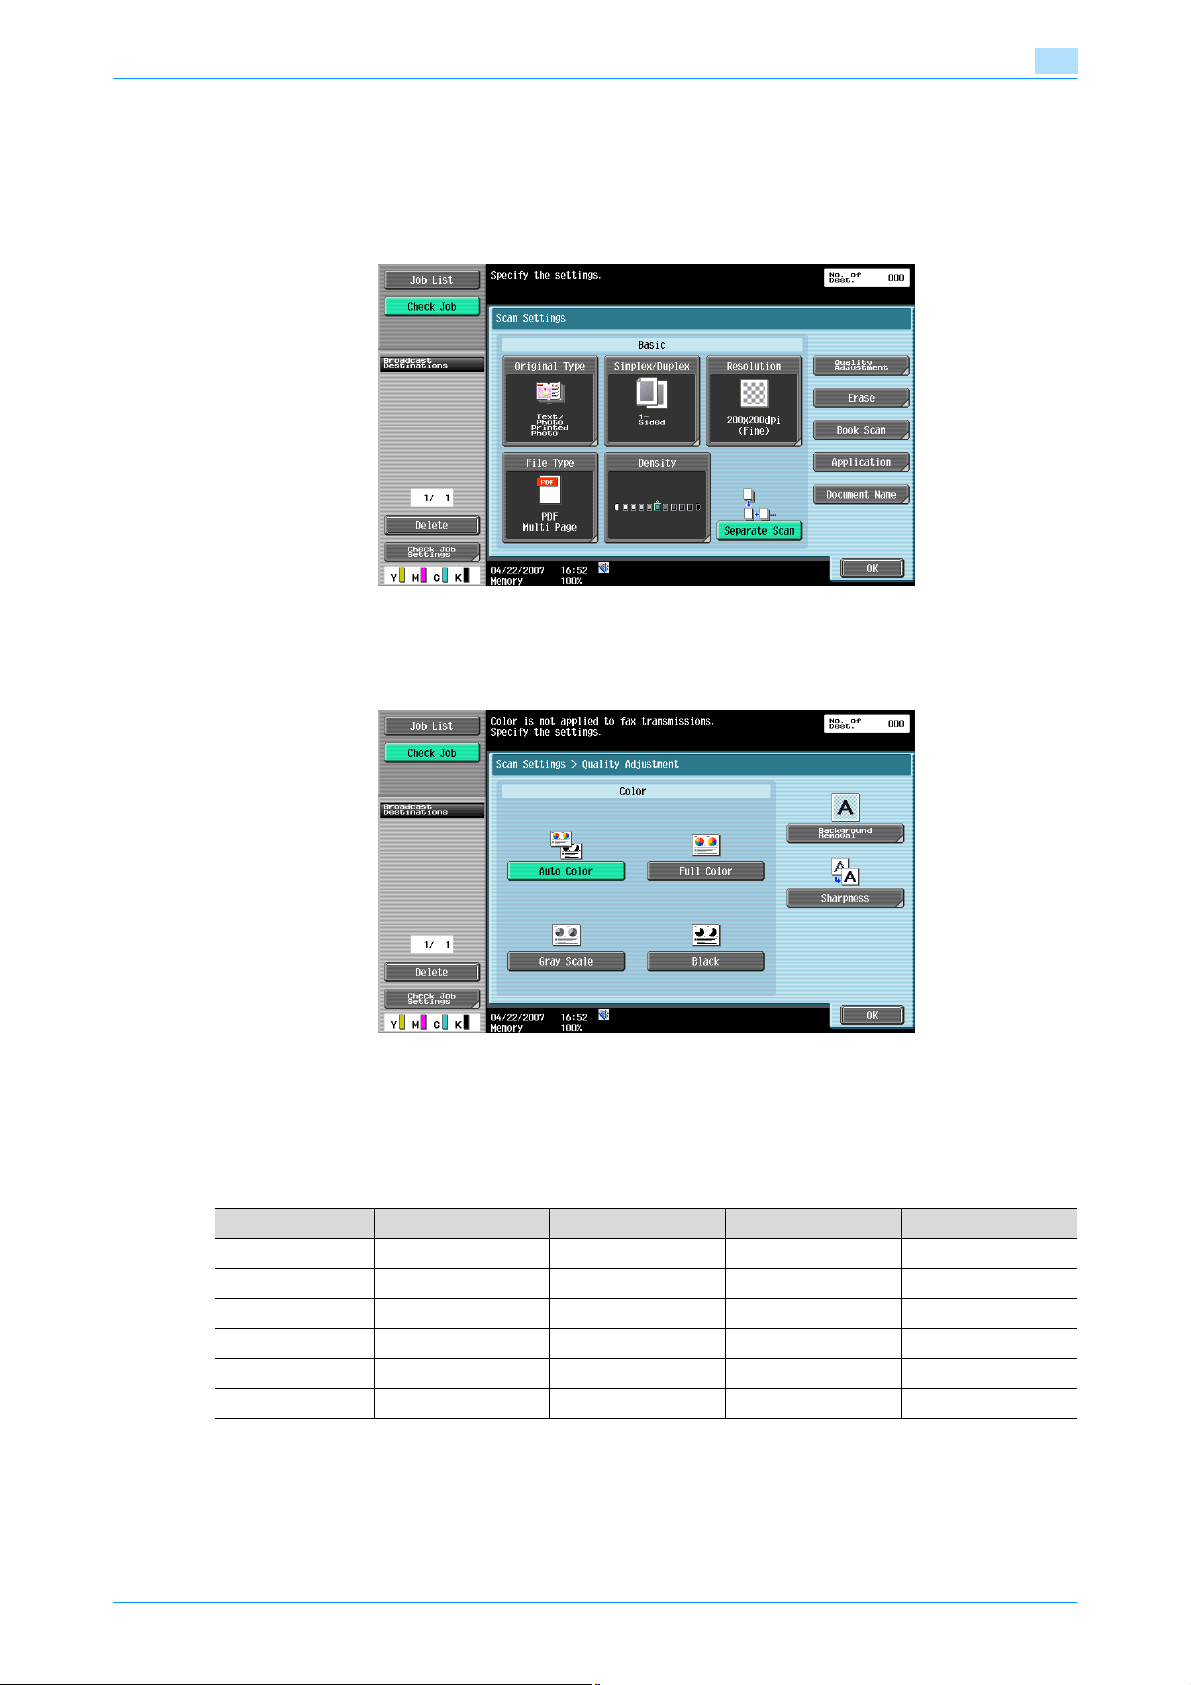
Transmitting data
4.5.6 Scan Settings - Separate Scan
The scan operation can be divided into several sessions for various types of documents, for example, when
all pages of a document cannot be loaded into the ADF, when placing the document on the original glass, or
when single-sided documents are combined with double-sided documents. To specify this setting, touch
[Separate Scan] to have the key label highlighted.
4.5.7 Quality Adjustment
Adjust the quality, such as color and background, for scanning.
4
Color (E-Mail/User Box/SMB/FTP/WebDAV/IP)
Specify an option for scanning in color or for scanning in black and white.
Some color settings may not be available, depending on the setting for "File Type". The possible
combinations of the "File Type" and "Color" settings are shown below.
Auto Color Full Color Gray Scale Black
PDF oooo
Compact PDF ooo ×
TIFF oooo
JPEG ooo ×
XPS oooo
Compact XPS ooo ×
C353/C253/C203 4-41
Page 96
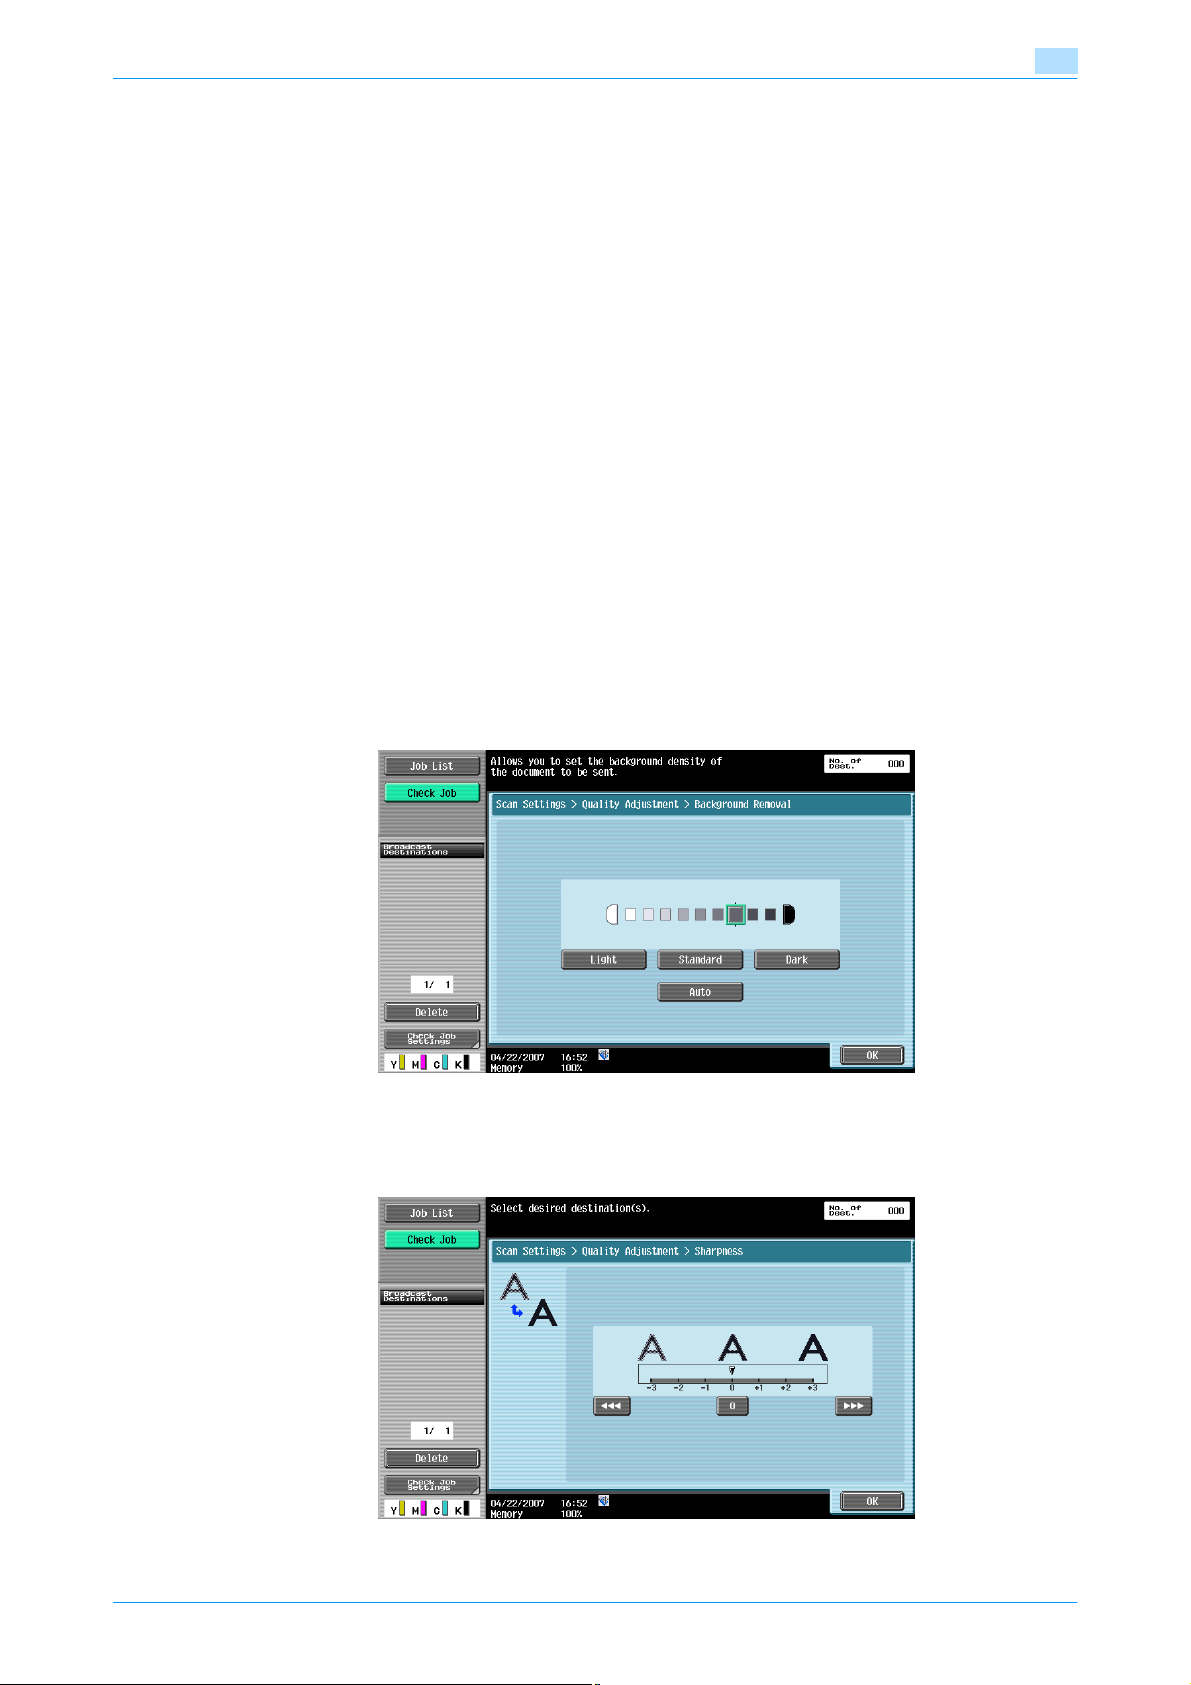
Transmitting data
!
Auto Color
This option automatically determines the color type of the original and scans it accordingly.
Full Color
This option scans in full color.
Gray Scale
Select this setting for originals with many halftones, such as in black-and-white photos.
Black
Select this setting for originals with distinct black and white areas, such as in line drawings.
Background Removal
Use this option to adjust the density of the original background during scanning. When colored paper is used
for the original to be scanned, the background color may be scanned, and a result may be that the entire
image is output in a dark color. In that case, the density of the background can be adjusted.
- To specify automatic adjustment, touch [Auto].
4
Detail
The compression format can be specified when saving a TIFF file in color. For details, refer to "Color
TIFF Type (E-Mail/User Box/SMB/FTP/WebDAV)" on page 8-48.
If "JPEG" is selected, "Single Page" is selected automatically for page setting.
Sharpness
This option enables outlines of characters, etc, to become sharper during scanning.
C353/C253/C203 4-42
Page 97
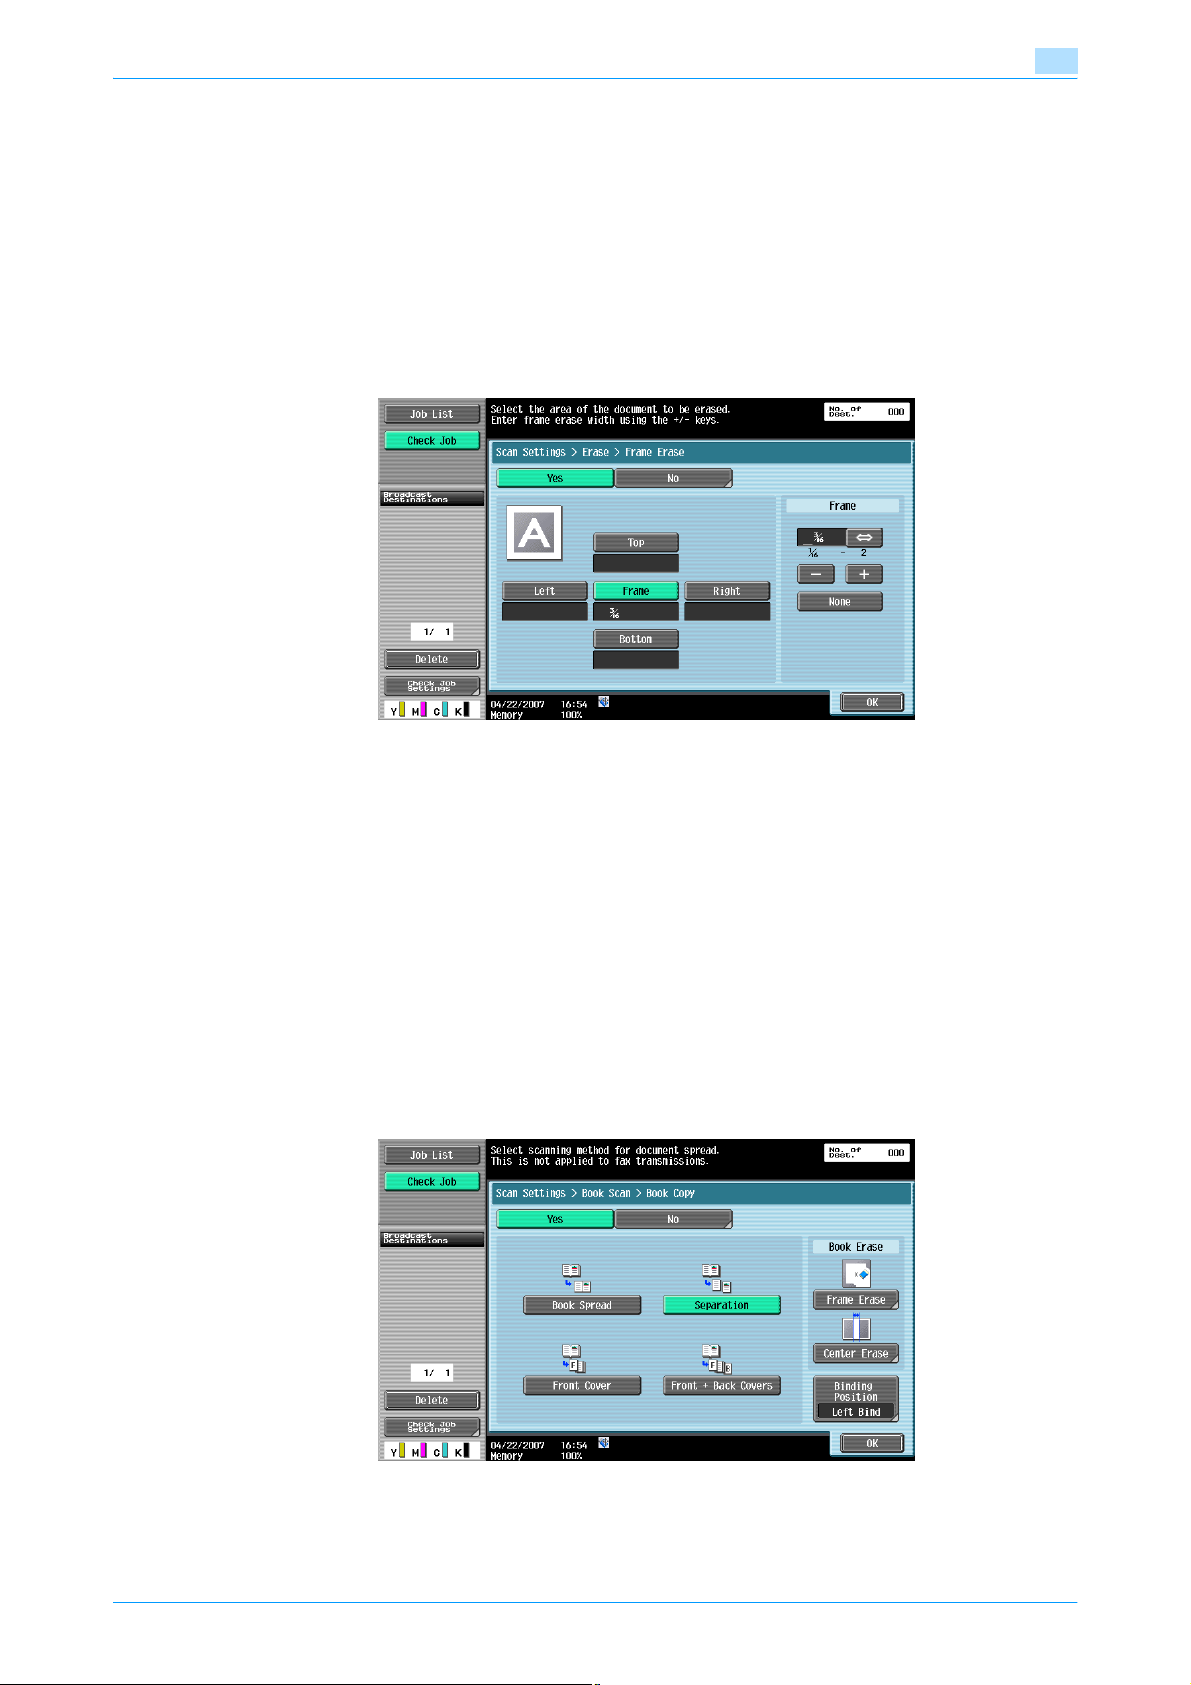
Transmitting data
4.5.8 Erase
An area around the edge of the original can be erased.
Frame Erase
Select this setting to specify frame erasing.
- To erase the same width on all sides, touch [Frame], and then specify a value (range: 1/16 inch to 2
- To specify different widths for the top, left, right, and bottom, touch the button for the desired location,
- To cancel frame erasing, touch [No].
4
inches (0.1 mm to 50.0 mm)).
and then specify a value.
!
Detail
If a width to be erased around the original is specified with "Frame Erase" in the Book Copy screen, the
same settings are also applied to "Frame Erase" in the Frame Erase screen.
4.5.9 Book Scan - Book Copy
Select this method for scanning a page-spread original. In addition, the binding position and erasure of
unnecessary parts can be specified.
!
Detail
Specify the size of the page spread as the scan size.
[Book Copy] cannot be selected for fax transmissions.
Book Spread
Select this setting to scan a page spread as a single page.
C353/C253/C203 4-43
Page 98
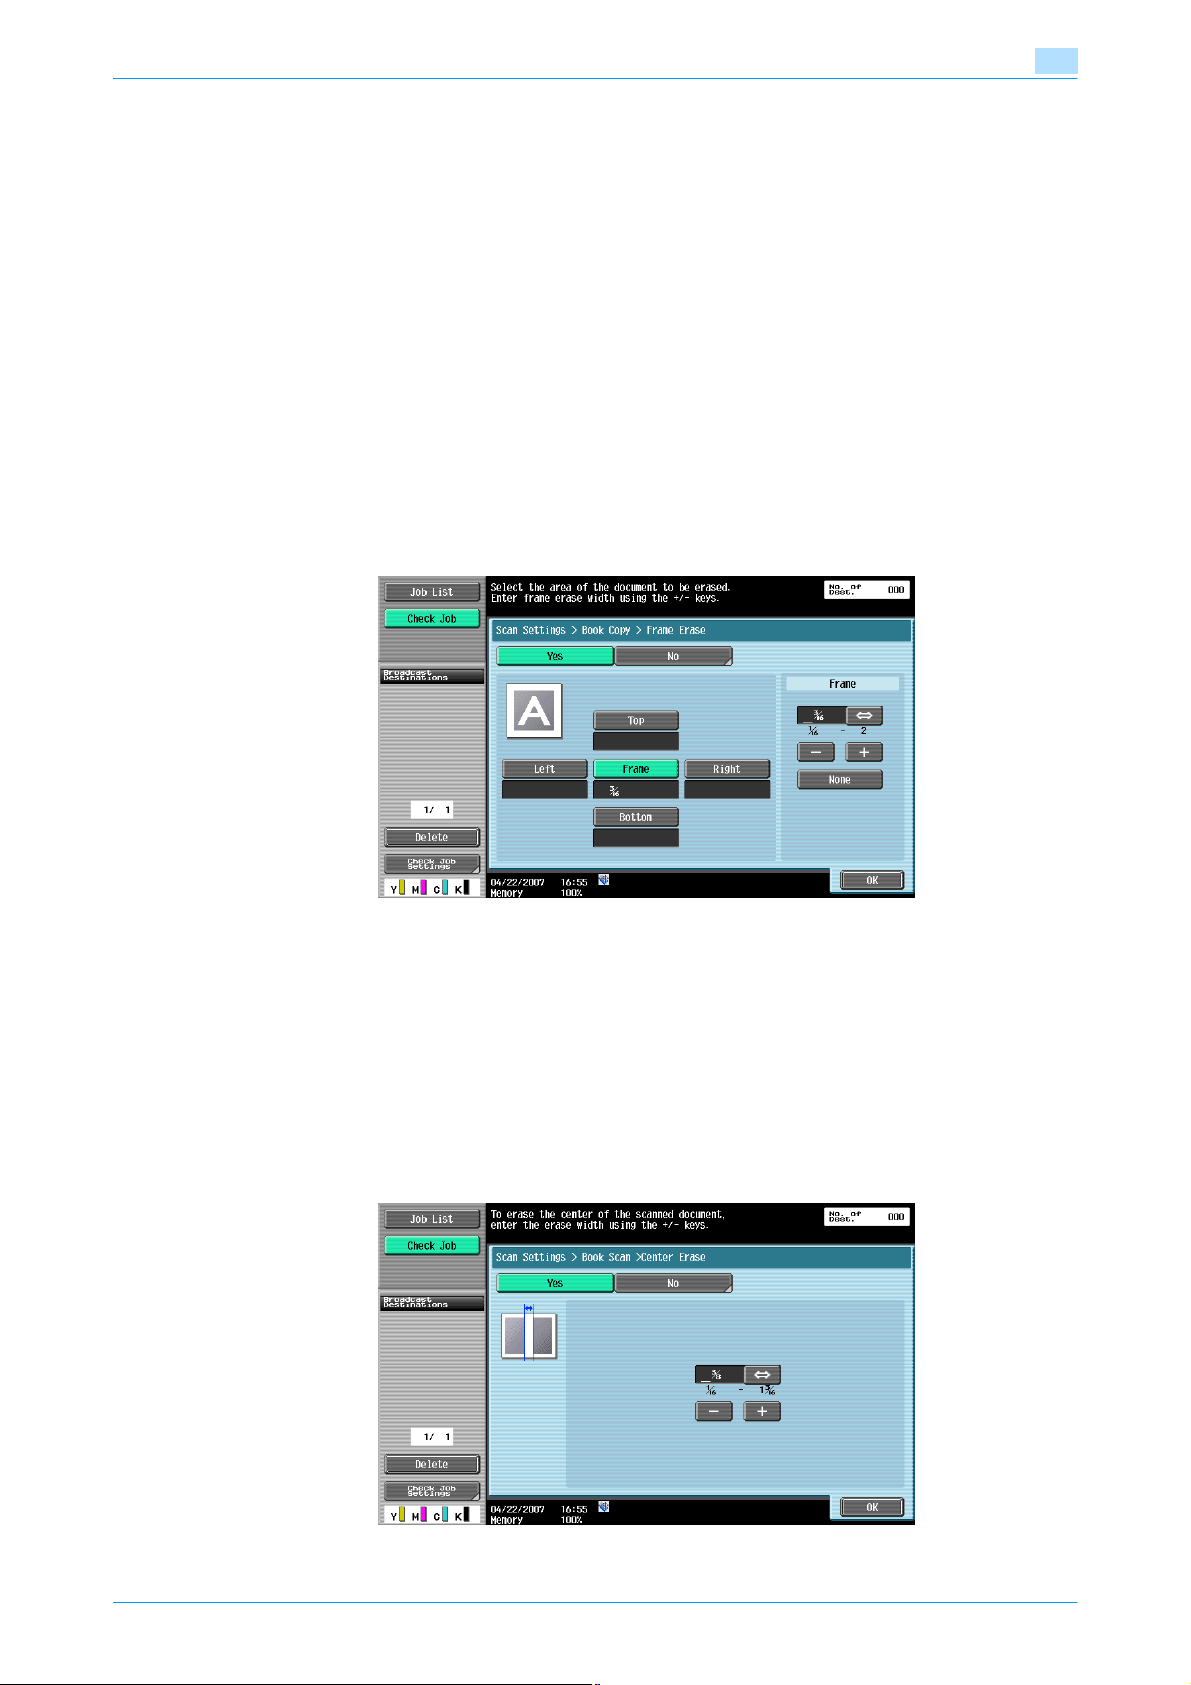
Transmitting data
Separation
Select this setting to scan a page spread as two separate pages (left and right).
Front Cover
Select this setting to scan the first page as the front cover.
Front + Back Covers
Select this setting to scan the first page as the front cover, the second page as the back cover, and the
remaining pages as the body.
Book Erase - Frame Erase
Select this setting to specify frame erasing for page spreads.
- To erase the same width on all sides, touch [Frame], and then specify a value (range: 1/16 inch to 2
- To specify different widths for the top, left, right, and bottom, touch the button for the desired location,
- To cancel frame erasing, touch [No].
4
inches (0.1 mm to 50.0 mm)).
and then specify a value.
!
Detail
If a width to be erased around the original is specified with "Frame Erase" in the Book Copy screen, the
same settings are also applied to "Frame Erase" in the Frame Erase screen.
Book Erase - Center Erase
Select this setting to erase the shadows along the binding position at the center of the original.
- Enter the frame erase width using the keypad or the [-] and [+] keys (range: 1/16 inch to 1-3/16 inches
(0.1 mm to 30.0 mm)).
C353/C253/C203 4-44
Page 99
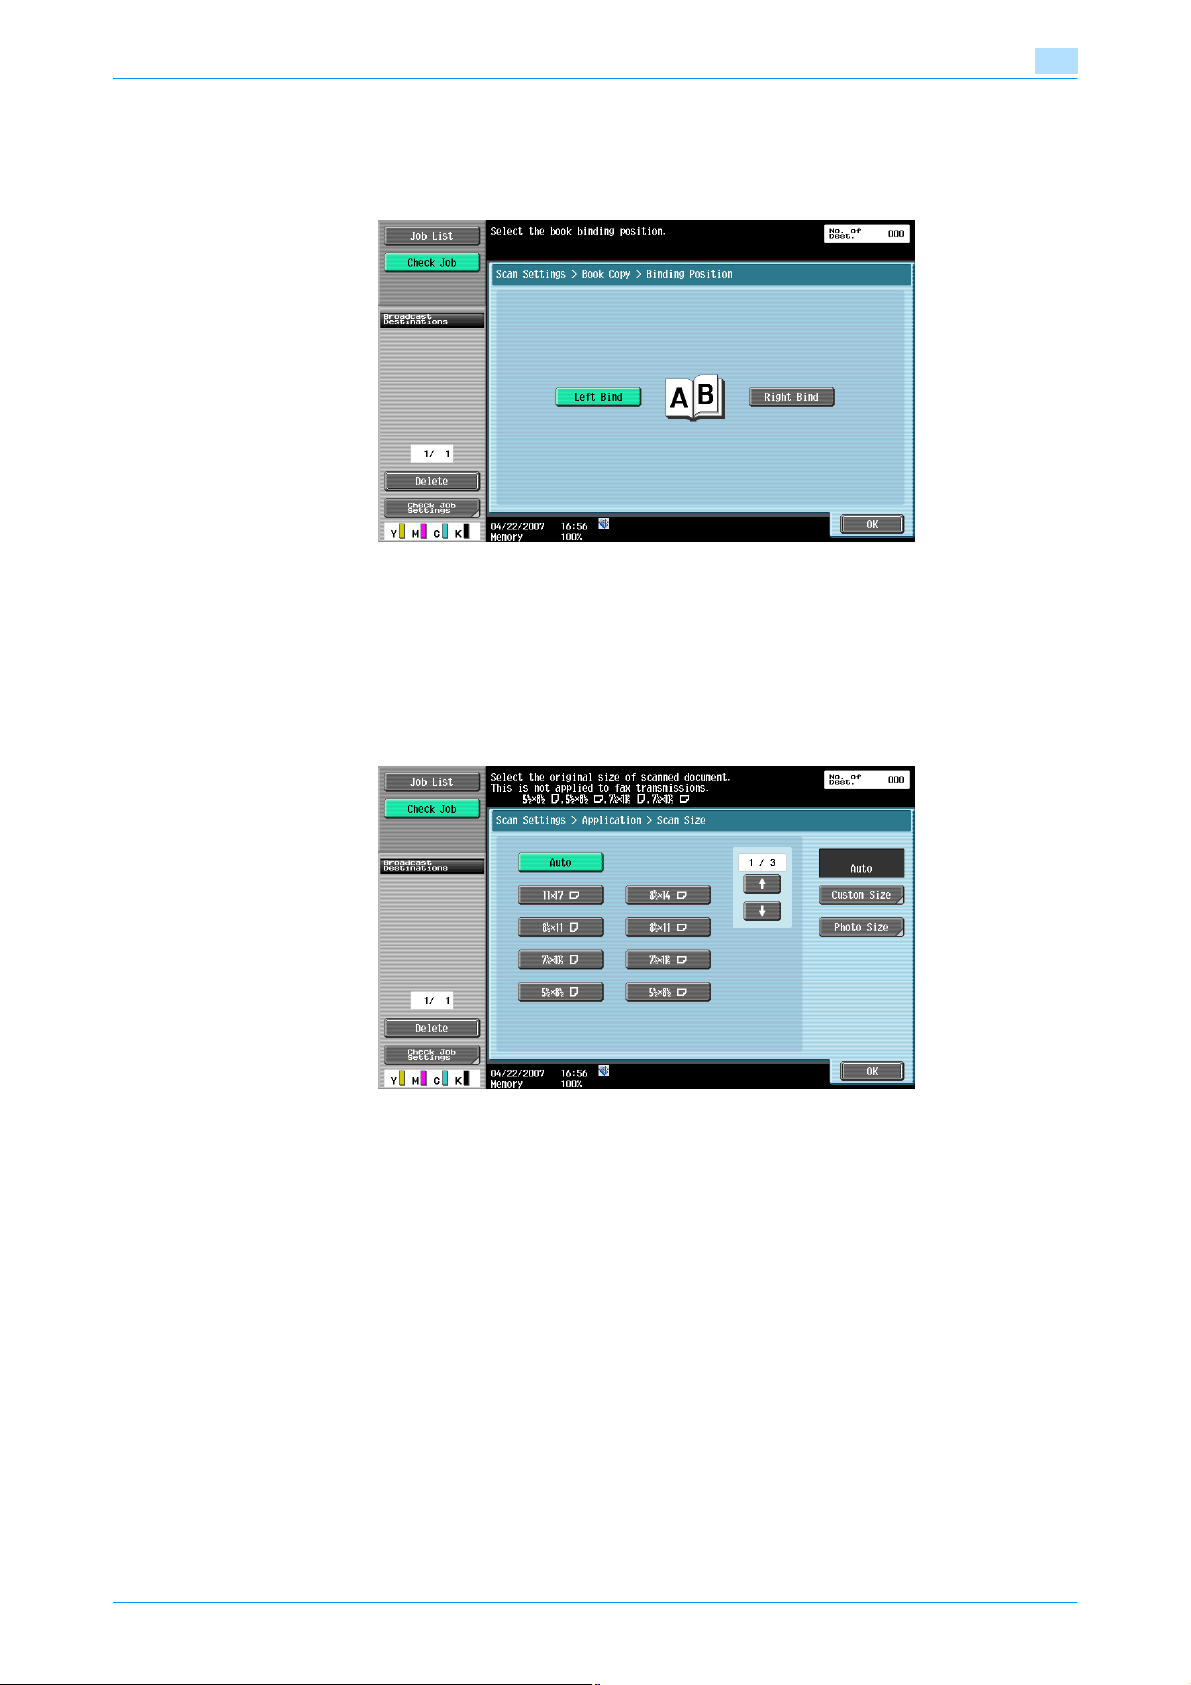
Transmitting data
Binding Position
If "Separation", "Front Cover", or "Front + Back Covers" was selected, touch [Binding Position], and then
select the binding position.
4.5.10 Application - Scan Size
Specify the size of paper for scanning.
4
Standard
To automatically detect the size of the first sheet of the original upon scanning, touch [Auto]. To scan an
original of a preset paper size (such as 8-1/2 × 11 (A4), or 7-1/4 × 10-1/2 (B5)), select the relevant paper size.
C353/C253/C203 4-45
Page 100
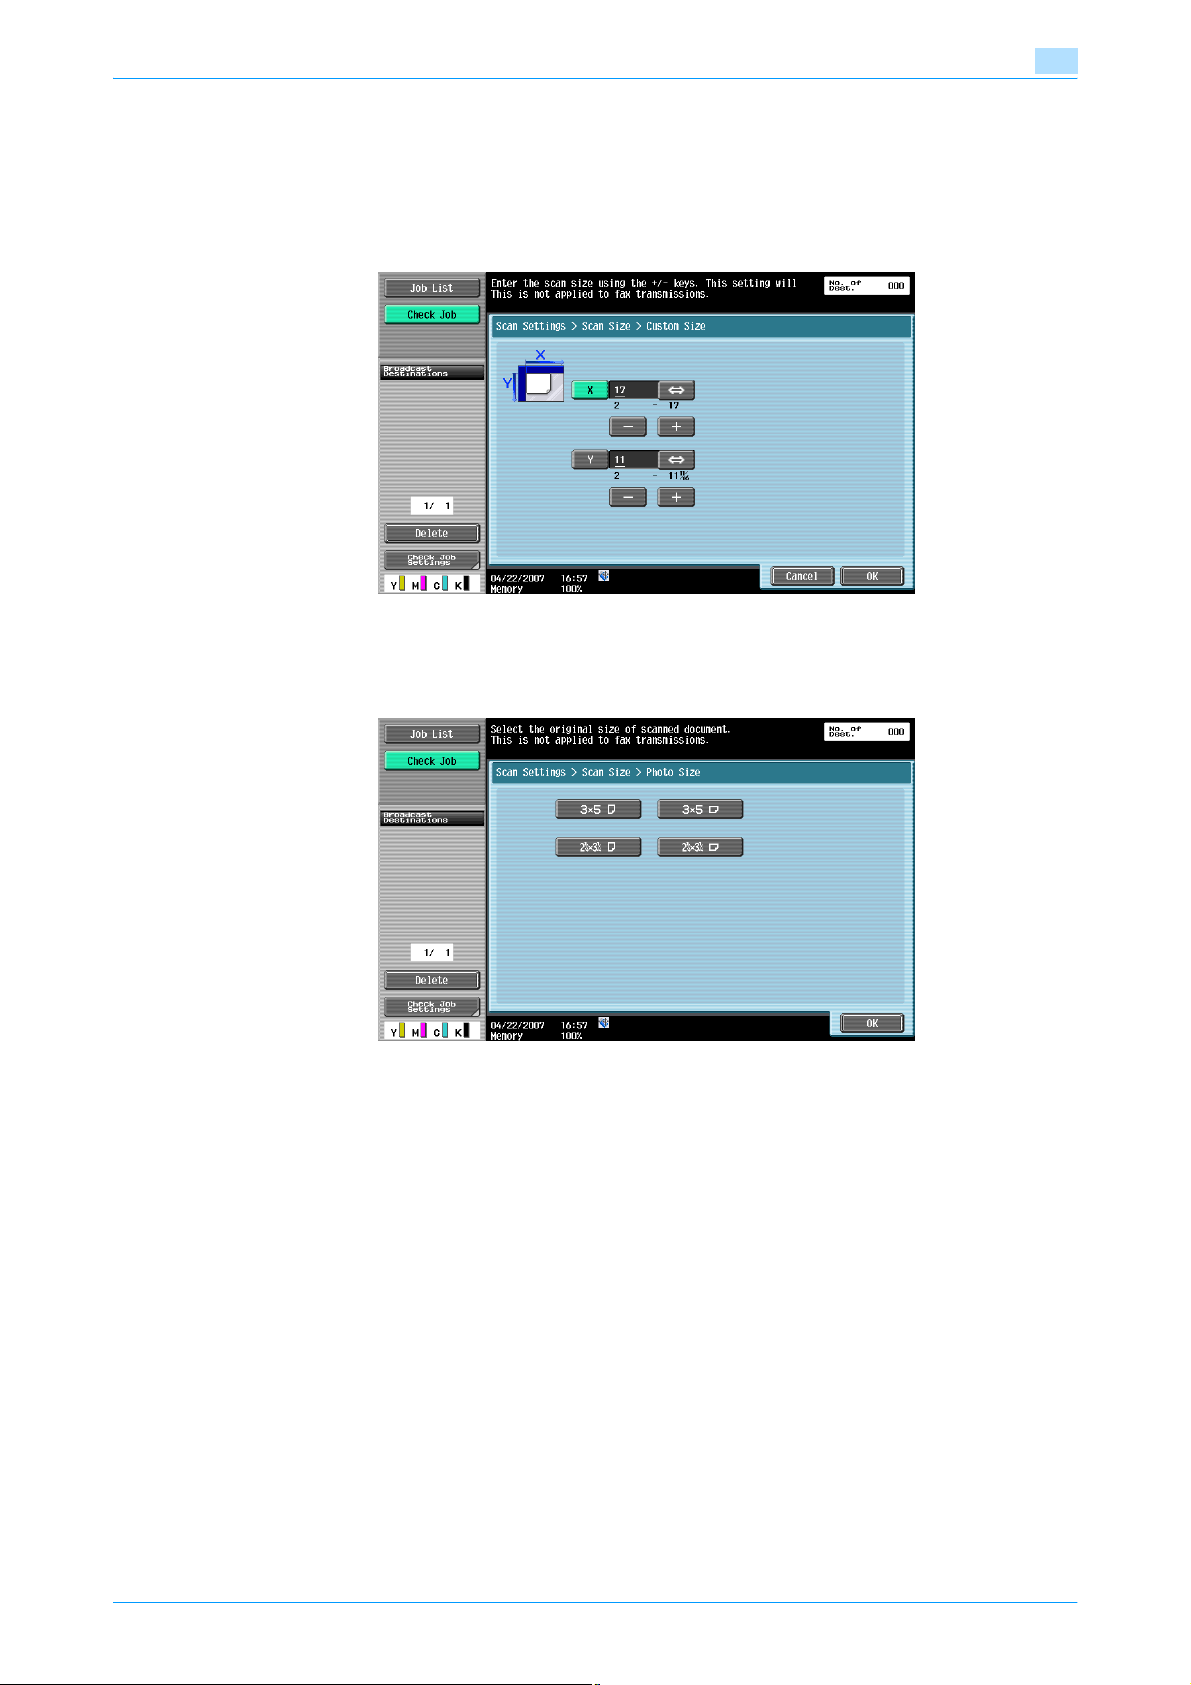
Transmitting data
Custom Size
Enter the dimensions of a custom size that is not available as a preset size.
- The size in the X direction can be set between 2 inches and 17 inches (between 30 mm and 432 mm).
- The size in the Y direction can be set between 2 inches and 11-11/16 inches (between 30 mm and 297
Photo Size
Select size 2-1/4 × 3-1/4 or 3 × 5 inches (9 × 13, 10 × 15 or 13 × 18 inches).
4
mm).
C353/C253/C203 4-46
 Loading...