

KitchenAid KMT2115, KMT4115 User Manual
KMT2115 • KMT4115
Toaster
INSTRUCTIONS
Grille-pain
INSTRUCTIONS
Toastador
INSTRUCCIONES
Welcome to the world of KitchenAid®.
We’re committed to helping you
create a lifetime of delicious meals for
family and friends. To help ensure the
longevity and performance of your
appliance, keep this guide handy.
It will empower you with the best way
to use and care for your product. Your
satisfaction is our #1 goal. Remember
to register your product online at
www.kitchenaid.com, or by
mail using the included
Product Registration Card.
USA: 1.800.541.6390
Canada: 1.800.807.6777
KitchenAid.com
KitchenAid.ca
2

Table of Contents
TOASTER SAFETY
Important Safeguards.................................................................................................4
Electrical Requirements .............................................................................................5
PARTS AND FEATURES ................................................................................................ 6
USING YOUR TOASTER
Before First Use ........................................................................................................7
Making Toast ..............................................................................................................8
SPECIAL TOASTING FUNCTIONS
Toasting Bagels ...........................................................................................................9
CARING FOR YOUR TOASTER ...................................................................................9
TROUBLESHOOTING ..........................................................................................10
WARRANTY ..........................................................................................................11
Proof of Purchase & Product Registration
Always keep a copy of the itemized sales receipt showing the date of purchase of your
Toaster. Proof of purchase will assure you of in-warranty service. Before you use your
Toaster, please ll out and mail your product registration card packed with the unit, or
register online at www.kitchenaid.com.
This will enable us to contact you in the unlikely event of a product safety notication and
assist us in complying with the provisions of the Consumer Product Safety Act. This card
does not verify your warranty. Please complete the following for your personal records:
English
Model Number ________________________________________________________
Serial Number ________________________________________________________
Date Purchased _______________________________________________________
Store Name __________________________________________________________
3
Toaster Safety
IMPORTANT SAFEGUARDS
When using electrical appliances, basic safety precautions should always be followed,
including the following:
1. Read all instructions.
2. Do not touch hot surfaces. Use handles or knobs.
3. To protect against electrical shock, do not immerse cord, plugs, or toaster in water or
other liquid.
4. Close supervision is necessary when any appliance is used by or near children.
5. Unplug toaster from outlet when not in use and before cleaning. Allow to cool before
putting on or taking off parts.
6. Do not operate any appliance with a damaged cord or plug or after the appliance
malfunctions or has been damaged in any manner. Return appliance to the nearest
Authorized Service Facility for examination, repair or adjustment.
7. The use of accessory attachments not recommended by the appliance manufacturer may
cause injuries.
8. Do not use outdoors.
9. Do not let cord hang over edge of table or counter, or touch hot surfaces.
10. Do not place on or near a hot gas or electric burner, or in a heated oven.
11. To disconnect, turn any control to “OFF,” then remove plug from outlet.
12. Do not use toaster for other than intended use.
13. Oversize foods, metal foil packages, or utensils must not be inserted in toaster as they
may involve a risk of re or electric shock.
14. A re may occur if toaster is covered with or touching ammable material, including
curtains, draperies, walls and the like, when in operation.
15. Do not attempt to dislodge food when toaster is plugged in.
16. This product is designed for household use only.
SAVE THESE INSTRUCTIONS
4
Toaster Safety
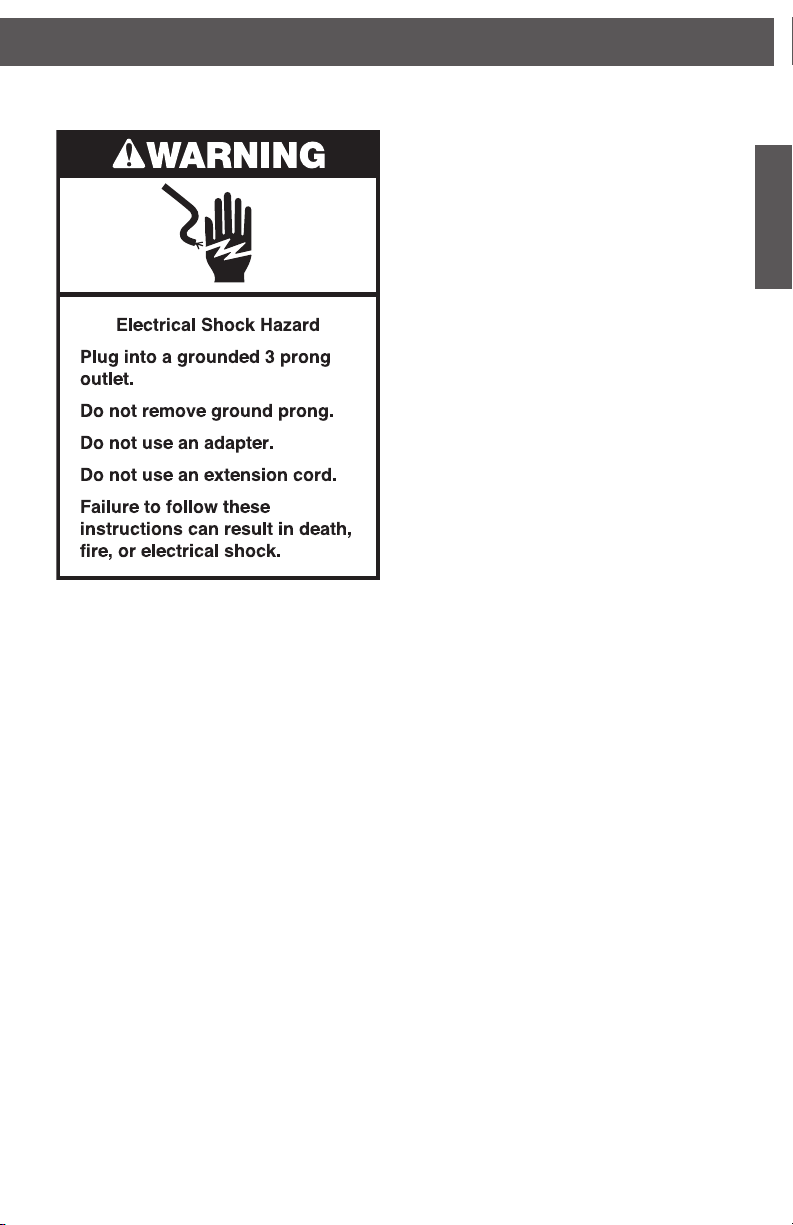
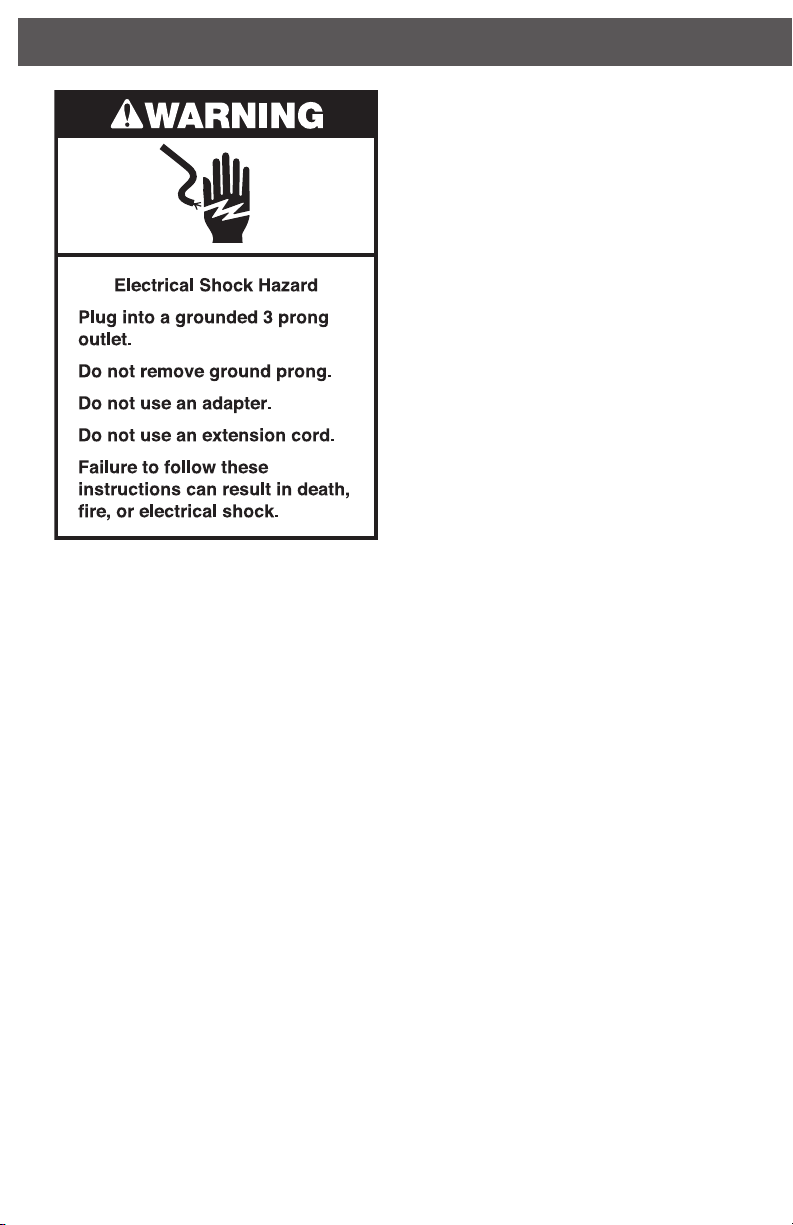
ELECTRICAL REQUIREMENTS
Volts: 120 Volts AC only.
Hertz: 60 Hz
NOTE: Your toaster has a 3-prong grounded
plug. To reduce the risk of electrical shock,
this plug will t in an outlet only one way. If
the plug does not t in the outlet, contact a
qualied electrician. Do not modify the plug
in any way.
Do not use an extension cord. If the power
supply cord is too short, have a qualied
electrician or serviceman install an outlet
near the appliance.
A short power supply cord (or detachable
power supply cord) should be used to
reduce the risk resulting from becoming
entangled in or tripping over a longer cord.
Longer detachable power supply cords or
extension cords are available and may be
used if care is exercised in their use. If a
longer detachable power supply cord or
extension cord is used:
• The marked electrical rating of the cord
set or extension cord should be at least
as great as the electrical rating of the
appliance.
• The cord should be arranged so that it will
not drape over the countertop or tabletop
where it can be pulled on by children or
tripped over unintentionally.
If the appliance is of the grounded type, the
extension cord should be a grounding-type
3-wire cord.
English
5
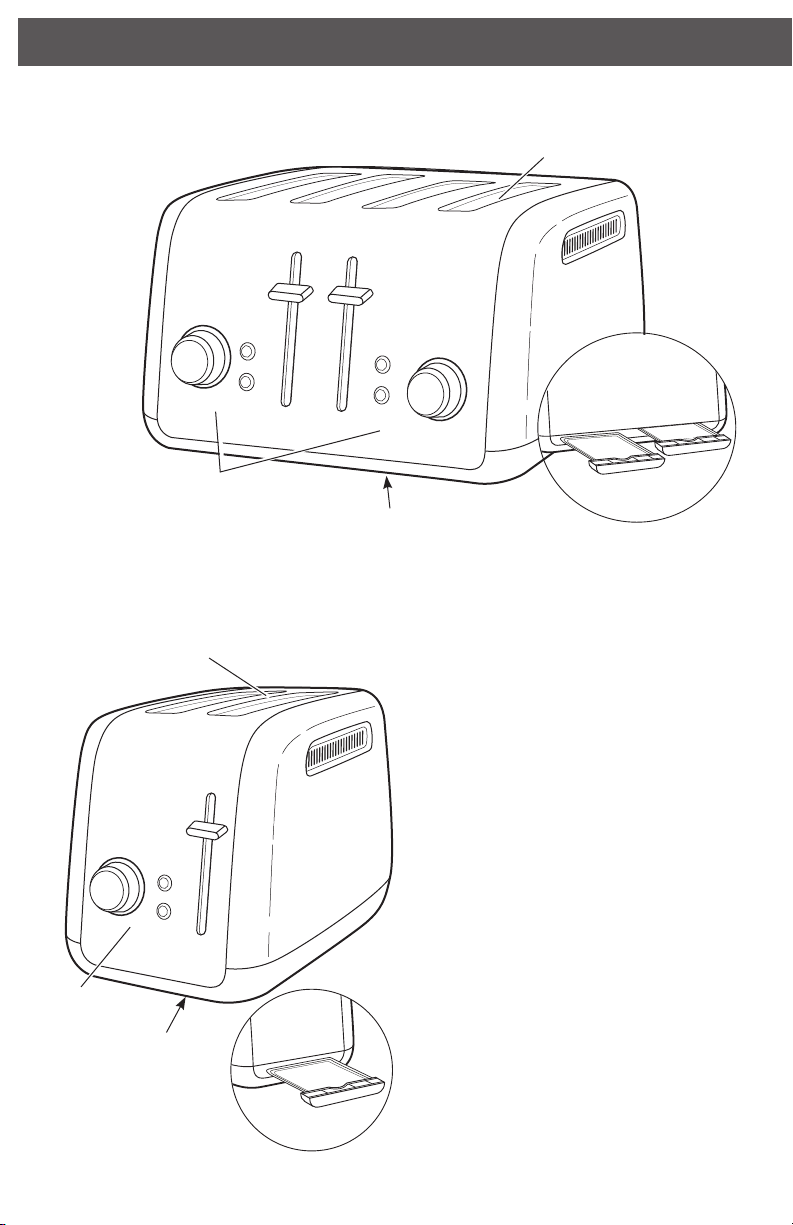
Parts and Features
4-Slice Model
1
2-Slice Model
Extra-Wide Slots
with Automatic
Self-Centering Racks
Shade
3
2
4
1
5
Cancel
Bagel
Controls
Cord Wrap
(not shown)
Removable
Crumb Tray
Shade
3
2
4
5
Cancel
Bagel
DualIndependent
Controls
Back of
Toaster
Shade
Cancel
Bagel
2
1
Cord Wrap
(not shown)
Extra-Wide Slots
with Automatic
Self-Centering Racks
3
4
5
Back of
Toaster
Removable
Crumb Trays
Extra-Wide Slots with
Self-Centering Racks
Extra-wide slots allow you to easily
toast bread, bagels, and English mufns
up to 11/8" (2.8 cm) thick. Self-centering
racks help ensure even heating of thin
or thick breads.
Controls
Easy-to-use controls with one-touch
buttons allow you to quickly select the
desired settings.
Cord Wrap
The cord wrap provides convenient
storage of the cord when not in use.
Removable Crumb Tray
The removable crumb tray slides
out for quick removal of crumbs.
Hand-wash only.
Dual Independent Controls
(4-slice models only)
Dual independent controls allow you to
select different settings for each pair of
slots.
6
Parts and Features
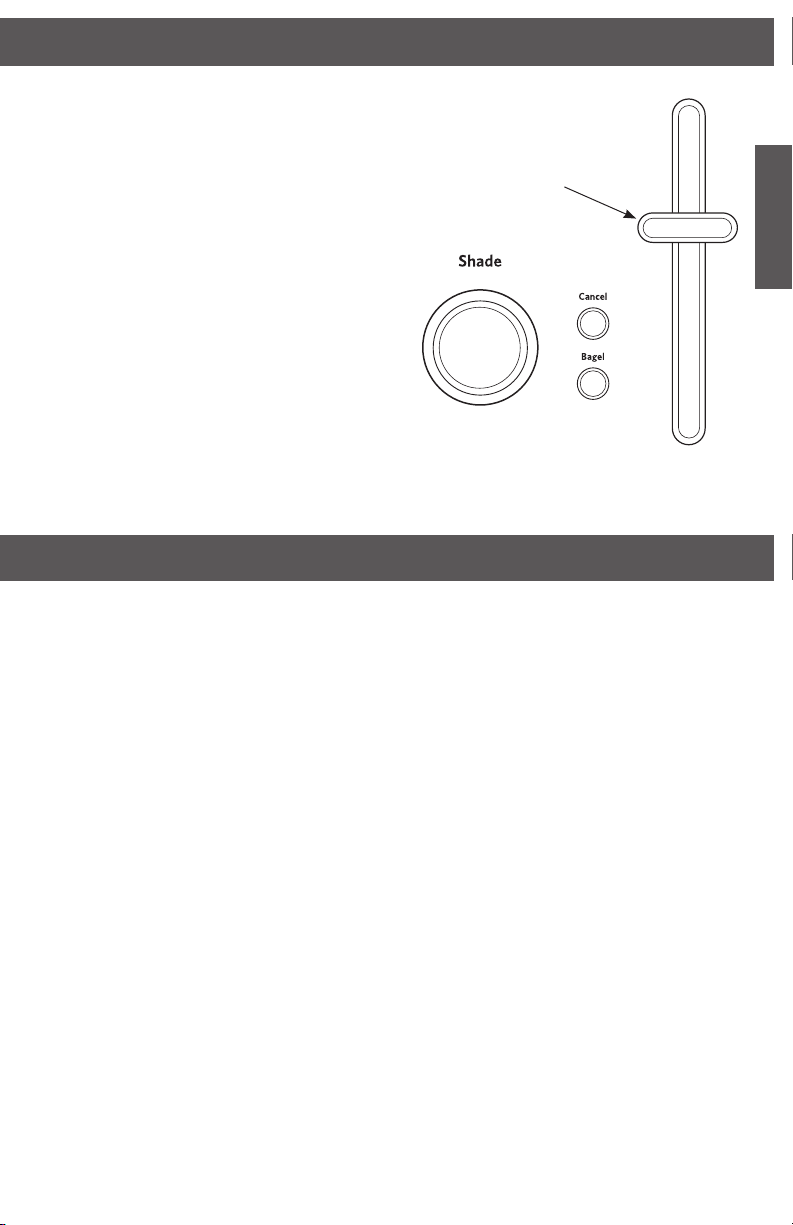
Shade Control Knob
Precisely sets the desired brownness level.
Bagel
Your Toaster features a special setting for
bagels, ensuring optimal heat and time for
the best results. The heating elements will
adjust to nicely toast the inside of a cut bagel
without burning the outside surface.
Cancel
Press the cancel button to stop a toasting
cycle that is already in process.
High-Lift Lever
Press down to lower foods and start the
toasting cycle. When toasting is complete,
lever lifts food above toaster for easy
removal.
Using Your Toaster
Before First Use
Before using your Toaster, check the
extra-wide slots and remove any packing
or printed material that might have fallen
inside during shipping or handling. Do not
probe inside the Toaster with a metal object.
You may see light smoke the rst time you
use the Toaster. This is normal. The smoke is
harmless and will soon disappear.
High-Lift
Lever
English
3
4
2
1
5
7
Using Your Toaster
Making Toast
1. Shorten cord, if necessary, by wrapping
cord under the base. The toaster’s feet
are tall enough to allow the cord to exit
from under any side of the toaster.
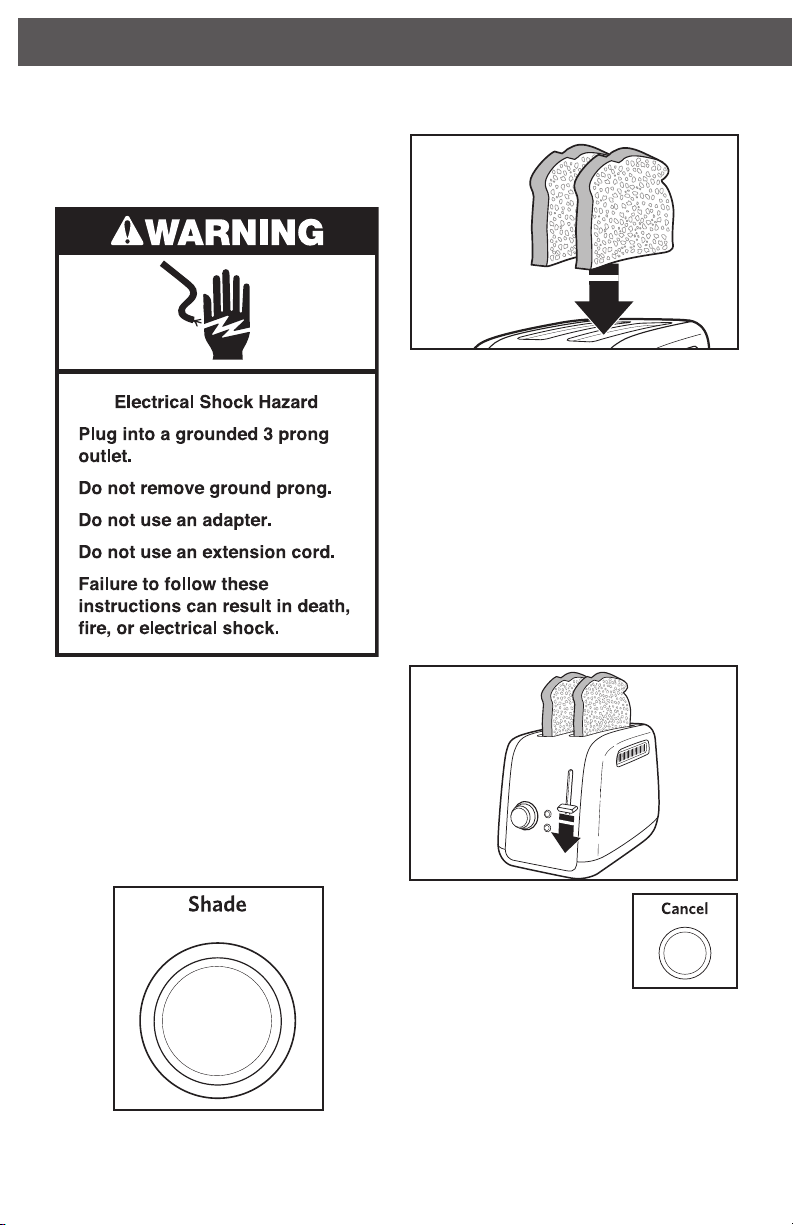
2. Plug into a grounded 3-prong outlet.
3. Turn the Shade Control Knob to select
the degree of brownness you want. Turn
the Shade Control Knob to the right for
darker toast or to the left for lighter.
NOTE: Different types of bread and their
moisture levels may require different
shade settings. For example, dry bread
will brown more rapidly than moist bread
and will require a lighter setting.
4. Insert bread or other food to be toasted
in slot(s).
NOTE: For even toasting on 2-slot models,
toast only one bread type and thickness at
a time. If toasting two different types or
thicknesses of bread with 4-slot models with
Dual Independent Controls, be sure to toast
only one bread type in each pair of slots.
If toasting bagels, be sure to press the Bagel
button. See “Toasting Bagels”.
5. Press down on Lift Lever to start
the toasting cycle. The toast will rise
automatically at the end of the cycle
and the toaster will turn off.
TIP: For smaller items, lift up on the Lift
Lever to raise toast above the top of the
toaster.
Shade
3
2
4
1
5
Cancel
Bagel
6. To cancel toasting at any
3
2
1
4
5
time, press CANCEL. The
toaster will raise the toast
and turn off.
8
Special Toasting Functions
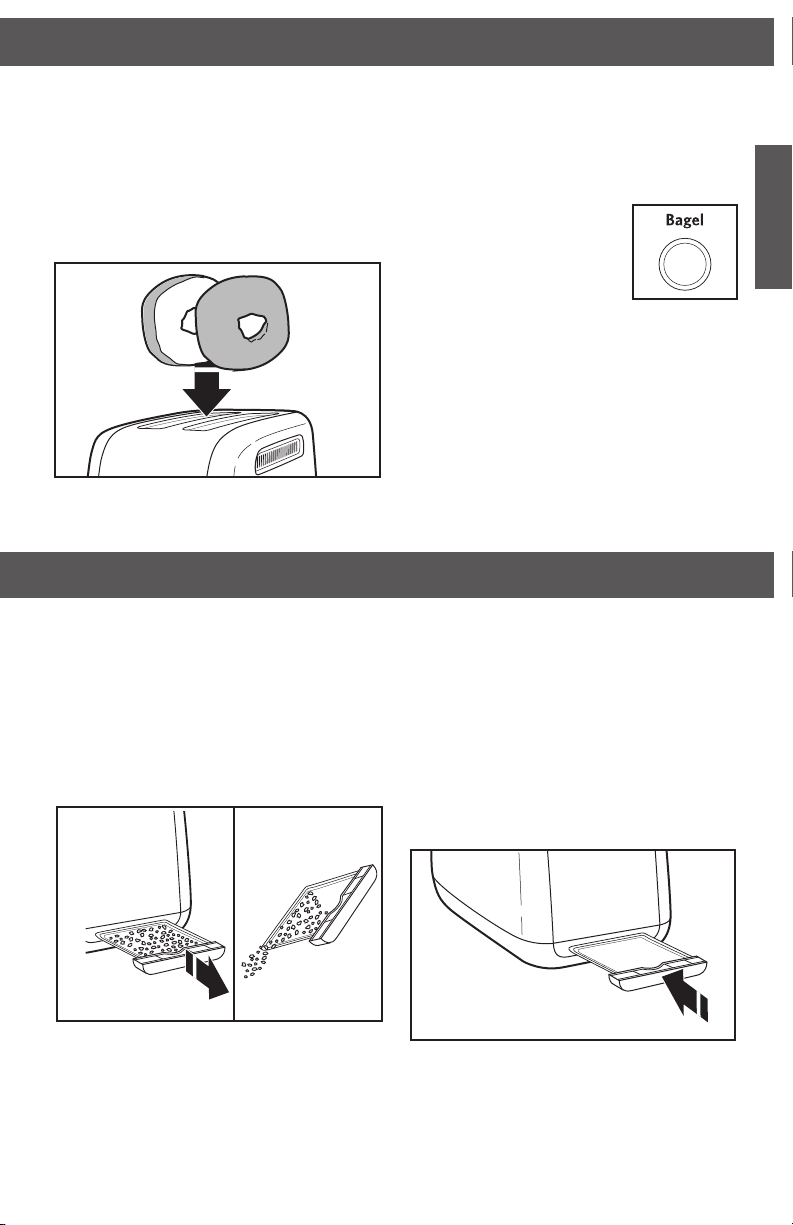
Toasting Bagels
Your Toaster features a special setting for
bagels, ensuring optimal heat and time for
the best results. The heating elements will
adjust to nicely toast the inside of a cut bagel
without burning the outside surface.
1. Insert bagels with the cut side facing in,
as shown.
Caring for Your Toaster
2. With the Shade Control Knob set to the
desired level of brownness, press down
on the Lift Lever to start the toasting
cycle.
3. Press the Bagel button.
The bagel(s) will rise
automatically at the end
of the cycle and the
Toaster will turn off.
English
1. Unplug the Toaster and let it cool before
cleaning.
2. Grasp the center of the Crumb Tray
then slide it out. Shake the crumbs into a
waste container. It is recommended that
the Crumb Tray be emptied after each
use. Crumb Tray is hand-wash only.
IMPORTANT: The tray will be hot
immediately following a toasting cycle.
3. Wipe toaster with a soft, damp cotton
cloth. Do not use paper towels, abrasive
cleansers or liquid cleaning products.
Do not immerse Toaster in water.
NOTE: If grease or oil splatters on the
toaster, wipe splatters away immediately
using a clean, damp cotton cloth.
4. Return Crumb Tray to Toaster. Press it in
rmly until it clicks into position. Do not
use the Toaster without the Crumb Tray in
proper position.
NOTE: KitchenAid does not recommend
the use of a toaster cover.
9
Troubleshooting
If your toaster should fail to operate,
check the following:
1. Check that the Toaster is plugged into a
grounded 3 prong electrical outlet. If it is,
unplug the Toaster.
2. Plug in Toaster.
3. If the Toaster still does not work, check
the household fuse or circuit breaker.
If the problem cannot be corrected:
See the KitchenAid Warranty and Service
sections. Do not return the Toaster to the
retailer; retailers do not provide service.
10

Warranty
KitchenAid® Toaster Warranty for the 50 United States, the
District of Columbia, Puerto Rico, and Canada
This warranty extends to the purchaser and any succeeding owner for Toasters operated in
the 50 United States, the District of Columbia, Puerto Rico, and Canada.
Length of Warranty: One Year Full Warranty from date of purchase.
KitchenAid Will Pay Hassle-Free Replacement of your Toaster.
for Your Choice of: See the next page for details on how to arrange for service,
or call the Customer Satisfaction Center toll-free at
1-800-541-6390.
OR
The replacement parts and repair labor costs to correct
defects in materials and workmanship. Service must be
provided by an Authorized KitchenAid Service Center.
KitchenAid Will A. Repairs when Toaster is used in other than normal
Not Pay for: single family home use.
B. Damage resulting from accident, alteration, misuse or
abuse.
C. Any shipping or handling costs to deliver your Toaster
to an Authorized Service Center.
D. Replacement parts or repair labor costs for Toasters
operated outside the 50 United States, District of
Columbia, Puerto Rico, and Canada.
DISCLAIMER OF IMPLIED WARRANTIES; LIMITATION OF REMEDIES
IMPLIED WARRANTIES, INCLUDING TO THE EXTENT APPLICABLE WARRANTIES
OF MERCHANTABILITY OR FITNESS FOR A PARTICULAR PURPOSE, ARE EXCLUDED
TO THE EXTENT LEGALLY PERMISSIBLE. ANY IMPLIED WARRANTIES THAT MAY
BE IMPOSED BY LAW ARE LIMITED TO ONE YEAR, OR THE SHORTEST PERIOD
ALLOWED BY LAW. SOME STATES AND PROVINCES DO NOT ALLOW LIMITATIONS
OR EXCLUSIONS ON HOW LONG AN IMPLIED WARRANTY OF MERCHANTABILITY
OR FITNESS LASTS, SO THE ABOVE LIMITATIONS OR EXCLUSIONS MAY NOT
APPLY TO YOU.
IF THIS PRODUCT FAILS TO WORK AS WARRANTED, CUSTOMER’S SOLE AND
EXCLUSIVE REMEDY SHALL BE REPAIR OR REPLACEMENT ACCORDING TO THE
TERMS OF THIS LIMITED WARRANTY. KITCHENAID AND KITCHENAID CANADA
DO NOT ASSUME ANY RESPONSIBILITY FOR INCIDENTAL OR CONSEQUENTIAL
DAMAGES. This warranty gives you specic legal rights and you may also have other rights
which vary from state to state or province to province.
English
11
 Loading...