


KDC-DAB400U
CD-RECEIVER
INSTRUCTION MANUAL
AMPLI-TUNER LECTEUR DE CD
MODE D’EMPLOI
CD-RECEIVER
BEDIENUNGSANLEITUNG
© 2015 JVC KENWOOD Corporation |
B5A-0884-00 (EN) |
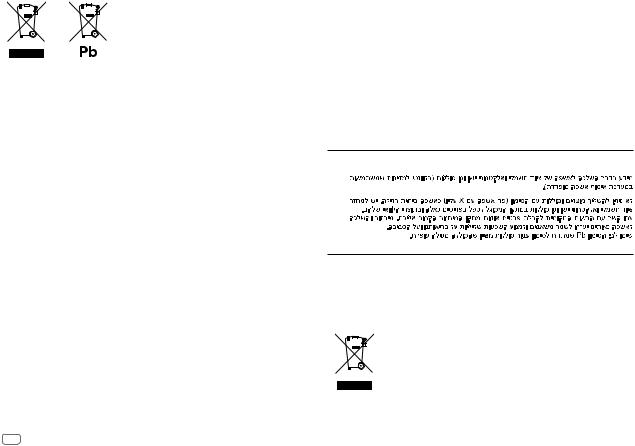
Information on Disposal of Old Electrical and Electronic Equipment and Batteries (applicable for countries that have adopted separate waste collection systems)
Products and batteries with the symbol (crossed-out wheeled bin) cannot be disposed as household waste.
Old electrical and electronic equipment and batteries should be recycled at a facility capable of handling these items and their waste byproducts.
Contact your local authority for details in locating a recycle facility nearest to you. Proper recycling and waste disposal will help conserve resources whilst preventing detrimental effects on our health and the environment.
Notice: The sign “Pb” below the symbol for batteries indicates that this battery contains lead.
Information sur l’élimination des anciens équipements électriques et électroniques et piles électriques (applicable dans les pays qui ont adopté des systèmes de collecte sélective)
Les produits et piles électriques sur lesquels le pictogramme (poubelle barrée) est apposé ne peuvent pas être éliminés comme ordures ménagères.
Les anciens équipements électriques et électroniques et piles électriques doivent être recyclés sur des sites capables de traiter ces produits et leurs déchets.
Contactez vos autorités locales pour connaître le site de recyclage le plus proche. Un recyclage adapté et l’élimination des déchets aideront à conserver les ressources et à nous préserver des leurs effets nocifs sur notre santé et sur l’environnement.
Remarque: Le symbole “Pb“ ci-dessous sur des piles électrique indique que cette pile contient du plomb.
Entsorgung von gebrauchten elektrischen und elektronischen Geräten und Batterien (anzuwenden in Ländern mit einem separaten Sammelsystem für solche Geräte)
Das Symbol (durchgestrichene Mülltonne) auf dem Produkt oder seiner Verpackung weist darauf hin, dass dieses Produkt nicht als normaler Haushaltsabfall behandelt werden darf, sondern an einer Annahmestelle für das Recycling von elektrischen und elektronischen Geräten und batterien abgegeben werden muss.
Durch Ihren Beitrag zur korrekten Entsorgung dieses Produktes schützen Sie die Umwelt und die Gesundheit Ihrer Mitmenschen.
Unsachgemässe oder falsche Entsorgung gefährden Umwelt und Gesundheit. Weitere Informationen über das Recycling dieses Produktes erhalten Sie von Ihrer Gemeinde oder den kommunalen Entsorgungsbetrieben.
Achtung: Das Zeichen „Pb“ unter dem Symbol fur Batterien zeigt an, dass diese Batterie Blei enthalt.
For Israel
For Turkey
Bu ürün 28300 sayılı Resmi Gazete’de yayımlanan Atik Elektrikli ve Elektronik Eşyalarin Kontrolü Yönetmeliğe uygun olarak üretilmiştir.
Eski Elektrik ve Elektronik Ekipmanların İmha Edilmesi Hakkında Bilgi (atık yan ürün toplama sistemlerini kullanan ülkeleri için uygulanabilir)
Sembollü (üzerinde çarpı işareti olan çöp kutusu) ürünler ev atıkları olarak
atılamaz.
Eski elektrik ve elektronik ekipmanlar, bu ürünleri ve ürün atıklarını geri dönüştürebilecek bir tesiste değerlendirilmelidir. Yaşadığınız bölgeye en yakın geri dönüşüm tesisinin yerini öğrenmek için yerel makamlara müracaat edin. Uygun geri dönüşüm ve atık imha yöntemi sağlığımız ve çevremiz üzerindeki zararlı etkileri önlerken kaynakların korunmasına da yardımcı olacaktır.
i
Declaration of Conformity with regard to the EMC Directive
Declaration of Conformity with regard to the RoHS Directive 2011/65/EU Manufacturer:
JVC KENWOOD Corporation
3-12, Moriya-cho, Kanagawa-ku, Yokohama-shi, Kanagawa, 221-0022, Japan
EU Representative:
JVCKENWOOD NEDERLAND B.V.
Amsterdamseweg 37, 1422 AC UITHOORN, The Netherlands
Déclaration de conformité se rapportant à la directive EMC
Déclaration de conformité se rapportant à la directive RoHS 2011/65/EU Fabricant:
JVC KENWOOD Corporation
3-12, Moriya-cho, Kanagawa-ku, Yokohama-shi, Kanagawa, 221-0022, Japan
Représentants dans l’UE:
JVCKENWOOD NEDERLAND B.V.
Amsterdamseweg 37, 1422 AC UITHOORN, The Netherlands
Konformitätserklärung in Bezug auf die EMC-Vorschrift Konformitätserklärung in Bezug auf die RoHS-Vorschrift 2011/65/EU Hersteller:
JVC KENWOOD Corporation
3-12, Moriya-cho, Kanagawa-ku, Yokohama-shi, Kanagawa, 221-0022, Japan
EU-Vertreter:
JVCKENWOOD NEDERLAND B.V.
Amsterdamseweg 37, 1422 AC UITHOORN, Niederlande
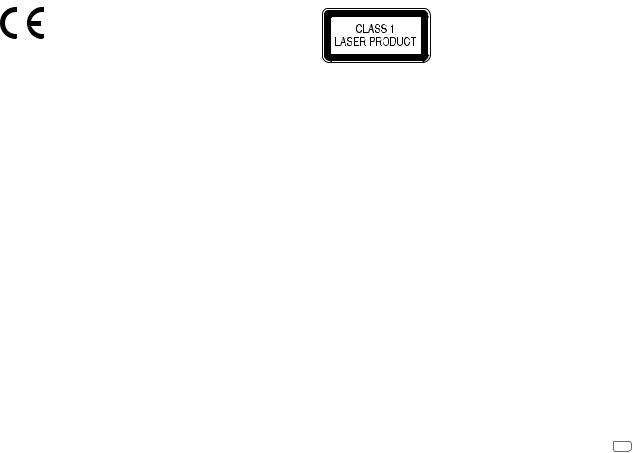
The marking of products using lasers
The label is attached to the chassis/case and says that the component uses laser beams that have been classified as Class 1. It means that the unit is utilizing laser beams that are of a weaker class. There is no danger of hazardous radiation outside the unit.
Marquage des produits utilisant un laser
L’étiquette est attachée au châssis/boîtier de l’appareil et indique que l’appareil utilise des rayons laser de classe 1. Cela signifie que l’appareil utilise des rayons laser d’une classe faible. Il n’y a pas de danger de radiation accidentelle hors de l’appareil.
Kennzeichnung von Geräten mit Laser-Abtastern
Das Etikett ist am Chassis/Gehäuse angebracht und besagt, dass sich die Komponente Laserstrahlen bedient, die als Laserstrahlen der Klasse 1 klassifiziert wurden. Dies weist darauf hin, dass sich das Gerät Laserstrahlen bedient, die einer schwächeren Klasse angehören.
Das bedeutet, dass durch den sehr schwachen Laserstrahl keine Gefahr durch gefährliche Strahlungen außerhalb des Geräts besteht.
ii

CONTENTS
BEFORE USE |
2 |
BASICS |
3 |
|
|
GETTING STARTED |
3 |
1Select the display language and cancel the demonstration
2 Set the clock and date
3 Set the initial settings
DIGITAL RADIO |
5 |
ANALOG RADIO |
8 |
|
|
AUX |
9 |
|
|
CD / USB / iPod / ANDROID |
10 |
|
|
AUDIO SETTINGS |
12 |
|
|
DISPLAY SETTINGS |
13 |
|
|
TROUBLESHOOTING |
14 |
|
|
REFERENCES |
15 |
Maintenance |
|
More information |
|
|
|
SPECIFICATIONS |
17 |
|
|
INSTALLATION / |
|
CONNECTION |
18 |
BEFORE USE
IMPORTANT
•To ensure proper use, please read through this manual before using this product. It is especially important that you read and observe Warning and Caution in this manual.
•Please keep the manual in a safe and accessible place for future reference.
 Warning
Do not operate any function that takes your attention away from safe driving.
 Caution
Volume setting:
•Adjust the volume so that you can hear sounds outside the car to prevent accidents.
•Lower the volume before playing digital sources to avoid damaging the speakers by the sudden increase of the output level.
General:
•Avoid using the external device if it might hinder safe driving.
•Make sure all important data has been backed up. We shall bear no responsibility for any loss of recorded data.
•Never put or leave any metallic objects (such as coins or metal tools) inside the unit to prevent a short circuit.
•If a disc error occurs due to condensation on the laser lens, eject the disc and wait for the moisture to evaporate.
•Depending on the types of cars, the antenna will automatically extend when you turn on the unit with the antenna control wire connected ( 20). Turn off the unit or change the source to STANDBY when parking at a low ceiling area.
How to read this manual
•Operations are explained mainly using buttons on the faceplate.
•English indications are used for the purpose of explanation. You can select the display language from the [FUNCTION] menu. ( 5)
5)
•[XX] indicates the selected items.
•( XX) indicates references are available on the stated page.
2
BASICS
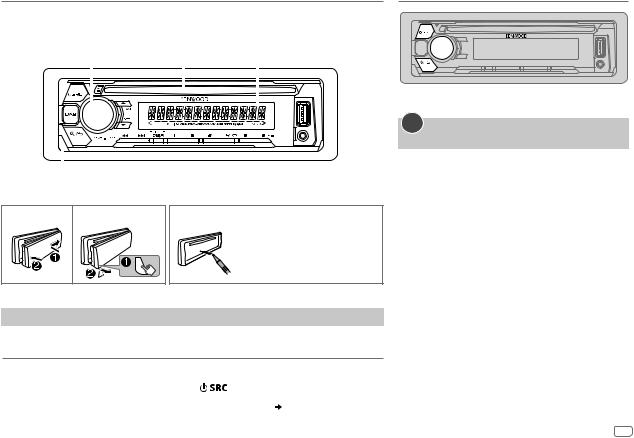
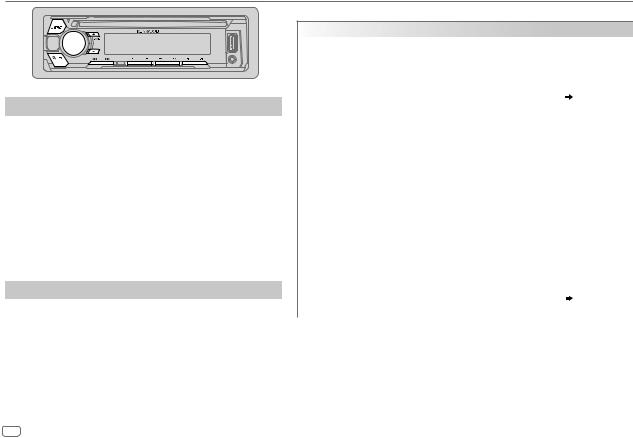
Faceplate
Volume knob |
|
Loading slot |
Display window |
|||||||
|
|
|
|
|
|
|
|
|
|
|
|
|
|
|
|
|
|
|
|
|
|
|
|
|
|
|
|
|
|
|
|
|
|
|
|
|
|
|
|
|
|
|
|
|
|
|
|
|
|
|
|
|
|
|
|
|
|
|
|
|
|
|
|
|
|
|
|
|
|
|
|
|
|
|
|
|
|
|
|
|
|
|
|
|
|
|
|
|
|
|
|
|
|
|
|
|
|
|
Detach button
Attach Detach
To
Turn on the power
How to reset
Your preset adjustments will be erased except stored radio stations.
On the faceplate
Press  .
.
• Press and hold to turn off the power.
Adjust the volume |
Turn the volume knob. |
|
Select a source |
Press |
repeatedly. |
|
|
|
Change the display information |
Press DISP repeatedly. ( 16) |
|
|
|
|
GETTING STARTED
1Select the display language and cancel the demonstration
When you turn on the power (or after you reset the unit), the display shows: “SEL LANGUAGE”  “PRESS”
  “VOLUME KNOB”
1Turn the volume knob to select [ENG] (English), [RUS] (Russian) or [SPA] (Spanish), then press the knob.
[ENG] is selected for the initial setup.
Then, the display shows: “CANCEL DEMO” 
“PRESS”  “VOLUME KNOB”.
2Press the volume knob.
[YES] is selected for the initial setup.
3Press the volume knob again.
“DEMO OFF” appears.
ENGLISH 3

GETTING STARTED
2Set the clock and date
1 Press the volume knob to enter [FUNCTION].
2 Turn the volume knob to select [CLOCK], then press the knob.
To adjust the clock
3 Turn the volume knob to select [CLOCK ADJUST], then press the knob.
4Turn the volume knob to make the settings, then press the knob.
Hour  Minute
5 Turn the volume knob to select [CLOCK FORMAT], then press the knob. 6 Turn the volume knob to select [12H] or [24H], then press the knob.
To set the date
7 Turn the volume knob to select [DATE FORMAT], then press the knob.
8Turn the volume knob to select [DD/MM/YY] or [MM/DD/YY], then press the knob.
9 Turn the volume knob to select [DATE SET], then press the knob.
10Turn the volume knob to make the settings, then press the knob.
Day  Month
Month  Year or Month
  Day
Day  Year
Year
11Press and hold 
 to exit.
To return to the previous setting item, press 
 .
.
3Set the initial settings
1 Press  repeatedly to enter STANDBY. 2 Press the volume knob to enter [FUNCTION].
3Turn the volume knob to select an item (see the following table), then press the knob.
4 Repeat step 3 until the desired item is selected or activated. 5 Press and hold 
 to exit.
To return to the previous setting item, press 
 .
.
|
|
|
Default: XX |
AUDIO CONTROL |
|
||
|
|
|
|
|
SWITCH |
REAR/ SUB-W: Selects whether rear speakers or a subwoofer are |
|
|
PREOUT |
connected to the line out terminals on the rear (through an external |
|
|
|
|
amplifier). |
|
SP SELECT |
OFF/ 5/4/ 6 × 9/6/ OEM: Selects according to the speaker size (5 inches |
|
|
|
|
or 4 inches, 6×9 inches or 6 inches) or OEM speakers for optimum |
|
|
|
performance. |
|
|
|
|
TUNER SETTING |
|
||
|
|
|
|
|
DAB L-BAND |
ON: Receives L-BAND ensemble during digital audio reception. ; |
|
|
|
|
OFF: Cancels |
|
|
|
|
|
DAB ANT |
ON: Supplies power to the DAB antenna. Selects when using the supplied |
|
|
POWER |
antenna. ; OFF: Does not supply power. Selects when using passive |
|
|
|
|
antenna without booster. ( 21) |
|
PRESET TYPE |
NORMAL: Memorizes one station for each preset button in each band |
|
|
|
|
(FM1/ FM2/ FM3/ MW/ LW/ DB1/ DB2/ DB3). ; MIX: Memorizes one |
|
|
|
station (digital radio or analog radio) for each preset button, regardless |
|
|
|
of the selected band. |
|
|
|
|
SYSTEM |
|
||
|
KEY BEEP |
ON: Activates the keypress tone. ; OFF: Deactivates. |
|
|
|
|
|
|
SOURCE SELECT |
|
|
|
|
BUILT-IN AUX |
ON: Enables AUX in source selection. ; OFF: Disables. ( 9) |
|
|
|
|
|
P-OFF WAIT |
Applicable only when the demonstration mode is turned off. |
|
|
|
|
Sets the duration when the unit will automatically turn off (while in |
|
|
|
standby mode) to save the battery. |
|
|
|
20M: 20 minutes ; 40M: 40 minutes ; 60M: 60 minutes ; |
|
|
|
– – –: Cancels |
|
|
|
|
4

GETTING STARTED
|
CD READ |
1: Automatically distinguishes between audio file disc and music CD. ; |
|||
|
|
|
|
2: Forces to play as a music CD. No sound can be heard if an audio file |
|
|
|
|
|
disc is played. |
|
|
|
|
|||
|
F/W UPDATE |
|
|||
|
|
UPDATE SYSTEM/ UPDATE DAB1/ UPDATE DAB2 |
|||
|
|
|
|
|
|
|
|
|
F/W UP xx.xx/ |
YES: Starts upgrading the firmware. ; NO: Cancels (upgrading is not |
|
|
|
|
F/W UP xxxxx/ |
activated). |
|
|
|
|
F/W UP Vxxx |
For details on how to update the firmware, see: |
|
|
|
|
|
www.kenwood.com/cs/ce/ |
|
|
|
|
|
|
|
CLOCK |
|
||||
|
|
|
|||
|
CLOCK DISPLAY |
ON: The clock time is shown on the display even when the unit is |
|||
|
|
|
|
turned off. ; OFF: Cancels. |
|
|
|
|
|
|
|
ENGLISH |
Select the display language for [FUNCTION] menu and music |
||||
|
|
|
|
||
|
|
|
|
||
РУССКИЙ |
information if applicable. |
||||
|
|
|
|
By default, [ENGLISH] is selected. |
|
ESPANOL |
|||||
|
|||||
|
|
|
|
|
|
DIGITAL RADIO
About DAB (Digital Audio Broadcasting)
DAB is one of the digital radio broadcasting systems available today. It can deliver digital quality sound without any annoying interference or signal distortion. Furthermore, it can carry text, pictures and data.
In contrast to FM broadcast, where each program is transmitted on its own frequency, DAB combines several programs (called “services”) to form one “ensemble.”
The “primary component” (main radio station) is sometimes accompanied by a “secondary component” which can contain extra programs or other information.
Preparation:
1 Connect the supplied DAB antenna to the DAB antenna jack. ( 20)
20)
2 Press DAB to select DIGITAL AUDIO directly.
3Press and hold DAB (DAB L. UPDATE) to start the Service List update.
“LIST UPDATE” appears and update starts. “UPDATED” appears when update completes.
Updates take up to 3 minutes. No interruption (such as traffic information) is possible during updates.
•To cancel the Service List update:
Press and hold DAB (DAB L. UPDATE) again.
ENGLISH 5
DIGITAL RADIO
Search for an ensemble
1 Press 
 repeatedly to select DIGITAL AUDIO.
2 Press  repeatedly to select DB1/ DB2/ DB3. 3 Press and hold S / T to search for an ensemble.
4Press S / T to select an ensemble, service or component to listen.
•To change the searching method for S / T: Press  repeatedly.
AUTO1 : Press S / T: Select an ensemble, service or component. Press and hold S / T: Automatically search for an ensemble.
AUTO2 : Press S / T: Search for a preset station.
MANUAL : Press S / T: Select an ensemble, service or component. Press and hold S / T: Manually search for an ensemble.
•To store a service: Press and hold one of the number buttons (1 to 6).
•To select a stored service: Press one of the number buttons (1 to 6).
Select a service
1 Press DAB (DAB L. UPDATE) to enter Service Search mode.
2Turn the volume knob or press J / K to select a service, then press the knob.
To cancel the Service Search mode, press 
 or
or
DAB (DAB L. UPDATE).
Select a service by name
1 Press DAB (DAB L. UPDATE) to enter Service Search mode.
2 Turn the volume knob quickly to enter Alphabet Search mode.
3Turn the volume knob or press S / T to select the character to be searched for.
Press J / K to go to the previous/next page.
4 Press the volume knob to start searching.
5 Turn the volume knob to select a service, then press the knob.
To cancel the Alphabet Search mode, press 
 .
.
Other settings
1 Press the volume knob to enter [FUNCTION].
2Turn the volume knob to make a selection (see the following table), then press the knob.
3 Repeat step 2 until the desired item is selected or activated. 4 Press and hold 
 to exit.
To return to the previous setting item, press 
 .
.
Default: XX
TUNER SETTING
|
AF SET |
ON: |
|
|
While listening to DAB: Automatically switch to FM broadcasting the same |
|
|
program if the DAB signal becomes weak. It will switch back to DAB sound |
|
|
when the signal becomes strong again. |
|
|
While listening to FM: Automatically switch to DIGITAL AUDIO source |
|
|
broadcasting the same program (if available). ; |
|
|
OFF: Cancels. |
|
|
|
|
TI |
ON: Allows the unit to temporarily switch to Traffic Information if available |
|
|
(“TI” lights up). ; OFF: Cancels. |
|
|
|
6
DIGITAL RADIO
|
PTY SEARCH |
1 |
Press the volume knob to enter PTY language selection. |
|
|
|
2 |
Turn the volume knob to select the PTY language (ENGLISH/ FRENCH/ |
|
|
|
3 |
GERMAN), then press the knob. |
|
|
|
Turn the volume knob to select the available Program Type (see the following). |
|
|
|
|
4 |
Press S/ Tto start searching. |
|
|
|
|
|
|
|
ASW SELECT |
TRAVEL, WARNINGS, NEWS, WEATHER, EVENT, SPECIAL, RAD INFO, SPORTS, |
|
|
|
|
FINANCE: Turn the volume knob to make a selection, then press the knob. |
|
|
|
|
“*” appears in front of the activated announcement type. |
|
|
|
|
Automatically switch from any source to Digital radio ensembles broadcasting an |
|
|
|
|
activated announcement type. |
|
|
|
|
• Multiple announcement can be activated simultaneously. |
|
|
|
|
• To deactivate, press the volume knob again (“*” goes off). |
|
|
|
LIST UPDATE |
AUTO: Automatically update the DAB Service List when the power is turned on. ; |
|
|
|
|
MANUAL: Updates the DAB Service List by pressing and holding |
|
|
|
|
DAB (DAB L. UPDATE). |
|
|
|
PTY WATCH |
1 |
Turn the volume knob to select the available Program Type, then press |
. |
|
|
|
The unit automatically switch from any source to Digital Radio ensembles |
|
|
|
|
broadcasting the selected type of program. |
|
|
|
|
Program Type: NEWS, AFFAIRS, INFO, SPORT, EDUCATE, DRAMA, CULTURE, |
|
|
|
|
SCIENCE, VARIED, POP M (music), ROCK M (music), EASY M (music), |
|
|
|
|
LIGHT M (music), CLASSICS, OTHER M (music), WEATHER, FINANCE, |
|
|
|
|
CHILDREN, SOCIAL, RELIGION, PHONE IN, TRAVEL, LEISURE, JAZZ, COUNTRY, |
|
|
|
|
NATION M (music), OLDIES, FOLK M (music), DOCUMENT |
|
|
|
2 |
OFF: Cancels. |
|
|
|
Press the volume knob to enter PTY language selection. |
|
|
|
|
3 |
Turn the volume knob to select the PTY language (ENGLISH/ FRENCH/ |
|
|
|
|
GERMAN), then press the knob. |
|
|
RELATED SERV |
ON: Enable Soft-Link function to switch to an alternative service which is different |
|
|
|
|
audio program from the current audio program. ; OFF: Disable. |
|
|
CLOCK |
|
|
|
|
|
|
|
|
|
|
TIME SYNC |
ON: Synchronizes the unit’s time to the Digital Radio signal station time. ; |
|
|
|
|
OFF: Cancels. |
|
|
|
|
|
|
|
Available Program Type for PTY SEARCH
SPEECH : NEWS, AFFAIRS, INFO (information), SPORT, EDUCATE, DRAMA, CULTURE, SCIENCE, VARIED, WEATHER, FINANCE, CHILDREN, SOCIAL, RELIGION, PHONE IN, TRAVEL, LEISURE,
DOCUMENT
MUSIC : POP M (music), ROCK M (music), EASY M (music),
LIGHT M (music), CLASSICS, OTHER M (music), JAZZ, COUNTRY, NATION M (music), OLDIES, FOLK M (music)
The unit will search for the Program Type categorized under [SPEECH] or [MUSIC] if selected.
•If the volume is adjusted during reception of traffic information, announcement, alarm or news bulletin, the adjusted volume is memorized automatically. It will be applied the next time traffic information, announcement, alarm or news bulletin is turned on.
ENGLISH 7
ANALOG RADIO
Search for a station
1 Press  repeatedly to select TUNER.
2Press  repeatedly to select FM1/ FM2/ FM3/ MW/ LW.
3 Press S/ Tto search for a station.
•To change the searching method for S/ T: Press  repeatedly.
AUTO1 : Automatically search for a station. AUTO2 : Search for a preset station. MANUAL : Manually search for a station.
•To store a station: Press and hold one of the number buttons (1 to 6).
•To select a stored station: Press one of the number buttons (1 to 6).
Other settings
1 Press the volume knob to enter [FUNCTION].
2Turn the volume knob to select an item (see the following table), then press the knob.
3 Repeat step 2 until the desired item is selected or activated. 4 Press and hold 
 to exit.
To return to the previous setting item, press 
 .
.
Default: XX
TUNER SETTING
|
LOCAL SEEK |
ON: Searches only stations with good reception. ; OFF: Cancels. |
|
|
|
• Settings made are applicable only to the selected source/station. Once you change |
|
|
|
the source/station, you need to make the settings again. |
|
|
AUTO |
YES: Automatically starts memorizing 6 stations with good reception. ; NO: Cancels. |
|
|
MEMORY |
• Selectable only if [NORMAL] is selected for [PRESET TYPE]. ( |
4) |
|
|
|
|
|
MONO SET |
ON: Improves the FM reception, but the stereo effect may be lost. ; OFF: Cancels. |
|
|
|
|
|
|
NEWS SET |
ON: The unit will temporarily switch to News Programme if available. ; OFF: Cancels. |
|
|
REGIONAL |
ON: Switches to another station only in the specific region using the “AF” control. ; |
|
|
|
OFF: Cancels. |
|
|
AF SET |
ON: Automatically searches for another station broadcasting the same program |
|
|
|
in the same Radio Data System network with better reception when the current |
|
|
|
reception is poor. ; OFF: Cancels. |
|
|
|
|
|
|
TI* |
ON: Allows the unit to temporarily switch to Traffic Information if available (“TI” |
|
|
|
lights up). ; OFF: Cancels. |
|
|
|
* [TI] in MW/LW band is for enabling traffic interruption to DIGITAL AUDIO source |
|
|
|
only. |
|
|
|
|
|
|
PTY SEARCH |
1 Press the volume knob to enter PTY language selection. |
|
|
|
2 Turn the volume knob to select the PTY language (ENGLISH/ FRENCH/ |
|
|
|
GERMAN), then press the knob. |
|
|
|
3 Turn the volume knob to select the available Program Type ( |
9). |
|
|
4 Press S/ Tto start searching. |
|
8
ANALOG RADIO
Available Program Type for PTY SEARCH
SPEECH : NEWS, AFFAIRS, INFO (information), SPORT, EDUCATE, DRAMA, CULTURE, SCIENCE, VARIED, WEATHER, FINANCE, CHILDREN, SOCIAL, RELIGION, PHONE IN, TRAVEL, LEISURE, DOCUMENT
MUSIC : POP M (music), ROCK M (music), EASY M (music), LIGHT M (music),
CLASSICS, OTHER M (music), JAZZ, COUNTRY, NATION M (music), OLDIES, FOLK M (music)
The unit will search for the Program Type categorized under [SPEECH] or [MUSIC] if selected.
•[LOCAL SEEK]/ [MONO SET]/ [NEWS SET]/ [REGIONAL]/ [AF SET]/ [PTY SEARCH] is selectable only when the band is FM1/ FM2/ FM3.
•If the volume is adjusted during reception of traffic information or news bulletin, the adjusted volume is memorized automatically. It will be applied the next time traffic information or news bulletin is turned on.
AUX
Preparation:
Select [ON] for [BUILT-IN AUX]. ( 4)
4)
Start listening
1 Connect a portable audio player (commercially available).
Auxiliary input jack
Portable audio player
3.5 mm stereo mini plug with “L” shaped connector (commercially available)
2 Press  repeatedly to select AUX.
3 Turn on the portable audio player and start playback.
Set the AUX name
While listening to a portable audio player connected to the unit...
1 |
Press the volume knob to enter [FUNCTION]. |
|
2 |
Turn the volume knob to select [SYSTEM], then press the knob. |
|
3 |
Turn the volume knob to select [AUX NAME SET], then press the knob. |
|
4 |
Turn the volume knob to select an item, then press the knob. |
|
5 |
AUX (default)/ DVD/ PORTABLE/ GAME/ VIDEO/ TV |
|
Press and hold |
to exit. |
|
To return to the previous setting item, press 
 .
.
ENGLISH 9
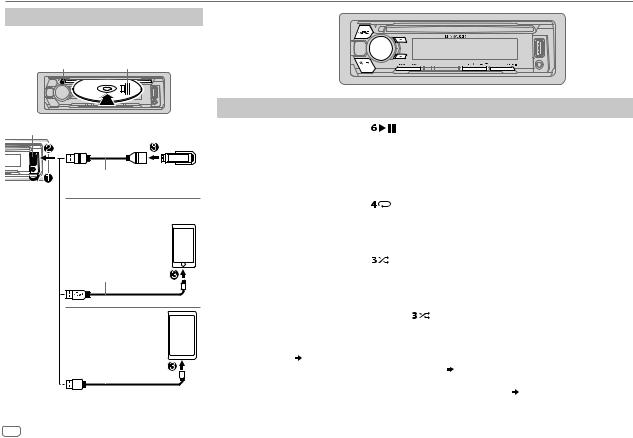
CD / USB / iPod / ANDROID
Start playback
The source changes automatically and playback starts.
M Eject disc |
Label side |
USB input terminal
USB
CA-U1EX (max.: 500 mA) (optional accessory)
iPod/iPhone
KCA-iP102 / KCA-iP103 (optional accessory)*1 or accessory cable of the iPod/iPhone*2
ANDROID*3
Micro USB 2.0 cable*2 (commercially available)
*1 |
|
|
|
|
|
|
|
|
|
KCA-iP102 : 30-pin type, KCA-iP103 : Lightning type |
||||
*2 |
Do not leave the cable inside the car when not using. |
|||
To |
|
On the faceplate |
|
|
|
Playback / pause |
Press |
. |
|
|
|
|
|
|
|||
Reverse / Fast-forward*4 |
Press and hold S / T. |
|
|||
Select a track/file |
Press S / T. |
|
|
||
|
|
|
|
||
Select a folder*5 |
Press J / K. |
|
|
||
Repeat play*6 |
Press |
repeatedly. |
|
||
|
|
TRACK REPEAT/ ALL REPEAT |
: Audio CD |
||
|
|
FILE REPEAT/ FOLDER REPEAT/ ALL REPEAT : MP3/WMA/WAV/FLAC file |
|||
|
|
FILE REPEAT/ FOLDER REPEAT/ REPEAT OFF : iPod or ANDROID |
|||
|
|
|
|
||
Random play*6 |
Press |
repeatedly. |
|
||
|
|
DISC RANDOM/ RANDOM OFF |
: Audio CD |
||
|
|
FOLDER RANDOM/ RANDOM OFF : MP3/WMA/WAV/FLAC file, iPod or |
|||
|
|
|
|
|
ANDROID |
|
|
|
|
||
|
|
Press and hold |
to select ALL RANDOM.*7 |
||
*3 |
When connecting an Android device, “Press [VIEW] to install KENWOOD MUSIC PLAY APP” is shown. Follow the instructions |
||||
|
to install the application. You can also install the latest version of KENWOOD MUSIC PLAY application on your Android device |
||||
*4 |
before connecting. ( 15) |
|
|
|
|
For ANDROID: Applicable only when [BROWSE MODE] is selected. ( |
11) |
||||
*5 |
For CD: Only for MP3/WMA files. This does not work for iPod/ ANDROID. |
||||
*6 |
For iPod/ ANDROID: Applicable only when [MODE OFF]/ [BROWSE MODE] is selected. ( 11) |
||||
*7 |
For CD: Only for MP3/WMA files. |
|
|
|
|
10
CD / USB / iPod / ANDROID
Select control mode
While in IPOD source, press 5 repeatedly.
MODE ON : Control iPod using the iPod itself. However, you can still play/ pause, file skip, fast-forward or reverse from this unit.
MODE OFF : Control iPod from this unit.
While in ANDROID source, press 5 repeatedly.
BROWSE MODE : Control Android device from this unit via KENWOOD MUSIC PLAY application installed in the Android device.
HAND MODE : Control Android device using the Android device itself via other media player applications installed in the Android device. However, you can still play/pause and file skip from this unit.
Select music drive
Press 5 repeatedly.
Stored songs in the following drive will be played back.
•Selected internal or external memory of a smartphone (Mass Storage Class).
•Selected drive of a multiple drives device.
Listen to TuneIn Radio/ TuneIn Radio Pro/ Aupeo
While listening to TuneIn Radio, TuneIn Radio Pro or Aupeo, connect the iPod/iPhone to the USB input terminal of the unit.
• The unit will output the sound from these applications.
Select a file from a folder/list
1 |
Press |
. |
2 |
Turn the volume knob to select a folder/list, then press the knob. |
|
3 |
Turn the volume knob to select a file, then press the knob. |
|
|
|
|
|
Quick Search |
|
|
If you have many files in the iPod, you can search through them |
|
|
quickly according to the first character of the file name. |
|
|
Turn the volume knob quickly to enter character search. |
|
|
Turn the volume knob to select the character. |
|
|
To search for a character other than A to Z and 0 to 9, enter only |
|
|
“*”. |
|
|
Press S / T to move to the entry position. |
|
|
• You can enter up to 3 characters. |
|
|
Press the volume knob to start searching. |
|
|
|
|
•To return to the root folder/ first file/ top menu, press 5.
•To return to the previous setting item, press 
 .
.
•To cancel, press and hold 
 .
.
•For iPod, applicable only when [MODE OFF] is selected.
•For ANDROID, applicable only when [BROWSE MODE] is selected.
ENGLISH 11

CD / USB / iPod / ANDROID
Other settings
1 Press the volume knob to enter [FUNCTION].
2Turn the volume knob to select an item (see the following table), then press the knob.
3Repeat step 2 until the desired item is selected or activated.
4 Press and hold 
 to exit.
To return to the previous setting item, press 
 .
.
|
|
Default: XX |
USB |
|
|
|
|
|
|
MUSIC DRIVE |
DRIVE CHANGE: The next drive ([DRIVE 1] |
|
|
to [DRIVE 5]) is selected automatically and |
|
|
playback starts. |
|
|
Repeat steps 1 to 3 to select the following |
|
|
drives. |
|
SKIP SEARCH |
0.5%/ 1%/ 5%/ 10%: While listening to iPod |
|
|
or ANDROID, selects the skip search ratio over |
|
|
the total files. |
|
|
|
AUDIO SETTINGS
While listening to any source...
1 Press the volume knob to enter [FUNCTION].
2 Turn the volume knob to select [AUDIO CONTROL], then press the knob.
3 Turn the volume knob to select an item (see the following table), then press the knob. 4 Repeat step 3 until the desired item is selected or activated.
5 Press and hold 
 to exit.
To return to the previous setting item, press 
 .
.
Default: XX
SUB-W LEVEL |
–15 to +15 (0) Adjusts the subwoofer output level. |
||
BASS LEVEL |
–8 to +8 (+2) |
Adjusts the level to memorize for each source. (Before making an adjustment, |
|
|
|
||
MID LEVEL |
–8 to +8 (+1) |
||
select the source you want to adjust.) |
|||
|
|
||
TRE LEVEL |
–8 to +8 (+1) |
||
|
|||
EQ PRO (This setting is stored to [USER].)
|
BASS ADJUST |
BASS CTR FRQ |
60/ 80/ 100/ 200: Selects the center frequency. |
|
|
|
|
|
|
BASS LEVEL |
–8 to +8 (+2): Adjusts the level. |
|
|
|
|
|
|
BASS Q FACTOR |
1.00/ 1.25/ 1.50/ 2.00: Adjusts the quality factor. |
|
|
|
|
|
|
BASS EXTEND |
ON: Turns on the extended bass. ; OFF: Cancels. |
|
|
|
|
|
MID ADJUST |
MID CTR FRQ |
0.5KHZ/ 1.0KHZ/ 1.5KHZ/ 2.5KHZ: Selects the center frequency. |
|
|
|
|
|
|
MID LEVEL |
–8 to +8 (+1): Adjusts the level. |
|
|
|
|
|
|
MID Q FACTOR |
0.75/ 1.00/ 1.25: Adjusts the quality factor. |
|
TRE ADJUST |
TRE CTR FRQ |
10.0KHZ/ 12.5KHZ/ 15.0KHZ/ 17.5KHZ: Selects the center frequency. |
|
|
|
|
|
|
TRE LEVEL |
–8 to +8 (+1): Adjusts the level. |
|
|
|
|
12

AUDIO SETTINGS |
|
DISPLAY SETTINGS |
PRESET EQ |
DRIVE EQ/ TOP40/ POWERFUL/ ROCK/ POPS/ EASY/ JAZZ/ |
|
NATURAL/ USER: Selects a preset equalizer suitable to the music |
|
genre. (Select [USER] to use the settings made in [EQ PRO].) |
|
[DRIVE EQ] is a preset equalizer that reduces noise outside the car or |
|
running noise of the tyres. |
|
|
BASS BOOST |
LV1/ LV2/ LV3: Selects your preferred bass boost level. ; OFF: Cancels. |
|
|
LOUDNESS |
LV1/ LV2: Selects your preferred low and high frequencies boost to |
|
produce a well-balanced sound at a low volume level. ; OFF: Cancels. |
|
|
SUBWOOFER SET |
ON: Turns on the subwoofer output. ; OFF: Cancels. |
|
|
LPF SUBWOOFER |
THROUGH: All signals are sent to the subwoofer. ; 85HZ/ 120HZ/ |
|
160HZ: Audio signals with frequencies lower than 85 Hz/ 120 Hz/ |
|
160 Hz are sent to the subwoofer. |
|
|
SUB-W PHASE |
REVERSE (180°)/ NORMAL (0°): Selects the phase of the subwoofer |
|
output to be in line with the speaker output for optimum performance. |
|
(Selectable only if a setting other than [THROUGH] is selected for |
|
[LPF SUBWOOFER].) |
|
|
FADER |
R15 to F15 (0): Adjusts the rear and front speaker output balance. |
|
|
BALANCE |
L15 to R15 (0): Adjusts the left and right speaker output balance. |
|
|
VOLUME OFFSET |
For AUX: –8 to +8 (0) ; For other sources: –8 to 0: Preset the initial |
|
volume level of each source. (Before adjustment, select the source you |
|
want to adjust.) |
|
|
SOUND RECNSTR |
ON: Creates realistic sound by compensating the high-frequency |
(Sound |
components and restoring the rise-time of the waveform that are lost |
reconstruction) |
in audio data compression. ; OFF: Cancels. |
|
|
•[SUB-W LEVEL]/ [SUBWOOFER SET]/ [LPF SUBWOOFER]/ [SUB-W PHASE] is selectable only if [SWITCH PREOUT] is set to [SUB-W]. ( 4)
4)
•[SUB-W LEVEL]/ [LPF SUBWOOFER]/ [SUB-W PHASE] is selectable only if [SUBWOOFER SET] is set to [ON].
Set the dimmer
Press and hold DISP (DIMMER) to turn on or off the dimmer.
•If you have set [DIMMER TIME], it will be canceled once you press and hold this button.
Other settings
1 Press the volume knob to enter [FUNCTION].
2 Turn the volume knob to select [DISPLAY], then press the knob.
3Turn the volume knob to select an item (see the following table), then press the knob.
4Repeat step 3 until the desired item is selected/activated or follow the instructions stated on the selected item.
5 Press and hold |
to exit. |
To return to the previous setting item, press 
 .
.
Default: XX
DIMMER |
Dim the display illumination. |
|
|
ON: Dimmer is turned on. ; OFF: Cancels. |
|
|
DIMMER TIME: Set the dimmer on and off time. |
|
|
1 |
Turn the volume knob to adjust the [ON] time, then press the knob. |
|
2 |
Turn the volume knob to adjust the [OFF] time, then press the knob. |
|
(Default: [ON]: 18:00; [OFF]: 6:00) |
|
|
|
|
BRIGHTNESS |
0 — 31: Select your preferred brightness level for display illumination. |
|
|
|
|
TEXT SCROLL |
AUTO/ ONCE: Select whether to scroll the display information |
|
|
automatically, or scroll only once. ; OFF: Cancels. |
|
ENGLISH 13
TROUBLESHOOTING
Symptom |
Remedy |
|
|||||
|
|
Sound cannot be heard. |
• Adjust the volume to the optimum level. |
||||
|
|
|
|
• Check the cords and connections. |
|||
|
|
“MISWIRING CHECK WIRING |
Turn the power off, then check to be sure the |
||||
|
|
THEN PWR ON” appears. |
terminals of the speaker wires are insulated properly. |
||||
|
|
|
|
Turn the power on again. |
|||
General |
“PROTECTING SEND |
Send the unit to the nearest service center. |
|||||
SERVICE” appears. |
|
|
|
||||
|
|
|
|
|
|||
|
|
• Sound cannot be heard. |
Clean the connectors. ( 15) |
||||
|
|
• The unit does not turn on. |
|
|
|
||
|
|
• |
Information shown on |
|
|
|
|
|
|
|
the display is incorrect. |
|
|
|
|
|
|
The unit does not work |
Reset the unit. ( |
3) |
|||
|
|
at all. |
|
|
|
||
|
|
DAB reception is poor. |
Make sure [ON] is selected for [DAB ANT POWER]. |
||||
Radio |
|
|
( |
4) |
|
||
|
|
|
|
|
|||
“DAB ANT ERR” |
Check the DAB antenna. If a passive antenna (without |
||||||
|
|
||||||
Digital |
|
|
a booster) is used, set [DAB ANT POWER] to [OFF]. |
||||
|
|
( |
4) |
|
|||
|
|
|
|
|
|||
|
|
|
|
|
|||
|
|
“RELATED SERV FOUND” |
• |
Press the volume knob to activate Soft-Link. ( 7) |
|||
|
|
|
|
• |
Press |
to cancel. |
|
|
|
|
|
|
|||
Analog |
Radio |
• |
Radio reception is poor. |
Connect the antenna firmly. |
|||
• |
Static noise while |
|
|
|
|||
|
|
|
|
|
|||
|
|
|
listening to the radio. |
|
|
|
|
/ |
iPod |
Disc cannot be ejected. |
Press and hold M to forcibly eject the disc. Be careful |
||||
USB/ |
|
|
not to drop the disc when it is ejected. If this does not |
||||
|
|
|
|
||||
CD |
|
|
|
solve the problem, reset the unit. ( 3) |
|||
|
Noise is generated. |
Skip to another track or change the disc. |
|||||
|
|
||||||
Symptom |
Remedy |
|||
|
Tracks do not play back as |
Playback order is determined when files are recorded. |
||
|
you intended them to play. |
|
|
|
|
“READING” keeps flashing. |
Do not use too many hierarchical levels or folders. |
||
|
Elapsed playing time is not |
This is caused by how the tracks are recorded. |
||
|
correct. |
|
|
|
|
Correct characters are not |
• This unit can only display uppercase letters, numbers, |
||
|
displayed (e.g. album |
|
and a limited number of symbols. |
|
|
name). |
• Depending on the display language you have selected |
||
|
|
|
( 5), some characters may not be displayed |
|
|
|
|
correctly. |
|
|
“NA FILE” |
Make sure the disc contains supported audio files. |
||
iPod |
|
( |
15, 16) |
|
“NO DISC” |
Insert a playable disc into the loading slot. |
|||
/ |
“TOC ERROR” |
Make sure the disc is clean and inserted properly. |
||
/USB |
||||
“PLEASE EJECT” |
Reset the unit. If this does not solve the problem, |
|||
CD |
||||
|
consult your nearest service center. |
|||
|
|
|||
|
“READ ERROR” |
Copy the files and folders onto the USB device again. If |
||
|
|
this does not solve the problem, reset the USB device or |
||
|
|
use another USB device. |
||
|
“NO DEVICE” |
Connect a USB device, and change the source to USB |
||
|
|
again. |
||
|
“COPY PRO” |
A copy-protected file is played. |
||
|
“NA DEVICE” |
Connect a supported USB device, and check the |
||
|
|
connections. |
||
|
“NO MUSIC” |
Connect a USB device that contains playable audio files. |
||
|
“iPod ERROR” |
• |
Reconnect the iPod. |
|
|
|
• |
Reset the iPod. |
|
14
TROUBLESHOOTING
Symptom |
Remedy |
•Sound cannot be heard • Reconnect the Android device.
during playback. • If in [HAND MODE], launch any media player application
|
• Sound output only from |
on the Android device and start playback. |
|
|
the Android device. |
• If in [HAND MODE], relaunch the current media player |
|
|
|
application or use another media player application. |
|
|
|
• Restart the Android device. |
|
|
|
• If this does not solve the problem, the connected Android |
|
|
|
device is unable to route the audio signal to unit. ( 16) |
|
|
Cannot playback at |
• Make sure KENWOOD MUSIC PLAY APP is installed on the |
|
|
[BROWSE MODE]. |
Android device. ( 10) |
|
ANDROID |
• Reconnect the Android device and select the appropriate |
||
|
|
||
|
|
control mode. |
|
|
|
• If this does not solve the problem, the connected Android |
|
|
|
device does not support [BROWSE MODE]. ( |
16) |
|
“NO DEVICE” or “READING” |
• Switch off the developer options on the Android device. |
|
|
keeps flashing. |
• Reconnect the Android device. |
|
|
|
• If this does not solve the problem, the connected Android |
|
|
|
device does not support [BROWSE MODE]. ( |
16) |
|
Playback is intermittent or |
Turn off the power saving mode on the Android device. |
|
|
sound skips. |
|
|
|
“ANDROID ERROR” / |
• Reconnect the Android device. |
|
|
“NA DEVICE” |
• Restart the Android device. |
|
Muting upon the reception of a phone call
Connect the MUTE wire to your telephone using a commercial telephone accessory. ( 20)
20)
When a call comes in, “CALL” appears. (The audio system pauses.)
• To continue listening to the audio system during a call, press  . “CALL” disappears and the audio system resumes.
When the call ends, “CALL” disappears. (The audio system resumes.)
REFERENCES
 Maintenance
Cleaning the unit
Wipe off dirt on the faceplate with a dry silicone or soft cloth.
Cleaning the connector
Detach the faceplate and clean the connector gently with a cotton swab, being careful not to damage the connector.
Connector (on the reverse side of the faceplate)
Handling discs
•Do not touch the recording surface of the disc.
•Do not stick tape etc. on the disc, or use a disc with tape stuck on it.
•Do not use any accessories for the disc.
•Clean from the center of the disc and move outward.
•Clean the disc with a dry silicone or soft cloth. Do not use any solvents.
•When removing discs from this unit, pull them out horizontally.
•Remove burrs from the center hole and disc edge before inserting a disc.
 More information
Visit also the following website <www.kenwood.com/cs/ce/> for:
–Latest firmware updates and latest compatible item list
–Android™ application KENWOOD MUSIC PLAY
–Any other latest information
General
•This unit can only play the following CDs:
•Detailed information and notes about the playable audio files are stated in an online manual on the following website: www.kenwood.com/cs/ce/audiofile/
ENGLISH 15

REFERENCES
Playable files
•Playable audio file: MP3 (.mp3), WMA (.wma)
•Playable disc media: CD-R/CD-RW/CD-ROM
•Playable disc file format: ISO 9660 Level 1/2, Joliet, Long file name.
•Playable USB device file system: FAT12, FAT16, FAT32
Even when audio files comply with the standards listed above, playback may be impossible depending on the types or conditions of media or device.
Unplayable discs
•Discs that are not round.
•Discs with coloring on the recording surface or discs that are dirty.
•Recordable/ReWritable discs that have not been finalized.
•8 cm CD. Attempting to insert using an adapter may cause malfunction.
About USB devices
•This unit can play MP3/WMA/WAV/FLAC files stored on a USB mass storage class device.
•You cannot connect a USB device via a USB hub.
•Connecting a cable whose total length is longer than 5 m may result in abnormal playback.
•This unit cannot recognize a USB device whose rating is other than 5 V and exceeds 1 A.
About iPod/iPhone
Made for
-iPod touch (2nd, 3rd, 4th, and 5th generation)
-iPod classic
-iPod nano (3rd, 4th, 5th, 6th, and 7th generation)
-iPhone 3G, 3GS, 4, 4S, 5, 5S, 5C, 6, 6 Plus
•You cannot operate iPod if “KENWOOD” or “ ” is displayed on iPod.
•Depending on the version of the operating system of the iPod/iPhone, some functions may not operate on this unit.
About Android device
•This unit supports Android OS 4.1 and above.
•Some Android devices (with OS 4.1 and above) may not fully support Android Open Accessory (AOA) 2.0.
•If the Android device supports both mass storage class device and AOA 2.0, this unit always playback via AOA 2.0 as priority.
Change the display information
Each time you press DISP, the display information changes.
•If the information is unavailable or not recorded, “NO TEXT”, “NO INFO”, “NO SIGNAL”, or other information (eg. station name, playing time) appears.
Source name |
|
|
|
Display information |
|
|
||
|
|
|
|
|
|
|
||
STANDBY |
Source name |
|
Clock |
(back to the beginning) |
|
|
||
|
|
|
|
|||||
DIGITAL AUDIO |
Service label |
Ensemble label Dynamic label Title/Artist |
|
|||||
|
Next program |
Signal level |
Clock |
(back to the beginning) |
|
|||
TUNER |
Frequency |
Clock |
(back to the beginning) |
|
|
|||
|
|
|
|
|||||
|
(For FM Radio Data System stations only) |
|
|
|||||
|
Station name |
Radio text |
Radio text+ Title/Artist Frequency |
|||||
|
Clock (back to the beginning) |
|
|
|
||||
|
|
|
|
|
|
|
|
|
CD or USB |
(For CD-DA) |
|
|
|
|
|
|
|
|
Disc name/Artist Track title/Artist |
Playing time |
Clock |
(back to |
||||
|
the beginning) |
|
|
|
|
|
|
|
|
(For MP3/WMA/WAV/FLAC files) |
|
|
|
||||
|
Track title/Artist |
Album title/artist |
Folder name |
|
|
|||
|
File name |
Playing time |
Clock |
|
|
|
||
|
(back to the beginning) |
|
|
|
|
|||
|
|
|
|
|
|
|||
IPOD or ANDROID |
Track title/Artist |
Album title/Artist |
Playing time |
Clock |
(back to |
|||
|
the beginning) |
|
|
|
|
|
|
|
|
|
|
|
|
|
|
||
AUX |
Source name |
|
Clock |
(back to the beginning) |
|
|
||
|
|
|
|
|
|
|
|
|
16

SPECIFICATIONS
|
DAB |
Frequency Range |
L Band 1 452.960 MHz — 1 490.624 MHz |
|
|
|
|
radio |
|
|
Band III 174.928 MHz — 239.200 MHz |
|
|
|
|
|
Sensitivity |
–100 dBm |
|
|
|
||
Digital |
|
Signal-to-Noise Ratio |
80 dB |
|
|
|
|
|
Antenna Connector Type |
SMB |
|
|
|
||
|
|
|
|
|
|
Antenna Output Voltage |
14.4 V (11 V – 16 V) |
|
|
|
|
|
|
Antenna Maximum Current |
< 100 mA |
|
|
|
|
|
FM |
Frequency Range |
87.5 MHz — 108.0 MHz (50 kHz space) |
|
|
|
|
|
|
Usable Sensitivity |
0.71 μV/75 Ω |
|
|
(S/N = 26 dB) |
|
|
|
|
|
|
|
Quieting Sensitivity |
2.0 μV/75 Ω |
|
|
(S/N = 46 dB) |
|
|
|
|
|
radio |
|
Frequency Response (±3 dB) |
30 Hz — 15 kHz |
|
Signal-to-Noise Ratio (MONO) |
64 dB |
|
Analog |
|
||
|
|
|
|
|
Stereo Separation (1 kHz) |
40 dB |
|
|
|
||
|
|
|
|
|
MW |
Frequency Range |
531 kHz — 1 611 kHz (9 kHz space) |
|
|
|
|
|
|
Usable Sensitivity |
28.2 μV |
|
|
(S/N = 20 dB) |
|
|
|
|
|
|
LW |
Frequency Range |
153 kHz — 279 kHz (9 kHz space) |
|
|
|
|
|
|
Usable Sensitivity |
50.0 μV |
|
|
(S/N = 20 dB) |
|
|
|
|
|
|
Laser Diode |
GaAIAs |
|
||
|
|
|
|
||
|
Digital Filter (D/A) |
8 times over sampling |
|||
|
|
|
|
||
|
Spindle Speed |
500 rpm — 200 rpm (CLV) |
|||
|
Wow & Flutter |
Below measurable limit |
|||
player |
|
|
|
|
|
Total Harmonic Distortion (1 kHz) |
0.01 % |
|
|||
|
Frequency Response (±1 dB) |
20 Hz — 20 kHz |
|||
CD |
|
|
|
|
|
Signal-to-Noise Ratio (1 kHz) |
105 dB |
|
|||
|
|
|
|
|
|
|
Dynamic Range |
90 dB |
|
||
|
|
|
|
|
|
|
Channel Separation |
85 dB |
|
||
|
|
|
|
||
|
MP3 Decode |
Compliant with MPEG-1/2 Audio Layer-3 |
|||
|
WMA Decode |
Compliant with Windows Media Audio |
|||
|
|
|
|
||
|
USB Standard |
USB 1.1, USB 2.0 Full Speed |
|||
|
|
|
|
||
|
File System |
FAT12/ 16/ 32 |
|||
|
|
|
|
|
|
USB |
Maximum Supply Current |
DC 5 V |
|
1 A |
|
|
|||||
|
|
|
|
||
MP3 Decode |
Compliant with MPEG-1/2 Audio Layer-3 |
||||
|
|||||
|
|
|
|
||
|
WMA Decode |
Compliant with Windows Media Audio |
|||
|
|
|
|
||
|
WAV Decode |
Linear-PCM |
|||
|
|
|
|
||
|
FLAC Decode |
FLAC file (Up to 48 kHz / 16 bit) |
|||
|
|
|
|
|
|
ENGLISH 17

SPECIFICATIONS
|
Maximum Output Power |
50 W × 4 |
|
|
|
|
|
||
|
Full Bandwidth Power |
22 W × 4 (at less than 1 % THD) |
||
|
|
|
|
|
|
Speaker Impedance |
4 Ω — 8 Ω |
|
|
Audio |
Tone Action |
Middle |
2.5 kHz ±8 dB |
|
|
Bass |
200 Hz ±8 dB |
||
|
|
|
|
|
|
|
Treble |
12.5 kHz ±8 dB |
|
|
|
|
||
|
Preout Level/Load (CD) |
2 500 mV/10 kΩ |
||
|
|
|
|
|
|
Preout Impedance |
≤ 600 Ω |
|
|
|
|
|
||
Auxiliary |
Frequency Response (±3 dB) |
20 Hz — 20 kHz |
||
|
|
|
||
Input Maximum Voltage |
1 000 mV |
|
||
|
|
|||
|
|
|
|
|
|
Input Impedance |
30 kΩ |
|
|
|
|
|
||
|
Operating Voltage |
14.4 V (10.5 V — 16 V allowable) |
||
|
|
|
|
|
General |
Maximum Current Consumption |
10 A |
|
|
|
|
|
||
Operational Temperature Range |
–10°C — +60°C |
|||
|
||||
|
|
|
||
|
Installation Size (W × H × D) |
182 mm × 53 mm × 159 mm |
||
|
|
|
|
|
|
Weight |
1.3 kg |
|
|
|
|
|
|
|
Subject to change without notice.
INSTALLATION / CONNECTION
 Warning
•The unit can only be used with a 12 V DC power supply, negative ground.
•Disconnect the battery’s negative terminal before wiring and mounting.
•Do not connect Battery wire (yellow) and Ignition wire (red) to the car chassis or Ground wire (black) to prevent a short circuit.
•Insulate unconnected wires with vinyl tape to prevent a short circuit.
•Be sure to ground this unit to the car’s chassis again after installation.
 Caution
•For safety’s sake, leave wiring and mounting to professionals. Consult the car audio dealer.
•Install this unit in the console of your vehicle. Do not touch the metal parts of this unit during and shortly after use of the unit. Metal parts such as the heat sink and enclosure become hot.
•Do not connect the [ wires of speakers to the car chassis or Ground wire (black), or connect them in parallel.
•Mount the unit at an angle of less than 30º.
•If your vehicle wiring harness does not have the ignition terminal, connect Ignition wire (red) to the terminal on the vehicle’s fuse box which provides 12 V DC power supply and is turned on and off by the ignition key.
•Keep all cables away from heat dissipate metal parts.
•After the unit is installed, check whether the brake lamps, blinkers, wipers, etc. on the car are working properly.
•If the fuse blows, first make sure the wires are not touching car’s chassis, then replace the old fuse with one that has the same rating.
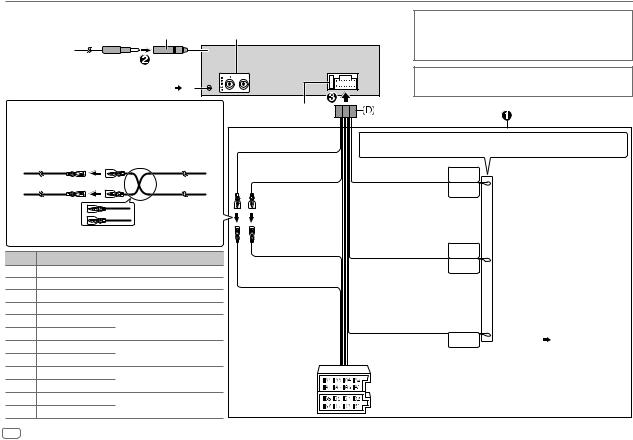
Basic procedure
1Remove the key from the ignition switch, then disconnect the [ terminal of the car battery.
2Install the DAB antenna.
See Installing the DAB antenna. ( 21)
21)
3Connect the wires properly.
See Wiring connection. ( 20)
20)
4Install the unit to your car.
See Installing the unit (in-dash mounting). ( 19)
19)
5 Connect the [ terminal of the car battery.
6 Reset the unit. ( 3)
3)
18

INSTALLATION / CONNECTION |
|
|
|
Installing the unit (in-dash mounting) |
Part list for installation |
|
|
|
|
(A) Faceplate |
|
|
Do the required wiring. |
|
|
|
( |
20) |
|
|
|
(B) Trim plate |
|
|
Hook on the top side |
|
|
|
Orientate the trim plate as |
Dashboard of your car |
|
|
illustrated before fitting. |
|
|
|
(C) Mounting sleeve |
|
|
|
|
|
|
|
Bend the appropriate tabs to hold the |
|
|
|
mounting sleeve firmly in place. |
|
|
|
|
(D) Wiring harness |
|
How to remove the unit |
|
|
|
1 |
Detach the faceplate. |
|
|
2 Fit the catch pin on the extraction keys into the holes |
|
|
|
|
on both sides of the trim plate, then pull it out. |
(E) Extraction key |
|
3 Insert the extraction keys deeply into the slots on |
|
||
|
each side, then follow the arrows as shown on the |
|
|
|
right. |
|
|
|
|
ENGLISH |
19 |
INSTALLATION / CONNECTION |
|
|
|
|
|||
Wiring connection |
|
|
If your car does not have an ISO terminal : |
||||
|
|
|
|
||||
|
|
Antenna terminal |
Front/ Rear/ Subwoofer output |
We recommend installing the unit with a commercially available |
|||
|
|
|
|
custom wiring harness specific for your car and leave this job to |
|||
|
|
|
|
professionals for your safety. Consult your car audio dealer. |
|||
|
|
|
|
When connecting to an external amplifier, connect its ground |
|||
|
|
DAB antenna jack ( 5) |
|
wire to the car’s chassis to avoid damaging the unit. |
|||
Connecting the ISO connectors on some VW/Audi or |
Fuse (10 A) |
|
|
|
|||
Opel (Vauxhall) automobiles |
|
|
|
|
|||
You may need to modify the wiring of the supplied wiring |
Yellow (Battery wire) |
|
|
|
|||
harness as illustrated below. |
Ignition wire |
If no connections are made, do not let the wire come out from the tab. |
|||||
A7 (Red) |
|
|
|
|
|||
(Red) |
Red (Ignition wire) |
Light blue/yellow |
STEERING WHEEL |
|
|||
|
|
|
To the steering wheel remote control |
||||
Vehicle |
|
Unit |
REMOTE INPUT |
||||
|
|
(Steering remote control |
|
||||
|
|
REMOTE CONT |
adapter |
||||
|
|
|
|
||||
A4 (Yellow) |
Battery wire |
|
wire) |
|
|
||
|
|
(Yellow) |
|
|
|
|
|
|
Default wiring |
|
|
|
To the power control terminal when |
||
|
|
|
Red (A7) |
Blue/White |
ANT CONT |
||
Pin |
Color and function |
using the optional power amplifier |
|||||
|
|
|
|||||
|
(Power control wire/ |
P. CONT |
or to the antenna control terminal in |
||||
A4 |
Yellow |
: Battery |
|
||||
Yellow (A4) |
Antenna control wire) |
|
the vehicle |
||||
A5 |
Blue/White |
: Power control |
|
||||
|
|
|
|||||
A7 |
Red |
: Ignition (ACC) |
|
|
|
|
|
A8 |
Black |
: Earth (ground) connection |
|
|
|
To the terminal that is grounded |
|
B1 |
Purple ] |
: Rear speaker (right) |
|
Brown |
|
||
|
|
when the telephone rings or during |
|||||
B2 |
Purple/black [ |
|
|
||||
|
|
(Mute control wire) |
MUTE |
conversation ( 15) |
|||
B3 |
Gray ] |
|
|
||||
: Front speaker (right) |
|
|
|
(To connect the Kenwood navigation |
|||
B4 |
Gray/black [ |
|
|
|
|||
|
|
|
|
system, refer your navigations manual.) |
|||
B5 |
White ] |
: Front speaker (left) |
|
|
|
|
|
B6 |
White/black [ |
|
|
|
|
||
|
ISO connectors |
|
|
|
|||
B7 |
Green ] |
|
|
|
|
||
: Rear speaker (left) |
|
|
|
|
|||
B8 |
Green/black [ |
|
|
|
|
||
|
|
|
|
|
|||
20
 Loading...