

Page 1

Instructions for Use
LABSIDE
Empress
®
CAD
IPS
Empress®System
IPS
Page 2

Product Information
2
Table of Contents
General
Information
Practical
Working Steps
Fabrication of the IPS Empress CAD Restorations
IPS Empress CAD – Product Information 4
Material
Uses
Composition
Block concept
Product overview and description
Accessories and equipment
IPS Empress CAD – Practical Working Steps 17
Preparation guidelines and minimum thicknesses
Shade determination
Cementation
IPS Empress CAD – Inlays / Onlays – stained / glazed 22
Finishing and preparing for the stain and glaze firing
2-in-1 technique and staining and glaze firing in one step
Corrective firing
IPS Empress CAD – Veneers / Anterior Crowns – stained / glazed 25
Finishing
Preparing for staining
Stain and characterization firing
Glaze firing
Corrective firing
IPS Empress CAD – Veneers / Anterior Crowns – Cut-back and layered 30
Cut-back technique
Preparing for veneering
Wash firing
Incisal / Transparent firing
Finishing and preparing for stain and glaze firing
Stain and glaze firing
Corrective firing
IPS Empress CAD – General Information 38
Preparing for cementation
Firing parameters
Combination table
Page 3
3
Nearly 20 years ago, IPS Empress revolutionized the processing of ceramic and thanks
to its many advantages, such as aesthetics, IPS Empress has been established as the
"benchmark". More than 33 million restorations fabricated of IPS Empress throughout
the world and the use of "IPS Empress" as a synonym for all-ceramics speak for the
durable life-like appearance, the ongoing success, and the high quality standard of the
material.
In addition to the tried-and-tested PRESS technology, the CAD/CAM technology has
also developed in the area of all-ceramics. In order to supply the "benchmark" for this
technology as well, the future IPS Empress System will comprise products for both
processing technologies. You will be able to benefit from roughly 20 years of clinical
experience and convincing aesthetics, irrespective of whether the restorations were
fabricated with the PRESS or CAD/CAM technique.
IPS Empress Esthetic is available for the PRESS technology, while IPS Empress CAD
is used in the CAD/CAM technology. Both products consist of the highly aesthetic,
leucite-reinforced glass-ceramic that has been clinically tried-and-tested for many years.
The two ceramics are characterized by excellent strength values and outstanding
aesthetic appearance. They may thus be used for the fabrication of fully anatomic
single-unit restorations, such as inlays, onlays, veneers, and crowns.
Both products may subsequently be stained and/or glazed using IPS Empress
Universal Shades/Stains, or individually veneered using the IPS Empress Esthetic
Veneer layering ceramic.
In this way, the IPS Empress System will remain synonymous for highly aesthetic, fully
anatomical all-ceramic restorations, irrespective of the processing technology.
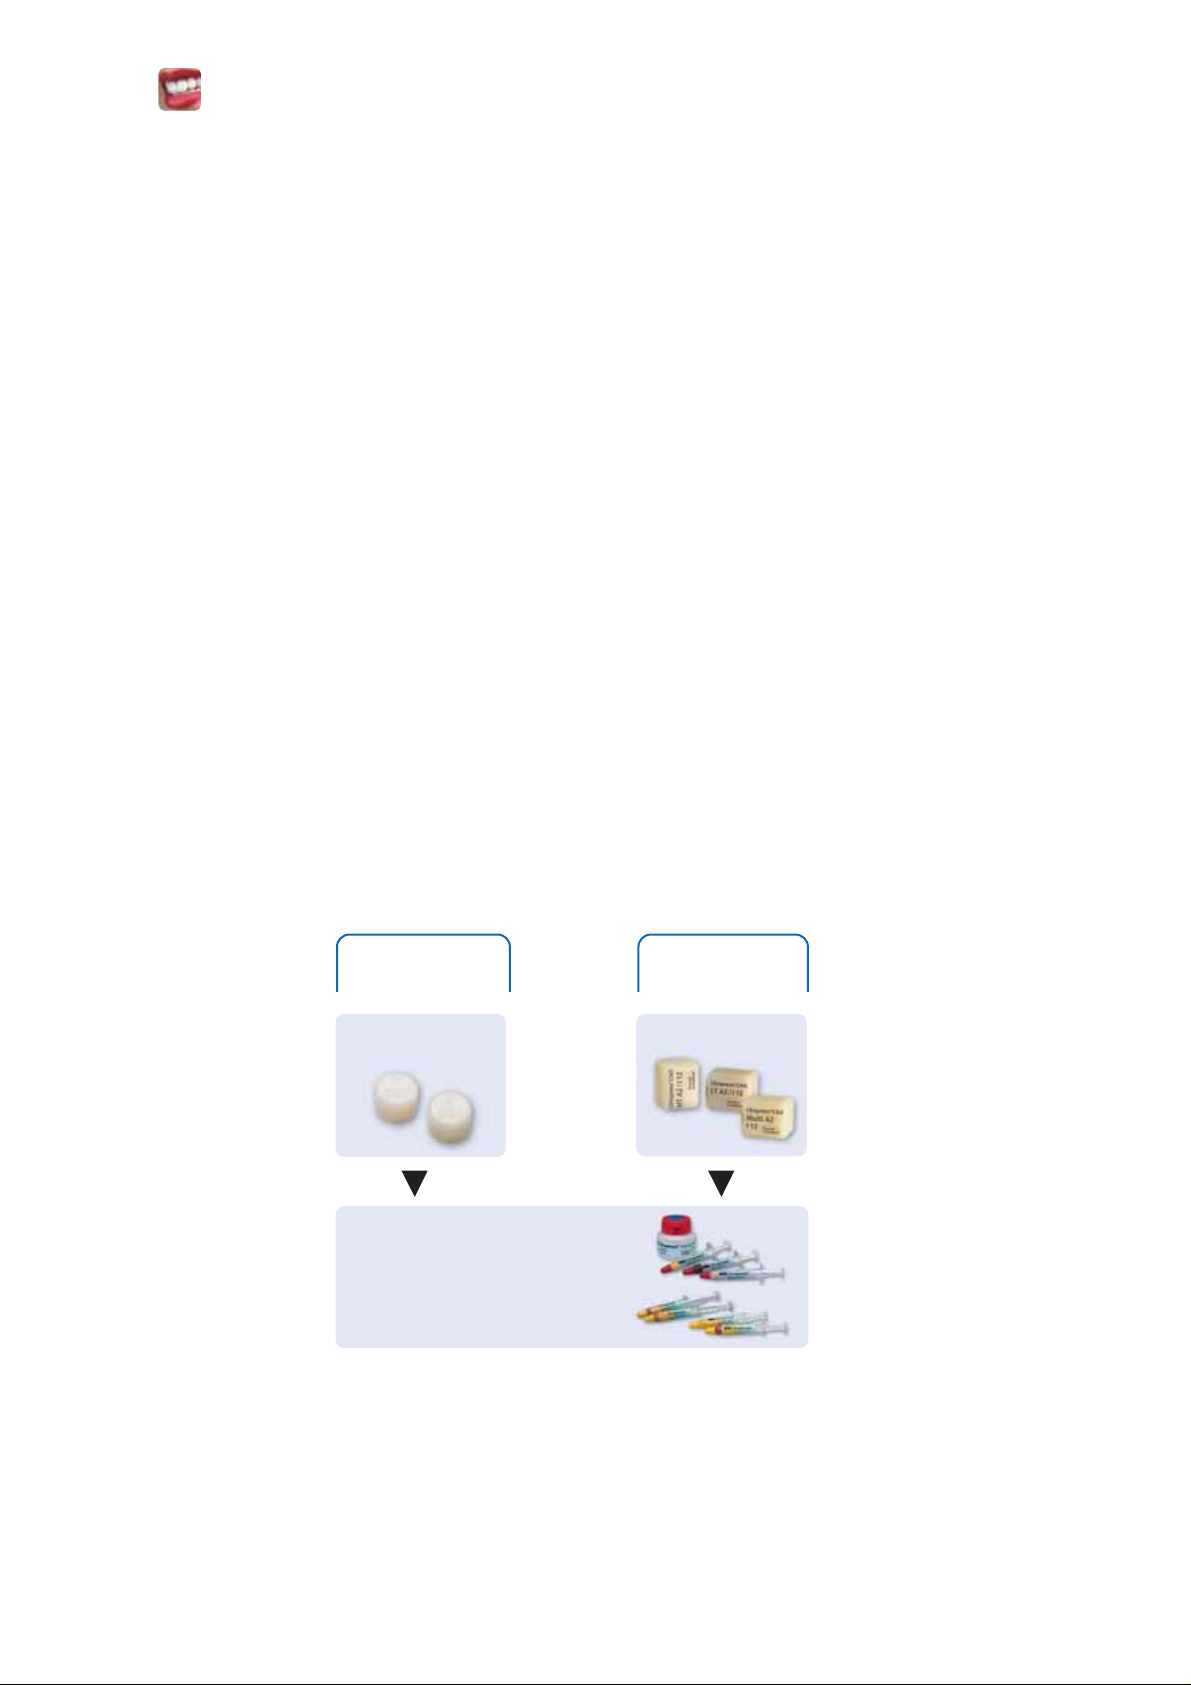
Empress
®
– the Original
IPS
PRESS
Technology
CAD / CAM
Technology
Empress
Esthetic
IPS
Empress
IPS
Empress
IPS
EmpressCAD
IPS
Universal Shade/Stains
Esthetic Veneer
Page 4
4
Empress CAD –
Product Information
IPS
Material
IPS Empress CAD is used for the fabrication of highly aesthetic, fully
anatomical single-unit restorations by means of the CAD/CAM
technology.
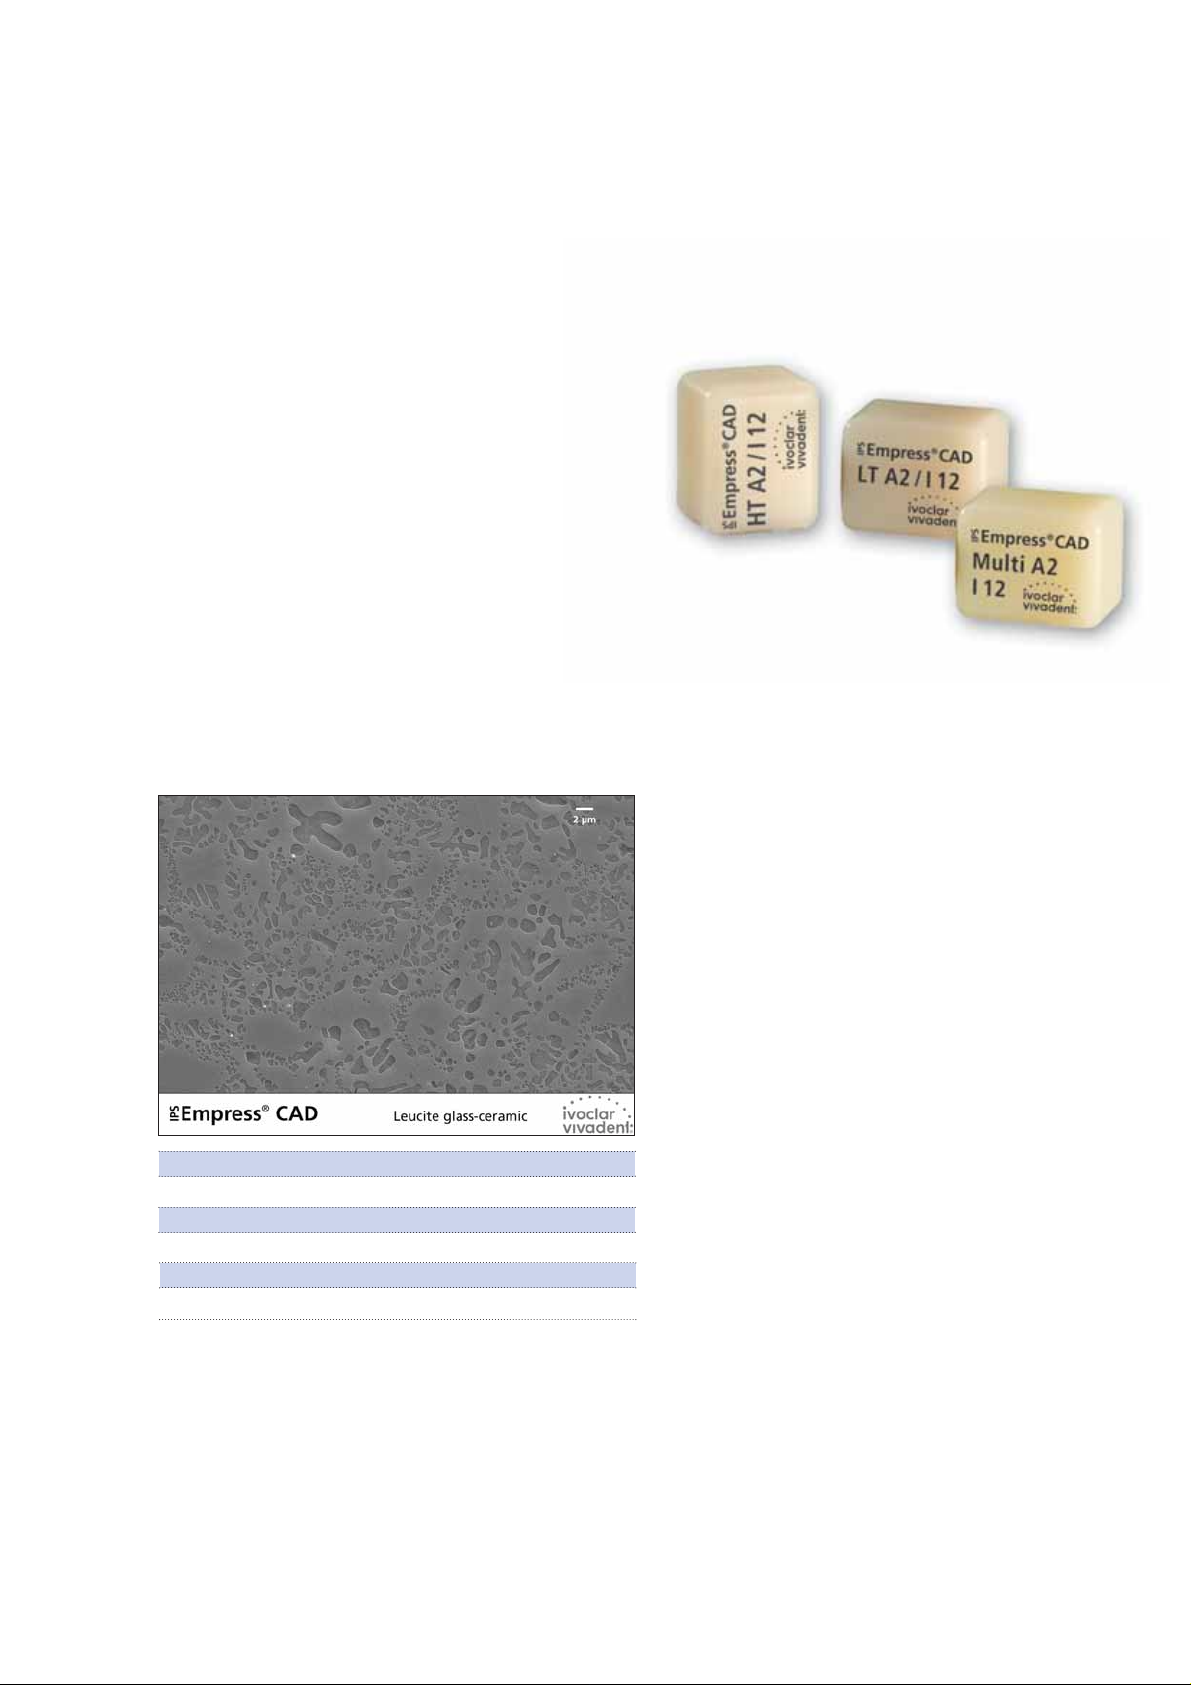
IPS Empress CAD blocks are made of a leucite-reinforced glassceramic which consists of a glass and a crystal phase. Leucite
crystals of few microns evenly grow in a multi-stage process directly
from the amorphous glass phase. During the fabrication of the
blocks, the semi-finished product in powder form is pressed to
blocks in a fully automated procedure, which enables a maximum of
homogeneity. Given the difference in the coefficients of thermal
expansion (CTE) between the glass phase and the crystal phase
(leucite), cooling after sintering produces compressive stress in the
glass phase. This mechanism results in an increase in strength and
enables IPS Empress CAD to achieve a flexural strength of 160 MPa.
This type of material has been successful, as well as proven. for
almost 20 years. The milled restorations feature
excellent accuracy of fit and a homogeneous surface. Subsequently,
the restorations may be stained using IPS Empress Universal Stains
and/or veneered using IPS Empress Esthetic Veneer.
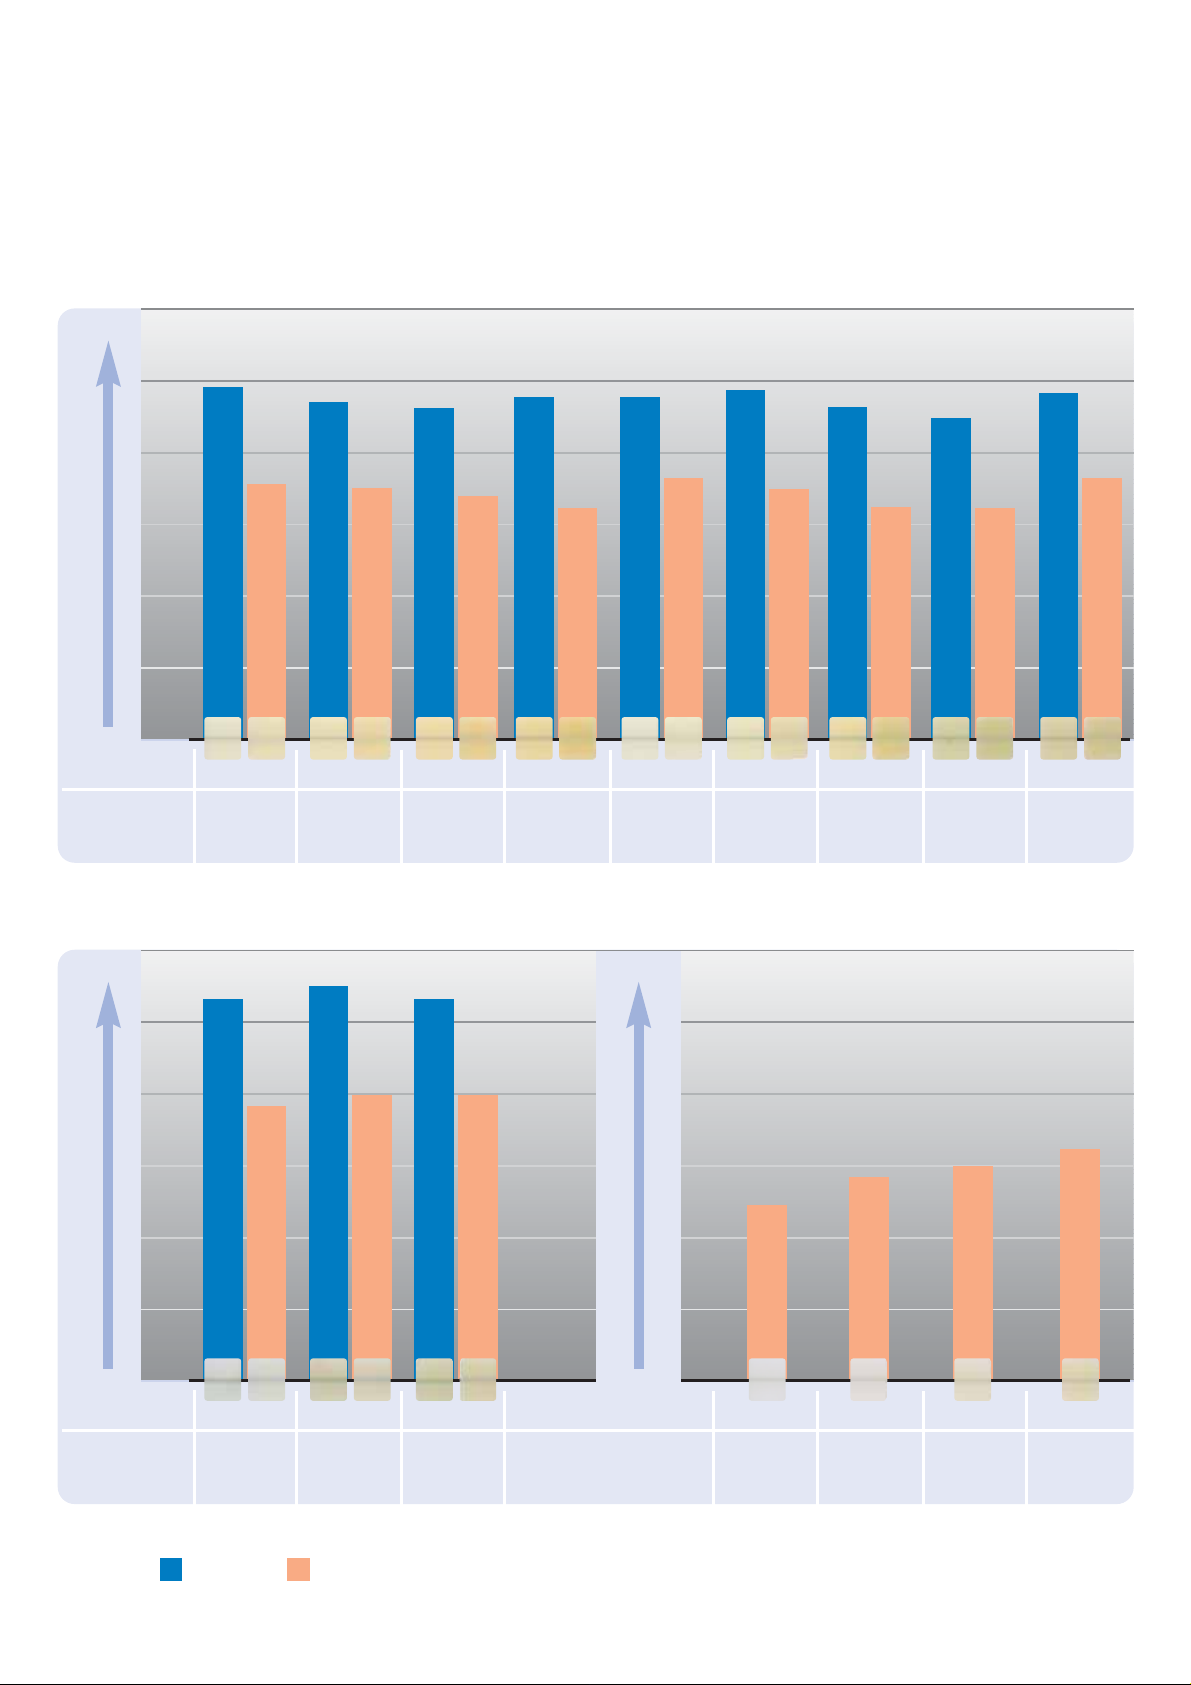
CTE (100–400°C) [10-6/K] 16.6
CTE (100–500°C) [10-6/K] 17.5
Flexural strength (biaxial) [MPa]* 160
Fracture toughness [MPa m
0.5
] 1.3
Vickers hardness [MPa] 6200
Chemical resistance [µg/cm2]* 25
*according to ISO 6872
Page 5

5
Uses
Indications
IPS Empress CAD blocks can be used for the following adhesively cemented restorations. Depending on
the type and size of the restoration, the respective HT (High Translucency), LT (Low Translucency), or
Multi Block is recommended. IPS Empress CAD restorations may be cemented either polished,
stained/glazed, or veneered.
For further processing of IPS Empress CAD restorations, users have the following options:
– Aesthetic characterization and glazing of fully anatomical restorations using IPS Empress Universal
Shades, Stains, and Glaze pastes.
– Aesthetic veneering in the incisal third of reduced restorations (veneers and anterior crowns) using
IPS Empress Esthetic Veneer materials
Contraindications
– Bridge reconstructions
– Conventional cementation
– Very deep, subgingival preparations
– Patients with severely reduced residual dentition
– Bruxism
– Fully (circularly) veneered anterior and posterior crowns using IPS Empress Esthetic Veneer
Important processing restrictions
Failure to observe the following restrictions may compromise the success achieved with IPS Empress CAD:
– The fully anatomical IPS Empress CAD restorations must not fall below the required minimum
thickness
– The reduced (cut-back) IPS Empress CAD restorations must not fall below the required minimum
thickness
– The maximum layer thickness of IPS Empress Esthetic Veneers layering materials must not be exceeded
– IPS Empress CAD restorations must not be stained using materials other than IPS Empress Universal
Shades, Stains, and Glaze
– Powder materials must not be mixed with paste materials
– The blocks must not be milled in a non-compatible CAD/CAM system
Side effects
If patients are known to be allergic to any of the ingredients of IPS Empress CAD, the material should
not be used.
HT Blocks
(High Translucency)
Higher translucency and
chameleon effect
Lower brightness value
– Inlays
– Onlays
– Veneers
LT Blocks
(Low Translucency)
Lower translucency and
chameleon effect
Higher brightness value
– Anterior and posterior crowns
– Partial crowns
– Veneers
Multi Blocks
True-to-nature transition
of shade, translucency, and
fluorescence
– Anterior and posterior crowns
– Partial crowns
– Veneers
Page 6

6
Composition
– IPS Empress CAD Blocks
Components: SiO
2
Additional contents: Al2O3, K2O, Na2O, CaO, and other oxides, pigments
– IPS Empress Esthetic Veneer
Components: SiO
2
Additional contents: Al2O3, K2O, Na2O, CaO, oxides and pigments
– IPS Empress Universal Shades, Stains, and Glaze Paste
Components: Oxides, glycerine, butandiol
– IPS Empress Esthetic Veneer Build-Up Liquid
Components: water, butandiol, chloride
– IPS Empress Universal Glaze and Stain Liquid
Components: Butandiol
– IPS Contrast Spray Labside
Components: Pigment suspension in ethanol; the propellant is a propane/butane mixture
– IPS Natural Die Material
Components: Polyester urethane dimethacrylate, paraffin oil, SiO2and copolymers
– IPS Natural Die Material Separator
Components: Wax dissolved in hexane
– IPS Ceramic Etching Gel
Components: Hydrofluoric acid
Warnings
– Butandiol is irritating - avoid contact with skin and eyes and do not inhale the vapours.
– Hexane is highly flammable and detrimental to health. Avoid contact with skin and eyes. Do not
inhale the vapours and keep away from sources of ignition.
– Do not inhale ceramic grinding dust during processing - use suction equipment and a face mask.
– Etching gel contains hydrofluoric acid. Avoid contact with skin, eyes, and clothing at any time, since
the material is highly toxic and corrosive. The etching gel is intended for professional use only and
must not be applied intra-orally (in the oral cavity).
Page 7
7
Block concept
IPS Empress CAD Blocks
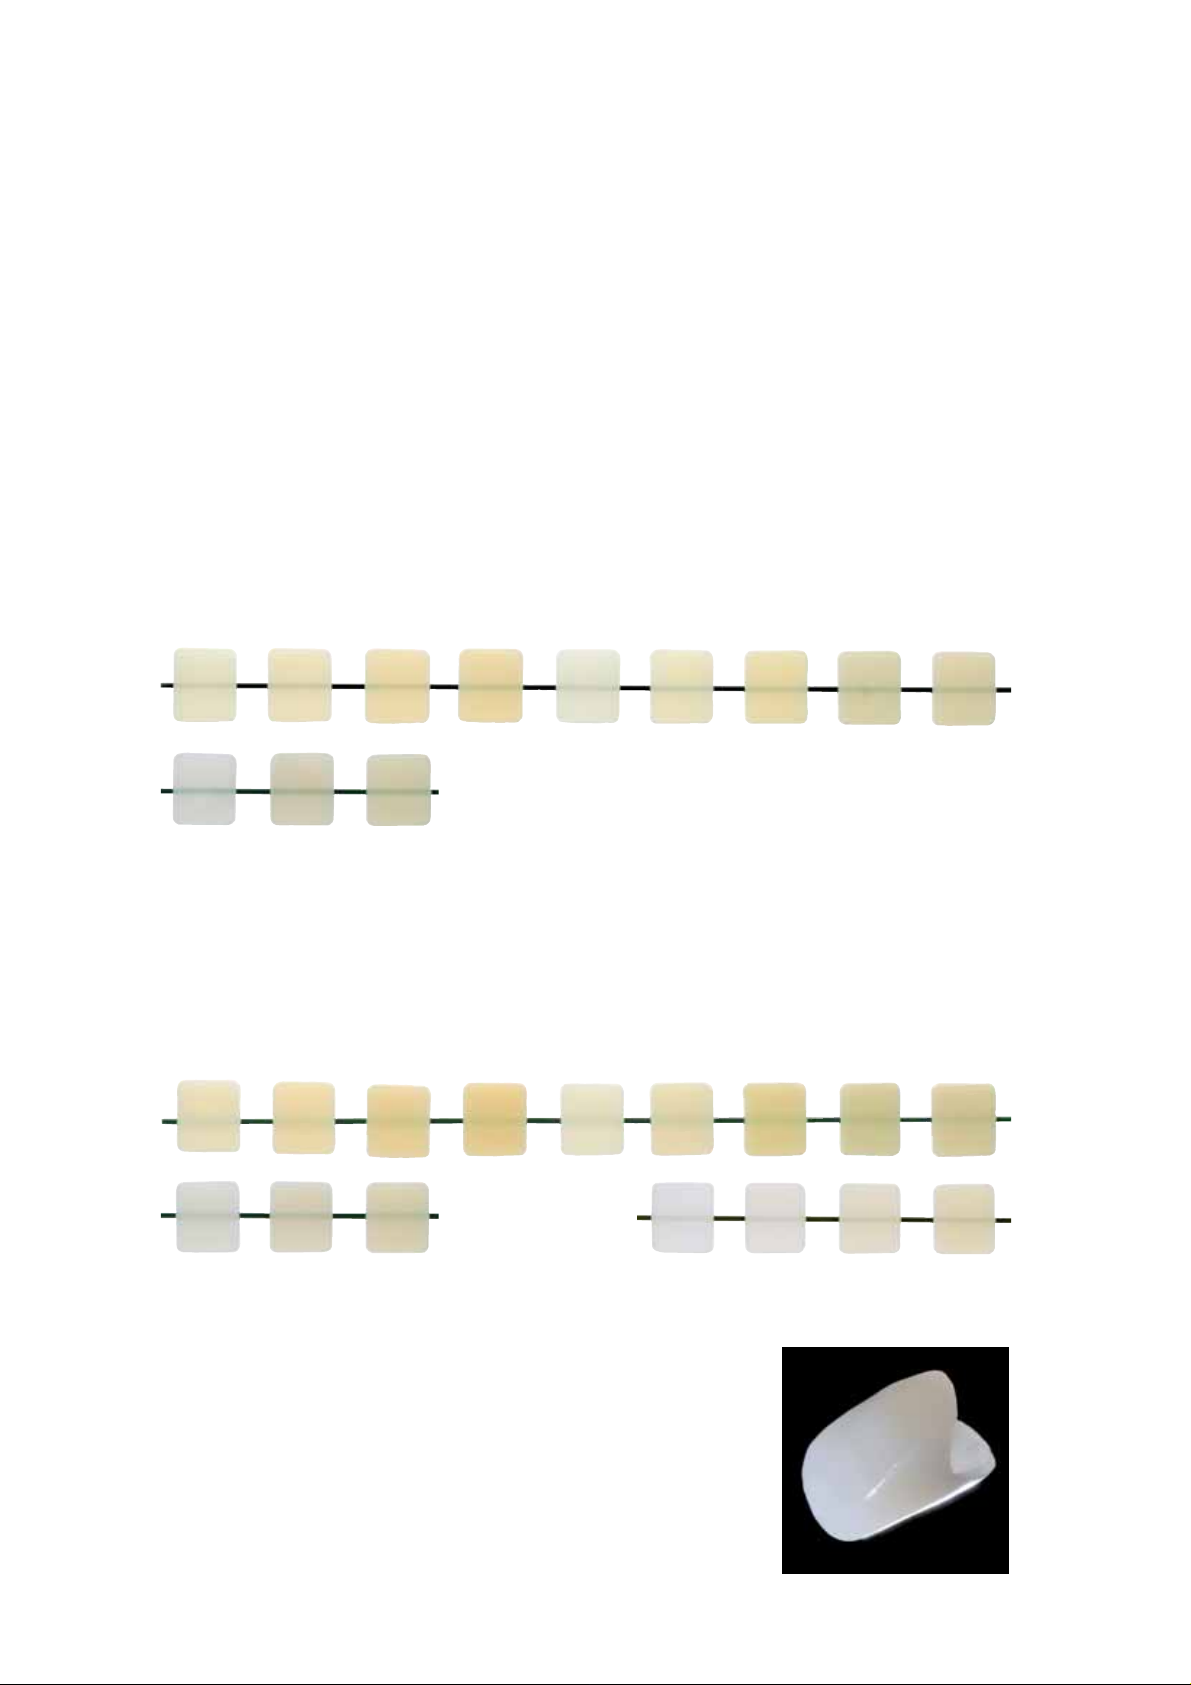
The shading and translucency control of the IPS Empress CAD Blocks is based on a newly developed translucency concept
built on the A-D, Chromascop, and Bleach BL shade guides.
The IPS Empress CAD Blocks are available in two degrees of translucency and as a polychromatic block. The blocks are
precisely coordinated with the respective indications and thus enable excellent shade match with the corresponding shade
guide. Depending on the indication, the blocks provide a true-to-nature chameleon effect, life-like brightness value, or a
natural shade transition.
IPS Empress CAD HT (High Translucency)
These blocks are available in the 9 most popular A–D shades, 3 Chromascop shades, and 4 sizes. Given their high
translucency, HT blocks are ideally suitable for the fabrication of smaller restorations (e.g. inlays and onlays). Restorations
made of HT blocks convince users with their true-to-nature chameleon effect and outstanding adaptation to the residual
tooth structure. The blocks demonstrate life-like fluorescence in order to permit optimum integration into the natural
residual tooth structure under different light conditions.
IPS Empress CAD LT (Low Translucency)
These blocks are available in the 9 most popular A–D shades, 3 Chromascop shades, 4 Bleach BL shades, and 4 sizes. Given
their high brightness value compared to the HT blocks, the LT blocks are ideal for the fabrication of larger restorations (e.g.
anterior and posterior crowns). Restorations made of LT blocks convince users with their true-to-nature brightness value
and chroma, which prevents a greying of the incorporated restorations. The blocks demonstrate a life-like fluorescence in
order to enable optimum integration into the natural environment, even under varying light conditions. Restorations made
of LT blocks are also ideally suitable for the cut-back technique.
IPS Empress CAD Multi
These blocks are available in the 5 most popular A–D shades and 3 sizes. Given the
natural shade gradient from the dentin to the incisal areas, restorations made of
IPS Empress CAD Multi Blocks demonstrate a maximum of aesthetics and naturalness. In
conjunction with the flexible positioning of the restoration within the block, the true-tonature opacity and translucency gradient enables a multitude of aesthetic possibilities.
The IPS Empress CAD Multi Block features a transition of fluorescence very similar to
that of natural teeth, which results in excellent integration into the residual dentition.
Given the innovative combination of true-to-nature transition of shade, translucency,
and fluorescence, highly aesthetic restorations are fabricated in an easy way.
A–D
Chromascop
A–D
Chromascop Bleach BL
Page 8
Overview of blocks - shades and sizes*
IPS Empress CAD Blocks are available in the following shades and sizes as Refill vials containing 5 blocks each.
*The available product range may vary from country to country.
A1
A2
A3
A3.5 B1 B2 B3 C2 D3
A–D
V 12
I 8
I 10
I 12
C 14
C14L
LT
Low Translucency
HT
High Translucency
Multi
100
200
300
BL1 BL2 BL3 BL4
Chromascop Bleach BL
V 12
I 8
I 10
I 12
C 14
C14L
LT
Low Translucency
HT
High Translucency
Multi
Page 9
99
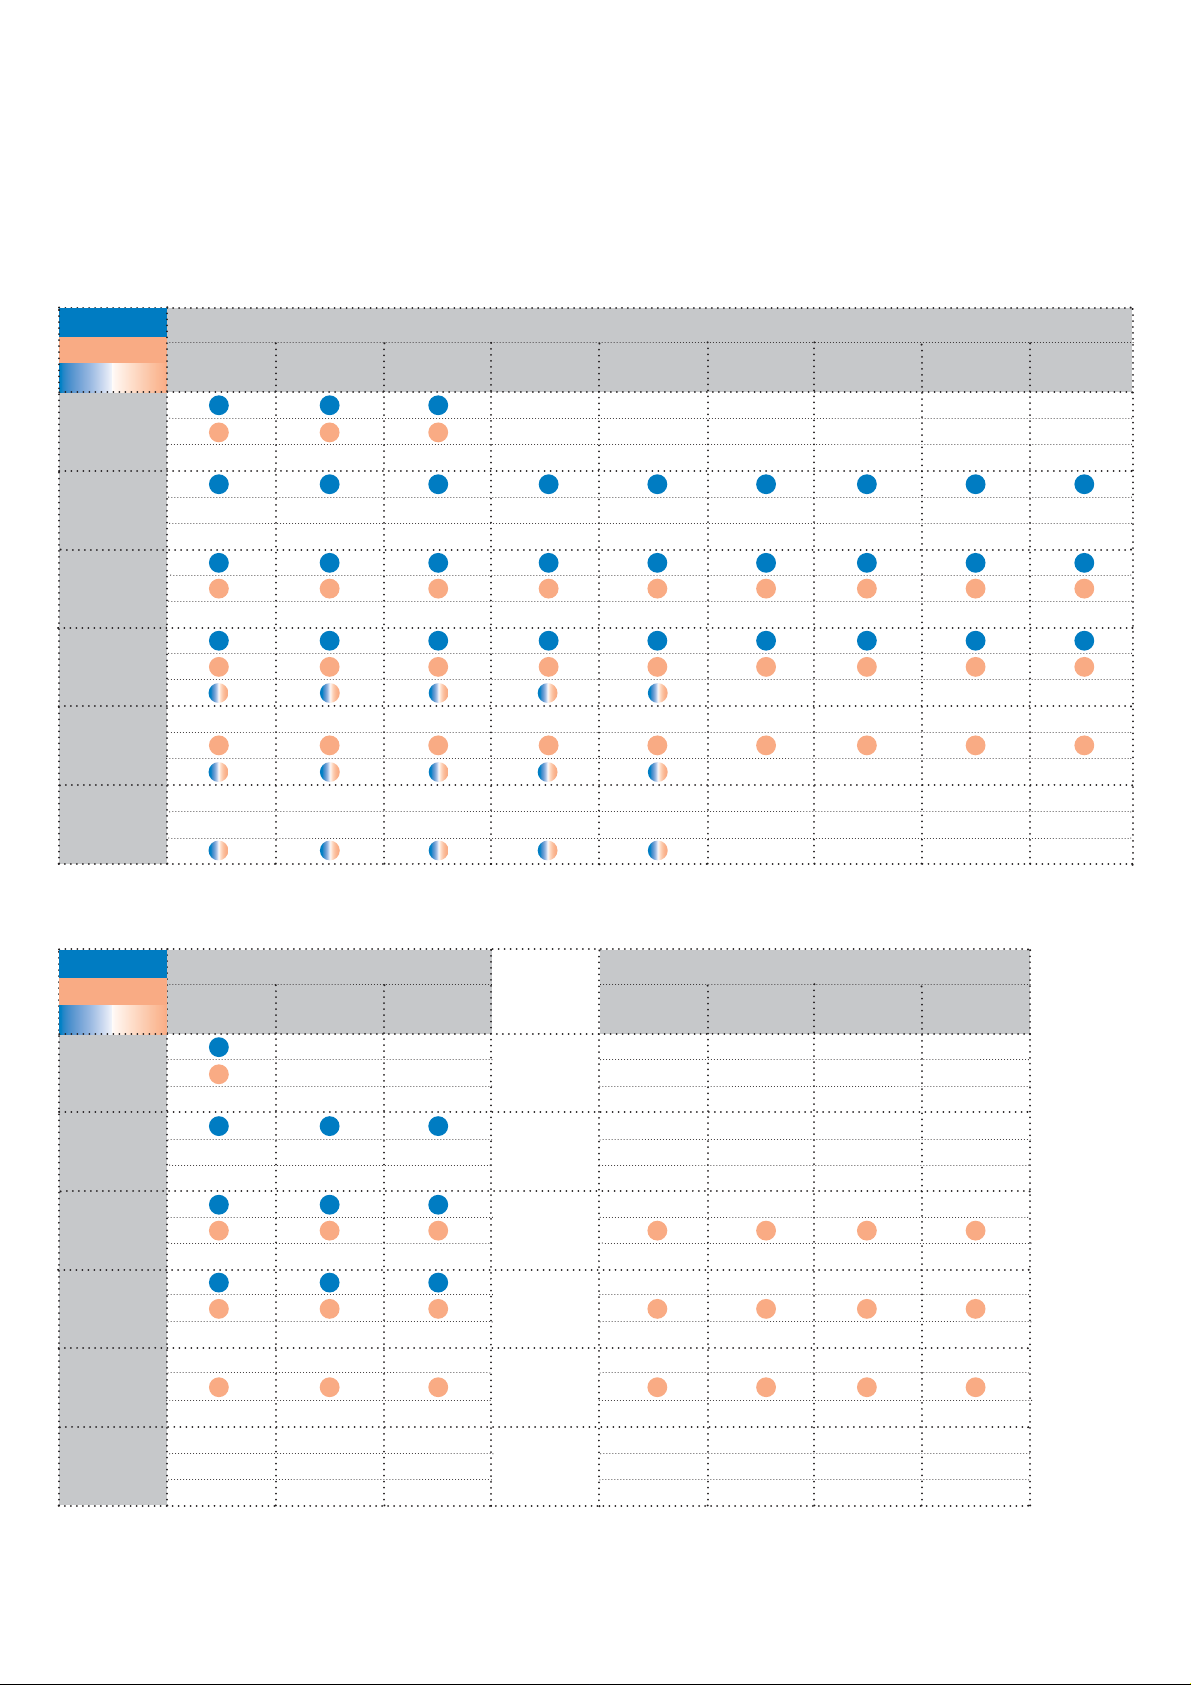
Overview of blocks – translucency
Translucency
Opacity
A–D Shades
A1 A2 A3 A3.5 B1 B2 B3 C2 D3
Translucency
Opacity
Chromascop
100 200 300
Bleach BL
BL1 BL2 BL3 BL4
HT Block LT Block
Page 10
10
Product overview and description
IPS Empress CAD for inLab Trial Kit A–D
The Trial Kit contains a small selection of block shapes in A–D
shades, as well as stains and the IPS Empress Esthetic Veneer layering
materials. The Trial Kit thus provides all the necessary products for
the first IPS Empress CAD restorations.
Delivery form:
IPS Empress CAD for inLab Trial Kit A–D
– 5x 1 IPS Empress CAD for CEREC and inLab HT Block;
Shades/sizes: A1/I 10, A2/I 10, A1/I 12, A2/I 12, A3/I 12
– 5x 1 IPS Empress CAD for CEREC and inLab LT Block;
Shades/sizes: A1/I 12, A2/I 12, A1/C 14, A2/C 14, A3/C 14
– 4x IPS Empress CAD for CEREC and inLab Multi Blocks;
Shades/sizes: A1/C 14, A2/C 14, A1/C 14 L, A2/C 14 L
– 3x 1 g IPS Empress Esthetic Veneer Wash Paste;
Shades: neutral, MM light-salmon, MM yellow-orange
– 2x 5 g IPS Empress Esthetic Veneer;
Shades: Incisal Opal HT, Incisal Opal LT
– 1x 3 g IPS Empress Universal Shade; Shade: A2/A3/A3.5
– 1x 3 g IPS Empress Universal Shade Incisal; Shade: I1
– 2x 1 g IPS Empress Universal Stains; Shades: white, mahogany
– 1x 3 g IPS Empress Universal Glaze Paste
– 1x 5 ml IPS Empress Universal Glaze and Stain Liquid
– 1x 5 ml IPS Empress Esthetic Veneer Build-Up Liquid
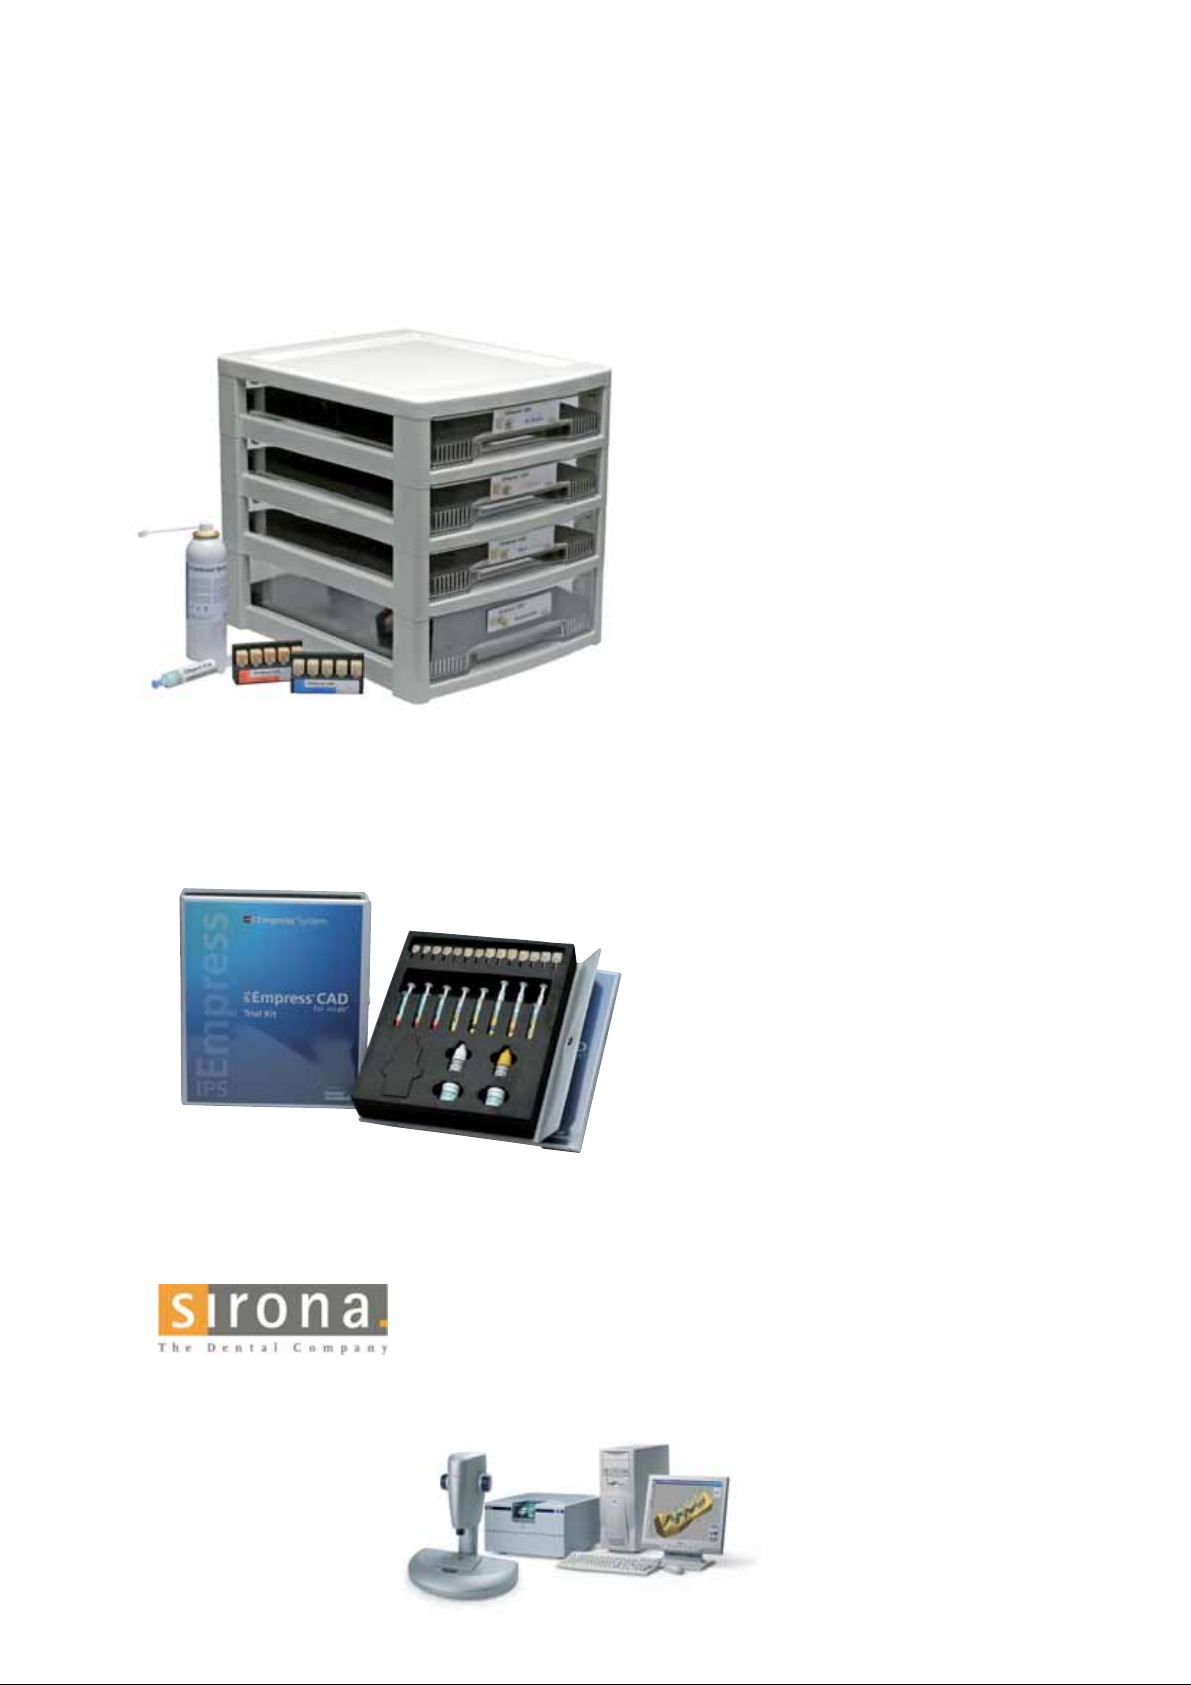
IPS Empress CAD for inLab Basic Kit A–D
The Basic Kit contains a selection of block shapes in the most
popular A–D shades, as well as the necessary accessories, e.g.
IPS Contrast Spray Labside. Therefore, the Basic Kit provides all the
necessary products for the complete laboratory fabrication
procedure. The Basic Kit is supplied in the new material cabinet and
can be supplemented with any other Ivoclar Vivadent all-ceramic
assortment, e.g. IPS e.max.
Delivery form:
IPS Empress CAD for inLab Basic Kit A–D
– 4x 5 IPS Empress CAD for CEREC and inLab HT Blocks;
Shades/sizes: A1/I 12, A2/I 12, A3/I 12, B1/I 12
– 5x 5 IPS Empress CAD for CEREC and inLab LT Blocks;
Shades/sizes: A1/C 14, A2/C 14, A3/C 14, B1/C 14, BL2/C 14
– 3x IPS Empress CAD for CEREC and inLab Multi Blocks;
Shades/sizes: A1/C 14 L, A2/C 14 L, A3/C 14 L
– 1x 200 ml IPS Contrast Spray Labside
– 1x 12 g IPS Object Fix
– 1x Bleach BL shade guide
Information on the inLab
®
System can be obtained from:
Sirona Dental Systems GmbH
Fabrikstrasse 31
64625 Bensheim
Germany
E-mail: contact@sirona.de
www.sirona.com
inLab®is a registered trademark of Sirona
Dental Systems GmbH
Page 11
11
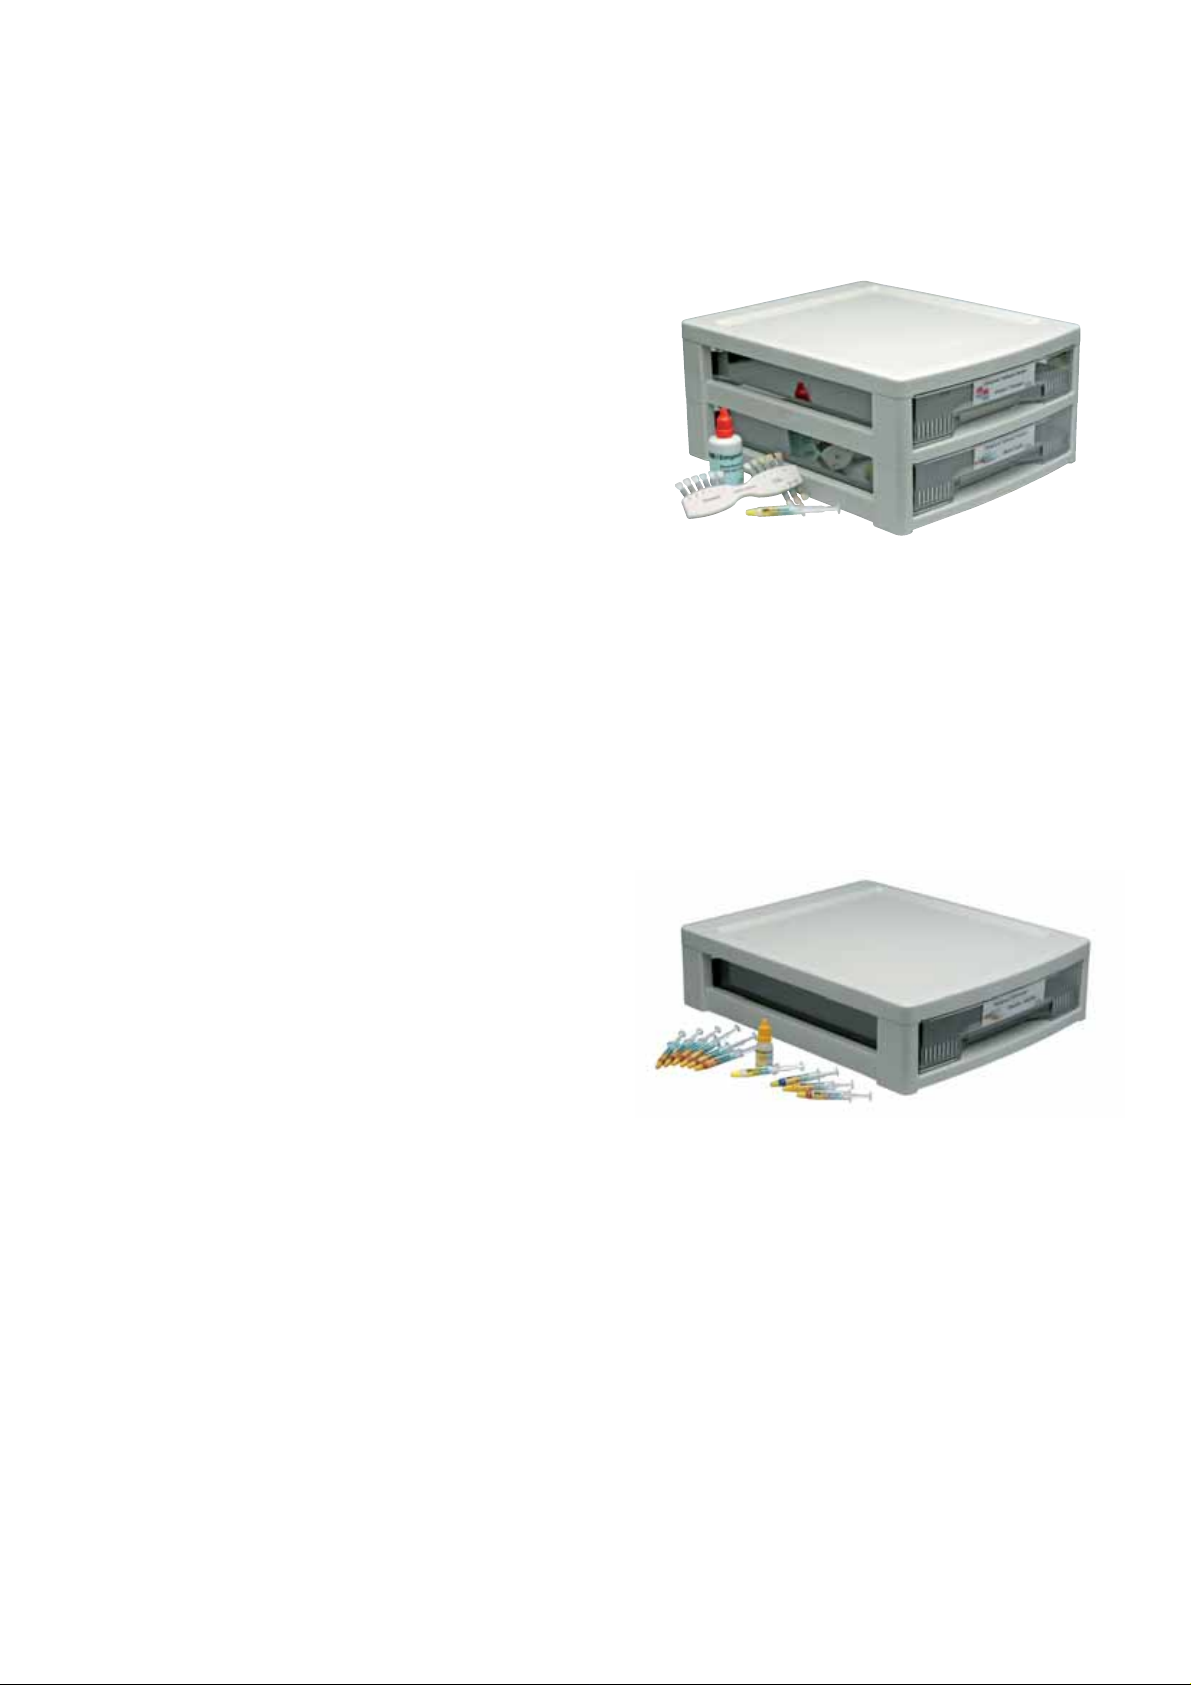
IPS Empress Veneer Kit
The IPS Empress Veneer Kit comprises a selection of the most
popular wash pastes and layering materials for the cut-back
technique of IPS Empress restorations (Esthetic and CAD). With the
wash pastes, an excellent and homogeneous bond with the reduced
restoration is achieved. The leucite-reinforced layering materials
feature incisal-like fluorescence and a true-to-nature opalescence.
The additional wash pastes and layering materials available as Refills
are indicated on the materials shade guide supplied with the Kit.
Delivery form:
IPS Empress Veneer Kit
– 6x 1 g IPS Empress Esthetic Veneer Wash Pastes;
Shades: neutral, Low Value, High Value, MM light-salmon,
MM yellow-orange, MM red-orange
– 6x 20 IPS Empress Esthetic Veneer;
Shades: Incisal Opal LT, Incisal Opal MT, Incisal Opal HT, Incisal
white, Transpa neutral, Transpa blue
– 1x 20 g IPS Empress Add-On 770°C/1418°F
– 1x 60 ml IPS Empress Esthetic Veneer Build-Up Liquid
– 1x 3 g IPS Empress Universal Glaze Paste
– 1x 15 ml IPS Empress Universal Glaze and Stain Liquid
– 1x 12 g IPS Object Fix
– 1x IPS Empress Esthetic Veneer Material Shade Guide
– Var. accessories
IPS Empress Universal Shade/Stains Kit
(A–D and Chromascop)
The IPS Empress Universal Shade/Stains Kits comprise a selection of
the most popular Dentin and Intensive stains. The stains are suitable
to apply surface characterizations. For the final glazing of the
IPS Empress restorations, a smooth and fine-grained glazing paste is
provided.
Delivery form:
IPS Empress Universal Shade/Stains Kit A–D
– 6x 3 g IPS Empress Universal Shade;
Shades: A1, A2/A3/A3.5, B1, B2/B3/B4, C1/C2, D2/D3
– 2x 3 g IPS Empress Universal Shade Incisal;
Shades: I1, I2
– 5x 1 g IPS Empress Universal Stains;
Shades: white, orange, mahogany, khaki, maroon
– 1x 3 g IPS Empress Universal Glaze Paste
– 1x 15 ml IPS Empress Universal Glaze and Stain Liquid
– Var. accessories
Delivery form:
IPS Empress Universal Shade/Stains Kit Chromascop
– 6x 3 g IPS Empress Universal Shade;
Shades: 110/120, 130, 140/210, 220/230, 310, 410/420
– 2x 3 g IPS Empress Universal Shade Incisal;
Shades: I1, I2
– 5x 1 g IPS Empress Universal Stains;
Shades: white, orange, mahogany, khaki, maroon
– 1x 3 g IPS Empress Universal Glaze Paste
– 1x 15 ml IPS Empress Universal Glaze and Stain Liquid
– Var. accessories
Page 12
12
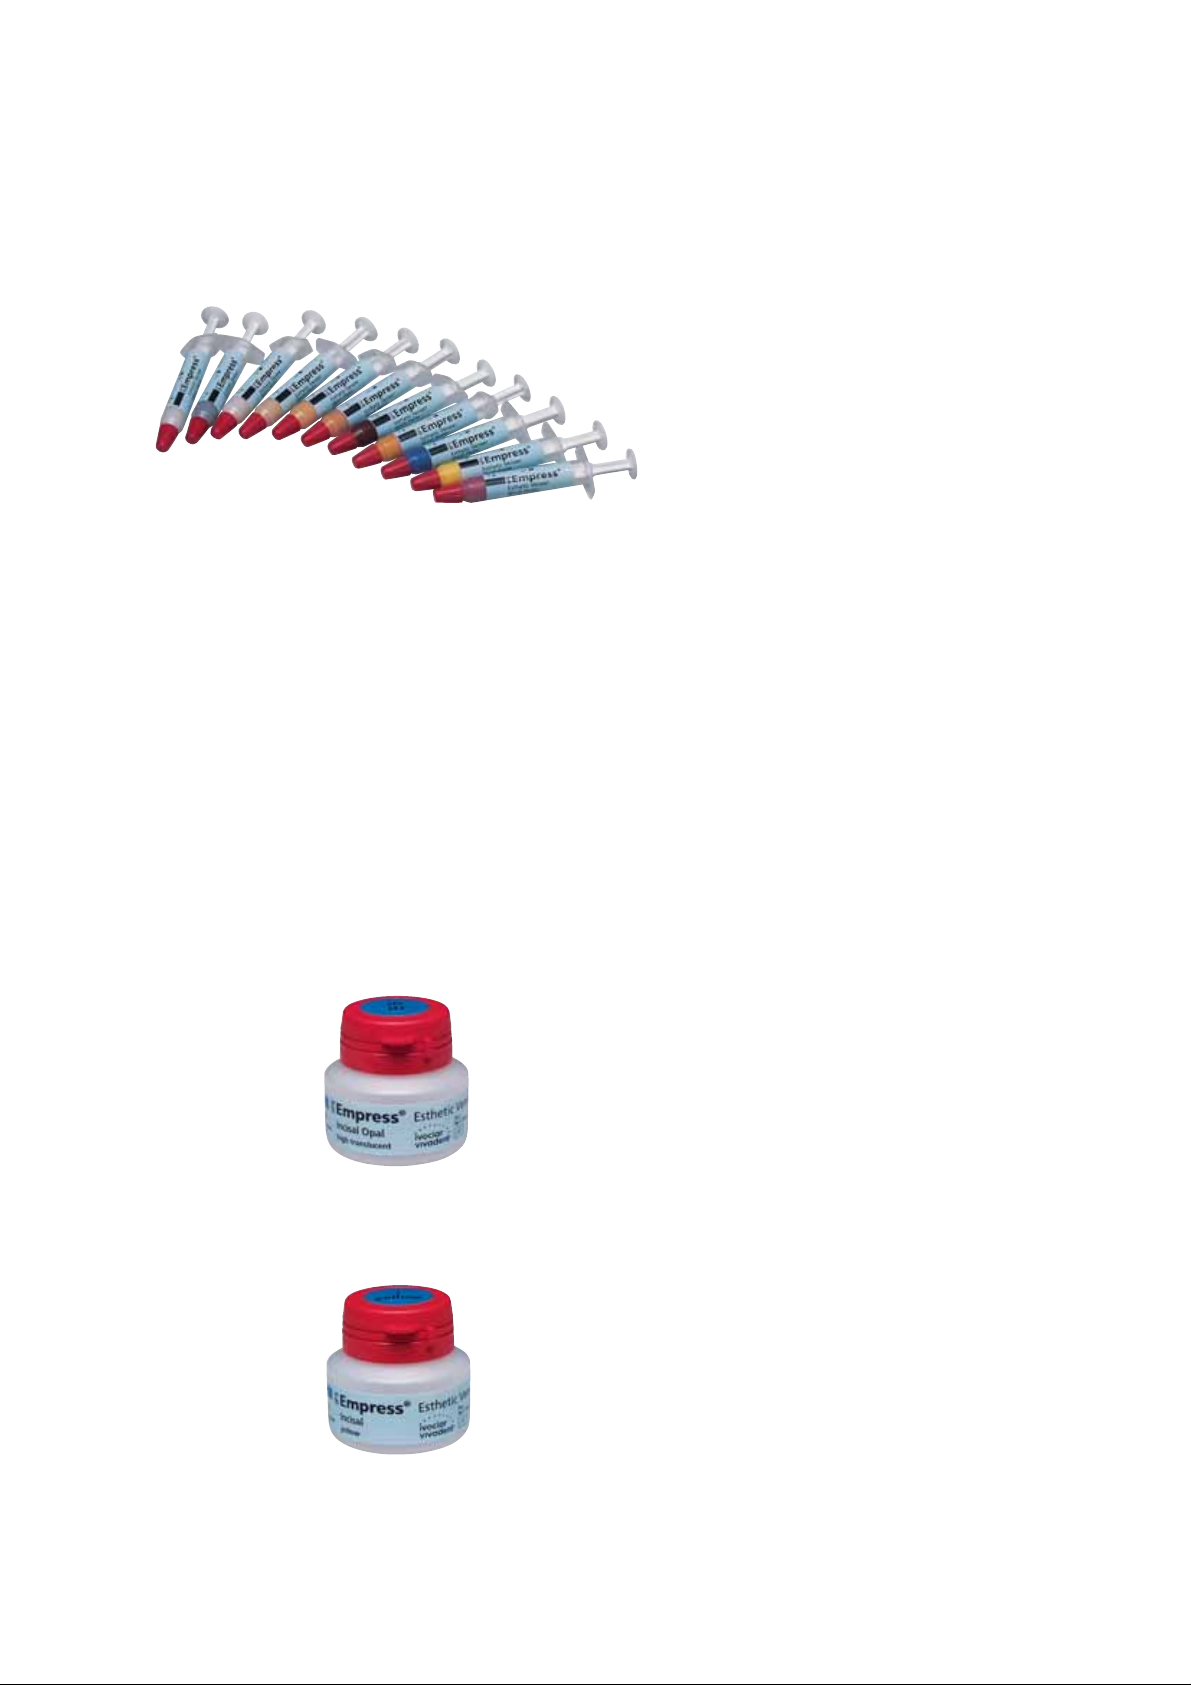
IPS Empress Esthetic Veneer Wash Pastes
Given the 2 : 1 effect of the wash pastes, i.e. bonding and
characterization in one step, highly aesthetic restorations can be
fabricated very efficiently.
The Wash Paste neutral produces the direct bond to the reduced
restorations and is always applied first on the restoration; it enables
a homogeneous bond.
Delivery form:
– 3x 1 g IPS Empress Esthetic Wash Paste neutral
Subsequently, the reduced restorations are individually characterized
using the 5 Standard Wash Pastes. Ideal shade gradations permit
individualized characterizations of the highest order.
Delivery form:
– 5x 1 g IPS Empress Esthetic Wash Paste;
Shades: low value, high value, MM light-salmon,
MM yellow-orange, MM reddish-orange
The 5 standard wash pastes may then be individually shaded using
the 5 Wash-Paste Modifiers or the neutral paste.
Delivery form:
– 5x 1 g IPS Empress Esthetic Wash Paste;
Shades: Modifier copper, Modifier orange, Modifier sky blue,
Modifier basic yellow, Modifier basic red
IPS Empress Esthetic Veneer Incisal Opal
These opalescent materials are available in three different gradations
(low, medium, and high translucency). They feature an incisal-like
fluorescence and true-to-nature opalescence. The high stability and
excellent modelling properties permit detailed layering of life-like
incisal edges. The opalescent effect demonstrates high firing stability
and is thus clearly visible even after several firing cycles.
Delivery form:
– 3x 20 g IPS Empress Esthetic Veneer Incisal Opal;
Shades: low translucent, medium translucent, high translucent
IPS Empress Esthetic Veneer Incisal
These Incisal materials are available in 6 shade nuances and are used
for additional characterizations in the incisal area.
Delivery form:
– 6x 20 g IPS Empress Esthetic Veneer Incisal;
Shades: white, grey, orange, edge, yellow, orange-pink
Page 13
13
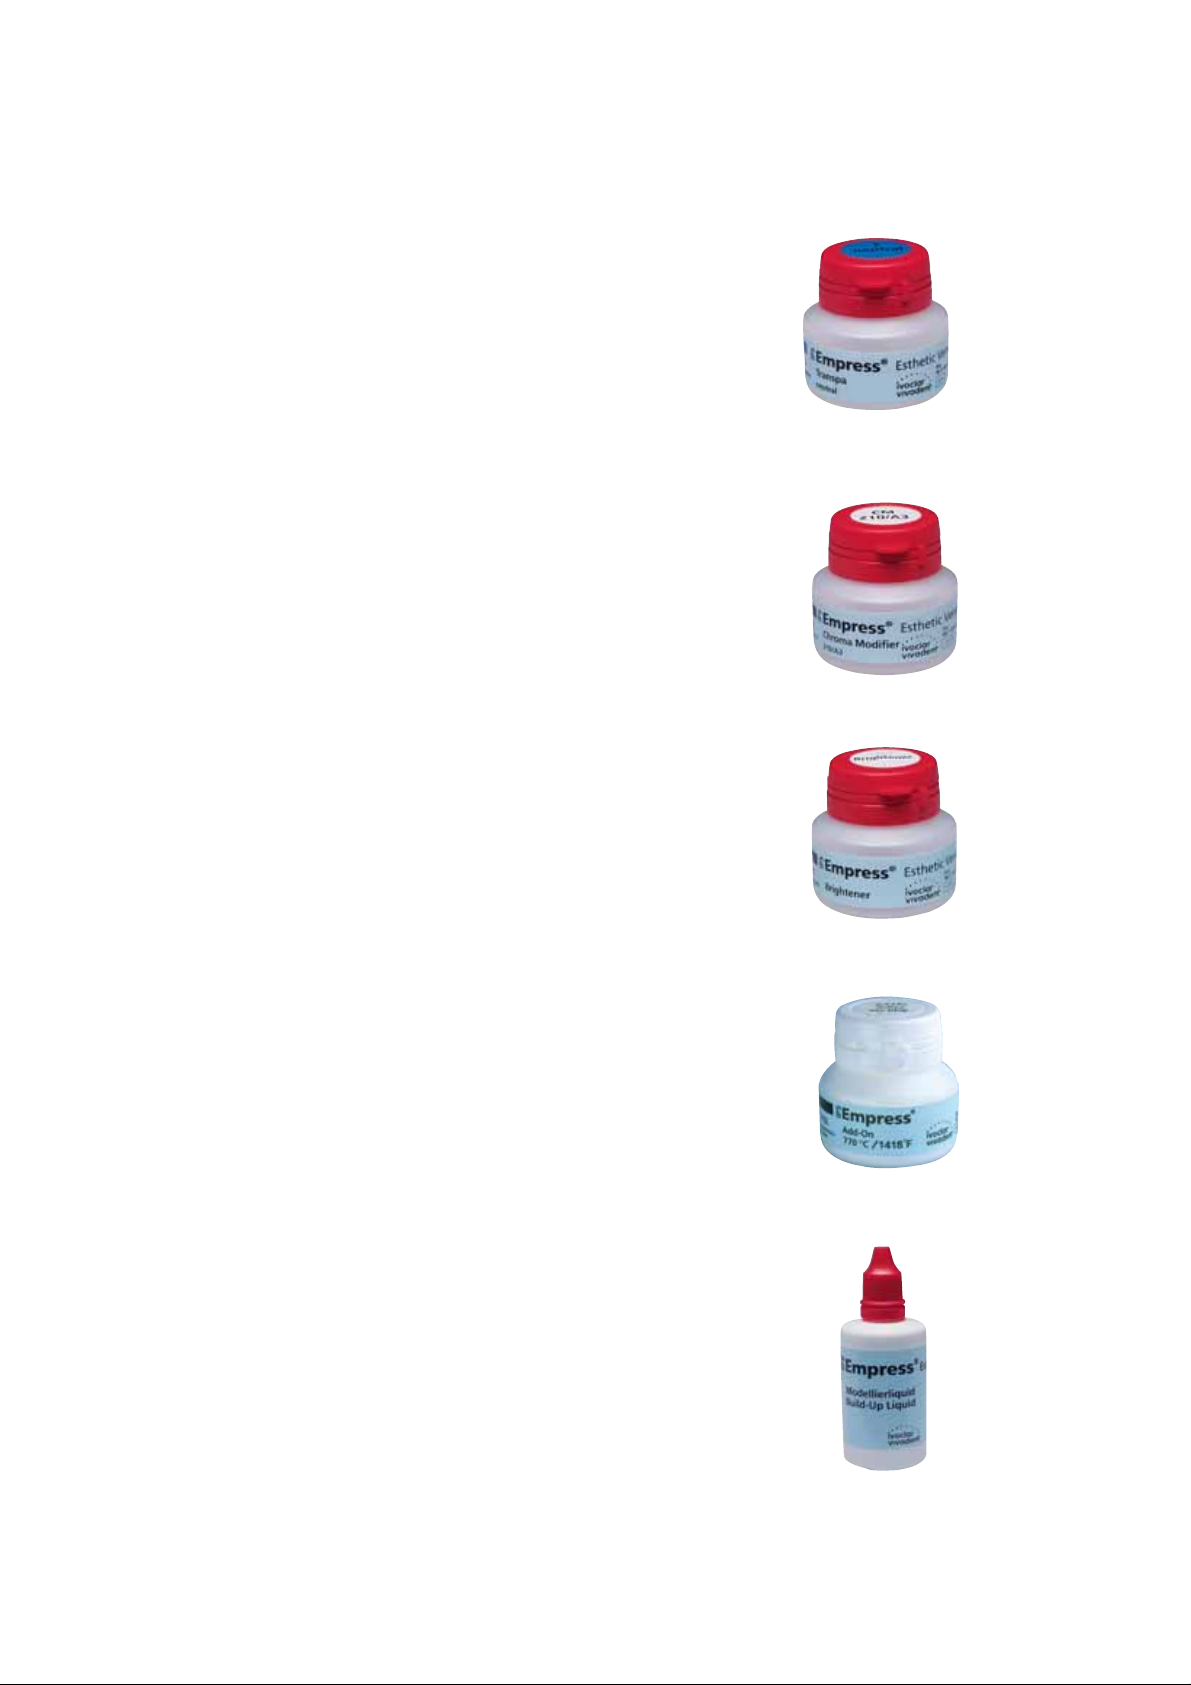
IPS Empress Esthetic Veneer Transpa
The Transparent materials in 2 shade nuances are used for the trueto-nature reproduction of transparent areas, particularly in the incisal
third.
Delivery form:
– 2x 20 g IPS Esthetic Veneer Transpa;
Shades: blue, neutral
IPS Empress Esthetic Veneer Chroma Modifier
These materials support the shade intensity of the reduced
restoration and are available in shades 110/A1 and 210/A3.
Delivery form:
– 2x 20 g IPS Empress Esthetic Veneer Chroma Modifier;
Shades: 110/A1, 210/A3
IPS Empress Esthetic Veneer Brightener
Used to increase the brightness value.
Delivery form:
– 1x 20 g IPS Empress Esthetic Veneer Brightener
IPS Empress Add-On 770°C/1418°F
IPS Empress Add-On 770 °C/1418 °F is a low-fusing add-on material
for subsequent adjustment, e.g. proximal and occlusal contact
points, of IPS Empress Esthetic and IPS Empress CAD restorations.
Delivery form:
– 1x 20 g IPS Empress Add-On 770°C/1418°F
IPS Empress Esthetic Veneer Build-Up Liquid
The Build-Up Liquid is used to mix the IPS Empress Esthetic Veneer
materials and the IPS Empress Add-On corrective material. IPS
Empress Esthetic Veneer Build-Up Liquid must be used since other
build-up liquids may contain organic additives thad could leave a
residue.
Delivery form:
– 1x 60 ml IPS Empress Esthetic Veneer Build-Up Liquid
Page 14
14
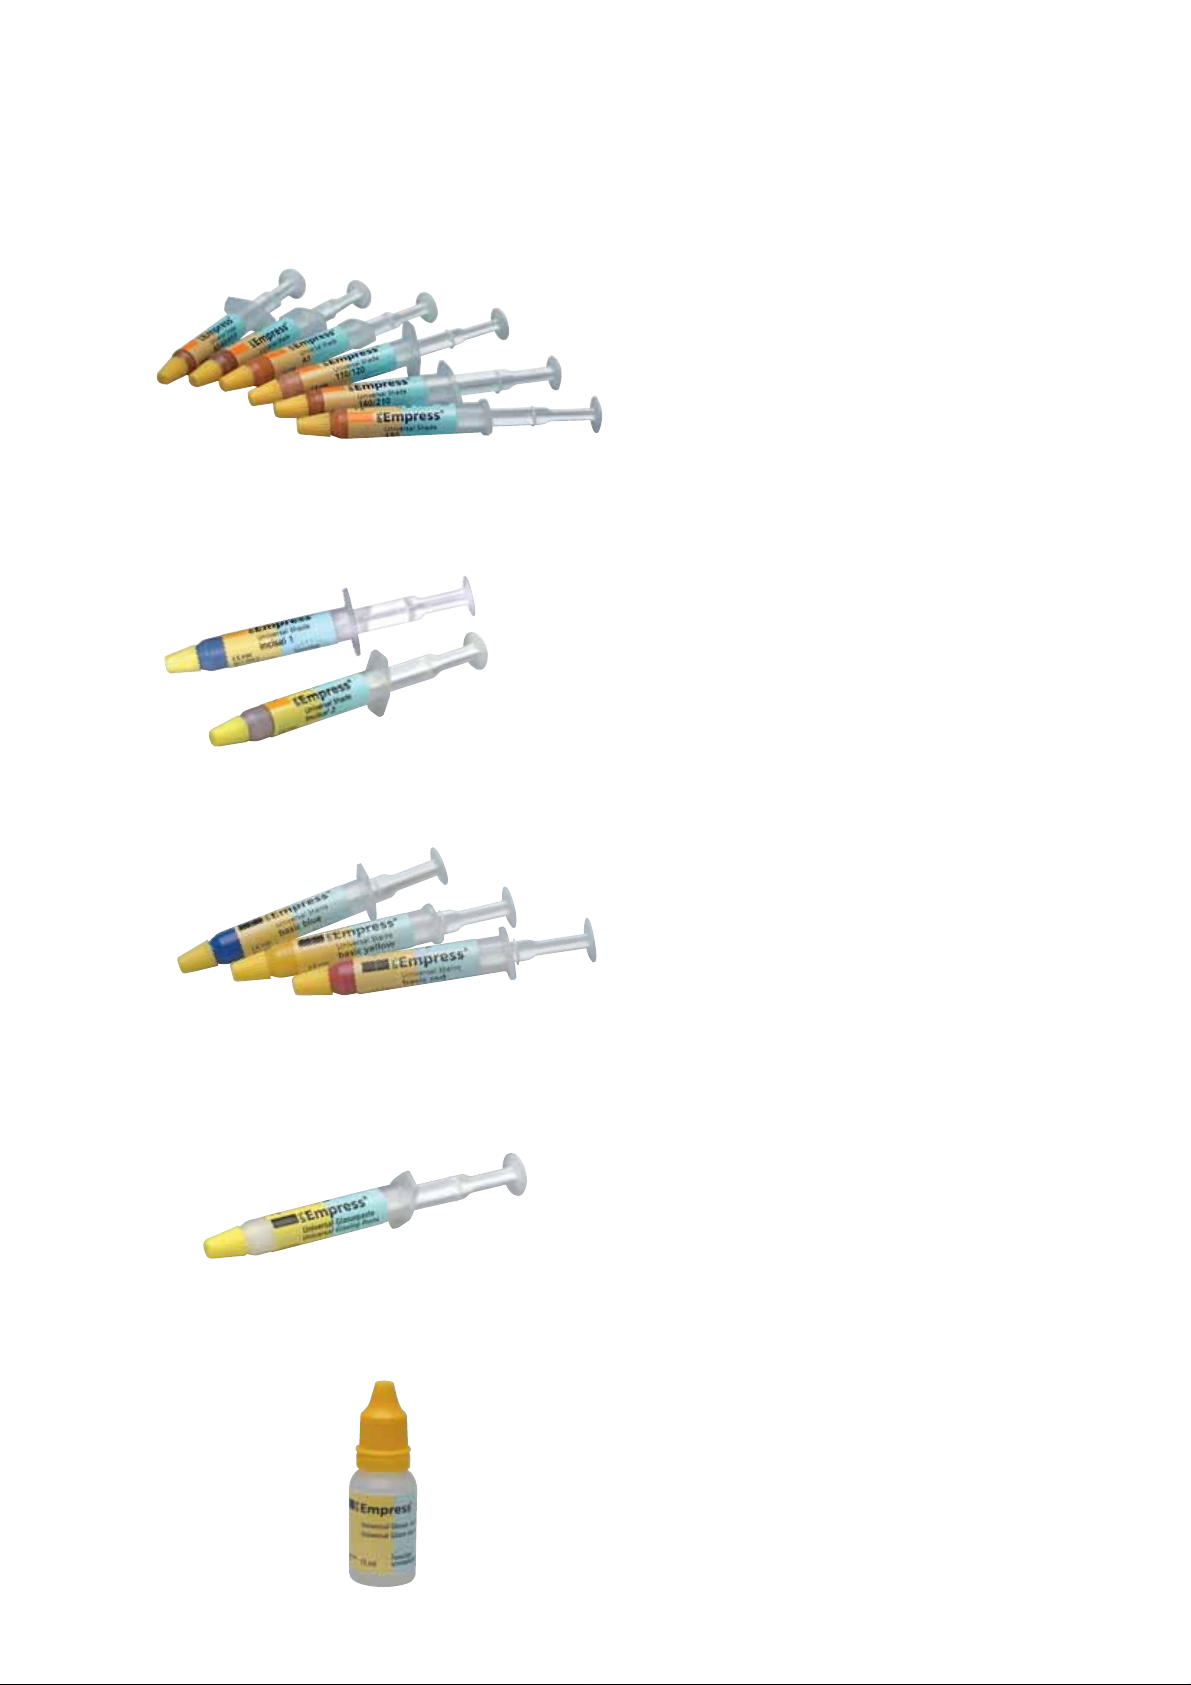
IPS Empress Universal Shade
The IPS Empress Universal Shades are available in 9 A–D and
15 Chromascop shades. They are used for the exact reproduction of
the A-D and Chromascop shades.
Delivery form:
– 9x 3 g IPS Empress Universal Shade;
A–D Shades: A1, A2/A3/A3,5, A4, B1, B2/B3/B4, C1/C2, C3/C4,
D2/D3, D4
– 15x 3 g IPS Empress Universal Shade;
Chromascop Shades: 110/120, 130, 140/210, 220/230, 240, 310,
320, 330, 340, 410/420, 430/440, 510, 520, 530, 540
IPS Empress Universal Shade Incisal
These 2 pastes are especially suitable for fully anatomical
restorations. They are used to imitate the incisal area and provide the
incisal third with optical translucency and an in-depth effect.
Delivery form:
– 2x 3 g IPS Empress Universal Shades Incisal;
Shades: I1, I2
IPS Empress Universal Stains
These intensive stains are available in 14 different shades. They are
used to reproduce natural characteristics. With the three
complementary shades basic blue, basic red, and basic yellow, the
shades can be individually adjusted.
Delivery form:
– 14x 1 g IPS Empress Universal Stains;
Shades: white, mahogany, khaki, orange, grey, vanilla, crackliner,
olive, yellow, black, maroon, basic red, basic blue, basic yellow
IPS Empress Universal Glaze Paste
IPS Empress Universal Glazing Paste is used to apply the final glaze to
IPS Empress restorations. The glazing paste demonstrates a smooth,
fine-grained consistency and thus permits easy and quick application
of the glazing material layer.
Delivery form:
– 1x 3 g IPS Empress Universal Glaze Paste
IPS Empress Universal Glaze and Stain Liquid
The IPS Empress Universal Glaze and Stain Liquid is used to adjust
the consistency of all materials in paste form (Wash pastes, Shades,
Stains, and Glaze). No other liquid may be used for this purpose,
since those liquids contain various organic additives that do not fire
without leaving residue at the defined firing temperatures, which
may result in discolouration.
Delivery form:
– 1x 15 ml IPS Empress Universal Glaze and Stain Liquid
Page 15

15
Accessories and equipment
IPS Contrast Spray Labside
The Contrast Spray Labside is used to achieve optimum scans for CAD/CAM
restorations. IPS Contrast Spray Labside balances out the different optical properties of
the stone model, thus enabling an excellent scan. With the atomizing nozzle, an
optimum covering layer with a detailed representation of the edges is achieved easily
and efficiently with only a short spray discharge.
Delivery form:
– 1x 200 ml [275 ml] IPS Contrast Spray Labside
IPS Natural Die Material
The light-curing IPS Natural Die Material simulates the shade of the prepared tooth
and thus is the optimum basis for true-to-nature shade match with the oral situation
during fabrication of the all-ceramic restorations. The IPS Natural Die Material Kit
comprises 9 shades. The shade arrangement was newly designed. The assortment
contains all the shade variants necessary for the fabrication of life-like all-ceramic
restorations. New items in the assortment are as follows:
– 1 shade for the imitation of bleached preparations (ND1)
– 1 shade for the imitation of intensively shaded secondary dentin (ND 6)
– 1 shade for the imitation of severely discoloured / devitalized preparations (ND 9)
Delivery form:
IPS Natural Die Material Kit
– 9x 8 g IPS Natural Die Material,
Shades: ND 1, ND 2, ND 3, ND 4, ND 5, ND 6, ND 7, ND 8, ND 9
– 1x IPS Natural Die Material Separator 20 ml
– 8x 10 IPS Condensers
– 8x 10 IPS Condenser Tips
– 2x Universal Holders
– 1x IPS Natural Die Material Shade Guide
IPS Object Fix
IPS Object Fix is an auxiliary firing paste to support all-ceramic restorations during
firing. The paste is used for easier securing of the restorations on the metal pins of
the honey-comb firing tray. Due to its consistency, IPS Object Fix is easy to apply and
convenient to remove after firing.
Delivery form:
– 1x 12 g IPS Object Fix
ND 1
–
ND 2
St 9
ND 3
St 1
ND 4
St 2
ND 5
St 3
ND 6
–
ND 7
St 8
ND 8
St 5
ND 9
–
IPS Natural Die Material
IPS Empress Die Material
The arrangement and designations of the IPS Natural Die shades compared to the IPS Empress Die is as follows:
IPS Contrast Spray Labside must not be applied intra-orally.
Page 16

16
IPS®Ceramic Etching Gel
IPS Ceramic Etching Gel is used to produce retentive bonding surfaces on ceramic restorations in the composite cementation technique. It enhances the bonding effect between the luting composite
and the ceramic surface. IPS Ceramic Etching Gel is exclusively
intended for professional use and must not be applied in the oral
cavity.
Advantages
– Usable in conjunction with most glass-ceramic materials
– No environmental pollution due to neutralization
Contraindications
– Application in the oral cavity
– Enamel etching of natural teeth
– Use in conjunction with oxide ceramics
Delivery form:
IPS Ceramic Etching Gel Kit
– 1x 5 ml IPS Ceramic Etching Gel
– 1x 30 g Neutralization Powder
– 1 Measuring Spoon
Programat®P300
The Programat P300 features a convincing and easy operating
concept. A simple menu structure with clearly arranged symbols
guides the user during the application of the programs. The furnace
is equipped in the factory with preset programs for IPS e.max,
IPS d.SIGN, IPS InLine, and the IPS Empress System and it convinces
users with its modern, timeless design.
Delivery form:
Programat P300 Basic Equipment
– Programat P300
– Power Cord, Vacuum Hose, Calibration Test Package,
Programat Firing Tray Kit
Programat®P500
Optimum firing results of glazing materials, stains, and ceramic
materials can be achieved with the user-friendly Programat P500
ceramic furnace. This new ceramic furnace combines high-tech and
design. The combination of the membrane-sealed keypad and the
large, clearly-arranged graphic display with touch function facilitate
operation. The homogeneous heat emission due to the new muffle
technology, the easy, precise and automatic temperature calibration,
as well as the 300 firing programs make the P500 and indispensable
companion in the laboratory.
Delivery form:
Programat P500 Basic Equipment
– Programat P500
– Power Cord, Vacuum Hose, Calibration Test Package,
Programat Firing Tray Kit
Page 17

17
Preparation guidelines and minimum thicknesses
Successful results with IPS Empress CAD can only be achieved if the guidelines below and minimum layering thicknesses
are strictly observed. The following minimum thicknesses are required for IPS Empress CAD restorations.
Inlays and Onlays
Static and dynamic antagonist contacts must be taken into consideration. The preparation margins must not be located on
centric antagonist contacts.
A preparation depth of at least 1.5 mm and an isthmus width of at least 1.5 mm must be observed in the fissure area.
Prepare the proximal box with slightly diverging walls and observe an angle of 100–120° between the proximal cavity walls
and the prospective proximal inlay surfaces. For inlays with pronounced convex cavity walls without adequate support by
the proximal shoulder, marginal ridge contacts should be avoided. Round out internal edges in order to prevent stress
concentration within the ceramic material. Eliminate the proximal contacts on all sides. Do not prepare slice-cuts or feather
edges.
Provide at least 2 mm of space in the cusp areas. The shoulder must not show any inclinations, i.e. it must show a 90°
angle to the residual tooth structure. Onlays are indicated if the preparation margin is less than approximately 0.5 mm
away from the cusp tip, or if the enamel is severely undermined.
Empress CAD –
Practical Working Steps
IPS
4°
>1.5
100-120°
>1.5
>2.0
4°
>1.5
>1.5
90°
Page 18

18
Veneers
If possible, the preparation should be entirely located in the enamel. The incisal preparation margins should not be located
in the area of the abrasion surfaces or dynamic occlusal surfaces. By preparing orientation grooves using a depth marker,
controlled enamel reduction can be achieved. Dissolution of the proximal contacts is not required.
For preparations without involving reduction of the incisal edge (only labial reduction), the preparation depth in the
cervical area should be at least 0.6 mm and at least 0.7 mm in the labial area.
For preparation involving reduction of the incisal edge (labial/incisal reduction), the preparation depth in the cervical
area should be at least 0.6 mm, and at least 0.7 mm in the labial area. The incisal edge must be reduced by 1.0 mm. The
extent of the incisal reduction depends on the desired translucency of the incisal area to be built up. The more transparent
the incisal edge of the intended veneer, the more pronounced the reduction should be. Discoloured teeth may require
more preparation.
Anterior and posterior crowns
The anatomical shape is evenly reduced while observing the given minimum thicknesses. A circumferential shoulder is
prepared with rounded inner edges or a chamfer. The width of the circular shoulder should be at least 1 mm. The
incisal/occlusal third is reduced by 2 mm. For anterior crowns, the labial and/or palatal/lingual part of the tooth should be
reduced by at least 1.5 mm. The incisal width of the preparation should measure at least 1 mm (milling tool geometry) in
order to permit optimum milling of the incisal edge during CAD/CAM processing.
> 0.6
>0.7
>0.7
> 0.6
>1.0
>1.0
>1.0
1.5
1.0
2.0
>1.0
1.5
2.0 2.0
1.5
1.5
>1.0
1.5
>1.0
Page 19

19
Shade determination
The correct tooth shade is the basis for a restoration with a life-like appearance. After tooth cleaning, the tooth shade of
the non-prepared tooth and/or the adjacent teeth is determined. Individual characteristics have to be taken into consideration when determining the tooth shade. If a crown preparation is planned, for example, the cervical shade should also be
determined. In order to achieve true-to-nature results, shade determination should be carried out at daylight. Furthermore,
the patient should not wear clothes of intensive colours and/or lipstick. Basically, it has to be kept in mind that the final
shade of the restoration is the result of the following individual shades:
– Die shade
– Shade of the ceramic block
– Shade of the layering ceramic
– Shade of the cementation material
IPS Natural Die Material
In order to facilitate the reproduction of the tooth shade, the shade
of the prepared tooth can be determined with the help of the
IPS Natural Die Material shade guide. This facilitates the fabrication
of the all-ceramic restoration and the individual characteristics of the
preparation may also be taken into consideration. By fabricating a
working die made of IPS Natural Die Materials in the respective
shade of the preparation, the shade and brightness value of the
IPS Empress CAD restorations may be checked during the individual
fabrication steps.
Page 20

20
Cementation
For cementation, the IPS Empress CAD restoration must be conditioned. For this
purpose, the completed restoration is etched with IPS Ceramic Etching Gel and
subsequently silanated using Monobond-S.
Total Etch
For the preparation of adhesive cementation with Variolink II/
Variolink Veneer, Total Etch is used. It is an enamel etching and
dentin conditioning gel used during the adhesive cementation of
all-ceramic restorations.
For the adhesive cementation of IPS Empress CAD restorations, you may choose
between tried-and-tested luting composites from Ivoclar Vivadent. Adhesive
cementation achieves an excellent bond between the preparation and the restoration.
Veneers
Inlays
Onlays
Partial crowns
Anterior and posterior crowns
Variolink
®
(Variolink II, Variolink Veneer)
Multilink
®
(Multilink, Multilink Automix)
––
indicated
contraindicated
––
Page 21

21
Variolink®II
The dual-curing luting composite Variolink II has been used for more
than ten years and in over 20 million restorations. It is the world's
leading highly aesthetic material concept. Numerous awards as the
best product in the category of adhesive luting composites and
excellent results from clinical long-term studies are testimony to this
success.
Variolink®Veneer
Purely light-curing luting composite in 7 "Value" shades for the
adhesive cementation of translucent all-ceramic restorations with a
layer thickness of < 2.0 mm (veneers, inlays, onlays).
Multilink®Automix
The universal, self-curing (with light-curing option) resin based luting
cement Multilink offers a broad range of indications and produces
very high adhesive strength on all material surfaces. Together with
the self-etching Primer, which is applied as a simple preliminary layer
on enamel and dentin, Multilink is processed quickly and efficiently.
Page 22

22
The 2-in-1 technique is suitable for efficient glazing and staining of inlays, onlays, and partial crowns. In this technique, the
glaze and stain firing is conducted in one single step. This technique does not permit as many shade adjustments as a
separate stain firing. If more intensive and extensive shade adjustments are desired, we recommend conducting a separate
stain and characterization firing (as described in the following chapter).
IPS Empress CAD Inlays / Onlays – stained/glazed
Please refer to the corresponding Operating Instructions and/or Manuals of the respective CAD/CAM system
for further information on the CAD/CAM processing procedure. The instructions by the manufacturer must be
observed.
Finishing and preparing for stain and glaze firing
For finishing glass-ceramics, appropriate grinding instruments are indispensable. If the
wrong grinding instruments are used, marginal chipping and local overheating my occur.
The following procedure is recommended for finishing IPS Empress CAD restorations:
– Use only suitable, fine-grained (grain size < 60 µm), ceramic-bonded grinding instruments
or diamonds at a speed of up to 20,000 rpm and little pressure.
– Overheating the glass-ceramic must be prevented.
– Smooth out attachment point of the holder and take the proximal contact points into
account.
– Carry out individual shape adjustments, if required.
Before the stain and glaze firing, the restorations must be free of dirt and grease. Avoid any
contamination after cleaning. Observe the following procedure.
– Clean the restoration with ultrasound in a water bath or blast with Al2O3at 0.5 bar
pressure (Caution: abrasive) and clean under running water or using the steam jet.
– Certain blasting devices require different settings for the intended blasting procedure.
2-in-1 Technique – Stain and glaze firing using IPS Empress Universal
Once the restoration has been cleaned, apply the stains and glazing material in 2 steps. First, the glazing paste is applied,
followed by the stains, which are applied on the unfired glaze layer. The following working procedure should be observed.
Step 1 – Application of the glazing material
– Extrude IPS Empress Universal Glazing Paste from the syringe and mix thoroughly.
– Thin the material to the desired consistency using IPS Empress Universal Glaze and Stain Liquid. Do not excessively dilute
the material, since this may render the glazing procedure difficult to control.
– Apply the glazing material on the entire outer surfaces of the restoration.
– The glazing material must not come into contact with the inner aspects of the restoration.
– Avoid pooling and excessively thick glazing material layers.
– Too thin glazing material layers result in an unsatisfactory gloss.
Fabrication of an IPS Empress CAD Restoration
Clean the restoration before staining.
Smooth out attachment point and take proximal contacts into account.
Page 23

23
Step 2 – Application of Shades / Stains
– Extrude IPS Empress Universal Shade or Stains from the syringe and mix thoroughly.
– Thin the material to the desired consistency using IPS Empress Universal Glaze and Stain Liquid.
– Apply the mixed Shade material directly into the unfired glazing material layer.
– Intensify the corresponding dentin shade in the cervical and occlusal areas using IPS Empress Universal Shades.
– To imitate the incisal area and translucency in the incisal third, use IPS Empress Universal Shade Incisal.
– Apply individualized effects and characterizations on cusps and in fissures using the Stains materials. Only apply the
Stains once staining with the Shade materials has been completed.
– Apply the Stains thinly and in a controlled manner on the unfired glazing material layer using a brush.
Apply the mixed Shade material directly into the unfired glazing material layer.
Intensify the corresponding dentin shade in the cervical and occlusal areas and imitate the incisal area using Shade Incisal.
Apply individualized effects and characterizations on cusps and in fissures using the Stains
materials.
Evenly apply the glazing material on the entire outer surfaces of the restoration.
Page 24

24
Completed IPS Empress CAD restoration,stained and glazed in one step.
IPS Empress CAD with IPS Empress Universal B S t T H V
1
V
2
Stain and Glaze firing 403°C 6' 100°C 790°C 1–2' 450°C 789°C
757°F 6' 180°F 1454°F 1–2' 842°F 1453°F
Firing parameters for the Stain and Glaze firing (note the temperature control)
Optional
Subsequent adjustment
After completion, additional adjustment (e.g. contact points) may become necessary. For that purpose,
IPS Empress Add-On 770 °C/1418 °F is available.
Processing:
– Before the adjustment, the restoration must be free from dirt and grease. For that purpose, thoroughly clean the
restoration using the steam jet.
– Mix IPS Empress Add-On 770 °C / 1418 °F to a workable consistency. Make sure that the add-on material and liquid are
evenly mixed so that an optimum firing result can be achieved.
– Apply the mixed add-on material on the cleaned, desired areas using a brush and slightly blot them with an absorbent
cloth.
– Position the adjusted restoration on the firing tray and fire in the ceramic furnace.
– After firing, manually polish the supplemented areas to a high gloss.
IPS Empress CAD with B S t T H V1 V2
IPS Empress Add-On 770°C/1418°F
Corrective firing 403°C 4' 60°C 770°C 2' 450°C 769°C
757°F 4' 108°F 1418°F 2' 842°F 1417°F
Firing parameters for the corrective firing
Place the objects on the honey-comb firing tray and start
the firing program
After glazing and staining, the glaze and stain firing is conducted in a compatible ceramic furnace (e.g. P500).
The following points should be observed when placing the restoration in the furnace and setting the firing parameters:
– Support inlays, onlays, and partial crowns with a firing pillow and place them on a honey-comb firing tray.
– Place veneers as well as anterior and posterior crowns on metal pins and position them on the honey-comb firing tray.
– As an alternative to the firing pillow and to better secure the restoration
on the metal pins (particularly with veneers), a small amount of
IPS Object Fix may also be used.
– Restorations supported with a firing pillow on the honey-comb tray are
exposed to less heat due to their lower position in the firing chamber.
Therefore, in order to achieve a true-to-nature gloss, it is recommended
to extend the holding time from 1 minute to 2 minutes.
– Make sure that the firing pillow is regularly replaced in order to prevent
contamination. Keep firing pillows used for all-ceramic materials
separated from those for metal-ceramics to avoid cross-contamination.
Page 25

25
If more intensive and excessive shade adjustments are desired, we recommend conducting them in several working steps.
To reproduce the tooth shade easily and reliably, an individual control die may be fabricated using the
IPS Natural Die Material. The IPS Empress Universal Shades and Stains are then applied in a first step and separately fired.
The shade result can be checked after firing. If required, the shade of the restoration may be intensified and adjusted to
the individual patient case by repeated application of the materials. Once the desired shade has been achieved and the
individualized characterizations completed, the glaze firing is conducted.
IPS Empress CAD Veneers / Crowns – stained/glazed
Please refer to the corresponding Operating Instructions and/or Manuals of the respective CAD/CAM system
for further information on the CAD/CAM processing procedure. The instructions by the manufacturer must be
observed.
Finishing
For finishing glass-ceramics, appropriate grinding instruments are indispensable. If the wrong grinding instruments are
used, marginal chipping and local overheating may occur.
The following procedure is recommended for finishing IPS Empress CAD restorations:
– Use only suitable, fine-grained (grain size < 60 µm), ceramic-bonded grinding instruments or diamonds at a speed of up
to 20,000 rpm and little pressure.
– Carefully finish the restoration margins using rubber and silicone polishers
(Speed: <10,000 rpm)
– Overheating the glass-ceramic must be prevented.
– Smooth out attachment point of the holder and take the proximal
contact points into account.
– Carry out individual shape adjustments, if required.
– Design the surface structure somewhat more pronounced, if necessary,
since it will be toned down by the glazing procedure.
Optional
Die fabrication using IPS Natural Die Material
The light-curing IPS Natural Die Material simulates the shade of the prepared tooth. Fabricate a control die of the selected
shade. This control die supports the optimum shade adaptation of the restoration to reproduce the given oral situation.
– Coat the inner surfaces of the ceramic restorations with IPS Natural Die Material Separator and allow it to react for a
short time.
– Apply die IPS Natural Die Material in the corresponding shade to the inner aspects of the restoration using the
IPS Condenser and adapt so that the entire inner aspect is coated and filled.
– Completely fill the restoration cavity and insert an IPS Die Holder into
the material and adapt excess material around the holder. Make sure
that the Die Material is well adapted to the restoration margins and
that no gaps are present.
– Polymerize the IPS Natural Die Material die with a commercial
polymerization light for 60 seconds.
– After polymerization, the die can be finished and or smoothed, if
required.
The control die made of IPS Natural Die Material is the optimum basis
for a true-to-nature all-ceramic restoration.
Design individual shape adjustments and a true-to-nature
surface structure
Page 26

26
Preparing for staining
Before the stain and characterization firing, the restorations must be free
of dirt and grease. Avoid any contamination after cleaning.
Observe the following procedure.
– Clean the restoration with ultrasound in a water bath or blast with
Al2O3at 0.5 bar pressure (Caution: abrasive) and clean under running
water or using the steam jet.
– Certain blasting devices require different settings for the intended
blasting procedure.
Stain and glaze firing using IPS Empress Universal Shade and Stains
Once the restoration has been cleaned, the stain and characterization firing is conducted. Observe the following working
procedure:
– Extrude IPS Empress Universal Shade or Stains from the syringe and mix thoroughly.
– Thin the material to the desired consistency using IPS Empress Universal Glaze and Stain Liquid.
– For better wetting of the stains, a small quantity of IPS Empress Universal Glaze and Stain Liquid may be slightly rubbed
into the surface.
– Apply the mixed Shade material directly unto the surface.
– Intensify the corresponding dentin shade in the cervical and central crown thirds using IPS Empress Universal Shades.
– Excessively thick or thin material layers should be prevented.
– More intensive shades are achieved by repeated staining, rather than by applying thicker layers.
– To imitate the incisal area and translucency in the incisal third, use IPS Empress Universal Shade Incisal.
– Design individualized affects and characterizations using the Stains material.
– Apply the Stains thinly and in a controlled manner using a brush.
The dentin body is intensified using IPS Empress Universal Shade
Individualized effects and characterizations are designed using IPS Empress Universal Stains
The incisal area is imitated using IPS Empress Universal Shade Incisal
Before staining, clean the restoration using the steam jet
Page 27

27
After staining, the stain and characterization firing is conducted in a compatible ceramic furnace (e.g. P500). The following
points should be observed when placing the restoration in the furnace and setting the firing parameters:
– Place veneers as well as anterior and posterior crowns on metal pins and position them on the honey-comb firing tray.
– To better secure the restoration on the metal pins (particularly with veneers), a small amount IPS Object Fix may also be
used.
IPS Empress CAD with IPS Empress Universal B S t T H V1 V2
Stain and Characterization firing 403°C 6' 100°C 790°C 1' 450°C 789°C
757°F 6' 180°F 1454°F 1' 842°F 1453°F
Firing parameters for the Stain and Characterization firing (note the temperature control)
Place the objects on the honey-comb firing tray and start the firing program
Optional
Shade check
To check the tooth shade after the first stain and characterization firing,
proceed as follows:
– Wet inner aspects of the restoration with IPS Contour Glaze and Stain
Liquid using a brush.
– Place the restoration on the individual control die and check the tooth
shade, as well as the individualized effects.
– If adjustments are required, apply the corresponding stains and fire
them using the above firing program.
Shade check. If necessary,the shade intensity can be increased
by additional staining.
Page 28

28
Glaze firing with IPS Empress Universal Glaze
Once the desired shade has been achieved and the individualized characterizations completed, the glaze firing is
conducted. Observe the following working procedure::
– Extrude IPS Universal Glazing Paste from the syringe and mix thoroughly.
– Thin the material to the desired consistency using IPS Empress Universal
Glaze and Stain Liquid. Do not excessively dilute the material, since this
may render the glazing procedure difficult to control.
– Apply the glazing material on the entire outer surfaces of the restoration.
– The glazing material must not come into contact with the inner aspects
of the restoration.
– Avoid pooling and excessively thick glazing material layers.
– Excessively thin glazing material layers result in an unsatisfactory gloss.
– The objects are positioned on the honey-comb firing tray same as for
the previous firing procedure.
– Then, the glaze firing is conducted in a compatible ceramic furnace
(e.g. Programat P500).
– If the gloss is unsatisfactory after the first glaze firing, further glaze
firing procedures may be conducted using the same firing parameters.
Place the objects on the honey-comb firing tray and start
the firing program.
Evenly apply the glazing material on the entire outer surfaces
of the restoration.
IPS Empress CAD with IPS Empress Universal B S t T H V1 V2
Glaze firing 403°C 6' 100°C 790°C 1–2' 450°C 789°C
757°F 6' 180°F 1454°F 1–2' 842°F 1453°F
Firing parameters for the glaze firing (note the temperature control)
Completed, stained,and glazed IPS Empress CAD crown and veneer.
Page 29

29
Optional
Subsequent adjustment
After completion, additional adjustment (e.g. contact points) may become necessary. For that purpose,
IPS Empress Add-On 770 °C/1418 °F is available.
Procedure:
– Before the adjustment, the restoration must be free from dirt and grease. For that purpose, thoroughly clean the
restoration using the steam jet.
– Mix IPS Empress Add-On 770 °C / 1418 °F to a workable consistency. Make sure that the add-on material and liquid are
evenly mixed so that an optimum firing result can be achieved.
– Apply the mixed add-on material on the cleaned, desired areas using a brush and slightly blot them with an absorbent
cloth.
– Position the adjusted restoration on the firing tray and fire in the ceramic furnace.
– After firing, manually polish the supplemented areas to a high gloss.
IPS Empress CAD with B S t T H V1 V2
IPS Empress Add-On 770°C/1418°F
Corrective firing 403°C 4' 60°C 770°C 2' 450°C 769°C
757°F 4' 108°F 1418°F 2' 842°F 1417°F
Firing parameters for the corrective firing
Page 30

30
In order to individualize restorations in the incisal area so that they correspond with their natural model, the IPS Empress
CAD restoration is additionally veneered using opalescent IPS Empress Esthetic Veneer ceramic materials. The cut-back
technique is very efficient if the fully anatomical anterior crown or the veneer are first designed according to the definite
final shape. After that, the incisal third is reduced and subsequently provided with an individualized aesthetic veneer.
IPS Empress CAD Veneers / Anterior Crowns – Cut-back and layered
Please refer to the corresponding Operating Instructions and/or Manuals of the respective CAD/CAM system
for further information on the CAD/CAM processing procedure. The instructions by the manufacturer must be
observed.
IPS Empress Esthetic Veneer
Wash Pastes
neutral low value high value MM
light-
salmon
MM
yelloworange
MM
reddish-
orange
Modifier
copper
Modifier
orange
Modifier
sky blue
Modifier
basic yellow
Modifier
basic red
IPS Empress Esthetic Veneer
Layering Materials
Incisal
Opal
HT = high
translucent
Incisal
Opal
MT = medium
translucent
Incisal
Opal
LT= low
translucent
Transpa
blue
Transpa
neutral
Incisal
edge
Incisal
white
Incisal
grey
Incisal
orange
Incisal
yellow
Incisal
orange-
pink
Chroma
Modifier
110/A1
Chroma
Modifier
210/A3
Brightener
Fully anatomical, milled veneer and anterior crown,which are reduced in the incisal area.
0.5 mm
0.5 mm
0.5 mm
approx.
0.5–1.0 mm
Veneer
Minimum thickness
of the milled objects
after the
corresponding
reduction
= 0.5 mm
Layer thickness =
Limited layering area:
labial, incisal third
0.5 mm
approx.
0.5–1.0 mm
Minimum thickness
of the milled objects
after the
corresponding
reduction
= 0.5 mm
Layer thickness =
Limited layering area:
labial, incisal third
Anterior crown
Page 31

31
Cut-back technique
Before the cut-back is carried out, the following points must be observed:
– Use only suitable, fine-grained (grain size < 60 µm), ceramic-bonded grinding instruments or diamonds at a speed of up
to 20,000 rpm and little pressure.
– Carefully finish the restoration margins using rubber and silicone polishers (Speed: <10,000 rpm)
– Overheating the glass-ceramic must be prevented.
– If the wrong grinding instruments are used, marginal chipping and local overheating may occur.
– Smooth out attachment point of the holder and take the proximal contact points into account.
– Before the cut-back the veneer or anterior crown should correspond with the final tooth shape.
– The incisal length must be exactly defined and the occluding surfaces taken into account.
– A palatal silicone key is used as a reference for the cut-back.
– The silicone key should slightly embrace the incisal edge.
Please see page 25 for information about the
fabrication of a control die using IPS Natural Die
Material.
Before the cut-back the veneer or anterior crown should correspond with the final tooth shape. Fabricate a palatal silicone key.
The control die made of IPS Natural Die Material is the optimum basis for sound
shade reproduction.
Page 32

32
The cut-back is conducted in 3 steps. Only in this way is a targeted and controlled reduction possible. The following
working procedure should be observed:
– Use only suitable grinding instruments for the cut-back (e.g. ceramic-bonded grinding instruments and diamonds) at low
speed.
– Too much pressure and excess heat development during grinding must be prevented.
– The thickness of the reduced IPS Empress CAD restoration must not fall below the required minimum of 0.5 mm.
– Step 1: Proximal cut-back - the mesial and distal ridges are reduced.
– Step 2: Labial/incisal cut-back - volume and length are tapered and reduced
– Step 3: Mamelon cut-back - design life-like mamelons using abrasive silicone disks at low pressure.
– Refrain from designing too extreme mamelons with undercuts.
Too much pressure and excess heat development during cut-back must be prevented. Step 1: Proximal cut-back – the mesial and distal ridges are reduced.
Step 2: Labial/incisal cut-back – volume and length are tapered and reduced.
Completed cut-back of the incisal third.
Step 3: Mamelon cut-back – design lifelike mamelons using abrasive silicone disks.
Refrain from designing too extreme mamelons with undercuts.
Page 33

33
Preparing for veneering
Before veneering, the restorations must be free of dirt and grease. Avoid any contamination after cleaning.
Observe the following procedure:
– Clean the restoration carefully by blasting with Al2O3at 0.5 bar pressure (Caution: abrasive) and clean with ultrasound
in a water bath or using the steam jet.
– Certain blasting devices require different settings for the intended blasting procedure.
Veneering of IPS Empress CAD with IPS Empress Esthetic Veneer
The IPS Empress CAD restoration is veneered and finished in 3 steps:
Step 1: IPS Empress Esthetic Veneer Wash Paste for an excellent bond and in-depth shading
Step 2: IPS Empress Esthetic Veneer for individualized aesthetics in the incisal third
Step 3: IPS Empress Universal Shade/Stains and Glaze for final staining and glazing
Wash firing with IPS Empress Esthetic Veneer Wash Pastes
The wash firing enables an optimum bond to the reduced IPS Empress CAD restorations.
The following working procedure should be observed:
– Extrude IPS Empress Esthetic Veneer Wash Paste neutral from the syringe and thin it with a small amount of IPS Empress
Universal Glaze and Stain Liquid, if required.
– Apply IPS Empress Esthetic Veneer Wash Paste neutral thinly on the entire surface to be veneered, in order to enable an
optimum bond.
– Depending on the individual patient situation, design mamelons.
– Apply internal effects using Modifier (pure or diluted).
– The mamelons and internal effects are applied on the unfired Wash Paste neutral layer.
– Note: The shade intensity will not be noticeably changed during firing.
– Place veneers and anterior crowns on the honey-comb firing tray with the help of metal pins. Additionally support the
veneers with a small amount IPS Object Fix.
Carefully blast the restoration with Al2O3at 0.5 bar pressure (Caution: abrasive) Clean the restoration with ultrasound in a water bath or using the steam jet
Apply IPS Empress Esthetic Veneer Wash Paste neutral thinly on the entire surface to be
veneered, in order to enable an optimum bond.
Apply mamelons and internal effects.
Page 34

34
Place restorations on the honey-comb firing tray and fire.
Build up the materials in accordance with the reduction.
For a life-like incisal third,combine various materials and layer.
Firing parameters for the Wash firing (note the temperature control)
IPS Empress CAD with B S t T H V1 V2
IPS Empress Esthetic Veneer
Wash firing 403°C 4' 60°C 840°C 2' 450°C 839°C
757°F 4' 108°F 1544°F 2' 842°F 1543°F
Firing parameters for the 1stIncisal/Transpa firing (note the temperature control)
IPS Empress CAD with B S t T H V1 V2
IPS Empress Esthetic Veneer
1stIncisal/Transpa firing 403°C 4' 60°C 830°C 2' 450°C 829°C
757°F 4' 108°F 1526°F 2' 842°F 1525°F
1stIncisal/Transpa firing with IPS Empress Esthetic Veneer
The incisal third is built-up according to the silicone key. The matching layering materials are listed in the Combination
Table on Page 41. The following working procedure should be observed:
– Mix IPS Empress Esthetic Veneer ceramic materials with the IPS Empress Esthetic Veneer Build-Up Liquid.
– The mixed material should demonstrate good stability. If this is not the case, either too much or too little Build-Up Liquid
was added.
– Build up the materials in accordance with the reduction using a ceramic brush.
– If a life-like incisal third is desired, various materials maybe combined and layered.
– Once the tooth shape has been completed, allow the ceramic material to dry for a short period of time.
– Place veneers and anterior crowns on the honey-comb firing tray with the help of metal pins. Additionally support the
veneers with a small amount of IPS Object Fix.
Page 35

35
2ndIncisal/Transpa firing (corrective firing) with IPS Empress Esthetic Veneer
After firing, carefully place the restoration on the model and rework. Proceed as follows for the 2ndfiring:
– Clean the restoration with ultrasound in a water bath or with the steam jet and completely dry it.
– Already mixed ceramic material may be rewetted with distilled water, or mix fresh IPS Empress Esthetic Veneer materials
with the Build-Up Liquid.
– Complete the missing areas taking the final tooth shape into account.
– Once the tooth shape has been completed, allow the ceramic material to dry for a short period of time.
– Place veneers and anterior crowns on the honey-comb firing tray with the help of metal pins. Additionally support the
veneers with a small amount IPS Object Fix.
Complete the tooth shape with the 2ndfiring and fire using the firing parameters below.
Finish the restoration with diamonds and give it a true-to-nature shape and surface structure.
Firing parameters for the 2ndIncisal/Transpa firing (note the temperature control)
IPS Empress CAD with B S t T H V
1
V
2
IPS Empress Esthetic Veneer
2ndIncisal/Transpa firing 403°C 4' 60°C 830°C 2' 450°C 829°C
757°F 4' 108°F 1526°F 2' 842°F 1525°F
Finishing and preparing for stain and glaze firing
Before the stain and glaze firing, the restoration has to be finished as follows:
– Finish the restoration using diamonds and give it a true-to-nature shape and surface structure, such as growth lines and
convex/concave areas.
– The surface structure may have to be worked out more strongly, since it has been weakened by the glazing procedure.
– The areas that are not covered with layering ceramic have to be smoothed out and prepolished using silicone disks in
order to obtain an even gloss on the surface after glaze firing.
Page 36

36
Clean restoration with ultrasound in a water bath or using the steam jet. Evenly apply the glazing material to the entire outer surfaces of the restoration.
Apply the mixed Shades directly into the unfired glazing material layer. Completely layered IPS Empress CAD crown and veneer fabricated in the cut-back technique.
Stain and glaze firing with IPS Empress Universal
The stain and glaze firing is carried out using IPS Empress Universal Shade, Stains, and Glaze material. Depending on the
situation, they can be conducted together or one after the other (see pages 22–24 for further details). Before the stain and
glaze firing, the restoration must be free of dirt and grease. Any contamination after cleaning must be prevented.
The following working procedure should be observed:
– Before staining and glazing, clean the restoration with ultrasound in a water bath or using the steam jet.
– To check the shade, wet the inner aspects of the restoration with IPS Empress Universal Glaze and Stain Liquid, position
the restoration on the control die, and check shade and effects.
– Extrude IPS Empress Universal Glazing Paste from the syringe and mix thoroughly.
– Thin the material to the desired consistency using IPS Empress Universal Glaze and Stain Liquid. Do not excessively dilute
the material, since this may render the glazing procedure difficult to control.
– Apply the glazing material a little thicker on areas that are not covered with layering ceramic. In this way, an even gloss
can be achieved.
– The glazing material must not come into contact with the inner aspects of the restoration.
– Avoid pooling and excessively thick glazing material layers.
– Excessively thin glazing material layers result in an unsatisfactory gloss.
– To intensify the dentin shade in the cervical and central crown third, mix the corresponding Shade material and apply it
directly into the unfired glazing material layer.
– Place veneers and anterior crowns on the honey-comb firing tray with the help of metal pins. Additionally support the
veneers with a small amount IPS Object Fix.
Firing parameters for the Stain and Glaze firing (note the temperature control)
Optional
– If the restoration has been optimally prepolished (silky-mat gloss) in the cervical area (not covered with layering ceramic),
the glazing material can be applied in these areas only. The layering ceramic features a true-to-nature gloss without the
glazing materials.
– If a more intensive shade is required in the cervical area, we recommend conducting a separate stain firing.
IPS Empress CAD with IPS Empress Universal B S t T H V1 V2
Stain and Glaze firing 403°C 6' 100°C 790°C 1–2' 450°C 789°C
Zahnform mit dem 2. Brand komplettieren und analog den Brennparametern brennen.
757°F 6' 180°F 1454°F 1–2' 842°F 1453°F
Page 37

37
Optional
Subsequent adjustment
After completion, additional adjustment (e.g. contact points) may become necessary. For that purpose,
IPS Empress Add-On 770 °C/1418 °F is available.
Procedure:
– Before the adjustment, the restoration must be free from dirt and grease. For that purpose, thoroughly clean the
restoration using the steam jet.
– Mix IPS Empress Add-On 770 °C / 1418 °F to a workable consistency. Make sure that the add-on material and liquid are
evenly mixed so that an optimum firing result can be achieved.
– Apply the mixed add-on material on the cleaned, desired areas using a brush and slightly blot them with an absorbent
cloth.
– Position the adjusted restoration on the firing tray and fire in the ceramic furnace.
– After firing, manually polish the supplemented areas to a high gloss.
IPS Empress CAD with B S t T H V1 V2
IPS Empress Add-On 770°C/1418°F
Corrective firing 403°C 4' 60°C 770°C 2' 450°C 769°C
757°F 4' 108°F 1418°F 2' 842°F 1417°F
Firing parameters for the corrective firing
IPS Empress CAD cut-back and layered – the ideal combination for highly aesthetic, CAD/CAM fabricated restorations.
Page 38

38
Empress CAD –
General Information
IPS
Conditioning of the ceramic surface in preparation for cementation is decisive for generating a sound bond between the
luting material and the all-ceramic restoration. The following working procedure should be observed:
– Leucite-reinforced glass-ceramic materials are generally etched with IPS Ceramic Etching Gel and subsequently silanated
using Monobond-S.
Preparing for cementation
IPS Empress CAD
Indication Veneers, inlays, onlays, partial crowns, anterior and posterior crowns
Cementation method Adhesive cementation
Etching of the restoration 60 seconds, using IPS Ceramic Etching Gel
Conditioning / Silanating
Monobond-S
of the restoration
Cementation system Variolink II or Variolink Veneer
Multilink Automix
Conventional cementation and blasting of finished IPS Empress CAD restoration is contraindicated!
Page 39

39
Firing of leucite-reinforced glass-ceramic restorations
– Always use the honey-comb firing tray to fire the restorations.
- Support inlays, onlays, and partial crowns with a firing pillow and place them on the honey-comb firing tray.
- Place veneers as well as anterior and posterior crowns on metal pins and position them on the honey-comb firing tray.
- As an alternative to the firing pillow and to better secure the restoration on the metal pins (particularly with veneers), a
small amount of IPS Object Fix may also be used.
- The firing temperatures must be observed at all times. Increasing the firing temperature will result in severe vitrification
between the framework and the veneering ceramic, which may lead to crack formation later on.
- Depending on the working habits, the glaze and stain firing procedures may also be conducted with a temperature
increase rate of 60 °C/108 °F per minute.
- If a vacuum pump is available, the stain and glaze firing procedures may also be carried out with a vacuum in place.
- Restorations supported with a firing pillow on the honey-comb tray are exposed to less heat due to their lower position
in the firing chamber. In order to achieve a true-to-nature gloss nonetheless, it is recommended to extend the holding
time from 1 minute to 2 minutes.
- The firing parameters specified in this Instructions for Use are coordinated with the Ivoclar Vivadent ceramic furnaces
(tolerance range ±10 °C/18°F).
– If furnaces other than those from Ivoclar Vivadent are used, temperature adjustments may be necessary.
Firing parameters
– These firing parameters represent standard values applicable to the ceramic furnaces from Ivoclar Vivadent.The
temperatures indicated also apply to furnaces of older generations,e.g. P20, P90, P95, P80, P100, P200. If one of these
furnaces is used, however,the temperatures may deviate by ± 10°C/18°F, depending on the age and type of the heating
muffle..
– If a non-Ivoclar Vivadent furnace is used,temperature corrections may be necessary.
– Regional differences in the power supply or the operation of several electronic devices by means of the same circuit
may render adjustments of the firing and press temperatures necessary.
Page 40

40
IPS Empress CAD with IPS Empress Universal – stained
IPS Empress CAD with IPS Empress Universal B S t T H V1 V2
2-in-1 Technique
Stain and Glaze firing 403°C 6' 100°C 790°C 1–2' 450°C 789°C
757°F 6' 180°F 1454°F 1–2' 842°F 1453°F
Corrective firing 403°C 4' 60°C 770°C 2' 450°C 769°C
IPS Empress Add-On 770°C/1418°F 757°F 4' 108°F 1418°F 2' 842°F 1417°F
IPS Empress CAD with IPS Empress Esthetic Veneer – veneered
IPS Empress CAD with B S t T H V1 V2
IPS Empress Esthetic Veneer
Cut-back and veneered
Washbrand 403°C 4' 60°C 840°C 2' 450°C 839°C
757°F 4' 108°F 1544°F 2' 842°F 1543°F
1
st
Incisal/Transpa firing 403°C 4' 60°C 830°C 2' 450°C 829°C
757°F 4' 108°F 1526°F 2' 842°F 1525°F
2
nd
Incisal/Transpa firing 403°C 4' 60°C 830°C 2' 450°C 829°C
757°F 4' 108°F 1526°F 2' 842°F 1525°F
Stain and Characterization firing 403°C 6' 100°C 790°C 1' 450°C 789°C
757°F 6' 180°F 1454°F 1' 842°F 1453°F
Glaze firing 403°C 6' 100°C 790°C 1–2' 450°C 789°C
757°F 6' 180°F 1454°F 1–2' 842°F 1453°F
Corrective firing 403°C 4' 60°C 770°C 2' 450°C 769°C
IPS Empress Add-On 770°C/1418°F 757°F 4' 108°F 1418°F 2' 842°F 1417°F
IPS Empress CAD with IPS Empress Universal B S t T H V1 V2
Stain and Characterization firing 403°C 6' 100°C 790°C 1' 450°C 789°C
757°F 6' 180°F 1454°F 1' 842°F 1453°F
Glaze firing 403°C 6' 100°C 790°C 1–2' 450°C 789°C
757°F 6' 180°F 1454°F 1–2' 842°F 1453°F
Corrective firing 403°C 4' 60°C 770°C 2' 450°C 769°C
IPS Empress Add-On 770°C/1418°F 757°F 4' 108°F 1418°F 2' 842°F 1417°F
B = Stand-by temperature °C / °F
S = Closing time/minutes
t
= Temperature increase rate °C/min./ °F/min.
T = Firing temperature °C /°F
H = Holding time / min.
V
1
= Vacuum-on temperature °C / °F
V
2
= Vacuum-off temperature °C / °F
Page 41

41
Empress®CAD – Combination Tables
IPS
A1
A1
ND 2
A2
A2
ND 2
A3
A3
ND 3
A3.5
A3.5
ND 4
A4
A3.5
ND 8
B1
B1
ND 2
B2
B2
ND 2
B3
B3
ND 5
B4
B3
ND 5
C1
B1
ND 2
C2
C2
ND 7
C3
C2
ND 7
C4
C2
ND 7
D2
C2
ND 7
D3
D3
ND 2
D4
D3
ND 3
HT LT MT MT MT HT LT LT LT MT MT MT MT MT MT MT
A1
I1 I1 I1 I2
A4
I2
B1
I1 I1 I1 I1 I2 I2 I2 I2 I2 I2
D4
I2
neutral
low value, high value
MM l-s, MM y-o, MM r-o
copper, orange, sky blue, basic yellow, basic red
T neutral, T blue
I white, I grey, I orange, I edge, I yellow, I orange-pink
110/A1, 210/A3
white, mahogany, khaki, orange, grey, vanilla, crackliner, olive, yellow, black, maroon, basic red, basic blue, basic yellow
A-O
A2/A3/A3.5
B2/B3/B4
C1/C2 C3/C4
D2/D3
A–D
IPS Empress CAD Blocks
IPS Natural Die Material
IPS Empress Esthetic Veneer
Wash Paste
IPS Empress Esthetic Veneer
Wash Paste Value
IPS Empress Esthetic Veneer
Wash Paste Mamelon
IPS Empress Esthetic Veneer
Wash Paste Modifier
IPS Empress Esthetic Veneer
Incisal Opal
IPS Empress Esthetic Veneer
Transpa
IPS Empress Esthetic Veneer
Incisal
IPS Empress Esthetic Veneer
Incisal Chroma Modifier
IPS Empress Esthetic Veneer
Brightener
IPS Empress Universal
Shade
IPS Empress Universal
Shade Incisal
IPS Empress Universal
Stains
IPS Empress Add-On
770°C/1418°F
Brightener
Combination Tables
The listed combinations are standard combinations. The A–D and Chromascop shades that are not available as IPS Empress CAD Blocks may be achieved using the following procedure:
– Selection of the closest block shade
– Staining and intensifying of the dentin shade using IPS Empress Universal Shade and Shade Incisal.
Page 42

42
110
ND 2
120
ND 2
130
ND 2
140
ND 2
210
ND 3
220
ND 3
230
ND 4
240
ND 4
310
ND 5
320
ND 5
330
ND 5
340
ND 5
410
ND 7
420
ND 7
430
ND 7
440
ND 7
510
ND 8
520
ND 8
530
ND 8
540
ND 8
HT LT LT LT MT MT MT MT LT MT MT MT MT MT MT MT MT MT MT MT
I1 I1
130
I1 I1 I1 I1 I1
240
I2
310
I1
320
I1
330
I2
340
I2 I2 I2 I2 I2
510
I2
520
I2
530
I2
540
I2
neutral
low value, high value
MM l-s, MM y-o, MM r-o
copper, orange, sky blue, basic yellow, basic red
T neutral, T blue
I white, I grey, I orange, I edge, I yellow, I orange-pink
110/A1, 210/A3
white, mahogany, khaki, orange, grey, vanilla, crackliner, olive, yellow, black, maroon, basic red, basic blue, basic yellow
A-O
110/120
140/210
220/230
100 200
300
200
300
410/420 430/440
Chromascop
IPS Empress CAD Blocks
IPS Natural Die Material
IPS Empress Esthetic Veneer
Wash Paste
IPS Empress Esthetic Veneer
Wash Paste Value
IPS Empress Esthetic Veneer
Wash Paste Mamelon
IPS Empress Esthetic Veneer
Wash Paste Modifier
IPS Empress Esthetic Veneer
Incisal Opal
IPS Empress Esthetic Veneer
Transpa
IPS Empress Esthetic Veneer
Incisal
IPS Empress Esthetic Veneer
Incisal Chroma Modifier
IPS Empress Esthetic Veneer
Brightener
IPS Empress Universal
Shade
IPS Empress Universal
Shade Incisal
IPS Empress Universal
Stains
IPS Empress Add-On
770°C/1418°F
Brightener
Page 43

43
BL1
BL1
ND 1
BL2
BL2
ND 1
BL3
BL3
ND 1
BL4
BL4
ND 1
LT LT LT LT
I1 I1 I1 I1
neutral
low value, high value
MM l-s, MM y-o, MM r-o
copper, orange, sky blue, basic yellow, basic red
T neutral, T blue
I white, I grey, I orange, I edge, I yellow, I orange-pink
110/A1, 210/A3
white, mahogany, khaki, orange, grey, vanilla, crackliner, olive, yellow, black, maroon,
basic red, basic blue, basic yellow
A-O
Brightener
Bleach BL
IPS Empress CAD Blocks
IPS Natural Die Material
IPS Empress Esthetic Veneer
Wash Paste
IPS Empress Esthetic Veneer
Wash Paste Value
IPS Empress Esthetic Veneer
Wash Paste Mamelon
IPS Empress Esthetic Veneer
Wash Paste Modifier
IPS Empress Esthetic Veneer
Incisal Opal
IPS Empress Esthetic Veneer
Transpa
IPS Empress Esthetic Veneer
Incisal
IPS Empress Esthetic Veneer
Incisal Chroma Modifier
IPS Empress Esthetic Veneer
Brightener
IPS Empress Universal
Shade
IPS Empress Universal
Shade Incisal
IPS Empress Universal
Stains
IPS Empress Add-On
770°C/1418°F
Page 44

Ivoclar Vivadent AG
Bendererstrasse 2
FL-9494 Schaan
Liechtenstein
Tel.+423 235 35 35
Fax +423 235 33 60
www.ivoclarvivadent.com
Ivoclar Vivadent Pty. Ltd.
1 – 5 Overseas Drive
P.O.Box 367
Noble Park, Vic. 3174
Australia
Tel.+61 3 979 595 99
Fax +61 3 979 596 45
www.ivoclarvivadent.com.au
Ivoclar Vivadent GmbH
Bremschlstr.16
Postfach 223
A-6706 Bürs
Austria
Tel.+43 5552 624 49
Fax +43 5552 675 15
www.ivoclarvivadent.com
Ivoclar Vivadent Ltda.
Rua Geraldo Flausino Gomes,
78 – 6.º andar Cjs.61/62
Bairro: Brooklin Novo
CEP: 04575-060 São Paulo – SP
Brazil
Tel.+5511 5102 2020
Fax.+5511 5102 4704
www.ivoclarvivadent.com
Ivoclar Vivadent Inc.
2785 Skymark Avenue,Unit 1
Mississauga
Ontario L4W 4Y3
Canada
Tel.+1 905 238 57 00
Fax +1 905 238 5711
www.ivoclarvivadent.us.com
Ivoclar Vivadent
Marketing Ltd.
Rm 603 Kuen Yang
International Business Plaza
No.798 Zhao Jia Bang Road
Shanghai 200030
China
Tel.+86 21 5456 0776
Fax.+86 21 6445 1561
www.ivoclarvivadent.com
Ivoclar Vivadent
Marketing Ltd.
Calle 134 No.13-83, Of. 520
Bogotá
Colombia
Tel.+57 1 627 33 99
Fax +57 1 633 16 63
www.ivoclarvivadent.com
Ivoclar Vivadent SAS
B.P. 118
F-74410 Saint-Jorioz
France
Tel.+33 450 88 64 00
Fax +33 450 68 91 52
www.ivoclarvivadent.fr
Ivoclar Vivadent GmbH
Dr.Adolf-Schneider-Str.2
D-73479 Ellwangen,Jagst
Germany
Tel.+49 (0) 79 61 / 8 89-0
Fax +49 (0) 79 61 / 63 26
www.ivoclarvivadent.de
Ivoclar Vivadent
Marketing Ltd
114, Janki Centre
Shah Industrial Estate
Veera Desai Road,
Andheri (West)
Mumbai 400 053
India
Tel. +91 (22) 673 0302
Fax.+91 (22) 673 0301
www.ivoclarvivadent.firm.in
Ivoclar Vivadent s.r .l.
Via dell’Industria 16
I-39025 Naturno (BZ)
Italy
Tel.+39 0473 67 01 11
Fax +39 0473 66 77 80
www.ivoclarvivadent.it
Ivoclar Vivadent S.A. de C.V.
Av.Mazatlán No. 61, Piso 2
Col. Condesa
06170 México,D.F.
Mexico
Tel.+52 (55) 5062-1000
Fax +52 (55) 5062-1029
www.ivoclarvivadent.com.mx
Ivoclar Vivadent Ltd
12 Omega St,Albany
PO Box 5243 Wellesley St
Auckland, New Zealand
Tel.+64 9 914 9999
Fax +64 9 630 61 48
www.ivoclarvivadent.co.nz
Ivoclar Vivadent
Polska Sp.z.o.o.
ul. Jana Pawla II 78
PL-01-501 Warszawa
Poland
Tel.+48 22 635 54 96
Fax +48 22 635 54 69
www.ivoclarvivadent.pl
Ivoclar Vivadent
Marketing Ltd.
180 Paya Lebar Road
# 07-03 Yi Guang Building
Singapore 409032
Tel.65-68469183
Fax 65-68469192
Ivoclar Vivadent S.A.
c/Emilio Muñoz, 15
Esquina c/Albarracín
E-28037 Madrid
Spain
Tel.+ 34 91 375 78 20
Fax + 34 91 375 78 38
www.ivoclarvivadent.com
Ivoclar Vivadent AB
Dalvägen 14
S-169 56 Solna
Sweden
Tel.+46 8 514 93 943
Fax +46 8 514 93 940
www.ivoclarvivadent.se
Ivoclar Vivadent UK Limited
Ground Floor Compass Building
Feldspar Close
Warrens Business Park
Enderby
Leicester LE19 4SE
United Kingdom
Tel.+44 116 284 78 80
Fax +44 116 284 78 81
www.ivoclarvivadent.co.uk
Ivoclar Vivadent, Inc.
175 Pineview Drive
Amherst, N.Y. 14228
USA
Tel.+1 800 533 6825
Fax +1 716 691 2285
www.ivoclarvivadent.us.com
Ivoclar Vivadent – worldwide
Date information prepared: 09/2006
Caution: US Federal Law restricts the sale of this device by or on the order of a licensed dentist.
These materials have been developed solely for use in dentistry. Processing should be carried out strictly
according to the Instructions for Use. Liability cannot be accepted for damages resulting from failure to
observe the Instructions or the stipulated area of application. The user is responsible for testing the material
for its suitability and use for any purpose not explicitly stated in the Instructions. Descriptions and data
constitute no warranty of attributes.
Printed in Liechtenstein
© Ivoclar Vivadent AG, Schaan / Liechtenstein
603082/1006/e/BVD
 Loading...