

Page 1

HP LaserJet 8150, 8150 N,
8150 DN, 8150 HN, and
8150 MFP Printers
Contents
How to
navigate
Index
User Guide
Use of this electronic document indicates that you accept the Copyright and License terms. Copyright 2001 Hewlett-Packard Company
Page 2

2
Copyright and License
Copyright Hewlett-Packard Company 2001
All Rights Reserved. Except as allowed by
copyright laws or herein, reproduction,
adaptation, or translation without prior written
permission is prohibited.
A user of the Hewlett-Packard printer associated
with this user guide is granted a license to: a)
print hard copies of this user guide for
PERSONAL, INTERNAL or COMPANY use
subject to the restriction not to sell, re-sell or
otherwise distribute the hard copies; and b)
place an electronic copy of this user guide on a
network server provided access to the electronic
copy is limited to PERSONAL, INTERNAL users
of the Hewlett-Packard printer associated with
this user guide.
The information contained in this document is
subject to change without notice.
Edition 3, 5/2003
Trademark Credits
Acrobat is a trademark of Adobe Systems
Incorporated.
PostScript® is a trademark of Adobe Systems
Incorporated which may be registered in certain
jurisdictions.
Arial, Monotype, and Times New Roman are U .S .
registered trademarks of the Monotype
Corporation.
Helvetica, Palatino, Times, and Times Roman
are trademarks of Linotype AG and/or its
subsidiaries in the U.S. and other countries.
Microsoft, MS Windows, Windows, and Windows
NT are U.S. registered trademarks of Microsoft
Corporation.
TrueType is a U.S. trademark of Apple
Computer, Inc.
E
NERGY STAR
is a U.S. registered service mar k
of the U.S. EPA.
Page 3

3
HP Customer Care
Thank you for your purchase. Along with your product, you receive a variety
of suppor t ser vices from Hewlett-Packard and our support par tners. These
services are designed to give you the results you need, quickly and
professionally.
Online Services:
For 24-hour access to information over your modem, we suggest these
services:
World Wide Web
Printer drivers, updated HP printer software, plus product and suppor t
information may be obtained from the following URLs:
in the U.S. http://www.hp.com
in Europe http://www2.hp.com
Continued on next page.
Page 4

4
Printer drivers may be obtained from the following sites:
in China http://www.hp.com.cn
in Japan http://www.jpn.hp.com
in Korea http://www.hp.co.kr
in Taiwan http://www.hp.com.tw
or the local driver website http://www.dds.com.tw
Page 5

5
Obtaining software utilities and electronic information:
For U.S. and Canada:
Phone:
(661) 257-5565
Fax:
(661) 257-6995
Mail:
HP Distribution
P.O. Box 907
Santa Clarita, CA
91380-9007
U. S.A
For Asia-Pacific countries/regions:
Contact Mentor Media at (65) 740-4477 (Hong K
Philippines, Malaysia, or Singapore). For Korea, call (82) (2) 3270-0805
or (82) (2) 3270-0893.
ong SAR, Indonesia,
Page 6

6
For Australia, New Zealand, and India:
For Australia, call (61) (3) 8877-8000. For New Zealand,
call (64) (9) 356-6640. For India, call (91) (11) 682-6035.
For European English:
Call +44 (0) 1429 865 511.
HP direct ordering for accessories or supplies:
Call 1-800-538-8787 (U.S.) or 1-800-387-3154 (Canada).
HP Support Assistant compact disc:
This support tool offers a comprehensive online infor mation system designed
to provide technical and product inform ation on HP products. To subscribe to
this quarter ly service in the U.S. or Canada, call 1-800-457-1762. In Hong
Kong SAR, Indonesia, Malaysia, or Singapore, call Fulfill Plus at (65) 740-4477.
Page 7

7
HP Service Information:
To locate HP-Authorized Dealers, call 1-800-243-9816 (U.S.) or
1-800-387-3867 (Canada).
HP Service Agreements:
Call 1 (800) 743-8305 (U.S.) or (800) 268-1221 (Canada). For extended
service, call 1-800-446-0522.
Page 8

8
Customer support options worldwide
Customer Support and Product Repair Assistance for
the U.S. and Canada
Call (208) 323-2551 Monday through Friday from 6 am to 6 pm, (Mountain
Time) free of charge during the warranty period. However, your standard
long-distance phone charges still apply. Have your system nearby and your
serial number ready when calling.
If you know your printer needs repair, call 1-800-243-9816 to locate your
nearest HP-Authorized ser vice provider, or call (208) 323-2551 for HP
centralized service dispatch.
Post-warranty telephone assistance is available to answer your product
questions. Call (900) 555-1500 ($2.50* per minute, U.S. only) or call
1-800-999-1148 ($25* per call, Visa or MasterCard, U.S. and Canada) Monday
through Friday from 6 am to 6 pm (Mountain Time). Charges begin only when
you connect with a support technician. *Prices subject to change.
Page 9

9
European Customer Support Center Language and
In-Country Options Available
Open Monday through Fr iday 8:30–18:00 CET
HP provides a free telephone support ser vice during the warranty period. By
calling a telephone number listed below, you will be connected to a responsive
team waiting to help you. If you require suppor t after your warranty has
expired, you can receive support for a fee through the same telephone nu mber.
The fee is charged on a per-incident basis. When calling HP, have the following
information ready: product name and serial number, date of purchase, and
description of the problem.
English Ireland: (353) (1) 662-5525
U.K.: (44) (171) 512-5202
International: (44) (171) 512-5202
Dutch Belgium: (32) (2) 626-8806
Netherlands: (31) (20) 606-8751
French France: (33) (01) 43-62-3434
Belgium: (32) (2) 626-8807
Switzerland: (41) (84) 880-1111
German Germany: (49) (180) 525-8143
Austria: (43) (1) 0660-6386
Norwegian Norway: (47) 2211-6299
Danish Denmark: (45) 3929-4099
Continued on next page.
Page 10

10
Finnish Finland: (358) (9) 0203-47288
Swedish Sweden: (46) (8) 619-2170
Italian Italy: (39) (2) 264-10350
Spanish Spain: (34) (90) 232-1123
Por tuguese Por tugal: (351) (1) 441-7199
In-country/region support numbers
Argentina 787-8080
Australia (61) (3) 272-8000
Brazil 022-829-6612
Canada (208) 323-2551
Chile 800-360999
China (86) (10) 65053888-5959
Czech Republic (42) (2) 471-7321
Greece (30) (1) 689-6411
Hong Kong SAR
Hungary (36) (1) 343-0310
India (91) (11) 682-6035
Continued on next page.
(852) 800-96-7729
(91) (11) 682-6069
Page 11

11
Indonesia (62) (21) 350-3408
Korea (82) (2) 3270-0700
Korea outside Seoul (82) (080) 999-0700
Japan (81) (3) 3335-8333
Malaysia (60) (3) 295-2566
Mexico (Mexico City) 01 800-22147
Mexico (outside Mexico City) 01 800-90529
New Zealand (64) (9) 356-6640
Philippines (63) (2) 894-1451
Poland (48) (22) 37-5065
Por tugal (351) (1) 301-7330
Russia (7) (95) 923-5001
Singapore (65) 272-5300
Taiwan (886) (02) 717-0055
Thailand +66 (0) 2 661-4011
Turkey (90) (1) 224-5925
Page 12

Contents
12
Introduction
Navigation Features . . . . . . . . . . . . . 19
Text Conventions . . . . . . . . . . . . . . . 20
Additional Features of Acrobat Reader 21
Tips for Use . . . . . . . . . . . . . . . . . . . 23
1 Printer Basics
Overview. . . . . . . . . . . . . . . . . . . . . . 24
Printer Features and Benefits . . . . . . . 26
Printer Information. . . . . . . . . . . . . . . 32
Configurations. . . . . . . . . . . . . . . . 32
Printer Parts and Locations . . . . . . 35
Accessories and Supplies . . . . . . . . . 37
Suggested Accessories . . . . . . . . . 38
Ordering Information . . . . . . . . . . . 42
Control Panel Layout . . . . . . . . . . . . . 53
Control Panel Lights . . . . . . . . . . . 54
Configuration Page . . . . . . . . . . . . 55
Control Panel Keys . . . . . . . . . . . . 56
Control Panel Menus . . . . . . . . . . . 58
Paper Handling LED Status
Interpretation . . . . . . . . . . . . . . . . . . . 60
Printer Software . . . . . . . . . . . . . . . . 62
Printer Drivers. . . . . . . . . . . . . . . . 66
Software for Windows . . . . . . . . . . 71
Installing Windows Printing Software
(CD) . . . . . . . . . . . . . . . . . . . . . . . 72
Installing Macintosh Printing
Software . . . . . . . . . . . . . . . . . . . . 74
Software for Macintosh Computers. 80
Software for Networks . . . . . . . . . . 83
2 Printing Tasks
Overview . . . . . . . . . . . . . . . . . . . . . 88
Loading the Input Tray . . . . . . . . . . . . 89
Loading Tray 1 . . . . . . . . . . . . . . . 89
Loading Trays 2, 3, and the Optional
2 x 500-sheet Input Tray
(Trays 4 and 5) . . . . . . . . . . . . . . . 93
Loading the Optional 2000-sheet Input
Tray (Tray 4). . . . . . . . . . . . . . . . . 98
Selecting the Output Bin . . . . . . . . . 101
Printing to the Standard Output
Bin . . . . . . . . . . . . . . . . . . . . . . . 103
Printing to the Face-up Bin . . . . . 105
Printing to a Mailbox . . . . . . . . . . 106
Page 13

13
Using the Stapler . . . . . . . . . . . . . . 113
Loading Staple Cartridges (5-bin
Mailbox with Stapler) . . . . . . . . . . 113
Stapling Documents (5-bin Mailbox with
Stapler). . . . . . . . . . . . . . . . . . . . 114
Printing Both Sides of Paper (Optional
Duplex Printing Accessory) . . . . . . . 117
Printing Envelopes . . . . . . . . . . . . . 123
Feeding Envelopes Automatically
(Optional Envelope Feeder) . . . . . 123
Inserting the Envelope Feeder . . 125
Loading Envelopes into the Envelope
Feeder . . . . . . . . . . . . . . . . . . . . 126
Changing Fuser Levers for Printing
Envelopes . . . . . . . . . . . . . . . . . . 128
Printing Envelopes from Tray 1 . . 130
Loading Envelopes in Tray 1 . . . . 132
Printing Envelopes from Your
Software Application . . . . . . . . . . 133
Printing Special Paper . . . . . . . . . . . 134
Printing Letterhead, Preprinted Paper,
or Prepunched Paper. . . . . . . . . . 134
Printing Labels . . . . . . . . . . . . . . 135
Printing Transparencies . . . . . . . 137
3 Advanced Printing Tasks
Overview . . . . . . . . . . . . . . . . . . . . 144
Using Features in the Printer Driver 146
Different First Page . . . . . . . . . . . . . 149
Blank Back Page. . . . . . . . . . . . . . . 151
Printing Multiple Pages on One Sheet
of Paper . . . . . . . . . . . . . . . . . . . 152
Customizing Tray 1 Operation . . . . . 154
Tray 1 Mode=First . . . . . . . . . . . . 154
Tray 1 Mode=Cassette . . . . . . . . . 155
Manually Feeding Paper from
Tray 1. . . . . . . . . . . . . . . . . . . . . 156
Printing by Type and Size of Paper . 157
Benefits of Printing by Type and Size of
Paper . . . . . . . . . . . . . . . . . . . . . 157
Changing the Variable Fuser Mode . 160
Loading Custom-size Paper . . . . . . 163
Job Retention . . . . . . . . . . . . . . . . . 166
Quick Copying a Job . . . . . . . . . . 167
Proofing and Holding a Job . . . . . 170
Printing a Private Job . . . . . . . . . 173
Storing a Print Job . . . . . . . . . . . . 176
Custom-size Paper in Tray 1 . . . . 139
Printing Cards, Custom-size, and
Heavy Paper . . . . . . . . . . . . . . . 141
Page 14

14
Printing with the Optional HP Fast
InfraRed Connect . . . . . . . . . . . . . . 179
Setting Up to Print with
Windows 3.1x . . . . . . . . . . . . . . . 180
Setting Up to Print with
Windows 9x. . . . . . . . . . . . . . . . . 181
Printing a Job . . . . . . . . . . . . . . . 182
Interrupting and Resuming Printing 184
Edge-to-Edge Printing . . . . . . . . . . . 185
Duplex Registration . . . . . . . . . . . . . 187
4 Printer Maintenance
Overview. . . . . . . . . . . . . . . . . . . . . 189
Printer Maintenance Kit . . . . . . . . . . 190
Managing the Toner Cartridge . . . . . 191
HP Policy on Non-HP Toner
Cartridges . . . . . . . . . . . . . . . . . . 191
Toner Cartridge Storage . . . . . . . 191
Toner Cartridge Life Expectancy . 192
Checking the Toner Level . . . . . . 192
Resetting the HP TonerGauge . . . 193
Continue Printing When Toner is
Low . . . . . . . . . . . . . . . . . . . . . . 194
Cleaning the Printer. . . . . . . . . . . . . 197
5 Problem Solving
Overview . . . . . . . . . . . . . . . . . . . . 200
Clearing Paper Jams . . . . . . . . . . . . 202
Clearing Jams from the Input Tray
Areas . . . . . . . . . . . . . . . . . . . . . 204
Clearing Jams from the Optional
Duplex Printing Accessory . . . . . . 213
Clearing Jams from the Top Cover
Area . . . . . . . . . . . . . . . . . . . . . . 215
Clearing Jams from the Output
Areas . . . . . . . . . . . . . . . . . . . . . 217
Clearing Jams from an Optional HP
Output Device . . . . . . . . . . . . . . . 221
Clearing Jams from the Stapler (5-bin
Mailbox with Stapler) . . . . . . . . . . 222
Solving Repeated Paper Jams . . . 224
Understanding Printer Messages . . . 226
Using the Printer Online Help
System . . . . . . . . . . . . . . . . . . . . 227
Correcting Output Quality Problems 254
Correcting Wrinkles on Envelopes 260
Determining Printer Problems . . . 262
Printer Problems . . . . . . . . . . . . . 264
Software, Computer, and Printer
Interface Problems . . . . . . . . . . . 267
Cabling Configurations . . . . . . . . 292
Selecting an alternate PPD . . . . . 308
Page 15

15
Communicating with an Optional
HP JetDirect EIO Print Server . . . 310
Checking the Printer’s Configuration 313
Configuration Page . . . . . . . . . . . 314
Menu Map . . . . . . . . . . . . . . . . . . 317
PCL or PS Font List. . . . . . . . . . . 318
File Directory Page . . . . . . . . . . . 320
Event Log Page. . . . . . . . . . . . . . 321
Paper Path Test . . . . . . . . . . . . . 323
6 HP Digital Copy
Overview. . . . . . . . . . . . . . . . . . . . . 324
HP Digital Copy Installation . . . . . . . 325
Installation Checklist . . . . . . . . . . 325
Step 1. Locate HP Digital Copy
Parts. . . . . . . . . . . . . . . . . . . . . . 326
Step 2. Prepare Printer and HP Digital
Copy Location . . . . . . . . . . . . . . . 327
Step 3. Install the HP Digital Copy 332
Step 4. Test HP Digital Copy
Operation . . . . . . . . . . . . . . . . . . 343
Troubleshoot the HP Digital Copy . 345
HP Digital Copy Operating
Instructions . . . . . . . . . . . . . . . . . . . 346
HP Digital Copy Features and
HP Digital Copy Settings . . . . . . . 362
Loading documents into the Automatic
Document Feeder . . . . . . . . . . . . 364
Loading documents onto the
Flatbed . . . . . . . . . . . . . . . . . . . . 366
Loading documents larger than the
Document Board . . . . . . . . . . . . . 367
Reading a page from a thick book 368
Foreign Interface Harness . . . . . . 369
Paper Specifications . . . . . . . . . . 370
Document Quality . . . . . . . . . . . . 371
HP Digital Copy Maintenance . . . . . 373
Clean the Document Cover, the
Document Holder, and the
Flatbed Glass . . . . . . . . . . . . . . . 373
Cleaning the Automatic Document
Feeder . . . . . . . . . . . . . . . . . . . . 374
Pad and Roller Maintenance . . . . 376
HP Digital Copy Problem Solving . . . 377
Temporary Error . . . . . . . . . . . . . 378
Equipment Error . . . . . . . . . . . . . 379
7 Service and Support
Overview . . . . . . . . . . . . . . . . . . . . 380
Hewlett-Packard limited warranty
Benefits . . . . . . . . . . . . . . . . . . . . 346
HP Digital Copy Control Panel . . . 347
statement . . . . . . . . . . . . . . . . . . . . 381
Page 16

16
Service During and After the Warranty
Period . . . . . . . . . . . . . . . . . . . . . 384
Limited Warranty for Toner Cartridge
Life . . . . . . . . . . . . . . . . . . . . . . . . . 385
HP Software License Terms . . . . . . 386
A Specifications
Overview. . . . . . . . . . . . . . . . . . . . . 389
Paper Specifications . . . . . . . . . . . . 390
Supported Sizes of Paper for Input and
Output. . . . . . . . . . . . . . . . . . . . . 392
Supported Types of Paper . . . . . . 397
Labels. . . . . . . . . . . . . . . . . . . . . 403
Transparencies . . . . . . . . . . . . . . 405
Envelopes . . . . . . . . . . . . . . . . . . 406
Card Stock and Heavy Paper . . . . 410
Printer Specifications. . . . . . . . . . . . 412
Physical Dimensions . . . . . . . . . . 412
Environmental Specifications . . . . 417
B Control Panel Menus
Overview. . . . . . . . . . . . . . . . . . . . . 420
Private/Stored Jobs Menu . . . . . . . . 423
Information Menu . . . . . . . . . . . . . . 424
Paper Handling Menu . . . . . . . . . . . 427
Print Quality Menu. . . . . . . . . . . . . . 435
Printing Menu . . . . . . . . . . . . . . . . . 439
Configuration Menu . . . . . . . . . . . . . 445
Configuration of MBM Menu . . . . . . . 456
I/O Menu. . . . . . . . . . . . . . . . . . . . . 457
EIO Menu . . . . . . . . . . . . . . . . . . . . 460
Duplex Registration Menu . . . . . . . . 464
Resets Menu. . . . . . . . . . . . . . . . . . 465
C Printer Memory and Expansion
Overview . . . . . . . . . . . . . . . . . . . . 467
Determining Memory Requirements . 470
Installing Memory . . . . . . . . . . . . . . 471
Checking Memory Installation . . . . . 475
Adjusting Memory Settings . . . . . . . 476
Installing EIO Cards/Mass Storage . . 479
D Printer Commands
Overview . . . . . . . . . . . . . . . . . . . . 480
Understanding PCL Printer Command
Syntax . . . . . . . . . . . . . . . . . . . . . . 483
Combining Escape Sequences. . . 484
Selecting PCL Fonts . . . . . . . . . . . . 485
Common PCL Printer Commands. . . 486
E Regulatory Information
Overview . . . . . . . . . . . . . . . . . . . . 494
FCC Regulations. . . . . . . . . . . . . . . 495
Page 17

17
Environmental Product Stewardship
Protecting the Environment . . . . . 497
Material Safety Data Sheet . . . . . . . 502
Environmental Conformity . . . . . . . . 503
Declaration of Conformity . . . . . . . . 504
Safety Statements . . . . . . . . . . . . . . 508
Laser Safety Statement . . . . . . . . 508
Canadian DOC Regulations . . . . . 509
VCCI Statement (Japan) . . . . . . . 510
Korean EMI statement . . . . . . . . . 511
Laser Statement for Finland. . . . . 512
. 497
Page 18

Introduction 18
Introduction
This section explains some of the features of this online user guide as well as
tips and tricks to help you use it to its greatest potential. It provides an
overview of the following information:
! Navigation Features
! Text Conventions
! Additional Features of Acrobat Reader
! Tips for Use
Additional features can be accessed through your Acrobat Reader menus and
toolbars.
Page 19

Introduction 19
Navigation Features
Button Button Name Function
Page Up and Down
Arrows
Table of Contents Icon This Table of Contents Icon calls up the table of
Introduction Icon The Introduction Icon calls up this introduction to
Index Icon The Index Icon calls up the online user guide text
The Page Up and Down arrows allow you to scroll
page-by-page through the online user guide. The
Page Up arrow allows you to go back one page,
while the Page Down arrow allows you to move
forward one page.
contents for the online user guide.
the guide.
Navigation Features
index. The index entries are linked to their related
topics.
Page 20

Introduction 20
Text Conventions
Some text is formatted differently to indicate specific meanings or functions.
Below is a table that defines the different text formats and what they indicate.
Text Format Style Meaning or Function
K
EY CAP
Hypertext
DISPLAY PANEL This format is used to indicate text that is displayed on the control
Input This format indicates that the text is typed by the user at a
This format is used to represent buttons on the printer, as well as
keys on the computer keyboard.
This format is used to indicate that the text is linked to another
page of the document. Clicking on the underlined text takes you
to that page. Sometimes, a page number and section heading are
included in the blue underlined text, but any text for matted this
way indicates the presence of a link.
panel.
command prompt or into a dialog box.
Text Conventions
Page 21

Introduction 21
Additional Features of Acrobat Reader
In addition to the navigation buttons provided on the right side of the page,
Adobe Acrobat Reader has a number of other features that you may find
useful.
Button Button Name Function
Actual Size This button sets the document view to the page’s actual
size.
Fit Page This button changes the document view so the page
fits in the window.
Fit Visible Width This button changes the document view so the visible
content and page width fit in the window.
Pag e On ly This button displays the page only with no bookmarks
or thumbnails.
Pag e Wi t h
Bookmarks
Additional Features of Acrobat Reader
This button displays the page and bookmarks to the
different sections of the document in a window to the
left of the screen.
Page 22

Introduction 22
Button Button Name Function
Pag e Wi t h
Thumbnails
Back This button allows you to go to the previous link or to
Find This button calls up the Find dialog.
Zoom This button allows you to change the page size.
This button displays the page and small images of each
page in a window to the left of the screen.
undo your last change.
Additional Features of Acrobat Reader
Page 23

Introduction 23
Tips for Use
Use bookmarks to navigate between chapters.
When reading large amounts of text, turn off bookmarks and change the page
view to full screen.
Use the find function under the Tools menu to find specific terms.
Use the back button (page 22
previous page when jumping from link to link.
To print this document - For best quality and quickest printing, always print
using a compatible PostScr ipt Level 3 emulation printer driver.
Due to the size of these print files, it is recommended that you print portions of
this document rather than printing the whole document at one time.
To save paper when you are printing this online user guide, you can create a
quick set to print 2 pages of the online user guide (N-up printing) on both sides
of the paper (duplex printing). See the printer driver help for details on these
feat ur es .
) in Adobe Acrobat Reader to return to the
Tips for Use
Page 24

Chapter 1 Printer Basics 24
Printer Basics
1
Overview
Congratulations on your purchase of an HP LaserJet printer. If you have not
done so, see the getting started guide provided with the printer for setup
instructions.
For detailed informatio n on the HP Digital Copy (that comes with the
HP LaserJet 8150 MFP), see the section on page 324
or the getting started
Overview
guide provided with the HP Digital Copy.
Now that the printer is set up and ready to use, take a few moments to get to
know the printer. This chapter introduces the following:
! Printer Features and Benefits
! Printer Information
! Accessories and Supplies
Continued on next page.
Page 25

Chapter 1 Printer Basics 25
! Control Panel Layout
! Paper Handling LED Status Inter pretation
! Printer Software
Overview
Page 26

Chapter 1 Printer Basics 26
Printer Features and Benefits
Speed and Throughput
! Transmit Once, RIP ONCE technology
! 32 pages per minute (ppm) on Letter or ISO A4 paper
! Duty Cycle: 150,000 pages per month on Letter or ISO A4 paper
! 250 MHz microprocessor
Resolution
! 600 dots per inch (dpi) with Resolution Enhancement technology (REt)
! FastRes 1200 provides 1200 dpi quality at full speed
! More than 220 levels of gray
Printer Features and Benefits
Page 27

Chapter 1 Printer Basics 27
Memory
! 32 MB (8150/8150 N/8150 DN/8150 HN) of RAM, expandable (up to
160 MB) using industr y standard 100-pin DIMMs (Dual In-Line Memory
Modules)
! 64 MB (8150 MFP) of RAM, expandable (up to 160 MB) using industr y
standard 100-pin DIMMs (Dual In-Line Memory Modules)
! Memory Enhancement tech nology (MEt) automatically compresses data to
use RAM more efficiently
! 3.2 Gigabyte hard disk (8150 MFP)
Enhanced Productivity (8150 MFP)
! Fast, convenient walk up digital copying
! Advanced paper handling including electronic collation, dual scan heads,
and automatic stapling
! Digital Sender module that easily conver ts and sends paper documents to
email
Printer Features and Benefits
Page 28

Chapter 1 Printer Basics 28
Language and Fonts
! HP PCL 6
! HP PCL 5e for compatibility
! Printer Job Language (PJL)
! Printer Management Language (PML)
! 45 scalable Tr ueType typefaces
! PostScript Level 3 Emulation standard
Paper Handling Options
! Input
" Tray 1: A multipurpose tray for paper, transparencies, labels, and
envelopes. Holds up to 100 sheets of paper.
" Trays 2 and 3: Two 500-sheet trays. These trays automatically sense
paper sizes.
" Optional 2 x 500-sheet Input Tray (Trays 4 and 5): Two 500-sheet trays.
These trays automatically sense paper sizes.
" Optional 2000-sheet Input Tray (Tray 4): One 2000-sheet tray. This tray
automatically senses paper sizes.
Continued on next page.
Printer Features and Benefits
Page 29

Chapter 1 Printer Basics 29
" Optional Duplex Printing Accessory: Provides two-sided printing (both
sides of paper).
" Optional Envelope Feeder: Automatically feeds up to 100 envelopes.
" Optional Custom Paper Trays: Allows printing on custom-size paper. Holds
up to 500 sheets of paper. (Used in place of trays 3 or 5.)
! Output
" Standard Output Bin (face-down bin): Holds up to 500 sheets of paper.
Automatically senses when full.
" Face-up Bin: Holds up to 100 sheets of paper. Provides the best results
when printing transparencies, labels, and envelopes.
" Optional 5-bin Mailbox with Stapler: Each of the 5 bins holds up to
250 sheets of paper. Provides job separation by stapling jobs.
" Optional 8-bin Mailbox: Each of the 8 bins holds up to 250 sheets of
paper.
" Optional 7-bin T abletop Mailbo x: Each of the 7 bins holds up to 120 sheets
of paper. Designed for tabletop printing.
" Optional 3000-sheet Stacker: One 3000-sheet stacking device.
" Optional 3000-sheet Stapler/Stacker: One 3000-sheet stacking device
which provides multi-position stapling for up to 50 sheets of paper per
document.
Continued on next page.
Printer Features and Benefits
Page 30

Chapter 1 Printer Basics 30
! Input/Output
" HP Digital Copy: The flatbed and the automatic document feeder have the
abil ity to c opy up to A3 or 1 1 x 1 7 si ze original doc uments . Th e au tom ati c
document feeder holds up to 50 sheets of paper.
Connectivity
! 3 EIO (enhanced input/output) slots
! HP JetDirect EIO cards, Ethernet (10Base-T, 10Base2), Token Ring, Fast
Ethernet 10/100Base-TX, USB, Serial, and Local Talk
! Parallel
! HP Fast InfraRed Connect (fast infrared connection)
! Foreign Interface Harness (HP LaserJet 8150 MFP or any model of
HP LaserJet 8150 printer with an HP Digital Copy attached)
Environmental Features
! EconoMode uses approximately 50% less toner, which extends the life of
the toner cartr idge (HP does not recommend full-time use of EconoMode)
! PowerSave setting saves energy (meets E
! High content of recyclable components and materials in the printer
Printer Features and Benefits
NERGY STAR
guidelines)
Page 31

Chapter 1 Printer Basics 31
Firmware Updates
Provides the ability to download firmware electronically.
To download the latest firmware, go to http://www.hp.com/go/lj8150_firmware
and follow the instructions on the screen. To easily send fir mware updates to
multiple printers, use HP Web JetAdmin (go to
http://www.hp.com/go/webjetadmin).
Printer Features and Benefits
Page 32

Chapter 1 Printer Basics 32
Printer Information
Configurations
HP LaserJet 8150 printer
The HP LaserJet 8150 printer (product number C4265A)
comes standard with 32 MB RAM, wide format printing,
two 500-sheet trays, and a 100-sheet multipurpose tray.
Note The HP LaserJet 8150 requires an optional EIO card to
connect to a Macintosh.
HP LaserJet 8150 N printer
The HP LaserJet 8150 N printer (product number C4266A)
comes standard with 32 MB RAM, wide format printing,
two 500-sheet trays, a 100-sheet multipurpose tray, and
an HP JetDirect EIO print ser ver.
Continued on next page.
Printer Information
Page 33

Chapter 1 Printer Basics 33
HP LaserJet 8150 DN printer
The HP LaserJet 8150 DN printer (product number
C4267A) comes standard with 32 MB RAM, wide format
printing, two 500-sheet trays, a 100-sheet multipurpose
tray, an HP JetDirect EIO pr int server, and a duplexer (for
printing on both sides of paper).
HP LaserJet 8150 HN printer
The HP LaserJet 8150 HN printer (product number
C4269A) comes standard with 32 MB RAM, wide format
printing, two 500-sheet trays, a 100-sheet multipurpose
tray, a 2000-sheet input tray (tray 4), a 3000-sheet
stacker, an HP JetDirect EIO print ser ver, and a duplexer
(for printing on both sides of paper).
Continued on next page.
Printer Information
Page 34

Chapter 1 Printer Basics 34
HP LaserJet 8150 MFP printer
The HP LaserJet 8150 MFP (product number C4268A)
comes standard with 64 MB RAM, wide format printing,
hard disk, two 500-sheet trays, a 100-sheet multipurpose
tray, a 2000-sheet input tray (tray 4), a 3000-sheet
Stapler/Stacker, an HP JetDirect EIO pr int server, a
duplexer (for printing on both sides of paper), a copy
connect EIO board, and an HP Digital Copy.
Printer Information
Page 35

Chapter 1 Printer Basics 35
Printer Parts and Locations
Standard Output Bin (Face-down Bin) Adjustable paper stop
Top cover
Control panel
Tra y 1
Fa c e - u p Bin
Left door
(not shown)
Front door
(multipurpose)
On/Off switch
Tray 3
Continued on next page.
Printer Information
Right door
Tray 1 extensions
Tray 1 paper width guidesTray 2
Page 36

Chapter 1 Printer Basics 36
Printed Circuit Assembly
(formatter board)
EIO slots
Bidirectional
Pa ra l l e l Port
(IEEE-1284)
Power outlet
Printer Information
Paper Handling
Connector (C-link)
Page 37

Chapter 1 Printer Basics 37
Accessories and Supplies
You can increase the capabilities of the pr inter with optional accessories and
supplies.
Use accessories and supplies specifically designed for the printer to ensure
optimum performance.
The printer suppor ts three enhanced input/output (EIO) cards. Other
accessories and options are available. For ordering information, see page 42
.
Accessories and Supplies
Page 38

Chapter 1 Printer Basics 38
Suggested Accessories
2 x 500-sheet Input Tray
(Trays 4 and 5)
2000-sheet Input
Tray (Tray 4)
Printer
Stand
HP Digital Copy
Stand
Continued on next page.
Accessories and Supplies
Custom Paper Tray
HP LaserJet MFP
Upgrade Kit
Page 39

Chapter 1 Printer Basics 39
3000-sheet
Stapler/Stacker
or 3000-sheet
Sta cke r
5-bin Mailbox
with Stapler
7-bin Tabletop
Mailbox
8-bin Mailbox
Envelope
Feeder
Duplexer
HP Fast InfraRed
Connect
Continued on next page.
Accessories and Supplies
Page 40

Chapter 1 Printer Basics 40
Optional Hard Disk
The Hard Disk accessory can be used to store selected pr int jobs, support
RIP ONCE technology, and permanently store downloaded fonts and forms in
the printer. Unlike standard printer memor y, many items on the Hard Disk
remain in the printer even when the printer is turned off. Fonts downloaded to
the Hard Disk are available to all users of the printer.
The Hard Disk can be write-protected through software for additional security.
Windows Users
Use HP LaserJet Resource Manager to delete files and manage fonts on a
mass storage device (page 86
help.
). For more information, see the pr inter software
HP is constantly introducing new software tools for use with your printer and
accessories. These tools are available from the Internet free of charge. See
page 3
Continued on next page.
Accessories and Supplies
for how to visit the HP website for more inform ation.
Page 41

Chapter 1 Printer Basics 41
Macintosh Users
Use the HP LaserJet Utility to download fonts and files. See HP LaserJet
Utility (Macintosh) on page 81 or the HP LaserJet Utility Guide online help
included with your HP LaserJet Utility software for more information.
Note The HP LaserJet Utility is not suppor ted for Traditional Chinese,
Simplified Chinese, Korean, Japanese, Czech, Russian, and Turkish.
Accessories and Supplies
Page 42

Chapter 1 Printer Basics 42
Ordering Information
Use only accessories specifically designed for this printer. To order an
accessory, contact an HP-author ized service or suppor t provider. (See the
HP Customer Care
pages at the front of this user guide.)
Order
Item Description or Use
Paper Handling 2 x 500-sheet Input Tray Two 500-sheet trays and
feeder.
2000-sheet Input Tray One 2000-sheet tray and
feeder.
Envelope Feeder Automatically feeds up to
100 envelopes.
Custom Paper Tray Allows printing on
custom-size paper.
Duplex Printing
Accessory (duplexer)
Allows automatic printing
on both sides of paper.
Number
C4780A
C4781A
C3765B
C4184A
C4782A
Accessories and Supplies
Page 43

Chapter 1 Printer Basics 43
Order
Paper Handling
(continued)
Item Description or Use
7-bin Tabletop Mailbox Each of the 7 output bins
holds 120 sheets of
paper.
8-bin Mailbox Each of the 8 output bins
holds 250 sheets of
paper.
5-bin Mailbox with
Stapler
3000-sheet Stacker One 3000-sheet stacking
Each of the 5 output bins
holds 250 sheets of
paper. Provides job
separation by stapling
jobs.
device.
Number
C4783A
C4785A
C4787A
C4779A
3000-sheet
Stapler/Stacker
Accessories and Supplies
One 3000-sheet stacking
device provides stapling
for up to 50 sheets of
paper per document.
C4788A
Page 44

Chapter 1 Printer Basics 44
Order
Item Description or Use
Paper Handling
(continued)
Printer Stands Printer Stand Used in place of the
HP LaserJet MFP
Upgrade Kit
A copy module that
comes standard with
32 cpm, duplexing, and
wide format copying.
2000-sheet Input Tray
(Tray 4) or the 2 x
500-sheet Tray (Trays 4
and 5) when an output
accessory is attached.
Note:
The printer stand cannot
be used with the stand for
the HP Digital Copy.
Number
C4166A
C2975A
Stand for the HP Digital
Copy.
Accessories and Supplies
This is the preferred
configuration for the
printer and copy module.
C4231A
Page 45

Chapter 1 Printer Basics 45
Order
Printing
Supplies
Item Description or Use
HP Multipurpose Paper
(Other HP media is
available where office
products are sold.)
HP LaserJet Paper
(Other HP media is
available where office
products are sold.)
HP brand paper for a
variety of uses (1 box of
10 reams, 500 sheets
each). To order a sample,
in the U.S. call
1-800-471-4701.
Premium HP brand paper
for use with HP LaserJet
printers (1 box of
10 reams, 500 sheets
each). To order a sample,
in the U.S. call
1-800-471-4701.
Number
HPM1120
HPJ1124
Toner Car tridge
(20,000 pages)
Accessories and Supplies
Replacement
HP UltraPrecise toner
car tridge.
C4182X
Page 46

Chapter 1 Printer Basics 46
Order
Printing
Supplies
(continued)
Item Description or Use
Staple Cart ridges
(5-bin Mailbox with
Stapler)
Staple Cart ridges
(3000-sheet
Stapler/Stacker)
3-pack of staple
car tridges. Each
car tridge contains
2000 staples.
3-pack of staple
car tridges. Each
car tridge contains
5,000 staples.
Number
C3772A
C4791A
Accessories and Supplies
Page 47

Chapter 1 Printer Basics 47
Order
Memory, Fonts,
and Mass
Storage
Item Description or Use
Dual In-line Memory
Module (DIMM)
(100-pin)
SDRAM DIMMs
(100-pin)
Flash DIMM
(100-pin)
Boosts the ability of the
printer to handle large
print jobs (maximum
160 MB with HP brand
DIMMs)
8 MB
16 MB
32 MB
64 MB
Permanent storage for
fonts and forms:
2 MB
Number
C7842A
C7843A
C7845A
C7846A
C4286A
Fon t DI M M
(100-pin)
Accessories and Supplies
4 MB
8 MB
8 MB Asian ROM:
Traditional Chinese
Simplified Chinese
C4287A
C8530A
C4292A
C4293A
Page 48

Chapter 1 Printer Basics 48
Order
Memory, Fonts,
and Mass
Storage
(continued)
Cable and
Interface
Accessories
Item Description or Use
Hard Disk Permanent storage for
fonts and forms. Enables
RIP ONCE mopying of
print jobs that are too
large to RIP ONCE mopy
in RAM (see pages 147
and 166
Parallel Cables 3 Meter IEEE-1284 cable
10 Meter IEEE-1284
cable
Macintosh Network Cable
Kit
For PhoneNET or
LocalTalk connection.
).
Number
C2985B
C2946A
C2947A
92215N
(Requires EIO card)
Accessories and Supplies
1-to-1 connection
(Macintosh DIN-8 cable
male-male).
92215S
Page 49

Chapter 1 Printer Basics 49
Order
Cable and
Interface
Accessories
(continued)
Item Description or Use
Enhanced I/O Cards HP JetDirect pr int server
multi-protocol EIO
network cards:
! Ether net RJ-45 only
! Ether net RJ-45 and
BNC, LocalTalk
! Token Ring RJ-45 and
DB-9
! Fast Ethe rn e t
10/100Base-TX RJ-45
only
HP JetDirect Connectivity
card for:
Number
J3110A
J3111A
J3112A
J4169A
HP Fast InfraRed
Connect
Accessories and Supplies
! USB, Serial, LocalTalk
Enables wireless printing
from any IRDA-compliant
portable device (such as
a laptop computer).
J4135A
C4103A
Page 50

Chapter 1 Printer Basics 50
Order
Cable and
Interface
Accessories
(continued)
Maintenance
Kit
Item Description or Use
Power Box For connecting a multibin
mailbox to the printer
when the printer is on a
printer stand. This item is
included only with the
2000-sheet Input Tray
and the 2 x 500-sheet
Input Tray.
Preventive Maintenance
Kit
Contains replacement
fuser, transfer roller, and
feed and separation
rollers.
For 110V units
Number
C4789A
C3914A
Documentation HP LaserJet Printer
Fa m i l y P a p e r
Specification Guide
Accessories and Supplies
For 220V units
A guide to using paper
and other print media
with HP LaserJet
printers.
C3915A
5090-3392
Page 51

Chapter 1 Printer Basics 51
Order
Documentation
(continued)
Item Description or Use
PCL 5/PJL Technical
Reference
Documentation Package
HP LaserJet 8150,
8150 N, 8150 DN,
8150 HN, and 8150 MFP
Printers User Guide
User Documentation
Bundle
A guide to using printer
commands with
HP LaserJet printers.
This is an online user
guide provided on
compact disc. This
CD-ROM contains all
suppor ted languages.
An additional copy of the
getting started guide and
the ready reference
guide. Available in all
suppor ted languages.
Number
5021-0377
C4265-60104
C4265-99001
(English
version)
HP 3000-sheet Stacker
and HP 3000-sheet
Stapler/Stacker (C4779x
and C4788x) Installation
Guide
Accessories and Supplies
Instructions for installing
the 3000-sheet Stacker
and 3000-sheet
Stapler/Stacker.
C4788-90900
Page 52

Chapter 1 Printer Basics 52
Order
Documentation
(continued)
Item Description or Use
HP 3000-sheet Stacker
and HP 3000-sheet
Stapler/Stacker (C4779x
and C4788x) User Guide
This is an online user
guide provided on
compact disc.
Number
C4788-90901
Accessories and Supplies
Page 53

Chapter 1 Printer Basics 53
Control Panel Layout
The control panel includes three indicator lights, six keys, and a 2-line display
(16 characters per line).
2-line display
Go
Menu
Ready Data Attention
READY
Item
- Value +
Cancel
Job
Select
Control Panel Layout
Page 54

Chapter 1 Printer Basics 54
Control Panel Lights
Light Indication
Ready
Off The printer is offline or has an
error.
Solid The printer is ready to print.
Blinking The printer is going offline, please
wait .
Data
Off The printer has no data to print.
Solid The printer has data to print, but is
Blinking The printer is processing or printing
Control Panel Layout
not ready or is offline.
the data.
Page 55

Chapter 1 Printer Basics 55
Light Indication
Attention
Off The printer has no error.
Solid The printer has a problem. Turn the
printer off and then on.
Blinking Action is required. See the control
panel display.
Configuration Page
To print a configuration page, see page 314.
Control Panel Layout
Page 56

Chapter 1 Printer Basics 56
Control Panel Keys
Key Function
G
O
! Places the pr inter either online or offline.
! Pr ints any data residing in the printer’s buffer.
! Allows the printer to resume printing after being offline. Clears most
printer messages and places the printer online.
! Allows the printer to continue printing with an error message such
as TRAY x LOAD [TYPE] [SIZE] or UNEXPECTED PAPER SIZE.
! Confirms a manual feed request if Tray 1 is loaded and TRAY 1 MODE=
CASSETTE has been set from the Paper Handling Menu in the printer’s
control panel.
! Overrides a manual feed request from Tray 1 by selecting paper
from the next available tray.
! Exits the control panel menus. (To save a selected control panel
setting, first press S
C
ANCEL JOB
Cancels the print job that the printer is processing. The time it takes to
cancel depends on the size of the print job. (Press it only once.)
Control Panel Layout
ELECT
.)
Page 57

Chapter 1 Printer Basics 57
Key Function
M
ENU
I
TEM
- V
ALUE
S
ELECT
Cycles through the control panel menus. Press the right end of the
button to move forward or the left end of the button to move backward.
Cycles through the selected menu’s items. Press the right end of the
button to move forward or the left end of the button to move backward.
The Item key is also used to navigate through the printer’s online Help
system (see page 227
).
+ Cycles through the selected menu item’s values. Press + to move
forward or - to move backward.
! Saves the selected value for that item. An aster isk (*) appears next
to the selection, indicating that it is the new default. Default settings
remain when the printer is switched off or reset (unless you reset all
factory defaults from the Resets Menu).
! Pr ints one of the printer information pages from the control panel.
Control Panel Layout
Page 58

Chapter 1 Printer Basics 58
Control Panel Menus
For a complete list of control panel items and possible values, see page 420.
for access to all control panel menus. When additional trays or
Press M
other accessories are installed in the printer, new menu items automatically
appear.
To change a control panel setting:
1 Press M
2 Press I
ENU
TEM
repeatedly until the desired menu appears.
ENU
repeatedly until the desired item appears.
3 Press - V
4 Press S
selection in the display, indicating that it is now the default.
5 Press G
Continued on next page.
Control Panel Layout
ALUE
ELECT
O
+ repeatedly until the desired setting appears.
to save the selection. An asterisk (*) appears next to the
to exit the menu.
Page 59

Chapter 1 Printer Basics 59
Note Settings in the printer driver and software application override control
panel settings. (Software application settings override printer driver
settings.)
If you cannot access a menu or item, it is either not an option for the
printer, or your network administrator has locked the function. (The
control panel reads ACCESS DENIED MENUS LOCKED.) See your network
administrator.
To print a control panel menu map:
See page 317 for infor mation on how to print a control panel menu map.
Control Panel Layout
Page 60

Chapter 1 Printer Basics 60
Paper Handling LED Status Interpretation
Use the following table to interpret the status lights on the Optional 2000-sheet
Input Tray (Tray 4), the Optional 2 x 500-sheet Input Tray (Trays 4 and 5), and
the optional HP output devices.
Optional 2000-sheet Input
Tray and the Optional
2 x 500-sheet Tray
Light
(Trays 4 and 5) Optional HP Output Devices
Solid Green The accessory is on and
ready.
Solid Amber The accessory is
experiencing a hardware
malfunction.
Paper Handling LED Status Interpretation
The accessory is on and
ready.
The accessory is
experiencing a hardware
malfunction.
Page 61

Chapter 1 Printer Basics 61
Optional 2000-sheet Input
Tray and the Optional
2 x 500-sheet Tray
Light
(Trays 4 and 5) Optional HP Output Devices
Flashing Amber The accessory has a paper
jam or a page needs to be
removed from the tray, even if
the page is not jammed.
The lower right door might be
open.
Off The printer might be in Power
.
Save mode. Press G
O
The accessory is not
receiving power. Check the
power supply, power cables,
and C-link cables.
The accessory has a paper
jam or a page needs to be
removed from the multibin
mailbox, even if the page is
not jammed.
The accessory is not
correctly attached to the
printer.
The printer might be in Power
.
Save mode. Press G
O
The accessory is not
receiving power. Check the
power supply, power cables,
and C-link cables.
Paper Handling LED Status Interpretation
Page 62

Wind
N
k
Chapter 1 Printer Basics 62
Printer Software
ows
Client
Macintosh
Client
Windows Software
HP Common Installer
HP Common Drivers
Macintosh Software
PPDs
HP LaserJet Utility*
Fonts*
Guide files* (English only)
etwor
Administrator
Windows Software
HP Resource Manager
HP Common Installer
HP Internet Installer
HP Disk Image Utility
HP Common Drivers
Macintosh Software
PPDs
HP LaserJet Utility*
Font s*
Guide files* (English only)
* These products are not supported in Traditional Chinese, Simplified Chinese,
Korean, Japanese, Czech, Russian, and Tur kish.
Printer Software
Page 63

Chapter 1 Printer Basics 63
The printer drivers provided on the compact disc must be installed to take full
advantage of the printer’s features. The other software programs are
recommended, but are not required for operation. See the ReadMe file for
more information.
Note Network Administrators: HP LaserJet Resource Manager should be
installed only on the network administrator’s computer. Load all other
applicable software on the server and all client computers.
To manage printers, open the server-based tool (HP Web JetAdmin) in
your web browser. For more information, go to
www.hp.com/go/webjetadmin
The most recent drivers, additional drivers, and other software are available
from the Internet. Depending on the configuration of Windows-driven
computers, the installation program for the pr inter software automatically
checks the computer for Internet access to obtain the latest software. If you do
not have access to the Internet, see the HP Customer Care
of this user guide to obtain the most recent software.
Included with the printer is a compact disc containing the HP LaserJet Printing
System. On the compact disc are software components and drivers that
benefit end users and network administrators. See the ReadMe file for the
most current information.
Continued on next page.
Printer Software
pages at the front
Page 64

Chapter 1 Printer Basics 64
The Printing System includes software designed for end users operating in the
following environments:
! Microsoft Windows 3.1x
! Microsoft Windows 9x
! Microsoft Windows NT 4.0
! Windows 2000
! IBM OS/2 version 2.0 or greater
! Apple Mac OS 7.5 or greater
! Auto Cad
The Printing System also includes software for network administrators using
the following network operating systems:
! Novell NetWare 3.x, 4.x, or 5.x
! Microsoft Windows 9x
! Microsoft Windows NT 4.0 or Windows 2000
! Apple AppleTalk (LocalTalk or EtherTalk)
Continued on next page.
Printer Software
Page 65

Chapter 1 Printer Basics 65
Network printer installation for UNIX and other network operating systems is
available from the web or through your HP distributor. (See the HP Customer
Care pages at the front of this user guide.)
The drivers and software components for end users and administrators using
the environments listed above are described in the following sections.
Printer Software
Page 66

Chapter 1 Printer Basics 66
Printer Drivers
Printer drivers access the printer features and allow the computer to
communicate with the printer.
Windows
See Access the Windows Printer Driver on page 75 for more specific dr iver
information.
Macintosh
See Apple LaserWriter 8 Driver on page 80 for more specific driver
information.
Note Check the “Installation Notes” file provided on the compact disc for
additional software included and supported languages.
Printer Software
Page 67

Chapter 1 Printer Basics 67
Drivers Included with the Printer
The following printer dr ivers are included with the printer. The most recent
drivers are available on the Internet. (See the HP Customer Care
pages at the
front of this user guide.) Depending on the configuration of Windows
computers, the installation program for the pr inter software automatically
checks the computer for Internet access to obtain the latest drivers.
PCL 5e PCL 6 PS
a
Windows 3.1x ###
Windows 9x ###
Windows NT 4.0 ###
Windows 2000 ###
Macintosh computer
a. PostScript Level 3 emulation is referred to as PS throughout this user guide.
b. Only PPDs are included (see page 80). If you need the Apple LaserWriter 8 driver,
it comes with the Mac OS system software or can be obtained directly from Apple
Computer, Inc.
b
Continued on next page.
Printer Software
Page 68

Chapter 1 Printer Basics 68
From the tables below, choose the appropr iate installation option for what you
want installed on your system.
Windows installation
Typical Install Select Typical Install to install the following:
! PCL 6
! Bi-directional communication
! Fon ts
! Stand-alone status
Custom Install Select Custom Install to:
! Copy drivers only (PCL 6, PCL 5e, and PS)
Continued on next page.
Printer Software
! Create customized installer (PCL 6, PCL 5e, PS, bi-directional
communications, fonts, stand-alone status, and Resource
Manager)
! Copy entire printing sys tem installer
Page 69

Chapter 1 Printer Basics 69
Macintosh installation
Install Select Install to install the following:
! PPD file for use with PostScript printer drivers
! HP LaserJet Utility
! Online help
Custom Select Custom to only install the software you prefer.
Printer Software
Page 70

Chapter 1 Printer Basics 70
Additional Drivers
The following additional printer dr ivers are included with the printer.
! OS/2 PCL/PCL 6 printer dr iver
! OS/2 PS printer driver
! AutoCAD
Note If the desired printer driver is not on the compact disc or is not listed
here, check the software application’s installation disks or ReadMe files
to see if they include support for the printer. If not, contact the software
manufacturer or distributor and request a driver for the printer.
Printer Software
Page 71

Chapter 1 Printer Basics 71
Software for Windows
Use the printing system software to install the printer. If you are installing the
printer on a network (Novell NetWare or Microsoft Windows network) from a
Windows 9x, NT, or 2000 system, the printing system software will guide you
through the installation process and will properly configure the network printer.
Note If the printer will be used on a network, the network clients and ser vers
must be properly configured to communicate on the network.
For additional network printer configuration and management, use
HP Web JetAdmin.
HP Web JetAdmin is a server-based tool that network administrators can
access using their web browser. For supported host systems and
available languages or to download the software, go to
www.hp.com/go/webjetadmin
Printer Software
Page 72

Chapter 1 Printer Basics 72
Installing Windows Printing Software (CD)
For Windows 9x, Windows NT 4.0, and Windows 2000
1 Close all running applications.
2 Inser t the CD ROM into the CD-ROM drive. (Depending on the computer
configuration, the installation program may automatically star t.)
3 Click Start.
4 Click Run.
5 Type D:\SETUP (or the appropriate dr ive directory letter) in the command
line box and click OK.
6 Follow the instructions on the computer screen.
Continued on next page.
Printer Software
Page 73

Chapter 1 Printer Basics 73
For Windows 3.1x
1 Close all running applications.
2 Inser t the CD ROM into the CD-ROM drive.
3 In the Windows Program Manager screen, click the File menu.
4 Click Run.
5 Type D:\SETUP (or the appropriate dr ive directory letter) in the command
line box and click OK.
6 Follow the instructions on the computer screen.
Printer Software
Page 74

Chapter 1 Printer Basics 74
Installing Macintosh Printing Software
Note Read the “Installation Notes” on the CD-ROM.
1 Quit all open applications.
2 Inser t the CD ROM into the CD-ROM drive.
3 Double-click the Installer icon and follow the instructions on the screen.
4 Open the Chooser from the Apple menu.
5 Click the LaserWriter 8 icon. If the icon is not there, contact HP Customer
Care or contact Apple Computer, Inc.
6 If you are on a network with multiple zones, select the zone in the AppleTalk
Zones box where the printer is located. If this is unknown, ask your network
administrator.
7 Select the desired printer name on the right side of the Chooser. An icon
should appear.
8 Close the Chooser by clicking the Close box in the upper left corner.
Printer Software
Page 75

Chapter 1 Printer Basics 75
Access the Windows Printer Driver
To configure the driver once the software is installed, access it in one of the
following ways:
Temporarily Change Settings
Operating System
Windows 9x From the File menu, click Print,
Windows NT
4.0/Windows 2000
(from a software application)
and then click Properties. (The
actual steps can vary; this is the
most common method.)
From the File menu, click Print,
and then click Properties. (The
actual steps can vary; this is the
most common method.)
Change Default Settings
(across all applications)
Click the Start button, point to
Settings, and then click Printers.
Right-click the printer icon, and
choose Properties.
Click the Start button, point to
Settings, and then click Printers.
Right-click and choose
Document Defaults to change
setup attributes (for example;
orientation, paper size, trays),
or choose Properties to
configure, add, or change
accessories.
Continued on next page.
Printer Software
Page 76

Chapter 1 Printer Basics 76
Temporarily Change Settings
Operating System
Windows 3.1x From the File menu, click Print,
Note Settings in the printer driver and software application override the
printer’s control panel settings. (Software application settings override
printer driver settings.)
(from a software application)
click Printers, and then click
Options. (The actual steps can
vary; this is the most common
method.)
Change Default Settings
(across all applications)
From the Windows control
panel, double-click Printers,
highlight the printer, and click
Setup.
Printer Software
Page 77

Chapter 1 Printer Basics 77
Choose the Right Printer Driver for Your Needs
For Windows, choose a printer driver based on the way you use the printer.
! Use the PCL 6 driver to take full advantage of the printer’s features. Unless
backward compatibility with previous PCL dr ivers or older printers is
necessary, the PCL 6 driver is recommended.
! Use the PCL 5e driver if you want print results to look comparable to those
from older printers.
! Use the PS driver for compatibility with PostScript Level 3 needs.
! The printer automatically switches between PS and PCL printer languages.
For the Macintosh, use the Apple LaserWriter 8 Driver, which is a PS dr iver.
Printer Driver Help
Each printer driver has help screens that can be activated either from the Help
button, the F1 key, or a question mark symbol in the upper r ight corner in the
printer driver (depending on the Windows operating system used). These help
screens give detailed information about the specific dr iver. Pr inter driver help
is separate from the software application help.
Printer Software
Page 78

Chapter 1 Printer Basics 78
HP JetSend Communications Technology
HP JetSend is a new technology from Hewlett-Packard that
allows devices to communicate with each other simply and
directly. HP JetSend is built into your printer, allowing it to
receive information from any JetSend-enabled sending device
anywhere on your network, whether it is in the same office or
at a remote location. When you use the HP Fast InfraRed
Connect accessory, your printer can also receive information from any
JetSend-enabled infrared device. Examples of JetSend sending devices
include PCs or laptops running JetSend software or scanners with JetSend
built in. JetSend uses simple IP addressing between networked devices and
“point and shoot” between infrared devices.
Note HP JetSend is not supported for Traditional Chinese, Simplified Chinese,
Korean, Japanese, Czech, Russian, and Tur kish.
Visit the JetSend web site (www.jetsend.hp.com) to download the JetSend
software. You will then be able to exchange intra-company documents directly
between PCs and between PCs and any JetSend-enabled printer, without the
problems of incompatible software applications or versions. JetSend software
will allow your colleagues to create documents on their PCs and send copies
directly to this printer without any device-specific drivers or configuration
difficulties.
Continued on next page.
Printer Software
Page 79

Chapter 1 Printer Basics 79
You can visit the JetSend web site to learn which other devices are available to
communicate easily and directly with your JetSend-enabled printer.
How the JetSend Communications Technology Works
Networked Devices
To use the JetSend capability between networked devices, print a
configuration page (see page 314
your address to anyone who wants to send information to your printer via
JetSend.
From a JetSend sending device, a person only needs to enter the printer’s IP
address and press “send.”
) to find your JetSend IP address, and give
Infrared Devices
To use JetSend infrared capability, line up the infrared sensors between the
sending and receiving devices, and choose the “send” option on the sending
device.
The devices will automatically negotiate the best possible outcome because
they have JetSend in them.
Note HP JetSend is not available for the Macintosh.
Printer Software
Page 80

Chapter 1 Printer Basics 80
Software for Macintosh Computers
Apple LaserWriter 8 Driver
The driver for the Apple LaserWriter 8 comes with the Mac OS system
software or can be obtained directly from Apple Computer, Inc.
PostScript Printer Description Files (PPDs)
PPDs, in combination with the Apple LaserWriter 8 Driver, access the printer
features and allow the computer to communicate with the printer. An
installation program for the PPDs and other software is provided on the
compact disc. Use the Apple LaserWriter 8 Dr iver that comes with the
computer.
Continued on next page.
Printer Software
Page 81

Chapter 1 Printer Basics 81
HP LaserJet Utility (Macintosh)
Note The HP LaserJet Utility is not suppor ted for Traditional Chinese,
Simplified Chinese, Korean, Japanese, Czech, Russian, and Turkish.
HP LaserJet Utility allows control of features that are not available in the
driver. The illustrated screens make selecting printer features from the
Macintosh computer easier than ever. Use the HP LaserJet Utility to do the
following:
! Customize the printer’s control panel messages.
! Name the printer, assign it to a zone on the network, download files and
fonts, and change most of the printer settings.
! Set a password for the pr inter.
! From the computer, lock out functions on the printer’s control panel to
prevent unauthorized access. (See the printer software help.)
! Configure and set the printer for IP printing.
! Initialize disk or flash memory.
! Manage fonts in RAM, disk, or flash memory.
! Administer Job Retention features.
See the LaserJet utility guide for more information.
Printer Software
Page 82

Chapter 1 Printer Basics 82
Fonts
Note Fonts are not supported for Traditional Chinese, Simplified Chinese,
Korean, and Japanese on Macintosh computers.
Forty-five screen fonts are installed that correspond with the PS fonts resident
in the printer.
Printer Software
Page 83

Chapter 1 Printer Basics 83
Software for Networks
HP Web JetAdmin
This browser-based HP Web JetAdmin software can be installed on any
supported ser ver platform. The following systems are suppor ted:
! Microsoft Windows NT 4.0 or Windows 2000
! HP-UX
! Sun Solaris
! Red Hat Linux
! SuSE Linux
1
Once installed, HP Web JetAdmin allows any client PC with a suppor ted web
browser to administer the printer.
For the latest list of supported ser ver platforms, go to
www.hp.com/go/webjetadmin
Continued on next page.
1. HP Web JetAdmin is not included on the compact disc with the printer, but is available from the
Internet (http://www.hp.com/go/webjetadmin). If you do not have access to the Internet, see the
HP Customer Care pages at the front of this user guide to obtain this software.
Printer Software
Page 84

Chapter 1 Printer Basics 84
Note The HP Web JetAdmin web site allows access to HP Web JetAdmin in
many languages.
Use HP Web JetAdmin to do the following:
! Install and configure printers that are connected to a network with an
HP JetDirect print ser ver.
! Manage and troubleshoot network printers from any location.
HP JetDirect Printer Installer for UNIX
The HP JetDirect Printer Installer for UNIX is a simple printer installation utility
for HP-UX and Sun Solaris network systems. For more information or to
download the software, go to www.hp.com/support/net_printing.
Printer Software
Page 85

Chapter 1 Printer Basics 85
HP LaserJet Utility (Macintosh)
HP LaserJet utility allows control of features that are not available in the driver.
The illustrated screens make selecting printer features from the Macintosh
computer easier than ever. Use the HP LaserJet Utility to do the following:
! Customize the printer’s control panel messages.
! Name the printer, assign it to a zone on the network, download files and
fonts, and change most of the printer settings.
! Set a password for the pr inter.
! From the computer, lock out functions on the printer’s control panel to
prevent unauthorized access. (See the printer software help.)
! Configure and set the printer for IP printing.
! Initialize disk or flash memory.
! Manage fonts in RAM, disk, or flash memory.
! Administer Job Retention features.
See the LaserJet utility guide for more information.
Note The HP LaserJet Utility is not suppor ted for Traditional Chinese,
Simplified Chinese, Korean, Japanese, Czech, Russian, and Turkish.
Printer Software
Page 86

Chapter 1 Printer Basics 86
HP LaserJet Resource Manager
Note The hard disk and flash memory DIMMs are optional pr inter accessories.
The HP LaserJet Resource Manager should be installed only on the network
administrator’s computer. The HP LaserJet Resource Manager allows you to
control hard disk and flash memory features not found in the drivers.
Bidirectional communication is required.
Note HP LaserJet Resource Manager is not available for the Macintosh.
If you are using a Macintosh, these features are available in the
HP LaserJet Utility (version 3.5.1 or greater).
Continued on next page.
Printer Software
Page 87

Chapter 1 Printer Basics 87
Use the HP LaserJet Resource Manager to do the following:
! Initialize disk and flash memory.
! Download, delete, and manage fo nts to disk and flash memory across
networks.
" PostScript Type 1, PostScr ipt Type 42 (True Type fonts conver ted to
PostScript format), TrueType, and PCL bitmap fonts.
! Download, delete, and manage printer firmware across networks.
Note To download Type 1 fonts, Adobe Type Manager must be loaded and
turned on.
! Update the HP Digital Copy firmware operating system.
Printer Software
Page 88

Chapter 2 Printing Tasks 88
Printing Tasks
2
Overview
This chapter presents basic printing tasks, such as:
! Loading the Input Tray
! Selecting the Output Bin
! Using the Stapler
! Printing Both Sides of Paper (Optional Duplex Printing Accessor y)
! Printing Envelopes
! Printing Special Paper
Note For more information on an optional HP output device, see the user guide
that came with the device.
For copying information, see HP Digital Copy
Overview
on page 324.
Page 89

Chapter 2 Printing Tasks 89
Loading the Input Tray
Loading Tray 1
Note For paper specifications, see page 390
To customize Tray 1 operation, see page 154
CAUTION To avoid a paper jam, never add or remove paper from Tray 1 while the
printer is printing.
To avoid damaging the printer, print labels, enve lopes, and
transparencies only from Tray 1. Send them to the Face-up Bin,
and do not print them on b oth sides.
When printing multiple transparencies, promptly remove each
transparency as soon as it emerges from the printer (so the sheets do not
stick together).
.
.
Continued on next page.
Loading the Input Tray
Page 90

Chapter 2 Printing Tasks 90
1 Open Tray 1.
2 Pull out the tray extension, if needed, for the
paper size you are printing.
3 Slide the paper width guides to the
appropriate size marked on the tray.
4 Place paper into the tray without stacking it
above the paperfill mark.
Continued on next page.
1
2
3
Loading the Input Tray
4
Page 91

Chapter 2 Printing Tasks 91
5 Paper loading differs by size:
a Load Letter or A4 paper with the top of the
page toward the rear of the printer and
with the side-to-be-printed up for
single-sided printing.
For two-sided printing, load paper with the
top of the page toward the rear of the
printer and with the first side-to-be-printed
down.
b Load shor t-edge fed media with the top of
the page toward the printer and with the
side-to-be-printed up for single-sided
printing.
For two-sided printing, load media with the
top of the page away from the printer and
with the first side-to-be-printed down. (For
5
more information on paper specifications,
see page 390
Note
See page 130
envelopes from Tray 1.
Continued on next page.
Loading the Input Tray
.)
for more information on printing
Page 92

Chapter 2 Printing Tasks 92
6 Slide the paper into the printer until paper fits
squarely and firmly between the paper width
guides, without bending.
Note
Paper heavier than 28 lb (105 g/m²) should be
printed from Tray 1 to the Face-up Bin to avoid
curl. If you are having trouble printing on media
other than plain paper, see Changing the
Va ri able Fus er M od e on page 160.
If Tray 1 is in CASSETTE mode, the printer Attention
light will flash. Press - V
ALUE
+ to change the
size to match the paper size in Tray 1 and press
S
ELECT
.
6
Loading the Input Tray
Page 93

Chapter 2 Printing Tasks 93
Loading Trays 2, 3, and the Optional 2 x 500-sheet Input
Tray (Trays 4 and 5)
Note
To avoid a paper jam, never open the tray while
it is in use.
For paper specifications, see page 390.
1 Open the tray until it stops.
2 Turn the paper guide lock to the unlocked
position.
3 Slide the paper guide to the mark that
indicates the size of paper you are loading.
Continued on next page.
1
2
3
Loading the Input Tray
Page 94

Chapter 2 Printing Tasks 94
4 Turn the paper guide lock to the locked
position.
5 Adjust the left paper guide by pushing back,
then lifting up and out.
6 Position the guide over the appropriate lines
marked in the tray. Press the guide into the
rear slot and then lower down into the front
slot. Be sure the guide is not skewed.
Continued on next page.
4
5
6
Loading the Input Tray
Page 95

Chapter 2 Printing Tasks 95
7 Insert up to 500 sheets of paper into the tray.
Do not fill the input tray above the paper fill
marks on the guide.
a Load Letter or A4 paper with the top of the
page toward the rear of the tray and with
the side-to-be-printed down for
single-sided printing.
For two-sided printing, load the top of the
page toward the rear of the tray and with
the first side-to-be-printed up.
b Load shor t-edge fed media with the top of
the page toward the right side of the tray
and with the side-to-be-printed down for
single-sided printing.
For two-sided printing, load media with
the top of the page toward the left side of
7
the tray and with the first
side-to-be-printed up.
Continued on next page.
Loading the Input Tray
Page 96

Chapter 2 Printing Tasks 96
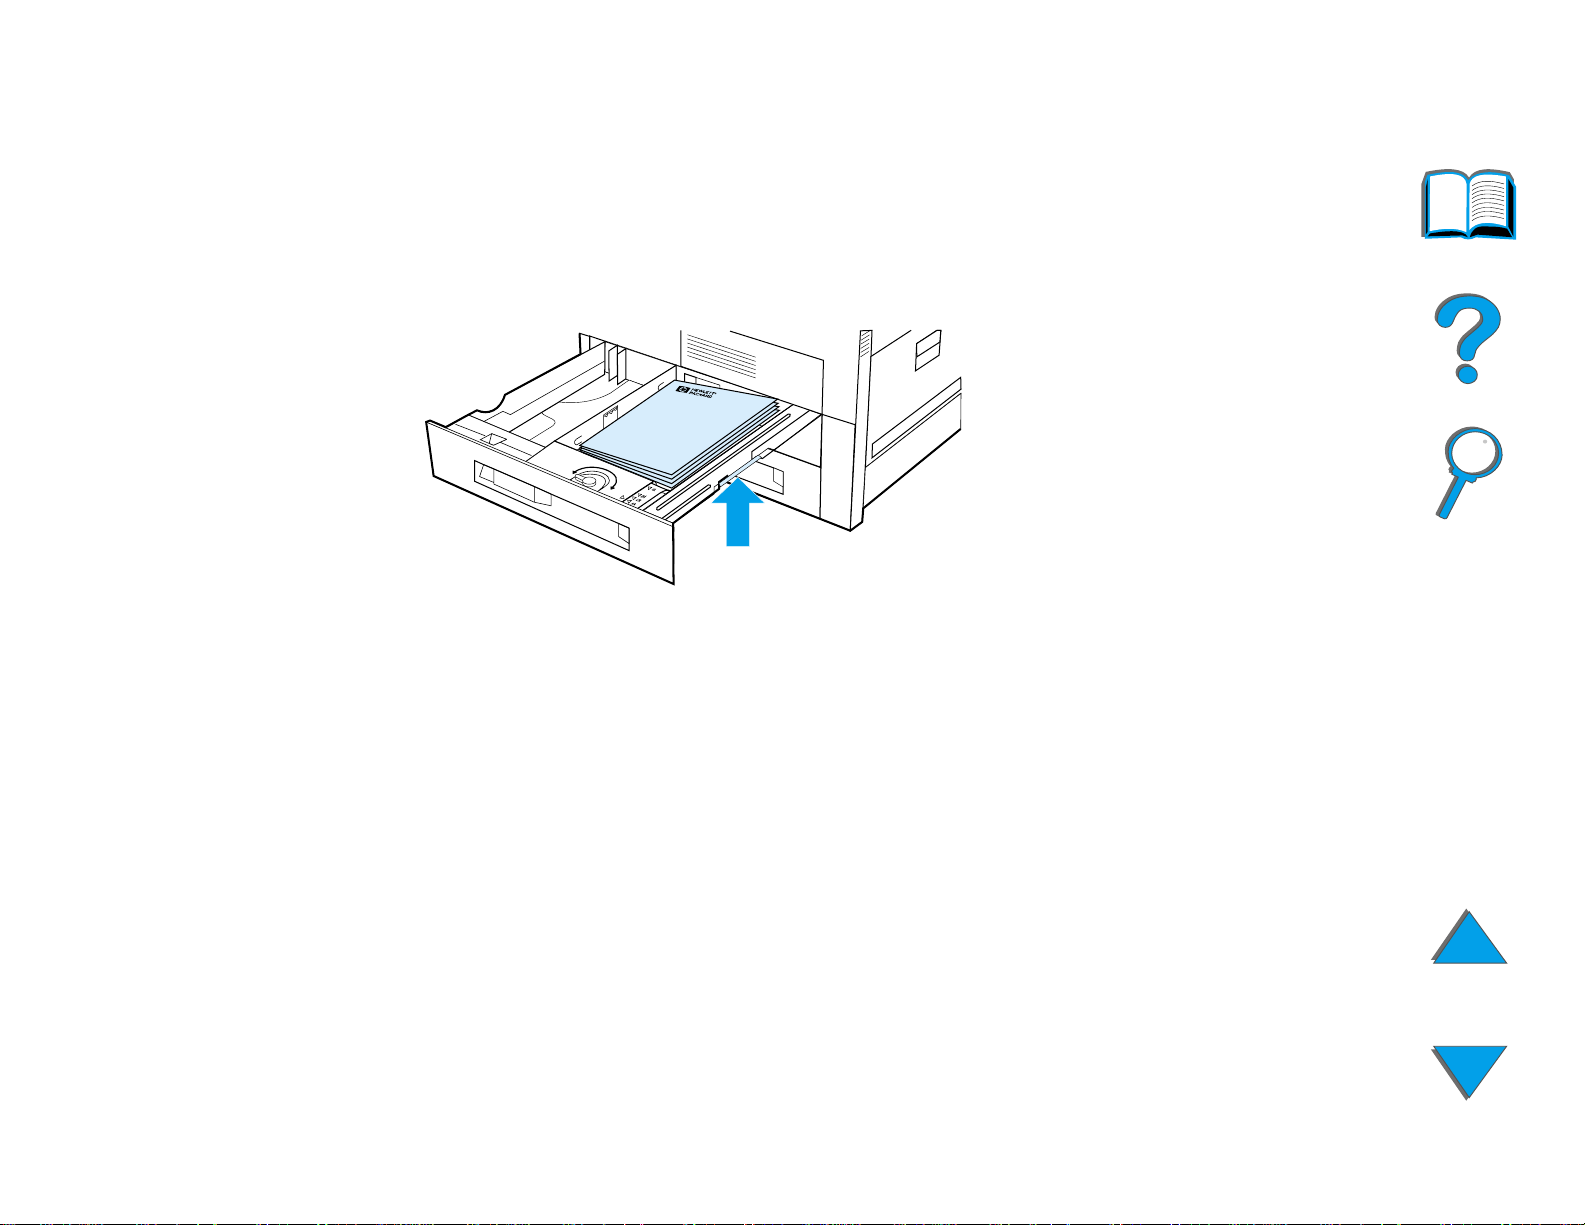
8 Make sure that the paper size tab is set
correctly. Slide the tray back into the printer.
If you wish to select your paper by type rather
than tray (source), see page 157
Adjust the paper stop guide on the Standard
Output Bin for paper sizes larger than Letter or
A4. See page 104
.
.
8
Loading the Input Tray
Page 97
Chapter 2 Printing Tasks 97
Removing Excess Paper from Trays 2, 3, and the
Optional 2 x 500-sheet Input Tray (Trays 4 and 5)
1 Open the tray until it stops.
2 Raise the paper stack and remove the excess paper.
Loading the Input Tray
Page 98

Chapter 2 Printing Tasks 98
Loading the Optional 2000-sheet Input Tray (Tray 4)
An optional 2000-sheet Input Tray (Tray 4) is available for the printer. The tray
fits under the printer and acts as a base.
Note
To avoid a paper jam, never open the tray while it
is in use.
For paper specifications, see page 390.
1 Slide Tray 4 open until it stops.
2 Pull the front guide out by the blue pin. Place
the guide into the slots in the top and bottom
of the input tray that correspond to the paper
size you are loading and push in the pin.
3 Repeat step 2 to adjust the back guide.
Continued on next page.
1
2
3
Loading the Input Tray
Page 99

Chapter 2 Printing Tasks 99
4 Repeat step 2 to adjust the left guide.
Note
To load 11 x 17 inch paper, move the left guide
to the back of the tray. Be sure to place the left
guide in the top and bottom slots marked for
11 x 17 inch paper.
5 Load up to 2000 sheets of paper into the tray.
Do not allow paper to extend above the
paperfill mark on the sides.
For loading instructions, see steps 7a and 7b
on page 95
Continued on next page.
.
4
Loading the Input Tray
Page 100

Chapter 2 Printing Tasks 100
6 Press down on all four cor ners of the paper
stack to ensure the paper rests flat in the tray,
without bending.
Note
Do not store paper in the free area on the left
side of Tray 4. Serious damage may occur to
Tray 4.
7 Close Tray 4.
8 Make sure that the paper size tab is set
correctly.
Note
See Printing by Type and Size of Paper
page 157
the tray.
to set the type of paper you loaded in
on
6
7
8
If using the Standard Output Bin (face-do wn bin),
remember to adjust the paper stop guide on the
output bin. See page 104.
Loading the Input Tray
 Loading...