

Page 1
use
hp LaserJet 5100Le
Page 2

Page 3

hp LaserJet 5100Le printer
use guide
Page 4

© Copyright Hewlett-Packard
Company 2002
All Rights Reserved. Except as
allowed by copyright laws or
herein, reproduction,
adaptation, or translation
without prior written
permission is prohibited.
A user of the Hewlett-Packard
printer associated with this use
guide is granted a license to: a)
print hard copies of this use
guide for PERSONAL,
INTERNAL, or COMP ANY use
subject to the restriction not to
sell, resell, or otherwise
distribute the hard copies; and
b) place an electronic copy of
this use guide on a network if
server-provided access to the
electronic copy is limited to
PERSONAL, INTERNAL
users of the Hewlett-Packard
printer associated with this use
guide.
The information contained in
this document is subject to
change without notice.
Trademark Credits
PostScript is a trademark of
Adobe Systems Incorporated.
Arial is a U.S. registered
trademark of the Monotype
Corporation.
Microsoft, Windows, and
Windows NT are U.S.
registered trademarks of
Microsoft Corporation.
HP-UX® Release 10.20 and
later, and Release 11.00 and
later (in both 32- and 64-bit
configurations) on all HP 9000
computers are Open Group
UNIX 95 branded products.
NERGY STAR is a U.S.
E
registered service mark of the
U.S. EPA.
Publication number
Q1863-online
Edition 3, 5/2003
Hewlett-Packard Company
11311 Chinden Boulevard
Boise, Idaho 83714
Page 5

Contents
1 Printer Basics
Overview . . . . . . . . . . . . . . . . . . . . . . . . . . . . . . . . . . . . . . . . . . .1
Printer Features and Benefits . . . . . . . . . . . . . . . . . . . . . . . . . . .2
Printer Information . . . . . . . . . . . . . . . . . . . . . . . . . . . . . . . . . . . .4
Printer Parts and Locations . . . . . . . . . . . . . . . . . . . . . . . . . .5
Accessories and Supplies . . . . . . . . . . . . . . . . . . . . . . . . . . . . . .6
Ordering Information . . . . . . . . . . . . . . . . . . . . . . . . . . . . . . 7
Control Panel Layout . . . . . . . . . . . . . . . . . . . . . . . . . . . . . . . . . .9
Control Panel Lights . . . . . . . . . . . . . . . . . . . . . . . . . . . . . . . 9
Control Panel Keys . . . . . . . . . . . . . . . . . . . . . . . . . . . . . . .10
Control Panel Menus . . . . . . . . . . . . . . . . . . . . . . . . . . . . . .11
Configure the control panel display language (Optional) . . 12
Printer Software . . . . . . . . . . . . . . . . . . . . . . . . . . . . . . . . . . . . . 13
Printer Drivers . . . . . . . . . . . . . . . . . . . . . . . . . . . . . . . . . . .14
Software for Windows . . . . . . . . . . . . . . . . . . . . . . . . . . . . . 16
Software for Linux . . . . . . . . . . . . . . . . . . . . . . . . . . . . . . . .17
2 Printing Tasks
Overview . . . . . . . . . . . . . . . . . . . . . . . . . . . . . . . . . . . . . . . . . .19
Selecting the Output Bin . . . . . . . . . . . . . . . . . . . . . . . . . . . . . . 20
Printing to the Top Output Bin . . . . . . . . . . . . . . . . . . . . . . .21
Printing to the Rear Output Bin . . . . . . . . . . . . . . . . . . . . . . 22
Loading Tray 1 . . . . . . . . . . . . . . . . . . . . . . . . . . . . . . . . . . . . . .24
Loading Tray 2 . . . . . . . . . . . . . . . . . . . . . . . . . . . . . . . . . . . . . .25
Printing Special Paper . . . . . . . . . . . . . . . . . . . . . . . . . . . . . . . 27
Printing Letterhead, Prepunched, or Preprinted Paper . . . . 27
Printing Envelopes . . . . . . . . . . . . . . . . . . . . . . . . . . . . . . .29
Printing Labels . . . . . . . . . . . . . . . . . . . . . . . . . . . . . . . . . . .31
Printing Transparencies . . . . . . . . . . . . . . . . . . . . . . . . . . . 32
Printing Rotated Paper . . . . . . . . . . . . . . . . . . . . . . . . . . . .33
Printing Full-Bleed Images . . . . . . . . . . . . . . . . . . . . . . . . .34
Printing Cards, Custom-Size and Heavy Paper . . . . . . . . . 35
Printing Vellum . . . . . . . . . . . . . . . . . . . . . . . . . . . . . . . . . .38
ENWW iii
Page 6

Advanced Printing Tasks . . . . . . . . . . . . . . . . . . . . . . . . . . . . . . 39
Using Features in the Printer Driver . . . . . . . . . . . . . . . . . . 39
Customizing Tray 1 Operation . . . . . . . . . . . . . . . . . . . . . . . 41
Printing by Type and Size of Paper . . . . . . . . . . . . . . . . . . . 43
Job Retention . . . . . . . . . . . . . . . . . . . . . . . . . . . . . . . . . . .44
Proofing and Holding a Job . . . . . . . . . . . . . . . . . . . . . . . . .45
Printing a Private Job . . . . . . . . . . . . . . . . . . . . . . . . . . . . . 46
3 Printer Maintenance
Overview . . . . . . . . . . . . . . . . . . . . . . . . . . . . . . . . . . . . . . . . . . 49
Performing Routine Maintenance . . . . . . . . . . . . . . . . . . . . . . .50
Managing the Print Cartridge . . . . . . . . . . . . . . . . . . . . . . . . . . .51
HP Policy on Non-HP Print Cartridges . . . . . . . . . . . . . . . . 51
Print Cartridge Storage . . . . . . . . . . . . . . . . . . . . . . . . . . . .51
Print Cartridge Life Expectancy . . . . . . . . . . . . . . . . . . . . . .51
Continue Printing When Toner is Low . . . . . . . . . . . . . . . . . 52
Cleaning the Printer . . . . . . . . . . . . . . . . . . . . . . . . . . . . . . . . . . 54
4 Problem Solving
Overview . . . . . . . . . . . . . . . . . . . . . . . . . . . . . . . . . . . . . . . . . . 57
Clearing Paper Jams . . . . . . . . . . . . . . . . . . . . . . . . . . . . . . . . . 58
Clearing Jams from the Input Tray Areas . . . . . . . . . . . . . .59
Clearing Jams from the Top Cover Area . . . . . . . . . . . . . . . 60
Clearing Jams from the Output Areas . . . . . . . . . . . . . . . . . 61
Solving Repeated Paper Jams . . . . . . . . . . . . . . . . . . . . . .62
Understanding Printer Messages . . . . . . . . . . . . . . . . . . . . . . . 63
Correcting Output Quality Problems . . . . . . . . . . . . . . . . . . . . .70
Determining Printer Problems . . . . . . . . . . . . . . . . . . . . . . . . . . 72
Troubleshooting Flowchart . . . . . . . . . . . . . . . . . . . . . . . . .72
Linux Problem Solving . . . . . . . . . . . . . . . . . . . . . . . . . . . . .78
Checking the Printer’s Configuration . . . . . . . . . . . . . . . . . . . . .79
Menu Map . . . . . . . . . . . . . . . . . . . . . . . . . . . . . . . . . . . . . .79
Configuration Page . . . . . . . . . . . . . . . . . . . . . . . . . . . . . . .80
PCL Font List . . . . . . . . . . . . . . . . . . . . . . . . . . . . . . . . . . .82
A Specifications
Overview . . . . . . . . . . . . . . . . . . . . . . . . . . . . . . . . . . . . . . . . . A-1
Paper Specifications . . . . . . . . . . . . . . . . . . . . . . . . . . . . . . . . A-2
Polyester media . . . . . . . . . . . . . . . . . . . . . . . . . . . . . . . . . A-3
Supported Sizes and Weights of Paper . . . . . . . . . . . . . . A-4
Supported Types of Paper . . . . . . . . . . . . . . . . . . . . . . . . A-5
Labels . . . . . . . . . . . . . . . . . . . . . . . . . . . . . . . . . . . . . . . . A-8
Transparencies . . . . . . . . . . . . . . . . . . . . . . . . . . . . . . . . . A-8
Vellum . . . . . . . . . . . . . . . . . . . . . . . . . . . . . . . . . . . . . . . . A-9
Envelopes . . . . . . . . . . . . . . . . . . . . . . . . . . . . . . . . . . . . . A-9
Card Stock and Heavy Paper . . . . . . . . . . . . . . . . . . . . . A-11
iv ENWW
Page 7

Printer Specifications . . . . . . . . . . . . . . . . . . . . . . . . . . . . . . . A-13
Physical Dimensions . . . . . . . . . . . . . . . . . . . . . . . . . . . . A-13
Environmental Specifications . . . . . . . . . . . . . . . . . . . . . A-14
B Control Panel Menus
Overview . . . . . . . . . . . . . . . . . . . . . . . . . . . . . . . . . . . . . . . . . B-1
Private/Stored Jobs Menu . . . . . . . . . . . . . . . . . . . . . . . . . . . . B-2
Information Menu . . . . . . . . . . . . . . . . . . . . . . . . . . . . . . . . . . . B-3
Paper Handling Menu . . . . . . . . . . . . . . . . . . . . . . . . . . . . . . . B-4
Print Quality Menu . . . . . . . . . . . . . . . . . . . . . . . . . . . . . . . . . . B-6
Printing Menu . . . . . . . . . . . . . . . . . . . . . . . . . . . . . . . . . . . . . B-8
Configuration Menu . . . . . . . . . . . . . . . . . . . . . . . . . . . . . . . . B-11
I/O Menu . . . . . . . . . . . . . . . . . . . . . . . . . . . . . . . . . . . . . . . . B-15
Resets Menu . . . . . . . . . . . . . . . . . . . . . . . . . . . . . . . . . . . . . B-17
C Printer Memory and Expansion
Overview . . . . . . . . . . . . . . . . . . . . . . . . . . . . . . . . . . . . . . . . . C-1
Installing a DIMM . . . . . . . . . . . . . . . . . . . . . . . . . . . . . . . . C-2
Checking Memory Installation . . . . . . . . . . . . . . . . . . . . . . C-4
Adjusting Memory Settings . . . . . . . . . . . . . . . . . . . . . . . . C-5
D Printer Commands
Overview . . . . . . . . . . . . . . . . . . . . . . . . . . . . . . . . . . . . . . . . . D-1
Understanding PCL Printer Command Syntax . . . . . . . . . . . . D-2
Combining Escape Sequences . . . . . . . . . . . . . . . . . . . . . D-3
Selecting PCL Fonts . . . . . . . . . . . . . . . . . . . . . . . . . . . . . . . . D-4
Common PCL Printer Commands . . . . . . . . . . . . . . . . . . . . . . D-5
Glossary
ENWW v
Page 8

vi ENWW
Page 9

Printer Basics
Overview
Congratulations on your purchase of an HP LaserJet 5 100 series
printer. If you have not done so, see the start guide provided with
the printer for setup instructions.
Now that the printer is set up and ready to use, take a few moments
to get to know the printer. This chapter introduces the following:
• Features and benefits of the printer.
• Important printer pa rts and locations.
• Accessories and supplies available fo r the printer.
• The layout and basic op eration of the printer’s control panel.
1
• Helpful printer software for increased printing flexibility.
ENWW Chapter 1: Printer Basics 1
Page 10

Printer Features and Benefits
Many of the printer’s features and benefits are outlined below.
Specific chapters contain more information on each feature. See
this guide’s index or contents to locate this information.
Wide Format Printing
Increased capability from your laser printer:
• Prints on paper sizes up to 312 x 470 mm (12.28 x 18.5 inches).
• Prints full bleed images (up to A3 size and 279 x 432 mm
[11 x 17 inches]) by printing images on larger paper that can be
trimmed to the edges.
High Print Quality
Professional results that meet the demands of complex documents:
• ProRes 1200 (true 1200 dpi) for highest quality graphics printing.
• FastRes 1200 for fast, high-quality image printing.
• HP UltraPrecise toner for high quality print.
High Performance
Faster printing for improved productivity:
• Prints 22 pages per min ute (A4) or 11 pages per minute (A3).
• 300 MHz RISC microprocessor.
• Prints the first page in less than 13 seconds.
Ease of Use
Easy to use and administer:
• Helpful printer software provided on a compact disc.
2 Chapter 1: Printer Basics ENWW
Page 11

Expandability
Ability to grow with the printing needs of workgroups:
• 3 built-in DIMM slots for memory expansion.
• Available flash and memory DIMM cards.
• Up to 192 MB maximum memory capability.
Paper Handling
Versatile to meet a combination of user needs:
• 100 sheet multi-purpose tray.
• 250 sheet pa per tray.
Best Value
Providing industry-leading value to customers:
• 10,000 page print cartridge.
Euro Character
Equipping customers for a changing world market:
• This printer is currently enabled to print the all-new euro character.
HP is committed to maximizing document portability through
supporting and promoting euro symbol standards.
• To learn more abou t printing the euro character, visit HP’s
LaserJet euro website at http://www.hp.com/go/laserjeteuro.
Environmental Features
• EconoMode uses approximately 50 % less toner, which extends
the life of the print cartridge (HP does not recommend full-time
use of EconoMode)
• PowerSave setting saves energy (meets ENERGY STAR
guidelines)
ENWW Chapter 1: Printer Basics 3
Page 12

Printer Information
Congratulations on your purchase of the HP LaserJet 5100Le
printer! This printer (product number: Q1863A) is a 22 pages per
minute (ppm) laser printer that comes standard with a 100-sheet
multi-purpose Tray 1, a 250-sheet Tray 2, and 16 MB of memor y.
The printer is able to print full-bleed images on paper sizes up to
A3 and 11 x 17 in (279 x 432 mm).
4 Chapter 1: Printer Basics ENWW
Page 13
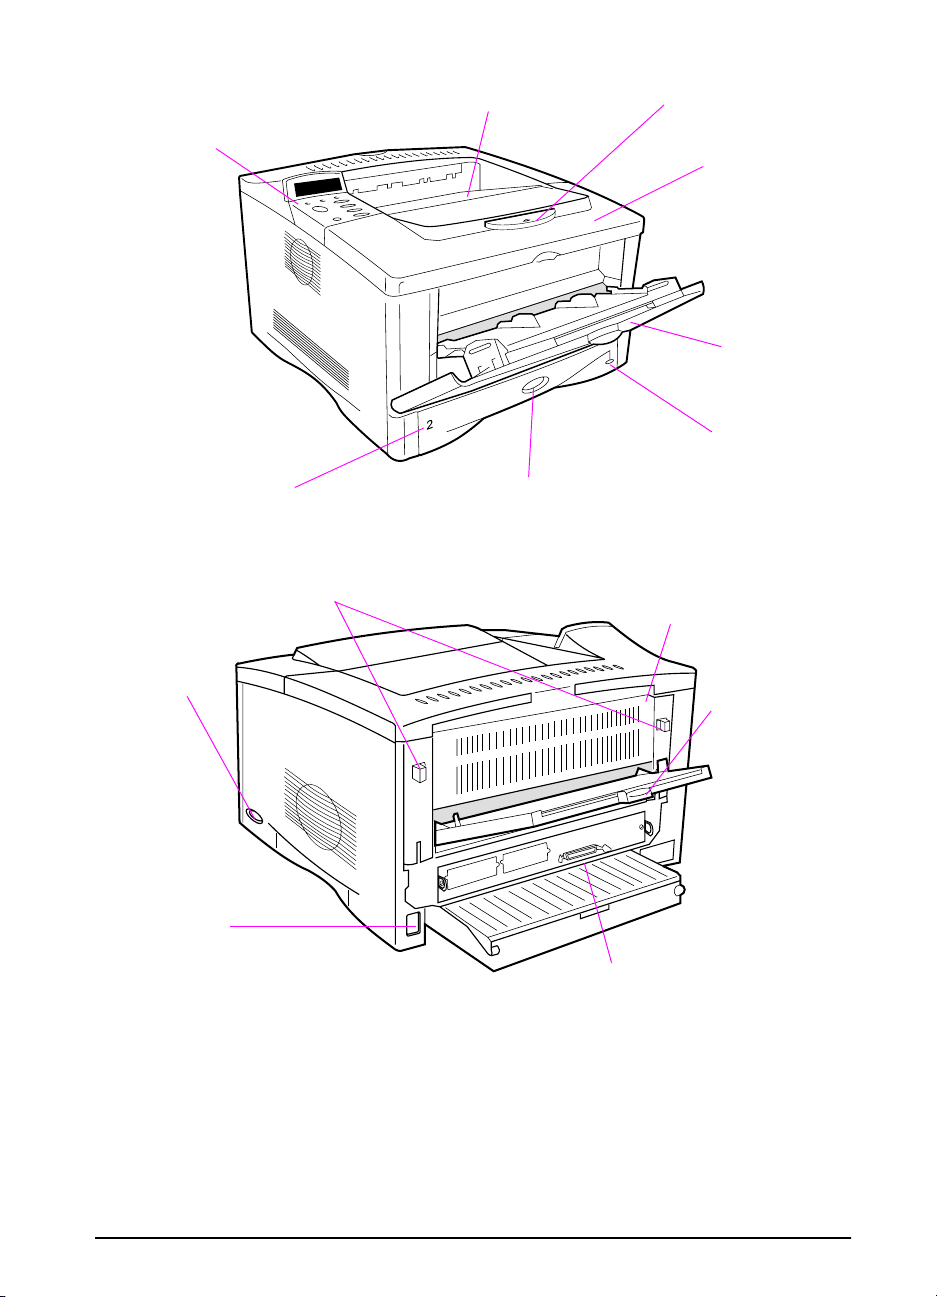
Printer Parts and Locations
Control
panel and
display
(250-sheet)
Tray 2
Latches (to open rear door)
Top output bin
Paper size indicator
(set with dial inside tray)
Paper stop
Top cover
Product and
serial numbers
(located on the
underside of
the top cover)
Tray 1
(100-sheet)
Paper level
indicator
Rear door
(paper jam access)
Power
switch
Power
connector
Parallel interface
connector
Figure 1 Printer Parts (front and rear views)
ENWW Chapter 1: Printer Basics 5
Rear output bin
(straight-through
paper path)
Page 14
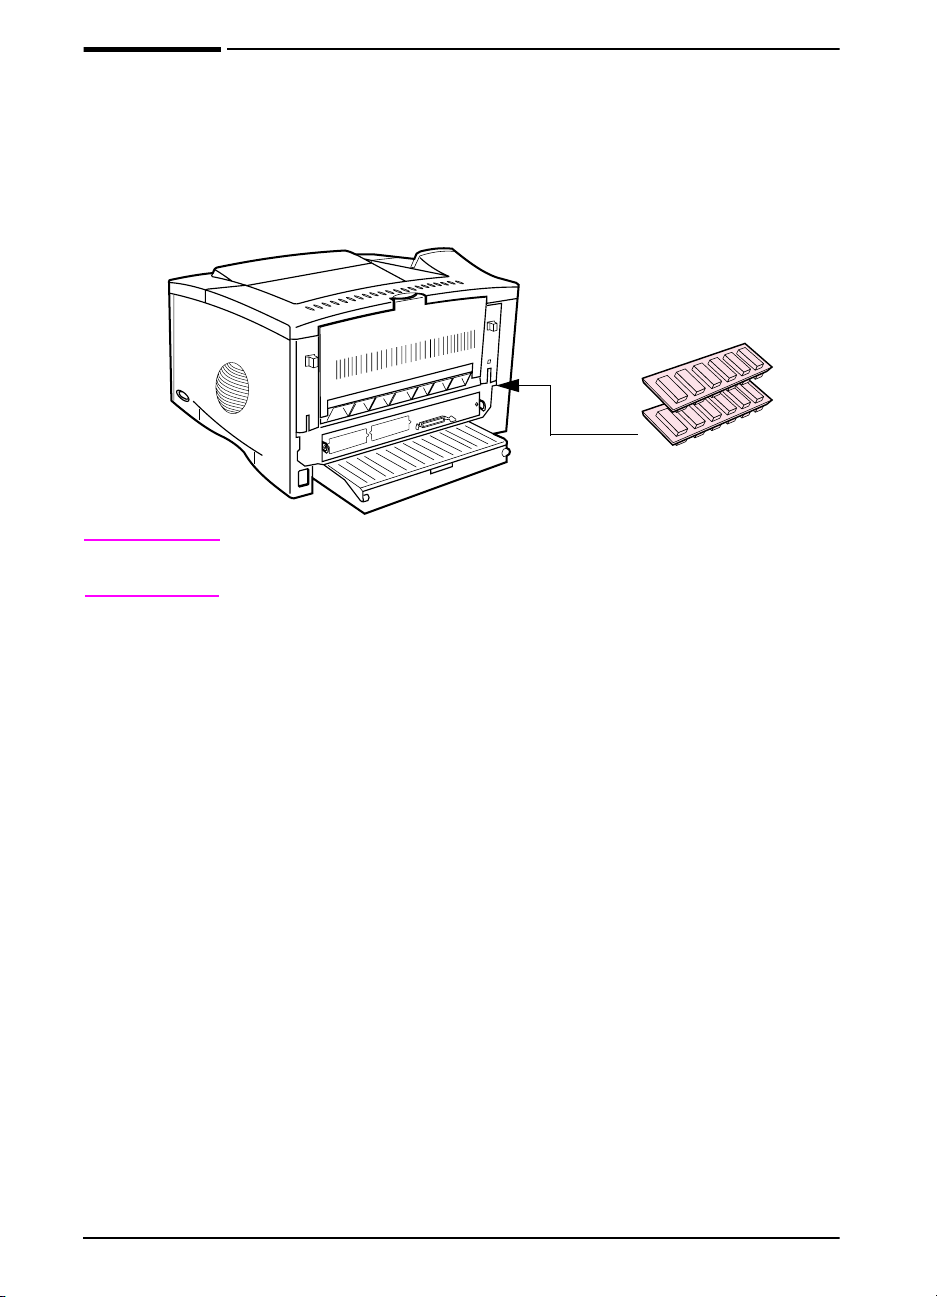
Accessories and Supplies
You can increase the capabilities of the printer with optional
accessories and supplies.
Memory, font,
or flash DIMM
Note Use accessories and supplies specifically designed for the printer
to ensure optimum performance.
Figure 2 Optional Accessories
6 Chapter 1: Printer Basics ENWW
Page 15
Ordering Information
Use only accessories specifically designed for this printer. To order
an accessory, contact an HP-authorized service or support
provider. (See the telephone support flyer included with the printer.)
Ordering Information
Item Description or Use Part Number
HP Multipurpose Paper HP brand paper for a variety of uses
(1 box of 10 reams, 500 sheets
each). T o order a sample, in the U.S.
call 1-800-471-4701.
HP LaserJet Paper Premium HP brand paper for use
with HP LaserJet printers (1 box of
10 reams, 500 sheets each). To
order a sample, in the U.S. call
1-800-471-4701.
HP LaserJet Recycled
Printing Supplies
Paper
Print Cartr idge
(10,000 pages)
Dual In-line Memory
Module (DIMM)
SDRAM DIMMs 16 MB
Flash DIMM Permanent storage for fonts and
Mass Storage
Memory, Fonts, and
HP brand recycled paper for a
variety of uses. 500 sheets. T o order
a sample, in the U.S. call
1-800-471-4701.
Replacement HP UltraPrecise print
cartridge.
Boosts the ability of the printer to
handle large print jobs (maximum
192 MB with HP brand DIMMs):
32 MB
64 MB
forms:
2 MB
4 MB
HPM1120
HPJ1124
E1120
C4129J
C7843A
C7845A
C9680A
C4286A
C4287A
Parallel Cab les 2 Meter IEEE-1284 cable
3 Meter IEEE-1284 cable
Accessories
Cable and Interface
ENWW Chapter 1: Printer Basics 7
C2950A
C2951A
Page 16
Ordering Information (Continued)
Item Description or Use Part Number
HP LaserJet Printer Family
Print Media Guide
PCL 5/PJL Technical
Reference Documentation
CD
Documentation
HP LaserJet 5100Le Start
Guide
Printer Maintenance Kit Contains user-replaceable parts
Maintenance
A guide to using paper and other
print media with HP LaserJet
printers.
A guide to using printer commands
with HP LaserJet printers.
An additional copy of the start guide. Q1860-90901
and instructions for routine printer
maintenance.
110 V printer:
new
exchange
220 V printer:
new
exchange
5963-7863
5961-0976
Q1860-67902
Q1860-69002
Q1860-67903
Q1860-69003
8 Chapter 1: Printer Basics ENWW
Page 17
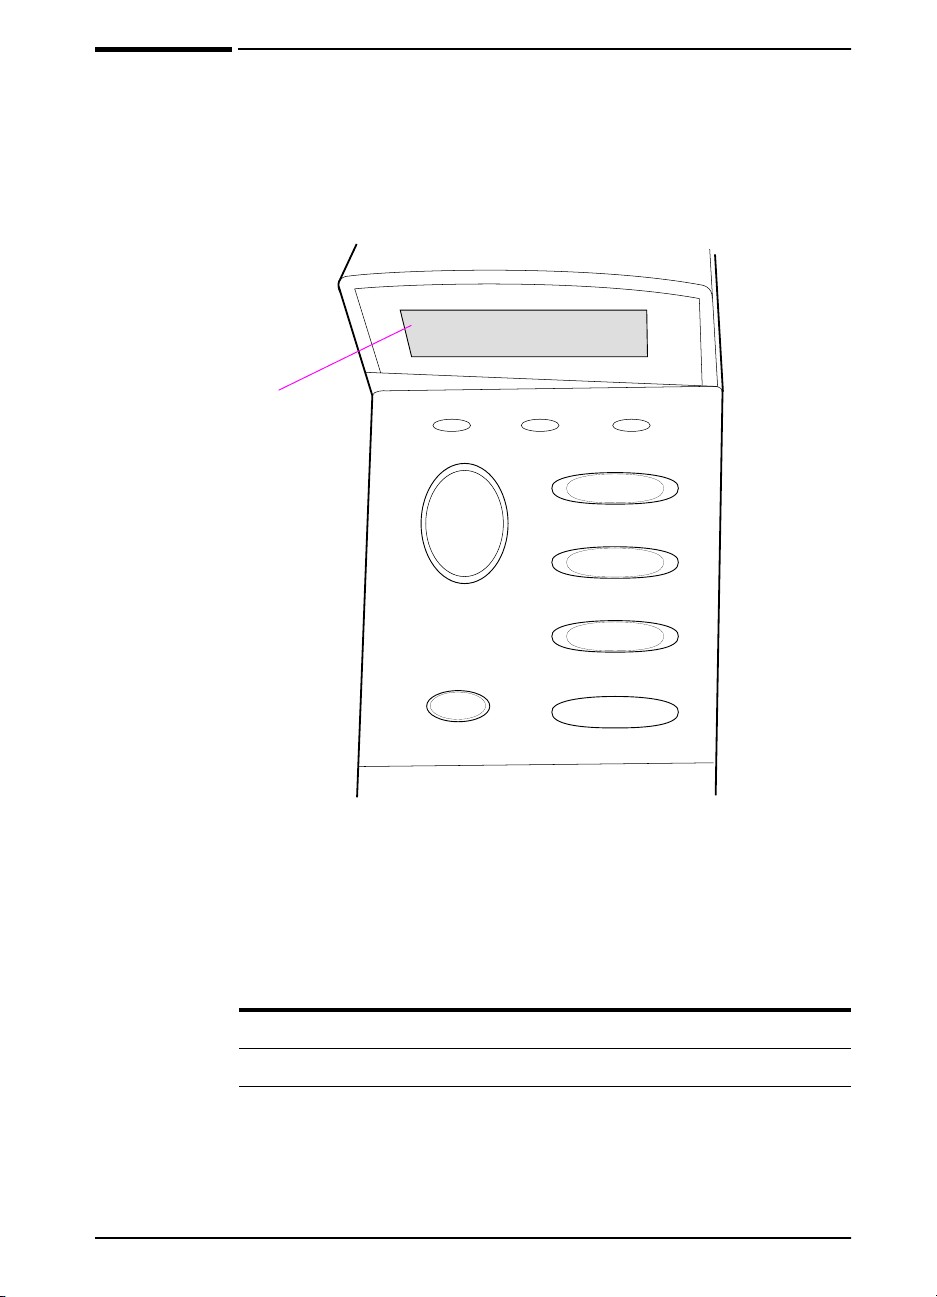
Control Panel Layout
The printer’s control panel consists of the following:
READY
2-line display
Figure 3 Control Panel Layout
Ready Data Attention
Go
Cancel
Job
Control Panel Lights
Menu
Item
- Value +
Select
Light Indication
Ready The printer is ready to print.
Data The printer is processing information.
Attention Action is required. See the control panel display.
ENWW Chapter 1: Printer Basics 9
Page 18

Control Panel Keys
Key Function
[Go] • Places the printer either online or offline .
• Prints any data residing in the printer’s buffer.
• Allows the printer to resume printing after being off li n e. Clears most
printer messages and places the printer online.
• Allows the printer to continue printing with an error message such as
TRAY x LOAD [TYPE] [SIZE] or UNEXPECTED PAPER SIZE.
• Confirms a manual feed request if Tray 1 is loaded and TRAY 1
MODE=CASSETTE
printer’s control panel.
• Overrides a manual feed request from Tray 1 by selecting paper from the
next available tray.
• Exits the control panel menus. (To save a selected control panel setting,
first press [Select].)
[Cancel Job] Cancels the print job that the printer is processing. The time it takes to cancel
depends on the size of the print job. (Press it only once.)
[Menu] Cycles through the control panel menus. Press the right end of the button
to move forward or the left end of the button to move backward.
[Item] Cycles through the selected menu’s items. Press the right end of the button
to move forward or the left end of the button to move backward.
has been set from the Paper Handling Menu in the
[- Value +] Cycles through the selected menu item’s values . Press [+] to move forw ard
or [-] to move backward.
[Select] • Saves the selected value for that item. An asterisk (*) appears next to the
selection, indicating that it is the new default. Default settings remain
when the printer is switched off or reset (unless you reset all factory
defaults from the Resets Menu).
• Prints one of the printer information pages from the control panel.
10 Chapter 1: Printer Basics ENWW
Page 19

Control Panel Menus
For a complete list of control panel items and possible values, see
page B-1.
Press [Menu] for access to all control panel menus.
To change a control panel setting:
1 Press [Menu] until the desired menu appears.
2 Press [Item] until the desired item appears.
3 Press [- Value +] until the desired setting appears.
4 Press [Select] to sav e the selection. An asterisk (*) appears next
to the selection in the display, indicating that it is now the default.
5 Press [Go] to exit the menu.
Note Settings in the printer driver and software application override
control panel settings. (Software application settings override
printer driver settings.)
If you cannot access a menu or item, it is not an option for the printer .
To print a control panel menu map:
To see the current settings for all of the menus and items availab le
in the control panel, print a control panel menu map.
1 Press [Menu] until INFORMATION MENU appears.
2 Press [Item] until PRINT MENU MAP appears.
3 Press [Select] to print the menu map.
Y ou might want to store the menu map near the printer for reference.
ENWW Chapter 1: Printer Basics 11
Page 20

Configure the control panel display langua ge (Optional)
By default, the control panel on the printer displays messages in
English. If necessary, set the printer to display messages and print
configuration pages in another supported language.
1 Turn the printer off.
2 Hold down [Select] while turning on the printer.
3 When SELECT LANGUAGE appears in the LED display, release
[Select].
4 After the printer has finished initializing, LANGUAGE = ENGLISH will
appear in the LED display.
5 When LANGUAGE = ENGLISH appears in the display, press
[- VALUE +] to scroll through the available languages.
6 Press [Select] to save the desired language as the new default.
7 Press [Go] to return to READY.
8 T o activate your new language choice, turn the printer off and then
turn the printer on.
9 The LED display text should now appear in the selected language.
Note For Japanese, language selection will change the default symbol
set for the specific language. For all other languages, the default
symbol set is PC-8.
12 Chapter 1: Printer Basics ENWW
Page 21

Printer Software
The printer comes with helpful software on a compact disc. See the
start guide for installation instructions.
Note Check the ReadMe file provided on the compact disc for additional
software included and supported languages.
The printer drivers provided on the compact disc must be installed
to take full advantage of the printer’s features. The other software
programs are recommended, but are not required for operation. See
the ReadMe file for more information.
The most recent drivers, additional drivers, and other software are
available from the Internet. Depending on the configuration of
Windows-driven computers, the installation program for the printer
software automatically checks the computer for Internet access to
obtain the latest software. If you do not hav e access to the Internet,
see the telephone support flyer included with the printer to obtain
the most recent software.
ENWW Chapter 1: Printer Basics 13
Page 22
Printer Drivers
Printer drivers access the printer features and allow the computer
to communicate with the printer (via a printer language).
Note Check the ReadMe file provided on the compact disc for additional
software included and supported languages.
Certain printer features are a vailable on ly fro m th e PC L 6 driver.
See the printer software help for availability of features.
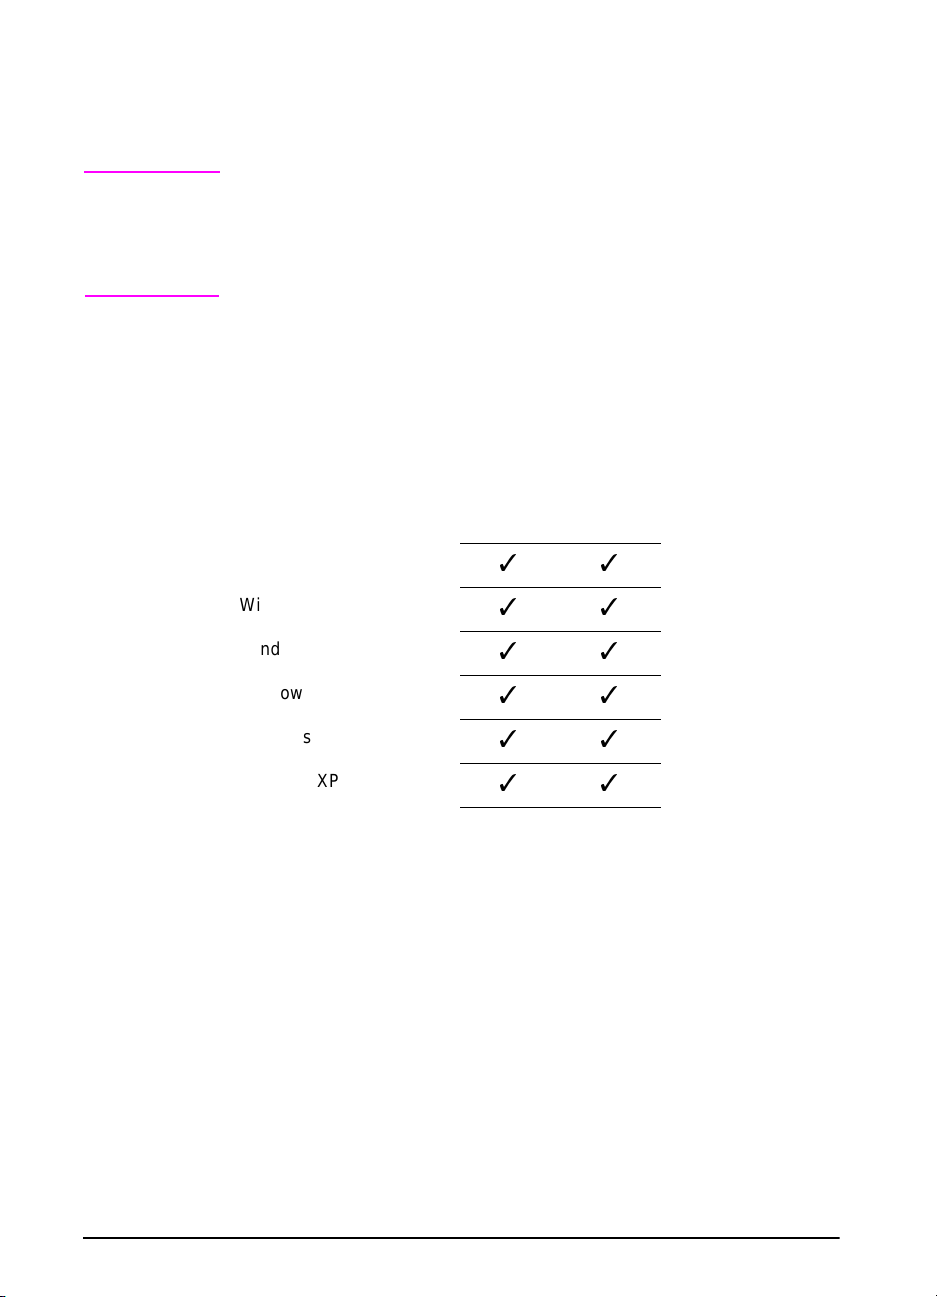
Drivers Included with the Printer
The following printer drivers are included with the printer. The most
recent drivers are available on the Internet. Depending on the
configuration of Windows computers, the installation program for
the printer software automatically checks the computer for Internet
access to obtain the latest drivers.
PCL 5e PCL 6
Windows 95
Windows 98
Windows Me
Windows NT® 4.0
Windows 2000
Windows XP
1.Microsoft® Windows® Millennium Edition
1
Within the computer installation program, select Typical Install to
install the PCL 5e, and PCL 6 drivers. Select Custom Install to
install only the software you prefer, or if you are a network
administrator. Select Minimum Install to install only the PCL 6
driver for basic printing.
14 Chapter 1: Printer Basics ENWW
Page 23

Additional Drivers
You can obtain the following printer drivers by downloading them
from the Internet, or by requesting them from an HP-authorized
service or support provider. (See the telephone support flyer
included with the printer.)
• OS/2 PCL/PCL 6 printer driver*
• AutoCAD™ (Rev. 15 compatible Windows printer driver available
on the compact disc. Rev. 14 printer driver available with
HP LaserJet 5100 printer drivers (http://www,hp.com/lj5100).)
*The OS/2 drivers are also available from IBM, and are packaged
with OS/2.
Note If the desired printer driver is not on the compact disc or is not listed
here, check the software application’s installation disks or ReadMe
files to see if they include support for the printer. If not, contact the
software manufacturer or distributor and request a driver for the
printer.
ENWW Chapter 1: Printer Basics 15
Page 24

Software for Windows
Use the Typical Install or Custom Install option to install the HP
software. (This includes several printer drivers. For more
information, see page 17.)
Access the Windows Printer Driver
To configure the driver, access it in one of the following ways:
Temporarily Change Settings
Operating System
Windows 95,
Windows 98, and
Windows Me
Windows NT 4.0 From the File menu, click Print,
Windows 2000 From the File menu, click Print,
Windows XP From the File menu, click Print,
Note Settings in the printer driver and software application override
(from a software application)
From the File menu, click Print,
and then click Setup or
Properties. (The actual steps can
vary; this is the most common
method.)
and then click Setup or
Properties. (The actual steps can
vary; this is the most common
method.)
and then click Setup or
Properties. (The actual steps can
vary; this is the most common
method.)
and then click Setup or
Properties. (The actual steps can
vary; this is the most common
method.)
Change Default Settings
(across all applications)
Click the Start button, point to
Settings, and then click Printers.
Right-click the printer icon, and
select Properties.
Click the Start button, point to
Settings, and then click Printers.
Right-click the printer icon, and
select Document Defaults or
Properties.
Click the Start button, point to
Settings, and then click Printers.
Right-click the printer icon, and
select Printing Preferences or
Properties.
Click the Start button, point to
Printers and Faxes. Right-click
the printer icon, and select
Properties
control panel settings. (Software application settings override
printer driver settings.)
16 Chapter 1: Printer Basics ENWW
Page 25

Choose the Right Driver for Your Needs
Choose a printer driver based on the way you use the printer.
• Use the PCL 6 driver to take full advantage of the printer’s
features. Unless backward compatibility with previous PCL
drivers or older printers is necessary, the PCL 6 driver is
recommended.
• Use the PCL 5e driver if you want print results to look comparable
to those from older printers. Certain features are not available in
this driver. (Do not use the PCL 5e driver provided with this printer
with older printers.)
Printer Driver Help
Each printer driver has help screens that can be activated either
from the Help button, the F1 key, or a question mark symbol in the
upper right corner in the printer driver (depending on the Windows
operating system used). These help screens give detailed
information about the specific driver. Printer driver help is separate
from the software application help.
Software for Linux
For information about Linux support for the printer, see the HP Linux
support homepage: http://hp.sourceforge.net/.
ENWW Chapter 1: Printer Basics 17
Page 26

18 Chapter 1: Printer Basics ENWW
Page 27

Printing Tasks
Overview
This chapter presents basic printing tasks, such as:
• Selecting the outp ut bin.
• Loading the trays.
• Printing on sp ecial paper, such as letterhead and envelopes.
This chapter also introduces some advanced printing tasks, to
help you tak e fu ll advantage of the printer’s features. These tasks
are “advanced” because they require you to change settings from
a software application, the printer driver, or the printer’s control
panel.
• The printer driver allows you to:
• Create Quick Sets to save the printer’s setup information for
different kinds of print jobs.
• Print pages with a watermark in the background.
• Print the first page of a document on a different kind of paper
than the rest of the pages.
• Print multiple pages on one sheet of paper.
• Store, Quick Copy, and proof and hold print jobs.
(See “Using Features in the Printer Driver” on page 43.)
2
• Tray 1 can be used in several different ways. See “Customizing
Tray 1 Operation” on page 45.
• If you frequently use several kinds of paper or share the printer
with others, print by type and size to ensure that print jobs always
print on the desired paper. See “Printing by Type and Size of
Paper” on page 47.
ENWW Chapter 2: Printing Tasks 23
Page 28

Selecting the Output Bin
The printer has two output locations: the rear output bin and the top
output bin. To use the top output bin, be sure the rear output bin is
closed. To use the rear outpu t bin, ope n it.
The following table shows the minimum and maximum sizes of
paper supported in the output bins.
Top Output Bin Rear Output Bin
Width From 3.9 to 11.7 inches wide
(100 to 297 mm wide)
Length From 5 to 18.5 inches long
(127 to 470 mm long)
From 3 to 12.28 inches wide
(76 to 312 mm wide)
Guidelines
• If paper coming out of the top output bin has problems, such as
excessive curl, try printing to the rear output bin.
• To avoid paper jams, do not open or close the rear output bin
while the printer is printing.
• Do not print envelopes, labels, paper wider than 11.7 inches
(297 mm) wide, small custom-size paper, postcards, or light or
heavy paper to the top output bin.
• For printing stacks of large paper only, the paper stop on the top
output bin prevents long paper from being pushed over the edge
of the printer.
24 Chapter 2: Printing Tasks ENWW
Page 29
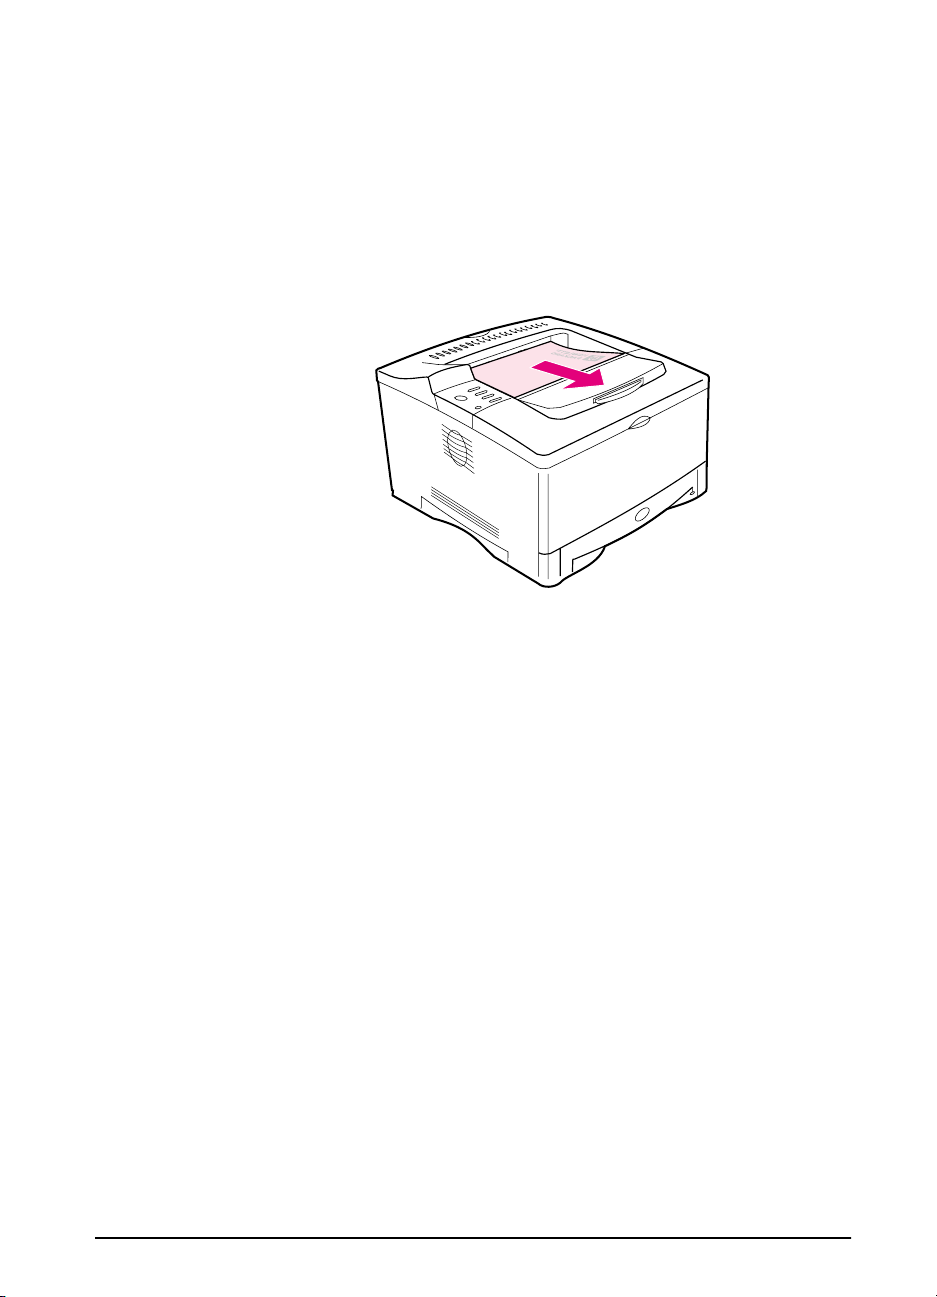
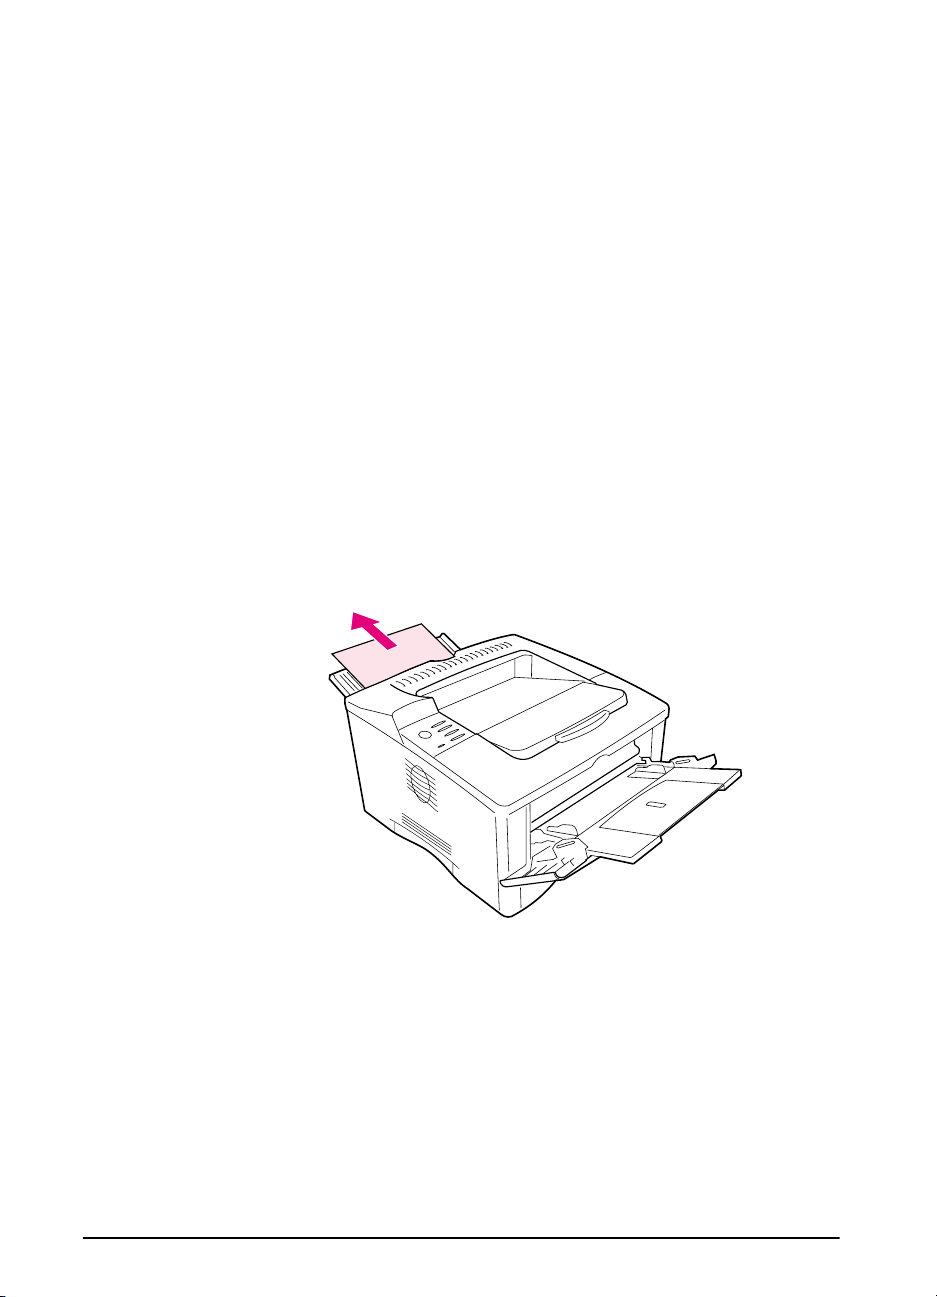
Printing to the Top Output Bin
The top output bin collects paper face-down, in correct order. The
top output bin should be used for most print jobs and is
recommended for printing the following:
• over 50 sheets of paper, continuously
• transparencies
Figure 6 Top Output Bin
ENWW Chapter 2: Printing Tasks 25
Page 30
Printing to the Rear Output Bin
The printer always prints to the rear output bin if it is open. Paper
comes out of the printer face-up, with the last page on top.
To open the rear output bin, grasp the handle at the top of the bin
and pull the bin down. Slide out the first extension, then flip open
the second extension if necessary.
Printing from Tray 1 to the rear output bin provides the straightest
paper path. Opening the rear output bin might improve output quality
with the following:
• envelopes
• labels
• paper wider than 11.7 inches (297 mm) or less than 3.9 inches
(100 mm) wide
• small custom-size paper
• postcards
• paper lighter than 16 lb (60 g/m
2
) or heavier than 28 lb (105 g/m2)
Figure 7 Rear Output Bin
26 Chapter 2: Printing Tasks ENWW
Page 31

Adjust the Paper Stop
For printing stacks of large paper only ,
the paper stop on the top output bin
prevents long paper from being pushed
over the edge of the printer.
1 Push in the center of the paper stop
to release it.
2 Pull the paper stop out until it stops.
3 Flip up the end section.
4 Adjust the paper stop to the desired
size.
ENWW Chapter 2: Printing Tasks 27
Page 32

Loading Tray 1
Note
To avoid paper jams, do not load trays
while the printer is printing.
T ra y 1 is a multi-purpose tray that holds
a variety of paper, including up to
100 sheets of paper, 10 envelopes, or
20 index cards. The printer might pull
paper from Tray 1 first. T o change this,
see page 45. For supported sizes of
paper, see page A-4.
1 Open Tray 1 and pull out the tray
extension.
2 If the paper being loaded is longer
than 9 in (229 mm), flip open the
second tray extension.
3 Set the side guides to the desired
size.
4 Load T r a y 1. Paper should fit under
the arrows and tabs on the guides.
For correct orientation, see
page 32.
• For example, load lette r, A4, A5,
Executive, and B5 size paper with
the long edge toward the printer.
• Load other sizes of paper with the
short edge toward the printer.
5 Make sure the guides touch the
edges of the paper without bending
it.
28 Chapter 2: Printing Tasks ENWW
Page 33

Loading Tray 2
The following instructions are for
loading Tray 2. For supported sizes of
paper, see page A-5.
Note
To avoid paper jams, do not load trays
while the printer is printing.
1 Pull the tray completely out of the
printer. Lift the tray cover.
2 Rotate the dial in the tray so the
printer will read the correct size of
paper. The toggle switch accesses
more sizes. An error might occur if
the dial is not set properly.
Note
Setting the dial adjusts the printer’s
sensors. It does not adjust the guides
inside the tray.
3 Make sure the paper size setting
matches the size of paper loaded, or
the printer might jam or other errors
might occur.
4 Tilt the blue rear guide toward the
front of the tray to detach it.
Continued on the next page.
ENWW Chapter 2: Printing Tasks 29
Page 34

5 Align the rear guide with the desired
paper size. With the guide angled
slightly toward the front of the tray,
insert the two front tabs (A) into the
A
B
A
appropriate holes. Push the guide
upright, snapping the center tab (B)
into place.
The guide must always be placed
correctly in the tray (ev en for 11 x 17
or A3 paper).
6 Adjust the side guides to the proper
size.
7 Load the tray. For correct
orientation, see page 32.
8 Make sure the paper is flat in the tray
at all four corners and below the tabs
on the guides.
9 Close the tray cover. Slide the tray
back into the printer.
Note
If you want to print by type and size of
paper from the printer driver, configure
the tray set tings in the printer’s control
panel to match the type of paper loaded
in each tray (page 47).
30 Chapter 2: Printing Tasks ENWW
Page 35

Printing Special Paper
Special paper includes letterhead, prepunched (including 3-hole
punched), envelopes, labels, transparencies, full-bleed images,
rotated paper, index cards, postcards, custom-size, and heavy
paper.
Printing Letterhead, Prepunched, or Preprinted Paper
When printing letterhead, prep u nc hed, or preprinted paper, it is
important to load the trays with the correct orientation.
Note It may be necessary to print prepunched paper in a rotated
orientation (page 37).
Printing in portrait or landscape mode is usually selected from the
software application or printer driver. If the option is not available,
change the Orientation setting from the Printing Menu in the
printer’s control panel (page B-9).
ENWW Chapter 2: Printing Tasks 31
Page 36

Paper Orientation
Figure 8 Paper Orientation for Tray 1
• Load letter, A4, A5, Executive, and B5 paper with the
side-to-be-printed facing up, and the top, short edge toward the
right.
• Load other sizes of paper with th e side-to-be-printed facing up,
and the top, short edge toward the printer.
Figure 9 Paper Orientation for Tray 2
• Load letter, A4, A5, Executive, and B5 paper with the
side-to-be-printed facing down, and the top, short edge toward
the right.
• Load other sizes with the side-to-be-printed facing down, and the
top, short edge toward the front of the tray.
32 Chapter 2: Printing Tasks ENWW
Page 37

Printing Envelopes
Many types of envelopes can be printed from Tray 1. (Up to 10 can
be stacked in the tray.) Printing performance depends on the
construction of the envelope. Always test a f ew sample envelopes
before purchasing a large quantity.
• Set margins at least 0.6 inch (15 mm) from the edge of the
envelope.
• To minimize curl and wrinkling, always print envelopes to the rear
output bin.
When you print large numbers of envelopes and standard paper,
for best printing performance print paper first, then envelopes. To
alternate paper and envelopes, from the Configuration Menu in the
printer’s control panel select SMALL PAPER SPEED=SLOW.
WARNING! Never use envelopes with coated linings, exposed self-stick
adhesives, or other synthetic materials. These items can emit
noxious fumes.
Caution Envelopes with clasps, snaps, windows, coated linings, exposed
self-stick adhesives, or other synthetic materials can severely
damage the printer.
T o a void jamming and possible printer damage, nev er try to print on
both sides of an envelope.
Before you load envelopes, make sure they are flat and not
damaged or stuck together. Do not use envelopes with
pressure-sensitive adhesive. (For envelope specifications, see
page A-9.)
ENWW Chapter 2: Printing Tasks 33
Page 38

Loading Envelopes in Tray 1
1 Open Tray 1 and pull out the tray
extension. If the envelopes are
longer than 9 inches (229 mm), flip
open the second tray extension.
2 Open the rear output bin and pull out
the tray extension. (This reduces
envelope curl and wrinkling.)
3 Load up to 10 envelopes in the
center of Tray 1 with the
side-to-be-printed facing up, and the
postage-end toward the front of the
tray. Slide the envelopes into the
printer as far as they will go without
forcing them.
4 Adjust the guides to touch the
envelope stack without bending the
envelopes. Make sure the
envelopes fit under the tabs on the
guides.
34 Chapter 2: Printing Tasks ENWW
Page 39

Printing Labels
Use only labels recommended for use in laser printers.
Multi-thickness labels and labels that do not stack flat might print
better rotated. To print rotated paper, see page 37. Make sure that
labels meet the specifications for the input tray y ou use (page A-8).
Do:
• Print a stack of 50 labels from Tray 1 or a stack of 50 to 100 labels
from Tray 2.
• For proper page orientation when printing labels, see page 32.
• Try opening the rear output bin (page 26) to prevent curl and other
problems.
Figure 10 Printing Labels
Do not:
Caution Failure to follow these instructions can damage the printer.
• Do not load Tray 2 to capacity because labels are heavier than
paper.
• Do not use labels that are separating from the backing sh eet,
wrinkled, or damaged in any way.
• Do not use labels that have the backing sheet exposed. (Labels
must cover the entire backing sheet with no exposed spaces.)
• Do not feed a sheet of labels through the printer more than once.
The adhesive backing is designed for only one pass through the
printer.
ENWW Chapter 2: Printing Tasks 35
Page 40

Printing Transparencies
Use only transparencies recommended for use in laser printers. For
transparency specifications, see page A-8.
• Load transparencies in Tray 1 with the side-to-be printed facing
up and the top edge toward the right.
• To preven t transparencies from becoming too hot or sticking
together, use the top output bin by closing the rear output bin
(page 25). Remove each transparency from the output bin before
printing another.
• Place transparencies on a flat surface to cool after removing them
from the printer.
Figure 11 Printing Transparencies
36 Chapter 2: Printing Tasks ENWW
Page 41

Printing Rotated Paper
The printer can print letter, A4, A5, Executive, and B5 (JIS) in a
rotated orientation (short-edge first) from Tray 1. Rotated paper
prints more slowly than paper that feeds long-edge first. Some types
of paper feed better if rotated, such as prepunched paper or labels
that do not stack flat.
Tray 1:
1 From the Paper Handling Menu in the printer’s control panel,
select TRAY 1 MODE=CASSETTE.
2 Also from the Paper Handling Menu, select LTR-R, A4-R, A5-R,
EXEC-R, or JB5-R as the Tray 1 size.
3 Load paper with the side-to-be pr inted facing up, and the top,
short-edge toward the printer.
4 In the printer driver or software application select the paper size
as you normally would and select Tray 1.
Figure 12 Printing Rotated Paper from Tray 1
ENWW Chapter 2: Printing Tasks 37
Page 42

Printing Full-Bleed Images
Full-bleed images extend from edge to edge of the page. T o achieve
this effect, use larger paper, then trim its edges to the desired size.
Caution Never print directly to the edge of paper. This causes toner to
accumulate inside the printer, which may affect print quality and
damage the printer. Print on paper up to 12.28 by 18.5 in (312 by
470 mm), leaving margins on all four sides of at least .08 inch
(2 mm).
Note When printing paper wider than 11.7 inches (297 mm), always use
the rear output bin.
38 Chapter 2: Printing Tasks ENWW
Page 43

Printing Cards, Custom-Size and Heavy Paper
Custom-size paper can be printed from Tray 1. For paper
specifications, see page A-2.
Tray Minimum Size Maximum Size
Tray 1 3 by 5 inches
(76 by 127 mm)
The maximum paper weight is 53 lb (199 g/m
Note Heavy paper and very small or very large custom-size paper should
12.28 by 18.5 inches
(312 by 470 mm)
2
) from Tray 1.
be printed from Tray 1 to the rear output bin. Open the rear output
bin to use it (page 26).
The printer’s control panel can be set for one custom size at a time.
Do not load more than one size of custom paper into the printer.
When you print large numbers of small or narrow media and
standard paper, for best printing performance print paper first, then
the small or narrow media. To alternate paper and small or narrow
media, from the Configuration Menu in the printer’s control panel
select SMALL PAPER SPEED=SLOW.
For information on setting custom paper sizes, see page 40.
ENWW Chapter 2: Printing Tasks 39
Page 44

Guidelines for Printing Custom-Size Paper
• Do not attempt to print on pap er smaller than 3 inches (76 mm)
wide or 5 inches (127 mm) long.
• Set page margin s at least .17 inch (4.23 mm) away from the
edges.
Setting Custom Paper Sizes
When custom paper is loaded, size settings need to be selected
from the software application (the preferred method), the printer
driver, and from the printer’s control panel.
Note All settings in the printer driver and software application (except
configuring custom paper sizes) override control panel settings.
(Software application settings override printer driver settings.) The
control panel must be set if the PCL 5e driver is used, or custom
paper is loaded long-edge first (X is longer than Y).
Tray 1
X edge
Y edge
Figure 13 Printing Custom-Size Paper
40 Chapter 2: Printing Tasks ENWW
Page 45

If the settings are not available from the software, set the custom
paper size from the control panel:
1 From the Printing Menu set CONFIGURE CUSTOM PAPER=YES.
2 From the Printing Menu, select inches or millimeters as the unit
of measurement.
3 From the Printing Menu, set the X dimension (the front edge of
the paper) as shown in Figure 13.The X dimension can be 3 to
12.28 inches (76 to 312 mm) for Tray 1. Set the Y dimension (the
side edge of the paper) as shown in Figure 13. The Y dimension
can be 5 to 18.5 inches (127 to 470 mm) for Tray 1.
4 If custom paper is loaded into T ray 1 and TRAY 1 MODE=CASSETTE,
then set TRAY 1 SIZE=CUSTOM from the Paper Handling Menu in
the printer’s control panel. See “Customizing T ra y 1 Operation” on
page 45.
5 In the software, select Custom as the paper size.
For example , if the custom paper is 8 by 10 inches (203 by 254 mm),
set X=8 inches and Y=10 inches (X=203 millimeters and Y=254
millimeters).
ENWW Chapter 2: Printing Tasks 41
Page 46

Printing Vellum
Vellum is special lightweight paper similar to parchment. Print
vellum from Tray 1 only, and open the rear output bin. Do not print
on both sides of vellum.
1 Load vellum with the side-to-be-printed facing up and the top,
short edge toward the right.
2 Open the rear output bin.
3 From the Paper Handling Menu in the printer’s control panel, set
TRAY 1 MODE=CASSETTE.
4 From the printer driver, set the type of paper f or Tray 1 to vellum,
and select paper by type. For details on selecting by type of paper,
see page 47.
Figure 14 Printing Vellum
42 Chapter 2: Printing Tasks ENWW
Page 47

Advanced Printing Tasks
This section will help you take full advantage of the printer’s f eatures.
These tasks are “advanced” because they require you to change
settings from the printer’s control panel or the printer driver.
Using Features in the Printer Driver
When you print from a software application, many of the printer’s
features are available from the printer driver. To access Windows
printer drivers, see page 16.
Note HP PCL 5e, and PCL 6 drivers are slightly different. Check the
drivers for av ailable options. The PCL 6 driver takes full adv antage
of the printer’s features.
Settings in the printer driver and software application override
control panel settings. (Software application settings override
printer driver settings.)
Saving Printer Setup Information
Printer drivers allow you to save the printer settings you use most
often as the default settings. For example, the driver might be set
to print on letter size paper, portrait orientation, with automatic tray
selection (from the first available tray).
Some PCL 6 printer drivers will allow you to save printer settings
for multiple kinds of print jobs. For e xample, you might want to create
a Quick Set for env elopes, or for printing the first page of a document
on letterhead.
Look for the Quick Sets option in the W indows PCL 6 printer driv er,
or see the printer driver help for more information.
Printing with a Watermark
A watermark is a notice, such as “Top Secret,” printed in the
background of each page in a document. Check the driver for
available options.
ENWW Chapter 2: Printing Tasks 43
Page 48

Printing the First Page on Different Paper
From the PCL 6 printer driver , you can choose to print the first page
of a document on different paper than the rest of the pages. Look
for “Use different paper for first page” in the printer driver.
Printing Multiple Pages on One Sheet of Paper
You can print more than one page on a single sheet of paper. This
feature is available in some printer drivers, and provides a
cost-effective way to print draft pages.
To print more than one page on a sheet of paper, look f or a Lay out
or Pages P er Sheet option in the printer driver . (This is sometimes
called 2-up, 4-up, or n-up printing.)
Figure 15 Sample Layout Options (1-up, 2-up, and 4-up)
44 Chapter 2: Printing Tasks ENWW
Page 49

Customizing Tray 1 Operation
Customize Tray 1 to fit your printing needs.
The printer can be set to print from T r ay 1 as long as it is loaded, or
to print only from Tray 1 if the type of paper loaded is specifically
requested. Set TRAY 1 MODE=FIRST or TRAY 1 MODE=CASSETTE from
the Paper Handling Menu in the printer’s control panel. (Print speed
might be slightly slower when printing from Tray 1 when TRAY 1
MODE=FIRST.)
Tray 1 Mode=First
If you do not keep paper in Tray 1 all the time, or y ou use T r ay 1 only
for manually feeding paper, keep the default setting, TRAY 1
MODE=FIRST in the Paper Handling Menu.
• TRAY 1 MODE=FIRST means that the printer usually pulls paper
from Tray 1 first unless it is empty.
• You can still choose pape r from other trays by specifically
choosing another tray in the printer driver.
Tray 1 Mode=Cassette
TRAY 1 MODE=CASSETTE means the printer treats Tr ay 1 like the other
tray . Instead of looking for paper in Tray 1 first, the printer pulls paper
either starting from the bottom tray upward, or the tray that matches
type or size settings selected from the software.
• When TRAY 1 MODE=CASSETTE is set, an option appears in the
Paper Handling Menu to configure size as well as type settings
for Tray 1.
• Through the printer driver, you can select paper from any tray
(including Tray 1) by type, size, or source. To print by type and
size of paper, see page 47.
ENWW Chapter 2: Printing Tasks 45
Page 50

Manually Feeding Paper from Tray 1
The Manual Feed feature allows y ou to print on special paper from
T ra y 1, such as envelopes or letterhead. If Manual Feed is selected,
the printer will print only from Tray 1.
Select Manual Feed through the software or printer driver. Manual
Feed can also be enabled from the Paper Handling Menu in the
printer’s control panel.
Note When Manual F e e d is se le cted, if TRAY 1 MODE=FIRST the printer
automatically prints (if paper is in the tray). If TRAY 1 MODE=CASSETTE
the printer prompts to load Tray 1 whether or not Tray 1 is loaded.
This enables you to load different paper if necessary . Press [Go] to
print from Tray 1.
46 Chapter 2: Printing Tasks ENWW
Page 51

Printing by Type and Size of Paper
You can configure the printer to select paper by type (such as plain
or letterhead) and size (such as letter or A4), as opposed to source
(a paper tray).
Benefits of Printing by Type and Size of Paper
If you frequently use sev eral different kinds of paper , once trays are
set up correctly , y ou do not hav e to chec k which paper is loaded in
each tray bef ore you print. This is especially helpful when the printer
is shared, and more than one person loads or removes paper.
Printing by type and size of paper is a way to be sure that print jobs
always print on the desired paper. (Some printers have a feature
which “locks out” trays, to prevent printing on the wrong paper.
Printing by type and size of paper eliminates the need to lock out
trays.)
To print by type and size of paper , do the following:
1 Be sure to adjust and load the trays correctly. (See the sections
on loading paper, starting on page 28.)
2 From the Paper Handling Menu in the printer’s control panel,
select the paper type for each tray. If you are unsure what type
you are loading (such as bond or recycled), check the label on
the package of paper. For supported types, see page A-2.
3 Select the paper size settings from the control panel.
• Tray 1: If the printer has been set to TRAY 1 MODE=CASSETTE
from the Paper Handling Menu, also set the Tray 1 size from
the Paper Handling Menu. If custom paper is loaded, set the
size of custom paper from the Printing Menu to match the paper
loaded in Tray 1. To print custom-size paper, see page 40.
• Tray 2: Paper size settings are adjusted when paper is properly
loaded into the printer and the paper size dials are set to match
the paper size (See the sections on loading paper, starting on
page 29.)
4 From the software or printer driver, select the desired type and
size of paper.
Note To print by type and size, it might be necessary to unload or close
T ra y 1, or set TRAY 1 MODE=CASSETTE from the Paper Handling Menu
in the printer’s control panel. For more information, see page 45.
Settings in the printer driver and software application override
control panel settings. (Software application settings override
printer driver settings.)
ENWW Chapter 2: Printing Tasks 47
Page 52

Job Retention
There are two job retention features availab le for the printer: Private
Job and Proof and Hold. See the following pages for more
information on each of these features.
Note The private job and the proof and hold features work by using the
printer’s available RAM memory. A minimum of 32 MB of RAM is
required.
To access each of the features, first follo w the steps below, then
continue to the section that describes the feature you wish to use.
1 Select Print from the application’s menu.
2 Click Properties to display the properties dialog box.
3 Click the Destination tab to display the destination options.
4 Click Options under Destination Features to display Job
Retention Options.
48 Chapter 2: Printing Tasks ENWW
Page 53

Proofing and Holding a Job
The proof and hold feature provides a quick and easy way to print
and proof one copy of a job and then print the additional copies.
The job is held on the printer’s memory until the user prints the
additional copies. After the additional copies are printed, the proof
and hold job is deleted from the printer.
Note The proof and hold feature works by using the printer’s available
RAM memory. A minimum of 32 MB of RAM is required.
Printing the Remaining Copies of a Held Job
The user can print the remaining copies of a job from the control
panel.
1 Press [Menu] repeatedly until PRIVATE/STORED JOBS MENU
appears.
2 Press [Item] until your user name appears.
3 Press [-Value+] until the desired job name appears.
4 Press [Select] to select the job. COPIES=x appears.
5 Press [-Value+] until the desired number of copies appears.
6 Press [Select] to print the job.
Deleting a Held Job
When a user sends a proof and hold job, the printer overwrites any
previous jobs with the same name.
Note If you turn the printer off and then back on, all quick copy , proof and
hold, and private jobs are de leted.
A stored proof and hold job can also be deleted from the control
panel.
1 Press [Menu] repeatedly until PRIVATE/STORED JOBS MENU
appears.
2 Press [Item] until your user name appears.
3 Press [-Value+] until the desired job name appears.
4 Press [Select] to select the job. COPIES=x appears.
5 Press [-Value+] until DELETE appears.
6 Press [Select] to delete the job.
ENWW Chapter 2: Printing Tasks 49
Page 54

Printing a Private Job
The private printing feature lets a user specify that a job is not
printed until that user releases it using a 4-digit Personal
Identification Number (PIN) through the printer’s control panel. The
user specifies the PIN in the driver and it is sent to the printer as
part of the print job.
Note The private job feature works by using the printer’s available RAM
memory. A minimum of 32 MB of RAM is required.
Specifying a Private Job
T o specify that a job is private from the driver , select the Private Job
option and type a 4-digit PIN.
Releasing a Private Job
The user can print a private job from the control panel.
1 Press [Menu] repeatedly until PRIVATE/STORED JOBS MENU
appears.
2 Press [Item] until your user name appears.
3 Press [-Value+] until the desired job name appears.
4 Press [Select]. PIN:0000 appears.
5 Press [-Value+] to change the first number of the PIN, and then
press [Select]. An * appears in place of the number. Repeat these
steps to change the remaining three numbers of the PIN.
COPIES=x appears.
6 Press [-Value+] until the desired number of copies appears.
7 Press [Select] to print the job.
50 Chapter 2: Printing Tasks ENWW
Page 55

Deleting a Private Job
When a user sends a private job, the printer overwrites any previous
jobs with the same name. A private job is automatically deleted from
the printer’s memory after the user releases it for printing.
Note If you turn the printer off and then back on, all quick copy , proof and
hold, and private jobs are de leted.
A private job can also be deleted from the printer’s control panel
before it is ever printed.
1 Press [Menu] repeatedly until PRIVATE/STORED JOBS MENU
appears.
2 Press [Item] until your user name appears.
3 Press [-Value+] until the desired job name appears.
4 Press [Select] to select the job. PIN:0000 appears.
5 Press [-Value+] to change the first number of the PIN, and then
press [Select]. An * appears in place of the number. Repeat these
steps to change the remaining three numbers of the PIN.
COPIES=x appears.
6 Press [-Value+] until DELETE appears.
7 Press [Select] to delete the job.
ENWW Chapter 2: Printing Tasks 51
Page 56

52 Chapter 2: Printing Tasks ENWW
Page 57

Printer Maintenance
Overview
This chapter explains basic printer maintenance.
• Performing routine maintenance.
• Managing the print cartridge.
• Cleaning the printer .
3
ENWW Chapter 3: Printer Maintenance 67
Page 58

Performing Routine Maintenance
To ensure optimum print quality, the printer will prompt you to
perform printer maintenance every 150,000 pages. When the
PERFORM PRINTER MAINTENANCE message appears on the contr ol
panel, you will need to purchase a printer maintenance kit and install
the new parts. T o check the number of pages the printer has printed,
print a configuration page (page 80).
To order the printer maintenance kit, contact an HP-authorized
service or support provider. (See the telephone support flyer
included with the printer.)
The kit includes:
• fuser assembly
• transfer roller
• feed rollers
• necessary instructions
For more information on installing the printer maintenance kit, see
the instructions that accompany it.
Note The printer maintenance kit is a consumable and is not covered
under warranty or standard service agreements.
68 Chapter 3: Printer Maintenance ENWW
Page 59

Managing the Print Cartridge
HP Policy on Non-HP Print Cartridges
Hewlett-Pac kard Company cannot recommend use of non-HP print
cartridges, either new or remanufactured. Because they are not HP
products, HP cannot influence their design or control their quality.
Caution Any damage caused by a non-HP print cartridge is not covered
under the HP warranty and service agreements.
To install a new HP print cartridge, follow the instructions included
in the start guide. To replace a HP print cartridge and recycle the
used cartridge, follow the instructions included with the new
cartridge.
Print Cartridge Storage
Do not remove the print cartridge from its package until you are
ready to use it. (The shelf life of a cartridge in an unopened package
is approximately 2.5 years.)
Caution To prevent damage to the print cartridge, do not expose it to light
for more than a few minutes.
Print Cartridge Life Expectancy
The life of the print cartridge depends on the amount of toner that
print jobs require. When printing text at 5% coverage, an HP print
cartridge lasts an average of 10,000 pages. (A typical business
letter is about 5% coverage.) This assumes that print density is set
to 3 and EconoMode is off. (These are the default settings.)
Caution HP does not recommend full-time use of EconoMode. (If
EconoMode is used consistently to print media with less than 5%
toner coverage, it is possible that the toner supply will outlast the
mechanical parts in the print cartridge.)
ENWW Chapter 3: Printer Maintenance 69
Page 60

Continue Printing When Toner is Low
When toner is low , the printer’s control panel displays the TONER LOW
message.
• If the TONER LOW message displays, but the printer continues
printing, TONER LOW is set to CONTINUE (the default setting).
• If the printer stops printing when low toner is detected, TONER LOW
is set to STOP. To resume printing, press [Go].
The printer will continue to display TONER LOW until y ou replace the
print cartridge.
Select TONER LOW=CONTINUE or TONER LOW=STOP from the
Configuration Menu in the control panel (page B-13).
70 Chapter 3: Printer Maintenance ENWW
Page 61

Redistributing the Toner
When toner is low, faded or light areas might appear on a printed
page. You might be able to temporarily improve print quality by
redistributing the toner. The f ollowing procedure might allow y ou to
finish the current print job before replacing the print cartridge.
1 Open the top cover.
2 Remove the print cartridge from the
printer.
WARNING!
Avoid reaching too far into the printer.
The adjacent fusing area might be hot!
Caution
To prevent damage to the print
cartridge, do not expose it to light for
more than a few minutes.
3 Rotate the print cartridge and gently
shake it from side to side to
redistribute the toner.
Note
If toner gets on your clothing, wipe it off
with a dry cloth and wash clothing in
cold water. (Hot water sets toner into
fabric.)
4 Reinsert the print cartridge into the
printer and close the top cover.
If the print remains light, install a new
print cartridge. (Follow the instructions
provided with the new print cartridge.)
ENWW Chapter 3: Printer Maintenance 71
Page 62

Cleaning the Printer
To maintain print quality, follow the cleaning procedure (on the
following page) every time the print cartridge is changed, or
whenever print quality problems occur . As much as possible , keep
the printer free from dust and debris.
• Clean the outside of the printer with a slightly water-dampened
cloth.
• Clean the inside with a dry, lint-free cloth.
Caution Do not use ammonia-based cleaners on or around the printer.
While cleaning the printer, be careful not to touch the transfer roller
(the black, rubber roller, located underneath the print cartridge).
Skin oils on the roller can cause print quality problems.
Figure 20 Location of the Transfer Roller—Do Not Touch!
72 Chapter 3: Printer Maintenance ENWW
Page 63

Cleaning the Printer
Before beginning these steps, turn the
printer off and unplug the power cord.
1 Open the top cover and remove the
print cartridge.
WARNING!
Avoid reaching too far into the printer.
The adjacent fusing area might be hot!
Caution
To prevent damage to the print
cartridge, do not expose it to light for
more than a few minutes.
2 Wipe any dust or dirt off the pape r
feed guides (shaded areas) with a
dry, lint-free cloth.
Note
If toner gets on your clothing, wipe it off
with a dry cloth and wash clothing in
cold water. (Hot water sets toner into
fabric.)
3 Using the green handles, lift the
paper access plates and wipe off
any residue with a dry , lint-free cloth.
4 Close the paper access plates,
replace the print cartridge, close the
top cover, plug in the power cord,
and turn the printer on.
ENWW Chapter 3: Printer Maintenance 73
Page 64

Using the Printer Cleaning Page
If toner specks appear on the front or back side of your print jobs,
follow the procedure below.
From the printer’s control panel, do the following:
1 Press [Menu] until PRINT QUALITY MENU appears.
2 Press [Item] until CREATE CLEANING PAGE appears.
3 Press [Select] to create the cleaning page.
4 Follow the instructions on the cleaning page to complete the
cleaning process.
Note In order for the cleaning page to work properly, print the page on
copier grade paper (not bond or rough paper).
You might need to create a cleaning page more than once. When
toner has been cleaned from inside the printer, shiny black spots
will appear on the page’s b lack strip. If white spots appear on the
black strip, create a cleaning page again.
To ensure good pr int quality with certain types of paper, use the
cleaning page every time the print cartr i dge is replaced. If the
cleaning page is frequently needed, tr y a different type of paper.
74 Chapter 3: Printer Maintenance ENWW
Page 65

Problem Solving
Overview
This chapter will help you to troubleshoot and solve printer
problems.
4
Clear paper
jams:
Understand
printer
messages:
Correct output
quality
problems:
Determine
printer
problems:
Occasionally, paper can jam during printing. This section will
help you to locate paper jams, properly clear them from the
printer, and solve repeated paper jams.
Many different messages can appear on the printer’s control
panel display. Some messages tell the printer’s current status,
such as INITIALIZING. Other messages require an action,
such as CLOSE TOP COVER. Many of these messages are
self-explanatory. However, some messages indicate a
problem with the printer, or require further action or description.
This section lists these types of messages, and tells what to
do if a message persists.
The printer should produce print jobs of the highest quality. If
print jobs do not look sharp and clea r, defects such as lines,
specks, or smears appear on the page, or paper is wrinkled or
curled, use this section to troubleshoot and solve the output
quality problem.
Before you can fix a printer problem, you must understand
where the problem lies. Use the flowchart in this section to
determine the printer problem, and then follow the
corresponding troubleshooting suggestions.
Check printer
configuration:
ENWW Chapter 4: Problem Solving 57
From the printer, you can print information pages, which give
details about the printer and its configuration.
Page 66

Clearing Paper Jams
If the printer’s control panel displays a paper jam message, look f or
paper in the locations indicated in Figure 15, then see the procedure
for clearing the paper jam. You might need to look for paper in other
locations than indicated in the paper jam message. If the location
of the paper jam is not obvious, look first in the top cover area.
When clearing paper jams, be very careful not to tear the paper. If
a small piece of paper is left in the printer, it could cause additional
jams. If paper jams are a recurring problem, see page 62.
Note A paper jam message might also display if the rear door is open.
The top cover of the printer must be opened and then closed to clear
a paper jam message.
Paper jams can occur at the following locations:
Output areas
(top and rear)
Go to page 61.
Top cover area
Go to page 60.
Input tray areas
Go to page 59.
Figure 15 Paper Jam Locations
Note Loose toner might remain in the printer after a paper jam, but the
toner should clear after a few sheets are printed.
58 Chapter 4: Problem Solving ENWW
Page 67

Clearing Jams from the Input Tray Areas
Note
To remove paper from the T ra y 1 area,
slowly pull the paper out of the printer.
For all other trays, follow the steps
below.
1 Slide the tray out of the printer, and
remove any damaged paper from
the tray.
2 If the edge of the paper is visible in
the feed area, slowly pull the paper
down and out of the printer. If the
paper is not visible, look in the top
cover area (page 60).
Note
Do not force the paper if it will not mo ve
easily . If the paper is stuck in a tra y, try
removing it through the tray above (if
applicable) or through the top cover
area (page 60).
3 Before replacing the tray , make sure
the paper is flat in the tray at all four
corners and below the tabs on the
guides.
4 Open and close the top cover to
clear the paper jam message.
If a paper jam message persists, there
is still paper in the printer. Look for
paper in another location (page 58).
ENWW Chapter 4: Problem Solving 59
Page 68

Clearing Jams from the Top Cover Area
1 Open the top cover and remove the
print cartridge.
Caution
To prevent damage to the print
cartridge, do not expose it to light for
more than a few minutes.
2 Use the green handles to lift the
paper access plates.
3 Slowly pull the paper out of the
printer. Do not tear the paper!
Note
Av oid spilling loose toner. Using a dry,
lint-free cloth, clean any loose toner
that might have fallen into the printer
(page 54).
If loose toner falls into the printer, it
might cause temporary problems with
print quality. Loose toner should clear
from the paper path after a few pages
are printed.
If toner gets on your clothing, wipe it off
with a dry cloth and wash clothing in
cold water. (Hot water sets toner into
fabric.)
4 Close the paper access plates,
replace the print cartridge, and
close the top cover.
If a paper jam message persists, there
is still paper in the printer. Look for
paper in another location (page 58).
60 Chapter 4: Problem Solving ENWW
Page 69

Clearing Jams from the Output Areas
Note
If paper is jammed in the top output
area, but most of the paper is still inside
the printer, it is best to remove it
through the rear door.
1 Push in the two gray latches to
release the rear door.
2 Push down the green paper release
levers.
3 Grasp both sides of the paper, and
slowly pull the paper out of the
printer. (There might be loose toner
on the paper. Be careful not to spill
it on yourself or into the printer.)
Note
If paper is difficult to remove, try
opening the top cover and removing
the print cartridge to release pressure
on the paper.
4 Close the rear door. (The levers
automatically return to their original
positions when the rear door is
closed.) Open and close the top
cover to clear the paper jam
message.
If a paper jam message persists, there
is still paper in the printer. Look for
paper in another location (page 58).
ENWW Chapter 4: Problem Solving 61
Page 70

Solving Repeated Paper Jams
If paper jams occur frequently, try the following:
• Check all the paper jam locations. A piece of paper might be stuck
somewhere in the printer. (See page 58.)
• Check that paper is correctly loaded in the trays, that the trays are
correctly adjusted for the loaded paper size, and that the trays are not
overfilled. (See the sections on loading paper, starting on page 24.)
• Check that Tray 2 is completely inserted into the printer. (If the tray is
opened during a print job, this might cause a paper jam.)
• Check that all covers and doors are closed. (If a cov er or door is opened
during a print job, this might cause a paper jam.)
• Try printing to a different output bin (page 20).
• The sheets might be sticking together. Try bending the stack to separate
each sheet. Do not fan the stack.
• If you are printing from T r a y 1, try feeding fe wer sheets of paper or fe wer
envelopes at a time.
• If you are printing small sizes (such as index cards), make sure the paper
is oriented correctly in the tray (page 36).
• Turn over the stack of paper in the tray. Also try rotating the paper 180°.
• T ry rotating paper (such as perforated or multi-sheet forms and labels) to
feed through the printer from a different orientation (page 33).
• Check the quality of the paper being printed. Damaged or irregular paper
should not be used.
• Use only paper that meets HP specifications (pages A-2 through A-12).
• Do not use paper that has already been used in a printer or copier. (Do
not print on both sides of envelopes, transparencies, vellum, or labels.)
• Check that the power supplied to the printer is steady , and meets printer
specifications (page A-14).
• Clean the printer (page 54).
• Contact an HP-authorized service or support provider to perform routine
printer maintenance. (See the telephone support flyer included with the
printer.)
62 Chapter 4: Problem Solving ENWW
Page 71

Understanding Printer Messages
The following table explains messages that might display on the
printer’s control panel. Printer messages and their meanings are
listed in alphabetical order, with numbered messages following.
If a message persists:
• If a message persists requesting that you load a tray, or if a
message indicates that a previous print job is still in the printer’s
memory, press [Go] to print or press [Cancel Job] to clear the
job from the printer’s memory.
• If a message persists after performing all of the recommended
actions, contact an HP-authorized service or support provider.
(See the telephone support flyer included with the printer.)
Note Not all messages are described in this user’s guide (many are
self-explanatory).
Some printer messages are affected by the Auto Continue and
Clearable Warning settings from the Configuration Menu in the
printer’s control panel (page B-13).
Printer Messages
Message Explanation or Recommended Action
ACCESS DENIED
MENUS LOCKED
CHECKING PAPER
The printer control panel function you are trying to access has been
locked to prevent unauthorized access.
The engine is rolling its rollers to check for possible paper jams.
PATH
CHOSEN LANGUAGE
NOT AVAILABLE
CLOSE TOP COVER
FLASH n
INITIALIZING
alternates with
A print job requested a printer language that does not exist in the
printer. The job will not print and will be cleared from memory.
Print the job using a driver for a different printer language, or add the
requested language to the printer (if available).
Press [Go] to continue.
The top cover is open and must be closed for printing to continue.
The flash DIMM can take a long time to initialize the first time that it
is used.
DO NOT POWER OFF
ENWW Chapter 4: Problem Solving 63
Page 72

Printer Messages (Continued)
Message Explanation or Recommended Action
FLASH DEVICE
FAILURE
FLASH FILE
OPERATION FAILED
FLASH FILE
SYSTEM IS FULL
FLASH IS
WRITE PROTECTED
INSTALL TONER
CARTRIDGE
INSTALL TRAY x
LOADING
PROGRAM <number>
alternates with
DO NOT POWER OFF
MANUALLY FEED
[TYPE] [SIZE]
The flash DIMM had a critical failure and no longer can be used.
Remove the flash DIMM and replace it with a new one.
The requested operation could not be performed. You might have
attempted an illegal operation, such as trying to download a file to a
non-existent directory.
Delete files from the flash DIMM or add another one. Download or
delete fonts. (See the software help for more information.)
The flash DIMM is protected, and no new files can be written to it.
The print cartridge has been removed and must be replaced for
printing to continue.
The printer is unable to print the current job, because the specified
tray (x) is open or not inserted correctly.
Re-insert the specified tray.
Programs and fonts can be stored on the printer’s file system. At
bootup time these entities are loaded into RAM. (These entities can
take a long time to load into RAM depending on the size and number
of entities being loaded.) The <number> specifies a sequence
number indicating the current program being loaded.
Load the requested paper into Tray 1.
Press [Go] if the desired paper is already loaded in Tray 1.
Press [-Value+] to scroll through the available types and sizes. Press
[Select] to accept the alternate type or size.
MEMORY FULL
STORED DATA LOST
MEMORY SETTINGS
CHANGED
There is no available memory in the printer. The current job might not
print correctly and some resources (such as downloaded fonts or
macros) might have been deleted.
You might want to add more memory to the printer (page C-1).
The printer changed its memory settings because it did not have
enough memory to use the previous settings for I/O Buffering and
Resource Saving. This usually occurs after removing memory from
the printer, or adding a printer language.
You might want to change memory settings for I/O Buffering and
Resource Saving (although default settings are usually best) or add
more memory to the printer (page C-1).
64 Chapter 4: Problem Solving ENWW
Page 73

Printer Messages (Continued)
Message Explanation or Recommended Action
MEMORY SHORTAGE
JOB CLEARED
MEMORY SHORTAGE
PAGE SIMPLIFIED
MOPY PAGE TOO
COMPLEX
alternates with
PRESS GO TO
CONTINUE
OFFLINE
OUTPUT BIN FULL
CLEAR (BIN nnn)
n (bin name)
PERFORM PRINTER
MAINTENANCE
The printer did not have enough free memory to print the entire job.
The remainder of the job will not print and will be cleared from
memory.
Press [Go] to continue.
Change the Resource Saving setting from the printer’s control panel
(page C-5) or add more memory to the printer (page C-1).
The printer had to compress the job in order to fit it in available
memory. Some data loss might have occurred.
Press [Go] to continue.
You might want to add more memory to the printer (page C-1).
The data (dense text, rules, raster or vector graphics) sent to the
printer was too complex.
Press [Go] to print the transferred data. (Some data might be lost.)
If this message appears often, simplify the print job.
Press [Go] to place the printer online.
The output bin is full and needs to be emptied.
Hewlett-Packard recommends that only HP-authorized service
technicians service the printer. However, you can perform most
routine maintenance. When the PERFORM PRINTER MAINTENANCE
message appears on the control panel, you will need to purchase a
printer maintenance kit and install the new parts.
RESEND UPGRADE
TRAY x EMPTY
ENWW Chapter 4: Problem Solving 65
There is an error in the printer’s flash firmware. Resend a valid
firmware image.
Load the empty tray (x) to clear the message.
If you do not load the specified tray, the printer will continue printing
from the next availab le tray, and the message will continue to display .
Page 74

Printer Messages (Continued)
Message Explanation or Recommended Action
TRAY x LOAD
[TYPE] [SIZE]
TRAY 2 LOAD
LEGAL
(or similar messages
requesting that you
load paper)
UNSUPPORTED SIZE
IN TRAY [YY]
USE [TYPE]
[SIZE] INSTEAD?
Load the requested paper into the specified tray (x). (See the sections
on loading paper, starting on page 24.)
Ensure that the trays are correctly adjusted for size. The siz e
displayed on the front of the paper tray must match the siz e of paper
loaded in the tray . The tra y type settings (and size for Tray 1) must be
set from the printer’s control panel (page 43).
If you are trying to print A4 or letter size paper, and this message
appears, make sure the default paper size is set correctly from the
Printing Menu in the printer’s control panel.
Press [Go] to print from the next available tray.
Press [-Value+] to scroll through the available types and sizes. Press
[Select] to accept the alternate type or size.
Load the requested paper into the indicated tray , or press [Select] to
override the message and to print on a loaded paper size.
If printing does not continue, press [Go].
An external paper handling device detected an unsupported paper
size. The printer will go offline until the condition is corrected.
If the requested paper size or type is not available, the printer asks if
it should use another paper size or type instead.
Press [-Value+] to scroll through the available types and sizes. Press
[Select] to accept the alternate type or size.
XX.YY
PRINTER ERROR
A printer error has occurred that can be cleared by pressing [Go] in
the printer’s control panel.
PRESS GO TO
CONTINUE
13.x PAPER JAM
[LOCATION]
20 INSUFFICIENT
MEMORY
alternates with
PRESS GO TO
Remove jammed paper from the specified location (page 58).
Open and close the top cover to clear the message.
If the message persists after all jams have been cleared, a sensor
might be stuck or broken. Contact an HP-authorized service or
support provider. (See the telephone support flyer included with the
printer.)
The printer received more data than can fit in its available memory.
You might have tried to transfer too many macros, soft fonts, or
complex graphics.
Press [Go] to print the transferred data (some data might be lost),
then simplify the print job or install additional memory (page C-1).
CONTINUE
66 Chapter 4: Problem Solving ENWW
Page 75

Printer Messages (Continued)
Message Explanation or Recommended Action
21 PAGE TOO
COMPLEX
alternates with
PRESS GO TO
CONTINUE
22 PARALLEL I/O
BUFFER OVERFLOW
alternates with
PRESS GO TO
CONTINUE
41.3 UNEXPECTED
PAPER SIZE
The data (dense text, rules, raster or vector graphics) sent to the
printer was too complex.
Press [Go] to print the transferred data. (Some data might be lost.)
To print the job without losing data, from the Configuration Menu in
the printer control panel, set PAGE PROTECT=ON, print the job, and
then return PAGE PROTECT=AUTO. (For more information, see
page B-12.) Do not leave PAGE PROTECT=ON; it might degrade
performance.
If this message appears often, simplify the print job.
Too much data was sent to the parallel port.
Check for a loose cable connection and be sure to use a high-quality
cable (page 7). (Some non-HP parallel cables might be missing pin
connections, or might otherwise not conform to the IEEE-1284
specification.)
This error can occur if the driver you are using is not IEEE-1284
compliant. For best results, use an HP driver that came with the printer
(page 17).
Press [Go] to clear the error message. (Data will be lost.)
If this message persists, contact an HP-authorized service or support
provider. (See the telephone support flyer included with the printer.)
The paper size you are trying to print is not the same as the settings
for the tray.
Make sure that all trays are correctly adjusted for size. The size
displayed on the front of the paper tray must match the siz e of paper
loaded in the tray. (The printer will continue trying to print the job until
size settings are correct.)
If you are trying to print from Tray 1, make sure the printer’s control
panel setting for paper size is correctly configured (page B-4).
After performing the actions above, press [Go]. The page containing
the error will automatically be reprinted. (Or, you might want to press
[Cancel Job] to clear the job from the printer’s memory.)
41.x
PRINTER ERROR
alternates with
PRESS GO TO
CONTINUE
50.x FUSER ERROR
ENWW Chapter 4: Problem Solving 67
A temporary printing error occurred.
Press [Go]. The page containing the error will automatically be
reprinted.
If this message persists, contact an HP-authorized service or support
provider. (See the telephone support flyer included with the printer.)
An internal error has occurred. T urn the printer off, and then turn the
printer on.
If this message persists, contact an HP-authorized service or support
provider. (See the telephone support flyer included with the printer.)
Page 76

Printer Messages (Continued)
Message Explanation or Recommended Action
51.x or 52.x
PRINTER ERROR
53.xy.zz
PRINTER ERROR
55 PRINTER ERROR
alternates with
PRESS GO TO
CONTINUE
A temporary printing error occurred.
Press [Go]. The page containing the error will automatically be
reprinted.
If this message persists, contact an HP-authorized service or support
provider. (See the telephone support flyer included with the printer.)
There is a problem with the printer’s memory. The DIMM that caused
the error will not be used. Values of x, y, and zz are as follows:
x = DIMM type 0 = ROM
1 = RAM
y = Device location 0 = Internal memory (ROM or RAM)
1 to 3 = DIMM slots 1, 2, or 3
zz = Error number
Turn the printer off, and then reseat the DIMM that caused the error.
Turn the printer on.
If the problem persists, move the DIMM to a different slot or replace
the specified DIMM (page C-2).
If this message persists, contact an HP-authorized service or support
provider. (See the telephone support flyer included with the printer.)
A temporary printing error occurred.
Press [Go]. The page containing the error will automatically be
reprinted.
If this message persists, contact an HP-authorized service or support
provider. (See the telephone support flyer included with the printer.)
56.x, 57.x,
58.x, or 59.x
PRINTER ERROR
62.x
PRINTER ERROR
64.x
PRINTER ERROR
A temporary printing error occurred.
Turn the printer off, and then turn the pri nter on.
If this message persists, contact an HP-authorized service or support
provider.(See the telephone support flyer included with the printer.)
There is a problem with the printer’s memory. The x va lue refers to
the location of the problem:
0 = Internal memory
1 to 3 = DIMM slots 1, 2, or 3
You might need to replace the specified DIMM.
If this message persists, contact an HP-authorized service or support
provider. (See the telephone support flyer included with the printer.)
A temporary printing error occurred.
Turn the printer off, and then turn the pri nter on.
If this message persists, contact an HP-authorized service or support
provider. (See the telephone support flyer included with the printer.)
68 Chapter 4: Problem Solving ENWW
Page 77

Printer Messages (Continued)
Message Explanation or Recommended Action
68 NVRAM ERROR
CHECK SETTINGS
68 NVRAM FULL
CHECK SETTINGS
69.x
PRINTER ERROR
79.xxxx
PRINTER ERROR
An error occurred in the printer’s nonvolatile memory (NVRAM) and
one or more printer settings has been reset to its factory default.
Print a configuration page and check the printer settings to determine
which values have changed (page 80).
Hold down [Cancel Job] while turning the printer on. This will clean
up the NVRAM by removing old areas that are not being used.
If this message persists, contact an HP-authorized service or support
provider. (See the telephone support flyer included with the printer.)
The printer’s nonvolatile memory (NVRAM) is full. Some settings
might have been re set to th e factory defaults.
Print a configuration page and check the printer settings to determine
which values have changed (page 80).
If this message persists, contact an HP-authorized service or support
provider. (See the telephone support flyer included with the printer.)
A temporary printing error occurred.
Turn the printer off, and then turn the pri nter on.
If this message persists, contact an HP-authorized service or support
provider. (See the telephone support flyer included with the printer.)
The printer detected an error. The numbers (xxxx) indicate the
specific type of error.
T urn the printer off, and then turn the printer on. T ry printing a job from
a different software application. If the job prints, go back to the first
application and try printing a different file. (If the message only
appears with a certain software application or print job, contact the
software vendor for assistance.)
If the message persists with different software applications and print
jobs, record the numbers that appear (xxxx) and contact an
HP-authorized service or support provider. (See the telephone
support flyer included with the printer.)
ENWW Chapter 4: Problem Solving 69
Page 78

Correcting Output Quality Problems
Use the examples below to determine which output quality problem
you are experiencing, then see the following table to troubleshoot
the problem.
Note The examples below depict letter-size paper that has passed
through the printer long-edge first. (If the paper has passed through
the printer short-edge first, lines and repeating defects will run
vertically rather than horizontally.)
Light Print or
Fade
Gray
Background
Misformed
Characters
Figure 16 Examples of Output Quality Problems
Toner Specks
(front or back)
Toner Smear
Page Skew
Dropouts
Loose Toner
Curl or Wave
Lines
Repeating
Defects
Wrinkles or
Creases
70 Chapter 4: Problem Solving ENWW
Page 79

Light Print or Fade
Lines
Dropouts
Toner Specks
Gray Background
Toner Smear
Loose Toner
Defects
Repeating
Misformed
Characters
Page Skew
Curl or Wave
11
1
1
Creases
Wrinkles or
1. Print a few more pages to see if the
2. Clean the inside of the printer
3. Make sure EconoMode is off in the
4. Turn over the stac k of paper in the
5. Check the paper (or other print
6. Check the printer’s environment
7. Make sure paper is loaded
Troubleshooting Steps
(Follow the steps in the
order they are listed.)
problem will correct itself.
(page 54) or use the printer’s
cleaning page (page 56).
software and in the control panel
(page B-7).
tray. Also try rotating the paper
180°.
media) type and quality
(pages A-2 through A-12).
(page A-14).
correctly and that the guides fit
properly against the paper stack.
(See the sections on loading
paper, starting on page24.)
8. Print to a different output bin
(page 20).
9. Adjust the toner density setting
(page B-7).
10.Change the fuser mode setting to
High (page B-5) or choose rough
paper type from the printer driver
(page 43).
11.Change the fuser mode setting to
Low (page B-5).
12.Redistribute the toner in the print
cartridge (page 53).
13.Install a new HP print cartridge.
(See instructions with the print
cartridge.)
14.To alternate small and standard
paper, from the Configur ation
Menu set
SPEED=SLOW.
15.After trying all the steps suggested
above, contact an HP-authorized
service or support provider. (See
the telephone support flyer
included with the printer.)
SMALL PAPER
ENWW Chapter 4: Problem Solving 71
Page 80

Determining Printer Problems
YES
Troubleshooting Flowchart
If the printer is not responding properly, use the flowchart to
determine the problem. If the printer does not pass a step, follow
the corresponding troubleshooting suggestions.
If you cannot resolve the problem after follo wing the suggestions in
this user’s guide, contact an HP-authorized service or support
provider. (See the telephone support flyer included with the printer.)
1 Does the control panel display READY?
NO
The display is
blank and the
printer’s fan is
off.
Check the power
cord connections
and the power
switch.
Plug the printer
into a different
outlet.
Check that the
power supplied to
the printer is
steady, and
meets printer
specifications
(page A-14).
The display is
blank but the
printer’s fan is
on.
Press any control
panel key to see
if the printer
responds. Turn
the printer off,
and then turn the
printer on. If this
does not work,
contact an
HP-authorized
service or
support provider.
(See the
telephone
support flyer
included with the
printer.)
The display is
in the wrong
language.
Turn the printer
off. Hold down
[Select] while
turning the
printer on. Press
[-Value+] to
scroll through the
available
languages. Press
[Select] to save
the desired
language as the
new default.
Press [Go] to
return to
READY.Turn the
printer off and on.
The display
shows garbled
or unfamiliar
characters.
Make sure the
desired language
is selected from
the control panel.
Turn the printer
off, and then turn
the printer on.
Reseat installed
accessories.
Go to step 2.
A message
other than
READY is
displayed.
Go to page 63.
72 Chapter 4: Problem Solving ENWW
Page 81

2 Can you print a configuration page?
YES
Go to step 3.
NO
A
configuration
page does not
print.
Check that all trays are properly
loaded, adjusted, and installed in
the printer. (See the sections on
loading paper, starting on page 24.)
From the computer , check the print
queue or print spooler to see if the
printer has been paused. If there
are problems with the current print
job, or if the printer is paused, a
configuration page will not print.
(Press [Cancel Job] and try Step 2
again.)
Print a configuration page to verify
that the printer is feeding paper
correctly (page 80).
A blank
page prints.
Check that the sealing tape is not still
in the print cartridge. (See the start
guide or the instructions that came
with the print cartridge.)
The print cartridge might be empty.
Install a new print cartridge.
A message other
than READY or
PRINTING
CONFIGURATION
is displayed.
Go to page 63.
ENWW Chapter 4: Problem Solving 73
Page 82

3 Can you print from a software application?
YES
Go to step 4.
NO
Print a short document from a software
application.
The job will
not print.
If the job will not print, and a message is displayed, see page 63. The printer might
From the computer, check to see if the printer has been paused.
Check the interface cable connections. Disconnect and reconnect the cable at the
computer and the printer.
Test the cable by trying it on another computer (if possible).
Make sure the cable is IEEE-1284 compliant.
To verify that it is not a computer problem, print from another computer (if possible).
Make sure the print job is being sent to the correct port (LPT1, or network printer
port, for example).
Check that you are using the proper printer driver (page 16).
Reinstall the printer driver. (See the start guide.)
Check that the port is configured and working properly . (One wa y to chec k this is to
connect another printer to that port and print.)
From the Configuration Menu in the printer’s control panel, make sure that
PERSONALITY=AUTO (page B-11).
Y ou might be missing a printer message that could help you solve the prob lem. From
the Configuration Menu in the printer’s control panel, temporarily turn the Clearable
Warnings and Auto Continue settings off (page B-13) and then print the job again.
A page of
commands
prints.
have received
PostScript code.
74 Chapter 4: Problem Solving ENWW
Page 83

4 Does the job print as expected?
YES
NO
continued
Print is garbled
or only a
portion of the
page prints.
Check that you are using the proper
printer driver (page 17).
The data file sent to the printer might
be corrupt. To test, try printing it on
another printer (if possible), or try a
different file.
Check the interface cable
connections. T est the cable by trying
it on another computer (if possible).
Replace the printer cable with a
high-quality cable (page 7).
Reduce the job’s complexity, print at
a lower resolution (page B-6), or
install more printer memory
(page C-1).
You might be missing a printer
message that could help you solve
the problem. From the Configuration
Menu in the printer’s control panel,
temporarily turn the Clearable
Warnings and Auto Continue
settings off (page B-13) and then
print the job again.
Printing
stops in the
middle of
the job.
[Cancel Job]
might have been
pressed.
Check that the
power supplied to
the printer is
steady, and
meets printer
specifications
(page A-14).
Print speed is
slower than
expected.
Simplify the print
job.
Add more
memory to the
printer
(page C-1).
A control panel
setting is not
taking effect.
Check settings in
the printer driver
or software
application.
(Printer driver
and software
commands
override control
panel settings.)
ENWW Chapter 4: Problem Solving 75
Page 84

Does the job print as expected? (continued)
YES
NO
Go to step 5.
The print
job is not
formatted
correctly.
Check that you are using the proper
printer driver (page 17).
Check the software settings. (See
the software help.)
Try a different font.
Make sure the setting of the dial in
the tray matches the size of the
paper loaded in the tray.
TRAY 1=FIRST is set in Paper
If
Handling Menu, the printer pulls
paper from T ray 1, regardless of size .
Pages are
not fed
correctly or are
damaged.
Make sure paper is loaded correctly
and that the guides are not too tight
or too loose against the paper stack.
(See the sections on loading paper,
starting on page 28.)
If you are trying to print A4 paper, the
side guides in the tray might have
slipped out of place. (Make sure the
side guides are loc ked in to position.)
If you are having problems printing
custom-size paper, see page 40.
If pages are wrinkled or curled, or if
the image is skewed on the page,
see page 71.
There are
print quality
problems.
Adjust the print
resolution
(page B-6).
Check that REt is
on (page B-6).
Go to page 71.
76 Chapter 4: Problem Solving ENWW
Page 85

5 Does the printer select the proper trays and
YES
output locations?
NO
The printer
pulls from the
wrong tray.
For other
problems,
check the
Contents, the
Index, or
the printer
software help.
A message
other than
READY is
displayed.
Make sure paper trays ar e c orrectly
configured for paper size and type
(page 47). Print a configuration page
to see current tray settings
(page 80).
Make sure the tray selection (or
paper type) in the printer driver or
software application is set correctly.
(The printer driver and software
application settings override the
printer’s control panel settings.)
If you do not want to print from T ray 1,
remove any paper loaded in the tra y
or change the
to CASSETTE (page 45). By default,
paper loaded in T ray 1 will be printed
first.
If you want to print from Tray 1, but
cannot select the tray from a
software application, see page 45.
TRAY 1 MODE setting
Go to page 63.
ENWW Chapter 4: Problem Solving 77
Page 86

Linux Problem Solving
For information about Linux problem solving, see the HP Linux
support homepage: http://hp.sourceforge.net/.
78 Chapter 4: Problem Solving ENWW
Page 87

Checking the Printer’s Configuration
From the printer’s control panel, you can print pages that give details
about the printer and its current configuration. The following
information pages are described here:
• Menu Map
• Configuration Page
• PCL Font List
For a complete list of the printer’s information pages, see the
Information Menu in the printer’s control panel (page B-3).
Menu Map
To see the current settings for the menus and items availab le in the
control panel, print a control panel menu map:
1 Press [Menu] until INFORMATION MENU appears.
2 Press [Item] until PRINT MENU MAP appears.
3 Press [Select] to print the menu map.
Y ou might want to store the menu map near the printer for reference.
The content of the menu map varies, depending on the options
currently installed in the printer. (Many of these values can be
overridden from the printer driver or software application.)
For a complete list of control panel items and possible values, see
page B-1. To change a control panel setting, see page 11.
ENWW Chapter 4: Problem Solving 79
Page 88

Configuration Page
Use the configuration page to view current printer settings, to help
troubleshoot printer problems, or to verify installation of optional
accessories, such as memory (DIMMs), and printer languages.
To print a configuration page:
1 Press [Menu] until INFORMATION MENU appears.
2 Press [Item] until PRINT CONFIGURATION appears.
3 Press [Select] to print the configuration page.
Figure 17 is a sample configurat io n p ag e. Numbers in the sample
printout match the numbers in the table. The content of the
configuration page varies, depending on the options currently
installed in the printer.
Figure 17 Sample Configuration Page
1
2
3
7
4
5
6
80 Chapter 4: Problem Solving ENWW
Page 89

Printer Information Lists the serial number, page counts, and other
1
information for the printer.
2
3
4
5
6
7
Event Log Lists the number of entries in the log, the maximum number
Installed Personalities
and Options
Memory Lists printer memory, PCL Driver Work Space (DWS), I/O
Security Lists the status of the printer’s control panel lock and control
Paper Trays and
Options
Toner Level Provides a graphic representation of how much toner is left in
of entries viewable, and the last three entries. The second
page of the event log is the manufacturing page. This page
contains information that may assist HP Customer Care
representatives in solving possible printer problems.
Lists all printer languages that are installed (such as PCL) and
lists options that are installed in each DIMM slot.
buffering information, and resource saving information.
panel password.
Lists the size settings for all trays.
the cartridge.
ENWW Chapter 4: Problem Solving 81
Page 90

PCL Font List
Use the font lists to see which fonts are currently installed in the
printer. (The font lists also sho w which fonts are resident on a flash
DIMM.)
To print a PCL font list:
1 Press [Menu] until INFORMATION MENU appears.
2 Press [Item] until PRINT PCL FONT LIST appears.
3 Press [Select] to print the font list.
The following describes the information that can be found on the
PCL font list:
• Font gives the font names and samples.
• Pitch/Point indicates the pitch or point size of the font.
• Escape Sequence (a PCL programming command) is used to
select the designated font. (See the legend at the bottom of the
font list page.)
Note For step-by-step instructions on using printer commands to select
a font with DOS applications, see page D-7.
• Font # is the number used to select fonts from the printer’s control
panel (not the software application). Do not confuse the font #
with the font ID, described below. The number indicates the DIMM
slot where the font is stored.
• SOFT: Downloaded fonts, which stay resident in the printer until
other fonts are downloaded to replace them, or until the printer
is turned off.
• INTERNAL: Fonts that permanently reside in the printer.
• Font ID is the number you assign to soft fonts when you download
them through software.
82 Chapter 4: Problem Solving ENWW
Page 91

Specifications
Overview
This appendix includes:
• Paper specifications
• Printer specifications
• Cable specifications
A
ENWW Specifications A-1
Page 92

Paper Specifications
HP LaserJet printers produce excellent print quality. This printer
accepts a variety of media, such as cut-sheet paper (including
recycled paper), envelopes, labels, transparencies, vellum, and
custom-size paper. Properties such as weight, grain, and moisture
content are important factors affecting printer performance and
output quality.
The printer can use a variety of paper and other print media in
accordance with the guidelines in this manual. Paper that does not
meet these guidelines may cause the following problems:
• poor print quality
• increased pa per jams
• prematu re wear on the printer, requiring repair
Note For best results, use only HP brand paper and print media.
Hewlett-Packard Company cannot recommend the use of other
brands. Because they are not HP products, HP cannot influence or
control their quality.
It is possible for paper to meet all of the guidelines in this manual
and still not produce satisfactory results. This might be the result of
improper handling, unacceptable temperature and humidity levels,
or other variables over which Hewlett-Packard has no control.
Before purchasing a large quantity of paper, make sure it meets the
requirements specified in this user’s guide and in the HP LaserJet
Printer Family Print Media Guide. (To order the guide, see page 7.)
Always test paper before purchasing a large quantity.
Caution Using paper outside HP specifications may cause problems for the
printer, requiring repair. This repair is not covered by the
Hewlett-Packard warranty or service agreements.
A-2 Specifications ENWW
Page 93

Polyester media
The use of polyester media through the printer for offset printing
applications will not effect or impact any e xisting printer warranties.
However, image print quality defects and jams are possible when
using polyester media. Only 1 sheet at a time should be fed through
Tray 1.
The media vendor should be contacted to resolve any perf ormance
issues related to the use of polyester media. For more information,
see the polyester media drawer statement at
http://www.hp.com/cposupport/printers/support_doc/
bpl07088.html.
ENWW Specifications A-3
Page 94

Supported Sizes and Weights of Paper
Tray 1 Dimensions
Minimum Size
(custom)
Maximum Size
(custom)
3 by 5 in
(76 by 127 mm)
12.28 by 18.5 in
(312 by 470 mm)
1
Weight Capacity
16 to 53 lb
(60 to 199 g/m2)
100 sheets of 20 lb
(75 g/m2) paper
Thickness:
Transparencies
0.0039 in to 0.0045 in
75 transparencies
(0.099 to 0.114 mm)
Labels
Same as minimum
and maximum paper
sizes listed above.
Thickness:
0.005 in to 0.007 in
(0.127 mm to
50 labels
0.178 mm)
Envelopes
1.The printer supports a wide range of paper sizes. Check the printer software for supported sizes. To print custom-size paper, see page 35.
2.Capacity may vary depending on paper weight and thickness, and environmental conditions.
20 to 28 lb
(75 to 105 g/m
2
)
10 envelopes
2
A-4 Specifications ENWW
Page 95

Tray 2 Dimensions
1
Weight Capacity
2
Letter
A4
Executive
Legal
B5 (JIS)
A5
11 x 17
A3
B4 (JIS)
1.The printer supports a wide range of media sizes. Check the printer software for supported sizes.
2.Capacity may vary depending on media weight and thickness, and environmental conditions.
8.5 by 11 in
(216 by 279 mm)
8.3 by 11.7 in
(210 by 297 mm)
7.3 by 10.5 in
(191 by 267 mm)
8.5 by 14 in
(216 by 356 mm)
7.2 by 10 in
(182 by 257 mm)
5.8 by 8.2 in
(148 by 210 mm)
11 by 17 in
(279 by 432 mm)
11.7 by 16.5 in
(297 by 420 mm)
10.1 by 14.3 in
(257 by 364 mm)
16 to 28 lb
(60 to 105 g/m2)
250 sheets of 20 lb
(75 g/m2) paper
Supported Types of Paper
The printer support s the following types of paper:
• plain • preprinted
• letterhead • transparency
• prepunched • labels
• bond • recycled
• color • card stock
• rough • vellum
ENWW Specifications A-5
Page 96

Guidelines for Using Paper
For best results, use conv entional 20 lb (75 g/m2) paper. Make sure
the paper is of good quality, and free of cuts, nicks, tears, spots,
loose particles, dust, wrinkles, voids, and curled or bent edges.
If you are unsure what type of paper you are loading (such as bond
or recycled), check the label on the package of paper.
Some paper causes print quality problems, jamming, or damage to
the printer.
Symptom Problem with Paper Solution
Poor print quality or toner
adhesion.
Problems with feeding.
Dropouts, jamming, curl. Stored improperly.
Increased gray background
shading.
Excessive curl.
Problems with feeding.
Jamming, damage to printer. Cutouts or perforations.
Problems with feeding. Ragged edges. Use good quality paper.
Note Do not use letterhead paper that is printed with low-temperature
Too moist, too rough, too
smooth, or embossed; faulty
paper lot.
Too heavy.
Too moist, wrong grain
direction or short-grain
construction.
Try another kind of paper,
between 100-250 Sheffield,
4-6% moisture content.
Store paper flat in its
moisture-proof wrapping.
Use lighter paper.
Open the rear output bin.
Open the rear output bin.
Use long-grain paper.
Set
FUSER MODE=LOW
(page B-5).
Use higher-quality paper with
cutouts or perforations.
inks, such as those used in some types of thermography.
Do not use raised letterhead.
Lower-quality cutout, perforated, or pre-punched media increases
the risk of jams.
The printer uses heat and pressure to fuse toner to the paper. Make
sure that any colored paper or preprinted forms use inks that are
compatible with the printer’s temperature (400° F or 205° C for
0.1 second).
A-6 Specifications ENWW
Page 97

Paper Weight Equivalence Table
Use this table to determine approximate equivalent points in weight
specifications other than U.S. bond weight. For example, to
determine the equivalent of 20 lb U.S. bond weight paper in U.S.
cover weight, locate the bond weight (in row 3, second column) and
scan across the row to the cover weight (in the f ourth column). The
equivalent is 28 lb.
Shaded areas indicate a standard weight for that grade.
U.S.
Post
Card
thick-
ness
(mm)
U.S.
1
Bond
Weight
(lb)
U.S.
Text/
Book
Weight
(lb)
U.S.
Cover
Weight
(lb)
U.S.
Bristol
Weight
(lb)
U.S.
Index
Weight
(lb)
U.S.
Tag
Weight
(lb)
Europe
Metric
Weight
2
(g/m
Japan
Metric
Weight
)
(g/m
1 16 41 22 27 33 37 60 60
2 17432429353964
3
4 215430364449
20 50 28 34 42 46 75 75
80 80
5 22563138465181
6
7 276837455561
8
9
10 34 86 47 58 71 79 128
11
12
.18 39 100 55 67 82 91 148 148
13 .19 42 107 58 72 87 97 157
24 60 33 41 50 55 90 90
100 100
28 70 39 49 58 65 105 105
32 80 44 55 67 74 120 120
128
36 90 50 62 75 83 135 135
157
64
81
2
)
14
15 .23 47 119
16 53 134 74 90
1.U.S. Post Card measurements are approximate. Use for reference only.
ENWW Specifications A-7
.20 43 110 60 74 90 100 163 163
65 80 97 108 176 176
110 122 199 199
Page 98

Labels
Caution To avoid damaging the printer, use only labels recommended for
use in laser printers.
If you have problems printing labels, use Tray 1 and open the rear
output bin.
Never print on the same sheet of labels more than once.
Label Construction
When selecting labels, consider the quality of each component:
• Adhesives: The adhesive material should be stable at 400° F
(205° C), the printer’s maximum temperature.
• Arrangement: Only use labels with no exposed backing between
them. Labels can peel off sheets with spaces between the labels,
causing serious jams.
• Curl: Prior to printing, labels must lie flat with no more than
0.5 inch (13 millimeters) of curl in any direction.
• Condition: Do not use labels with wrinkles, bubbles, or other
indications of separation.
To print sheets of labels, see page 31.
Transparencies
T ransparencies used in the printer must be able to withstand 400° F
(205° C), the printer’s maximum temperature, for 0.1 second. Close
the rear output bin to print transparencies to the top output bin.
Caution To avoid damaging the printer, use only transparencies
recommended for use in laser printers.
If you have problems printing transparencies, use Tray 1.
To print transparencies, see page 32.
A-8 Specifications ENWW
Page 99

Vellum
Vellum is special lightweight paper similar to parchment. Print
vellum from Tray 1 only, and open the rear output bin. Do not print
on both sides of vellum.
Vellum used in the printer must be able to withstand 400° F
(205° C), the printer’s maximum temperature, for 0.1 second. To
print vellum, see page 38.
Envelopes
Envelope Construction
Envelope construction is critical. Envelope fold lines can vary
considerably , not only between manuf acturers, but also within a box
from the same manufacturer. Successful printing on envelopes
depends upon the quality of the envelopes. When selecting
envelopes, consider the following components:
• Weight: The weight of the envelope paper should not exceed
28 lb (105 g/m
2
), or jamming may result.
• Construction: Prior to printing, envelopes should lie flat with less
than 0.25 inch (6 mm) curl, and should not contain air. (Envelopes
that trap air may cause problems.)
• Condition: Make sure enve lopes are not wrinkled, nicked, or
otherwise damaged.
• Sizes in Tray 1: From 3 by 5 inches (76 by 127 mm) to 8.5 by 14
inches (216 by 356 mm) 12.28 by 18.5 inches (312 by 470 mm).
Always print env elopes from T ray 1 (page 29). To pre vent envelopes
from wrinkling or jamming, open the rear output bin.
ENWW Specifications A-9
Page 100

Envelopes with Double-Side-Seams
Double-side-seam construction has vertical seams at both ends of
the envelope rather than diagonal seams. This style ma y be more
likely to wrinkle. Be sure the seam extends all the wa y to the corner
of the envelope as illustrated belo w.
Acceptable
Unacceptable
Figure A-1 Envelopes with Double-Side-Seams
Envelopes with Adhesive Strips or Flaps
Envelopes with a peel-off adhesive strip or with more than one flap
that folds over to seal must use adhesives compatib le with the heat
and pressure in the printer. The extr a flaps and strips might cause
wrinkling, creasing, or jams.
A-10 Specifications ENWW
 Loading...