


UH70939
Hoover UH70939, UH70935, UH70930, UH70905, UH70901 Owner’s Manual
...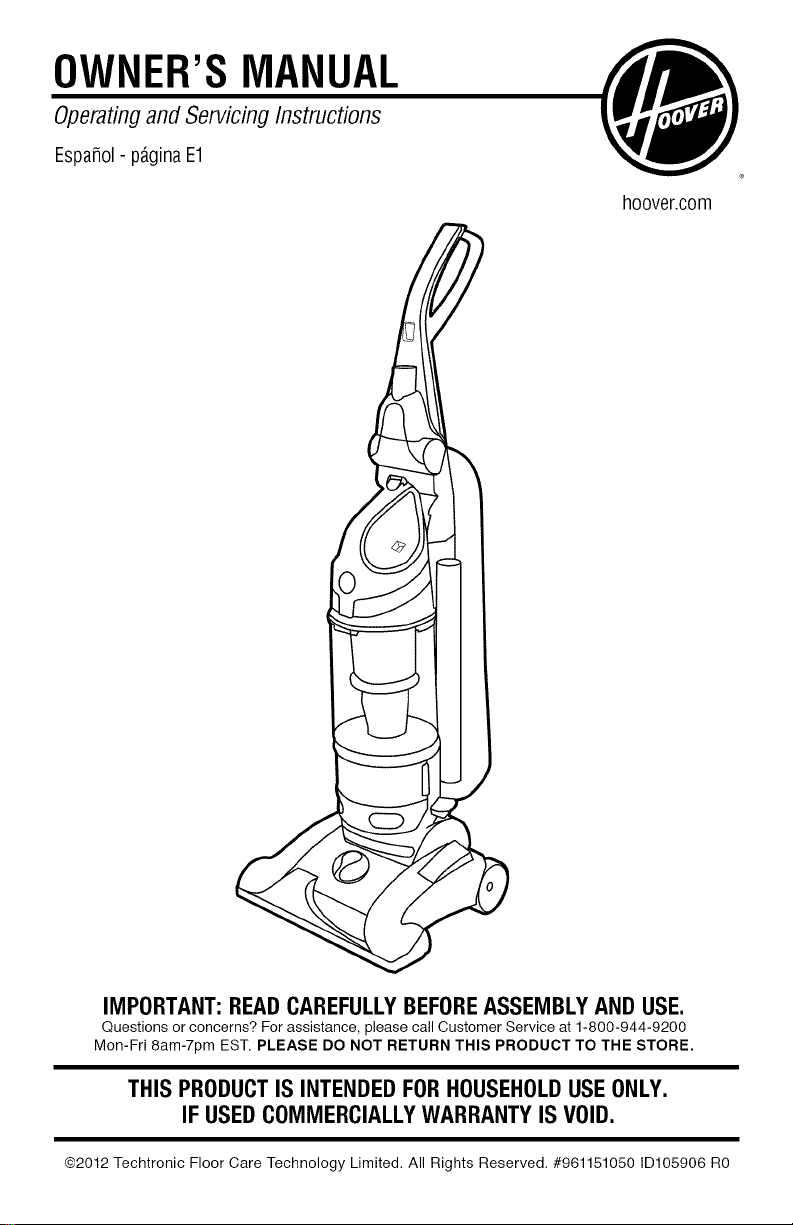
OWNER,S MANUAL j_b,
hoover.com
®
IMPORTANT:READCAREFULLYBEFOREASSEMBLYANDUSE.
Questions or concerns? For assistance, please call Customer Service at 1-800-944-9200
Mon-Fri 8am-7pm EST. PLEASE DO NOT RETURN THIS PRODUCT TO THE STORE.
THIS PRODUCTIS INTENDEDFORHOUSEHOLDUSEONLY.
IF USEDCOMMERCIALLYWARRANTYIS VOID.
@2012 Techtronic Floor Care Technology Limited, All Rights Reserved. #961151050 ID105906 R0
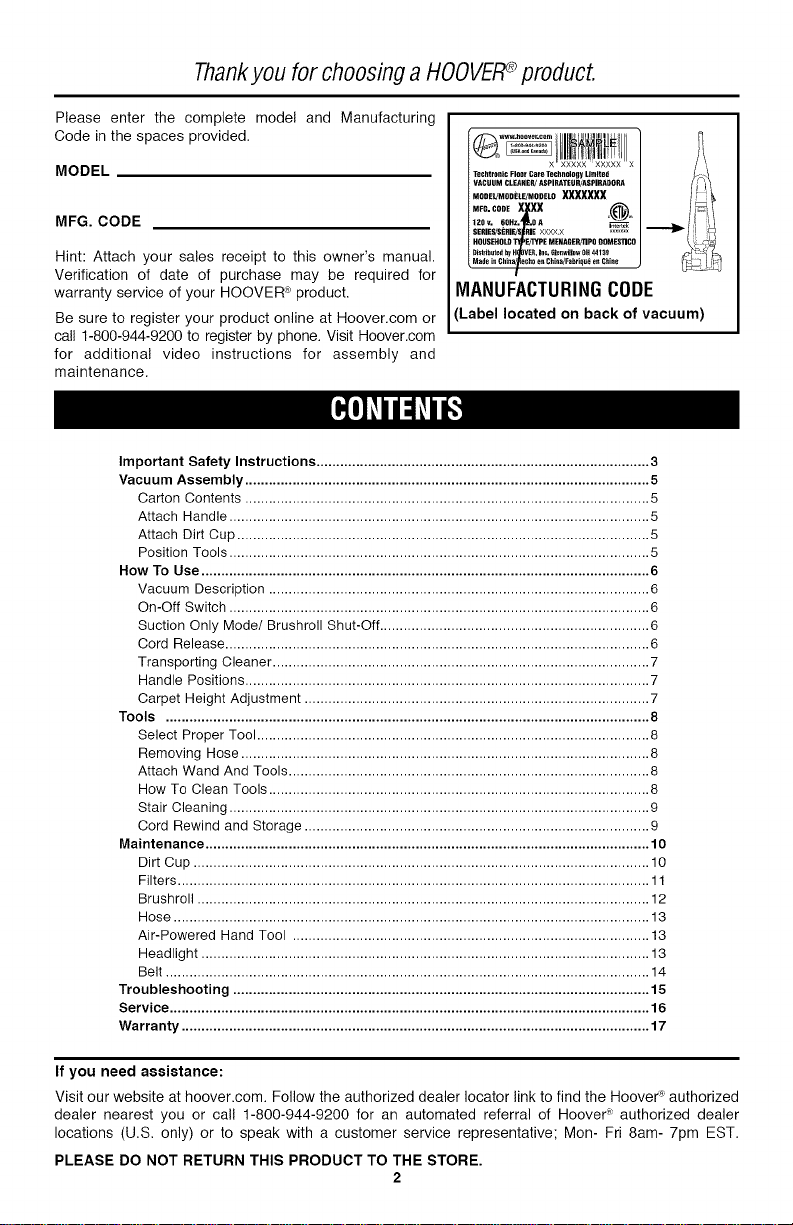
Thankyou for choosing aHOOVER° product.
Please enter the complete model and Manufacturing
Code in the spaces provided.
MODEL
MFG. CODE
Hint: Attach your sales receipt to this owner's manual.
Verification of date of purchase may be required for
warranty service of your HOOVER _ product.
Be sure to register your product online at Hoover.com or
call 1-800-944-9200 to register by phone. Visit Hoover.com
for additional video instructions for assembly and
maintenance.
important Safety Instructions .................................................................................... 3
Vacuum Assembly ...................................................................................................... 5
Carton Contents ...................................................................................................... 5
Attach Handle .......................................................................................................... 5
Attach Dirt Cup ........................................................................................................ 5
Position Tools .......................................................................................................... 5
How To Use ................................................................................................................. 6
Vacuum Description ................................................................................................ 6
On-Off Switch .......................................................................................................... 6
Suction Only Mode/Brushroll Shut-Off .................................................................... 6
Cord Release ........................................................................................................... 6
Transporting Cleaner ............................................................................................... 7
Handle Positions ...................................................................................................... 7
Carpet Height Adjustment ....................................................................................... 7
Tools .......................................................................................................................... 8
Select Proper Tool ................................................................................................... 8
Removing Hose ....................................................................................................... 8
Attach Wand And Tools ........................................................................................... 8
How To Clean Tools ................................................................................................ 8
Btair Cleaning .......................................................................................................... 9
Cord Rewind and Btorage ....................................................................................... 9
Maintenance ................................................................................................................ 10
Dirt Cup ................................................................................................................... 10
Filters ....................................................................................................................... 11
Brushroll .................................................................................................................. 12
Hose ........................................................................................................................ 13
Air-Powered Hand Tool .......................................................................................... 13
Headlight ................................................................................................................. 13
Belt .......................................................................................................................... 14
Troubleshooting ......................................................................................................... 15
Service ......................................................................................................................... 16
Warranty ...................................................................................................................... 17
Techtronlc Floor Care Technology Urn[ted /
VACUUM CLEANER! ASPIRATEQR/ASPIRADORA
,,,°.,o,,xpx _../
120v. 60Hz. OA _ |
SERIES/SERIEJS RIE XX,v,x X _x_,
Distributed byH VER, Inc, Glenwil_w OH44139
HOUSEHOLDS@ PE MENAGER!TIPQDOMES]]CO
MaCe inChin enChina/Fabriqu_ en Chine
/MOOEI_MOI)ELE/MODELOXXXXXXX
/
MANUFACTURINGCODE
(Label located on back of vacuum)
If you need assistance:
Visit our website at hoover.com. Follow the authorized dealer locater link to find the Hoover '_authorized
dealer nearest you or call 1-800-944-9200 for an automated referral of Hoover _; authorized dealer
locations (U.S. only) or to speak with a customer service representative; Mon- Fri 8am- 7pm EST.
PLEASE DO NOT RETURN THIS PRODUCT TO THE STORE.
2
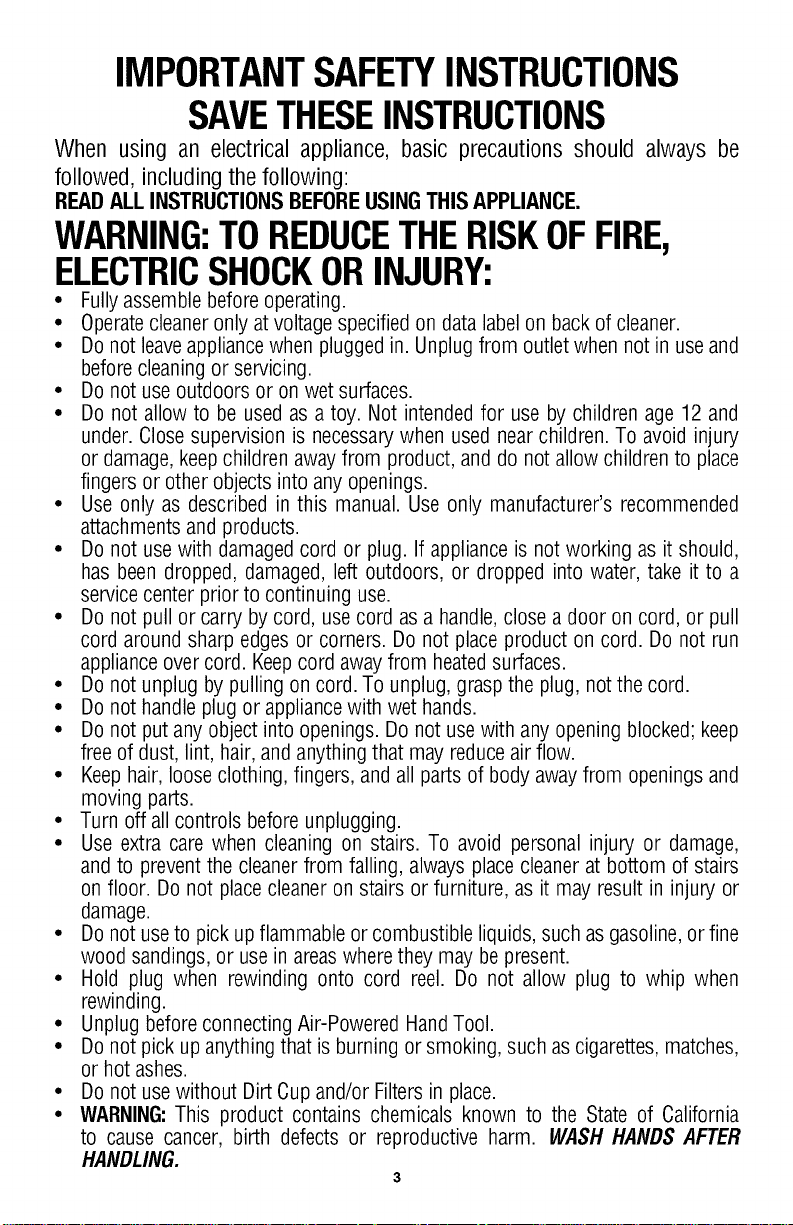
IMPORTANTSAFETYINSTRUCTIONS
SAVETHESEINSTRUCTIONS
When using an electrical appliance, basic precautions should always be
followed, including the following:
READALL INSTRUCTIONSBEFOREUSING THIS APPLIANCE.
WARNING:TOREDUCETHERISKOFFIRE,
ELECTRICSHOCKORINJURY:
• Fully assemble before operating.
• Operatecleaner only at voltage specified on data label on back of cleaner.
• Do not leaveappliance when plugged in. Unplug from outlet when not in use and
before cleaning or servicing.
• Do not use outdoors or on wet surfaces.
• Do not allow to be used as a toy. Not intended for use by children age 12 and
under. Close supervision is necessary when used near children. To avoid injury
or damage, keepchildren awayfrom product, and do not allow children to place
fingers or other objects into any openings.
• Use only as described in this manual. Use only manufacturer's recommended
attachments and products.
• Do not use with damaged cord or plug. If appliance is not working as it should,
has been dropped, damaged, left outdoors, or dropped into water, take it to a
service center prior to continuing use.
• Do not pull or carry by cord, use cord as a handle, close a door on cord, or pull
cord around sharp edges or corners. Do not place product on cord. Do not run
appliance over cord. Keep cord away from heated surfaces.
• Do not unplug by pulling on cord. To unplug, grasp the plug, not the cord.
• Do not handle plug or appliance with wet hands.
• Do not put any object into openings. Do not use with any opening blocked; keep
free of dust, lint, hair, and anything that may reduce air flow.
• Keephair, looseclothing, fingers, and all parts of body away from openings and
moving parts.
• Turn off all controls before unplugging.
• Use extra care when cleaning on stairs. To avoid personal injury or damage,
and to prevent the cleaner from falling, always place cleaner at bottom of stairs
on floor. Do not place cleaner on stairs or furniture, as it may result in injury or
damage.
• Do not use to pick up flammable or combustible liquids, such as gasoline, or fine
wood sandings, or use inareas where they may be present.
• Hold plug when rewinding onto cord reel. Do not allow plug to whip when
rewinding.
• Unplug before connecting Air-Powered Hand Tool.
• Do not pick upanything that is burning or smoking, such as cigarettes, matches,
or hot ashes.
• Do not use without Dirt Cup and/or Filters in place.
• WARNING:This product contains chemicals known to the State of California
to cause cancer, birth defects or reproductive harm. WASH HANDS AFTER
HANDLING.
3

CAUTION:TOREDUCETHERISKOFDAMAGE:
• Avoid picking up hard, sharp objects with this product, as they may cause
damage.
• Store appropriately indoors in a dry place. Do not expose machine to freezing
temperatures.
• Do not use sharp objects to clean out hose as they can cause damage.
• With brushroll on, do not allow cleaner to sit in one location for an extended
period of time, as damage to floor can result.
WARNING:
• To reduce the risk of electric shock, this appliance hasa polarized plug (one blade
iswider than the other). This plug will fit ina polarized outlet only one way. If the
plug does not fit fully in the outlet, reversethe plug. If it still does not fit, contact a
qualified electricanto install the proper outlet. Donot changethe plug in any way.
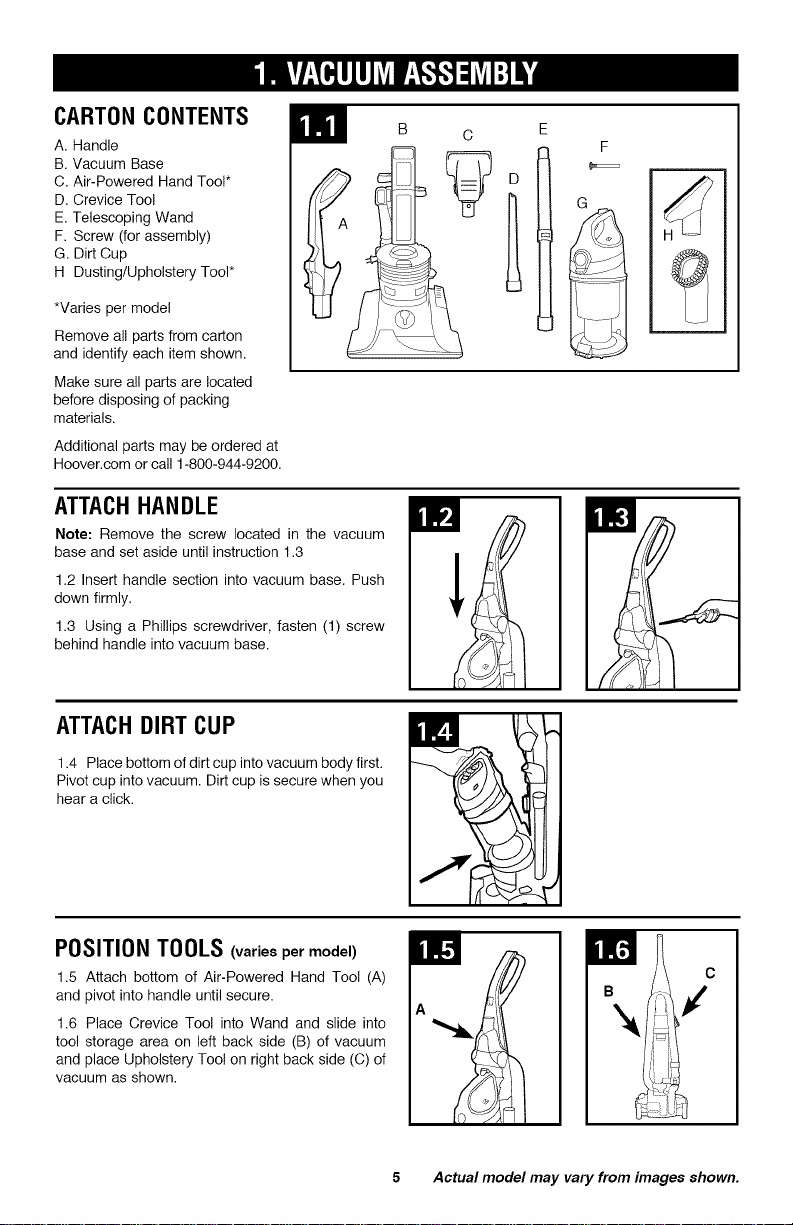
CARTONCONTENTS
A. Handle
B. Vacuum Base
C. Air-Powered Hand Tool*
D. Crevice Tool
E. Telescoping Wand
F. Screw (for assembly)
G. Dirt Cup
H Dusting/Upholstery Tool*
*Varies per model
Remove all parts from carton
and identify each item shown.
Make sure all parts are located
before disposing of packing
materials.
Additional parts may be ordered at
Hoover.com or call 1-800-944-9200.
II!
ATTACHHANDLE
Note: Remove the screw located in the vacuum
base and set aside until instruction 1.3
1.2 Insert handle section into vacuum base. Push
down firmly.
1.3 Using a Phillips screwdriver, fasten (1) screw
behind handle into vacuum base.
B C E
F
@
ATTACHDIRT CUP
1.4 Place bottom of dirt cup intovacuum body first.
Pivot cup into vacuum. Dirtcup is secure when you
hear a click.
POSITION TOOLS (varies per model)
1.5 Attach bottom of Air-Powered Hand Too! (A)
and pivot into handle until secure.
1.6 Place Crevice Tool into Wand and slide into
tool storage area on left back side (B) of vacuum
and place Upholstery Tool on right back side (C) of
vacuum as shown.
5 Actual model may vary from images shown.
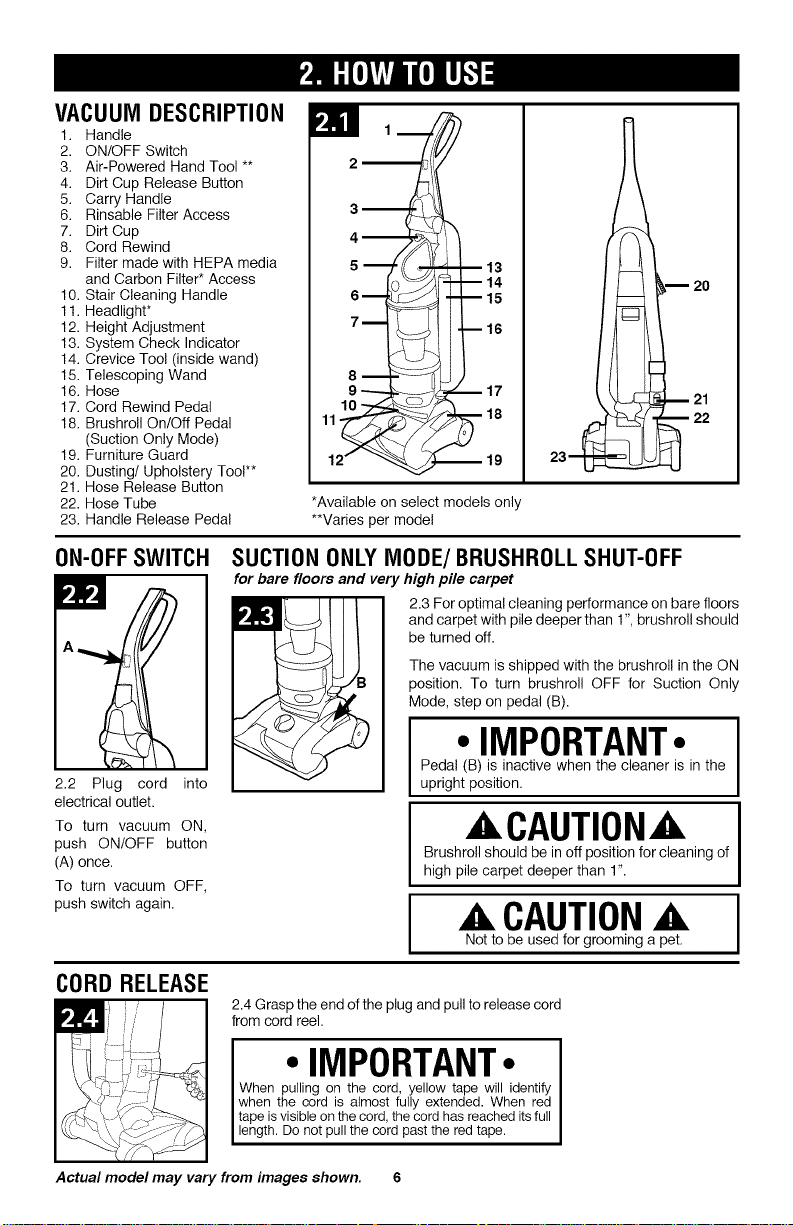
VACUUM DESCRIPTION
1. Handle
2. ON/OFF Switch
3. Air-Powered Hand Tool **
4. Dirt Cup Release Button
5. Carry Handle
6. Rinsable Filter Access
7. Dirt Cup
8. Cord Rewind
9, Filter made with HEPA media
and Carbon Filter* Access
10. Stair Cleaning Handle
1I. Headlight*
12. Height Adjustment
13. System Check Indicator
14. Crevice Tool (inside wand)
15. Telescoping Wand
16. Hose
17. Cord Rewind Pedal
18, Brushroll On/Off Pedal
(Suction Only Mode)
19. Furniture Guard
20. Dusting/Upholstery Too!**
21. Hose Release Button
22. Hose Tube
23, Handle Release Pedal
W lm
13
14
15
16
18
*Available on select models only
**Varies per model
m 2o
21
22
23-"_
ON-OFFSWITCH
2.2 Plug cord into
electrical outlet.
To turn vacuum ON,
push ON/OFF button
(A) once.
To turn vacuum OFF,
push switch again.
CORD RELEASE
SUCTION ONLYMODE/BRUSHROLL SHUT-OFF
for bare floors and very high pile carpet
2.3 For optimal cleaning performance on bare floors
and carpet with pile deeper than 1", brushroll should
be turned off.
The vacuum is shipped with the brushroll in the ON
position. To turn brushroll OFF for Suction Only
Mode, step on pedal (B).
• IMPORTANT•
Pedal (B) is inactive when the cleaner is in the
upright position.
ACAUTION_
Brushroll should be in off position for cleaning of
high pile carpet deeper than 1".
A CAUTION,&
Not to be used for grooming a pet.
2.4 Grasp the end of the plug and pull to release cord
from cord reel.
• IMPORTANT•
When pulling on the cord, yellow tape will identify
when the cord is almost fully extended. When red
tape is visible on the cord, the cord has reached its full
length. Do not pull the cord past the red tape.
Actual model may vary from images shown. 6
 Loading...