


WDYN D
Instruction
Book
Instructions for installation and use

Contents
Introduction
Introduction 3
Delivery Information 3
Guarantee 3
Customer Service 4
Caring for the Environment 5
Warning and Safety Instructions 6
Unpacking the Product 8
Installation 9
Electricity Supply 9
Water Supply 10
Connecting the Cold Water Supply 11
Connecting the Drainage Pipe 12
Levelling the Machine 13
Testing the Installation 13
Description of the Machine 15
The Control Panel 16
Digital Display 17
Wash Options 19
Dry Options 21
Automatic Features 22
Programme Descriptions 23
Programme Guide 26
Detergent 28
Laundry 29
Washing Advice 30
Running a Wash Cycle 31
Drying Advice 33
Running a Dry Cycle 34
Care and Maintenance 36
Problem Solving Guide 38
After Sales Service 42
Please read and follow these instructions carefully and operate the machine
accordingly. This booklet provides important guidelines for safe use,
installation, maintenance and some useful advice for best results when
using your machine.
Please complete the information below referencing your products details found on the
rating plate that is attached to the porthole of your machine:
Model Number:___________________
Serial Number (16 digits): _ _ _ _ _ _ _ _ _ _ _ _ _ _ _ _
Our customer service advisors will require this information whenever you contact
Hoover. Please keep all documentation in a safe place for future reference or for any
future owners.
Delivery information
Please check that the following items are delivered with the appliance:
● Instruction manual
● Guarantee card
● Blanking plugs
● Inlet hose
Check that no damage has occurred to the machine during transit.
Guarantee
Your new Hoover appliance comes with a 12-month call-out, parts and labour
guarantee. Registering your appliance also gives you an additional 4-year parts
guarantee absolutely free. To activate both your 12-month and 4 year guarantees, you
must register your appliance within 30 days, quoting your model number, serial
number, plus the date and price of you purchase.
Register your appliance now by calling
08444 810 157
or register online
www.hoover.co.uk
If you would like to register for an additional 4 years labour protection, please ask our
service advisor for cost details, or complete the enclosed form.
2
3
Customer Service
Caring for the environment
At Hoover, we aim to make appliances that are reliable and long lasting. However,
should your appliance need to be serviced during its working life, no one is more
qualified to maintain your appliance than our own Hoover Service engineers. To book
a service call or to ask our customer service advisors for help on using your appliance,
please call:
08705 400 600
Alternatively, you can consult our Problem Solving Guide on page 38.
Technical data
■ Max. load of dry laundry for washing
■ Max. load of dry laundry for drying
■ Water pressure
0.05 ÷ 0.8 MPa
8 kg
5 kg
Together, we share the responsibility to safeguard our environment for future
generations.
At Hoover, that means continually developing new, intelligent technologies to produce
electrical appliances that perform more efficiently and use less electricity and less
water. This significantly reduces the carbon footprint from your appliance.
Our ongoing commitment will ensure that we will continue to develop more intelligent,
more efficient appliances for future generations.
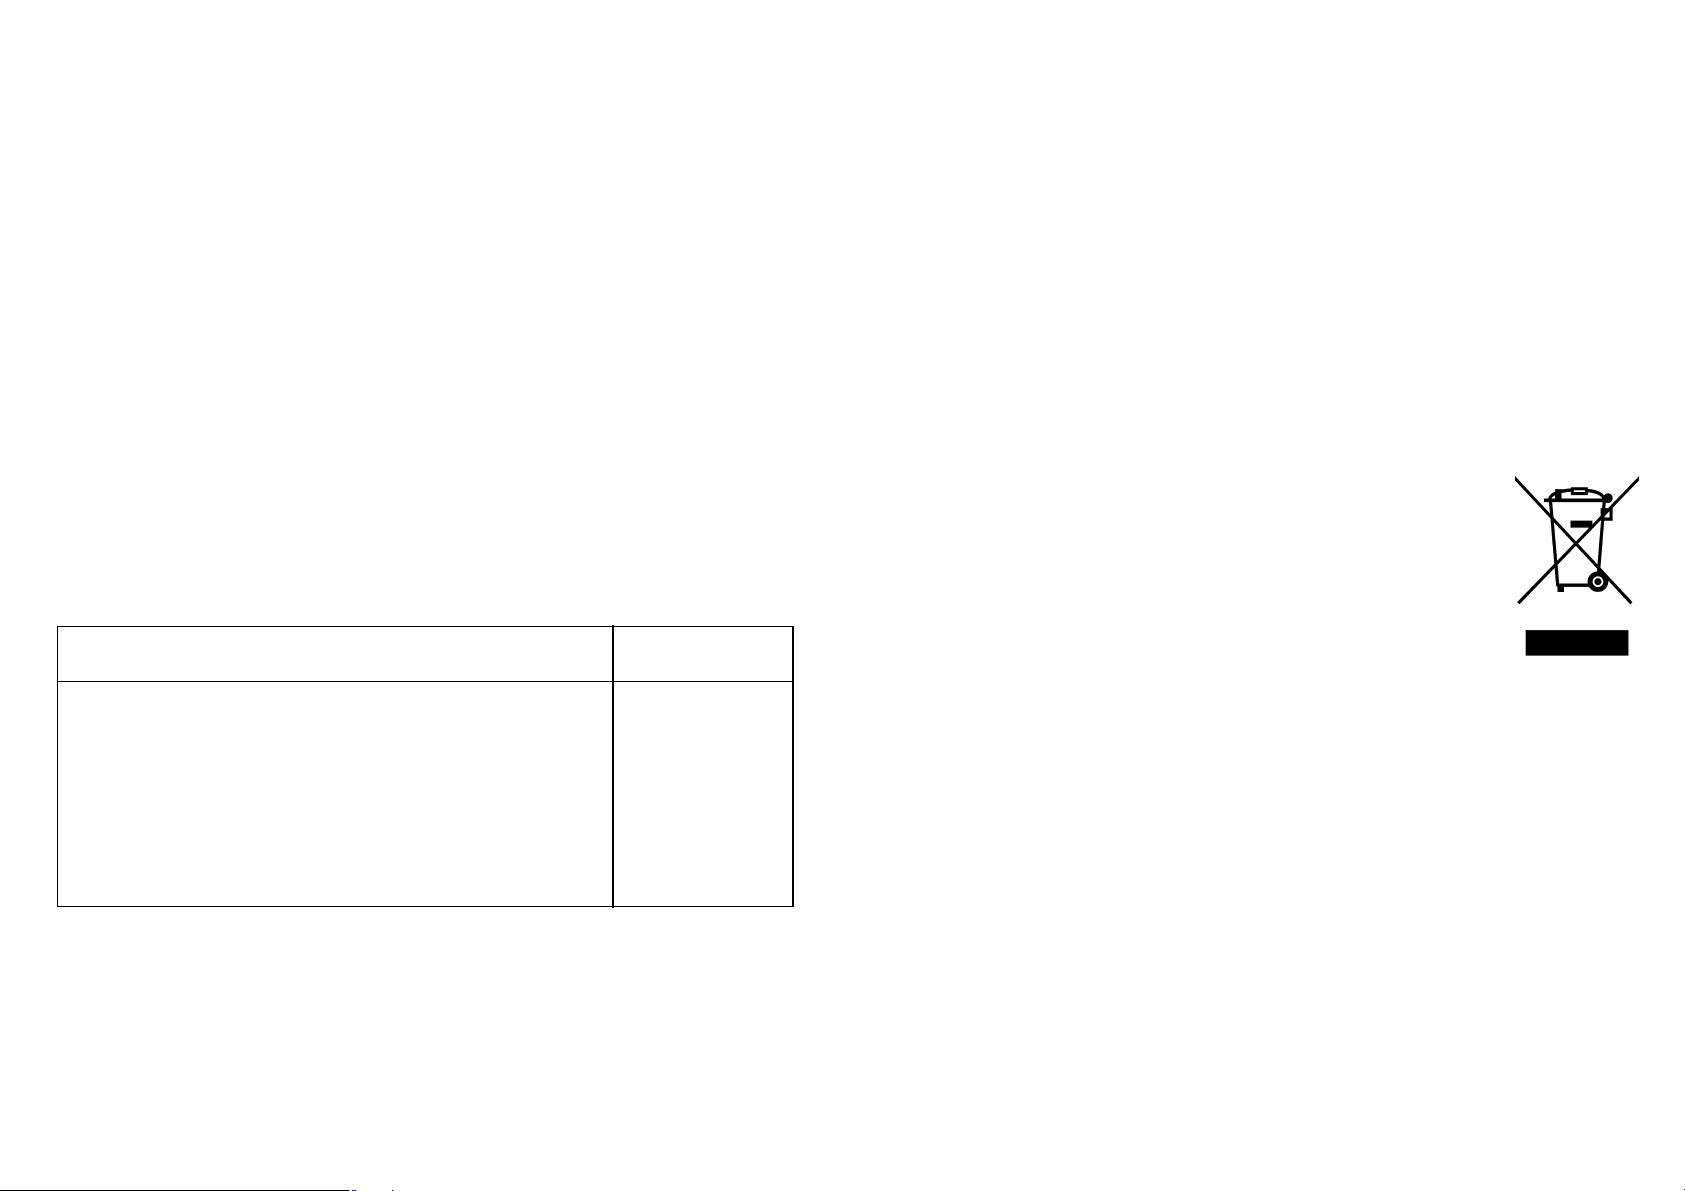
European Directive
2002/96/EC
This appliance is marked according to the European directive
2002/96/EC on Waste Electrical and Electronic Equipment
(WEEE).
By ensuring this product is disposed of correctly, you will help
prevent potential negative consequences for the environment and
human health, which could otherwise be caused by inappropriate
waste handling of this product.
The symbol on the product indicates that this product may not be
treated as household waste. Instead it shall be handed over to the
applicable collection point for the recycling of electrical and
electronic equipment.
Measurements
■ Height
■ Width
■ Depth
NB: For specifications regarding electrical data, see the data panel on the front of the
washing machine (porthole area).
4
85 cm
60 cm
54 cm
Disposal must be carried out in accordance with local
environmental regulations for waste disposal.
For more detailed information about treatment, recovery and
recycling of this product, please contact your local city office, your
household waste disposal service or the shop where you purchased
the product.
5

Warning and Safety
Instructions
This machine is solely for domestic use, i.e. to wash, rinse and spin dry household
textiles and garments.
Do not touch the appliance when hands or feet are damp or wet.
Do not lean on the door when loading the machine or use the door to lift or move the
machine.
Do not try to open the door when water is visible in the drum or the door locked
indicator is ON.
Do not touch the drained water as it may reach extremely high temperatures.
Do not use adapters, multiple connectors and / or extensions leads.
Do not pull the power cord or the appliance itself to remove the plug from the socket.
Ensure the appliance mains supply is earthed, and if it is not, seek assistance from a
qualified person.
If the power cable is damaged, it must only ever be replaced by an authorised
serviceman.
If the appliance is installed on a carpeted floor ensure that the ventilation holes on the
base of the appliance are not obstructed.
The appliance must not be installed behind a lockable door, a sliding door or a door
with a hinge on the opposite side to that of the washer dryer.
If the appliance is not running properly or breaks down, switch off the power, turn off
the tap and do not tamper with the appliance. Contact an authorised serviceman and
ask them to use official Hoover spare parts.
Warning! The company denies all liability if and when these instructions are not
respected.
Never force the porthole door: doing so may damage the safety lock mechanism
designed to prevent the door being opened accidentally.
This appliance is not intended for use by persons (including children) with reduced
physical, sensory or mental capabilities, or lack of experience and knowledge, unless
they have been given supervision or instruction concerning use of the appliance by a
person responsible for their safety.
Children should be supervised to ensure that they do not play with the appliance.
When moving the appliance, never lift it by the controls, detergent drawer or door,
and never attempt to move it alone as the machine is extremely heavy.
When in transit, never rest the door against the trolley or transport the appliance
without its polystyrene base.
6
7
Unpacking the Product
Installation
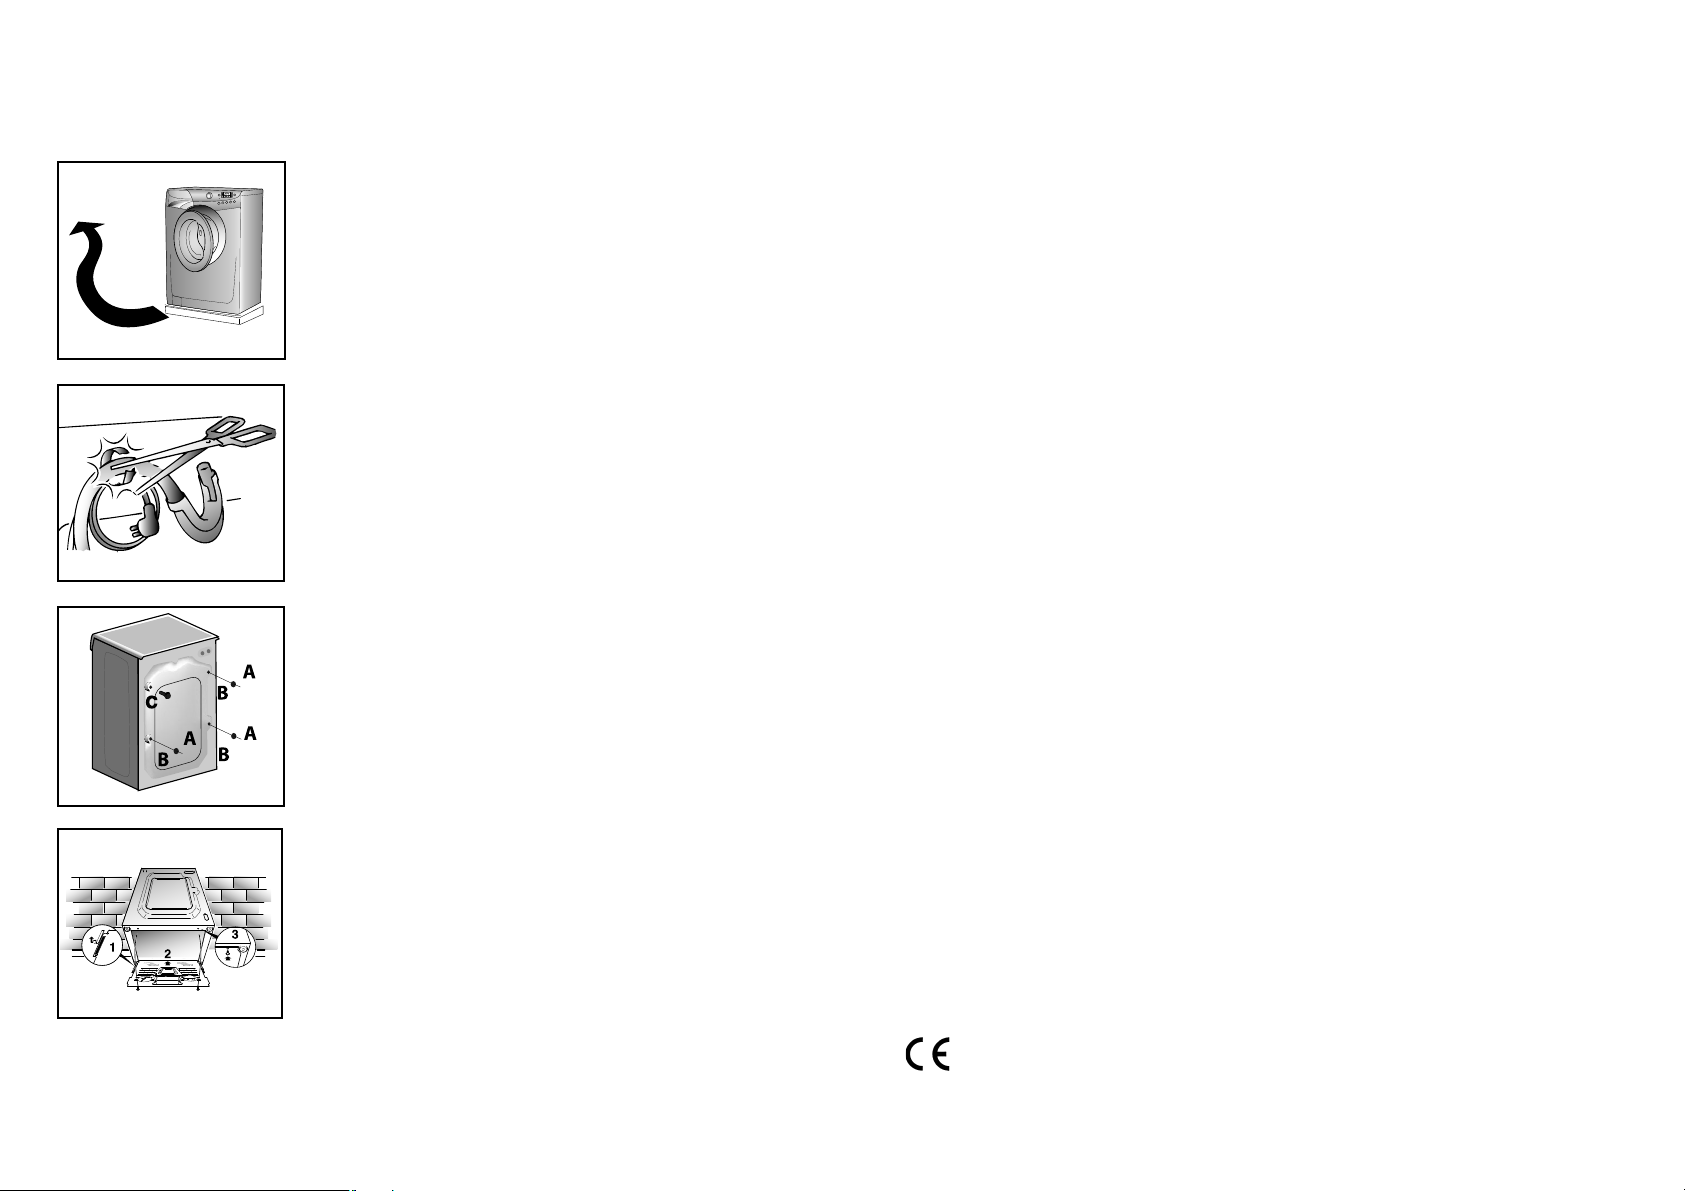
Remove the machine from its packaging close to the final location of the machine.
Step 1. Remove all outer packaging from the
machine. Check there is no damage to the machine
before continuing the installation process.
Step 2. Carefully cut through the hose-retaining clip
at the rear of the machine, taking care not to cut
the hose itself.
Step 3. Remove the 3 retaining screws (A) at the
rear of the machine, as indicated in the image on
the left.
Remove the screw (C).
A spacer will fall inside the machine.
By tilting the machine, remove the above mentioned
spacer.
Use the blanking plugs provided in the instruction
booklet pack to cover the holes once the screws
have been removed.
Before installing the machine, ensure that the mains plug and water supply valves are
easily accessible from your chosen machine location.
Make sure there is enough space for the machine. Select a space at least 600mm wide
and 850mm high. Also leave enough space to open the door fully so you can load
and unload it easily.
Keep the area underneath and around the machine free of combustible materials such
as lint, paper, rags, chemicals etc.
All machines are tested with water prior to leaving the factory, so a small amount of
water may be present in the drum and the drain hose.
Flooding may occur if any part of the installation process is not completed correctly.
Electricity Supply
Washing machines are supplied to operate at a voltage of 230-240V, 50 Hz single
phase. Please check that the supply circuit is rated to at least 13A.
The plug is already equipped with a 13A fuse, which is BS 1362 ASTA approved. Any
replacement must be the same rating and specification. If the fuse cover is lost, do not
use the plug until it is replaced.
Electricity can be extremely dangerous. Please take care when connecting your
machine to the electricity supply.
This washing machine must be earthed.
Step 4. Tilt the machine forward and apply the
insulation base panel (corrugated plastic) to the
base of the machine using the self-adhesive strips.
All packaging materials used are environmentally friendly and recyclable. Please help
dispose of the packaging via environmentally friendly means. Your local council will be
able to give you details of current means of disposal.
8
The socket outlet and the plug on the appliance must be of the same type.
Do not use multiple adapters and/or extension leads.
The wires in the mains lead are coloured in accordance with the following codes:
Blue NEUTRAL
Brown LIVE
Green and Yellow EARTH
Appliance complies with European Directive 73/23/EEC, 89/336/EEC
replaced by 2006/95/EC and 2004/108/EC and subsequent amendments.
9

Water Supply
Connecting the Cold Water
This machine should only be connected to a cold-water supply. The cold-water
pressure should be between 0.5 and 8 bar (0.05-0.8 Mpa).
Do not connect the machine to a single outlet instantaneous water heater.
Before connecting the fill hose, check that the water is running from the water supply
tap to be used. Let the water flow from the tap until the water runs clear before
connecting to the machine. The water supply tap should be accessible when the
machine is installed.
Supply
Only one hose is required to install this machine to a cold water supply. Cold fill is an
energy efficient system. Only the water required to wash the laundry is heated. There
is no loss of heat in the pipeline from the hot water tank or the boiler.
If your previous machine installation was hot and cold fill ensure that the hot tap is
firmly closed to prevent leakage.
This machine has an inlet hose with a 19mm (3/4") threaded ferrule fitted to the end,
to attach between the threaded connector on the appliance and the water supply. Only
use the new hose supplied to connect the machine and ensure that the sealing washers
are in place inside the hose connectors.
Do not re-use old hoses that are attached to existing installations.
Do not over-tighten the connections. Hand tight is sufficient.
Do not trap or kink the hose.
Step 1. Connect the elbow end of the hose
provided to the threaded inlet on the back of the
machine.
The grey pipe needs to connect to the white
threaded inlet on the machine.
10
Step 2. Hand tighten the connector.
Step 3. Connect the straight ends of the pipes to
the water supply; ensure that there are no kinks.
Step 4. Turn on the water supply and check there
are no leaks. If there is a leak, turn off the water
supply, disconnect the hose and check the sealing
washers are in place. Refit the hose and turn on
the water supply.
11
Connecting the drainage pipe
Levelling The Machine
This machine must be connected in accordance with the water supply regulations.
Water bylaws prohibit connection to a surface water drain.
Decide which plumbing option suits you best then follow the instructions below:
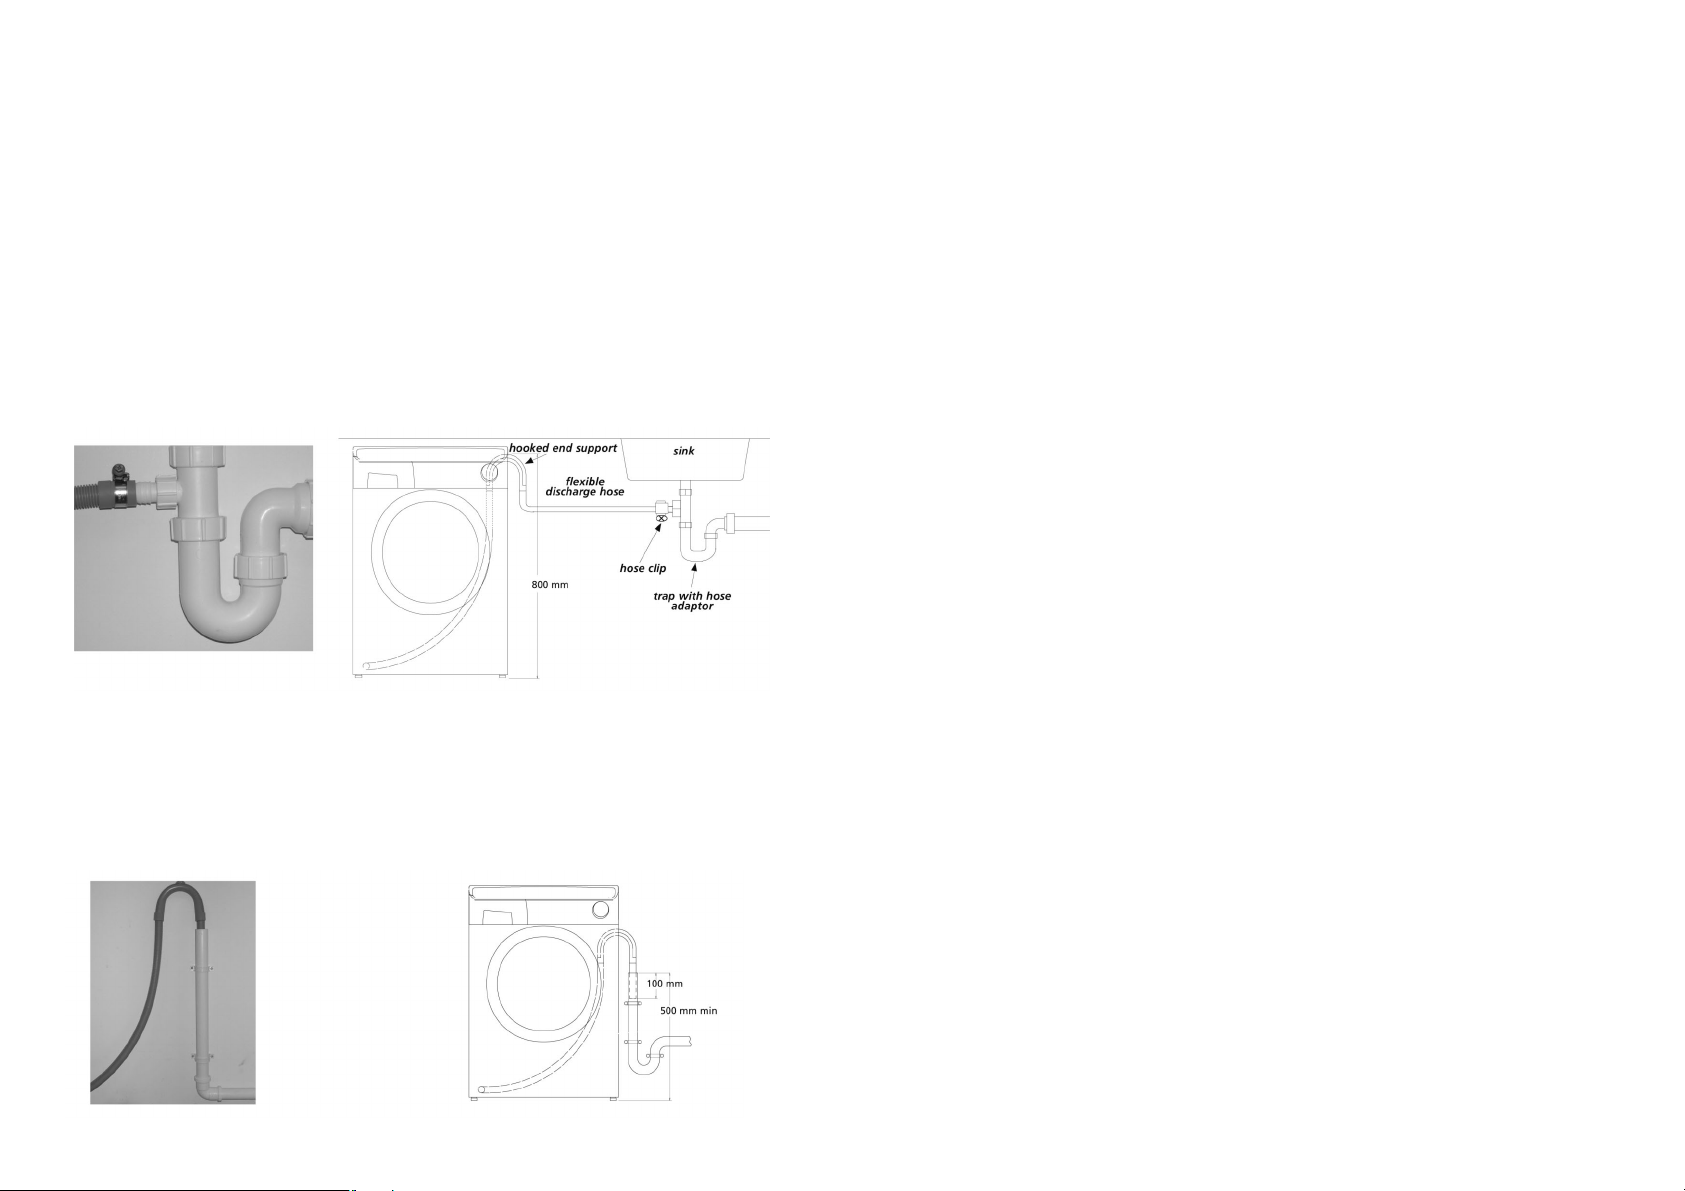
Option 1 - Waste pipe connection (waste trap)
Fit the hooked end support to the outlet pipe and position it at least 800mm off the
floor.
After removing the blanking plug, or cutting the membrane from the waste system,
securely fix the outlet pipe to the drainage system, using a hose clip.
Secure the hooked end support up to at least 800mm to avoid water being drawn
back into the machine.
Your machine is heavy so care must be taken when moving it.
We recommend that two people move the machine to avoid strain and possible injury.
Take care not to damage flooring when moving the machine and do not drag or lift
the machine by its door.
When moving the machine to its final position, take care not to kink or damage the
hose at the back of the machine.
Once the machine is in place the feet should be adjusted to ensure that the machine is
level. If the machine is not level it may become very noisy or move during the spin
cycle.
Step 1. Turn the locking nut clockwise to release the screw adjuster on the feet.
Step 2. Adjust the feet on the corners of the machine by rotating each foot to raise or
lower its position until it is firm and level on the ground.
Step 3. When the machine is firm and level, tighten the locking nuts on the feet in an
anti-clockwise direction until they reach the base of the machine.
Testing the Installation
Refer to “Selecting the wash programme” for details of how to select programmes.
Step 1. Turn on the water supply and check for leaks from the fill hose.
Option 2 - Into a standpipe
Ensure that the standpipe is not located near an electrical socket.
Fit the hooked end support to the outlet pipe. Install the hose into the standpipe
ensuring that the pipe is at least 500mm from the floor.
Insert the outlet pipe approximately 100mm into the standpipe.
12
Step 2. Switch on the electricity supply.
Step 3. Select the spin programme and then press the Start Pause button to start the
machine. Allow the programme to continue for one minute and then cancel the
programme by returning the selector to the OFF position. This will remove any water
remaining in the machine from factory testing.
Step 4. To check for cold water filling to the machine:
Select the rinse programme and press the Start Pause button to start the machine.
Once the rinse has finished, allow the tumble action to continue until the water has
pumped out. Check that the drain outlet is not leaking or overflowing.
13

Step 5. Switch off the machine at the end of the cycle by turning the Programme
Selector to the OFF position.
Step 6. Select the spin programme and press the Start Pause button to start the
machine. If the machine takes longer than one minute to empty check the drain hose
for kinks.
Installation testing is now complete.
Description of the Machine
The Hoover Washer Dryer details are indicated below:
Now you have successfully installed the machine we advise that you run the machine
to ensure the drum is thoroughly clean after testing and storage. Select Cottons 90°C
programme and run the machine for a complete cycle using only wash detergent and
water.
This programme will take approximately 2 hours to complete.
Detergent
Dispenser
Porthole
Door
Filter
Control
Panel
Door
Handle
Adjustable
Feet
14
15
 Loading...