


ZISW480DRF
GE ZISW480DRF, ZISW480DRE, ZISW420DRF, ZISW420DRE, ZISW360DRF Owner’s Manual
...
OwneF_s
Manual
Side-by-Side
B6"42"48"
Built-In Refrigerators
Monogram_
Consumer Infbrmation
Built-In R</)'ig'erators
Introduction Your new Monogram refl'igerator makes an eloquent statement of style, convenience and kitchen
planning flexibility: Whether you chose it fin" its purity of design, practical storage arrangements
or assiduous attention to detail--or fin" all of these reasons--you'll find that your Monogram
refl'igerator's superior blend of fl_rm and traction will delight you fl_r years to come.
The Monogram refl'igerator was designed to provide the flexibility to blend in with wmr kitchen
cabinetry. Decorative door insert panels allow it to match wmr kitchen cabinets or blend with
vour kitchen decor. Through a series of product choices, the Monogram refl'igerator can be
beautififlly integrated into the kitchen.
Since this is designed to be a built-in product, custom panels are required on the fl'ont
of the Monogram refl_igerator. Consult wmr kitchen designer or cabinetmaker for your
customized look.
The intormation on the fi_llowing pages will hel I) you operate and maintain vour
refl'igerator i)roperly.
If w)u have any questions, visit our website at: ge,com
ConWn_
Consumer Services
hnportant Phone Numbers ............. 31
Model and Serial Numbers .............. 3
Problem Solver . .................. 25-28
Product Registration ................... 3
Satetv lnsttuctions .................. 4-7
Smartwater Filter Pert)finance
Dam Sheet .......................... 29
State of Califin'nia
_V_ter Treatment Device Certificate ...... 30
_V_rrantv ................... Back Cover
Care and Clemfing
Cleaning--Outside and Inside .......... 19
Cleaning--Condenser . ............... 24
I,ight Bulb Replacement ........... 20-23
Moving and Vacation ................. 24
Master I,ight Switch ................... 21
Operating Instructions
Automatic lcemaker . ................. 12
Climate Control Drawer . ........ 13, 14, 16
Control I,ock ........................ 14
Ice and X_'ater Dispenser . ........... 10, 11
Shelves and Bins .................. 17, 18
Storage Pans ..................... 15, 16
Temperature Controls .................. 8
_V_ter Filter Cartridge .................. 9
Sabbath Mode Product 14dt, ZSAB1 ....... 18
Consunmr Infbnnation
Buill-In I¢_f*'ig'eralors
Be/ore
using your
r@igewator
Read this manual carefllllv. It is intended
to hel I) you operate and maintain wmr new
refl'igerator properly:
Kee I) it handy fl)r answers to vom" questions.
If wm don't tmderstand something or need
more hell) , there is a list of toll-free consumer
service nmnbe_ included in the back section
of this manual.
OR
Visit otu" X_'ebsite at: ge.com
Write
down the
model &
serial
n _Ll_ll)_s
You'll see them on a label above the fl'eezer
compartment behind the grille panel,
These nmnbers are also on the Consmner
Product Ownership Registration Card
included with this manual,
Before sending in this cm'd, please write these
numbers here:
Model Nmnber
Serial Nmnber
Use these nmnbers in any correspondence or
serxice calls concerning yore" refrigerator.
If you
received a
damaged
r@igerator
hmnediatelv contact the dealer (or builder)
that sold xou the refrigerator,
Save time
& money
Before you request service, check the
Problem Solver in the back of this manual.
It lists causes of minor operating problems that
VO/I C_lll correct _,otlrself.
If you
,teed
service
To obtain service, see the Consumer Services
page in the back of this mmmal.
_'e're proud of our service and want wm to be
pleased. If tin" some reason you are not hal)py
with the service you receive, here are steps to
ti_llow tot flu'ther hell).
For customers in the USA:
FIRST, contact the people who serxiced yore"
appliance. Explain wh) you are not pleased.
In most cases, this will solxe the problem.
NEXT, if you are still not pleased, write all the
details--including, _,otu', I)h°ne ntunber--to:
Manager, Customer Relations
GE Appliances
Appliance Park
I,ouis_ille, KY 40925
For customers in Canada:
FIRST, contact the people who serviced vom"
appliance. Explain why you are not pleased.
In most cases, this will solve the problem.
NEXT, if wm are still not pleased, write all the
details-including yotu" phone ntunber to:
Manage_; (]onsulner Relations
Camco Inc.
1 Factory i,ane, Suite 310
Moncton, N.B. E1C 9M3
IMPORTANT SAFETY INSTRUCTIONS
BEAD AND SAVE THESE INS TR UCTIONS
WARNING - X hen.sin
this appliance, alwa):s exercise basic saletv
i)recautions, ii_cluding the tollowing:
• Use this appliance only for its intended
purpose as described in this Owner's Malmal.
• This refrigerator must be properly installed
in accordance with the Installation
Instructions before it is used.
• Do not allow children to cfimb, stand or
hang on the shelves in the refrigerator.
They could damage the refrigerator and
seriously injure thelnselves.
• After your refrigerator is in operation,
do not touch the cold surfaces in the
freezer compartment, particularly when
hands are dmnp or wet. Skin inav adhere
to these extrelnelv cold surtaces.
• Do not store or use gasoline or other
flammable vapors and liquids in the
vicinhy of this or any other applimace.
• In refrigerators with an automatic icema_ker,
avoid contact with the Inoving parts of the
ejector u_echai_isln, or with the heating
eleu_ent located on the bottom of the
iceulaker. Do not place fingeI_ or hands on
the autolnatic icelnaking u_echai_isu_ while
the refrigerator is l_lugged ill
• Keep fingers out of the "pinch point" areas:
clearances between the doors aim between
the doors aim cabinet are necessarily slnall.
Be carefld closing doors when children are
in the area.
• Unplug your refrigerator before clemfing
mad making repairs. NOTE: We strongly
recomu_ei_d that any servicing be i)ertorlned
by a qualified individual.
• Before replacing a burned-out light bulb,
set the Master I,ight switch in the OFF
position to turn off the lights in order to
avoid contact with a live wire filau_ent.
(A burned-out light bulb may break when
being replaced.) NOTE: Setting the
refl'igerator telnperature controls to OFF
does not remove power to the light circuit.
• Do not refreeze frozen foods which have
thawed completely.
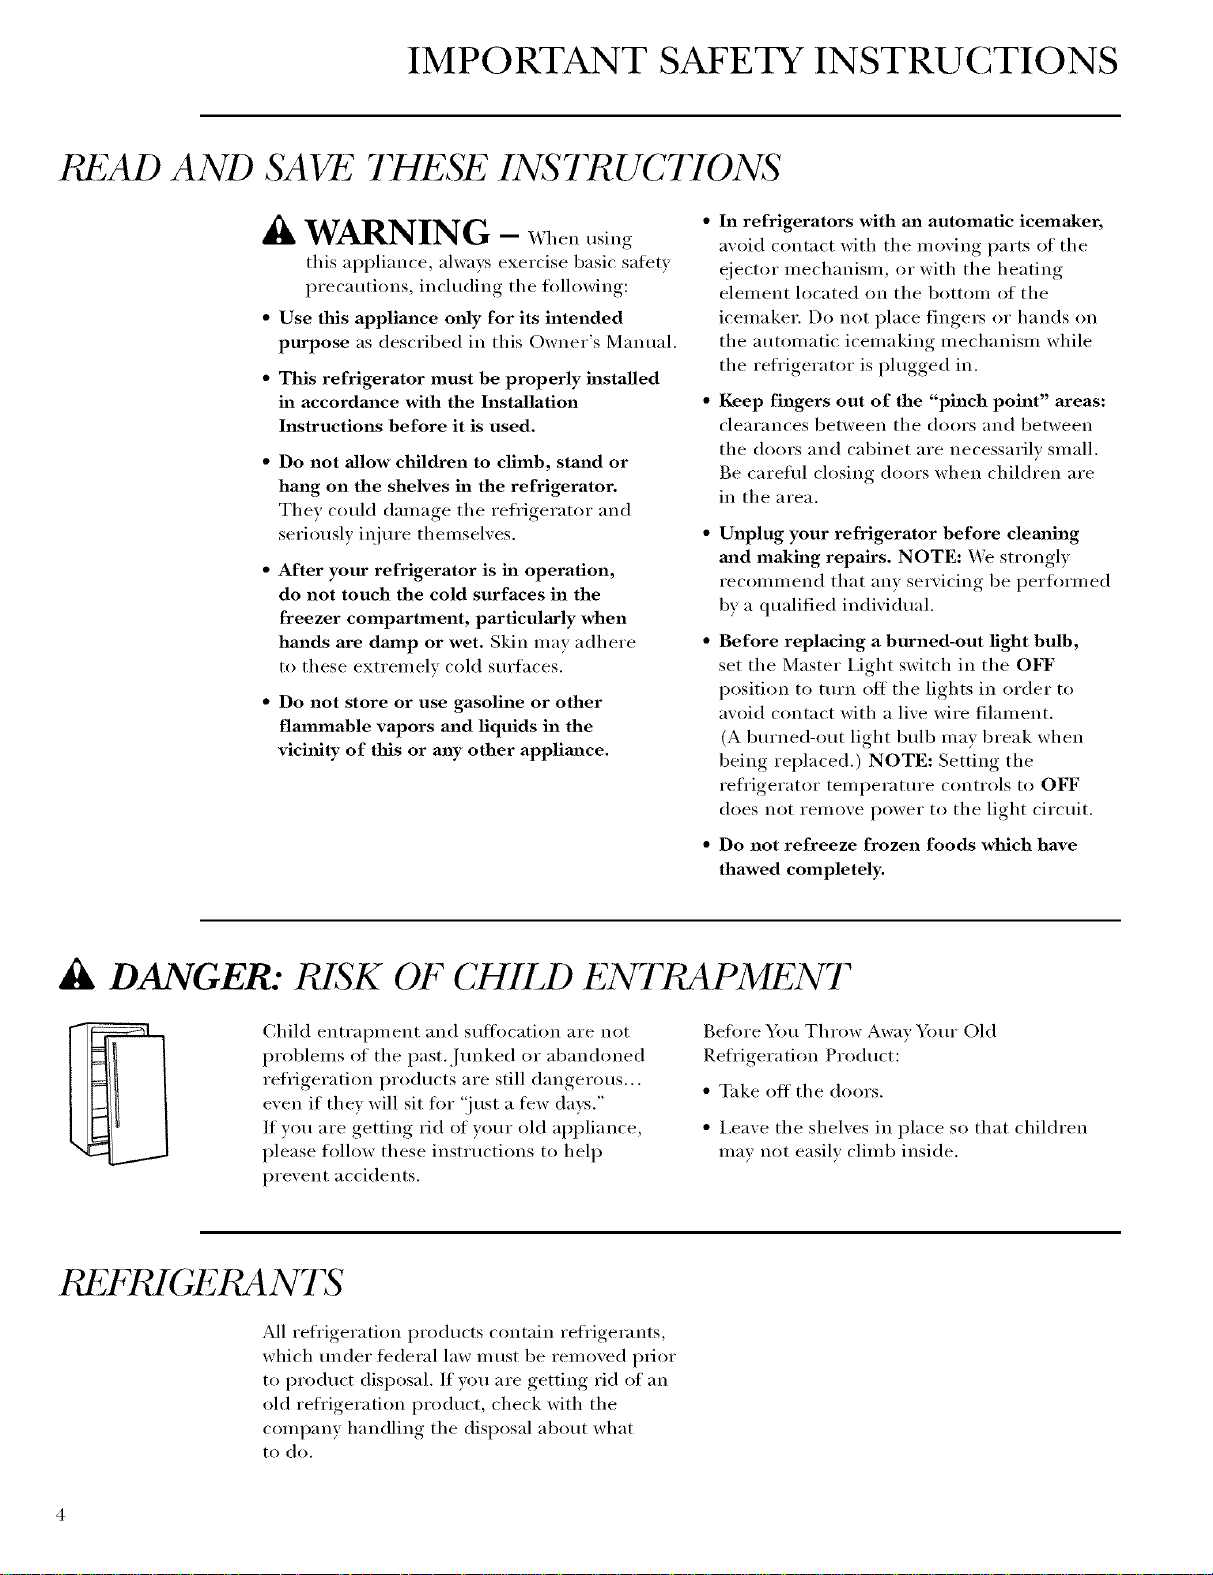
DANGER: RISK OF CHILD ENTRAPMENT
Child elatrai)lnelat and stdfocation are not
i)roblems of the past.,lunked or abandoned
refl'igeratioi_ i)roducts are still dangerous...
even if they will sit tor 'ijust a ti_w days."
If w)u are getting rid of your old ai)pliance ,
please follow these instiuctions to hel I)
prevent accidents.
gefi_re You Throw Away Your Old
Refl'igera tion Product:
• Take off the doors.
• I,eave the shelves in place so that children
Inav not easily clilnb inside.
REFI GEBANTS
All refl'igeration products contain refl'igerants,
which under tedeI"al law 11/ust be removed prior
to product disposal. If you are getting rid of an
old refrigeration product, check with the
conq)any hai_dling the disposal about what
to do.

IMPORTANTES INSTRUCTIONS DE SI CURITI
LIRE ET CONSERVER CES INSTRUCTIONS
ii AVERTISSEMENT :
Lorsque vous utilisez le r6frig6rateur,
observez toujours certahms pr6caufions
de base, notamment :
• N'utilisez le r6frig6rateur que pour son usage
pr6vu, COlmne d_crit dans le present malmel.
• Installez le r_frig6rateur couform_meut aux
directives d'iustaJlatiou avmat de l'utiliser.
• Ne laissez pas les enfmlts grimper, s'asseoir,
se tenir debout ni se pendre aux clayettes du
r_frig_rateur, lls pourraient endonmmger le
i'_frig_rateur et se blesser gravelnent.
• Uue lois le r6frig6rateur en marche, ne
touchez pas les surfaces froides du
cong61ateur, surtout si vous avez les mains
humides ou mouill_es : la peau risque
d'adhg_rer _'l ces surtaces tr_s froides.
• N'entreposez et n'utilisez pas d'essence ou
autres vapeurs et liquides inflammables
proximit6 de cet appareil ou de tout autre
appaJreil 61ectrom6nager.
• Pour les r6frig6rateurs dot6s d'une machine
/_glaqons automatique, 6vitez le contact avec
les pi_ces mobiles du ing_canislne &jecteui; ou
avec l'_l_Iuent chauflant situ(_ _'lla partie
intFrieure de la inachine fi glacons. Ne posez
pas les doigts oil les inains sur le in_canislne
de la inachine _'lglaqons pendant que le
i'_frig_rateur est branch,.
f;loignez les doigts des parties du
rOfrigOrateur off l'on peut facilement se
pincer : les espaces entre les p()rtes et les
placards s(mt to/tjours _troits. Sovez prudent
lorsque wins tvrlnez les portes de l'appareil
ell pr6sence des enfimts,
D_brauchez votre r_frig&rateur avmat
de le nettoyer et de le r6parer.
REMARQUE : Nous wins reconllnandons
vivelnent de confier toute r_paration fi un
technicien qualifi6.
• Avmlt de remplacer tree mnpoule grill_e,
lnettez le colnlnutateur de huni&re principale
ell position OFF (axrbt) pour (_teindre la
huni&re afin d'_viter tout contact avec tall
fil soils tension. (Une alnpoule grill_e
peut se briser pendant l'op_ration).
REMARQUE : i,orsque vous placez les
colnlnandes de telnpg_rature (Ill r(eti'ig(erateur
Sill" OFF (arrSt), l'alilnentation 81ectrique
de l'alnp(mle n'est pas coupSe.
• Ne faites PAS recougeler des aliments
surgelSs qui out complStemeut d_gel&
ik DANGER. t RISQUES POUR Id ?,SENFANTS
I,es enfimts pris au pi&ge ou Inorts d'asphyxie
sont tot!iours d'actualit_. I,es appareils de
r_frig&'ation abandon_s sont toujours aussi
dangereux, in6ine si o15 n'attend que "quelque
jours" pour s'en d_barasser. Si vous ne gardez
pas votre ancien appareil, veuillez suivre les
directives ci-dessous afin de pr_venir les
accidents.
Avant de vous d6barasser de votre vieux
appareil de r_fl'ig_ration:
• D&nontez les portes.
• i.aissez les clavettes ell place afin d'elnp&cher
les enfimts de grilnper fi l'int&'ieur.
REH Gt ?,RANTS
Toils les appareils de r_frig&'ation contiennent
des r_fl'ig&'ants qui, confornl_ment aux lois
tiad&'ales, doivent _tre enlev_s awmt tome
_liluination de l'appareil. Si vous vous
d_barrassez de vieux appareils de r_frig_ration,
v&'ifiez, aupr&s de la soci6t6 qui s'occupe de
leur 61ilnination, ce que wins devez taire.

IMPORTANT SAFETY INSTRUCTIONS
HOW 7"0 CONNECT EI ?,CTRICITY
Do not, under rely circumstmlces, cut or
remove the third (ground) prong from the
power cord. For personal safety, this appliance
must be properly grounded.
The power cord of this appliance is equipped
with a 3-prong (grounding) plug which mates
with a standard 3-prong (grounding) wall
outlet t() minimize the possibility of electric
shock hazard ti'om this appliance.
Have the wall outlet and circuit checked
by a qualified electrician to make sm'e the
outlet is properly grotmded.
Where a standard 2-prong wall outlet is
encountered, it is wmr personal responsibility
and obligation to have it replaced with
a properly grotmded 3-prong wall outlet.
Use of a GFI (Grotmd Fault lnterHq_tor) is not
recommended ti)r the reii'igerator outlet.
The appliance should always be plugged into
its own individual electrical outlet which has
a w)ltage rating that matches the rating plate.
This provides the best peril)finance and also
prevents overloading house wiring circuits
which could cause a fire hazard from
overheated wires.
DO NOT USE AN ADAPTER PLUG TO
CONNECT THE REFRIGERATOR TO
A 2-PRONG OUTLET.
DO NOT USE AN _2XTENSION CORD
WITH THIS APPLIANCE.
Never mq)lug an appliance by pulling on the
power cord. Always grip the plug firmly and
pull straight out fl'om the outlet.
Repair or replace immediately all power cords
that have become fl'aved or otherwise damaged.
Do not rise a cord that shows CI'ilcks OI" _lbI'_lsion
damage along its length or at either end.
When moving the appliance, be careflfl not to
roll over or damage the power cord.
SAVE THESE INSTR UCTYONS
IMPORTANTES INSTRUCTIONS DE SI CURITI
_ _" "7 4 _ _" 7 4
RA CCORDEMEN7 ETa;CT'RIQUE
Ne coupez _fi retirez en aucun cas la troisibme
broche (raise fi la terre) de la fiche du cordon
d'alimentation. Pour votre s6curit6, cet
appa_eil doit 6tre correctement mis a la terre.
I,e cordon d'alilnei_tation de cet appareil est
muni d'une fiche fi 3 broches (raise fi la terre)
qui se branche darts une prise mural ordinaire
a 3 alv(_oles (raise a la terre) pore _r(_duire au
minimmn les risques du chocs (dectriques.
Faites examiner la prise de courant et le circuit
par un (dectricien qualifi(_ pour vous assurer
que la prise est correctement raise fi la terre.
Si la prise murale est (111type standard
fi 2 alv_oles, il vous incombe de la thire
remplacer par tree prise fi 3 alvg_oles
correctement raise fi la terre.
i)utilisation d'un interrupteur de d(_fimt
a la terre (GFI-Grotmd Fault Inter_uptor)
n_st pas recommand(_ pour la prise de
courant du rOfl'ig(_rateur.
I,a machine a gla_ons doit tot{jours _tre
branchO darts sa propre prise de torn'ant,
dont la tension nominale est identique a
celle indiquOe sin" la plaque signalOtique.
Cette precaution est recolnlnand(_e pour
garantir un rendement optimum et Oviter
tree sm'charge des circuits Olectriques de la
rOsidence, ce qui pourrait cr(_er un risque
d'incendie par sm'schaufli _ des ills.
N'UTILISEZ PAS UNE FICHE D'ADAPTATION
POUR RACCORDER LE RI_:FRIG]_]RATEUR
DANS UNE PRISE MURALE A 2 ALV_:OLFS.
N'UT1LISEZ PAS DE CORDONS
PROLONGATEURS AVEC CET APPARF1L
Ne dObranchezjamais l'appareil en tirant le
cordon d'alimentation. Saisissez termement
la fiche du cordon et tirez droit pour la retirer
de la prise.
R_parez ou remplacez imm(_diatement tout
cordon efliloch(_ ou endommag& N'utilisez
pas un cordon fendillO ou prOsentant des
signes d'usm'e.
I,orsque vous d_placez l'appareil du m m;
taites attention de ne pas la taire fouler
sur le cordon d'alimentation afin de ne pas
l'endommager.
CONSER VEZ CES DIRECTIVES

Temperature Controls
Buill-ln R@ig'eralors
FREEZER FRESH FOOD
)_ @ WATER FILTER
Preset Settings:
Allow 24 hours to reach these preset temperatures.
7 mp ature
contrvIs
The temperature display shows the actual
temperature of the freezer mid fresh food
compaxtments. The actual temperature will
wu'v fron_ the set temi_erature based on tactors
such as door opening, amount of ti)od, defrost
cycling and room temperature.
NOTE: Frequent door openings or door leii
open for periods of time may increase the
internal temperature of the freezer and ti'esh
tood comi_artments temporarily.
To turn off the cooling system in both the
freezer and ti'esh tood compartments, press
either @ pad m_til both displays show OFF.
To turn the cooling system on, press either
@ pad. The preset temperatures of 0°F and
37°F will appear in the display:
To check the current temperature setting
for the fresh food or freezer compartment,
press tile @ or @ pad once. After 5 seconds,
the display will retm'n to the actual temperature.
To change the temperature settings, press
the @ or @ pads to desired temperatm'e set
point fin" ti'esh ti_ocl and freezer separately.
Allow 24 hours liar the refrigerator to reach the
temperature you have set.
Temperature Ranges
Low High
34°F 45°F
1°(2 7°C
Fresh Food
Freezer
_6°F +6°F
_21°C _14°C
NOTE: Setting the controls to OFF" stops
cooling, but does not shut off electrical power
to the reti'igerato_:
Changing
diCtay
temp atures
from °F to °C
To change the temperature display
between Fahrenheit and Celsius, press
Temp Display °C/°E
Door
alarm
To turn the Door Alarm feature on, press
DOOR ALARM once. The ACTIVE light will
come on. To turn it otI, press it again.
On models with a dispenser, the Door Alam_
feature is located on the dispenser panel on
the ti'ont of the ti'eezer door.
"_Ahen the DOOR ALARM
is actixe, the alarm will flash •
and beep if)Fro keep the
door open fi_r more than
2 minutes. ((_

Water Filter Cartridge
Built-l*_ I¢_qrigerators
Tile water filter cartrido-e is located in tile
back upper right corner of tile refrigerator
COlllpa i'tlllent.
To Replace the Filter:
The filter camidge is designed
to filter 300 gallons of water
(lasting approximately 12 months).
It should be replaced when tile
status light ttwns red or if w)u notice
tile ice cubes getting hollow or small.
Installing the Filter Cartridge:
1.
WATERRL'I1ER
Remove tile old cartridge by slowly turning
it to tile letL A small amount of water may
drip down. Do not pull down on tile cartridge.
Fill tile new cartridge with water from tile
tap to allow fi)r better flow immediately atter
installation,
3. I,ine up tile arrow on tile cartridge with tile
center of tile holder: Do not push it up into
tile holder;
4. Slowly turn it to tile right until tile cartridge
stops. It will rotate about 1/4 turn. DO NOT
OVERTIGHTEN.
To Reset the Filter Status Light:
Press and hold tile RESET pad tot 3 seconds.
I_ilter Bypass Plug:
Yi)u must use file filter bypass plug:
a) it w)u have a household
re\'elNe osiilosis water svsteli1
and/or another titan ot home
water filtration svsteln
b) if a replacement filter is not
awfilable.
Bypass
Plug
Tile icemaker and dispenser Mll not operate
without tile filter or filter b)pass plug installed.
Replacement Filters:
To order additional Filter cartridges in the
United States, visit our Website at ge.com, or call
GE Parts mad Accessories, 800.626.2002.
Suggested Retail $38.95-47.95
Custome_ in Canada should consult tile xellow
I)ages, tot tile nearest Camco Serxice Center:
Cartridge
Slowlyturn it tothe rigi)t.
Donot overtighten.
Ice & Water Dispenser (on some models)
Buill-ln H_/rig'eralors
Dispenser
with
glass-touch
controls
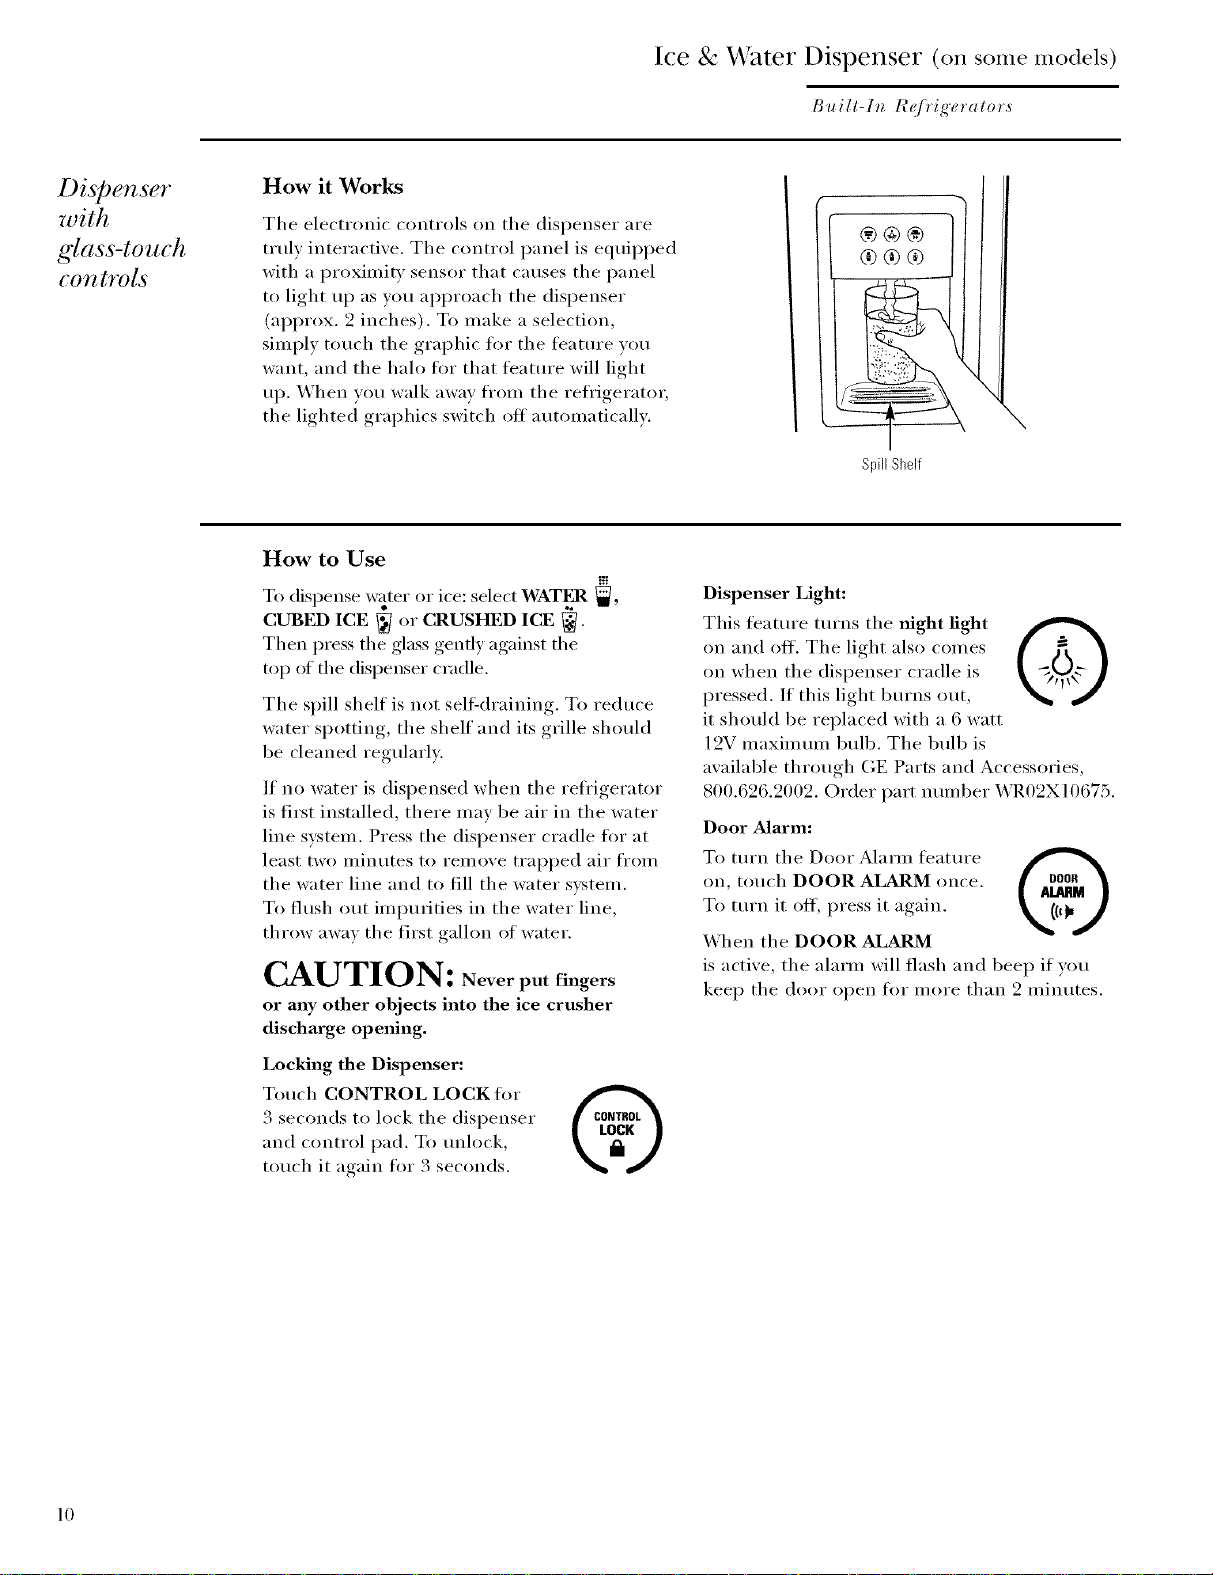
How it Works
The electronic controls on the dispenser are
truly interactive. The control panel is equipped
with a proximity sensor that causes the panel
to light up as you approach the dispenser
(approx. 2 inches). To make a selection,
simply touch the graphic fl_r the fl_ature w)u
want, and the halo tot that feature will light
up. When you walk away from the reti'igeratm;
the lighted graphics switch off automatically.
Spill %elf
\
How to Use
To dispense water or ice: select WATEll _,
CUBED ICE _ or CRUSHED ICE
Then press the glass gently against the
top of the dispenser cradle.
The spill shelf is not sell:draining. To reduce
water spotting, the shelf and its grille should
be cleaned regularl).
If no water is dispensed when the refrigerator
is first installed, there may be air in the water
line sxstem. Press the dispenser cradle for at
least two minutes to remoxe trapped air from
the water line and to fill the water sxstem.
To flush out impurities in the water line,
throw awax the first galhm of water.
CAUTION: Never put fingers
or any other objects into the ice crusher
discharge opmfing.
Locking the Dispenser:
Touch CONTROL LOCK for
3 seconds to lock the dispenser
and control pad. To tmlock,
touch it again for 3 seconds.
Dispenser Light:
This fl_ature turns the night light
on and off. The light also comes
on when the dispenser cradle is
pressed. If this light bm'ns out,
it should be replaced with a 6 watt
12V maximmn bulb. The bulb is
available through GE Parts and Accessories,
800.626.2002. Order part nmnber WR02X10675.
Door Alarm:
To turn the Door Alarm feature
on, touch DOOR ALARM once.
To turn it off, press it again.
When the DOOR ALARM
is active, the alarm will flash and beep if )ou
kee I) the door open fl)r more than 2 minutes.
10
 Loading...