


GFXP1308FMC
Installation
White Pedestal: GFXP1308FWW
Red Pedestal: GFXP1308FRR
Metallic Carbon Pedestal: GFXP1308FMC
Instructions
Pedestal
Instructions en français : . . . . . . . . . .. . . . . .5
Instrucciones en español: . . . . . . . . . . . . . . .9
BEFORE YOU BEGIN
Read these instructions completely and carefully.
IMPORTANT – Save these instructions for local
•
inspector’s use.
•
IMPORTANT – Observe all governing codes and
ordinances.
•
Note to Consumer – Keep these instructions for future
reference.
Completion time – 1 to 2 hours
•
Proper installation is the responsibility of the installer.
•
Product failure due to improper installation is not
•
covered under the Warranty
CAUTION ³'XHWRWKHVL]HDQGZHLJKW
of these products, and to reduce the risk of
SHUVRQDOLQMXU\RUGDPDJHWRWKHSURGXFW7:2
PEOPLE ARE REQUIRED FOR PROPER INSTALLATION.
• See washer and dryer Owner’s Manual & Installation
Instructions for additional installation requirements and
guidelines.
.
For Washer Models:
GFWS2500, GFWS2505, GFWS2600, GFWS2605,
GHWS3600, GHWS3605, GFWS3700 and GFWS3705
For Dryer Models:
GFDS250, GFDS255, GFDS260, GFDS265, GHDS360,
GHDS365, GFDS370 and GFDS375
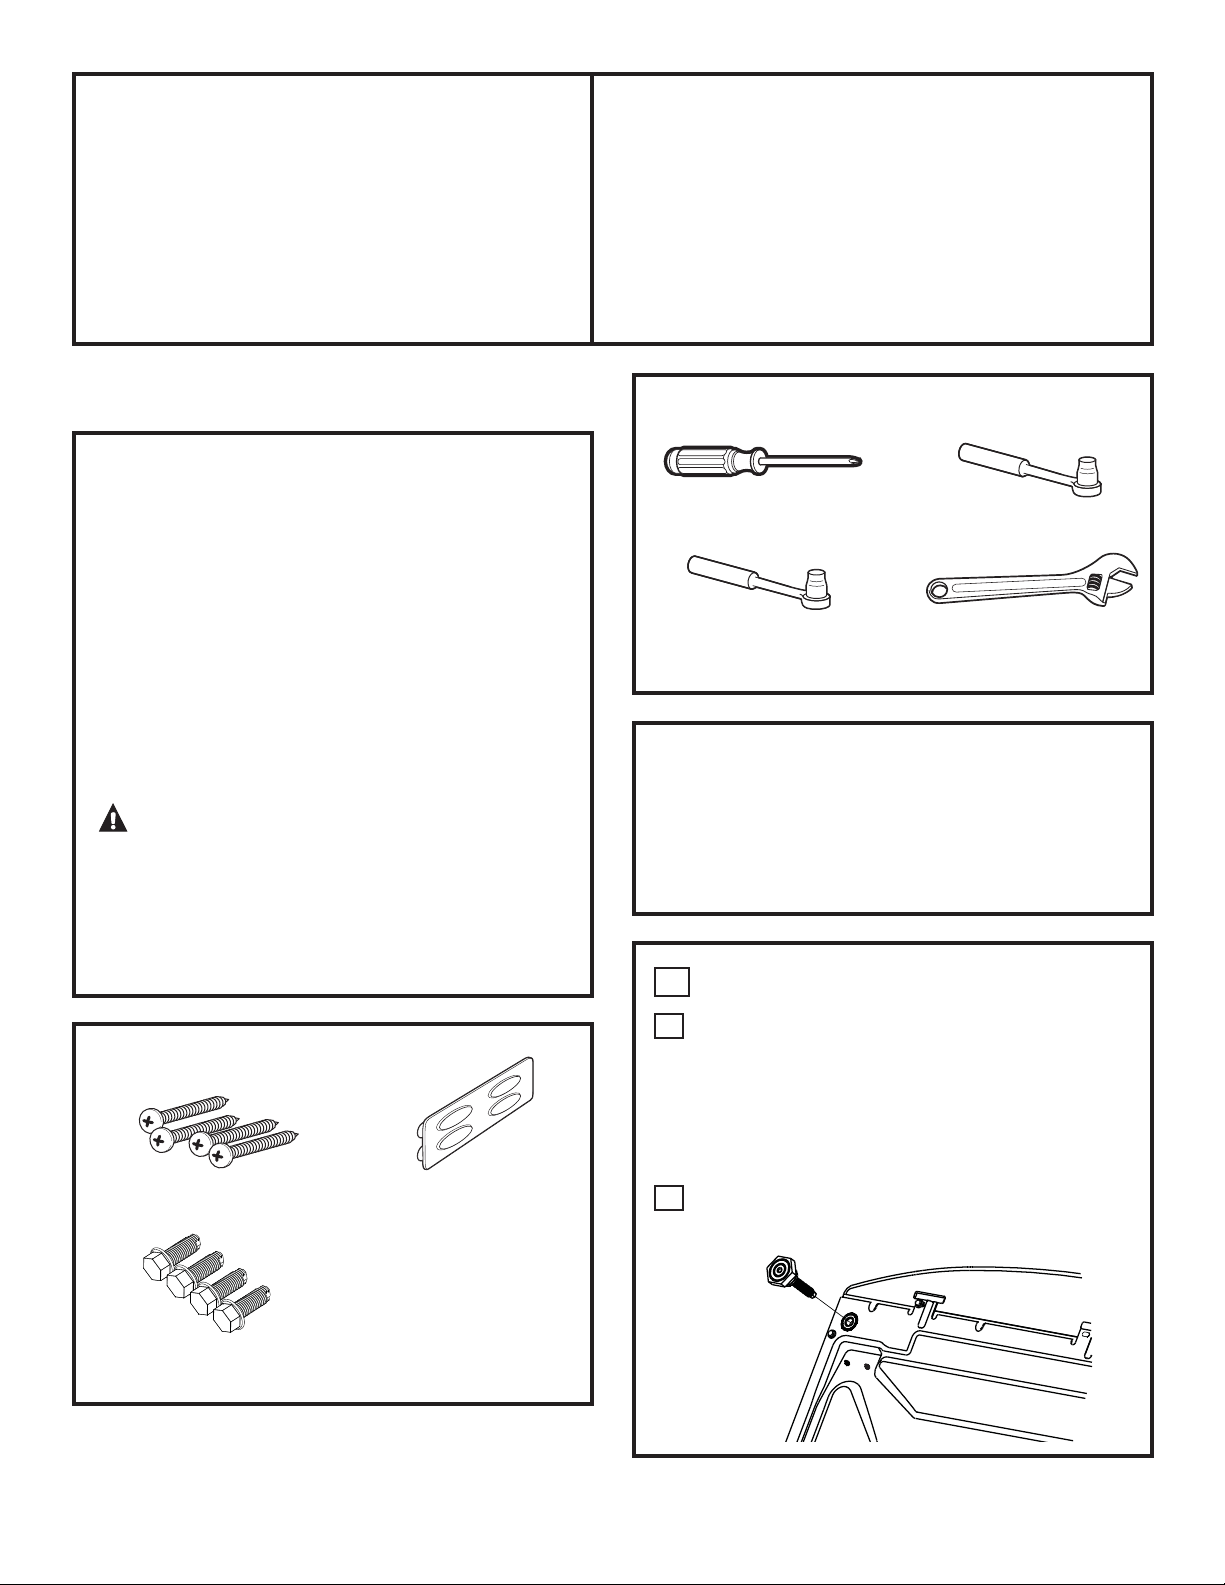
TOOLS YOU WILL NEED
Phillips-head
screwdriver
9/16” socket wrench
8 mm socket wrench
10” Adjustable
wrench
INSTALLATION PREPARATION
Remove the packaging.
Flatten the product carton to use as a pad to lay
the washer or dryer down on its side. Continue using
the carton to protect the finished floor in front of the
installation location.
REMOVE THE LEVELING LEGS
1
KIT CONTENTS
4 Mounting screws -
Dryer
4 Mounting bolts -
Washer
31-16708-1 11-13 GE
Drawer divider
Carefully lay down the appliance to access
A
the leveling legs on its bottom. The washer
shipping bolts must remain in place until the
washer is returned to an upright position.
Washer – Lay on its back
Dryer – Lay on its side
Use an adjustable wrench to remove the
B
washer or dryer leveling legs.
Printed in the United States
1
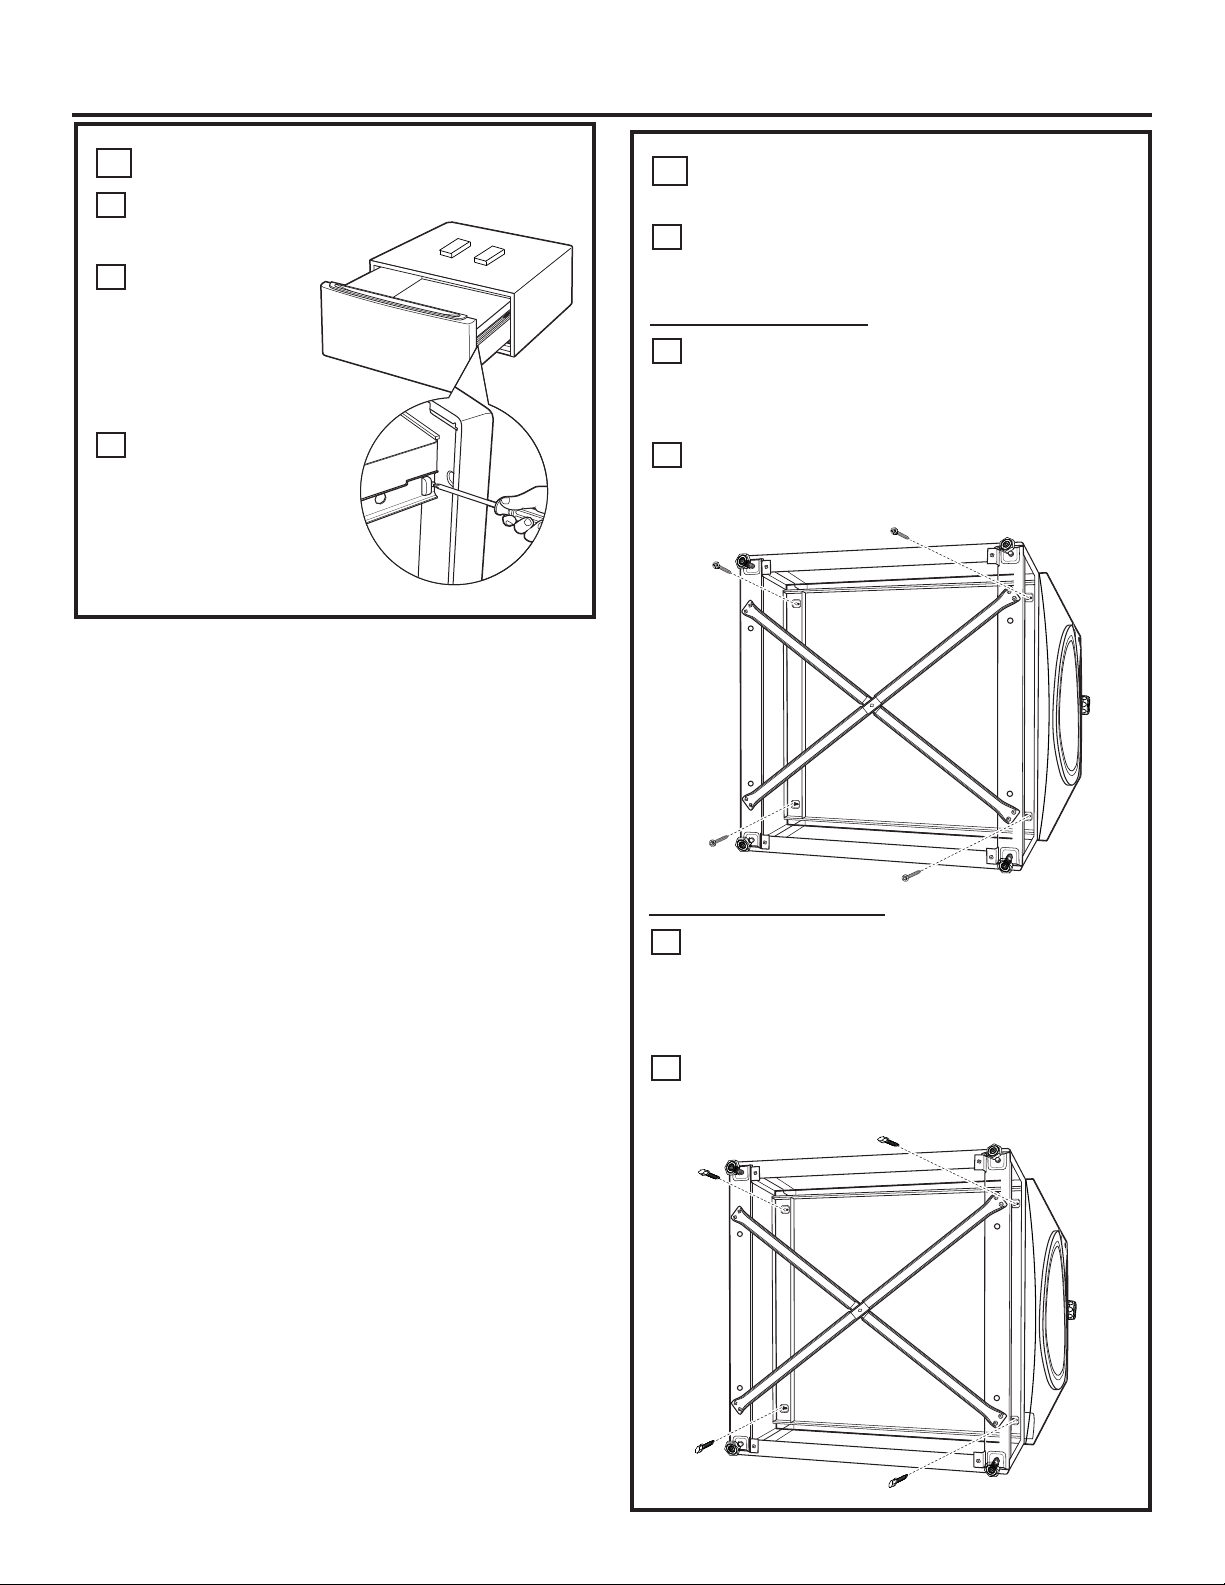
PREPARE THE PEDESTAL
2
Pull the drawer out as far as it
A
will go.
Remove screws
B
from drawer
slides. Slide
drawer out of the
base and
set aside.
Do not remove
C
the foam blocks
on the top of the
pedestal.
Installation Instructions
INSTALL THE PEDESTAL TO THE
3
WASHER OR DRYER
Place the pedestal against the bottom of the
A
unit. Check to be sure the drawer front is at
the front of the washer.
To attach to the dryer:
Align the holes in the pedestal with the holes
B
in the bottom of the unit. Use a Phillips
screwdriver to install the 4 screws through the
pedestal and into the unit – do not tighten.
Slide the pedestal toward the unit until it is
C
aligned front to back. Use an 8 mm socket
wrench to securely tighten the screws.
7RDWWDFKWRWKHZDVKHU
Align the holes in the pedestal with the holes in
B
the bottom of the unit. Use a 9/16” socket
wrench to install the 4 washer mounting bolts
through the pedestal and into the unit – do not
tighten.
Slide the pedestal toward the unit until it is
C
aligned front to back. Use a 9/16” socket
wrench to securely tighten the bolts.
2

Installation Instructions
LEVEL THE WASHER OR DRYER
4
REMOVE SHIPPING SCREWS
6
Stand the washer or dryer upright. Move it
A
close to its final location.
Make sure that the washer or dryer is level by
B
placing a level on top. Check side to side and
front to back.
Use an open
C
ended wrench to
adjust the legs in
and out. Tighten
the lock nut
against the
bottom of the
pedestal.
NOTE: To minimize vibration, the locking nuts must
be tight.
REINSTALL THE DRAWER
5
Check to be sure the slides are closed.
A
Slide the drawer into the opening. Align the
B
drawer supports to the slides on each side.
Remove the 4 shipping screws on the back side of the
washer.
FINALIZE THE INSTALLATION
7
Refer to the washer or dryer Installation Instructions
to complete the installation.
Reinstall the original screws into each drawer
C
slide. Tighten both screws.
Open the drawer fully. Slide drawer divider
D
into slots in the center of the drawer. The
drawer should slide smoothly when you push
it closed.
3

Notes
4
 Loading...