


GE AJEQ12DCFL2, AJEQ12DCFL1, AJEQ10DCFL2, AJEQ10DCFL1, AJEQ09DCFL2 Owner’s Manual
...Air Conditioners
Room
Safety Instructions . . . . . . . . . 2, 3
About the Controls . . . . . . . . . . 4-9
Cool Models. . . . . . . . . . . . . . . . . . . . . 4, 5
Heat Models . . . . . . . . . . . . . . . . . . . . . 6, 7
Vent Control. . . . . . . . . . . . . . . . . . . . . . . . 8
Care and Cleaning
Grille and Case. . . . . . . . . . . . . . . . . . . 10
Outdoor Coils . . . . . . . . . . . . . . . . . . . . 10
Front Grille . . . . . . . . . . . . . . . . . . . . . . . . 10
Air Filter . . . . . . . . . . . . . . . . . . . . . . . 10-11
Long Term Storage . . . . . . . . . . . . . . 12
Installation Instructions
Before You Begin. . . . . . . . . . . . . . .12-13
Installing a J-Model in
an Existing Wall Case . . . . . . . . . . . . . 14
Through-the-Wall
Installation . . . . . . . . . . . . . . . . . . . . . . . 15
Troubleshooting Tips . . . . . . . 16
Normal Operating Sounds . . . . . . . 16
Consumer Support
Warranty. . . . . . . . . . . . . . . . . . . . . . . . . 19
Consumer Support. . . . . . Back Cover
Write the model and serial numbers here:
Model # _________________________
Serial # ____________________________
Find these numbers on a label on the front of the base pan behind the front grille.
Owner’s Manual and
Installation Instructions
Cool Only: |
AJCM 08, |
10 |
ACG |
|
|
AJCM 10, |
12 |
DCG |
|
|
AJCQ |
06 |
|
LCG |
|
AJCQ |
08, 10, 12 |
ACG |
|
|
AJCQ |
09, 10, 12 |
DCG |
|
|
|
|
|
|
Heat/Cool: |
AJEM |
12 |
|
DCF |
|
AJEQ |
06 |
|
LCF |
|
AJEQ |
08 |
|
ACF |
|
AJEQ |
09, 10, 12 |
DCF |
|
Español
For a Spanish version of this manual, visit our Website at GEAppliances.com.
Para consultar una version en español de este manual de instrucciones, visite nuestro sitio de internet GEAppliances.com.
Française
For a French version of this manual, visit our Website at GEAppliances.com.
Pour une version française de ce manuel d’utilisation, veuillez visiter notre site web à l’adresse GEAppliances.com.
49-7754 02-16 GE
IMPORTANT SAFETY INFORMATION.
READ ALL INSTRUCTIONS BEFORE USING.
SAFETY INFORMATION
 This is the safety alert symbol. This symbol alerts you to potential hazards that can kill or hurt you and others. All safety messages will follow the safety alert symbol and the word “DANGER”, “WARNING”, or “CAUTION”. These words are defined as:
|
DANGER |
Indicates a hazardous situation which, if not avoided, will result in death or serious injury. |
|
||
|
|
|
|
WARNING |
Indicates a hazardous situation which, if not avoided, could result in death or serious injury. |
|
|
|
|
CAUTION |
Indicates a hazardous situation which, if not avoided, could result in minor or moderate injury. |
|
|
|
|
|
|
 WARNING
For your safety, the information in this manual must be followed to minimize the risk of fire or explosion, electric shock, or to prevent property damage, personal injury, or loss of life.
SAFETY PRECAUTIONS
 WARNING
Risk of electric shock. Can cause injury or death. For your safety, the information in this manual must be followed to minimize the risk of fire, electric shock or personal injury.
Use this appliance only for its intended purpose as described in this Owner’s Manual.
This air conditioner must be properly installed in accordance with the Installation Instructions before it is used.
Never unplug your air conditioner by pulling on the power cord. Always grip plug firmly and pull straight out from the receptacle.
Replace immediately all electric service cords that have become frayed or otherwise damaged. A damaged power supply cord must be replaced with a new power supply cord obtained from the manufacturer and not repaired. Do not use a cord that shows cracks or abrasion damage along its length or at either the plug or connector end.
Turn OFF and unplug your air conditioner before making any repairs or cleaning.
NOTE: We strongly recommend that any servicing be performed by a qualified individual.
For your safety…do not store or use combustible materials, gasoline or other flammable vapors or liquids in the vicinity of this or any other appliance.
All air conditioners contain refrigerants, which under federal law must be removed prior to product disposal. If you are getting rid of an old product with refrigerants, check with the company handling disposal about what to do.
SAVE THESE INSTRUCTIONS
2

IMPORTANT SAFETY INFORMATION. READ ALL INSTRUCTIONS BEFORE USING.

 WARNING
HOW TO CONNECT ELECTRICITY

 WARNING Risk of electric shock. Can cause injury or death. This appliance must be properly grounded. Do not, under any circumstances, cut or remove the third (ground) prong from the power cord. For personal safety, this appliance must be properly grounded.
The power cord of this appliance is equipped with a 3-prong (grounding) plug which mates with a
standard 3-prong (grounding) wall outlet to minimize the possibility of electric shock hazard from this appliance.
Have the wall outlet and circuit checked by a qualified electrician to make sure the outlet is properly grounded.
Power cord may include a current interrupter device. A test and reset button is provided on the plug case. The device should be tested on a periodic basis by first pressing the TEST button and then the
RESET button. If the TEST button does not trip or if the RESET button will not stay engaged, discontinue use of the air conditioner and contact a qualified service technician.
Where a 2-prong wall outlet is encountered, it is your personal responsibility and obligation to have it replaced with a properly grounded 3-prong wall outlet.

 WARNING
Risk of electric shock. Can cause injury or death.
The air conditioner should always be plugged into its own individual electrical outlet which has a voltage rating that matches the rating plate. This provides the best performance and also prevents overloading house wiring circuits which could cause a fire hazard from overheated wires.
See the Installation Instructions, Electrical Requirements section for specific electrical connection requirements.
USE OF EXTENSION CORDS
|
|
|
DO NOT use an extension cord with this Built-in Air |
WARNING |
|
||
RISK OF FIRE. Could cause |
|
Conditioner. |
|
serious injury or death. |
|
|
DO NOT use surge protectors or multi-outlet adaptors |
|
|
|
with this Built-in Air Conditioner. |
USE OF ADAPTER PLUGS |
|
|
|
 WARNING
Risk of electric shock. Can cause injury or death.
We strongly recommend against the use of an adapter plug.
If you must use an adapter, where local codes permit, a temporary connection may be made to a properly grounded 2-prong wall outlet by use of a UL-listed adapter available at most local hardware stores.
The larger slot in the adapter must be aligned with the larger slot in the wall outlet to provide proper polarity in the connection of the power cord.
When disconnecting the power cord from the adapter, always hold the adapter in place with one hand while pulling the power cord plug with the other hand. If this is not done, the adapter ground terminal is very likely to break with repeated use.
If the adapter ground terminal breaks, DO NOT USE the air conditioner until a proper ground has been established.
Attaching the adapter ground terminal to a wall outlet cover screw does not ground the appliance unless the cover screw is metal, not insulated, and the wall outlet is grounded through the house wiring. You should have the circuit checked by a qualified electrician to make sure the outlet is properly grounded.
READ AND FOLLOW THIS SAFETY INFORMATION CAREFULLY.
SAVE THESE INSTRUCTIONS
3

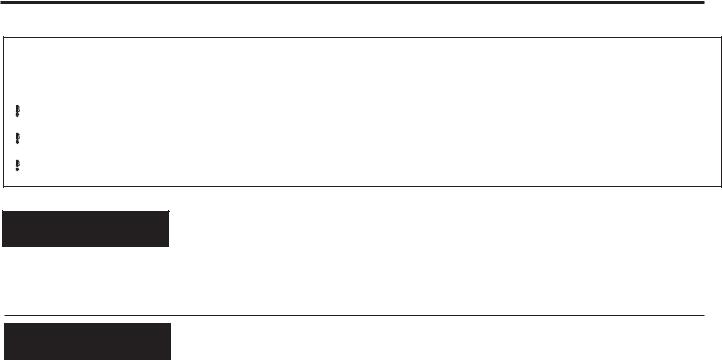
$ERXW WKH FRQWUROV RQ WKH DLU FRQGLWLRQHU³&RRO 2QO\ 0RGHOV
Appearance may vary.
|
|
|
|
|
|
|
|
|
|
Cool |
|
||||
|
|
|
|
|
|
|
|
|
|
|
|||||
|
|
|
|
|
|
|
|||||||||
|
|
|
|
|
|
|
|
|
|
|
|||||
|
|
|
|
|
|
|
|
|
|
Fan |
|
|
|
|
|
|
|
|
|
|
|
|
|
|
|
|
|
|
|
||
|
|
|
|
|
|
|
|
|
|
|
|
|
|
||
|
|
|
|
|
|
|
|
|
|
Hi |
|
|
|
|
|
|
|
|
|
|
|
|
|
|
|
|
Mode |
||||
|
|
|
|
|
|
|
|
|
|
|
|||||
|
|
|
|
|
|
|
|
|
|
|
|||||
|
On |
|
|
|
|
|
|
Med |
|
||||||
|
|
|
|
|
|
|
|
|
|
|
|||||
|
|
|
|
|
|
|
Low |
|
|
|
|
||||
|
Off |
|
|
|
|
|
|
|
|
|
|
||||
|
|
|
|
|
|
|
|
|
|
|
|
||||
|
|
|
|
|
|
|
|
|
|
|
|
||||
Delay Hrs |
|
|
|
Temp |
|
|
|
|
|||||||
Reset |
Power |
||||||||||||||
|
On Off |
|
|
|
|
||||||||||
|
Filter |
|
|
|
|
On/Off |
|||||||||
|
|
|
|
||||||||||||
|
|
|
|
|
|
|
|
|
|
|
|
|
|
|
|
Power
Cool Fan
Mode
Temp High
Med
On
Delay
Hrs Low
 Off
Off
Air Conditioner Controls |
Remote Control |
Controls
Lights beside the touch pads on the air conditioner control panel indicate the selected settings.
1. Power On/Off
Turns air conditioner on and off.
2.Display
Displays the temperature setting. Displays hours when setting the timer.
3. Mode
On the remote control, use to set the air conditioner to
Cool or Fan mode.
On the air conditioner controls, use to set Cool or Fan mode at High, Med or Low fan speed. Indicator lights on the air conditioner controls will show the mode and fan speed selected.
4.Temp Increase + /Decrease – Pads
Use to set temperature when in COOL mode.
5.Fan Speeds
Use to set the fan speed at Low, Med or High.
6.Delay Hrs
2Q³When the air conditioner is off, it can be set to automatically turn on in half an hour to 24 hours at its previous setting. Each touch will set the time in half hours up to 10 and then in hours up to 24.
To cancel the Delay Timer, press the On pad until “CL” appears. Then wait until the display turns off.
2II³When the air conditioner is on, it can be set to automatically turn off in half an hour to 24 hours. Each touch will set the time in half hours up to 10 and then in hours up to 24.
To cancel the Delay Timer, press the Off pad until “CL” appears and wait for the set temperature to be displayed. The unit will now resume normal operation.
7.Reset Filter
LED will turn on when fan has accumulated 250 hours of run time as a reminder to clean filter. Press Reset Filter to turn off the LED and reset the accumulated run time.
8.Remote Control Signal Receiver
NOTE: When the air conditioner is turned on, it will automatically start in the setting last used.
Remote Control
To ensure proper operation, aim the remote control at the signal receiver on the air conditioner.
The remote control signal has a range of up to 21 feet.
Make sure nothing is between the air conditioner and the remote control that could block the signal.
0DNH VXUH EDWWHULHV DUH IUHVK DQG LQVWDOOHG FRUUHFWO\³VHH the Care and Cleaning section.
4
Cool Mode
Remote Control
1.Press Cool pad.
2.Press Low, Med or High pads to set desired fan speed.
3. Press the Increase +/ Decrease – pads to set the desired temperature 60°F to 85°F in 1°F increments.
Control Panel
1.Press the Mode pad until the Cool indicator light is lit and the Low, Med or High indicator light is lit for the desired fan speed.
2.Press the Increase + / Decrease – pads to set the desired temperature 60°F to 85°F in 1°F increments.
A thermostat is used to maintain the room temperature. The compressor will cycle on and off to keep the room at the set level of comfort. Set the thermostat at a lower number and the indoor air will become cooler.
Set the thermostat at a higher number and the indoor air will become warmer.
NOTE: If the air conditioner is off and is then turned on while set to Cool, it will take approximately 3 minutes for the compressor to start and cooling to begin.
Cooling Descriptions
)RU1RUPDO&RROLQJ³Select the Cool mode and High or Med fan with a middle set temperature.
)RU0D[LPXP&RROLQJ³Select the Cool mode and HIGH fan with a lower set temperature.
)RU4XLHWHUDQG1LJKWWLPH&RROLQJ³Select the Cool mode and Low fan with a middle set temperature.
NOTE: If you switch from a Cool setting to Off or to a fan setting, wait at least 3 minutes before switching back to a Cool setting.
FAN MODE
Use the Fan mode to provide air circulation and filtering without cooling. Since fan-only settings do not provide cooling, a temperature setting will not be displayed.
Remote Control
Press Fan pad. Press Low, Med or High pads to set desired fan speed.
Control Panel
Press the Mode pad until the Fan indicator light is lit and the Low, Med or High indicator light is lit for the desired fan speed.
5

$ERXW WKH FRQWUROV RQ WKH DLU FRQGLWLRQHU³+HDW &RRO 0RGHOV
Appearance may vary.
|
Cool |
Mode |
|
Fan |
|
On |
|
|
Heat |
|
|
Off |
|
Hi |
|
|
|
|
|
|
|
|
|
|
|
|
|
|
|
|
|
|
|
|
|
|
|
|||
|
|
|
|
Low |
|
|
|
|
|
|
|
|
|
|
|
|
|
|
|
|
|
|
|
|
|
|
|
|
|
|
Timer |
|
|
Temp |
|
|||||||||
|
|
|
|
|
||||||||||
|
On Off |
Fan |
|
|
|
|
Power |
|
|
|
||||
|
|
|||||||||||||
|
|
|
|
|
On/Off |
|
||||||||
|
|
|
||||||||||||
|
|
|
|
|
|
|
|
|
|
|
|
|
|
|
Air Conditioner Controls |
Remote Control |
Lights beside the touch pads on the air conditioner
control panel indicate the selected settings.
Controls
1. ON/OFF
Turns air conditioner on and off.
2.Display
Displays the temperature setting. Displays hours when setting the timer.
3. MODE
On the air conditioner controls, use to set COOL, HEAT or FAN mode. Indicator lights on the air conditioner controls will show the mode selected.
4.TEMP Increase + /Decrease – Pads
Use to set temperature when in COOL or HEAT mode.
5.FAN Speeds
Use to set the fan speed at LOW or HIGH. Indicator lights will show the speed selected.
6.TIMER
21³When the air conditioner is off, it can be set to automatically turn on in half an hour to 24 hours at its previous setting. Each touch will set the time in half hours up to 10 and then in hours up to 24.
To cancel the On Timer, press the ON pad until “CL” appears. Then wait until the display turns off.
2))³When the air conditioner is on, it can be set to automatically turn off in half an hour to 24 hours. Each touch will set the time in half hours up to 10 and then in hours up to 24.
To cancel the Off Timer, press the OFF pad until “CL” appears and wait for the set temperature to be displayed. The unit will now resume normal operation.
7.Remote Control Signal Receiver
NOTE: When the air conditioner is turned on, it will automatically start in the setting last used.
Remote Control
To ensure proper operation, aim the remote control at the signal receiver on the air conditioner.
The remote control signal has a range of up to 21 feet.
Make sure nothing is between the air conditioner and the remote control that could block the signal.
0DNH VXUH EDWWHULHV DUH IUHVK DQG LQVWDOOHG FRUUHFWO\³VHH the Care and Cleaning section.
6
 Loading...