


F U S I O N P L U S™ 6 0 0 0 L F U S I O N P L U S™ 7 0 0 0 L
A 3 L A M I N AT O R S
start here démarrez ici starten sie hier iniziare qui begin hier empieza aquí comece aqui buradan başlayın ξεκινήστε εδώ start her
aloita tästä start her börja här
rozpocznij tutaj začněte zde kezdés itt
начинать здесь
انه أدبا

A |
B |
|
C |
D |
E |
|
F |
7000L |
x3 |
= |
= |
|
|||
|
|
||
G |
|
|
H |
! |
x3 |
A |
|
F U S I O N P L U S™ 6 0 0 0 L F U S I O N P L U S™ 7 0 0 0 L
A 3 L A M I N AT O R S
GB |
instruction manual |
4 |
||||
F |
manuel d’utilisation |
10 |
||||
D |
bedienungsanleitung |
16 |
||||
I |
manuale d’istruzioni |
22 |
||||
NL |
gebruiksaanwijzing |
28 |
||||
E |
manual de instrucciones |
34 |
||||
P |
manual de instruções |
40 |
||||
TR |
kullanım kılavuzu |
46 |
||||
GR |
οδηγίες |
52 |
||||
DK |
brugsvejledning |
58 |
||||
FI |
käyttöopas |
64 |
||||
NO |
bruksanvisning |
70 |
||||
S |
bruksanvisning |
76 |
||||
PL |
instrukcja obsługi |
82 |
||||
CZ |
návod k obsluze |
88 |
||||
H |
használati útmutató |
94 |
||||
RUS |
руководствo по зкcплyатации |
100 |
||||
AR |
تاداشرلإا ليلد |
106 |
||||
|
|
|
|
|
|
|
|
|
|
|
|
|
|

GB
professional finish… automatically!
Welcome to the new GBC Fusion Plus™ 6000L and 7000L laminators which allow lamination to be completed quickly and simply with GBC quality lamination output. Perfect for novice users choosing automatic self setting to expert users with multiple pouch thicknesses and document sizes.
For best lamination results and performance, use only GBC branded pouches.
Please take a little time to study these instructions to ensure you get the best results out of your machine.
safety instructions
mYour safety as well as the safety of others is important to ACCO® Brands.In this instruction manual and on the product are important safety messages.Read these messages carefully.
mThe safety alert symbol precedes each safety message in this instruction manual. This symbol indicates a potential personal safety hazard that could hurt you or others, as well as cause product damage or property damage.
points to note
•Use this unit only for its intended use of laminating documents
•Only use 75mic, 80mic, 100mic, 125mic, 150mic 175mic or 250mic pouches with this laminator
•Do not laminate an empty pouch
•The unit must be connect to a supply voltage corresponding to the electrical rating shown on the unit
•Ensure the machine is clear of pouches prior to starting the next pouch
•The socket outlet shall be installed near the equipment and shall be easily accessible
•Clean the lamination rollers on a regular basis
•Maximum A3 document pouch 426x303mm
•Active anti jam feature may not detect issue on smaller items
•Failure to comply will result in damage and invalidate guarantee
•Place the unit on a secure, stable work area to prevent the unit from falling and possibly causing personal injury or damage to the unit
•Equipment must be earthed.Only use the power cord supplied with this equipment
•Rating label is on the base of the machine
4 register this product online at www.accobrands.com

GB
service
Do not attempt to service or repair the pouch laminator yourself.Unplug the unit and contact an authorised GBC service representative for any required repairs.
technical specifications
Fusion Plus™ 6000L Laminator |
Fusion Plus™ 7000L Laminator |
|||
Electrical |
220-240V / 50/60Hz / 6.5A / |
|
Electrical |
220-240V / 50/60Hz / 6.5A / |
|
1450W |
|
|
1450W |
Machine Dimensions |
580x235x120mm |
|
Machine Dimensions |
580x235x120mm |
|
(without exit tray) |
|
|
(without exit tray) |
|
580x330x120mm |
|
|
580x330x120mm |
|
(with exit tray) |
|
|
(with exit tray) |
Machine Weight |
7.7kg |
|
Machine Weight |
8.1kg |
Maximum Pouch Width |
A3:303mm |
|
Maximum Pouch Width |
A3:303mm |
|
|
|
|
|
getting ready to laminate
Easy Set Up
1Remove the plastic exit tray from the box and place into the two holes on the back of the laminator and extend to use.Ensure that there is sufficient space behind the laminator for the item to be removed.
2Take the electrical plug and place in an appropriate power source, which is near the table you intend to use.
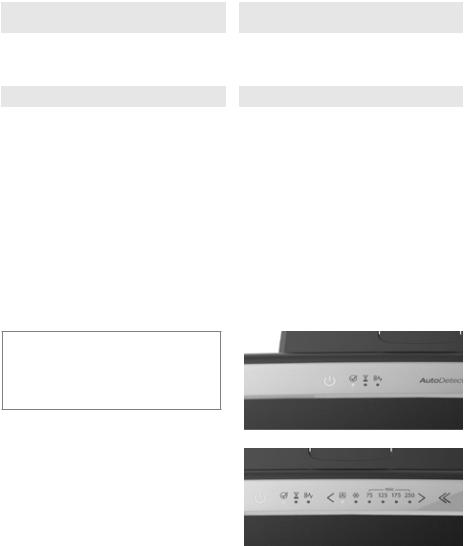
3A sequence of lights will cross the control panel.
4To use the laminator gently tap the‘power on’ button.
NOTE: Your new laminator may emit a slight odour during the initial operation.Its is normal and will diminish after a few hours of operation.
Manual Select
Fusion Plus™ 7000L only
If you do not wish to use the Auto setting select the pouch thickness using the arrows to scroll until the required pouch thickness setting is shown.
F U S I O N P L U S |
™ |
6 0 0 0 L & 7 0 0 0 L A 3 L A M I N AT O R S |
5 |
|
|
|

GB
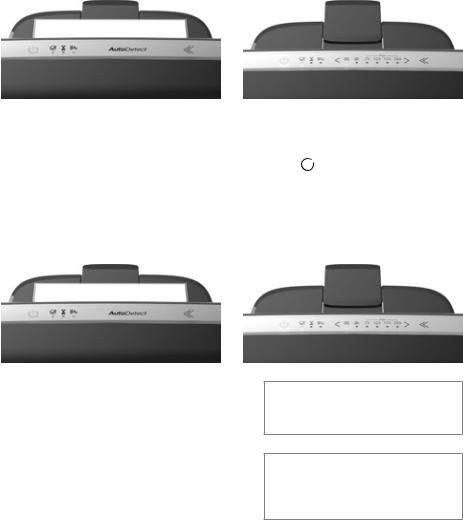
Auto Pouch Setting
Auto Pouch Select (  ), the laminator automatically measures document and pouch thickness and sets itself accordingly.
NOTE: The machine will not take any pouch during warm up.
loading the pouch
1Take your item to be laminated and place into the laminating pouch.Ensuring it is firmly placed along the sealed edge of the pouch.This is to help ensure that you get optimal quality output.
SEALED EDGE |
SEALED EDGE |
NOTE: Do not cut pouches prior to lamination.
A3, A4, A5, etc. |
Irregular shaped item |
Before laminating important or unique documents, always run a test pouch through the laminator using a similar type document.
6 register this product online at www.accobrands.com

GB
laminating
1On the front of the laminator there are line guides to help you feed your pouch accurately.
Always feed your document through the centre of the laminator to ensure accurate thickness measurement.
2Feed the sealed edge of the pouch, into the laminator between the guides.The laminator will grip the pouch and guide it through to the exit tray.
3When you are finished laminating tap the‘power’ button and if required remove the tray, unplug and store accordingly.
Upon exiting remove your laminated item immediately and lay on a flat surface to ensure optimal quality.
NOTE: You may notice a change in the engine noise when you feed your pouch and document in.This is due to the laminator changing speed to ensure consistent premium quality lamination.
F U S I O N P L U S ™ 6 0 0 0 L & 7 0 0 0 L A 3 L A M I N AT O R S 7

GB
additional features
Intelligent Pouch Reverse
If pouch misfeed or jam starts to occur a constant beep will be emitted and the laminator will automatically reverse the document out.
Fusion Plus™ 6000L |
Fusion Plus™ 7000L |
If you wish to recover a partially fed pouch press and hold the “Reverse” button and the pouch will be quickly reversed out of the laminator.You will hear a series of single beeps until Reverse button is released.
If you try to feed your pouch into the laminator before it is ready |
the laminator will detect this and |
run the rollers in reverse.Please wait until ready light is lit. |
|
If the laminator emits a continuous audible beep and the jam icons flashes but there is no obvious jam please check there are no documents in either the front or rear of the laminator.
Fusion Plus™ 6000L |
Fusion Plus™ 7000L |
NOTE: Never reuse a misfed or jammed pouch
NOTE: Do not put partially laminated items back into the laminator.
8 register this product online at www.accobrands.com

GB
 Intelligent Power Off
For added safety and environmental reasons the laminator will automatically go into sleep mode after 30 minutes of inactivity.You will hear a single beep before this occurs.
cleaning
mWARNING: UNPLUG THIS PRODUCT BEFORE CLEANING THE EXTERIOR. WIPE EXTERIOR ONLY WITH A DAMP CLOTH AND DO NOT USE DETERGENTS OR SOLVENTS.
Regularly feed a cleaning card or sheet of paper through the laminator to clean the rollers.Cleaning sheet order code:EK50000.
guarantee
Operation of this machine is guaranteed for two years from date of purchase, subject to normal use.Within the guarantee period, ACCO Brands Europe will at its own discretion either repair or replace the defective machine free of charge.Defects due to misuse or use for inappropriate purposes are not covered under the guarantee.Proof of date of purchase will be required.
Repairs or alterations made by persons not authorised by ACCO Brands Europe will invalidate the guarantee.It is our aim to ensure that our products perform to the specifications stated. This guarantee does not affect the legal rights which consumers have under applicable national legislation governing the sale of goods.
F U S I O N P L U S ™ 6 0 0 0 L & 7 0 0 0 L A 3 L A M I N AT O R S 9

F
plastification professionnelle… …automatiquement !
Merci d’avoir choisi la nouvelle plastifieuse GBC Fusion Plus™ 6000L & 7000L au fonctionnement simple et rapide, qui offre la qualité de plastification supérieure associée à la marque GBC.Idéale tant pour les utilisateurs novices grâce aux réglages automatiques que pour les utilisateurs expérimentés qui peuvent choisir entre de nombreux formats et épaisseurs.
Pour optimiser la performance et les résultats de plastification, utilisez uniquement les pochettes de plastification GBC.
Veuillez consacrer quelques instants à la lecture de ces instructions pour tirer le maximum de votre appareil.
consignes de sécurité
mACCO® Brands Europe se soucie de votre sécurité ainsi que de celle d’autrui.Des messages de sécurité importants sont donnés dans ce manuel d’instructions et sur le produit.Veuillez les lire attentivement.
mCe symbole d’avertissement précède chaque message de sécurité donné dans ce manuel.
Il indique un danger potentiel susceptible de provoquer des blessures personnelles ainsi que des dommages au produit ou à d’autres biens matériels.
remarques
•Utilisez cet appareil uniquement pour plastifier des documents.
•Avec cette plastifieuse, utilisez uniquement des pochettes de 75, 80, 100, 125, 150, 175 ou 250 microns.
•N’insérez pas de pochette vide dans la machine.
•L’appareil doit être branché sur une prise de courant correspondant à la tension précisée sur l’appareil.
•Avant d’alimenter une nouvelle pochette, vérifiez toujours qu’il ne reste aucune autre pochette dans l’appareil.
•L’appareil doit être installé à proximité d’une prise de courant facilement accessible.
•Nettoyez les rouleaux de plastification à intervalles réguliers.
•Format maximum :document A3, pochette 426x303 mm.
•La fonction anti-bourrage ne détecte pas nécessairement les problèmes avec les articles de plus petite taille.
•Tout non-respect de ces consignes entraînera des dommages et annulera la garantie.
•Placez l’appareil sur une surface de travail stable et sûre afin qu’il ne puisse pas tomber, ni s’endommager, ni provoquer des blessures personnelles.
•L’équipement doit être mis à la terre.Utilisez uniquement le cordon d’alimentation fourni avec cet
équipement.
•L’étiquette d’évaluation est sur la base de la machine.
10 enregistrez ce produit en ligne à www.accobrands.com
F
entretien
N’essayez pas d’entretenir ni de réparer vous-même cette plastifieuse.Débranchez l’appareil et contactez un représentant GBC agréé pour toute réparation requise.
spécifications techniques
Plastifieuse Fusion Plus™ 6000L
Alimentation électrique |
220-240V AC / 50 Hz/60 Hz / |
|
6,5 A / 1450 W |
Dimensions de l’appareil |
580 x 235 x 120mm |
|
(sans plateau de réception) |
|
580 x 330 x 120mm |
|
(avec plateau de réception) |
Poids de l’appareil |
7,7 kg |
Largeur de pochette |
A3:303 mm |
maximale |
|
Plastifieuse Fusion Plus™ 7000L
Alimentation électrique |
220-240V AC / 50 Hz/60 Hz / |
|
6,5 A / 1450 W |
Dimensions de l’appareil |
580 x 235 x 120mm |
|
(sans plateau de réception) |
|
580 x 330 x 120mm |
|
(avec plateau de réception) |
Poids de l’appareil |
8,1 kg |
Largeur de pochette |
A3:303 mm |
maximale |
|
préparation à la plastification
Installation facile
1Retirez le plateau de réception en plastique du carton.Insérez-le dans les deux trous situés à l’arrière de l’appareil et déployez-le avant toute utilisation.Veillez à laisser suffisamment d’espace derrière la plastifieuse pour que l’article plastifié puisse être retiré sans difficulté.
2Branchez la plastifieuse sur une prise de courant appropriée, située à proximité de la table sur laquelle vous souhaitez l’utiliser.
3Les voyants du panneau de commande clignotent une fois l’un après l’autre.
4Pour mettre la plastifieuse sous tension, tapez légèrement sur la touche d’alimentation.
REMARQUE : Il est possible que votre plastifieuse neuve émette une légère odeur lors de sa première utilisation.Cette odeur est normale et s’atténuera après quelques heures de fonctionnement.
Sélection manuelle Fusion Plus™ 7000L
Si vous ne souhaitez pas utiliser le réglage « auto », appuyez sur l’une des flèches jusqu’à la sélection de l’épaisseur de la pochette.
F U S I O N P L U S ™ 6 0 0 0 L & 7 0 0 0 L A 3 P L A S T I F I E U S E S 11

F
Réglage automatique adapté à la pochette
Sélection AUTO des pochettes (  ) – La plastifieuse mesure automatiquement l’épaisseur du document et de la pochette et se règle en conséquence.
REMARQUE : L’appareil ne peut pas accepter de pochettes pendant le préchauffage.
chargement du document dans la pochette
1Placez le document à plastifier dans la pochette de plastification de la taille appropriée. Assurez-vous de le placer fermement contre le bord collé de la pochette pour optimiser la qualité de plastification.
BORD SCELLÉ |
BORD SCELLÉ |
REMARQUE : Ne coupez pas les pochettes avant la plastification.
A3, A4, A5, etc. |
Document de |
|
forme irrégulière |
Avant la plastification de documents importants ou uniques, effectuez toujours un essai à l’aide d’un type de document similaire.
12 enregistrez ce produit en ligne à www.accobrands.com

F
plastification
1Des lignes de marquage situées sur l’avant de l’appareil vous permettent d’aligner votre document correctement pour l’alimentation.
Alimentez toujours votre pochette (document compris) au centre de la plastifieuse pour que son
épaisseur soit mesurée correctement.
2Alimentez le bord collé de la pochette dans la plastifieuse entre les lignes de marquage.La plastifieuse saisit la pochette et la guide jusqu’à sa sortie sur le plateau de réception.
3Lorsque vous avez terminé de plastifier, tapez sur la touche d’alimentation et, si besoin est, retirez le plateau de réception.Débranchez la plastifieuse et rangez-la dans un lieu approprié.
Retirez immédiatement la pochette plastifiée, une fois sortie de l’appareil, et posez-la sur une surface plane pour optimiser la qualité de plastification.
REMARQUE: Peut-être remarquerez-vous que la plastifieuse se met à faire un bruit différent lors de l’alimentation de la pochette et du document.Il est dû au changement de vitesse de la plastification, susceptible d’être nécessaire pour toujours assurer une plastification de haute qualité.
F U S I O N P L U S ™ 6 0 0 0 L & 7 0 0 0 L A 3 P L A S T I F I E U S E S 13

F
fonctions supplémentaires
Marche arrière intelligente
En cas de mauvaise alimentation de la pochette ou de bourrage, l’appareil émet un bip sonore constant et fait automatiquement ressortir le document par l’avant.
Fusion Plus™ 6000L |
Fusion Plus™ 7000L |
Si vous souhaitez récupérer une pochette alimentée en partie, appuyez et maintenez enfoncée le bouton de marche arrière « Reverse » pour faire ressortir rapidement la pochette par l’avant.La machine émet une série de bips sonores jusqu’à ce que vous cessiez d’appuyer sur ce bouton.
Si vous essayez d’alimenter une pochette dans la plastifieuse avant que cette dernière soit prête à l’emploi , les rouleaux se mettront automatiquement en marche arrière.Veuillez attendre l’allumage de l’indicateur avertissant que l’appareil est prêt à l’emploi.
Si vous ne constatez aucun bourrage alors que la plastifieuse émet un bip sonore continu et que l’icône de bourrage clignote, veuillez vérifier qu’aucun document ne se trouve à l’avant ou à l’arrière de l’appareil.
Fusion Plus™ 6000L |
Fusion Plus™ 7000L |
REMARQUE : Ne réutilisez jamais une pochette qui a été mal alimentée ou qui a fait l’objet d’un bourrage.
REMARQUE : N’alimentez pas une nouvelle fois un document
partiellement plastifié dans l’appareil.
14 enregistrez ce produit en ligne à www.accobrands.com

F
Mise en veille intelligente
Pour plus de sécurité et pour des raisons environnementales, la plastifieuse se met automatiquement en mode veille après 30 minutes d’inutilisation.Vous entendrez un seul bip sonore juste avant.
nettoyage
mAVERTISSEMENT : DÉBRANCHEZ CET APPAREIL AVANT D’EN NETTOYER L’EXTÉRIEUR. NETTOYEZ L’EXTÉRIEUR UNIQUEMENT AVEC UN LINGE HUMIDE ET N’UTILISEZ NI DÉTERGENTS NI SOLVANTS.
Insérez une feuille de nettoyage ou une feuille de papier dans la plastifieuse à intervalles réguliers afin de nettoyer les rouleaux.Code de commande de feuille de nettoyage :EK50000.
garantie
Le fonctionnement de cet appareil est garanti pendant deux ans à partir de la date d’achat, sous réserve d’un usage normal. Pendant la période de garantie, ACCO Brands Europe décidera, à son gré, de réparer ou de remplacer gratuitement l’appareil défectueux.Les défauts dus à un usage abusif ou un usage à des fins non appropriées ne sont pas couverts par cette garantie.Une preuve de la date d’achat sera exigée.Les réparations ou modifications effectuées par des personnes non autorisées par ACCO Brands Europe annuleront la garantie.Notre objectif est d’assurer le bon fonctionnement de nos produits conformément aux spécifications précisées.Cette garantie ne compromet pas les droits légaux des consommateurs au titre de la législation nationale en vigueur régissant la vente des biens de consommation.
F U S I O N P L U S ™ 6 0 0 0 L & 7 0 0 0 L A 3 P L A S T I F I E U S E S 15

D
Automatisch ein professionelles Ergebnis!
Diese Anleitung enthält Informationen zurVerwendung des Laminiergeräts GBC Fusion Plus™ 6000L und 7000L, anhand derer die Laminierung in der von GBC gewohnt hochwertigen Qualität einfach und schnell durchgeführt werden kann. Das Gerät ist ideal geeignet für unerfahrene Benutzer, die eine automatische Einstellung wählen können, ebenso wie für Experten, die alle durch unterschiedliche Laminiertaschenstärken und Dokumentformate gebotenen Möglichkeiten nutzen möchten.
Zur Erzielung der bestmöglichen Laminierergebnisse und Leistung sind ausschließlich GBCLaminiertaschen zu verwenden.
Es wird empfohlen, die vorliegende Anleitung sorgfältig durchzulesen, um die Möglichkeiten des Geräts optimal nutzen zu können.
Betriebssicherheit
mDie Sicherheit der Benutzer des Geräts sowie Anderer ist ACCO Brands ein wichtiges Anliegen.Die vorliegende Anleitung und das Gerät enthalten wichtige Sicherheitshinweise.Diese Hinweise sorgfältig durchlesen.
mIn dieser Anleitung steht das Warnsymbol vor jedem Sicherheitshinweis. Dieses Symbol kennzeichnet sowohl Hinweise, bei deren Nichtbeachtung Verletzungsgefahr besteht, als auch solche, die auf potenzielle Produktund Sachbeschädigung aufmerksam machen.
Wichtige Hinweise
•Das Gerät ausschließlich zum Laminieren von Dokumenten und nie für einen nicht vorgesehenen Zweck verwenden.
•Nur Laminiertaschen der Stärke 75, 80, 100, 125, 150, 175 oder 250 μm in diesem Laminiergerät verwenden.
•Keine leere Laminiertasche in das Gerät einführen.
•Das Gerät muss an eine geeignete Stromquelle (s.Hinweis auf dem Gerät) angeschlossen werden.
•Vor dem Einführen der nächsten Laminiertasche sicherstellen, dass sich keineTaschen mehr in dem Gerät befinden.
•Das Gerät in der Nähe der Steckdose aufstellen und dafür sorgen, dass die Steckdose stets gut zugänglich ist.
•Die Laminierwalzen regelmäßig reinigen.
•Maximales Format:A3-Dokument, Laminiertasche 426 x 303 mm
•Bei kleineren Artikeln funktioniert die Anti-Stau-Technik u.U.nicht.
•Bei einer Zuwiderhandlung wird das Gerät beschädigt und die Garantie verliert ihre Gültigkeit.
•Das Gerät zurVermeidung von Beschädigungen undVerletzungen auf einer sicheren, stabilen Fläche aufstellen.
•Ausrüstung muss geerdet sein.Verwenden Sie nur das mitgelieferte Netzkabel.
•Rating-Etikett befindet sich auf der Unterseite der Maschine.
16 registrieren sie dieses produkt online bei www.accobrands.com

D
Wartung
Das Laminiergerät nicht selbst warten oder instand setzen.Ist eine Reparatur erforderlich, den Gerätestecker ziehen und einen autorisierten GBC-Kundendienst verständigen.
Technische Daten
Fusion Plus™ 6000L Laminiergerät |
Fusion Plus™ 7000L Laminiergerät |
|||
Netzanschluss |
220-240V AC / 50 Hz/60 Hz / |
|
Netzanschluss |
220-240V AC / 50 Hz/60 Hz / |
|
6,5 A / 1450 W |
|
|
6,5 A / 1450 W |
Abmessungen |
580 x 235 x 120mm |
|
Abmessungen |
580 x 235 x 120mm |
|
(ohne Ausgabefach) |
|
|
(ohne Ausgabefach) |
|
580 x 330 x 120mm |
|
|
580 x 330 x 120mm |
|
(mit Ausgabefach) |
|
|
(mit Ausgabefach) |
Gewicht |
7,7 kg |
|
Gewicht |
8,1 kg |
Maximale |
A3:303 mm |
|
Maximale |
A3:303 mm |
Laminiertaschenbreite |
|
|
Laminiertaschenbreite |
|
Vorbereitung
Einfache Einrichtung
1Das Kunststoffausgabefach auspacken, in die beiden Löcher an der Geräterückseite einsetzen und ausziehen.Darauf achten, dass hinter dem Laminiergerät ausreichend Platz ist für die Ausgabe und Entnahme der laminierten Artikel.
2Den Netzstecker an eine geeignete Stromquelle in unmittelbarer Nähe des Aufstellorts anschließen.
3Am Bedienfeld leuchten nun Anzeigen nacheinander auf.
4Zum Einschalten des Geräts die Betriebstaste antippen.
HINWEIS: Bei der Inbetriebnahme macht sich eventuell ein leichter Geruch bemerkbar. Dieser ist unbedenklich und verliert sich nach einigen Betriebsstunden.
Manuelle Auswahl
NUR Fusion Plus™ 7000L
Zur manuellen Einstellung der Laminiertaschenstärke die Pfeiltasten drücken, bis der gewünschte Wert markiert ist.
A 3 - L A M I N I E R G E R Ä T S F U S I O N P L U S ™ 6 0 0 0 L & 7 0 0 0 L 17

D
Einstellung „Auto“ für Laminiertaschen
Automatische Auswahl (  ):Bei Auswahl dieser Option wird die Stärke von Dokument und Laminiertasche automatisch ermittelt und entsprechend eingestellt.
HINWEIS: Während der Aufwärmphase können keine Laminiertaschen eingeführt werden.
Einlegen der Dokumente in die Laminiertasche
1Das zu laminierende Material in die Laminiertasche einlegen.Darauf achten, dass es eng an der versiegeltenTaschenkante anliegt, um die optimale Laminierqualität zu gewährleisten.
VERSIEGELTE KANTE |
VERSIEGELTE KANTE |
HINWEIS: Die Laminiertaschen vor dem Laminiervorgang nicht schneiden.
A3, A4, A5, etc. |
Unregelmäßig |
|
geformtes Dokument |
Vor dem Laminieren von wichtigen Dokumenten oder Unikaten stets zuerst eine Testlaminiertasche mit einem ähnlichen Dokumenttyp durch das Gerät laufen lassen.
18 registrieren sie dieses produkt online bei www.accobrands.com

D
Laminiervorgang
1Die Strichmarkierungen vorne am Gerät erleichtern die richtige, gradlinige Zufuhr der
Laminiertaschen.
Dokument mit Laminiertasche immer mittig ausgerichtet einführen, damit die Stärke präzise gemessen werden kann.
2Die Laminiertasche mit der versiegelten Kante nach vorne zwischen den Strichmarkierungen in das Gerät einführen.Die Laminiertasche wird vom Gerät erfasst, zugeführt und im Ausgabefach abgelegt.
3Wird das Gerät nicht mehr benötigt, die Betriebstaste antippen und ggf.das Ausgabefach abnehmen.Den Netzstecker des Geräts ziehen und das Gerät an einem geeigneten Ort lagern.
Den laminierten Artikel unmittelbar nach dem Durchlauf entnehmen und zur Gewährleistung der optimalen Qualität auf eine flache Oberfläche legen.
HINWEIS : Beim Einführen des Dokuments ist evtl.eine Änderung des Betriebsgeräuschs zu vernehmen.
Dies liegt an der automatischen Anpassung der Laminiergeschwindigkeit zur Erzielung einer gleichmäßig hohen Laminierqualität.
A 3 - L A M I N I E R G E R Ä T S F U S I O N P L U S ™ 6 0 0 0 L & 7 0 0 0 L 19

D
Weitere Funktionen
Automatischer Taschenrücklauf
Im Fall eines Fehleinzugs oder eines Staus ertönt ein konstantesTonsignal und das Dokument wird automatisch im Rückwärtsbetrieb ausgegeben.
Fusion Plus™ 6000L |
Fusion Plus™ 7000L |
Zur Wiederentnahme einer teilweise eingezogenen Laminiertasche die Rücklauftaste drücken und halten.Auf diese Weise wird dieTasche im Rückwärtsbetrieb wieder ausgegeben.Bei Drücken der Rücklauftaste ertönt eine Reihe von Signalen bis dieTaste wieder losgelassen wird.
Wird ein Dokument eingeführt, bevor das Gerät betriebsbereit ist , laufen die Walzen automatisch rückwärts.Abwarten, bis die grüne Lampe aufleuchtet.
Ist ein andauernder Piepton zu hören und das Stausymbol blinkt, obwohl kein Stau festgestellt werden kann, sicherstellen, dass sich an derVorderseite und Rückseite des Geräts keine Dokumente befinden.
Fusion Plus™ 6000L |
Fusion Plus™ 7000L |
HINWEIS: Falsch eingezogene oder bei einem Stau entfernte
Laminiertaschen nicht wiederverwenden.
HINWEIS: Ein teilweise laminiertes
Dokument nicht wieder in das Gerät einführen.
20 registrieren sie dieses produkt online bei www.accobrands.com
D
Automatische Abschaltung
Aus Gründen der Sicherheit und des Umweltschutzes wird das Laminiergerät nach 30 Minuten der Inaktivität automatisch in den Standbymodus geschaltet.Dies wird durch ein kurzesTonsignal angezeigt.
Reinigung
mACHTUNG: VOR DER REINIGUNG DER GERÄTEAUSSENSEITE MUSS DER NETZSTECKER GEZOGEN WERDEN. DAS GERÄT (NUR) AN DER AUSSENSEITE MIT EINEM FEUCHTEN TUCH ABWISCHEN. KEINE REINIGUNGSODER LÖSUNGSMITTEL VERWENDEN.
Zum Reinigen der Walzen regelmäßig einen Reinigungskarton oder ein Blatt Papier durch das Laminiergerät laufen lassen.Bestellnr.für Reinigungskarton EK50000.
Gewährleistung
Der Betrieb des Geräts ist bei normalerVerwendung für 2 Jahre ab Kaufdatum gewährleistet. Innerhalb des Gewährleistungszeitraums wird ACCO Brands Europe nach eigenem Ermessen das defekte Gerät entweder kostenlos instandsetzen oder ersetzen.Die Gewährleistung deckt keine Mängel ab, die aufgrund missbräuchlicherVerwendung oderVerwendung für unangemessene Zwecke entstanden sind.Ein Nachweis des Kaufdatums muss vorgelegt werden.Instandsetzungen oder Änderungen, die durch nicht von ACCO Brands Europe autorisierten Personen vorgenommen werden, setzen die Gewährleistung außer Kraft.Es ist unser Ziel, sicherzustellen, dass die Leistung unserer Produkte den angegebenen technischen Daten entspricht.Diese Gewährleistung stellt keine Einschränkung der nach dem geltenden Kaufvertragsrecht gültigen Rechte desVerbrauchers dar.
A 3 - L A M I N I E R G E R Ä T S F U S I O N P L U S ™ 6 0 0 0 L & 7 0 0 0 L 21

I
risultati professionali…..automaticamente!
Benvenuti alla nuova plastificatrice GBC Fusion Plus™ 6000L & 7000L che consente di plastificare documenti in maniera più semplice e veloce offrendo la stessa elevata qualità di plastificazione che contraddistingue i prodotti GBC. È adatta sia per principianti, che possono selezionare l’impostazione automatica, che per progrediti, e offre la possibilità di utilizzare pouches di diversi spessori e documenti di svariati formati.
Per ottenere risultati e prestazioni ottimali, usare solo pouches GBC.
Si prega di leggere attentamente le presenti istruzioni per utilizzare in maniera ottimale la macchina.
istruzioni per la sicurezza
mACCO® Brands Europe attribuisce notevole importanza alla sicurezza degli operatori. Alcuni importanti messaggi relativi alla sicurezza sono riportati in questo manuale di istruzioni e sulla macchina.Si prega di leggerli con attenzione.
mQuesto simbolo precede ogni messaggio relativo alla sicurezza.
Esso indica un rischio potenziale per l’operatore o per terzi, o un danno potenziale alla macchina o ad altri oggetti.
informazioni importanti
•Utilizzare la macchina esclusivamente per le funzioni per cui è stata progettata, ossia per la plastificazione dei documenti.
•Utilizzare solo pouches da 75, 80, 100, 125, 150, 175 o 250 micron con questa plastificatrice.
•Non inserire pouches vuote nella macchina.
•L’unità deve essere collegata a una tensione di alimentazione corrispondente alle specifiche elettriche riportate sulla macchina.
•Controllare che la pouch sia uscita dalla macchina prima di inserire quella successiva.
•La presa di alimentazione va installata vicino alla macchina e in un luogo che consenta di accedervi facilmente.
•Pulire periodicamente i rulli della plastificatrice.
•Formato max.documento A3, pouch 426 x 303 mm.
•La funzione anti-inceppamento attiva potrebbe non rilevare eventuali problemi con documenti di formato più piccolo.
•La mancata osservanza di queste precauzioni causerà danni alla macchina e renderà nulla la garanzia.
•Collocare la macchina su un piano di lavoro stabile e sicuro onde evitare cadute che possano eventualmente causare danni alla persona o alla macchina.
•L’apparecchiatura deve essere collegata a terra.Utilizzare solo il cavo di alimentazione fornito con questa apparecchiatura.
•L’etichetta di valutazione è sulla base della macchina.
22 Registrare il prodotto online su www.accobrands.com
I
assistenza
Si prega di non tentare di effettuare personalmente interventi di manutenzione o riparazione. Staccare la macchina dalla presa della corrente e rivolgersi per le riparazioni a un rivenditore o distributore GBC.
specifiche tecniche
Plastificatrice Fusion Plus™ 6000L
Caratteristiche elettriche |
220-240V AC / 50 Hz/60 Hz / |
|
6,5 A / 1450 W |
Dimensioni |
580 x 235 x 120mm |
|
(senza vassoio di raccolta) |
|
580 x 330 x 120mm |
|
(con vassoio di raccolta) |
Peso |
7,7 kg |
Larghezza massima della |
A3:303 mm |
pouch |
|
Plastificatrice Fusion Plus™ 7000L
Caratteristiche elettriche |
220-240V AC / 50 Hz/60 Hz / |
|
6,5 A / 1450 W |
Dimensioni |
580 x 235 x 120mm |
|
(senza vassoio di raccolta) |
|
580 x 330 x 120mm |
|
(con vassoio di raccolta) |
Peso |
8,1 kg |
Larghezza massima della |
A3:303 mm |
pouch |
|
preparazione della plastificatrice
Facile impostazione
1Rimuovere il vassoio di raccolta in plastica dalla confezione, inserirlo nei due fori posti sul retro della plastificatrice ed estenderlo per l’uso.Controllare che vi sia sufficiente spazio dietro la plastificatrice per consentire la rimozione dei documenti plastificati.
2Inserire la spina in una presa di corrente appropriata in prossimità del tavolo su cui si intende utilizzare la macchina.
3Una serie di spie lampeggerà sul pannello di controllo.
4Per utilizzare la plastificatrice, premere delicatamente sul pulsante di accensione.
NOTA: La nuova plastificatrice potrebbe emanare un leggero odore durante la fase iniziale del lavoro.Ciò è assolutamente normale e diminuisce dopo alcune ore di funzionamento.
Selezione MANUALE SOLO Fusion Plus™ 7000L
Se non si desidera utilizzare l’impostazione automatica, selezionare lo spessore della pouch usando le frecce di scorrimento fino a quando non viene indicato lo spessore della pouch desiderato.
F U S I O N P L U S ™ 6 0 0 0 L & 7 0 0 0 L A 3 L A M I N AT O R I 23

I
Impostazione automatica per la pouch
Selezione AUTOMATICA pouch (  ) – la plastificatrice misura automaticamente lo spessore del documento e della pouch e seleziona automaticamente la velocità appropriata.
NOTA: Non sarà possibile inserire alcuna pouch durante la fase di riscaldamento della macchina.
inserimento del documento nella pouch
1Inserire il documento da plastificare nella pouch dal formato appropriato.Controllare che il documento sia posizionato contro il lato presigillato della pouch per garantire di ottenere un’ottimale qualità di plastificazione.
LATO PRESIGILLATO
LATO PRESIGILLATO
NOTA: Non tagliare le pouches prima della plastificazione del documento.
A3, A4, A5, etc. |
Documento di |
|
forma irregolare |
Prima di plastificare documenti importanti o in copia unica, fare sempre una prova inserendo una pouch con un documento simile.
24 Registrare il prodotto online su www.accobrands.com

I
plastificazione
1Sulla parte frontale della plastificatrice sono riportate delle linee per consentire l’accurato inserimento della pouch.
Inserire sempre la pouch e il documento al centro della plastificatrice per assicurare la corretta misurazione dello spessore.
2Inserire il lato presigillato della pouch nella plastificatrice tra le linee.La pouch viene quindi afferrata e alimentata nella plastificatrice fino a raggiungere il vassoio di raccolta.
3Una volta completata l’operazione di plastificazione, premere sul tasto di accensione e, se richiesto, rimuovere il vassoio.Scollegare la spina e conservare la plastificatrice in un luogo appropriato.
Togliere immediatamente il documento plastificato non appena esce dalla macchina e collocarlo su una superficie piana per ottenere un’ottimale qualità di plastificazione.
NOTA: Si potrebbe notare un cambiamento del rumore emesso dalla plastificatrice quando si inseriscono la pouch e il documento.Questo è dovuto al cambiamento della velocità di plastificazione per assicurare la stessa elevata qualità di plastificazione nel corso del tempo.
F U S I O N P L U S ™ 6 0 0 0 L & 7 0 0 0 L A 3 L A M I N AT O R I 25
I
funzioni addizionali
Funzione reverse automatica pouch
In caso di errato inserimento di una pouch o di inceppamento, la macchina emetterà un segnale acustico continuo e la plastificatrice farà uscire automaticamente il documento.
Fusion Plus™ 6000L |
Fusion Plus™ 7000L |
Se si desidera recuperare una pouch parzialmente inserita, premere e mantenere premuto il pulsante “Reverse” e la pouch uscirà velocemente dalla plastificatrice.Si udirà una serie di singoli segnali acustici fino a quando non verrà rilasciato il pulsante “Reverse”.
Se si inserisce la pouch nella plastificatrice prima che sia pronta  , la plastificatrice rileverà questo tentativo e farà funzionare i rulli nella modalità‘Reverse’.Attendere fino a quando non si accende la spia che indica che la plastificatrice è pronta per essere utilizzata.
Se la plastificatrice emette un segnale acustico continuo e l’icona dell’inceppamento lampeggia sebbene non sia presente alcun ovvio inceppamento, controllare che non vi siano documenti nella parte frontale o sul retro della plastificatrice.
Fusion Plus™ 6000L |
Fusion Plus™ 7000L |
NOTA: Non riutilizzare mai una pouch alimentata in maniera errata oppure inceppata.
NOTA: Non inserire nuovamente nella plastificatrice una pouch che è stata precedentemente inserita parzialmente.
26 Registrare il prodotto online su www.accobrands.com

I
Spegnimento automatico
Per una maggiore sicurezza e un maggior rispetto dell’ambiente, la plastificatrice passa automaticamente alla modalità sleep dopo 30 minuti di inattività.Si udirà un segnale acustico prima che la plastificatrice passi a questa modalità.
pulizia
mATTENZIONE: STACCARE SEMPRE LA SPINA DALLA PRESA DI CORRENTE PRIMA DI PULIRE L’ESTERNO DELLA MACCHINA. PULIRE LA SUPERFICIE ESTERNA SOLO CON UN PANNO UMIDO E NON UTILIZZARE DETERGENTI O SOLVENTI.
Far passare regolarmente un‘Cleaning Sheet’ o foglio di carta attraverso la plastificatrice per pulire i rulli.Codice prodotto “Cleaning Sheet”:EK50000.
garanzia
Il funzionamento di questa macchina è garantito per due anni dalla data di acquisto, subordinatamente ad uso normale.Durante il periodo di garanzia, ACCO Brands Europe provvederà, a propria discrezione, a riparare o sostituire gratuitamente la macchina difettosa. Difetti provocati da un uso errato o un uso improprio non sono coperti dalla garanzia.Sarà richiesta la prova della data di acquisto.Riparazioni o modifiche effettuate da persone non autorizzate da ACCO Brands Europe rendono nulla la garanzia.È nostro obiettivo assicurare il funzionamento dei prodotti secondo le specifiche dichiarate.La presente garanzia non pregiudica alcun diritto riconosciuto ai consumatori dalle leggi nazionali applicabili che regolano la vendita di beni.
F U S I O N P L U S ™ 6 0 0 0 L & 7 0 0 0 L A 3 L A M I N AT O R I 27

NL
professionele afwerking ...
helemaal automatisch!
Welkom bij de nieuwe GBC Fusion Plus™ 6000L & 7000L lamineermachine voor het snel en eenvoudig lamineren van documenten met GBC-kwaliteit. Ideaal voor nieuwe gebruikers, dankzij de automatische zelfinstelling, maar ook voor experts, dankzij de dikteinstellingen voor de lamineertassen en het feit dat documenten van verschillend formaat gelamineerd kunnen worden.
Voor de beste prestaties en lamineerresultaten gebruikt u alleen lamineertassen van GBC. Lees deze aanwijzingen goed door, zodat u met deze machine het beste resultaat behaalt.
veiligheidsinstructies
mZowel uw veiligheid als die van anderen is belangrijk voor ACCO® Brands Europe. In deze handleiding en op het product bevinden zich belangrijke veiligheidsmededelingen.
Lees deze goed door.
mEr staat een waarschuwingssysmbool vóór elke veiligheidsmededeling in deze handleiding. Dit symbool duidt op een potentieel veiligheidsrisico waarbij u of anderen letsel kunnen oplopen en er schade aan het product of aan eigendommen kan ontstaan.
opmerkingen
•Gebruik deze machine alleen voor het beoogde doel:het lamineren van documenten.
•Gebruik voor deze lamineermachine alleen lamineertassen met een dikte van 75 micron, 80 micron, 100 micron, 125 micron, 150 micron, 175 micron of 250 micron.
•Voer geen lege lamineertassen door de machine.
•De machine moet worden aangesloten op een netspanning die overeenkomt met de nominale spanningswaarde die op de machine staat aangegeven.
•Zorg ervoor dat de vorige lamineertas helemaal uit de machine is geleid, voordat u de volgende lamineertas invoert.
•Het stopcontact moet zich in de buurt van de machine bevinden en goed toegankelijk zijn.
•Reinig de lamineerrollers regelmatig.
•Maximaal:A3-document, lamineertas van 426 x 303 mm.
•De geactiveerde anti-vastloopfunctie kan niet altijd een probleem met kleinere documenten opmerken.
•Als u deze waarschuwingen niet in acht neemt, raakt de machine beschadigd en vervalt de garantie.
•Plaats de machine op een veilig en stabiel oppervlak om te voorkomen dat door een val persoonlijk letsel wordt veroorzaakt of de machine beschadigd raakt.
•Apparatuur moet geaard worden.Gebruik alleen het meegeleverde netsnoer.
•Rating label staat op de basis van de machine.
28 Registreer dit product online bij www.accobrands.com

NL
onderhoud
Probeer nooit zelf onderhoud of reparaties aan de lamineermachine uit te voeren.Haal het netsnoer los en neem contact op met een erkende GBC-reparateur voor alle benodigde reparaties.
technische specificaties
Fusion Plus™ 6000L-lamineermachine |
Fusion Plus™ 7000L-lamineermachine |
|||
Elektrisch |
220-240V AC / 50 Hz/60 Hz / |
|
Elektrisch |
220-240V AC / 50 Hz/60 Hz / |
|
6,5 A / 1450 W |
|
|
6,5 A / 1450 W |
Afmetingen |
580 x 235 x 120mm |
|
Afmetingen |
580 x 235 x 120mm |
|
(zonder uitvoerlade) |
|
|
(zonder uitvoerlade) |
|
580 x 330 x 120mm |
|
|
580 x 330 x 120mm |
|
(met uitvoerlade) |
|
|
(met uitvoerlade) |
Gewicht |
7,7 kg |
|
Gewicht |
8,1 kg |
Maximumbreedte |
A3:303 mm |
|
Maximumbreedte |
A3:303 mm |
lamineertas |
|
|
lamineertas |
|
voorbereidingen
Eenvoudige setup
1Haal de plastic uitvoerlade uit de doos, steek hem in de twee gaten aan de achterkant van de lamineermachine en trek hem uit.Zorg ervoor dat er voldoende ruimte achter de lamineermachine is om het gelamineerde document te verwijderen.
2Steek de stekker in een stopcontact in de buurt van de tafel die u gaat gebruiken.
3Er gaan verschillende lampjes op het bedieningspaneel aan en uit.
4U activeert de lamineermachine door zachtjes op de aan/uit-knop te tikken.
OPMERKING: Het is mogelijk dat u bij deze nieuwe lamineermachine aan het begin een vreemde lucht ruikt.Dit is normaal.De lucht zal verdwijnen wanneer de machine enkele uren heeft gefunctioneerd.
Handmatige Selectie
ALLEEN voor Fusion Plus™ 7000L
Als u de instelling‘Auto’ niet wilt gebruiken, selecteert u de dikte van de lamineertas door met de pijlen naar de gewenste dikte-instelling te gaan.(Het groene lampje onder de dikteinstelling gaat branden.)
F U S I O N P L U S ™ 6 0 0 0 L & 7 0 0 0 L A 3 L A M I N E E R S Y S T E M E N 29

NL
Instelling ‘Auto’ voor lamineertassen
Automatische selectie (  ) – de lamineermachine meet de dikte van de lamineertas en het document en selecteert automatisch de juiste instelling.
OPMERKING: U kunt tijdens het opwarmen geen lamineertassen in de machine voeren.
het document in de lamineertas steken
1Steek het document dat gelamineerd moet worden in de lamineertas met de juiste maat.Leg het document stevig tegen de gesloten kant van de lamineertas aan.Zodoende zorgt u voor een gelamineerd document van optimale kwaliteit.
DICHTE RAND
DICHTE RAND
OPMERKING: Knip de lamineertassen nooit op maat voordat u het document hebt gelamineerd
A3, A4, A5, etc. |
Onregelmatig |
|
gevormd document |
Voordat u een belangrijk of uniek document lamineert, moet u altijd een test uitvoeren door een gelijksoortig document te lamineren.
30 Registreer dit product online bij www.accobrands.com
 Loading...