

Page 1

TABLE OF
CONTENTS
TABLE OF CONTENTS
WELCOME TO THE FLEET
Getting Started ........................................................................... 5
Launch Screen.............................................................. 5
Installation.................................................................. 5
Quickstart.................................................................... 5
Main Menu ................................................................................. 6
Tutorials...................................................................... 6
Skirmish Mode.............................................................. 6
Single Player Campaign.................................................. 6
Dynaverse 3 ................................................................. 6
Exit Game.................................................................... 6
Options Menu ............................................................................. 7
Game Controls.............................................................. 7
Audio Controls.............................................................. 8
Video Controls.............................................................. 8
Keyboard Remapping..................................................... 9
Basic Starship Controls.................................................................10
Alert Status .................................................................10
Turning .......................................................................10
Speed .........................................................................11
Targeting.....................................................................11
Weapon Selection/Control ..............................................12
Shields........................................................................14
Communication.............................................................14
Cloaking......................................................................15
1
Page 2

Empires......................................................................................43
The United Federation of Planets ....................................43
Klingon Empire.............................................................44
Romulan Empire ...........................................................45
Borg Collective.............................................................46
Ships.........................................................................................47
Weapons ....................................................................................62
Ship Systems ..............................................................................69
Key Bindings ..............................................................................71
Credits.......................................................................................73
Customer Support........................................................................77
Software License Agreement..........................................................79
Scanning .....................................................................16
Repairs........................................................................16
Advanced Starship Controls...........................................................17
Marines .......................................................................17
Power Allocation...........................................................18
Helm Controls ..............................................................19
Science .......................................................................21
Tractor Beam................................................................22
Transporters.................................................................23
Shuttles ......................................................................23
Officers .......................................................................24
Mines..........................................................................25
Skirmish Mode ............................................................................26
Setting up Single Player ................................................26
Joining a Multiplayer Skirmish........................................29
Hosting a Multiplayer Skirmish .......................................30
Film Room ...................................................................31
Vessel Library...............................................................31
Single Player Campaign ................................................................32
The Hex Map................................................................32
Loading Saved Games....................................................38
Conquest Mode.............................................................38
Dynaverse 3 .............................................................................39
Signing Up ..................................................................39
Setting Up Your Character ..............................................39
Gameplay.....................................................................40
Dynaverse 101..............................................................41
TABLE OF
CONTENTS
TABLE OF
CONTENTS
3
2
Page 3

GETTING STARTED
Launch Screen
The following options are available from
the splash screen:
Install: Begins the installation of the
game. This button will change to “Play”
once the game is installed.
Uninstall: Removes the installation of
the game.
Extras: Click here for information on other Activision products.
Support/Info: Click to access the SFC troubleshooting document
if you are having problems with the game.
Quit: Closes the launch screen.
Installation
To install the game, insert the SFC3 CD into your CD-ROM drive and choose
one of the following actions:
If your CD-ROM drive has AutoPlay enabled, the Launch Screen will
appear automatically. Click “Install” and follow the on-screen installation
instructions.
If AutoPlay is not enabled, Double-click on the “My Computer” icon on your
desktop. Double-click on the CD-ROM drive icon. Double-click on the “Setup”
icon. When the Launch Screen appears, click “Install” and follow the onscreen instructions.
Quickstart
If you want to jump into the game and start playing right away, skip ahead
to the Basic Starship Controls section on page 10. This section describes the
basic controls to play the game. Once you’re comfortable with them you can
move on to Advanced Starship Controls on page 18, which goes into more
detail on ship systems and tactics.
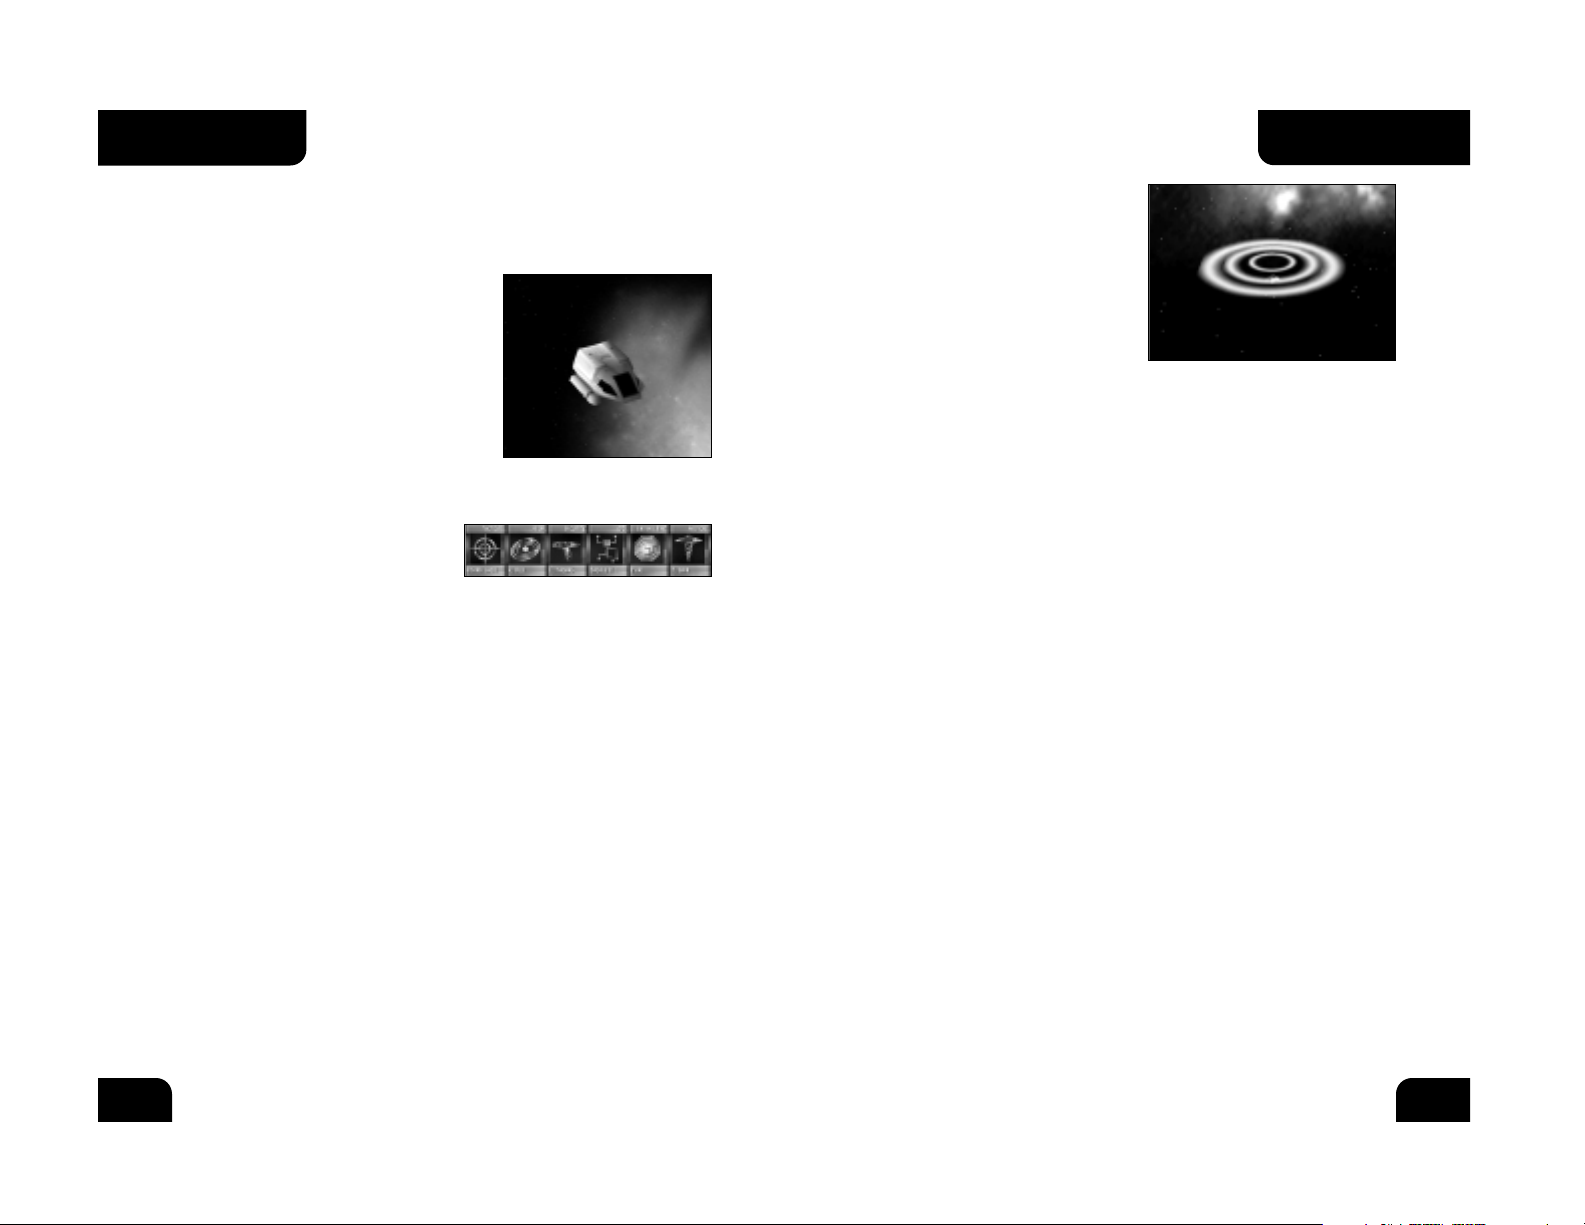
WELCOME TO THE FLEET
Welcome to the third game in the Starfleet Command series. SFC3 is a game
of tactical starship combat set in Star Trek: The Next Generation
®
era of the
Star Trek universe. It contains a single player campaign in which you can
experience an epic universal conflict from three sides: Klingon, Romulan, and
Federation. In addition to completing story-critical missions while exploring
the galaxy, you will be able to take on optional missions to gain prestige,
allowing you to hire more experienced officers, buy better ships, and refit
your existing ship. These options combine to bring you the most immersive
single player SFC yet.
SFC3 also brings you Dynaverse 3, an exciting multiplayer component that
allows you to join one of 4 empires and fight alongside and against other
captains for control of the galaxy. You’ll be able to form fleets with your
friends to raid enemy convoys, siege planets, and attack enemy fortifications.
Each victory will bring your side more prestige to bolster its forces for
future conflicts.
Activision and Taldren have worked hard to bring the Starfleet Command
series into this universe, and we hope you enjoy it.
GETTING STARTED
INTRODUCTION
4
5
Page 4

OPTIONS MENU
This menu allows you to tweak game options to your liking, as well as adjust
sound and video options and re-assign keyboard controls (note that keyboard
re-mapping is only available from the menu screens; the in-game options
menu does not contain this feature).
Camera Controls
This section allows you to change your
camera controls while in the game. The
following options are available:
Overhead: A view of your ship and its
surroundings from directly overhead, with your ship in the center of the
screen. If you have an enemy targeted, the screen will zoom out as your
target moves away, allowing you to keep them in sight at all times. In large
battles, this is often a better view for strategic planning. You can access this
camera angle in game by pressing F1.
Chase: This view locks the camera on your current target. You can access
this camera angle in game by pressing F2.
Follow: This is the default view for SFC3. It shows your ship from a 3D
perspective just above the plane of attack that can be zoomed in and out
with the + and – keys. You can access this camera angle in game by
pressing F3.
Enemy: This view places your target in the foreground but still allows you to
see your ship. You can access this camera angle in game by pressing F4.
Target: This button will toggle the camera lock on your target. When
activated, the camera will always keep your opponent on screen by zooming
out (in Overhead mode) or by rotating the camera (in Follow mode). When
toggled off, the camera will stay behind your ship. You can also toggle this
feature on and off while in game by pressing F5.
Miscellaneous
This section of the menu allows you to
set game functions and adjust volume.
The following options are available:
Quick Tips: When turned on, a helpful tip will appear if you hold the mouse
over most buttons in the game. When turned off, the tips will not appear.
MAIN MENU
Double-click on the SFC3 icon on your
desktop or select SFC3 from the Start Menu
to begin the game. After a brief loading
period, you will be greeted by the Main
Menu, which contains the
following options:
Explore Tutorials: This section is where
new captains can learn the basics of
starship control. It covers everything from
helm maneuvers to combat controls. Clicking on this button will allow you to
select from six different Starfleet Academy classes. If you’re new to the
game, you should play them in order. If you’re a returning captain and are
familiar with the basics, feel free to skip ahead.
Single/Multiplayer Skirmish: If you’d like to dispense with story and jump
right into combat, this is the section for you. From this menu, you can setup
any combat scenario you’d like to play against either computer-controlled or
human opponents. Setting up a skirmish and the numerous options available
are detailed on page 26.
Single Player Campaign: This menu grants you access to SFC3’s immersive
single player missions. You can choose to play as either the Klingons,
Romulans, or Federation. As these campaigns feature a storyline which plays
out over all three, we recommend you play them in order to get the full
scope of the story. However, if you’re disgusted by the idea of playing a
sneaky, untrustworthy Romulan, feel free to skip around. More details on the
Single Player Campaign can be found on page 32.
Multiplayer Online Campaign: Select this menu to sign on to a Dynaverse 3
server and begin your quest to conquer the galaxy. You’ll need to sign up for
an account and choose a team before you’re sent out to battle alongside
your friends to destroy the competition. Dynaverse 3 is examined in more
detail on page 39. You will need a internet connection to play on the
Dynaverse 3.
Options: This button allows you to adjust audio, video and gameplay
settings. See page 7 for more information.
Exit Game: This button allows you to exit the game and return to your
desktop at any time.
OPTIONS MENUMAIN MENU
6
7
Page 5
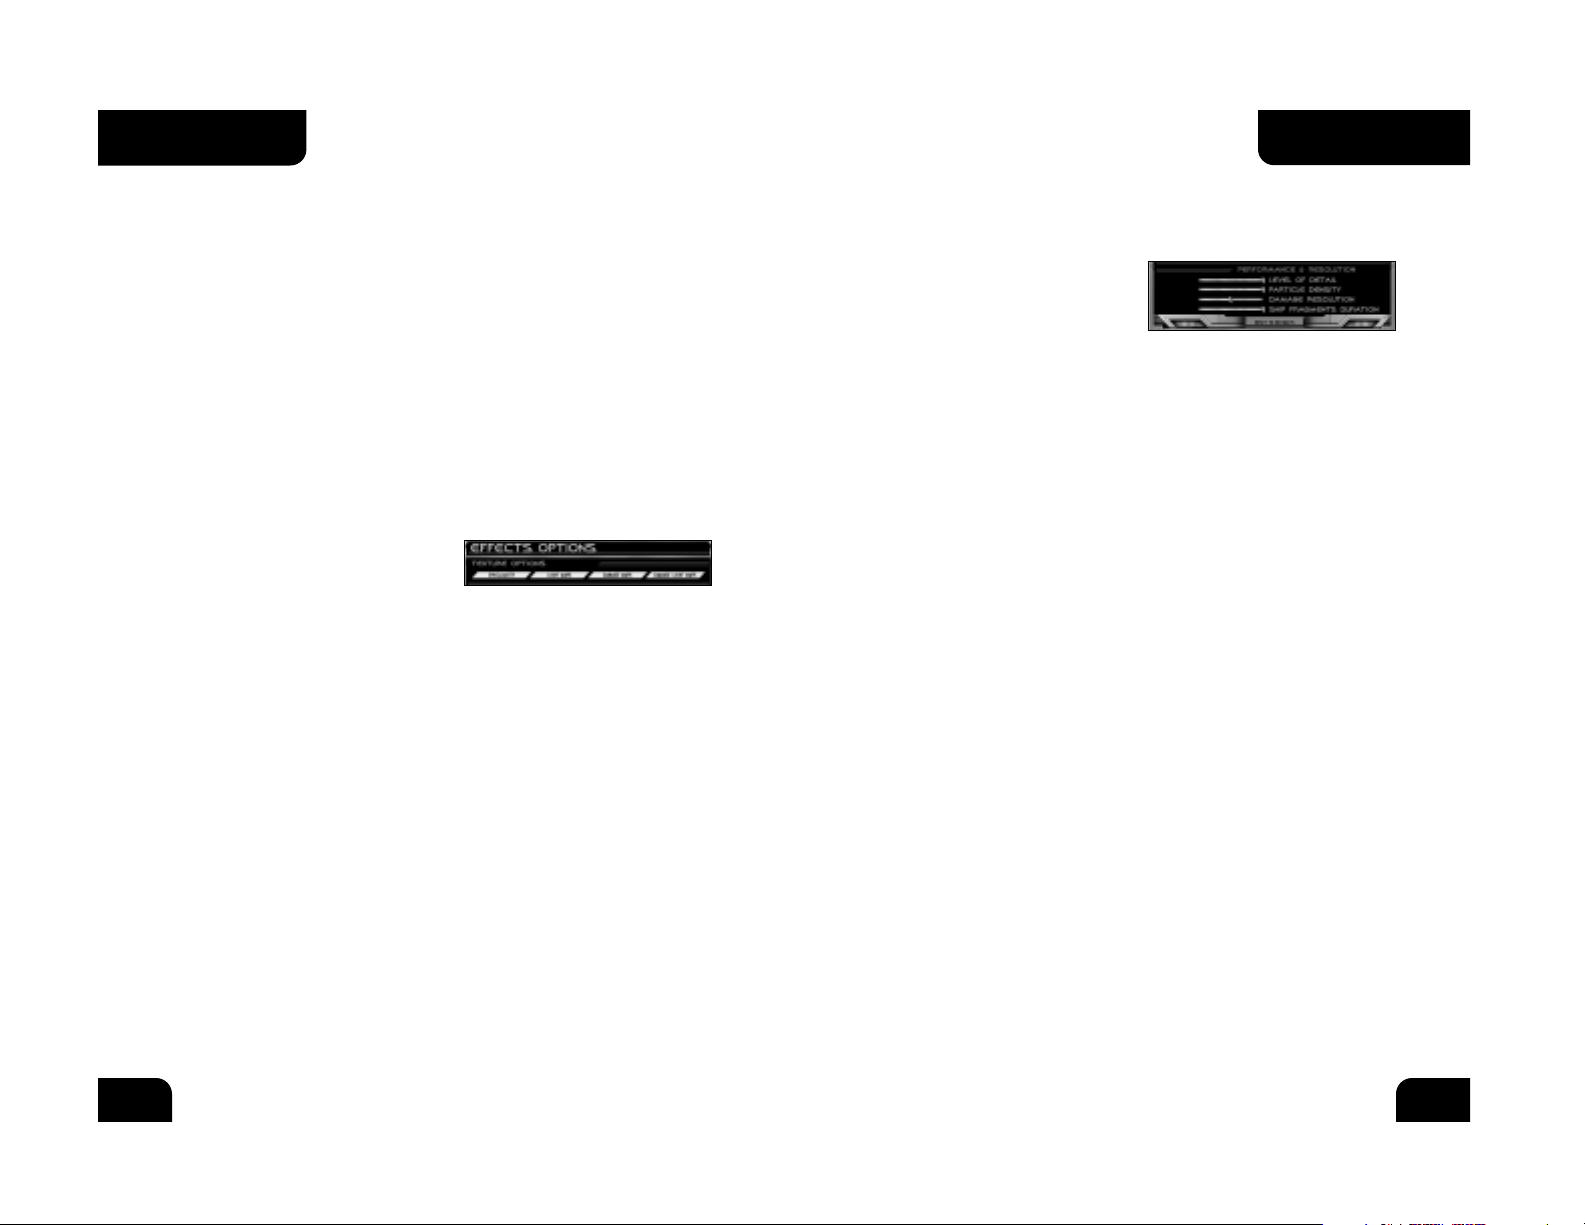
Performance and Resolution
Level of Detail: This slider controls the level of complexity of the models in
the game.
Particle Density: Controls the detail
level of in-game particle effects.
Damage Resolution: Controls the
amount of damage displayed on a
ship’s surface after it has been hit
by weapons fire.
Ship Fragments Duration: This slider dictates how long pieces of ships will
remain floating in space after they have been blown up.
Keyboard Bindings
This section of the options menu allows you to alter the default settings for
the keyboard in SFC3 or assign keys to functions which do not normally have
a hotkey. To change a key’s function, simply click on the key currently
assigned, then press the key you wish to newly assign to that function. If
you choose a key already in use, whatever function that key was previously
assigned to will now have no key bound to it.
A full list of Star Trek: Star Fleet Command 3’s default key bindings can be
found on page 71.
Exiting the Options Menu
If you want to exit out of the options menu without saving the changes
you have made, click on the “Back” button in the upper right corner of the
screen. To exit and save the changes you have made to the game, click
on “Accept.”
Game Speed: This slider controls the speed of the game and can be set from
1 to 11. Slower speeds give you more time to think and plan, while faster
speeds focus more on action and quick-thinking. You can adjust the speed of
the game to suit your style of play.
Visible Grid: When activated, this feature will display a visible grid on the
playfield. This can help you gauge relative distance to targets and plan
certain attacks.
Text Speed: This slider controls the speed at which on-screen text displays.
If you find yourself unable to read the text before it scrolls off of the screen,
you can slow it down.
Master Volume: This slider controls the overall volume level of the game.
Music Volume: This slider adjusts the volume for only the music of SFC3.
Speech Volume: Use this slider to adjust the volume of the speech in
the game.
Texture Options
This menu allows you to turn on and
off various advanced graphical
components of the SFC3 engine. If you are experiencing performance
problems, turning these options off should help.
Specularity: Controls the way the game reflects light off various surfaces.
Light Maps: Controls the game’s display of lighted surfaces on ship and
station models.
Damage Maps: Controls the display of damage textures on a ship model after
it has taken fire.
Damage Light Maps: Controls the display of the lighted portions of damage
textures on ships in battle.
OPTIONS MENU
8
9
OPTIONS MENU
Page 6
Speed
The slider at the bottom of your in-game interface is used to set your speed.
The slider represents the fraction of your maximum speed you are traveling
and the number to the left of the slider shows your current speed. Drag the
slider to your desired speed or click directly on the speed you want and the
ship will begin accelerating to reach that speed. A ship’s maximum speed
and its acceleration rate depend on its size, mass, engines, and condition.
Your ship is capable of traveling in
reverse if needed. By sliding the bar to
the left of zero, your ship will begin traveling backward and your reverse
speed will be displayed with a “-“ in front of it, letting you know you’re
traveling in reverse. Reverse can come in handy in combat when your enemy
is trying to out-maneuver you and get on your tail.
To the right of the speed slider is the “Warp” button. Pressing this button
will cause your ship to jump to warp speed and travel very quickly across the
map. Warp has its disadvantages, however, as your shields go down while at
warp and your beam weapons will not fire. You are also only able to travel in
a straight line; no course corrections are possible at such high speeds. Press
the button once and your engines will charge for a brief moment before your
ship is flung forward at warp speed. Pressing the button again will cause you
to come out of warp speed. Be aware that the ship doesn’t come to a halt as
soon as the button is pressed; it has a stopping distance in which the warp
engines power down. So if you are warping to a planet, make sure you give
yourself enough distance to stop, or you may find yourself becoming a
fireworks display in the atmosphere. After exiting warp, your engines will
require a cool down period before you are able to go to warp again. Warp is
very useful for reaching mission objectives a long distance away, fleeing
from battle to recharge your shields, or in short bursts during combat.
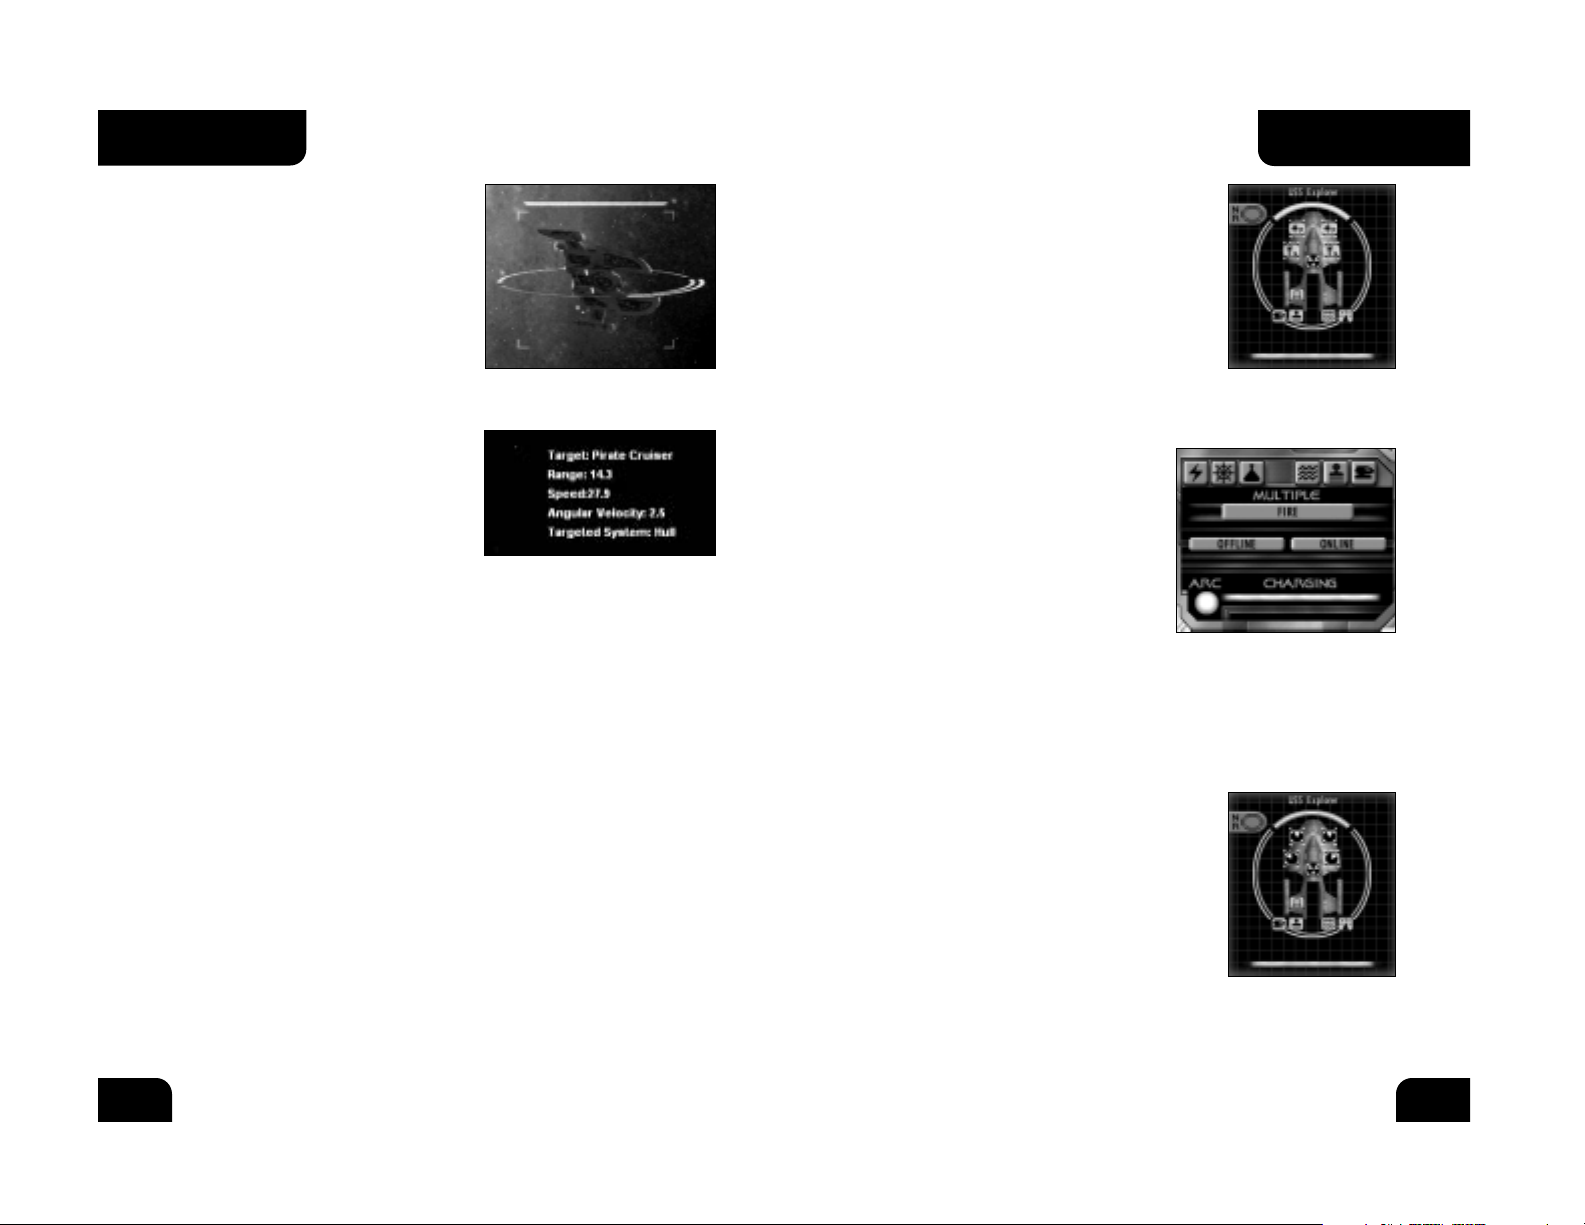
Targeting
Your weapons can’t fire at anything unless you first set a target. Targeting is
also used to scan ships and objects. To target a ship, station, or other
object, right click on it. A box will appear around the target and (if the
Target Lock option is on) the camera will center on the target. You will see
the target’s name, health, and speed, and a picture of the target will appear
in the upper left portion of the interface.
BASIC STARSHIP CONTROLS
This section will cover the basics of starship control, allowing you to jump in
and start blasting with a minimum of preparation. If you wish to learn about
the more advanced options available to captains in SFC3, read on to the
Advanced Starship Control section on page 17.
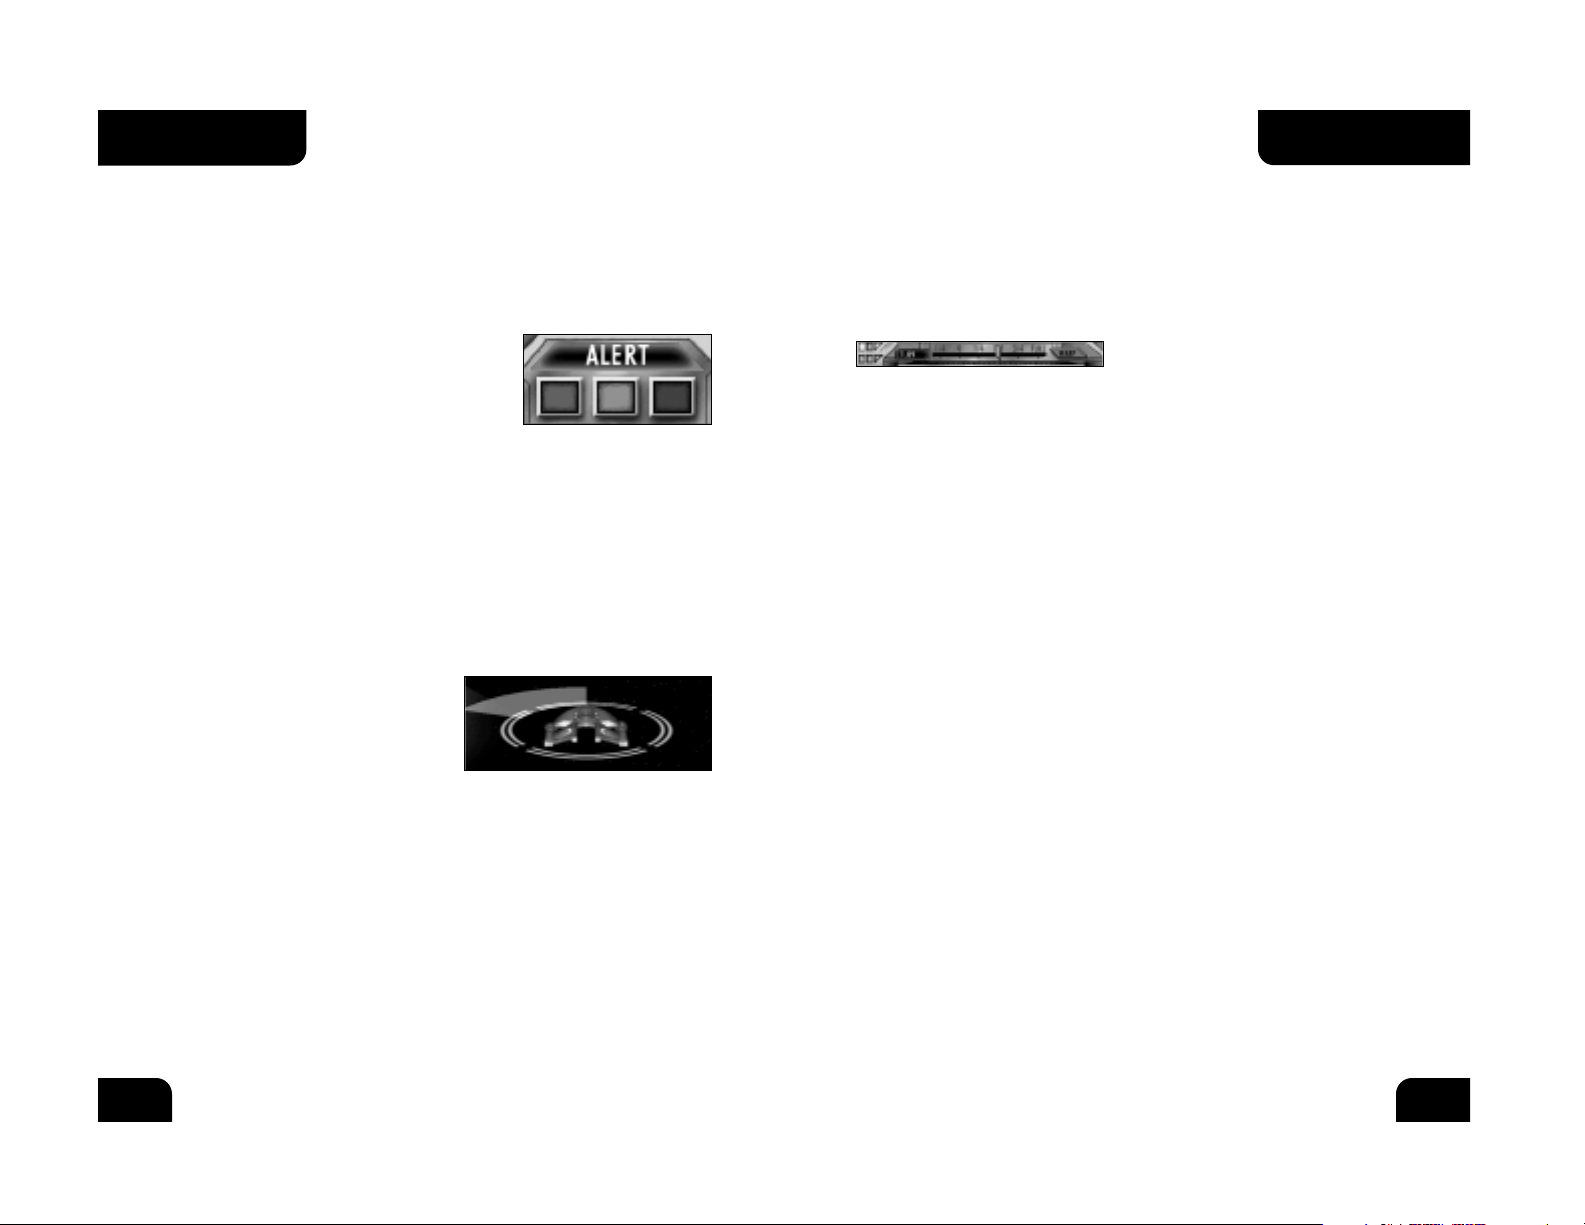
Alert Status
Your ship’s alert status is displayed in the
bottom right corner of the game screen, and
can be changed by clicking on the colored
buttons beneath the indicator. The alert levels
are as follows:
Condition Green (Normal): Standard running alert level, non-aggressive.
Shields and weapons are powered down.
Yellow Alert: This is a defensive posture used predominantly when entering
into a situation of unknown risk. Shields are raised but weapons are
not powered.
Red Alert: Highest alert status and where you will be spending most of your
time. Shields are raised and weapons are powered. The ship is ready for
combat. Shifting your ship to Red Alert will generally be the first thing you
do when entering a mission.
Turning
To turn your ship, simply left click in
space in the direction you want your
ship to face. A colored arc will appear
showing your ship’s projected turn, and
the ship will begin turning. Your
starship’s turning speed depends on its mass, engines, and current speed. If
you wish for your ship to turn to face a target, left click on that target and
the ship will begin turning to face it. You can also use the arrow keys to
turn your ship. Pressing and holding the left or right arrow keys will begin
extending your ship’s turning arc. Release the button when you have reached
the desired end of the turn. The ship will continue turning until it reaches
the end of the arc.
BASIC STARSHIP
CONTROLS
BASIC STARSHIP
CONTROLS
10
11
Page 7
interface. Once selected, that weapon’s settings
will appear in the window above, allowing you to
adjust its settings or take it offline to conserve
energy. You can also fire that individual weapon
by clicking on the “Fire” button.
You are also able to select multiple weapons by
holding down the “Shift” or “Ctrl” key and clicking
on the weapons you want to group together. After
selecting a weapons group, you can assign that
group to a hotkey by holding down the “Ctrl” key and pressing a number
from 1-5. After doing this, pressing the corresponding number will
automatically select your custom group of weapons.
The names of currently selected weapons
will appear in the lower left portion of the
game window. When you have an enemy
targeted, the name of the weapon will turn
green when you can fire it at the target.
Weapons in red are unable to fire, and
weapons in yellow are ready but the target
is not in their arc. To fire all available
selected weapons, you can click on Fire in
the weapons display, or press the Z key.
The icon for each of your weapons will appear as a dark green color when
the weapon is idle. Once activated (by going to Red Alert) the weapons will
begin to charge. The current charge of a weapon is indicated by the bright
green bar which gradually fills as the weapon charges. Once the entire
weapon icon is bright green, that weapon is ready to fire. Firing the weapon
depletes its charge, and you must wait for it to recharge before firing it again.
Each of your weapons has a firing arc. That
weapon can only fire when its target is within
this arc. When a weapon is selected, its firing arc
appears in its display box. You can also view the
firing arcs of all your ship’s weapons at any time
by pressing the pie-shaped Firing Arc button
beneath your ship schematic.
This will replace your weapon icons with an
overlay displaying the firing arc of each weapon.
The white section of each circle represents the area
that weapon can “see.”
The targeting box will appear red if the
target is hostile, green for friendly
targets, and gray for neutral targets.
Target info also appears in the upper
right of the game window, showing target
name, targeted subsystem, speed, and
angular velocity.
You can also use hotkeys to cycle through
targets. The “T” key (by default) will cycle
through all targets, while the “Y” key will
cycle through enemy targets only.
Once a ship is targeted, you can target
specific subsystems on that ship if your
Tactical Officer is experienced enough
(see Officers on page 24). The currently
targeted subsystem is displayed in the
target info in the upper right corner of
the game window. You can cycle through
subsystems on your target with the mouse
wheel, or you can click directly on the subsystem you wish to attack in the
target display in the upper left of the interface. Use subsystem targeting to
take out an enemy’s weapons or engines, disabling them.
Weapon Selection/Control
Once you have an enemy ship targeted, you’re going to want to shoot at it.
The first thing you will need to do is to select the weapons you want to fire.
Each starship features both primary and heavy weapons, which differ
depending on the empire the ship belongs to and the weapons loadout you
have given it. Primary weapons are the main offensive weapons, consisting
of beam and disruptor weapons. These weapons charge much faster than
heavy weapons, but do less damage. Heavy weapons consist of various
torpedoes and plasma weaponry. These weapons are slow to charge but do
much more damage than primary weapons.
The “Primary” and “Heavy” buttons to the left of the speed control slider can
be used to fire all of your weapons that are currently charged and have your
target in their firing arcs. Click “Primary” to fire your beam weapons and
“Heavy” to fire your torpedoes. If the icon to the left of either of these
buttons is yellow, it means those weapons are charging and cannot yet fire.
You are also able to select individual weapons. To do this, simply click on
the weapon icon on the schematic of your ship in the lower left of the
BASIC STARSHIP
CONTROLS
12
13
BASIC STARSHIP
CONTROLS
Page 8
ships currently under your command. Clicking a ship name will bring up a
variety of orders you can give that ship, from assigning targets to ordering
an ally to capture a ship.
Hail: This button allows you to hail
other ships in your area. Hailing ships
is sometimes a required part of a
mission. Oftentimes, you will be hailed
by other ships in a mission. When this occurs, their transmission will be
displayed in text form on the Comm menu. You can then select a response
from the given list, or click on the “Target” option to target the ship which
is currently speaking.
Mission Objectives: Clicking this button will bring up a list of your current
mission objectives. These are the tasks you need to accomplish in order to
successfully complete your current mission. Objectives will gray out as they
are completed. Objectives can be added as you go further into a mission, so
this is a good place to check if you ever find yourself wondering where to
go next.
Captain’s Log: Clicking this button will bring up a log of all transmissions
you have received in the comm menu. You can then cycle through these logs
to review communications you may have missed.
Close Channels: This button closes the Comm menu.
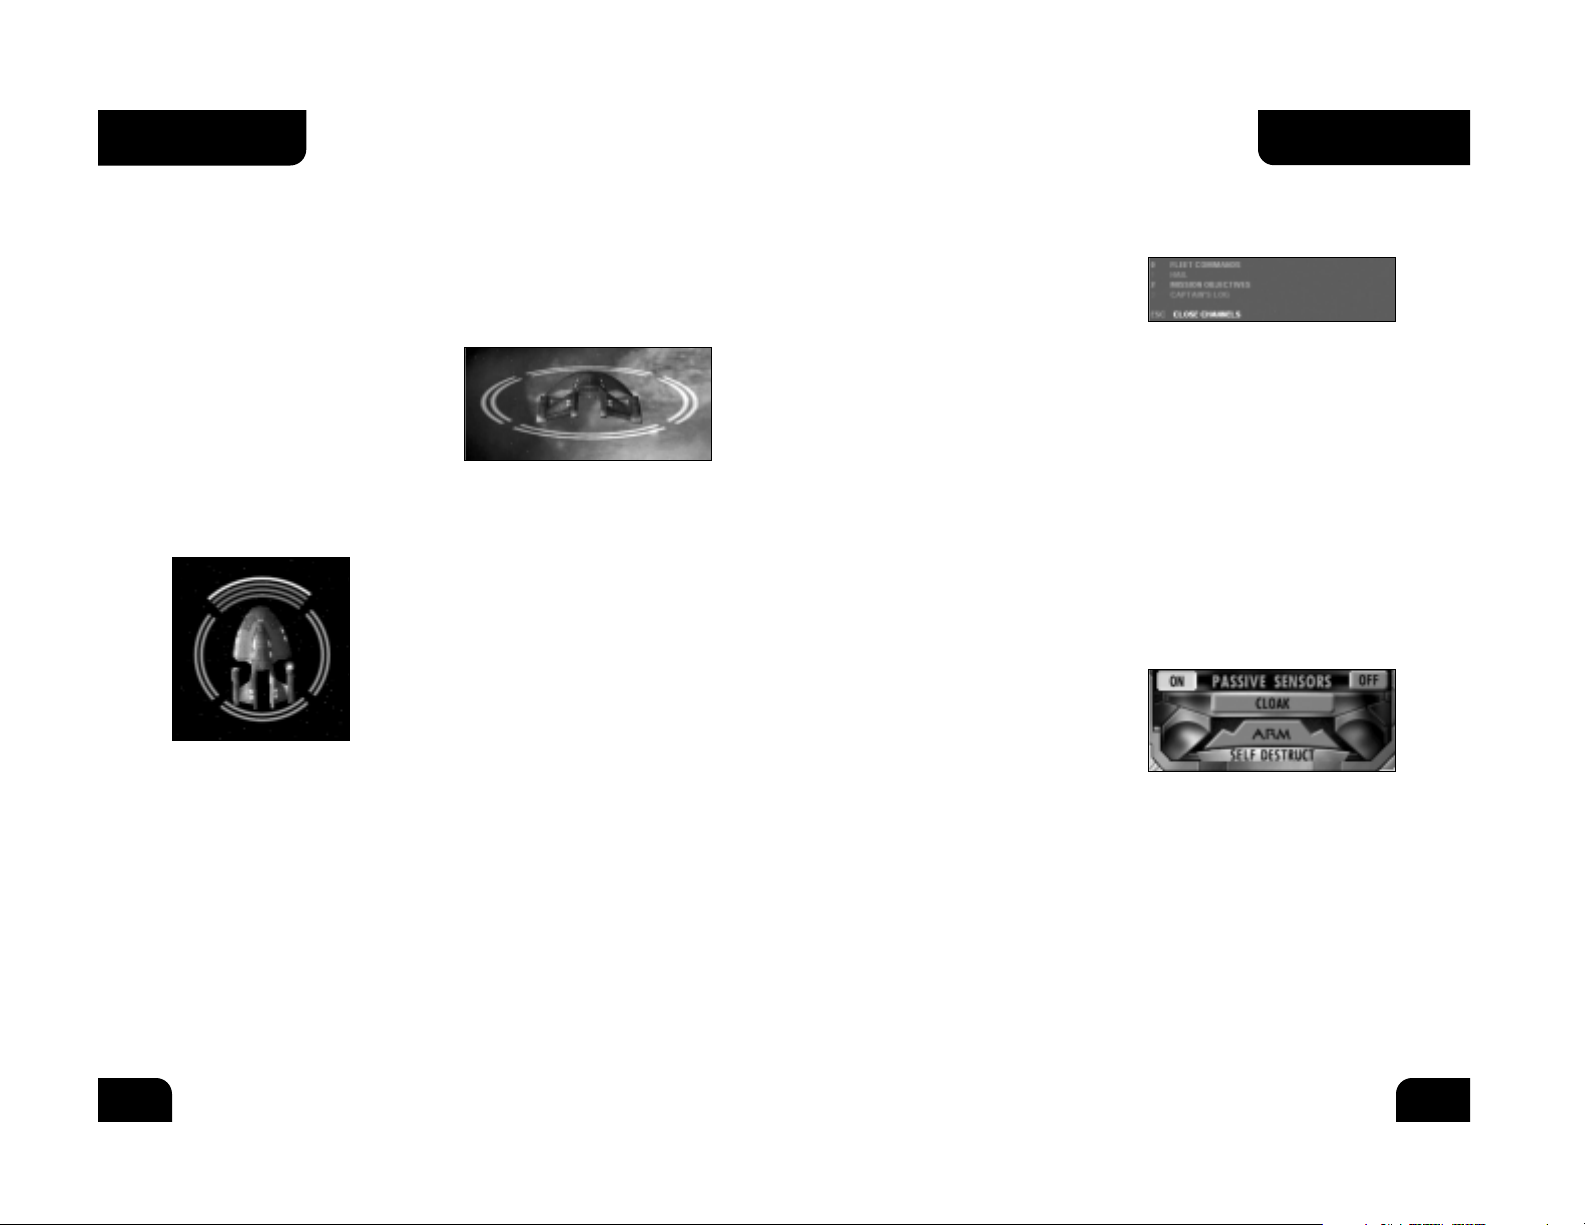
Cloaking
Some of the ships you will be flying
in SFC3 are equipped with cloaking
devices. This allows you to render your
ship invisible to your opponents.
You are unable to fire weapons while
cloaked, and your shields are powered down, but you remain unseen. You can
activate your cloaking device by pressing the “C” key, or by clicking
on the “Cloak” button in the Science menu.
Be aware that your shields will be down while you are visible to the enemy
for a short period of time when engaging or disengaging your cloak, leaving
you vulnerable to weapons fire. For this reason, it is a good idea to cloak or
de-cloak when you are out of an enemy’s range or firing arcs.
Some enemies have advanced anti-cloaking sensor systems that can detect
your ship while cloaked. If an enemy fires on you while you are cloaked,
they have detected you. De-cloak immediately to raise your shields and
fight back.
Shields
Shield knowledge is a must for staying alive in the world of SFC3. Every ship
in the game, with the exception of Borg ships, is protected by four shields
(fore, aft, port, starboard). These shields absorb attacks on the ship and
have the ability to recharge after they have taken damage. Once a shield is
down, enemy fire will tear into your armor, and then your ship’s hull,
damaging your systems.
Your shields activate automatically in
Yellow or Red alert. The current
strength of each of your shields is
visible around your ship schematic in
the interface, and is also visible
around the ship itself in the game
window. This allows you to see which
of your shields is currently stronger and maneuver yourself accordingly. If
your enemy has taken out your aft shield, it’s a good idea not to turn your
back on them until that shield has recharged.
You are also able to reinforce one of your shield
facings at any time, as long as your shield is not
fully depleted. To do this, simply click on the
shield you wish to reinforce in your ship
schematic. The currently reinforced shield is
indicated on the schematic and in the game
window by a white highlight. Reinforcement
causes energy to be diverted from the other
three shields to the reinforced one, giving it a
boost in strength. This can come in very handy
when one of your shields is weakening and you
cannot turn it away from the enemy to recharge. To clear reinforcement
orders and return your shields to their regular balance of energy, click on the
“NR” button in the upper left of the ship schematic.
Communication
The “Comm” button is located above the target display in the upper left
corner of the interface. Clicking this button will bring up the
Communications menu, allowing you to access the following features:
Fleet Commands: For select missions in SFC3, you will be assigned other
ships to fight alongside you in your battle group. You do not have direct
control over these ships, but you can communicate with their captains to
give them orders. Clicking on “Fleet Commands” will bring up a list of the
BASIC STARSHIP
CONTROLS
BASIC STARSHIP
CONTROLS
14
15
Page 9
ADVANCED STARSHIP CONTROLS
The skills learned in the previous section will get your ship into space
and fighting, but to become a truly legendary captain, you’ll want to master
all of your ship’s subsystems. The following section will go much deeper
into the workings of your ship and the many tactics available to an
experienced captain.
Marines
Each starship is equipped with a complement of marines. These troops can
be beamed over to an enemy vessel once its shields are down, allowing you
to attempt to capture the ship or sabotage its systems.
The controls for marine functions are located above the target display in the
upper left corner of the interface.
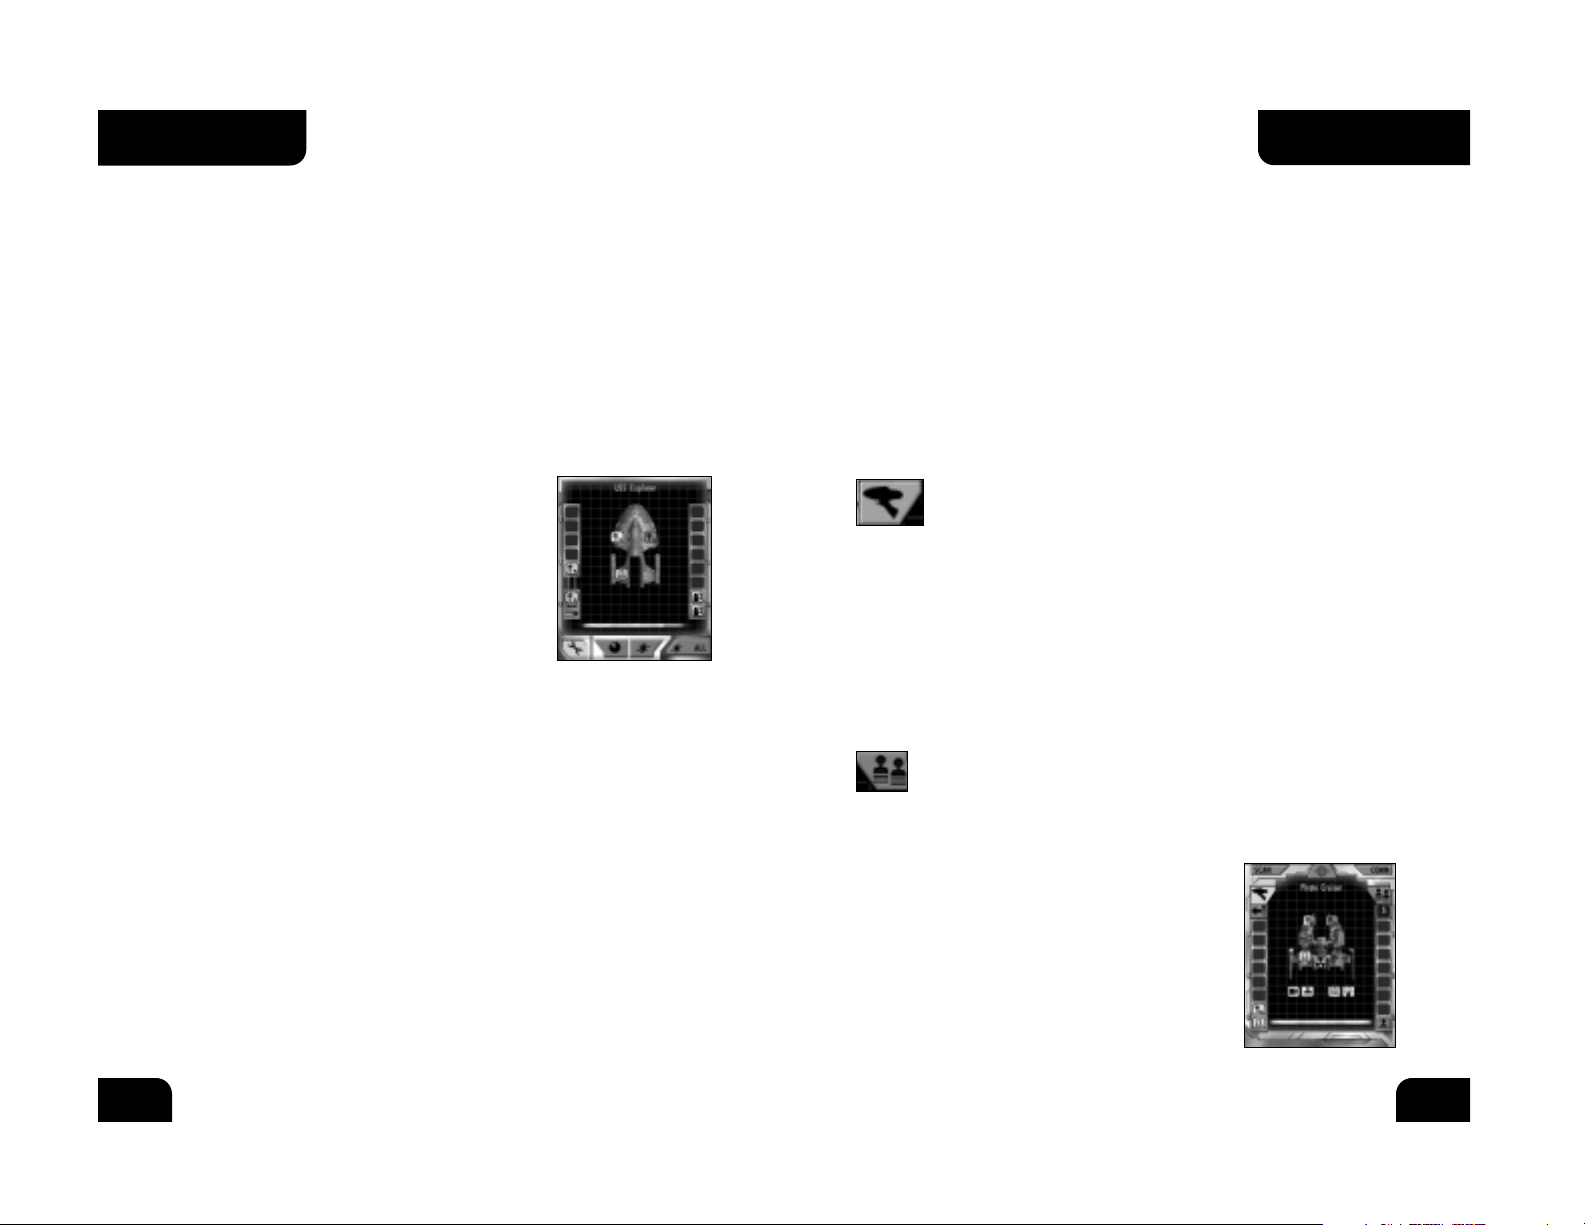
Hit and Run: The Phaser icon represents your marines’ ability to
beam to an enemy ship and take out key systems. Your current
number of marines is displayed in the upper right corner of the
display. Below it are icons representing the number of transporters your ship
has and their current status. Select an enemy system by clicking on it in the
target display. This system will then appear in the queue on the left hand
side of the display. Once an enemy’s shields are down, your marines will
beam over and attempt to destroy your target systems in the order you have
selected them. Their chance of success depends on the number of marines
you have and your Security officer’s skill. By default, marines given hit and
run targets will beam over as soon as they have the chance. To pause or
delay transport, click on the icon at the top of the target system queue. To
resume, click it again.
Capture Raids: If simply pecking away at your opponent’s systems
isn’t enough, why not try to take over his entire ship? The marine
icon beneath the “Comm” button brings up the Capture menu. In
the center of this menu, you can see the empire in current control of your
target. The number to the left of this symbol
represents the number of enemy marines on board
the target. The number to the right is the number of
your marines currently on board. To get your marines
onto the enemy ship, you first need to knock down
an enemy’s shields. You can then choose to beam
over one marine by clicking the “One Marine”
button, or send over as many marines as you have
transporters by clicking “All Marines.” Once on board
the enemy ship, your marines will engage the enemy
in combat. The progress can be seen by simply
Scanning
Your starship is used for things other than combat. In certain missions, you
will be required to scan objects or ships in order to gain information about
them. To do this, move your ship near the object and press the “Scan”
button in the upper left corner of the interface. If you are in scanning range,
your Operations officer will give you the scan results. If you are out of range,
you will be told to move closer to the object you’re scanning.
Repairs
Your ship will inevitably take some damage during combat. After your shields
are knocked down, enemy weapons fire will strike your hull and sometimes
damage your systems. If a weapon or system icon turns gray in your ship
schematic, it has been knocked offline and requires repairs to used be again.
To access your repair menu, click on the “Repair”
button with the wrench on it below your ship
schematic. To repair a system, click on its icon.
Repairs will begin. The progress of the repairs can
be seen on the left side of the menu. Beneath the
icon that displays the current system being repaired
a progress bar will slowly fill until that system is
fully repaired. You can only repair one system at a
time. Clicking more than one will add them to the
repair queue, and your repair teams will move
on to the next system in the queue when they
are available.
BASIC STARSHIP
CONTROLS
BASIC STARSHIP
CONTROLS
16
17
Page 10
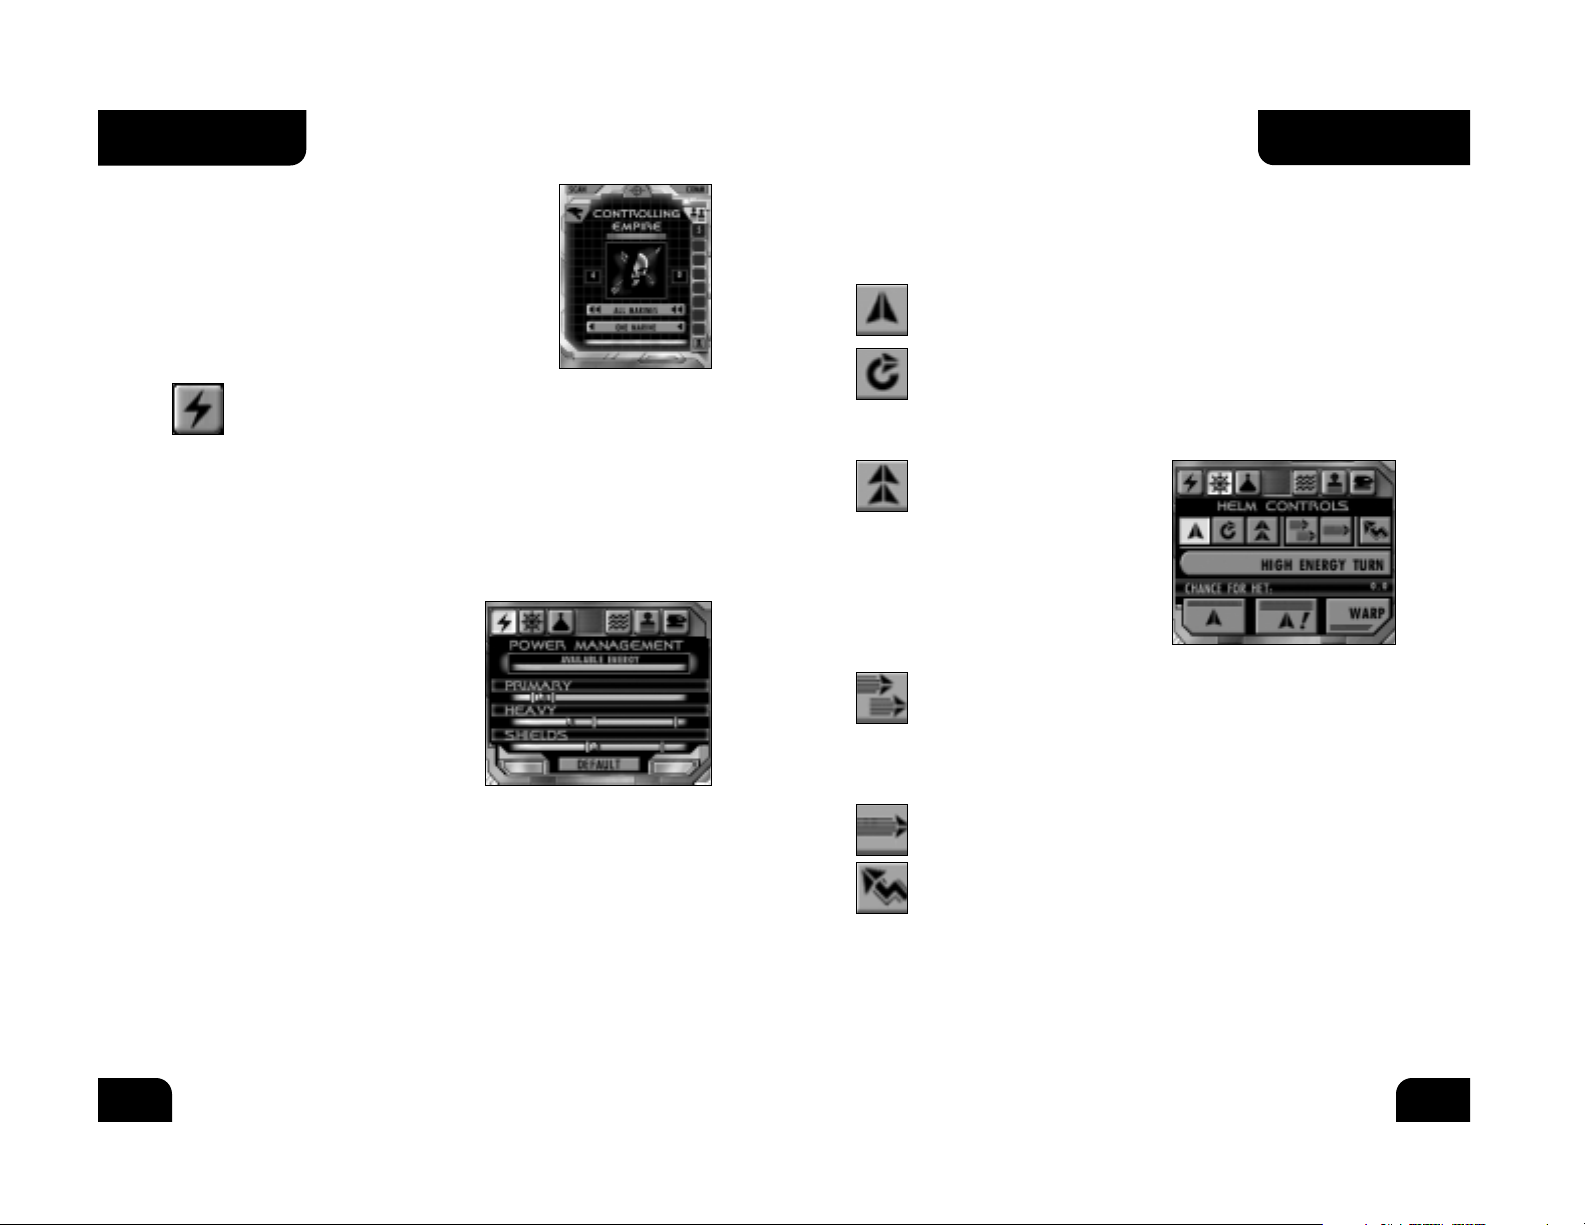
Helm Controls
The Helm Controls menu is accessed by clicking on the “Helm” button. This
brings up the helm controls. The following advanced helm maneuvers are
available from this menu:
Steady as She Goes: This option will clear any previous helm
maneuvers you have selected, returning the ship to regular flight.
Orbit Target: Selecting this maneuver will tell your helmsman to
plot a circular path around your target. This is useful for keeping
weapons trained on an enemy or for orbiting stations or planets.
The ship will turn itself automatically. Giving a turn order yourself
will clear this order.
Follow Your Target: This option
tells your helmsman to turn the
ship toward the target. No
matter where your target is,
your ship will automatically
turn to face it. This is useful on
ships whose main weapons are
on the front of the ship. Giving
a turn order yourself will clear
this order.
Match Target’s Speed: Sets your ship’s speed to match the speed
of the current target. Useful when you are behind a target and
would like to stay there. Your ship’s speed will adjust along with
the target. Even if you try to manually adjust your speed, it will
return to that of the target. Changing your speed manually will
clear this order.
Maximum Speed: Sets your speed to maximum. Giving a new
speed order will clear this order.
Erratic Maneuvers: Orders your helmsman to do his best to evade
enemy fire by performing evasive maneuvers. The ship will begin
to jink from left to right. You are free to turn while under this
order, and can cancel it at anytime by returning to Steady as
She Goes. While performing erratic maneuvers your ship is harder
to hit. However, it is also harder for your weapons to strike
the enemy.
watching the numbers and the slider bar beneath
the empire symbol. If your marines are staying alive
and their’s aren’t, you’re on your way to victory.
Once all the enemy marines have been neutralized,
the ship becomes an ally. You can order it around
via your Comm menu. Note: Capture works only in
the single player campaign.
Power Allocation
The lightning bolt icon below the target display brings up your
Power Allocation menu. This menu consists of three sliders: one for
Primary weapons; one for Heavy weapons; and one for Shields. Your warp
core produces a set amount of power, and from here you can control how
much of that power goes to each system. Your current available power is
displayed in the top bar. If any portion of that bar is blue, it means you
have power available that is not currently being used. To add that power to
a system, grab the blue indicator and slide it to the desired level. The
available energy will decrease appropriately.
The power bar for each system has a
green indicator on it. This represents the
minimum amount of power needed for the
system to run. If the allocated power is
below that green indicator, the system
will operate at a very basic level. Setting
the power above the green indicator will
allow that system to function even more
efficiently. Each bar also contains a red
indicator. This bar represents the system
powerlinks and no more energy can be
assigned to it.
As you move the power allocation bars, other bars will decrease
automatically if you try to assign more power than your warp core is
outputting. If you have equipped your ship with too many weapons and a
small warp core (or your warp core has been damaged), you may not have
enough power to keep all your systems “in the green.” In this situation, you
can either take individual weapons offline to lower power requirements, or
shift power allocations on the fly to keep your ship in fighting shape.
Clicking the Default button will return power levels to their standard levels.
ADVANCED STARSHIP
CONTROLS
ADVANCED STARSHIP
CONTROLS
18
19
Page 11
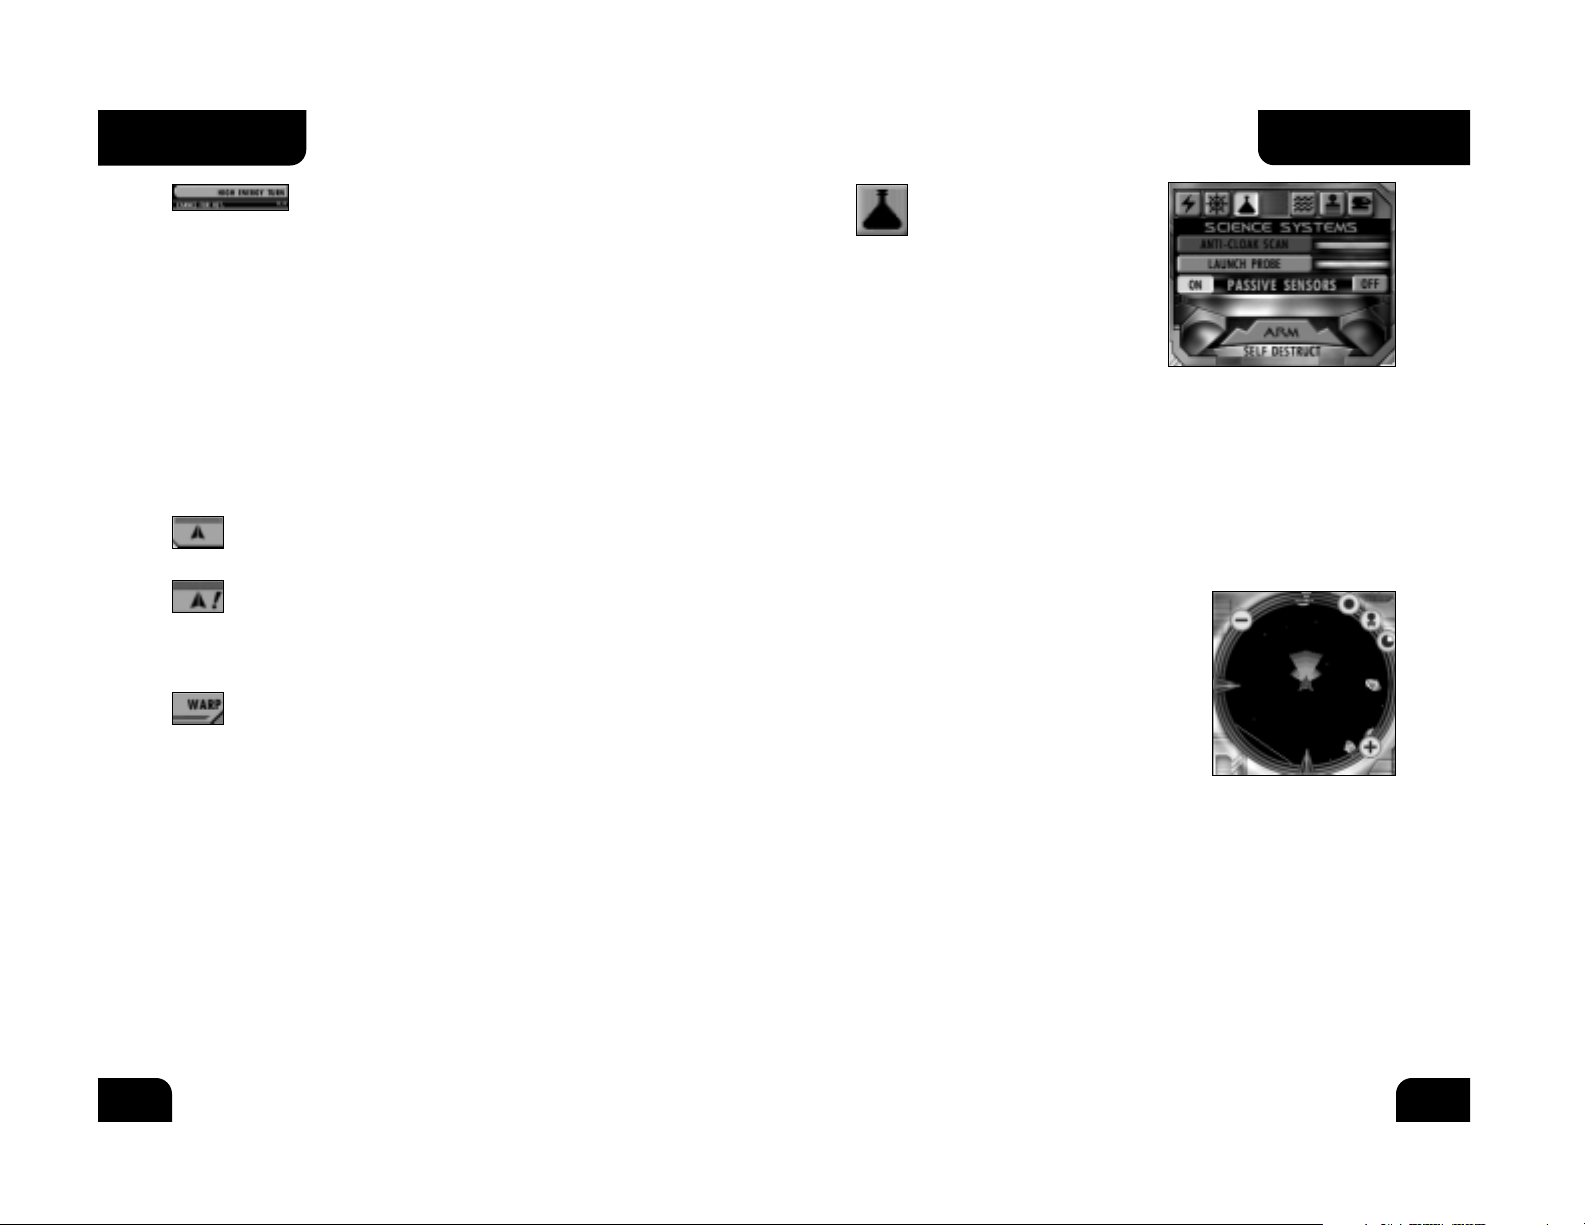
High Energy Turn: By using additional energy, your helm
officer can force your ship to turn at a much accelerated
rate. However, this is a risky maneuver that puts great strain on
the ship’s engines. If the High Energy Turn (HET) fails, your ship
will be momentarily paralyzed. Engines and maneuvering thrusters
fail and weapons are unavailable, leaving you a sitting duck until
your engineer sorts things out. To execute the HET, click the “HET”
button. A new display will appear at the bottom of the interface,
indicating that your helm officer is preparing to execute the turn.
During the charging phase, click on the interface as you would for
a regular turn. Once the HET bar is full, your ship will (if the turn
is successful) turn to that heading. If the HET fails, you’re dead in
your tracks. The approximate chance of success for the HET is
displayed below the “HET” button. This percentage depends on the
skill of your helm officer, the status of your ship, and how recently
you attempted a previous HET.
All Stop: This button sets your speed to zero, bringing the ship to
a halt.
Emergency Stop: This maneuver uses the warp engines to bring
the ship to a near immediate stop, as opposed to the slow
deceleration of All Stop. This is a bit stressful on the engines, and
as a result you will be unable to move for a short time after
executing an Emergency Stop.
Warp: This button acts identically to the warp button on the main
interface. Your ship will engage warp speed, traveling very quickly
across the map. Shields drop, beam weapons are unable to be
used, and turning is impossible at warp. Click once to engage and
again to drop out of warp.
Science
The Science button is
located next to the Helm
button and allows you to access the
following functions:
Anti-Cloak Scan: Allows you to perform
an advanced scan to attempt to detect
cloaked enemy ships. Click the button to
activate the scan. Once your sensors have
charged, your scanners will emit a “ping,” giving you a chance to detect the
enemy. Your success depends on the quality of your sensors as well as the
skill of your operations officer. If successful, the enemy will be revealed and
you can lock onto him and fire while his shields are down.
Launch Probe: Launching a probe at an enemy vessel allows you to get an
accurate sensor reading on it before it comes into weapons range, allowing
you to plan accordingly. Target a distant enemy and click to launch a probe
at it. Once the probe is in range, the target’s information will appear on your
target display.
Passive Sensors: Activate your passive sensors
by clicking the “on” button next to the passive
sensor text. This will bring up a sensor display
into the upper left portion of the screen. This
display acts as a radar, giving you a view of the
system around you. Enemy targets are
represented by red symbols, allies in blue, and
neutral targets in gray. Using the buttons on
the passive sensor interface you can zoom in
and out, filter planets/ships from the display,
or display an overlay of your firing arcs. You
can also use the TAB key to toggle passive
sensors on or off.
Self Destruct: If you’re having a bad day, why not take everyone else out
with you? Click this button to begin a five second countdown. At the end of
the countdown your ship will blow up and you will die. This can be
somewhat effective in multiplayer team games, but anywhere else you will
most likely just lose faster. Click again during the countdown to cancel the
destruct order.
ADVANCED STARSHIP
CONTROLS
ADVANCED STARSHIP
CONTROLS
20
21
Page 12
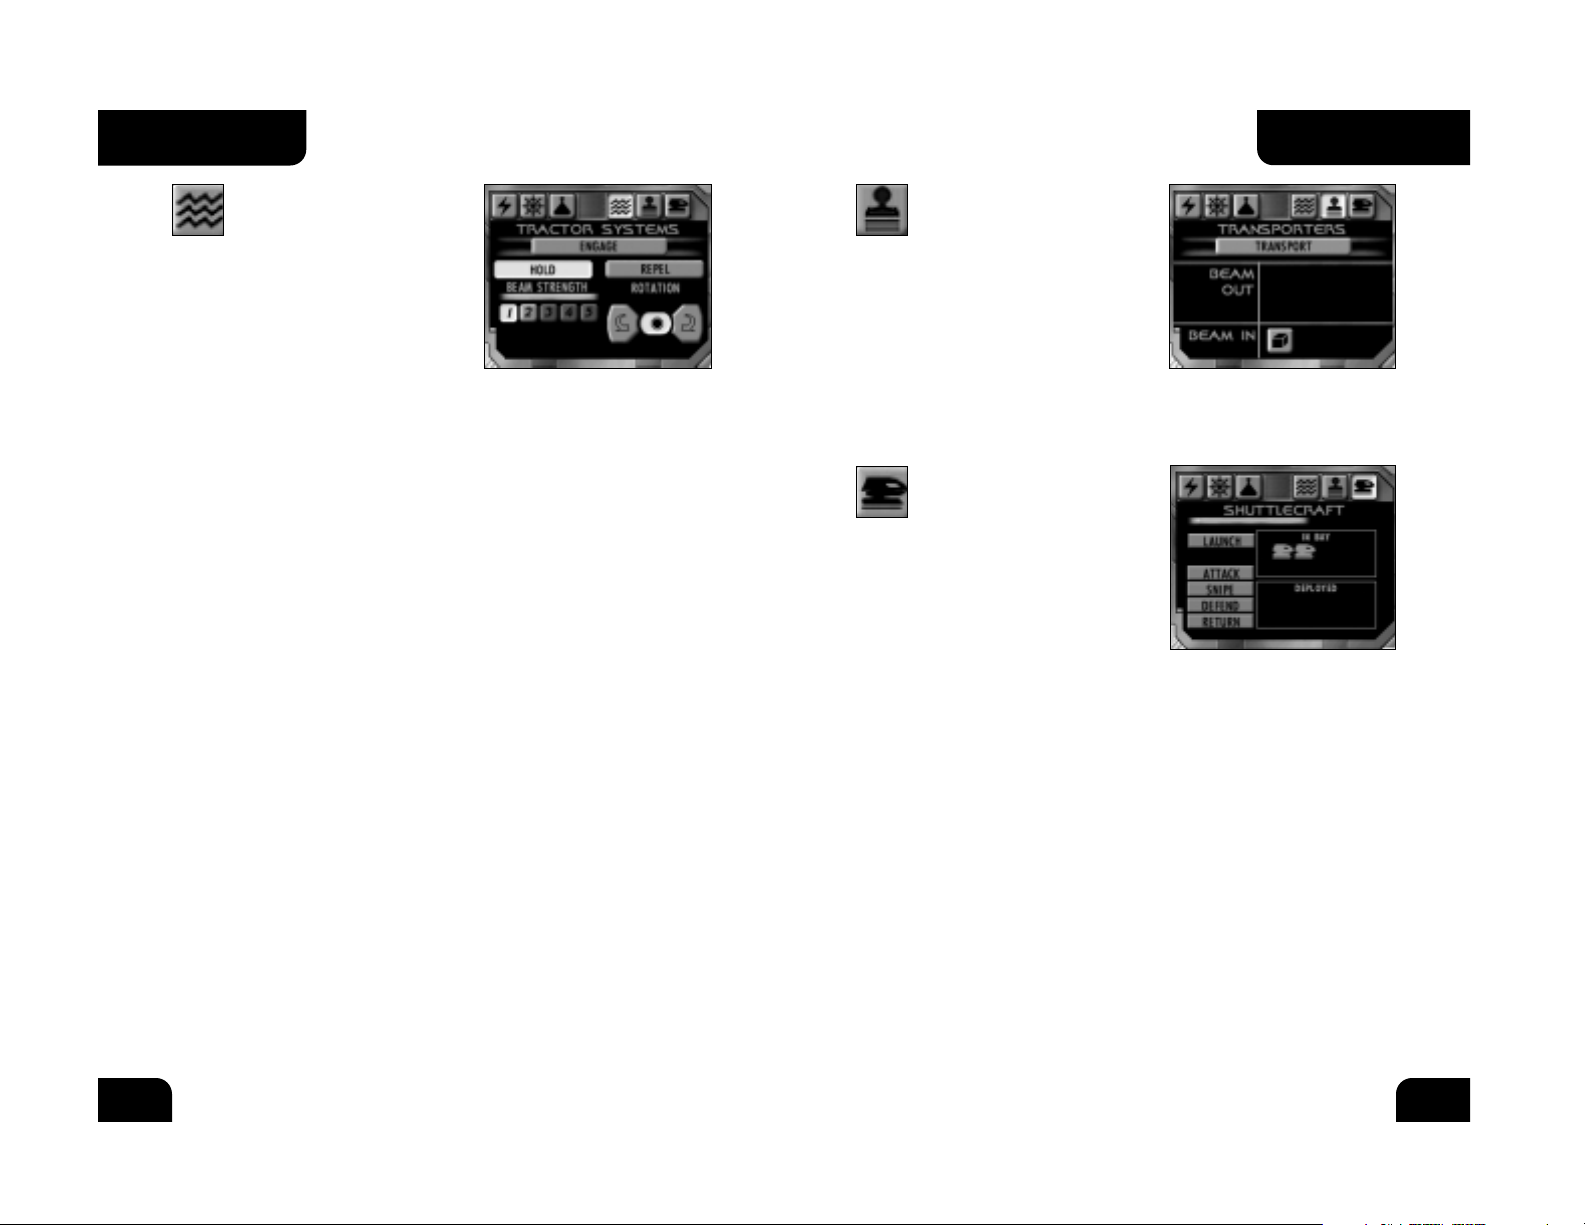
Transporters
The transporter button, located
next to the tractor beam button,
brings up the transporter controls. At times
during your missions, you will be required
to beam items or personnel from other
ships, or beam them from your ship to
another location. Icons appearing in the
Beam Out section are ready to be beamed
off the ship. Icons in the Beam In section
are on a nearby ship and ready to beam
to yours. Click on Energize to activate
the transporter.
Shuttles
The shuttle control panel is
accessed by clicking on the
shuttle button, located to the right of the
transporter button. This menu displays
the shuttles currently available and allows
you to launch them and assign orders.
Shuttlecraft are small utility ships, used
primarily to ferry personnel and
equipment to places the transporters cannot reach. In SFC3, shuttlecraft
can be used in combat. Although relatively weak, they can give a
knowledgeable captain an advantage during battle, or at the very least
frustrate the opponent.
Your current available shuttles are displayed in the In Bay box. Each shuttle
has its own icon. To launch a shuttle, click on its icon and then click
Launch. The shuttle will emerge from your ship and follow its current orders.
This shuttle now appears in the Deployed box and can be selected there to
change its orders or return it to the ship. After launching a shuttle, the blue
bar above the launch button must refill before you can launch another. This
represents the time needed to prepare the shuttle and shuttle bay for
another launch. Before launching a shuttle, or at any time while deployed,
you may change its orders. The following options are available:
Attack: The shuttle will fly to and attack the enemy that is targeted when
the order is given. Shuttles are equipped with a weak beam weapon which
will not do much damage. However, they can distract an enemy and force
him to divert his attention away from you for a short period of time.
Tractor Beam
Your ship is equipped with a
tractor beam, which can be
used to grab and maneuver objects or
ships. To access these controls, click on
the tractor button located to the right of
the sensor button. The following features
are available from this menu:
Engage: This button will begin charging
your tractor beam. Once the beam is charged, it will lock on to the current
target. If that target is out of range, the beam will lock on once you move
within range.
Hold/Repel: These two buttons control the function of your tractor beam.
The default setting is “Hold,” which will lock onto a target and hold it in
place, allowing you to maneuver it wherever you want. If you find yourself
the target of an enemy tractor beam, the Repel setting allows you to use
your tractor beam to attempt to break free.
Beam Strength: These controls allow you to set your tractor beam strength
from 1 to 5, depending on the level of your installed tractor system. The
higher the strength, the longer it will take for your beam to charge and
engage. Tractor strengths are used to determine whether or not you are able
to repel another tractor beam. In order to successfully repel an opponent’s
tractor beam, you need a tractor beam strength equal to or greater than
their’s. If your opponent has you locked in a tractor beam at a 3 strength,
you will need to repel with a beam of 3, 4, or 5 strength to break free. If
you want to grab onto an opponent for a longer period of time, choose the
higher strength beams and chances are your opponent will have to try more
than once to break free.
Rotation: Once you have locked your target up with a tractor beam, you can
move their ship around yours while they are still held in the beam. The left
button will rotate the target counter-clockwise, the right button will rotate
them clockwise, and the center button halts rotation. Use this function to
bring tractored targets into your strongest weapon arc, or to run tractored
ships into asteroids or planets.
ADVANCED STARSHIP
CONTROL
ADVANCED STARSHIP
CONTROL
22
23
Page 13
Mines
Your ship is equippped with a standard
minelayer, which allows you to lay
mines in combat. Do this by pressing
the m key. When activated, a mine will
be laid behind your ship. The ring
around the mine represents the area in
which a ship will detonate it. The ring
is green when first laid, indicating that
the mine is not yet armed. Once your ship is far enough away from the
mine not to detonate it, the mine will arm and the ring will turn red to
indicate this.
Whenever a ship (including yours or an ally’s) is in proximity of the mine, it
will detonate and damage surrounding vessels. After you lay a mine, you
must wait for your minelayer to recharge before laying another. Unlike
torpedoes, you can carry only a set number of mines. Mines can be bought in
the Skirmish resupply screen or at a starbase in campaign mode. You can
also equip the more powerful Antimatter Mine Layer, which will do increased
damage when the mines are detonated. See page 28 for details on refittng
your ship.
Snipe: The shuttle will maintain its distance from enemy ships, attacking
targets from long range. This allows the shuttle to survive longer, as it is
more difficult to hit. However, the shuttle’s weapons will do less damage to
the enemy.
Defend: Orders the shuttle to defend the
current target. If no target is selected, the
shuttle will defend the player. Shuttles
assigned this order will stay in the vicinity
of their target. If an enemy ship approaches,
the shuttle will attack. If the enemy
disengages, the shuttle will follow for a
short distance and then return to its
assigned target.
Return: Orders a shuttle to return to your ship. Note that if you are flying at
high speeds the shuttle may have a hard time docking.
Officers
Your ship is only as good as its crew,
and officers play a large role in SFC3.
While in combat, you can view the status of your officers by clicking on the
Officers button located to the left of the alert status indicator.
Your six officer stations are shown along with the name of each officer. To
the right of each officer icon is a bar which represents your officer’s health.
As your ship takes damage, your officers can be hurt. They can fall
unconscious or even die. In these cases, that officer is replaced by a generic
crewmen who can do the job, but not as well as a dedicated officer.
Each of your officers has a set of attributes which benefit your ship in
gameplay. These attributes can be viewed in the Skirmish setup screen,
or while at a Starbase in the single or multiplayer campaign (see page 36
for details).
ADVANCED
STARSHIP CONTROL
ADVANCED STARSHIP
CONTROLS
24
25
Page 14

SKIRMISH MODE
Skirmish mode allows you to set up an epic battle in whatever way you
choose and jump right into the combat without worrying about having to
keep up with a storyline. You have the option of playing against computer
opponents, other human players, or a mixture of both.
Setting up Single Player
Click on the Single/Multiplayer
Skirmish button from the main menu.
From the Skirmish menu, click on Start
Single Player. This will take you to the
single player setup menu, where you
can setup your game. You have control
over the following options:
• Game Speed: Sets the speed of the
game from 1 (slowest) to 11 (fastest). Slower games allow more time for
planning and strategy, while faster games focus on action.
• Game Points: Sets the maximum number of points players (including AI)
are allowed to spend on their ships. If you want to keep the more
powerful ships out of the game, set this lower. To have access to all ships
and weapons, set it higher.
• Scenario: Allows you to choose the type of skirmish game you wish to
play. Choose from the following:
* Base Assault: One team is tasked with defending a starbase while the
other’s goal is to destroy it. If the starbase is destroyed, the attacking
team wins. If all attackers are destroyed, the defenders are victorious.
* Battlefest: Battlefest starts the player in a frigate, then moves them up
to a heavy cruiser and dreadnought with each successive death. Each
player has a total of three “lives” and each ship they are resurrected in
is more powerful than the last. Last man standing wins.
* Free For All: Every man for himself. The only goal in this mode is
to destroy the enemy, though players can elect to team up if they
so desire.
* Team Assault: Two teams, each with a starbase. Whichever side
destroys the enemy starbase first wins. Balance your forces between
attackers and defenders. This is a mode best played with a large number
of players.
• Map Types: Allows you to choose the venue for your skirmish battle. Each
map type has a size indicator next to the name. S for Small, M for
Medium, and L for Large. The following maps are available:
SKIRMISH MODE
SKIRMISH MODE
26
27
* Open Space: As the name implies, this is open space. No distractions.
* Planets: This map contains planets and suns (depending on the size of
the map).
* Asteroid Field: This map contains a large number of asteroids littering
the map. The number of asteroids increases with map size.
* Asteroid Belt: Instead of asteroids strewn about the entire map, this
map features a belt of asteroids stretching across the screen (two in the
Large version) allowing you to conduct combat in the rocks or out.
* Nebula: This map features nebulae of various sizes to fight in and
around. Nebulae adversely effects your shields and targeting, and can
damage your hull.
• Adding AI: To add a computer controlled player to the game, click on the
“Add an AI Player” button. This will add one AI to the player list. Click
again to add another. The AI player will enter the game as a Federation
player with a Low level difficulty setting.
• Player Name: Click in this field to change your name or the names of your
AI players. A dialog box appears, allowing you to enter a new name. Click
“OK” to set the name.
• AI Strength: Allows you to set the AI level for your AI opponents and
allies. These settings can be changed in the list by clicking on the area
beside the AI player under “AI Strength,” Choose from low, medium, or
maximum difficulty.
• Team: You have the option of playing every man for himself or assigning
teams. To assign a player to a team, click on their current team number,
choose a new one, then click “OK.” You can assign up to six teams. Note
that some game types which require two teams will only allow you to
assign two teams. Assign AI players to your team if you want them to act
as your allies.
• Star Empire: Click on this field to change the allegiance of yourself or the
AI. Choose from Federation, Romulan, Klingon, or Borg. This controls
which ships and weapons you will be able to choose from.
• Points: Displays the current worth of each player’s ship. This number will
change as the player refits or upgrades their ship and allows you to see
the relative strength of your opponent without knowing their exact setup.
• Max Points: Allows you to set point limits for individual players, keeping
them from using ship configurations which are worth more than the limit.
Click in this field beside the player name to bring up a box where you can
enter the point limit. Click “OK” to accept the limit.
Page 15

28
• Ship Setup: Each race has a default starting ship. To change that ship,
click on the ship name. You will be given the following setup options:
* Select Ship: This will bring up the vessel library for your respective star
empire and allow you to choose your ship for the battle. The main
window displays a schematic of your ship that shows the hardpoints and
default loadout. Click on the arrows to the left and right of the Ship
Class to choose between various classes. If you have saved custom ship
variants, you can scroll through them using the arrows beside the
Variant button. You can also delete your custom variants using the
Delete Variant button in the upper right corner. The right side of the
screen displays an isometric view of the currently selected ship, as
well as statistics on the ship’s mass, power, acceleration,
and maneuverability.
* Resupply Ship: From this menu you can purchase marines, shuttles, and
mines for your ship. Your current number, the max allowed number for
your current ship type, the cost of each item, and your total cost are all
displayed. Click on the + and – buttons to buy or remove each item.
Click “Done” when you’re finished or “Reset” to negate any changes you
have made.
* Refit Ship: This menu allows you to load your ship with whatever
weapons you wish for the coming battle. A schematic of your ship shows
the hardpoints you have available. To cycle between hardpoint types,
use the buttons above the schematic. This allows you to view the
Shield, Primary Weapon, Heavy Weapon, Hull Systems, Bridge Systems,
and Engines hardpoints. For weapon hardpoints, the pie-shaped button
in the lower right corner of the schematic will display the firing arcs of
the hardpoints in the currently selected group. See page 62 for
descriptions of the weapons available to you.
Once you have selected the type of hardpoint you wish to modify, click
on the hardpoint you want to load/remove. It will highlight. Below the
ship schematic is your ship’s mass readout. The number to the right of
the bar is the maximum mass allowed for that hardpoint group. The
number to the left is your current mass for that group. You may not
exceed the mass limit. Below the mass limit indicator is the buy/remove
menu. The “Now Installed” section displays the systems currently
installed. The “Available Systems” section displays the systems available.
SKIRMISH MODE
29
SKIRMISH MODE
To purchase systems, you need prestige points. Prestige points are
earned through mission completion in single player and Dynaverse. In
skirmish games, you begin with a set amount of prestige depending on
the host’s preference. Your current prestige is displayed in the Prestige
window. The prestige cost of each system is displayed in the
“Description” box beside the name of the system, as well as a
description of the system currently highlighted in “Available Systems.”
This section gives a short briefing on the system as well as its mass.
To purchase a system, highlight the hardpoint in which you want to
place it, then highlight the system you wish to buy and click Buy/Trade.
If the hardpoint is empty, the new system will be added and the prestige
cost subtracted from your total. If there is an existing system in the
hardpoint, the two systems will be traded. You will receive full prestige
credit for the system you are trading in. If you wish to sell off a system
but not replace it with something, highlight the hardpoint and click
“Remove.” This will remove the system and credit you the full prestige
cost. See page 69 for details on the systems available.
To save your personal configuration, click Save below the prestige
window. You can now name your ship. After saving the vessel, it will
appear in your vessel library for future games, saving you the time of
reconfiguring it.
* Select Officers: This menu allows you to recruit new officers for your
crew. More experienced officer can use their skills to aid you in combat,
giving you an advantage. The left side of the menu displays you current
crew of six officers, their station, and their relative worth (in prestige
points). The right side shows the officer available to you, their worth,
station, and their skill rating. Skill ratings range from Skilled to
Legendary. Highlighting an officer in either window will bring up that
officer’s stats in the window below. Compare the stats of the officers on
your ship to the ones on the starbase and decide who stays and who
gets canned.
Officers are rated in three attributes and 18 skills. See page 36 for a list
of officer skills and their effects on your ship’s performance.
Joining a Multiplayer Skirmish
SFC3 skirmish games can be played over the Internet via Gamespy, or over a
network. To begin setting up for a multiplayer game, first make sure you are
connected to a LAN or the Internet then click on Single/Multiplayer
Skirmish. The multiplayer address book appears in the main window on the
Select Skirmish screen. From here, you can select a place to look for games.
You can also change the name you will be using in multiplayer games by
Page 16

Film Room
Available from the Skirmish Select menu and the Campaign Select menu, the
Film Room is accessed by clicking on the “Film Room” button at the bottom
of the screen. From here you can review saved replays of past battles. A list
of replays is displayed in the leftmost window. Details of each film are shown
on the right. You can change the name of each film by clicking in the File
Name field. The control panel below the description allows you to play the
film, save it as a new file, or delete it from the list.
Below the control panel is the Automatic Film control. By default, the game
will automatically record each battle. To turn this feature off, select Off.
Games will no longer be recorded until you turn it on again.
Note: Single player campaign missions are not recorded.
Vessel Library
The vessel library allows you to view the ships and stations of the major
races in the game. It is accessible by clicking on the Vessel Library button at
the bottom of the Select Skirmish or Select Campaign screens.
Once in the vessel library, you can use the control panel above the ship
schematic to view the ships. The scroll arrows surrounding the hull class on
the left can be used to view each class of ship. The scroll arrows around the
empire symbol below the schematic will switch between the four Star
Empires in the game, and the scroll arrows around the Variant field will
switch between custom ship configurations you have created in the selected
Hull class, if any. You can delete your custom cariants with the Delete
Variant button in the upper right. The right side of the screen shows
statistics for the displayed ship. Click Done when you are finished to return
to the previous menu.
clicking in the Player Name field and typing in your desired name. If you’re
going to be hosting a game with a password, you can enter that here
as well.
If you know the IP address of an Internet server you wish to connect to
directly, click on New Entry. You will be prompted to enter the IP address of
the server and give it a name. After you do this, that server will appear in
your address book. To delete address book entries, highlight them and
click Delete. To look for games, highlight your server or network and
click Connect.
NOTE: To play SFC3 over the Internet, you will need to sign up for a Gamespy
account. Gamespy is a free service which will help you locate others to play
against online. Click on Create Account to do this. You will be taken to the
Gamespy web page. You must be connected to the Internet to sign up.
Once you have selected your source and clicked on Connect, you will be
taken to the game list. Games which are currently open are displayed in the
top window, where you can see the game’s name, its scenario type, the
maximum number of players, and the speed of the game. To join a game,
select it and click Join on the right side of the screen. If a password is
required, enter it in the Password field before joining. You can refresh the
list at any time by clicking on Update, allowing you to see if any new games
are available.
Once you have joined a game you will be taken to the Game Setup screen,
which is nearly identical to the one found in the Single Player Skirmish
mode. The host has control over game speed, scenario types, AI, and point
limits. You have control over your empire, team, and the configuration of
your ship. Use the chat window at the bottom of the screen to talk with
other players. When you are happy with your setup and ready to play, click
Yes beneath Are You Ready? In the lower right corner of the screen. Once all
players are ready, the host can begin the game.
Hosting a Multiplayer Skirmish
To host your own Multiplayer game, select the location from the address
book (Network or Internet), and then click “Host.” You will be taken to the
Game Setup screen, where you can set the parameters for your game in the
same manner as for the Single Player Skirmish described above. Your game is
now on the open list and players will join. Once all players are listed as
ready, you can click “Start” to begin the game.
SKIRMISH MODE
SKIRMISH MODE
30
31
Page 17

The hex map contains the following symbols and terrain identifiers to display
the contents of a hex:
SINGLE PLAYER CAMPAIGN
SFC3 features an exciting single-player campaign driven by a story that is
viewed from the eyes of the three major star empires of the game: Klingons,
Romulan, and Federation. To begin this adventure, click on Single Player
Campaign from the main menu. This will take you to the Select Star
Empire menu.
From this menu, you can bring up a list of saved games by clicking on the
Saved Games button. This will bring up a menu which allows you to load a
game you have previously saved. Simply click on the game to load and then
click Load Game. You can also delete games from the list using the “Delete
Game” button.
In addition to the three main campaigns, you may play the game in
Conquest mode. To do this, click on the List All Campaigns button. This will
bring up a list of the campaigns available and a short description of each.
Click the one you wish to play and then click Begin New Campaign. For more
information on Conquest mode, see page 38.
SFC3’s single player campaign is designed to be played first as the Klingons,
then the Romulans, and finally the Federation. By playing the campaigns in
this order, you will get the whole story. However, if you have an
overwhelming desire to do things out of order, you can skip ahead and play
the campaigns in any order you wish. Click on the empire you wish to play
to begin.
This takes you to the Campaign Options screen. Enter the name you wish to
use for your player in the “Player Name” field. Select a difficulty by clicking
on the buttons below, and then click Begin Campaign to get started. While
the campaign loads, you will see a few briefing screens, giving you a short
description of your empire and some starting tips. Click through these
screens to enter the game map.
The Hex Map
SFC3’s campaigns take place on a large map which consists of numbered
hexes. These hexes represent sectors in space. The hex map is displayed in
the main game window. The highlighted hex in the center of the screen is
your ship’s current location. You can use the arrow keys on the edges of the
window to scroll around the map. Directly below the hex map are the zoom
buttons, which allow you to cycle through three zoom levels: The widest
view shows you the entire hex map with limited detail. The medium view
(default) shows terrain, planets, and bases in each hex, and the closest view
will show ships in each hex. Cycle between these views with the + and –
keys. If you get lost, click Center to center the map on your ship at
any time.
SINGLE PLAYER
CAMPAIGN
SINGLE PLAYER
CAMPAIGN
32
33
A Planet
A Stardock
Asteroids
A Nebula
A Black Hole
Hexes are color coded to display the empire which owns them. Blue for
Federation, red for Klingon, green for Romulan, and gray for contested or
neutral sectors. In the closest zoom mode, you will also see small labeled
icons which represent ships, which are color coded to the empire which
controls them. Outside of the Single Player Campaign other empires may
appear on the hex map such as the Borg Collective.
To get more information on a hex, right click on it. This will display the hex
number, the owning empire, and three statistics:
Defense: The defense value of the hex represents how difficult the hex is to
sway to your side. In hexes with low defense, the hex can be claimed with
only a few victorious battles.
Economy: This represents the value of the hex to the controlling empire. A
high number means better economy for that empire, allowing them access to
more ships.
Impedance: The hindering qualities of the terrain in the hex are represented
by this number. Hexes with high impedance numbers take longer to
travel through.
Page 18

Mission: Certain missions are of utmost importance to your Empire.
Completing them will earn medals.
Special: These medals are earned for performance above and beyond the call
of duty during your campaign.
Exit the Medal display by clicking any of the buttons on the left side of
your screen.
Below your player information is information on your current ship. The name
and class of your ship are displayed along with your current hull integrity.
Hex Options
Below the player and ship information boxes is a set of buttons which allow
you to access the facilities in the hex you are currently in. If you are in a
hex which does not provide these options (because it lacks a starbase,
stardock, battlestation, or planet), these buttons may be grayed out. The
following options are available:
Supply Docks: Here you can repair your ship by spending prestige. The cost
of the repairs are displayed beside the Repair button. To spend the prestige
and get your ship back to perfect condition, click “Repair.” You are always
able to fully repair your ship. Even if you don’t have the prestige, the
Starbase Commander will carry out the repairs in full. The trade in value of
your current vessel is also shown here in case you are thinking of upgrading,
and you can purchase shuttles, marines, and mines for your ship. Your
current number, the max allowed number for your current ship type, the cost
of each item, and your total cost are all displayed. Click on the + and –
buttons to buy or remove each item. Click Done when you’re finished or
Reset or Back to negate any changes you have made.
Shipyard: This is the place to buy a shiny new ship. The classes of available
ships are listed along with their prestige value (their relative strength in
battle) and their prestige cost. To purchase a ship, highlight the ship you
want and click Buy. If you cannot afford a particular ship. Its line will be
grayed out. Note that you can purchase bases in this menu as well. Doing
so will not put the base under your control. Rather, it will allow you to place
a starbase in an empty hex, giving you and your allies another base to work
from. To place your Starbase, travel to the friendly hex you wish to place
it in, go to the Mission Menu, and click Deliver beside the Deliver
Starbase mission.
Refit: This menu allows you to spend prestige to customize your ship’s
weapons and systems. A detailed description of this menu is given in the
Skirmish section on page 28.
In addition, right-clicking will list the name, captain, rating, and current
prestige of every ship currently in the hex. All ships on the map are
constantly moving, so this information changes constantly. Switching the
map into high detail mode by clicking on the “high map detail” button will
bring up icons on each hex representing the defense, economy, and
impedance levels. The relative brightness of the icons indicates the level of
each statistic.
To navigate the hex map, click on a hex adjacent to the one your ship is in.
A pointer will appear indicating the move, and your ship will move to that
hex. Depending on the impedance value of the hexes, some journeys take
longer than others.
The News Screen
Below the Hex Map is the news screen, where vital information is displayed.
Any time you right click on a hex, the information is displayed here. Directly
above the news screen is the Stardate indicator, which displays the current
Stardate. The bar to the right of the Stardate represents passage through the
current date. It fills gradually and once full, the Stardate progresses.
In addition to displaying hex statistics, the news screen will also display any
orders you may be given. During the campaign, your headquarters will
sometimes request your presence in a certain hex and may even give you a
certain timeframe to get there. These orders will be displayed here. The
scroll bar to the right of the news screen allows you to scroll back to review
past information.
NOTE: Some orders will appear in pop-up dialog boxes instead of on
the news screen.
For extended news events, click on the News button to the left of
the News Screen. This will bring up a list of allied movements and
enemy encroachments.
Player Information
The upper left section of the Campaign interface displays your player
information. The symbol of your chosen empire is shown along with your
rank, name, and the current amount of prestige you have earned.
Click on the Medals button to view any medals you have accumulated. This
will display the Medals screen. SFC3 awards players three types of medals:
Rank: As you gain prestige, your rank will increase. For each rank, a medal
is awarded.
34
SINGLE PLAYER
CAMPAIGN
SINGLE PLAYER
CAMPAIGN
35
Page 19

Accepting Missions
To return to the Hex Map display at any time, you can click on the “Map” button
located below the Hex Options to the left of the News Screen. Below this button
is the “Missions” button. If this button is grayed out, there are no missions
available in the hex you currently occupy. If the button is available, clicking it
will bring you to the mission display screen.
The mission display screen lists every ship in the hex and tells you their current
status. Ships are color coded by their respective empires. If you see a group of
ships with (in battle) beside their names, these ships are currently engaged in
combat and you cannot take action against them. If there is an enemy ship in
the hex, you may attack it by clicking on Attack. This will start a battle between
you and the enemy ship. If the enemy ship has allies in the hex, they may join
in. Enemy ships may also initiate an attack on you; if they do so, you have the
option to accept and enter battle or forfeit. Forfeiting battle will let you escape,
but if you have more than 5,000 prestige points, you will lose 25% of your
prestige. Once you drop below 5,000 prestige, you will lose your primary ship and
be assigned back to your empire’s starting ship. Forfeiting battle is usually a
bad idea.
In addition to the ship list, special missions are displayed at the top of the
mission display screen in yellow. There are both optional and campaign-required
special missions. Optional mission allow you to embark on a special mission if
you so choose. You may be tasked with attacking an enemy base or convoy,
answering a distress call, or defending one of your bases. These missions
generally reward you with more prestige than a standard battle, and may also
effect your empire’s economy. To accept an optional special mission, click Accept
next to the mission name.
Each campaign has a set number of required special missions for you to complete.
These missions reveal the storyline of the game and are of the utmost
importance. If you forfeit one of these missions, the campaign will end. If you
fail one of them, you will lose prestige and you may even fail the campaign
depending on the importance of the mission. If you try to leave a hex when a
campaign-required mission is available, a dialog box will appear telling you that
you need to embark on the required mission or forfeit.
Campaign required missions are sometimes hex specific. You will be given orders
to proceed to a certain hex. Unless you are told otherwise, you are free to accept
other missions and engage the enemy on your way to these missions. Sometimes,
your empire will require your presence as soon as possible and you will be told
not to engage the enemy on your way to the hex. Doing so will be viewed as a
violation of direct orders and dealt with appropriately. At times, the game will
automatically move your ship to a required Hex.
Officers: You can recruit and trade officers for your ship. Officers gain
experience through out the campaign and as they do, their worth and skills
increase. You can swap your officers out at any time by spending prestige on
more experienced crewmen in the officer pool. This menu’s features are
described in depth in the Skirmish section on page 29.
Officers are rated in three attributes and 18 skills. The attributes are
Intelligence (dictates the rate the officer will learn new skills), Toughness
(the amount of damage taken in battle), and Health (starting health level for
the officer). As your officers gain experience, their skills will increase. These
skills have a direct effect on your vessel’s performance. Officer skills and
their effects are as follows:
Tactical Skills
Targeting: Increases your chance to hit an enemy vessel.
Weapon Technology: Causes your weapons to fire faster, and allows highly
skilled officers to fire multiple torpedoes in one volley.
Sub-System Targeting: Allows you to target enemy sub-systems
more accurately.
Helm Skills
Piloting: Increases your acceleration and turning rate.
Erratic Maneuvers: Increases the effectiveness of evasive action.
Emergency Procedures: Increases your ability to do High Energy Turns.
Security Skills
Close Quarters: Increases the effectiveness of your boarding parties.
Defensive Planning: Increases your defense against enemy marines.
Countermeasures: Reduces your chance to be hit in combat.
Operations Skills
Scanner Technology: Increases the effectiveness of your sensors.
Cloak Countermeasures: Increases your chances of a successful anti-cloak
scan. Also, decreases your chance to be detected while cloaked.
Find Weakness: Increases the damage of your weapons.
Engineering Skills
Impulse Technology: Increases your ship’s top speed.
Warp Technology: Increases power output.
Repair: Increases the speed of your repair teams.
Medical Skills
Surgery and Recovery: Increases the chance of revival for
incapacitated officers.
First Aid: Reduces the length of time officers are stunned.
Fitness Program: Reduces officer injuries in combat.
36
37
SINGLE PLAYER
CAMPAIGN
SINGLE PLAYER
CAMPAIGN
Page 20

DYNAVERSE 3
Dynaverse 3 is an immersive multiplayer experience provided free to all SFC3
players. It allows you to join an empire and fight alongside other players for
the defense of it, and contains missions which can be completed yourself or
with a fleet of other players. Dynaverse 3 is played much like the single
player campaign described previously, but instead of the universe being
populated with AI, most ships in play are controlled by real people.
Signing Up
From the Main Menu, click on Multiplayer Online Campaign. This will take you
to the Dynaverse 3 connection screen.
NOTE: The first time you click on the Multiplayer Online Campaign button, you
will see a dialog box describing Gamespy’s policies for players younger than 13.
Persons under 13 should not submit their information to Gamespy without the
help and consent of a parent or guardian. Click OK to continue or Cancel to
return to the main menu.
Dynaverse connections are handled through Gamespy, and you’ll need a free
account to play. Enter your email address and password into the appropriate
fields. You will also need to supply a nickname for the account. You can then
sign up directly from this screen by entering your desired information and
clicking Create New Account. This will create an account with the
information you entered. The game will remember your information for
future connections.
The main window on this screen will give you the status of your current
Dynaverse connection. If you fail to connect, an error message will be
displayed with troubleshooting information. Upon connection, a list of
available servers will be displayed. Choose the one you want to play on, then
click Login to begin.
NOTE: You must be connected to the Internet to enter Dynaverse 3.
Setting Up Your Character
The first time you sign onto a Dynaverse server, you will be asked to choose
an empire. This will be your team affiliation for the game. Select from
Klingon, Romulan, Federation, or Borg. Your player name will be the same as
the nickname you chose in the previous screen. However, you can change it
here as well.
Once you have completed all of the campaign required missions in a
campaign, you will see the ending cinematic for the campaign, which
furthers the SFC3 storyline. You can then continue on to the next campaign.
Save/Load
Click on the Saved Games button to access the Save/Load menu. A list of
saved games is displayed in the hex map area. Beneath it, you can save your
game by naming it in the “New Saved Game” field and then clicking Save.
You can also load a game in the list by selecting it and clicking Load or
delete a game by selecting it and clicking Delete.
You can exit the game at any time by clicking on the Exit Game button. The
game will ask you if you are sure you wish to exit. Click on the check mark
to exit.
Conquest Mode
Conquest mode is a variation on the Single Player Campaign. There are no
campaign-required missions in Conquest, only optional special missions. You
have as much time as you want to fly around and attempt missions to gain
prestige and build up the strength of your ship and your empire. Defend your
territory and take over enemy sectors in an effort to control the galaxy while
the enemy AI is trying to do the same. With the exception of the lack of
campaign required missions and their respective medals, Conquest is played
exactly as a regular Campaign mode is played.
Additional star empires such as the Borg Collective and Cardassian Union may
oppose your efforts in Conquest mode.
38
39
SINGLE PLAYER
CAMPAIGN
DYNAVERSE
Page 21

Dynaverse 101
Gameplay in Dynaverse is nearly identical to that in the Single Player
Campaign. Your goal is to work together with the other members of your
empire to conquer the galaxy and destroy your opponents. This is done by
taking over enemy territory and eliminating enemy forces.
Whereas capturing territory in the single player game is a secondary
objective, it is the prime focus of the Dynaverse. The team with the most
territory will inevitably win the game, as territory effects not only the
number of bases and planets at your disposal, it also effects your empire’s
economy. If your empire owns numerous hexes with high economy ratings,
they will have more, better ships available to their players, as well as more
supplies, giving them the edge in most battles. Therefore, capturing and
defending territory is of the utmost importance in the multiplayer game.
Battles need to take place in enemy held or neutral territory in order to
capture the hex for your side. Each successful battle with an enemy in the
hex decreases or increases the victory points in a hex (depending on the
victor). When the points pass the defense value of the hex, it goes neutral.
At that point, the process continues to change it to the control of the
winning race. Once you have control of a hex, your empire receives its
economy bonuses.
Attacking enemy ships in Dynaverse is handled via the Mission screen. When
you are in a hex with enemy ships, your Mission button (located to the left
of the News Screen) will be lit up and selectable. Clicking on it will bring up
a list of all ships in the hex. By clicking on the “Attack” button beside an
enemy vessel, you can initiate an attack on that ship. The enemy has the
option to forfeit and run away, but they will lose large amounts of prestige if
they do so. (See page 38 for details on forfeit penalties.) Similarly, enemy
players can attack you in the same way. If an enemy player initiates an
attack against you, you will receive a notice that you are under attack. From
the Mission screen, you can either accept and enter battle or forfeit and
lose prestige.
Fleets are also much more important in the Dynaverse campaign than in the
Single Player Campaign. Traveling in fleets means that you have a better
chance of winning battles as you are bringing more than one ship into
battle. Fleets also allow you to play with your friends and gang up
unsuspecting enemy forces. The first thing you will need to do to form a
fleet is to get all the ships that wish to join into the same hex. Once there,
choose a fleet leader. This person will be responsible for the movements and
attacks of the fleet. All fleet members should go to their Mission screen and
click “join” beside the fleet leader’s name. The fleet leader must accept each
person into their fleet. Only three ships are allowed in a fleet.
Gameplay
After selecting your race, you will enter the Dynaverse. The Dynaverse takes
place on a Hex Map identical to the one used for the Single Player Campaign.
All of the controls are identical to those described in Single Player Campaign
on page 32. There a few features which are exclusive to the Dynaverse
version of the Hex Map:
Player List: The right side of the screen is now occupied by a list of players
who are currently in the Dynaverse. This allows you to see if any friends
(or enemies) are online.
Chatting: A chat bar at the bottom of the screen allows you to talk to other
players in the Dynaverse. You can choose to broadcast your message to the
entire server or only to the other members of your empire. This allows you to
plan attacks with members of your team without the enemy overhearing. Use
the button in front of the chat bar to cycle between empire/general chat.
Type your message in the chat bar and hit Enter to send. Chat messages
appear in the News Screen.
Shipyard: To acquire a new ship in Dynaverse, you must bid on the ship you
want along with the rest of your empire. As there are only a set number of
vessels available, not everyone will get what they want. To bid on a ship,
click on the Shipyard button when you’re in a friendly hex which contains a
planet or base. Select the ship you wish to purchase from the list. At the
bottom of the screen, you have four options to place your bid. You can up
the current bid by 5 prestige, 10 prestige, 5% of its value, or 10% of its
value. This number represents your maximum bid, and is not necessarily what
you will pay. The amount of the bid will be subtracted from your current
prestige and held as a retainer. If you lose the auction, the full amount will
be reimbursed to you. If no one bids against you, you will get the ship for
the lowest price and any excess prestige from your retainer will be
reimbursed to you. If others bid against you, the computer will automatically
raise your bid for you and will keep doing so up to your maximum bid. After
bidding on a ship, the list will reflect the current price of the ship, your bid,
and the closing date of the auction. If you are the highest bidder, you will
be granted your new ship on this date.
DYNAVERSE
40
41
DYNAVERSE
Page 22

EMPIRES
The United Federation of Planets
History
The UFP is made up of more than 150 member worlds spread out over 8000
light-years. It remains one of the few major political groups which is not
controlled by a single race of beings. Instead, the Federation is ruled by the
Federation Council, which is composed of representatives from various
member planets and based in San Francisco on Earth. Its ideals stem from
the Constitution of the United Federation of Planets, drafted when the group
was formed in 2161, which assures mutual protection and benefit of all
member worlds and citizens.
Federation ideals put peace and exploration before conflict, and their ships
will never attack without warning, as their operating procedures forbid overt
hostility. Federation borders are maintained with diplomacy and treaties, and
the group has never assumed an expansionist posture in regards to its
territory. Planets which wish to gain entry to the Federation must be
governed by a unified planetary government and follow strict nondiscriminatory policies.
The Federation has been involved in several major galactic conflicts in its
relatively short history. Their early history was marked by prolonged tensions
with the Klingon Empire, which lessened after the Organian Peace Treaty in
2267. The two empires are now on friendly terms after the Khitomer
Conference of 2293, despite the occasional setback. Federation relations with
the Romulans have also been strained, stemming from a bitter war which
ended in the creation of the Romulan Neutral Zone, violation of which was
considered an act of war. Recently, the Federation fought alongside the
Klingon and Romulan Empires in the Dominion War against the Cardassians
and the Dominion, a group of expansionist races from the Gamma Quadrant.
Ships and Tactics
Federation ships traverse the galaxy with a warp drive system created by
scientist Zefram Cochrane in 2063. Though a peaceful organization, their
ships are more than prepared to defend themselves. The primary weapon on
most Federation ships is the Phaser (which stands for phased energy
rectification), a beam weapon of varying strengths. Federation vessels rely
on either photon or quantum torpedoes for their heavy weaponry. As noted
above, Federation vessels approach battle cautiously and generally will not
fire first in a conflict, choosing instead to seek a peaceful solution. Enemies
can use this weakness to gain the upper hand early by getting off the first
shot. Be warned, however, that once a Federation ship goes on the offensive,
Once your fleet is formed, the fleet leader moves and attacks in the Hex Map
as he would normally, and all the fleet members automatically follow. When
the leader attacks an enemy, all fleet members will join in the combat. A
member can leave at any time by clicking Leave beside the fleet leader’s
name in the Mission screen. You may have up to three ships in a fleet: the
leader and two wingmen.
Even if you are not a member of a fleet, you can still come to the aid of
friendly ships in your hex in the event they are attacked. If you look at the
mission screen and see that an enemy has declared an attack on an ally, you
have a period of time in which you can join your ally to fight alongside him.
If you miss this window, your ally must fight without your help. You cannot
join in once a battle has begun.
Other mission types will also appear in certain hexes. You may be asked to
protect a convoy or raid an enemy supply route. The outcome of these
missions will have an impact on the economy of the game. These missions
appear in yellow in the Missions screen. They are not required.
Once one Empire’s total economic strength reaches a certain threshold, that
empire wins the game and gains bragging rights throughout the galaxy. The
Dynaverse server will then reset territory and prestige to starting levels, and
the battle for the universe begins anew.
42
43
DYNAVERSE
EMPIRES
Page 23

The Romulan Star Empire
History
The Romulans are an offshoot of the Vulcan civilization who broke away to
settle on the twin planets of Romulus and Remus. Romulans are passionate
people, in direct contrast to their emotionless Vulcan counterparts, and they
pride themselves as both intellectuals and cunning warriors. The Romulan
Empire relies more on stealth and subterfuge than overt military action, a
tactic which has led to the development of the cloaking device and the
formation of the Tal Shiar, the special intelligence branch of the Romulan
military. The Romulan Empire is currently controlled by the Romulan Senate,
which is presided over by the Praetor.
The Romulans’ earliest recorded military action was the century-long
Romulan-Vulcan war, which was later followed by a conflict with Earth forces
around the year 2160. This conflict ended with the creation of the Romulan
Neutral Zone, which remained unviolated until the year 2266, when a
Romulan ship entered the expanse. The Romulans then entered a brief
alliance with the Klingon Empire, which resulted in an exchange of military
technology and allowed the Romulans access to Klingon vessel designs.
Following the Tomed Incident in 2311, the Romulans adopted an isolationist
policy which lasted until 2364, when they again emerged to investigate early
Borg activity near the Neutral Zone. Romulan-Federation relations remained
strained until a brief yet reluctant alliance against the Cardassians and
Dominion in the Dominion War.
Ships and Tactics
Whereas the Federation will never fire first, and the Klingons can usually be
counted on to fire most often, the Romulans are more likely to sneak up
behind you and stab you in the back. All Romulan ships are equipped with
cloaking devices, allowing them to turn invisible and recharge their weapons
or gain position on their enemy. A quick-thinking captain can use the
Romulans’ constant cloaking to their advantage by holding off on firing
weapons until the Romulan is cloaking or uncloaking and his shields are
down. Romulan ships are equipped with disruptors similar to those used by
the Klingons, and also with deadly plasma torpedoes, which are capable of
inflicting massive amounts of damage. Myotronic beams, which can stun an
enemy’s weapon systems for a short period, are also available to the
Romulans. Romulan vessels typically face most of their weapons toward the
forward arc, so attacking a Warbird form the rear is usually the best tactic.
it can be a powerful opponent. Federation ships generally have strong
forward firing arcs with fewer weapons facing aft, so try to avoid a head-on
confrontation if possible. In addition, the torpedoes of Federation ships are
far less accurate from long range.
The Klingon Empire
History
The Klingon Empire was founded by the legendary Kahless the Unforgettable
after slaying the tyrant, Molor. The Empire was ruled by an emperor until
2069, when the Klingon High Council became so powerful that it took over
the governing duties, ruling from Great Hall on the Klingon homeworld,
Qo’noS. A clone of Kahless was later created by the clerics of Boreth, and
this second Kahless once again asserted the role of the Emperor, though the
High Council still maintained the majority of political power.
As a result of the Klingons’ warrior nature, their past is littered with military
conflict. After a disastrous first contact scenario in 2218, the Klingons and
the Federation were at odds with each other until the Organian Peace Treaty
of 2267 imposed a reluctant peace between the two. After this event, the
Klingons shared a brief alliance with the Romulan Empire, resulting in a
trade of military technology between the two races which granted cloaking
technology to the Klingon Empire. In 2293, the Klingons’ key energy
production facility, Praxis, exploded, severely damaging the Klingon economy
and causing environmental damage to the Klingon homeworld. This event led
the Klingons to end nearly a century of unmitigated hostilities with the
Federation via the Khitomer Accords. The Klingon Empire became engaged in
a brief civil war in 2367, and later allied with the Federation to fight the
Cardassians and Dominion in the Dominion War after a brief period of
renewed hostility with the Federation which had been brought about by
Dominion influences in the High Council.
Ships and Tactics
Klingon vessels forego luxuries such as crew quarters and entertainment
facilities in favor of more armor and weapons. As a result, most Klingon
ships are tough and well armed for their size. The standard primary weapon
for Klingon vessels is the disruptor, while the Klingons rely mainly on photon
torpedoes for their heavy weaponry, though the experimental polaron
torpedo is fitted on some ships. While not as sneaky as the Romulans, most
Klingon ships are fitted with cloaking devices, allowing them to hide from
their foes. In battle, Klingons are bold and decisive, and are not afraid to
risk their own lives to gain the upper hand.
44
45
EMPIRES
EMPIRES
Page 24

SHIPS
United Federation of Planets
SABER–CLASS “FRIGATE”
History
The Saber-class starship was introduced
in the late 24th century as part of
Starfleet’s initiative to create a new
generation of ships to combat any
future Borg incursions. Designed
primarily as a reconnaissance vessel,
the Saber’s high maneuverability and
versatility made it a reliable combat vessel in the defense against the Borg
invasion of Earth, and later the Dominion War. The Saber’s compact design
allows it to maintain faster impulse speeds and turn more tightly than other,
larger ships. The Saber needs this speed, as its design features a weaker hull
than other Starfleet vessels and less shield power than most other ships.
Notable Saber-class vessels include the U.S.S Yeager, NCC-61947, which
defended Sector 001 against Borg invasion in 2373.
NORWAY–CLASS “DESTROYER”
History
The Norway–class Starship was
designed in the same Starfleet
initiative that produced the Saber-class
frigate. The Norway was intended
primarily as an advanced escort vessel
and was engineered with an eye
toward defeating any future Borg
invasions. Completed in time to assist the fleet against the Borg incursion
into Sector 001 in 2373, the Norway proved itself as a versatile combat
vessel and saw action again in the Dominion War. The Norway is fitted
with heavier armor and more weapons than the smaller Saber-class frigate,
but sacrifices some of the speed and maneuverability of that class. For
this reason, the Norway is used mainly for low-risk exploration and
escort missions.
Notable Norway-class vessels include the U.S.S. Budapest, NCC-64923, which
helped fight back the Borg in 2373.
The Borg Collective
History
The Borg are a powerful race of cyborgs originating from the Delta Quadrant,
where they were responsible for the annihilation of countless races. The Borg
strive for perfection, and they seek to attain their goal by assimilating other
races into their own by force. Borg share a hive mind which is facilitated by
a subspace communication network which connects all Borg, eliminating the
concepts of self and individuality. Once assimilated, the knowledge and
technology of a race is adapted into the Borg collective, and individuals are
transformed into Borg drones to accomplish various tasks.
The Borg were first encountered by the Federation in 2365, when a Q-entity
transported the U.S.S. Enterprise to system J-25, deep in the Delta Quadrant.
The Federation was then able to prepare for a Borg invasion which came
earlier than expected, in 2366, when a Borg cube was detected heading
toward Earth. After the Battle of Wolf 359, in which 39 ships and 11,000
lives were lost in an attempt to halt the advance of the cube, the Borg were
eventually stopped by implanting a destructive computer code into their
collective. The Borg again attempted an assimilation of Earth in 2373 and
though they were defeated, a Borg sphere managed to enter a temporal
vortex and travel back in time in an attempt to sabotage Earth’s first warp
flight in 2063. This incursion was stopped by the U.S.S. Enterprise and her
crew, who managed to destroy the Borg Queen. The Borg were dealt a
crippling blow in 2378, when the actions of the U.S.S. Voyager destroyed a
Borg transwarp hub, severely hindering their ability to travel through space.
Ships and Tactics
Borg ships are extremely powerful; one cube is more than a match for an
entire fleet of Federation vessels. When it comes to tactics and strategy
however, the Borg usually take the direct approach, heading directly toward
their target and firing whenever they have the opportunity. Borg weapons
consists of powerful gravimetric torpedoes, cutting beam weapons, and a
deadly shield inversion beam capable of draining all of an enemy’s shields at
once. When in combat against the Borg, mobility is a captain’s chief asset,
as it is the best way to avoid the inevitable onslaught of Borg weaponry.
Although they lack shields, Borg vessels are equipped with regenerative
armor, and their tractor beams should be avoided as they have the ability to
not only hold a ship in place but damage it as well. A constant stream of
attacks is the best way to assure maximum damage.
46
47
EMPIRES
SHIPS
Page 25
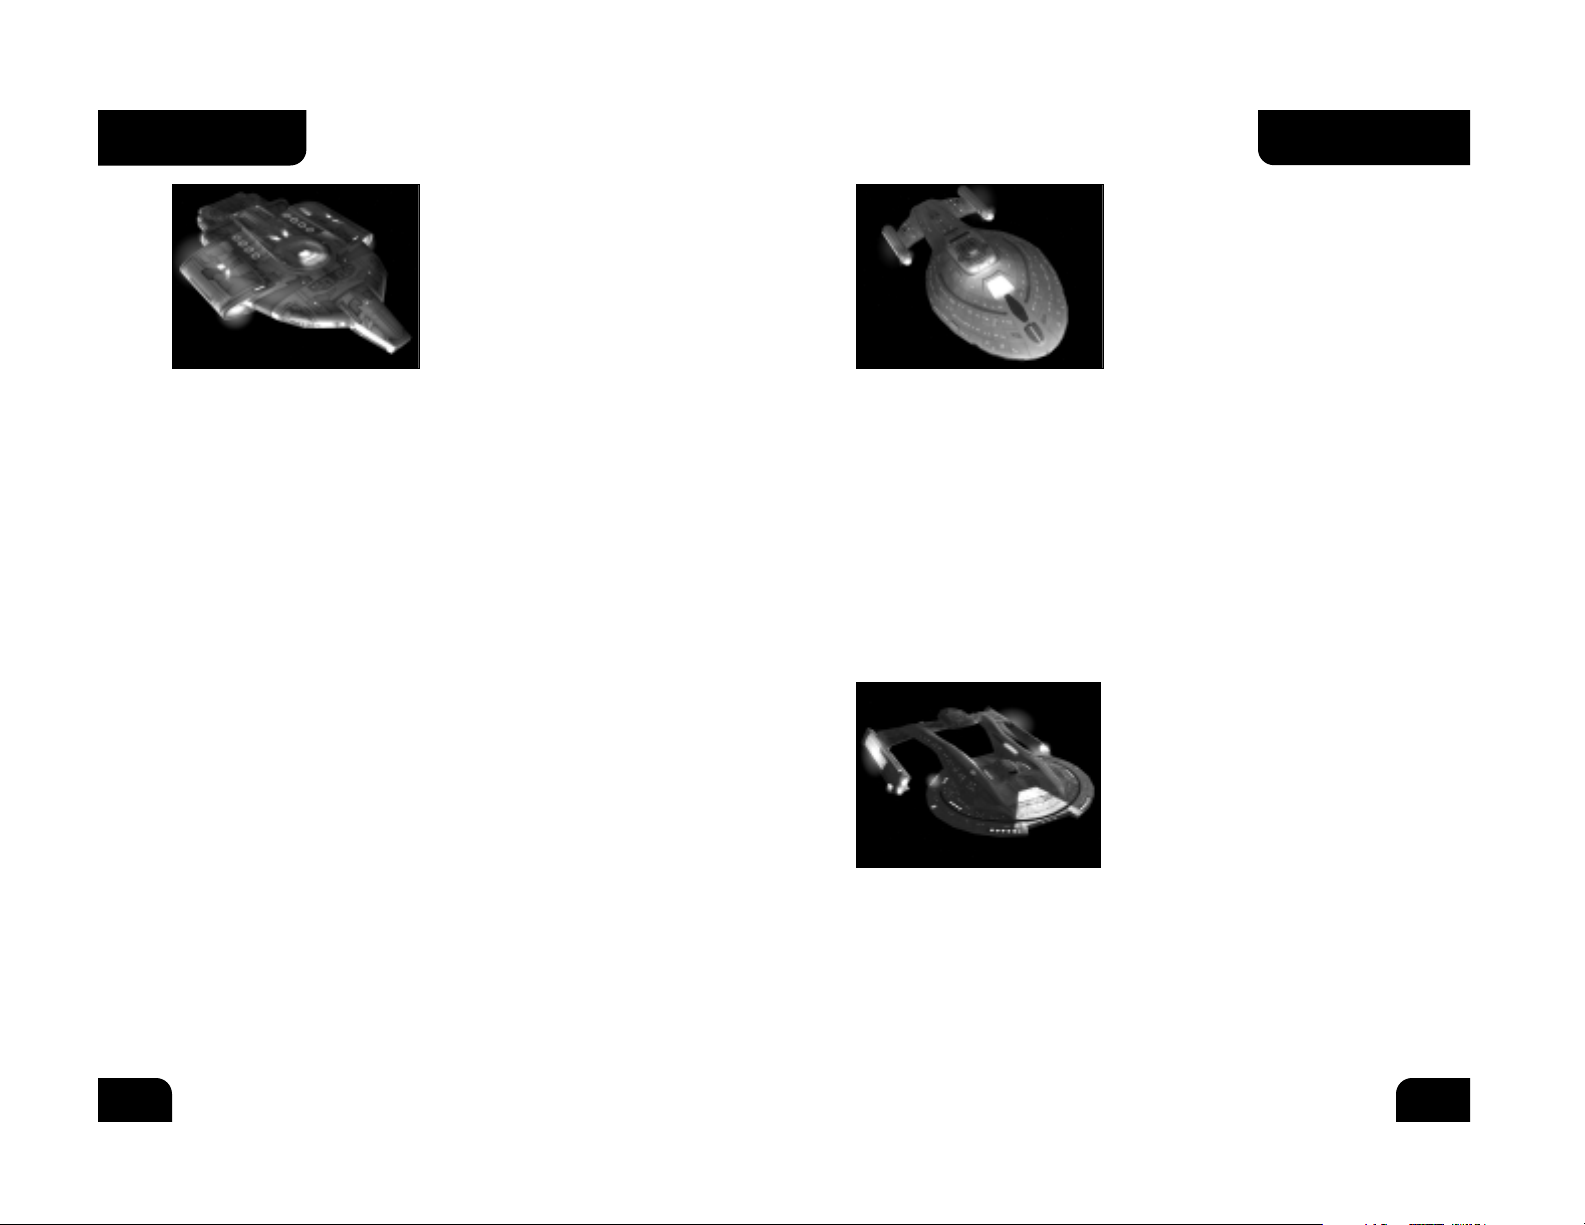
INTREPID-CLASS
“LIGHT CRUISER”
History
The Intrepid-class starship features
numerous new technologies that mark
a change in Starfleet’s design
philosophy. Instead of building ever-
larger, more complicated ships, the
new design initiative focused on
smaller, more compact and streamlined vessels. The Intrepid is the first
Starfleet vessel equipped with a computer system based on bio-neural gel
packs, allowing for advanced processing at enhanced speed. The Intrepid also
pioneered technology allowing a starship to land on a planet with minimal
system damage. Another design breakthrough introduced with the Intrepid
was variable geometry warp nacelles, capable of configuring themselves to
maximize the efficiency of the ship’s warp core to provide maximum warp for
less power than on a regular warp drive.
Notable Intrepid-class vessels include the U.S.S. Voyager, NCC-74656. Lost on
its first mission, Voyager was later discovered to have been transported to
the Delta Quadrant. While there, the ship made more first contacts than any
ship in Starfleet history and made significant research into the workings of
the Intrepid class. Voyager returned to the Alpha Quadrant in 2377.
AKIRA–CLASS “HEAVY CRUISER”
History
The Akira-class vessel was designed as
one of Starfleet’s first combat-focused
starships. Its design was originally
used merely as a testing bed for
advanced weapons systems being
developed during the buildup of
tensions between the Federation and
the Cardassian Empire. After the battle of Wolf 359, Starfleet hurried the
prototype into actual production, sensing the need for more ships whose
primary focus was combat instead of exploration. The vessel proved itself
during the second Borg attack and later during the Dominion War. Although
its primary focus is tactical, the Akira is also able to be used for a wide
variety of other purposes.
Notable Akira-class vessels include the U.S.S. Thunderchild, NCC-63549, which
took part in the defense of Sector 001 against Borg invasion in 2373.
DEFIANT–CLASS
“LIGHT CRUISER”
History
The Defiant–class is the first pure
warship designed by Starfleet and is
the basis for many of the technologies
found in ships which would later come
out of the advanced starship initiative.
The Defiant was rushed into production
after the first Borg attack and was designed specifically to counter any
future Borg incursions. As time passed and the Borg did not re-appear, work
on the vessel slowed. It’s prototype was eventually assigned to Deep Space 9
in order to aid in skirmishes with the Dominion. When the Borg re-appeared
in 2373, the Defiant–class was put to its original use and was invaluable to
the defense of Sector 001. The Defiant is heavily armored and extremely
maneuverable, allowing it to infiltrate enemy territory at high warp.
Today, the vessel serves many functions in Starfleet, most of them military
in nature.
Notable vessels in the Defiant–class include the U.S.S. Defiant, NX-74205,
assigned to station Deep Space 9, which fought several key battles and was
eventually destroyed in the Dominion War. The U.S.S. Sao Paulo was then
assigned to Deep Space Nine as a replacement. By special Starfleet
dispensation, the ship was re-named Defiant and given that ship’s former
registry number.
48
49
SHIPS
SHIPS
Page 26

GALAXY–CLASS “DREADNOUGHT”
History
The Galaxy was designed as the
Federation’s primary research and
exploration vessel and is among the
most advanced and powerful vessels in
Starfleet, once serving as the flagship of
the fleet. The Galaxy was designed to fill
any role given to it, from combat to first
contact duties, and is the first ship in the fleet to feature extensive civilian
quarters, allowing families to be raised on board the ship. Its sheer size makes
it ideal for emergency evacuation and relocation duties. The Galaxy–class is
also one of the most expensive ships ever constructed by the fleet, and as a
result its production is limited, and the smaller Nebula–class was designed as
a lower cost alternative.
Notable Galaxy-class vessels include the U.S.S. Enterprise NCC-1701-D, the
flagship of the Federation under the command of Captain Jean-Luc Picard until
its destruction in the Veridian system in 2371.
SOVEREIGN-CLASS “BATTLESHIP”
History
The Sovereign-class vessel is the most
advanced ship in use in Starfleet today
and functions as the current flagship of
the Federation. Featuring elements
researched as a part of the advanced
starship initiative in order to react to
future Borg incursions, the Sovereign, at
nearly 700 meters in length, is the largest and most impressive starship in the
fleet. Designed as a multi-function vessel, the Sovereign is equipped with
advanced weapons platforms and upgraded sensor and shield systems. It is
effective both as an exploratory and research vessel as well as a front-line
combat vessel.
Notable Sovereign–class vessels include the Federation flagship U.S.S.
Enterprise NCC 1701-E, which stopped the Borg from interfering with Earth’s
timeline after the Borg incursion in 2373, and the U.S.S. Sovereign NCC73811, which served a major role in the Kessok Incident.
EXCELSIOR–CLASS
“HEAVY CRUISER”
History
The Excelsior–class was originally
designed and built in the 23rd century
during Starfleet’s early experiments
with transwarp drive. Transwarp was
eventually proven unviable, and the
Excelsior class was refitted with a
standard warp drive. An advanced ship for its time, the Excelsior has been
continually refitted and upgraded to serve alongside Starfleet’s more
advanced vessels. It still sees heavy use today, though usually in some of
the less glamorous assignments. Due to its upgraded weapons systems, the
Excelsior is still a formidable opponent in combat situations.
Notable Excelsior-class vessels include the prototype U.S.S. Excelsior NCC-
2000 under the command of Hikaru Sulu, which played a key role in the
defense of the Khitomer Conference in 2293, and the U.S.S. Enterprise
NCC-1701-B.
NEBULA–CLASS
“HEAVY BATTLECRUISER”
History
The Nebula–class vessel was originally
designed as a lower cost alternative to
the Galaxy–Class. The two vessels share
many of the same advanced
components, systems, and design
features, but the Nebula’s integrated
hull structure and modest scale make it more cost-effective for mass
production than its larger Galaxy-class cousin. In addition, the Nebula
features a large dorsal equipment module. This module allows the Nebula to
be alternately configured for either research or combat by housing either an
advanced sensor package or weapons platform. Its wide array of uses makes
the Nebula one of the most versatile ships in Starfleet, though its relatively
weak armor keeps it from seeing the front lines as often as more combatoriented vessels.
Notable Nebula-class vessels include U.S.S. Endeavor, NCC-71805, which
participated in the Romulan blockade during the Klingon civil war, and the
U.S.S. Phoenix, NCC-65420.
50
51
SHIPS
SHIPS
Page 27

K’TINGA–CLASS
“LIGHT CRUISER”
History
The K’Tinga–class vessel has been in
service in the Klingon empire in one
from or another for decades, even
longer than the dependable B’Rel–class
Bird Of Prey. The ship has received
constant upgrades and refits to keep it
current, and still serves many important functions in the Empire today. The
design is based on the original Klingon D7 vessel. While certainly dependable
in combat, the K’Tinga is one of the only Klingon vessels adaptable to
exploratory and research use as well. The vessel serves many diplomatic
functions, and is a reliable light escort ship.
Notable K’Tinga–class vessels include Kronos 1, which was transporting
Chancellor Gorkon to the Khitomer Conference when he was assassinated in
2293 by sources within the Klingon military.
FEK’LHR–CLASS
“HEAVY CRUISER”
History
The Fek’lhr–class is named after a
mythical Klingon beast who guards the
gates of Gre-Thor, where dishonored
Klingon warriors go after death. The
vessel was designed as a heavy attack
escort vessel. Better armored and
mounted with better weapons than the smaller ships in the military, the
Fek’lhr is also capable of long range reconnaissance and scout duties thanks
to its cloaking device and advanced sensor package. The Fek’lhr is also
equipped with a modular equipment pod similar to that found on the
Federation’s Nebula–class. This allows the vessel to be refitted quickly for
other duties.
Notable Fek’lhr–class vessels include the I.K.S. Kosh, which led the assault
on Cantessa Prime during the Klingon push toward Cardassia Prime in the
Dominion War.
The Klingon Empire
BIRD OF PREY-B’RELCLASS “FRIGATE”
History
The B’Rel–class frigate, also known
simply as the Bird Of Prey, has been in
service in the Klingon Empire for over
eighty years. The class has undergone
several upgrades and refits, but is still
used as a major component of the
Klingon fleet. The ship is highly maneuverable, requires a minimal crew to
run at maximum combat effectiveness, and carries very impressive firepower
for its small size. The B’Rel is capable of atmospheric flight and planetary
landings as well as warp-speed interstellar flight. The craft is also equipped
with a cloaking device, making it a very effective scout ship. The hull design
and general layout were used to create the heavier K’Vort–class destroyer.
Notable vessels in the class include the I.K.S. B’Redge, which was
instrumental in the defense of the Vartha station during the brief Klingon
civil war.
K’VORT–CLASS “DESTROYER”
History
The K’Vort–class destroyer is a more
advanced and upgraded version of the
smaller B’Rel–class frigate. Like the
B’Rel, it is capable of atmospheric
flight and planetary landings as well as
interstellar warp travel, and is
equipped with a standard Klingon
cloaking device. The K’Vort features more weapon mounts then the B’Rel and
therefore requires a slightly larger crew to operate. The added durability and
offensive capabilities of the craft make it a bit less maneuverable then the
B’Rel. K’Vort–class vessels are primarily used as fast-attack combat vessels
and scout ships.
Notable K’Vort–class vessels include the I.K.S. Thraxis, lost in the Battle of
Meglar III in 2363.
52
53
SHIPS
SHIPS
Page 28
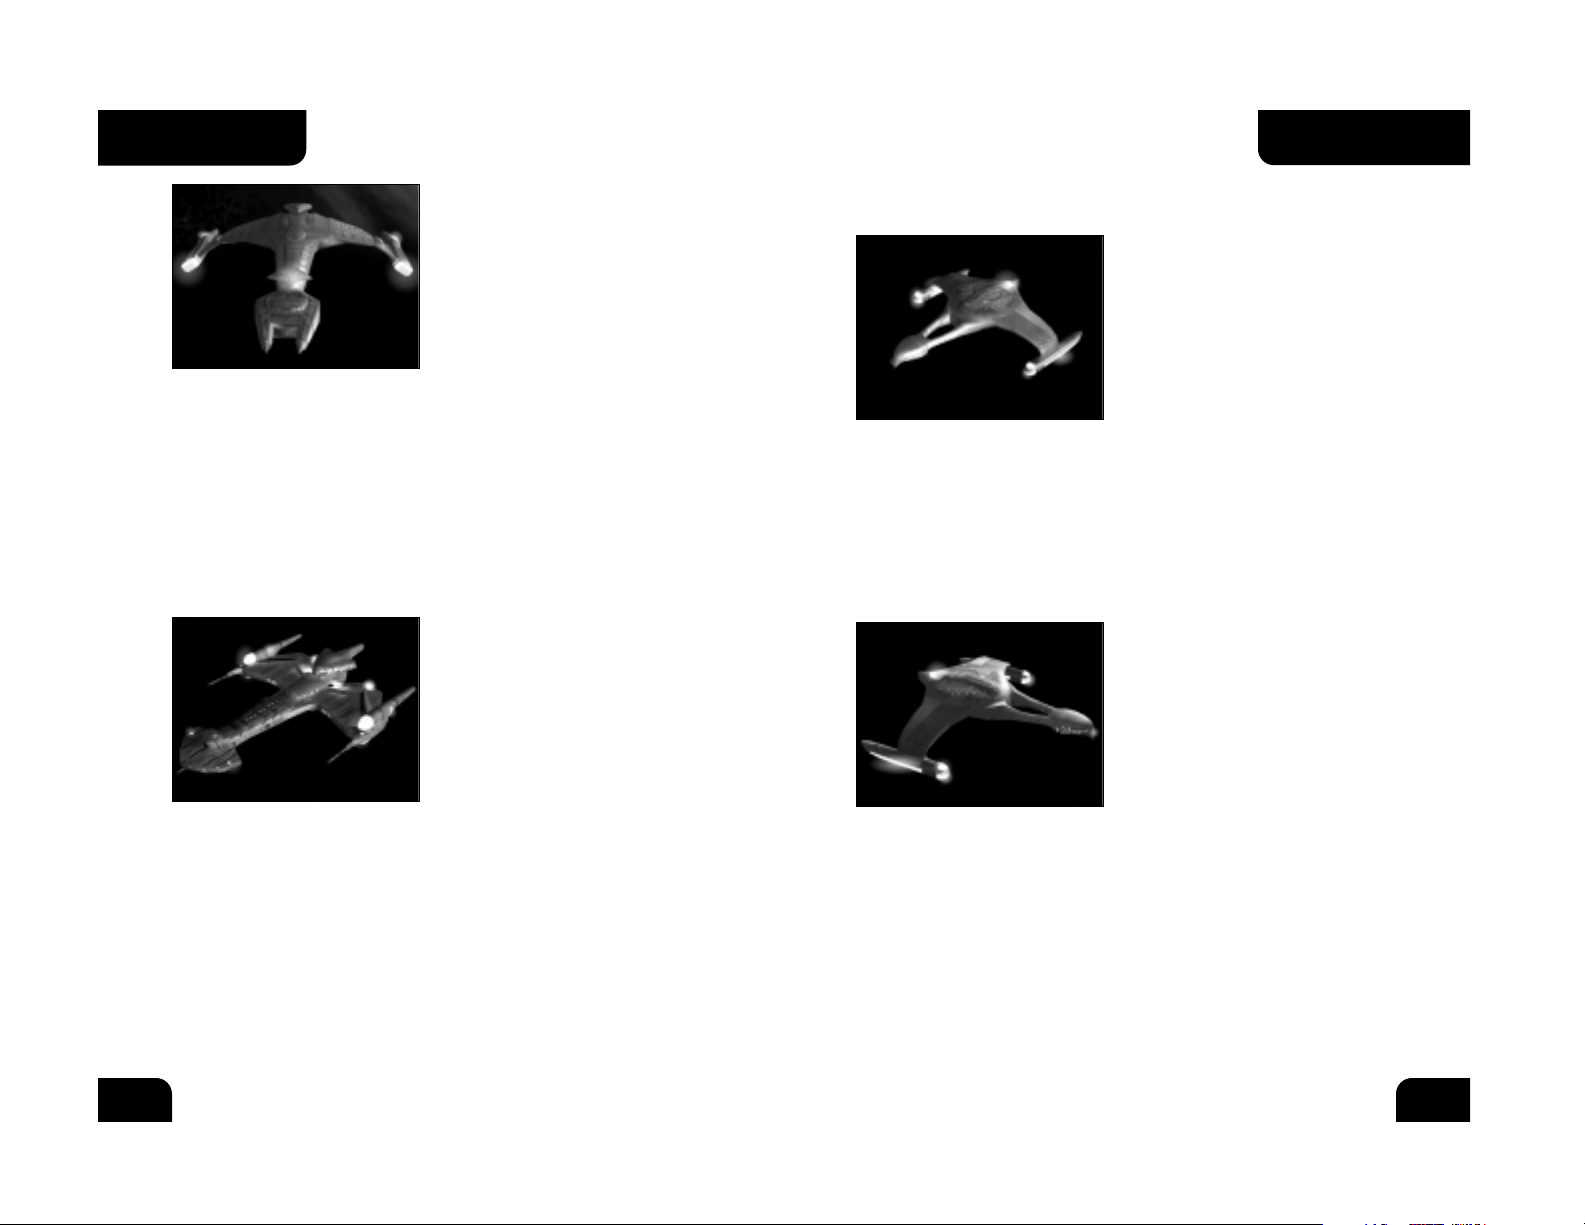
The Romulan Star Empire
TALON-CLASS “FRIGATE”
History
The Tal on-class frigate fills the fast
attack role in the Romulan fleet.
Extremely quick and very agile, the
ship is capable of out-maneuvering any
vessel it comes across. The Talon was
designed primarily to avoid combat in
favor of stealth, using its standard
cloaking device to penetrate enemy fortifications and extract spies or
sabotage enemy defenses. Although lightly armored and featuring relatively
weak weapons, the Talon is a formidable and often deadly opponent.
Notable Tal on–class vessels include the I.R.W. Deunan, which single-handedly
defended the Romulan Briareos Outpost from attack by 3 rogue Klingon
B’Rel–class Birds of Prey in 2371.
FALCON–CLASS “DESTROYER”
History
After the Talon proved itself as a
versatile high-speed combat vessel,
the need arose for a version of the
ship which was more capable of
defending itself for use in high-risk
insertion and escort missions. The
result was the Falcon–class, which is
based on the same hull design as the Talon but features additional weapon
mounts to make the vessel a more formidable opponent if it is unable to use
its speed and cloaking device to escape. The added systems lower the
overall top speed and maneuverability of the ship, but raise its overall
survivability significantly.
Notable Falcon–class vessels include the I.R.W. Taval, which leads the
Romulan fleet’s prestigious Omicron Fast Attack Wing.
VOR’CHA–CLASS
“HEAVY BATTLECRUISER”
History
The Vor’cha–class battlecruiser makes
up the bulk of the Klingon fleet. A
powerful ship second only in size and
firepower to the mighty Negh’Var, the
Vor’cha manages to maintain its
maneuverability despite its upgraded
posture. Due to its versatility, the Vor’cha is tasked with numerous roles in
the Klingon Empire. While it is the primary assault vessel of the Klingon
military during war time, it is also equipped with a cloaking device and
advanced long-range sensor systems, allowing it to be quite effective as an
exploratory and reconnaissance vessel.
Notable Vor’cha–class vessels include the I.K.S. B’Err, which transported
Klingon High Council leader K’mpec on his final mission in 2367, and the
I.K.S. Vor’nak, commanded by General Tanas.
NEGH’VAR–CLASS “BATTLESHIP”
History
The Negh’Var is the flagship of the
Klingon Defense Force, and the largest
and most powerful ship in the Klingon
fleet. The ship was designed to
showcase the military might of the
Empire and features the most advanced
weapons and sensor packages
available, including support for a Polaron Torpedo refit. Due to the sheer
size and advanced nature of the vessel, it is also the most expensive ship
ever built by the Empire, meaning that while powerful, it will never replace
the Vor’cha for sheer usefulness. The Negh’var is slow-moving and sacrifices
maneuverability for armor and weapons, making it a feared opponent
in combat.
Notable Negh’Var vessels include the class’s namesake, the I.K.S. Negh’Var,
which functions as the Empire’s flagship and was commanded by General
Martok during the Klingon Empire’s invasion of Cardassia.
54
55
SHIPS
SHIPS
Page 29

RAPTOR–CLASS
“HEAVY BATTLECRUISER”
History
The Raptor–class vessel is a child of
the same advanced design initiative
that brought the Vales into the
Romulan military. While the Vales was
designed primarily as a combat vessel,
the Raptor was to be a more rounded
ship. In addition to advanced weaponry, the Raptor also features highbandwidth sensor packages and upgraded onboard research facilities, making
it a very effective exploration and research vessel. Capable of extended
periods away from base due to its low-bleed singularity core and extensive
crew facilities, the Raptor is ideal for the more secretive missions of the
Romulan military.
Notable Raptor–class vessels include the I.R.W. Antares, which aided in the
downing and eventual salvage of a Borg scout vessel in the Relik sector,
thwarting a Borg incursion and allowing the Romulans an insight into
numerous new technologies.
WARBIRD–CLASS “BATTLESHIP”
History
The D’Deridex–class Warbird is the most
powerful vessel in the Romulan Empire.
Although Warbirds were in service long
before the more advanced Romulan
weapons and systems were developed,
the vessels are constantly upgraded to
keep their technology current. The
Warbird fills many duties in the fleet, including combat, exploration, and
science missions. The Warbird’s enormous size (it is nearly twice as long as a
Federation Galaxy-class vessel) comprises research labs, reverse-engineering
terminals, and intelligence gathering equipment which make it instrumental
in Romulan combat operations, both direct and covert.
Notable Warbird–class vessels include the I.R.W. D’Trell, leader of the
Romulan division of the Alpha Quadrant alliance in the attack on the
Chin’Toka system in 2374.
SHRIKE–CLASS
“LIGHT CRUISER”
History
The Shrike–class is a light cruiser
designed primarily as a scout vessel.
As conflicts along the RomulanFederation Neutral Zone tapered off,
the Romulan military realized that
assigning its heavier ships to the
region was a waste of resources. They set about designing a smaller vessel
which could fill the patrol duties and yet still defend itself adequately if the
need arose. The Shrike, which requires a minimal crew and is relatively cheap
to produce, is the result of this design. The vessel is also equipped with a
standard Romulan cloaking device, allowing it to investigate disturbances
in secret.
Notable Shrike–class vessels include the I.R.W. Soren, which was instrumental
in detecting and eliminating the presence of Cardassian minelayers along the
Neutral Zone during the Dominion War.
HAWK–CLASS “HEAVY CRUISER”
History
After the first indications of the
coming Borg threat along the Neutral
Zone in 2364, the Romulan military
began researching advanced systems
and ship designs in an effort to
upgrade their military against future
incursions. The project was accelerated
after the Romulans obtained intelligence reports on the full capabilities of
the Borg after the battle of Wolf 359, and the Hawk was the first ship to
emerge from the new design initiative. Taking numerous cues from the
powerful Romulan Warbird in its design, the Hawk is a well armed and
maneuverable strike vessel with cloaking capabilities designed for heavy
combat duties.
Notable Hawk–class vessels include the I.R.W. Cathex, the ship captained by
the legendary Commander Astran, which disappeared in 2372.
56
57
SHIPS
SHIPS
Page 30

BORG DIAMOND-CLASS
“LIGHT CRUISER”
History
The Borg Diamond’s main function is to
scout areas for races and technology
to assimilate. Upgraded weapons
systems and high maneuverability
allow it to avoid enemy resistance if
necessary and return to the collective
so that heavier assimilation forces may
be dispatched.
BORG DIAMOND PRIME-CLASS “HEAVY CRUISER”
History
The Diamond Prime is an upgraded version of the standard Borg Diamond.
While standard Borg design emphasizes a balance between a vessel’s
offensive capabilities and its assimilation facilities, the rise of empires which
pose a legitimate threat to the Collective necessitated a change in design.
As a result, the Prime has more mass available to devote to weapons and
systems. It also comes equipped with more powerful engine systems and
additional weapons.
The Borg Collective
Note: Little is known about the vessels of the Borg collective, as confrontations
with them tend to result in the destruction of any ships which would normally
gather information. The following database is gathered from various intelligence
reports as well as the extensive information on the Borg gathered by the U.S.S.
Voyager during its years in the Delta Quadrant.
BORG PYRAMID-CLASS
“FRIGATE”
History
The Borg pyramid functions as a
Frigate-class vessel in the Borg
Collective. Its primary function is to
assist the Cube in reducing enemy
resistance to assimilation. The Cube’s
massive size makes maneuvering to
attack more agile vessels a problem,
so the Borg utilize the Pyramid for such purposes, as it is fast and highly
maneuverable, yet still features powerful Borg weapons.
BORG PYRAMID PRIME-CLASS “DESTROYER”
History
As the Borg began encountering an ever greater number of technologically
advanced races, the Collective saw the need to upgrade the combat potential
of even their smaller scout vessels. The Pyramid Prime features a larger mass
limit than the standard pyramid, allowing greater latitude in selecting
weapons and systems. In addition, the Prime has more powerful standard
engine systems. The extra mass devoted to ship systems results in a slight
decrease in top speed and maneuverability.
58
59
SHIPS
SHIPS
Page 31

BORG CUBE-CLASS
“BATTLESHIP”
History
The Cube is the primary vessel of the
Borg Collective. Massive in size, the
Cube features a highly decentralized
design, making it difficult to
effectively damage in a combat
situation. In addition, Cubes are highly
regenerative, able to repair damage to their armor very rapidly. Although
lacking in maneuverability, the Cube features highly advanced weapons
capable of destroying entire fleets of vessels. A typical Cube features
assimilation facilities capable of assimilating an entire planet. The Cube is
an awesome sight and a feared opponent.
BORG SPHERE-CLASS “HEAVY
BATTLE CRUISER”
History
The Borg Sphere is second in size and
power only to the mighty Cube. Its
primary function is to aid the Cube in
large scale assimilations which require
a high degree of combat. The Sphere is
more maneuverable than the Cube and
requires fewer resources, making it a reliable support ship. In addition, the
Sphere has its own large scale assimilation facilities, allowing it to complete
low-risk assimilations on its own if need be.
BORG SPHERE PRIME-CLASS “DREADNOUGHT”
History
As they spread into the Alpha quadrant, the Borg began encountering groups
of technologically advanced races that were capable of mounting more of a
resistance to forced assimilation. The Collective adapted by modifying its
vessels to carry more advanced systems and firepower. The Sphere Prime is
the second only to the Cube in sheer power. The Prime features more
available mass for weapons and systems, as well as a more powerful standard
engine and weapon loadout. Due to the increased mass, the Sphere Prime is
slightly less maneuverable than the standard Sphere.
60
61
SHIPS
SHIPS
Page 32

The Klingon Empire had been experimenting with matter/antimatter
weaponry at the same time as the Federation, and their end result was much
similar to Starfleet’s, though with a slightly higher yield and fewer safety
precautions. Since then, the two empires have shared technology to the
point where the two systems are identical on current vessels. Photon
torpedoes can be set to detonate when in the proximity of an enemy vessel,
lessening the chance of a miss but also lessening damage yield.
Quantum Torpedoes
The quantum torpedo is an
advanced heavy weapon
developed by Starfleet as a
part of its Advanced Defense Initiative
to combat Borg incursions.
As the photon torpedo reached what
many Starfleet researchers agreed was
its highest possible explosive yield, a
group of engineers at the Starfleet
R&D facility on Groombridge 273-2A began investigating methods for
achieving a higher release of energy from a projectile of equal dimensions to
the photon torpedo. The result is the quantum torpedo, which utilizes an
eleven-dimensional space-time membrane suspended in ultra-clean vacuum
within the projectile. The membrane is twisted into a string and then
isolated from the background vacuum. This results in the creation of a new
particle, which is accompanied by a tremendous release of energy.
The quantum torpedo is a heavy weapon available only to Federation vessels.
It does significantly more damage than the photon torpedo. Like the photon
torpedo, it can be set to proximity detonation.
Pulse Phasers
The Pulse Phaser is an
advanced heavy weapon
designed for a high rate of
fire and a high damage yield. It is
available only to Federation vessels.
The Pulse Phaser was developed by
Starfleet as a weapon to combat future
Borg incursions and was first fitted
onto the prototype U.S.S. Defiant. The
device functions similarly to a standard Phaser, but without a continuous
beam. The energy emissions are instead stored in a magnetic field, allowing
WEAPONS
Phaser
™
The Phaser (short for PHASed
Energy Rectification) is the
standard primary weapon for
all ships in Starfleet.
In the early ages of interstellar travel,
it became clear that directed energy
devices would be needed in order to
assist in clearing gas, dust, and other
microscopic materials from the flight
paths of vehicles. This eventually led to the deflection of such materials
using directed energy. It soon became apparent that such technology could
also make an effective weapon system, and the Phaser was conceived.
Current Federation ship-mounted phasers range in power from the Phaser
Type IX (the weakest ship-mounted Phaser) to the Type XII (the most
powerful ship-mounted Phaser). Each Phaser type comes in both fast and
slow firing rate versions, depending on the energy available to them. Phaser
energy dissipates over distance, so a beam shot from long range will do less
damage than one shot from close range.
Photon Torpedoes
The Photon Torpedo is the
standard heavy weapon on
most Federation vessels. A
variant on the weapon is the standard
Klingon heavy weapon.
Phasers proved effective against most
vessels in the early history of space
travel. However, as warp drive became
more prevalent, the need arose for a
weapon which was deliverable at high relativistic and warp speeds. Initially,
rudimentary nuclear projectiles were used for this purpose. After much
research, Starfleet engineers perfected the controlled detonation of matter
and antimatter and fitted the new technology into a torpedo casing with an
advanced propulsion system. The result was the photon torpedo, which
immediately became the standard heavy weapon on all Federation vessels.
Though the design has been upgraded since its inception, the basic
configuration remains the same even on the more advanced vessels.
62
63
WEAPONS
WEAPONS
Page 33

highly destructive plasma torpedo. The device generates a ball of plasma
using a burn process similar to the one used in impulse engines (which
generate plasma as a byproduct). This plasma is suspended in a-energy
magnetic field and hurled at a target. On impact, the plasma ignites and a
massive amount of energy is released. Early plasma weaponry degraded
seriously over distance and traveled quite slowly. Recently, using intelligence
on zero-point clean-vacuum energy fields stolen from Federation sources,
the plasma torpedo has gained a higher speed and greatly increased
effective range.
Plasma torpedoes are available in three strengths: light, medium, and
heavy. They are very slow to recharge and require large amounts of energy
to maintain, but they are the most powerful heavy weapon available to
any race.
Antimatter Mines
Antimatter mines are a heavy
weapon available to all
empires except the Borg.
The antimatter mine is, at its heart, a
matter/antimatter warhead designed to
detonate when a vessel reaches a
certain proximity to it. It functions in
much the same way as the Federation
photon torpedo, utilizing a detonation
device that releases controlled amounts of matter and antimatter, which
annihilate and cause a massive energy release. Although the effectiveness of
mine fields in the vastness of space is minimal, mines have been used to
great effect when in close quarters starship combat, or to distract and
damage pursuing vessels.
Mines are dropped behind a ship and arm when the ship is a certain distance
away. They will detonate when any ship (even the ship that laid them) is
in proximity.
Tachyon Pulse
The tachyon pulse is an
advanced heavy weapon
capable of nullifying a
vessel’s warp field for a short period of
time. In addition to doing significant
damage, it is available to all empires.
them to coalesce and agitate to higher energy states. The field is then redirected, forcing the burst of Phaser energy toward the target. This process
is repeated rapidly using multiple magnetic field generators, and the result is
a stream of phased energy projectiles. Although the range of such a weapon
is much less than the standard Phaser due to rapid dissipation, from close
range the pulse Phaser can do more damage than most Phaser types.
The weapon has since been adapted to function on most Federation ships.
Disruptors
The disruptor is the standard
primary weapon on Romulan
and Klingon vessels.
Early Romulan spacecraft were
equipped with basic projectile
weaponry which was largely ineffective
at high speeds and long range. As their
technology grew, the Romulans
realized (as Starfleet later would) that
the same directed energy fields they were using to deflect particles of dust
in the path of their vessels could be amplified and used as an effective
weapon. The standard disruptor function very similarly to the Phaser, though
it is often fired in pulses as opposed to beam form.
A brief Romulan-Klingon alliance around 2268 resulted in disruptor
technology being shared with the Klingon Empire. Though they have
upgraded the weapon to their own specifications since then, the two
weapons remain largely identical. Disruptors are available in strengths from 1
(weakest) to 5 (strongest) and each level is available in normal or faster
firing rate.
Plasma Torpedoes
The plasma torpedo is the
standard heavy weapon of
the Romulan Empire.
Plasma is a highly unstable form of
matter in which a gas has become so
hot that its electrons have been
stripped away from the atomic nuclei.
The result is matter on the verge of
becoming pure energy. While most
races have abandoned research into plasma-based weaponry because of the
high risk involved, the Romulans ignored precautions and developed the
64
65
WEAPONS
WEAPONS
Page 34

the torpedo to pass through most forms of energy shielding in use today and
impact directly on the target’s hull. The upgrade also provides the torpedo
with a slightly increased range.
Myotronic Beam
The myotronic beam is a
recent Romulan technology
which has the ability to stun
enemy weapons systems. It is available
only to the Romulan Star Empire.
Utilizing technology discovered on a
salvaged Dominion vessel, Romulan
researchers developed the myotronic
beam. The weapon does a fairly high
amount of damage on its own, but a side effect of its enhanced energy field
is the creation of a field of electromagnetic particles. These particles
interfere with energy buildup typical of most weapon designs. The result is
that the enemy’s weapons are effectively stunned until the field dissipates.
Cutting Beam
The cutting beam is capable
of locking onto a ship and
cutting directly through its
shields and into its hull. It is the
primary weapon of the Borg Collective
and is available only to them.
Little is known about the genesis of
Borg weaponry, but many races in the
galaxy have been unfortunate enough
to see the effectiveness of the Borg cutting beam in action. The beam
damages a vessel’s shields and will eventually cut through them and into the
hull of the enemy ship. Primarily used by the Borg to dissect and analyze
enemy ships for possible technological assimilation, it has also proven to be
a powerful melee weapon.
The cutting beam is available in light, medium, and heavy versions. Higherend beams do more damage but require more power to maintain.
The tachyon pulse was developed by Klingon scientists in an effort to
prevent opponents from fleeing battle, a tactic deemed dishonorable by the
Klingons. It utilizes a burst of tachyons, particles which can only exist at
faster then light speeds. This tachyon burst is dissipated as soon as it comes
into contact with an enemy vessel but the resultant sub-space disturbance
caused by the sheer number of particles makes the formation of a warp field
impossible for a short period of time. The renders warp drive inoperable and
prevents the enemy from fleeing battle. The technology soon spread to other
empires who adapted it for use on their own vessels.
Ion Cannon
The ion cannon is a heavy
weapon which propels a
massive beam of energy at
an opponent. It is available only to
the Klingon Empire.
The ion cannon is similar to the
Romulan plasma torpedo, though
instead of the highly unstable and
dangerous plasma, it uses a beam of
highly ionized gas suspended in a magnetic field and at the target. The
resultant explosion is not as damaging as the plasma torpedo, but requires
far less energy to fire and is much less likely to overload. As the ionized gas
travels through space, it dissipates, giving the ion cannon a much shorter
range than a torpedo based weapon. However, at close range, the ion cannon
can do more damage then torpedoes.
Polaron Torpedoes
The polaron torpedo is an
advanced weapon capable
of penetrating an enemy’s
shields and damaging their hull
directly. It is available only to the
Klingon Empire.
The polaron weapon was developed by
the Klingons in an effort to create a
torpedo based weapon to keep pace
with the Federation’s research into quantum torpedoes. Although the
explosive discharge is not much greater than a standard photon torpedo
system, the delivery system has been vastly upgraded to include a
modulating polaron radiation generator. This surrounds the torpedo in a field
of polaron emissions which are constantly changing modulation. This allows
66
67
WEAPONS
WEAPONS
Page 35

SHIP SYSTEMS
Shields
Shields protect a starship from enemy weapons fire and other
hazards by generating a field of energy around the vessel. Once
they fall, your armor and hull begin taking damage. Shield systems
are available in ten levels, each providing increasing protection but requiring
more warp energy to maintain. This system is available to all empires except
the Borg.
Armor
Armor provides protection for the ship’s hull. The armor absorbs
damage after a ship’s shields have failed. Once a vessel’s armor is
depleted, its hull and subsystems are vulnerable. Armor is available
in five strengths. As an armor’s strength increases, so does its mass. Armor is
available to all empires and requires no warp power to maintain.
Tractor Beam
The tractor beam emits a focused linear graviton force beam,
which allows a ship to hold another ship in place and manipulate
it. The beam can also repel an enemy tractor beam of equal or
greater strength, meaning that the more powerful your tractor beam system,
the more likely you are to keep your hold on an enemy ship. The tractor
beam is available to all empires in five strengths.
Transporter
The transporter system allows you to send boarding parties to an
enemy vessel for sabotage or capture. The more powerful your
transporter system, the more marines you can beam over at one
time, which allows you to more rapidly strike against the enemy. Transporter
systems are available to all races in five strengths.
Computer
The bridge computer contains the ship’s sensor package, which
allows you to detect and scan vessels from a distance. The more
powerful your main computer, the further out you can detect and
identify other vessels. The computer is available to all empires in five
strengths. Computers at levels four and five allow you to perform anti-cloak
scans to detect cloaked enemy vessels.
SHIP SYSTEMS
69
Gravimetric Torpedoes
The gravimetric torpedo is
the standard heavy weapon
of the Borg Collective and
is available only to their empire.
Although the Borg are primarily
concerned with the assimilation of
other worlds, they are occasionally
tasked with defending themselves
against those who don’t wish to be
assimilated. To adapt to this situation, they developed the gravimetric
torpedo. This projectile weapon utilizes an advanced graviton inversion field
to cause a gravimetric shear in its target, causing severe structural damage.
Shield Inversion Beam
The shield inversion beam is
an advanced Borg heavy
weapon. It is capable of
draining all of a target’s shields
simultaneously. This weapon is
available only to the Borg Collective.
Depletion of an enemy’s shields is
crucial to the assimilation of a ship
and its crew. Damage to the hull of a
vessel risks the destruction of viable technology. The Borg have adapted the
shield inversion beam to aid them in combating shielded enemies. While
most weapons damage only the shield facing they strike, the shield inversion
beam damages all of an enemy’s shields at once, weakening them equally.
This makes lowering an opponent’s shields for boarding easier, as the enemy
cannot maneuver their stronger shields toward the attacker.
68
WEAPONS
Page 36

Cloaking Device
The cloaking device generates an energy screen which renders your
ship invisible to enemy sensors, allowing you to spy on the enemy
and mount surprise attacks. The cloaking device is available only
to the Klingon and Romulan Empires and comes in five strengths. Higher
level cloaking systems require more power but are less susceptible to
detection through anti-cloaking scans.
Impulse Drive
The impulse engines provide power for non-warp maneuvers. The
more powerful your impulse drive, the faster your ship can move
during combat. More powerful engines provide greater speeds but
are heavier and require more warp energy to maintain. The impulse drive is
available to all empires in ten strength levels.
Warp Core
The warp drive generates power for all of your ship’s systems and
is crucial to the operation of any starship. In the refit screen, your
ship’s statistics display the power your current systems are using
as well as the power your warp core is capable of producing. If the power
your systems require is greater than what your warp core can output, your
systems won’t function properly. You need to either fit a more powerful warp
core on your vessel or downgrade your systems to consume less power. The
warp core is available to all empires in ten strength levels.
Thrusters
The thrusters complement a ship’s impulse engines and counteract
the effects of your ship’s mass. This allows for better acceleration
and turning rates, allowing you to maneuver more efficiently in
combat. More powerful thrusters provide greater maneuverability and
require more power to operate. Thrusters are available to all empires in ten
strength levels.
SHIP SYSTEMS
70
NAVIGATION
Increase Impulse Power . . . . . . . . . . . S, Up Arrow Key
Decrease Impulse Power . . . . . . . . . . . A, Down Arrow Key
Turn Left . . . . . . . . . . . . . . . . . . . . . Left Arrow Key
Turn Right . . . . . . . . . . . . . . . . . . . . Right Arrow Key
All Stop . . . . . . . . . . . . . . . . . . . . . . Numpad –
Full Impulse . . . . . . . . . . . . . . . . . . . Numpad +
Emergency Stop . . . . . . . . . . . . . . . . Numpad 0
Follow Target . . . . . . . . . . . . . . . . . . Numpad /
Match Target Speed . . . . . . . . . . . . . . Numpad *
Evasive Maneuvers . . . . . . . . . . . . . . . Numpad .
High Energy Turn . . . . . . . . . . . . . . . . H
Engage/Disengage Warp . . . . . . . . . . . W
TACTICAL
Cloak/Uncloak . . . . . . . . . . . . . . . . . . C
Reinforce Forward Shield . . . . . . . . . . . Numpad 8
Reinforce Starboard Shield . . . . . . . . . Numpad 6
Reinforce Port Shield . . . . . . . . . . . . . Numpad 4
Reinforce Aft Shield . . . . . . . . . . . . . . Numpad 2
Negate Shield Reinforcement . . . . . . . . Numpad 5
Fire Selected Weapons . . . . . . . . . . . . Z
Fire All Primary Weapons . . . . . . . . . . V
Fire All Heavy Weapons . . . . . . . . . . . . B
Deploy Mine . . . . . . . . . . . . . . . . . . . M
Next Target (All) . . . . . . . . . . . . . . . . T
Next Target (Ally) . . . . . . . . . . . . . . . U
Next Target (Enemy) . . . . . . . . . . . . . Y
Target Nearest Enemy . . . . . . . . . . . . Space
Break Target Lock . . . . . . . . . . . . . . . \
71
DEFAULT KEY BINDINGS
DEFAULT KEY BINDINGS
Page 37

A TALDREN GAME
AN ACTIVISION
PRODUCTION
TALDREN, INC.
PRODUCER
Erik Bethke
PROGRAMMING
LEAD PROGRAMMER
Marc Hertogh
PROGRAMMERS
Scott Bruno
Paul Schreiber
Alex Sherman
Ken Yeast
Zachary Drummond
Sean Dumas
GAME DESIGN
DESIGN
Josh Morris
LEAD DESIGNER
Scott Bruno
MISSION PROGRAMMER
David Farrell
MISSION STORIES
John Boomershine
LINE PRODUCER
Mark Pfeiffer
ART
ART DIRECTOR
Bradley W. Schenck
ARTISTS
Ed Lacabanne
Jaime Marx
Nate Simpson
VOICE TALENTS
CAPTAIN JEAN-LUC PICARD
Patrick Stewart
ADMIRAL ARAI
Nancy Linari
COMMANDER JURETH
Greg Eagles
GENERAL MI'QOGH
Brock Peters
FEDERATION OFFICERS
Jennifer Hale
Paul Mercier
KLINGON OFFICERS
George Ball
Rodney Saulsberry
ROMULAN OFFICERS
B.J. Ward
Dee Bradley Baker
BORG VOICES
THE BORG COLLECTIVE
Charles Bartlett
Terrence Beasor
Daamen Krall
David Randolph
ADDITIONAL VOICE
TALENTS
(in alphabetical order)
Vaughn Armstrong
James Horan
Dee Bradley Baker
Roger L. Jackson
George Ball
Nancy Linari
Cam Clarke
Paul Mercier
Greg Eagles
Matt Morton
Paul Eiding
Rodney Saulsberry
Max GrodÈnchek
Courtenay Taylor
Jennifer Hale
B.J. Ward
Tim Harrison
Gary Anthony Williams
Jess Harnell
Kris Zimmerman
ORIGINAL SOUND EFFECTS
David Hone
AllSound Recording
SOUND EFFECTS PROCESSING
Salami Studios
CASTING AND VOICE
DIRECTOR
Kris Zimmerman
POST-PRODUCTION
Salami Studios, LLC
Devon Bowman
Marc Mercado
Rick Hinson
POP Sound
MUSIC
THEME AND ORIGINAL
SCORE
Danny Pelfrey
CREDITS
73
Target Next Subsystem . . . . . . . . . . . . Mouse Wheel Up
Target Last Subsystem . . . . . . . . . . . . Mouse Wheel Down
Green Alert . . . . . . . . . . . . . . . . . . . G
Red Alert . . . . . . . . . . . . . . . . . . . . . R
Launch Probe . . . . . . . . . . . . . . . . . . P
Scan . . . . . . . . . . . . . . . . . . . . . . . . I
INTERFACE
Power Allocation Menu . . . . . . . . . . . . J
Helm Panel . . . . . . . . . . . . . . . . . . . . K
Science Panel . . . . . . . . . . . . . . . . . . L
Tractor Panel . . . . . . . . . . . . . . . . . . ;
Transporter Panel . . . . . . . . . . . . . . . . ‘
Shuttle Panel . . . . . . . . . . . . . . . . . . E
Show Officer Panel . . . . . . . . . . . . . . . O
Player Schematic Panel . . . . . . . . . . . . N
Repair Panel . . . . . . . . . . . . . . . . . . . ,
Target Schematic Panel . . . . . . . . . . . . .
Target Hit and Run Panel . . . . . . . . . . /
Tactical Display On/Off . . . . . . . . . . . . TAB
Comm Menu . . . . . . . . . . . . . . . . . . . X
Hide/Show UI Panels . . . . . . . . . . . . . D
Decrease Game Speed . . . . . . . . . . . . . [
Increase Game Speed . . . . . . . . . . . . . ]
Chat Toggle . . . . . . . . . . . . . . . . . . . ENTER
CAMERA CONTROLS
Overhead Camera . . . . . . . . . . . . . . . . F1
Chase Camera . . . . . . . . . . . . . . . . . . F2
Follow Camera (Default) . . . . . . . . . . . F3
Enemy Camera . . . . . . . . . . . . . . . . . . F4
Target Lock On/Off . . . . . . . . . . . . . . . F5
72
DEFAULT KEY BINDINGS
CREDITS
Page 38

CREDITS
75
CREDITS
74
MOVIES
CG ANIMATION
Backyard Digital
Studios, LLC
DIRECTOR
Jason Adams
ART DIRECTOR
Daniel Wang
PRODUCER/
LEAD ANIMATOR
Robert DiFiglia
PROJECT MANAGER
Jim Bradbury
LEAD MODELER
Nick Losq
LEAD COMPOSITOR
Robert Reinhart
TECHICAL DIRECTOR
Daesun Hwang
TEXTURE ARTIST
Andrew Losq
ACTIVISION, INC.
PRODUCED BY
Dan Hagerty
EXECUTIVE PRODUCER
Marc Struhl
PRODUCTION
COORDINATORS
Aaron Gray
Eric Lee
Doug Mirabello
ADDITIONAL PRODUCTION
Glenn Ige
V.P. OF PRODUCTION,
NORTH AMERICA
Mark Lamia
E.V.P. WORLDWIDE
STUDIOS
Larry Goldberg
GLOBAL BRAND MANAGER
Jenny Stornetta
ASSOCIATE BRAND
MANAGER
Elizabeth Dunn
V.P., GLOBAL BRAND
MANAGEMENT
Tricia Bertero
E.V.P., GLOBAL BRAND
MANAGEMENT
Kathy Vrabeck
PUBLIC RELATIONS
V.P., CORPORATE
COMMUNICATIONS
Maryanne Lataif
SENIOR PUBLICIST,
CORPORATE
COMMUNICATIONS
Michael J. Larson
LEGAL
Rob Pfau
Michael Hand
INTERNATIONAL
SENIOR V.P., EUROPEAN
PUBLISHING
Scott Dodkins
HEAD OF PUBLISHING
SERVICES
Nathalie Ranson
SENIOR LOCALISATIONS
PROJECT MANAGER
Tamsin Lucas
DIRECTOR OF STRATEGIC
MARKETING EUROPE
Roger Walkden
MARKETING MANAGER,
UK & ROE
Carolyn London
PR MANANGER, UK
Guy Cunis
PR MANAGER, ROE
Suzanne Panter
PR Manager, GERMANY
Bernard Reinartz
BRAND MANAGER,
UK/ROE
Daleep Chabria
MARKETING MANAGER,
GERMANY
Stefan Luludes
BRAND MANAGER,
GERMANY
Stephan Seidel
JR. BRAND MANAGER,
GERMANY
Thomas Schmitt
MARKETING DIRECTOR ASIA PACIFIC
Paul Butcher
BRAND MANAGER - ASIA
PACIFIC
Leigh Glover White
CENTRAL TECHNOLOGY
SENIOR MANAGER
Ed Clune
INSTALLER & DESIGN
CONSULTATION
Andrew Petterson
INSTALLER
Hector Guerrero
INSTALLER TOOLS
Alexander Rohra
CUSTOMER SUPPORT
CUSTOMER SUPPORT MANAGER
Bob McPherson
CUSTOMER SUPPORT LEADS
Rob Lim
Gary Bolduc
Mike Hill
QUALITY ASSURANCE
MANAGER, PC TESTING
Marilena Rixford
SENIOR QA PROJECT LEAD
Siôn Rodriguez y Gibson
PROJECT LEAD
Brad Saavedra
SP FLOOR LEAD
Jeff Love
MP FLOOR LEAD
Dan Siskin
DATABASE MANAGER
Wil Kus
TESTERS
Mishelle Moross
Adam Tourkow
Nathaniel McClure
Mark Ishak
Anthony Moran
Barry Wright Jr.
Russell Johnson
Robert Alvarez
Matthew Burns
D. Richard Todd
Pete Veniscofski
LOCALIZATIONS PROJECT LEAD
Mihai Pohontu
LOCALIZATIONS TESTERS
Lonnie Carter
Natasha Darnall
Michael DeMarti
John Macmillan
Eric Zimmerman
Kop Tavormas
CODE RELEASE GROUP
MANAGER, CODE RELEASE
GROUP
Tim Vanlaw
CRG LEAD
Jason Levine
TESTERS
Frankie Kang
Paul Williams
NETWORK LAB
LEAD, QA NETWORK TESTING
Chris Keim
COMPATIBILITY LEAD, QA
COMPATIBILITY TESTING
Neil Barizo
TESTERS
John Santry, Joule Middleton
VISIONEER TESTING GROUP
EXTERNAL TEST COORDINATOR
Chad Siedhoff
VISIONEER TESTERS
Calvin Oliveria, John Vernon,
Jean-Ray Arseneau,
Brendan Burke,
Christopher Cannon,
Wayne Chang, Brandon Crick,
Clay Culver, Don Healy,
Iain Hill, David Joy,
Jason L'Hirondelle,
David Longhurst, Derek Lung,
Red River, Andy Serwatuk,
Marc Zaritsky, James Hurst,
Mark Kaelin, James King,
Jeff Landfried, Zachary Nobles,
Paul Pettit, Steve Ricketts,
Jeff Smith, Brian Wardell,
N. Blomenkamp, Karim Nouri,
Adam Taylor, Kevin Swisher,
Michael Allen, John Aubin,
Jamie Badgerow, Tim Barnes,
Hector Barrera, Charles Biro,
Chris Blendowski, Joseph Bott,
James Boydston,
Derek Brinkmann,
Steven Bybee, Jeffrey Call,
Daniel Carter, Leo Chiao,
John Chiu, Paul Chouy, Brant
Clabaugh, Armond Clark,
David Cleric, Scott Cook,
Trevor Cook, Aaron Cox,
|Russell Crim,
Maxwell DeChant,
Lane Denson, Ethan Dicks,
James Dillinger,
Jeremiah Dorn, Robert Dudley,
Richard Durrer, Michael Dwiel,
Danny Elias, David Evans,
Darren Evans, Joseph Faske,
Eric Friedner, Keith Galocy,
Paul Gilbert, Jerry Graber,
Gary Gray, Philip Hansen,
Panayoti Haritatos,
Tom Hepner, Jeff Hexter,
Jason Hitchens,
Kevin Hoekman,
Josh Horowitz, Justin Hromas,
Marc Hrossowyc, Robert Hubby,
David Jarrell, Stephen Jensen,
Warren Johnson, Tyler Jordan,
Elias Jubran, Scott Kasai,
Michael Kelly, Paul Keslin,
Maurice Kienenberger,
Richard Kurnadi,
Andrew Kuschnerait,
Jessie Lawrence, William Lazar,
Jonathan Lenaway,
Giancarlo Lenzi,
Page 39

CUSTOMER SERVICE
CREDITS
76
77
William Leppala, Craig Lewis,
Alan Liebowitz, Charles Little,
Eric Lo, Ian MacInnes,
Robert Mackey,
Rich Matheson,
Ryan McCaffrey,
Mike McCurdy, Sean McKay,
Douglas McKinney,
Myron McMullen,
Brett Milliken, Michael Milner,
Heather Moses, Craig Organ,
Christopher Penney, Jef"Frey"
Petermeier, George Politis,
Joshua Pollak,
Carolann Quinn, Rich Reed,
Joseph Ruffolo, Ken Rumsey,
Eddie Sarphie, Paul Seale,
John Silva, William Slayton,
Alan Springer,
Chris Squatritto,
Andrew Stein, James Sutliff,
Don Swanner, Joshua Tacey,
David Teague, Stephen Tobin,
Richard Torres,
Christopher Travis,
Joseph Vegh, Henry Wang,
Theodore Weidenbacher,
Alan Wexelblat, David Wilson,
Timothy Wilson,
Brian Winslow,
Philip Worthen, Jason Yeh,
Omar Yehia, Lee Zane,
Dimitri Zelepuhin,
Dominick Ziccarelli,
Yulia Zykin
QA SPECIAL THANKS
Jim Summers
Jason Wong
Adam Hartsfield
Nadine Theuzillot
Joe Favazza
Jennifer Vitiello
Indra Gunawan
Todd Komesu
Marco Scataglini
Willie Bolton
Jay Franke
Glenn Vistante
Matt McClure
Nick Falzon
Evan Button
James Van Meter
Jon Virtes
Mike Rixford
Matt McClure
CREATIVE SERVICES
V.P., CREATIVE SERVICES
Denise Walsh
CREATIVE MARKETING
DIRECTOR
Matt Stainner
MANAGER,
CREATIVE SERVICES
Jill Barry
PACKAGING AND
MANUAL DESIGN
Ignited Minds, LLC
ACTIVISION MANAGEMENT
Ron Doornink
Brian Kelly
Bobby Kotick
SPECIAL THANKS
Matthew Beal
Tim Curtis
David Dalzell
Gary Falcone
D.J. Fox
Joanna Fuller
Regina Gibson-Broome
Tiffani Halverson
James Mayeda
Joe Pizzulo
Bob Rice
& Gene Roddenberry!
VIACOM CONSUMER
PRODUCTS/PARAMOUNT
PICTURES LIASONS
EXECUTIVE DIRECTOR,
PRODUCT DEVELOPMENT
INTERACTIVE & TECHNOLOGY
Harry Lang
MANAGER, PRODUCT
DEVELOPMENT INTERACTIVE
& TECHNOLOGY
Daniel Felts
SPECIAL THANKS
Christina Burbank
VIACOM CONSUMER
PRODUCTS/PARAMOUNT
PICTURES
Andrea Hein, Terri Helton,
Pam Newton, Rick Berman,
Dave Rossi, Mike Okuda,
Sandi Isaacs
GAMESPY
Joost Schuur
Travis Hogue
RAD GAME TOOLS, INC.
Mitch Soule
Jeff Roberts
CUSTOMER SUPPORT
You should read through the manual and the readme file on the CD before
contacting Activision Customer Support. Additionally, if you have internet
access, search our troubleshooting database at:
http://www.activision.com/support.
Please ensure that your computer system meets the minimum system
requirements that are listed on the bottom of the box. Our Customer Support
representatives will not be able to help customers whose computers do not
meet the requirements. So that we can better help you, please have the
following information ready:
• Complete product title (include version number)
• Exact error message reported (if any) and a brief description of
the problem
• Your computer’s processor type and speed (e.g. Pentium 200 MHz)
• Amount of RAM
• Make and model of your video and sound cards (e.g. Diamond Viper V770,
Creative Sound Blaster Live Platinum)
• Make and model of your CD-ROM or DVD-ROM drive (e.g. Samsung SC-140)
• Operating system
NOTE: Please do not contact Customer Support for hints/codes/cheats;
only technical issues.
Internet/E-mail: http://www.activision.com/support
Our support section of the web has the most up-to-date information
available, including patches that can be downloaded free-of-charge. We
update the support pages daily so please check here first for solutions. By
going to the Find Answers section and selecting the platform/game you are
inquiring about you can view the top solutions for the game to date. If you
don’t find your question/solution there try using inputting a keyword into
the search.
If you cannot find an answer to your issue you can email us using the
support form. A response may take anywhere from 24-72 hours depending on
the volume of messages we receive and the nature of your problem. During
the first few weeks of a game release and during holiday seasons the
response time may take a little longer.
NOTE: Internet/e-mail support is handled in English only.
NOTE: The multiplayer components of Activision games are handled only
through internet/e-mail.
Page 40

SOFTWARE LICENSE
AGREEMENT
79
CUSTOMER SUPPORT
78
Phone: (310) 255-2050
You can call our 24-hour voice-mail system for answers to our most
frequently asked questions at the above number. Contact a Customer Support
Representative at the same number between the hours of 9:00 am and 5:00
pm (Pacific Time), Monday through Friday, except holidays. When calling
please make sure you are in front of your computer with the power on and
have all the necessary information as listed above at hand.
Please do not send any game returns directly to Activision without first
contacting Customer Support. It is our policy that game returns/refunds
must be dealt with by the retailer or online site where you purchased the
product. Please see the Limited Warranty contained within our Software
License Agreement for warranty replacements.
SOFTWARE LICENSE AGREEMENT
IMPORTANT - READ CAREFULLY: YOUR USE OF THIS SOFTWARE (THE “PROGRAM”) IS SUBJECT TO THE SOFTWARE LICENSE TERMS SET FORTH
BELOW. THE “PROGRAM” INCLUDES ALL SOFTWARE INCLUDED WITH THIS AGREEMENT, THE ASSOCIATED MEDIA, ANY PRINTED MATERIALS,
AND ANY ON-LINE OR ELECTRONIC DOCUMENTATION, AND ANY AND ALL COPIES OF SUCH SOFTWARE AND MATERIALS. BY OPENING THIS
PACKAGE, INSTALLING, AND/OR USING THE PROGRAM AND ANY SOFTWARE PROGRAMS INCLUDED WITHIN THE PROGRAM, YOU ACCEPT THE
TERMS OF THIS LICENSE WITH ACTIVISION, INC. (“ACTIVISION”).
LIMITED USE LICENSE: Subject to the conditions described below, Activision grants you the non-exclusive, non-transferable, limited right and license
to install and use one copy of the Program solely and exclusively for your personal use. All rights not specifically granted under this Agreement are
reserved by Activision and, as applicable, Activision’s licensors. The Program is licensed, not sold, for your use. Your license confers no title or
ownership in the Program and should not be construed as a sale of any rights in the Program. All rights not specifically granted under this Agreement
are reserved by Activision and, as applicable, its licensors.
LICENSE CONDITIONS
You agree not to:
• Exploit the Program or any of its parts commercially, including but not limited to use at a cyber cafe, computer gaming center or any other
location-based site. Activision may offer a separate Site License Agreement to permit you to make the Program available for commercial use; see
the contact information below.
• Sell, rent, lease, license, distribute or otherwise transfer this Program, or any copies of this Program, without the express prior written consent of
Activision.
• Use the Program, or permit use of the Program, in a network, multi-user arrangement or remote access arrangement, including any on-line use,
except as otherwise specifically provided by the Program.
• Use the Program, or permit use of the Program, on more than one computer, computer terminal, or workstation at the same time.
• Make copies of the Program or any part thereof, except for back up or archival purposes, or make copies of the materials accompanying the
Program.
• Copy the Program onto a hard drive or other storage device; you must run the Program from the included CD-ROM (although the Program itself
may automatically copy a portion of the Program onto your hard drive during installation in order to run more efficiently).
• Reverse engineer, derive source code, modify, decompile, or disassemble the Program, in whole or in part.
• Remove, disable or circumvent any proprietary notices or labels contained on or within the Program.
• Export or re-export the Program or any copy or adaptation thereof in violation of any applicable laws or regulations.
OWNERSHIP: All title, ownership rights and intellectual property rights in and to the Program and any and all copies thereof are owned by Activision
or its licensors. The Program is protected by the copyright laws of the United States, international copyright treaties and conventions and other laws.
The Program contains certain licensed materials and Activision’s licensors may protect their rights in the event of any violation of this Agreement. You
agree not to remove, disable or circumvent any proprietary notices or labels contained on or within the Program.
THE PROGRAM UTILITIES: The Program contains certain design, programming and processing utilities, tools, assets and other resources (“the
Program Utilities”) for use with the Program that allow you to create customized new game levels and other related game materials for personal use in
connection with the Program (“New Game Materials”). The use of the Program Utilities is subject to the following additional license restrictions:
• You agree that, as a condition to your using the Program Utilities, you will not use or allow third parties to use the Program Utilities and the New
Game Materials created by you for any commercial purposes, including but not limited to selling, renting, leasing, licensing, distributing, or
otherwise transferring the ownership of such New Game Materials, whether on a stand alone basis or packaged in combination with the New
Game Materials created by others, through any and all distribution channels, including, without limitation, retail sales and on-line electronic
distribution. You agree not to solicit, initiate or encourage any proposal or offer from any person or entity to create any New Game Materials for
commercial distribution. You agree to promptly inform Activision in writing of any instances of your receipt of any such proposal or offer.
• If you decide to make available the use of the New Game Materials created by you to other gamers, you agree to do so solely without charge.
• New Game Materials shall not contain modifications to any COM, EXE or DLL files or to any other executable Product files.
• New Game Materials may be created only if such New Game Materials can be used exclusively in combination with the retail version of the
Program. New Game Materials may not be designed to be used as a stand-alone product.
• New Game Materials must not contain any illegal, obscene or defamatory materials, materials that infringe rights of privacy and publicity of third
parties or (without appropriate irrevocable licenses granted specifically for that purpose) any trademarks, copyright-protected works or other
properties of third parties.
• All New Game Materials must contain prominent identification at least in any on-line description and with reasonable duration on the opening
screen: (a) the name and E-mail address of the New Game Materials’ creator(s) and (b) the words “THIS MATERIAL IS NOT MADE OR
SUPPORTED BY ACTIVISION.”
LIMITED WARRANTY: Activision warrants to the original consumer purchaser of the Program that the recording medium on which the Program is
recorded will be free from defects in material and workmanship for 90 days from the date of purchase. If the recording medium is found defective
within 90 days of original purchase, Activision agrees to replace, free of charge, any product discovered to be defective within such period upon its
receipt of the Product, postage paid, with proof of the date of purchase, as long as the Program is still being manufactured by Activision. In the event
that the Program is no longer available, Activision retains the right to substitute a similar program of equal or greater value. This warranty is limited to
the recording medium containing the Program as originally provided by Activision and is not applicable to normal wear and tear. This warranty shall
not be applicable and shall be void if the defect has arisen through abuse, mistreatment, or neglect. Any implied warranties prescribed by statute are
expressly limited to the 90-day period described above.
EXCEPT AS SET FORTH ABOVE, THIS WARRANTY IS IN LIEU OF ALL OTHER WARRANTIES, WHETHER ORAL OR WRITTEN, EXPRESS OR IMPLIED,
INCLUDING ANY WARRANTY OF MERCHANTABILITY, FITNESS FOR A PARTICULAR PURPOSE OR NON-INFRINGEMENT, AND NO OTHER
REPRESENTATIONS OR CLAIMS OF ANY KIND SHALL BE BINDING ON OR OBLIGATE ACTIVISION.
When returning the Program for warranty replacement please send the original product disks only in protective packaging and include: (1) a
photocopy of your dated sales receipt; (2) your name and return address typed or clearly printed; (3) a brief note describing the defect, the problem(s)
you are encountered and the system on which you are running the Program; (4) if you are returning the Program after the 90-day warranty period, but
within one year after the date of purchase, please include check or money order for $10 U.S. (A$19 for Australia, or £10.00 for Europe) currency per
disc replacement. Note: Certified mail recommended.
In the U.S. send to:
Warranty Replacements
Activision, Inc.
P.O. Box 67713
Los Angeles, California 90067
In Europe send to:
WARRANTY REPLACEMENTS
ACTIVISION (UK) Ltd., Parliament House,
St Laurence Way, Slough, Berkshire,
SL1 2BW, United Kingdom.
Disc Replacement: +44 (0) 8705 143 525
In Australia send to:
Warranty Replacements
Activision
Level 5
51 Rawson Street
Epping, NSW 2121
Australia
Page 41

SOFTWARE LICENSE
AGREEMENT
80
LIMITATION ON DAMAGES: IN NO EVENT WILL ACTIVISION BE LIABLE FOR SPECIAL, INCIDENTAL OR CONSEQUENTIAL DAMAGES RESULTING
FROM POSSESSION, USE OR MALFUNCTION OF THE PROGRAM, INCLUDING DAMAGES TO PROPERTY, LOSS OF GOODWILL, COMPUTER FAILURE
OR MALFUNCTION AND, TO THE EXTENT PERMITTED BY LAW, DAMAGES FOR PERSONAL INJURIES, EVEN IF ACTIVISION HAS BEEN ADVISED OF
THE POSSIBILITY OF SUCH DAMAGES. ACTIVISION’S LIABILITY SHALL NOT EXCEED THE ACTUAL PRICE PAID FOR THE LICENSE TO USE THIS
PROGRAM. SOME STATES/COUNTRIES DO NOT ALLOW LIMITATIONS ON HOW LONG AN IMPLIED WARRANTY LASTS AND/OR THE EXCLUSION OR
LIMITATION OF INCIDENTAL OR CONSEQUENTIAL DAMAGES, SO THE ABOVE LIMITATIONS AND/OR EXCLUSION OR LIMITATION OF LIABILITY MAY
NOT APPLY TO YOU. THIS WARRANTY GIVES YOU SPECIFIC LEGAL RIGHTS, AND YOU MAY HAVE OTHER RIGHTS WHICH VARY FROM
JURISDICTION TO JURISDICTION.
TERMINATION: Without prejudice to any other rights of Activision, this Agreement will terminate automatically if you fail to comply with its terms and
conditions. In such event, you must destroy all copies of the Program and all of its component parts.
U.S. GOVERNMENT RESTRICTED RIGHTS: the Program and documentation have been developed entirely at private expense and are provided as
“Commercial Computer Software” or “restricted computer software.” Use, duplication or disclosure by the U.S. Government or a U.S. Government
subcontractor is subject to the restrictions set forth in subparagraph (c)(1)(ii) of the Rights in Technical Data and Computer Software clauses in
DFARS 252.227-7013 or as set forth in subparagraph (c)(1) and (2) of the Commercial Computer Software Restricted Rights clauses at FAR 52.22719, as applicable. The Contractor/Manufacturer is Activision, Inc., 3100 Ocean Park Boulevard, Santa Monica, California 90405.
INJUNCTION: Because Activision would be irreparably damaged if the terms of this Agreement were not specifically enforced, you agree that Activision
shall be entitled, without bond, other security or proof of damages, to appropriate equitable remedies with respect to breaches of this Agreement, in
addition to such other remedies as Activision may otherwise have under applicable laws.
INDEMNITY: You agree to indemnify, defend and hold Activision, its partners, licensors, affiliates, contractors, officers, directors, employees and
agents harmless from all damages, losses and expenses arising directly or indirectly from your acts and omissions to act in using the Product
pursuant to the terms of this Agreement
MISCELLANEOUS: This Agreement represents the complete agreement concerning this license between the parties and supersedes all prior
agreements and representations between them. It may be amended only by a writing executed by both parties. If any provision of this Agreement is
held to be unenforceable for any reason, such provision shall be reformed only to the extent necessary to make it enforceable and the remaining
provisions of this Agreement shall not be affected. This Agreement shall be construed under California law as such law is applied to agreements
between California residents entered into and to be performed within California, except as governed by federal law and you consent to the exclusive
jurisdiction of the state and federal courts in Los Angeles, California.
If you have any questions concerning this license, you may contact Activision at 3100 Ocean Park Boulevard, Santa Monica, California 90405, USA,
(310) 255-2000, Attn. Business and Legal Affairs, legal@activision.com.
 Loading...