

Page 1

CONTENTS
INSTALL
Combat Ships . . . . . . . . . . . . . . . . . . . . . . . . . . . . . . . . . . . . . . .55
The Romulan Stations . . . . . . . . . . . . . . . . . . . . . . . . . . . . . . . . . .59
The Cardassian Union . . . . . . . . . . . . . . . . . . . . . . . . . . . . . . . . . . . . . .63
The Cardassian Fleet . . . . . . . . . . . . . . . . . . . . . . . . . . . . . . . . . . . . . . .63
Non-Combat Ships . . . . . . . . . . . . . . . . . . . . . . . . . . . . . . . . . . . .63
Combat Ships . . . . . . . . . . . . . . . . . . . . . . . . . . . . . . . . . . . . . . .64
The Cardassian Stations . . . . . . . . . . . . . . . . . . . . . . . . . . . . . . . .68
Species 8472 . . . . . . . . . . . . . . . . . . . . . . . . . . . . . . . . . . . . . . . . . . .72
Species 8472 Organisms . . . . . . . . . . . . . . . . . . . . . . . . . . . . . . . .72
Active Units . . . . . . . . . . . . . . . . . . . . . . . . . . . . . . . . . . . . . . . . .73
Passive Units . . . . . . . . . . . . . . . . . . . . . . . . . . . . . . . . . . . . . . . .77
Ferengi Alliance . . . . . . . . . . . . . . . . . . . . . . . . . . . . . . . . . . . . . . . . .79
Transporting Crew . . . . . . . . . . . . . . . . . . . . . . . . . . . . . . . . . . . . . . . .79
Map Objects . . . . . . . . . . . . . . . . . . . . . . . . . . . . . . . . . . . . . . . . . . . .80
Trading . . . . . . . . . . . . . . . . . . . . . . . . . . . . . . . . . . . . . . . . . . . . . . .84
Multiplayer and Instant Action . . . . . . . . . . . . . . . . . . . . . . . . . . . . . . .85
Star Trek: Armada II in GameSpy
™
Arcade . . . . . . . . . . . . . . . . . . . . . . . . .90
Option Screens . . . . . . . . . . . . . . . . . . . . . . . . . . . . . . . . . . . . . . . . . .91
Admiral’s Log . . . . . . . . . . . . . . . . . . . . . . . . . . . . . . . . . . . . . . . . . . .93
Credits . . . . . . . . . . . . . . . . . . . . . . . . . . . . . . . . . . . . . . . . . . . . . . . .95
Customer Support . . . . . . . . . . . . . . . . . . . . . . . . . . . . . . . . . . . . . . . .99
Software License Agreement . . . . . . . . . . . . . . . . . . . . . . . . . . . . . . . .101
INSTALLING
STAR TREK: ARMADA II
HOW TO INSTALL
Before installing, close all other applications. Also make sure Virtual Memory is on
(located in your System Control Panel). Verify that you have 1.3 GB of free hard
drive space.
Insert the Star Trek: Armada II CD into your CD-ROM drive. If AutoPlay is enabled,
wait a few moments until the Star Trek: Armada II title screen appears. On the title
screen click the Install button to begin the installation process, and then follow the
on-screen instructions.
If AutoPlay is not enabled, double-click on the My Computer icon on your desktop.
Double-click on the CD-ROM drive icon. Double-click on the Star Trek: Armada II
setup.exe icon. When the launch screen appears, click Install.
After Star Trek: Armada II setup is complete, your computer will install the Microsoft
DirectX 8.0a drivers if you do not already have them. When DirectX 8.0a installation
is complete, you will need to restart your computer for the new drivers to take
effect.
Now you can run Star Trek: Armada II by choosing Programs/Star Trek: Armada
II/Star Trek: Armada II from the Start menu or by clicking Play on the CD title screen
or double-click the Armada II shortcut on your desktop.
Please register your copy of Star Trek: Armada II. To make it easy and fast, you can
use our electronic registration system. There are two ways to access the system: (1)
from the Star Trek: Armada II title screen click on Help/Support, and then click
Register or (2) From the Start menu go to Star Trek: Armada II/Register.
TITLE SCREEN BUTTON FUNCTIONS
Install—Installs the game. Once the game has been installed, this button will
change to Play.
Reinstall—This function allows you to reinstall the program in the event of
corrupted or damaged files.
Play—If the game has already been installed to your system, click this button to
play Star Trek: Armada II.
Uninstall—Click this button to remove Star Trek: Armada II from the system.
Some files will be left behind. The Uninstaller will supply a list of leftover files,
(i.e., saved games).
2
3
Page 2

TROUBLESHOOTING
TROUBLESHOOTING
Help/Support—This button will take you to the help files, readme, game manual
(.pdf), technical support, online help, electronic registration, along with supplying
the options to install DirectX and Adobe®Acrobat Reader®.
Extras—This will allow you to install Earthlink and Gamespy and supply information on other Activision Star Trek titles.
Links—The Links button will take you to other Star Trek and Activision, Inc. related
web sites.
Exit—Click this button to close the title screen and exit Star Trek: Armada II.
TROUBLESHOOTING
We have supplied Help documents that can help you in troubleshooting problems.
There are two ways to access this help file:
1. From the title screen, click on Help/Support then Help Documents.
2. Af ter installation, from the Start menu, select Programs/Star Trek: Armada
II/Armada II Help/Armada II Help Documents.
AUTOPLAY
If the Star Trek: Armada II title screen does not appear, try performing the
following steps:
1. Double-click on the My Computer icon on your desktop or right-click on the
icon and choose the Open option.
2. Select the Refresh option located in the View pull-down menu.
3. Double-click on the Star Trek: Armada II CD icon in the window or right-click
on the icon and choose the AutoPlay option.
4. Af ter the Star Trek: Armada II title screen appears, click on the Play/Install
button. If the AutoPlay feature does not function, please check the following:
A. Make sure the CD is clean and properly placed in the CD-ROM drive.
B. Your CD-ROM driver may not be optimized for use with Windows
95/98/ME/2000. To verify this, perform the following steps:
a. Open the Windows 95/98/ME/2000 Control Panel folder and
double-click on the System icon.
b. Click on the Performance tab. If any of your hardware drivers are
not fully optimized for use with Windows 95/98/ME/2000, they will
be listed here with an explanation of the exact problem and
suggestions on how to fix it.
DIRECTX 8.0A
Upon completion of the Star Trek: Armada II setup, the installation process will
continue by determining if Microsoft’s DirectX 8.0a needs to be installed on
your computer. If so, the appropriate files will be installed on your computer
automatically.
Q. What is DirectX 8.0a and why do I need it?
A. Microsoft’s DirectX 8.0a is a set of functions that gives Windows
95/98/ME/2000 games and other applications their power. Using these
functions allows applications to perform advanced functions in
networking, graphics, sound, and input beyond what’s possible on other
operating systems and accounts for many of the performance gains
associated with Windows 95/98/ME/2000 games. Star Trek: Armada II
uses Direct3D, DirectDraw, DirectSound and DirectInput, four of the
DirectX 8.0a functions.
Q. If I don’t have DirectX 8.0a will Star Trek: Armada II install it for me?
A. Yes. If InstallShield does not detect DirectX 8.0a on your computer, it will
install DirectX 8.0a for you, if you choose. After the entire installation is
complete, you will need to restart your computer in order for DirectX 8.0a
to take effect.
Q. I already have other Windows 95/98/ME/2000 games installed on my
computer. Will the Microsoft DirectX Installer change my DirectX files?
A. If you already have other Windows games on your computer, chances are
you already have an earlier version of DirectX installed. In this case, the
Microsoft installer will detect and overwrite any previous versions with
DirectX 8.0a. At that point, you will need to restart your computer for the
changes to take effect.
If, however, you already have DirectX 8.0a installed on your computer, the
Microsoft DirectX 8.0a installer will detect that and not overwrite any
DirectX 8.0a files. You will not need to restart your computer after installation in order to run Star Trek: Armada II.
4
5
Page 3

CHAPTER
PRELUDE
PROBLEMS & SOLUTIONS
Intro Movie and Cinematics do not play properly
• Make sure your system meets the minimum requirements for the program,
especially your CD-ROM drive. The program requires a CD-ROM drive with a
minimum sustained transfer rate of 600K/sec (a quad-speed drive).
• You may not have enough RAM to run movies. Check to make sure you have
sufficient RAM to run this product. You need at least 64 MB.
• Too many other applications may be running. Close down other applications
(especially DOS boxes or modem programs) and try again. We strongly recommend that you not run other applications while running Star Trek: Armada II.
Game freezes
• Make sure your computer has at least 64 MB of RAM.
• Make sure you are using the latest 32-bit drivers for all your peripheral devices.
No sound, partial sound, or no voices or sound effects
• Make sure you have a 100% DirectX 8 Windows-compatible sound card in your
computer.
• Make sure your speakers are plugged in correctly and turned on, and make sure
the volume is turned up to an audible level.
• Make sure you are using the latest 32-bit sound drivers for your sound card.
• Make sure your audio card is properly installed and that you have the correct
audio drivers installed. Check your audio card’s installation and its setup
parameters within Windows 95/98/ME/2000 to be sure all are correct. See your
card’s manual and your Windows 95/98/ME/2000 manual for details.
• Check your settings in your Control Configuration.
Game too slow
• Make sure you are running Star Trek: Armada II on a Pentium II 300 or higher
system with 64 MB of RAM. A lower system usually will not run Armada II
satisfactorily.
• Try turning off some game options in the Graphic Settings screen or lowering
the Graphic Detail setting.
• Make sure you have no other applications running in the background.
• Make sure your screen resolution is set as low as it can be in the Graphic
Options screen.
• The game may run faster if more RAM is available. Increasing the RAM in your
system to 128 MB of RAM will make the game run faster.
6
PRELUDE
STARDATE 54500.3
It has been six months since the Federation and its allies drove back the Borg
incursion into the Alpha Quadrant, wrestling the Omega Particle from the Borg
Collective’s grasp, and driving the Borg from Federation space. Though the
Quadrant is still recovering from the devastation brought about by the invasion,
an emergency meeting of the Federation Council has directed Starfleet to find
out how and where the Borg have been entering the Alpha Quadrant.
Once found, the Federation forces have orders to launch the first ever offensive
into the Delta Quadrant in their war with the Borg—a strategic operation to
eliminate the Borg threat once and for all.
Such an operation carries risks—only some of which can be anticipated.
With the Federation’s strength and attention focused on the Delta Quadrant,
there are those in the Alpha Quadrant who might feel the time is right to
reassert their power. While the forces of the Klingon Empire are begrudgingly
left to play the role of Alpha Quadrant peacekeepers, they learn that it will take
all of their strength—and their forces—to preserve the Quadrant.
In the Delta Quadrant, the Borg find themselves set upon by not just the
intruders from the Alpha Quadrant, but by a merciless assault from the fluidic
space dwellers, Species 8472.
7
Page 4

MAIN MENU
MAIN MENU
MAIN MENU
The Main menu is the gateway into
®
: Armada II single and
Star Trek
multiplayer play. The following selections
are available: Single Player, Instant
Action, Multiplayer, Options, Replay Intro,
and Credits. You can also press Exit to
leave the game.
SINGLE PLAYER
To play single player, click on Single
Player in the Main menu—this takes
you to the Single Player Menu. Here,
you'll find the Tutorial and Federation
campaigns.
To begin, click on the image in the
upper left of the screen. This will start
the Tutorial. A submenu will appear listing the training missions. Once a mission is completed, the next mission will
become accessible.
You are not required to play through the Tutorial, but it is recommended. The
storyline and success in the missions requires that they be played in order. You
begin with the Federation Campaign and progress through the Klingon
Campaign to the Borg Campaign.
Note: All missions that you've played are then available to play again at any
time, in any order.
MISSION OBJECTIVES SCREEN
Once the in-game cinematic is complete, an objective screen will appear in the
center of the screen that restates the mission objectives. Click on the OK box
and it will disappear, beginning the mission. To access the objectives during the
mission, press the Objectives button on the upper right toolbar.
SAVE/LOAD
To save a game during game play, click on the Menu button on the upper right
tool bar and select the Options menu. From there, clicking on Save will bring up
the Save Game screen. Type in a description of the saved game or accept the
default description (the mission title and the time).
To load a saved game from the Main menu, click on the Load option on the
Single Player menu. Click on the game you wish to load and then click the Load
button. To load a game from within a mission, hit Esc or click on the Menu
button on the interface to go to the Options menu. From the Options menu,
click on Load Game to go to the Load Game screen. Click on the game you wish
to load and then click the Load Game button.
MOUSE SELECTION
Your mouse can perform almost every action in Star Trek: Armada II.
Left-click is for selecting an object, and right-click to give default orders.
Advanced users can use the alternative right-click and hold interface.
Right-click and hold will bring up the context-sensitive command palette. You
can toggle that option on the Command Palette button found on the upper
right tool bar Option menu.
IN-GAME CINEMATICS
Each mission begins with an in-game cinematic. These communicate the mission’s objectives in cinematic form. If you’ve already seen the in-game cinematic and wish to go directly to the mission, tapping the Spacebar will skip the ingame cinematic.
8 9
Page 5
INTERFACE
INTERFACE
INTERFACE
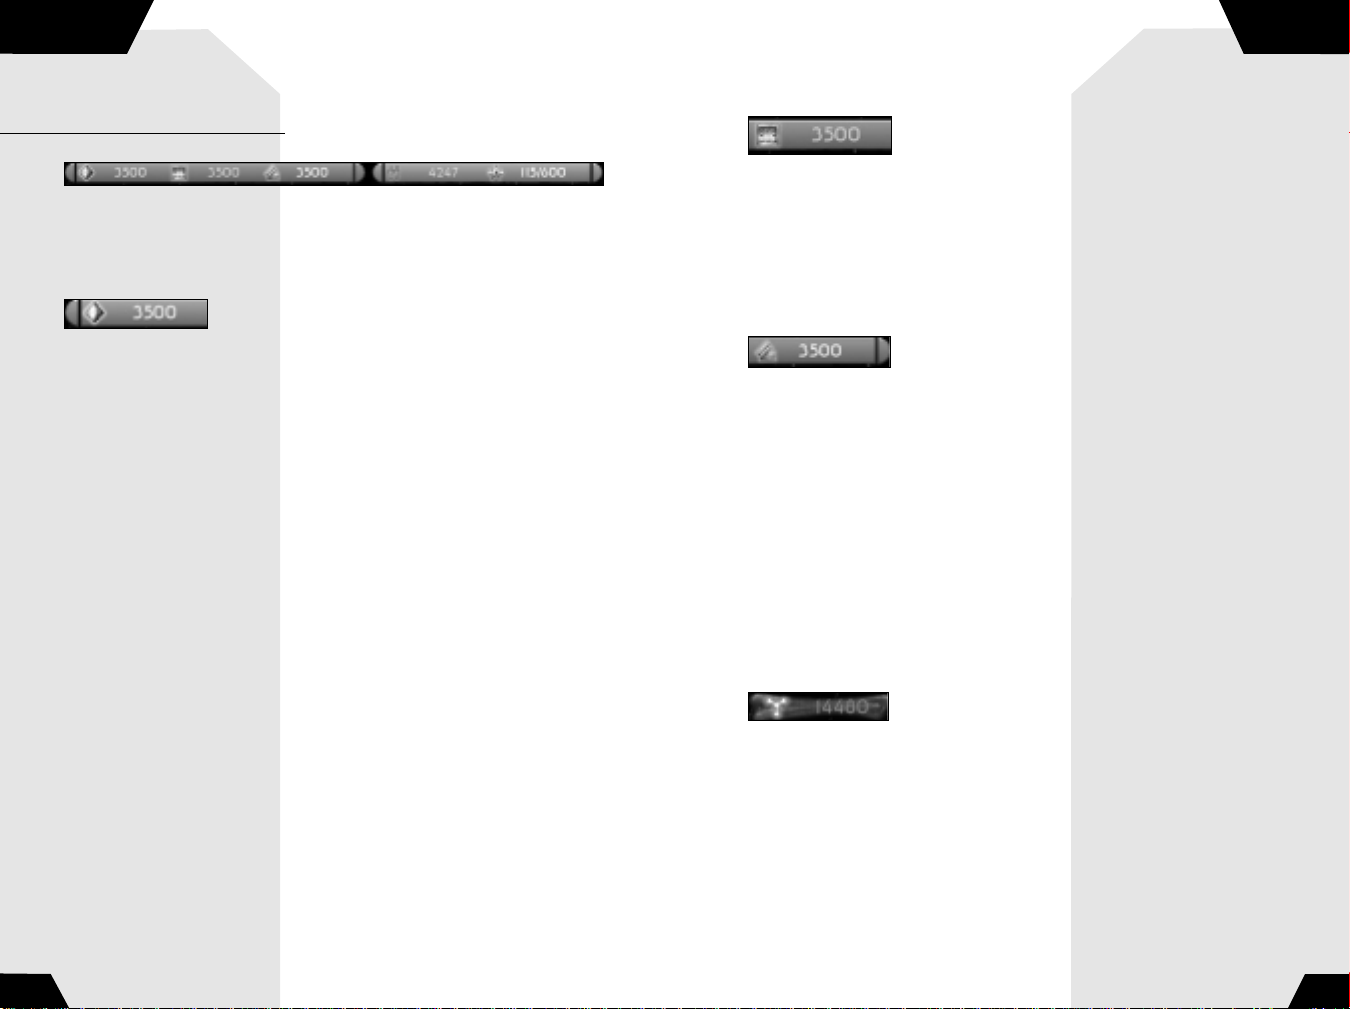
RESOURCES
Along the top left of the interface, you’ll find the resources. From left to right,
the resources are: Dilithium, Metal, Latinum, Crew, and Officers.
Dilithium
Dilithium is a crystalline substance used in warp
propulsion systems aboard starships, and is mined from moons. Dilithium
regulates the matter/anti-matter reactions that provide the energy necessary
to warp space and travel faster than the speed of light.
The size and maximum speed of a ship typically reflects the amount of dilithium
required for its development—larger starships require increased quantities of
this resource. While stationary structures (such as a Shipyard) typically have
lower energy requirements, their construction still demands a quantity of
dilithium.
When an order to build a unit is given, the dilithium required for that object is
taken from your dilithium account. Cancelling construction of a unit replaces
the dilithium for that unit back into your account. Decommissioning a ship or
station replaces dilithium back into your account.
To collect dilithium, a mining station needs to be built—preferably near a
dilithium moon. Once built, a freighter will mine dilithium from the nearest
dilithium moon. More freighters can be built to increase the rate at which a
team acquires dilithium. Only one freighter can mine a moon at one time,
although one can be mining a moon while another is returning its load to a
mining station.
Certain moons contain an infinite supply of dilithium. These moons have a
noticeably purple tint to them, and their quantity will not alter as they are
mined for resources.
Note: Species 8472 have no use for dilithium, and this resource will not
appear on the screen when playing as Species 8472, but it can be
converted to bio-matter which Species 8472 uses for embryo evolution.
Metal
This resource represents the variety of metals and
materials needed for the construction of starships and
military installations. Metal is extracted from planets.
Metals are used primarily in the construction of stations. The size of the unit
typically reflects the amount of metals needed—larger structures require more
metal. Decommissioning a ship or station replaces metal back into your account.
To collect metal, you must build an Orbital Processing Facility near a planet.
Once finished, the facility will begin mining metal from the planet.
Latinum
These valuable metal ingots are used as a medium of
exchange, primarily outside of the Federation. Liquid at room temperature,
latinum is typically suspended in ingots of gold, which come in standard sizes
for ease of trade.
Latinum is used primarily for trade and during the development and research of
new technologies.
Latinum is extracted from Latinum nebulae by mining ships. Harvesting latinum
from nebulas is possible by sending a mining ship into a latinum-rich nebula and
instructing it to harvest. Once it has completely filled its storage bays, it will
head toward a starbase to drop off its load before returning to the nebula. Full
latinum freighters are very vulnerable when carrying these volatile metals and
can be spotted by the gaseous trail they leave behind.
Note: The Borg have no use for latinum, and this resource will not appear on
the screen when playing as this race.
Bio-matter
A unique breakdown of matter employed solely by
Species 8472 yields Bio-matter, the only resource that they need as a race.
Using their Collector and Transmuter (see Species 8472 Organisms on page 70),
Species 8472 are able to derive Bio-matter by converting standard resources
(such as dilithium or metal) or taking it directly from other races's ships and
stations.
10 11
Page 6
CREW
OPTION BUTTONS
CREW
Each ship and most stations require a set number of
crew members from your crew pool in order to be built.
Crew filters into your crew pool at a steady rate by
possessing a starbase. The rate that crew accumulates is based on the number
of starbases built. If you have no starbase, you’ll receive no additional crew.
You also gain crew by colonizing planets.
Once an order to build a unit is given, the crew required for that project are
taken from your crew pool. Canceling construction of a unit replaces the crew
for that unit back into the crew pool. Decommissioning a ship or station
transfers the remaining crew from that unit back into the crew pool.
Species 8472 do not utilize crew and therefore cannot colonize planets.
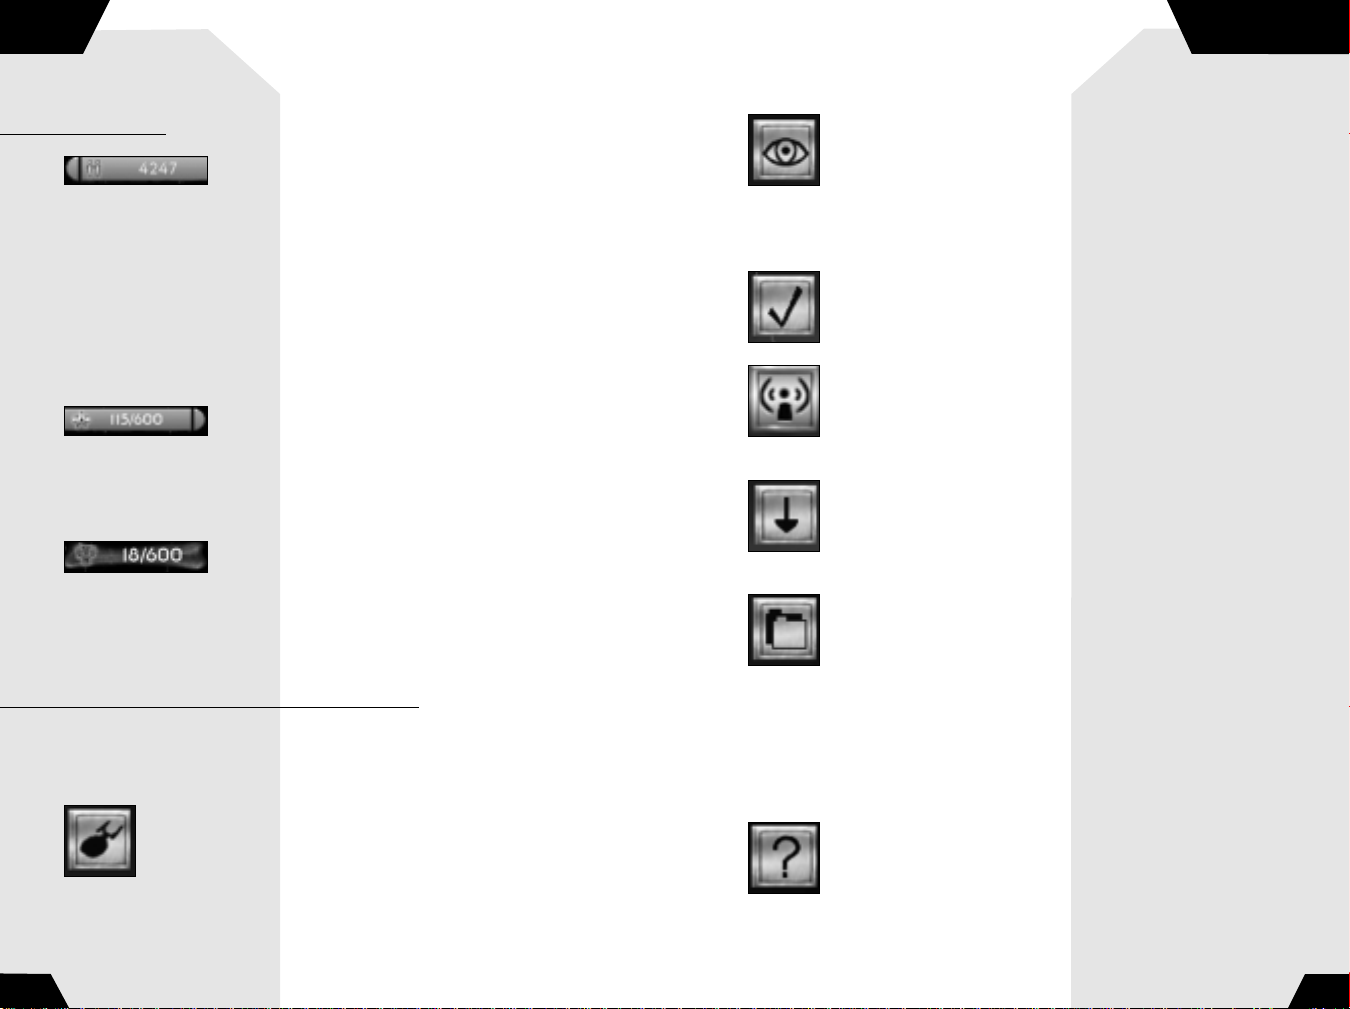
OFFICERS
The number of of ficers that you have restricts the total
number of ships and stations that you can possess at one time. Each ship or
station requires a set number of of ficers.
Note: You are limited to 600 officers total.
Pilots
(Species 8472 only)
Like officers for other races, the maximum pilot count restricts the total
number of organisms that can be built. Each organism requires a set number
of pilots. Species 8472 ships require only a single pilot.
OPTION BUTTONS
Along the top right of the interface in Single Player mode, you’ll find the
Option buttons. From left to right, they are: Idle Ship, Toggle View, Show
Objectives, and Toggle For More Buttons.
Idle Ship
Sets the focus to the next ship that has no current orders.
Toggle View
Switches the view between the Strategic and Tactical Views.
The Strategic View is the traditional top-down view of the map,
with a visible grid. You can zoom in and out using the mouse
wheel. The Tactical View is full 3D. Moving the mouse will rotate your view; you
can also zoom in and out with the mouse wheel.
Show Objectives
Shows the current mission objectives.
Comm Menu
Opens the Multiplayer Options menu to change alliances, modify
chat settings, and give resources or units to other players.
Advanced Buttons
Brings up the following additional option buttons: Toggle Palette,
Toggle Help, and Main Menu.
Toggle Palette
Controls the location of the Command Palette. The first
(and default) setting will fix the command palette for selected
objects in a row to the right of the mini map. The second setting
will bring up the command palette next to a selected ship if you right-click and
hold for a moment on a selected ship or station. You can also press the X key
to trigger this action. With a ship selected, right-clicking on another object
will either bring up the icon for the default action (mining for a freighter on
a moon, trading for a cargo ship on a trading station, etc.), or a menu of
commands available for that context.
Toggle Help
Will allow you to toggle the tooltip help messages. The default
setting will bring up a tooltip box if you move the cursor over any
interface element. If the cursor remains over the same element for
a moment longer, an extended tooltip will appear, giving more information on
12 13
Page 7
CINEMATIC WINDOW
WARP SPEED
the topic. Clicking once on Toggle Help will bring up a fixed box with the
extended tooltip that will remain over the Mini Map, active when you mouse
over any element. The third setting of Toggle Help will stop all tooltips from
appearing.
Main Menu
The Main menu will bring up the following choices: Save Game,
Load Game, Graphics Settings, Sound Settings, Game Settings,
Abort Mission, Return To Game, View Admiral’s Log, Tech Tree, Exit
to Windows, and Restart Mission. (For detailed descriptions, see the Save/Load,
Options, and Admiral's Log sections.)
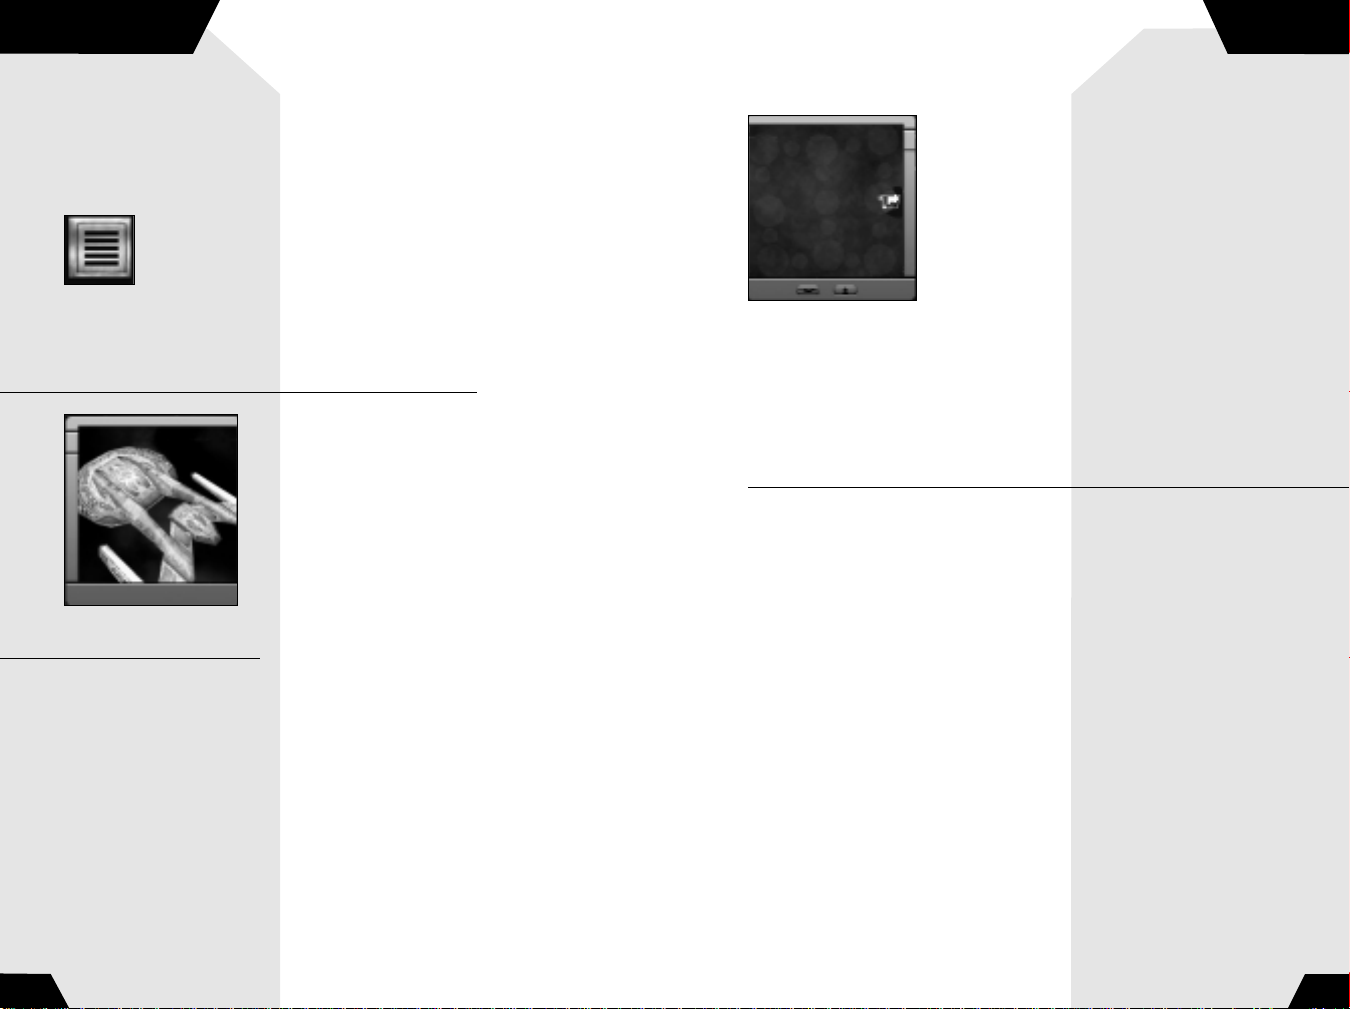
CINEMATIC WINDOW
In the lower right corner of the screen, you’ll find
the Cinematic Window. The view will show events
occurring in other parts of the map, prioritized by
significance. Clicking on the window will bring you
directly to that event. Double-clicking on this
window will also change your view from strategic
to tactical and vice versa.
MINI MAP
In the lower left corner of the screen, you’ll find the mini map. The entire game
board is displayed, showing where you’ve been and what you can currently see.
Any space objects that are permanent game fixtures will also be displayed, once
they are seen. Enemy stations are also displayed, though only in their last
known position if they’re currently out of your line-of-sight. All ships and
stations are represented by their team color.
SHROUD AND FOG OF WAR
Unexplored regions of the map appear as a colored
shroud on the mini map and in both the Tactical and
Strategic views in the main display window. Explored
regions that are no longer in the line-of-sight of any
of your ships or stations become covered with a fog
of war. The terrain and stations within this fogged
area appear as they last appeared to a friendly
ship/station. The view updates when a ship/station
comes back within your line-of-sight.
FILTERS
The mini map can be filtered to the following states for both ships and
stations: Show All, Friendly Only, Enemy Only, Show None, and Neutral Only
via the buttons on the bottom of the mini map.
WARP SPEED
To travel long distances quickly, you may use warp speed. To warp, select a ship
or group of ships that are capable of warp (Mining, Construction, and Cargo
ships are among the ships that aren’t capable of warp) and right-click on the
mini map to the point you’d like them to go. Alt-right-click in the main window
will also have the selected ship or ships warp to the location of the cursor.
Ships will automatically come out of warp speed in the proximity of planets,
moons, asteroids, black holes, and nebulae. They will return automatically to
warp speed once they’ve passed by the gravitational well of an object.
The translucent purple radius around an object on the mini map represents the
gravitational well.
A ship in warp will not be able to fire on targets, and will be more vulnerable to
attack, as its shields must be down to warp. Sensor strength is also reduced, so
the amount of the map revealed below the shroud when warping is significantly
less than when traveling at impulse speed.
A move order made on the main screen will automatically be set at impulse
speed. A move order made by clicking on the mini map will automatically be set
at warp speed.
Pressing Alt + right-click will set you to warp on the main screen and use
impulse speed on the mini map.
14 15
Page 8
SHIP DISPLAY
COMMAND MENU
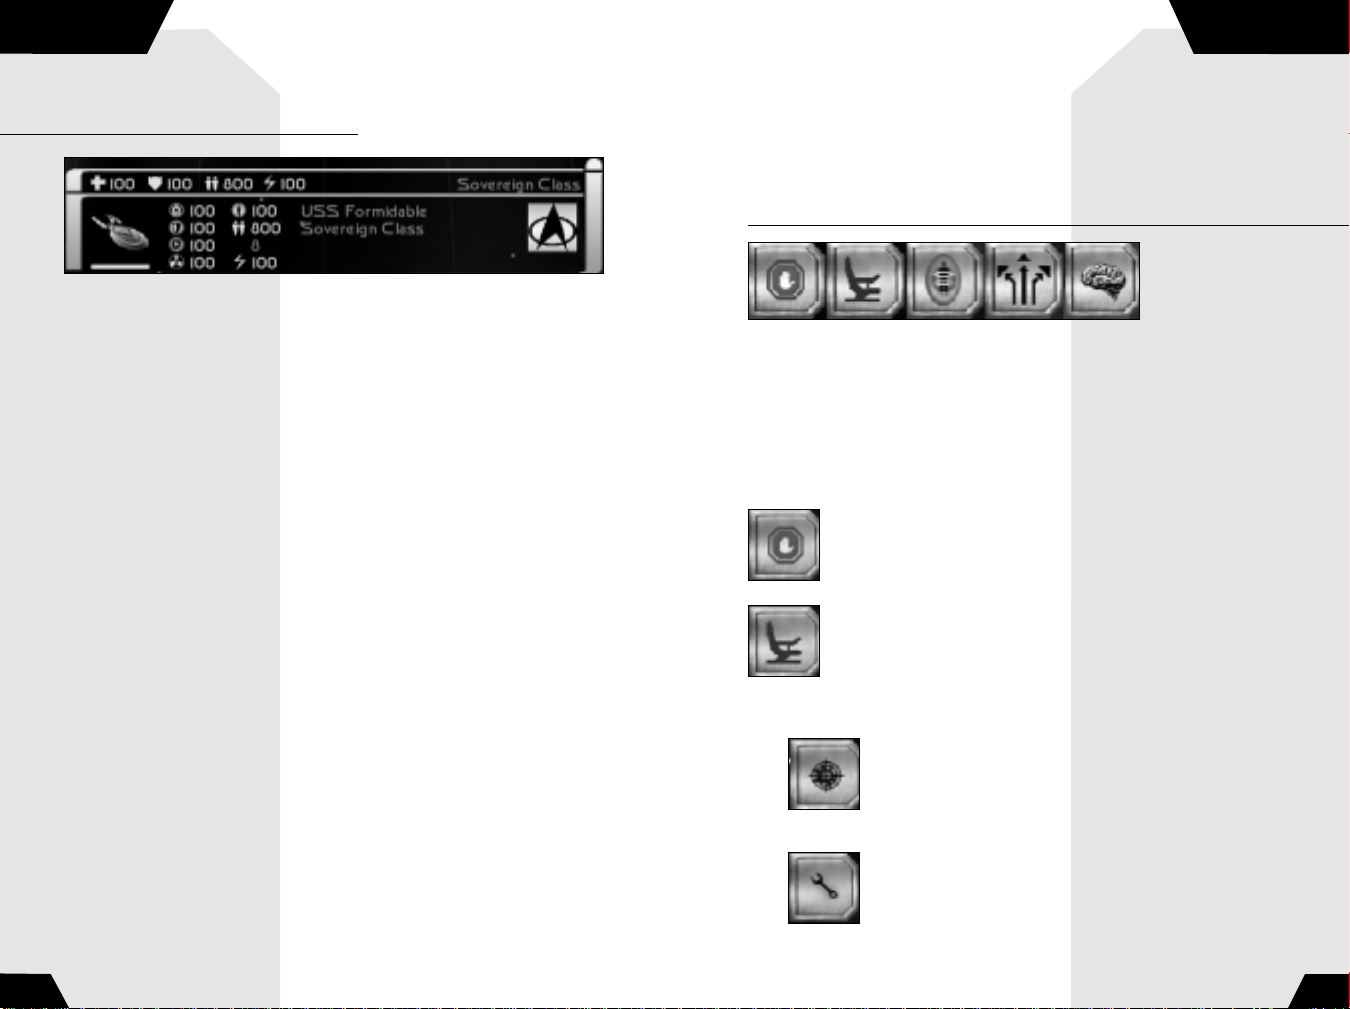
SHIP DISPLAY
Between the mini map and the cinematic window, you’ll see the ship display.
When one ship is selected on the main screen, its vital statistics appear on the
ship display.
Next to the schematic of the ship, there is a detailed look at the state of the
ship. The icons on the left (in descending order) represent: Sensors, Shield
Generator, Weapon Control, Engines. To the right of these are: Life Support,
Crew, Officers Needed to Operate, and Special Energy (used for special
weapons).
Any damage not directly absorbed by the shields can damage these systems.
The more crew available to the ship, the faster damaged systems can repair.
The color of the system icon and percentage reflects the health of that system:
green is optimal, yellow means that the functionality has been compromised,
and red reflects severe damage to the system. If a system completely fails, the
ship will lose the use of that system (e.g., if life support fails, the crew will
begin to die off).
Damage to a system will be reflected in the ship images display by the location
of that system turning red. Below the picture of the unit, there is also a bar
that reflects the health of the ship. The size and color of the bar corresponds
to damage taken.
If multiple ships are selected (up to 16 ships can be selected at once), their
ship images will show up in the ship display. Damage to various systems will be
indicated by sections of the thumbnail turning red, and the health of the ship
will be indicated by the bar underneath it.
MOUSING OVER SHIPS
Mousing over any ship on the main screen in Star Trek: Armada 2 will bring up
a quick status report on that ship.
Directly over the ship display, the name of the ship and its class will appear.
Below the name, four icons represent the strength (as a percentage) of the
following systems: Health, Shields, Crew, and Weapons.
COMMAND MENU
The Command menu shows you the different command buttons available to
ships and structures. These buttons include Stop, Orders, Transport, Formations,
AI, and Special Weapon. Clicking on the Orders, Formations, and AI buttons
bring up sub-menus. The buttons on these menus are explained below under
Ship Orders.
SHIP ORDERS
Stop
Orders this vessel to stop its current actions.
Orders Menu
All ships have an orders button. When clicked, you have access
to the orders button menu, which usually includes the following
buttons:
Attack
Orders the vessel to attack a target or go to a location and
attack any enemies there.
Repair and Recrew
Sends the vessel to the nearest shipyard for faster repair and
recrewing from the crew pool.
16 17
Page 9
COMMAND MENU
COMMAND MENU
Priority Repair
Has the ship ignore all further orders until the ship is repaired.
Patrol
The vessel will patrol an area of space between its current position
and the patrol point. To make more complex patrol routes, you can
use the TAB key and right-clicking to lay down waypoints.
Scout
The ship will search unexplored areas of the map.
Search and Destroy
The ship will search for enemy ships and stations and destroy
them.
Guard
Has the ship follow and protect the designated vessel or structure.
Decommission
Will disassemble and recover resources from a ship or station.
Ships must return to a shipyard to be decommissioned.
(Except for Species 8472.)
AI Menu
Go to the AI menu to set the autonomy level for the selected
ship(s) or stations.
Evolve Menu
Go to the Evolve menu to change your embryo into another form
(Species 8472 only).
Build
Go to the Construction menu to select ships and stations to build.
Tractor Beam
Lock on a target vessel with disabled or derelict engines, allowing
it to be towed.
Recrew
Reinforce the crew of the station with crew taken from the crew
pool. You can’t recrew while under attack.
Research
Go to the Research menu to construct pods that allow the use of
special weapons.
Trade Menu
Go to the Trade menu to exchange resources.
Back
Return to the previous menu.
Set Rally Point
Choose a location where vessels will collect after exiting the
station.
18 19
Page 10
FORMATIONS MENU
AI MENU
T ransport
Sends a boarding party over to another vessel. On enemy vessels,
the boarding party will fight the crew and take the ship over if no
crew remains. It will reinforce crew on friendly vessels.
Note: You can only transport onto enemy ships if their shields are at 0%.
Transport Attack
Found on assault ships, this command will have the ship attack the
target with normal weapons until the target's shields are down,
and then send a boarding party of specially trained troops onto
the other vessel.
Self Destruct
Initiates auto-destruct sequence, destroying the craft and
damaging everything in the immediate area.
FORMATIONS MENU
All ships have a formations button. When clicked, you have access to the
formation button menu, which includes the following buttons:
Assault Wall
Offensive. Places combat ships up front, frigates in middle, and
artillery at far back.
Column
Movement. Puts ships in a column for movement with a narrow
sensor footprint.
X Formation
Blockade. Spreads combat ships out widely to guard map areas.
Sheet
Array ships in 2D plane. Maximizes sensor scanning.
Clover Leaf
Attack in a clover leaf pattern. This can only be used for assaults.
Circle
Attack by circling target. This can only be used for assaults.
Arrow
Attack by darting back and forth. This can only be used for assaults.
When a group of ships are selected, you may choose a formation.
The ships will organize themselves into the formation that you choose,
remaining in that formation while they attack and move.
AI MENU
Clicking on the AI button brings up the AI menu, which contains the following buttons:
Note: For Advanced Users—A ship will inherit the AI state of the ship or station that
constructed it.
Green Alert
This sets the unit into Green Alert. A unit on Green Alert will not fire
until ordered. It will not engage or pursue.
Yellow Alert
This sets the unit into Yellow Alert. This level of alert requires that a
craft only fires on an enemy if it is fired upon. It will pursue this
craft within a small radius of its center point, then disengage and
return to its point of contact.
20 21
Page 11
AI MENU
FLEETS
Red Alert
(Default status)
This sets a unit into Red Alert. In Red Alert, a craft will fire on any
enemy craft it sees. It will pursue this craft within a small radius
of its center point.
Note: If a vessel is cloaked, the default will go to Yellow Alert. Also, alert
status mainly affects ships not engaged in other activities. For example, a
freighter mining dilithium will continue to mine when attacked, regardless of
alert status. If it is not engaged in an activity, it will act according to its
alert status.
Low Movement Autonomy
A ship will not move from the location that you designate until you
order it to.
Medium Movement Autonomy
A ship will maintain its position in formation, moving with the
formation as needed.
High Movement Autonomy
The ship may leave its location to pursue an enemy that it spots,
following that enemy until it destroys it, or moves out of range.
No Special Weapon Autonomy
A ship will only use conventional weapons when attacking the
enemy.
Medium Special Weapon Autonomy
The ship may use conventional and special weapons in attacking an
enemy, until special weapons energy falls below 50%. Then, it will
only use conventional weapons.
High Special Weapon Autonomy
The ship may use conventional and special weapons to attack an
enemy, regardless of remaining special weapons energy.
FLEETS
In Star Trek: Armada 2, ships can be grouped into fleets which will then respond
as a group to the orders you give them. To create a fleet, left-click and drag or
Shift-select a number of units (up to 16) that you want in a fleet. Once selected,
press Ctrl-(number) (the Ctrl button plus one of the number keys at the top of the
keyboard), and those units will reflect that they are now in that fleet—the number
of the fleet will appear next to the ship when selected. To select the fleet, simply
press the number key for that fleet.
A ship can be added to a fleet by selecting it and hitting Ctrl-Shift and the number
of the fleet. To remove a unit from a fleet, select the unit and hit Ctrl–(minus key
on the top of the keyboard).
To quickly move to the location of a fleet, a double-tap on the fleet number will
bring you to that fleet's location.
A few things to note about fleets:
• Ships can only belong to one fleet at a time
• A construction facility can belong to a fleet, and every ship produced by that
facility will automatically join that fleet (until the 16 slots are filled)
• If a fleet is selected, any AI orders given become the default for that fleet.
Changing AI orders will affect the entire fleet.
SHIPS, SPECIAL
WEAPONS, AND STATIONS
The six playable races in Star Trek: Armada 2 each have their own specific fleets,
special weapons, and stations. Building ships and stations, as well as efficient
control of special weapons, is essential for victory. Below is a list of each race’s
fleet (including which ship possesses which special weapon) and stations.
Most special weapons require a set amount of special energy to operate. These
special weapons are built at the research and science stations. Once built, a pod
representing the special weapon appears on the station. If one of these pods or
stations is destroyed by an enemy, your fleet loses access to that special weapon.
Special weapons operate in two ways. Most special weapons work simply by
clicking on the special weapon icon located in the Command menu. A few special
weapons require a target, be it a location or another object, to fire at. For these
weapons, you’ll need to click on both the special weapon icon and the target of
the weapon.
22 23
Page 12
THE FEDERATION
THE FEDERATION
RACES
THE UNITED FEDERATION OF PLANETS
The United Federation of Planets is an interstellar alliance of planetary
governments and colonies established in 2161. There are over 150 members of
the Federation and their territory spreads across 8,000 light years. The UFP is
governed by the Federation Council, composed of representatives from the
various planets and located in the Earth city of San Francisco. The agency
responsible for all deep space exploration, scientific research, and military
actions for the Federation is known as Starfleet. Starfleet provides security and
defense for all the colonies of the Federation through its vast fleet of starships.
The flagship of the Federation—and the pride of Starfleet—is the
USS Enterprise-E, commanded by Captain Jean-Luc Picard.
THE FEDERATION FLEET
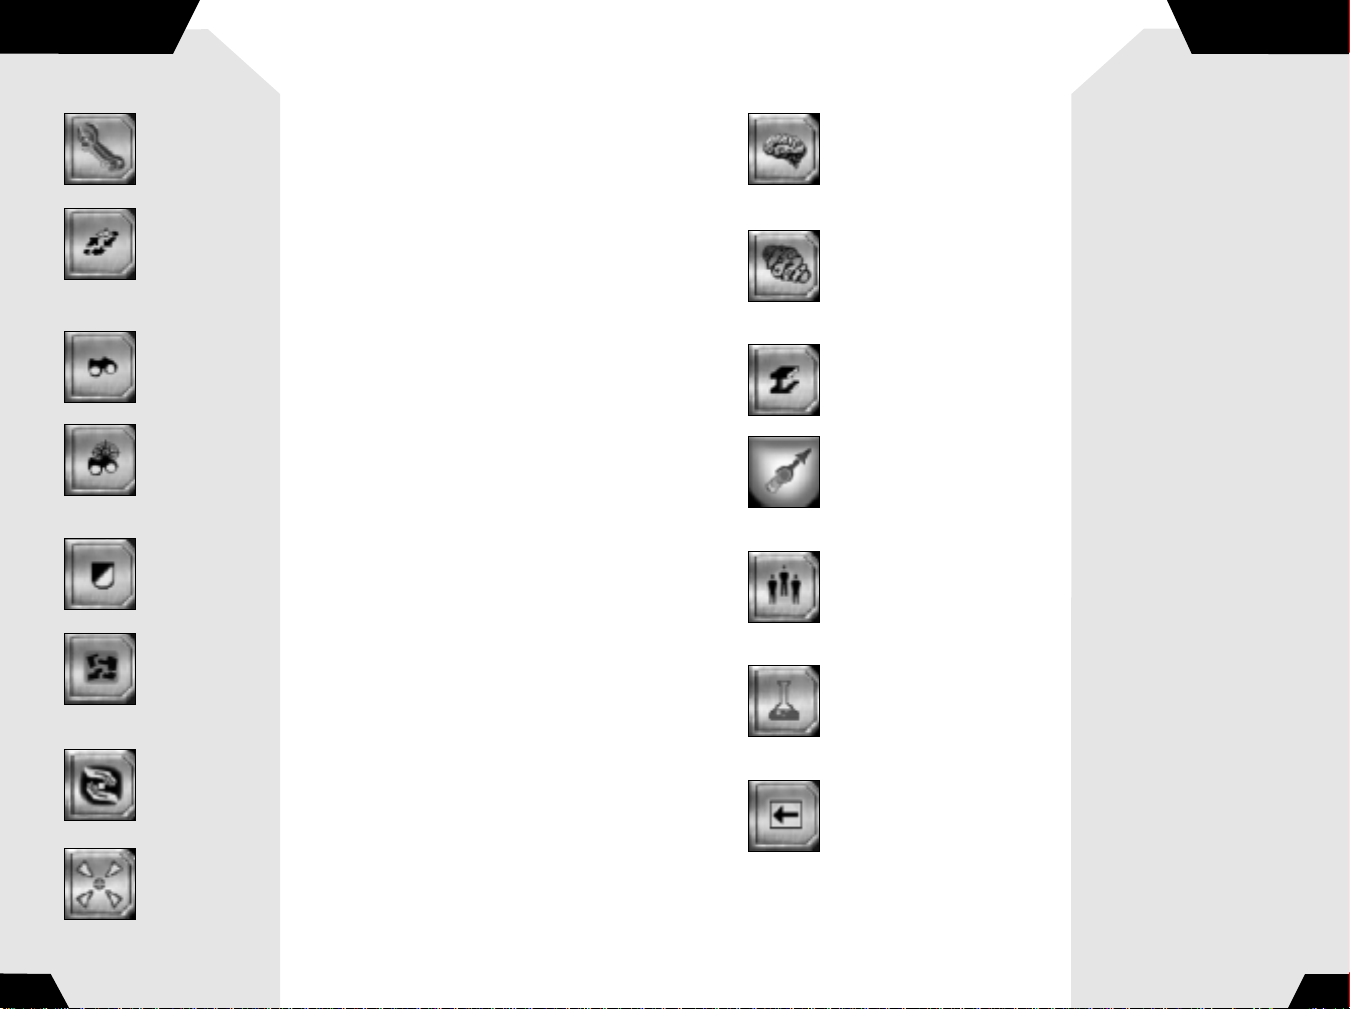
NON-COMBAT SHIPS
Freighter
The Federation freighter is outfitted with a reinforced
hull, capable of carrying large amounts of unprocessed
dilithium or latinum. Freighters have no weapons,
though their heavy shielding allows them to withstand
considerable damage in combat.
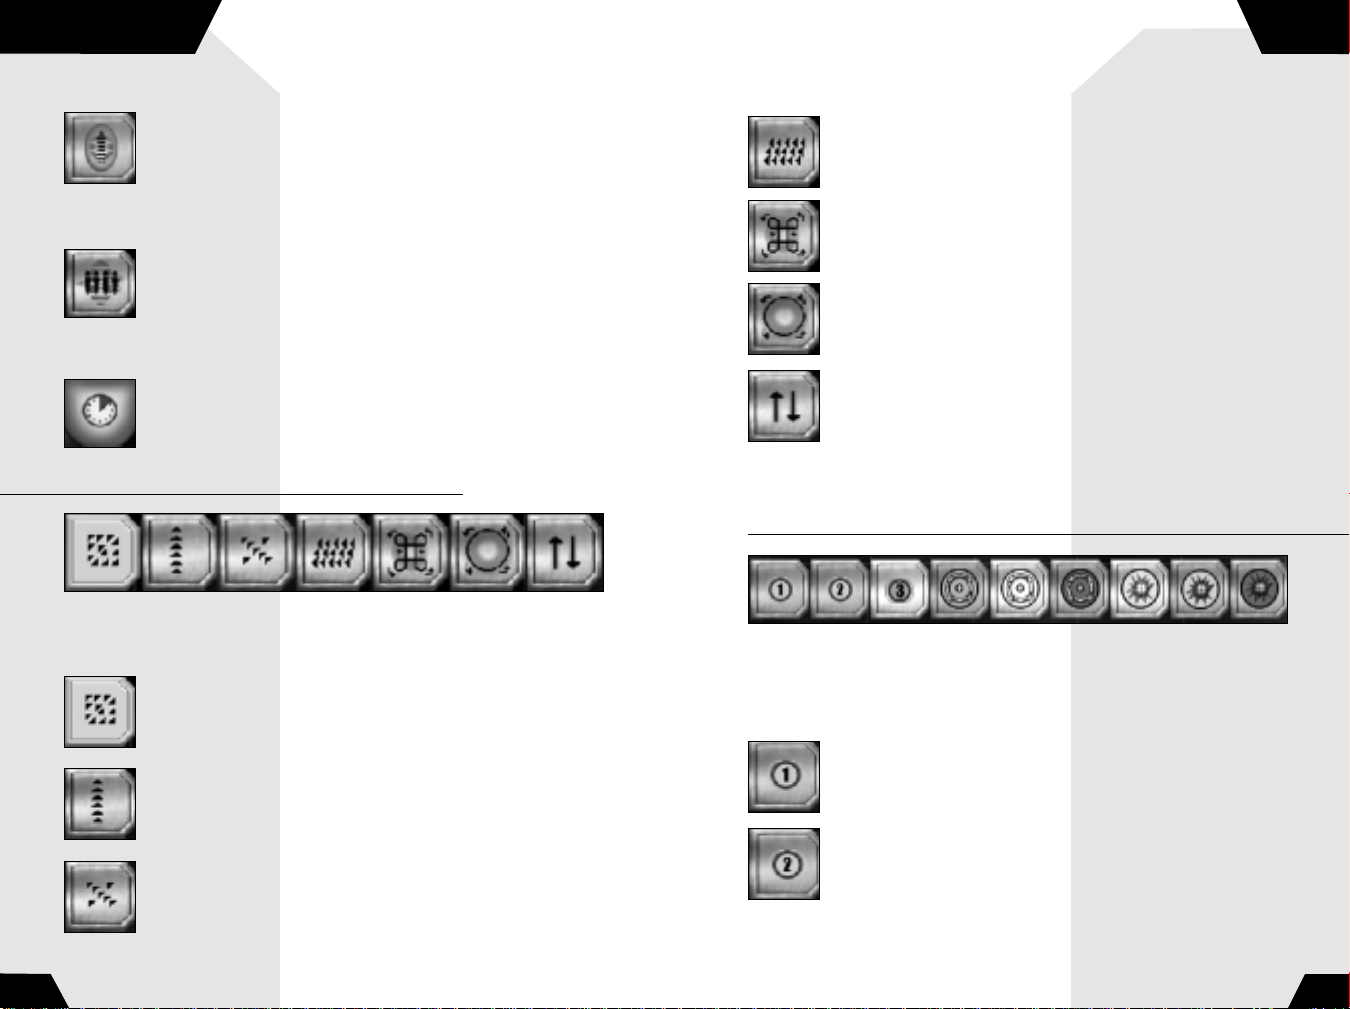
Construction Ship
The Federation construction ship is loaded with a team
of worker bees in its cargo bay. When constructing a
station, these one-person engineering shuttlecraft are
deployed from the construction vessel. While the
construction ship transports the raw materials, the
worker bees assemble the areas with welding lasers.
Like freighters, construction vessels are not armed with
weapons. They do have a tractor beam that allows them to tow derelicts and
ships with disabled engines.
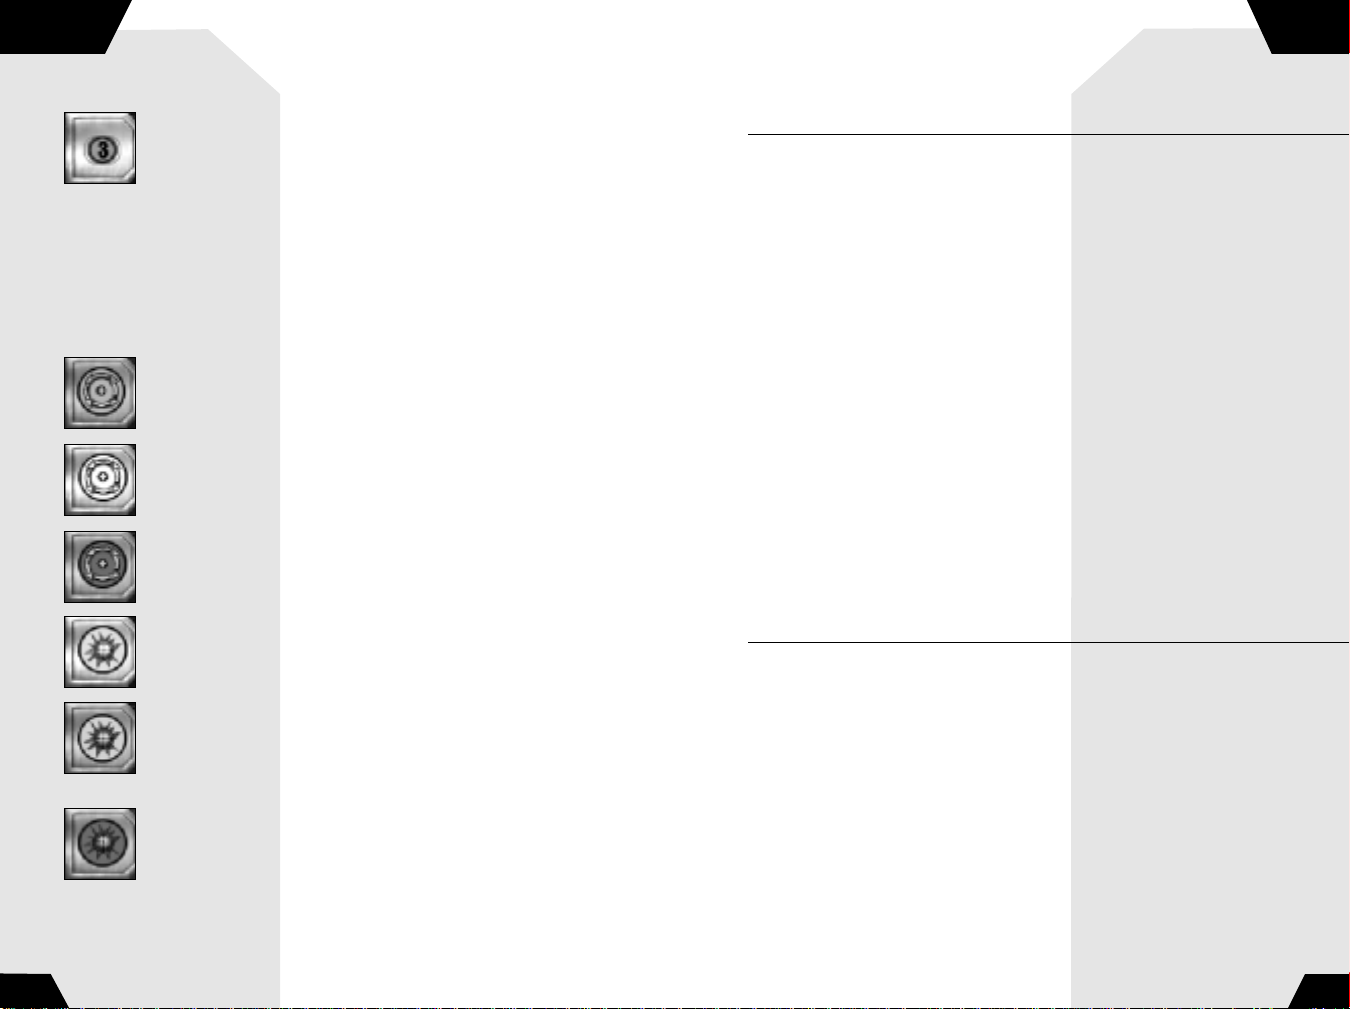
Repair Ship
The Federation repair ships are able to provide mobile
repair capabilities to both ships and facilities. Unarmed,
they are heavily fortified so that they may carry out
their critical duties, even in combat situations.
Note: If set to High Special Autonomy, these units will
repair nearby ships and stations automatically.
Cargo Ship
Federation merchant ships ply the space lanes, moving
between the trading stations near worlds both inside
and outside the Federation. They are equipped with
excellent shields, but no defensive armaments, relying
on their maneuverability to get them out of harms way.
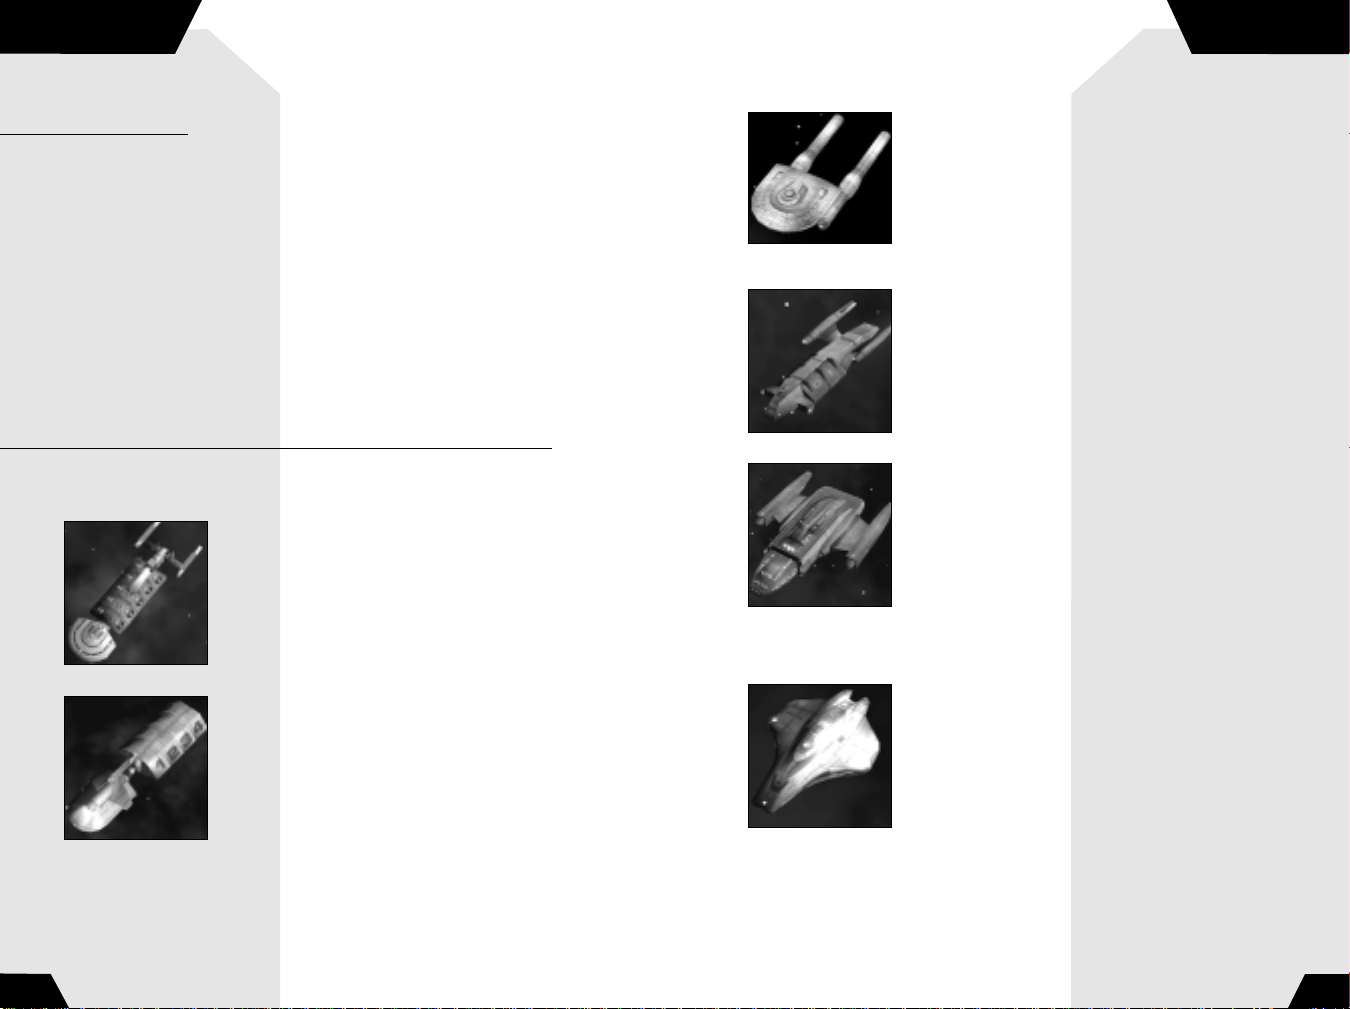
Colony Ship
The Federation is always on the lookout for new planets
to colonize. The colony ship is able to transport enough
colonists and supplies to start a fledgling colony. Once
colonization is complete, the colony ship will travel
down to the surface of the planet.
Note: Not all planets are suitable for colonization.
COMBAT SHIPS
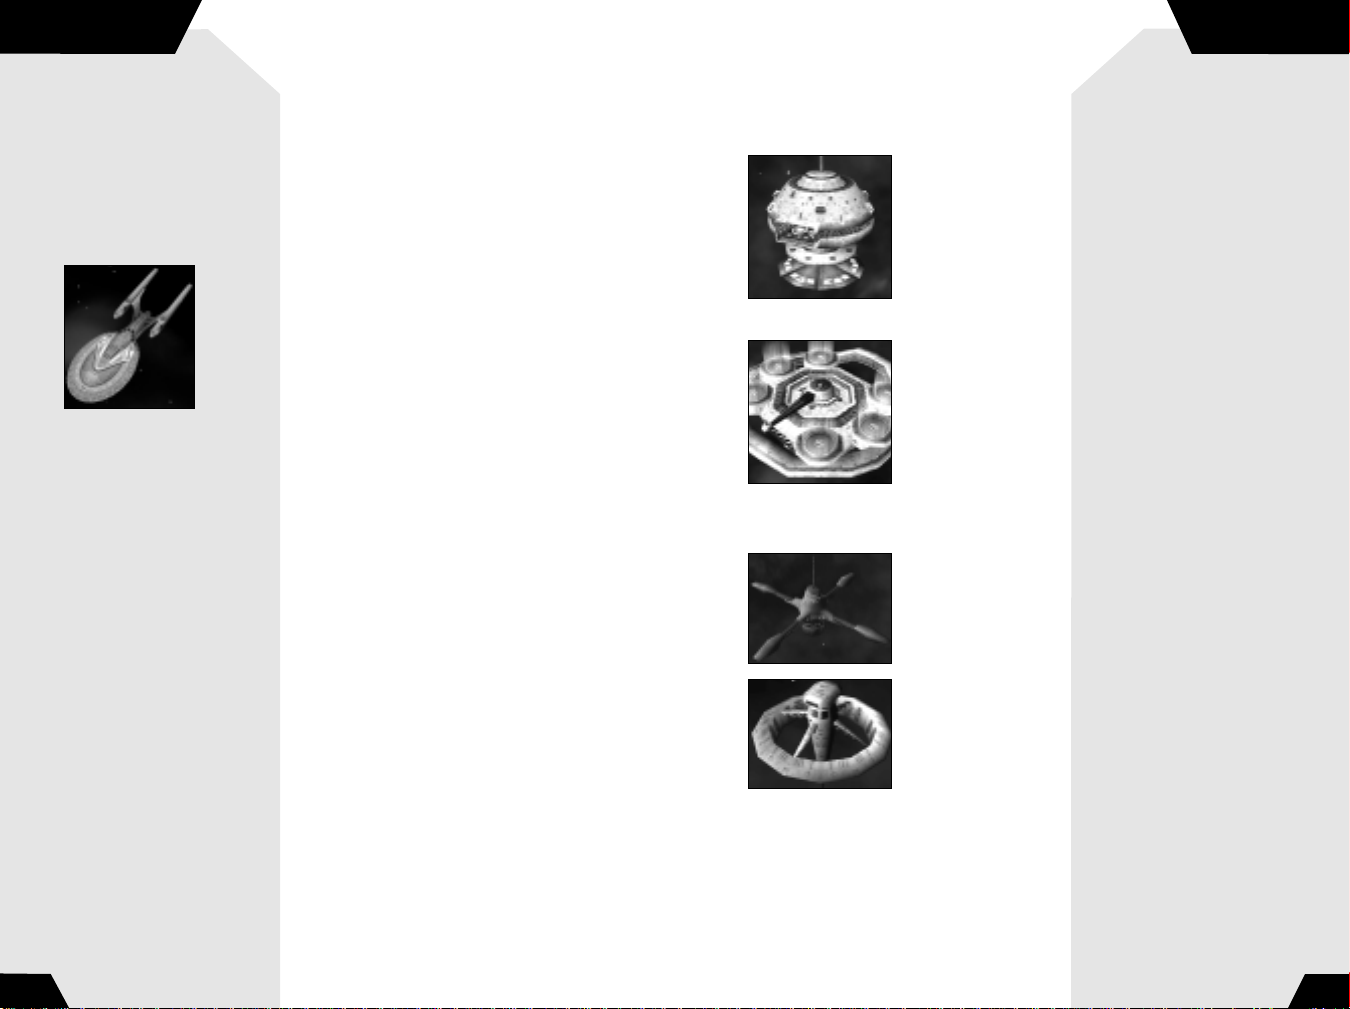
Venture-class Scout
The lightly armored, highly maneuverable scout vessel is
capable of deep space travel. The Venture-class ship has
limited space, preventing a large crew complement.
Designed primarily for reconnaissance and short-range
exploration, it is equipped with a single forward-firing
pulse phaser, should it need to engage in combat. It is
ideal for quickly exploring unknown areas of space.
24 25
Page 13

THE FEDERATION
THE FEDERATION
Special Weapon: Tachyon Detection Grid
Venture-class ships can have their sensor arrays modified to use a Tachyon
Detection Grid, allowing them to detect cloaked ships within their sensor range.
Iwo Jima-class
One of the newest additions to the Federation’s
Starfleet, the Iwo Jima-class assault ship went into
production in 2375. Carrying Federation marines, the
Iwo Jima-class is designed to deploy its cargo both
quickly and efficiently to the target (a ship or a facility)
and take control of it in the shortest possible time.
Federation marines have a reputation for toughness,
and come from a variety of Federation member races. A pulse phaser and a
tractor beam for immobilizing targets complement the Iwo Jima-class ships.
Note: Marines can only be transported onto a ship whose shields are down. The
assault ships must also lower their own shields during the transport process,
leaving them vulnerable to enemy fire. Transport Attack will direct the ship to
fire at an enemy vessel until the shields are down, and then begin transporting
marines aboard.
Aegian-class
Recently integrated into Starfleet, the Aegian-class frigate
is a quick ship that carries a powerful battery of photon
torpedoes and phasers and is used to protect fleets.
Special Weapon: Shield Enhancer
The Aegian-class frigates can be modified to function as a
Shield Enhancer. When activated, this boosts the shield
strength for all friendly ships within a specified distance to the frigate. Once
the special energy is depleted the effect is turned off.
forward-firing pulse phasers on its bow, allowing it to unleash a barrage of
firepower at any opponent they face.
Special Weapon: Anti-matter Mines
The Defiant-class can be modified to carry a payload of anti-matter mines.
These mines lie still in space until they detect the engine signatures of a
nearby enemy ship, causing them to home in on their target and detonate.
Sabre-class
The Sabre-class is another recent addition to Starfleet,
designed for heavy combat operations. The first
prototypes were hurried into production to defend
against the Borg, providing a quick-response addition to
the Starfleet defenses. The Sabre-class is armed with
pulse phasers and photon torpedoes.
Steamrunner-class
The Steamrunner-class went into production in 2371 as
part of Starfleet’s response to the larger, disposable
Jem’Hadar fleets. As a result, the Steamrunner is armed
with long-range tri-cobalt torpedoes. These torpedoes—
effective as long-range artillery—cause tremendous
damage. As a consequence of the tremendous energy it
takes to fire its weapons, the Steamrunner tends to be
slower and have less shielding than its counterparts, making it an easier target
if engaged at close range.
Special Weapon: Engine Overload
The Steamrunner-class can be outfitted with an Engine Overload weapon.
This blast disables the engines of multiple enemy ships, allowing it to use its
long-range torpedoes on immobile targets or escape from an incoming attack.
Defiant-class
Initially designed as an escort vessel, the Defiant-class
began development in 2366 with the explicit intent of
defending the Federation against the Borg. Since their
initial production run, the Defiant has quickly filled the
ranks of the Federation fleet and is now one of its most
abundant starships. Each Defiant is outfitted with two
the Borg offensive of 2373, and later in the Dominion War. Its extensive
shielding, maneuverability, and powerful phaser banks make it useful in both
Akira-class
Put into production in 2370, the Akira-class was
designed to provide offensive strength and support to
Starfleet’s armada. The Akira has since become an
invaluable asset to Starfleet, first by helping to repel
offensive and defensive situations.
26 27
Page 14
THE FEDERATION
THE FEDERATION
Special Weapon: Chain Reaction Pulsar
The Akira can be refitted to carry a Chain Reaction Pulsar. The Chain Reaction
Pulsar is an enhanced torpedo that automatically homes in on the nearest
enemy ship. It is capable of hitting multiple targets in quick succession, gaining
energy with each hit.
Intrepid-class
Introduced in the early 2370s, the Intrepid-class was
Starfleet’s answer to their growing need for a versatile
and quick class of ships, capable of excellent
maneuverability at both impulse and warp speed. Using
their variable configuration nacelles, the Intrepid-class
ships have greater control of the warp f ield. Armed with
both phasers and photon torpedoes, the Intrepid-class ships rely more heavily
on their speed and maneuverability to survive in combat.
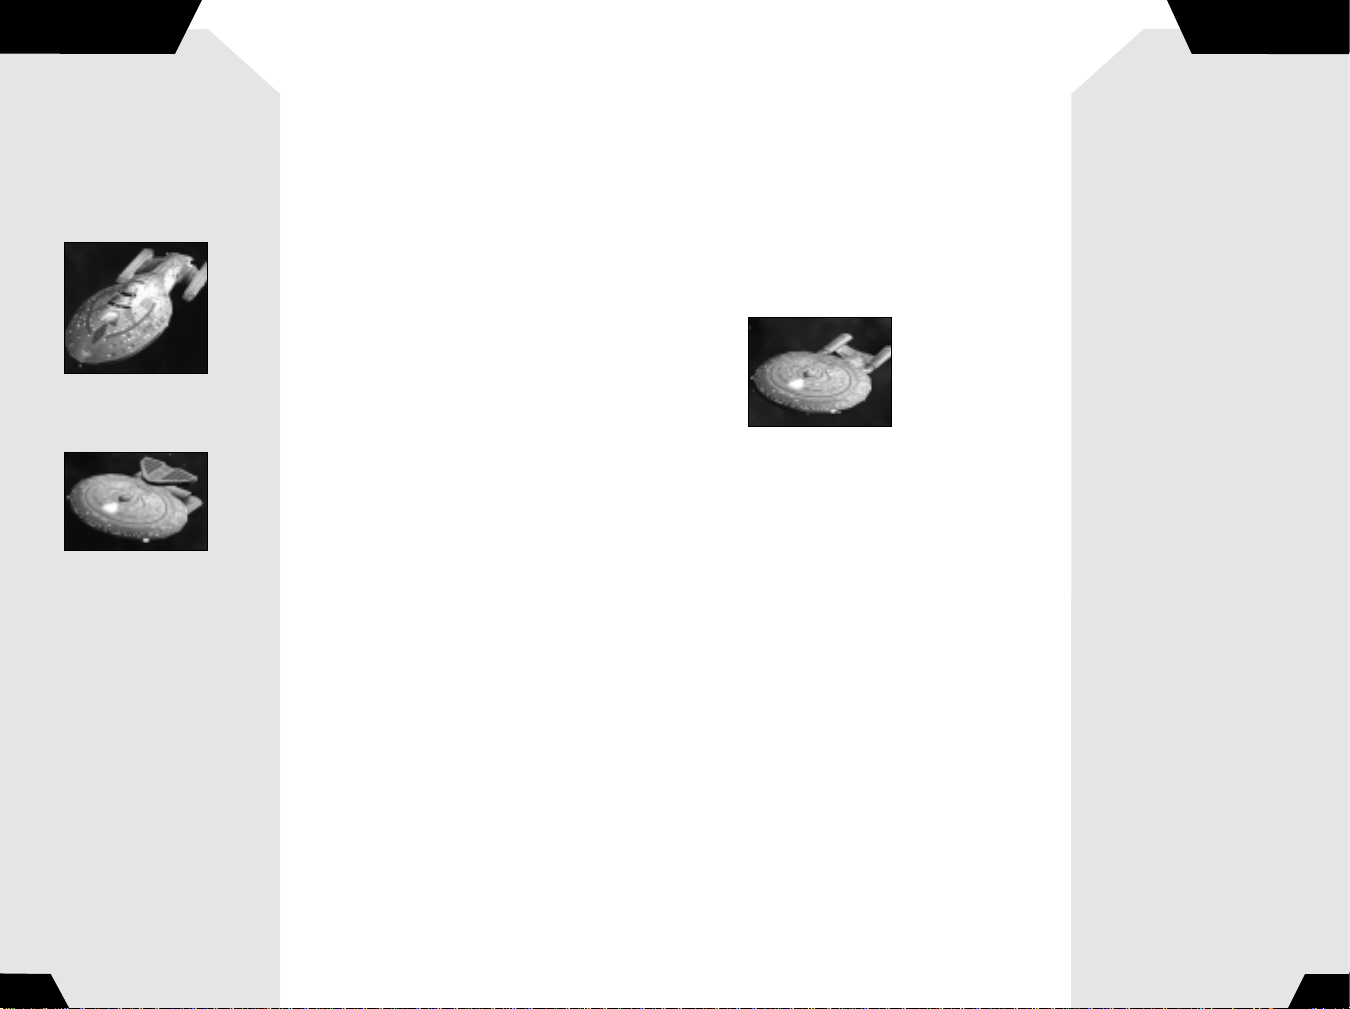
Nebula-class
Designed originally for scientific research and explo-
ration, the Nebula-class starships have been refitted for
combat since the Dominion War. With an extensive array
of multi-purpose weaponry and new technology at its
disposal, the Nebula is a great complement to the
Federation fleet. In addition to the Nebula’s phaser banks, it can be outfitted
with four special weapons researched at the Federation Science Station.
Special Weapons:
Shield Disruptor
This weapon was based on technology adapted from the Breen Shield
Dampening Weapon. It disables the shields of a group of enemy ships for a
short time, allowing weapons to damage the hull and systems directly.
Gemini Effect
The Gemini Effect was created as a result of Dr. Paul Manheim’s temporal
research in 2364. The effect creates a temporal disturbance in the space-time
continuum, allowing two of the same ship to exist simultaneously in different
locations.
Point Defense Phaser
The initial concept for this weapon goes back as far as the twentieth century,
with the Strategic Defense Initiative. Perfected in 2374, the PDP destroys
incoming torpedoes before they can do any damage.
Engineering Team
Each Nebula-class can be assigned teams of Starfleet engineers. These miracle
workers can be transported onto other allied ships, temporarily increasing their
repair rate and shield recharge rate.
Galaxy-class
Introduced into Starfleet in the early 2360s, the
Galaxy-class was designed to be the flagship of the
fleet. A well-armed and formidable class of ship, the
Galaxy-class has been at the heart of exploration and
defense of the Federation. Galaxy-class ships have the
ability to separate their saucer section from the stardrive section, making them
one of the fleet’s most versatile classes.
Saucer separation is generally employed so that the saucer section—which
contains most of the crew—can remain in relative safety while the star drive
(or battle) section goes into battle or other hazardous situations.
Saucer separation can only be attempted at sub-light speeds and not while
the ship is at warp speed. While separated, the following rules apply:
Saucer Module:
• Not capable of warp speed, only impulse speed
• Contains 71% of the total crew
• Contains shorter range sensors than stardrive section
• Faster impulse speed
• 2 Phaser strips
• 1 aft-firing photon torpedo
28 29
Page 15
THE FEDERATION
THE FEDERATION
Stardrive Section:
• Capable of warp speed
• Long range sensors
• Contains only 29% of total crew (making repair times slower)
• Stronger shields
Sovereign-class
The Federation’s most advanced starship, the
Sovereign serves as the new flagship of their armada. The
Sovereign’s powerful shields, cutting edge weaponry, and
advanced technology allow it to defend the Federation
and her allies from threats of any kind. The Sovereign is
armed with powerful phasers and quantum torpedoes.
Special Weapon: Corbomite Reflector
Originally used as a bluff by Captain James T. Kirk, the fictitious Corbomite
Reflector became a reality in 2363 when a long-retired engineer submitted
plans for the device to Chief Engineer Geordi LaForge. Sovereign-class vessels
have since been modified to accommodate a reflector, which enables it to
redirect enemy fire back at its opponents. When activated, a portion of the
incoming fire is reflected directly back at the enemy vessel, while the rest is
deflected into space.
Note: Phaser fire and disruptor fire will still hit the ship when the
Corbomite Reflector is active.
THE FEDERATION STATIONS
Federation Starbase
The Federation Starbase is the center of the Federation
fleet in a sector. Once a starbase is operational, crew
begins to be transported into the crew pool at a steady
rate. Building additional starbases will increase this
rate. The station can build construction ships, cargo
ships, repair ships, and freighters, the basic units for
establishing an outpost in the area.
Federation Mining Station
The Federation Mining Station is necessary for
harvesting and processing dilithium. The facility comes
with a freighter, which begins mining the nearest
dilithium moon or latinum nebula as soon as the mining
station is operational. Once the freighter has a full
payload of dilithium, it will return to the mining
station. However, if the freighter is hauling latinum,
it will return to the starbase to unload.
Federation Orbital Processing Facility
Federation Orbital Processing Facilities are built by
construction ships and are placed over a planet to tap
the planet’s metal resources. Once built, they stay in a
fixed orbit over the planet while mining.
Federation Pulse Cannon
The Federation Pulse Cannon is a small, unmanned
defensive platform. It provides support for Federation
outposts by firing pulse phasers at all enemy vessels
within its range. You must have a starbase to build a
pulse phaser cannon.
30 31
Page 16

THE FEDERATION
THE FEDERATION
Federation Sensor Array
The Federation Sensor Array is an unmanned, small
satellite that provides line-of-sight in a wide area
around it. The sensor array can be modified to use a
Tachyon Detection Grid to locate cloaked ships if
developed by a research station.
Federation Trading Station
The Federation is rich with culture and trade, and the
Trading Station is the center of the economy. Once
constructed, a trading station can be used to buy or sell
dilithium, metal, and latinum—particularly useful when
there is an abundance of one resource but a limited
supply of another. You can build a cargo ship that can
then be sent to other trading stations you construct, or trading stations of
other allied players. Ferengi traders will periodically send trading ships to any
trading stations you construct, generating latinum for you.
Note: To build a cargo ship, select your starbase. Then select the Build icon and
build a cargo ship.
Federation Shipyard
The Federation Shipyard has two bays, one for
construction and one for repair. This allows it to
construct or repair one ship at a time. The Federation
Shipyard can build the Venture-class, Iwo Jima-class,
Defiant-class, Akira-class, Steamrunner-class,
Intrepid-class, Sabre-class, and Colony ships.
Federation Torpedo Turret
The Federation Torpedo Turret is a larger, unmanned
defensive platform. It provides support for Federation
outposts by firing quantum torpedoes at all enemy
vessels within its range.
Federation Research Facility
The Federation Research Facility allows you to upgrade the
Venture, Defiant, Steamrunner, Akira, and Sovereign-class,
each with its own special weapon. When each new ship’s
technology is researched, a new pod is built onto the
research facility. Though they are attached to the facility,
each pod has its own shields and can be targeted
independently from the main structure. If the research
facility is destroyed, all pods on the facility are destroyed with it. A research
facility can build the following pods:
Tachyon Detection Grid—Venture-class
Anti-matter Mines—Defiant-class
Engine Overload—Steamrunner-class
Chain Reaction Pulsar—Akira-class
Corbomite Reflector—Sovereign-class
Shield Enhancer—Aegian-class
Federation Advanced Shipyard
The Federation Advanced Shipyard has two bays, one
for construction and one for repair, like its smaller
counterpart. The advanced shipyard can build the
Aegian-class, Nebula-class, Galaxy-class, and Sovereign-
class vessels. You must possess a Research Facility to
build an advanced shipyard.
Federation Science Station
The Federation Science Station upgrades the Nebula-class
vessels. When each new technology is researched, a new
pod is built onto the Science Station. Though they are
attached to the station, each pod has its own shields and
can be targeted independently from the main structure.
If the science station is destroyed, all pods on the station
are destroyed with it. The science station can build the following pods:
Shield Disruptor—Nebula-class
Gemini Effect—Nebula-class
Point Defense Phaser—Nebula-class
Engineering Team—Nebula-class
32 33
Page 17

THE FEDERATION
KLINGON EMPIRE
Vulcan Research Institute
Recently incorporated into the structure of Starfleet,
the Vulcan Research Institute has become the central
fixture in Federation research on shipboard systems.
There are five separate ship systems that can be
researched and upgraded at the Institute: weapons,
shields, sensors, engines, and life support. Each system can be upgraded by two
levels: level 2 and level 3. Though they are attached to the institute, each pod
has its own shields and can be targeted independently from the main structure.
If the Vulcan research institute is destroyed, all pods on the institute are
destroyed with it.
Temporal Research Facility
Recent breakthroughs in temporal mechanics have
caused Starfleet to devote entire facilities to better
understand time and how it is affected or manipulated
in the universe. These research facilities have been able
to create a temporal stasis field within a confined area
of space. Modifications to their quantum signatures
prevent allied ships from being affected by the stasis field. However, all enemy
activity in that area is frozen until the field destabilizes and time is restored.
Regular use of this device is still under debate by the Federation Council, and
for now has only been granted in times of war or under extreme circumstances.
KLINGON EMPIRE
The Klingon Empire was founded over 1,500 years ago on the planet of Qo’nos
by Kahless the Unforgettable. Klingons are a humanoid warrior civilization
bound by pride, tradition, and honor. Their violent and aggressive nature has
made them an interstellar power to be respected. Each chapter of the Empire’s
existence has been wrought through war and violence, then scrawled upon the
pages of history with the blood of the dishonored. The Klingon Empire’s ruling
body has fluctuated throughout history between an Emperor or the Klingon
High Council. The current Klingon Chancellor is Martok, who assumed the title
after Worf, son of Mogh, killed the previous Chancellor in a duel.
THE KLINGON FLEET
NON-COMBAT SHIPS
Freighter
The Klingon Freighter uses its mining beams to extract
and transport dilithium, and latinum, carrying the load
to mining stations for processing. As with all Klingon
vessels, the freighter is armed—it is equipped with a
forward-firing phaser. Captaining a Klingon Freighter is
considered a dishonor, usually reserved for the old or
dying.
Construction Ship
The Klingon construction ship is loaded with a team of
workers in its cargo bay. When constructing a station,
one-man shuttlecraft are deployed from the construction vessel. While the construction ship transports the
raw materials, the workers assemble the areas with
welding lasers. Along with a forward-f iring phaser, the
construction ship is also equipped with a tractor beam,
allowing it to tow derelicts and ships with disabled
engines.
34 35
Page 18

KLINGON EMPIRE
KLINGON EMPIRE
Repair Ship
The Klingon repair ships are able to provide mobile
repair capabilities to both ships and facilities.
Cargo Ship
Klingon merchant ships have come to be the newest
source of lifeblood for the Klingon Empire, gradually
supplanting the historical Klingon economics of
conquest. Lightly armed, they rely on their
maneuverability to successfully ply the space lanes.
Colony Ship
While the Klingons favor seizing the planets of other
races, they are not above colonizing a planet. The
Colony Ship is able to transport enough colonists and
supplies to start a fledgling colony. Once the colony is
in place, the colony ship is automatically
decommissioned and broken into its component
parts to be used by the colonists.
COMBAT SHIPS
NuQ’Duj-class
The NuQ’Duj is a fast and mobile fighter used primarily
for scouting and patrolling the Neutral Zone. It is both
a blessing and a curse for the Klingon officer to
command. These scouts are only equipped with one
forward-firing disruptor cannon, preventing the captain
from gaining much honor in battle. However, most of
these scout ships are destroyed in combat, and dying in battle is a great honor
for a Klingon.
Special Weapon: Tachyon Detection Grid
NuQ’Duj-class ships can have their sensor arrays modified to use a Tachyon
Detection Grid, allowing them to detect cloaked ships within their sensor range.
Chava’kal-class
The Chava’kal-class assault ship was designed to deploy
two companies of the fiercest warriors in the Empire,
the Klingon Marines. Known as the "Dagger of the
Empire" to its crews, the marines aboard a single
Chava’Kal-class ship are capable of overwhelming the crew of a larger vessel.
Note: Marines can only be transported onto a ship whose shields are down.
Transport Attack will direct the ship to fire at an enemy vessel until the
shields are down, and then begin transporting marines aboard. In addition,
the assault ships must also lower their own shields during the transport
process, leaving them vulnerable to enemy fire.
Koloth-class
The Koloth-class frigate is the latest in a long line of
variants based on the venerable D7 class. The main dif-
ference being the original D7 and the Koloth is the warp
nacelles and the main boom. The boom is larger to house the additional equipment needed to power the weapon energy boosters. The Koloth is armed with
phasers and photon torpedoes.
Special Weapon: Weapons Enhancer
Provides an increase to both the range and effectiveness of all energy weapons
fired from friendly ships that are within a short radius of the frigate.
B’rel-class (Bird of Prey)
The B’rel-class, more commonly known as the Klingon
Bird of Prey, has been in service for the Empire for over
eighty years. Once the workhorse of the Empire, new
technology and weaponry has reduced the Bird of Prey
to a supporting role in the Klingon fleet. The B’rel-class is
armed with two forward-firing disruptor cannons and
photon torpedoes, as well as a cloaking device. This
allows the destroyer to be useful for reconnaissance as
well as surprise attacks.
Special Weapon: Gravity Mines
The B’rel-class can be equipped with gravity mines, which slow the enemy’s
movement, allowing the larger ships of the fleet to hunt down the enemy.
36 37
Page 19

KLINGON EMPIRE
KLINGON EMPIRE
Chuq’Beh-class
The Chuq’Beh-class are one of the newest additions to
the Klingon fleet, equipped with a cannon capable of
hurling disruptor bolts at distant targets and pulse
phasers for short-range combat. With a superior
recharge rate, the Chuq’Beh-class are formidable
combat ships at medium and long distances.
SuQ’Jagh-class
The SuQ’Jagh-class assault vessel, created during the
last Klingon expansion campaign, was originally
designed for planetary assaults. Its role has since been
modified to accommodate ship-to-ship combat, focusing
on boarding and taking over enemy vessels. The
SuQ’Jagh is armed with multiple photon torpedo
launchers and is crewed with the bravest close-quarter warriors in the Empire.
Special Weapon: Commando Team
The SuQ’Jagh can be modified to launch pods of commando teams onto enemy
ships. These pods are capable of penetrating enemy shields, allowing a squad of
Klingons to board and attack an enemy ship from the inside.
Vor’Cha-class
This Klingon cruiser compliments the Klingon Imperial
Fleet with both its formidable phasers and cloaking
capability. For the past fifty years, the Vor’Cha has
steadily replaced the Bird of Prey as the most abundant
ship in the defense force. The Vor’Cha continues to be
an essential part of the Klingon fleet, used for missions that require stealth or
offensive strength.
Special Weapon: Polaron Torpedo
The Polaron Torpedo was modified from Dominion technology with the help
of Federation engineers. The Vor’Cha can be upgraded with Polaron Torpedoes
that can pierce through the shields of an enemy and directly damage the ship’s
systems.
Fek’Lhr-class
The Fek’Lhr was named after the mythical Klingon beast
and guardian of Gre’Thor, the Klingon afterlife for the
dishonored. The Fek’Lhr is armed with phasers, but can
be additionally outfitted with powerful weapons allowing it to unleash waves of destruction on its enemies.
Special Weapons:
Death Chant
The chilling battle cry echoing in the halls of a ship stirs the blood of even the
weakest Klingon. Hearing the Death Chant increases the rate of fire and crew
effectiveness of all friendly ships within range.
Repulsion Wave
The original prototype for the Shockwave, this weapon propels a ship in a
direction, damaging it and disabling its engines.
Ion Storm
After multiple failed attempts, Klingon scientists were able to contain and
recreate the deadly Ionic nebulae from deep space. This torpedo deploys an
area-effect cloud which damages any ship in its radius.
Energy Dissipator
The Fek’Lhr is most effective when its opponents cannot fire back. This special
weapon drains the energy off multiple enemy targets, rendering their special
weapons useless.
Qeh’Ral-class
While slightly older than the Negh’Var-class of ships,
the Qeh’Ral-class battleship has had a long and
distinguished service record with the Empire. It makes
up for its lack of speed with a wide assortment of
phasers and photon torpedoes.
38 39
Page 20

KLINGON EMPIRE
KLINGON EMPIRE
Negh’Var-class
The Negh’Var is the flagship of the Klingon Defense
Force, as well as the most powerful ship in the fleet. Its
massive phasers, photon torpedo launchers, powerful
shields, and large crew complement are used to defend
the borders of the Klingon Empire against any foe.
There are few ships in the galaxy that can withstand the
combined force of a fleet of Negh’Vars.
Special Weapon: Ion Cannon
The Ion Cannon f ires a single, powerful blast of ionized energy that decimates
an enemy target.
Jach’Eng-class
The Jach’Eng, built out of the Shockwave Facility, is
crewed with the bravest and most loyal warriors in the
fleet. Officers assigned duty on a Jach’Eng are listed as
killed in action as the vessel departs from the
shipyard—they do not intend to come back. Captaining
a Jach’Eng-class vessel is considered one of the highest
honors a Klingon warrior can achieve.
Special Weapon: Shockwave
When the Jach’Eng detonates its only weapon, the Shockwave, it creates an
expanding wave of destruction that moves out in a direction, damaging
everything in its path. The resulting explosion also tears apart the hull of the
fragile ship from the inside, killing the entire crew in the process. This is the
most powerful weapon of the Klingon fleet, and one of the most destructive
forces in the known galaxy.
THE KLINGON STATIONS
Klingon Starbase
The Klingon Starbase coordinates actions for the
Klingon fleet in a sector of space. Once a starbase is
operational, crew begins to be transported into the
crew pool at a steady rate. Building additional starbases
will increase this rate. The station can build
construction ships, cargo ships, repair ships, and
freighters, the basic units for establishing an outpost
in the area. The Klingon Starbase is armed with an array
of pulse phasers for defense.
Klingon Dilithium Refinery
The Dilithium Refinery is necessary for harvesting and
processing dilithium. The refinery comes with a
freighter, which begins mining the nearest dilithium
moon or latinum nebula as soon as the mining station is
operational. Once the freighter has a full payload, it
returns to the refinery to process the raw load.
Klingon Orbital Processing Facility
Klingon Orbital Processing Facilities are built by
construction ships and are placed over a planet to tap
the planet’s metal resources. Once built, they stay in a
fixed orbit over the planet while mining.
Klingon Disruptor Cannon
The Klingon Disruptor Cannon is a small, unmanned
defensive platform. It provides support for Klingon
outposts by firing disruptors at all enemy vessels within
its range. You must have a starbase in order to build a
Disruptor Cannon.
40 41
Page 21

KLINGON EMPIRE
KLINGON EMPIRE
Klingon Sensor Array
The Klingon Sensor Array is an unmanned, small
satellite that provides line-of-sight in a wide area
around it. The Sensor Array can be modified to use a
Tachyon Detection Grid to locate cloaked ships if
developed by a research station.
Klingon Weapons Center
The Klingon Weapons Center allows you to upgrade
the NuQ’Duj, B’rel, Vor’Cha, SuQ’Jagh, Koloth, and
Negh’Var-class, each with their own special weapon.
When each new ship’s technology is researched, a new
pod is built onto the weapons center. Though they are
attached to the center, each pod has its own shields and
can be targeted independently from the main structure.
Klingon Trading Station
While savage conquest dominated Klingon history, the
benefits of trade have been realized by the Klingon
Empire. Once constructed, a trading station can be used
to buy or sell dilithium, metal, and latinum—particularly
useful when there is an abundance of one resource but a
limited supply of another. A cargo ship will need to be constructed at the
starbase that can then be sent to other trading stations you construct, or
trading stations of other players (when playing Multiplayer). Ferengi traders
will periodically send trading ships to any trading stations you construct,
generating latinum for you.
Klingon Shipyard
The Klingon Shipyard has two bays, one for construction
and one for repair. This allows it to construct or repair
one ship at a time. The shipyard can build the NuQ’Duj,
If the weapons center is destroyed, all pods on the center are destroyed with it.
A weapons center can build the following pods:
Tachyon Detection Grid—NuQ’Duj-class
Gravity Mines—B’rel-class
Commando Team—SuQ’Jagh-class
Polaron Torpedo—Vor’Cha-class
Ion Cannon—Negh’Var-class
Weapons Enhancer—Koloth-class
Klingon Imperial Shipyard
The Klingon Imperial Shipyard has two bays, one
for construction and one for repair, like its smaller
counterpart. The Imperial Shipyard can build the
Koloth, Qeh’Ral, Negh’Var, Fek’Lhr-class vessels.
Chava’kal, B’Rel, Vor’Cha, SuQ’Jagh, colony ship, and
Chuq’Beh-class ships. You must have a starbase in order
to build a shipyard.
Klingon Torpedo Turret
The Klingon Torpedo Turret is a larger, unmanned
defensive platform. It provides support for Klingon
outposts by firing quantum torpedoes at all enemy
vessels within its range.
Gre’Thor Armory
The Klingon Gre’Thor Armory upgrades the Fek’Lhr-class
ships. When each new technology is researched, a new
pod is built onto the Gre’Thor armory. Though they are
attached to the armory, each pod has its own shields
and can be targeted independently from the main
structure. If the Gre’Thor armory is destroyed, all
pods on the armory are destroyed with it. The Gre’Thor
armory can build the following pods:
Death Chant—Fek’Lhr-class
Repulsion Wave–Fek’Lhr-class
Ion Storm–Fek’Lhr-class
Energy Dissipator–Fek’Lhr-class
42 43
Page 22

KLINGON EMPIRE
BORG COLLECTIVE
Imperial Research Institute
The Imperial Research Institute is the Klingon center for
research and upgrades on shipboard systems. There are
five separate ship systems that can be researched and
upgraded at the institute: weapons, shields, sensors,
engines, and life support. The systems can each be
upgraded by two levels: level 2 and level 3. Though they
are attached to the institute, each pod has its own
shields and can be targeted independently from the main structure.
If the Imperial Research Institute is destroyed, all pods on the institute are
destroyed with it.
Shockwave Station
This large station is designed to produce the deadly
Jach’Eng-class ships. Jach-Eng ships are armed with a
Shockwave Device, a weapon that creates an expanding
wave of destruction that moves out in a direction,
damaging everything in its path. The resulting explosion
also tears apart the hull of the ship from the inside,
killing the entire crew in the process.
THE BORG COLLECTIVE
The Borg are a monstrously powerful civilization of enhanced humanoids with
roots in the Delta Quadrant of the galaxy. The Borg have cybernetic implants,
augmenting both their technological and combat capabilities. Each Borg drone
is tied to an advanced subspace communication network, forming the Borg
Collective. The Borg Collective have a shared consciousness in which the idea of
the individual is a meaningless concept. The Borg exhibit a high degree of
intelligence and adaptability in their tactics—striking fear in all other species
they come across.
THE BORG FLEET
NON-COMBAT SHIPS
Collector
The Collector’s function in the Collective is to mine
unprocessed dilithium from moons and metal from
planets. The Collector is equipped with a mining beam
to efficiently perform its function. The Collector does
not require offensive weapons for its function.
Note: The Borg Collective does not trade, and has
no use for latinum.
Assembler
The Assembler’s function in the Collective is to
construct stations. The Assembler deploys numerous
drones to efficiently complete its function. The
Assembler is equipped with a towing beam, allowing it
to tow derelicts and vessels without functioning
engines. The Assembler does not require offensive
weapons for its function.
44 45
Page 23

BORG COLLECTIVE
BORG COLLECTIVE
Colony Ship
The huge Borg Colony Ships are the ultimate planet
assimilation weapon. The planetary assault beam fired
from the tip of the Colony Ship is used to eliminate
cities and planetary defenses, and then a swarm of
drones is beamed onto the planet surface.
COMBAT SHIPS
Interceptor
The Interceptor’s function in the Collective is to identify
unassimilated vessels and stations, determine their
potential value, and assimilate or eliminate them based
on its evaluation. The Interceptor is equipped with an
energy beam.
Detector
The Detector’s function in the Collective is to explore
areas of space, evaluate their importance, and report
the results to the Collective. The Detector is equipped
with a forward-firing energy cannon. The Detector
requires a minimal crew to perform its function.
Special Weapon: Tachyon Detection Grid
The Detector can be adapted to use a Tachyon Detection Grid, allowing it to
locate cloaked ships within its sensor range.
Wedge
The Wedge is one of the Collective’s key tools in
assimilation. Armed with pulse phasers and the
maneuverability to get in close to an enemy vessel, the
Wedge can lock a vessel in its holding beam as it sends
boarding parties onto enemy ships.
Note: Borg boarding parties can only be transported onto a ship whose
shields are down. Transport Attack will direct the ship to fire at an enemy
vessel until the shields are down, and then drones will begin transporting
aboard. In addition, the Wedge must also lower its own shields during the
transport process, leaving it vulnerable to enemy fire.
Special Weapon: Transwarp Drive
The Interceptor can be adapted with a Transwarp Drive. This modification
allows the Interceptor to instantaneously move to a location currently within
line-of-sight of the Collective or its allies, regardless of the distance.
Assimilator
The Assimilator’s function in the Collective is to assimilate or destroy all unassimilated vessels and stations. It
is equipped with high yield energy torpedoes.
Special Weapon: Auto-Assimilator
The Assimilator can be adapted with an Auto-Assimilator. This beam transfers
the crew of an enemy ship from its target and incorporates them into the
Collective on board the Assimilator.
Harbinger
The Harbinger’s function in the Collective is to provide
long-range artillery assault capabilities against enemy
fleets and installations. The Harbinger is armed with
long-range high-yield torpedoes.
Sphere
The Sphere’s function in the Collective is to assimilate
or destroy all unassimilated vessels and stations. The
Sphere is equipped with an energy beam and requires a
moderate number of drones to accomplish its function.
Special Weapon: Regeneration
The Sphere can be adapted to engage its regenerative
systems. Regenerating the Sphere temporarily increases
its repair rate and shield recharge rate.
46 47
Page 24

BORG COLLECTIVE
BORG COLLECTIVE
Diamond
The Diamond’s function in the Collective is to assist the
coordinated assimilation of unassimilated fleets and
stations. The Diamond is equipped with an energy beam
and can be adapted with distinct technologies necessary
to accomplish its function.
Special Weapons:
Shield Remodulation
The Diamond can be adapted to modify the shields of an allied vessel, making
them temporarily impervious to attack.
Computer Override
The Diamond can be adapted to emit an override frequency to an enemy vessel,
allowing the Collective to temporarily take control of it.
Nanites
The Diamond can be adapted to inject Borg Nanites into an enemy’s
communications system. Infecting an opponent with Nanites results in a
scrambling of the enemy’s computer interface.
Ultrium Burst
The Diamond can be adapted to fire an Ultrium Burst at multiple enemy targets
it has determined as unsuitable for assimilation. The Ultrium Burst severely
damages all vessels it targets.
Harmonic Defender
To protect the Collective’s fleet vessels, the Harmonic
Defender is armed with Fleet Defense Phasers,
short-ranged but wide-coverage weapons.
Special Weapon: Special Energy Recharger
Will recharge the special weapons energy of any friendly
ships within a specified distance.
Cube
The Cube’s function in the Collective is to assimilate or
destroy all unassimilated vessels and stations. The Cube
requires a significant number of drones to perform its
function efficiently. The Cube is equipped with high-yield
energy torpedoes and energy beams and can assimilate one
enemy special weapon.
Special Weapons:
Holding Beam
The Cube can be adapted to use a Holding Beam on an enemy vessel. The Holding
Beam restricts movement of an enemy vessel and transfers drones directly onto the
enemy ship.
Technology Assimilation Beam
This beam is available on all Cube-class ships once you possess a Technology
Assimilator. The beam immobilizes the target vessel and assimilates a special
weapon from the target vessel (assuming one is present), giving that Cube-class
ship the ability to use that special weapon. If more than one special weapon is
present on the target vessel, then a special weapon is assimilated at random.
Assimilating a special weapon and then bringing that Cube to a technology assimilator station can equip all Cube-class ships in your fleet with that special weapon.
Tactical Cube
The Tactical Cube is a more powerful, more heavily-armored
version of the Cube. Each Tactical Cube can assimilate two
enemy special weapons.
Special Weapons:
Holding Beam
Technology Assimilation Beam
Fusion Cube
One of the Collective’s most powerful vessels, the Fusion
Cube is not made from resources at a shipyard, but rather
from the fusing together of eight cubes. Armed with eight
batteries of phasers and photon banks, the Fusion Cube can
also be adapted to assimilate the special weapon technology of enemy ships—each Fusion Cube can assimilate up to
three enemy special weapons.
48 49
Page 25

BORG COLLECTIVE
BORG COLLECTIVE
Special Weapons:
Holding Beam
Technology Assimilation Beam
Tactical Fusion Cube
The most powerful weapon in the Collective, the Tactical
Fusion Cube is a more powerful version of the Fusion
Cube. Each Tactical Fusion Cube can assimilate up to
three enemy special weapons.
Special Weapons:
Holding Beam
Technology Assimilation Beam
THE BORG STATIONS
Nexus
The Borg Nexus is the communications network for the
Collective in a sector. Once a Nexus is operational, drones
begin to be transported into the drone pool at a steady
rate. Building an additional Nexus can increase this rate.
The Nexus itself can build Assemblers and Collectors, the
basic units for establishing an outpost in an area. The
Borg Nexus is armed with an array of energy cannons for
defense.
Resource Processing Node
The Resource Processing Node is necessary for harvesting
and processing dilithium and metal, essential for the
construction of ships and stations. This node comes with a
Collector, which begins mining the nearest dilithium moon or
planet as soon as the processing node is operational. Once
the Collector is full, it returns to the Processing Node to
process the resource. Processed metal or dilithium is added
to your resource accounts.
Borg Energy Cannon
The Borg Energy Cannon is a small, unmanned defensive
platform. It provides support for the Collective by firing
energy blasts at all enemy vessels within its range.
Borg Detection Array
The Borg Detection Array is an unmanned, small satellite
that provides line-of-sight in a radius around it. The
Detection Array can be modified to use a tachyon
detection grid to locate cloaked ships if developed at
the modification center.
Borg Assembly Matrix
The Borg Assembly Matrix has two bays, one for
construction and one for repair, allowing it to construct
and repair one ship at a time. The assembly matrix can
build the Detector, Interceptor, Harbinger, Colony Ship,
Sphere, Wedge, and Assimilator-class ships.
Borg Recycler
The Borg Recycler allows the Collective to gain resources
through assimilation. Enemy vessels that have been
taken can be brought to the recycler and broken down
into their component resources for use by the Collective.
The Recycler can also convert dilithium into metal and
vice versa.
Borg Torpedo Turret
The Borg Torpedo Turret is a larger, unmanned
defensive platform. It provides support for Borg
installations by firing energy torpedoes at all enemy
vessels within its range.
50 51
Page 26

BORG COLLECTIVE
BORG COLLECTIVE
Modification Center
The Borg Modification Center allows you to modify the
Detector, Interceptor, Sphere, Assimilator, Harmonic
Defender, and Cube-class ships, each with its own special
weapon. When each new ship’s technology is researched, a
new pod is built onto the modification center. Though they
are attached to the center, each pod has its own shields
and can be targeted independently from the main
structure. If the modification center is destroyed, all pods on the center are
destroyed with it. A modification center can build the following pods:
Tachyon Detection Grid—Detector
Transwarp Drive—Interceptor
Auto-Assimilator—Assimilator
Regeneration—Sphere
Holding Beam—Cube
Special Energy Recharger—Harmonic Defender
Technology Assimilator
The Borg use the Technology Assimilator station to
supplement the special weapons of all of its fleet’s
cubes. When an assimilated ship is fed into the technology assimilator, any special weapon that it has is added
to the Cubes’ repertoire. The appropriate node is then
added to a spoke on the Technology Assimilator, while
the enemy vessel is destroyed.
Researched at the Technology Assimilator, the Collective Hub is the technology
that is necessary to assemble Fusion Cubes and Tactical Fusion Cubes out of
groupings of eight Cubes or Tactical Cubes.
Advanced Assembly Matrix
The Borg Advanced Assembly Matrix has two bays,
one for repair and one for construction, like its smaller
counterpart. The Advanced Assembly Matrix can
build Cube, Tactical Cube, Harmonic Defender, and
Diamond-class ships.
Technology Node
The Borg Technology Node allows you to modify the
Diamond-class vessels. When each new technology is
acquired, a new pod is built onto the technology node.
Though they are attached to the node, each pod has its
own shield and can be targeted independently from the
main structure. If the technology node is destroyed, all
pods on the facility are destroyed with it. The technology
node can build the following pods:
Shield Remodulation—Diamond
Computer Override—Diamond
Nanites—Diamond
Ultrium Burst—Diamond
Borg Ship Upgrade Facility
The Borg Ship Upgrade Facility is the Collective’s center
for research and upgrades on shipboard systems. There
are five separate ship systems that can be researched
and upgraded at the facility: weapons, shields, sensors,
engines, and life support. The systems can each be upgraded by two levels:
level 2 and level 3. Though they are attached to the facility, each pod has its
own shields and can be targeted independently from the main structure. If the
Borg Ship Upgrade Facility is destroyed, all pods on the facility are destroyed
with it.
Transwarp Gate
The Transwarp Gate allows the Collective to open a transwarp conduit from the gate’s origin to another location.
Any number of vessels can travel either way through the
conduit while it is open. The tremendous energy required
to maintain the conduit prevents it from being open
permanently.
52 53
Page 27

ROMULAN EMPIRE
ROMULAN EMPIRE
THE ROMULAN
STAR EMPIRE
The Romulans are an offshoot of the Vulcan people, having left the planet over
2000 years ago to relocate on the twin planets of Romulus and Remus.
This exodus was in rebellion against the dogmatic Vulcan philosophy of logic
and pacifism prevalent in Vulcan society at the time. The governing body of the
Romulan Empire is the Romulan Senate, and their leader is known as the
Praetor. The Romulans are a passionate and aggressive people known for their
stealth and cunning in combat. They have a large military presence in the Alpha
Quadrant, and have been involved in wars with both the United Federation of
Planets and the Klingon Empire in the past.
THE ROMULAN FLEET
NON-COMBAT SHIPS
Freighter
The Romulan freighter is outfitted with a reinforced
hull, capable of carrying large amounts of unprocessed
dilithium, or latinum. The drain of energy required to
carry their heavy payload limits the freighter’s speed.
Freighters have no weapons, though their heavy
shielding allows them to withstand considerable
damage in combat.
Construction Ship
The Romulan construction ship is loaded with a team of
workers in its cargo bay. When constructing a station,
these one-person engineering shuttlecraft are deployed
from the construction vessel. While the construction
ship transports the raw materials, the workers assemble
the areas with welding lasers. Like freighters,
construction vessels are not armed. They do have a
tractor beam that allows them to tow derelicts and ships
with disabled engines.
Repair Ship
The Romulan repair ships are able to provide mobile
repair capabilities to both ships and facilities. Unarmed,
they are heavily fortified so that they may carry out
their critical duties, even in combat situations.
Cargo Ship
Romulan merchant ships trade with many worlds and races
throughout the galaxy, moving between the trading stations
near worlds both inside and outside the Star Empire.
They are equipped with excellent shields but no defensive
armaments, relying on their maneuverability to get them
out of harm’s way.
Colony Ship
The Romulan Empire continues to search for new planets
to colonize. The Romulan colony ship is able to
transport enough colonists and supplies to start a
fledgling colony. Once the colony is in place, the colony
ship is automatically decommissioned and broken into
its component parts to be used by the colonists.
COMBAT SHIPS
Note: All Romulan combat ships are equipped with a cloaking device,
allowing them to move through space undetected.
T alon-class
The Talon was designed to be the eyes and ears
of the Romulan armada. Its superior speed and
maneuverability allows it to recon an area of space
before the fleet moves in. This ship is armed with a
single forward-firing plasma cannon.
Special Weapon: Tachyon Detection Grid
Talon-class ships can have their sensor arrays modified to use a Tachyon
Detection Grid, allowing them to detect cloaked ships within their sensor range.
54 55
Page 28

ROMULAN EMPIRE
ROMULAN EMPIRE
Kestrel-class
The Kestrel-class assault ship is designed to transport
Centurion assault troops across the reaches of space.
The Centurions are specially trained to perform quick
and efficient boarding actions, seizing control of enemy
vessels and bases in record time.
Note: Centurions can only be transported onto a ship
whose shields are down. Transport Attack will direct
the ship to fire at an enemy vessel until the shields are down, and then begin
transporting centurions aboard. In addition, the assault ships must also
lower their own shields during the transport process, leaving them vulnerable
to enemy fire.
Shrike-class
The Shrike-class is a favorite of the Tal Shiar, the
Romulan Intelligence Agency, for its stealth and speed.
Its cloaking device allows Tal Shiar operatives to
conduct covert operations in unsanctioned areas of
space. Shrike-class vessels are equipped with two
forward-firing plasma cannons.
Special Weapon: Romulan Spy
The Shrike can be modified to accommodate a Romulan spy on board. The Shrike
has been specially designed with unique transporters, allowing it to transfer
the spy onto enemy vessels without lowering its shields or decloaking. If
successfully transported, the Romulan spy accesses the enemy’s sensors, giving
it line-of-sight on a targeted enemy ship or station for a short period of time. If
the Romulan spy is able to get on board an enemy starbase, it can access that
opponent’s entire communications network, allowing full line-of-sight on all
enemy vessels and stations for a short period of time.
Veles-class
The Veles-class is a protector of the Romulan fleet.
Equipped with four banks of photon torpedoes and a
standard arrangement of phasers, they make a
formidable foe in battle. Additionally, Romulan weapons
scientists have enabled the Veles to extend the power
of a cloaked fleet of Romulan warships with its special
weapon.
Special Weapon: Cloak Enhancer
Veles-class vessels can be upgraded to use a Cloak Enhancer. When activated,
this device allows nearby cloaked ships to perform actions that they could not
otherwise perform while cloaked, including the use of their weapons.
Raptor-class
The Raptor is equipped with the same tri-cobalt
torpedoes as the Federation Steamrunner cruiser.
Starfleet is still unsure how the Romulans were able to
duplicate the technology, but it is suspected that
Romulan Tal Shiar operatives infiltrated Starfleet’s Corps
of Engineers and stole the plans for the weapon.
Special Weapon: Myotronic Inhibitor
To prevent the Raptor from being destroyed before it can unleash its attack, all
Raptors can be outfitted with a Myotronic Inhibitor. This torpedo temporarily
disables the weapons system of an enemy vessel, rendering them ineffective in
combat.
Griffin-class
The Griffin was designed to compliment the
Romulan fleet by confusing and disabling the enemy.
Its reinforced shielding and ample crew allow it to be
a formidable opponent in combat. All Griffins are armed
with powerful phasers.
Special Weapon: Sensor Jammer
Griffins can also be outfitted with a Sensor Jammer. The sensor jammer
unleashes a subspace wave that disables all enemy ships’ sensors in its wake.
Draconarius-class
One of the latest additions to the Romulan fleet, the
Draconarius-class is a sleek and deadly attack cruiser,
capable of inflicting punishing damage through its
banks of phasers and photon torpedoes.
56
57
Page 29

ROMULAN EMPIRE
ROMULAN EMPIRE
Shadow-class
The Tal Shiar, having need of a vessel more suited to their
covert operations, assembled the greatest military scientists in
the Star Empire. The culmination of their efforts resulted in
the Shadow-class. The technology on board the Shadow is
extremely classified, so much so that even members of the
Romulan Senate are not "officially" aware of its existence.
The Shadow comes equipped with phasers, but can also be refitted with four
experimental technologies.
Special Weapons:
Holo-emitter
The Shadow is equipped with a unique deflector dish able to project holograms.
When outfitted with a Holo-emitter, the projection manipulates enemy sensors
by reversing their warp signatures and appearance. This causes affected ships
to inadvertently target their allies.
Psychonic Blast
The Shadow’s deflector dish can also be rigged to emit a subspace blast of
radiation known as the Psychonic Blast. This causes an enemy’s crew to
temporarily go insane, killing members of their own crew.
Energy-Shield Converter
A modification to the inversion beam, this converter redistributes the Shadow’s
energy into shield energy, then transfers it to an allied ship.
Phase Cloak
Development of this technology began as early as 2367, but was not competed
until recently. The Shadow is the first of its kind to carry a functional
interphase generator. When activated, the generator phases the ship’s
molecular structure, allowing it to move unseen through physical objects.
Venator-class
The Venator is one of the newest ship designs to come
from the ship design yards at Romulus. A battleship
intended to compliment the mighty Romulan Warbird,
the Venator is slightly smaller, yet is equipped with
longer range phasers.
Warbird-class
The Romulan Warbird, designated the D’deridex-class,
is a massive spaceship and the flagship of the Romulan
fleet. The Warbird is equipped with powerful plasma
torpedoes and phasers. The combination of of fensive
strength, maneuverability, and stealth make the Warbird
a deadly predator and an invaluable asset to the
Romulan fleet.
Special Weapon: Shield Inversion Beam
The Warbird can be modified to fire a shield inversion beam. This beam drains
an enemy’s shields directly from the ship and transfers them to the Warbird’s.
Phoenix-class
The Phoenix was originally developed by the Star Empire as
a last resort, should the Romulan Empire fall to invaders.
Its potential effect is so devastating, it requires a special
shipyard for its construction. Because of the intense burden
Phoenix-class captains must bear, the Tal Shiar has been
known to use unorthodox "conditioning" techniques in their
training. These techniques ensure the loyalty and commitment of Phoenix
captains to the Star Empire.
Special Weapon: Spatial Rift
When the Phoenix activates its only weapon, it creates an expanding tear in the
space-time continuum that does massive damage to any ship or station within
its range. The ship and its crew are destroyed in the resulting explosion.
THE ROMULAN STATIONS
Romulan Starbase
The Romulan Starbase is the center of the Romulan fleet
in a sector. Once a starbase is operational, crew begins
to be transported into the crew pool at a steady rate.
Building additional starbases will increase this rate. The
station can build construction ships, cargo ships, and
freighters, the basic units for establishing an outpost in
the area. The Romulan Starbase is armed with an array
of pulse phasers for defense.
58 59
Page 30

ROMULAN EMPIRE
ROMULAN EMPIRE
Romulan Mining Facility
The Romulan Mining Facility is necessary for harvesting
and processing dilithium. The facility comes with a
freighter, which begins mining the nearest dilithium
moon or latinum nebula as soon as the Mining Facility is
operational. Once the freighter has a full payload, it
returns to the Mining facility to process the raw load.
Romulan Orbital Processing Facility
Romulan Orbital Processing Facilities are built by
construction ships and are placed over a planet to tap
the planet’s metal resources. Once built, they stay in a
fixed orbit over the planet while mining.
Romulan Plasma Cannon
The Romulan Plasma Cannon is a small, unmanned
defensive platform. It provides support for Romulan
outposts by firing pulse phasers at all enemy vessels
within its range.
Romulan Spy Satellite
The Romulan Spy Satellite is an unmanned, small
satellite that provides line-of-sight in a radius around
it. The spy satellite can be modified to use a Tachyon
Detection Grid to locate cloaked ships if developed by
a research station.
Romulan Trading Station
The Star Empire extends far into the galaxy, bringing
Romulan trade and influence to myriad worlds. Once
constructed, a trading station can be used to buy or sell
dilithium, metal, and latinum—particularly useful when
there is an abundance of one resource but a limited
supply of another. A cargo ship will need to be
constructed that can then be sent to other trading stations you construct, or
trading stations of other players (when playing Multiplayer). Ferengi traders
will periodically send trading ships to any trading stations you construct,
generating latinum for you.
Romulan Shipyard
The Romulan Shipyard has two bays, one for construction
and one for repair. This allows it to construct or repair
one ship at a time. The Romulan shipyard can build the
Talon, Shrike, Kestrel, Griffin, Draconarius, Raptor, and
colony-class ships.
Romulan Torpedo Turret
The Romulan Torpedo Turret is a larger, unmanned
defensive platform. It provides support for Romulan
outposts by firing plasma torpedoes at all enemy vessels
within its range.
Romulan Covert-Ops. Facility
The Romulan Covert-Ops Facility allows you to upgrade
the Talon, Shrike, Raptor, Griffin, Veles, and Warbird-class,
each with their own special weapon. When each new
ship’s technology is researched, a new pod is built onto
the covert ops facility. Though they are attached to the
facility, each pod has its own shields and can be targeted
independently from the main structure. If the covert ops
facility is destroyed, all pods on the facility are destroyed with it. A covert ops
facility can build the following pods:
Tachyon Detection Grid—Talon-class
Romulan Spy—Shrike-class
Myotronic Inhibitor—Raptor-class
Sensor Jammer—Griffin-class
Shield Inversion Beam—Warbird-class
Cloak Enhancer—Veles-class
Romulan Advanced Shipyard
The Romulan Advanced Shipyard has two bays, one for
construction and one for repair, like its smaller
counterpart. The advanced shipyard can build the Veles,
Shadow, Venator, and Warbird-class vessels.
60 61
Page 31

ROMULAN EMPIRE
CARDASSIAN UNION
Tal Shiar Facility
The Tal Shiar, the secret Romulan Intelligence Agency,
has created this facility to modify the Veles and
Shadow-class vessels. When each new technology is
researched, a new pod is built onto the facility. Though
they are attached to the facility, each pod has its own
shields and can be targeted independently from the
main structure. If the facility is destroyed, all pods on the facility are destroyed
with it. The facility can build the following pods:
Holo-emitter—Shadow-class
Psychonic Blast—Shadow-class
Energy-Shield Converter—Shadow-class
Phase Cloak—Shadow-class
Star Empire Research Institute
The Star Empire Research Institute is the Romulan
center for research and upgrades on shipboard systems.
There are five separate ship systems that can be
researched and upgraded at the Institute: weapons,
shields, sensors, engines, and life support. The systems
can each be upgraded by two levels: level 2 and level 3.
Though they are attached to the institute, each pod has its own shields and can
be targeted independently from the main structure. If the Star Empire research
institute is destroyed, all pods on the institute are destroyed with it.
Phoenix Facility
The Phoenix Facility constructs the Phoenix-class vessel.
The Phoenix is armed with a Spatial Rift creator, a
weapon that creates an expanding tear in the space-time
continuum that does massive damage to any ship or
station within its range. The ship and crew are destroyed
in the resulting explosion.
THE CARDASSIAN UNION
The Cardassian Union is a powerful alliance of worlds with the homeworld of
Cardassia at its heart. Poor in natural resources, the home of the Cardassians
drove the evolution of their ruthless desire to gather and expand. After many
years of hostilities towards the Federation, the ruling body of the Cardassian
government—the Detapa Council—begrudgingly signed the FederationCardassian treaty of 2370. Soon afterwards, an invasion by the Klingon
Empire—who suspected that the Detapa Council had been compromised by
agents of the Dominion—left the Cardassian government angered and
humiliated. Rumors have made their way to the busy trade routes of the Alpha
Quadrant that Cardassian military scientists have been called back to Cardassia.
THE CARDASSIAN FLEET
NON-COMBAT SHIPS
Freighter
The Cardassian freighter uses its mining beams to extract
and transport dilithium and latinum for processing. The
drain of energy required to carry their heavy payload limits
the freighter’s speed. Freighters have no weapons,
though their heavy shielding allows them to withstand
considerable damage in combat.
Construction Ship
The Cardassian construction ship is loaded with a team of
workers in its cargo bay. When constructing a station,
these one-person engineering shuttlecraft are deployed
from the construction vessel. While the construction ship
transports the raw materials, the worker bees assemble
the areas with welding lasers. Like freighters,
construction vessels are not armed. They do have a tractor beam that
allows them to tow derelicts and ships with disabled engines.
62 63
Page 32

CARDASSIAN UNION
CARDASSIAN UNION
Repair Ship
The Cardassian repair ships are able to provide mobile
repair capabilities to both ships and facilities. Unarmed,
they are heavily fortified so that they may carry out their
critical duties, even in combat situations.
Cargo Ship
Cardassian merchant ships trade with many worlds and
races throughout the galaxy, moving between the trading
stations near worlds both inside and outside the
Cardassian Union. They are equipped with excellent
shields but no defensive armaments, relying on their
maneuverability to get them out of harm’s way.
Colony Ship
In its never-ending quest for more resources, the
Cardassian Union continues to seek out new worlds to
colonize. The Cardassian colony ship is able to transport
enough colonists and supplies to start a fledgling colony.
Once the colony is in place, the colony ship is
automatically decommissioned and broken into its
component parts to be used by the colonists.
COMBAT SHIPS
Hideki-class Scout
This versatile class of ship primarily serves in a patrol
capacity with the Cardassian fleet, capitalizing on its
superior speed and agility. In fact, many Cardassian
commanders have employed them as fighters, a role in
which they excel. A common Cardassian tactic is to have
Hidekis perform hit and run attack against large enemy
capitol ships. In addition, Hidekis are often used in a shuttle capacity for
important personnel. The Hideki is equipped with a cloaking device.
Special Weapon: Tachyon Detection Grid
Hideki-class ships can have their sensor arrays modified to use a Tachyon
Detection Grid, allowing them to detect cloaked ships within their sensor range.
Janissary-class
Recently introduced into the Cardassian fleet, the Janissary
carries two reinforced companies of Cardassian Marines.
Designed to deploy its cargo both quickly and efficiently to
the target (a ship or a facility), the Janissary is capable of all
manner of boarding actions.
Note: Marines can only be transported onto a ship whose
shields are down. Transport Attack will direct the ship to
fire at an enemy target until the shields are down, and then begin transporting marines aboard. In addition, the assault ships must also lower their own
shields during the transport process, leaving them vulnerable to enemy fire.
Vasad-class
Introduced to safeguard the Cardassian fleets in combat, the
Vasad is armed with powerful phaser banks and photon
torpedoes. Further, the Vasad can be adapted to scramble
enemy sensors and make targeting the ships that surround
the frigate more dif ficult.
Special Weapon: Sensor Scrambler
When activated, Vasad-class ships outfitted with the Sensor Scrambler will make
target acquisition of any friendly ships within a specified distance of the frigate
considerably more difficult.
Gul Vystan-class
Named for a Cardassian general whose wholehearted
support of the former Obsidian Order was legendary,
the Gul Vystan is a class of ship used extensively in
espionage-related activities. To this end, it is equipped
with a cloaking device allowing it to penetrate enemy
lines undetected.
Special Weapon: Flux Wave
Gul Vystan ships outfitted with this special weapon can create a wave that
emanates out from the ship, sending any ship (enemy or friendly) spinning
around for a specified amount of time. Once the wave ef fect is over, ships
caught in it will return to normal, though may still be disoriented for a small
amount of time.
64 65
Page 33

CARDASSIAN UNION
CARDASSIAN UNION
Legate-class
The Legate-class cruiser is equipped with powerful
plasma torpedoes, providing the ship with long-range
bombardment capabilities. Fleets with the Legate in it
gain the benefits of its extended offensive range.
Brinok-class
Brinok-class ships are long-range patrol cruisers that
are frequently found patrolling the borders of the
Cardassian Union. They are equipped with cloaking
devices and a devastating array of plasma banks and
phasers—making them lethal opponents in combat.
Special Weapon: Drones
Brinok-class ship can be adapted to launch a number of remote piloted drones
at a target that are extremely difficult to evade.
Rasilak-class
A lightly armed and armored ship, the Rasilak class of
ship relies on its quickness and maneuverability to
penetrate enemy lines. Once near an enemy vessel,
it can deliver a debilitating payload.
Special Weapon: Micro-organisms
Once equipped with this special weapon, a Rasilak can
deliver a host of micro-organisms to a target ship that will eat away the ship’s
hull.
Sartan-class
Built for speed and offense, the Sartan is designed to be
the quick-strike tool of the Cardassian fleet. While its
hull is slightly stronger than that of an average
destroyer, it is lightly shielded.
Kulinor-class
Recently introduced by Cardassia’s secretive military engineers, the Kulinor is the dark new jewel of the fleet. Armed
with phasers and heavy shields, the Kulinor is capable of
front-line offensive combat. The new technologies it can be
outfitted with make it a devastating multi-purpose vessel.
Special Weapons:
Plasma Cannon
Designed for planetary bombardment, the Plasma Cannon is slung underneath
the Kulinor and launches a super-dense projectile at a planet’s surface. The only
valid target for a Plasma Cannon is a planet, and when a planet is successfully
struck, it will reduce the target planet’s population.
Quantum Singularity Effect
If equipped with this special weapon, the Kulinor can open a gate to fluidic
space and bring a Species 8472 ship across. The Species 8472 ship gated in will
then attack the nearest ship. If the Kulinor that opened the gate is the closest
ship, then it will be the first to go.
Impulse Engine Boost
Once outfitted with this technology, the Kulinor can receive a temporary speed
boost.
Shield Harmonics Disruptor
Equipped with this technology, the Kulinor can lower the shields of an enemy
ship for as long as the special energy permits. Once the effect is over, the
target ship’s shields will return to normal.
Galor-class
Until the introduction of the Keldon-class, the Galor was
the most powerful vessel in the Cardassian fleet. Equipped
with both phasers and plasma banks, the Galor-class ships
are powerful and dangerous adversaries.
66 67
Page 34

CARDASSIAN UNION
CARDASSIAN UNION
Keldon-class
The Keldon-class of ship are the new flagship of the
Cardassian fleet. Although it uses the same basic hull
design as the Galor, the Keldon is equipped with more
powerful phasers and plasma banks. In addition, the
Cardassians have also equipped Keldon class ships with
cloaking devices.
Special Weapon: Plasma Bank Overload
Once equipped with this special weapon, a Keldon can overload its own plasma
banks and delivers a deadly barrage of plasma energy to a target.
Dreadnought Missile
Often referred to as the Cardassian super weapon, the
Dreadnought is very expensive in terms of resources to
produce. It carries a charge of a thousand kilograms of
anti-matter, enough explosive power to destroy a small
moon. It is unmanned and once a target is chosen and the
missile hits its target, the target will most certainly be
destroyed. One of the uses of the Dreadnought is to take
out large stationary targets such as starbases and defensive outposts.
THE CARDASSIAN STATIONS
Cardassian Starbase
The Cardassian Starbase is the center of the Cardassian
fleet in a sector. Once a starbase is operational, crew
begins to be transported into the crew pool at a steady
rate. Building additional starbases will increase this
rate. The station can build construction ships, cargo ships, and freighters,
the basic units for establishing an outpost in the area. Once a starbase is
constructed, mining stations, phaser turrets, sensor arrays, colony ships,
trading stations, shipyards, and research stations can be built. The Cardassian
starbase is armed with an array of pulse phasers for defense.
Cardassian Mining Station
The Cardassian Mining Station is necessary for harvesting
and processing dilithium. The facility comes with a
freighter, which begins mining the nearest dilithium moon
or latinum nebula as soon as the mining station is
operational. Once the freighter has a full payload, it
returns to the mining station to process the raw load.
Cardassian Orbital Processing Facility
Cardassian Orbital Processing Facilities are built by
construction ships and are placed over a planet to tap the
planet’s metal resources. Once built, they stay in a fixed
orbit over the planet while mining.
Cardassian Phaser Turret
The Cardassian phaser turret is a small, unmanned
defensive platform. It provides support for Cardassian
outposts by firing at all enemy vessels within its range.
You must have a starbase to build a phaser turret.
Cardassian Sensor Array
The Cardassian sensor array is an unmanned, small
satellite that provides line-of-sight in a radius around it.
The sensor array can be modified to use a tachyon
detection grid to locate cloaked ships if developed by a
research station.
Cardassian Trading Station
Though the Cardassians have a ruthless reputation,
they’ve also learned the benefits of trade. Once
constructed, a Trading Station can be used to buy or sell
dilithium, metal, and latinum—particularly useful when
there is an abundance of one resource but a limited
supply of another. A cargo ship will need to be constructed
that can then be sent to other trading stations you construct, or trading
stations of other allied players (when playing Multiplayer). Ferengi traders will
periodically send trading ships to any trading stations you construct, generating
latinum for you. You must have a starbase in order to build a trading station.
68 69
Page 35

CARDASSIAN UNION
CARDASSIAN UNION
Cardassian Shipyard
The Cardassian Shipyard has two bays, one for
construction and one for repair. This allows it to
construct or repair one ship at a time. The Cardassian
shipyard can build the Hideki, Colony, Sartan, Janissary,
Gul Vystan, Brinok, Legate, and Rasilak-class ships.
Cardassian Plasma Turret
The Cardassian Plasma Turret is a larger, unmanned
defensive platform. It provides support for Cardassian
outposts by firing plasma torpedoes at all enemy vessels
within its range.
Cardassian Military Research Center
The Cardassian Military Research Center allows you to
upgrade the Hideki, Brinok, Gul Vystan, Rasilak, Vasad,
and Keldon-class, each with their own special weapon.
When each new ship’s technology is researched, a new
pod is built onto the Military Research Center. Though
they are attached to the center, each pod has its own
shields and can be targeted independently from the main structure. If the
Military Research Center is destroyed, all pods on the center are destroyed with
it. A Military Research Center can build the following pods:
Tachyon Detection Grid—Hideki-class
Drones—Brinok-class
Flux Wave—Gul Vystan-class
Micro-organisms—Rasilak-class
Plasma Bank Overload—Keldon-class
Sensor Scrambler—Vasad-class
Cardassian Advanced Shipyard
The Cardassian Advanced Shipyard has two bays, one for
construction and one for repair, like its smaller
counterpart. The Advanced Shipyard can build the
Kulinor, Vasad, Galor, and Keldon-class vessels.
Cardassian Advanced Research Station
The Advanced Research Station upgrades the
Kulinor-class vessels. When each new technology is
researched, a new pod is built onto the advanced
research station. Though they are attached to the
station, each pod has its own shields and can be
targeted independently from the main structure. If the
advanced research station is destroyed, all pods on the
station are destroyed with it. The Kulinor-class vessels can be built without the
Advanced Research Station, but their special weapons must be researched at it.
The Advanced Research Station can build the following pods:
Impulse Engine Boost—Kulinor-class
Quantum Singularity Effect—Kulinor-class
Plasma Cannon—Kulinor-class
Shield Harmonics Disruptor—Kulinor-class
Cardassian Research Institute
The secretive Cardassian military research engineers
have put the fruits of their research into the Research
Institute. There are five separate ship systems that can
be researched and upgraded at the institute: weapons,
shields, sensors, engines, and life support. The systems
can each be upgraded by two levels: level 2 and level 3. Though they are
attached to the institute, each pod has its own shields and can be targeted
independently from the main structure. If the Research Institute is destroyed,
all pods on the Institute are destroyed with it.
Cardassian Advanced Robotics Institute.
Recent breakthroughs in advanced robotics have driven
the Detapa Council to devote entire facilities to further
this research. These research facilities have led to the
development of the Dreadnought missile, which is now
built at the Advanced Robotics Institute.
70 71
Page 36

SPECIES 8472
SPECIES 8472
SPECIES 8472
First encountered by the Borg in the Delta Quadrant in 2373, Species 8472 is
unlike any race in the galaxy. Interdimensional beings, Species 8472 originate
outside of the known universe—from a place with no planets or stars, but only
bio-matter. Known as Fluidic Space, Species 8472 can traverse the divide
between there and the conventional universe through quantum singularities.
Single-minded in purpose, they pose a threat to all other races in their
aggression. Requiring only Bio-matter to function, Species 8472 has no need of
dilithium, metal, or latinum—and virtually every object they encounter can be
broken down into some degree of Bio-matter. Their "ships" and "stations" are in
fact organic life-forms genetically designed to a specific purpose, many are
crewed by a single creature, and nearly all of them are mobile. The organic
nature of their structures negates the need for repair—they are all capable of
regeneration. Furthermore, their technology is so different and advanced that
they cannot be boarded or assimilated, and tractor beams have no effect. There
is no creation of separate units at different shipyards—the different organisms
have the ability to transform themselves into other forms of units. Their
presence in the universe is hostile, and they have already marked the Borg
and the Federation as their enemies.
SPECIES 8472 ORGANISMS
Mother
A very large, slow moving unit, the Mother is the central
organism of Species 8472. There are two basic types of
organisms that are generated by the Mother: Active and
Passive embryos. The Mother is armed with Bio-pulse beams.
Passive Embryo
This unit is a softer, amoeba-like organism that can transform
into the less active facility-like structures of Species 8472. The
Passive organism is able to transform itself into the following
units: Mother, Transmuter, Enhancer, Biogenesis Core,
Metogenesis Core, and Fluidic Gate. Passive Embryos have tractor
beams for towing ships.
ACTIVE UNITS
Scout
Species 8472 uses this class of organism as scouts
because they are fast, maneuverable, and possess
excellent sensory abilities. The Scout has a basic
bio-pulse beam as armament, and is capable of
moderate regeneration.
Special Weapons:
Clairvoyance
If adapted to use clairvoyance, the Scout is able to probe the minds of crewmen
aboard nearby vessels, and see what they see while the special energy lasts.
This special weapon is particularly effective during the early stages of
exploration as the scout ship can map areas of space without having to venture
there. It is also useful to determine the size of an attacking fleet before they
reach your sensor range. Cloaked ships are immune to clairvoyance.
Tachyon Detection Grid
Scouts can have their sensor arrays modified to use a Tachyon Detection Grid,
allowing them to detect cloaked ships within their sensor range.
Active Embryo
This unit is a hard shell organism that can eventually transform
into the more active and mobile Species 8472 "ships." The
Active organism is capable of transforming itself into the
following units: Scout, Destroyer, Cruiser, Launcher, and
Collector. Active Embryos have tractor beams for towing ships.
When equipped to use Clairvoyant Link, the Destroyer can create and maintain a
psionic lock on a target ship, tracking them through space and gathering information through their sensors. A ship can track only a single vessel at a time.
72 73
Destroyer
This is a lightly armed and armored assault unit. Though
the Destroyer has less powerful regenerative capabilities
than the other warships, it offers increased maneuver-
ability and speed. It is armed with bio-pulse beams.
Special Weapon: Clairvoyant Link
Page 37

SPECIES 8472
SPECIES 8472
Clairvoyant link can be especially effective when attempting to locate the
enemy’s starbase—damaging an enemy ship and then using the link to track
them back to their shipyard as they attempt to get repairs.
Cruiser
A mid-level assault organism equipped with an
arrangement of bio-pulse weapons, the Cruiser is a
powerful unit in the Species 8472 arsenal. The Cruiser
is lightly armored, but fast and maneuverable.
Special Weapon: Psionic Disruption
The Cruiser can be modified to use psionic disruption, a
weapon that renders its target incapable of immediate action. Movement and
offensive actions are delayed or even halted while the weapon is in effect.
Launcher
More heavily armored than the Cruiser, this ship is
armed with long-range organic artillery. The Launcher
can provide long-range offensive capabilities to the
Species 8472 fleets.
Battleship
The primary warship used by the Species 8472 fleet, the
Battleship is armed with a very powerful bio-pulse
beam. One of the largest bio-matter ships encountered
by other races, the Battleship is fearsome in combat.
Special Weapon: Psionic Insanity
Battleships outfitted with this special weapon are able
to release a wave that makes all non-Species 8472 ships unable to determine
who their enemy actually is. The effected ship will fire randomly at nearby
targets throughout the duration of the effect. In certain situations, ship
captains have been known to initiate their ship’s self-destruct sequence,
thinking the situation hopeless.
Frigate
Slightly larger than the Battleship, Species 8472’s Frigate is
a specialized fleet defense organism. While not designed
for lone offensive actions, the Frigate equipped with a biopulse conduit can ensure victory in a closely pitched battle.
Special Weapon: Bio-Pulse Conduit
When grouped with four to eight operational Battleships,
the Bio-Pulse Conduit becomes an effective super-weapon. When the order is
given to activate the bio-pulse conduit, the supporting Battleships form a ring
around and slightly behind the Frigate. As each battleship fires its primary
weapon at the aft of the Frigate, the energy is redirected into an immensely
powerful Bio-Pulse Beam that is capable of destroying even the most powerful
enemy ships.
Behemoth
One of the most awesome ships seen in the universe,
Species 8472’s Behemoth is a gigantic vessel. Though slow
to move and to regenerate, the Behemoth is nonetheless a
powerful threat to enemy fleets. Its defensive projectile
targeting system destroys incoming torpedo weapon fire
before it can do damage. The Behemoth can be upgraded
with devastating special weapons.
Special Weapons:
Nebula Generation
This special weapon allows the Behemoth to create a special fluidic nebula by
excreting matter from pores that form a ring around the ships body. It is a time
consuming process, but when complete, there will remain a diffuse mass of
interstellar dust and gas. The nebula prevents other races from building within
its boundaries, and it creates warp inhibitor fields that prevent ships from using
warp. The generated nebula decays over time and will eventually collapse.
Nebula Flux
When fired into a nebula, this weapon causes a destructive reaction that
spreads from the center of the nebula to its outer reaches. The amount of
damage is dependent on the type of nebula. The targeted nebula remains
behind afterwards and operates as it always did.
74 75
Page 38

SPECIES 8472
SPECIES 8472
Transient Rift
This special weapon allows a Behemoth to travel to any explored point on the
map by opening a temporary rift to Fluidic Space. Two rifts are created, one at
the source and one at the destination point. This allows travel between the two
points.
Collector
Moving through space seizing disabled and derelict ships and
stations, the Collector is able to begin breaking down their
component parts into useable resources. The Collector can be
used on an actual resource (such as a dilithium moon) or a
ship or station that used resources during its construction.
When its storage is full, it delivers the payload to a transmuter
for conversion into Bio-matter.
Special Weapon: Resource Extraction Beam
Similar to the mining beam seen on mining ships of other races, the Resource
Extraction Beam reaches out for a nearby vessel and begins draining it of
resources, breaking it down into component parts.
Defender
This is unit constructs Sentinels and lays Mines, and has
no defensive weaponry.
Mines
A small organism that sits immobile in an area of space
and only reacts to the presence of enemy starships, the
Mine is a treacherous threat to enemy races. As an enemy
ship approaches, the Mine moves at high-speed towards
the vessel and latches onto its hull. It emits a stream of
corrosive acids that eat though the hull, lowering its
overall integrity. The longer the effect goes on, the more
damage is done.
Sentinel
The Sentinel is an organic mass that acts as a defensive
emplacement. This immobile turret-like organism is
more damaging than mines and it has a longer range,
firing on enemy vessels that enter its sector of space.
Initially equipped with basic plasma beam weapons, as
ship upgrades are researched, its weapon capabilities
improve.
PASSIVE UNITS
T ransmuter
The function of the Species 8472 Transmuter is to convert
bio-matter gathered by a Collector into usable bio-matter
materials. The bio-matter transmutation occurs after the
collector deposits its payload in the Transmuter. Heavily
armored and capable of quick regeneration, the
Transmuter is essential to Species 8472. The Transmuter is
also capable of movement.
Enhancer
This organism has been genetically designed to further
the technology of the Species 8472 forces. When each
new technology is researched, a new pod grows onto
the organism. Though they are attached, each pod has
its own “shields” and can be targeted independently
from the main structure. If the enhancer is destroyed,
all pods are destroyed with it. The Enhancer organism
can build the following pods:
Clairvoyance—Scout
Tachyon Detection Grid—Scout
Clairvoyant Link—Destroyer
Psionic Disruption—Cruiser
Psionic Insanity—Battleship
76 77
Page 39

SPECIES 8472
FERENGI ALLIANCE
Biogenesis Core
This organism is similar to the Enhancer, focusing on
more advanced special weapon technologies. The
following technologies can be researched at the
Biogenesis Core:
Bio-Pulse Conduit—Frigate
Nebula Generation—Behemoth
Nebula Flux—Behemoth
Transient Rift—Behemoth
Metogenesis Core
Genetically engineered to improve the systems of the
organisms of Species 8472, the Metogenesis Core is
equipped with excellent armor and regeneration power.
There are four separate ship systems that can be researched
and upgraded: weapons, regeneration, sensors, and engines.
The systems can each be upgraded by two levels: level 2 and
level 3. Though they are attached to the organism, each pod
has its own shields and can be targeted independently from the main structure.
If the Metogenesis Core is destroyed, all pods are destroyed with it.
Fluidic Gate
The key to Species 8472’s ability to cross between
dimensions, the Fluidic Gate is an organic structure
used to create and stabilize a quantum singularity.
Aside from the mines, turret-like sentinels, and research
centers, this is the only 8472 unit that is immobile.
It has no defensive capabilities and is generally
constructed in an area with additional protection. Each unit summoned has a
pre-determined bio-matter cost. The fluidic gate can summon in the following
organisms: defender, frigate, and behemoth.
FERENGI ALLIANCE
Originally from the planet Ferenginar, the interstellar civilization of the Ferengi
has come to dominate galactic trade routes with their highly evolved form of
capitalism. Bound to a strict code of honor known as the Rules of Acquisition,
Ferengi traders have become an inescapable part of Federation commerce.
Interested in galactic politics only inasmuch as they might increase their profits, the Ferengi actively trade with any worlds or civilizations that might expand
their sphere of economic influence.
Building trading stations will automatically attract Ferengi cargo ships to trade
with you, providing you with latinum.
Derelict ships will also attract Ferengi scavenger ships, who will attempt to take
the ships for their parts.
TRANSPORTING CREW
You can transport crew from ship to ship. The purpose for transporting from one
friendly ship to another is to bolster the complement of crew on a ship where
most of the crew have been killed. This will allow the ship to repair and fire
faster. You can also transport crew to derelict ships in order to gain control of
an unmanned ship.
Once the shields have been lowered on an enemy ship, you can transport crew
onto that ship. A boarding party on an enemy ship will engage in combat with
that ship’s crew. Each race has its own proficiency in doing this. Once the
enemy ship’s crew reaches zero, your crew will take control of the ship.
PLACING BUILDINGS ON THE MAP
You can only place a station on the map in certain locations. If a station can be
placed onto the map at a given location, the ghost of the station will appear
with a green square around it. If a red square appears around it, that means
that you cannot build at that location.
78 79
Page 40

MAP OBJECTS
MAP OBJECTS
MAP OBJECTS
The game field may be populated by many different types of objects. These
include well known astronomical phenomena, as well as some unique to the
Star Trek universe.
DILITHIUM MOONS
These large floating rocks are the main source of
dilithium, necessary for warp engines. Each moon is
capable of being mined by freighters for dilithium
crystals. Blue dilithium moons have a fixed amount of
the resource—as the moon is mined, it will reduce in
size and lose its blue glow as the dilithium supply is
exhausted. Purple moons provide an unlimited supply of
dilithium. Dilithium moons, like planets, create a gravity
well which inhibits warp travel in their vicinity.
PLANETS
There are six different classes of planets that you can encounter. All planets
supply metal, although in varying amounts, that can be harvested with orbital
processing facilities or the resource collectors of some races. Some planets are
capable of supporting life, and are therefore able to be colonized. You must use
a colony ship to colonize a planet. Once colonized, the planet will provide a
steady influx of crew to your crew pool.
Note: Species 8472 DO NOT colonize planets.
The six classes of planets are:
Class D Planet
These planets are small, rocky planetoids. They are gen-
erally rich in metals, but not capable of supporting life.
Class H Planet
These planets tend to be extremely dry and are often
referred to as desert planets. Class H planets can only
support a sparse civilian population, though they have
high metal contents.
Class J Planet
Class J planets are gas giants with turbulent
atmospheres, similar to Jupiter and Saturn from Earth’s
solar system. While these planets possess rich metal
deposits, they cannot be colonized.
Class K Planet
Class K planets are arctic worlds, with a small
amount of harvestable metal. A light population can
be established.
Class L Planet
Class L planets are small, rocky, terrestrial worlds with
thin atmospheres and extreme temperatures, capable of
supporting a medium civilian population. A small
amount of metal is available from Class L planets.
Class M Planet
These are worlds with oxygen-nitrogen atmospheres and
are highly supportive of organic life. The Class M planets
can support a heavy civilian population.
80 81
Page 41

MAP OBJECTS
MAP OBJECTS
Planet Class Metal Content Max. Civilian Pop.
Class J High —
Class H High Sparse
Class D Medium High —
Class M Medium Heavy
Class L Low Medium
Class K Low Light
The gravitational well of a planet prevents ships from traveling in warp speed
within a specified radius around the planet—providing a natural defense for a
base built nearby, as enemies won’t be able to warp directly into your base.
Note: Gravitational wells show up as purple, circular fields on the mini map.
NEBULAE
These gaseous areas of space may be used for strategic purposes—depending on
the type of nebula. There are six types of nebulae, each of which affect ships
differently. Each type may be identified by its color or visual effect.
The six nebula types are:
Metreon Nebula (red)
These dangerous nebulae shoot out volatile electric
currents and slow the movement of ships. The reddish
metreon break down ships’ shields at a steady rate, then
begin damaging systems when shields are down.
Radioactive Nebula (yellow)
Any starship captain knows to steer clear of the
yellowish radioactive nebulae. These nebulae will kill
off the crew at a steady rate, regardless of ship status.
Metaphasic Nebula (green)
Entrance into a metaphasic nebula will remove some of the
negative effects that an enemy’s special weapon may have
caused to a ship. The metaphasic nebula’s healing properties
also increase shield recharge rate.
Cerulean Nebula (blue)
Shields do not work in cerulean nebulae, and all
weapons, special or otherwise, are non-functional.
Cloaking is also disabled within the confines of a
cerulean nebula.
Mutara Nebula (purple)
The mutara nebula, recognizable by its purplish, silver
hue and sparking electricity, slows down any ship within
it. The mutara nebula also disables shields, sensors, and
prevents warp.
Latinum Nebula (yellow/greenish}
These nebulae are the only raw source of latinum in
the galaxy. As the latinum is mined from a latinum
nebula, it changes color or shrinks to show the latinum
disappearing.
Tachyon Nebula (multicolor)
These nebulae have a high concentration of tachyon
particles, but otherwise have no positive or negative
effects.
Asteroid Belts
Clusters of rocks of various sizes that prevent the
movement of ships.
Black Holes
Gravity wells that will damage engines and pull in
disabled ships. Once engines are disabled or the ship
becomes derelict, the wells will destroy the vessel.
82 83
Page 42

TRADING
MULTIPLAYER
Wormholes
A gateway that allows a starship to instantaneously
travel from one f ixed point in space to another. When a
ship is directed into a wormhole, the wormhole and its
connecting partner open.
TRADING
In order to build and support your armada, you will need to develop a strong
economy. Collecting resources—dilithium, latinum, metal, and crew—is the
primary method of expanding your infrastructure. To further strengthen your
economy, you can begin trading your resources—selling for profit when you
have excess, buying when you need more. To do this, you’ll need to build a
trading station.
Note: The Borg and Species 8472 do not trade. Assimilation and ruthless
expansion are the sole source of their infrastructure. The Borg can, however,
transmute metal and dilithium.
Once you have a trading station, you can trade dilithium and metal for latinum.
To do this, you only need to select the station, and click on the Trade button to
see your trading options. Here, you can choose to buy or sell dilithium, metal,
or latinum.
Trading stations will also generate latinum on their own—having a trading
station will attract Ferengi cargo ships, who will automatically trade with you,
increasing your latinum. Also, you can build multiple trading stations and trade
between them to generate even more latinum. Remember, the further apart
your trading stations are, the more latinum they generate.
To trade with another station, you’ll need to use your cargo ship. Cargo ships
can be built at your starbase. Select the cargo ship at the first station and click
on the Trade Menu button. From there, click on the Start Trade icon and then
move the icon over the other station you wish to set up a trade route with and
left-click on it. The icon will change to the End Trade icon and right-clicking on
the second station will start the cargo ship trading.
There may be times when you will wish to send a specific resource to an ally. To
do this, select a cargo ship and click on the Trade Menu button. From there, you
have the option to load 500 units of either dilithium, latinum, metal, or crew.
Once you select which resource you wish to send, your cargo ship will load up
the resource at your nearest trading station. Once it’s bays are loaded,
right-click on the allied station that you want it to go to, and it will go there
and deliver the resource.
MULTIPLAYER AND
INSTANT ACTION
From the Main menu (shown left), you
can enter Multiplayer by clicking the icon
in the lower left quadrant of the screen.
From there, a screen appears that will
allow you to choose which mode of
multiplayer you want to play. An Instant
Action game can be accessed by clicking
the icon in the upper right quadrant.
The Multiplayer Connection screen allows
you to choose your screen name, and
which type of multiplayer connection you
will use. You can choose from: Internet
and Local Area Network (TCP/IP or IPX).
For hosting or playing a game on
GameSpy, choose Internet. To play
GameSpy, you’ll need a GameSpy account.
Once you've selected the connection
you'll be using, you'll be able to create
or join games. Under Current Games,
you'll find a list of all the games that
are available. This display will tell you
the name of the game, the number of
players in the game, and the map
being played. To join a game, select
the game from the Current Games list
and click Join Game. Games displayed
in white can be joined. Games
displayed in red are closed or currently launched. Games that are displayed in
amber are using custom game assets or are a different game version.
To create a game, click Create Game. A box will appear where you can enter the
name of the game you wish to create, as well as a password for that game.
84 85
Page 43

MULTIPLAYER
MULTIPLAYER
If you’re playing on the Internet, you'll see a display of the other players in the
room on the right side of the screen.
The Chat window at the bottom-left side of the screen lets you communicate
with other players. Simply click inside the box, type your message and press
Enter to send it.
Once you've either created or joined a
multiplayer game, or selected Instant
Action, you'll go to the Game Setup
screen. The options will allow you to
change the game parameters before
starting a game. If you've joined a
game, you can only change your side
(race), armada (a single team whose
forces are shared with another player),
team, and team color. If the host has
elected not to have random starting
locations, you may also pick your starting location by clicking on the starting
location display.
If you've created a game, you can set the following options for a custom game:
Select Map
Allows you to choose which map the game will take place on. The following
game types are selectable from the drop down menu:
Team Game—Standard multiplayer game. Teams are locked once game is
launched.
Alliances Game—Standard multiplayer game. Teams can change alliances even
after the game is launched—once both players agree (via the Comms menu),
they become allies, with shared vision of the map.
Capture the Flag—All teams begin with a flag near their starting location. Only
construction ships (using their tractor beam) can "grab" another player's flag,
and must then return to their own base. If a player's flag is captured and
successfully returned to the capturing base, the first player is eliminated. The
last player with an uncaptured flag is the winner.
Collect Latinum—The first player (or team) to collect (or trade for) a
pre-determined amount of latinum wins. The amount varies per map and by the
host’s setup.
Colonize Planets—The first player (or team) to colonize more than half of the
planets on the map wins.
Defend Planets—Each player starts with a colonized planet near their starting
location. If your planet is taken from you, you're eliminated. To win, you must
seize every planet held by every player.
Assault—This is a pre-set battle map. Players cannot chose their race or team,
they are assigned when a start location is chosen. (Random start location mode
is not available in Assault maps.)
Team 1 is the defending team. If they can keep any units alive for a set amount
of time (the default time is 30 minutes, but it can be changed), they win. Team
2 is the attacking team. They win only if they destroy every unit on Team 1
within the match time.
Note: Species 8472 cannot participate in Capture the Flag, Collect Latinum,
Colonize Planets, or Defend Planets game types.
Mini Map Hidden/Not Hidden
As the host, you can decide to reveal the mini map to all players before the
game begins. Once selected, the mini map cannot be hidden again for the
current game.
Random Placement/Fixed Placement
Toggles between random and fixed starting location. If the starting location is
random, no one gets to see the start locations until the game begins. If it's
fixed, the players can select their starting locations. AI player starting
locations are determined by the host.
Shroud/Fog
Toggles either or both the Shroud and Fog on and off.
Show All/Available/Allies
Displays the starting locations. Can be toggled to show all locations, only
available locations, or only the locations of allies.
Game Open/Closed
This can prevent or allow other players to join the game.
Resources: Normal/Lots/Unlimited
Sets the amount of resources available on the map.
86 87
Page 44

MULTIPLAYER
MULTIPLAYER
ADVANCED MULTIPLAYER OPTIONS
The Advanced Options screen allows you
to further customize your game using
the following parameters:
No Observers/Observers
Under the Teams category in the set-up
screen, the Observer selection will allow
someone to watch a game without
playing, with full access to the explored
regions of the map. This toggles that
function.
Game Open/Game Closed
Also found on the Multiplayer Set Up screen.
Warp Enabled/Disabled
Toggles the ability for ships to warp.
Resources: Normal/Lots/Unlimited
Also found on the Multiplayer Set Up screen.
Officer Limit: Normal/Restricted/More/Max
Sets the officer limit for all the teams.
Standard Tech/No Super Weapons/No Science Ships/
No Special Weapons/Free Tech
Allows different states of technology to be allowed.
Ferengi On/Off
Toggles the Ferengi trading.
Don't Create a Random Map/Create a Random Map
Toggles whether the map is randomly created or standard.
Special Weapons Auto/Manual
Sets whether or not ships will automatically use their special weapons, or will
only do so when directed by the player.
Cease Fire: Zero/5 minutes/10 minutes
Sets a buffer time at the start of the game in which no hostilities can occur.
Build Time
This slider controls the speed of the build time for AI teams.
Resource Cost
This slider controls the resource cost for AI teams.
Note: the Default button will set all the game options to their default state.
Once the game options have been selected and all the players have hit the
Launch button, the host can launch the game.
Infinite Resources On/Off
Toggles infinite resources.
Instant Trading/Trade using Convoys
Sets how trading between allies happens.
Give Units On/Off
Toggles the ability to give units from ally to ally.
88 89
Page 45

GAMESPY ARCADE
OPTION SCREENS
STAR TREK: ARMADA II
IN GAMESPY®ARCADE
You can play Star Trek: Armada II online through GameSpy Arcade, which comes
conveniently bundled with the game. If you haven’t done so already, insert
your Star Trek: Armada II CD and install Arcade now. Then, to play
Star Trek: Armada II online, just follow these simple instructions:
Launch GameSpy Arcade and Go to the Star Trek: Armada II Room: Click on
the GameSpy Arcade link in your Start Menu. When the software starts, you’ll
see a list of games and more along the left-hand side. There’s plenty to do, but
there’s time for that later: Click on the Star Trek: Armada II button on the left
to enter the Star Trek: Armada II room.
Find or Start a Star Trek: Armada II Server: Once you’re in the
Star Trek: Armada II room you can meet or greet other players, find servers
or create your own server. The top half of the application will list all of the
available servers, including the number of people playing and your connection
speed (measured by something called "ping." The lower your ping, the better.)
Don’t like any currently existing servers? Click on the "Create Room" button to
start your own server and wait for people to sign up. (A clever server name,
such as "Taste the end of my rusty hob-nailed boot!" usually attracts people).
Otherwise, double-click on a server of your choice to join in.
Joining and Starting a game: Once you double-click on a server or start your
own, you’ll be in a staging room, in which you can banter with your fellow
players and prepare for combat. When you’re ready to play, click the "Ready"
button at the top of the screen. When everyone in the room has signaled their
readiness, the host can then launch the game. Arcade will fire up
Star Trek: Armada II and the carnage will begin!
PROBLEMS?
If you have problems using GameSpy Arcade, whether installing the program,
registering it, or using it in conjunction with Star Trek: Armada II, consult our
help pages, located at www.gamespyarcade.com/help/ or e-mail GameSpy by
using the form located at www.gamespyarcade.com/support/contact.asp.
OPTION SCREENS
GRAPHIC SETTINGS
The Graphic Settings screen allows you
to optimize the look and performance
of the game based on the video card in
your system. The following options are
broken down into display settings and
performance settings.
DISPLAY SETTINGS
Display Mode
Displays the current game resolution and allows the resolution to be changed to
the following modes: 800 x 600, 1024 x 768, and 1280 x 1024. These modes are
available in both 16 and 32 bit color settings.
Display Driver
Shows the current driver installed on your computer and allows you to change
drivers between primary and secondary cards (if you have a secondary card
installed.)
PERFORMANCE SETTINGS
Hardware Vertex Processing
Toggles hardware vertex processing on and off for video cards which support
this feature.
Bump Mapping
Toggles bump mapping on and off for video cards which support this feature.
Cinematic Window
Toggles the cinematic window on and off.
90 91
Page 46

OPTION SCREENS
ADMIRAL’S LOG
Graphics Detail
This sliding bar raises and lowers the graphics detail to optimize performance
on lower-end machines, and to get the best look out of a high-end machine.
SOUND SETTINGS
This menu adjusts the in-game sound
settings. The following settings are
available:
Music Volume
Raises and lowers the music volume.
Effects Volume
Raises and lowers the effects volume.
Button Volume
Raises and lowers the button sound volume.
Voice Volume
Raises and lowers voice volume.
Sound Channels
Allows you to change the number of sound channels.
Stereo Sound
Toggles stereo sound on and off.
Hardware Acceleration
Toggles hardware acceleration on and off for your sound card.
GAME SETTINGS
This menu allows you to change specific game settings. You can adjust the
following:
Game Speed
Game speed can be increased or decreased based on your preference. Increasing
or decreasing the game's speed may increase the difficulty of some missions.
Mouse Scroll Speed
The mouse scroll speed can be increased
or decreased.
Keyboard Scroll Speed
The keyboard scroll speed can also be
increased or decreased.
Mouse Hold Level
Sets the speed at which right-click and
hold will bring up the Command menu.
AI Build Cost Handicap
For single player games.
AI Build Time Handicap
For single player games.
ADMIRAL'S LOG
Star Trek: Armada II provides you with a
detailed breakdown of how well you've
done, both in Single Player and
Multiplayer/Instant Action. When you've
finished a mission in Single Player or a
game in Multiplayer/Instant Action,
you'll be automatically taken to the
Admiral's Log.
The following screens can be accessed
by clicking on the appropriate tab,
providing you with a detailed look at
your game (and the others who played,
including AI players):
Score
Shows your game points, with a quick look at your military, economic, science,
and total scores.
92 93
Page 47

ADMIRAL’S LOG
CREDITS
Military
Displays your military strength during the game, for ships (killed, lost, ratio,
built, maximum); stations (built, lost); and planets (colonized, lost, and
maximum held).
Economy
Breaks down the resources (gathered, spent, and traded), and the trade profit
you generated.
Timeline
Displays the relative power of the dif ferent armadas in the game, with
highlights marking battles and planet colonization.
Battles
Gives a list of all the battles that occurred during the game, and which ships
were involved in them.
Ships
Displays a screenshot of each ship you built during the game and lists the
name, date of commission, battles it took part in, and any ships it defeated.
Ships can be filtered by class as well.
Build
Details all the ships and stations you built during the game by class, listing the
first stardate one was created, the number built, and the number lost.
T ally
Shows your most and least effective combat ships by class, as well as a
breakdown of ships and stations by class, the number built, the number lost,
the number of kills, and the number destroyed.
CREDITS
MAD DOC SOFTWARE
Elizabeth Budington
Peter J. Calabria Jr.
Dr. Ian Lane Davis
Ken Davis
Tim Farrar
James Fleming
Mark C. Graham
Shaun McDermott
Gordon Moyes
Brian Mysliwy
Steven W. Nadeau
Matthew Nordhaus
Michael Thomas Ryan
Michael Swiderek
Tara Teich
Kevin Wasserman
Karen Wolff
INTERNS
Jason Craig Dunlop
Sarah Hastings
ADDITIONAL ART
Franz Boehm
Nicholas Greco
Rick "pneumonic91" Knox
TESTERS
Nathaniel Blumberg
Chris Wyman
Daniel Krikorian
Nathan G. Raymond
PRODUCTION COORDINATION
Jennifer Mysliwy
VOICEOVER
Patrick Stewart PICARD
J.G. Hertzler MARTOK
Alice Krige BORG QUEEN
Judi Durand COMPUTER
ADDITIONAL VOICEOVER
Vaughn Armstrong, Iris Bahr,
Terrance Beasor, Michael Bell, Earl Boen,
Charles Bartlett, Charles Chun,
Jonathan Cook, John Cragen,
Jonathan Del Arco, Barry Dennen,
Gregg Eagles, Paul Eiding, Dan Gilvezan,
Max Grodenchik, Nicholas Guest,
Martha Hackett, James Horan,
Sherman Howard, Tony Jay,
Denise Kumagai, Lex Lang, Lisa Locicero,
Brian Mysliwy, Tony Pasqualini,
David Randolph, Peter Renaday,
Michael Reisz, Neil Ross, Joel Swetow,
Jim Ward, Patti Yasutake
CASTING
Ron Surma
Barbara Harris Casting
SOUND
SOUND DESIGNER
Kemal Amarasingham
VOICE OVER DIRECTION
Kris Zimmerman
SALAMI STUDIOS
Devon Bowman, Mark Mercado,
Gregory Cathcart
MUSIC
THEME AND ORIGINAL SCORE
Danny Pelfrey
INTRO MOVIE
CG ANIMATION
Creat Studios
PRODUCER
Daniel Prousline
CG SUPERVISOR
Avenir Sniatkov
94
95
Page 48

CREDITS
CREDITS
ACTIVISION, INC.
PRODUCER
Doug Pearson
ASSOCIATE PRODUCERS
Jim Hudson, Glenn Ige
EXECUTIVE PRODUCER
Marc Struhl
PRODUCTION TESTERS
Eric Lee
Doug Mirabello
Tim Ogle
VP OF PRODUCTION, LA STUDIO
Mark Lamia
EVP, WORLDWIDE STUDIOS
Larry Goldberg
GLOBAL BRAND MANAGER
Jenniffer Stornetta
ASSOCIATE BRAND MANAGER
Elizabeth Dunn
VICE PRESIDENT,
GLOBAL BRAND MANAGEMENT
Tricia Bertero
EXECUTIVE VICE PRESIDENT,
GLOBAL BRAND MANAGEMENT
Kathy Vrabeck
PUBLIC RELATIONS
VP CORPORATE COMMUNICATIONS
Maryanne Lataif
SENIOR PUBLICIST
CORPORATE COMMUNICATIONS
Michael J. Larson
INTERNATIONAL MARKETING
MARKETING MANAGER, UK & ROE
Carolyn London
PR MANAGER, UK
Guy Cunis
PR MANAGER, ROE
Suzanne Panter
MARKETING DIRECTOR, GERMANY
Andreas Stock
MARKETING MANAGER, GERMANY
Achim Kaspers
JR. BRAND MANAGER, GERMANY
Stephan Ricken
MARKETING DIRECTOR, ASIA PACIFIC
Paul Butcher
BRAND MANAGER, ASIA PACIFIC
Leigh Glover White
INSTALLER
John Fritts
LEGAL
Mike Walker, George Rose
QUALITY ASSURANCE
QA PROJECT LEAD
Matt McClure
FLOOR LEAD
Doug Rothman
DATABASE MANAGER
Dan Carreker
MULTIPLAYER LEAD
Nick Falzon
SINGLE PLAYER LEAD
Michael Wade
Corey Levin, Dan Ko, Francis Jimenez,
TESTERS
Glen Gregory, James Jacobs, Jay Sosnicki,
Matt Burns, Michael McConn,
Walter Williams, Halo Mauch,
Jeremy Richards, Ayal Moreno,
Brad Arnold, Aaron Cantu, Paul Williams
SENIOR LEAD
Marilena Rixford
MANAGER, PC TESTING
Sam Nouriani
NETWORK LAB
SR. LEAD, NETWORK LAB
Chris Keim
COMPATIBILITY LAB
LEAD, COMPATIBILITY LAB
Neil Barizo
QA COMPATIBILITY TECHNICIAN
Jason Kim
CODE RELEASE GROUP LEAD
Brad Saavedra
CUSTOMER SUPPORT
CUSTOMER SUPPORT MANAGER
Bob McPherson
CUSTOMER SUPPORT LEADS
Rob Lim, Gary Bolduc, Mike Hill
EXTERNAL TEST COORDINATOR
Chad Siedhoff
Eric Lo, Travis Prebble, John Silva,
VISIONEERS
David C. Seale, Baldwin Yen, Henry Wang,
Rich Reed, Maxwell DeChant,
Theresa Spielbauer, Aaron Cox,
Graham Nardone, Paul Castillo,
Calvin Oliveria, Dan Carter, Scott Cook,
CJ Biro, Mickael Gross, Scott Kasai,
Mark Spadavecchia, Michael Dwiel,
Ken Rumsey, Jamie K. Badgerow,
Kevin Hoekman, Alan Wexelblat,
Joseph Bott, Trevor Cook, Philip Hansen,
David Teague, Dominick Ziccarelli,
Tom Hepner, Timothy Wilson, John Vernon,
James Dillinger, Myron McMullen,
Don R. Swanner Jr., Dave Barron,
Dee Anderson, Carolann Quinn, Lee Thium,
William Carl Slayton Jr., Chris Penney,
Daniel Smith
QA SPECIAL THANKS
Jim Summers, Jason Wong,
Indra Gunawan, Juan Valdes, Todd Komesu,
Nadine Theuzillot, Glenn Vistante,
Jessica Burnett, Homestar Runner,
Tim Vanlaw
VIACOM CONSUMER
PRODUCTS/
PARAMOUNT PICTURES
LIAISONS
DIRECTOR, PRODUCT DEVELOPMENT—
INTERACTIVE & TECHNOLOGY
Harry Lang
SUPERVISOR, PRODUCT DEVELOPMENT—
INTERACTIVE & TECHNOLOGY
Daniel Felts
96 97
Page 49

CREDITS
CUSTOMER SUPPORT
VIACOM CONSUMER
PRODUCTS/
PARAMOUNT PICTURES
Andrea Hein, Terri Helton, Pam Newton,
Rick Berman, Dave Rossi, Peter Lauritson,
Mike Okuda, Sandi Isaacs
GAMESPY
Joost Schuur, Travis Hogue
RAD GAME TOOLS, INC.
Mitch Soule, Jeff Roberts
INTERNATIONAL
SENIOR VICE PRESIDENT EUROPEAN PUBLISHING
Scott Dodkins
HEAD OF PUBLISHING SERVICES
Nathalie Dove
SENIOR LOCALIZATION PROJECT MANAGER
Tamsin Lucas
LOCALIZATION PROJECT MANAGER
Simon Dawes
DIRECTOR OF STRATEGIC MARKETING EUROPE
Roger Walkden
CREATIVE SERVICES
VP, CREATIVE SERVICES
Denise Walsh
MANAGER, CREATIVE SERVICES
Jill Barry
PACKAGING AND MANUAL PRODUCED BY
Ignited Minds, LLC
SPECIAL THANKS
Belinda M. Van Sickle, Magnus Morgan,
Ron Gould, Mike Rivera, Josh Lieber
ACTIVISION MANAGEMENT
Ron Doornink, Brian Kelly, Bobby Kotick
SPECIAL THANKS
The Original Armada Team
Sandy O'Toole, Leah, James Matthew Ryan,
Adviye Tolunay, Steve Crane, Gene Mauro,
Wicked, Max, Maya, Rachel, Owen, Amberly,
Emelia, Addie, Emma 'Schnootch' Graham,
Schnootch 2, Dr. Audrey Graham,
Jim Martin, Bob Deluca, Jim Thorp,
Bert Paley, Doc Davis, Sr., Attorney Davis,
Alfred Angelo Tomaselli III, Rick Glenn,
Alfalfa, Bailey, Buckwheat, David Dalzell,
Chessmess, Trickster, Steve, Mike Webster
Viacom Consumer Products/
Paramount Pictures
VERY SPECIAL THANKS
Gene Roddenberry
LICENSES
Uses Bink Video
Copyright © 1997-2001 by
RAD Game Tools, Inc.
GameSpy and GameSpy Arcade
Copyright © 2000 by
GameSpy Industries, Inc.
CUSTOMER SUPPORT
You should read through the manual and the readme file on the CD before
contacting Activision Customer Support. Additionally, if you have internet
access, check out our Top Solutions and/or search our troubleshooting
database at:
http://www.activision.com/support
Please ensure that your computer system meets the minimum system
requirements that are listed on the bottom of the box. Our Customer Support
representatives will not be able to help customers whose computers do not
meet the requirements. So that we can better help you, please have the
following information ready:
• Complete product title (include version number)
• Exact error message reported (if any) and a brief description of the problem
• Your computer’s processor type and speed (e.g. Pentium 200 MHz)
• Amount of RAM
• Make and model of your video and sound cards
(e.g. Diamond Viper V770, Creative Sound Blaster Live Platinum)
• Make and model of your CD-ROM or DVD-ROM drive (e.g. Samsung SC-140)
• Operating system (e.g., Windows 95)
Note: Please do not contact Customer Support for hints/codes/cheats;
only technical issues.
Note: Internet/e-mail support is handled in English only.
Internet: http://www.activision.com/support
Our support section of the web has the most up-to-date information available
including patches that can be downloaded free-of-charge. We update the
support pages daily so please check here first for solutions. By selecting the
game you are inquiring about you can view the Top Solutions for the game to
date. If you don’t find your question/solution there try using the Search.
E-Mail: support@activision.com
The best way for you to help us aid you is through the use of the Ask a Question
Support Form. Simply click on the Ask a Question link from our Support section
of our web site. You can also e-mail us directly at the above e-mail address.
Please ensure that you include all of the bulleted information asked above for
the computer you are running the program from when e-mailing to the above
address. A response may take anywhere from 24-72 hours depending on the
98
99
Page 50

SOFTWARE LICENSE AGREEMENT
SOFTWARE LICENSE AGREEMENT
volume of messages we receive and the nature of your problem. During the first
few weeks of a game release and during holiday seasons the response time may
take a little longer.
Note: The multiplayer components of Activision games are handled only
through Internet/e-mail.
Phone: (310) 255-2050
You can call our 24-hour voice-mail system for answers to our most
frequently asked questions at the above number. Contact a Customer Support
representative at the same number between the hours of 9:00 am and 5:00 pm
(Pacific Time), Monday through Friday, except holidays. When calling please
make sure you are in front of your computer with the power on and have all the
necessary information as listed above at hand.
Please do not send any game returns directly to Activision.
It is our policy that game returns must be dealt with by the retailer or online
site where you purchased the product.
IMPORTANT - READ CAREFULLY: YOUR USE OF THIS SOFTWARE (THE "PROGRAM") IS SUBJECT TO THE SOFTWARE
LICENSE TERMS SET FORTH BELOW. THE "PROGRAM" INCLUDES ALL SOFTWARE INCLUDED WITH THIS AGREEMENT,
THE ASSOCIATED MEDIA, ANY PRINTED MATERIALS, AND ANY ON-LINE OR ELECTRONIC DOCUMENTATION, AND ANY
AND ALL COPIES OF SUCH SOFTWARE AND MATERIALS. BY OPENING THIS PACKAGE, INSTALLING, AND/OR USING
THE PROGRAM AND ANY SOFTWARE PROGRAMS INCLUDED WITHIN THE PROGRAM, YOU ACCEPT THE TERMS OF
THIS LICENSE WITH ACTIVISION, INC. ("ACTIVISION").
LIMITED USE LICENSE: Subject to the conditions described below, Activision grants you the non-exclusive, nontransferable, limited right and license to install and use one copy of the Program solely and exclusively for your personal
use. All rights not specifically granted under this Agreement are reserved by Activision and, as applicable, Activision’s
licensors. The Program is licensed, not sold, for your use. Your license confers no title or ownership in the Program and
should not be construed as a sale of any rights in the Program. All rights not specifically granted under this Agreement are
reserved by Activision and, as applicable, its licensors.
LICENSE CONDITIONS
You agree not to:
• Exploit the Program or any of its parts commercially, including but not limited to use at a cyber cafe, computer gaming
center or any other location-based site. Activision may offer a separate Site License Agreement to permit you to make
the Program available for commercial use; see the contact information below.
• Sell, rent, lease, license, distribute or otherwise transfer this Program, or any copies of this Program, without the
express prior written consent of Activision.
• Use the Program, or permit use of the Program, in a network, multi-user arrangement or remote access arrangement,
including any on-line use, except as otherwise specifically provided by the Program.
• Use the Program, or permit use of the Program, on more than one computer, computer terminal, or workstation at the
same time.
• Make copies of the Program or any part thereof, except for back up or archival purposes, or make copies of the
materials accompanying the Program.
• Copy the Program onto a hard drive or other storage device; you must run the Program from the included CD-ROM
(although the Program itself may automatically copy a portion of the Program onto your hard drive during installation
in order to run more efficiently).
• Reverse engineer, derive source code, modify, decompile, or disassemble the Program, in whole or in part.
• Remove, disable or circumvent any proprietary notices or labels contained on or within the Program.
• Export or re-export the Program or any copy or adaptation thereof in violation of any applicable laws or regulations.
OWNERSHIP: All title, ownership rights and intellectual property rights in and to the Program and any and all copies
thereof are owned by Activision or its licensors. The Program is protected by the copyright laws of the United States,
international copyright treaties and conventions and other laws. The Program contains certain licensed materials and
Activision’s licensors may protect their rights in the event of any violation of this Agreement. You agree not to remove,
disable or circumvent any proprietary notices or labels contained on or within the Program.
THE PROGRAM UTILITIES: The Program contains certain design, programming and processing utilities, tools, assets and
other resources ("the Program Utilities") for use with the Program that allow you to create customized new game levels
and other related game materials for personal use in connection with the Program ("New Game Materials"). The use of the
Program Utilities is subject to the following additional license restrictions:
• You agree that, as a condition to your using the Program Utilities, you will not use or allow third parties to use the
Program Utilities and the New Game Materials created by you for any commercial purposes, including but not limited
to selling, renting, leasing, licensing, distributing, or otherwise transferring the ownership of such New Game Materials,
whether on a stand alone basis or packaged in combination with the New Game Materials created by others, through
any and all distribution channels, including, without limitation, retail sales and on-line electronic distribution. You agree
not to solicit, initiate or encourage any proposal or offer from any person or entity to create any New Game Materials
for commercial distribution. You agree to promptly inform Activision in writing of any instances of your receipt of any
such proposal or offer.
• If you decide to make available the use of the New Game Materials created by you to other gamers, you agree to do so
solely without charge.
• New Game Materials shall not contain modifications to any COM, EXE or DLL files or to any other executable Product
files.
• New Game Materials may be created only if such New Game Materials can be used exclusively in combination with the
retail version of the Program. New Game Materials may not be designed to be used as a stand-alone product.
• New Game Materials must not contain any illegal, obscene or defamatory materials, materials that infringe rights of
privacy and publicity of third parties or (without appropriate irrevocable licenses granted specifically for that purpose)
any trademarks, copyright-protected works or other properties of third parties.
• All New Game Materials must contain prominent identification at least in any on-line description and with reasonable
duration on the opening screen: (a) the name and E-mail address of the New Game Materials’ creator(s) and (b) the
words "THIS MATERIAL IS NOT MADE OR SUPPORTED BY ACTIVISION."
SOFTWARE LICENSE AGREEMENT
100
101
Page 51

SOFTWARE LICENSE AGREEMENT
LIMITED WARRANTY: Activision warrants to the original consumer purchaser of the Program that the recording medium on which the
Program is recorded will be free from defects in material and workmanship for 90 days from the date of purchase. If the recording
medium is found defective within 90 days of original purchase, Activision agrees to replace, free of charge, any product discovered to
be defective within such period upon its receipt of the Product, postage paid, with proof of the date of purchase, as long as the
Program is still being manufactured by Activision. In the event that the Program is no longer available, Activision retains the right to
substitute a similar program of equal or greater value. This warranty is limited to the recording medium containing the Program as
originally provided by Activision and is not applicable to normal wear and tear. This warranty shall not be applicable and shall be void if
the defect has arisen through abuse, mistreatment, or neglect. Any implied warranties prescribed by statute are expressly limited to the
90-day period described above.
EXCEPT AS SET FORTH ABOVE, THIS WARRANTY IS IN LIEU OF ALL OTHER WARRANTIES, WHETHER ORAL OR WRITTEN, EXPRESS
OR IMPLIED, INCLUDING ANY WARRANTY OF MERCHANTABILITY, FITNESS FOR A PARTICULAR PURPOSE OR NON-INFRINGEMENT,
AND NO OTHER REPRESENTATIONS OR CLAIMS OF ANY KIND SHALL BE BINDING ON OR OBLIGATE ACTIVISION.
When returning the Program for warranty replacement please send the original product disks only in protective packaging and include:
(1) a photocopy of your dated sales receipt; (2) your name and return address typed or clearly printed; (3) a brief note describing the
defect, the problem(s) you are encountered and the system on which you are running the Program; (4) if you are returning the
Program after the 90-day warranty period, but within one year after the date of purchase, please include check or money order for
$10 U.S. (A$19 for Australia, or £10.00 for Europe) currency per CD or floppy disk replacement. Note: Certified mail recommended.
In the U.S. send to:
Warranty Replacements
Activision, Inc.
P.O. Box 67713
Los Angeles, California 90067
LIMITATION ON DAMAGES: IN NO EVENT WILL ACTIVISION BE LIABLE FOR SPECIAL, INCIDENTAL OR CONSEQUENTIAL DAMAGES
RESULTING FROM POSSESSION, USE OR MALFUNCTION OF THE PROGRAM, INCLUDING DAMAGES TO PROPERTY, LOSS OF
GOODWILL, COMPUTER FAILURE OR MALFUNCTION AND, TO THE EXTENT PERMITTED BY LAW, DAMAGES FOR PERSONAL
INJURIES, EVEN IF ACTIVISION HAS BEEN ADVISED OF THE POSSIBILITY OF SUCH DAMAGES. ACTIVISION’S LIABILITY SHALL NOT
EXCEED THE ACTUAL PRICE PAID FOR THE LICENSE TO USE THIS PROGRAM. SOME STATES/COUNTRIES DO NOT ALLOW
LIMITATIONS ON HOW LONG AN IMPLIED WARRANTY LASTS AND/OR THE EXCLUSION OR LIMITATION OF INCIDENTAL OR
CONSEQUENTIAL DAMAGES, SO THE ABOVE LIMITATIONS AND/OR EXCLUSION OR LIMITATION OF LIABILITY MAY NOT APPLY TO
YOU. THIS WARRANTY GIVES YOU SPECIFIC LEGAL RIGHTS, AND YOU MAY HAVE OTHER RIGHTS WHICH VARY FROM
JURISDICTION TO JURISDICTION.
TERMINATION: Without prejudice to any other rights of Activision, this Agreement will terminate automatically if you fail to comply with
its terms and conditions. In such event, you must destroy all copies of the Program and all of its component parts.
U.S. GOVERNMENT RESTRICTED RIGHTS: the Program and documentation have been developed entirely at private expense and are
provided as "Commercial Computer Software" or "restricted computer software." Use, duplication or disclosure by the U.S. Government
or a U.S. Government subcontractor is subject to the restrictions set forth in subparagraph (c)(1)(ii) of the Rights in Technical Data and
Computer Software clauses in DFARS 252.227-7013 or as set forth in subparagraph (c)(1) and (2) of the Commercial Computer
Software Restricted Rights clauses at FAR 52.227-19, as applicable. The Contractor/Manufacturer is Activision, Inc., 3100 Ocean Park
Boulevard, Santa Monica, California 90405.
INJUNCTION: Because Activision would be irreparably damaged if the terms of this Agreement were not specifically enforced, you
agree that Activision shall be entitled, without bond, other security or proof of damages, to appropriate equitable remedies with respect
to breaches of this Agreement, in addition to such other remedies as Activision may otherwise have under applicable laws.
INDEMNITY: You agree to indemnify, defend and hold Activision, its partners, licensors, affiliates, contractors, officers, directors,
employees and agents harmless from all damages, losses and expenses arising directly or indirectly from your acts and omissions to
act in using the Product pursuant to the terms of this Agreement
MISCELLANEOUS: This Agreement represents the complete agreement concerning this license between the parties and supersedes all
prior agreements and representations between them. It may be amended only by a writing executed by both parties. If any provision of
this Agreement is held to be unenforceable for any reason, such provision shall be reformed only to the extent necessary to make it
enforceable and the remaining provisions of this Agreement shall not be affected. This Agreement shall be construed under California
law as such law is applied to agreements between California residents entered into and to be performed within California, except as
governed by federal law and you consent to the exclusive jurisdiction of the state and federal courts in Los Angeles, California.
If you have any questions concerning this license, you may contact Activision at 3100 Ocean Park Boulevard, Santa Monica, California
90405, USA, (310) 255-2000, Attn. Business and Legal Affairs, legal@activision.com.
In Europe send to:
Activision (UK) Ltd.
Parliament House
St. Laurence Way,
Slough
Berkshire SL1 2BW
United Kingdom
Disc Replacement:
+44 (0) 8705 143 525
In Australia send to:
Warranty Replacements
Activision
Century Plaza
41 Rawson Street
Epping, NSW 2121,
Australia
NOTES
102
103
Page 52

NOTES
104
 Loading...