

Page 1
BEFORE YOU BEGIN .......................... 2
Earth 2150 Prologue............................ 3
What Comes with this Game? ............ 4
SYSTEM REQUIREMENTS .................. 4
Recommended Configuration .............. 5
Installing the Game ............................ 5
Uninstalling the Game ........................ 5
Saving Games .................................... 6
Electronic Registration ........................ 6
DirectX Setup .................................... 6
Getting Started .................................. 6
PLAYING EARTH 2150 ...................... 7
Main Menu ........................................ 7
Choosing Your Player .......................... 8
MISSION MENU.................................. 8
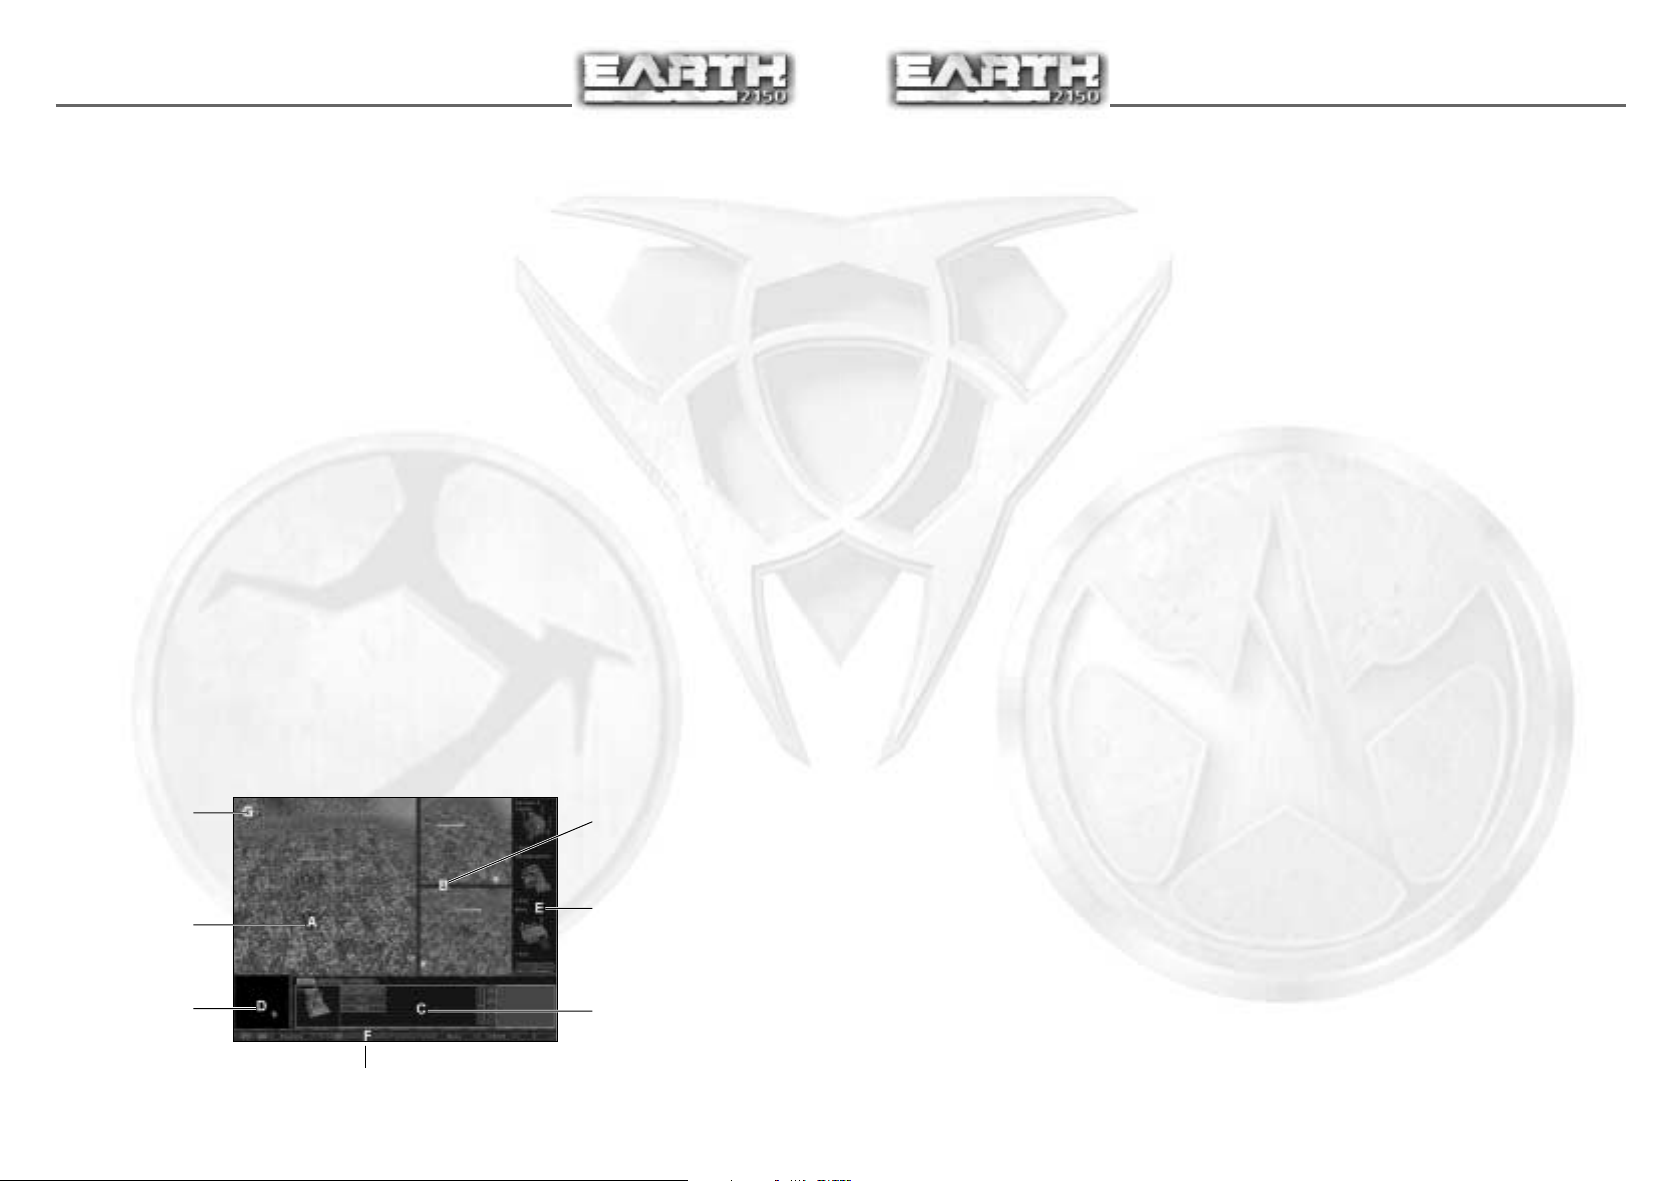
GAME SCREEN.................................... 9
A — Camera Viewer ............................ 9
B — Auxiliary Camera Windows ............ 9
C — Multifunctional Main
Control Panel .............................. 9
D — Map............................................ 9
E — Construction Panel ...................... 10
F — Status Bar .................................. 10
G — Compass .................................... 10
CONTROLLING THE CAMERA ............ 11
Controlling Your Units .......................... 11
Selecting a Single Unit ........................ 11
Selecting a Group of Units .................. 11
Creating Groups.................................. 12
Searching for Units ............................ 12
Orders................................................ 13
Recording Orders ................................ 14
Pause Mode ...................................... 14
CONTROLLING STRUCTURES ............ 15
Selecting a Structure .......................... 15
Erecting Structures ............................ 15
Main Commands for Structures .......... 16
PRODUCTION LIST ............................ 17
Unit Limits ........................................ 17
UNIT CONSTRUCTION CENTRE .......... 17
Unit Construction Panel ...................... 17
OPERATING THE
CONSTRUCTION PANEL
...................... 19
Constructing a New Model .................. 19
Editing Existing Models ........................ 19
BUILDINGS UPGRADE CENTRE ........ 19
RESEARCH AND TECHNOLOGY ........ 20
Research Centre ................................ 20
Research Tree .................................... 20
KEYBOARD LAYOUT .......................... 21
Default Keyboard Settings .................. 21
SKIRMISH MODE .............................. 22
The Start Screen ................................ 22
THE MULTIPLAYER GAME ................ 22
Getting Connected..............................22
Defining Game Parameters ................ 23
Multiplayer Game Types...................... 23
In-Game Settings................................ 24
THE EURASIAN DYNASTY (ED) ........24
ED Arsenal ........................................ 27
Unit Chassis ......................................28
Weapons and Technology .................... 31
ED Structures .................................... 33
UNITED CIVILISED STATES (UCS)...... 37
UCS Arsenal ...................................... 39
Unit Chassis ......................................39
Weapons and Technology ....................42
UCS Structures .................................. 44
LUNAR CORPORATION (LC) .............. 49
LC Arsenal.......................................... 51
Unit Chassis ...................................... 51
Weapons and Technology .................... 53
LC Structures .................................... 56
CONTACTING TECHNICAL
SUPPORT
............................................60
CREDITS .............................................. 61
1
Page 2
2
3
BEFORE YOU BEGIN
We know you’re anxious to begin playing Earth 2150. If you don’t read any other part of
the manual, please read this section. Earth 2150’s single-player campaigns are quite
different from other real-time strategy games. In the single-player campaigns, each side
has a main base area. From here, you can move units and resources to the mission area
via the Transport, as long as a Transport Base or Landing Zone exists in the mission
area.
You can choose a new mission by clicking on the spinning globe icon in the main base
area. Keep in mind that buildings, units, and resources in the main base area are carried
over from mission to mission. Therefore, it’s a good idea to transport all units and
resources from the mission area back to the main base before ending a mission. You
may also have resources left in your main base area; these resources will also be
available in the next mission. This is an important point to keep in mind, as the
resources in your main base and the mission are not shared; they are two separate
pools of resources. You can transfer resources between your main base and mission
area with the Transport.
In the single-player campaigns, there are many pressing demands for resources.
Fortunately, you have a lot of options to deal with those demands. Generally, you will
start out with a certain amount of resources in the mission area. This amount should be
enough for you begin a base. Remember, the overall goal for each campaign is to
harvest enough resources to build an evacuation fleet.
The Space Port is a critical part of your main base. The Space Port sends credits to the
R&D teams building the evacuation fleet. Once the Space Port sends its resources to the
R&D teams, those resources are gone and cannot be used again. Resources earmarked
for the R&D teams are held in the Space Port structure until a shuttle picks them up.
You can take resources from the Space Port and give them to your Main Base by
selecting the Space Port and then clicking the “Take 5000 CR” button. This will only
work if the shuttle has not already retrieved the resources.
In many missions, you will have to send a specified amount of credits to the Space Port.
Each side has a specific building that will take resources and transfer them
automatically to the Space Port. For the ED, this building is the Transport Base.
For the UCS, it is the Ore Transport Base. And for the LC, it is the Ore Transport
Refinery. If these buildings are not built, you will have to manually transfer resources
to the Space Port via the Transport. Furthermore, if you transport resources
manually via the Transport, those resources will not count toward the mission’s credit
requirements.
EARTH 2150 PROLOGUE
The 21st century was supposed to herald the
dawn of a new age. The wars, famines and
suffering of the last two millennia were to
become a distant, fading memory, as scientific
advances brought global peace and prosperity.
Toward the end of the 20th century, a now
forgotten US president even went so far as to
officially proclaim the arrival of a New World
Order, in which right, not might, would govern
international relations.
Unfortunately, this bright future was not to
be. First came a meltdown of the international
stock and currency exchanges. Then the major international conglomerates were
dissolved in a vain attempt to stop the fiscal haemorrhage. By 2012 the world economy
had collapsed. Poverty and hunger caused social and political tensions to flare. As the
crisis wore on, few were bold or naive enough to predict anything positive for the
future. Most realised that the planet was on the verge of global conflict.
During this time, the old American organisation, NASA, was taken over by a new company
called the Lunar Corporation. The LC, as it was known, saw a business opportunity in all
this chaos, and began building a city in orbit. When it was completed, those who could
afford it flocked to the newly opened Orbital City I.
In 2048, the anticipated global conflict broke out with a level of violence that shook the
planet to its core. All major centralised governments were destroyed in the maelstrom.
Europe and Eastern Asia bore the brunt of the devastation, as entire urban centres,
from Madrid to Moscow and from Seoul to Singapore were literally wiped off the map.
The 20th-century dream for a better world ended in death and destruction. The
population of Orbital City I, shocked by the horrors they were witnessing, emigrated to
a newly constructed lunar base to better protect themselves. The colony then severed
all connections with Earth and began to prosper as a separate, self-contained
community.
The human race has always been known for its resiliency. Within a dozen years, the
Earth’s inhabitants had begun to restore their old nationalities – with a few twists.
Twelve states of the former United States joined together to form a new country, called
the United Civilised States. The UCS citizens had essentially given up their old roles as
producers and leaders. Nearly all work was being performed by robots which were
controlled by expert computer systems. Not surprisingly, the human inhabitants of the
UCS had become lazy and decadent.
In the European and Asian territories, which suffered so terribly in the war, a new
empire was created under the iron fist of the Khans. Its proud name was meant to
conjure up an association with a glorious former age – The Eurasian Dynasty. With
access to the military bases, weapons and technology of the former Soviet Union, the
Khans were able to build up a formidable military state. Decadence is unheard of in the
ED. The citizens are drilled from an early age to serve the state and be ready to die if so
ordered. The regime is quick to eliminate any individualists and pleasure-seekers, not
to mention those who are merely lazy or incompetent.
As the only two organised powers, both the ED and the UCS were able to extend their
Page 3

4
5
borders very quickly, and soon possessed all remaining inhabitable areas. But two
powerful empires can rarely live in harmony. Soon the ED army invaded the UCS
territories. Thus began another horrendous war. During eight years of continuous
conflict, the retreating ED army, desperate after suffering a series of battlefield defeats,
attempted to turn the tide with nuclear weapons. A barrage was launched against UCS
positions near the North Pole. The explosions unleashed were so violent that the Earth’s
orbital motion was affected. This was first noticed in 2150 by UCS scientists and the
almost-forgotten colonists on the Moon. Soon, the information also reached ED
headquarters. The scientists’ calculations became cause for serious alarm. The distance
between the Earth and the Sun would shrink by nearly 17% over the next few years. The
implications became clear, even to the thick-headed ED commanders — the Earth and
the Moon are headed for a terrible cosmic disaster.
The only hope for salvation is to escape the doomed planet. But building an evacuation
fleet of such size requires immense natural resources and these are to be found only in
a few select regions. This means only one thing – whichever side emerges victorious in
the battle for these territories will escape Armageddon. The next war will truly be the
last our Earth will ever see...
What Comes with this Game?
Your game box should contain this user manual and two E
manual explains how to play and contains important information on menus, scenarios,
unit classes and equipment. To get the game running on your computer, see the
installation instructions following.
ARTH 2150 CDs. This user
SYSTEM REQUIREMENTS
Required Configuration
• Windows 95B or higher (Windows 98 recommended)
• DirectX 7.0a required
• Windows Media Player 6.4 or higher required
• Pentium II 233Mhz or better
• 32 MB of RAM (64MB of RAM recommended)
• 451 MB minimum hard disk space (276MB for minimum install; 175 MB free for swap file)
• 3D Hardware Accelerated video card with 4MB RAM (Voodoo 1 or better)
• DirectX compatible sound card
• 4X CD-ROM required (8X CD-ROM recommended)
• Windows compatible mouse
• Multi-Player: TCP/IP, IPX, and Modem to Modem (56K or better required for modem play; Internet Service
Provider required for Internet play).
Note: Windows 95B users will need to upgrade WINSOCK to WINSOCK2 in order to play
over the Internet. To update to WINSOCK2, you can visit Microsoft's webpage at:
www.microsoft.com/windows95/downloads/contents/wuadmintools/s_wunetworkingtools/w95sockets2/
Recommended Configuration
• Pentium II 400 MHz or better
• 64 MB RAM
• 961 MB free disk space (786 MB for maximum install; 175 MB free for swap file)
• 12X CD-ROM
• Windows compatible mouse
• Windows 98
• 3D Hardware Accelerated video card with 16 MB RAM (Voodoo 3 or better)
In addition to the basic system requirements, the game requires that DirectX and
Windows Media Player 6.4 be installed on your hard drive. The earliest compatible
version of DirectX is 6.1. The option to install DirectX 7 appears during the game
installation. For network play, you need a DirectPlay compatible network adaptor.
INSTALLING THE GAME
You must install EARTH
in your CD-ROM drive to play this game.
To install the game, insert CD 1 into the CD-ROM drive. When the pop-up window
appears, click on the Installation option. If you have disabled the Windows Autorun, or if
it does not function, Explore the CD and double-click on the Setup icon.
The “Minimum” option will install only the program files without installing any Music or
Video files. Choose this option if you want to save disk space.
The “Normal” option will install the program files and Music files. Video will be read
from the CD.
The “Maximum” option will install the program, Music, and Video files. Choose this
option for the best performance.
You can also choose to install a “spawned” version. Spawned versions can join in
multiplayer games but will not be able to play the single-player campaigns, skirmish
games, or host multiplayer games.
Follow all on-screen prompts after selecting your option to complete the installation.
Uninstalling the Game
To uninstall the game, choose Settings from the Windows 95/98 Start Button, and select
Control Panel. In the Control Panel, select Add/Remove Programs, left-click on EARTH
2150, and click on the Add/Remove button. The game and all of its components are
then removed from your hard drive, except for your saved games or edited scenarios.
2150 game files to your hard drive and have the EARTH 2150 CD 2
Page 4

6
7
Saving Games
EARTH 2150 requires space on your hard drive for saved games and temporary files.
Each saved game can take up to 150Kb of hard drive space.
Electronic Registration
If you did not register your copy of EARTH 2150 after installation and wish to do
so later:
1. From your desktop select the Start button, click on Programs, click on EARTH 2150
and click on Complete Registration.
2. Follow all on screen prompts.
DirectX Setup
This game requires DirectX to be installed, DirectX 6.1 is the earliest compatible
version. If you do not have DirectX 7, then it can be installed or reinstalled from the
CD. Installing DirectX 7 is an option when installing the game. It can also be installed
by exploring the game CD, and opening the DIRECTX folder. Double click on
DXSETUP.EXE to start the DirectX 7 install.
Using either the Install DirectX 7 button from the Autorun or DXSETUP.EXE, you can
install DirectX 7, reinstall DirectX 7, test your drivers certification, or reinstate your
previous audio and video drivers.
DirectX Disclaimer
EARTH
2150 utilises Microsoft’s DirectX sound and video drivers. DirectX is a
programming tool created by Microsoft, and the installation of DirectX may cause video
problems and system anomalies with computers using video drivers that aren’t DirectX
compliant. DirectX is a Microsoft product, and as such, this publisher cannot be
responsible for changes that might occur to your computer system due to its
installation. For DirectX related problems that cannot be fixed by updating to your
video card’s latest Windows driver set, you must contact either Microsoft or the
manufacturer of your video card for further technical support or service.
Microsoft retains all intellectual property rights to DirectX. The user has been granted a
limited license to use DirectX with Microsoft operating system products.
PLAYING EARTH 2150
Shortly after you start the game, the M
Main Menu
Here you can choose your side (i.e. “faction”), view the propaganda films for each
faction and activate the editor.
Button descriptions:
Eurasian Dynasty – Start playing for the ED
ED Video – Take a look at the ED propaganda film
United Civilised States – Start playing for the UCS
UCS Video – Take a look at the UCS propaganda film
Lunar Corporation – Start playing for the LC
LC Video – Take a look at the LC propaganda film
Multiplayer – Start a multiplayer game
Skirmish – Start a single-player game using a network scenario
Editor – Start the landscape editor
Credits – View credits movie
Exit – Quit the game
The game begins once you have chosen your side. There are three very different sides
in the game. Each has its own mentality, arsenal, strengths, and weaknesses. To choose
a side, click on the appropriate button: Eurasian Dynasty, United Civilised States, or
Lunar Corporation. Or you can choose from two special types of matches: Multiplayer
or Skirmish. Once you’ve done this, the Choose Player menu appears.
Choosing Your Player
In the Choose Player menu, you can pick one of the players from the existing Players List
or create a new one by entering a name in the New Player box. Click OK to continue or
Back to return to the Main Menu.
AIN MENU appears.
Getting Started
Start the game by choosing EARTH 2150 in the Start Menu (you’ll find it under
/Programs/SSI/Earth2150/Earth 2150). If you have not inserted CD 2 into the drive,
you are prompted to do so. In order to play E
drive.
ARTH 2150, CD 2 must be in the CD-ROM
Page 5
8
9
MISSION MENU
The Mission Menu appears right after you’ve chosen a player. It consists of the
following buttons:
Start New Game – Here you can begin a new game. Your starting point is always your own
base and Mission 1.
Load Game – Here you can continue a previously saved campaign. A window is displayed
where you can choose from all your saved games. E
games as you play them; you can always play the last saved game by choosing
“Autosave” from the bottom of the list.
Tutorial – This button starts the tutorial for the side that you’ve chosen. We recommend
that you play the tutorial for each of the three sides since they all have differences in
the way they harvest resources and build structures.
Movies – This button lets you view all video announcements you received since the
beginning of the campaign. These are very useful in planning strategy as they inform
you of new developments outside the field of play.
Back – This returns you to the Choose Player menu, so you can choose a different player if
you don’t like the one you have.
Exit Game – This quits the game and goes back to the desktop.
ARTH 2150 automatically saves
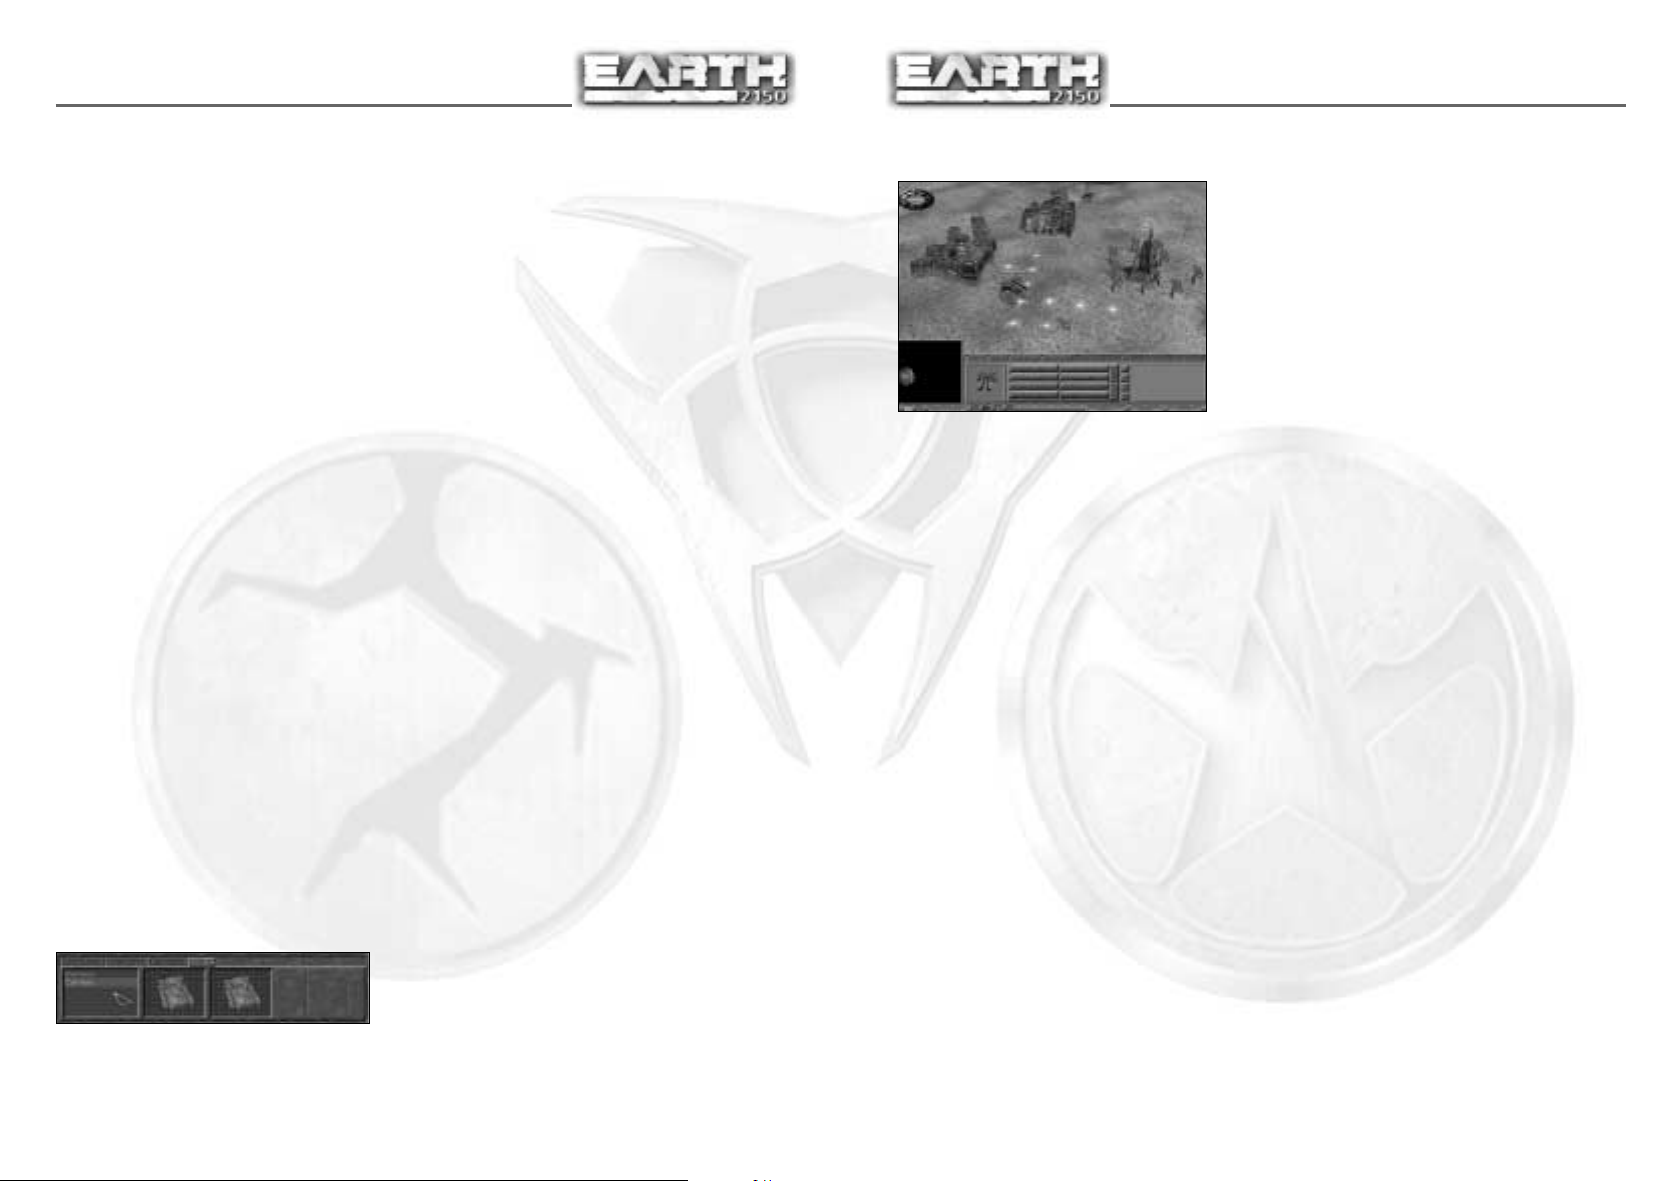
GAME SCREEN
Shortly after a campaign has started, the game screen appears. Here you can give
orders to all your units and structures, and use several camera systems to keep track of
what’s happening on the battlefield.
Here’s the game screen along with a description of its parts:
Compass
Camera Viewer
Auxiliary Camera Windows
Construction Panel
A — Camera Viewer
This area takes up most of the screen. It lets you track events on the battlefield with
orbiting camera systems. These well situated “eyes in the sky” let you command and
control your units very easily.
B — Auxiliary Camera Windows
You can turn on the two small Auxiliary Camera Windows by pressing the appropriate
button in the Symbol Bar or by pressing the V key. Each auxiliary camera can do
everything the main camera can do, such as selecting a unit, giving orders, or changing
the view angle. To activate an auxiliary camera, just right-click on it.
C — Multifunctional Main Control Panel
This is designed to help you carry out most of the operations you’ll need. It consists of
a few tabs. To select a given tab, just click on the button with the tab’s name.
Selection – Getting a description of a selected object (or group of objects) lets you
easily issue all orders which that object can carry out. Double-clicking a building or
unit automatically switches the Control Panel to the Selection tab.
Structures – Here you can get a list of all structures currently in your possession. This
tab allows you to easily locate a structure without looking all over the map for it. You
can select a structure from the list by left-clicking it, or centre the camera over a
structure by right-clicking it. When you double-click a structure, the Control Panel
automatically switches to the Selection tab.
Platoon – This gives you a list of all platoons currently in your possession, so you can
carry out platoon-based operations. The same mouse controls described above for the
Structure tab also work here.
Build – This tab is only available when playing the Lunar Corporation. It lets you issue
the “Build” order from the orbiting Construction Centre. To build a structure, just select
a structure from this tab and click a location on the map.
Units –This tab lets you quickly search for different types of civilian vehicles. Units are
displayed across the panel, grouped by type. Additional units can be seen by clicking
the arrow buttons. Left-click a unit thumbnail to select the unit; right-click its
thumbnail to centre the screen on the unit.
TIP: You can also scroll all lists (Structures, Platoons, Units) by moving the mouse cursor
over a list and dragging the mouse left or right while pressing the right mouse button.
The list will automatically scroll with the mouse direction. This option is very useful
during combat when you don’t have time to click on the arrow buttons.
Map
Symbol Bar
Multifunctional Main
Control Panel
D — Map
This shows the actual battlefield. Here you can either right-click to move the camera to
a chosen location or left-click to order a selected unit (or group of units) to a specified
location.
Page 6
10
11
E — Construction Panel
This appears when you select a construction vehicle or a Production Centre. It includes
thumbnails for all objects which you can produce/construct during the game. Begin
construction by left-clicking on an object thumbnail. Note that if you want to build a
structure, you first click the object thumbnail, then point to an area on-screen (with the
camera viewer) to where you want it located. You can abort the construction process by
right-clicking over the building/object thumbnail.
F — Status Bar
This is located at either the top or the bottom of the screen. It shows how much
energy/money you have, and lets you switch the following Command Centre elements
on or off:
Map switch switches the Map on/off.
Panel switches the Main Panel on/off.
Next land switches the camera view between your main base and the mission
area. You can also press the Q key to switch between the main base and the
mission area.
Tunnels switches the active camera view between the surface and the
underground tunnels. You can also press the T key to switch between surface
and tunnel views.
View switches the two auxiliary cameras on or off. You can also press the V key
to turn the auxiliary cameras on or off.
Research displays the Research screen. You can also press 2 to display the
Research screen.
Construction Centre displays the Construction Centre where chassis and
weapons are combined to create units. You can also press 1 to display the
Construction Centre screen.
G — Compass
This shows which way is North.
TIP: Press . (or d) on the numberpad to position the camera to face North.
End Mission Dialog
You’ll see this whenever you complete a mission in the campaign. Press the button and
the mission is officially over – and you return to base. Warning! Be sure to send all the
units you intend to use in the next mission back to base before you press the END
MISSION button! Otherwise you’ll lose all your units!
CONTROLLING THE CAMERA
To move the camera position, just move the cursor to whichever side of the screen you
want. The camera scrolls automatically as soon as the cursor touches the screen edge.
To stop the camera, just scroll it toward the centre of the screen. You can also change
the camera position by using the cursor keys on your keyboard.
TIP: To quickly move the camera to a specific location, just right-click that location on
the map window.
To rotate the camera horizontally, press and hold down the right mouse button. Now,
continue holding the button down and move the mouse right or left. The camera rotates
with the mouse. You can also use the I and D keys to do this.
To change the camera’s vertical angle, press and hold the right button while moving the
mouse forwards and backwards. Or you can use the h and j keys.
To zoom in or out, hold down both right and left mouse buttons, and then move the
mouse forwards or backwards. You can also press the uY keys.
You can also set the camera to follow a specific unit around the map. Select a unit and
press the F key on the keyboard. The camera will now follow the selected unit around;
you can still rotate, tilt, or zoom the camera. Press the F key again to turn follow mode
off.
CONTROLLING YOUR UNITS
Selecting a Single Unit
To select a single unit, place the cursor on it and left-click. A Status Bar appears above
the unit you’ve selected.
To select a group of units, keep the c key pressed and select one after the other. As long
as the c key remains pressed, each unit you click on is added to the group.
If you click on a unit while the a key is pressed, that unit gets “de-selected.”
To deselect one unit from a group of selected units, choose the unit’s name from the
list box and click on it while holding down the a key.
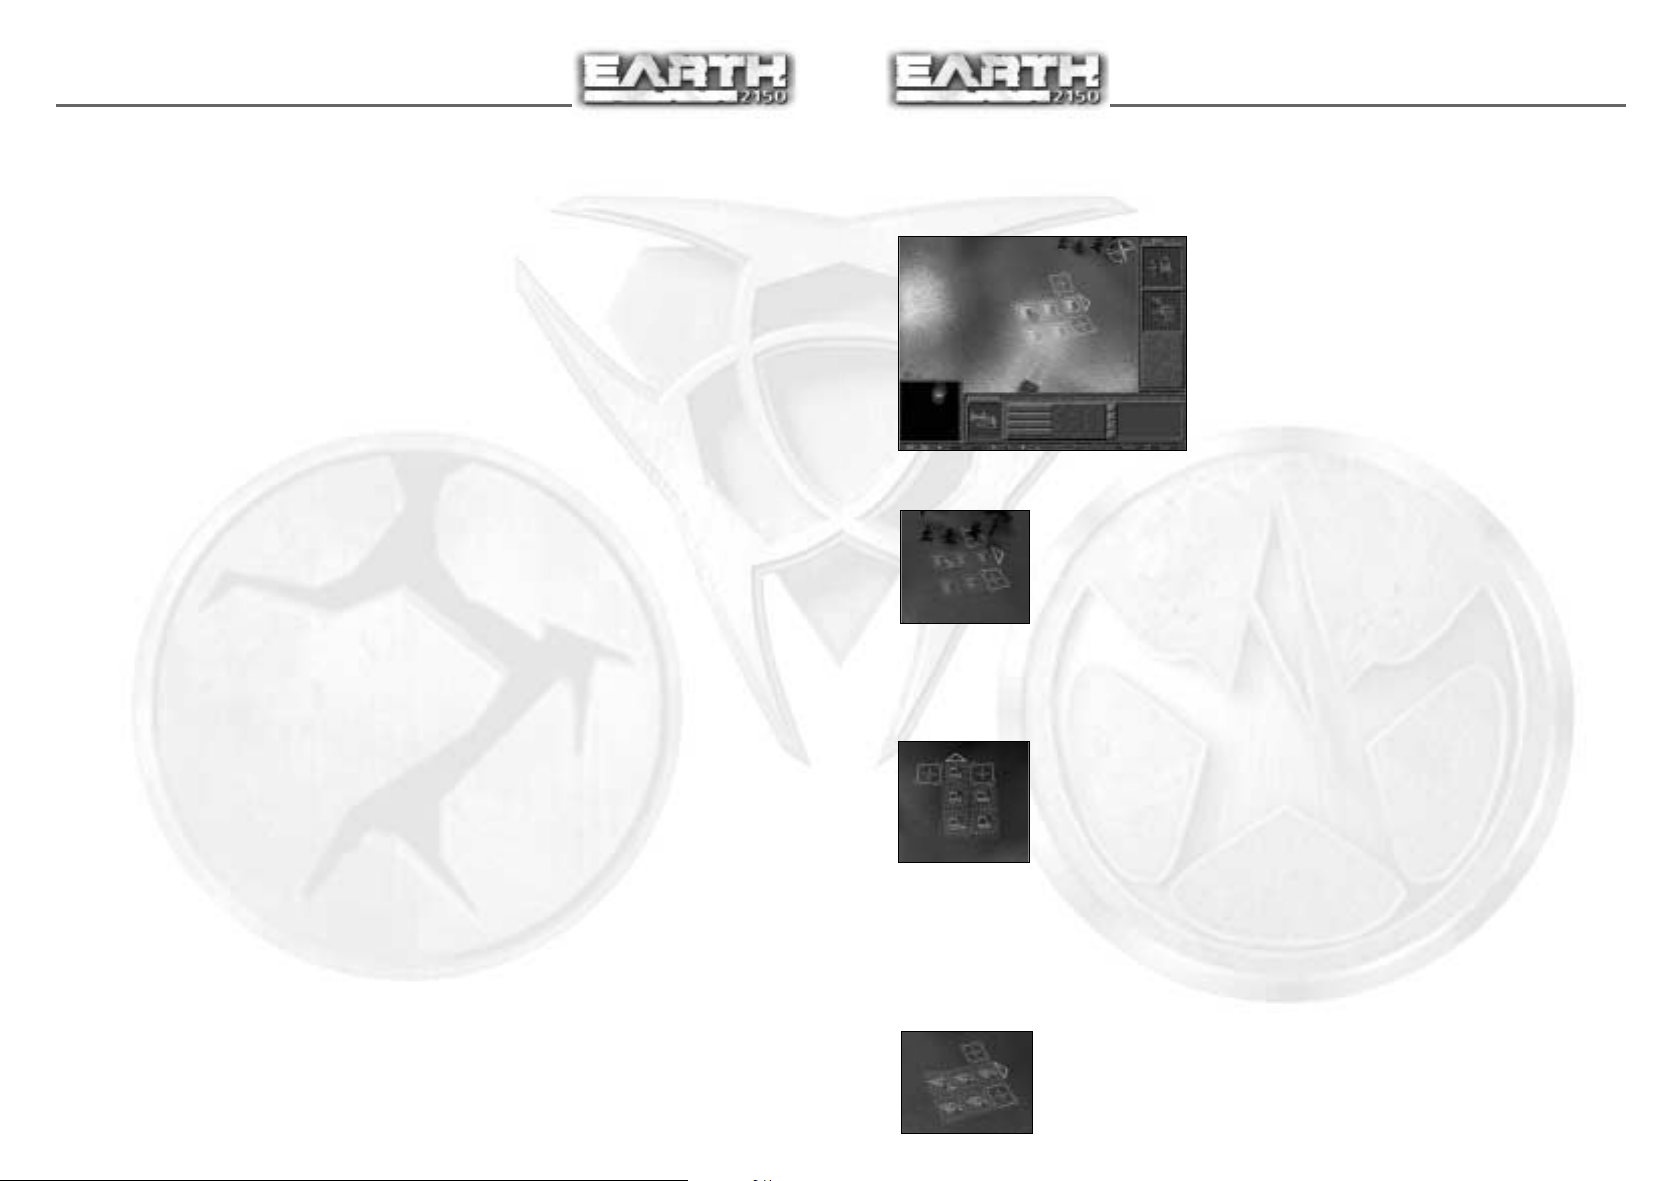
Selecting a Group of Units
To quickly select a group of units, place your
cursor at the edge of the group and move the
mouse over the group while holding down the
left button. You can clearly see the selection’s
range on the ground under the cursor. Every unit
within the group remains selected even after you
release the mouse button.
Choose Mission Dialog
This shows up whenever there is no mission active. From here you can pick out a
mission from the Choose Mission Window.
Page 7
12
13
You can choose the shape of the selection rectangle by selecting Options from the Menu
on the Symbol Bar. Click the Selection tab after the Options screen appears. In the Shapes
section, you can choose between Square or Isometric. Choosing Square will always keep
the selection rectangle in a rectangular shape while choosing Isometric allows the
selection rectangle to change its shape as you move it across the screen.
TIP: You can also double-click a unit; doing so will select all similar units that are
visible on screen.
• If you want to add more units to your selection, perform the above operation with the
c key pressed.
• If you want to “subtract” units from your selection, perform the above operation with the
a key pressed.
• Right-click on the main camera window to de-select all units.
• These hot keys select the following units which are in the camera’s range:
• , - Select all visible units
• . - Select all visible air units
• / – Select all visible ground units
• ; – Select all visible armed units
• ' – Select all visible civilian units
Creating Groups
Unit groups provide quick access to units on the battlefield with just the press of a key.
Players can create up to ten unit groups per battlefield.
To create a unit group, select a group of units and then press a number from 0-9 while
holding the Left c key. That group of units can now be selected by pressing the
corresponding number on the keyboard. Pressing the number twice will centre the
camera on that group of units. Units can be attached to more than one unit group at the
same time.
TIP: You can assign units to a group before they are produced. Just select a factory,
move the cursor over the unit thumbnail in the construction panel, and then press Left
c and a number. You’ll see the Group Number appear on the unit thumbnail. All units
produced by this thumbnail are assigned to this group. You can also assign different
types of units from more than one factory to the same group with this tip.
Searching for Units
To find a civilian unit, select the Units tab.
Orders
You can issue orders only to units you have
selected. Orders are divided into two groups:
Immediate Orders
These are “spur of the moment” orders which
get obeyed right away. The nice thing about
immediate orders is that you can issue them
directly on the map – no need to choose from
the panel. To issue an immediate order, place
the cursor on the area which it relates to and
press the left mouse button. A small thumbnail
inside the cursor shows the order, which is
completely dependent on what objects are in
that particular area. The best example of an immediate order is Move. Just select a unit
and click a point on the map, the unit begins moving there immediately.
Ordinary Orders
These are split into two subgroups and must be chosen from the panel. The two groups
are:
Action Orders – These orders signify some kind of action that a unit has been ordered
to obey, for example, Move, Attack, or Escort. To issue these orders, simply click on a
destination in the main camera window.
Configuration Orders – Here you can change a unit’s parameters. To apply a given
parameter to a unit, press one of the buttons on the panel that has a * in front of the
actual configuration name. Depending on the script (see below) chosen for the unit, you
will be able to turn a unit’s lights on, have it follow enemy units, or retreat after
suffering a certain amount of damage.
In any case, a unit’s current state is always displayed on the appropriate button. For
example, the Chase enemy button switches a unit between Chase enemy or Hold position. If
Chase enemy is displayed, then the unit will pursue any enemy units it sees. If Hold position
is displayed, the unit will fire at enemy units but won’t pursue them.
A question mark ? appears on configuration buttons whenever you select
multiple units with different states. Click this button to set a common state for
all selected units.
Be careful! Some orders, such as Build Wall/Bridge or Dig Tunnel, require additional
information like direction and line of construction. Mark a spot by left-clicking on it,
then move the cursor to a different spot and click again. You’ll see a direct line display
on the ground when you move the cursor. Right-click to abort the operation
immediately. The resulting orders are displayed in a panel in the lower right corner, at
the right end of the Units panel.
This is a list of all civilian vehicle types. When you select one, the vehicle’s thumbnail is
displayed.
To select the unit, left-click its thumbnail. To centre the camera on the unit, right-click
on its thumbnail. Double-clicking the thumbnail will select the unit and switch the
Control panel to the Selection Tab.
Page 8
14
15
Unit Scripts
Unit scripts determine the basic behaviour of all units. They also control what types of
commands are available when a unit is selected.
Many units, especially civilian vehicles, have only one script available to them. Other
units have a selection of scripts that allow you a choice of commands. Most combat
units are set to the Battle unit script. This script provides a good balance between
simplicity and control. The Advanced Battle unit script provides many more options for
ordering your units while the Simple Battle unit script provides the bare minimum.
Experiment with the scripts to find out which one you prefer.
Recording Orders
On the Selection tab, you can see the Command list. This small window with 4 buttons is
used to record orders for your units. You can use this tool when you want your units to
make more complicated orders, i.e., build multiple buildings, move through way points,
or attack the enemy in a specific order. When you’re recording orders, a small record
symbol appears over the mouse cursor.
There are two methods of recording orders, Regular and Quick.
Regular Recording
Regular recording is useful when you want to give orders to a unit but don’t want him to
start immediately. All recorded orders are stored in the unit’s memory. The unit will
carry out the orders only after you give it the Execute command from the Command List.
• Start recording by pressing the Record button on the Command List or R key.
• Give orders to the unit.
• Finish recording by pressing record button again (R key) or pressing Repeat button (Z). If you press the
Repeat button, the unit will execute the orders over and over again in a loop.
• When you want the orders to be carried out, press the Execute commands button or X key.
Quick Recording
Quick recording is useful when you want to give orders that you want executed
immediately. Giving orders in “Quick Record” mode won’t delete previously recorded
commands. This option is especially useful for giving multiple build commands.
• Hold down the l key or press the Quick Record button.
• Give orders to the unit.
• Release the l key or press the Quick Record button again.
The unit will immediately execute all the recorded orders.
TIP: If you’re playing as the LC, you can use the l key to place multiple structures
without picking every structure from the Build tab.
Pause Mode
In single-player, you can enter “Pause Mode” by pressing the n key. In this mode, you
can give orders to your units but all game action is frozen. However, all command,
camera, and interface functions are still working.
CONTROLLING STRUCTURES
Selecting a Structure
To select a structure, place the cursor over it and
left-click. Double-clicking it will automatically
switch the Control panel to the Selection tab.
Erecting Structures
This process requires construction vehicles, like the Gruz or the
Mammoth. If you’re playing as the LC, you’ll be doing your
construction work in orbit.
Highlight a construction vehicle and select a structure from the
construction panel. If you move the cursor a little, the outlines of
your proposed structure appears. These can differ according to the
location of the site. If the structure can be erected, its outline is green. Strategic parts
of the building, like a shipment point or an entrance to a production centre, are marked
with a cross. An arrow shows you where the front of the structure is (and the direction
in which its cannons are trained). You can turn a structure prior to placing it using the
e key on the numberpad.
A lightning symbol in the structure outline tells you that you’ve
located your structure in an area outside the range of your power
sources. You must either locate the structure closer to a power
station, or build more power structures closer to the desired location.
Green and yellow squares in the structure outline tell you that the
structure is within range of your power plants but they are currently
not producing enough power. If you need more power, you can
expand the power station (UCS, LC) or construct another one (all three sides). You can
build the structure if there’s not enough power, but it will not be functional when
construction is finished.
TIP: If you hold the l key, you will be able to place multiple instances of a structure
without the need to select it again from the panel. By holding down the l key, you can
erect multiple structures in one order session.
A red square means that no structure can be erected in the current location due to
unsuitable terrain.
NOTE: When building Ship Yards, the entire structure outline must
be located on land. The exit must point to water and the water
should be deep enough so that ships will not get trapped inside the
Ship Yard.
Page 9
16
17
Structures Tab
The Structures tab is located in the middle of the panel. A series of animated thumbnails
illustrates all structures in your possession. You can scroll through this list with the
direction buttons, which are also situated on the panel. Click on the appropriate button
to scroll the list forwards (next) or backwards (previous). Do this while holding down
the s key and you’ll scroll through multiple structures. You can also scroll the list by
dragging the list with the right mouse button.
This list gives you a quick and easy way to search for specific structures. To get a better
look at any structure in the list, just right-click on it and the camera displays it.
Going the other way, just left-click on a structure in the Camera Window to go to its
thumbnail in the Structures tab.
Main Commands for Structures
Command Description
Lights AUTO/ON/OFF ............Changes the structure’s lighting mode.
Power ON/OFF........................This order temporarily “turns off” a structure. Use this to suspend production or free
up power supplies for other structures.
Autodestruction ....................Destroys the structure without leaving a trace. When you click on this button, a
countdown begins, telling you how long you have until the building explodes. To
cancel the Autodestruction command, click on the timer button.
Commands for “Armed” Structures:
Command Description
Change weapon ....................When you issue this order, you’ll see a window containing a list of all weapon types.
During game play, you can change weapons any time you like and mount them
directly onto the structure. Press 3 to see this screen at any time.
Upgrade All ............................Use this to replace a structure’s weapons with the latest version.
Supply......................................Demands more ammunition.
Attack ......................................Displays your target. Order the structure’s weapons to attack a target.
Commands for Production Centres:
Command Description
Produce 1x/Continuous ........With this order you can specify the manner in which a vehicle is produced. In the
Continuous mode, the production sequence of the requested units is repeated ad
infinitum.
Set Dest ..................................Selects the location where the vehicles built in that particular structure are sent. If
the structure is highlighted, the target is shown in the form of a green circle.
Show Dest ..............................Positions the camera above the location where your vehicles (built in that particular
structure) are sent.
PRODUCTION LIST
Right after you’ve chosen a Production Centre, the Production List appears at the edge
of the screen. It includes all vehicles you can produce there. The Production list has
two tabs. In ED and UCS vehicle production centres, air units are placed on the second
tab. In LC production centres, civilian units are placed on the second tab.
To start producing a certain vehicle, left-click on its thumbnail. A progress bar appears
just below the thumbnail to let you know how the process is coming along. Now look
carefully at the bottom right corner of the thumbnail. Notice the figure displayed? This
is the number of vehicles you are going to manufacture. To change this number, simply
left-click to increase, or right-click to decrease. Remember, you’ll need to plan your
production carefully as resources are not unlimited – build too many attack vehicles
without the necessary support craft and your offensive is likely to flounder.
Unit Limits
In campaign missions and many multiplayer or skirmish games, there may be a unit
limit. This limit is expressed in credits and represents the maximum amount of units
you can have at any one time. For example, if the Unit Limit is set to 20,000 credits,
you can build up to 20,000 credits worth of units. Civilian units do not count against
this limit, just combat units.
To see how close you are to the Unit Limit, just select any Weapons Production Centre
(ED & UCS) or Main Base (LC). The Unit Limit will be displayed to the right of
the structure commands. This number is updated as new units are built or existing
ones are destroyed.
UNIT CONSTRUCTION CENTRE
Unit Construction Panel
You’ll see this screen when you press 1, or
click on the Construction button
in the Research Centre. Here you
can build more advanced vehicles, using
whatever new equipment you’ve managed to
develop. You can then add vehicles you’ve
built here to the Production List.
Page 10
18
19
The Construction panel consists of the following:
New Model Thumbnail - Activates design of a new model.
Chassis List – Here you’ll see thumbnails for all the chassis types currently available to
you.
Equipment List – A list of weapons and equipment for the vehicle currently being
designed. Just double-click a thumbnail to add the equipment to the currently selected
chassis.
Finished Unit – A picture of the newly designed vehicle. The panel to the right
contains a description of the designed model. To the left are text fields for choosing a
name and unit script. The available scripts are based on the equipment you chose for
the vehicle. The script you choose will be the default script for the vehicle whenever it
is built. Of course, you can always change its script during the game.
When you are satisfied with the vehicle’s equipment, name, and script, click the
Add to list button to make it appear in your production centres. You’ll see your new
vehicle design in the Production List at the bottom of the screen. Double-clicking on the
unit’s thumbnail achieves the same result.
Production List – This list includes all vehicle types that can be made in production
centres. The list is divided into groups:
• Civilian units
• Military units
• Water units (only appears if water units can be used in the current mission)
You can work on this list using the four buttons located above it:
Arrows – Used for changing the position of a model on the list (they can also be used
to establish the order of objects on the list).
X – Removes a selected model from the list.
Disk Icon – Saves a selected model to disk. A thumbnail in a form of an O appears each
time you save a model. It is then automatically assembled during the next round played
by the current player. This option is great if you’re playing network games, since it
saves you from designing the same model each time you play.
OPERATING THE CONSTRUCTION PANEL
Constructing a New Model:
Click the New Model thumbnail to ready the dialog box for use.
To choose a chassis from the Chassis list, just left-click on a chassis thumbnail.
The chassis parameters are displayed in the description box below. To approve a
chosen chassis, double-click on its thumbnail. The cursor automatically turns into the
Choose Equipment mode.
Choose weapons or equipment the same way you chose a chassis, but pick them from
the Equipment List. Right-clicking on a thumbnail removes that piece of equipment
from the current design.
When you have selected your equipment, give the vehicle a name (if you want) and
choose its script (this selects an AI mode).
Then press the Add to list button (or double-click the vehicle thumbnail in the centre of
the screen) to add the finished unit to the Production List.
Editing Existing Models:
Pick out the model you want to edit from the Production List.
Use the same steps as the New Model construction process (but remember - you can’t
change the chassis).
When you’re finished editing, press the Update button.
BUILDINGS UPGRADE CENTRE
This window lets you mount weapons and shields on your buildings. To see this screen,
press the 3 key. The window is very similar to the Construction Centre window. You
can choose new weapons, shields, and equipment for the selected building(s) and
upgrade them to use what you have chosen. You can select additional buildings from the
row of thumbnails at the bottom of the window for further upgrades.
When you want to upgrade groups of identical buildings (e.g. all small towers), hold
down the c key and click on one building of that type in the list. All identical buildings
will be selected and you will be able to change their weapons together. Identical means
the same building and the same weapon. For example, this allows you to choose a
group of towers with rocket launchers and upgrade them, without changing a group of
towers with lasers.
Page 11

20
21
RESEARCH AND TECHNOLOGY
To research new weapons and technologies,
you must build a Re-search Centre. Just how
quickly you can research something depends
on the number of Research Centres you
have. Three research buildings develop
technology advancements the fastest. This
means that you cannot research any more
quickly even if you have four or more
Research Centres.
Research Centre
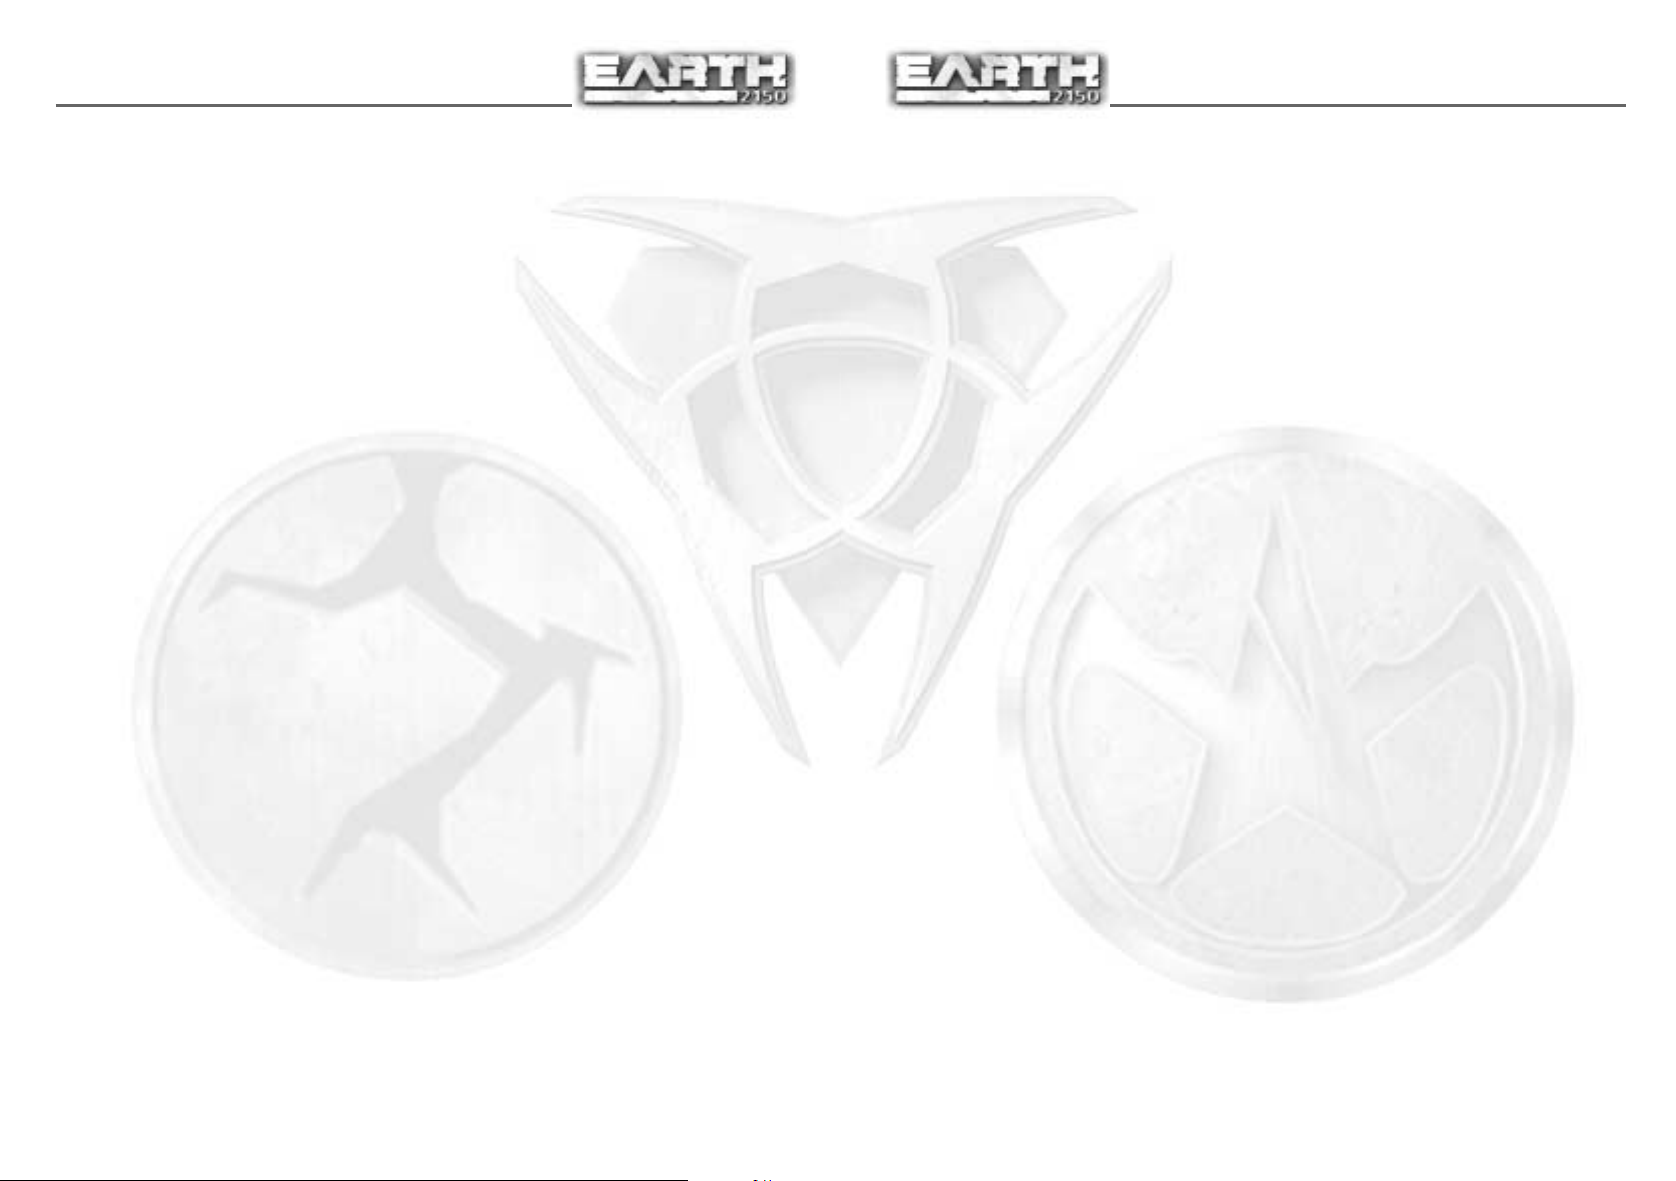
To display a panel listing all accessible inventions in groups, just click on the Research
button when you’re in the Research Centre, or press the 2 key.
This panel includes all the currently accessible inventions, arranged into groups. Each
of these groups is represented by a tab across the top of the screen A. To start the
invention process, just left-click on a particular invention thumbnail B. A progress bar
appears in the description area C. This indicates just how the work is advancing on that
invention. To stop inventing, right-click on the thumbnail
Work can even be carried out on several inventions at the same time, one after another.
The sequence of the orders you give is listed in the top right corner of the invention’s
thumbnail.
To exit the panel and get back to the game, either press the q key or click on the X
button located in the top right corner of the screen.
Help Panels appear if you choose commands which have to be further defined.
Research Tree
To access the Research Tree, bring up the Research Centre screen by pressing 2 or
clicking the Research icon on the Symbol Bar. Next, click the Research Tree button in the
Research Centre window, or press 2 again. The Research Tree shows all available
technologies in a tree format, including the ones that you have and the ones that you
can research.
You can research technologies by clicking on the thumbnails for a technology, just like
the Research Centre. If you select an item that has prerequisites, your Research Centres
will research all the prerequisites required for that item.
TIP: You can scroll this window by using the arrow buttons, or by dragging the mouse
around with the right mouse button held down.
KEYBOARD LAYOUT
You’ll find a full description of all keyboard functions in the Keyboard tab of the Option dialog.
You can define each key individually and your new keyboard setup is always saved. To
assign a function to a new key, just click on a function in the list, press the e key and
then press the new key. This overwrites any previously assigned key function.
To remove a keyboard shortcut to any function, first press the e key then the B key.
Default Keyboard Settings
1 ..........................Construction window
2 ..........................Research window
3 ..........................Change weapons of building
9 ..........................Show range of power station
= ..........................Show tunnels on surface
a+1 ....................Quick save
a+2 ......................Save game
a+3 ......................Load game
Keypad e ..................Rotate buildings during
placement
Gamespeed (on keypad)
+ / - ......................Faster/slower
* ..............................Pre-adjusted speed
n................................Switch pause/run
Groups and Platoons
Left-c+1-9 ............Group selected units
under #1-9
1-9 ..........................Select group # 1-9
1-9 (two times) ........Centre on # 1-9
P................................Group selected units as platoon
a+1-9 ....................Select platoon # 1-9
a+1-9 (two times) ..Centre on platoon # 1-9
Camera
t................................Switch surface/tunnels
z................................Centre camera to area of last
Keypad . ..................Turn camera to north
Press both mouse buttons and move mouse forward/back to scroll text-window
message
Keypad 0 ..................Centre camera on selected unit
F................................Switch automatic follow mode
Q................................Switch main base/mission area
V................................3 window mode
Unit Selection
, ..............................Select all units in sight
. ..............................Select all air units in sight
/ ..............................Select all ground units in sight
; ..............................Select all armed units in sight
'................................Select all civilian units in sight
Interface
a+P..........................Switch interface on/off
a+M..........................Switch minimap on/off
Unit Orders
A................................Attack
E................................Escort
H................................Hold position
S................................Cancel order
Y................................Request ammo
R................................Get orders (no execution)
X................................Execute order (R)
a+S..........................Change unit script
Page 12

22
23
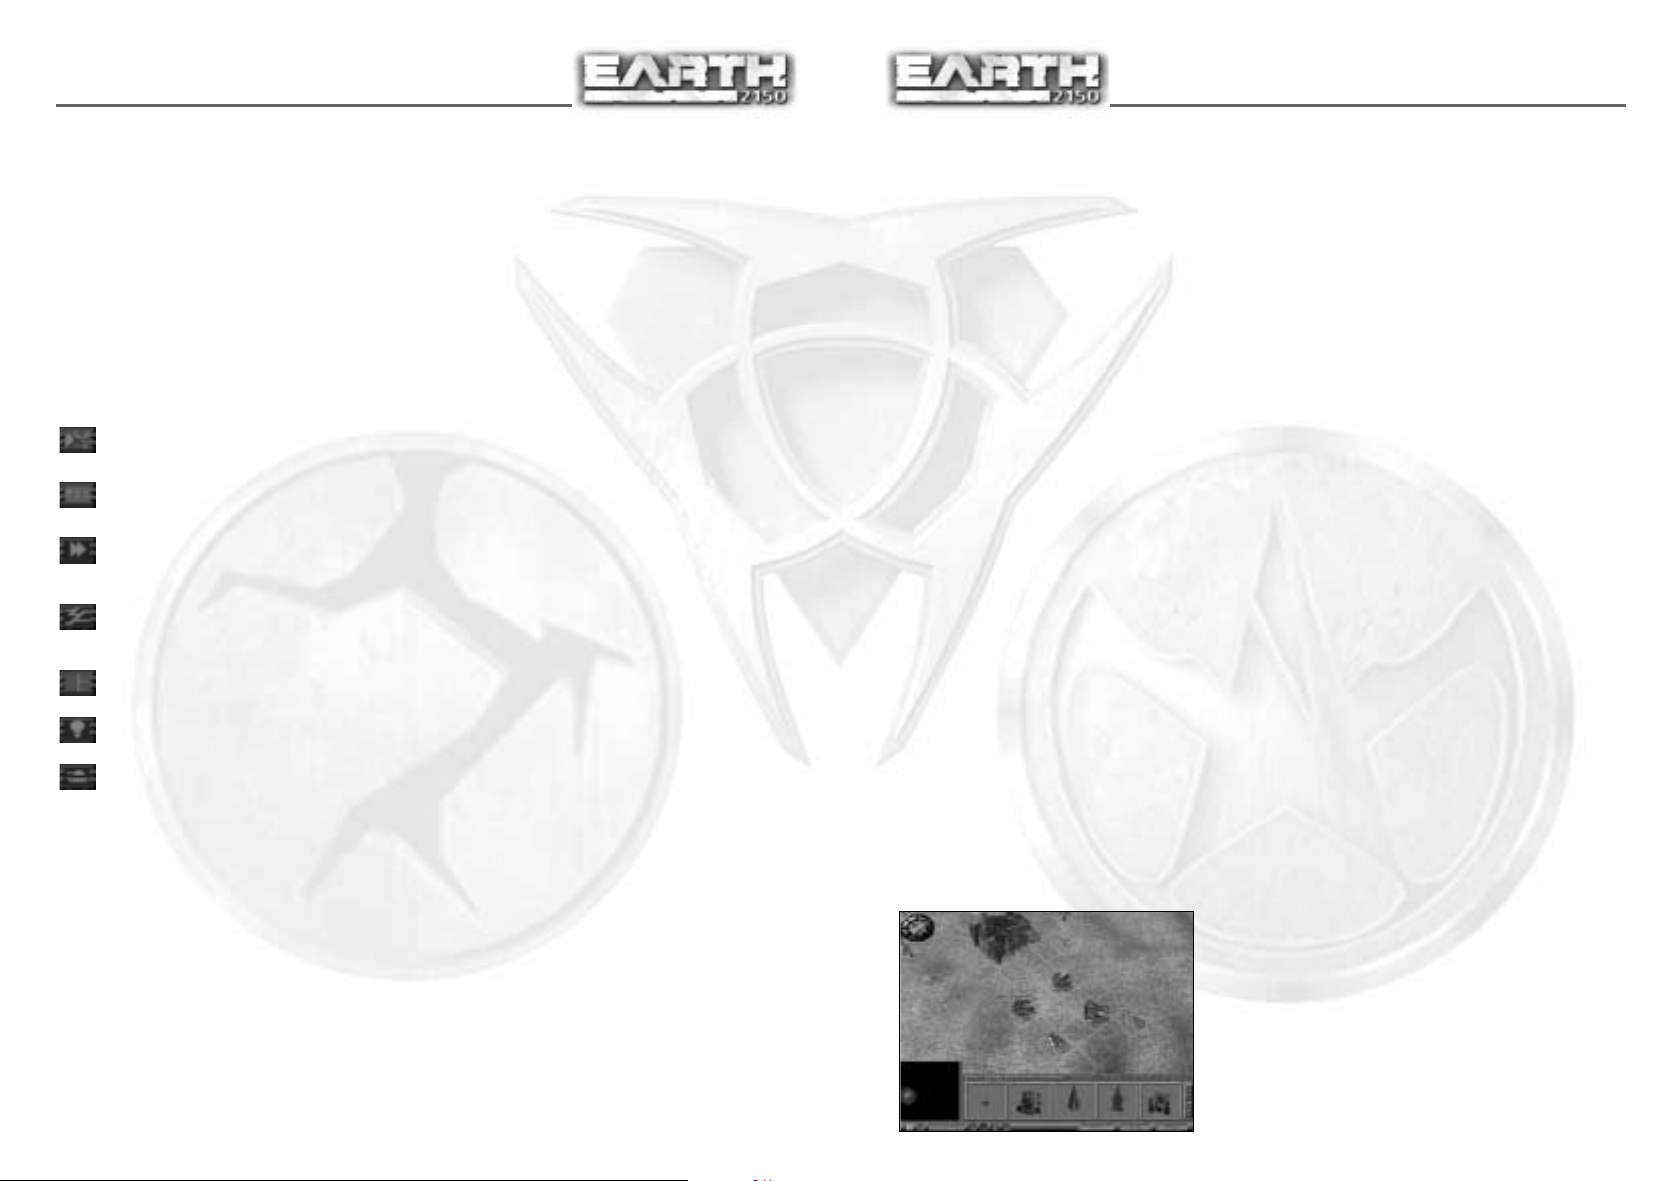
SKIRMISH MODE
In this mode, you can fight skirmishes in which you call the tune! It gives you access to
battlefields created by you in the Editor. Used for multiplayer game-training, you can
play multiplayer games against computer opponents.
The Start Screen:
As you can see, the start screen is divided
into four columns. In the first column, you
have a list of accessible buttons and a
description of the one you select. It tells
you what that particular button means, the
amount of raw material you have available,
and how many players are taking part.
The second column gives you
more information about the button you
chose. The information you
get depends on the game mode
you selected.
The third and fourth columns contain player
information. Here you can decide how many computer opponents should play and how
powerful they should be simply by changing the current values. In the fourth column
you can select your faction and that of the computer opponent.
When you’ve finished defining your parameters, click on Start Game to commence playing.
The Load button loads a previously saved game, but you can’t load a game saved by
another player.
Left-clicking on the Back button returns you to the Mission menu.
THE MULTIPLAYER GAME
This mode lets you test your prowess
against human opponents. To start, select
Multiplayer in the main menu. Now select or
create a player, just like in single-player
mode and carry on. A network parameter
selection window is displayed.
Getting Connected
Configuration settings appear in the network
parameter window. These settings depend on
the current configuration of your computer.
If the window is empty, check to see if the
network parameters are installed and if DirectX has been installed properly.
Select a parameter and click on Initialise. But
remember to choose a parameter which all
players have.
After parameter initialisation, the game
session selection window
is displayed.
Here you can create your own multiplayer
game or join a current game. The current
games are displayed in the right window.
To join a current game, select one from the
list and click on Join.
To create your own network game, enter your
name (and a password if desired) and click on Create New Session. We recommend that the
fastest computer should always be the host for a multiplayer game.
Defining Game Parameters
The game host defines most game parameters. The others can only make decisions
about their own game particulars. While the parameters are being set, the players can
keep in touch by way of the Message window which always remains active. When you
type in a message and press Enter, all the players receive it.
When all game parameters have been defined, the player who created the game clicks
on Start Game and off you go!
TIP: To ensure smooth performance for all players, we recommend that you always
play with a unit limit. If you’re playing with powerful machines on a fast network, then
you can set the unit limit higher or eliminate it entirely.
Multiplayer Game Types
Here’s a brief description of the different types of multiplayer games. These
descriptions also apply to Skirmish games of the same name.
Uncle Sam
In Uncle Sam games, players don’t have to worry about mining and gathering resources.
Players start the game with a set amount of credits and thereafter receive credits on a
constant basis. The amount and rate of credit delivery is determined by the game host
prior to starting the game. Victory is achieved by wiping out the enemy.
Earn Money
Earn Money is the exact opposite of Uncle Sam. In Earn Money games, the objective is to
collect a predetermined amount of money in the shortest amount of time. The host can
set the time limit and amount of money needed to win. If no one collects the required
amount of money in the time allotted, the game ends without a winner.
Page 13

24
25
Kill‘em All
Kill ‘em All is your standard deathmatch type of multiplayer scenario. All players must
harvest resources and the objective is simply to wipe out the enemy player. The host
can set a time limit, the victor is then determined by the greatest amount of points
amassed at the end of the game.
Destroy Structures
Destroy Structures is similar to Kill ‘em All, but the focus here is on destroying the
enemy’s buildings. Options for mining money or receiving an automatic cash flow,
different victory conditions, and various research choices make Destroy Structures the
most flexible multiplayer game type.
Hide-n-Seek
Hide-n-Seek is a variation on standard capture the flag games. Instead of capturing an
enemy flag and bringing it back to your base, all you have to do is find the enemy flag
and touch it with one of your units. What makes this difficult is the fact that enemy
structures can be built on the flag, thereby hiding it from view.
Arena
Arena is a simple slugfest, without the need to worry about resources, base building, or
research. Each player gets a certain amount of units and then proceeds to slug it out.
Destroyed units are respawned and power-ups are liberally sprinkled on the maps.
In-Game Settings
During a multiplayer game, the host (the player who created the session) has the ability
to make small changes to the network configuration. By selecting Options from the
Menu at the bottom of the screen, the host will see the Network tab. The Network tab
provides the host with control over the frequency of game packets. He can move it to
the very left if the game is playing over a fast LAN, and to the right if it’s playing over a
slow Internet connection. Players should try different settings to find the optimal
setting for their network setup.
THE EURASIAN DYNASTY (ED)
Greater Russia was one of the parties to the war of 2048. During this conflict, all
governments in Europe and Asia were de-centralised, and the entire area fell into an
almost feudal anarchy. Naturally, once the war ended this situation quickly changed.
Generals wasted little time officially consolidating the power which they had enjoyed
throughout the war. A mighty new empire arose from the ruins of civilisation – the
Eurasian Dynasty.
The following excerpts are taken from the personal diary of a Russian general, Siergiej
Zugij, while he was commander of the Irkutsk III missile base. This ambitious career
soldier was one of the founders of the new Dynasty and became its first leader.
October 11th 2048
“We have been under fire for 8 hours. The main arsenal and all communication lines
have been destroyed. Nine comrades have fallen and fourteen are injured. I have just
issued the order for everyone to go to the fallout shelter.”
October 25th 2048
“Ground sensors are out of order. The Science Officer believes that they were damaged
by the shock wave of a nearby nuclear explosion. Radiation is stable at the moment.
Another comrade has been killed.”
April 17th 2049
“We have been here much too long. My people are panicking, although life support
systems are in order and food and water supplies last for many more months. Death
will probably end this endless waiting. We can only count on ourselves in this long
struggle for survival. No one can come to rescue us.”
May 21st 2049
“I have decided to send a few men up to the surface. This has raised everyone’s hopes.
Although the radiation up there exceeds safety levels, a few comrades have bravely
volunteered.”
June 9th 2049
“One soldier returned. He reported that all infrastructures, including the sensor, have
been totally destroyed by conventional missiles. There is some good news, though.
According to his Geiger counter there is only moderate radiation on the surface.”
July 12th 2049
“We are out, at last! Now we must start to build our temporary base. It excites all of us
to see sunshine for the first time in months.”
August 10th 2049
“Our scouts have found some off-road vehicles hidden in one of the fallout shelters of
the Irkutsk II base. The increased fuel reserves will extend our scouting range.”
August 22nd 2049
“The scouts just brought in 12 people. Some of them were stationed nearby some time
ago. Two people are suffering from radiation sickness. What a terrible sight!”
September 2nd 2049
“One of those suffering from radiation sickness has died. The other one will not last
much longer. The soldiers now appreciate why I ordered them not to leave the fallout
shelter for such an extended period of time.”
September 30th 2049
“There’s no doubt that the central part of our country is totally devastated. The fallout
coming from that region is causing recurrent increases in radiation levels. We do not
know if anyone there has survived.”
October 2nd 2049
“Our scouts have penetrated as far as 300 miles south, reaching the area once known as
Mongolia. They have reported the existence of some sheep-herding tribes. The radiation
level in that region is minimal.”
Page 14

26
27
October 6th 2049
“I’ve made a decision to move south. The men need something to keep them occupied.”
October 15th 2049
“Winter is on the march. The temperature at night falls to -5ºC. We spend most of our
time in the fallout shelter as protection against the cold. We intend to set out for the
south in the spring.”
October 20th 2049
“The fallout shelter is locked up again. We will stay here for another few months. The
leader of our brave scouts, Colonel Aniuszin, suggested that we make some
preparations for our spring departure.”
December 12th 2049
“Our comrades enjoy Colonel Aniuszin’s lectures. Although I know his reports by heart,
I still like to listen to his stories about what we should expect in the far south.”
March 15th 2050
“It is so exciting to leave the shelter again. Now that everyone knows exactly what he
has to do, we can set off for the south within the week.”
March 22nd 2050
“Today is departure day. The fallout shelter is locked up and the surrounding area
mined. We are travelling due south, not knowing what is waiting for us out there.”
In the spring of 2050, a group of soldiers under Colonel Siergiej Zugij’s command set out
towards the Mongolian steppes to find remaining survivors. The colonel’s plan was very
ambitious. As commander-in-chief he had an extremely thorough socio-political training
behind him and commanded legions of troops ready and willing to lay down their lives
for him. He was therefore able to capitalise on any opportunity to create a strong, new
empire. That empire would be ruled by one person – Zugij himself.
Zugij even had a few more aces up his sleeve. He had access to a wide variety of
weapons and he knew where all the old secret Russian military bases were located. All
he needed now was a location to make his dream come true. Coming across a
Mongolian nomadic tribe and taking control over it gave him the perfect opportunity to
start a new empire. In the spring of 2051, the now General Zugij encountered a tribe of
sheepherders ruled by the Khan family. These sheepherders weren’t really interested in
the global war raging throughout the known world. Their main problem was the
constant conflict with neighbouring communities. This situation was tailor-made for
Zugij and it didn’t take him long to convince the tribe’s leader that an armed squad
could put an end to their problem once and for all. Within the following year, the Khans
had conquered the surrounding territories, uniting their peoples into one tribe. The
victories strengthened Zugij’s position as the leader’s advisor and at the end of the first
year he became a member of the Khan family by marrying one of the chief’s daughters.
He took a new name, Yaga Zi Khan, to help win the tribe’s respect and confidence. The
old leader died in 2059 and Yaga Zi Khan became the new leader. While establishing the
capital of his new country, he continued to bring more and more areas under his
control. After a few more years had elapsed, Yaga Zi Khan found himself controlling
most of the remaining uncontaminated areas in Asia. Yaga’s son, just as bloodthirsty as
the old leader himself, marched to Europe and conquered its peoples. This was the
birth of the huge and powerful empire which would be given a proud name at the end
of the 21st century — the Eurasian Dynasty.
The dictatorial Khan Dynasty gave the absolute highest priority to military science,
forever searching for new technological solutions which would give them total military
control. They had access to old Russian military bases and this gave them nuclear
capability and other usefully destructive technology. Trusting nobody, they naturally
set up a highly trained, large network of spies and saboteurs. They sent many of these
shady characters to North America to gather as much information as possible on their
arch rivals, the UCS.
In 2132, the impetuous and cunning Tiao Thi Zhe Khan came to power. His ambition
was to conquer both Americas and hammer the laziness out of the UCS citizens. He
started his preparations by ordering the ED scientists to develop a technology whereby
human body parts could be replaced by mechanical parts. The scientists were
successful and soon a new generation of tough, extremely resistant cyborg-soldiers
were being mass-produced and held in Bio Centres.
Then in 2140 something totally unpredictable happened....the UCS invaded the British
Isles! Now Tiao Thi Zhe Khan had a reason to do the only thing which warmed his cold,
cruel heart...he declared war on the UCS.
The war proved to be enormously expensive and Khan still wasn’t seeing any signs of
the crushing victory he had anticipated. Naturally, the people soon started to balk at
paying the high taxes levied to finance Khan’s war. The situation was ripe for rebellion.
Khan’s cousin, Kata Mae Zhe Khan, a master of the insidious (the one quality the entire
family shared), made the most of it. He incited the citizens to riot and in the mayhem
which ensued, the Bio Centre was razed to the ground. The next step for Kata was to
assume total control. After a brief but bloody struggle, he deposed his cousin with the
support of his rebels. Now he could realise all his dreams and ambitions!
But the change in government didn’t change much in the war. The ED army suffered
some terrible defeats. In 2148, while making a desperate retreat from South America,
they finally retaliated with nuclear weapons. Gigantic explosions near the North Pole
changed the course of the war for good - Earth was knocked out of orbit. The first
effects of this were noticed in 2150, and as a result, Kata Mae Zhe Khan decided to
build an evacuation fleet to escape the planet. Later that year a new enemy appeared.
The Lunar Corporation, an almost forgotten society living on the Moon, dispatched its
units to various parts of the Earth to seek new territories rich in natural resources. ED
reconnaissance, stealthy and effective as ever, reported that the LC had obviously
figured out what was happening and was making preparations to evacuate the Moon.
Their scientists had no doubt reached the same conclusion as those in the ED – if the
Earth was going to blow, get as far away as possible.
A general command was issued from ED headquarters....defend all natural resources on
ED territories at all costs ! And prepare for battle against not just one, but two, enemies!
ED Arsenal
The most primitive of the three factions, the ED army still relies on conventional
weapons. Their main offensive force is comprised of units equipped with large-calibre
anti-tank guns and rocket launchers. Towards the end of the last war, however, a few
new units were equipped with laser weapons. Ever aware that the UCS had managed to
Page 15

28
29
eliminate the human element from the process of warfare in favour of computers, the
ED scientists made efforts to create fully automatic weapon systems. This led to the
development of the Ion Cannon, which interrupts the electronic circuitry of any target
it hits, disabling it without destroying it. Using this formidable piece of firepower, the
ED is able to capture many hostile units intact, then examine them for potential weak
points.
The ED is the only nation that still has a nuclear weapons stockpile. Be sure to use
nuclear weapons only when extreme danger threatens.
Unit Chassis
Despite years of research, the ED scientists still have not been able to develop an
effective anti-gravity generator. ED units continue to run on engines based on old 20th
century technology. Ground vehicles have wheel or caterpillar-track type chassis. The
main drawback to this is that different terrain types have a great effect (almost always
negative) on their mobility. On the plus side, the simplicity of their power transmission
system means they don’t break down much. The aircraft fly by means of propellerscrew propulsion. This gives them enormous manoeuvrability, allows them to fly at low
altitudes beneath the enemy’s radar, and most importantly, enables them to land and
take off practically anywhere.
Gruz
This is a heavy construction vehicle equipped with front-mounted
excavation buckets. It is used for constructing buildings, digging ditches
and tunnels, and levelling ground. A rear-mounted construction module
contains most components needed to build important structures.
Taiga
This is a heavy-transportation vehicle used originally for cutting trees in
the Taiga forests. The ZK Taiga is currently assigned to hauling containers
between mines and refineries. A powerful generator enables add-on
systems, such as laser weapons, or other equipment to be attached. With
these attachments, it is often used as a support unit.
Siberia
The Siberia model was designed during adaptation of the ZK series for
military purposes. The Siberia is armoured, but unlike the ZK Taiga, is also
fast and light. The reduction in weight was possible because the ZT 100
Siberia was not intended to be used as a transportation unit. The powerful
generator remains unchanged, enabling the user to attach the usual extra equipment.
The ZT series is the mainstay of the ED support units.
Minelayer
After war broke out in 2140, construction began on a vehicle that would be
able to mine large areas in a short time. This led to the development of the
Minelayer. During the development process, however, the scientists luckily
stumbled across a design for a laser mine detector, which they immediately
incorporated into the Minelayers. This detector finds mines quickly and detonates them
from a safe distance.
Boyar
This light, speedy helicopter is used as a supply unit. Its main task is to resupply front-line units with ammunition.
Pamir
The TT model (“Pamir”) was developed from the American Abrams M1A1
tank. To adapt the design to 22nd Century demands, scientists modified its
equipment so that one man can operate it. The steering stand is situated
inside the chassis right beneath the turret, giving the operator better
protection. A targeting computer installed in the turret controls the firing. Although it
isn’t a particularly large unit, it comes with high-quality armour enabling it to take part in
very dangerous operations. It can also travel over most types of terrain. Unfortunately,
the generator is not powerful enough for a laser weapon.
Kruszchev
An upgrade of the Pamir, HT 400 Kruszchev tanks were constructed as
defence vehicles. Their two most significant features are low speed and
very heavy armour. The ED mainly uses them to repulse enemy attacks.
Their heavy armour makes them extremely resistant and they can inflict
appreciable losses on any opponent. Its fighting prowess can be
tremendously increased by attaching add-on equipment.
Ural
Although the Ural has less armour and strength then the Kruszchev, it
makes for up for its lack of armour with greater firepower. The Ural is the
ED’s hardest hitting ground unit and has two hardpoints for weapons.
Often used as a command vehicle, the Ural can carry a banner or noise
generator and still carry up to two other weapon systems.
Caspian
The ED Army needed an amphibious vehicle capable of operating in
swamps and flooded areas. So they developed the TK101 Caspian from an
armoured infantry transporter.
The transport bed was replaced with a highly efficient generator, giving it
more than enough energy to power any special add-ons. On solid ground, the vehicle
uses all-wheel drive; on water, it is driven by rear and front-mounted propellers, giving
it tremendous speed and manoeuvrability. The TK101 is lightly armoured. When
equipped with a light weapons system, it is often deployed in rough terrain as a
reconnaissance vehicle.
Volga
When the scientists at the Kurtchatov Research Centre started work on an
amphibious tank, the first thing they did was reduce the armour. The TL 70
model is the result of these experiments, which were partially successful.
The TL 70 can operate in water but is very slow and cumbersome. So the
engineers came up with a better idea – to use it as a mobile ballistic rocket launcher.
Page 16

Irkutsk
The Irkutsk is a lightly armoured patrol boat used for reconnaissance and
strike operations. Its main function is battling heavy enemy ships. The
unit’s enormous speed enables it to strike like a cobra and quickly
withdraw beyond enemy range. It can also defend ships of the Leviathan
class.
Leviathan
This heavily armoured ship is the ED navy’s main strike unit. It has an
extended firing range, meaning that its rockets can hit targets situated far
inland. Various upgrades of the Leviathan allow it to mount more weapon
systems.
Cossack
This small helicopter, equipped with machine guns, is perfectly suited for
reconnaissance operations. With its tremendous speed and
manoeuvrability, it can easily dodge enemy rockets, while its special
ammunition helps it destroy light enemy units.
Grozny
Due to the heavy losses of MI 106 Cossacks during the early part of the
war, ED scientists were forced to develop a new helicopter that would be
strong enough to withstand a direct hit from a surface-to-air rocket. The
needed breakthrough was reached when the scientists developed new
composite armour. This enabled them to construct an assault helicopter,
the “Grozny,” with much more armour than the Cossack. However, the increase in
protection came at the expense of overall flying speed.
Thor
The Thor is a heavily armoured helicopter used to carry out air raids. Able
to carry either heavy rocket launchers or bomb bays, the Thor is capable of
delivering a deadly payload to the enemy. The Thor is also versatile since it
can be equipped with a Container Hook. When equipped with a hook, Thors
can lift and transport ore containers.
Han
Similar in design to the Thor, the Han is a dedicated heavy weapons
platform. The Han is much tougher than the Thor and carries more armour.
This additional protection prevents the Han from using Container Hooks,
but allows it to deliver its deadly payloads with a much higher degree of
success.
Ukraine (Transport)
The Ukraine is a heavy transport craft used to ferry units and resources
from mission areas to the main ED base. It can carry up to 10 units and
5,000 credits simultaneously.
30
Page 17

Lenin
The Lenin is a heavy transport helicopter used for hauling ore between
Transport Bases and the Space Port.
Fake Units
Fake tank units are used by the ED to mask their
numbers and make their armies seem larger. These
units are basically mockups of tanks and can fool an
enemy into thinking he faces more opponents than he
actually does.
Weapons and Technology
20mm Chaingun
Prerequisites: None
Upgrades: Double Chaingun; Helicopter Chaingun
Anti-Air?: Ye s
Description: Primary light weapon of the ED. The chaingun comes with lots of ammo so resupplying is not an
issue.
Rocket Launcher
Prerequisites: None
Upgrades: Rocket Launcher II; Heavy Rocket Launcher;
Helicopter Rocket Launcher; Helicopter Heavy Rocket
Launcher; Heavy Rocket Launcher II; Ballistic Rocket Launcher
Anti-Air?: Ye s
Description: Primary rocket attack weapon for the ED; effective against both ground and air targets. One
drawback is rapid rate of ammo use. Rockets can be upgraded for greater damage and for accuracy. The
Ballistic Rocket is the ED’s main weapon of mass destruction.
105 mm Cannon
Prerequisites: None
Upgrades: Double Cannon, 120mm Heavy Cannon, Double
120mm Heavy Cannon
Anti-Air?: No
Description: This is the primary mounted gun for the ED. Quick to make, this gun is used to punch through enemy
armour. Very useful when combined with air strikes.
Bomb Bay
Prerequisites: Thor Chassis
Upgrades: Bomb: 5 Bomb Bay, Nuclear Bomb
Anti-Air?: No
Description: This weapon is used by the Thor and Han to deliver high-powered bombs and nukes on the enemy.
Very effective in getting rid of nasty defenses and entire bases.
31
Page 18

32
33
Laser Cannon
Prerequisites: None
Upgrades: Heavy Laser Cannon
Anti-Air?: No
Description: Developed during the war to destroy enemy armour, this weapon
heats the metal of an unshielded unit and causes the ammo inside to explode.
Ion Cannon
Prerequisites: None
Upgrades: Heavy Ion Cannon
Anti-Air?: No
Description: Developed in secrecy, the ion cannon represents the best in ED technology. When the ion cannon
is fired upon an unshielded unit, it causes the unit to become immobilised for a few seconds. This gives Repairer
units time to capture the unit.
Repairer
Prerequisites: None
Upgrades: Screamer (noise generator)
Anti-Air?: N/A
Description: This piece of equipment is integral in the ED lineup. Used to perform on-the-spot repairs to
buildings and units, a repairer can also be used to capture immobilised units that have been hit with an ion
cannon. An upgraded repairer has the ability to repaint friendly units so they look like the enemy.
Screamer (Noise Generator)
Prerequisites: Repairer
Upgrades: Noise Generator II
Anti-Air?: N/A
Description: The noise generator is used for two different tasks. First, this device uncovers invisible units cloaked
by a shadow generator. Second, the noise generator cuts enemy communication lines. Enemy units under the
influence of a noise generator will still shoot at hostile units but cannot be controlled by their owner. This is very
helpful against human units in multiplayer games. Units under the influence of a noise generator are marked with
a blue glow. The higher you upgrade the noise generator, the more effective it is.
Shield Generator
Prerequisites: None
Upgrades: 1200 PSU, 1800 PSU Generators
Anti-Air?: N/A
Description: With the invention of lasers and electric cannons, the shield generator is
necessary to protect your units and buildings. Units and structures without a shield generator will quickly
overheat and explode from energy-based weapons.
Banners
Prerequisites: None
Upgrades: None
Anti-Air?: N/A
Description: Every war effort needs it’s flag bearer and banners are just that. A unit or structure equipped with a
banner adds a bonus of two levels of experience to all units near it. This equals about 20% higher damage done,
and weapons range. The effect of a banner is not cumulative; in other words, units will gain a maximum bonus of
two levels regardless of how many banners are within range.
ED Structures
Vehicle Production Centre
Heavy construction machines and civilian vehicles are manufactured here. Any basic
civilian vehicle can be produced here. Its two weapon mounts can easily fend off
attacks from light enemy units. Remember to protect your VPC at all costs. If lost, you
lose the ability to produce any heavy construction machinery to expand your operation,
and that means defeat.
Weapons Production Centre
Here you can produce any kind of battle vehicle you want. The WPC isn’t particularly
well armoured, so you’ll need to defend it with other structures and units. If this
structure is destroyed, no combat units can be built.
Power Plant
This is a normal atomic power station. The reactor has a built-in cooling system, plus a
transmitter which supplies energy to neighbouring structures.
Your Power Plant has an ingenious automatic safety system, so if it takes a direct hit
and is destroyed during an enemy attack, there’ll be no atomic explosion to blow your
other structures and units to smithereens!
Energy Supply
The ED energy network is based on small nuclear power plants built close to different groups
of buildings. Each plant is self-supporting and consists of two elements – a nuclear reactor
responsible for creating the energy, and a transmitter to send it to the structures. Since the ED
never really got into wireless energy transmission research, they still rely on inefficient firstgeneration transmitters based on plans stolen from the UCS. The transmitters use lots of
energy, which is why they have to be located within the power plant complex itself. These
transmitters can supply only those structures that are located in the immediate vicinity.
Structures farther away need their own power plants. This is the single most noticeable aspect
of all ED bases – there’s always a power plant right in the middle, surrounded by various
buildings.
Some tips:
F9 tells you the energy range of your Power Plant.
A Green Lightning Symbol defines energised areas.
Page 19

34
35
Mine
The Mine excavates underground resources. The raw materials are packed in airtight
containers and brought out on a conveyor belt. Then the containers are either
transported to a Refinery or Transport base.
Refinery
The Refinery breaks down the raw materials into components necessary to keep
production going in your Production Centres. Special units deliver the raw material
containers to the Refinery and the Refinery processes the ore into credits for use within
the current mission.
Ore Extraction –
They
build mines, extract the ore, and then store it in special containers. Transporters haul
these containers either to the refinery for further processing or to the Transport Base
for shipment to the Space Port. The Mine, the Refinery, and the Transport Base are
equipped with “conveyor belt” flights and containers. Transport Bases also have landing
pads that allow transport helicopters to land and pick up resources for delivery to the
Space Port.
The ED is still way behind the times when it comes to mining.
Transport Base
After ore is excavated by a mine, you have to decide how to distribute the ore. If you
need resources for your current operations (like structure or vehicle construction), then
order your transporters to deliver the ore to a refinery. The refinery will process the ore
and provide you with credits to use in the current mission. If you want to send the ore
to produce parts for your evacuation fleet, then order your transporters to deliver the
ore to a Transport Base.
The Transport Base is well armoured, so you won’t have to worry too much about
enemy attacks. The resources are taken directly from the Transport Base to the Space
Port by transport helicopters. These helicopters will automatically pick up resources
whenever the Transport Base has stored 2,000 credits worth of resources.
Research Centre
This is where your scientists and engineers are based. All research and development is
carried out by your Research Centres. Every unit or structure upgrade has to be
researched and developed by a Research Centre. Research Centres also provide access
to unit design and technology research. Owning a Research Centre gives
you access to ultra-modern technology. If you have Research Centres in both your main
base and the mission area, credits will be drawn from both the mission area and main
base when you conduct research.
Note: Two Research Centres speed up your research by 15%, a third by another 30%.
More than three provide no further benefit and are therefore is a waste of resources.
Supply Depot
This is a military centre which supplies ammunition to your units and structures. As
soon as a unit’s ammunition supply is exhausted, delivery occurs automatically. You can
have ammunition delivered to any unit or building you select. Units in tunnels are
difficult to supply, but as soon as they exit the tunnel, ammunition will be waiting for
them
Note: The Fast/Average/Slow button defines how fast the deliveries are made. If you only
have one Supply Depot, the recommended setting is “Slow.” If you have many Supply
Depots, the recommended setting is “Fast.” Supply Depots work best with only one or
two supply helicopters attached to each one.
Ship Yard
The heart of the Shipyard is a hangar where naval units are constructed. This structure
should only be built at the waterside, at a location with enough space to harbour ships
and boats, and broad enough for a lock.
Base Defence
ED structures are usually equipped with active defence systems, consisting of directly
mounted guns. This has one major advantage – it is incredibly hard to destroy a highly
fortified structure which is constantly firing back! A typical ED defence structure has
high towers and low, complex bunkers. Two defensive lines usually protect ED
fortifications. The first includes the pill-box, designed to resist enemy attacks for long
periods and to ensure the security of the second line. The second line includes high,
lightly armoured but heavily armed large towers capable of firing above the bunkers
and destroying any attacking units with their heavy weapons. Spread all over the base,
and covering the entire defensive area, small towers are responsible for anti-aircraft
defence.
Small Tower – Three or four Small Towers are an excellent defence against light and
medium airborne attacks. They can also repel lightly-armoured vehicles. Bear in mind
that they are not as effective against heavily-armoured enemy vehicles, simply because
they do not mount heavy weapons. The chief benefit of Small Towers is
that they are self-powered and therefore will remain active even if your power plants
are destroyed.
Large Tower – Normally equipped with heavy artillery, extra weapons such as heavy
lasers or large rockets can be added to the Large Tower. A few of these structures,
placed strategically, can thwart even the strongest and most heavily-armed attack. Large
Towers are dependent on power plants for energy.
Pill-Box – The Pill-Box is an important defensive structure. Heavily armoured, with
great resistance to all kinds of firepower, it lies close to the ground in the ED defensive
line. While the Pill-Box is doing its stuff, your second line of defence can open fire on
your enemies and annihilate them. Because the Pill-Box lies so low, there’s little danger
of your own units hitting your Pill-Box from behind. The Pill-Box is dependent on power
plants for its energy.
Missile Control Centre
The MCC is the control centre for the most dangerous weapon of all – the ballistic
missile with an atomic warhead. You’ll need this structure to erect silos for the missiles.
No matter what the distance, these weapons always hit their target unless intercepted
by an SDI laser, since they’re aimed by satellite. It may be necessary to use these
weapons often to successfully achieve your mission aims.
Page 20

36
37
Silo
The silo is the firing point for your ballistic missiles. It is concealed underground and
should always be built near your MCC. Ready-to-fire ballistic missiles (and atomic
warhead missiles) are stored here. A silo takes a long time to reload, so it’s best to have
several of them loaded up and ready to fire. Each MCC can support up to four missile
silos. Each silo is reloaded automatically at a cost of 5000 credits.
Headquarters
This is the strategic control centre of the ED. Each Headquarters structure you own can
provide automated control over one of the following functions: research, unit
construction, weapon upgrades on structures, and base defence. To automate all of
these functions, you’ll need to build four Headquarters structures.
Noise Generator
In the last years of the war, the UCS used the camouflage effect of the Shadow
Generators to great effect. The ED had to find an answer to this and their scientists
came up with a trump card. They developed a generator which destroys the Shadow
Generator’s camouflage effect. Mounted on a radar structure or unit, this generator has
yet another capability — it produces a strong magnetic field which jams the enemy’s
communications with their Command Centre, making them leaderless and easy prey.
Tunnel Entrance
This structure handles communication between the tunnel system and the surface. It
has its own generator, so it doesn’t need a Power Plant.
Landing Zone
This small structure marks out landing areas for heavy transporters. It has a strong
signal transmitter which enables it to guide planes in safely at night or in thick fog.
Note: This structure is absolutely vital for transporters travelling between a mission
area and the main base.
Space Port
The Space Port is a critical part of your main base. The Space Port sends resources to
the R&D teams building the evacuation fleet. Once the Space Port sends its resources to
the R&D teams, those resources are gone and cannot be used again. Resources
earmarked for the R&D teams are held in the Space Port structure until a shuttle picks
them up. You can take resources from the Space Port and give them to your Main Base
by selecting the Space Port and then clicking the “Take 5000 CR” button. This will only
work if the shuttle has not already retrieved the resources. You can also give credits to
the Space Port by clicking the “Give 5000 CR” button.
In many missions, you will have to send a specified amount of credits to the Space Port.
For the ED, this building is the Transport Base. If a Transport Base is not built, you will
have to manually transfer resources to the Space Port via the Transport. Furthermore, if
you transport resources manually via the Transport, those resources will not count
toward the mission’s credit requirements.
UNITED CIVILISED STATES (UCS)
As the 21st century began, who could have predicted that things would turn out as they
did? With millennium parties in full swing, people around the globe celebrated wildly.
As the world’s most prosperous land, the United States had the most to cheer about –
and the most to look forward to. Globalisation had won the day and there was little
doubt who the big winner would be.
But after the empty champagne bottles had all been cleared away and the hangovers
subsided, the first rumblings started. First came the crash on Wall Street. Stocks
plummeted to levels which made the 1930’s look good. As irrational exuberance gave
way to incurable pessimism, one international corporation after another simply
dissolved, factories closed their doors, and pictures of millions of unemployed
wandering around desolate city centres in the vain hope of finding something to eat
came to symbolise the plight of the 21st century.
The crisis brought about some dramatic social and political changes in the US. To focus
attention away from the miserable economic situation, those in power pushed for a
“guns instead of butter” policy. Defence outlays were dramatically increased and a siege
mentality created among the population. For 30 long years, Americans were made to
believe the entire world had become an enemy, and that foreign armies were just
waiting for the right moment to attack. Under these tense circumstances there was little
to prevent a relatively minor incident with Greater Russia in the 2040s from escalating
into a large-scale conflict. In the ensuing war of 2048 all European and Asian powers
were completely destroyed. Since the US had invested early in a top-rate missile
defence system, it suffered less damage than the others. But the war left its mark. Not
one single nation managed to emerge unscathed. The only result of the bitter conflict
was global anarchy.
Slowly and painfully, the North American continent began reconstruction. Twelve states
in the former USA formed a federation called the United Civilised States, with a
provisional government. People had long ago lost faith in politicians, who were seen as
self-interested and greedy. A new movement led by Richard Bowman stepped into this
power vacuum. Bowman’s theory was radical if not particularly original – power
corrupts, and since those who seek it are usually motivated by the lowest personal
interests, the best government is the one that doesn’t exist. To his critics, who pointed
out that somebody must govern, he repeatedly claimed to have a plan already worked
out. And that he did.
His “solution” was a government run by an absolute minimum number of bureaucrats
chosen by a lottery system. To keep them from becoming entrenched, they could only
remain in office for a few months.
Despite some opposition from conservatives, this strange form of government was
installed and given the name “Stochocracy.” At first it was difficult getting newly chosen
politicians trained in their new positions. But after a few years government ran
smoothly. Occasionally a new lottery “winner” was reluctant to take up a position, but
these were rare cases. Most citizens saw it as their patriotic duty to carry out the tasks
of government – at least for a short time. Fortunately the greenhorn politicians could
rely on highly specialised computer systems to assist them in day-to-day matters of
state. In fact, they began depending so much on these so-called “advisors” that, after a
while, it became clear that the systems were fully capable of running the government
without their human overseers.
Page 21

38
39
In 2074, the physicist Mark Springer became head of state. During his short one-year
reign he was able to secure financing for a large scientific research program. Back then
there were quite a few research institutes, Stanford Laboratory being the best known.
Springer also led expeditions into some of the regions destroyed by the war. One of
these was known as Area 51, formerly a secret military base. While digging nearby,
Springer’s crew unearthed a mysterious wreck, which turned out to be the remains of an
alien space ship. Scientists began thorough investigations into the strange find to see
what it could yield.
The steady stream of scientific breakthroughs, inventions and discoveries had a great
influence on the daily lives of UCS citizens. Soon CPU-controls were everywhere.
Automated factories needed little attention. Robots did all the household chores. There
was little work to be done, and everyone lived quite comfortably. Computer systems
assumed de facto control over running the country, since the human rulers by now
hardly ever felt confident enough to reject their “advice,” which now covered every
decision imaginable.
This situation changed in 2134 when Jonathan Swamp became Defence Minister. A
highly skilled programmer, Swamp was for many years in charge of the main
government computer systems. This experience made him the only person in the
country capable of using their total potential. As Defence Minister he was granted
unlimited access to the military administration processor, known as GOLAN. While in
office, he made some radical changes to the system, allowing him to run computer
simulations of military battles all over the planet. But by changing GOLAN’s delicately
balanced program structure, Swamp created unforeseen glitches throughout the system.
As a result, over the next few years incorrect data led GOLAN to make some fatal
miscalculations. The worst of these was the order to send a large army to
the former British Isles. The ED rulers of the territory naturally saw this as a declaration
of war.
The resulting war lasted ten years and was fought on all continents. The intelligence of
the GOLAN system went up against the courage and experience of the ED leader.
Employing some new tactics, the ED at first had the upper hand, until GOLAN calculated
the right counter-measures. The battlefield was in a state of constant flux. For a while
the ED Army occupied part of North America, until the UCS deployed units equipped
with the most modern arsenal. By 2148 the ED was in full retreat before the UCS
onslaught from the south. While crossing the North Pole towards Siberia the ED shot off
nuclear weapons to stop the advancing UCS units. This turned out to be the turning
point – but not as intended by the ED commanders who ordered the launch. The power
of the explosions literally knocked the Earth out of its orbit.
In January of 2150 the UCS scientists proved beyond any doubt that in only a few years
a major cosmic catastrophe was inevitable. GOLAN was clearly unable to deal with this
new information and completely shut down. A new government was quickly chosen to
deal with the situation. The solution they came up with was most human in its
simplicity - build a space station and evacuate the population. To work out the details
they rolled out their new cyber-leader: GOLAN IV. This state-of-the-art CPU quickly
started issuing orders for new factories to produce the necessary parts. Through
computer simulations, it became clear that such a process would require massive
amounts of ore and other raw material. So GOLAN IV issued another order, this time
directly to the UCS Defence Minister – “must immediately call out army... secure all
identified sources of raw material.”
The final war had begun.
UCS Arsenal
The computer-controlled UCS army spent vast sums during the war researching new
types of weapons. A peek at the UCS arsenal shows the money was well invested. The
most impressive weapon is clearly the Plasma Gun, probably the most effective ever
used by mankind. Its incredible destructive power, low energy consumption and high
rate of fire make it the ideal all-around weapon.
But the crowning glory was the integration of an old satellite reconnaissance link into
an orbital plasma gunnery system. This resulted in the UCS having the ability to
intercept plasma beams shot from ground-based guns and redirect them towards any
target on the Earth’s surface. With this devastating technology the UCS can destroy
enemy vehicles and structures hidden in places which normally would be inaccessible
to regular units. In short – enemies can run from the UCS Plasma Gun, but they can’t
hide.
Unit Chassis
Most unit types in the UCS army are robots, with bodies mounted on two-legged
chassis. By using this type of stepping machinery, UCS engineers managed to
substantially increase the robots’ mobility in hilly areas and in forest clearings where
tree stumps would normally stop tracked or wheeled vehicles. Yet another factor
contributing to their battlefield success is that size and weight have been considerably
reduced. Since these units normally must be transported to different locations, this had
a major impact on logistics.
Many years of intense research into anti-gravity generation gave UCS engineers an
insight into the realm of levitation. They figured out that if an anti-gravity generator
could be retrofit into existing lightweight units it would give them tremendous speed
and manoeuvrability. They thought it would also solve the G-force problem, as the
generator would produce its own gravity around the unit, thus providing balance and
stability. Now at last the theories have been put into practice - generators have been
installed in Gargoyle fighter planes, heavy bombers and transport vehicles.
Mammoth
This versatile, heavy robot is used for building construction, ditch/tunnel
digging, and levelling ground. You need to watch your Mammoth closely as it
is very slow and has a hard time evading enemies.
Tiger
This is the basic robot of the UCS army. With good armour and the capability
to hold various weapons, the Tiger is fast off the assembly line and can
cause trouble to opposing forces in large numbers. Its weak spot is low
resistance against projectile weapons.
Page 22

40
41
Spider
Panther
Jaguar
Minelayer
This 6-legged chassis can support special equipment add-ons, making it a
favourite support unit in the UCS Army. The Spider chassis can also be
equipped with a shield generator to give it good protection against energy
weapons. Its weak spot is poor armour against weapons such as rockets
and cannons.
A 2-legged chassis deployed as a main striking force, the Panther packs a
real wallop with its ability to carry heavy weapon systems and shields.
The greater amount of armour on this unit does take away from its speed
but the Panther just plods along, killing all
in its way.
This 2-legged chassis, a modified version of the Panther, is equipped with
an add-on weapon system. This add on weapon system allows for greater
damage as the Jaguar lays down twice the amount of firepower of the
Panther. Due to the extra equipment and armour on this unit, it does take
longer to make and is very slow.
A caterpillar vehicle deployed either for mine-laying or quickly clearing
large mined areas, it can locate and detonate enemy
mines at a distance. This is due to an electromagnetic field detector
connected to a radio transmitter. The rear-mounted mine bay
can quickly lay mines over an entire battlefield. Basic models carry a
maximum of 10 mines, each of which can destroy any type
of enemy vehicle.
Gargoyle
A light anti-gravity craft, the Gargoyle is fast and manoeuvrable. It is
primarily used for reconnaissance and anti–aircraft operations against
enemy bombers. Due to the speed of the Gargoyle, the UCS can use this
unit to keep ahead of the enemy.
Bat
As its name implies, this is a medium-weight, anti-gravity bomber,
deployed against weakly defended enemy positions. The Bat is ideal for
destroying stray units as well as recon units.
Dragon
This heavy anti-gravity bomber is normally deployed against heavily
defended enemy units and bases. With its heavy armour, the Dragon can
remain under enemy fire for long periods of time. The main drawback
to this unit is that it is very slow and expensive.
Condor
With no armour, shields, or weapons, this unit is used to supply
your units when they run out of ammo. Due to the fact that this
unit comes with so little armour, it is one of the fastest flying units in
your command.
Harvester
The Harvester can extract ore and transport it to the refinery. The
Harvester is the core ore transport unit for the UCS. Upgrades of the
Harvester are faster and carry more armour.
Shark
Hydra
This is a lightweight naval unit employed for reconnaissance and quickstrike operations. Due to its light armour and simple weapon systems, the
Shark is not good for heavy combat.
The Hydra is a heavily armoured ship used by the UCS navy as the “big
hammer.” It’ll blow ‘em up with a bang! Complete with the ability to carry
heavy weapon systems, the Hydra can go toe to toe with land defenses
and is the bane of amphibious units. Upgrades of the Hydra allow it to
mount even more weapon systems.
Harvester IV
This model is the first flying Harvester. As such, it can harvest
resources from distant locations and fly out of danger when necessary.
Later upgrades provide more armour and speed.
Albatross (Transport)
The Albatross is a heavy transportation craft used to ferry units and
resources from mission areas to the main UCS base. It can carry up to
10 units and 5,000 credits.
Page 23

42
43
Weapons and Technology
20 mm Chaingun
Prerequisites: None
Upgrades: Double Chaingun; Gargoyle Chaingun
Anti-Air?: Ye s
Description: Basic point defence weapon; can be used against both ground and air targets.
Rocket Launcher
Prerequisites: None
Upgrades: Small Rocket Launcher I; Small Rocket
Launcher II; Heavy Rocket Launcher; Bomber Rocket
Launcher
Anti-Air?: Ye s
Description: This is the primary projectile weapon of the UCS. Rockets are effective against both ground and air
targets. Their rapid rate of fire results in rapid ammo depletion. Rockets can be upgraded for greater damage
and accuracy.
Grenade Launcher
Prerequisites: None
Upgrades: Heavy Grenade Launcher
Anti-Air?: No
Description: High-explosive weapon that delivers a fair amount of
damage, especially to structures.
Plasma Cannons
Prerequisites: None
Upgrades: Heavy Plasma Cannon I; Heavy Plasma
Cannon II; Offensive Plasma Cannon; Bomb Bay
Anti-Air?: No
Description: Plasma Cannons are rapid-fire energy weapons that burn through armour to ignite ammo, fuel, etc.
Offensive Plasma Cannons can hit targets anywhere on the battlefield with impunity. Research of Plasma
Cannons also allows construction of plasma bombs.
Bomb Bay
Prerequisites: Heavy Plasma Cannons I
Upgrades: Bomb Bay; Bombs
Anti-Air?: No
Description: Bomb bays deliver high-explosive plasma bombs.
SDI Laser
Prerequisites: None
Upgrades: None
Anti-Air?: No
Description: The SDI Laser is a defence system against ballistic missile attacks. The SDI Laser can shoot down
missiles within a limited radius. However, its slow rate of fire means that it can be overwhelmed by a saturation
attack.
Repairer
Prerequisites: None
Upgrades: Repairer; Shadow Generators
Anti-Air?: No
Description: Repairers allow the repair of damaged units and structures. As a special
option, repairers can repaint your units to any colour. This helps to make surprise attacks in multiplayer games.
Upgraded repairers have the ability to upgrade other units right on the battlefield.
Shadow Generators
Prerequisites: Repairer
Upgrades: Shadow Generator I; Shadow Generator II; Shadow Generator III
Anti-Air?: No
Description: This is one of the most important devices in the UCS arsenal. Shadow generators conceal units
from enemy scanners, so long as the units have their lights turned off. All units within range of the shadow
generator are cloaked and can attack the enemy without being seen. However, they must have their lights
turned off in order for the shadow generator to function properly.
Shield Generator
Prerequisites: None
Upgrades: Higher-powered shields
Anti-Air?: N/A
Page 24

44
45
Description: With the invention of lasers and ion cannons, the shield generator is necessary to protect your
units and buildings. Units and structures without a shield generator will quickly overheat and explode from
energy-based weapons.
Banners
PreRequisites: None
Upgrades: None
Anti-Air?: N/A
Description: Every war effort needs it’s flag bearer and banners are just that. A unit equipped with a banner
adds a bonus of two levels of experience to all units near it. This bonus is not cumulative.
UCS Structures
Power Plant
This is a classical nuclear plant with tremendous power. It includes an atomic reactor
and a cooling system. You have the option of expanding the plant with additional
reactors in order to increase its energy output, simply press the B key.
In addition, the plant has its own transmitter for sending energy supplies to
other structures.
Notes: The 9 function key displays the plant’s range. The Green lightning symbol
denotes the fields supplied with energy, a Blue lightning symbol denotes fields
where you can place a transmitter. Transmitters are automatically connected to the
Power Plant.
Energy Supply – Keeping in mind the rule, “without a proper energy supply a
structure will wither and die,” this field was made top priority in UCS research centres.
The conventional method of delivering power with cable and power lines proved
difficult to maintain in wartime. They were over-exposed to enemy attacks, extremely
easy to damage, and very expensive (and time consuming) to repair. But in 2112,
scientists from the Ramaz Hill Research Centre came up with a better solution. They
managed to build a prototype of a phenomenally efficient energy transmitter. This
invention revolutionised the UCS energy grid.
The UCS uses traditional high-power nuclear generators, usually run on a few reactors.
The transmitters send the generated power to the nearby structures. Within the
transmitter’s operational range, an additional transmitter serves to expand the area
which can be supplied. So, by installing a complete network of transmitters, the UCS
can now supply energy to structures far and wide.
Energy Transmitter
Structures predominantly get the energy they need to function from Power Plants. But
the on-going achievements of UCS scientists have brought dynamic improvements to
this field of research. Energy Transmitters expand the range of Power Plants; using
these Transmitters, whole networks can now be constructed , enabling you to build
power stations much further away from your base. So your transmitter network
protects your base from the drastic effects of a nuclear explosion brought about by one
of those sneak enemy attacks.
Notes: The F9 function key displays the plant’s range. The Green lightning symbol
denotes the fields supplied with energy. A Blue lightning symbol denotes fields
where you can place a transmitter. Transmitters are automatically connected to the
Power Plant.
Weapons Production Centre
This is the production centre for various forms of battle equipment. Every military
project developed and tested in the Research Centre can be built here. Since this
structure is not very well fortified, you’ll need to provide extra protection. Lose it and
weapon production stops – and so does any hope of victory.
Vehicle Production Centre
This is where the UCS builds its heavy construction machinery and civilian vehicles. All
non-military projects, developed and tested in the Research Centre, can be built in this
complex. The Centre’s heavy armour, high resistance, and large gun enable it to
withstand moderate enemy attacks. You should protect it well. If you don’t have enough
construction equipment in reserve and this structure is destroyed, you won’t be able to
build any more – which in turn means you won’t be able to fight anymore.
Ore extraction
The UCS uses special drilling vehicles to extract ore. These multipurpose vehicles locate
ore deposits for extraction. Once extracted, the ore is stored in holds within the vehicle.
When the holds are full, the vehicle takes the ore directly to the Refinery or the
Transport Centre for unloading.
Ore Transport Base
After ore is excavated by a harvester, you have to decide how to distribute the ore. If
you need resources for your current operations (like structure or vehicle construction),
then order your harvesters to deliver the ore to a refinery. The refinery will process the
ore and provide you with credits to use in the current mission. If you want to send the
ore to produce parts for your evacuation fleet, then order your transporters to deliver
the ore to an Ore Transport Base.
The Ore Transport Base is well armoured, so you won’t have to worry too much about
enemy attacks. The resources are taken directly from the Ore Transport Base to the
Space Port by transporters. These transporters will automatically pick up resources
whenever the Ore Transport Base has stored 2,000 credits worth of resources.
Refinery
The Refinery breaks down the excavated raw materials into elements which are needed
to keep the production lines running in your Production Centres. Your harvester units
deliver the raw materials to the Refineries in containers. The transfer process takes
place in a special type of lock which operates hydraulically. You can also unload your
ground and airborne units here. Your air units don’t even have to touch the ground,
they can land directly on the lock itself!
Research Centre
This is where your scientists and engineers are based. All research and development is carried
out by your Research Centres. Every unit or structure upgrade has to be researched and
Page 25

46
47
developed by a Research Centre. Research Centres also provide access to unit design and
technology research. Owning a Research Centre gives you access to ultra-modern technology.
If you have Research Centres in both your main base and the mission area, credits will be
drawn from both the mission area and main base when you conduct research.
Note: Two Research Centres speed up your research by 15%, a third by another 30%. More than
three provide no further benefit and are a waste of resources.
Aerial Supply Depot
This is a Supply Centre. Supply aircraft supply units and structures with ammunition for
projectile weapons.
Note: The
one Aerial Supply Depot, the recommended setting is “Slow.” If you have many Aerial Supply
Depots, the recommended setting is “Fast.” Aerial Supply Depots work best with only one or
two supply aircraft attached to each one.
Fast/Average/Slow
button defines how fast the deliveries are made. If you only have
Ship Yard
The heart of the Shipyard is a hangar where naval units are constructed. This structure
should only be built at the waterside, at a location with enough space to harbour ships
and boats, and broad enough for a lock.
Base Defence
UCS bases are defended by three types of structures. Small Towers, situated right on
base, are armed with lightweight weapon systems for anti-aircraft defence. Large
Towers, normally equipped with heavy plasma guns, are very effective in fighting off
attacks in mountainous areas where there’s not a lot of open space. Flat plains are
defended with so-called Fortresses. These well-armoured structures are equipped with
four different cannon types, and are practically impenetrable for conventional units.
Small Tower – You’ll only realise just how effective these structures can be when you
have several of them in operation. Three or four of Small Towers are an excellent
defence against airborne units. They can also repel lightly-armoured vehicles attacks.
But bear in mind that they won’t be so effective against heavily-armoured enemy
vehicles, simply because you can’t mount heavy weapons on Small Towers. Small
Towers also have the benefit of being self-powered, so they won’t stop fighting if your
power plants are destroyed.
Large Tower – This is a huge hurdle for your enemies to cross! It is normally
equipped with heavy artillery but you can add an extra weapon to this structure, like
large rockets. A few of these Large Towers, placed strategically, can thwart even the
strongest and most heavily-armed enemy troops.
Fortress – This is the most heavily-armoured structure in the game. The Fortress has
two small and two large cannons, making it virtually indestructible to all but the
strongest enemy forces. Its strong firepower usually means a quick and successful
defence. It can only be endangered by well-equipped, heavily-armoured enemy units or
weapons of mass-destruction. Because of its sheer firepower, we recommend that you
build the Fortress near one of your strategically important structures.
Plasma Control Centre – The POS (Plasma Offensive System) is a weapon of mass
destruction, technologically very advanced. The PCC (Plasma Control Centre) is a part of
the POS and supervises the complete system. Based on a satellite defence system
invented in 2073, it consists of plasma rays and control structures. The satellites form
a system of mirrors which enable plasma beams fired at Earth to be very accurately
aimed. The plasma cannon system can reach the enemy anywhere on the map! Its
precise aiming mechanism is the secret of its effectiveness. Enemy units or structures
located in areas which haven’t yet been scouted can also be fired upon. In this case,
just aim at where you think the enemy is.
The bundled plasma beams are fired by stationary plasma cannons.
Plasma Cannon – Another part of the satellite attack system. The Plasma Cannon
shoots out a bundled plasma beam. Aimed by the help of satellites, it can make life hot
for enemy units at great distances! Just one shot destroys a majority of enemy vehicles
and structures.
Headquarters
This is the strategic control centre of the UCS. Each Headquarters structure you own
can provide automated control over one of the following functions: research, unit
construction, weapon upgrades on structures, and base defence. To automate all of
these functions, you’ll need to build four Headquarters structures.
SDI Defence Centre
This structure becomes necessary when the enemy achieves nuclear capability. Its
function is to protect your positions from weapons of mass-destruction. If a nuclear
missile is fired at you, three specially constructed detectors calculate its flight path and
select the precise time to fire three laser cannons with awesome power. The missile is
destroyed in the air, without harming any units or structures. The only disadvantage
the system has is that the three detectors have a limited range. That’s why it’s
important to keep the same distance between your SDI’s. You should normally place
them right next to strategically important structures.
Shadow Tower
The UCS strategic experts made the most of the Shadow Generator’s excellent
camouflage capabilities and adapted it for defence use. The result was the Shadow
Tower. It conceals your units and structures from enemy scanners, so long as they have
their lights turned off.
Teleport
The UCS leadership, using all their experience gained in the wars of 2140–2145, wanted
to construct a machine which could instantly transport battle units to other crisis areas.
After 5 years of intensive research by numerous top UCS scientists, they finally
managed to produce the Teleport.
You’ll need at least two Teleports, one on each “end.” The transmitter splits material
into atoms and decodes the atoms’ structure. This information is then passed to the
other Teleport. It has material generators which use the information to re-materialise
the object. The Teleports are an enormous help to you in your battle campaigns. They
speed up your troops’ transport to the front and, more often than not, are instrumental
in helping you to avoid defeat.
Note: To put a newly constructed Teleport into action, you’ll need a target Teleport to
transport your units. Just highlight the first Teleport and left-click on the target
Teleport. But don’t forget, this goes only in one direction! To get the Teleports going in
both directions, repeat the procedure with the second Teleport. To choose a
destination, use the SHOW DEST button.
Page 26

48
49
Tip: To speed up the teleporting procedure, e.g., between an ore vein and a Refinery,
you’ll need 2 pairs of Teleports, one pair for each direction.
Tunnel Entrance
This structure connects the surface with the tunnel itself. It has its own generator, so it
doesn’t need a Power Plant.
Landing Zone
This small structure marks out landing areas for heavy transporters. It has a strong
signal transmitter which enables it to guide planes in safely at night or in thick fog.
Note: This structure is absolutely vital for transporters travelling between a mission
area and the main base.
Space Port
The Space Port is a critical part of your main base. The Space Port sends resources to the
R&D teams building the evacuation fleet. Once the Space Port sends its resources to the
R&D teams, those resources are gone and cannot be used again. Resources earmarked for
the R&D teams are held in the Space Port structure until a shuttle picks them up. You can
take resources from the Space Port and give them to the main UCS base by selecting the
Space Port and then clicking the “Take 5000 CR” button. This will only work if the shuttle
has not already retrieved the resources. You can also give credits to the Space Port by
clicking the “Give 5000 CR” button.
In many missions, you will have to send a specified amount of credits to the Space Port.
For the UCS, this building is the Ore Transport Base. If an Ore Transport Base is not
built, you will have to manually transfer resources to the Space Port via the Transport.
Furthermore, if you transport resources manually via the Transport, those resources
will not count toward the mission’s credit requirements.
LUNAR CORPORATION (LC)
John Fisher was born in 1976. Since his early childhood he had been fascinated by the
cosmos, spending his days dreaming of space flights and inventing new technology.
The walls of his small bedroom were always covered with science fiction posters.
Unfortunately, his dreamy nature didn’t endear him to his teachers, and he was
generally considered a poor student, despite an occasional good grade in math or
science. After finishing high school, he entered State University and got his college
diploma. He then took up a job as a scientist in a small private laboratory. Although the
pay wasn’t bad, something was missing. The child dreamer could hardly be content
devoting his life to doing trivial analysis jobs for whatever large corporation happened
to be paying the bill. He knew he didn’t have the patience to be an inventor, but he still
wanted to achieve his most avid schoolboy dream – to take mankind into space. But
how could he turn this quest into reality? His lack of money ruled out establishing his
own research centre. So he abandoned the “go it alone” approach and put his greatest
asset – his passionate, contagious belief in THE DREAM – to good use. Within a few
months he had convinced ten wealthy, famous industrialists to sponsor his project.
Soon he had assembled an efficient research team whose members had been thoroughly
infected by Fisher’s optimism. In 2002, despite his young age, he was appointed head of
the Lunar Corporation. At that time the corporation, or LC as it was affectionately
referred to, was growing rapidly, making tremendous technological strides. This
culminated in 2012-2014 with the LC taking over the American organisation, NASA. As
the new holder of nearly all space patents (the most important Russian ones were
acquired soon afterwards) the LC was now in a position to take the first major step into
the unknown. In 2025 construction began on an orbital city. After more than a few trials
and tribulations, in 2034 one of Fisher’s dreams came true – Orbital City I was officially
opened.
The grand opening came not a moment too soon, for the situation on Earth was
deteriorating rapidly. Storm clouds – in the form of political tensions and an everdeepening economic depression – were gathering on the horizon. The LC was able to
charge exorbitant sums from the wealthy for tiny residences in Orbital City I. With its
coffers overflowing and a long waiting list, the LC began construction of Orbital City II as
well as the far more ambitious Luna Project, which would create the first permanent
settlements on the Moon. In 2040 it became clear that war was inevitable and the only
guarantee of survival was to move far away from the coming atomic bloodbath. Work on
Orbital City II was suspended and all resources were poured into the Luna Project. Soon
the LC was busily transporting completed materials to the Moon.
Work on the lunar city, now known simply as Luna, progressed rapidly, with people
moving into each new sector the moment its construction was complete. When war did
finally break out in 2048, all Orbital City I citizens were moved to Luna and the Lunar
Corporation severed all contact with Earth. This was the start of the city’s existence as a
self-sufficient, independent community. It was governed by ten people on the
Supervisory Board of the Lunar Corporation. The now grey-haired John Fisher was voted
in as the first president.
All was not rosy. Cracks in the facade appeared as time went by. The majority of the
inhabitants were extremely wealthy people who had led very comfortable lives on Earth.
Now forced to live in rough, primitive conditions and do hard, physical labour, they
started grumbling - loudly. The Supervisory Board passed a series of edicts designed to
tighten discipline and force obedience from the citizens. In response,
Page 27

50
51
the citizens revolted. The aging president was removed from power. His declining
health had long ago turned him into little more than a figurehead. It was clearly
impossible for him to take full control of the situation. The rebellion was suppressed in
a sea of blood and its ringleaders killed by simply pushing them through an air lock
without spacesuits. A few weeks after that, John Fisher died. Despite all that had
happened, his loss was mourned by the entire colony and served to stifle the
aggression of the two opposing sides. A rather uneasy truce was called, which brought
stability to the colony. The community then elected a judge to the Supervisory Board.
His duty was to stop friction between the population and the government. He was
empowered to remove the membership status of any Supervisory Board member whose
attitude or deeds might destabilise the colony. But he was not entitled to participate in
the day-to-day running of the colony. This form of government strengthened national
stability and discouraged political intrigue. Each member of the Supervisory Board
knew that any attempt to strengthen his own position could put an end to his career.
John Fisher’s son, Nathan, well-tutored by his father, became the new president.
A new order had finally arrived and with it a new philosophy was starting to take root.
The maxim was, “a man’s worth as an individual is based on the benefit he brings to the
society.” A citizen’s status was defined by his knowledge, skills and diligence – and how
he put those to work. Upon leaving elementary school, each child was given a test for
individual skills and coaxed into the occupation deemed most beneficial to the colony.
In the social hierarchy scientists were clearly at the top since they were responsible for
the colony’s future. After all, the colony owed its very existence to solving the many
problems associated with life in space. To improve these living conditions, several
research groups were formed to begin examining the Moon’s surface. In just a few
months, the scientists from Luna’s Research Centre succeeded in developing
technologies essential for the colony’s survival and evolution.
In 2061, a scientific expedition encountered a series of caves with a high radiation
level. More research uncovered a deserted alien base. This discovery spread panic
throughout the society. A special group was immediately created under the leadership
of Prof. Atomi Hakura and a makeshift laboratory was built near the caves. The research
lasted for many years, with the laboratory gradually expanding until it became a
separate city itself. It was given the rather uninspired name Luna II.
Around this time a wrecked alien space ship was found off the coast of Mare Imbrium.
Extensive examinations showed that it possessed an unknown form of propulsion. To
discover just what secrets lay behind it, a special team consisting of the best specialists
in particle physics was created. Finally, after six years of intensive research, the scientists
proudly presented anti-gravitational propulsion to the lunar colony.
Extraterrestrial technologies were not the only field to capture the scientists’ interest,
however. In 2070, some very peculiar crystals had been discovered. They expanded
very rapidly when placed in a strong magnetic field and could absorb elements from
the ground around them. Further research proved that utilising these crystals in the
construction of vehicles and buildings was a very inexpensive way of enhancing their
resistance.
At the end of the 70s, Prof. Hakura was in charge of a Mars terra-forming project and in
2085, the first unmanned anti-gravitational ship was sent to Mars on a fact-finding
mission. More ships were sent in 2090. Their mission over the next 100 terrestrial years
was to make Mars a great place to live.
While this was going on, the scientists working on alien technology discovered how
magnetic shields operated. This enabled construction of space ships capable of
interplanetary travel without exposing passengers and crew to solar radiation.
Hope spread through the colony like wildfire. Could the population exodus plan drawn
up by the Board really be feasible? The next 50 years were spent sending ships to Mars
in order to create living conditions suitable for human beings. A man-made greenhouse
effect increased the temperature to 15ºC, rising a little each year. The scientists
predicted that in 20 years they could melt the ice cap to provide enough water to
sustain life on the Red Planet.
In 2150, the long-dreaded Great War finally broke out, sending Earth down a headlong
path towards destruction. This cosmic disaster would eventually engulf the Moon as
well. Faced with this horrifying reality, the citizens of Luna turned their efforts to
constructing yet another home – one far enough away from the long-suffering Blue
Planet. But for this project they require lots of natural resources, far more than the
barren Moon can offer. So, it’s back to Earth and a battle for which they are woefully
unprepared.
LC Arsenal
When the Great War broke out in 2150, the LC, having never been involved in conflict,
had no army whatsoever. Conventional weapons production had to start in a hurry. The
weapons they did produce were of little help, though, since the units to which they
were given hardly knew how to use them! It soon became painfully clear that rifles and
rockets just wouldn’t do against an experienced enemy – the LC had
to make up in technology what it lacked in fighting skills. Their highly creative
scientists started coming up with advanced forms of weaponry. One success was the
development of a sonic gun, based on components from the drilling rigs. Another giant
step was the development of an electric shock gun, which could quickly destroy enemy
units’ metal casings.
More research led to even more breakthroughs. One of the most dazzling was the
development of a cloud cover control system, which could be used to accompany an
offensive against an enemy base. Then came something truly ingenious – a meteorite
shower control system for bombing enemy bases from space!
Unit Chassis
Since the Lunar Corporation had to build up an army from scratch, they saved time by
converting their civilian vehicles to military ones and mounting guns on them. The
vehicles all utilise anti-gravity propulsion. Most are equipped with weak anti-gravity
generators, allowing them to float 1–2 meters above the ground. Later models have
stronger generators, allowing them to operate at any height.
Lunar
This is a light, unarmoured vehicle used for reconnaissance. Equipped with
only light weapon systems, the Lunar is best suited for scouting and
raiding. Its powerful shield generator and easy manoeuvrability make it a
fantastic escort vehicle. The Lunar is best suited for scouting and raiding.
Page 28

52
53
Moon
The Moon is a very fast, lightly armoured vehicle. A power shield generator
and light weapon systems can be attached, making the Moon a powerful
combat unit at a good price.
Crater
When designing this vehicle, the LC engineers sacrificed speed for power,
and equipped it with heavy armour and a power shield generator. The
decision made the Crater the toughest of all LC units. It has been adapted to
carry high-calibre weapons that should guarantee its success in the heat of
battle.
Crusher
This typical attack vehicle is designed to inflict huge losses on the enemy
in a very short period of time. By reducing the energy consumption of the
power shield generator, the engineers have made it possible to attach two
heavy weapon systems. Because its armour is only average, the Crusher is
unable to spend a long time under direct fire. You’ll need to protect it with
an escort of smaller, heavy shield-equipped units, like the Lunar.
Meteor
This light fighter is the first model equipped with a modified anti-gravity
generator capable of rising to any altitude. It is used for reconnaissance
operations and to repel enemy bombers. Due to the engine’s high energy
consumption, the Meteor is not equipped with magnetic shields. For attack
purposes, it comes equipped with a chain-gun or light rockets.
Thunderer
This huge, very slow, anti-gravity craft is equipped with heavy armour. The
modified engines allow it to fly at any altitude, so it can reach into the heart
of an enemy base. Heavy rockets and sonic guns make it the ideal unit for
air raids against enemy troop concentrations.
Mercury
This unit is used to supply your units when they run out of ammo. Because
it is unarmoured, the Mercury relies on its speed to avoid dangerous
situations.
Phobos
This small anti-gravity unit is the LC’s basic support unit. Depending on
what type of equipment is mounted, the Phobos can serve as a scout, repair
unit, or shield regenerator.
Transport
This is a large transportation vehicle used for ferrying units between
mission areas and the main LC base.
Crion
Rumors abound of a top secret LC vehicle equipped with a deadly new
energy weapon that is not stopped by shields or armour. So far, these
reports have not been verified
Weapons and Technology
20 mm Chaingun
Prerequisites: None
Upgrades: Air Chaingun
Anti-Air?: Ye s
Description: Primary light weapon of the LC. The chaingun comes with lots of ammo so resupplying is not an
issue.
Rocket Launcher
Prerequisites: None
Upgrades: Rocket Launcher Upg. 1; Heavy Rocket Launcher; Heavy Rocket
Launcher Upg. 1 and Upg. 2; Air Heavy Rocket Launcher; Air Heavy Rocket
Launcher Upg.
Anti-Air?: Ye s
Description: Primary rocket attack weapon for the LC, it is effective against both ground and air targets. One
drawback is its rapid rate of ammo use. Rockets can be upgraded for greater damage and for accuracy.
Air Rocket Launcher
Prerequisites: None
Upgrades: Larger rocket launcher
Anti-Air?: Ye s
Description: Used only on Meteor and Thunderer air combat vehicles, this weapon inflicts significant amounts of
damage. But due to the size of the rockets, ammo is limited and must be resupplied frequently.
Page 29

54
55
Electro Cannon
Prerequisites: None
Upgrades: Heavy Electro Cannon; Sonic Cannon; Heavy Sonic Cannon;
Air Sonic Cannon
Anti-Air?: No
Description: In order to keep up with the UCS and the ED, the LC had to come up with an energy weapon. After
many tests, LC scientists developed the Electro Cannon. Able to spit out streams of pure energy, this weapon
soon helped to give the LC a fighting chance in the war for survival.
Sonic Cannon
Prerequisites: Electro Cannon
Upgrades: Heavy Sonic Cannon; Air Sonic Cannon
Anti-Air?: No
Description: In an effort to develop weapons of mass destruction the LC came up with the Sonic Cannon. This
weapon is capable of hitting targets in a large radius. Damage is greater at the centre of the attack and less as
the ring of energy travels outward.
Weather Control Centre
Prerequisites: Heavy Defence Building
Upgrades: None
Anti-Air?: Ye s
Description: The WCC is the ultimate weapon in the LC arsenal. Combining the best in LC
technology with Mother Nature can have devastating effects. Depending on the terrain of the map, you can call
down winds, lightning, rain, or even meteor showers to reign terror on your foes.
SDI Defence
Prerequisites: None
Upgrades: None
Anti-Air?: N/A
Description: As the war progressed, nuclear strikes were launched against the LC. In an effort
to stop this threat, the SDI defence system was put into action. Using laser sighting, the SDI can effectively
destroy incoming nuclear missiles before they hit.
Shield Recharger
Prerequisites: None
Upgrades: Upgraded Shield Recharger
Anti-Air?: N/A
Description: Just as its name implies, this technology makes shields last longer as it recharges depleted shield
energy at a faster rate.
Regenerator
Prerequisites: None
Upgrades: Upgraded Regenerator
Anti-Air?: N/A
Description: Lacking repairer technology, the LC developed an automated regenerator that helps
to repair damaged armour.
Detector
Prerequisites: None
Upgrades: Upgraded Detector
Anti-Air?: N/A
Description: When a detector is applied on a unit, it gives that unit a longer sighting range. This is useful when
trying to find bases or targets to strike at with meteor showers and lightning. This device has also the ability to
uncover invisible UCS units.
Banners
Prerequisites: None
Upgrades: None
Anti-Air?: N/A
Description: Every war effort needs it’s flag bearer and banners are just that. A unit equipped
with a banner adds a bonus of two levels of experience to all units near it.
Shield Generator
Prerequisites: None
Upgrades: Higher-powered shields
Anti-Air?: N/A
protect your units and buildings. Without a shield generator, you may see your units and buildings explode right
before your eyes.
Description: With the invention of lasers and ion cannons, the shield generator is a must have to
Page 30

56
57
LC Structures
Main Base
The LC builds all their civilian and military vehicles right here. Any object developed
and tested in the Research Centre can also be built here. The Base is thickly armoured
and has cannons to fend off attacks by lightly armed enemy units. You must protect
this structure well. If it is destroyed, the battle is close to over for you.
Energy supply
Not surprisingly, given the Moon’s almost complete lack of fissionable material, the
Lunar Corporation’s energy supply comes from solar power stations. Getting this
system up and running on Earth posed some tricky problems, particularly with the
shorter day and night cycles. Also, unlike the Moon, the Earth has an atmosphere, and
frequent cloud cover drove the LC scientists crazy at first. But, as always, they managed
to adapt. The first problem was solved by adding battery structures to gather the
energy reserves during the daytime hours for use at night. Effective weather control
systems solved the cloud cover problem. Now, enormously efficient transmitters send
this power directly to LC structures. The power and range of these exceed that of
anything ever invented on Earth.
Solar Power Plant – The LC Solar Power Plant is a technologically advanced structure
consisting of a generator and several well designed and very powerful solar cells. The
plant has a high-performance transmitter, capable of providing energy to distant
structures. Extra energy is sent to batteries for storage. These batteries run the base
during nighttime hours. The plant’s capacity is based on the intensity of the sun’s rays.
At night the reflective plates fold up and wait for sunrise.
Note: This structure doesn’t actually create energy! For this, at least one solar cell is
needed. Click on the “Solar cell” button to equip the plant with up to ten solar cells.
Solar Battery – This is a battery with a huge capacity. Its only task is to store excess
energy during the day for use at night. It has a high-power transmitter, which can
supply energy to structures many kilometres away. If it’s destroyed, parts of your base
could lose power completely, ruining all your defensive plans. Solar batteries are
charged at 25% capacity when they are built.
Ore Extraction
The Lunar Corporation operates fully automatic mine-processing factories. The
machines mine ore and process it into the required materials. Since the ore is
processed at the same time it is mined, there is no need to transport it. This is the
fastest and most streamlined method of obtaining the materials the LC needs for Earthbased operations.
Mine – For obvious reasons, this high-tech structure should be built very close to ore
deposits. LC mines are capable of extracting and processing ore simultaneously. In
other words it’s a mine and a refinery in one. Its loss eliminates the ability to supply
raw material to your military and civilian infrastructure.
Ore Transport Refinery – If you want to send the ore to produce parts for
your evacuation fleet, then build an Ore Transport Refinery over a patch of
resources.The Ore Transport Refinery is well armoured, so you won’t have to worry too
much about enemy attacks. The resources are taken directly from the Ore Transport
Refinery to the Space Port by transporters. These transporters will automatically
pick up resources whenever the Ore Transport Refinery has stored 2,000 credits worth
of resources.
Research Centre
This is where your scientists and engineers are based. All research and development is
carried out by your Research Centres. Every unit or structure upgrade has to be
researched and developed by a Research Centre. Research Centres also provide access
to unit design and technology research. Owning a Research Centre gives
you access to ultra-modern technology. If you have Research Centres in both your main
base and the mission area, credits will be drawn from both the mission area and main
base when you conduct research.
Note: Two Research Centres speed up your research by 15%, a third by another 30%.
More than three provide no further benefit and are a waste of resources.
Aerial Supply Centre
An Aerial Supply Centre is the LC’s source for supplies. Mercurys use this as a base for
delivering ammunition for heavy weapons to units and structures.
Note: The Fast/Average/Slow button defines how fast the deliveries are made. If you only
have one Aerial Supply Centre, the recommended setting is “Slow.” If you have many
Aerial Supply Centres, the recommended setting is “Fast.” Supply Depots work best with
only one or two Mercurys attached to each one.
Base Defence
The Lunar Corporation built their structures with one thing in mind: “get the
best functionality from the least material.” For defence against enemy attacks, they
equipped all structures with light guns. To protect their structures they created
two types of buildings: the Defender and the Guardian. The Defender is a small
structure with two light guns, usually assigned to anti-aircraft defence. The Guardian,
on the other hand, is a very solid structure equipped with two heavy guns capable of
repelling attacking ground units. Using two guns really increases
the structure’s effectiveness.
Living in space, the LC have always been on the cutting edge of innovation. Their lunar
bases and light vehicle crews are protected from space radiation by magnetic power
fields. With some slight modifications, they can be used to disperse laser, ion or plasma
beams. These magnetic power fields have one fantastic advantage – recharging them is
fast and easy!
Defender
Single Defender structures are too weak to defend themselves against enemy attacks.
There is, however, strength in numbers. If you set them up in groups, one next to the
other, they can ward off attacks by lightweight aircraft and other weakly armoured
units. If you place them in large unexplored territory, they act as a good early warning
system. They also have their own power generators, so they can continue defending
your base even if you have lost power.
Guardian
The Guardian is a heavily armoured structure. The double-ringed defence tower is
Page 31

58
59
fortified with two rocket launchers, making it indestructible for all but the most heavily
armed attack units. Since the tower packs a serious punch, it can usually repulse attacks
quickly and successfully. Only concentrated attacks by well-equipped enemy units pose
any danger. Because of its strength, you should set up the tower near the Main Base or
other strategically vital structures. Due to their larger power demands, Guardians are
dependent on power from Solar Power Plants and Solar Batteries.
Headquarters
This is the strategic control centre of the LC. Each Headquarters structure you own can
provide automated control over one of the following functions: research, unit
construction, weapon upgrades on structures, and base defence. To automate all of
these functions, you’ll need to build four Headquarters structures.
SDI Defence Centre
This structure becomes necessary when the enemy achieves nuclear capability. Its
function is to protect your positions from weapons of mass-destruction. If an atomic
missile is fired at you, three specially constructed detectors calculate its flight path and
select the precise time to fire three laser cannons with awesome power. The missile is
destroyed in the air, without harming any units or structures. The only disadvantage
the system has is that the three detectors have a limited range. That’s why it’s
important to keep the same distance between your SDI’s. You should normally place
them right next to strategically important structures.
Weather Control Centre
This is the LC’s answer to the other weapons of mass-destruction, nuclear and plasma
weapons. The WCC is capable of radically altering weather conditions. It can start a
long rain shower, suddenly send the temperature soaring, or unleash a thunder storm.
In other words, the LC has managed to turn weather into a weapon. Use Rain to slow
down enemy advances. Use lightning to take out those at higher elevations.
As the game progresses, it becomes more and more difficult to summon the forces of
nature. The closer the Earth gets to the Sun, the drier the planet becomes – until rainfall
is a precious commodity. Nevertheless, the Weather Control Centre does not completely
lose its usefulness. It can take over the control of meteorite showers and redirect them
toward enemy units and structures.
This structure is powered by electricity. Right after you’ve built it, the WCC starts
loading up its batteries. Once they’re full, the structure is ready for action. The control
panel displays these buttons:
Clear Sky ................Sweeps the clouds away. This in turn increases the output of your Solar Power Plants. This
is very useful for stopping lightning storms.
Wind ........................Brings strong gusts to the entire map. This hinders any enemy air strikes. This is a very
powerful weapon against an enemy who is just producing aircraft. All aircraft produced
during a strong wind period are trapped on the ground and block production factories.
Snow ......................(only works in snowy terrain) Starts a serious snowfall. The view range of all units is reduced
to 1/5 of normal range.
Rain ..........................(only works in Spring and Summer terrain) Starts a downpour, which greatly reduces units’
speed and manoeuvrability. A player can use it to slow down an enemy attack on the player’s
base.
Lightning Storm ....(only works in Spring and Summer terrain) Starts a thunder storm. Lightning wreaks havoc
on vehicles and structures.
Meteor......................(only works in volcanic terrain) Starts a meteorite shower, which destroys units and
structures.
Landing Zone
This small structure marks out landing areas for heavy transporters. It has a strong
signal transmitter which enables it to guide planes in safely at night or in thick fog.
Note: This structure is absolutely vital for transporters travelling between a mission
area and the main base.
Space Port
The Space Port is a critical part of your main base. The Space Port sends resources to
the R&D teams building the evacuation fleet. Once the Space Port sends its resources to
the R&D teams, those resources are gone and cannot be used again. Resources
earmarked for the R&D teams are held in the Space Port structure until a shuttle picks
them up. You can take resources from the Space Port and give them to the main LC base
by selecting the Space Port and then clicking the “Take 5000 CR” button. This will only
work if the shuttle has not already retrieved the resources. You can also give credits to
the Space Port by clicking the “Give 5000 CR” button.
In many missions, you will have to send a specified amount of credits to the Space Port.
For the LC, this building is the Ore Transport Refinery. If an Ore Transport Refinery is
not built, you will have to manually transfer resources to the Space Port via the
Transport. Furthermore, if you transport resources manually via the Transport, those
resources will not count toward the mission’s credit requirements.
Page 32

60
61
Ubi soft uk technical support
Technical support: 0870 800 6160 (local rate call)
Hints and tips hotline service: 0960 466 5200 (premium rate call)
On-line Support Options
Ubi Soft offers several on-line support options for their software
products. One of these is our website at:
http://www.ubisoft.co.uk/support/
If you have a specific problem that is not addressed on our site, you can send your
question to us via e-mail at: techsupport@ubisoft.co.uk
Please be as specific as you can be about the problem you are experiencing. Also
include in the body of your e-mail: the name of the manufacturer of your computer
system; the brand and speed of the processor; how much RAM you have, the version
number of Windows you are using (if you aren't sure, right-click on the My Computer
icon on your desktop and select 'Properties'), and the manufacturer name and model
number of your video card, modem, and sound card.
Other Support Options
You can also contact Ubi Soft Customer Support by phone and fax. When you call,
please have all of the above mentioned information ready.
UBI SOFT ENTERTAINMENT Ltd.
Chantry Court
Minorca Road
Weybridge
Surrey KT13 8DU
Tel: +44 (0) 870 800 6160
Fax: +44 (0) 1932 838 274
In Nederland: Telefoonnummer: 0900-202 6766 (50cpm)
Tijden: maandag tot en met vrijdag van 09:30 tot 18:00 uur.
E-mail: techsupport@ubisoft.nl
In Belgie: Telefoonnummer: 02-73.25.57.7
E-mail: hotmail@ubisoft.be
Scandinavia: Ubi Soft Nordic Support
Ubi Soft Nordic offers different possibilities to obtain support. On our website:
http://www.ubisoft.dk If you have a question, which is not described on our website, please e-mail
us at: suppor
Other ways of reaching us: By telephone or fax, please call:
Telephone: (0045) 38 32 02 50 Fax: (0045) 38 33 34 49
We regret that we cannot offer game hints and tips, as the service is provided for
technical difficulties only.
t@ubisoft.dk
TopWare Credits
Producer ................................................Achim Heidelauf
Branch Director, Poland ........................Tadeusz Zuber
Project Leader, Poland ..........................Miroslaw Dymek
Programmers ........................................Tomasz Barabasz – Editor;
Jan Nitecki – Game Programmer;
Tomasz Radon – 3D Programmer;
Jacek Sikora – Game Programmer
Musicians ..............................................Maciej Pawlowski, Lukasz Targosz
Sound ....................................................Remiguiusz Miernikiewicz
Graphic Artists ......................................Piotr Rulka, Kajetan Czarnecki, Andrzej Rams, Daniel Duplaga, Violetta
Tranter, Slawomir Jedrzejewski, Wojciech Drazek, Grzegorz Wisniewski,
Krzysztof Rybczynski, Rafal Januszkiewicz
Mission Designer ..................................Miroslaw Dymek
Manual ..................................................Lidia Dutkiewicz, Miroslaw Dymek
Beta-Testing ..........................................Dawid Jakubowski
German Editor ......................................Achim Heidelauf
Translation, German - English ..............Ronnie Shankland, Kevin Decker-Weiss
Special thanks from
the musicians go to ..............................YAMAHA EUROPA NV21 & PROMUSICA for their newest musical
innovations and to KINETIX and ADOBE for their software. Maciej
Pawlowski and Lukasz Targosz plays DEAN MARKLEY (Logo) guitar strings.
Thanks to Grzegorz Rybicki of the B.THOVEN company.
Mattel Interactive UK Credits
Product Manager ....................................Anthony Parkins
PR Manager ............................................Paul Kluge
Graphic Design ......................................Steve Longdale
Product Testing......................................Andrew Crowe, Tony Dorey
Mattel Interactive Credits
VP of Product Development ..................Don Laabs
Senior Producer ....................................Jim Tso
Associate Producer ................................Steven Peterson
Production Assistant ............................Alex Marcelo
Product Test Credits ............................Dave Costa (Test Manager), Robert Andrakin (Assistant Test Manager),
Richard Fielder (Test Supervisor), Dwight Cordero (Test Lead), Mark
Wagman, Dave Chapman, Nathan Tice, Jason Gray, Matt Garman, Paul
Brandt, Matt Gayda, Brian Yager, Tyler Ludlow, Josh Palmer, Trevalyn
Markle, Andy Davies, Ben Etheridge, Peter Ferriola, Jason Cahill, Mike
Chevalier, Walker Richardson, Skiff Sumner, Dennis Pelham, Jason Leek,
Jess Sterzl, Kevin Dewell, Erik Braa, Clifton Allen
Manual Editor ........................................Mark Whisler
General Manager,
Entertainment Division..........................Amy Boylan
Managing Director, Novato Studio ........Carl C. Norman
Executive Vice President........................Chuck Kroegel
Vice President of R&D............................Jan Lindner
Manual Layout & DTP ............................Louis Saekow Design
Special Thanks ......................................Dexter Chow, Garrett Graham, Jon Kromrey, Stan Biesiadecki, Chuck
Yager, Rick White, Gwendaline Mazzara, Russ Brown, Dave Cobb, Tena
Lawry, Sarah Taylor
 Loading...