

Page 1
Page 2

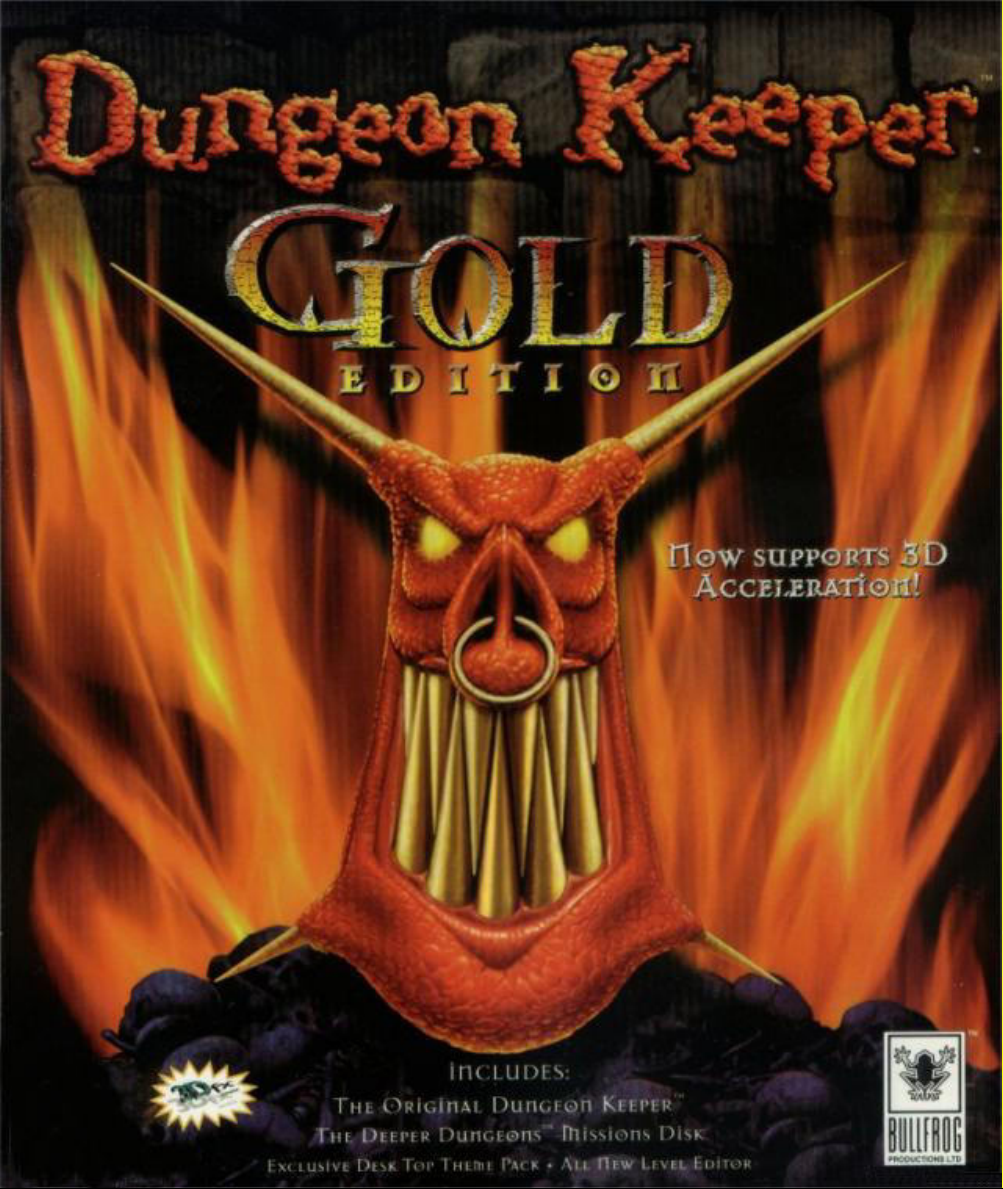
DUNGEON KEEPER™ GOLD
WARNING: TO OWNERS OF PROJECTION
TELEVISIONS
Still pictures or images may cause permanent picture-tube damage or mark the
phosphor of the CRT. Avoid repeated or extended use of video games on largescreen projection televisions.
EPILEPSY WARNING
PLEASE READ BEFORE USING THIS GAME OR ALLOWING YOUR
CHILDREN TO USE IT.
Some people are susceptible to epileptic seizures or loss of consciousness when
exposed to certain flashing lights or light patterns in everyday life.
Such people may have a seizure while watching television images or playing
certain video games. This may happen even if the person has no medical history
of epilepsy or has never had any epileptic seizures.
If you or anyone in your family has ever had symptoms related to epilepsy
(seizures or loss of consciousness) when exposed to flashing lights, consult your
doctor prior to playing.
We advise that parents should monitor the use of video games by their
children. If you or your child experience any of the following symptoms:
dizziness, blurred vision, eye or muscle twitches, loss of consciousness,
disorientation, any involuntary movement or convulsion, while playing a video
game, IMMEDIATELY discontinue use and consult your doctor.
P
RECAUTIONS TO TAKE DURING USE
• Do not stand too close to the screen. Sit a good distance away from the
television screen, as far away as the length of the cable allows.
• Preferably play the game on a small screen.
• Avoid playing if you are tired or have not had much sleep.
• Make sure that the room in which you are playing is well lit.
• Rest for at least 10 to 15 minutes per hour while playing a video game.
1
Page 3

INSTALLING DUNGEON KEEPER GOLD
When you install Dungeon Keeper Gold, you will install both Dungeon Keeper™ and The Deeper
Dungeons™ at the same time. The Dungeon Keeper™ Editor will not be installed. To install this,
please refer to the readme.txt file in the Editor subdirectory of the Dungeon Keeper™ Gold CD.
WINDOWS® 95
Note: If you already have Dungeon Keeper installed on your hard disk, it is a good idea to
uninstall it before installing Dungeon Keeper Gold. This is because Dungeon Keeper Gold will
automatically install both Dungeon Keeper™ and The Deeper Dungeons™ at the same time. If you
have any save games you want to keep, move the contents of the Keeper save directory to a safe
place, uninstall Dungeon Keeper and then install Dungeon Keeper Gold. Then copy the contents
of your old save directory into the new save directory.
When you are in Windows, insert the Dungeon Keeper Gold CD into the CD drive. Windows 95
will automatically detect the disc and run the installation program. Follow the simple
instructions on the screen to install Dungeon Keeper Gold.
If Windows 95 fails to recognise the Dungeon Keeper Gold CD, just run setup on the root of the
CD and the installation will begin.
Running Dungeon Keeper
To run Dungeon Keeper, click on the Start button and go to the Programs menu. Go up to the
Bullfrog menu and then to the Dungeon Keeper Gold menu. Click on the Play Dungeon Keeper
option.
Please refer to the Dungeon Keeper manual for more information on the game.
Running The Deeper Dungeons
To run The Deeper Dungeons, click on the Start button and go to the Programs menu. Go up to
the Bullfrog menu and then to the Dungeon Keeper Gold menu. Click on the Play The Deeper
Dungeons option.
You can play the levels included with The Deeper Dungeons in any order but bear in mind that
they are harder and more challenging than those in Dungeon Keeper. It is recommended that you
play Dungeon Keeper first before attempting The Deeper Dungeons.
THE DEEPER DUNGEONS
EVIL NEVER SLEEPS...
The world is under your total domination. The Avatar and his band of happy followers lie dead
and rotting at your feet. Your power is complete, millions of demonic creatures obey your every
command and weak, pitiful subjects quake in your presence. Depravity and evil rule and you are
master...
Doomsday, the anniversary of your great victory, and the land is preparing for an orgy of blood
and mayhem. Late at night, grave news reaches your ear and you realise your dominion is in
danger from the last place you expected. The Avatar has returned, reincarnated by some
misguided Knights who escaped the slaughter of your first victory. They have taken over many of
the caverns that lie hidden below the surface of the world and have mustered a new army. You
must strike first and wipe them out once and for all.
2
Page 4

NEW FEATURES
The following features have been included in the Deeper Dungeons Data Disc:
• Fifteen new levels to test your strength and cunning.
• Fifteen new multiplayer levels to play against your friends and slaughter their pitiful armies.
• New dungeon graphics.
• Improved Artificial Intelligence for the enemy Dungeon Keepers. Improvements include:
- Enemy Keepers will now sell doors and traps to gain revenue.
- Enemy Keepers preserve their gold.
- Gold finding abilities are greatly improved.
• Miscellaneous enhancements that include:
- Creatures no longer teleport to unexplored areas of the map.
- Parties who have had their leader killed now choose a new leader and continue their quest.
- Improved creature AI.
PLAYING MULTIPLAYER MAPS AS A SINGLE PLAYER
You can also play the multiplayer maps even if you are a lone single player. If you choose this
option, computer players will replace your absent opponents. To do this, click on the Start button
and select the Run option. Type in the location of Dungeon Keeper on your hard disk and add
-1player on the end e.g. c:\program files\bullfrog\keeper\keeper95.exe -1player. When the
Dungeon Keeper Main Menu appears, click on the Multiplayer button and you will see a new
option below the normal network options called 1 Player. Click on this option and you will enter
the Multiplayer Levels Map. Click on any flag to start that level.
You can do the same on The Deeper Dungeons by typing deeper95.exe instead of keeper95.exe.
Warning: This is an unsupported feature and was therefore omitted from the original manual.
Bullfrog™ or Electronic Arts™ do not take any responsibility for incompatible levels or other errors
related with this feature.
DUNGEON KEEPER EDITOR MANUAL
AMENDMENTS
The following are amendments to the Dungeon Keeper Editor Manual supplied with Dungeon
Keeper Gold:
PLAYING YOUR SINGLE PLAYER LEVELS
In the manual it says that you can play your newly created levels by using the command
keeper95 -level xxx (where xxx is the number of the level). Unfortunately, this is incorrect. The
only way to play your levels is by using only The Deeper Dungeons and adding your level to it’s
own list of single levels.
3
Page 5

To do this, go to the Levels subdirectory of your Keeper directory on your hard disk. In there, you
will find a file called Ddiskmp.lof. Open this file with Notepad and you will see that all the
Deeper Dungeons levels are listed here. On each line of the list, the number is the level number
and after the comma is the name of the level. You will need to add yours to the end by entering
it’s level number and name. Once you have done this, save Ddiskmp.lof. and close it. Then, when
you next start The Deeper Dungeons, your level will be on the single player level list.
EDITING THE K
EEPER.CFG
To edit the Keeper.cfg file, which you need to alter when you install the Dungeon Keeper Editor,
you must use Notepad. To do this, double click on the file and Windows 95 will ask you what
program you want to use to edit it. Scroll down the list of programs and find Notepad. Select this
and click on OK. You will then be able to edit the Keeper.cfg file.
DUNGEON KEEPER DIRECT 3D
The Dungeon Keeper Direct 3D version supports 3D accelerator cards using the Direct3D standard.
You can play the Direct 3D version if you have a 3D accelerator card and you have DirectX5 or
greater installed. If you do not have an accelerator card, you should play the standard version of
Dungeon Keeper.
For the minimum specification and the machines supported by the Direct 3D version, please read
the ReadMeD3D.txt which can be found in the DK-D3D directory of the Dungeon Keeper Gold
CD. Before you install the Direct 3D version, make sure your machine is one of those supported.
INSTALLATION
Note: before installing Dungeon Keeper Direct 3D, you will first need to install Dungeon Keeper
Gold.
First insert your Dungeon Keeper Gold CD. Leave your computer alone for a moment and wait for
the Dungeon Keeper Menu to appear. Click on exit to remove it. Next, double left click on the My
Computer icon on your Windows Desktop. Find the icon for your CD drive (normally labelled D: )
and right click on it. This will bring up the icon’s menu. Left click on the Open option and you
will see the contents of the Dungeon Keeper Gold CD. Double left click on the Install Keeper
Direct3D icon and follow the onscreen instructions. The installation program will know where
you installed Dungeon Keeper and will ask you to confirm.
If you do not have DirectX5, you will be asked whether or not you want to install it. Dungeon
Keeper Direct 3D requires DirectX5 or later for it to work and will not work with DirectX3 or
earlier.
To run Dungeon Keeper Direct 3D, click on the Start button, go into Program Files and find the
Bullfrog folder. In the Bullfrog folder will be a folder called Dungeon Keeper - Direct 3D. Enter
this folder and select Dungeon Keeper Direct 3D.
READMED3D.TXT
If you have any problems with the installation or running the Direct3D version of Dungeon
Keeper, please refer to the ReadMeD3D.txt. To read this file, go to the Dungeon Keeper Direct 3D
folder of the Bullfrog folder in your Start Menu and select Readme Direct3D.
There are many potential complexities involved with the Direct3D version due to the variety of
hardware 3D accelerators in existence. Please consult this readme file for the very latest
information about your card.
4
Page 6

3D Accelerator Cards Supported
Please see the Readme Direct3D file for the latest information. Dungeon Keeper Direct3D runs on
most Direct3D accelerator cards with DirectX5 support. This list includes, but is not limited to,
cards based on the following chipsets: 3Dfx-Voodoo, nVidia-RIVA128, ATI-RagePro,
Videologic/NEC PowerVR-PCX2 and 3DLabs-Permedia2.
HELP AND FREQUENTLY ASKED QUESTIONS
VIEWING DUNGEON KEEPER IN HIGH RESOLUTION
To view Dungeon Keeper in high resolution, press ALT-R. Please note that this feature requires a
PC with sixteen megabytes to run. If you press Alt-r and the game does not change resolution
then you do not have enough memory. Note that the Direct3D version will only run in high
resolution mode.
You also require more than eight megabytes to enable the special lens effects when Possessing
certain creatures.
GHOSTS
Contrary to the manual, Ghosts do not float through doors or walls for gameplay reasons.
DEMON SPAWN BECOMING DRAGONS
Demon Spawn do become Dragons but only on certain levels in the game. As the Dragon is a very
powerful creature, this feature was removed from certain levels to make them more of a
challenge.
C
ANCELLING CALL TO
A
RMS
Trouble is often encountered when cancelling the Call to Arms spell. This small section explains
how to use it properly:
When you click on the Call to Arms icon, your mouse pointer changes to a waving flag and you
will be in ‘cast’ mode.
CLICKING THE LEFT MOUSE BUTTON
When you click the left mouse button on the ground for the first time, a flag will appear. Do not
click the right mouse button yet. Any creatures near the flag will enter a trance and walk
towards the flag.
When you first cast the spell on the ground, you pass from ‘cast’ mode to ‘move’ mode. The
‘move’ mode means that you can move the flag around by left clicking on the ground elsewhere.
Any creatures already under the influence of the flag will try and get to it even if they are on the
other side of the map. This feature enables you to move the flag around your dungeon, by left
clicking on the floor, collecting all your creatures into a small army. Then, by placing the flag on
the other side of the map in your enemy’s dungeon, your creatures will walk across the map to
the flag and into the enemy dungeon.
5
Page 7

CLICKING THE RIGHT MOUSE BUTTON
If you click the right mouse button when you are in ‘move’ mode, all you will do is take your
mouse pointer out of ‘move’ mode. You will not cancel the spell as the Call to Arms flag is still
active in the dungeon, attracting creatures. This feature enables you to keep the Call to Arms
going, cast different spells or build rooms, and then return to the Call to Arms later.
If you click the right mouse button before you cast the spell on the ground (while you are still in
‘cast’ mode’) you will just cancel the casting of the spell and your mouse pointer will return to
normal.
If you have clicked the right mouse button when in ‘move’ mode, by clicking on the spell’s icon
on the Control Panel again, you will re-enter ‘move’ mode and you will be able to reposition the
flag once more.
CANCELLING THE CALL TO ARMS SPELL
To actually cancel the Call to Arms spell, your mouse pointer must be a waving flag (in ‘move’
mode). Then you have to click the spell’s button on the Control Panel. The flag will the disappear
and your creatures will return to their normal jobs. You will have returned to ‘cast’ mode and you
will be able to recast the spell. If you want to, by clicking the right mouse button you will return
your mouse pointer to normal.
If you have clicked the right mouse button after casting the spell, then you will need to click the
spell’s button twice: once to re-enter ‘move’ mode and a second time to cancel the spell for
good.
Remember: You can increase the range of the Call to Arms spell by holding down the left mouse
button when you cast it or move it.
Also, the spell does not cost any money if cast on your own land. If you cast it on enemy ground,
then you will have to pay. If you cast the spell on an enemy room, your creatures will destroy
that room when they get to it.
Note: The Sight of Evil spell works in exactly the same way.
THE DEEPER DUNGEON CREDITS
Producer: Alex Peters
Programming: Alex Peters
Artwork: Andy Bass
Lead Level Designer: Barrie Parker
Level Design: Barrie Parker, Andy Robson, Steve Lawrie,Tim Minor,
Andy Trowers,Wayne Frost,Jon Rennie, Matt Dixon
Script and Documentation: Jon Rennie, Neil Cook
Design Assistant Manager: Andy Robson
The Wrecking Crew: Andy Robson, Steve Lawrie, Andy Trowers,Wayne Frost,
Nathan Smethurst, Tristan Paramor, Jeff Brutus
Additional Testing: Tim Minor, Jon Rennie, Dan Riley
Installation: Andy Nuttall
6
Page 8

DUNGEON KEEPER GOLD CREDITS
Producer: Sean Cooper
Project Leader: Alex Peters
Installer Programming: Andy Nuttall
Documentation: Jon Rennie
Testing Manager: Andy Robson
Lead Tester: Nathan Smethurst
Testing: Steve Lawrie, Tristan Paramor, Jeff Brutus
Product Manager: David Dyett
Translation Co-ordinators: Petrina Wallace, Clare Parkes
Documentation Layout: Brian Howlett & Anita K. Legg
Documentation Editor: James Lenoël
Quality Assurance: Simon Romans, Peter Hill
Materials Planner: Kevin Smith
Original Game Design: Peter Molyneux, Simon Carter, Mark Healey,
Dene Carter, Jonty Barnes, Alex Peters
Special Thanks: Simon Carter, Dene Carter, Mark Stacey, Colin Robinson,
Steve Fitton, Stan Ragan
DUNGEON KEEPER DIRECT3D CREDITS
Programming: Morten Pedersen
Project Leader: Ian Shaw
Installer Programming: Andy McDonald
Documentation: Jon Rennie
Testing Manager: Dominic Murphy
Original Graphic Engine Design: Martin Bell, Glenn Corpes
Special Thanks: Colin Robinson, David Bryson, Nick Goldsworthy,
Julian Glover, John Miles, Darren Pattenden, Alex Peters
Page 9

DUNGEON KEEPER™ MANUAL
CONTENTS
1.0 Introduction . . . . . . . . . . . . . . . . . . . . . . . 6
3.0 Playing the Game . . . . . . . . . . . . . . . . . . . 6
3.1 Moving Around . . . . . . . . . . . . . . . . . . . . 7
3.2 The Options Panel . . . . . . . . . . . . . . . . . .7
3.2.1 Load and Save . . . . . . . . . . . . . . . . . . 7
3.2.2 Graphics . . . . . . . . . . . . . . . . . . . . . . . 8
3.2.3 Sound . . . . . . . . . . . . . . . . . . . . . . . . . 9
3.2.4 Computer Assistance . . . . . . . . . . . . . 9
3.2.5 Quit . . . . . . . . . . . . . . . . . . . . . . . . .10
4.0 The Control Panel . . . . . . . . . . . . . . . . . .10
4.1 The Dynamic Map . . . . . . . . . . . . . . . . .10
4.1.1 The Map Screen . . . . . . . . . . . . . . . . 11
4.2 Money . . . . . . . . . . . . . . . . . . . . . . . . . . 11
5.0 The Information Panel . . . . . . . . . . . . . . 12
5.1 Imprison . . . . . . . . . . . . . . . . . . . . . . . . 12
5.2 Flee . . . . . . . . . . . . . . . . . . . . . . . . . . . .12
5.3 Payday Bar . . . . . . . . . . . . . . . . . . . . . .12
5.4 Research Time Bar . . . . . . . . . . . . . . . . .12
5.5 Workshop Time Bar . . . . . . . . . . . . . . . .13
5.6 Number of Rooms . . . . . . . . . . . . . . . . .13
5.7 Number of Creatures . . . . . . . . . . . . . . .13
5.8 Query . . . . . . . . . . . . . . . . . . . . . . . . . . . 13
6.0 The Rooms Panel . . . . . . . . . . . . . . . . . .14
6.1 Selected Rooms and Information . . . . . .14
6.2 Room icons . . . . . . . . . . . . . . . . . . . . . .14
6.2.1 Blank Spaces . . . . . . . . . . . . . . . . . .14
6.2.2 Question Marks . . . . . . . . . . . . . . . .14
6.2.3 Sunken Icon . . . . . . . . . . . . . . . . . . .15
6.2.3 Raised Icon . . . . . . . . . . . . . . . . . . . 15
6.3 Laying Rooms . . . . . . . . . . . . . . . . . . . .15
6.4 Selling Rooms . . . . . . . . . . . . . . . . . . . .15
7.0 The Research Panel . . . . . . . . . . . . . . . . 16
7.1 Casting Spells . . . . . . . . . . . . . . . . . . . . 16
7.2 Cancelling a Spell . . . . . . . . . . . . . . . . . 16
8.0 The Workshop Panel . . . . . . . . . . . . . . . 17
8.1 Traps . . . . . . . . . . . . . . . . . . . . . . . . . . . 17
8.1.1 Placing Traps . . . . . . . . . . . . . . . . . . 17
8.1.2 Selling a Trap . . . . . . . . . . . . . . . . . . 18
8.2 Doors . . . . . . . . . . . . . . . . . . . . . . . . . . . 18
8.2.1 Placing Doors . . . . . . . . . . . . . . . . . .18
8.2.2 Locking Doors . . . . . . . . . . . . . . . . . 18
8.2.3 Selling a Door . . . . . . . . . . . . . . . . . 19
9.0 The Creature Panel . . . . . . . . . . . . . . . . . 19
9.1 Idle . . . . . . . . . . . . . . . . . . . . . . . . . . . .19
9.2 Working . . . . . . . . . . . . . . . . . . . . . . . . . 19
9.3 Fighting . . . . . . . . . . . . . . . . . . . . . . . . . 20
10.0 Pop-up Icons . . . . . . . . . . . . . . . . . . . . . 20
10.1 Reading Pop-up Icons . . . . . . . . . . . . .20
10.2 Deleting Pop-up Icons . . . . . . . . . . . . . 20
10.3 Objective . . . . . . . . . . . . . . . . . . . . . . .21
10.4 Important Information . . . . . . . . . . . . .21
10.5 A Battle . . . . . . . . . . . . . . . . . . . . . . . . 21
10.6 New Creature . . . . . . . . . . . . . . . . . . . . 22
10.7 Manufactured Item . . . . . . . . . . . . . . . . 22
10.8 Newly Researched Item . . . . . . . . . . . . 22
2
Page 10

11.0 The Dungeon View . . . . . . . . . . . . . . . . 23
11.1 Your Mouse Pointer . . . . . . . . . . . . . . . 23
11.1.1 Normal (an arrow) . . . . . . . . . . . . .23
11.1.2 Digging (a pickaxe) . . . . . . . . . . . . 23
11.1.3 A Creature (a hand) . . . . . . . . . . . . 24
11.2 The Dungeon Heart . . . . . . . . . . . . . . . 24
11.3 Your Imps . . . . . . . . . . . . . . . . . . . . . . 24
12.0 Building Your Dungeon . . . . . . . . . . . . 25
12.1 Digging . . . . . . . . . . . . . . . . . . . . . . . . 25
12.2 Gold . . . . . . . . . . . . . . . . . . . . . . . . . . . 26
12.3 Gems . . . . . . . . . . . . . . . . . . . . . . . . . . 26
12.4 Impenetrable Rock . . . . . . . . . . . . . . . . 26
13.0 Building Basic Rooms . . . . . . . . . . . . . . 27
13.1 Building a Treasure Room . . . . . . . . . . 27
13.2 Building a Lair . . . . . . . . . . . . . . . . . . . 27
13.3 Building a Hatchery . . . . . . . . . . . . . . . 28
14.0 Continuing Your Dungeon . . . . . . . . . . 28
14.1 Water . . . . . . . . . . . . . . . . . . . . . . . . . . 28
14.2 Lava . . . . . . . . . . . . . . . . . . . . . . . . . . . 29
15.0 Hidden Rooms and Secrets . . . . . . . . . . 29
15.1 Secret Surprise . . . . . . . . . . . . . . . . . . . 29
15.2 New Rooms . . . . . . . . . . . . . . . . . . . . . 29
15.3 Hero Gates . . . . . . . . . . . . . . . . . . . . . . 29
16.0 Rooms . . . . . . . . . . . . . . . . . . . . . . . . . . 30
16.1 Room Flags . . . . . . . . . . . . . . . . . . . . . 30
16.1.1 Health . . . . . . . . . . . . . . . . . . . . . . . 30
16.1.2 Capacity . . . . . . . . . . . . . . . . . . . . . 30
16.1.3 Efficiency . . . . . . . . . . . . . . . . . . . . 30
17.0 Individual Rooms . . . . . . . . . . . . . . . . .31
17.1 Treasure Room . . . . . . . . . . . . . . . . . . . 31
17.2 Lair . . . . . . . . . . . . . . . . . . . . . . . . . . .31
17.3 Hatchery . . . . . . . . . . . . . . . . . . . . . . . 32
17.4 Library . . . . . . . . . . . . . . . . . . . . . . . . . 32
17.5 Training Room . . . . . . . . . . . . . . . . . . .33
17.6 Bridge . . . . . . . . . . . . . . . . . . . . . . . . . 33
17.7 Guard Post . . . . . . . . . . . . . . . . . . . . . . 34
17.8 Workshop . . . . . . . . . . . . . . . . . . . . . . .34
17.9 Barracks . . . . . . . . . . . . . . . . . . . . . . . . 35
17.10 Prison . . . . . . . . . . . . . . . . . . . . . . . . . 35
17.11 Torture Chamber . . . . . . . . . . . . . . . .36
17.12 Temple . . . . . . . . . . . . . . . . . . . . . . . .36
17.13 Graveyard . . . . . . . . . . . . . . . . . . . . .37
17.14 Scavenger Room . . . . . . . . . . . . . . . .37
17.15 Sell Room . . . . . . . . . . . . . . . . . . . . .37
18.0 Spells . . . . . . . . . . . . . . . . . . . . . . . . . . . 38
18.1 Possess Creature . . . . . . . . . . . . . . . . . . 38
18.2 Create Imp . . . . . . . . . . . . . . . . . . . . . . 39
18.3 Sight of Evil . . . . . . . . . . . . . . . . . . . . .39
18.4 Speed Creature . . . . . . . . . . . . . . . . . . . 39
18.5 Must Obey . . . . . . . . . . . . . . . . . . . . . .39
18.6 Call To Arms . . . . . . . . . . . . . . . . . . . . 40
18.7 Conceal Creature . . . . . . . . . . . . . . . . .40
18.8 Hold Audience . . . . . . . . . . . . . . . . . . . 40
18.9 Heal . . . . . . . . . . . . . . . . . . . . . . . . . . .40
18.10 Lightning Strike . . . . . . . . . . . . . . . . .41
18.11 Protect Creature . . . . . . . . . . . . . . . . . 41
18.12 Turn To Chicken . . . . . . . . . . . . . . . .41
18.13 Cave-In . . . . . . . . . . . . . . . . . . . . . . .42
18.14 Disease . . . . . . . . . . . . . . . . . . . . . . . . 42
18.15 Armageddon . . . . . . . . . . . . . . . . . . . . 42
18.16 Destroy Walls . . . . . . . . . . . . . . . . . . . 42
3
Page 11

19.0 Traps and Doors . . . . . . . . . . . . . . . . . .43
20.0 Traps . . . . . . . . . . . . . . . . . . . . . . . . . . .43
20.1 Boulder Trap . . . . . . . . . . . . . . . . . . . .43
20.2 Alarm Trap . . . . . . . . . . . . . . . . . . . . .44
20.3 Poison Gas Trap . . . . . . . . . . . . . . . . . . 44
20.4 Lightning Trap . . . . . . . . . . . . . . . . . . . 44
20.5 Word of Power Trap . . . . . . . . . . . . . . .44
20.6 Lava Trap . . . . . . . . . . . . . . . . . . . . . . . 45
21.0 Doors . . . . . . . . . . . . . . . . . . . . . . . . . . .45
21.1 Wooden Door . . . . . . . . . . . . . . . . . . . .45
21.2 Braced Door . . . . . . . . . . . . . . . . . . . . .45
21.3 Iron Door . . . . . . . . . . . . . . . . . . . . . . . 46
21.4 Magical Door . . . . . . . . . . . . . . . . . . . .46
21.5 Selling a Trap or a Door . . . . . . . . . . . . 46
22.0 Your Creatures . . . . . . . . . . . . . . . . . . . 46
22.1 Getting Creatures . . . . . . . . . . . . . . . . . 47
22.2 Looking After Your Creatures . . . . . . . 47
22.2.1 Picking Up and Viewing Creatures
22.2.2 Slapping Creatures . . . . . . . . . . . . . 48
22.2.3 Sacking a Creature . . . . . . . . . . . . . 48
22.2.4 Creature Moods . . . . . . . . . . . . . . .48
22.3 Querying a Creature . . . . . . . . . . . . . . .49
23.0 Creature Information Panel . . . . . . . . . 49
23.1 The Primary Information Panel . . . . . .49
23.2 Creature Anger Bar . . . . . . . . . . . . . . .49
23.3 Creature Experience . . . . . . . . . . . . . . .49
23.4 Creature Name and Health . . . . . . . . . .50
23.5 Creature Weapons . . . . . . . . . . . . . . . . 50
23.6 The Secondary Information Panel . . . . .50
23.7 Creature Kills . . . . . . . . . . . . . . . . . . . .50
23.8 Gold Held . . . . . . . . . . . . . . . . . . . . . . 51
23.9 Defence . . . . . . . . . . . . . . . . . . . . . . . .51
23.10 Age / Time in Dungeon . . . . . . . . . . .51
. .47
23.11 Luck . . . . . . . . . . . . . . . . . . . . . . . . . . 51
23.12 Strength . . . . . . . . . . . . . . . . . . . . . . .51
23.13 Wage . . . . . . . . . . . . . . . . . . . . . . . . . 52
23.14 Skill . . . . . . . . . . . . . . . . . . . . . . . . . . 52
3.15 Dexterity . . . . . . . . . . . . . . . . . . . . . . .52
23.16 Blood Type . . . . . . . . . . . . . . . . . . . . 52
23.17 Exiting From Query Creature Mode . . 52
24.0 Creature Types . . . . . . . . . . . . . . . . . . . 53
24.1 Imp . . . . . . . . . . . . . . . . . . . . . . . . . . . 53
24.2 Beetle . . . . . . . . . . . . . . . . . . . . . . . . . . 53
24.3 Bile Demon . . . . . . . . . . . . . . . . . . . . . 53
24.4 Dark Mistress . . . . . . . . . . . . . . . . . . . . 53
24.5 Demon Spawn . . . . . . . . . . . . . . . . . . . 54
24.6 Dragon . . . . . . . . . . . . . . . . . . . . . . . . . 54
24.7 Fly . . . . . . . . . . . . . . . . . . . . . . . . . . . . 54
24.8 Ghost . . . . . . . . . . . . . . . . . . . . . . . . . . 54
24.9 Troll . . . . . . . . . . . . . . . . . . . . . . . . . . . 55
24.10 Hellhound . . . . . . . . . . . . . . . . . . . . . 55
24.11 Horned Reaper . . . . . . . . . . . . . . . . . . 55
24.12 Orc . . . . . . . . . . . . . . . . . . . . . . . . . . . 55
24.13 Skeleton . . . . . . . . . . . . . . . . . . . . . . . 55
24.14 Spider . . . . . . . . . . . . . . . . . . . . . . . . 56
24.15 Tentacle . . . . . . . . . . . . . . . . . . . . . . .56
24.16 Vampire . . . . . . . . . . . . . . . . . . . . . . .56
24.17 Warlock . . . . . . . . . . . . . . . . . . . . . . .56
25.0 Creature Spells . . . . . . . . . . . . . . . . . . . 57
25.1 Abilities . . . . . . . . . . . . . . . . . . . . . . . . 57
25.2 Dig . . . . . . . . . . . . . . . . . . . . . . . . . . . . 57
25.3 Hand to Hand . . . . . . . . . . . . . . . . . . . . 57
25.4 Arrow . . . . . . . . . . . . . . . . . . . . . . . . . 57
4
Page 12

26.0 Spells . . . . . . . . . . . . . . . . . . . . . . . . . . . 58
26.1 Armour (Personal) . . . . . . . . . . . . . . . . 58
26.2 Chicken (Weapon) . . . . . . . . . . . . . . . . 58
26.3 Disease (Weapon) . . . . . . . . . . . . . . . . 58
26.4 Drain (Weapon) . . . . . . . . . . . . . . . . . . 58
26.5 Fireball (Weapon) . . . . . . . . . . . . . . . . 59
26.6 Flamebreath (Weapon) . . . . . . . . . . . . . 59
26.7 Flight (Personal) . . . . . . . . . . . . . . . . . . 59
26.8 Freeze (Weapon) . . . . . . . . . . . . . . . . . 59
26.9 Grenade (Weapon) . . . . . . . . . . . . . . . . 60
26.10 Hailstorm (Weapon) . . . . . . . . . . . . . . 60
26.11 Heal (Personal) . . . . . . . . . . . . . . . . . . 60
26.12 Invisibility (Personal) . . . . . . . . . . . . .60
26.13 Lightning (Weapon) . . . . . . . . . . . . . .60
26.14 Meteor (Weapon) . . . . . . . . . . . . . . . . 61
26.15 Missile (Weapon) . . . . . . . . . . . . . . . . 61
26.16 Navigating Missile (Weapon) . . . . . . . 61
26.17 Poison Cloud (Weapon) . . . . . . . . . . . 61
26.17.1 Fart (Weapon) . . . . . . . . . . . . . . . . 61
26.18 Rebound (Personal) . . . . . . . . . . . . . . 62
26.19 Slow (Weapon) . . . . . . . . . . . . . . . . . .62
26.20 Speed (Personal) . . . . . . . . . . . . . . . . 62
26.21 Teleport (Personal) . . . . . . . . . . . . . . . 62
26.22 Wind (Weapon) . . . . . . . . . . . . . . . . . 62
26.23 Word of Power (Weapon) . . . . . . . . . . 63
27.0 Possessing Creatures . . . . . . . . . . . . . . 63
27.1 Controlling The Creature . . . . . . . . . . . 63
27.1.1 Controls . . . . . . . . . . . . . . . . . . . . . 63
27.1.2 Exiting Creature . . . . . . . . . . . . . . . 63
27.2 The Possess Creature Panel . . . . . . . . . 64
27.3 Changing Weapons . . . . . . . . . . . . . . . . 64
28.0 Battles, Heroes and Enemy Creatures . 65
28.1 Creatures in Battle . . . . . . . . . . . . . . . . 65
29.0 Heroes . . . . . . . . . . . . . . . . . . . . . . . . . . 66
29.1 Tunneller . . . . . . . . . . . . . . . . . . . . . . . 66
29.2 Thief . . . . . . . . . . . . . . . . . . . . . . . . . . 67
29.3 Archer . . . . . . . . . . . . . . . . . . . . . . . . . 67
29.4 Dwarf . . . . . . . . . . . . . . . . . . . . . . . . . . 67
29.5 Barbarian . . . . . . . . . . . . . . . . . . . . . . . 67
29.6 Wizard . . . . . . . . . . . . . . . . . . . . . . . . . 67
29.7 Witch . . . . . . . . . . . . . . . . . . . . . . . . . .68
29.8 Giant . . . . . . . . . . . . . . . . . . . . . . . . . .68
29.9 Samurai . . . . . . . . . . . . . . . . . . . . . . . . 68
29.10 Monk . . . . . . . . . . . . . . . . . . . . . . . . . 68
29.11 Fairy . . . . . . . . . . . . . . . . . . . . . . . . . .68
29.12 Lord of the Land . . . . . . . . . . . . . . . .69
29.13 Avatar . . . . . . . . . . . . . . . . . . . . . . . .69
30.0 Win or Lose . . . . . . . . . . . . . . . . . . . . . . 69
30.1 Statistics Screen and the High Score Table
30.1.1 Statistics Screen . . . . . . . . . . . . . . . 69
30.1.2 High Score Table . . . . . . . . . . . . . .70
30.2 Torturing the Lord of the Land . . . . . . . 70
32.0
Appendix A: Creature Thought Bubbles
32.1 Barrack . . . . . . . . . . . . . . . . . . . . . . . .70
32.2 Battle . . . . . . . . . . . . . . . . . . . . . . . . . . 71
32.3 Call To Arms . . . . . . . . . . . . . . . . . . . . 71
32.4 Flee . . . . . . . . . . . . . . . . . . . . . . . . . . .71
32.5 Guard . . . . . . . . . . . . . . . . . . . . . . . . . .71
32.6 Home . . . . . . . . . . . . . . . . . . . . . . . . . .71
32.7 Hungry . . . . . . . . . . . . . . . . . . . . . . . . . 72
32.8 Leave . . . . . . . . . . . . . . . . . . . . . . . . . .72
32.9 Prison . . . . . . . . . . . . . . . . . . . . . . . . . .72
32.10 Psycho . . . . . . . . . . . . . . . . . . . . . . . . 72
32.11 Research . . . . . . . . . . . . . . . . . . . . . . . 73
32.12 Scavenging/Being Scavenged . . . . . . .73
32.13 Sleep . . . . . . . . . . . . . . . . . . . . . . . . . 73
32.14 Sulk . . . . . . . . . . . . . . . . . . . . . . . . . . 73
32.15 Torture . . . . . . . . . . . . . . . . . . . . . . . . 74
32.16 Train . . . . . . . . . . . . . . . . . . . . . . . . . 74
32.17 Wages . . . . . . . . . . . . . . . . . . . . . . . . 74
32.18 Workshop . . . . . . . . . . . . . . . . . . . . . . 74
36.0 Credits . . . . . . . . . . . . . . . . . . . . . . . . . . 75
Notice . . . . . . . . . . . . . . . . . . . . . . . . . . . . . . 77
69
70
5
Page 13

1.0 INTRODUCTION
Welcome to the realm of the Dungeon Keeper. This is your world. Above ground all might be peace and
harmony, but deep in the bowels of the earth you rule over a realm of chaos and violence. Your task is to
plan, dig and manage Dungeons with which to lure explorers with the promise of untold wealth. You also
have to attract an army of evil creatures to do your bidding and, if you keep them fed, housed and paid,
you can train them in combat and call on them to deal with the interlopers.
Different rooms attract certain creatures, so how you design the Dungeon directly affects the type of
creatures who join your fight against the common good. You also need to dig for gold as this is the only
thing that the creatures are interested in (loyalty is not a concept they understand). Each land is ruled
over by a Lord who you have to defeat to force his realm into submission. You may also have to fight
against rival Dungeon Keepers who know every underhand method in the book and are desperate to
gain control of both your gold and your creatures. It’s going to require all your wits and wisdom, as well
as all your back-stabbing craftiness, to finally gain control of every realm and prove yourself to be the
supreme Dungeon Keeper.
The key to exploring the world of Dungeon Keeper is to experiment. Everything interacts with everything
else and if you have an idea, no matter how outlandish, try it. You might find that you’ve discovered
something to guarantee your victory over the foul forces of good.
Note: Section 2.0 Before the Game can be found in the Ref Card.
3.0 PLAYING THE GAME
You are now in the main game of Dungeon Keeper. This section of the manual takes you through all the
game’s aspects, explaining the control panels, the different rooms and spells and how to get the best from
your creatures.
The Screen is split into two sections: The Control Panel to the left and the
Dungeon View to the right.
The Control Panel has a map at the top which displays a limited view of your
Under the map are five panels which can be selected by left-clicking on the icon tabs attached to each
panel. The panels are (from left to right): Information, Rooms, Research, Workshop and Creatures. See
the Control Panel section (section 4.0) later in the manual for more information.
The Dungeon View displays all of your Dungeon. Use this view to place rooms and control your
creatures. For more information, see the Dungeon View section (section 11.0) later in the manual.
Dungeon. This is centred on you’re current position in the Dungeon View.
Pop-up icons appear at the edge of the Control Panel from time to time. When
clicked on, these bring up important information about your dungeon, for
example a new discovery, a new creature or a battle involving your creatures.
See the Pop-up Icons section (section 10.0) for more information.
6
Page 14

Each time you put your mouse over an icon or part of your dungeon, a scrolling
Tooltip appears telling you what it is, how to use it and where in the manual it is
mentioned and explained. You can also play the game in high resolution by pressing
ALT-R.
3.1 MOVING AROUND
You can scroll around the Dungeon by pressing the cursor keys or by moving the mouse to the edge
of the screen. To rotate the map, hold down the right Ctrl key and press the left or right cursor key
(or delete/page down). To zoom in and out, hold down the right Ctrl key and press the up cursor key
to zoom in and the down cursor key to zoom out (or home/end). By doing both (e.g. holding down
the up arrow and moving the mouse to the top edge of the screen) you can move at twice the speed.
Holding down Shift and pressing the cursor keys scrolls you at twice the speed.
For right-handed players, it’s best to use these keys with your left hand (your middle three fingers
on the cursor keys and your little finger on the right Ctrl key) and leave your right hand free for the
mouse. Left-handed players can use the same setup but with opposite hands.
For more information on the keys in the game, see the Keys section (section 33.0) later in the
manual.
3.2 THE OPTIONS PANEL
The Options Panel can be accessed by pressing the Esc key at the top left
of your keyboard or simply by clicking on the panel. The panel has six
icons on it: Load, Save, Graphics, Sound, Computer Assistance and Quit.
3.2.1 LOAD AND SAVE
Load restores the games previously saved on the Save menu. Left-click on the relevant icon to
bring up each panel.
To load a game, left-click on the slot you want to load.
To save a game, click on a slot and change the text in it to your chosen
filename. Now press Enter to save.
7
Page 15

3.2.2 GRAPHICS
Graphics contains five options with which you can configure your game:
Shadows, View Distance, View Type, Wall Height and Gamma Correction.
Shadows has five settings and determines the maximum number of shadows
each creature can cast. The default is four.
View Distance sets how far your Dungeon is drawn from the centre of the
Dungeon View, which directly affects the speed of the game. Its default setting
is maximum size.
View Type toggles between the two types of view available in Keeper. The
default view has warped walls and can be rotated. By left-clicking on the icon
you enter a fast, forced perspective view which is quicker but has straight
walls and can only be rotated through 90 degrees.
Wall Height enables you to make the walls one block high so that they are
easier to see over. This can help when viewing your creatures.
Gamma Correction has five settings each one of which makes the screen a bit
brighter. The default setting is lowest.
8
Page 16
3.2.3 SOUND
Sound contains two bars with which you can set the volumes; the
sound effects volume is at the top and the music at the bottom.
3.2.4 COMPUTER ASSISTANCE
You may select four different types of Computer Assistance. Each
performs a different task for you, such as building your dungeon,
laying traps or moving your creatures around. The default assistant is
Aggressive.
Aggressive Computer Assistance constructs your dungeon, lays traps, casts
spells and always tries to attack the enemy players.
Defensive Computer Assistance also constructs your dungeon, lays traps and
casts spells but never goes out to attack the enemy.
Construction Only Computer Assistance only builds rooms and lays traps and
isn’t able to cast spells or move creatures around.
Move Only Computer Assistance only moves creatures and slaps them.
9
Page 17
3.2.5 QUIT
Quit takes you back to the Level Map.
You are then asked to confirm that you want to quit the game.
To exit from the panel or any of the sub-panels, click the right mouse
button or press the Esc key.
4.0 THE CONTROL PANEL
4.1 THE DYNAMIC MAP
[Map Screen Options Panel Computer Assistant Increase scale Decrease scale
Compass points]
The Dynamic Map on the Control Panel is centred on your Dungeon View and
button on the map, the Dungeon View jumps to that area. At the edge of the map are four letters
marking the four points of the compass so that you know in which direction you are facing.
There is a dotted line stretching from the centre of the map. This always points directly at your
Dungeon Heart, the core of your Dungeon. The red areas are tiles owned by you and the grey areas
around these tiles are the reinforced walls. Yellow tiles indicate the presence of gold or gems and
dark grey tiles are impenetrable rock. Creatures appear on the map as black flashing dots while
heroes appear as white dots. Any multi-coloured flashing squares on the map represent as-yet
unclaimed rooms, for example: Portals.
You can left-click on the map to zoom the Dungeon View to that place.
To the right of the map are two icons marked with a + and -. Clicking on these decreases or incre a s e s
the scale of the map. To the top left is a scroll icon. Clicking on this takes you to the Map Scre e n .
moves around as you rotate the Dungeon View. If you left-click with the mouse
10
Page 18

4.1.1 THE MAP SCREEN
This screen displays your entire Dungeon and the area around it which
you can dig through. Visually, it is the same as the Dynamic Map on
the Control Panel. If you are battling against an enemy Keeper, you
his or her Dungeon appear on the map in the appropriate colour.
If you left-click on any part of the map, the screen closes and the Dungeon View recentres itself.
right-clicking on the map acts as an exit and takes you back to the Dungeon View without
altering your position.
Attached to the mouse is a spy window which gives you a more detailed view of the area under
your mouse. Also in this view, instead of appearing as dots, all the creatures are shown by their
individual pictures and experience levels.
Move your mouse pointer over a room and a tool-tip appears giving you the name and, if
available, information on that room.
can see any part of his or her Dungeon you have discovered. Parts of
4.2 MONEY
Just beneath the map are some gold digits denoting the total amount of
gold you have to spend. Watch this figure carefully - you need to use your
Imps to dig out some more gold if it becomes too low.
11
Page 19

5.0 THE INFORMATION PANEL
At the top of the information panel there are two icons indicating the Creature Tendencies.
These tell a creature what to do in the event of a battle. Both can be selected at once as they do
not conflict with one other. The Creature Tendencies icons are:
5.1 IMPRISON
This is only available if you have built a Prison. This tells creatures to take enemy
heroes or creatures to the Prison instead of killing them. For more information on
the Prison see section 17.10.
5.2 FLEE
This tells the creatures to run away if they are too badly damaged.
5.3 PAYDAY BAR
Below these icons is the Payday Bar. This bar increases gradually over
time and, when it reaches its peak, all of your creatures receive their wages
from your Treasure Room.
new item. The length of time it takes depends on the size of your Research Room (the Library) or the
Workshop. It also depends on the number of creatures working on research in the Library.
The following two bars tell you how long it takes to research or build a
12
5.4 RESEARCH TIME BAR
This indicates the length of time for research of a new room or spell to be
completed by the creatures using the Library.
Page 20

5.5 WORKSHOP TIME BAR
This is the amount of time remaining before the building of a new object in
the Workshop is complete. The Workshop is used for the construction of
traps and doors. Note that you have to build a new trap or door every time
you want to place one in the dungeon.
Under the Time Bars there are two columns of information on each Dungeon Keeper on the map:
5.6 NUMBER OF ROOMS
The number of rooms that the Keeper has in his or her Dungeon.
5.7 NUMBER OF CREATURES
The number of creatures that the Keeper has under his or her control.
If you are alone on the map, as you are on level 1, the only information available is on
your own dungeon. If there are other Keepers on that level their information appears in
their own colours.
5.8 QUERY
Left-click on the Query Button and your mouse pointer changes into a
question mark. You can then query any creature to bring up the Creature
Information Panel. While you are displaying a creature’s information
panel, the Dungeon View follows that creature. You can also query a
creature by holding down Shift and left-clicking on the creature, this will also make you enter the
creature.
See the Creature section (section 22.0) later in the manual for more information on the panel.
13
Page 21
6.0 THE ROOMS PANEL
The Rooms Panel lists all of the rooms available for you to build on the current level. When you
select a room, a picture icon of that room is displayed.
6.1 SELECTED ROOMS AND INFORMATION
To the left is a picture showing you which room you selected, for example, a bag of
gold for a Treasure Room. Next to the picture are two numbers. The first, in red, is
the amount of rooms you have of that type. The second, in gold, is the amount each
room tile costs to place down.
When you place the first room of any type down, a bar appears to the right
of these numbers. This bar indicates, collectively, how full up all those
rooms are. If all your rooms of that type are full, the bar is at maximum.
6.2 ROOM ICONS
There are fifteen different types of room in Dungeon Keeper and each has its own slot on the panel.
The icons on the panel have four states: blank, question mark, sunken or raised.
6.2.1 BLANK SPACES
14
If the box for the room icon is blank, it means that the room is not available on the
current level.
6.2.2 QUESTION MARKS
If the box has a question mark inside, it means that the room is available for you
to research.
Page 22
6.2.3 SUNKEN ICON
If the room icon’s box is sunken, it means that you have not built any rooms of
that type yet.
6.2.3 RAISED ICON
If the icon is raised, it means that one or more rooms of that type are available
on that level. You can see all the available rooms by right-clicking on an icon;
this zooms the Dungeon View to each of those rooms in turn.
6.3 LAYING ROOMS
To lay a room, left-click on an icon and move over to the Dungeon View.
Your mouse pointer changes so that you can see the type of room you are
laying. You can only build on areas of Dungeon that you have claimed (a
with the left mouse button to lay the room tile. Many rooms may require a minimum size of three by
three tiles before they function properly, such as the Torture Chamber and the Temple.
To cancel the laying of a room, click the right mouse button and your cursor returns to normal.
See the Rooms section (section 16.0) later in the manual for more information on individual rooms.
tile with a red dot in the centre). Once you have found a good spot, click
6.4 SELLING ROOMS
The last icon on the panel is a dollar sign called the Sell Room Icon. If you left-click
on this and then move the cursor over an already built room, you are able to sell that
room tile and return the square to a normal tile. Note, however, that when you sell a
room you only get back half its original price.
15
Page 23
7.0 THE RESEARCH PANEL
The Research Panel lists all of the spells available for you to use on the current level. There are
fifteen spells in all that you can research and use in Dungeon Keeper, and each has its own
square on the panel. When a spell has been selected, its picture appears on the panel. It flashes
to show that it has been selected.
7.1 CASTING SPELLS
Some spells need casting directly on a creature, some need to be cast on the Dungeon View and
others are cast automatically.
To pick up a spell, simply left-click on it. If it needs to be cast on a specific
creature, highlight the creature with the cursor and then left-click to cast the
spell. To cast the spell on a specific location in the Dungeon, go to that place
and click the left mouse button.
Each time you pick up a spell, the cursor changes into an icon of that spell so
you can see exactly what you’re casting. You’re often able to hold down the left
mouse button instead of just clicking it and this slowly builds up the power of the
spell to increase its power or longevity.
When a spell is in action on the map, the icon for that spell becomes raised. Clicking
the right mouse button on the spell icon jumps the Dungeon View to the point in the
dungeon at which it is being used. Subsequent clicks with the right mouse button
cycle through any of the spells that are currently active.
16
7.2 CANCELLING A SPELL
To cancel a spell while you’re still holding it, click the right mouse button.
See the Spells section (section 18.0) later in the manual for more information on individual spells.
Page 24
8.0 THE WORKSHOP PANEL
The Workshop Panel contains all the traps and doors which you can place in your Dungeon.
Each trap or door must be individually constructed in the Workshop by your creatures.
If you select a trap or a door, a picture icon of that door appears with a number beside it. This
number tells you how many of those traps or doors you have available to place. Traps and doors
do not cost anything to place down, but must be manufactured beforehand.
8.1 TRAPS
There are six traps in Dungeon Keeper for you to manufacture.
8.1.1 PLACING TRAPS
To lay down a trap, click on the icon with the left mouse button. Move your
mouse over to the Dungeon View and place the trap where you want it with the
left mouse button. You can only place a trap down on your own tile, so make
click the right mouse button to cancel it.
When a trap is placed, it becomes transparent. This is because an Imp has to go and take it
from the Workshop to the place you have specified.
trap and arms it. Sometimes an Imp may drop a crate it’s carrying because it gets killed or
scared. The crate remains on the ground until another Imp, either yours or an enemy’s, picks it
up. To prevent an enemy stealing your crate, you can drop an Imp onto the crate and it either
takes it back to the Workshop or takes it to a trap if one needs arming.
When a trap has been set in your Dungeon, the trap’s icon on the panel becomes raised. You
can then cycle through all traps of the same type by right-clicking on the icon. Although visible
to your own beady eye, your traps are invisible to enemy Dungeon Keepers and heroes until
triggered. But be warned - the same is true of your enemy’s traps, so move your forces with
caution.
sure that you plan your defences carefully. If you decide against placing a trap,
Imps automatically go and place traps, but you may not want to wait for one
of them to get around to it. Drop an Imp onto the transparent trap and it goes
straight to the Workshop to get it. If you drop an Imp into the Workshop and
onto a square occupied by a trap crate, then the Imp takes it to the nearest
17
Page 25

8.1.2 SELLING A TRAP
To sell a trap, left-click on the Sell Traps and Doors Icon (the dollar sign) at the
bottom of the panel. Move the cursor over the trap and click the left mouse
button; the trap is then sold.
later in the manual
.
For more information on Traps, see the Traps and Doors section (section 20.0)
8.2 DOORS
There are four types of door in Dungeon Keeper.
Doors are effective barriers against an enemy, as they have to destroy them
to get through. Your creatures, however, are able to go through your doors
protected Dungeon.
8.2.1 PLACING DOORS
Doors appear straight away, unlike the traps.
When a door has been placed down, the icon on the panel becomes raised. right-click on this
icon to zoom and cycle through all the same door types owned by you on the map.
at will. This makes a good set of doors a very useful addition to the well-
You can only place a door down on your own tiles in a corridor one tile wide.
Select the type of door you want to place down with the left mouse button; the
mouse pointer changes to show your chosen door type. Move the mouse pointer
over the Dungeon View and left-click to place the door down in a valid place.
18
8.2.2 LOCKING DOORS
If you don’t want your creatures walking through doors, you can lock them.
This allows you to cut off parts of your Dungeon. If you put your mouse over a
door, the pointer changes into a spinning key. Now click the left mouse button
to lock the door; a similar spinning key icon appears over the door to show you
that it is currently locked.
To unlock a door, left-click on the door again and the spinning key icon disappears.
Page 26

8.2.3 SELLING A DOOR
To sell a door, click with the left mouse button on the Sell Traps and Doors Icon
(the dollar sign) at the bottom of the panel. Move the cursor over the door and
click the left mouse button. The door is then deleted.
later in the manual.
For more information on Doors, see the Traps and Doors section (section 21.0)
9.0 THE CREATURE PANEL
The Creature Panel gives you information on the activity of your creatures. At the top of the
panel are three icons: idle (a question mark), working (a brick) and fighting (a sword).
Further down the panel is a picture of the type of creature selected and, under the relevant icon,
a number showing how many of your minions are involved in specific activity. The panel can
display six types of creature at a time; if you have more than six, scroll arrows appear at the top and
bottom of the panel enabling you to scroll up and down the list.
9.1 IDLE
This means that the creatures are just existing in your Dungeon and not involved in
anything constructive or useful. They can be asleep in their Lairs or finding food to
eat.
9.2 WORKING
This means that the creature is doing work for you. Imps are busy tunneling,
reinforcing walls, placing traps or digging gold. Other creatures could be in the
Workshop, Training Room or researching in the Library.
19
Page 27

9.3 FIGHTING
This means that the creature is involved in a battle somewhere.
See the Creatures section (section 22.0) of this manual for more information on
individual creatures and the Picking Up Creatures section (section 22.2.1) on how
to pick up creatures directly from the panel.
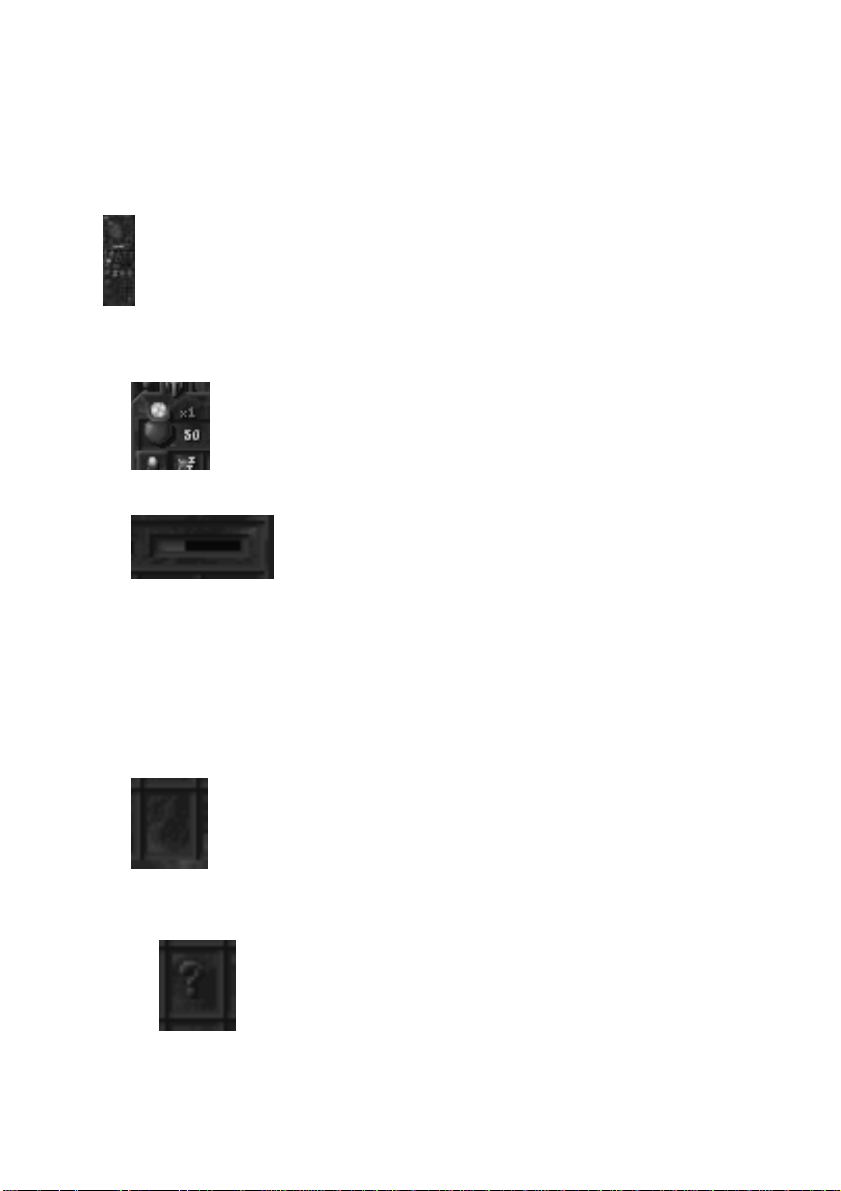
10.0 POP-UP ICONS
Pop-up icons appear periodically at the side of the Control Panel. They give you important information
on the status of your Dungeon. There are six different icons: Objective (a question mark), Important
Information (an exclamation mark), a Battle (a sword), New Creature (red creature), Manufactured Item
(a hammer) and Newly Researched Item (a book).
10.1 READING POP-UP ICONS
Left-click to open one of these icons. A transparent window containing a
message appears at the bottom of the screen. On each window are four
icons: Zoom to Area (an eye), Close Window (a tick) and an up and down
depending on the message and its length.
To close the window, left-click on the icon again. The icon remains on the screen until it is deleted.
10.2 DELETING POP-UP ICONS
To get rid of a message, right-click on the Pop-up Icon. Note that you cannot delete an objective
message.
arrow to scroll the text. Some of these icons may not be available
20
Page 28

10.3 OBJECTIVE
These messages tell you what you need to do to complete the level, or a certain part of
it, and act like a tutorial. If you discover a new part of the map such as a new area or a
new spell, you are told how to use it in the Objective Window.
If there is a lot of information, use the arrow keys to view all the text.
Left-click on the tick icon to close the window.
10.4 IMPORTANT INFORMATION
The Important Information icon appears if you discover a new area or a
spell.
Left-click on the eye icon to see the new area.
10.5 A BATTLE
If there are any battles in progress, this flashing icon
appears. It continues to flash until all of the battles are
decided. Each row in the window represents a single battle.
by their pictures and then, to the right, are the heroes or enemy creatures. Above each picture is the
creature’s experience level and below is the creature’s health.
To zoom to any of your creatures, right-click on the creature’s picture. You can also zoom to the
enemy in the same way provided they are on your land.
To pick any of your creatures, left-click on their pictures.
You can cast spells directly onto the creatures and enemies by left-clicking on the spell icon and
then left-clicking on the creature’s icon. This allows you to heal damaged creatures without having
to hunt for them in the melee.
See the Battles, Heroes and Enemy Keeper section (section 28.0) later in the manual for more
information on battles.
To the left of the ‘vs’ symbol are your creatures, represented
21
Page 29

10.6 NEW CREATURE
If a new type of creature enters your Dungeon from a Portal, this window informs you
what species of creature it is.
Left-click on the eye icon to see the new creature.
individual creatures.
See the Creature Types section (section 24.0) later in the manual for information on the
10.7 MANUFACTURED ITEM
If your creatures manufacture a new item in the Workshop, this message appears giving
you information about it.
Left-click on the eye icon to see the details of your Manufactured Item.
individual items.
See the Traps and Doors section (section 19.0) later in the manual for information on
10.8 NEWLY RESEARCHED ITEM
If the creatures engaged in research in the Library discover a new spell
or item, this window appears telling you all about it.
Left-click on the eye icon to see the new item.
on individual spells and their uses.
See the Spells section (section 18.0) later in the manual for information
22
Page 30

11.0 THE DUNGEON VIEW
The Dungeon View is a view of your Dungeon from above that allows you to
observe everything that’s going on inside. From here you can see all of your rooms
in action and each of your creatures walking around performing the evil tasks
you’ve set them.
You can scroll around the Dungeon by using the cursor keys or by pushing the mouse to the edges of the
screen. Doing both together scrolls you around at twice the normal rate. Holding down the Shift key and
pressing the cursor keys also scrolls at twice the normal rate.
To rotate the Dungeon, hold down the right Ctrl key and press down the left or right cursor keys.
To zoom in or out, hold down the right Ctrl key and press down the up and down cursor keys.
For more information on the keys and how to define them, refer to section 33.0 of this manual.
11.1 YOUR MOUSE POINTER
Your mouse pointer is dynamic and changes depending on what it is positioned over. It also acts as
a light in your Dungeon and cast rays in even the darkest areas.
11.1.1 NORMAL (AN ARROW)
If the mouse is positioned over a tile that cannot be altered, such as an
ordinary corridor tile, your mouse pointer is a standard arrow.
11.1.2 DIGGING (A PICKAXE)
more information.
If your mouse is over a part of the map that hasn’t been dug out, the pointer
changes to a pickaxe. This means that you are able to tag that tile for
digging by your Imps.
See the Building Your Dungeon section (section 12.0) later in the manual for
23
Page 31

11.1.3 A CREATURE (A HAND)
If your mouse is over a creature, the pointer changes to become the powerful
Hand of Evil.
While your mouse is over the creature, a symbol appears shaped like a red,
experience. The spikes on the star represent the creature’s health. If the creature is at full health,
then all the spikes are bright red. The lower its health, the fewer the number of spikes.
Clicking the left mouse button picks up that creature (right-click to drop them again).
If you click the right mouse button, you can slap the creature. This makes the creature faster
and more obedient but also damages its health.
For more information on picking up creatures, see section 22.2.1. For more information on
slapping creatures, see section 22.2.2
eight-pointed star. The number in the centre of this star is the creature’s
11.2 THE DUNGEON HEART
The Dungeon Heart is the life force of your Dungeon. You must take good
care of it because, if it’s destroyed, you lose the level.
The size of the Heart depends on its strength, which is on maximum at the
walls and start attacking the Heart, it starts to shrink as it becomes damaged.
If you destroy the Dungeon Heart of a rival Keeper, you have vanquished him or her.
To zoom to the Dungeon Heart at any time, press H.
start of each level. If heroes or enemy creatures breach your Dungeon
11.3 YOUR IMPS
24
You start every level with a small number of Imps. These creatures are unique in
their abilities and are very valuable as they perform all the digging and
maintenance of your Dungeon. They are fast but very weak and, although they can
attack heroes or enemy creatures, they are easily killed. It’s best to keep them away
from combat.
You will get more information on these creatures as you read on.
Page 32

12.0 BUILDING YOUR DUNGEON
When you begin a Dungeon, you need three rooms to make sure your creatures are happy: a Treasure
Room for gold, a Lair for your creatures to rest and a Hatchery where your creatures can eat.
12.1 DIGGING
To dig out some new caverns, choose a location for the new room and
highlight it with your mouse pointer. When positioned over a tile of
unmined earth your mouse pointer changes to a pickaxe. Click on the tile
earth tiles to mark more for digging. Hold down the left mouse button and scroll around the
dungeon with the mouse to paint large areas with the yellow tagging stripes.
distinguish their tiles from your own.
of earth and it becomes marked by some yellow stripes. Click on more
Your Imps now go to the selected piece of earth (as long as they can reach
it) and start to dig at the wall with their picks. The wall soon collapses
leaving a bare patch of ground. However, you aren’t able to build on this
land yet, as it’s not owned by you.
Once your Imps have finished digging out new land, they lay down some
tiles. Once this has been done it means that you’ve claimed the land and
can build on it. The area has a central tile in your own colour (red)
indicating that it’s yours. Any enemy Keepers have colours of their own to
When all the bare earth has been claimed, the Imps start to reinforce the
walls. This takes quite a bit of time but is very useful because, once
completed, heroes and enemy Keepers are unable to tunnel into your
Dungeon without a Destroy Walls spell. Likewise, if an enemy Keeper has
fortified his walls you are unable to break into his Dungeon without the Destroy Walls spell.
To deselect a square you have tagged for digging, just left-click on the square and the yellow stripes
disappear.
25
Page 33

12.2 GOLD
Some unmined areas of the map sparkle, indicating that they contain veins
of gold. Dig these out (by tagging them in the same way as normal earth)
and your Imps haul the gold to a Treasure Room. If there is no Treasure
the wealth of your dungeon, so make certain that you have enough Treasure Room tiles to hold all
the gold. If not, you can always enlarge your Treasure Room, or build a new one.
Once gold has been dug out, it appears as lumps of treasure on the ground which can be picked up,
as long as they are on a tile owned by you. They can then be placed directly in the Treasure Room
or given to a creature by left-clicking. This kind of bonus is a great motivator and makes the
creature much happier.
Room available, the gold is simply left on the ground and isn’t included in
12.3 GEMS
Mining gems adds to your overall wealth, but they act differently to normal
gold blocks. Gems cannot be destroyed and therefore give you an infinite
supply of gold for your Dungeon. The downside is that it takes much
Imps simply pile up the gold around the Gem block until they get fed up of digging it. To dig a Gem
block, select it as you selected an area of gold; to stop mining, deselect it in the same way.
longer for your Imps to mine them. If the Treasure Room is full, then your
12.4 IMPENETRABLE ROCK
Some tiles on the map are made of solid rock and cannot be dug out. These
appear as a lighter, harder texture that are always visible on the screen,
even if you haven’t yet tunnelled to them. The only solution is to go round
such rock can have important defence implications.
impenetrable rock. The experienced Keeper is aware that building near
26
Page 34

13.0 BUILDING BASIC ROOMS
13.1 BUILDING A TREASURE ROOM
Your first room should be a Treasure Room as you need to store gold to pay wages to the creatures
in your Dungeon.
To build a Treasure Room, go into the Rooms panel on the Control Panel
and select the bag of gold icon in the top corner; your pointer changes into
a bag of gold. Move the cursor over an empty tile and click the left mouse
number appears, telling you how much that room tile cost. Build a square room of three by three
tiles to start with.
13.2 BUILDING A LAIR
When new creatures enter your Dungeon, they always look for a Lair. Without one, your creatures
aren’t able to rest and make a home. They soon become unhappy and leave.
button to place it down. The Dungeon shakes as it is placed down and a
Once the room has been built, a flag lets you know the room type. It also
has three bars, which are explained further in the Rooms section (section
16.1) later in the manual.
Now when you dig out gold, the Imps take it to the Treasure Room and
deposit it on the tiles.
To build a Lair, go to the Rooms panel on the Control Panel and click on
the sleeping creature icon. Place the room down in the same way as the
Treasure Room. You may need to make the Lair bigger than the Treasure
Room as each creature in your Dungeon claims one room tile as their own
so, as soon as you open your Dungeon, it begins to fill up.
27
Page 35

13.3 BUILDING A HATCHERY
Creatures need wages, sleep and food to keep them happy. Food is grown in the form of chickens in
your Hatchery.
To build a Hatchery, go to the Rooms panel on the Control Panel and
select the third icon along with an egg on it. Find a spare space and place
the room down in the same way as the Lair. This room can be small to
you have, the larger the Hatchery needs to be.
If you slap a chicken, it explodes in a puff of feathers. This, though good fun, is wasteful; do it
sparingly to conserve your resources.
begin with but its production rate depends on its size so the more creatures
Once a tile has been laid down, eggs start to rise through the earth. After a
while they hatch into chickens, who wander around the room and peck at the
floor. When a creature wants to eat, it simply goes to the Hatchery, picks out a
chicken and eats it.
14.0 CONTINUING YOUR DUNGEON
Now that you’ve built the basic rooms, you need to find a Portal on the map
and tunnel towards it. Without one, no creatures can enter your Dungeon. The
more Portals you have, the more creatures you attract so make sure that you get
to them before any enemy Keepers.
Remember to dig for gold so that your creatures don’t get disillusioned and fight amongst themselves.
28
14.1 WATER
As you dig around, you may uncover some water. Your creatures aren’t
harmed by this and, in fact, some may live in it. Water can be a very useful
tactical asset but you are not able to build on it.
You can, however, use the Bridge room tile (see Section 17.6) to make new
land on the water.
Page 36

14.2 LAVA
Lava is uncovered in the same way as water but, as it’s molten rock, it’s far
more deadly. Your creatures avoid it as they are hurt if they come into
contact with its glowing surface. However, a few creatures, like the
Dragon, cannot be harmed by lava.
The only way to get over lava is to do a Cave-In (see section 18.13) or build a Bridge (see section
17.6) over it. Lava can have great tactical importance in your battle against the just and good.
15.0 HIDDEN ROOMS AND SECRETS
As you dig around, look out for hidden rooms and secrets. These include new spells, a secret surprise, a
new room or a Hero Gate. Hidden items are always worth investigating.
15.1 SECRET SURPRISE
These appear as boxes with question marks and spikes on. If you move your mouse
over the icon, the pointer changes into the Hand of Evil. When you left-click on the
secret it becomes active. Examples of Secret Surprises include: all research
completed, resurrect a creature or even an entire secret level.
15.2 NEW ROOMS
If you come across a hidden room, a Pop-up Icon appears telling you what
you have discovered. You then see the room on the Control Panel for you to
use later. Some rooms may come with new creatures unique to that room.
15.3 HERO GATES
These Gates appear as wavy, transparent teleports and act as entrances for
heroes. They are a weak spot in your Dungeon so guard them carefully.
29
Page 37

16.0 ROOMS
16.1 ROOM FLAGS
When a new room is built a flag appears on the first tile that was laid down. The flag
has a picture icon on it denoting the room type. Next to the icon are three bars:
Health (top red bar), Capacity (middle green bar) and Efficiency (bottom white bar).
16.1.1 HEALTH
If an enemy Imp enters your Dungeon and begins to try and take over one of your rooms, the
health of that room starts to fall. Once the room has been drained of all health, the room
becomes the property of the enemy Keeper.
16.1.2 CAPACITY
This indicates how full the room is. If the bar is high then it is nearly full and you should
consider expanding.
16.1.3 EFFICIENCY
You can build a room any size and shape you want, but when doing so you need to take into
account room efficiency. Efficiency directly affects the rate at which a room works. A more
efficient Hatchery, for example, produces more chickens, a more efficient Library researches
faster, etc.
A totally inefficient room consists of a single tile on its own. It is, in fact, negatively efficient. If
it has another room tile of the same type placed next to it, its efficiency automatically increases.
The more room tiles of the same type surround it, the more efficient it becomes. The most
efficient room tile is one that is completely surrounded by room tiles of the same type.
In general, large, square, enclosed rooms are the most efficient. Sometimes it’s impossible to
build rooms in the shape you want - the Efficiency rating helps you make the best of the area
you’ve got.
Efficiency also affects the fire trail which travels around the perimeter of the room. The higher
the flame, the more efficient the room.
30
Page 38

17.0 INDIVIDUAL ROOMS
Each room in Dungeon Keeper is individual and performs its own useful function within your Dungeon.
Listed are the creatures which are attracted when you build a room of a particular type, plus the size of
the room required to attract a specific species of creature.
17.1 TREASURE ROOM
Creature attracted: Dragon (also needs Lair) and Demonspawn
(also needs Training Room).
The minimum size it has to be to attract that creature: 25 tiles.
Zoom To key: T
The Treasure Room is where all your gold is stored. Gold can be both mined and collected from the
bodies of enemies. To pick up treasure that has been deposited in your Treasure Rooms, move the
mouse over a pile and click the left mouse button. You can then drop it into any other Treasure
Room, allowing you to concentrate your treasure in a well-defended place. You can also pick up
gold from anywhere in your dungeon and deposit it into your Treasure Rooms directly.
If an enemy Keeper spies your Treasure Room, he may dig for it. Intruding heroes often make their
way directly for the Treasure Room, too.
17.2 LAIR
Creatures attracted: Beetle, Vampire (also needs Graveyard),
Spider (also needs Hatchery), Tentacle (also needs Temple),
Dragon (also needs Treasure Room), Bile Demon (also needs
Hatchery).
The minimum size it has to be to attract each creature:
Beetle: 1 tile.
Vampire: 9 tiles.
Spider: 9 tiles.
Tentacle: 9 tiles.
Dragon: 15 tiles.
Bile Demon: 25 tiles.
Zoom To key: Shift L
The Lair is where your creatures sleep and rest.
When a creature enters a level, it first secures its place in a Lair. Each creature has its own
individual Lair so that you can easily tell who has made their home there. Most creatures take up
one Lair tile to themselves but a few take up more, so make sure you have sufficient space.
31
Page 39

Some creatures dislike each other, like the Spider and the Fly, and you should therefore avoid
making a Lair for them in the same room. If they do have to share a Lair, these creatures fight one
another to the death.
You can pick up creatures or possess them even if they are sleeping, but this generally annoys them
as it disturbs their rest.
If you drop a creature in a Lair, it’s forced to set up its home there. This way, you can avoid any
fights and control where your creatures go. Carefully placed Lairs around your Dungeon can act as
a good defence against intruders as there are always some creatures sleeping there.
17.3 HATCHERY
Creature attracted: Spider (also needs Lair) and Bile Demon
(also needs Lair).
The minimum size it has to be to attract each creature:
Spider: 9 tiles.
Bile Demon: 25 tiles.
Zoom To key: Shift H
Hatcheries generate chickens which all creatures (apart from Imps) eat to sustain themselves.
Chickens are mindless creatures that wander around pecking at the floor for food and explode in a
puff of feather if slapped. When creatures are hungry, they enter the Hatchery and eat a chicken or
two to fill themselves up. In fact, if you drop any creature in a Hatchery, it eats a chicken whether it
is hungry or not. Creatures eat a lot, so make sure that your Hatchery is large enough to sustain
your entire menagerie.
You can Possess chickens (see the Possess spell in the Spells section - sections 18.1 and 27.0 - later
in the manual) but you have no control over them. You can also pick up chickens and place them
anywhere in your Dungeon. Unfortunately, the chickens die if they are not put back into the
Hatchery after a while. Place the chicken in a Prison (see section 17.10 for more information on the
Prison) and any creatures currently imprisoned fight for possession of this tasty morsel. To the
victor the spoils.
32
17.4 LIBRARY
Creature attracted: Warlock.
The minimum size it has to be to attract that creature: 9 tiles.
Zoom To key: L
The Library is the research centre of your Dungeon. From here,
you can research new spells and rooms to use against an enemy.
You can tell what you need to research on a level if you look at the Research and Workshop Panels
on the Control Panel (see sections 7.0 and 8.0 for more information on the Research Panel and the
Workshop Panel respectively). On some squares you may see a question mark. This is where spells
and objects are placed when research has been completed.
Page 40

A creature placed in a Library starts to research immediately and occupies a single floor tile. The
more creatures in the Library, the faster the research is completed. The room efficiency also directly
alters the research speed (see the Room Flags section - section 16.1).
When a piece of research is completed, the creatures dance around before continuing on with their
work. If a spell has been researched, it appears in your Library as a floating spell book and remains
there permanently. The spell takes up one tile in the Library, so make sure you have more space to
research in. As the spell is permanently held in the Library, it is vulnerable to attack meaning that
it’s possible for an enemy to take over your Library and steal your spells.
Creatures whose primary job is researching in the Library suffer from job stress. As a result, if any
creature enters the Library who isn’t a researcher, the researching creature attacks it. This has a
detrimental effect on your research, so make sure you build the Library away from the main walking
routes.
17.5 TRAINING ROOM
Creature attracted: Orc (also needs Barracks). The Training
Room also increases the chances of enticing a Demon Spawn
(also needs Treasure Room).
The minimum size it has to be to attract the Orc: 9 tiles.
The minimum size it has to be to attract a Demon Spawn: 1 tile.
Zoom To key: Shift T
The Training Room is the place where creatures increase their experience. When a creature gains
experience, they become larger and may receive additional powers that can be devastating in battle.
When a creature either goes to, or is dropped into, the Training Room, it takes up one floor tile to
train on. The creatures then go around hitting pillars or the spinning training posts. Some creatures
can also fight with other creatures as this helps them to train at a greater speed. While creatures are
training, they require a lot of gold so make sure you have enough.
Creatures start off in your Dungeon at skill level 1, which is the weakest of all. The maximum they
can reach is level 10, by which point they have become very large and fast. You’ll know when a
creature has gone up an experience level; it performs a little dance before resuming its training.
Creatures that are naturally loyal, such as the Hellhound, often group with other members of their
species that they know they can learn from. Some creatures attain extra skills when training, for
example Warlocks gain spells as their experience increases, while level 10 Demon Spawn become
level 2 Dragons when fully trained.
17.6 BRIDGE
Creature attracted: None
Zoom To key: Shift B
The bridge is a safe way of crossing water and lava. Just place
them where you want them and click the left mouse button.
Creatures subsequently traverse your bridges on their way to
other parts of the map.
33
Page 41

17.7 GUARD POST
Creature attracted: None
Zoom To key: Shift G
If you place a creature in a Guard Post, the creature remains
heroes and enemy creatures and, should any appear, it attacks them.
You can drop a creature in the Guard Post. A creature with a natural tendency to guard, such as the
Orc, automatically goes to an empty Guard Post and watches for invaders.
Note: Each creature takes up one room tile.
If a rolling boulder from a Boulder Trap (see section 20.1) hits a Guard Post square, the Guard Post
square is destroyed and the floor returns to bare earth.
there unless it needs food or rest. It is on a constant lookout for
17.8 WORKSHOP
Creature attracted: Troll.
The minimum size it has to be to attract that creature: 1 tile.
Zoom To key: W
for you to place around your Dungeon.
Note: A trap cannot be manufactured if it is not available on the Workshop Panel (see section 8.0).
As a creature is manufacturing an object, it hammers on the anvils and hits the centre machine.
Each creature in the room takes up one tile. When a new object is manufactured, the creatures cheer
and dance and a Pop-up Icon appears telling you what has been made. This new object appears in
the form of a crate which, again, takes up one tile in the room.
Unlike spells, each object can be built many times and is always stored in the Workshop. You may
find yourself running out of space if you’re not careful. Each object also requires the room to be of a
certain size before it can be manufactured. See the information on each individual object in the
Traps and Doors section (section 19.0) later in the manual for more information.
When you lay a trap in your Dungeon, it becomes transparent which indicates that it hasn’t been
armed. An Imp then goes to the Workshop and drags the trap to the specified location. This takes
time, so make sure that your Workshop is accessible to all areas of your Dungeon. Also, if an enemy
Keeper invades your Dungeon and takes over your Workshop, he attains all your traps and doors.
Enemy traps are invisible until set off for the first time.
Remember: the efficiency of the Workshop directly affects how fast each object is manufactured.
The Workshop is where all the traps and doors are manufactured
34
Page 42

17.9 BARRACKS
Creature attracted: Orc (also needs Training Room).
The minimum size it has to be to attract that creature: 1 tile.
Zoom To key: B
one to guide them around your dungeon. To do this, you have to pick up all the creatures you want
in your group and drop them onto a Barracks room. The creatures stay in the room until you
Possess one of them, after which you act as the group’s leader and they follow you wherever you go.
Some creatures do not group together. Spiders and Flies, for example, definitely don’t get on in a
group.
Once you leave the creature, by pressing the right mouse button, the group breaks up and each
creature returns to its normal job.
For information on the Possess Spell, see section 18.1. For instructions regarding the Possess
Creature mode and controlling the creature directly, see section 27.0.
Barracks enable you to group creatures and then take control of
17.10 PRISON
This room attracts no creatures but dead creatures have a
chance of being resurrected here and joining your menagerie as
skeletons.
Zoom To key: Shift P
The Prison is where you put all your troublesome creatures and captured enemy heroes and
creatures. You can dump your own creatures into chokey just by picking them up. Heroes and enemy
creatures have to be captured before they can be taken to the Prison. To do this, go into the
Information Panel on the Control Panel and click on the imprison button (see section 5.2). This tells
your creatures to capture the invaders instead of killing them.
When creatures are in the Prison, they take up one tile each. Make certain that the Prison isn’t too
small because, if it becomes overcrowded it could burst, causing a jailbreak. Jailbreaks also occur if
a tile owned by one player is positioned next to a prison owned by another player.
Creatures are free from the influences of an enemy Scavenger Room while in Prison, but it also
means that they cannot get to food. Remember that creatures starve to death in the prison if you
don’t feed them, although if a humanoid creature dies, they become a Skeleton for your army. To
feed creatures, go to the Hatchery and pick up a chicken as you would normally. Now go to the
prison and drop it in. The creatures fight over the chicken whether they are hungry or not. After all,
they don’t know where their next meal is coming from.
35
Page 43

17.11 TORTURE CHAMBER
Creature attracted: Dark Mistress.
The minimum size it has to be to attract that creature: 9 tiles.
Zoom To key: Alt T
and enemy creatures. There are many factors that this room can influence, although any creature
being tortured slowly loses its health until it eventually dies or you let it go.
You can drop your own creatures straight in and start the torture. The creature is then at the mercy
of the fiendish torture device the room contains. (Each creature put into the room occupies a single
floor tile.) While you are torturing one of your own creatures, its wages drop to half the normal
value. Also, all the creatures of its type begin to work twenty-five per cent faster. This is because
they’re scared. If you drop another creature of the same type in the room, it won’t make any further
difference to the increase in work rate.
To place heroes and enemy creatures in the Torture Chamber, you first have to capture them and
place them in a Prison. Once they are in the cell you can pick them up as if they were your own
creature and do what you want with them. While they are being tortured, two things can happen.
First, they have a small chance of revealing the layout of the enemy Keeper’s Dungeon. Secondly,
they have a slightly greater chance of being converted to your side.
Remember, though, that while a creature is suffering torture, it is slowly dying. It has a tolerance
level to torture and will resist until this level is reached. The efficiency of the room affects how long
it takes to break down a creature’s resistance, so design your room carefully. Some creatures,
notably the Dark Mistress, receive an increase in happiness from watching the torture take place,
while some particularly sick creatures actually enjoy the experience of being tortured.
Note: If a creature dies under torture, it turns into a Ghost.
The Torture Chamber is where you can torment both your own
17.12 TEMPLE
36
This room doesn’t attract any creatures directly but improves the
chances of a Tentacle entering your Dungeon (also needs Lair).
Zoom To key: right Ctrl T
The Temple is where creatures go if they are unhappy. Being in
the Temple raises their contentment level. You can also sacrifice creatures to please the gods here.
When a creature goes to the Temple, it dances around the Temple Font and occasionally stops for
prayer. Each creature in the Temple takes up one tile. You can drop creatures onto the Temple to
make them happier but the Temple also does other things to certain creatures. If a creature is
diseased or has been changed into a chicken, dropping it onto the Temple cures it. The room also
stops creatures being scavenged by enemy Keepers for a little while.
You can sacrifice creatures by dropping them directly into the Temple Font. Certain creatures or
groups of creatures give you great benefits as their sacrifice pleases the gods. If you make a bad
sacrifice, however, the gods punish you. Sacrifice carefully.
Page 44

17.13 GRAVEYARD
Creature attracted: Vampire (also needs Lair).
The minimum size it has to be to attract that creature: 9 tiles.
Zoom To key: G
game as it has no need for creatures to operate it. It is used to store the decomposing bodies of
creatures that have fallen in your Dungeon. If a creature walks past a dead body anywhere else, it
gets a little bit unhappy. The Graveyard is a good way of clearing up corpses.
Your Imps drag the dead creatures to the Graveyard provided there is enough space. Each dead
body takes up one tile in the room until it decomposes. Once it has decomposed, the space is free.
And once a certain number of bodies have decomposed, a Vampire is created for you to command.
Efficiency won’t affect this room in any way, so you can place a Graveyard anywhere.
The Graveyard is different from all of the other rooms in the
17.14 SCAVENGER ROOM
Creature attracted: Hellhound.
The minimum size it has to be to attract that creature: 9 tiles.
Zoom To key: S
and turn them to your side. It can also attract new creatures to your Dungeon.
Drop a creature into the Scavenger Room and it dances around the centre of the room casting its
evil influence around the map. It targets the lowest level creatures of its type first before looking
further afield for other creatures. The scavenged creatures increases the chance of another creature
of the same type arriving from a Portal. Each creature in the room takes up one tile, but more
creatures in the room, especially of the same type, greatly increase the chances of your side
scavenging a new creature.
When a creature switches sides and joins the ranks of your minions, it instantly becomes happy as it
has a new master. Remember that creatures in Prison and those that have recently visited the Temple
cannot be scavenged.
The Scavenger Room allows you to head-hunt enemy creatures
17.15 SELL ROOM
To sell a room, either to gain gold or to simply free up space, left-click on the Sell
Room icon and then move the mouse over the tile you want to remove. Click the left
mouse button and you are given back half the money you originally paid for it.
37
Page 45

18.0 SPELLS
A number of spells are available for you to use, to help you out of any tight corners or scrapes. You can
either find them on the maps in secret rooms, or you may research them. Either way, once they are on the
Spells Panel section of the Control Panel, they are available for use.
Most spells need to be cast on the Dungeon View. The mouse pointer turns into a circle
with a diagonal stripe inside if placed in an invalid location. This prevents you from
using the spell.
To cast the spell on a creature, click on its icon with the left mouse button and then
left-click the target creature. If the spell has to be cast on the map, left-click on its
icon and then left-click on the map where you want it cast. Some spells, such as
then confirm its selection.
are happy with the strength of the spell, release the left mouse button and the spell is cast at its new
strength.
Armageddon, are cast as soon as you click the left mouse button on the icon and
Many spells can be powered up. When you are casting these, instead of just clicking
on the creature or location, hold down the left mouse button. On the mouse pointer,
you can see some numbers increasing and the arrows on the pointer spreading
further apart. The numbers on the pointer are the price of the spell rising. When you
If a spell is in action, such as the Sight of Evil, its icon on the Spell Panel is raised. You
can zoom the Dungeon View to the spell by clicking on the icon with the right mouse
button.
38
18.1 POSSESS CREATURE
This spell is the most unusual of all and allows you to directly
control a creature by seeing through its eyes. You can move it
about the Dungeon, dig, fight and explore for however long you
want.
To cast the spell, left-click on the spell’s icon and then on the creature you want to possess. You can
also Possess a creature by holding down the Shift key and left-clicking.
For more information on this spell and how to control the creatures, see the Possessing Creatures
section (section 27.0) later in the manual.
Page 46

18.2 CREATE IMP
This spell allows you to create new Imps to work in your
Dungeon. The price of the spell depends on the number of Imps
already present.
on the spell icon and then left-click on one of your own tiles. An Imp immediately jumps from the
mouse pointer and gets to work.
The spell can only be cast over tiles claimed by you, so left-click
18.3 SIGHT OF EVIL
This spell can be cast anywhere on the map to expand it,
revealing hidden parts of the underworld to you. This is
especially useful for spying on an enemy if you can’t see the
extent of its Dungeon.
Cast the spell by left-clicking on the icon and then clicking on the area you want to see. Hold down
the left mouse button as you are casting the spell to make it last for longer. Note, though, that doing
this makes it more expensive.
While the spell is active, you can also cast spell within the area you have uncovered, such as the
disease spell.
18.4 SPEED CREATURE
If you need a creature to do something quickly, such as research
or fight, then the Speed Creature spell can be used to double the
rate at which they perform a task.
left-click on the creature in question. The creature starts to blur and perform tasks at an accelerated
rate. To increase the amount of time the spell lasts, hold the left mouse button down when casting
the spell. Remember that doing this costs you more gold. The spell wears off after a time.
To speed up a creature, left-click on the spell’s icon and then
18.5 MUST OBEY
This spell accelerates all of your creatures and forces them to
perform all of their tasks much more quickly for however long
the spell lasts. The spell’s cost depends on the number of
creatures in your Dungeon, so make sure you have enough gold.
To cast the spell, left-click on the spell icon and then confirm that you wish to proceed with the
spell. You creatures are now under your direct control for the duration of the spell.
To cancel the spell, left-click on the spell icon on the Research Panel.
39
Page 47

18.6 CALL TO ARMS
If you have a battle on your hands then the Call To Arms spell
rallies your creatures to that spot.
Cast the spell by left-clicking on its icon and then clicking with
its influence around an area of your Dungeon, calling all the creatures to that point. This way you
can make sure that have total control over your creatures during the battle.
If you cast the spell on a tile you have claimed as yours, the spell costs you nothing, but if you cast
it on unclaimed earth or an enemy’s tile, the spell constantly drains gold from your Treasure Rooms.
The spell stays active until you cancel it or run out of money.
To cancel the spell, left-click twice on the Call To Arms spell icon on the Control Panel to pick up
the spell again. Then click the right mouse button.
the left mouse button anywhere on the map. The spell then casts
18.7 CONCEAL CREATURE
Sometimes, you may want to resort to stealth to explore around a
Dungeon. Casting this spell on a creature makes it invisible to
heroes and enemy creatures although the penalties are that it be
visible when fighting.
To cast the spell, left-click on the spell’s icon and then click on the creature you want to conceal.
Ghosts can see invisible creatures. Be warned.
18.8 HOLD AUDIENCE
40
Another powerful spell, Hold Audience summons all your
creatures to the Dungeon Heart. They then circle it dancing until
the spell stops after which they continue their normal jobs.
To cast the spell, left-click on the icon and then confirm that you
wish to cast the spell. All your creatures now converge on the Dungeon Heart. This spell is useful if
you need to quickly defend the Dungeon Heart from attack.
18.9 HEAL
If you do not have the time to send your creatures to the Temple
for healing, you can cast the Heal spell on them to take them
back up to full health.
The spell is cast on an area of the Dungeon and the spell then
heals all the creatures within a certain radius. This range can be increased by holding down the left
mouse button while casting, although it costs more.
Page 48

To cast the spell, left-click on the spell icon and then left-click on an area of Dungeon to cast the
weakest version of the spell. Hold down the left mouse button to make the spell stronger. The Heal
spell only works on your own creatures.
18.10 LIGHTNING STRIKE
This is a very powerful spell that does a lot damage to any
creatures it hits.
The spell has to be cast on an area of the Dungeon to take effect.
want to attack. Then either click the left mouse button for a small burst, or hold down the left mouse
button for a stronger, more effective but costlier strike.
The spell won’t do any damage to your own creatures.
To do this, left-click on its icon and then select the place you
18.11 PROTECT CREATURE
The Protect Creature spell reduces the damage creatures take in
battle, making them stronger and more durable. To cast the spell,
left-click on its icon and then left-click on the creature. By
can increase the spell’s strength, although it subsequently costs you more.
The spell only lasts for a limited time.
holding down the left mouse button when casting the spell, you
18.12 TURN TO CHICKEN
If you need to combat a sudden invasion and you’re hopelessly
outnumbered, you can cast this spell on an enemy creature and
turn it into a chicken for a limited time. Although they aren’t
able to fight back, they retain their original strength so may take
a short while to kill.
To cast the spell, left-click on the spell’s icon and then left-click on a hero or enemy creature. By
holding down the left mouse button when casting the spell, you can increase the strength of the
spell, although it costs you more gold. The spell then turns the targeted creature into a chicken.
If one of your own creatures is changed into a chicken, it makes its way to the Hatchery, where the
other chickens live. Make sure it does not get accidentally eaten. The spell can be countered by
picking up the creature and putting it in the Temple to be cured.
41
Page 49

18.13 CAVE-IN
Cave-In allows you partially collapse the roof of a Dungeon,
whether it is your own or an enemy’s.
To cast the spell, left-click on its icon and then move the mouse
button on the map to collapse one square’s worth of roof or keep the left mouse button held down to
increase the power and the size of the destruction.
If there are any creatures under the rock-fall as it occurs, they get damaged and flee.
pointer to where you want the rock-fall. Click with the left mouse
18.14 DISEASE
The disease spell spreads a plague among the enemy creatures
when cast. If you infect one creature they have a chance of
spreading the disease each time they encounter another creature.
While the carrier has the disease it is also slowly dying. Good.
To cast the spell, left-click on the appropriate icon and then select the creature you want to infect.
Now either click the left mouse button or hold down the left mouse button to increase the strength of
the spell. The stronger the spell the longer it lasts but the more it costs you.
If this spell is cast by an enemy on one of your own creatures, you can cure them by placing them in
the Temple.
18.15 ARMAGEDDON
This is a very powerful spell that sparks a brutal battle around
your Dungeon Heart.
When you cast the spell, you’re asked to confirm whether you
the level, both yours and any enemy’s, are transported to your Dungeon Heart and begin an
almighty battle.
Make sure that you have enough to conquer all the enemy hordes otherwise you could find yourself
instantly creating the very situation you have been trying to avoid. Also, you will not be able to pick
up your creatures while the Armageddon is active so make sure you are well prepared.
want do go ahead with it or not. If you do all the creatures on
42
18.16 DESTROY WALLS
You cannot break through an enemy Keeper’s fortified Dungeon
walls just by digging. You can dig through normal earth but, if it
is fortified, you need to cast the Destroy Walls spell. The spell
does not destroy walls, just gets rid of the fortifying stone blocks
and returns them to mineable earth.
Page 50

To cast the spell, left-click on the spell’s icon and then select the square of fortified wall you want to
destroy. The wall becomes plain earth and you can then tunnel through before you rival’s own Imps
have time to fortify it again.
19.0 TRAPS AND DOORS
Traps and Doors are available for you to use as deterrents against invaders entering your Dungeon.
They can only be placed on tiles you have already claimed. Both have to be
individually manufactured in the Workshop (see section 17.8) and your supply
is limited to what you have produced.
20.0 TRAPS
Traps have to be transported to your selected sites by Imps. All of your own creatures remain unaffected
by the traps you place. The moment one is triggered by a hero or enemy creature, though, they suffer the
consequences. Equally, enemy traps are invisible to you until it’s too late.
For more information on traps and how to use them, refer to the Traps section of the Workshop panel
(section 8.1).
20.1 BOULDER TRAP
The Boulder Trap allows to you lay down a huge round rock
which rolls over heroes and enemy creatures when they come
within range.
and within its line of sight. The boulder then starts rolling towards them. When the boulder reaches
a wall, it bounces off in a random direction so its path cannot be predicted. After some time, the
boulder breaks up and is destroyed.
You can also set off the trap at any time by slapping it and by careful aiming you can change the
boulder’s direction by slapping it as it’s in motion.
Should the Boulder roll onto lava it is destroyed, although it continues to roll on water but becomes
trapped. Should the boulder hit a Guard Post square (see section 17.7), that Guard Post square is
destroyed and replaced with bare earth. If a boulder rolls onto an enemy Lava Trap the trap
activates, causing the boulder to fall onto the lava. Remember, although your own creatures do not
set off the trap, they can still be squashed if caught in it’s path.
Note: The Boulder Trap requires your Workshop to made up of at least seventeen squares before
production begins.
The trap is triggered when a hero or enemy creature is close to it
43
Page 51

20.2 ALARM TRAP
The Alarm Trap starts a strong Call To Arms if triggered. All of
your creatures in the area are summoned to a specific point.
When a hero or enemy creature sets off the trap the Call To Arms
breach of your Dungeon security. The Alarm Trap can be triggered twelve times before it must be
replaced.
To manufacture the Alarm Trap, your Workshop can be of any size.
begins, making sure that you have an immediate response to a
20.3 POISON GAS TRAP
The Poison Gas trap emits a cloud of toxic gas which drains the
health of anything near it.
The gas trap can be used five times before it needs replacing.
automatically go to the Workshop, take a gas trap and restore the old one to full. Remember that the
poisoned gas can hurt your own creatures if they inhale it.
To manufacture the Poison Gas Trap, your Workshop must be made up of at least ten squares.
You won’t have to put down another trap; your Imps
20.4 LIGHTNING TRAP
The Lightning Trap lets loose a bolt of lightning when tripped.
The trap has a limit of twelve shots before it needs to be replaced
by your Imps. They do this automatically. Shots from the
Lightning Trap do not harm your creatures.
The Lightning Trap requires your Workshop to made up of at least thirteen squares before one can
be manufactured
.
44
20.5 WORD OF POWER TRAP
The Word of Power trap explodes with a Word of Power spell
when a hero or enemy creature passes over it. This spell is very
destructive and expands from the trap in all directions.
The trap does not harm your creatures but only has three shots
and isn’t replaced by your Imps.
To manufacture the Word of Power Trap, your Workshop must be made up of at least twenty-one
squares.
Page 52

20.6 LAVA TRAP
The Lava Trap turns the tile on which it is set to lava when a
hero or enemy creature steps on it. This trap is deadly and works
well in conjunction with other traps. The trap can only be laid
once and is capable of damaging your creatures if they are on it
when it is triggered.
The Lava Trap requires your Workshop to be made up of at least seventeen squares before
production can begin.
21.0 DOORS
Doors can only be placed in the one square gap between two reinforced walls.
This means that any corridors in which they’re placed have to be one square
wide. They open and allow the safe passage for your creatures but do not open
which stops any creatures, yours or otherwise, from passing through them. Only Ghosts can travel
through doors without opening them.
For more information on doors and how to use them, refer to the Doors section of the Workshop panel
(section 8.2).
21.1 WOODEN DOOR
ten squares before production can begin.
for heroes or enemy creatures. You can lock the doors by left-clicking on them
This is the weakest of all the doors and is made of plain,
ordinary wood. It can be broken down easily and destroyed if hit
by a boulder from a Boulder Trap.
The Wooden Door requires your Workshop to made up of at least
21.2 BRACED DOOR
The Braced Door is of average strength and lasts a little longer
than the wooden door.
To manufacture the Braced Door, your Workshop must be made
up of at least thirteen squares.
45
Page 53

21.3 IRON DOOR
The Iron Door is the strongest door and takes a lot of time to
break through. Bear in mind, though, that it also takes a lot of
time to manufacture.
seventeen squares before production can begin.
The Iron Door requires your Workshop to made up of at least
21.4 MAGICAL DOOR
This is a special door that is almost impregnable to Hand to
Hand attack and can only be broken down by magical spells
such as fireballs or lightning.
up of at least twenty-one squares.
To manufacture the Magic Door, your Workshop must be made
21.5 SELLING A TRAP OR A DOOR
This allows you to sell a trap or door from within your Dungeon. Although traps
and doors do not cost you anything to manufacture you did pay creatures to produce
them so, by selling them, you can regain some of that lost revenue.
door in the Dungeon View. The door disappears and your gold increases.
To sell a trap or door, left-click on the sell icon and then left-click on the trap or
22.0 YOUR CREATURES
Your creatures are the workhorses of your Dungeon and failure to control them
or utilise their strengths is going to get you nowhere fast.
Each type of creature is distinctively different and has its own likes and dislikes.
is available. For example, Trolls always manufacture items if a Workshop is available. Some creatures
dislike certain jobs and even other creatures, such as the Spider and the Fly.
46
Most have primary jobs which they perform automatically if the relevant room
Page 54

22.1 GETTING CREATURES
Creatures can enter your service in several ways.
The most significant of these is through Portals. Portals are dotted around the
map at the start of a level but are all unclaimed. You have to dig to the Portal
and claim it as your own before creatures can enter the dungeon. The more
Portals you have, the more creatures you get.
Another way is to scavenge them from enemy Keepers by putting creatures in a Scavenger Room
(see section 17.14). These creatures attract and influence other creatures of the same type on the
map and turn them to your side.
You can also imprison enemy creatures and torture them. If you are good at the torture they transfer
their allegiance to you.
Sacrificing in the Temple can also play a big part in getting creatures. You’ll have to experiment to
discover what benefits you can achieve.
Sometimes, you may find a new room hidden on the map in which some creatures can be found.
Once you have discovered the room, these creatures are yours to command.
22.2 LOOKING AFTER YOUR CREATURES
Your creatures all work for gold and are only loyal to those who can please, feed and pay them. If
you force them to do work they dislike, or leave dead bodies in the corridors that they have to walk
past, they soon get fed up and leave.
22.2.1 PICKING UP AND VIEWING CREATURES
You can pick up your creatures and place them wherever you want in the
Dungeon. To do this, find the creature you wish to relocate in the Dungeon
View and move your mouse pointer over it; the pointer changes into a hand.
Click the left mouse button and the hand picks up the highlighted creature.
To drop the creature, click the right mouse button. You can only drop creatures on tiles that you
have claimed. If you drop a creature in a room, it begins using that room unless it hates the job,
in which case it gets unhappy.
You can pick up multiple creatures, to a maximum of eight, by left-clicking on each creature
(making sure that the mouse pointer is over them). You can see how many creatures and what
type they are from the creature symbols on your pointer.
Pressing Backspace drops creatures in the reverse order in which they were picked up. They are
then returned to their original locations.
You can also drop creatures into your dungeon through the Dynamic Map. To do this,
pick up the creatures and then right-click on your land on the map and they are
dropped there.
47
Page 55

Another way to pick up creatures is to use the Creature Panel on the Control Panel (see
section 9.0). On this panel there are three columns displaying the different activities a
creature might be engaged in: Idle (a question mark), Working (a brick) and Fighting (a
sword). Under these icons are pictures representing each creature and then, next to
these, the number of those creatures performing each task.
Left-click on any number on the table (not zero) to pick up one creature which is performing
that task. You can keep left-clicking on the numbers to pick up a maximum of eight. Right-
clicking on these numbers zooms and cycles you through all of those creatures.
Left-clicking on the creature symbols picks up a creature of that type regardless of its current
job. Right-click to zoom and cycle through all those creatures.
Right-click on the job icon to zoom and cycle through all those creatures. Left-clicking does
nothing.
22.2.2 SLAPPING CREATURES
While your mouse is over a creature and the pointer has changed to a hand, you can click the
right mouse button and slap that creature. This knocks the creature over and damages it slightly
but it makes it work faster out of fear.
If you slap a chicken, it explodes.
22.2.3 SACKING A CREATURE
If you want to get rid of a creature, you can eject it from your dungeon permanently. Pick up the
troublesome creature and then drop it into a Creature Portal to sack them.
22.2.4 CREATURE MOODS
When a creature is doing a job or walking somewhere, it may have a thought
bubble over its head. This tells you what mood it is in or where it is going. For
example, it may have a sleepy icon above its head which indicates it is going to
its Lair for some rest.
See the Creature Thought Bubbles section (section 32.0) later in the manual for more
information on individual bubbles.
48
Page 56

22.3 QUERYING A CREATURE
If you want to follow a single creature around the Dungeon or view its individual information, you
can query the creature.
To do this, go into the Information Panel on the Control Panel. At the
bottom of the panel is a ‘?’ icon. Left-click on this and then left-click on
the creature you want information on. Alternatively, hold down Shift and
left-click on a creature, this will also make you enter the creature.
On the Control Panel, the Creature Information Panel appears and the Dungeon View scrolls to
follow the creature.
23.0 CREATURE INFORMATION PANEL
This panel is split into two parts. The Primary Information Panel contains the
creature’s vital information and its weapons. The Secondary Information Panel,
which can be accessed be clicking on the More Information Button at the bottom
of the panel, contains more detailed miscellaneous information such as that
creature’s wage and number of kills.
23.1 THE PRIMARY INFORMATION PANEL
In the top left of the panel is a picture of the creature type.
23.2 CREATURE ANGER BAR
Next to this is the Creature Anger Bar. The higher the bar, the angrier the
creature.
23.3 CREATURE EXPERIENCE
Below the Happiness Bar is that creature’s experience. The lowest is one and
the highest is ten. Behind the number is a bar indicating the creatures
progress towards attaining more experience.
49
Page 57

23.4 CREATURE NAME AND HEALTH
Each creature has its own individual name. Behind the name is the creature
health bar. The higher the red bar, the better health the creature is in.
23.5 CREATURE WEAPONS
The next set of bars are the creature’s weapons. A creature can have up to ten
weapons in its arsenal and two available to use at any one time. The number
in the corner is important as this is the number key you have to press to use
that weapon while in possession of a creature.
See the Creature Spells section (section 25.0) for more information on individual spells.
If you click twice on the downward arrow icon at the bottom of the panel,
the Secondary Panel appears.
23.6 THE SECONDARY INFORMATION PANEL
The secondary panel contains ten sections of information.
On the left side, there are:
50
23.7 CREATURE KILLS
The total kills attained by that creature.
Page 58

23.8 GOLD HELD
The total amount of gold held by that creature.
23.9 DEFENCE
This is the chance of the creature avoiding a blow. The higher the number,
the greater the chance of avoidance and thus the better the creature’s
defence.
23.10 AGE / TIME IN DUNGEON
The amount of time that creature has been living in your Dungeon.
23.11 LUCK
The percentage chance a creature has of doing a double attack and a
double defence per round of combat It indicates twice the chance of each.
It doesn’t necessarily mean that attacks or defences are guaranteed to
work.
23.12 STRENGTH
Strength is the amount of damage a creature does each time it hits an
enemy.
51
Page 59

23.13 WAGE
The amount of gold the creature is paid each payday.
23.14 SKILL
Skill is a creature’s ability to perform any given task. The higher the Skill
level, the better the creature’s performance.
23.15 DEXTERITY
This rating indicates a creature’s ability to avoid being harmed by a trap
or an enemy’s weapon. The higher the number, the greater the chance of
weapon or trap avoidance.
23.16 BLOOD TYPE
You, as Dungeon Keeper, must know your creatures if you are to command
them effectively. Being aware of a creature’s blood type gives you greater
power of them. Apart from this, it does nothing.
52
The toggle button at the bottom of the panel then takes you back to the
Primary Information Panel.
23.17 EXITING FROM QUERY CREATURE MO D E
To exit from Query Creature mode, click the right mouse button.
Page 60

24.0 CREATURE TYPES
There are seventeen types of creature in Dungeon Keeper.
24.1 IMP
The Imp is a special creature as it doesn’t need to be attracted to your Dungeon
and you can only get more through the Create Imp spell.
The Imps are the most valuable of the creatures, as they perform all the tunnelling
dragging heroes and enemy creatures to the Prison and fitting traps. Imps can be trained to level ten
and get bigger and gain spells such as Conceal Creature and Fly. They can only be replaced by the
Create Imp spell (see section 18.1).
24.2 BEETLE
24.3 BILE DEMON
Bile Demons are invulnerable to Poison Gas.
Attracted by: Lair (minimum size: 25 tiles) and Hatchery (minimum size: 25 tiles)
work in your Dungeon and also maintain it by dragging away dead bodies,
A very basic creature that gets stamped on in a fight. Beetles are very weak and
are regarded as fireball fodder by the stronger heroes.
Attracted by: Lair (minimum size: 1 tile)
A very big, red, greedy creature that eats you out of house and Dungeon if you are
not careful. Despite this, they are excellent fighters and as hard as nails. Also, their
primary job is manufacturing. If they don’t get enough food, they get angry and fall
asleep until food arrives.
24.4 DARK MISTRESS
The kinkiest of the creatures who enjoys pain and inflicting it on others. She has no
special job but goes to watch a torture if one is in progress. Slapping her makes
her happier and she rushes off to a battle as soon as one starts. An excellent
fighter, if quite worrying.
Attracted by: Torture Chamber (minimum size: 9 tiles)
53
Page 61

24.5 DEMON SPAWN
Demon Spawn are scaly, squat creatures who are good fighters despite their size.
They enjoy training and will become level 2 Dragons once they have trained past
level 10.
size: 1 tile)
Attracted by: Training Room (minimum size: 1 tile) and Treasure Room (minimum
24.6 DRAGON
The best all-round creatures, Dragons can arrive two ways. They can either enter
your Dungeon through a Portal or be grown from Demon Spawn who have been
trained to level ten. These Demon Spawn then become level two Dragons. They are
creatures. They are natural researchers but will train if no research is available.
They are impervious to lava and gain experience if their Lair is placed next to lava
Attracted by: Treasure Room (minimum size: 25 tiles) and Lair (minimum size: 15 tiles)
excellent in combat and breathe a natural fire that toasts heroes and enemy
24.7 FLY
This bog-standard giant insect is the first creature you get. Fast but flimsy, flies are
a push-over for the stronger invaders into your Dungeon. They hate Spiders and
fight them if forced to share the same Lair. Despite this, they are excellent
explorers and reveal more of the map to you by flying over water and lava.
Attracted by: Nothing, but soon require a Lair as otherwise they become unhappy.
54
24.8 GHOST
A supernatural creature that, thankfully, requires no food. Ghosts can pass through
doors and see creatures that are using the Conceal Creature spell. Their primary
job is researching in the Library although they also go to the Temple and wail
occasionally.
Ghosts are created when a creature dies in a Torture Chamber
Page 62

24.9 TROLL
This is a very hardy creature whose primary job is in the Workshop. They are
average fighters.
Attracted by: Workshop (minimum size: 1 tile)
24.10 HELLHOUND
A double headed dog who is great at guarding and pointing out heroes or enemy
creatures. These dogs sniff out enemies behind walls and get as close to them as
possible. They also cock their legs on dead bodies to aid decomposition.
Attracted by: Scavenger Room (minimum size: 9 tiles)
24.11 HORNED REAPER
The biggest and the most destructive of all the creatures that cannot be attracted to
your Dungeon via the normal methods. He does not group, either with other
Horned Reapers or with any other creature. These are known for being sadistic,
as Horny, although never to its face.
psychotic fighters. The Horned Reaper is usually referred to by Dungeon-dwellers
24.12 ORC
A basic fighting creature of average ability. Orcs are good for guarding key
strategic points in your Dungeon, and for bulking out your army.
Attracted by: Training Room (minimum size: 9 tile) and Barracks (minimum size: 1
tile)
24.13 SKELETON
A basic fighter of average ability that is created in the Prison if a humanoid
creature dies.
55
Page 63

24.14 SPIDER
A weak creature who sometimes goes to the Prison and freeze prisoners for fun.
Spiders detest the Flies and fight them if provoked or stationed in the same Lair.
Attracted by: Lair (minimum size: 9 tiles) and Hatchery (minimum size: 9 tiles)
24.15 TENTACLE
An aquatic beast, the Tentacle only enters your Dungeon if there is water around.
He hangs around the water and attacks enemies from there. Tentacles won’t usually
be persuaded to move far from their watery homes.
Require: Lair (minimum size: 9 tiles) and the Temple (minimum size: 9 tiles)
24.16 VAMPIRE
An undead creature that is a natural at research and scavenging but refuses to get
its hands dirty and manufacture for you. If it is scavenging in the Scavenger Room
and there are no other Vampires on the map, it raises your Portal attraction by
Vampire’s experience level is higher than three it becomes immortal after which it resurrects itself in
its Lair if it dies (although its experience level drops by one).
Vampires can be created in Graveyard from decomposing bodies.
Attracted by: Lair (minimum size: 9 tiles) and Graveyard (minimum size: 9 tiles)
half, thus increasing the number of creatures who enter your Dungeon. If a
56
24.17 WARLOCK
Powerful magical creatures who are excellent at research. Training makes them
more powerful and expands their range of spells. If there are Warlocks in a group
and their total experience is more than fifteen, they lead a rebellion against the rest
of the group. The only way to combat this is to put them in a Prison or put one in
the Torture Chamber. For this reason, Warlocks work well either with other Warlocks or alone.
Attracted by: Library (minimum size: 9 tiles)
Page 64

25.0 CREATURE SPELLS
Each creature has up to ten spells or abilities which it can use. These are gained through training and
experience.
25.1 ABILITIES
Abilities relates to the non-magical jobs that creatures do.
25.2 DIG
This is the basic ability of the Imp and allows it to tunnel through earth.
25.3 HAND TO HAND
The basic battle ability that allows the creature to attack the enemy with
either its bare hands or a sword.
25.4 ARROW
The basic weapon of the Archer. You are only able to use this if you subvert
an Archer to your army.
57
Page 65

26.0 SPELLS
These magical weapons can be hurled by creatures at the enemy and used on themselves to gain an
advantage. Those which are used to attack are labelled ‘Weapon’ and those which are cast by the
creature for itself are labelled ‘Personal’. Most of the weapons also do damage to your own creatures so
watch where you fire them. Listed in alphabetical order.
26.1 ARMOUR (PERSONAL)
This lowers the amount of damage a creature takes each time it is hit.
26.2 CHICKEN (WEAPON)
When fired at enemies, this turns them into chickens. The enemy isn’t able
to attack but has the same strength and thus won’t be as easy to kill as a
normal chicken. This spell wears off after a while. Acts the same as the
Turn To Chicken spell on the Research Panel of the Control Panel (see
section 18.12)
26.3 DISEASE (WEAPON)
When fired at a foe, it gives them a Disease which is then spread to other
creatures in its own Dungeon. These creatures are slowly dying and can
only be healed in the Temple (see section 17.12)
58
26.4 DRAIN (WEAPON)
This spell drains the target creature to a fifth of its health and magical
abilities.
Page 66

26.5 FIREBALL (WEAPON)
A low level attack weapon that fires a single fireball which homes in on the
nearest enemy. Also inflicts minor damage to a Dungeon’s walls and doors.
26.6 FLAMEBREATH (WEAPON)
The weapon of the Dragon. Flamebreath is a constant stream of searing
fire.
26.7 FLIGHT (PERSONAL)
Causes the creature to take off from the ground and attack creatures from
the air.
26.8 FREEZE (WEAPON)
Changes the target creature to ice. The creature is then held in suspended
animation until it thaws. While it is frozen, it can be shattered with a wellaimed blow.
59
Page 67

26.9 GRENADE (WEAPON)
Throws a powerful explosive at the approaching enemy. It can also bounce
off walls and has the traditional delayed fuse.
26.10 HAILSTORM (WEAPON)
Creates a shower of hailstones wherever the spell lands.
26.11 HEAL (PERSONAL)
When this is cast, the creature you are controlling is healed to full health.
Also, any nearby creatures are healed by a quarter.
26.12 INVISIBILITY (PERSONAL)
Cast on one of your minions, it makes the host creature invisible to all
except the Ghost.
60
26.13 LIGHTNING (WEAPON)
This is a powerful magical weapon and casts a bolt of lighting from the
creature.
Page 68

26.14 METEOR (WEAPON)
More powerful that the fireball, this spell throws out a solid ball of fire
which does a lot of damage to an enemy.
26.15 MISSILE (WEAPON)
A simple spell that launches a screaming magic reptile at the invaders.
Very disconcerting
26.16 NAVIGATING MISSILE (WEAPON)
This homes in on the nearest hero or enemy creature and explodes with
devastating force.
26.17 POISON CLOUD (WEAPON)
Forms a cloud of noxious gas capable of damaging both the enemy and
also your own creatures. The gas cloud affects all who breathe it, not just
the opposition.
26.17.1 FART (WEAPON)
A Poison Gas cloud that only damages enemy creatures at close range
and is unique to the Bile Demon.
61
Page 69

26.18 REBOUND (PERSONAL)
Causes any spell fired at you to bounce back at the attacker.
26.19 SLOW (WEAPON)
Slows down the target creature.
26.20 SPEED (PERSONAL)
This speeds up the creature you are controlling so that it can perform
fighting and working tasks really quickly. Acts the same as the Speed
Creature spell on the Research Panel of the Control Panel (see section
18.4).
26.21 TELEPORT (PERSONAL)
With this spell, a creature can teleport anywhere on the map. If you are
Possessing a creature, then the creature teleports back to its Lair while
Imps teleport back to the Dungeon Heart.
62
26.22 WIND (WEAPON)
Wind creates a force twelve gale in your Dungeon blowing every creature
away from you.
Page 70

26.23 WORD OF POWER (WEAPON)
An incredibly powerful weapon that causes rings of fire to emanate from
the creature’s body and inflicts massive damage on any creature in the
vicinity.
27.0 POSSESSING CREATURES
One of the most powerful spells in your arsenal is the Possess Creature Spell. It allows you to enter a
creature’s mind and control it directly. You have access to this spell from level 1.
The Possess Creature spell can be found in the lower right hand corner of the Spells
Panel on the Control Panel (see section 18.1).
To cast the spell on a creature, left-click on the spell icon and then left-click on the
you’re looking at the Dungeon through the creature’s eyes.
27.1 CONTROLLING THE CREATURE
Control the creature with the keyboard and the mouse. Although you can alter the keys in the Main
Menu (see the Keys section in the Reference Card for more information - section 33.0), this section
describes the default controls.
creature in the Dungeon View. You zoom in on the creature and the screen changes so
While in Possession of a creature, you can perform any task that it would do
normally. You can dig out tunnels and take over enemy rooms with an Imp. You
can also increase a creature’s experience by attacking the rotating training
posts in the Training Room.
27.1.1 CONTROLS
To move the creature forward, backward and to the side, use the cursor keys. Up moves the
creature forward, down moves it backwards. Left and right strafe it from side to side (sidestep).
You move forward in the direction the creature is facing. To move the creature’s head from side
to side and up and down, use the mouse. Moving the mouse from side to side moves the
creature’s head. Moving the mouse up makes the creature look down, while moving the mouse
down makes the creature look up. It works in a similar way to aeroplane controls.
Take a bit of time to get used to the controls by moving the creature about your Dungeon when
things are quiet. To fire the creature’s currently selected weapon, click the left mouse button.
27.1.2 EXITING CREATURE
To exit the creature, click the right mouse button.
63
Page 71

27.2 THE POSSESS CREATURE PANEL
On the Control Panel there is now an additional section displaying the creature’s
information.
At the top is a picture of the creature you are controlling.
Next to the picture is the creature’s anger bar (refer to section 23.2).
Under this is the creature’s experience level (refer to section 23.3)
Beneath all this is the name of the creature.
Lastly the creature’s ten possible weapons are listed.
64
27.3 CHANGING WEAPONS
On each weapon picture is a number. This number refers to a key on your keyboard. To select the
first weapon, press the number one on your keyboard.
You can tell which weapon is selected because its icon is sunken instead of raised.
Page 72

28.0 BATTLES, HEROES AND ENEMY
CREATURES
Battles occur when two or more creatures fight each other. Sometimes a battle
kicks off between your own creatures but mostly they occur between your
creatures and heroes or enemy creatures.
When a battle occurs, you’re told about it by an icon that appears at the side of the
Control Panel (see section 10.5). You can also zoom to the battle by pressing F
There are rows on the battle window and each one represents a single battle. To
the left of the ‘vs.’ symbol are your creatures represented by their pictures and
to the right of these are the heroes or enemy creatures represented by their
creature’s health.
T o zoom to any of your creatures, right-click on the creature’s picture. You can also zoom to the enemy
in the same way provided they are on your land.
To pick any of your creatures, left-click on their pictures.
You can cast spells directly onto the creatures and enemies by left-clicking on the spell icon and then
left-clicking on the creature’s icon. This allows you to heal damaged creatures without having to hunt
for them in the melee.
pictures. Above each picture is the creature’s experience level and below is the
28.1 CREATURES IN BATTLE
When creatures are in battle, they hit the opponents or fire magical weapons in their direction.
If a creature is hit, it loses some health and a symbol appears shaped like a red
eight-pointed star. The number in the centre of this star is the creature’s experience.
The spikes on the star represent the creature’s health. If the creature is at full health,
all the spikes are bright red.
65
Page 73

As soon as the creature is hurt, the top spike disappears and then, as it continues to
take damage, the spikes start to disappear clockwise around the symbol. When the
spikes have completely disappeared, the creature is dead.
coloured red. The heroes’ symbols are white and the enemy Keeper’s creature symbols are in their
own colours.
Creatures gain a lot of experience in battles and learn faster than they would normally in a Training
Room. Often, battles are an excellent way of training creatures fast. Try using captured heroes.
If a battle is not going well, you could try Possessing a creature and fight that way. Often, you’re
able to swing the battle if you are good enough. Grouping creatures is also a useful way of
guaranteeing lots of good creatures fighting together in a battle.
Note: Creatures do not stay in battle if they are tired.
To tell your creatures from the enemy in battle, your creatures’ symbols are
29.0 HEROES
You have many enemies in the lands of Dungeon Keeper, each wanting your gold and your untimely
demise. When your Dungeon is large enough to be famous, heroes start to arrive in the land and tunnel
through the earth towards your Dungeon.
Heroes are little more than hired mercenaries who are either working for themselves or for the Lord of
the Land, often in large groups. Sometimes they may have their own Dungeons which you have to
destroy.
They try and do many things to your Dungeon, including plundering your gold, destroying rooms and
attacking the Dungeon Heart. As each hero is an individual, you have to watch them all carefully in case
one should part company and invade different areas of your Dungeon.
On the plus side, every hero carries a sum of gold which they drop when they are defeated.
29.1 TUNNELLER
66
The Tunneller is a very poor fighter but speedy at digging through earth towards
your Dungeon. Heroes use Tunnellers to get them into your realm and then it’s
every man, dwarf and fairy for his (or her) self.
Page 74

29.2 THIEF
An average if sneaky fighter who likes to hunt out and steal gold. That’s why he’s
called the Thief. Naturally enough.
29.3 ARCHER
Although this hero is bad at hand to hand combat, he is excellent at a long range
and very hard to get close to.
29.4 DWARF
A good hand-to-hand fighter who makes a point of stealing any gold he finds lying
about.
29.5 BARBARIAN
The Barbarian is a very tough and strong character who battles to the death.
29.6 WIZARD
An excellent magical fighter with a huge range of spells. Wizards are very vain and
hate other Wizards. They are to be feared when stalking your Dungeon’s floor.
67
Page 75

29.7 WITCH
A Good Witch who is a competent magical fighter but, sadly for her, has a near
phobic aversion to Vampires. Can’t say that I blame her, but it certainly doesn’t
help when the fists are flying.
29.8 GIANT
The Giant is slow and lumbering but a large, tough fighter.
29.9 SAMURAI
A master swordsman, the Samurai is fearless and swift in battle. The Samurai’s
code of fighting, the Bushido, is strict and the sense of honour he has can hamper
his performance when faced by hordes of evil, nihilistic creatures.
29.10 MONK
The monk is a good fighter who can heal himself and heroes around him when they
take hits in battle.
68
29.11 FAIRY
A weak hero who is bad at combat but excellent at spells.
Page 76

29.12 LORD OF THE LAND
A traditional knight, excellent at hand-to-hand combat. He is the sworn enemy of
the Horned Reaper and they both immediately fight to the death if they encounter
one another in the dungeon’s subterranean passageways.
29.13 AVATAR
The Greatest and Final Overlord of the Land who has to be killed to complete Dungeon Keeper.
30.0 WIN OR LOSE
Once you have defeated the Lord of the Land or completed the last objective in a particular realm, you
are informed by an on-screen message. Although you’re able to keep on playing if you wish, you can
finish and jump to the new level at any time by pressing Spacebar on your keyboard.
If you have lost the level, you are told as much by a message in the Objective Window. Left-clicking on
the Possess Creature icon on the Research Panel, you can become a Lost Soul and explore the corridors,
tunnels and rooms in the form of an ethereal spirit.
Whether you become a Lost Soul or not, you have the option of watching the
rest of the level before pressing the Space key.
If you’ve won, you’re shown the statistics and high score table to show you how
well you did on that level. Then you’re taken to the Level Map to enter the next
level. If you lost, you’re taken back to the Main Menu.
30.1 STATISTICS SCREEN AND THE HIGH
SCORE TABLE
30.1.1 STATISTICS SCREEN
The Statistics Screen displays information on your performance on the
level.
One panel is static and shows important information.
The second panel scrolls and shows other information.
To exit the screen, click on the OK button at the bottom of the screen.
69
Page 77

30.1.2 HIGH SCORE TABLE
Have you scored enough to place yourself among the greatest of the
Dungeon Keepers?
The High Score Table displays the top ten scores gained by people
the table, you are able to enter your name here.
Once you have done this, click on the OK button at the bottom of the screen to proceed to the
Level Map.
playing Dungeon Keeper. If you are worthy enough to add your name to
30.2 TORTURING THE LORD OF THE LAND
If you have captured and imprisoned the Lord of the Land, you have the
chance to torture him.
When you press Space to finish the level, you’re taken to the dungeons to
a different torture. Hold down the left mouse button on one of the doors to choose your torture.
Subsequently you’re treated to the Lord’s agonised screams of suffering as he pays the price for
intruding into your subterranean world.
Note: Section 31.0 Multiplayer Games can be found in the Ref Card.
select the torture. You are presented with a number of doors, behind which is
32.0 APPENDIX A: CREATURE THOUGHT
BUBBLES
Creature Thought Bubbles appear above a creature’s head telling you what that creature is doing or
what their current mood is.
70
32.1 BARRACK
The creature is in the Barracks Room and grouping with other creatures. The
creature with a crown above its head is the leader of that group (see section 17.9
for more information on the Barracks).
Page 78

32.2 BATTLE
The creature is in, or going to, a battle.
32.3 CALL TO ARMS
The creature is being influenced by a Call To Arms spell and is going to where it
was cast (see section 18.6 for more information on the Call To Arms spell).
32.4 FLEE
The creature is fleeing from an enemy creature or hero.
32.5 GUARD
The creature is on a Guard Post and is patrolling for foes (see section 17.7 for
more information on the Guard Post).
32.6 HOME
The creature is trying to find its Lair or is attempting to build a new one.
71
Page 79

32.7 HUNGRY
The creature is hungry and needs some chickens from the Hatchery to eat.
32.8 LEAVE
The creature is fed up and leaving your dungeon.
32.9 PRISON
The creature has been imprisoned (see section 17.10 for more information on the
Prison).
32.10 PSYCHO
When a Horned Reaper get angry, he goes Psycho and destroys everything in his
path.
72
Page 80

32.11 RESEARCH
The creature is in the Library researching (see section 17.4 for more
information on the Library).
32.12 SCAVENGING/BEING SCAVENGED
The creature is either in the Scavenger Room, looking for other creatures to
tempt to your side, or falling under the influence of an enemy scavenging for
them (see section 17.14 for more information on the Scavenger Room).
32.13 SLEEP
The creature is tired and is going back to its Lair for some kip.
32.14 SULK
The creature is getting annoyed and may soon leave.
73
Page 81

32.15 TORTURE
The creature is being tortured in the Torture Chamber (see section 17.11 for more
information on the Torture Chamber).
32.16 TRAIN
The creature is training in the Training Room (see section 17.5 for more
information on the Training Room)
32.17 WAGES
Creature Pay Day has arrived and the creature is going to receive its wage from
the Treasure Room.
32.18 WORKSHOP
The creature is manufacturing items in the Workshop (see section 17.8 for more
information on the Workshop).
74
Note: Section 33.0 Appendix B: Keys and Key Configuration can be found in the Ref Card.
Page 82

36.0 CREDITS
Designed by: Bullfrog Productions Ltd.
Game Design: Peter Molyneux, Simon Carter, Mark Healey, Dene Carter, Jonty Barnes,
Project Leader: Peter Molyneux
Lead Programmer: Simon Carter
Lead Artist: Mark Healey
Programming: Dene Carter, Jonty Barnes, Alex Peters
Lead Level Design: Barrie Parker, Shintaro Kanaoya
Music and SFX: Russell Shaw
Engine Design: Glenn Corpes, Martin Bell
Support Art: Darran Thomas, Paul McLaughlin
Navigation System: Ian Shaw
Associate Producer: Andy Nuttall
Network Programming: Mark Lamport, Ian Shippen, Alex Peters
Script: Sean Masterson, James Leach
Testing Manager: Andy Robson
Lead Testers: Andy Robson, Nathan Smethurst, Steve Lawrie
Additional Script: Simon Carter
Additional Artwork: Mike Man, Jon Farmer, Tony Dawson, Neil Kaminski, Matt Wee, Adam
Additional Programming: Martin Bell, Dave Stewart, Mark Lamport, Jan Svarovsky, Ben Deane,
Level Design: Ken Malcolm, Vince Farquharson, Peter Molyneux, Mark Healey, Jonty
Testers: Andy Trowers, Tim Minor, Wayne Frost, Olly Byrne, Wayne Imlach,
Libraries and Tools: Mark Huntley, Austin Ellis
Voice-overs: Dene Carter, Richard Ridings
Manual and Documentation: Jon Rennie, James Leach, Neil Cook
Installer: Andy Nuttall, Richard Reed, Andy Cakebread
Marketing and PR: Cathy Campos, Sean Ratcliffe, Pete Murphy, Annabel Roose, Pete
Tech Support: Mike Burnham, Simon Handby, Kevin Donkin
Finance: Annette Dabb, Lucia Gobbo
Alex Peters
Coglan, John Kershaw, Joe Rider, Saurev Sarkar, Jason Cunningham,
Dianna Davies
Alex Evans, Tim Harris, Ian Shaw, Tony Cox
Barnes, Alex Peters, Dene Carter, Simon Carter
Dan Riley, Jon Rennie, Tristan Paramor, Jeff Brutus
Larsen, Tamara Burke, Clare Jones
75
Page 83

Administration: Emma Gibbs, Jo Goodwin, Audrey Adams, Sian Jones, Kathy McEntee,
Localisation Management: Carol Aggett, Petrina Wallace, Trude Olen
Localisation Audio Management: David Lapp
Localisation: Christine Jean, Art Of Words, Veronique Viretto, Kia Collin, Cbg
Language Test Supervisor: Simon Davison
Language Testers: Lionel Berrodier, Kai Pacyna, Ulf Thor, Sascha Mairesse, Michele
Lead QA Testers: Simon Romans, Jason Berisford
Documentation and Package Design: Caroline Arthur
Production: Rachel Holman
Management: Les Edgar, David Byrne
Additional Thanks: Mark Lewis, Matt Webster, Steve Fitton
Special Thanks To: Beryl Porter, Joanna Watts
Thanks To: Mark Adami, Justin Amore, Andy Bass, Andy Beale, Pete Blow, David
Louise Ratcliffe, Frances Van Eupen
Consult, Julio Valladares, Ricardo Martinez, Cto Studios Spa, Ips
Computer Group, Gryphon Game Translations, Dagmar Geller, Bianca
Normann
Pinardi, Ricardo Martinez, Wojciech Gierasimowocz
Bryson, Gary Carr, Martin Carroll, Matt Chilton, Alex Cullum, Matt
Eyre, Iain Hancock, Jeremy Longley, Andy Mcdonald, Steve Metcalf,
Adrian Moore, Mark Pitcher, Bjarne Rene, Daniel Roth, Carsten
Sorensen, Gary Stead, Rajan Tande, Alex Trowers, Ben Vincent, Daren
Watson, Natalie White, Matthew Whitton, Michael Willis, Alan Wright
76
 Loading...