

Page 1
Customer Service
en.avm.de/service/support-request/your-support-request/
Legal Notice
The licensing conditions are specifi ed in the user interface:
Open a web browser.
Enter http://fritz.box in the address fi eld.
The FRITZ!Box user interface opens.
Click “Help / Legal Notice”.
en.avm.de
© AVM GmbH · Alt-Moabit 95 · 10559 Berlin · Germany
FRITZ!DECT
200
Installation and
Operation
512011002
llation and
ration
Page 2
English
Deutsch
Español
Français
Italiano
Nederlands
......... 3
.......... 16
........... 28
........... 40
........... 52
........... 64
This is FRITZ!DECT 200
EN
In purchasing FRITZ!DECT 200 you have acquired a smart plug for the home network.
FRITZ!DECT 200 switches electrical devices in your household on and off automatically. You
can confi gure fi xed times for switching on and off , have FRITZ!DECT switch at sunrise and
sunset, or set up random switching.
In combination with a FRITZ!Fon cordless telephone, FRITZ!DECT 200 can be remote
controlled.
FRITZ!DECT 200 measures the power consumption of connected electrical devices. You
have the option of receiving these measurement values in a regular e-mail message.
FRITZ!DECT 200 is easy to set up and operate over the FRITZ!Box, be it at the home
computer or tablet, or via the Internet when you’re away from home.
The connection to the FRITZ!Box is established quite simply using DECT radio.
FRITZ!DECT 200
2
3
Page 3

Security
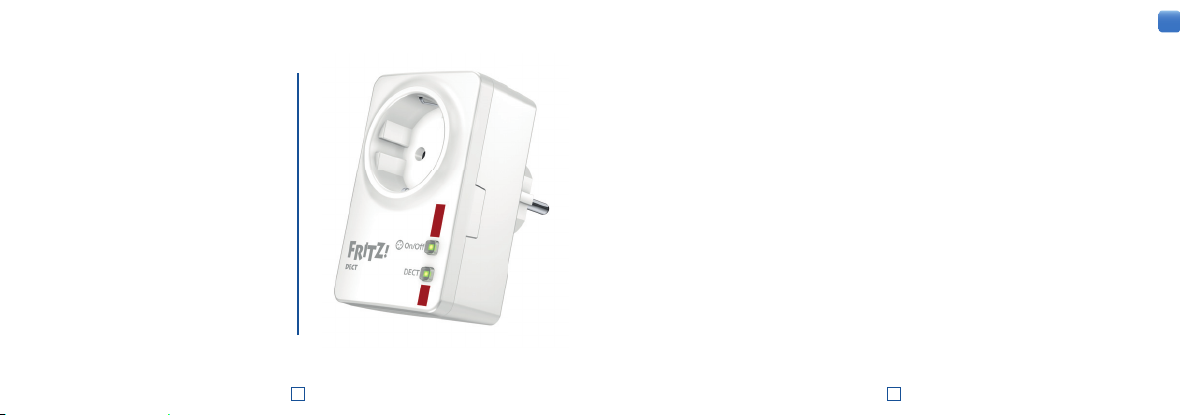
FRITZ!DECT 200 is intended for indoor
use only.
FRITZ!DECT 200 is intended for operation
in a dry location that is free of dust,
protected from direct sunlight, and well
ventilated.
Insert FRITZ!DECT 200 into an electrical
outlet that is easy to reach.
FRITZ!DECT 200 devices cannot be
plugged together.
FRITZ!DECT 200 can be subjected to a
maximum load of up to 2300W/10A,
the specifi ed output limit.
Overloading can damage FRITZ!DECT 200
and result in malfunction or an electrical
accident.
No devices that present a risk of fi re
may be operated unsupervised at the
FRITZ!DECT 200 socket. Such devices
include electric irons and radiant
heaters.
Never let liquids get inside FRITZ!DECT
200.
FRITZ!DECT 200 may not be altered,
converted, modifi ed or repaired except
by a qualifi ed technician.
Frequent switching can shorten the ser-
vice life of electrical devices. Confi gure
automatic switching at frequent intervals
in FRITZ!DECT 200 only if the connected
devices are designed for such operation.
No liability will be accepted for corresponding damage to these devices.
4
Requirements
To operate your FRITZ!DECT 200 you need:
a230 V socket
FRITZ!Box models that include a
DECT base station (except FRITZ!Box
7312/7412) and the latest FRITZ!OS
Buttons
FRITZ!DECT has 2 buttons with LEDs
Button Function
> Switches the socket on
On/Off
and off .
DECT > Deregisters from FRITZ!Box:
Hold the button down for at
least 6 seconds.
> Registers with FRITZ!Box:
Press the button until the
LED begins fl ashing. Then
press the DECT button on
the FRITZ!Box (see also
page 7).
5
Page 4
LEDs
Festnetz
In
t
ern
e
t
W
LA
N
IN
FO
Power
/DS
L
Fest
netz
Internet
Power/
DSL
INFO
WLAN
W
WLAN
N
DDED
DE
LED Condition Meaning
On/Off
DECT on > FRITZ!DECT 200 is registered with the FRITZ!Box.
off > Socket is switched off
on > Socket is switched on
fl ashing > Transmitting fi rmware update to FRITZ!DECT Repeater 200.
(Depending on the progress of the fi rmware update, the LED
is off or fl ashing.)
fl ashes
briefl y at regular intervals
> FRITZ!DECT 200 switched off the integrated socket
because the permitted amperage was exceeded. For more
information, see also p.14.
fl ashing > Registering with FRITZ!Box.
fl ashes
briefl y at regular intervals
> FRITZ!DECT 200 is not connected to the FRITZ!Box.
FRITZ!DECT is either not registered, or it is outside the
FRITZ!Box range.
6 7
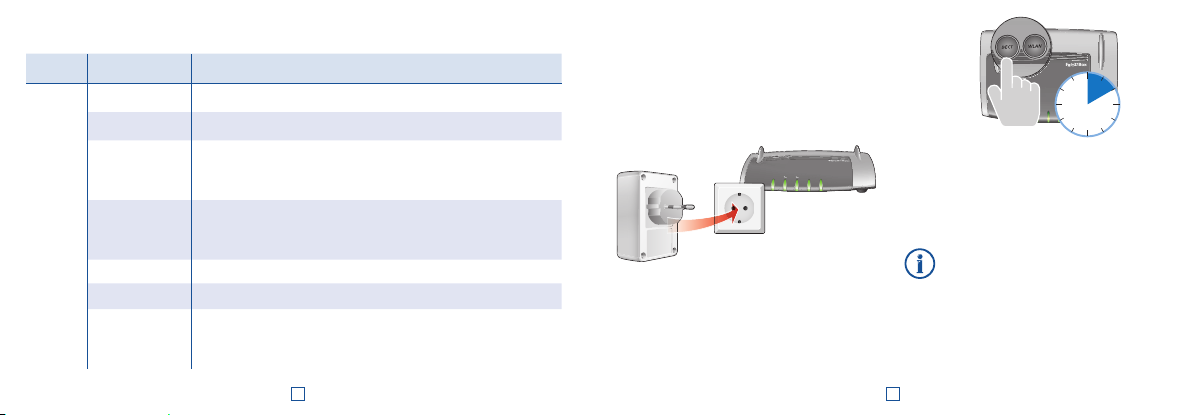
Registering with FRITZ!Box
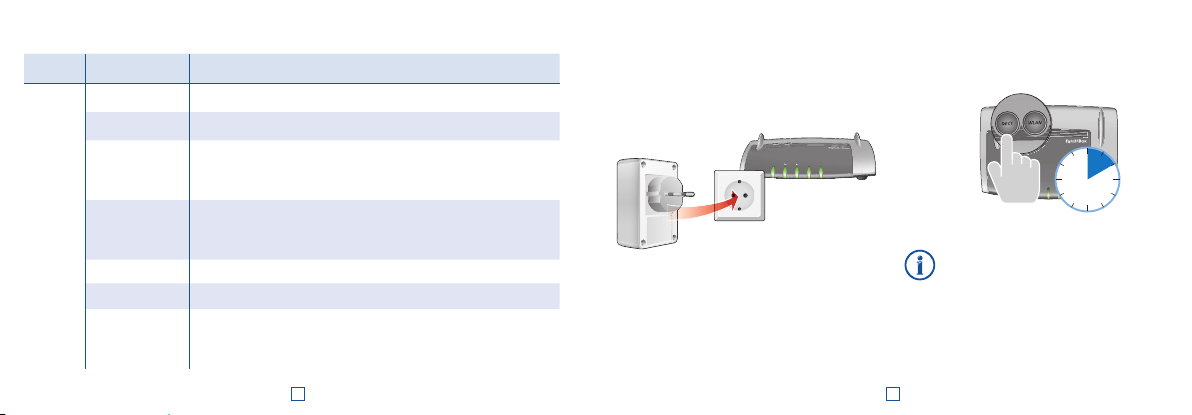
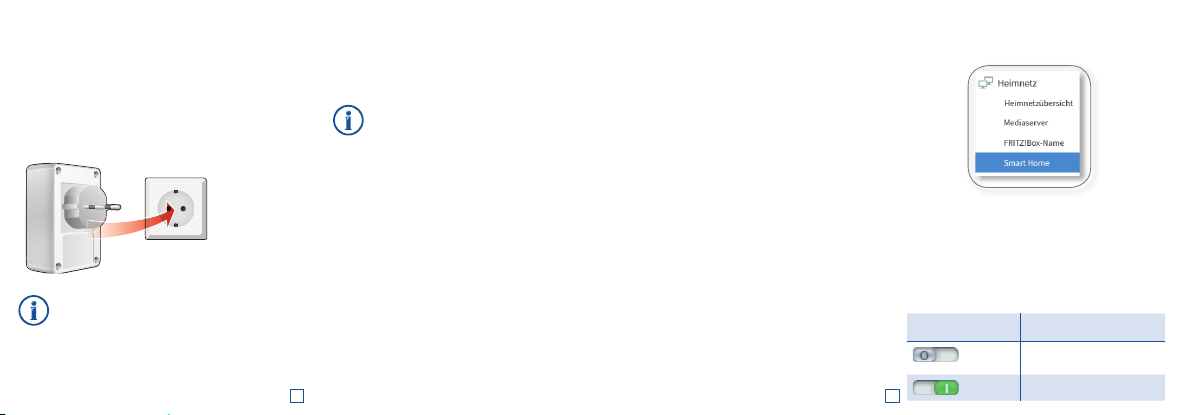
1. Insert the FRITZ!DECT 200 in an outlet
near your FRITZ!Box.
The “DECT” LED fl ashes regularly.
Internet
Festnetz
Power/DSL
WLAN
INFO
2. Within twominutes, press the “DECT”
button on your FRITZ!Box. Hold the button down until the “Info” or “DECT” LED
on the FRITZ!Box begins fl ashing.
FRITZ!DECT 200 is registered with the base
station. The wireless connection has been
established when the “DECT” LED lights up.
WLAN
DECT
DECT
WLAN
DSL
Internet
Festnetz
Powe
INFO
WLAN
10 seconds
If “DECT” continues to fl ash, registration was not successful. Remove
FRITZ!DECT 200 from the power
outlet and repeat the registration
process.
Page 5
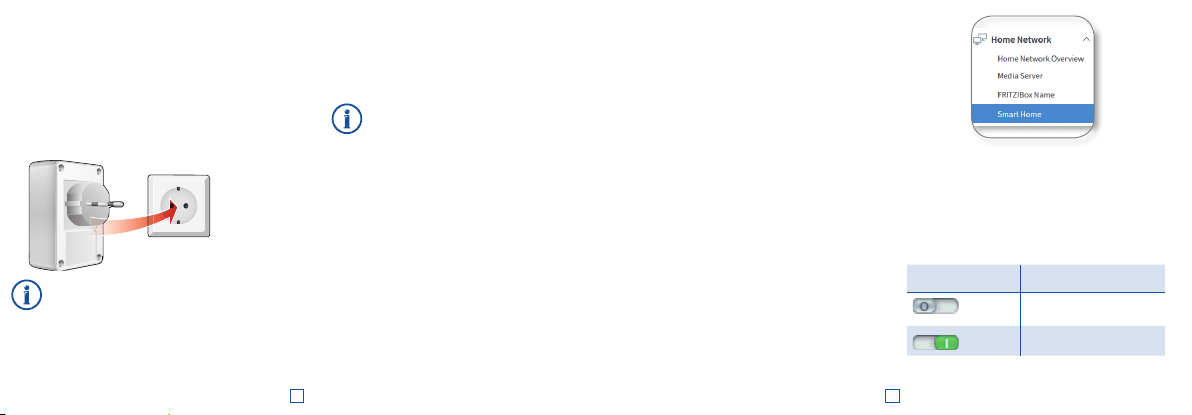
3. Now insert FRITZ!DECT 200 in the
socket where you would like to use the
device.
FRITZ!DECT automatically re-registers
with the FRITZ!Box. When the connection has been established, the “DECT”
LED lights up.
If “DECT” keeps fl ashing, test a different outlet closer to the FRITZ!Box.
The outlet must be located within the
range of the DECT radio network of
the FRITZ!Box.
Switching On and Off
The socket on your FRITZ!DECT can be
switched on and off in various ways.
The socket is switched off upon
delivery.
You can confi gure automatic switching
and control the socket with a weekly
calendar or a Google calendar.
You can also switch the socket on and off
by hand at any time, even when automatic switching is enabled:
using the “On/Off ” button
(page 5)
by mouse click on the computer
(page 14)
using a FRITZ!Fon as a remote control
(page 12)
8 9
Confi guring and Operating at
the Computer
Once you have registered FRITZ!DECT 200
with the FRITZ!Box, you can confi gure and
operate FRITZ!DECT 200 in the FRITZ!Box
user interface.
Opening the FRITZ!Box User Interface
The user interface can be opened on any
computer connected with the FRITZ!Box.
1. Open a web browser.
2. Enter
http://fritz.box in the address
fi eld of the browser.
3. Open the “Home Network / Smart Home“
menu.
The “Smart Home” page appears, presenting a list of the registered FRITZ!DECT
devices.
Switching the Socket On and Off
On the “Smart Home” page you can switch
the socket of your FRITZ!DECT 200 on and
off with the click of mouse. Do this by
clicking one of the following icons:
Icon The socket is
off
to
Page 6
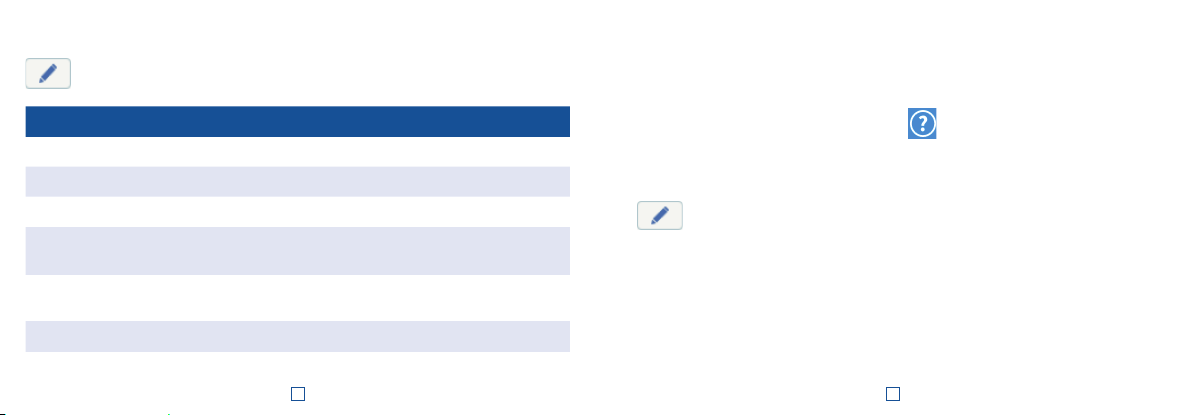
Confi guring FRITZ!DECT 200
By clicking the “Edit” button on the “Smart Home” page you can open the following settings for FRITZ!DECT200:
Area Settings
General Enter your electricity rate
Defi ne the switch condition (on/off ) after a power outage
Switch on and off the LED display
Confi gure push services, for instance in order to be notifi ed by e-mail
about switching events
Switch Automatically
Energy Display Measure the power consumption of connected devices
Various automatic switching settings for the socket (for instance weekly,
once, random)
10
Confi guring Automatic Switching
Here is how to confi gure automatic
switching:
1. Open the FRITZ!Box user interface
(http://fritz.box).
2. Select “Home Network / Smart Home”.
3. Click the “Edit” button for FRITZDECT
200:
4. Click the “Switch Automatically” tab.
5. Enable the “Automatic switching
enabled” option.
6. Select the kind of switching and confi gure the automatic switching.
The various types of switching are
described comprehensively in the Online
Help of the user interface.
7. Click “OK” to save the settings.
Online Help
The Online Help in the FRITZ!Box
user interface contains complete
instructions for operating FRITZ!DECT
200. The Online Help is accessed by
clicking the question mark icon in
the user interface.
11
Page 7
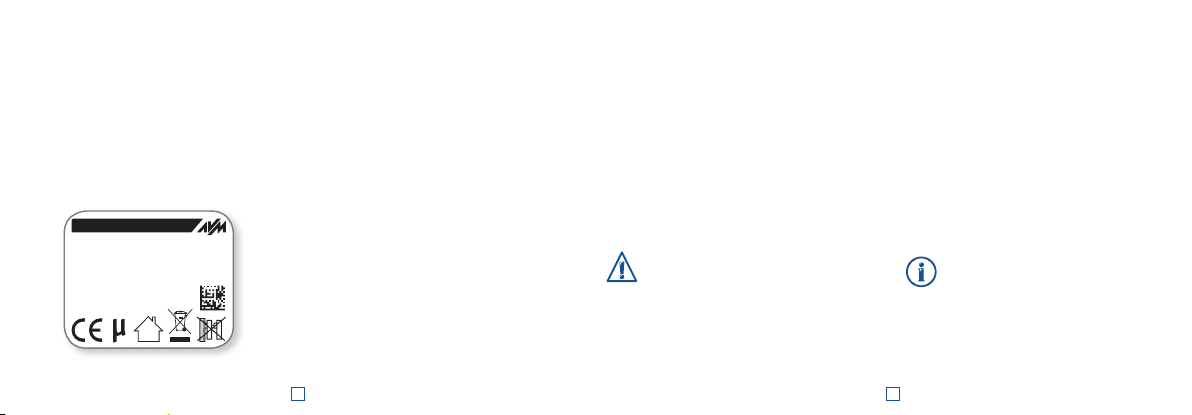
AIN (Actuator Identifi cation Number)
R987.321.65.498.777
12345 6789012
Serial no.:
Input:
230 V~; 0.02 A; 50 Hz
AIN:
FRITZ!DECT 200
AVM GmbH, 10547 Berlin
Article no.: 2000 2636
Max. load: 10 A
Every FRITZ!DECT device has its own
individual AIN (Actuator Identifi cation
Number).
The AIN is displayed in the user interface
and is printed on the sticker on the back
of the device.
Remote Controlling the
Socket with FRITZ!Fon
With the latest FRITZ!Fon cordless DECT
telephones from AVM, you can remote
control the socket of your FRITZ!DECT 200
(by switching it on and off ).
1. Press the “Menu” key on FRITZ!Fon.
2. Select “Home Network” and then
press “OK”.
3. Select “Smart Home” and then press
“OK”.
Under “FRITZ! Actuators”, select a
FRITZDECT device and press “off ” or
“on” to change its status.
12 13
Unsubscribe
If you would like to register FRITZ!DECT 200
with another FRITZ!Box, de-register it from
the current FRITZ!Box fi rst:
1. Hold the “DECT” button down for at least
6 seconds.
2. FRITZ!DECT 200 is de-registered from the
FRITZ!Box.
After a brief delay the “DECT” begins
fl ashing. Now you can register
FRITZ!DECT with another FRITZ!Box.
Removing FRITZ!DECT 200 from the
power outlet does not de-register it
from the FRITZ!Box.
Help in Case of Errors
No connection with the base station
The “DECT” LED fl ashes briefl y at regular
intervals. FRITZ!DECT 200 does not have a
wireless connection to the FRITZ!Box.
1. Insert the FRITZ!DECT in an outlet near
your FRITZ!Box.
2. When the “DECT” LED lights up, the fi rst
outlet is located outside the range of the
FRITZ!Box, or the wireless connection
is faulty.
Typical sources of interference
include (multiple) closed doors and
zones with high humidity.
If “DECT” continues fl ashing, FRITZ!DECT
200 is not registered with the FRITZ!Box.
Register FRITZ!DECT 200 again.
Page 8
Integrated socket switched off
The “On/Off ” LED fl ashes briefl y at regular
intervals and the connected electrical
device does not work. The integrated socket
is off .
Do no subject FRITZ!DECT 200 to a load
higher than its limit of 2300 W. The connected devices can take a permanent
current of no more than 10 A (resistive
load).
1. Remove the electrical device from the
FRITZ!DECT 200 socket.
2. Press the “On/Off ” button. The integrated socket is switched back on. The
“On/Off ” LED lights up.
3. Insert the electrical device back into the
integrated socket.
Disposal
In accordance with the Waste of Electrical
and Electronic Equipment Directive,
FRITZ!DECT Repeater 200 may not be
disposed with household waste. Please
bring the device to your local collection
points for disposal after use.
14 15
Technical specifi cations
• DECT wireless standard
• Range: up to 40m indoors and up to
300m outdoors
• Maximum power consumption:
ca. 1.5 W
• Power consumption on standby:
ca. 0.9 Ws
• Measurement accuracy:
+/- 100mW (up to 5 W)
+/- 2% (5 W or higher)
• 230V, 50Hz A/C
• Dimensions (without plug): 93mm x 59
mm x 41mm
• Weight: approx. 135g
• for connected devices up to
2300 W / 10 A
• Ambient conditions:
- operating temperature: 0°C—40°C
- relative humidity:
10%—90%, no condensation
CE Declaration
AVM declares herewith that the device is
compliant with the basic requirements and
the relevant rules in directives 2014/53/EU,
2009/125/EC and 2011/65/EU.
The long version of the declaration of CE
conformity is available at
http://en.avm.de/ce.
Page 9

DE
Sicherheit
FRITZ!DECT 200 ist für die Verwendung in
Gebäuden vorgesehen.
FRITZ!DECT 200 ist für den Betrieb an
einem trockenen und staubfreien Ort
ohne direkte Sonneneinstrahlung mit
ausreichender Belüftung vorgesehen.
Stecken Sie FRITZ!DECT 200 in eine
leicht erreichbare Steckdose
Es dürfen keine FRITZ!DECT 200 hinte-
reinander gesteckt werden.
FRITZ!DECT 200 darf bis zur angegebenen
Leistungsgrenze von 2300W/10A belastet
werden.
Durch Überlastung kann FRITZ!DECT200
beschädigt werden und Fehlfunktionen
oder ein elektrischer Unfall könnten die
Folge sein.
An der FRITZ!DECT 200-Steckdose dürfen
keine Geräte mit Brandgefahr unbeauf-
sichtigt betrieben werden. Geräte mit
Brandgefahr sind z. B. Bügeleisen oder
Heizstrahler.
Es dürfen keine Flüssigkeiten in das
Innere von FRITZ!DECT200 eindringen.
FRITZ!DECT 200 darf nicht geändert, um-
gebaut, modifi ziert oder unsachgemäß
repariert werden.
Häufi ges An- und Ausschalten kann die
Lebensdauer elektrischer Geräte verkür-
zen. Richten Sie in FRITZ!DECT 200 nur
dann eine automatische Schaltung mit
häufi gen An- und Ausschaltvorgängen
ein, wenn die angeschlossenen Geräte
dafür ausgelegt sind. Für entsprechende
Schäden an diesen Geräten wird nicht
gehaftet.
16
Voraussetzungen
Für den Betrieb Ihres FRITZ!DECT200
benötigen Sie:
eine 230-Volt-Steckdose
FRITZ!Box mit DECT (Ausnahme
FRITZ!Box 7312/7412) und aktuellem
FRITZ!OS
Taster
FRITZ!DECT hat 2 Taster mit Leuchtdioden
(LEDs)
Taster Funktion
On/Off >
DECT > Von FRITZ!Box abmelden:
17
Steckdose ein- und ausschalten.
Drücken Sie den Taster mindestens 6 Sekunden lang.
> An FRITZ!Box anmelden:
Drücken Sie den Taster, bis
der Taster blinkt. Drücken
Sie dann an der FRITZ!Box
den DECT-Taster, siehe auch
Seite 19.
Page 10
Leuchtdioden
Festnetz
In
t
ern
e
t
W
LA
N
IN
FO
Power
/DS
L
Fest
netz
Internet
Power/
DSL
INFO
WLAN
WWWL
LAN
W
DDED
DE
LED Zustand Bedeutung
On/Off
DECT leuchtet
aus
leuchtet
blinkt
blinkt
regelmäßig
kurz auf
blinkt
blinkt
regelmäßig
kurz auf
> Steckdose ist ausgeschaltet.
> Steckdose ist eingeschaltet.
> Firmware-Update wird auf FRITZ!DECT 200 übertragen. (Die
DECT-LED blinkt je nach Fortschritt des Firmware-Updates
oder ist aus.)
> FRITZ!DECT 200 hat die integrierte Steckdose abgeschaltet,
da die zulässige Stromstärke überschritten wurde. Lesen
Sie hierzu auch Seite 25.
> FRITZ!DECT 200 ist an der FRITZ!Box angemeldet.
> Anmeldung an FRITZ!Box läuft.
> FRITZ!DECT 200 hat keine Verbindung zur FRITZ!Box. Ent-
weder ist FRITZ!DECT nicht angemeldet oder außerhalb der
Reichweite der FRITZ!Box.
18 19
An FRITZ!Box anmelden
1. Stecken Sie FRITZ!DECT 200 in eine
Steckdose in der Nähe Ihrer FRITZ!Box.
Die Leuchtdiode „DECT“ blinkt gleichmäßig.
Internet
Festnetz
Power/DSL
WLAN
INFO
2. Drücken Sie an Ihrer FRITZ!Box innerhalb
von 2 Minuten den Taster „DECT“. Halten Sie den Taster gedrückt, bis an der
FRITZ!Box die Leuchtdiode „Info“ oder
„DECT“ blinkt.
WLAN
DECT
DECT
WLAN
DSL
Internet
Festnetz
Powe
INFO
WLAN
10 Sekunden
FRITZ!DECT 200 wird an der der Basisstation angemeldet. Die Funkverbindung ist
hergestellt, wenn die Leuchtdiode „DECT“
leuchtet.
Falls „DECT“ weiter blinkt, war
die Anmeldung nicht erfolgreich.
Ziehen Sie FRITZ!DECT 200 aus der
Steckdose und wiederholen Sie die
Anmeldung.
Page 11
3. Stecken Sie FRITZ!DECT 200 jetzt in
die Steckdose, an der Sie das Gerät
einsetzen möchten.
FRITZ!DECT meldet sich automatisch
wieder an der FRITZ!Box an. Wenn die
Verbindung hergestellt ist, leuchtet die
LED „DECT“.
Falls „DECT“ dauerhaft blinkt,
testen Sie eine andere Steckdose näher an der FRITZ!Box. Die
Steckdose muss innerhalb der
Reichweite des DECT-Funknetzes
der FRITZ!Box liegen.
An- und ausschalten
Die FRITZ!DECT-Steckdose können Sie auf
verschiedene Arten an- und ausschalten.
Im Auslieferungszustand ist die
Steckdose ausgeschaltet.
Sie können eine automatische Schaltung
einrichten und die Steckdose mit einem
wöchentlichen Kalender oder mit einem
Google-Kalender steuern.
Außerdem können Sie die Steckdose jeder-
zeit per Hand an- und ausschalten, auch
bei aktivierter automatischer Schaltung:
mit dem Taster „On/Off “ (Seite 17)
per Mausklick am Computer
(Seite 21)
mit einem FRITZ!Fon als Fernsteuerung
(Seite 24)
20 21
Am Computer einrichten und
bedienen
Nachdem Sie FRITZ!DECT 200 an der
FRITZ!Box angemeldet haben, können Sie
FRITZ!DECT 200 in der Benutzeroberfl äche
der FRITZ!Box einrichten und bedienen.
Benutzeroberfl äche der FRITZBox öff nen
Die Benutzeroberfl äche können Sie an jedem Computer öff nen, der mit der FRITZ!Box
verbunden ist.
1. Öff nen Sie einen Internetbrowser.
2. Geben Sie in der Adresszeile
http://fritz.box ein.
3. Öff en Sie das Menü „Heimnetz / Smart
Home“.
Die Seite „Smart Home“ mit einer Liste
der angemeldeten FRITZ!DECT-Geräte
erscheint.
Steckdose an- und ausschalten
Auf der Seite „Smart Home“ können Sie
die Steckdose Ihres FRITZ!DECT 200 per
Mausklick an- und ausschalten. Klicken Sie
dazu auf eines der folgenden Symbole:
Symbol Steckdose ist
aus
an
Page 12
FRITZ!DECT 200 einrichten
Über die „Bearbeiten“-Schaltfl äche auf der Seite „Smart Home“ können Sie
folgende Einstellungen für FRITZ!DECT200 öff nen:
Bereich Einstellungen
Allgemein > Eigenen Stromtarif eingeben
> Schaltzustand (an/aus) nach einem Stromausfall festlegen
> LED-Anzeige an-/ausschalten
> Push-Services einrichten, um per E-Mail zum Beispiel über Schaltvor-
gänge informiert zu werden
Automatisch
Schalten
Energieanzeige > Energieverbrauch angeschlossener Geräte messen
> Verschiedene automatische Schaltungen (zum Beispiel wochentäg-
lich, einmalig, zufällig) für die Steckdose
22
Automatische Schaltung einrichten
Eine automatische Schaltung richten Sie
so ein:
1. Öff nen Sie die Benutzeroberfl äche
(http://fritz.box).
2. Wählen Sie „Heimnetz / Smart Home“.
3. Klicken Sie auf die „Bearbeiten“-Schaltfl äche für FRITZDECT 200:
4. Wechseln Sie auf den Tab „Automatisch
Schalten“.
5. Aktivieren Sie die Option „Automatische
Schaltung aktiv“.
6. Wählen Sie eine Schaltungsart aus und
richten Sie die Schaltung ein.
Die verschiedenen Schaltungsarten
werden in der Online-Hilfe der Benutzeroberfl äche ausführlich beschrieben.
7. Zum Speichern der Einstellungen klicken
Sie auf „OK“.
Online-Hilfe
Die Online-Hilfe in der FRITZ!BoxBenutzeroberfl äche enthält eine vollständige Anleitung zur Bedienung
von FRITZ!DECT 200. Die Online-Hilfe
wird in der Benutzeroberfl äche über
das Fragezeichen aufgerufen.
23
Page 13

AIN (Aktor-Identifi kationsnummer)
R987.321.65.498.777
12345 6789012
Serial no.:
Input:
230 V~; 0.02 A; 50 Hz
AIN:
FRITZ!DECT 200
AVM GmbH, 10547 Berlin
Article no.: 2000 2636
Max. load: 10 A
Jedes FRITZ!DECT-Gerät hat eine individuelle AIN (Aktor-Identifi kationsnummer).
Die AIN wird in der Benutzeroberfl äche
angezeigt und ist auf dem Aufkleber auf
der Geräterückseite aufgedruckt.
Steckdose mit FRITZ!Fon
fernsteuern
Mit den aktuellen Schnurlostelefonen
FRITZ!Fon von AVM können Sie die Steckdose Ihres FRITZ!DECT 200 fernsteuern
(an- und ausschalten):
1. Drücken Sie am FRITZ!Fon die
Menütaste.
2. Wählen Sie „Heimnetz“ und drücken
Sie „OK“.
3. Wählen Sie „Smart Home“ und
drücken Sie „OK“.
Wählen Sie unter „FRITZ!-Aktoren“ ein
FRITZ!DECT-Gerät aus und drücken Sie je
nach Schaltzustand „aus“ oder „an“.
24 25
Abmelden
Möchten Sie FRITZ!DECT 200 an einer anderen FRITZ!Box anmelden, melden Sie das
Gerät erst von der aktuellen FRITZ!Box ab:
1. Drücken Sie die Taste „DECT“ mindestens 6 Sekunden lang.
2. FRITZ!DECT 200 wird von der FRITZ!Box
abgemeldet.
Nach kurzer Zeit beginnt die Leuchtdiode „DECT“ zu blinken. Jetzt können Sie
FRITZ!DECT an einer anderen FRITZ!Box
anmelden.
Wenn Sie FRITZ!DECT 200 aus der
Steckdose ziehen, wird das Gerät
nicht von der FRITZ!Box abgemeldet.
Hilfe bei Fehlern
Keine Verbindung zur Basisstation
Die Leuchtdiode „DECT“ blinkt regelmäßig
kurz auf. FRITZ!DECT 200 hat keine Funkverbindung zur FRITZ!Box.
3. Stecken Sie FRITZ!DECT in eine
Steckdose in der Nähe Ihrer FRITZ!Box.
4. Wenn die LED „DECT“ leuchtet, liegt
die erste Steckdose außerhalb der Reichweite der FRITZ!Box oder die Funkverbindung war gestört.
Typische Störquellen sind z.B.
(mehrere) geschlossene Türen oder
Bereiche mit hoher Feuchtigkeit.
Wenn „DECT“ immer noch blinkt, ist
FRITZ!DECT 200 nicht an der FRITZ!Box
angemeldet. Melden Sie FRITZ!DECT 200
neu an.
Page 14

Integrierte Steckdose abgeschaltet
Die Leuchtdiode „On/Off “ blinkt regelmäßig
kurz auf und das angeschlossene elektrische Gerät funktioniert nicht. Die integrierte
Steckdose ist abgeschaltet.
Belasten Sie FRITZ!DECT 200 nur bis
zur Leistungsgrenze von 2300 W. Der
maximale Strom, den angeschlossene Geräte dauerhaft ziehen dürfen,
beträgt 10 A (Ohm’sche Last).
1. Ziehen Sie das elektrische Gerät aus
FRITZ!DECT 200.
2. Drücken Sie den Taster „On/Off “. Die
integrierte Steckdose wird wieder
eingeschaltet. Die Leuchtdiode „On/Off “
leuchtet.
3. Stecken Sie das elektrische Gerät wieder
in die integrierte Steckdose.
Entsorgung
FRITZ!DECT 200 darf gemäß europäischen
Vorgaben und deutschem Elektro- und
Elektronikgesetz (ElektroG) nicht über den
Hausmüll entsorgt werden. Bringen Sie das
Gerät nach der Verwendung bitte zu den
Sammelstellen der Kommune.
26 27
Technische Daten
• Funkstandard DECT
• Reichweite: in Gebäuden bis zu 40 m,
im Freien bis zu 300 m
• maximale Leistungsaufnahme: ca. 1,5W
• Leistungsaufnahme im Standby:
ca. 0,9W
• Messgenauigkeit:
+/- 100mW (bis 5 W)
+/- 2% (ab 5 W)
• 230V, 50Hz A/C
• Maße (ohne Stecker):
93mm x 59 mm x 41mm
• Gewicht: ca. 135g
• für angeschlossene Geräte bis 2300 W
/10 A
• Umgebungsbedingungen
- Betriebstemperatur: 0 °C – 40 °C
- relative Luftfeuchtigkeit:
10 % – 90 % nicht kondensierend
CE-Erklärung
Hiermit erklärt AVM, dass sich das Gerät in
Übereinstimmung mit den grundlegenden
Anforderungen und den anderen relevanten
Vorschriften der Richtlinien 2014/53/EU,
2009/125/EG sowie 2011/65/EU befi ndet.
Die Langfassung der CE-Konformitätserklä-
rung fi nden Sie in englischer Sprache
unter
http://en.avm.de/ce.
Page 15

ES
Seguridad
FRITZ!DECT 200 ha sido diseñado para la
utilización en el interior de edifi cios.
Utilice FRITZ!DECT 200 en un lugar seco
y libre de polvo, donde no reciba la luz
directa del sol y asegúrese de que tenga
ventilación sufi ciente.
Conecte su FRITZ!DECT 200 a una toma
de corriente cercana.
No se pueden conectar varios FRITZ!DECT
200 en cadena.
FRITZ!DECT 200 puede ser cargado hasta el
límite de capacidad de 2300 W/10 A.
Si se sobrecarga el FRITZ!DECT200
puede dañarse o funcionar mal; también
puede producirse un corto circuito.
No debe conectar a la toma del
FRITZ!DECT 200 dispositivos que no se
pueden utilizar sin vigilancia por peligro
de incendio. Dispositivos con riesgo de
incendio son, por ejemplo, planchas o
calentadores eléctricos.
No permita que entre ningún tipo de
líquido al interior del FRITZ!DECT200.
FRITZ!DECT 200 no debe ser cambia-
do, alterado, modifi cado o reparado
incorrectamente.
El encender y apagar con frecuencia los
dispositivos eléctricos puede acortar
la vida útil de éstos. Confi gure en el
FRITZ!DECT 200 el encendido automático frecuente, sólo si los dispositivos
electrícos conectados están diseñados
para ello. Por los daños que pueden
presentarse en estos dispositivos no se
acepta responsabilidad alguna.
28
Requisitos previos
Para trabajar con el FRITZ!DECT 200
necesita
Una toma de corriente de 230 voltios
FRITZ!Box con estación DECT (con
excepción de los modelos FRITZ!Box
7312/7412) y una versión actual del
FRITZ!OS
Botones
FRITZ!DECT tiene 2 teclas con diodos
(LEDs)
Botón Función
On/Off >
DECT > Desconectar de FRITZ!Box:
29
Activar o desactivar la toma
de corriente
Pulse la tecla y manténgala
presionada por 6 segundos.
> Conectar a FRITZ!Box:
Presione la tecla, hasta
que comience a parpadear.
Luego presione el botón
DECT en su FRITZ!Box, ver
página 31.
Page 16

Diodos luminosos
Festnetz
In
t
ern
e
t
W
LA
N
IN
FO
Power
/DS
L
Fest
netz
Internet
Power/
DSL
INFO
WLAN
W
WLAN
N
DDED
DE
Diodo Estado Signifi cado
On/Off
DECT brilla
fuera de
servicio
brilla
parpadea > Ahora se transmitirá el fi rmware a su FRITZ!DECT 200.
parpadea
periódica y
brevemente
parpadea > Se está ejecutando la conexión a su FRITZ!Box.
parpadea
periódica y
brevemente
> La toma de corriente no está activa.
> La toma de corriente se encuentra activa.
(El diodo luminoso DECT parpadea según el avance de la
actualización del fi rmware o estará apagado)
> FRITZ!DECT 200 ha desactivado la toma integrada, porque
se ha sobrepasado capacidad eléctrica. Lea al respecto la
información que encontrará en la página 38.
> FRITZ!DECT 200 se ha conectado a FRITZ!Box.
> FRITZ!DECT 200 no tiene conexión a su FRITZ!Box.
FRITZ!DECT no se ha conectado o está fuera del alcance de
su FRITZ!Box.
30 31
Conectarse a FRITZ!Box.
1. Inserte el FRITZ!DECT 200 a una toma
eléctrica cerca a su FRITZ!Box.
El indicador luminoso luminoso “DECT”
parpadea uniformemente.
Internet
Festnetz
Power/DSL
WLAN
INFO
2. EEn los siguientes dos minutos presione
l botón “DECT” que se encuentra en su
FRITZ!Box. Continúe presionado el botón
hasta que el indicador luminoso “Info”
o “DECT” de su FRITZ!Box comience a
parpadear.
FRITZ!DECT 200 se conectará a la
estación base. La conexión inalámbrica
ha sido establecida, cuando el indicador
luminoso “DECT” brille permanente-
mente.
WLAN
DECT
DECT
WLAN
10 segundos
DSL
Internet
Festnetz
Powe
INFO
WLAN
Si “DECT” continua parpadeando,
no se ha realizado la conexión.
Retire el FRITZ!DECT 200 de la toma
de corriente y trate de conectarse
de nuevo.
Page 17

3. Conecte ahora el FRITZ!DECT 200 a la
toma de corriente, en la que desea
utilizar el dispositivo.
FRITZ!DECT se conectará de nuevo
automáticamente a FRITZ!Box. El
diodo “DECT” brillará una vez se haya
realizado la conexión.
Si el indicador luminoso “DECT”
parpadea constantemente, conéctelo en otra toma de corriente
en la cercana a su FRITZ!Box. La
toma de corriente tiene que estar
al alcance de la red DECT del
FRITZ!Box.
Activar y desactivar
Podrá activar o desactivar la toma de
corriente del FRITZ!DECT de diversas
maneras.
En la confi guración de fábrica la
toma de corriente no está activa.
Podrá ajustar el encendido automático y
manejar la toma de corriente con ayuda
de un calendario semanal o un calendario de Google.
Además podrá activar o desactivar
manualmente la toma, incluso si ha
confi gurado el encendido automático:
con la tecla “On/Off ” (página 30)
con ayuda del ratón desde el ordena-
dor (página 33)
usando FRITZ!Fon como control remoto
(página 36)
32 33
Confi guración y operación
desde el ordenador
Una vez haya conectado FRITZ!DECT 200 al
FRITZ!Box, podrá ajustarlo y manejarlo desde la interfaz de usuario de su FRITZ!Box.
Abrir la interfaz de usuario de FRITZ!Box
Podrá abrir la interfaz de usuario desde
cualquiera de los ordenadores conectados
a su FRITZ!Box.
1. Abra un navegador web.
fritz.box en la línea de dirección.
2. Teclee
3. Vaya al menú “Red doméstica /
Domótica”.
Se abrirá la página “Smart Home”
donde podrá ver todos los dispositivos
FRITZ!DECT que estén conectados.
Activar o desactivar la toma de corriente
En la página “Domótica” podrá activar o
desactivar con ayuda del ratón la toma
de corriente del FRITZ!DECT 200. Haga
clic para ello sobre uno de los siguiente
símbolos:
Icono Toma de corriente...
inactiva
activa
Page 18

Confi gurar el FRITZ!DECT 200
Con ayuda del botón “Modifi car” que encontrará en la página “Domótica” podrá ajustar la
confi guración del FRITZ!DECT 200.
Campo Confi guración de
General > Indicar su tarifa eléctrica
> Determinar el estado (activo/inactivo) que debe tener después de
un apagón
> Aquí podrá apagar/encender los diodos
> Ajustar el servicio de Push, para recibir por ejemplo un correo elec-
trónico cada vez que hay un cambio de conmutación en los circuitos
Cambiar automáticamente
Medidor de
energía
> Varios circuitos automáticos para la toma de corriente (por ejemplo,
cada día de la semana, un día a la semana, al azar)
> Medir el consumo de energía de los dispositivos eléctricos conecta-
dos
34
Confi gurar el encendido automático
De la siguiente manera podrá confi gurar el
encendido automático:
1. Abra la interfaz de usuario
(http://fritz.box).
2. Abra el menú “Red doméstica / Domótica”.
3. Haga clic en el botón “Modifi car” frente
al FRITZ!DECT 200:
4. Abra ahora la pestaña “Encender automáticamente”.
5. Seleccione la opción “Encendido automático activo”.
6. Indique cúando y cómo se debe encender la toma.
Tendrá para ello varias posibilidades,
para mayor información consulte la
ayuda en línea de la interfaz de usuario.
7. Para guardar los ajustes en la confi guración presione el botón “Aceptar”.
Ayuda en línea
En la ayuda en línea en la interfaz de
usuario de su FRITZ!Box encontrará
una guía completa sobre el manejo
del FRITZ!DECT 200. Podrá abrir la
ayuda en línea pulsando en símbolo
de pregunta que verá en la interfaz
de usuario.
35
Page 19

AIN (Número de identifi cación del
R987.321.65.498.777
12345 6789012
Serial no.:
Input:
230 V~; 0.02 A; 50 Hz
AIN:
FRITZ!DECT 200
AVM GmbH, 10547 Berlin
Article no.: 2000 2636
Max. load: 10 A
actuador)
Cada dispositivo FRITZ!DECT tiene un AIN
(número de identifi cación del actuador)
propio.
Podrá ver el AIN en la interfaz de usuario,
además está impreso en la placa del
fabricante en la parte posterior del
dispositivo.
Controlar la toma con FRITZ!Fon
Con los modelos más nuevos de
FRITZ!Fon de la fi rma AVM podrá controlar
remotamente su FRITZ!DECT 200 (activar/
desactivar):
1. Pulse en el FRITZ!Fon la tecla “Menu”.
2. Seleccione “Red doméstica” y luego
“OK”.
3. Luego seleccione “Smart Home”,
después “OK”.
Escoja bajo “Actuadores FRITZ!” un
FRITZ!DECT y según lo desee presione el
botón “Activar” o “Desactivar”.
Desconectar
Si desea conectar el FRITZ!DECT 200 a
otro FRITZ!Box, desconéctelo primero del
FRITZ!Box al que se encuentra conectado
actualmente:
1. Pulse la tecla “DECT” y manténgala
presionada por mínimo 6 segundos.
2. FRITZ!DECT 200 se desconectará del
FRITZ!Box.
Después de corto tiempo el indicador
luminoso “DECT” comenzará a parpadear.
Ahora podrá conectar el FRITZ!DECT a otro
FRITZ!Box.
Con sólo desconectar el FRITZ!DECT
200 de la toma de corriente, no se
desactivará la conexión al FRITZ!Box.
36 37
Ayuda en caso de errores
No hay conexión a la estación base
El indicador luminoso “DECT” parpadea
periódica y brevemente. FRITZ!DECT 200 no
tiene conexión a su FRITZ!Box.
3. Inserte el FRITZ!DECT a una toma eléctrica cerca a su FRITZ!Box.
4. Si el diodo “DECT” brilla, la primera
toma de corriente estaba fuera del
alcance de su FRITZ!Box o había problemas en la conexión.
Fuentes típicas de interferencia
son, por ejemplo, ((varias) puertas
cerradas o áreas con alta humedad.
Si el indicador luminoso “DECT” continua
parpadeando el FRITZ!DECT 200 no ha
podido conectarse al FRITZ!Box. Conecte de
nuevo el FRITZ!DECT 200.
Page 20

La toma de corriente integrada no está
activa
El indicador luminoso “On/Off ” parpadea
periódica y brevemente, el dispositivo conectado no funciona. La toma de corriente
no se encuentra activa.
No cargue el FRITZ!DECT 200 más allá
del límite de 2300 vatios. El máximo
de corriente, que los dispositivos
conectados pueden utilizar, es 10 A
(carga resistiva).
1. Desconecte el dispositivo de la toma del
FRITZ!DECT 200.
2. Presione el indicador luminoso “On/
Off ”. La toma de corriente se activará de
nuevo. El indicador luminoso “On/Off ”
brilla permanente.
3. Conecte el dispositivo de nuevo a la
toma de corriente integrada.
Reciclaje
El FRITZ!DECT Repeater 200 se deben reciclar de acuerdo con las normas europeas
de reciclaje y no con los residuos urbanos
normales. Lleve por favor el dispositivo a
los centros de reciclaje de su comuna.
38 39
Datos técnicos
• Estándar DECT
• Alcance: en interiores hasta
40 m, al aire libre hasta 300 m
• Consumo máximo de energía:
aprox. 1,5W
• Consumo en estado de reposo:
aprox. 0,9W
• Precisión:
+/- 100 mW (hasta 5 W)
+/- 2% (a partir de 5 W)
• 230V, 50Hz A/C
• Medidas (sin conector):
93mm x 59 mm x 41mm
• Peso: aprox. 135gramos
• Para los dispositivos conectados hasta
2300 W /10 A
• Condiciones del entorno
- Temperatura de funcionamiento:
0 °C – 40 °C
- Humedad relativa:
10 % – 90 % no condensada
Declaración CE
Por la presente declara AVM, que el dispo-
sitivo cumple con los requisitos esenciales
y las disposiciones pertinentes de las
Directivas 2014/53/UE, 2009/125/CE y
2011/65/UE.
Podrá descargar la versión completa de
la declaración CE (en idioma inglés) en la
página
http://en.avm.de/ce.
Page 21

FR
Sécurité
FRITZ!DECT200 doit être utilisé à l’inté-
rieur d’un bâtiment.
FRITZ!DECT200 doit être utilisé dans un
endroit sec, sans poussière ni exposition
directe aux rayons du soleil et avec une
aération suffi sante.
Branchez FRITZ!DECT 200 sur une prise
de courant facilement accessible.
Les prises FRITZ!DECT200 ne doivent
pas être branchées les unes aux autres.
FRITZ!DECT200 peut être soumis à la puis-
sance maximale indiquée de 2300W/10A.
Une surcharge peut endommager
FRITZ!DECT200 et occasionner des
défaillances ou un accident électrique.
Aucun appareil présentant un risque
d’incendie ne doit être utilisé sans surveillance sur une prise FRITZ!DECT200
(fer à repasser, radiateur infrarouge, etc.)
Aucun liquide ne doit pénétrer à l’inté-
rieur de FRITZ!DECT200.
FRITZ!DECT200 ne doit être ni modifi é,
ni transformé, ni altéré, ni réparé de
façon incorrecte.
Activer et désactiver fréquemment les
appareils électriques peut réduire leur
longévité. Confi gurez une (dés)activation automatique fréquente sur
FRITZ!DECT200 uniquement si les
appareils branchés sont conçus pour un
tel usage. Il n’est off ert aucune garantie
pour des dommages de ce type sur ces
appareils.
40
Conditions requises
Pour le bon fonctionnement de votre
FRITZ!DECT200, vous avez besoin:
d’une prise de courant de 230volts
d’une FRITZ!Box avec station DECT (à
l’exception des modèles FRITZ!Box
7312/7412) et un FRITZ!OS actuel
Touches
FRITZ!DECT a 2 touches dotées de
voyants.
Touche Fonction
On/Off >
DECT > Déconnexion de FRITZ!Box:
41
(Dés)activation de la prise
de courant
enfoncez la touche pendant
au moins 6 secondes.
> Enregistrement sur FRITZ!Box:
enfoncez la touche jusqu’à
ce qu’elle clignote. Enfoncez
alors la touche DECT sur
FRITZ!Box – cf. également
page 43.
Page 22

Voyants lumineux
Festnetz
In
t
ern
e
t
W
L
AN
IN
FO
Power
/DS
L
Fest
netz
Internet
Power/
DSL
INFO
WLAN
W
WLAN
N
DDED
DE
Voyant État Signifi cation
Éteint
Allumé
Clignote
Clignote
à intervalles
brefs réguliers
Clignote
Clignote
à intervalles
brefs réguliers
On/Off
DECT Allumé
> La prise de courant est désactivée.
> La prise de courant est activée.
> La mise à jour du micrologiciel est en cours de télécharge-
ment sur FRITZ!DECT200. (Le voyant DECT clignote suivant
la progression de la mise à jour ou bien il est éteint.)
> FRITZ!DECT200 a désactivé la prise de courant intégrée car
l’intensité du courant autorisée a été dépassée. À ce sujet,
lisez également ce qui fi gure en page 45.
> FRITZ!DECT200 est enregistré sur FRITZ!Box.
> L’enregistrement sur FRITZ!Box est en cours.
> FRITZ!DECT200 n’a aucune connexion à FRITZ!Box.
FRITZ!DECT n’est pas enregistré sur FRITZ!Box ou bien se
trouve en dehors de son rayon d’action.
42 43
Enregistrement sur FRITZ!Box
1. Branchez FRITZ!DECT200 sur une
prise de courant à proximité de votre
FRITZ!Box.
Le voyant «DECT» clignote à intervalles
réguliers.
Internet
Festnetz
Power/DSL
WLAN
INFO
2. Enfoncez alors la touche «DECT» sur
votre FRITZ!Box dans les 2 minutes qui
suivent. Maintenez cette touche enfoncée jusqu’à ce que le voyant «Info» ou
«DECT» commence à clignoter.
FRITZ!DECT200 va être enregistré sur la
station de base. La connexion sans fi l est
établie dès que le voyant «DECT» est
allumé.
WLAN
DECT
DECT
WLAN
DSL
Internet
Festnetz
Powe
INFO
WLAN
10 secondes
Si le voyant «DECT» continue à
clignoter, l’enregistrement a échoué.
Retirez FRITZ!DECT200 de la prise
de courant, puis répétez l’enregistrement.
Page 23

3. À présent, branchez FRITZ!DECT200
sur la prise de courant sur laquelle
vous souhaitez l’utiliser.
FRITZ!DECT se réenregistre automatiquement sur FRITZ!Box. La connexion
est établie dès que le voyant «DECT»
est allumé.
Si le voyant «DECT» clignote en
permanence, testez une autre
prise de courant plus proche de
FRITZ!Box. La prise de courant doit
se trouver dans le rayon d’action
du réseau sans fi l (DECT) de
FRITZ!Box.
(Dés)activation
Vous pouvez (dés)activer la prise de
courant de FRITZ!DECT de diff érentes
manières.
À la livraison, la prise est
désactivée.
Vous pouvez confi gurer une (dés)acti-
vation automatique et piloter la prise à
l’aide d’un calendrier hebdomadaire ou
d’un calendrier Google.
Par ailleurs, vous pouvez (dés)activer
manuellement la prise de courant, même
si la (dés)activation automatique est
activée:
avec la touche «On/Off » (page 41),
d’un clic de souris sur l’ordinateur
(page 45),
à l’aide de FRITZ!Fon comme télécom-
mande (page 48).
44 45
Confi guration et utilisation sur
l’ordinateur
Après avoir enregistré FRITZ!DECT200
sur FRITZ!Box, vous pouvez confi gurer et
utiliser la prise sur l’interface utilisateur de
FRITZ!Box.
Ouvrir l’interface utilisateur de FRITZ!Box
Vous pouvez ouvrir l’interface utilisateur de
FRITZ!Box depuis tout ordinateur connecté
à cette FRITZ!Box.
1. Ouvrez un navigateur Internet.
2. Saisissez
3. Ouvrez le menu «Réseau domestique /
http://Fritz.box dans la ligne
d’adresse.
Smart Home».
La page «Smart Home» apparaît avec
une liste des périphériques FRITZ!DECT
enregistrés.
(Dés)activer la prise de courant
Sur la page «Smart Home», vous pouvez
(dés)activer d’un clic de souris la prise de
courant de votre FRITZ!DECT200. Pour
ce faire, cliquez sur l’une des icônes
suivantes:
Icône La prise est
désactivée
activée
45
Page 24

Confi gurer FRITZ!DECT200
Sur la page «SmartHome», le bouton «Éditer» vous permet d’ouvrir les
paramètres de FRITZ!DECT200 suivants:
Section Confi guration
Général > Saisir votre tarif.
> Défi nir l’état d’activation (éteint/allumé) après une coupure de
courant.
> (Dés)activer les voyants.
> Confi gurer les services push afi n de recevoir des informations par
courrier électronique (p. ex. sur les (dés)activations).
(Dés)activation
automatique
Affi chage de
l’énergie
> Confi gurer plusieurs (dés)activations automatiques pour la prise de
courant (hebdomadaire, unique, aléatoire, etc.).
> Mesurer la consommation d'énergie des équipements connectés.
Confi gurer la (dés)activation automatique
Voici comment confi gurer la (dés)activation
automatique:
1. Ouvrez l’interface utilisateur
(http://fritz.box).
2. Sélectionnez le menu «Réseau domestique / Smart Home».
3. Cliquez sur le bouton «Éditer» pour
FRITZ!DECT200:
dans l’aide en ligne de l’interface
utilisateur.
7. Pour enregistrer les paramètres, cliquez
sur «OK».
Aide en ligne
L’aide en ligne disponible sur l’interface utilisateur de FRITZ!Box contient
des instructions complètes concernant l’utilisation de FRITZ!DECT200.
Pour appeler l’aide en ligne de
l’interface utilisateur, cliquez sur le
point d'interrogation.
4. Passez à l’onglet «(Dés)activation
automatique»
5. Cochez l’option «(Dés)activation automatique active».
6. Sélectionnez un type de (dés)activation,
puis confi gurez l’option.
Vous trouverez une description détaillée
46
des diff érents types de (dés)activation
47
Page 25

Numéro d’identifi cation de l’actionneur/
R987.321.65.498.777
12345 6789012
Serial no.:
Input:
230 V~; 0.02 A; 50 Hz
AIN:
FRITZ!DECT 200
AVM GmbH, 10547 Berlin
Article no.: 2000 2636
Max. load: 10 A
gestionnaire (AIN)
Chaque périphérique FRITZ!DECT a un
numéro d’identifi cation du gestionnaire
(AIN).
L’AIN est précisé sur l’interface utilisateur
et sur un autocollant au dos de l’appareil.
Commande à distance de la
prise de courant à l’aide de
FRITZ!Fon
Les téléphones sans fi l FRITZ!Fon actuels
d’AVM vous permettent de (dés)activer
à distance la prise de courant de votre
FRITZ!DECT200:
1. Sur FRITZ!Fon, enfoncez la touche
«Menu».
2. Sélectionnez «Réseau domestique»,
puis appuyez sur «OK».
3. Sélectionnez «Smart Home», puis
appuyez sur «OK».
Parmi les «Gestionnaires FRITZ!»,
sélectionnez un périphérique FRITZ!DECT,
puis, selon l’état d’activation, appuyez
sur «Activée» ou «Désactivée».
48 49
Désenregistrer
Si vous souhaitez enregistrer
FRITZ!DECT200 sur une autre FRITZ!Box,
vous devez d’abord le désenregistrer de la
FRITZ!Box sur laquelle il est actuellement
enregistré:
1. Enfoncez la touche «DECT» pendant au
moins 6 secondes.
2. FRITZ!DECT200 va être déconnecté de
FRITZ!Box.
Au bout de quelques instants, le voyant
«DECT» commence à clignoter. Vous
pouvez désormais enregistrer FRITZ!DECT
sur une autre FRITZ!Box.
Si vous débranchez FRITZ!DECT 200,
l’appareil ne sera pas désenregistré
de FRITZ!Box.
Aide en cas d’erreur
Aucune connexion avec la station de base
Le voyant «DECT» clignote à intervalles
brefs réguliers. FRITZ!DECT200 n’a aucune
connexion à FRITZ!Box.
3. Branchez FRITZ!DECT sur une prise de
courant à proximité de votre FRITZ!Box.
4. Si le voyant «DECT» s’allume, c’est que
la première prise se trouvait en dehors
du rayon d’action de FRITZ!Box ou que la
connexion sans fi l était perturbée.
Des portes fermées ou une forte
humidité peuvent être une source
de perturbation.
Si le voyant «DECT» continue à clignoter,
FRITZ!DECT200 n’est pas enregistré sur
FRITZ!Box. Enregistrez FRITZ!DECT200 une
nouvelle fois.
Page 26

Prise de courant intégrée désactivée
Le voyant «On/Off » clignote à intervalles
brefs réguliers et l’appareil électrique branché ne fonctionne pas. La prise de courant
intégrée est désactivée.
Ne soumettez pas FRITZ!DECT200 à
une puissance supérieure à 2300W.
Le courant électrique maximal
pouvant être capté continuellement
par les appareils branchés à la prise
s’élève à 10A (charge d’Ohm).
1. Débranchez l’appareil élec-
trique de FRITZ!DECT200.
2. Enfoncez la touche «On/Off ». La prise
de courant intégrée va être réactivée. Le
voyant lumineux «On/Off » s’allume.
3. Rebranchez l’appareil électrique sur la
prise de courant intégrée.
Élimination
Conformément aux prescriptions européennes, FRITZ!DECT 200 ne doit pas être
jeté dans les ordures ménagères. Après
l’avoir utilisé, veuillez remettre l’appareil
aux services municipaux de gestion des
déchets.
50 51
Données techniques
Norme radio DECT
Rayon d’action jusqu’à 40m dans les
bâtiments, jusqu’à 300m à l’extérieur
Puissance consommée maximum:
env. 1,5W
Puissance consommée en veille:
env. 0,9 W
Précision des mesures: +/- 100mW
(jusqu’à 5W) +/- 2% (à partir de 5W)
230V, 50Hz A/C
Dimensions (sans prise):
93mm x 59 mm x 41mm
Poids: env. 135g
Puissance maximale totale de
2300 W / 10 A
Conditions d’utilisation:
- Température de service: 0 °C – 40 °C
- Humidité relative de l’air:
10 % à 90 % sans condensation
DéclarationCE
AVM déclare par la présente que l’appareil
est conforme aux exigences essentielles et
aux instructions pertinentes des directives
2014/53/UE, 2009/125/CE et 2011/65/UE.
Vous trouverez la version longue de la
déclaration de conformité CE à l’adresse
http://en.avm.de/ce (en langue anglaise).
Page 27

IT
Sicurezza
Il FRITZ!DECT 200 è concepito per essere
usato all’interno degli edifi ci.
Usate il FRITZ!DECT 200 in un ambiente
asciutto, privo di polvere, protetto dalle
irradiazioni solari e suffi cientemente
ventilato.
Inserite il FRITZ!DECT 200 in una presa
di corrente di facile accesso.
Non è consentito innestare i FRITZ!DECT
200 l’uno nell’altro.
Il FRITZ!DECT 200 si può sottoporre al
carico limite specifi cato, corrispondente a
2300W/10A.
Il sovraccarico può danneggiare il FRITZ!-
DECT200 e causare malfunzionamenti o
un incidente relazionato con l’elettricità.
Non collegate alla presa del FRITZ!DECT
200 dispositivi soggetti a rischio d’incen-
dio che non vengono sorvegliati. Sono di-
spositivi soggetti a rischio d’incendio, ad
esempio, i ferri da stiro o i riscaldatori
per irraggiamento.
Evitate che si infi ltrino liquidi nel
FRITZ!DECT200.
Il FRITZ!DECT 200 non deve essere
cambiato, trasformato o modifi cato né
riparato in modo inappropriato.
L’accensione e lo spegnimento frequenti
di un dispositivo elettrico ne possono
ridurre la durata. Confi gurate nel FRITZ!DECT 200 la commutazione automatica
con accensioni e spegnimenti frequenti
soltanto se i dispositivi collegati sono
predisposti a tale scopo. AVM non si
assume alcuna responsabilità per eventuali danni a questi dispositivi.
52
Requisiti
Per poter usare il FRITZ!DECT200 avete
bisogno di:
una presa da 230 volt
FRITZ!Box con stazione base DECT
(fatta eccezione per 7312/7412) e con
FRITZ!OS attuale
Tasti
Il FRITZ!DECT è dotato di 2 tasti con diodi
luminosi (LED)
Tasti Funzione
On/Off >
DECT > Scollegamento dal
53
Attivazione e disattivazione
della presa.
FRITZ!Box:
Premete il tasto per almeno
6 secondi.
> Registrazione sul FRITZ!Box:
Premete il tasto fi nché non
lampeggia. Premete quindi
il tasto DECT del FRITZ!Box,
vedi anche a pag. 55.
Page 28

LED
Festnetz
In
t
ern
e
t
W
L
AN
IN
FO
Power
/DS
L
Fest
netz
Internet
Power/
DSL
INFO
WLAN
W
WLAN
N
DDED
DE
LED Stato Signifi cato
On/Off
DECT acceso
off
acceso
lampeggia
lampeggia
brevemente
a intervalli
regolari
lampeggia
lampeggia
brevemente
a intervalli
regolari
> La presa è disattivata.
> La presa è attivata.
> È in corso l’aggiornamento del fi rmware del FRITZ!DECT
200. (Il LED DECT lampeggia a seconda del progresso
dell’aggiornamento del fi rmware oppure è spento.)
> Il FRITZ!DECT 200 ha disattivato la presa integrata perché è
stato superato l’amperaggio consentito. Leggete anche la
pagina 57.
> Il FRITZ!DECT 200 è registrato sul FRITZ!Box.
> È in corso la registrazione sul FRITZ!Box.
> Il FRITZ!DECT 200 non è connesso al FRITZ!Box. Il
FRITZ!DECT non è registrato oppure si trova fuori dalla
portata del FRITZ!Box.
54 55
Registrazione sul FRITZ!Box
1. Inserite il FRITZ!DECT 200 in una presa
di corrente in prossimità del FRITZ!Box.
Il LED “DECT” lampeggia ad intervalli
regolari.
Internet
Festnetz
Power/DSL
WLAN
INFO
2. Entro i due minuti successivi premete
il tasto “DECT” del FRITZ!Box. Tenete
premuto il tasto fi nché non iniziano a
lampeggiare il LED “Info” o “DECT” del
FRITZ!Box.
Il FRITZ!DECT 200 viene registrato sulla
stazione base. La connessione radio è
instaurata quando si accende il LED “DECT”.
WLAN
DECT
DECT
WLAN
DSL
Internet
Festnetz
Powe
INFO
WLAN
10 secondi
Se “DECT” continua a lampeggiare
signifi ca che la registrazione è fallita.
Estraete il FRITZ!DECT 200 dalla
presa e ripetete la registrazione.
Page 29

3. Ora inserite il FRITZ!DECT 200 nella
presa di corrente alla quale desiderate
collegare il dispositivo.
Il FRITZ!DECT si registra di nuovo
automaticamente sul FRITZ!Box. Se la
connessione è instaurata, il LED “DECT”
è acceso.
Se “DECT” lampeggia costantemente fate una prova usando
un’altra presa più vicina al
FRITZ!Box. La presa deve trovarsi
entro la portata della rete wireless
DECT del FRITZ!Box.
Attivazione e disattivazione
La presa del FRITZ!DECT si può attivare e
disattivare in diff erenti modi.
Alla consegna, la presa è disattivata.
Potete confi gurare una commutazione
automatica e gestire la presa con un calendario settimanale o di Google.
Inoltre, potete attivare e disattivare manualmente la presa in qualsiasi momento,
anche se è attivata la commutazione
automatica:
con il tasto “On/Off ” (pag. 53)
cliccando con il mouse dal computer
(pag. 57)
con un FRITZ!Fon che funge da teleco-
mando (pag. 60).
56 57
Confi gurazione e comando dal
computer
Una volta registrato il FRITZ!DECT 200 sul
FRITZ!Box, potete confi gurare il FRITZ!DECT
200 nell’interfaccia utente del FRITZ!Box e
comandarlo a partire da qui.
Apertura dell’interfaccia utente del
FRITZ!Box
L’interfaccia utente si può aprire su ogni
computer collegato al FRITZ!Box.
1. Aprite un browser web.
2. Immettete http://fritz.box nella barra
degli indirizzi.
3. Aprite il menu “Rete domestica/Smart
Home”.
Si apre la pagina “Smart Home” con una
lista dei dispositivi FRITZ!DECT registrati.
Attivazione e disattivazione della presa
Nella pagina “Smart Home” potete attivare
e disattivare la presa del FRITZ!DECT 200
con un semplice clic. Per farlo, cliccate uno
dei seguenti simboli:
Simbolo La presa è
off
a
Page 30

Confi gurazione del FRITZ!DECT 200
Con il pulsante “Modifi ca” della pagina “Smart Home” potete aprire le seguenti
impostazioni per FRITZ!DECT200:
Campo Impostazioni
Informazioni
generali
Commutazione
automatica
Indicazione
energia
> Inserire la vostra tariff a elettrica
> Stabilire lo stato di commutazione della presa (on/off ) dopo una
caduta di tensione
> Attivare/disattivare i LED
> Confi gurare i servizi Push per essere informati via e-mail, ad esempio
delle commutazioni
> Varie commutazioni automatiche (ad esempio durante la settimana,
una sola volta o casualmente) per la presa
> Misurare il consumo di energia dei dispositivi collegati
Confi gurazione della commutazione
automatica
Confi gurate come segue la commutazione
automatica:
1. Aprite l’interfaccia utente (http://fritz.
box).
2. Selezionate “Rete domestica/Smart
Home”.
3. Cliccate il pulsante “Modifi ca” per
FRITZDECT 200:
no descritti dettagliatamente nella guida
online dell’interfaccia utente.
7. Cliccate “OK” per salvare le impostazioni.
Guida online
La guida online dell’interfaccia
utente del FRITZ!Box contiene le
istruzioni complete per l’uso di
FRITZ!DECT 200. Nell’interfaccia
utente si accede alla guida online
cliccando il punto di domanda.
4. Aprite la scheda “Commutazione
automatica”.
5. Attivate l’opzione “Commutazione
automatica attiva”.
6. Selezionate un tipo di commutazione e
58
confi guratela.
I diff erenti tipi di commutazione vengo-
59
Page 31

AIN (numero identifi cazione attuatore)
R987.321.65.498.777
12345 6789012
Serial no.:
Input:
230 V~; 0.02 A; 50 Hz
AIN:
FRITZ!DECT 200
AVM GmbH, 10547 Berlin
Article no.: 2000 2636
Max. load: 10 A
Ogni dispositivo FRITZ!DECT dispone di
un proprio AIN (numero identifi cazione
attuatore).
L’AIN viene visualizzato nell’interfaccia
utente ed è stampato sull'adesivo che si
trova sul retro del dispositivo.
Telecomandare la presa con FRITZ!Fon
Con gli attuali telefoni cordless FRITZ!Fon
di AVM potete telecomandare la presa
del FRITZ!DECT 200, attivandola e disattivandola:
1. Premete il tasto “Menu” del FRITZ!Fon.
2. Selezionate „Rete domestica“ e
premete “OK”.
3. Selezionate “Smart Home” e premete
“OK”.
In “Attuatori FRITZ!” selezionate un
dispositivo FRITZ!DECT e premete “off ”
oppure “on” a seconda dello stato di
commutazione.
Cancella
Se desiderate registrare il FRITZ!DECT
200 su un altro FRITZ!Box dovete prima
disconnetterlo dal FRITZ!Box su cui è
registrato ora:
1. Premete il tasto “DECT” per almeno 6
secondi.
2. Il FRITZ!DECT 200 viene disconnesso dal
FRITZ!Box.
Dopo breve tempo il LED “DECT” inizia
a lampeggiare. Ora potete registrare il
FRITZ!DECT su un altro FRITZ!Box.
Il FRITZ!DECT 200 non si disconnette
dal FRITZ!Box semplicemente estraendolo dalla presa.
60 61
Cosa fare in caso di errori
Nessuna connessione con la stazione
base
Il LED “DECT” lampeggia brevemente a
intervalli regolari. Il FRITZ!DECT 200 non ha
una connessione radio con il FRITZ!Box.
1. Inserite il FRITZ!DECT in una presa di
corrente in prossimità del FRITZ!Box.
2. Se il LED “DECT” è acceso, signifi ca che
la prima presa si trova fuori dalla portata
del FRITZ!Box oppure che la connessione
radio era disturbata.
Le sorgenti di disturbo tipiche sono,
ad esempio, le porte chiuse o varie
porte chiuse e gli ambienti con
molta umidità.
Se “DECT” continua a lampeggiare, signifi ca che il FRITZ!DECT 200 non è registrato.
Registrate di nuovo il FRITZ!DECT 200.
Page 32

Presa integrata disattivata
Il LED “On/Off ” lampeggia brevemente ad
intervalli regolari e il dispositivo elettrico
collegato non funziona. La presa integrata
è disattivata.
Non sottoponete il FRITZ!DECT 200
ad un carico superiore a 2300 W. La
corrente massima che i dispositivi
collegati possono assorbire costantemente corrisponde a 10 A (carico
ohmico).
1. Scollegate il dispositivo elettrico dal
FRITZ!DECT 200.
2. Premete il tasto “On/Off ”. La presa
integrata viene attivata di nuovo. Il LED
“On/Off ” è acceso.
3. Collegate di nuovo il dispositivo elettrico
alla presa integrata.
Smaltimento
In conformità con le leggi europee il
FRITZ!DECT 200 non va smaltito con i rifi uti
domestici bensì consegnato, al termine
del suo ciclo di vita, presso un centro di
raccolta autorizzato.
62 63
Dati tecnici
standard radio DECT
portata: negli edifi ci fi no a
40 m, all’aperto fi no a 300 m
potenza massima assorbita:
circa 1,5W
potenza assorbita in stand-by:
circa 0,9 W
precisione di misura:
+/- 100 mW (fi no a 5 W)
+/- 2% (a partire da 5 W)
230V, 50Hz A/C
dimensioni (senza spina):
93mm x 59 mm x 41mm
peso: circa 135g
per dispositivi collegati fi no a
2300 W/10 A
Condizioni ambientali
- temperatura di funzionamento:
0 °C – 40 °C
- umidità dell’aria relativa:
10 % – 90 % senza condensa
Dichiarazione CE
AVM dichiara che il dispositivo è conforme
ai requisiti fondamentali e alle disposizioni inerenti delle direttive 2014/53/UE,
2009/125/CE e 2011/65/UE.
Il testo integrale della dichiarazione di con-
formità CE è disponibile in lingua inglese
all’indirizzo
http://en.avm.de/ce.
Page 33

NL
Veiligheid
FRITZ!DECT 200 is ontworpen voor het
gebruik in gebouwen.
FRITZ!DECT 200 is ontworpen voor het
gebruik op een droge en stofvrije plaats
zonder direct zonlicht met voldoende
ventilatie.
Steek FRITZ!DECT 200 in een goed
bereikbare contactdoos
Er mogen geen FRITZ!DECT 200 achter
elkaar gestoken worden.
FRITZ!DECT 200 mag tot de aangeduide
vermogensgrens van 2300W/10A worden
belast.
Door overbelasting kan FRITZ!DECT200
beschadigd raken, en kunnen storingen
of een elektrisch ongeval het gevolg zijn.
Er mogen geen apparaten waarbij brand-
gevaar bestaat zonder toezicht worden
gebruikt op de FRITZ!DECT 200-contactdoos. Apparaten waarbij brandgevaar
bestaat zijn bijvoorbeeld strijkijzers of
straalkachels.
Er mogen geen vloeistoff en in de
FRITZ!DECT200 binnendringen.
De FRITZ!DECT 200 mag niet gewijzigd,
omgebouwd, aangepast of ondeskundig
hersteld worden.
Frequent in- en uitschakelen kan de
levensduur van elektrische apparaten
verkorten. Richt in de FRITZ!DECT 200
alleen een automatische schakeling met
frequente in- en uitschakelprocedures in
als de aangesloten apparaten daarvoor
ontworpen zijn. Voor schade aan deze
apparaten zijn wij niet aansprakelijk.
64
Voorwaarden
Voor het gebruik van uw FRITZ!DECT200
hebt u volgende elementen nodig:
een contactdoos 230 volt
FRITZ!Box met DECT (uitzondering:
FRITZ!Box 7312/7412) en actueel
FRITZ!OS
Knoppen
De FRITZ!DECT heeft 2 knoppen met
lichtdioden (leds)
Knop Functie
> Contactdoos in- en
On/Off
uitschakelen.
DECT > Van FRITZ!Box afmelden:
Druk de knop minstens 6
seconden lang in.
> Op de FRITZ!Box
aanmelden:
Druk op de knop tot deze
begint te knipperen. Druk
dan op de FRITZ!Box op de
DECT-knop, zie ook pagina
67.
65
Page 34

Leds
Festnetz
In
t
ern
e
t
W
LA
N
IN
FO
Power
/DS
L
Fest
netz
Internet
Power/
DSL
INFO
WLAN
WWWL
LAN
W
DDED
DE
Led Toestand Betekenis
uit
brandt
knippert
knippert
regelmatig kort
aan
knippert
knippert
regelmatig kort
aan
On/Off
DECT brandt
> Contactdoos is uitgeschakeld.
> Contactdoos is ingeschakeld.
> Firmware-update wordt op de FRITZ!DECT 200 toegepast.
(De DECT-led knippert afhankelijk van de voortgang van de
fi rmware-update of is uit.)
> FRITZ!DECT 200 heeft de geïntegreerde contactdoos
uitgeschakeld, aangezien de toegestane stroomsterkte is
overschreden. Lees hierover ook p. 74.
> FRITZ!DECT 200 is aan de FRITZ!Box aangemeld.
> Aanmelding aan FRITZ!Box is bezig.
> FRITZ!DECT 200 heeft geen verbinding met de FRITZ!Box.
Ofwel is FRITZ!DECT niet aangemeld, of deze bevindt zich
buiten de reikwijdte van de FRITZ!Box.
66 67
Bij de FRITZ!Box aanmelden
1. Sluit de FRITZ!DECT 200 aan op een contactdoos in de buurt van uw FRITZ!Box.
De led “DECT” knippert gelijkmatig.
Internet
Festnetz
Power/DSL
WLAN
INFO
2. Druk binnen 2 minuten op de knop
“DECT” van uw FRITZ!Box. Houd de knop
ingedrukt tot op de FRITZ!Box de led
“Info” of “DECT” knippert.
HDe FRITZ!DECT 200 wordt bij het
basisstation aangemeld. De draadloze
verbinding is tot stand gebracht wanneer
de led “DECT” brandt.
WLAN
DECT
DECT
WLAN
DSL
Internet
Festnetz
Powe
INFO
WLAN
10 seconden
Als “DECT” verder knippert, betekent
dit dat de aanmelding mislukt is.
Trek de FRITZ!DECT 200 uit de con-
tactdoos en herhaal de aanmelding.
Page 35

3. Steek de FRITZ!DECT 200 nu in de
contactdoos waarop u het apparaat
wilt aansluiten.
De FRITZ!DECT wordt automatisch
weer aangemeld op de FRITZ!Box. Als
de verbinding tot stand is gebracht,
brandt de led “DECT”.
Als “DECT” continu knippert,
moet u een andere contactdoos
dichterbij de FRITZ!Box testen.
De contactdoos moet binnen de
reikwijdte van het draadloze DECTnetwerk van de FRITZ!Box liggen.
In- en uitschakelen
De FRITZ!DECT-contactdoos kunt u op ver-
schillende manieren in- en uitschakelen.
Bij levering is de contactdoos
uitgeschakeld.
U kunt een automatische schakeling inrichten en de contactdoos met een wekelijkse
kalender of met een Google-kalender
besturen.
Bovendien kunt u de contactdoos op elk
moment handmatig in- en uitschakelen, ook bij geactiveerde automatische
schakeling:
met de knop “On/Off ” (pagina 65)
per muisklik op de computer
(pagina 69)
met een FRITZ!Fon als afstandsbedie-
ning (pagina 72)
68 69
Op de computer instellen en
bedienen
Nadat u FRITZ!DECT 200 op de FRITZ!Box
hebt aangemeld, kunt u FRITZ!DECT 200
in de gebruikersinterface van de FRITZ!Box
inrichten en bedienen.
Gebruikersinterface van de FRITZ!Box
openen
De gebruikersinterface kan op elke computer die met de FRITZ!Box verbonden is,
worden geopend.
1. Open een internetbrowser.
2. Voer in de adresregel
3. Open het menu “Home Network / Smart
Home” (Thuisnetwerk / Smart Home).
De pagina “Smart Home” verschijnt met
een lijst met aangemelde FRITZ!DECTapparaten.
http://fritz.box in.
Contactdoos in- en uitschakelen
Op de pagina “Smart Home” kunt u de
contactdoos van uw FRITZ!DECT 200 per
muisklik in- en uitschakelen. Klik hiervoor
op een van de volgende symbolen:
Symbool Contactdoos is
uit
aan
Page 36

FRITZ!DECT 200 inrichten
Met de knop “Edit” (Bewerken) op de pagina “Smart Home” kunt u volgende
instellingen openen voor FRITZ!DECT200:
Gebied Instellingen
Algemeen > Eigen stroomtarief invoeren
> Schakeltoestand (aan/uit) na een stroomuitval vastleggen
> Led-indicatie in-/uitschakelen
> Push services inrichten, om per e-mail bijvoorbeeld over schakelpro-
cessen te worden geïnformeerd
Automatisch
schakelen
Energie-indicatie
> Verschillende automatische schakelingen (bijvoorbeeld op weekda-
gen, eenmalig, toevallig) voor de contactdoos
> Eenergieverbruik van aangesloten apparaten meten
Automatische schakeling inrichten
Een automatische schakeling richt u als
volgt in:
1. Open de gebruikersinterface
http://fritz.box).
(
2. Selecteer “Home Network / Smart Home”
(Thuisnetwerk / Smart Home).
3. Klik op de knop “Edit” (Bewerken) voor
FRITZ!DECT 200:
4. Ga naar het tabblad “Switch Automatically” (Automatisch schakelen).
5. Activeer de optie “Automatic switching
enabled” (Automatische schakeling
actief).
6. Selecteer een schakelingstype en richt
de schakeling in.
De verschillende schakelingstypes worden in de online-hulpfunctie van de gebruikersinterface uitvoerig beschreven.
7. Om de instellingen op te slaan, klikt u
op “OK “.
Online-hulpfunctie
De online-hulpfunctie in de gebruikersinterface van de FRITZ!Box bevat
een complete handleiding voor de
bediening van FRITZ!DECT 200. De
online-hulpfunctie wordt in de
gebruikersinterface opgeroepen via
het vraagteken.
70
71
Page 37

AIN (actor-identifi catienummer)
R987.321.65.498.777
12345 6789012
Serien-Nr.:
Input:
230 V~; 0.02 A; 50 Hz
AIN:
FRITZ!DECT 200
AVM GmbH, 10547 Berlin
Artikel-Nr.: 2000 2572
Max. load: 10 A
Elk FRITZ!DECT-apparaat heeft een eigen
AIN (actor-identifi catienummer).
Het AIN wordt in de gebruikersinterface
weergegeven en staat op de sticker op de
onderkant van het apparaat gedrukt.
Contactdoos met FRITZ!Fon
op afstand bedienen
Met de actuele draadloze telefoons
FRITZ!Fon van AVM kunt u de contactdoos van uw FRITZ!DECT 200 op afstand
bedienen (in- en uitschakelen).
1. Druk op de FRITZ!Fon op de menuknop.
2. Selecteer “Home Network” (Thuisnetwerk) en druk op “OK “.
3. Selecteer “Smart Home” en druk op
“OK “.
Selecteer onder “FRITZ! Actuators”
(FRITZ!-actoren) een FRITZ!DECT-
apparaat en druk afhankelijk van de
schakeltoestand op “off ” (uit) of “on”
Afmelden
Indien u FRITZ!DECT 200 bij een andere
FRITZ!Box wenst aan te melden, dient u het
apparaat eerst van de actuele FRITZ!Box af
te melden:
1. Druk minstens 6 seconden lang op de
knop “DECT”.
2. FRITZ!DECT 200 wordt van de FRITZ!Box
afgemeld.
Na korte tijd begint de led “DECT” te knipperen. U kunt FRITZ!DECT nu bij een andere
FRITZ!Box aanmelden.
Wanneer u de FRITZ!DECT 200 uit de
contactdoos trekt, wordt het apparaat
niet van de FRITZ!Box afgemeld.
(aan).
72 73
Hulp bij storingen
Geen verbinding met het basisstation
De led “DECT” knippert regelmatig kort
aan. FRITZ!DECT 200 heeft geen draadloze
verbinding met de FRITZ!Box.
3. Sluit de FRITZ!DECT aan op een contactdoos in de buurt van uw FRITZ!Box.
4. Als “DECT” brandt, bevindt de eerste
contactdoos zich buiten de reikwijdte
van de FRITZ!Box of was er een storing
bij de draadloze verbinding.
Typische storingsbronnen zijn bijv.
(meerdere) gesloten deuren of ruim-
tes met een hoge luchtvochtigheid
Als “DECT” nog steeds knippert, is de
FRITZ!DECT 200 niet bij de FRITZ!Box aangemeld. Meld FRITZ!DECT 200 opnieuw aan.
Page 38

Geïntegreerde contactdoos uitgeschakeld
De led “On/Off ” knippert regelmatig kort
aan en het aangesloten apparaat werkt
niet. De geïntegreerde contactdoos is
uitgeschakeld.
Belast FRITZ!DECT 200 slechts tot aan
de vermogensgrens van 2300 watt.
De maximale stroom die aangesloten
apparaten maximaal continu mogen
verbruiken, bedraagt 10 A (ohmse
belasting).
1. Trek het elektrische apparaat uit de
FRITZ!DECT 200.
2. Druk op de knop “On/Off ”. De geïntegreerde contactdoos wordt opnieuw
ingeschakeld. De led “On/Off ” brandt.
3. Steek het elektrische apparaat weer in
de geïntegreerde contactdoos.
Afvoer
FRITZ!DECT 200 mag overeenkomstig de
Europese wetgeving en de Duitse wetgeving
over elektrische apparatuur en elektronica
(ElektroG) niet met het huisvuil worden
afgevoerd. Breng het apparaat na gebruik
naar uw gemeentelijk inzamelpunt.
74 75
Technische gegevens
• Radiografi sche standaard DECT
• Reikwijdte: in gebouwen maximaal 40 m,
in de open lucht tot 300 m
• Maximaal opgenomen vermogen:
ca. 1,5W
• Opgenomen vermogen in stand-by:
ca. 0,9W
• Meetnauwkeurigheid: +/- 100mW
(tot 5 watt) +/- 2% (vanaf 5 W)
• 230V, 50Hz A/C
• Afmetingen (zonder stekker):
93mm x 59 mm x 41mm
• Gewicht: ca. 135g
• Voor aangesloten apparaten
tot 2300 W /10 A
• Omgevingsvoorwaarden
- bedrijfstemperatuur: 0 °C – 40 °C
- relatieve luchtvochtigheid:
10 % – 90 % niet condenserend
CE-verklaring
Hiermee verklaart AVM dat het apparaat
overeenstemt met de fundamentele vereisten
en de andere relevante voorschriften van de
richtlijnen 2014/53/EU, 2009/125/EG en
2011/65/EU.
De volledige tekst van de EG-verklaring van
overeenstemming vindt u in het Engels op
http://en.avm.de/ce
 Loading...