


ENGLISH - PAGES. . . . . . . . . . . . 6-9
ESPAÑOL - PAGINAS . . . . . . . . . 10-13
FRANÇAIS - PAGES.. . . . . . . . . . 14-17
ITALIANO - PAGINE . . . . . . . . . . 18-21
DEUTSCH - SEITEN.. . . . . . . . . . 22-25
PORTUGUÊS - PAGINA.. .. .. .. .. .. .. 26-29
. . . . . . . . . . . . . . 30-33
I M P O R T A N T S A F E T Y I N S T R U C T I O N S
The lightning flash with arrowhead symbol within an equilateral triangle is intended to alert the user to the presence of uninsulated “dangerous voltage” within the product’s enclosure that may be of sufficient magnitude to constitute a risk of electric shock to persons.
The exclamation point within an equilateral triangle is intended to alert the user to the presence of important operating and maintenance (servicing) instructions in the literature accompanying the product.
1)Read these instructions.
2)Keep these instructions.
3)Heed all warnings.
4)Follow all instructions.
5)Do not use this apparatus near water.
6)Clean only with dry cloth.
7)Do not block any ventilation openings. Install in accordance with the manufacturer’s instructions.
8)Do not install near any heat sources such as radiators, heat registers, stoves, or other apparatus (including amplifiers) that produce heat.
9)Do not defeat the safety purpose of the polarized or grounding-type plug. A polarized plug has two blades with one wider than the other. A grounding type plug has two blades and a third grounding prong. The wide blade or the third prong are provided for your safety. If the provided plug does not fit into your outlet, consult an electrician for replacement of the obsolete outlet.
10)Protect the power cord from being walked on or pinched particularly at plugs, convenience receptacles and the point where they exit from the apparatus.
11)Only use attachments/accessories specified by the manufacturer.
12)Use only with the cart, stand, tripod, bracket, or table specified by the manufacturer or sold with the apparatus. When a cart is used, use caution when moving the cart/ apparatus combination to avoid injury from tip-over.
13)Unplug this apparatus during lightning storms or when unused for long periods of time.
14)Refer all servicing to qualified service personnel. Servicing is required when the apparatus has been damaged in any way, such as power-supply cord or plug is damaged, liquid has been spilled or objects have fallen into the apparatus, the apparatus has been exposed to rain or moisture, does not operate normally, or has been dropped.
15)To completely disconnect this apparatus from the AC mains, disconnect the power supply cord plug from the AC receptacle.
16)The mains plug of the power supply cord shall remain readily operable.
17)WARNING – To reduce the risk of fire or electric shock, do not expose this apparatus to rain or moisture.
18)Do not expose this equipment to dripping or splashing and ensure that no objects filled with liquids, such as vases, are placed on the equipment.
19)Maintain at least 6 inches (15.25 cm) of unobstructed air space behind the unit to allow for proper ventilation and cooling of the unit.
20)CAUTION – For rack mounted power amplifiers, keep all wiring and materials away from the sides of the unit and allow the unit to cool down for 2 minutes before pulling from a rack enclosure.
21)Amplifiers and loudspeaker systems, and ear/headphones (if equipped) are capable of producing very high sound pressure levels which may cause temporary or permanent hearing damage. Use care when setting and adjusting volume levels during use.
22)FCC COMPLIANCE NOTICE: This equipment has been tested and found to comply with the limits for a Class B digital device, pursuant to Part 15 of the FCC rules. These limits are designed to provide reasonable protection against harmful interference in a residential installation. This equipment generates, uses and can radiate radio frequency energy and if not used in accordance with the instructions, may cause harmful interference to radio communications and there is no guarantee that interference will not occur in a particular installation. If this equipment does cause harmful interference to radio or television reception, which can be determined by turning the equipment off and on, the user is encouraged to try to correct the interference by one or more of the following measures: reorient or relocate the receiving antenna, increase the separation between the equipment and receiver, connect the equipment into an outlet on a circuit different from that of the receiver. Consult the dealer or an experienced radio/TV technician if help is needed with interference. NOTE: FMIC will not be responsible for unauthorized equipment modifications that could violate FCC rules, and/ or void product safety certifications.
23)WARNING – To maintain product safety, products with internal or external (battery pack) batteries: •Batteries and/or the product in which they are installed, shall not be exposed to excessive heat such as sunshine, fire or the like. •There may be a danger of explosion if the battery is incorrectly connected/ replaced. Replace only with the same or equivalent type battery specified in the instructions or on the product.
24)CAUTION – Unplug unit and allow it to cool before touching/ replacing vacuum tubes.
25)WARNING – Provide an earthing connection before the mains plug is connected to the mains. And, when disconnecting the earthing connection, be sure to disconnect after pulling out the mains plug from the mains.
26)Apparatus with CLASS I construction (grounded type with a three-prong plug) must be connected to a MAINS socket outlet with a protective earthing connection.

I N S T R U C C I O N E S D E S E G U R I D A D I M P O R T A N T E S
El relámpago con el símbolo de cabeza de flecha dentro de un triángulo equilátero tiene por objeto alertar al usuario de la presencia de “voltaje peligroso” no aislado dentro del gabinete del producto, que puede ser de magnitud suficiente como para constituir un riesgo de descarga eléctrica para las personas.
El signo de admiración dentro de un triángulo equilátero tiene por objeto alertar al usuario a la presencia de importantes instrucciones de operación y mantenimiento (servicio) en los documentos que acompañan al producto.
1)Lea estas instrucciones.
2)Conserve estas instrucciones.
3)Atienda todas las advertencias.
4)Siga todas las instrucciones.
5)No use este aparato cerca del agua.
6)Limpie sólo con un paño seco.
7)No bloquee ningún orificio de ventilación. Instale de acuerdo con las instrucciones del fabricante.
8)No lo instale cerca de ninguna fuente de calor, como radiadores, registros de calefacción, estufas u otros aparatos (incluidos los amplificadores) que produzcan calor.
9)No elimine el objetivo de seguridad de la clavija polarizada o con conexión a tierra. Una clavija polarizada tiene dos hojas, una de ellas más ancha que la otra. Una clavija con conexión a tierra tiene dos hojas y una tercera pata de tierra. La hoja ancha o la tercera pata se suministran para su seguridad. Si la clavija suministrada no encaja en su enchufe, consulte a un electricista para que reemplace el enchufe obsoleto.
10)Proteja el cable de alimentación para que no sea pisado o pellizcado, especialmente en las clavijas, receptáculos de conveniencia y en el punto en el que salen del aparato.
11)Use únicamente aditamentos o accesorios especificados por el fabricante.
12)Úselo únicamente con el carrito, soporte, trípode, abrazadera o mesa especificados por el fabricante o que se venden con el aparato. Cuando se use un carrito, sea precavido al mover la combinación de carrito y aparato para evitar lesiones por volcadura.
13)Desenchufe este aparato durante las tormentas eléctricas o cuando no se use durante períodos prolongados de tiempo.
14)Refiera todo el servicio a personal cualificado. Se requiere servicio cuando el aparato se ha dañado de cualquier forma, como si se dañan el cable de alimentación o la clavija, si se ha vertido un líquido o han caído objetos al interior del aparato, si el aparato ha estado expuesto a la lluvia o la humedad, no funciona normalmente o ha caído.
15)Para desconectar completamente este aparato de la red de CA, desconecte el cable de alimentación eléctrica del receptáculo de CA.
16)La clavija eléctrica del cable de alimentación se mantendrá fácilmente operativa.
17)ADVERTENCIA – Para reducir el riesgo de incendio o descarga eléctrica, no exponga este aparato a la lluvia o la humedad.
18)No exponga este equipo a escurrimientos o salpicaduras, y asegúrese de que no se coloquen objetos llenos de líquido, como jarrones, sobre el equipo.
19)Mantenga al menos 6 pulgadas (15.25 cm) de espacio de ventilación sin obstrucciones detrás de la unidad para permitir su ventilación y enfriamiento adecuados.
20)PRECAUCIÓN – En el caso de amplificadores de potencia montados en anaqueles, conserve todo el cableado y materiales alejados de los lados de la unidad y permita que la unidad se enfríe durante 2 minutos antes de retirarla de un gabinete de anaquel.
21)Los amplificadores, sistemas de altavoces y auriculares (sea cual sea el dispositivo con el que esté equipada la unidad) son capaces de producir niveles de presión sonora muy elevados que pueden llegar a producir problemas de sordera tanto temporal como crónica. Tenga mucho cuidado a la hora de ajustar los niveles de volumen al usar este aparato.
22)Certificación de cumplimiento de la sección 15 de las normas FCC (para dispositivos digitales, según sea aplicable en cada caso) - Sección 15.21: Los cambios o modificaciones que no hayan sido autorizados expresamente y por escrito por la empresa responsable del cumplimiento de estas normas pueden anular la autorización del usuario para seguir utilizando este aparato. NOTA: El fabricante no será responsable de ninguna interferencia en radio o TV que sea producida por modificaciones no autorizadas en este aparato. Tal tipo de modificaciones pueden anular la autorización del usuario para seguir utilizando este aparato.
23)ADVERTENCIA – Para mantener la seguridad de los productos con baterías internas o externas (paquete de baterías): •Las baterías y el producto en el que están instaladas no deberán exponerse a calor excesivo, como la luz del sol, fuego y similares. •Puede haber peligro de explosión si la batería se conecta o reemplaza de modo incorrecto. Reemplácelas sólo con baterías del mismo tipo o equivalente especificadas en las instrucciones o en el producto.
24)PRECAUCIÓN – Desconecte esta unidad de la corriente y espere un rato hasta que se refrigere antes de tocar / sustituir las válvulas.
25)PRECAUCION – Antes de conectar el cable de alimentación a la corriente eléctrica, consiga una conexión a tierra. Además, a la hora de desconectar esta toma de tierra, asegúrese de hacerlo después de haber extraído el cable de alimentación del chasis.
26)Los dispositivos de CLASE I (enchufe de tres bornes con toma de tierra) como este deben ser conectados a una salida de corriente que disponga de una conexión de toma de tierra de seguridad.
C O N S I G N E S D E S É C U R I T É I M P O R T A N T E S
Ce symbole avertit l'utilisateur de la présence d’une tension dangereuse non isolée dans le boîtier du produit, qui peut être suffisamment importante pour constituer un risque d'électrocution.
Le symbole du point d’exclamation dans un triangle équilatéral avertit l’utilisateur de la présence d’instructions importantes relatives au fonctionnement et à l'entretien dans la documentation qui accompagne le produit.
1)Lisez ces instructions.
2)Conservez ces instructions.
3)Respectez toutes les mises en garde.
4)Suivez toutes les instructions.
5)N’utilisez pas cet appareil à proximité d’un point d’eau.
6)Nettoyez-le uniquement avec un chiffon sec.
7)Ne bloquez pas les ouvertures de ventilation. Installez l'appareil en suivant les instructions du fabricant.
8)Ne l’installez pas à proximité d’une source de chaleur, comme un radiateur, un four ou tout autre appareil (incluant les amplificateurs) produisant de la chaleur.
9)Ne modifiez pas la fiche polarisée (Canada) ou la mise à la terre. Les fiches polarisées possèdent deux lames, dont l’une est plus large que l’autre. Les fiches avec mise à la terre possèdent deux broches plus une broche de terre. La lame plus large et la terre sont des éléments de sécurité. Si la fiche ne correspond pas à votre prise secteur, contactez un électricien pour la faire remplacer.
10)Évitez de marcher sur le cordon secteur ou de le pincer, en particulier au niveau des fiches, des prises secteur et de l'embase de l’appareil.
11)Utilisez uniquement les pièces/accessoires spécifiés par le fabricant.
12)Utilisez uniquement le chariot, le support, le trépied, la console ou la table spécifiés par le fabricant ou vendus avec l’appareil. Lorsqu'un chariot est utilisé, prenez toutes les précautions nécessaires pour éviter les chutes lors du déplacement de l’ensemble chariot-appareil.
13)Déconnectez l’appareil pendant les orages ou les longues périodes d'inutilisation.
14)Confiez toutes les réparations à un technicien qualifié. Vous devez faire contrôler cet appareil s'il a été endommagé de quelque façon que ce soit, comme lorsque le cordon secteur ou les fiches sont endommagés, qu'un liquide ou des objets se sont infiltrés dans l’appareil, qu'il a été exposé à la pluie ou l’humidité, qu'il a subi un choc ou qu'il ne fonctionne pas normalement.
15)Pour déconnecter entièrement l’appareil du secteur (phase, neutre et terre), déconnectez la fiche du cordon secteur de la prise.
16)La fiche du cordon secteur doit demeurer accessible en tout temps.
17)MISE EN GARDE – Pour réduire les risques d’incendie ou d'électrocution, n’exposez pas cet appareil aux intempéries ou à l'humidité.
18)N’exposez pas cet appareil à l’humidité ou aux projections liquides. Ne posez pas de récipient rempli de liquide, tel qu'un vase, sur cet appareil.
19)Maintenez un espace d’au moins 15 cm (6 pouces) à l'arrière de l'appareil pour laisser circuler l’air et permettre une ventilation et un refroidissement convenables.
20)ATTENTION – Pour les amplificateurs de puissance montés en Rack, ne placez pas de câbles et matériaux à proximité des côtés de l’appareil. Laissez l'appareil refroidir pendant 2 minutes avant de le retirer du Rack.
21)Les amplificateurs, les haut-parleurs, les enceintes, les casques et écouteurs (selon le cas) peuvent produire des niveaux sonores très élevés qui peuvent causer des dommages auditifs temporaires ou permanents. Réglez le volume avec modération.
22)Norme fédérale US FCC Part 15 (pour les produits numériques répondant aux descriptions) - alinéa 15.21 : Les changements ou modifications non approuvées officiellement par l'organisation ou la société responsable de la conformation à la norme peuvent annuler le droit de l'utilisateur à se servir du produit. REMARQUE : le fabricant n'est pas responsable des interférences radio ou TV causées par les modifications non-autorisées apportées au matériel. Ces modifications peuvent annuler le droit de l'utilisateur à se servir du produit.
23)MISE EN GARDE – Pour éviter d'endommager les produits munis de piles internes ou externes : • Les piles et/ou le produit dans lequel elles sont installées ne doivent pas être exposés à une chaleur excessive, comme les rayons du soleil, le feu, etc. • Il y a un risque d’explosion lorsque la pile n’est pas correctement connectée/remplacée. Remplacez-la uniquement par une pile de type identique ou équivalent, spécifié dans les instructions ou sur le produit.
24)ATTENTION – Déconnectez l'appareil du secteur et laissez-le refroidir avant de toucher ou de remplacer les lampes.
25)ATTENTION – Veuillez vous assurer que l'appareil soit mis à la terre avant de connecter la fiche au secteur. De la même façon, assurez-vous que la terre soit déconnectée en dernier lorsque vous déconnectez la prise du secteur.
26)Les équipements de CLASSE I (mis à la terre avec une fiche secteur à trois broches) doivent être impérativement connectés à une prise SECTEUR avec terre.
I M P O R T A N T I N O R M E D I S I C U R E Z Z A
Il simbolo del fulmine con la punta a freccia, racchiuso in un triangolo equilatero, avverte l’utente della presenza di tensione pericolosa non isolata all’interno del prodotto, sufficiente a costituire un rischio di shock elettrico per le persone.
Il punto esclamativo all’interno di un triangolo equilatero avvisa l’utente della presenza di importanti istruzioni per il funzionamento e la manutenzione incluse nel materiale informativo che accompagna il prodotto.
1)Leggere queste istruzioni.
2)Conservare queste istruzioni.
3)Rispettare tutte le avvertenze.
4)Seguire tutte le istruzioni.
5)Non usare questo apparecchio vicino all’acqua.
6)Pulire unicamente con un panno asciutto.
7)Non ostruire le prese di aerazione. Installare secondo le istruzioni fornite dal costruttore.
8)Non installare vicino a fonti di calore come caloriferi, diffusori di calore, stufe o altri dispositivi che producono calore (inclusi gli amplificatori).
9)Non annullare la sicurezza garantita dalla spina polarizzata o con messa a terra. Le spine polarizzate sono caratterizzate da due lamine, di cui una più grande dell’altra. Le spine con messa a terra dispongono di due lame e di un terzo polo per la messa a terra. La lamina grande o il terzo polo sono contemplati per garantire la sicurezza. Se la spina del cavo fornito in dotazione non si adatta alla presa, consultare un elettricista per sostituire la presa obsoleta.
10)Proteggere il cavo di alimentazione perché non venga calpestato, tirato o piegato, in particolare vicino alla presa e al punto in cui il cavo esce dal dispositivo.
11)Usare solo accessori/componenti specificati dal costruttore.
12)Usare solo carrelli, supporti, treppiedi, staffe o tavoli specificati dal costruttore o venduti con l’apparecchio. Quando si usa un carrello, fare attenzione nello spostare la combinazione carrello/apparecchio per evitare lesioni causate dal ribaltamento.
13)Scollegare il dispositivo durante i temporali con fulmini o in caso di lunghi periodi di inutilizzo.
14)Per l’assistenza tecnica rivolgersi sempre a personale qualificato. È necessaria l’assistenza quando il dispositivo risulta danneggiato in qualunque modo (ad esempio: cavo di alimentazione o spina danneggiati, liquido versato o oggetti caduti nel dispositivo, dispositivo esposto a pioggia o umidità, funzionamento non normale o dispositivo caduto).
15)Per scollegare completamente l’apparecchio dalla presa di rete CA togliere la spina del cavo di alimentazione dalla presa CA.
16)La spina di rete del cavo di alimentazione deve essere sempre facilmente accessibile e operabile.
17)AVVERTENZA - Per ridurre il rischio di incendio o di shock elettrico, non esporre questo apparecchio alla pioggia o all’umidità.
18)Non esporre il dispositivo a sgocciolamenti o a spruzzi di alcun liquido ed assicurarsi che nessun oggetto contenente liquidi, come vasi, venga collocato su di esso.
19)Lasciare almeno 15 cm di spazio libero dietro al dispositivo per consentire una corretta aerazione e il raffreddamento dell'unità.
20)ATTENZIONE- Per gli amplificatori di potenza montati all'interno di un rack, mantenere tutti i cavi e gli oggetti lontano dai fianchi laterali del dispositivo e, prima di estrarlo dal rack-case, lasciarlo raffreddare per 2 minuti.
21)Gli amplificatori, i sistemi di altoparlanti e le cuffie/dispositivi in-ear (se presenti) possono generare livelli audio con un'elevata pressione sonora, in grado di causare danni temporanei o permanenti all'udito. Quindi, durante l'uso è opportuno prestare molta attenzione nell'impostazione e regolazione dei livelli di volume.
22) |
Dichiarazione di Conformità FCC Parte 15 (per prodotti digitali, se applicabile) - |
|
Parte 15.21: Le modifiche non espressamente approvate dalla parte responsabile alla conformità |
può annullare l'autorità dell'utente di operare con il dispositivo. NOTA: Il costruttore non è da ritenersi responsabile per qualsiasi interferenza radio o TV causata da modifiche non autorizzate del dispositivo in oggetto. Tali modifiche possono annullare l'autorità dell'utente di operare con il dispositivo.
23)AVVERTENZA – Per preservare la sicurezza dell'unità, prodotti con batterie interne o esterne (battery-pack): • Le batterie e/o il prodotto in cui queste sono installate non devono essere esposti a calore eccessivo, come luce solare, fuoco o simili. • Se la batteria viene collegata/sostituita in modo non corretto può sussistere il rischio di esplosione. Sostituire solo con batterie dello stesso tipo o equivalente, come specificato nelle istruzioni o sul prodotto.
24)CAUTELA - Prima di toccare/sostituire le valvole, disconnettere l'unità e lasciarla raffreddare.
25)ATTENZIONE – Prima di collegare la spina alla rete elettrica, assicurarsi che la presa disponga di messa a terra. Inoltre, nel disconnettere la connessione con messa a terra, assicurarsi di aver precedentemente scollegato la spina dalla rete elettrica.
26)Gli apparati in CLASSE I (con messa a terra mediante spina a tre-poli) devono essere collegati alla presa di corrente elettrica tramite una connessione protettiva con messa a terra.
W I C H T I G E A N W E I S U N G E N Z U I H R E R S I C H E R H E I T
Das Symbol Blitz und Pfeil in einem gleichseitigen Dreieck soll den Benutzer vor dem Vorhandensein nicht isolierter „gefährlicher Spannung“ im Gehäuse des Produkts warnen, die möglicherweise hoch genug ist, um ein Stromschlagrisiko darzustellen.
Das Ausrufezeichen in einem gleichseitigen Dreieck soll den Benutzer auf wichtige Bedienungsund Wartungsanweisungen (Serviceanweisungen) in den dem Produkt beiliegenden Broschüren aufmerksam machen.
1)Lesen Sie diese Anweisungen.
2)Bewahren Sie diese Anweisungen auf.
3)Beachten Sie alle Warnhinweise.
4)Befolgen Sie alle Anweisungen.
5)Benutzen Sie die Vorrichtung nie in der Nähe von Wasser.
6)Nur mit trockenem Tuch reinigen.
7)Belüftungsöffnungen nicht blockieren. Den Anweisungen des Herstellers entsprechend installieren.
8)Installieren Sie die Vorrichtung nicht in der Nähe von Wärmequellen wie Radiatoren, Heizkörpern, Herden oder anderen Geräten (insbesondere Verstärkern), die Wärme erzeugen.
9)Achten Sie darauf, den Sicherheitszweck des verpolungssicheren oder geerdeten Steckers nicht zu umgehen. Ein verpolungssicherer Stecker ist mit zwei flachen Stiften ausgestattet, von denen einer breiter ist als der andere. Ein geerdeter Stecker ist mit zwei Stiften und einer Erdbuchse ausgestattet. Der breitere Stift oder die Erdbuchse dienen Ihrer Sicherheit. Sollte der mitgelieferter Stecker nicht in Ihre Steckdose passen, wenden Sie sich zum Austausch der veralteten Steckdose an einen Elektriker.
10)Schützen Sie das Stromkabel davor, dass darauf getreten oder dass es besonders am Stecker, an Steckerleisten oder an der Austrittsstelle aus dem Gerät geknickt wird.
11)Verwenden Sie nur vom Hersteller zugelassenes Zubehör.
12)Benutzen Sie das Gerät nur mit den vom Hersteller festgelegten oder gemeinsam mit dem Gerät verkauften Wagen, Ständern, Stativen, Halterungen oder Tischen. Achten Sie bei Benutzung eines Wagens darauf, dass das gemeinsam mit dem Wagen bewegte Gerät nicht kippt und zu Verletzungen führt.
13)Ziehen Sie bei Gewittern oder bei längeren Stillstandzeiten den Netzstecker des Geräts.
14)Überlassen Sie alle Wartungsarbeiten qualifiziertem Personal. Ein Service wird erforderlich, wenn das Gerät in irgendeiner Weise beschädigt wurde, beispielsweise bei Beschädigung des Netzsteckers oder des Netzkabels, wenn Flüssigkeiten über das Gerät vergossen wurden oder Gegenstände in das Gerät gefallen sind, das Gerät Regen oder Feuchtigkeit ausgesetzt war, nicht ordnungsgemäß funktioniert oder fallen gelassen wurde,
15)Ziehen Sie den Netzstecker aus der Steckdose, um das Gerät vollständig vom Wechselstromnetz zu trennen.
16)Der Netzstecker des Netzkabels muss jederzeit betriebsbereit sein.
17)WARNHINWEIS: Um die Gefahr vom Feuer oder Stromschlag zu vermeiden, darf das Gerät nicht Regen oder Feuchtigkeit ausgesetzt werden.
18)Lassen Sie nicht zu, dass Flüssigkeiten auf das Gerät tropfen oder gespritzt werden können, und achten Sie darauf, dass keine mit Wasser gefüllten Gegenstände wie Vasen auf das Gerät gestellt werden.
19)Achten Sie auf mindestens 15 cm Abstand hinter dem Gerät für die ungehinderte Luftzirkulation und Kühlung des Geräts.
20)VORSICHT: Bei in Regalen (Racks) montierten Verstärkern ist die gesamte Verkabelung und sämtliches Material von den Seiten des Gerätes fernzuhalten; lassen Sie das Gerät vor Entnahme aus dem Rack zwei Minuten lang abkühlen.
21)Verstärker, Lautsprechersysteme und Ohr/Kopfhörer (falls getragen) können sehr hohe Schalldruckpegel erzeugen und dadurch vorübergehende oder dauerhafte Hörschäden verursachen. Gehen Sie vorsichtig vor, wenn Sie während des Betriebs die Lautstärkepegel einstellen oder nachregeln.
22)FCC Konformitätserklärung Teil 15 (für Digitalprodukte, nach Anwendbarkeit) - Teil 15.21: Änderungen oder Modifikationen, die nicht ausdrücklich von der für die Konformität verantwortlichen Stelle genehmigt wurden, können zu einem Betriebsverbot führen. HINWEIS: Der Hersteller ist nicht verantwortlich für Radiooder TV-Interferenzen, die durch unautorisierte Modifikationen an diesem Gerät verursacht werden. Derartige Modifikationen können zu einem Betriebsverbot führen.
23)WARNHINWEIS: Zur Aufrechterhaltung der Sicherheit von mit internen oder externen Batterien (Akkumulatoren) betriebenen Produkten ist folgendes zu beachten: • Die Batterien sowie das Produkt, in dem sie installiert sind, dürfen keiner übermäßigen Hitze (durch Sonneneinstrahlung, Feuer usw.) ausgesetzt werden. • Bei unsachgemäßem Anschluss/Austausch der Batterien besteht Explosionsgefahr. Der Austausch darf nur mit Batterien des gleichen oder gleichwertigen Typs erfolgen, der in den Anweisungen oder am Produkt angegeben ist.
24)VORSICHT – Ziehen Sie den Netzstecker und lassen Sie das Gerät abkühlen, bevor Sie die Vakuumröhren berühren/ersetzen.
25)VORSICHT – Stellen Sie einen Erdungsanschluss her, bevor Sie den Netzstecker in die Netzsteckdose stecken. Unterbrechen Sie den Erdungsanschluss erst, nachdem Sie den Netzstecker aus der Netzsteckdose gezogen haben.
26)CLASS I Geräte (geerdet mit einem 3-Stift Stecker) müssen an eine Netzsteckdose mit Schutzerde angeschlossen werden.
I N S T R U Ç Õ E S D E S E G U R A N Ç A I M P O R T A N T E S
O relâmpago com símbolo de cabeça de flecha dentro de um triângulo equilátero destina-se a alertar o utilizador para a presença de “tensão perigosa” dentro da estrutura do produto que pode ter magnitude suficiente para representar um risco de choque eléctrico para as pessoas.
O ponto de exclamação dentro do triângulo equilátero destina-se a alertar o utilizador para a presença de instruções de funcionamento e manutenção (assistência técnica) na documentação que acompanha o produto.
1)Leia estas instruções.
2)Guarde estas instruções.
3)Cumpra todas as advertências.
4)Siga todas as instruções.
5)Não utilize este aparelho próximo de água.
6)Limpe apenas com um pano seco.
7)Não bloqueie quaisquer orifícios de ventilação. Instale de acordo com as instruções do fabricante.
8)Não instale próximo de fontes de calor, tais como radiadores, saídas de ar quente, fogões ou outros aparelhos (incluindo amplificadores) que produzam calor.
9)Não anule a finalidade de segurança da ficha polarizada ou de ligação à terra. Uma ficha polarizada possui duas lâminas, sendo uma delas mais larga do que a outra. Uma ficha de ligação à terra possui duas lâminas e um terceira ponta de ligação à terra. A lâmina larga ou a terceira ponta são fornecidas para sua segurança. Se a ficha fornecida não couber na sua tomada, consulte um electricista para substituir a tomada obsoleta.
10)Proteja o cabo de alimentação eléctrica do aparelho para que não seja pisado ou dobrado especialmente nas fichas, nos receptáculos ou no ponto onde o cabo sai do aparelho.
11)Utilize apenas acessórios/peças especificados pelo fabricante.
12)Utilize o aparelho apenas com o carrinho, suporte, tripé ou mesa especificados pelo fabricante ou vendidos com o aparelho. Quando utilizar um carrinho, tenha cuidado ao deslocar a combinação carrinho/aparelho para evitar ferimentos provocados por uma possível queda.
13)Desligue este aparelho durante trovoadas ou quando não for utilizá-lo por um longo período de tempo.
14)Solicite todas as reparações a pessoal de assistência qualificado. É necessária assistência técnica quando o aparelhos se tiver danificado de alguma forma como, por exemplo, o cabo de alimentação ou a ficha estão danificados, foram derramados líquidos ou caíram objectos para dentro do aparelho, o aparelho esteve exposto a chuva ou humidade, o aparelho não funciona normalmente ou sofreu uma queda.
15)Para desligar por completo este aparelho da corrente eléctrica de CA, desligue a ficha do cabo de alimentação do receptáculo de CA.
16)A ficha eléctrica do cabo de alimentação irá permanecer pronta a funcionar.
17)ADVERTÊNCIA – Para reduzir o risco de incêndio ou choque eléctrico, não exponha este aparelho a chuva ou humidade.
18)Não exponha este equipamento a gotejamento ou salpicos e certifique-se de que não são colocados objectos com líquidos, tais como jarras, sobre o equipamento.
19)Mantenha desobstruído pelo menos 15,25 cm de espaço por trás da unidade para que a unidade disponha de ventilação e arrefecimento adequados.
20)CUIDADO – Para amplificadores montados numa estante, mantenha todas as ligações eléctricas e materiais afastados das partes laterais da unidade e deixe a unidade arrefecer durante 2 minutos antes de retirar de uma estante.
21)Amplificadores, sistemas de alto-falantes, e fones de ouvido (se equipado) são capazes de produzir níveis de pressão de som muito altos que podem causar lesões auditivas temporárias ou permanentes. Seja cauteloso ao configurar e ajustar os níveis de volume durante o uso.
22)FCC parte 15 Indicação de Conformidade (para produtos digitais, como aplicável) – Parte 15.21: Mudanças ou modificações não aprovadas por parte da responsável pela conformidade, poderia causar que o usuário não tenha mais a autoridade de manusear o equipamento. NOTA: O fabricante não está responsável por qualquer interferência de radio ou televisão causada por modificações deste equipamento. Tais modificações pode fazer com que o usuário não tenha mais a autoridade de manuseá-lo.
23)ADVERTÊNCIA – Para manter a segurança do produto, no caso de produtos com pilhas (conjunto de pilhas) internas ou externas: • As pilhas e/ou o produto no qual estão instaladas, não devem ser expostos a temperaturas excessivas, tal como a luz solar directa, fogo, ou temperaturas semelhantes.
• Pode existir um risco de explosão se a pilha estiver ligada/colocada de forma incorrecta. Substitua apenas por pilhas de tipo equivalente ou idêntico ao especificado nas instruções ou no produto.
24)AVISO – Desconecte a unidade e permite-o de resfriar-se antes tocar ou trocar as válvulas de vácuo.
25)AVISO – Providencie uma conexão terra antes de ligar seu aparelho à tomada. E, quando estiver desconectando o terra, certifique-se de ter desconectado antes de puxar o fio ligado à corrente elétrica.
26)A aparelhagem com construção CLASS I (tipo terra com um plugue de 3 pinos) deve ser conectado a uma tomada elétrica MAINS com uma conexão terra de proteção.
ックを与えるに十分な、絶縁されていない「高電圧の危険」が製品のケース 内にあることを警告するものです。
8) 熱を発する機器の近くには設置しないでください。
のブレードに加えて接地プロングがあります。幅の広いブレードまたは3
11)/
14) こぼれて入ったり、ものが落ちて入ったりした場合、装置が雨や湿気にさらされた 場合、装置が正常に動作しない場合、装置を落とした場合。
15)AC
17) ようにしてください。
19)15.5 cm
21)/•
22)FCC Part 15 ( ) – Part 15.21::
23) ッテリーおよび/ /
24)– /
25) から接地を切断してください。
26)I 3

• INTRODUCTION •
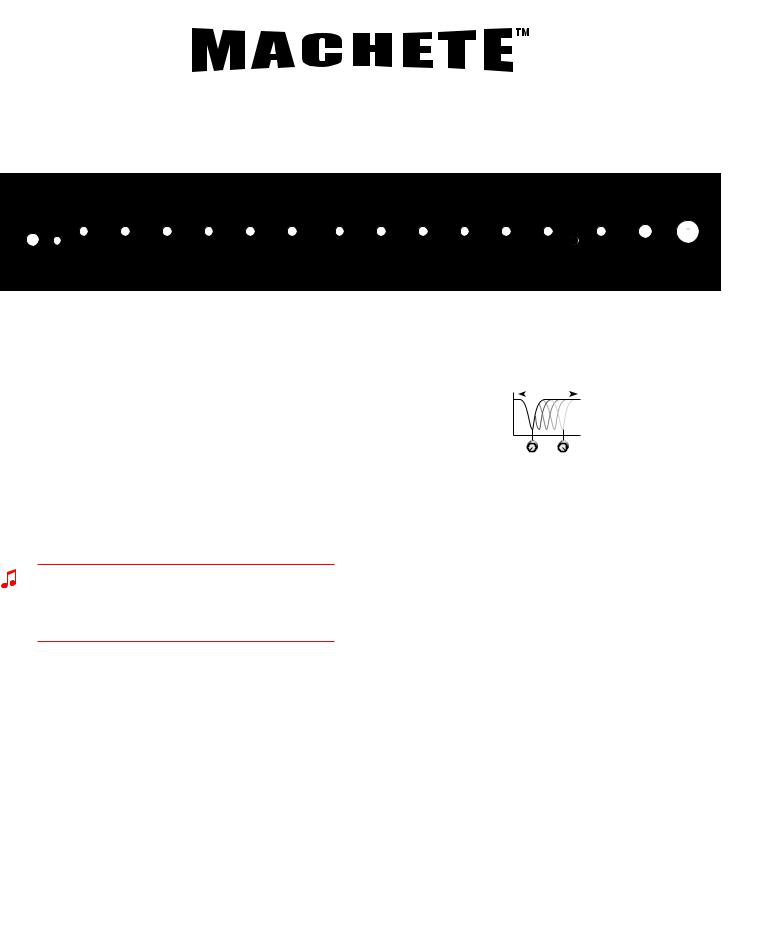
The new Machete amp is unlike any guitar amp Fender has ever created—a highperformance, high-gain, high-end tone machine that combines tube sound and highly distinctive cosmetics. Discerning guitarists and amp connoisseurs who are both meticulous and adventurous about even the finest details of their sound will find the Machete a formidable new member of the Fender family.
The 50-watt, dual-channel Machete combo boasts a completely new high-gain channel unlike anything ever seen on a Fender amp, an extremely clear-sounding clean channel that can be pushed into aggressive rhythm guitar territory, and onboard digital reverb. Its heavily robust enclosure construction and single 12” Celestion® speaker deliver full, rich and pummeling response, with a midrange notch control, adjustable speaker damping for finely tuned performance, XLR output with switchable speaker muting and cabinet emulation, and push-pull pots for bright boost and gain boost on the rhythm channel. Its distinctive cosmetics include black vinyl covering with inlaid white piping and gray vinyl “steering wheel grip” accents, new Black Silver Strand grille cloth, heavily knurled chrome knobs and all-new corners and hardware. Four-button footswitch and fitted cover included.
+/-
INPUT
™
|
|
|
|
|
|
|
|
|
CHANNEL |
TWO |
|
|
LOOSE |
TIGHT |
|
|
|
CHANNEL ONE |
|
|
|
|
|
|
|
|
|
|
|
|
|
|
|
|
|
|
|
|
|
|
|
|
CH 2 |
|
|
|
|
|
|
|
|
|
|
|
|
|
NOTCH |
REVERB |
DAMPING |
|
|
|
|
|
|
|
|
|
LOW |
MID |
HIGH |
|
|
|
PULL BRIGHT |
PULL |
GAIN BOOST |
|
|
|
NOTCH |
GAIN |
VOLUME |
|
|
|
|
|
|
|
|
HIGH |
|
|
|
|
|
|
|
|||||
|
VOLUME |
LOW |
MID |
|
|
|
|
|
|
|
|
|
||
GAIN |
|
|
|
|
|
|
|
|
|
|
|
|||
|
|
|
|
|
|
|
|
|
|
|
|
|
|
|
™
6
• CONTROL PANEL •
A.INPUT — Plug your guitar in here.
B.+/– — Press to activate 6dB of input attenuation as indicated by the button LED. This provides cleaner response when used with pre-amplified or high-output instruments.
C.GAIN — Adjusts the channel one preamp gain level. Pull this knob out for additional channel one high-frequency preamp response.
D.VOLUME — Adjusts the channel one volume. Pull this knob out to select the "Channel One Boost" channel for an extra boost of preamp gain; also switchable from the Machete footswitch or by using MIDI commands.
If the footswitch or MIDI is used to select the channel one gain boost, the in/out position of the VOLUME knob may not accurately indicate whether the channel one boost is selected. The "CHANNEL ONE GAIN BOOST" LED on the footswitch will always light up when the channel one boost is active.
E.LOW / MID / HIGH — Adjusts the channel one tone.
F.NOTCH — Adjusts the channel one mid-frequency attenuation for a variety of American and British tonal flavors:
|
FREQUENCY |
Treble |
Bass |
Emphasis |
Emphasis |
G.GAIN — Adjusts the channel two preamp gain level.
H.VOLUME — Adjusts the channel two volume.
I.LOW / MID / HIGH — Adjusts the channel two tone.
J.NOTCH — Adjusts the channel two mid-frequency attenuation for a variety of American and British tonal flavors.
K.CHANNEL SELECT — Press to switch between channel one and channel two. Illuminates when channel two is active.
L.REVERB — Adjusts the reverb level for both channels.
M.DAMPING — Adjusts speaker damping, or the resonance interaction between the power amplifier and the speaker.
N.POWER INDICATOR — Illuminates when power is on to the unit.
Connect either jack on the footswitch to the
FOOTSWITCH jack {Z} on the rear panel of the amplifier using the supplied cable to enable the remote footswitch functions described below.
Press to switch channels, instead of using the control panel CH 2 switch {K}.
• FOUR-BUTTON FOOTSWITCH •
You can connect the "open" jack to a second Machete footswitch (optional) to enable identical footswitch functions from two remote locations!
|
|
|
|
Press to switch the channel one |
Press to switch the effects |
Press to switch the reverb |
|
gain boost on/off, instead of pulling |
loop on/off. |
effect on/off. |
|
out the VOLUME knob {D}. |
|
|
|
7
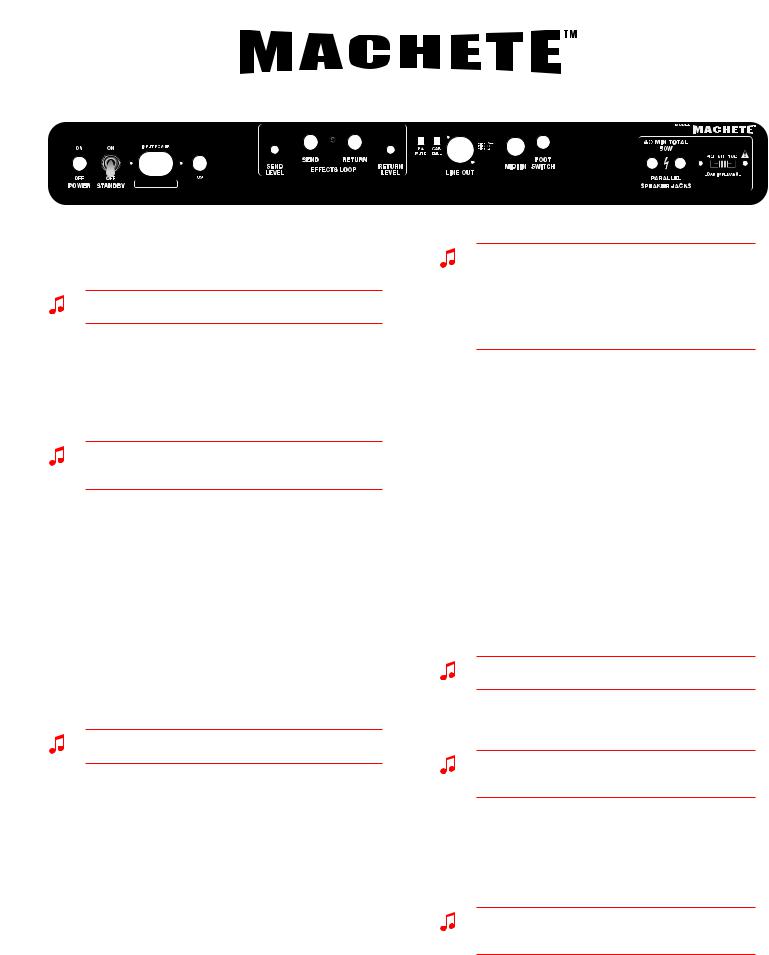
• REAR PANEL •
O.POWER SWITCH — Switch to the "ON" position to turn the unit on. Switch to the "OFF" position to turn the unit off.
Both POWER and STANDBY must be switched to "ON" to play the amplifier.
P.STANDBY — Switch to "STANDBY" during short breaks instead of turning the POWER off. In the STANDBY position, highvoltage power is turned off to the pre-amp and power-amp tubes, extending their life and silencing the amplifier. Power is still supplied to the tube filaments, keeping them warm and ready to play.
You can further extend the life span of the amplifier tubes by keeping the Standby switch in the "STANDBY" position for the first 60 seconds each time you switch the Power to "ON."
Q.POWER CORD SOCKET — Connect to a grounded outlet using the included power cord in accordance with the voltage and frequency ratings specified on the rear panel of your amplifier.
R.FUSE — Protects the unit in case of electrical faults. Replace only with the type and rating specified on the rear panel of your amplifier.
S.SEND LEVEL — Adjusts the signal level sent to any effects connected to the EFFECTS LOOP jacks {T}.
T.EFFECTS LOOP — These effects loop jacks have been tested and found compatible with instrument-level stomp boxes and line-level effects processors. Connect SEND to your effects device input and RETURN to the effects output.
The effects loop cannot be engaged without a plug in the RETURN jack.
U.RETURN LEVEL — Adjusts the signal level returning from any effects connected to the EFFECTS LOOP jacks.
To set the Effects Loop "unity gain level" so that volume levels are the same whether the effects loop is ON or OFF:
1.Start with the SEND LEVEL {S} at maximum and the RETURN LEVEL {U} at minimum.
2.If any distortion is noted with the effects processor, reduce the SEND LEVEL (and/or the processor's input level control) until the distortion is no longer present).
3.Then increase the RETURN LEVEL (and/or the processor's output level control) so the effects loop output is at unity gain (or to your preference).
The EFFECTS LOOP button on the Machete footswitch can be configured as a switchable lead volume boost without effects by simply connecting the SEND and RETURN jacks with an instrument cable. The effects loop will provide an additional 12dB of gain when both SEND LEVEL {S} and RETURN LEVEL {U} are set to maximum. Lower the RETURN LEVEL for less boost if preferred.
V.POWER AMP MUTE — Press this switch in to disable output from the power amp and the PARALLEL SPEAKER JACKS {AA}.
W.CABINET EMULATION — Press this switch in to activate a speaker cabinet emulation circuit for the LINE OUT jack {X}. Use of cabinet emulation is strongly recommended should the LINE OUT jack be connected to a sound board or recording equipment.
X.LINE OUT — Impedance balanced output for connection to sound boards and recording equipment.
y.MIDI in —Connect a MIDI controller here to use MIDI for channel selection, effects loop bypass, and reverb on/off.
To set up MIDI for channel selection:
1.Press the "+/–" {B} and "CH 2" {K} front panel push buttons simultaneously and release. The LED in the "+/–" switch will blink indicating that the Machete is in MIDI Learning Mode.
By default, all MIDI program change commands are assigned to select Machete channel one.
2.Send the MIDI program change you want to be associated with a Machete channel.
When the Machete is put into MIDI Learning Mode, the first MIDI command that the Machete receives is used to set the MIDI channel assignment for the amplifier.
3.Use the front panel controls on the Machete to switch to the channel you wish to assign. (This will cause the blinking "+/–" LED to hesitate for a moment.)
The available Machete channel selections are: •Channel One, •Channel One Boost, •Channel Two
While the Machete is in Learning Mode, the last Machete channel change is what will be remembered for a given MIDI program command change.
4.Press and release the "+/–" and "CH 2" buttons simultaneously to exit MIDI Learning Mode.
8

• REAR PANEL (CONTINUED) •
To use MIDI for effects loop and reverb bypass:
No set up is required. Use the same MIDI channel as used to select Machete channels in the section above. For the effects loop, send a change message on MIDI continuous controller #85. (0 to 63 is effects loop bypass, 64 to 127 is effects loop on.) For reverb, send a change message on MIDI continuous controller #84. (0 to 63 is reverb bypass, 64 to 127 is reverb on.)
Notes on using MIDI:
1.You can re-enter MIDI Learning Mode to reassign Channel One, Channel One Boost, and Channel Two.
2.MIDI bank select messages are ignored, so the MIDI program change commands are not “bank-able.”
3.When in MIDI Learning Mode, the Machete footswitch will continue to function, but changes made by the footswitch will not be “remembered.”
4.To erase all MIDI assignments in the Machete, press and hold either the "+/–" switch or the "CH 2" switch while turning on the amplifier. Release the switch.
z.FOOTSWITCH — Plug the included footswitch in here to enable remote switching functions (see page 7).
aa.PARALLEL SPEAKER JACKS —
Connect speaker enclosures, then set the LOAD IMPEDANCE switch {BB} accordingly.
|
|
|
|
! |
A speaker must ALWAYS be connected to one of the SPEAKER |
||
jacks when the amplifier is on or damage may occur to the unit. |
|||
|
|
|
|
bb.LOAD IMPEDANCE — Set this switch to match the total load impedance of the speakers you have connected, according to the table below. The internal Machete speaker is 16Ω.
|
|
|
|
|
|
|
|
|
IMPEDANCE |
|
|
SPEAKER |
|
SPEAKER |
|
TOTAL |
SWITCH |
||||
|
|
ONE |
|
TWO |
|
IMPEDANCE |
SETTING |
|||
|
|
16Ω |
+ |
None |
= |
16Ω |
16Ω |
|||
|
|
16Ω |
+ |
16Ω |
= |
8Ω |
8Ω |
|||
|
|
|
8Ω |
+ |
None |
= |
8Ω |
8Ω |
||
|
|
|
8Ω |
+ |
8Ω |
= |
4Ω |
4Ω |
||
|
|
|
4Ω |
+ |
None |
= |
4Ω |
4Ω |
||
|
|
|
|
|
|
|||||
! |
|
Switch the amplifier to "STANDBY" {P} or switch the power to |
||||||||
|
"OFF" {O} while changing speaker connections. |
|||||||||
|
|
|
|
|
|
|
|
|
|
|
• TUBE REPLACEMENT •
Your new Fender® amplifier comes equipped with the highest quality tubes available, sourced from various manufacturers all over the world. Because of occasional
irregularities in supply, the specific tube type used in each amplifier is subject to change without notice.
When replacing output tubes, please note the specific tube on the original tubes factory supplied with your amplifier. For example,
6L6 output tube types used by Fender include, but are not limited to: 6L6C; 6L6CQ; 6L6RD, etc. The installation of a different type may require significant adjustment by a qualified technician to avoid reduction in performance and tube life.
Additionally, Groove Tubes® tests and sorts many of our output tubes based on their measured performance. The sorted tubes are marked with a label on the base with coarse ratings of BLUE, WHITE, & RED plus fine ratings of 1-10. If your amp came supplied with, for example, a pair of matched 6L6 power tubes ranked at WHITE-6, then any pair of 6L6 power tubes marked with a course rating of WHITE will be a good replacement. If the tube replacements are marked as WHITE-6, they will be a perfect direct replacement.
If you have questions or concerns, contact your Fender dealer or authorized service center.
• TUBE INFORMATION LABEL •
The tube information label is located on the inside wall of the amplifier cabinet and includes tube location and hum balance adjustment location information.
HUM BALANCE ADJUST — This control is located on the bottom side of the amplifier chassis as shown on the tube information label. Should any tubes be replaced, use this adjustment to minimize the hum heard from the amplifier while at rest (not being played). Turn both GAIN knobs {C and G} all the way down. Turn both VOLUME knobs {D and H} and both LOW knobs {E and I} all the way up. Turn all other channel knobs to 50% rotation. Select channel two. Use a small flat-head screwdriver to adjust this control until hum is at a minimum. Select channel one. If the hum is not less than channel two, try replacing the V2 tube.
IMPORTANT SAFETY INFORMATION — Replace and secure
!the back cover after replacing tubes.
9

• INTRODUCCIÓN •
El nuevo amplificador Machete es distinto a cualquier otro amplificador diseñado por Fender hasta la fecha—un generador de sonidos de alto rendimiento, alta ganancia y de última generación que combina el sonido a válvulas con un aspecto y un acabado totalmente exclusivo. Los guitarristas más expertos junto con los mayores especialistas del campo de la amplificación, exigentes en todos los detalles que rodean su sonido encontrarán que el Machete es un formidable nuevo miembro de la familia Fender.
El combo de doble canal y 50 watios Machete dispone de un canal de alta ganancia completamente nuevo, absolutamente diferente a todo lo que se haya visto hasta ahora en un amplificador Fender, un canal limpio con un sonido extremadamente cristalino, pero capaz a la vez de llegar hasta los límites más agresivos de la guitarra rítmica y una reverb digital interna. Su recinto acústico de construcción robusta y su único altavoz Celestion® de 12” le ofrecen una respuesta completa, rica y con pegada, con un control de muesca de rango medio, amortiguación ajustable de altavoz para un rendimiento totalmente afinado, salida XLR con anulación de altavoz conmutable y simulación de recinto acústico, y mandos giratorios "push-pull" para un realce de brillo y de ganancia en el canal rítmico. Su exclusivo acabado incluye un recubrimiento en vinilo negro con incrustaciones en ribetes blancos y muescas en vinilo gris, una nueva parrilla de tela en color negro plateado, mando cromados de gran resistencia y cantoneras y otras piezas de nuevo diseño. Incluye también una pedalera de cuatro pedales y una tapa.
+/-
INPUT
™
|
|
|
|
|
|
|
|
|
CHANNEL |
TWO |
|
|
LOOSE |
TIGHT |
|
|
|
|
|
|
|
|
|
|
|
|
|
||
|
|
|
CHANNEL ONE |
|
|
|
|
|
|
|
|
|
|
|
|
|
|
|
|
|
|
|
|
|
|
|
|
CH 2 |
|
|
|
|
|
|
|
|
|
|
|
|
|
NOTCH |
REVERB |
DAMPING |
|
|
|
|
|
|
|
|
|
LOW |
MID |
HIGH |
|
|
|
|
|
|
|
|
|
|
|
VOLUME |
|
|
|
|
||
PULL BRIGHT |
PULL |
GAIN BOOST |
|
|
|
NOTCH |
GAIN |
|
|
|
|
|
||
|
|
HIGH |
|
|
|
|
|
|
|
|||||
|
VOLUME |
LOW |
MID |
|
|
|
|
|
|
|
|
|
||
GAIN |
|
|
|
|
|
|
|
|
|
|
|
|||
|
|
|
|
|
|
|
|
|
|
|
|
|
|
|
™
10
• PANEL DE CONTROL •
A.INPUT — Conecte aquí su guitarra.
B.+/– — Pulse aquí para activar 6 dB de atenuación de entrada, tal como será indicado por el piloto del botón. Esto le ofrece una respuesta más limpia cuando lo use con instrumentos preamplificados o de alta salida.
C.GAIN — Esto ajusta el nivel de ganancia del previo del canal 1. Tire de este mando hacia fuera para una respuesta adicional en los agudos del previo del canal 1.
D.VOLUME — Ajusta el volumen del canal 1. Tire de este mando para elegir el "realce de canal 1" para un realce extra de la ganancia del previo, conmutable también desde la pedalera del Machete o a través de órdenes MIDI.
Si usa la pedalera o el sistema MIDI para elegir el realce de ganancia del canal 1, la posición dentro/fuera del mando VOLUME no indicará con precisión si el realce del canal 1 está activa o no. El piloto "CHANNEL ONE GAIN BOOST" de la pedalera SIEMPRE estará iluminado cuando esté activo el realce del canal 1.
E.LOW / MID / HIGH — Ajuste con estos mandos el tono del canal 1.
F.NOTCH — Esto ajusta la atenuación de medios del canal 1 para una amplia gama de sonidos de tipo americano y británico:
|
FREQUENCY |
Énfasis de |
Énfasis de |
agudos |
graves |
G.GAIN — Esto ajusta el nivel de ganancia del previo del canal 2.
H.VOLUME — Esto ajusta el volumen del canal 2.
I.LOW / MID / HIGH — Ajustan el tono del canal 2.
J.NOTCH — Esto ajusta la atenuación de medios del canal 2 para una amplia gama de sonidos de tipo americano y británico.
K.CHANNEL SELECT — Púlselo para cambiar entre el canal 1 y el 2. Se iluminará cuando esté activo el canal 2.
L.REVERB — Ajusta el nivel de reverb de ambos canales.
M.DAMPING — Ajusta la amortiguación del altavoz o la interacción de resonancia entre la etapa de potencia y el altavoz.
N.PILOTO DE ENCENDIDO — Se ilumina cuando la unidad está encendida.
Conecte cualquiera de las tomas de la pedalera a la toma FOOTSWITCH {Z} del panel trasero del amplificador usando el cable incluido para activar las funciones de conmutación remotas descritas abajo.
Púlselo para cambiar de canal, en lugar de usar el interruptor CH 2 {K} del panel de control.
• PEDALERA DE CUATRO PEDALES •
Puede conectar la toma "abierta" a una segunda pedalera Machete (opcional) para disponer de las mismas funciones de conmutación remota desde dos posiciones!
|
|
|
|
|
|
|
|
Púlselo para activar/desactivar el |
Púlselo |
para |
activar/ |
Púlselo |
para |
activar/ |
|
realce de ganancia del canal 1, en |
desactivar |
el |
bucle de |
desactivar |
el |
efecto |
|
lugar de tirar del mando VOLUME |
efectos. |
|
|
reverb. |
|
|
|
{D} del panel de control. |
|
|
|
|
|
|
|
11
 Loading...