

Page 1
Robot Air Purifier
A320/A330
U s e r G u i d e
S
D
Mode
Page 2

Page 3

Welcome and congratulations on your purchase of a Robot Air
Purifier.
We trust the purchase of your new product will help you to keep
your home clean and provide you more quality time to do other
things.
Before you go any further, we ask you to record your model
number, serial number and date of purchase below. We also
suggest you attach your Receipt to this page for safe keeping.
(Model and Serial numbers are located on the label on the
bottom of the Robot.)
MODEL # ________________
SERIAL # ________________
DATE OF PURCHASE ___ / ___ / ___
Should you have any problems in programming or getting your
product to function properly, we ask you to call us first before
contacting or returning the product to the place where you
purchased it.
Call 1-8 __-______ for assistance.
(Provide 1-8 __-______ phone number also provide address of
US business Office and WEB site for Service Stations.)
To find an authorized Service Center nearest you, please turn
to page ___.
For Warranty information, please turn to page ____.
Page 4

Content
1. Safety I nstru ctions 7. Magnet ic Tape
User Guide ……… ………..... ..... ....………… ……5 Various Uses fo r Ma gneti c Tape.. ....………… …20
Child Safe ty … ……………….. ..... ........ ..……… ..5 Applica tion of Magneti c Tape .………………. 20,21
Precaut ionar y I tems …… ……... ........ ..……… .6,7 8. Us ing Robot.... ..... ........ ..... ........ ..... ............. .21
Power Sup ply f or th e Robot ……….... ...………...7 9. SD Ca rd... ........ ..... ............. ............. ..... ........ 21
Battery Charg ing, Replaceme nt and Disposal ....8 10. Maintenan ce
Recycli ng Packa ging Mat erial ………...…… ……8 Cleanin g Rob ot...... ..... ...…………… …………. ..22
When the Produ ct ha s Problems ………… ...……8 Clea ning Filte rs... ............. ..……………………..2 2
Correct Di sposal of Pr oduct … ………….... ..... …8 Cleaning Drop Sens ors.. .....……… …………… ..22
2. Packed C onten ts and Produ ct Spec ificatio ns Cleanin g Charg er Dock ..... ........ ..……… ………23
Packed Con tents..………….. ............. ..... ....…... 9 11. LC D Icon A larm Defini tions ............. ............. 23
Product Specific ations.. ….... ............. ..…………9 12. Common Failu res.. ........ ..... ............. ............2 4
Part Name ..……… ……...... ..... ........ ..... ....……10 13. Comm on Quest ions wit h Answe rs... ........ 25,26
Unpacki ng and In stalling F ilters.… ..... ..……….10
Remote C ontro l Panel. ..... ........ ..... ...…………. 11
3. Remote C ontro l
Install ing Bat teries....... ..... ........ ..... …………...11
Use....... ... ........ ... ........ ... ........ ... .........…… ….11
4. Charge r Dock
Assembl ing C harger D ock.. ........ ..……… ……..12
Placeme nt of Char ger Dock..... ......…………12, 13
Chargin g Ro bot's B attery..... ..... ......…… ….... ..13
5. Operat ion and P rogrammi ng Robo t
LCD Panel. ..... ............. ............. ..... ...….... ..... 14
Tur ning R obot ON.... ..... ............. .......………... 14
Pause M ode.. ............. ............. …………… …...15
Tur ning Robot OFF....... ..... ........ …………… ….15
Setting Air Schedule Cleanin g Ti me..…………..15
Setting C lock Tim e..……….. ..... .......… ……….. .16
Setting F reque ncy of Sched uled Air C leaning
Time. ..... ............. ............. ..... ........ ..... .....16
6. Mode Sel ectio n
Auto Mo de... ........ ..... ........…………… …………17
Search Mo de... ........ ..... ..........……… ………….18
Spot Mo de... ........ ..... .......……………… ……….18
Back to Char ge Mo de........... ..…………………..19
Demo Mode. ..... ........ ..... ...…………………….. .19
Raise/L ower Mo de...... ..... .………………… …...1 9
Music Mo de... ........ ...…… …………………… …..19
4
Page 5
Enjoy Smar ter Life!
1. SAFETY INSTRUCTIONS
Please fo llow th ese basic Sa fety In structio ns to bes t assure you o r the pro duct is not ha rmed in t he initial s et-up
and use of th e produ ct. Should at anyti me you have any quest ions, please call o ur 1-800 number for a ssistanc e.
User Guide
Get M achin e
Bod y Wet
● Be carefu l in unpa cking the pr oduct s o as not to loos e or brea k anything .
● Immedia tely di spose of all p lasti c bags befor e readi ng these to
Safety In struc tions
prevent c hildr en from play ing wit h the bags.
● Do NOT disp ose of th e rest of the pa ckagi ng materia l until y ou check the I nstru ction
Book to mak e sure yo u have all the c onten ts. Refere nce pag e 9 for list of co ntent s.
● Read the In struc tion Book ca reful ly and use you r Robot a ccording t o the det ailed
instruc tions . Store this I nstru ction Book i n a conve nient plac e for eas y referenc e by all
users.
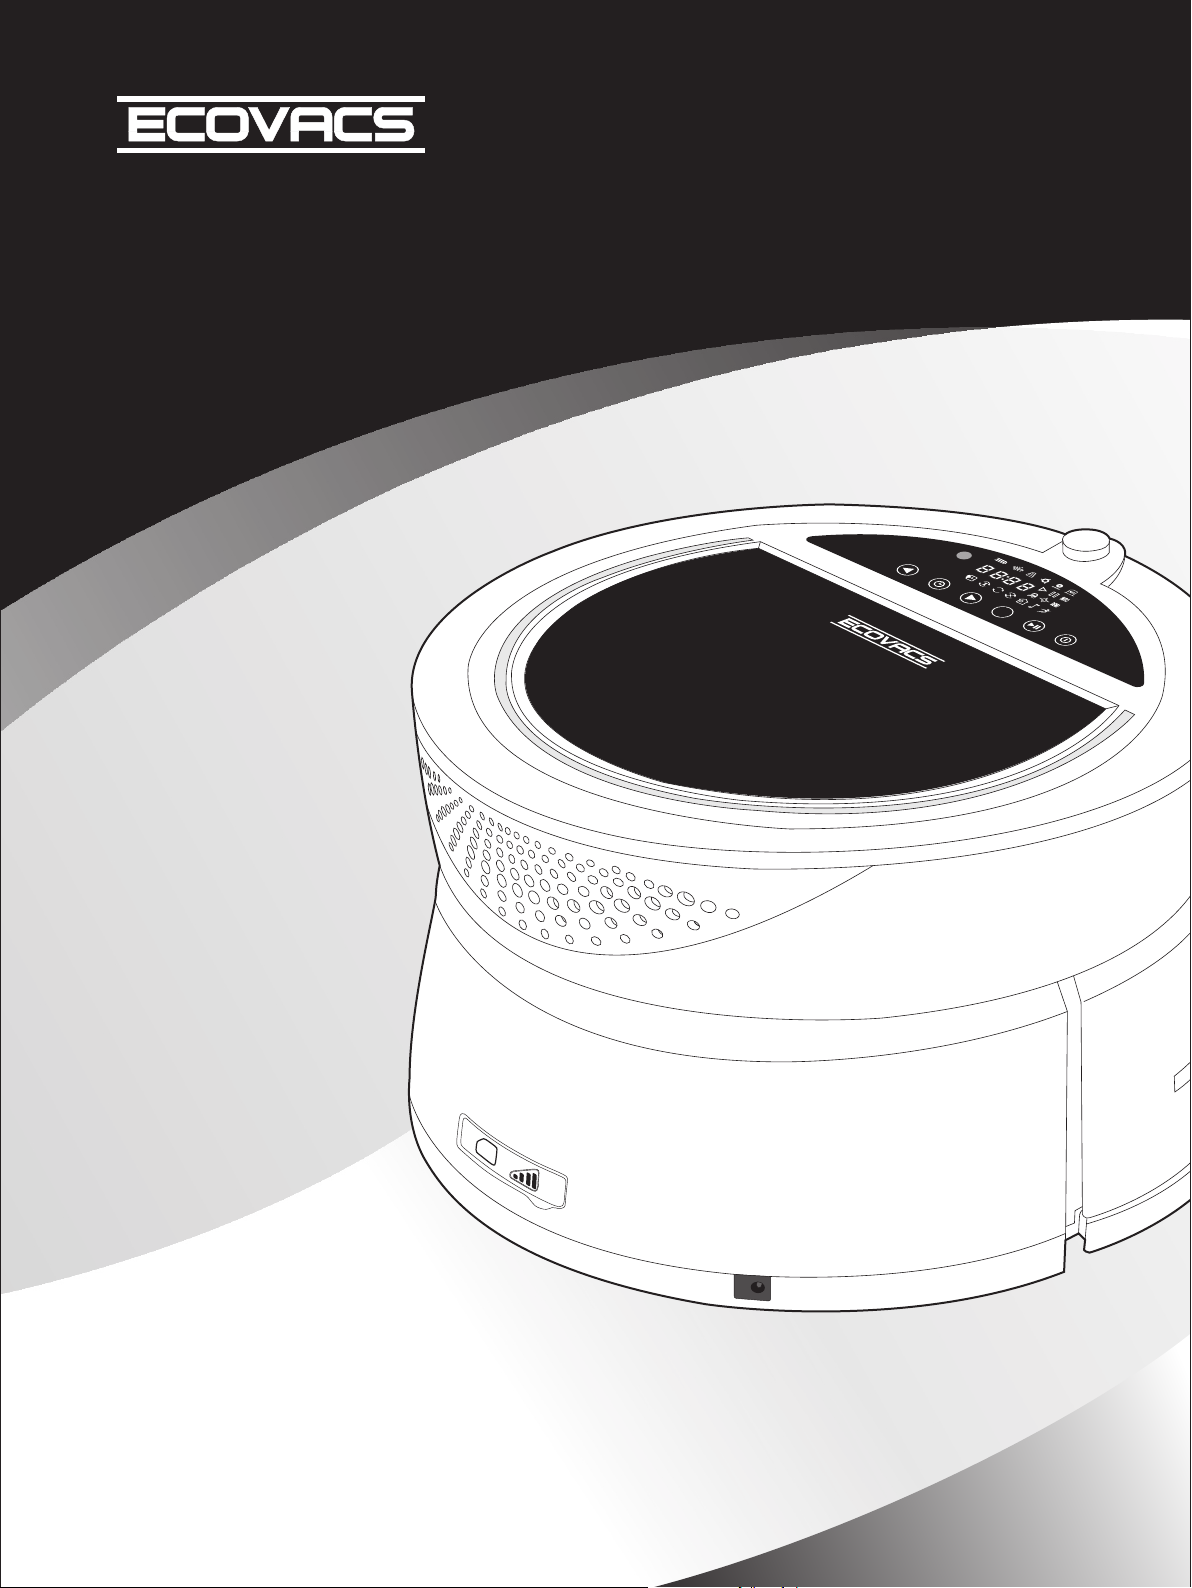
● Do NOT use the top of th e Robot as a pla ce to res t items or a dri nk. If th e Robot gets
WET, it may d estro y the interi or elec trical com ponen ts and requi re serv ice.
● Do NOT sit or stand on t he Robot NOR u se as a foo trest.
● Do NOT press HARD on t he LCD as you ma y damag e or break the g lass. P lease do NOT
touch the L CD if it is b roken to avo id inju ry to yourse lf.
● Imprope r opera tion of the Ro bot may c ause injur y to a pers on or may requ ire you r Robot
to be servi ced by a Se rvice Techni cian.
● Not to be used to filt er live ciga rette s moke as a hot as h from th e cigarett e could i gnite
the filte r.
● Use in the Ou tdoor s, Busines s or in are as with comb ustib le materia l is prohibited. It
will void y our Wa rranty.
The Magne tic Tape may NE VER be used to
NO
NO
Guardrail
Guardrail
confine a n eleva ted area whe re the Ro bot
Set up
Guardrail
could fal l down an d hurt a perso n or caus e
conside rable d amage to the r oom bel ow when
the tape ha s lost it s magnetis m power.
Child Safety
● In keepin g with ou r name ECOVACS, w e stron gly urge you t o recycle the packa ging
materia ls.
● Attempt to repair o r alter the op erati on of this Rob ot will v oid the warr anty an d may allow
damage to b e done to y our proper ty or you rself. All re pair wo rk must be don e by a
qualifi ed Serv ice Technician .Call our 1- 800 num ber for the ne arest S ervice Sta tion to
you.
● The Robot i s NOT a toy a nd childre n shoul d NOT be allow ed to pla y with it.
● Childre n shoul d NOT be allow ed to be al one in the sam e room that the Robot
is operat ing.
● Adult sup ervis ion is requi red at al l times when t he chil d is in the same r oom
the Robot i s opera ting in.
5
Page 6
Precautionar y Items
Magnetic
Border
Magnetic
Border
medium pile
medium pile
carpet
carpet
Woo d Fl oo rWoo d Fl oo r
Ceramic tileCeramic tile
● We recommen d the fir st time you us e your Ro bot you be pre sent to make
sure ther e are no ob structio ns whic h might caus e a probl em to either t he
Robot or th e objec ts in your hom e.
●
If Pets are p art of th e everyday h ouseh old activi ty, you need to observe ho w
the Pet and t he Robo t inner act wi th each o ther.
●
Followi ng prec autions sh ould be t aken to prev ent acc idents fro m happenin g
while you r Robot i s working:
──
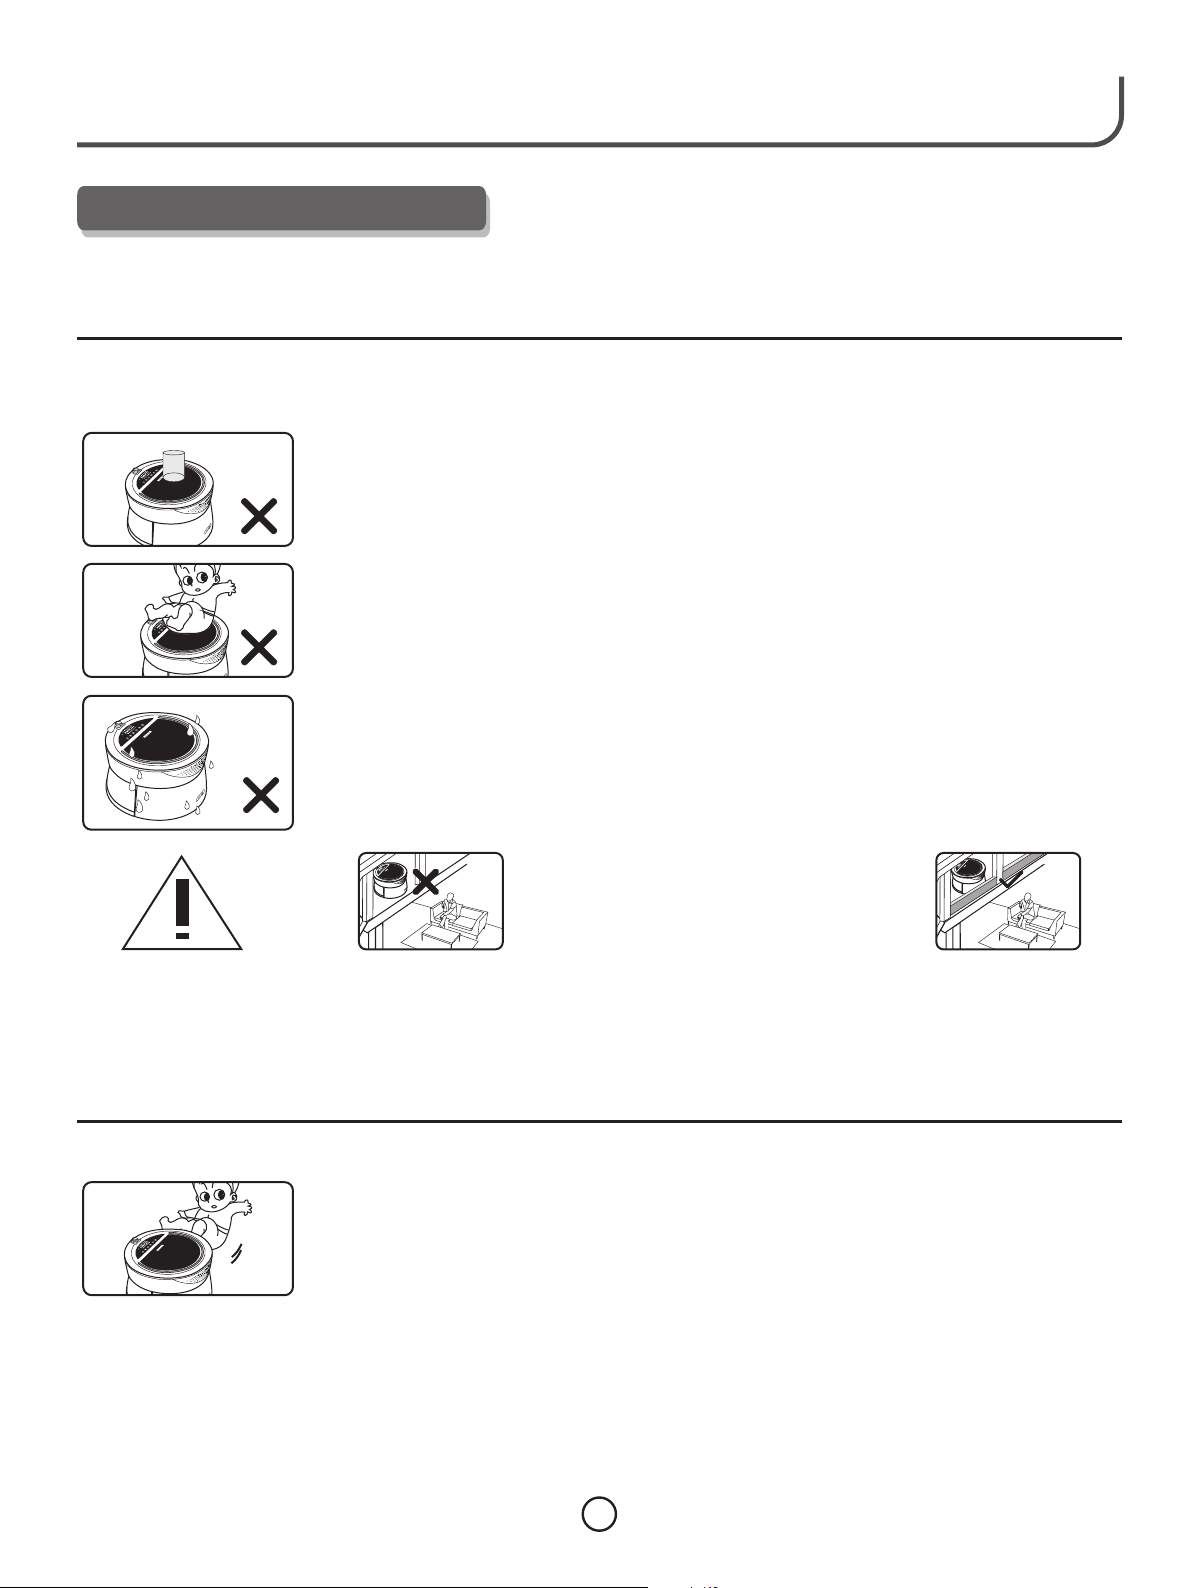
Objects e asy to kn ock over sho uld be re moved from t he path o r
magneti c tape us ed.
──
Table cloth , curta ins, and thr ows sho uld be kept off of t he floor so they
will NOT ob struc t the Robot' s freed om to move wit hin the r oom.
──
Power cor ds for la mps, radio s, TV, etc. , must NOT lie i n the pat h as
they migh t be dama ged by the Rob ot or bec ome entang led with the
Robot and c ause da mage to the Ro bot or pu ll the item fr om its re sting
place.
── bjects su ch as mag azines,n ewspa pers,soc ks,et c.,may obs truct t he
O
Robot dur ing use o r cause dama ge to the p roduct.
● People in t he home s hould be inf ormed w hen the Robo t is func tioning,
especia lly tho se who maybe h ard of he aring or hav e poor eyesight.
Magne ti c
Tape
.5 i nc
1
e
h
Wet
Hands
● Charger D ock sho uld be kept in a s pace where peop le will not ea sily tr ip over
when walk ing in th e room.
Robot can not det ect a stairc ase if th e height is le ss than 1 .5 inches. Al so, if
●
the top ste p of the st aircase ha s a refle ctive surf ace suc h as mirror, gl ass,
s
marble , ti le, etc ., it may caus e the Dro p Sensor not t o funct ion and caus e the
Robot to fa ll down t he stairs. We st rongl y recommen d that you ope rate th e
Robot at th e Stair case or Step t o make su re the Robot c an dete ct the drop
off. Should y ou find t hat the Robo t does not detect the S tep or Staircase,
then you mu st plac e a piece of mag netic t ape at the edg e to the ba re surface ,
NOT on carp et and to m ake sure the t ape wil l cause a per son to tr ip
NOT
over and fa ll down t he steps.
● Keep WET ha nds fro m the plug or Ro bot.
6
Page 7
Cloth
cleanin g
Enjoy Smar ter Life!
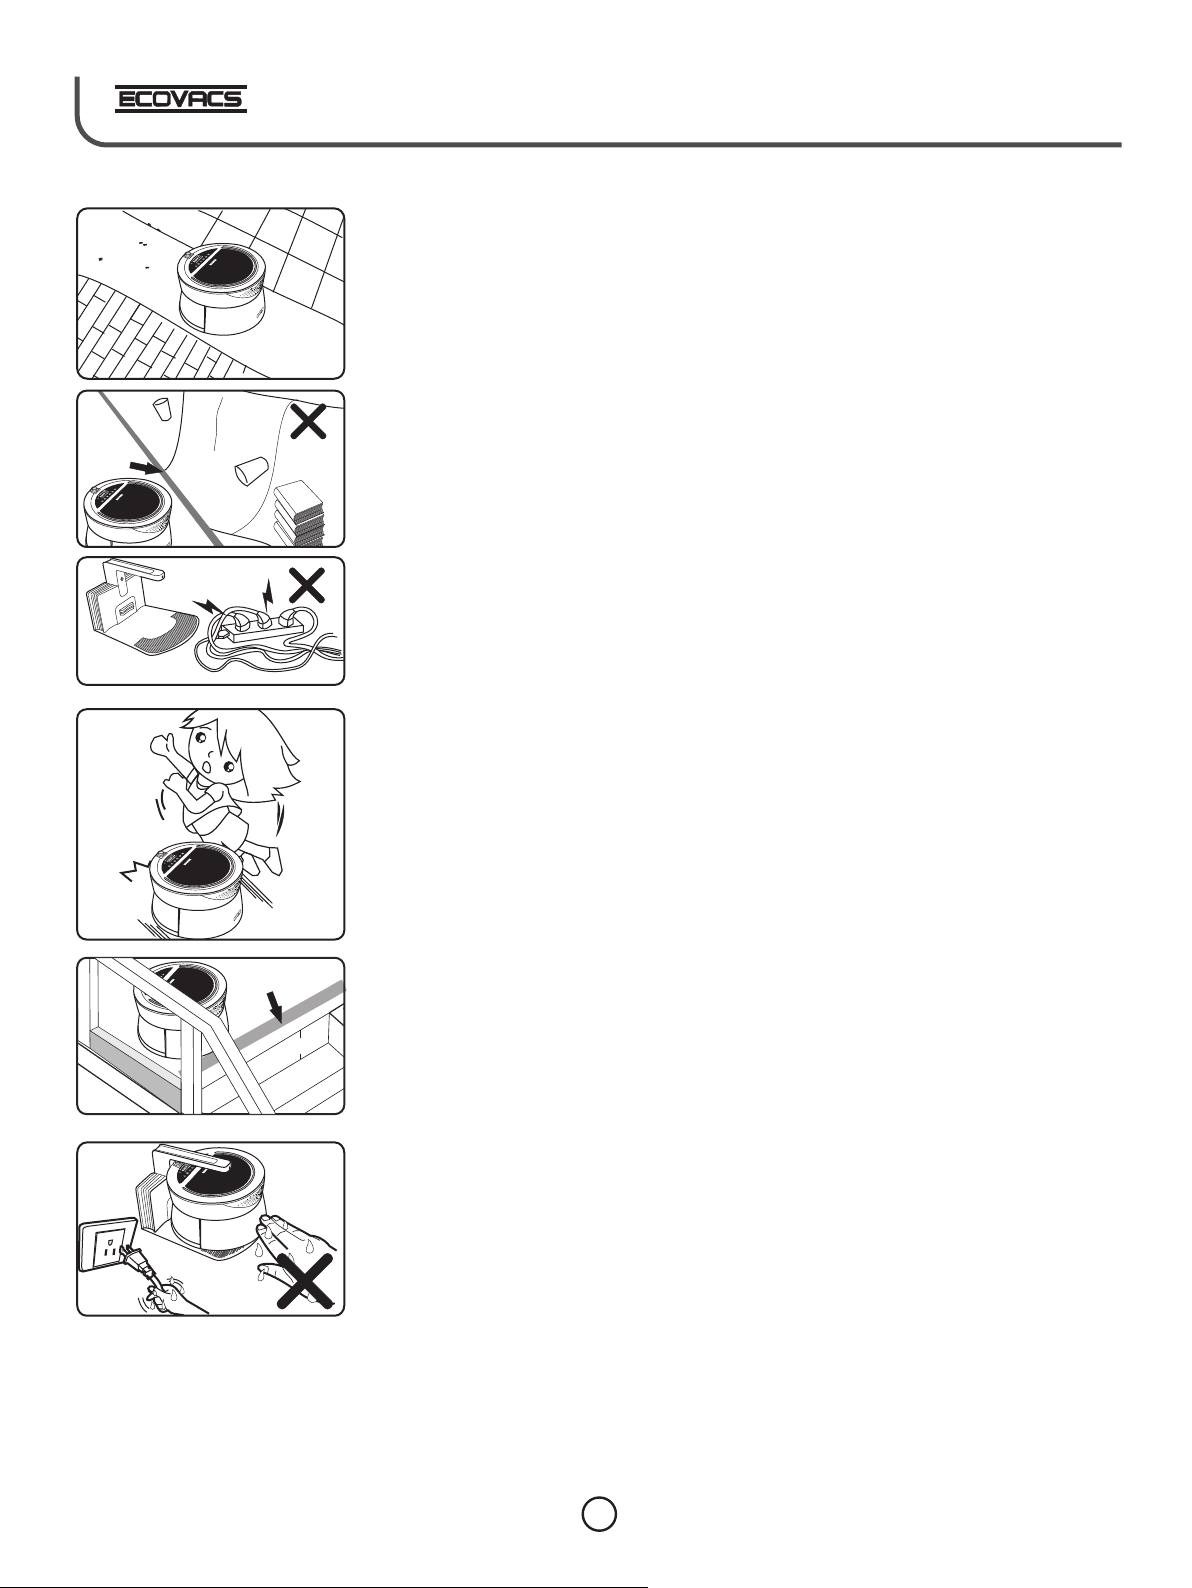
Use a DRY soft clot h for daily an d weekl y cleaning o f the
plug, cor d, Char ger Dock and R obot. A dam p soft cloth
that has be en rung d ry of water co uld be use d to wipe t he
surface s for bet ter cleani ng. A WET clo th may NOT be
used as wat er may ge t into the Rob ot or Cha rger Dock
and cause e lectr ical probl ems res ulting in a Se rvice Call.
● Do NOT gras p the upp er portion o f the pro duct as doin g so may ca use
damage to t he prod uct.
Do not Drop
● Do NOT drop the Robo t, should th is happ en, run the Ro bot to se e that
everyth ing is ok ay before le tting i t operate by i tself w ithout you b eing
present .
Ka
● Keep the Ro bot awa y from hot sou rces su ch as
heater, fi repla ce, radiat or, kitc hen oven, di rect
sunligh t, etc. , as the plast ic coul d become
distort ed and di scolored .
Power Supply for the Robot
The Robot's p ower su pply is from a N I-MH re chargeab le battery a nd only
Correct
Draw out
the plug
●
accompa nying COVACS ' Charg er Dock may be u sed.
Do NOT use th e Robot i f the power su pply co rd to the Char ger Doc k becomes
●
damaged . Call ou r 1-800 numb er or vis it our Web Site fo r the neares t Servi ce
Center to s end the C harger Doc k for rep air.
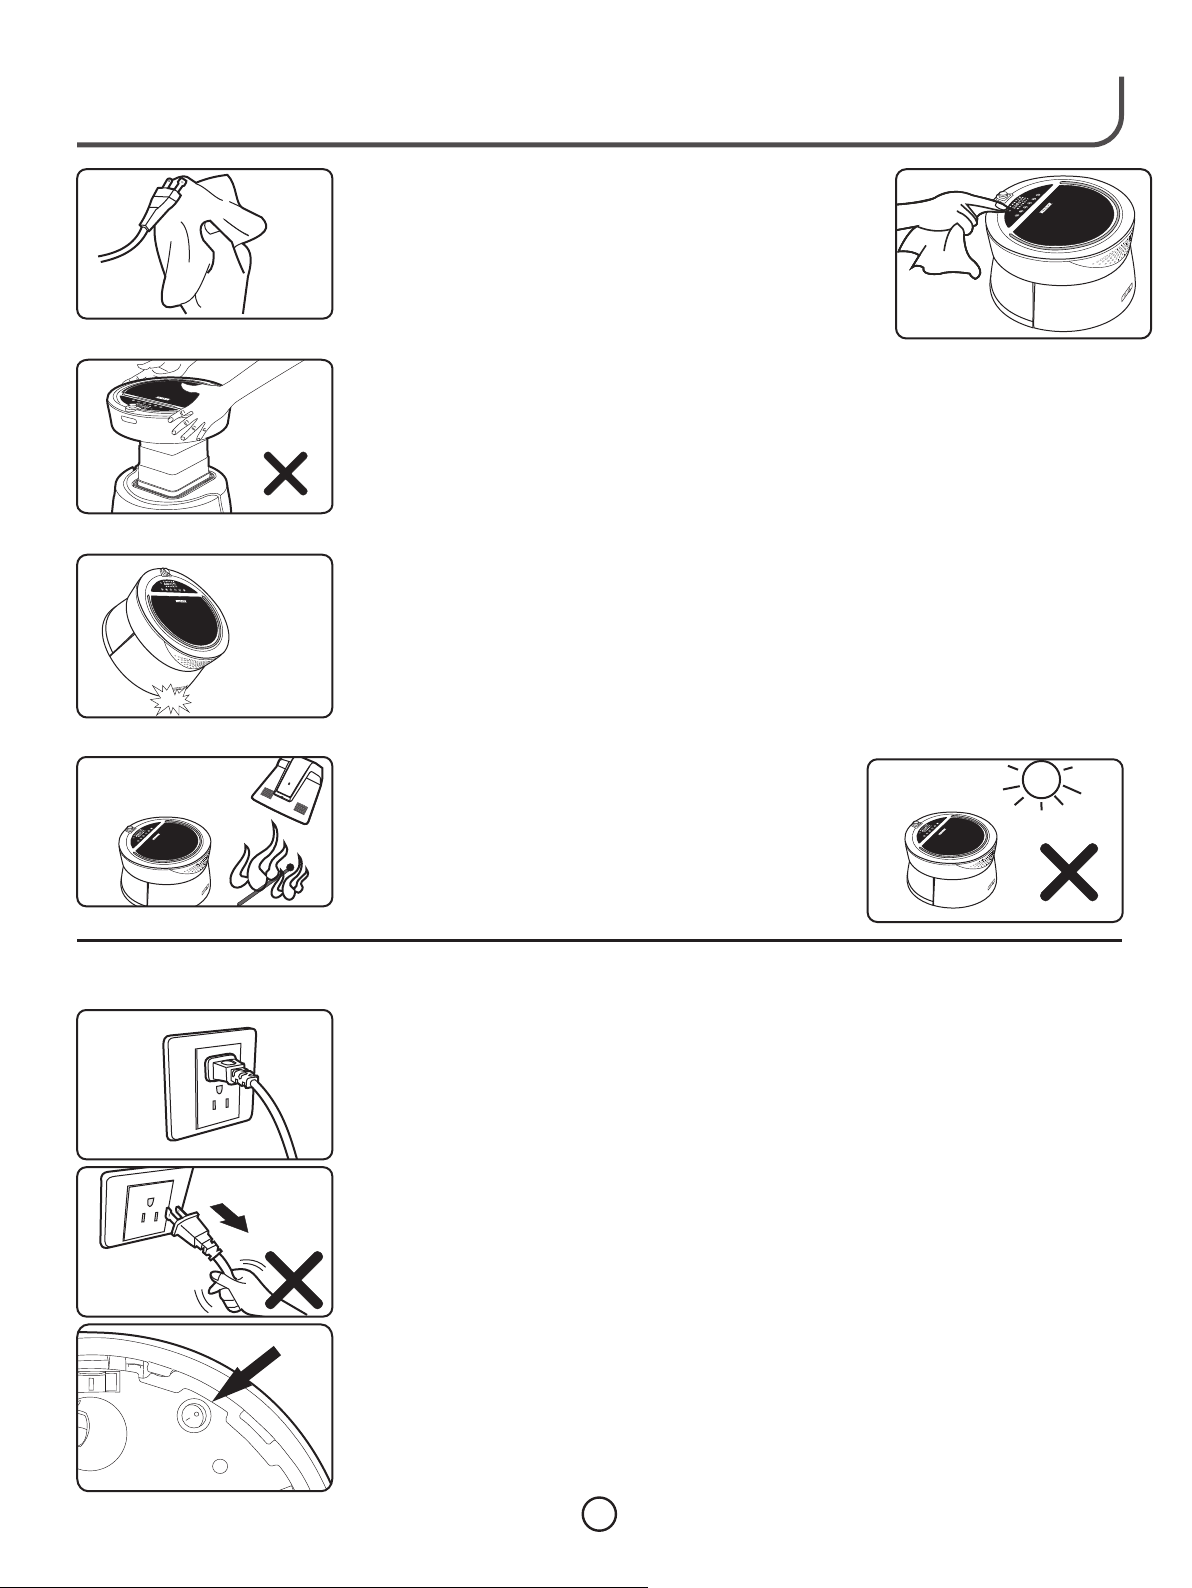
Do NOT remo ve the pl ug from the wa ll rece ptacle by pu lling o n the power su pply
●
cord as it ma y damag e the cord or in terna l wiring. Gr asp the p lug to remov e from
the recep tacle .
Do NOT move t he Char ger Dock by pu lling o n the power su pply co rd as you may
●
damage in terna l wiring.
Do NOT twis t or pinc h the power su pply co rd to avoid da mage to t he insulat ion.
●
Keep powe r suppl y cord away fr om warm /hot place s or shar p edges to avo id
●
damage to t he insu lation.
Turn the Rob ot OFF an d remove the C harge r Dock plug fr om the re ceptacle w hen
●
you are not u sing th e Robot for an e xtend ed period of t ime.
E
7
Page 8
Batter y Charging,Replacement an d D i sposal
●
Approve d ECOVACS ba ttery and Ch arger Dock must be us ed to preven t
potenti al dang er and damag e to the Ro bot, and to NO T VOID th e Warrant y.
Call our 1- 800 num ber or visit o ur Web site to order repl acement pa rts.
●
Model and s erial n umber will b e requi red when ord ering.
ECOVACS, bei ng an env ironment al friendly compa ny, asks you to dis pose of
●
used batt eries i n complian ce with y our local en vironmental leg islation , as the
batteri es haza rdous subs tance w ill pollut e the environment .
Recycling Packaging Material
● Please re cycle t he packagi ng mate rial in acco rdanc e with your lo cal
guideli nes.
When the Product
Has Problems
● Should th e power s upply cord b ecome d amaged, do n ot atte mpt to repai r by
yoursel f.
● Should th e Robot s top functi oning , referenc e pages 2 4, 25 and 26 in th is
Instruc tion Bo ok or call our 1 -800 nu mber to talk t o an expe rienced
Technicia n.
● As with the po wer sup ply cord, sh ould th e Robot requ ire ser vice, plea se have
a certifi ed Serv ice Technician h andle your r epair. O therwise , your Warranty
will be voi d and you c ould possi bly cau se yoursel f or your property da mage
by attemp ting to d o it yoursel f.
Corr e c t D isposal of Product
●
This marking indicates the Robot and Charger Base should NOT be disposed with
other household wastes throughout the EU. To prevent possible harm to the
environment or human health from uncontrolled waste disposal, recycle responsibly
to promote the sustainable reuse of material resources. To return your used device,
please use the return and collection systems or contact the retailer where the
product was purchased. They can take this product for environmental safe
recycling.
● In the U.S., please dispose of product at an acredited disposal site in compliance
with your local requirements.
8
Page 9
Robot Air Purifier
A320/A 330
Use r Gu i de
S
D
M
o
d
e
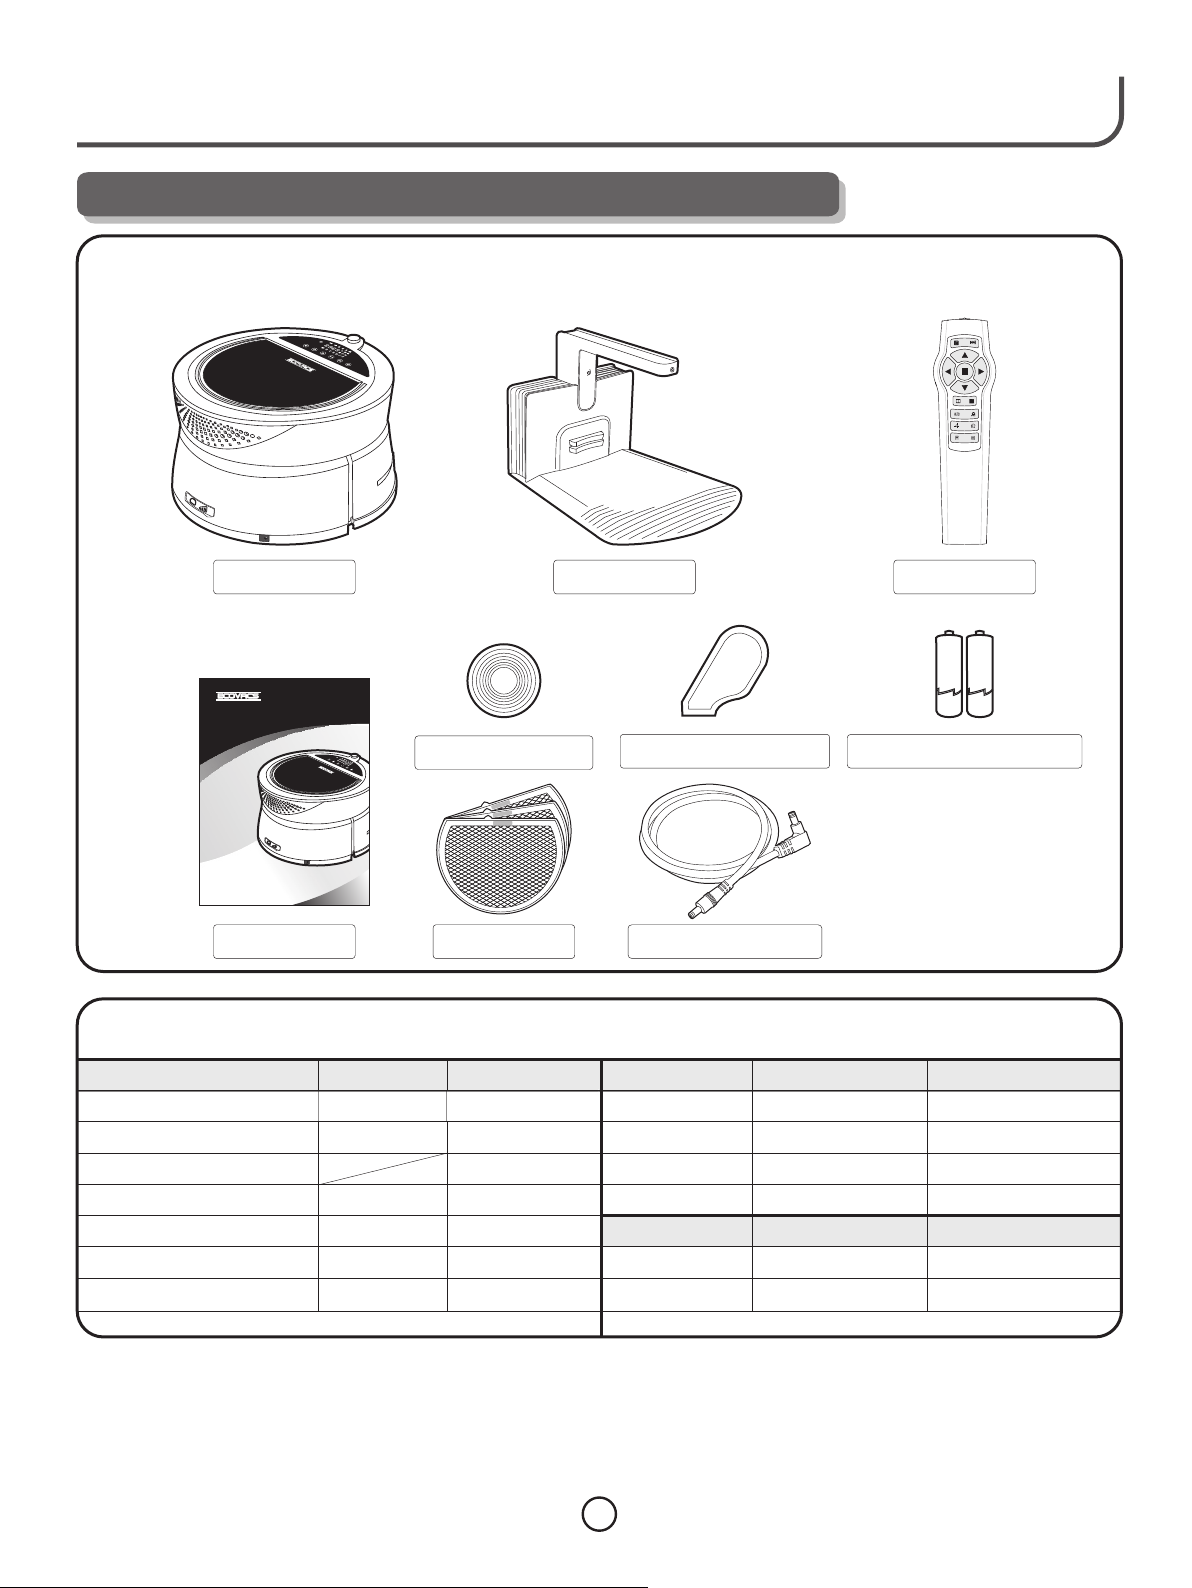
2. Package Contents and Product Specifications
Packed Contents
S
D
Enjoy Smar ter Life!
Main R ob ot
User G ui de
Product Specificat i ons*
Fu nc tio na l Pa ram et er s Mo de l A32 0
Wor ki ng Vol ta ge
Rated P ow er
Maxim um L ift in g Hei gh t (IN CH ES)
Co ntinu ou s Wor ki ng o n On e Ch arg e
Charg in g Time
Noise **
12VDC 12VDC
24W 24W
Appro xi mat el y
two hou rs
Appro xi mat el y
4-5 hou rs
≤60dB ≤60dB
Magn et ic Tape
ayer
Antibacerial Filter L
lter Layer
Formaldehyde Fi
Efficient Filter Layer
Char ge r Dock
Magn et ic Recovery Tool
Remo te C ontrol
Batt er ies for Remot e Co ntrol
Thre e Fi lters Ch ar ging Cabl e
Mo de l A33 0 Mo de l A33 0
Ch ar g er D oc k
Input Vo lt age
Fre qu en cy
Rated O ut put Vo lt age
Rated O ut put C ur ren t
Remo te C on tro l
(Remo te C ont ro l)
Inp ut Vo lt age
18.5
Appro xi mat el y
two hou rs
Appro xi mat el y
4-5 hou rs
Remote Control Dis tance
Mo de l A32 0
220-2 40 V~
50Hz
15VDC 15VDC
1.6A 1.6A
Mo de l A32 0 Mo de l A33 0
3VDC 3 VDC
≤1 6 Fe et ≤1 6 Fe et
220-2 40 V~
50Hz
* Our Company res er ve s th e ri gh t to m ake technolog ic al a nd d es ig n ch an ges as a result in pu rs ui ng C on ti nu ous Improvement . Th e ri ght of interpreta ti on
of the data belon gs t o EC OVACS Electrical C o. , Lt d.
** The data is coll ec te d by o ur c om pa nies' laborator y ba se d on n oi se t es t and in accordan ce w it h IE C 60 70 4- 1:1997. IEC 60704 -2 -1 :2 00 1 In te rnational
Standard. Noi se i s di fferent based on en vi ro nm en ta l co nditions existi ng a t th e ti me i n yo ur setting.
9
Page 10

Par t Name
Efficient Filter Layer
Air Qua li ty In di cat or L igh t
Air Out le t Gri d
Air Qua li ty De te cto r
LCD Dis pl ay Sc re en
Unive rs al Wh ee l
ON / OF F Sw itch
Key Pan el
Surfa ce C ove r of M ach in e
Drop Se ns or
Fro nt B uff er ing P la te
SD Memo ry C ard a nd
Butto n fo r Volu me C ont ro l
SD
Remot e Re cei ve r
Charg er B ase R ec eiv er
Lifti ng S yst em
Charg in g Str ip s
Unpacking Filter s
Opt io na l Cha rg ing S lo t of Ma in R obot
Cha r g er Dock
Lifti ng C oll is ion B uffer in g Pla te
Upper H ou sin g
Opt io na l Cha rg er Sl ot
of Char gi ng Do ck
Charg in g Str ip s
Drivi ng W hee l
Charg er B ase S ig nal I nd ica to r
Power I nd ica to r
Power C or d
Anti- sl ip Ba se
● Open the top of the Ro bot and remo ve the fi lters. Ins tall th e filters in t he
proper se quenc e.
SD
Filters particles down to 0.6 Microns
Filters VOC's from the air
Filters down to 0.3 Microns
yer
Antibacerial Filter La
r Layer
Formaldehyde Filte
Efficient Filter Layer
1
2
Ins ta ll ati on
Seque nc e
3
SD
10
Page 11

Remote Control Panel
Enjoy Smar ter Life!
15
1
3
4
5
8
9
11
13
3. Remote Control
Installing Batteries
2
6
7
10
12
14
1. Music Mo de 9. “Auto” M ode
2. Play Nex t Song 10. Exact S earch M ode
3. Machin e Move Fo rward 11. Fixed Mode
4. Machin e Turn Lef t 12. B ack to Dock
5. Machin e Move Ba ckward 13.
6. Machin e Stop 14.
7. Machin e Turn Rig ht 15. Remot e Signa l Beam
8. Auto Demo
Spot
Charger
Raise Hea d
Lower Hea d
● Remote co ntrol u ses two (7#) b atter ies.
● When inst allin g the two batt eries , be sure to not e the dir ection of po sitiv e and negati ve polarities.
● If the batteries a re low on ener gy, please r eplace bot h batteries so Remo te will work p roper ly.
● Properl y dispo se of batter ies in ac cordance w ith loc al legisla tion.
● If the Remote is NOT g oing to be use d for an ex tended per iod of ti me, please r emove t he batteri es so the R emote
will NOT be come da maged.
Use:
● To use the Remo te, you m ust be withi n 16 feet a nd point it to wards t he Indicat or ligh t on top of the Ro bot.
● If the Robot is clos e to the Charg er Dock , the signal f rom the C harger Doc k may int erfere wit h the use o f the
Remote.
● The Remote ma y NOT wor k in certain a reas wh ere a wirele ss product i s opera ting. The wire less si gnal may
block the u se of the R emote.
● Do NOT use the Remot e to force the R obot to g o over a drop off. Thi s will cause d amage t o the Robot, t o your
propert y and per haps injur e a perso n in the close v icinity of the prod uct.
● Do NOT plac e the Rem ote in a hot pla ce or in di rect Sun lig ht as the R emote may be come da maged.
● Do NOT expose the Re mote to wate r or allo w debris to be come lo dged aroun d the buttons or insi de when
replaci ng the ba tteries as t his cou ld cause dam age to th e Remote.
11
Page 12

4. Charger Dock
5 fe
e
t
1.5
f
e
e
t
1.
5f
e
e
t
Assembling Char ger Dock
Tra nsm it ter Fra me
Charg er B ase
Remove th e Charg er Base and Tra nsmit ter frame fr om the ca rton. Look ing at th e pictures , connect the
wire from t he base t o the frame an d then ca refully in sert th e frame, kee ping th e wires from b eing pinched,
until you h ear a "cl ick" sound . Th is "click" sound in dicates th e frame i s securely l atche d into the bas e.
Please ch eck by ge ntly grasp ing the f rame and the b ack and t rying to pul l upwards.
Placement of Char ger Dock
● Place the C harge r Dock again st the wa ll
accordi ng to the p icture. It m ust be pl aced
Correct
close to a Re cepta cle so the Cha rger Do ck's
power sup ply cor d will reach .
● Any excess p ower su pply cord mu st be bun dled and mad e secur e so not to
interfe re with t he return of t he Robo t. The power cor d may NOT be placed und er
the Charg er Dock as it will affe ct the Ro bot's retu rn to the Charger Dock .
● Please en sure th ere are NO obs tacle s within a rec tangu lar box of 5 fee t and 1.5
feet on eac h side of t he Ch arg er Do ck so t he Robot can e asily f ind the Charger
Dock to rec harge t he battery. A refl ectiv e surface, s uch as mirror, glass , etc.
should NO T be dire ctly oppos ite the C harger Dock s o that it will NOT affect t he
infrare d signa l and keep the R obot fr om finding t he Char ger Dock. Do N OT place
close to st airs as i t will affect it s abili ty to Dock or ev en fall down the stai rs.
12
Page 13

?
?
Enjoy Smar ter Life!
● The Ch arg er Do ck
should be p laced
in the room s o the
Long an d
Narro w
Room
?
?
Long an d
Narro w
Room
Robot can f ind the
Charger D ock's
beam as qui ckly
as possib le and
follow th e beam to
th e source.
Warning:
Do NOT plac e the Dock ne ar stairs or a d rop off as it may affe ct the au tomatic re turn fo r charging
and may cau se the Dr op Sensor fr om prop erly funct ionin g.
Do NOT plac e in a well t raveled pa th by peo ple of the hou sehold.
Charger
Charging Robot ' s B atter y
● Before us ing for t he first tim e, char ge the Robot f or a mini mum of 5 hours .
● In normal u se, the c harging ti me is abo ut 4-5 hours .
● Dependi ng on the r oom
size and th e numbe r of
pieces of f urnit ure in
the room, i t may tak e a
while for t he Robo t to
find the Ch arger D ock.
If you find t his to be
* The r oo m la yo ut i s to o co mplicated;
therefore, th e ma ch in e ca nn ot q uickly
find the Charge r Do ck .
Run the Rob ot unti l it wants to se ek the Ch arger Dock t o recha rge. Do this
for 2 or 3 time s to achi eve the best p erfor mance for th e batte ry.
happeni ng, you m ay
want to rel ocate t he
Charger D ock to a ne w
spot to see i f the Rob ot
can find it e asier.
* The r oo m la yo ut i s to o co mplicated;
therefore, th e ma ch in e ca nn ot q uickly
find the Charge r Do ck .
While R ob ot is c ha rgi ng t he li gh t wi ll bl in k
Whe n th e ba tte ry i s ful ly c har ge d,
the l ig ht w ill s ta y on co nt inu ou sl y.
● A warmer or co oler ro om ma y requi re a longer ch argin g time.
● When the Ro bot's b attery get s low dur ing use, it wi ll quit c leaning th e air and
seek out th e Charg er Dock for re charg ing its batt ery.
● While the R obot is c harging in t he Char ger Dock, th e Batte ry Icon will b link.
Once the Ro bot's b attery is fu lly cha rged, the Ba ttery I con will qui t blink ing
and stay on c ontin uously.
● So the Robo t is read y to go out and cl ean the a ir at anytim e, you ma y leave
the Robot i n the Cha rger Dock. O nce the b attery is fu lly cha rged, the cu rrent
will decr ease fo r charging t he batt ery so that it w ill not h urt the batt ery.
● When the Ro bot is pl aced in the Ch arger D ock, the Rob ot will a utomatic ally
turn itse lf ON and g o in to the PAUSE mod e where i t will wait fo r the next
schedul ed air cl eaning.
●
If you have s et the pu rificati on "on a sc hedule" in a dvanc e, the Robot w ill
automat icall y exit from th e Charg er Dock to wor k in the "A uto Mode" wh en
the sched uled ti me arrives .
● If Robot is N OT goin g to be used for 1 o r 2 month s, unplug th e Charg er Dock
and turn th e Robot O FF with the sw itch on t he bottom of R obot. W hen you
want to use t he Robo t again, we su ggges t you rechar ge the ba ttery as
mention ed abov e to regain be st perf ormance fo r the bat tery.
13
Page 14

5. Operation and P r og ramming Robot
MO DE
LCD Panel
The detailed indication of display screen and control panel:
3
1
2
4
5
6
7
8
12
13
14
15
16
17
9
10
MODE
11
Ti me Setting Keys
Batt er y Charge Stat us n ot r esting on f lo or. curr en t day
1. 14. Aut o Mo de
2. Pro mp t for Lack of Fil te r 6. for wh et her the 10. 15.
Mate ri al Memo ry C ard Is Instal le d 16. Aut om atic Demo Mod e
3. Pro mp t for Lifting S ys tem Or No t 11. 17. Se ar ch Mode
Stuc k 7. 18.
4. Pro mp t for Driving W he el 8. Pro mp t for Display o f 12. In di cation of Working 19. Ba ck t o Charger Doc k
Tangle d Sche du ling Stat us
Prom pt f or Driving Wh ee l Purif ic ation sch ed uled for Paus e Mo de
5. 9. 13 .
Prom pt Puri fi cation Sche du led Spot M od e
24 Hou r Tim e Display HOL D Musi c Mo de
Mode selection key
Ever y Da y
Puri fi cation Sche du le on
Start/Pause Key
Power On/Off Key
Tur ning Robot ON
18
19
● Turning th e Robot o ver, turn the s witch O N so the Robot w ill be ab le to
operate .
● Pressin g key on th e LCD on the top o f the Rob ot will turn t he Robo t ON
and the Rob ot will b e in stand by mo de.
● Pressin g key a sec ond time wil l turn th e Robot OFF.
14
Page 15

Pause Mode
MODE
MODE
MODE
MODE
Tur ning Power OFF
Enjoy Smar ter Life!
Pressin g the Pau se Mode, you w ill Pau se the opera tion of t he Robot.
●
During th e Pause M ode, you can s elect o ne of the vari ous ope rating Mod es.
●
● Pressin g the key a gain will st art the R obot in the op erati ng mode you
selecte d.
● You may press any ke y on the LCD to ca use the R obot to ente r the
Pause Mod e.
● Wit h the R obot in the Pause Mode , the R obo t is co nsuming po wer f rom the
battery.
● With the Ro bot run ning, pres sing th e key will tur n the Rob ot OFF.
● With the Ro bot tur ned OFF and NO T place d back in the Ch arger D ock, the
Robot wil l NOT go ou t at the next se t Air Clea ning time.
● If the Robo t is NOT go ing to be used f or a mont h or more, it is r ecomm ended
to turn the R obot OF F by depress ing the b utton on the b ottom a nd
unplug th e Charg er Dock.
Setting Air Schedule Cleaning Time
FOR EX AMPLE : if t he sche duled
Air Cl eanin g Time is to be 1: 30 PM
then t he disp lay on the LC D
scre en will b e shown as1 3:30.
NOTE: After you ha ve set the Air Cl eanin g Time,
you will au tomat ically be le d into se tting the Cl ock
time.
1. With the p ower ON , press the Pa use
Button.
2. Then press t he Cloc k Button and h old for
about 4 sec onds un til the 00 are f lashi ng in the
LCD. This is th e hour se ction of the c lock. The
clock is a 24 h our clo ck.
3. Adjust th e hour fo r the Air Clean ing Time b y
depress ing eit her or . Press ing onc e each
time will m ove the n umber in the d irect ion you
desire fo r the hou r.
4. Press th e Clock B utton to set t he Hour.
5. The Minute 0 0 will fl ash. Set the m inute by
pressin g the or . Pr essing onc e each ti me
will move t he numb er in the dire ction y ou desire
for the min ute.
6. Press th e Clock B utton to set the Minu te.
The Clock i ndica tor on the LCD w ill not b e lit.
7. The LCD will a utoma tically go t o the Clock Set
Mode and th e 00 will s tart flash ing in th e Hour
section .
15
Page 16

MODE
MODE
Setting Clock Time
8. You are NOW in t he Autom atic Clock s et mode ,
you will se e 00 flas hing in the Ho ur sect ion.
9. Set the ho ur – reme mber this is a 2 4 hour cl ock
- for the Clo ck by dep ressing ei ther or
Pressin g once ea ch time will m ove the n umber
in the dire ction y ou desire fo r the hou r.
10.Pres s the Clo ck Button to s et the Ho ur.
11.The Minut e 00 will f lash. Set th e minute by
pressin g the or . Pr essing onc e each
time will m ove the n umber in the d irect ion you
FOR EX AMPLE : if t he curr ent
time i s 3:30 PM , th en the di splay
on the L CD scre en will be sh own
as 15: 30
NOTE:
▶ If the Robo t is turn ed OFF and NOT i n the Cha rger Dock, t he Robo t will NOT go ou t to clea nse the air at t he next
schedul ed time .
▶ If the Robo t while i n the Charge r Dock is N OT making a go od elec trical con nection to the char ger strips , the
battery w ill dra in itself an d will NO T have the bat tery po wer to go out on n ext sch eduled tim e.
desire fo r the min ute.
12.Pres s the Clo ck Button to s et the Mi nute.
The Clock i ndica tor on the LCD w ill not b e lit.
Setting Frequency of Sche d u l e d Air Cleaning Time
● Once y ou have s ch edule d the time of t he day fo r the Robot t o go out an d clean the
Air, yo u may sel ect from th e followi ng sche dule:
▶ one da y only
▶ ever y day
▶ plac e on HOLD
Adju st the fr eq uency o f schedul ed puri ficatio n by shor t press of .
●
Look ing at th e LCD scree n, you wi ll s ee that t he clock bu tton is l it and the is l it.
●
This m eans th at the Robo t will only d o the sch eduled Air c leani ng once and t hen
go out a gain un til instr ucted. The Ro bot wil l return to t he Char ger Dock wh en
NOT
the ba ttery r un s low.
By pre ssing t he Clock Bu tton and re leasi ng, the nex t selec tion will b e lit.
●
When t his is lit, the n the Rob ot will go ou t day o n the sch eduled ti me and
● ever y
clea n the Air, re turning t o the Cha rg er Dock w hen the bat tery ru ns low.
By pre ssing t he Clock Bu tton agai n and rel easing, t he next s electio n will be l it.
●
When t his is lit , it mean s it w ill do t he sche duled cle aning a nd will rem ain
●
in the Doc k until y ou make one o f the abo ve select ions te lling it to d o the
Ch arger
NOT
Air cl eanin g.
Notes:
▶ ONLY the Auto M ode can be se lecte d to run in the S chedu le d Air Clea ning Tim e se tting . Referen ce page 1 7 for
inst ructi on s on how to s elect thi s mode.
▶ When t he Robo t st arts th e air clean ing pro cess, the R obot wi ll raise th e top to be tter clea n the air. I f the Robot i s under a
tabl e or a piec e of furnit ure, the to p will ri se until it m eets re sistanc e, wher e it will imm ediat ely stop an d start t o clean the
air. The to p can rise to a h eight o f 18.5 inch es.
Each t ime pre ss ing ,thi s produ ct
will c arry ou t icons accord ing to th e
foll owing s equence :
Sch ed ul ed
Purif ic ati on
once
Sch ed ul ed
Purif ic ati on
Eve ry D ay
Sch ed ul ed
Purif ic ati on
place d on
HOL D
Caution : Because t he Robo t moves on it s own and t he top will r aise an d lower on it s own, yo u must NEVE R place
anyt hing on t he top of the R obot.
16
Page 17

6. Mode Selectio n
MOD E
Enjoy Smar ter Life!
By pr es si ng "M od e key r ep ea ted ly , thi s
produ ct w ill i mp lem en t act io n accor di ng to t he
Exa ct
Auto
Sea rch
Auto M o d e
Fixe d
Poin t
"
Ret urn Musi c
DEM O
This i s the onl y Mo de the Ro bot will ru n in for th e Schedul ed Air Cle aning Time .
●
● When R obot ru ns i n this Mo de, the Rob ot will t ravel in a st raigh t line to fin d the Dir ty Air. If ther e
is an ob stacl e in its way, the bu mper, upon t ouchi ng the obst acle, w ill chang e direc tion of the
Robo t but wil l still con tinue to fi nd the so urce.
● Once t he Dirt y Air i s found , the Robot w ill sto p, the ligh t on top wi ll change f rom Gre en to Red,
the to p will ex tend upwa rds and t he f an will b egin to cir culat e the air thr ough th e filters t hus
begi nning t o perform t he air cl ea ning pr ocess.
● The Robo t can opera te for up t o 2 hours in cl eanin g the air.
● When t he air ha s be en clea ned, the li ght on to p will turn G REEN, t he top of the R obot wi ll retrac t
and th e Robot w ill move to s ee if there i s Dirty a ir elsewh ere in th e room.
● When t he Robo t de tects t hat the bat tery is r unning lo w, it will s top clean ing the a ir and retu rn to
the Ch arger D ock for rec harging t he batt ery.
By p ressing the MOD E Ke y, yo u may s elect one o f the six M odes of operat ion
MO DE
th at you wa nt th e Ro bot t o do.
Th ey are: AUTO , SEARC H, SPOT, DEM O, BACK TO CHA RGER an d MUSIC .
Foll owi ng is a d escription of t he di fferent mo des .
Remot e
LCD PANE L
Comment:
▶ This m ode is no t re stric ted by the ro om size , and will au tomat ically se arch po llution a nd perf orm purif icati on. It is
reco mmend ed to purif y the home ai r often b y using thi s mode.
17
Page 18

Search Mode
SD
● Use of t his Mod e is d esire d when know n air pol lution ex ists an d you desir e it to go to t he
sour ce to cle an the air.
Spot Mode
Remot e
LCD PANE L
● When R obot ru ns i n this Mo de, the Rob ot will t ravel to fi nd the so urce of pol luted a ir. If there i s
an obs tacle i n its way, the bum per will ac tivat e on touchi ng the ob stacle an d the Rob ot will
chan ge dire ction.
● Havi ng foun d th e sourc e of the poll ution , the Robot w ill sto p, the ligh t on top wi ll turn fro m Green
to RED , the top w il l exten d upwards a nd the fa n will begi n to circ ulate the a ir thro ugh the fil ters
thus b eginn ing to perf orm the air c leani ng proces s.
● The Robo t can opera te for up t o 2 hours in cl eanin g the air.
● When t he air ha s be en clea ned, the li ght on to p will turn G REEN, t he top of the R obot wi ll retrac t
and th e Robot w ill move to s ee if there i s Dirty a ir elsewh ere in th e room..
● When t he Robo t de tects t he batter y is runn ing low, it wi ll stop c leaning t he air an d return to t he
Char ger Doc k for recha rging the b atter y.
● This Mode i s used wh en you want to c lean th e air in a parti cular a rea becaus e of
various r eason s, such as: fo od prep aration in t he kitc hen, peopl e gathering in a room ,
people sm oking i n a room, pet od ors, an d other stro ng or offensiv e odors . You use the
Remote to d irect t he Robot to th e Spot de sired.
Remot e
LCD PANE L
● Under nor mal con ditions, t he Robo t will clean t he air un til the air is c lean or the battery
runs low an d the Rob ot needs to re turn to i ts Charger D ock to re charge the b attery.
● If a longer d urati on is requir ed to cle an the air, the C harge r Dock may be mo ved to the
room and wi th the pr ovided Cha rging C able, conn ect the Robot to the Ch arger Dock .
This will a llow th e Robot to run c ontin uously til l the air i s clean.
● Do NOT plac e the Rob ot under a tab le or cha ir as it will de creas e the Robot' s ability to
Power
Suppl y
Charg in g Slo t
cleanse t he air.
Note :
For th e uni t to clean the air on t he ne xt sc hed ule d time, the unit MU ST be s et back to the AUTO m ode and placed ba ck
in to the Charg er Do ck.
18
Page 19
Enjoy Smar ter Life!
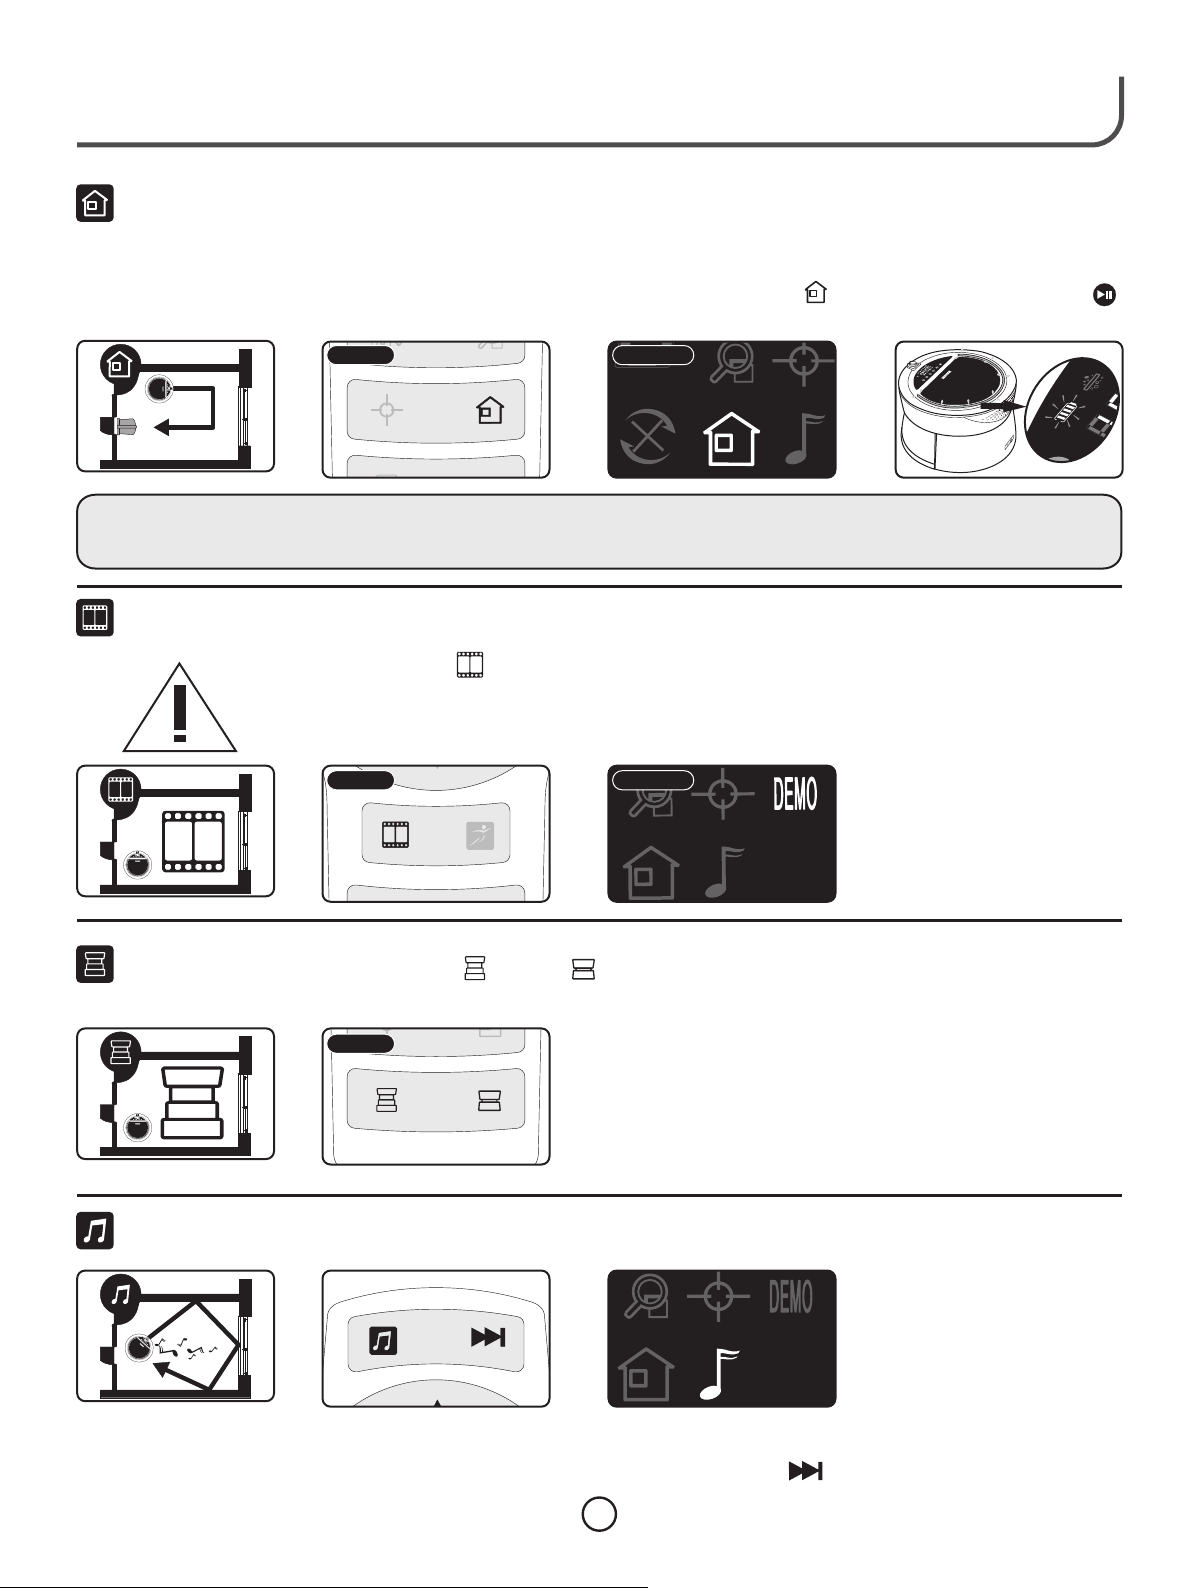
Back To
Charge Mode
Comm ents:
▶ Batt ery
Duri ng the pr ocess of ch argin g, icon f lashe s.
▶ After t he comp le tion of c harging , Batte ry icon wil l stay li t.
Demo Mode
●
When the Ro bot's b attery run s low, the B attery sy mbol wi ll start to bl ink; th e Robot will
stop clea ning th e air and will s eek out t he Charger D ock to re charge its b attery.
● At anyt ime you w an t to send t he Robot ba ck to the C harger Do ck, you s hould pre ss the Pa use
butt on and th en press th e Mode butt on unti l the symbo l appea rs. Then pres s the Pau se
butt on so the R obot will s eek out the C harge r Dock.
Remot e
This Mode d emons trates the m ain fun ctions of th e Robot a nd helps you q uickly learn by
interac ting wi th the Robot b y follo wing the voi ce comm ands. Remo ve Robot from Charg er
Dock and pr ess on th e Remote to st art the i nteracti on.
CAUTION :Duri ng the DEMO Mo de, the D rop Sensor s are tur ned OFF. The Rob ot must NOT
be operat ed near s teps or drop o ff s as the Robot will NOT b e able to dete ct eith er of these
conditi ons.
LCD PANE L
Raise/
Lower Mode
(Only Limited to Model A330)
Music Mode
Remot e
LCD PANE L
You may raise or low er the head of t he Robo t by pressin g the app ropriate k ey on
the Remot e.
Remot e
In this mod e, you ma y select the m usic th at you want pl ayed by u sing the Rem ote. The
Robot wil l play th e music whil e it is in th e Charger Do ck or out cleaning the ai r.
● After s elect in g this Mo de, the Rob ot will p lay music .
● You may se lect th e piece of mu sic by de pr essin g the butto n on the Re mote.
19
Page 20

7. Magnetic Ta pe
Applica tion of t he Magneti c Tape t o the floor will esta blish the ar ea you wa nt the Air Puri fier to w ork within .
Various Uses for the Magnetic Tape.
● Ma gn et ic Tape can be
affi xe d to O NLY h ar d fl oo r
su rf ac es w he n yo u wa nt t o
keep t he A ir P ur ifier from
go in g in t o an a re a.
Magne ti c
Tape
Magne ti c
Tape
1. 5 i
n
● In cas e yo u ha ve s ta ir s or a
drop o ff w hi ch t he A ir
Pu ri fi er c annot det ec t
be ca us e of c ertain
es
ch
ci rc um st an ces, you must u se
th e Ma gn et ic Tape. NOTE:
Be c er ta in t hat the Mag ne ti c
Tape w il l not cause a per so n
to t ri p an d fa ll a nd i njure
th em se lv es .
Application of Ma gnetic Ta p e
●
Use a dry cloth to wi pe t he ● Remove the Magn et ic Tap e
area clean of any d ir t or
dust before app li ca ti on o f
the Magnetic Tape.
Door si ll
Magne ti c
Tape
Wat er
2 inc hes
Magne ti c
Tape
● If the door jam or ob st ac le i s le ss
than 0.4 inch hig h, t he Ai r
Purifier can mo ve o ve r th e
obstacle. If th is i s no t de si re d,
then Magnetic Tap e ne ed s to be
applied so the Air P ur if ie r wi ll n ot
attempt to move o ve r th e
obstacle.
● Do n ot a ll ow t he Air Puri fi er t o
op erat e in a re as w he re there
mi gh t be w at er, op en F ir eplaces ,
He at er s or f ra gi le g lass. The
Ma gn et ic Tape can be us ed t o
keep t he A ir P ur ifier from ge tt in g
in to o r cl os e to t hese area s.
from packagin g, u nr ol l th e
Magnetic Tape a nd c ut t he
length requir ed f or t he l oc at io n.
● Being careful , re mo ve O NLY
the WHITE backing off t he
Magnetic Tape a nd n ot t he
tape itself. App ly t he
Magnetic Tape t o th e fl oo r
surface, bein g ca re fu l to
make sure it adhe re s to t he
floor.
● Using the Magne ti c Re co ve ry
Tool, swipe the mag ne ti c ta pe
several times t o in cr ea se t he
strength of the m ag ne ti c ta pe .
You wi ll f in d that you have to do
this to keep the ta pe u p to
suffi ci en t st re ng th over a
period of time.
Comment s:
▶ You may use the m agnet ic tape incl uded in t he packagi ng to keep the Robot in a r oom for clea ning th e air.
▶ If a step in the area wh ere the Air Pur ifier i s going to be us ed is les s than 1.5 inc hes, th en magneti c tape must be
placed to k eep the Ai r Purifier f rom fal ling down th e step. C AUTION, th e tape must be secure s o as not to
cause a per son to tr ip down the st ep.
▶ The magneti c tape ca n also be used t o define an area wher e you do NOT wan t the Rob ot to enter.
20
Page 21

Enjoy Smar ter Life!
2.0GB
Lock
Do NOT appl y to a carp eted surfa ce as the a dhesion wi ll be ad equate to ke ep the ma gnetic tap e in position.
● NOT
● The Magneti c Tape m ust be appli ed to a cle an dry hard fl oor sur face for pro per adh esion.
● After appl ying th e Magnetic Tape, r ub the Magnetic Tape with t he Magneti sm Reco very Tool . Th is incre ase s the
magneti sm of the t ape.
● The tape shou ld NOT be u sed within 5 f eet of th e Charger Do ck as it will in terfe re with the Ro bot fin ding and ent ering
the Charg er Dock .
● The Magneti sm Reco very Tool s hould b e used to rest ore the m agnetism o f the tap e when it is fou nd to be we ak.
● There may be re sidue w hen you remo ve the Magnetic Tape. Usu ally a soapy c loth wi ll clean the a rea.
● Remaining Mag net ic Tape must be s tor ed in a c ool, dark plac e.
● The Magneti c Tape s hould NEVE R be used t o confine an
NO
NO
Guardrail
Guardrail
elevate d area wh ere the Robo t could f all down and h urt a
person or c ause co nsiderab le dama ge to the room b elow
Set up
Guardrail
when the ta pe has lo st its magne tism po wer.
● Inste ad, a tta ch a pe rma nent guard rail to block the unit
from reach ing t he ed ge of the drop off.
8. Using Robot
With all pr ogram ing having b een com pleted, yo u are now ready to use th e Air
●
Purifie r.
Having pl aced th e Charger Do ck in a roo m where you wa nt the Robot to
●
operate , place t he Robot in th e Charg er Dock.
With the Ro bot tur ned ON, the Ro bot sho uld automa tical ly go to the Pau se
●
Mode and wa it for th e next sched uled ai r cleaning t ime.
Should no l ights l ight up on the R obot, r emove the Ro bot, tu rn the Robot o ver
●
and press t he swit ch to the ON set ting.
Place the R obot ba ck in the Char ger Doc k and the Robo t is read y to go out on
●
the next sc hedul ed air clean ing.
Remembe r, the Aut o mode is the on ly mode t he Robot wil l autom atically l eave
●
the Charg er Dock .
Remembe r, we stro ngly recom mend th at you be pres ent for t he first run o f the
●
Robot to ma ke sure o bstructi ons suc h as cords, ma gazin es, etc. are r emove d
and the Rob ot will e asily find i ts Char ger Dock whe n it is tim e to charge it s
battery.
9. SD Card
Before re movin g the SD card, y ou must t urn the Robo t OFF by th e switch on
●
the botto m of the Ro bot.
The SD card w ill bec ome very HO to the touc h if remo ved after us ing the
● T
Robot, so b e very ca reful in han dling t he SD card so yo u do not bu rn
yoursel f.
Install t he SD car d to your comp uter or t o an adapter c onnec ted to your
●
compute r.
Go to www.ec ovacs .com and cli ck on A330 f or your lang uage preference .
●
Follow th e instr uctions fo r loadi ng the music t o the web s ite and then t o your
SD card.
Reinsta ll the SD c ard the prop er way an d close the co ver.
●
Tur n the Robot ov er and press the swit ch to turn the R obot ON .
●
With your R emote , you may sele ct the de sired song t o play.
●
Referri ng to the p icture, yo u may adj ust the volu me.
●
Lock
2.0GB
Ope n th e Co ver
Insert with Facing up
Volu me
Volu me
Con tr ol
Con tr ol
21
Page 22

10. Maintenance o f Robot Air Purifier
Efficient Filter
La
yer
Cleaning Robot
● Turn the Rob ot OFF by p ressing th e Butto n on the LCD.
● The Robot may b e clean ed by using a so ft damp cloth with a mi ld soap
solutio n. The clot h MUST NOT be we t, but wr ung dry.
● Do NOT try to extend t he Robot to wi pe the to wer panels .
Cleaning Filter s
● Remove th e Robot f rom the Char ger Doc k and press th e OFF but ton.
● Remove th e Top an d remov e the three fi lters from the Robo t.
● The Top #1 and Bottom # 3 filters ca n be gent ly tapped on t he edge o f your
Efficient filter layer
Formaldehyde filter layer
Anti-bacterial filter layer
#3 Filters particles down to 0.6 Microns
#2 Filters VOC's from the air
#1 Filters down to 0.3 Microns
wasteba sket to r emove any de bris.
● You may use the h ose att achment of y our Vacuum cleaner to su ck the fines
out of the fi lter. DO N OT place the e nd of t he hose or tool directly on the fi lter
materia l. This cou ld damage th e filter and decrea se its efficie ncy.
● The Middle fi lter #2 , can be gentl y tapped on the edge of y our wasteb asket t o
remove an y debri s. DO NOT use a va cuum on t his filter a s it may ca use
damage an d rende r the filter u seles s.
● After thor ough cl eaning, in stall t he filters b ack int o the Robot wi th #3 going in
first, #2 g oing in o n top of #3 and #1 g oing in o n top of #2.
● Replace t he Cove r making sur e it is sec urely in pos ition .
COMMENT S:
The #1 and #3 f ilter m ay change co lor aft er a while. This c omes from us e. You may ch eck the filt ers to se e if they are
still effic ient by h olding the m up to a bright light an d if you can NOT e asily s ee light thr ough th e material , it is tim e
to replac e the fil ters.
The #2 filt er shou ld be change d every 6 m onths or whe n found t hat odor fil tration is not work ing well.
Cleaning Drop Sensor s
Drop Sens ors are l ocated on th e botto m of the Robot . Dirty l enses will n ot allow the
sensors t o funct ion proper ly and ma y cause the Ro bot NOT t o detect a dro p off or
stairs.
● Turn the Rob ot over o nto a flat sof t surfa ce.
● You will see fi ve (5) se nsors whic h detec t a drop off of more t han 1.5 inch es.
● These senso rs need t o be wiped eve ry two weeks or often er with a soft dry clot h
to remove a ny dust t hat has been a ttrac ted to the len ses.
Cleaning the Charger Dock
Unplug th e Charg er Dock from t he Wal l.
●
● Using a dam p soft cl oth, one tha t has bee n wrung dry of w ater, yo u may wipe the
plug, pow er supp ly cord and th e Charg er Dock.
● Be sure to wi pe the se nsors with a s oft dry c loth befor e placi ng back into p ositi on
and plugg ing the p ower suppl y cord in t o the recept acle.
22
Page 23

Enjoy Smar ter Life!
11. LCD Icon Definitions
NOTE:
This prod uct wil l stop worki ng or fai l to start whe n any of th e followin g symbols are lit on th e LCD screen .
ICON
CAUS E OF FAILU RE
Filt ers not
inst alled i n Robot
Driv e wheel i s tangled
with h air, pie ce of cloth ,
stri ng, etc .
One or b oth of Dr iv ing
Whee ls are no t in
cont act wit h th e floor.
Batt ery is lo w on i ts
char ge and ca nnot
retu rn to the C ha rger
Dock t o recha rg e its
batt ery.
SOLU TION
Remo ve the to p and
chec k that fi lt ers are
prop erly in stalled a nd in
the pr oper se quence: # 1
on Top, #2 in th e Middle
and #3 o n the Bot tom.
Tur n the Rob ot OFF.Turn
the Ro bot ove r and
remo ve the it em t hat is
tang led wit h the Drive
Whee l.
By gra sping t he bottom o f
the Ro bot on op posite
side s with yo ur hands,
gent ly lift t he R obot an d
plac e back on t he floor so
that b oth Dri ve w heels
are to uchin g the floor.
By grasping the bottom of
the Robot on opposite
sides with your hands,
gently lift the Robot and
carry back to the Charger
Dock and place in the Dock
making sure the Robot
makes contact with the
Charger Dock by having
the lights come ON on top
LOSS o f FUNCTIO N
The Ro bot wil l not funct ion prope rly
in cle aning t he Air.
Robo t will no t drive
The Robot wil l sto p its fun ction bec ause one
or bot h wheels ar e off of t he floor an d the
Robo t can not m ove to perf orm its fun ction .
The Robo t has sto pped bef ore re turning to
the C harge r Dock because the ba ttery do not
have e nergy l eft.
The Robot i s not abl e
to raise th e Top to t he
proper he ight.
Remo ve the ob stacle or
pres s the OFF but ton
and ge ntly re move the
Robo t from un der the
obst acle.
23
Page 24

12. Common Failure
NO.
1
2
Problem Solution
1. Turn t he powe r ON b y press ing on the LC D panel . Check the B atter y icon to
see am ount of b attery en ergy left i n batte ry. If Battery i con doe s not light u p
on the L CD pane l, then the b attery ha s no rese rve energ y.
2. Veri fy that t he C harge r Dock is plu gged in to a wall rec eptac le. The arm tha t
exte nds fro m th e Charg er Dock sho uld lig ht up with an o range c ast. If the a rm
is not l it, the n tr y anoth er recept acle. I f the arm sti ll does n ot light up , then th e
Does n ot work
Mach ine is not
func tioning
prop erly
Char ger Doc k should be s ent to ou r Se rvice C enter.
3. Wit h the Cha rg er Dock a rm lit, pla ce the Ro bot in the Ch arger D ock so the
cont acts re st a gains t the Charg er Dock c ontact. The L CD pane l should li ght
up. If t he Robo t' s LCD pan el does not l ight up , then cont act our S ervice
Cent er for fu rt her ins tructio ns.
4. Che ck that t he s witch o n the botto m, unde rneath th e Robot , has not bee n
turn ed OFF ac ci denta lly.
The ma chine i s suscept ible to var ious th ings foun d in the av erage hom e. Some
of the se thin gs we might n ot find dur ing the i nitial op erati on or may app ear
occa siona lly in late r use.
1. Cor ds from l ig hts, TV or ot her items c an beco me entang led in th e Drive
Whee ls whic h will caus e the Rob ot t o stop fu nctioni ng unti l the entan gleme nt
is rem oved.
2. Pap ers, ma ga zines , clothes , comfo rt throws , etc. ca n cause a lif ting ac tion
with t he bott om o f the Rob ot so that th e Drive W heels can not fun ction.
3. The R obot ha s ma neuve red itsel f into a ti ght area so t hat no ma tter how it
turn s, its bu mp er will r un into an ob stacl e and set it in m otion t o turn once
agai n.
Each o f these i ns tance s will requ ire per sonal att entio n to attend t o the Rob ot
and se t it in an ar ea to start w orking ag ain.
The Ro bot doe s not detec t a drop off and go es over t he edge.
.
1 Th e Drop off co uld be less t han 1.5 i nches, or
.
2 Th e top of th e Drop off (sta ir) cou ld b e refle ctive, no t allow ing the sen sors to
Mach ine fai ls t o
3
4
dete ct a drop off
(Sta irs)
Air cl eanin g
func tion is not
work ing or is
grea tly red uc ed.
work .
The Ma gneti c Tape nee ds to be ap plied to th e edge of t he Drop Off. Be c arefu l
to mak e sure a pe rs on will n ot trip ove r the mag netic tap e and cau se them to fa ll.
Refe rence p age 20 for ap plica ti on of the M agnetic S trip.
3. The Dro p Sensors o n the bot tom of the un it need t o be wiped fr ee of dus t.
Firs t liste n to s ee if the f an is runni ng, you m ay also pla ce a at th e
exha ust exi t to v erify t hat the fan i s worki ng. If the fa n is NOT ru nning, ca ll our
Serv ice Cen ter for fur ther inst ructi ons.
If the f an is run ni ng, tur n the power O FF on the R obot by pre ssing B utton .
1.Re move th e Top of the R obot an d remove th e filte rs.
2.Cl ean the f ilters by r eferenc ing pag e 22 and veri fy that t hey are not c logge d.
3.Re place t he filter s by instal ling in t he proper o rder.
4.Pr ess the But ton and o bserve th e clean ing funct ion.
5.If s till NO T wo rking , call our Se rvice C enter for f urthe r instruc tions .
piec e of tiss ue
24
Page 25

Enjoy Smar ter Life!
13. Common Quest i o n s with Answers
1. How l ong can the R obot fu nction wh en full y 8. Is th ere any dan ger to fu rniture , child ren or
char ged? pets ?
Answ er: The Rob ot will r un for appr oxima tely two Answ er: The Rob ot has a se nsor that s lows it
(2) ho urs dep ending on t he Mode t he R obot is s et down w hen it de tects an ob stacle in i ts path ; by
to cle an the ai r in. slow ing dow n, it will ma ke a gent le b ump wit h its
2. Wha t keeps the R obot fr om fallin g down wh en
the dr op off is gre ater th an 1.5 inch es?
Answ er: The Rob ot has fi ve (5) sens ors ins talled
in the b ottom o f th e Robot t o detect a dr op off.
The le nses mu st be wiped w ith a dry sof t cloth
ever y two wee ks or often er to rem ove dus t that
can ob struc t it s funct ion.
3. Why d oes the Rob ot not op erate for a d ecent
leng th of time in t he sele cted Mode ?
Answ er:
a.Th e battery m ay be low o n its charg e and has t o
retu rn to the C ha rger Do ck to charg e its bat tery,
or
b. the R obot has se nsed th e air in its Di rt Sens or
and ha s deter mined to be c lean.
4. How d oes the Rob ot reac t when it mee ts an
obst acle?
Answ er: The Rob ot sens es an objec t and wil l slow
down u ntil th e bumper to uches the o bstac le; this
will t ell the R obot that i t needs to ch ange di rection
for a ne w route .
5. Why d oes the Rob ot not pe rform its s chedu led
air cl eanin g?
Answ er: a. the un it may ha ve been lef t in a mode
sele ction o ther than A uto mode,
b.th e Robot may h ave bee n in the Canc el mode ,
or
c. the b atter y ma y not hav e enough en ergy to d o
the sc hedul ed cleani ng.
6. Why d oes the Rem ote Con trol fail t o work?
Answ er: a. you ma y be beyo nd the 16 foo t
work ing ran ge of the Rem ote.
b. the re maybe ot her wor king wi-f i in the ro om
that i nterf er es with t he Remote s ignal ,
c. the l enses on th e Remot e and the Rob ot may
be dir ty and sh ould be cle aned wi th a d ry soft
clot h,or
d. the b atterie s in the Re mote may ne ed to be
chan ged
7. Why d oes the Rob ot slow d own befor e
stop ping?
Answ er: The Rob ot has de termine d the spo t
wher e it shou ld stop and c lean th e ai r so the
Robo t will sl ow down so th at it doe s no t pass th e
spot .
25
viny l guard a nd then cha nge its d ir ectio n. There
are no s harp ed ges so the Ro bot wil l no t cut a
chil d’s skin nor ma r the fur niture.
9. How t o prevent t he Driv e Wheels fr om gett ing
tang led in Powe r Cords ?
Answ er: Befor e opera ting the un it in a roo m,
chec k that al l power cor ds have bee n lifte d off the
floo r or plac ed behind M agnet ic Tape.
10. Do es it matte r if the pr oduct sta ys on the
Char ger Doc k even afte r it has been c harge d?
Answ er: When th e batte ry is fully c harge d, the
char ger wil l switch to a l ow curr en t mode an d will
not de terio rate the ba ttery. Shoul d you not u se
the Ro bot for a n ex tende d period of t ime, yo u
shou ld unpl ug the Char ger Doc k and turn th e
Robo t off by pressi ng the Bu tton and tu rning t he
swit ch OFF on the u ndern eath side o f the Rob ot
11. Is th ere any dan ger in to uching th e conta cts
on the C harge r Do ck or the R obot?
Answ er: The vol tage is 2 4 volts DC an d will no t
caus e a probl em should a p erson o r an imal co me
in con tact wi th i t
12. Ho w can I stop th e Robot f rom going o n its
sche duled a ir c leani ng while I am a way on a
trip ?
Answ er: You m ay cancel t he func tion. Ref erence
page 16 for in structi ons.
13. Wh at is the cor rect wa y to move the R obot?
Answ er: With bo th hand s, grasp th e Robot o n
oppo site si des under t he Robo t. L ift and
tran sport a nd place ba ck on the flo or gent ly.
Make s ure whe n graspin g the Rob ot t hat you d o
not ac ciden tally tou ch the ON – OFF s witch t hat is
on the u ndern eath ei the r side of the R obot. You
can ch eck tha t th e Robot h as power by t ouchi ng
ei the r the PAUSE or the O FF button o n the pan el
or use t he Remo te .
14. Ho w do I clean th e LCD pan el?
Answ er: Clean w ith a cle an soft clo th and do n ot
pres s hard on t he panel so a s not to brea k the
glas s. Clea ner used to c lean gl as ses or a TV
scre en can be l ightly sp rayed o n th e cloth t o wipe
the st ubbor n sp ots. Fo llow by wip ing wit h a dry
sect ion of th e cl oth.
Page 26

15. Wh y is there NO m usic in t he MUSIC Mo de? 21. Ho w to downlo ad musi c?
Answ er: Answe r: Plea se refer to “ Music Mod e” in thi s
1.Ch eck to see th at the SD c ard has bee n
inst alled i n the Robot ,
2. Che ck that the v olume h as been tur ned up so
you ca n hear th e music, or
3.if s till no sou nd, the n call our Se rvice C enter for
furt her ins tr uctio ns
16. Wh y does the Ro bot fai l to return t o the
Char ger Doc k?
Answ er: 1.The re are ob jects wit hin 5 fee t of the
Char ger Doc k which int erfer es w ith the i nfrared
beam
2.Th ere is an obj ect tha t has a stron g refle ctive
surf ace (mi rr or) wit hin the inf rared b eam
proj ectio n from the Ch arger D oc k that affe cts the
Robo t from re ce iving t he Charge r Dock be am. 3.Th e light on to p will fl ash RED whe n the air
3.Pl acement o f the Cha rger Dock d oes not h ave a
clea r view of t he room for t he infrar ed beam .
4.Th e lenses on t he Char ger Dock an d the Rob ot
need t o be clea ned with a so ft dry clot h.
17. Wh y does the Ro bot not c lean the ai r in the
room ?
Answ er: The pol lutio n has perme ated th e air in
the ro om and it r eq uires a l onger p er iod to cl ean
the ai r.
18. Ho w to use for lo nger ti me under fi xed-p oint
mode ?
Answ er: In this c ase, yo u should mo ve the
Char ger doc k to the room a nd plug the c able in to
the Ch arger D ock and the R obot so the R obot wi ll
cont inue to c lean the ai r witho ut u sing al l of the
batt eries e nergy. Refer ence Fixe d Point M ode on
page 18 for in structi ons.
19. Wh y does the Ro bot tak e longer in o ne plac e
than i n another t o clean t he air?
Answ er: The Robot h as a buil t in sensor t hat has full y charg ed. Repea t this cycl e one mor e time
a set st andar d to j udge th e air quali ty agai nst. an d the batte ry shou ld f uncti on to its ful l capac ity.
When t he air re aches the a cceptab le limi t, the If the p roduc t is n ot goin g to be used fo r more
Robo t stops c le aning a nd will m ov e to anot her than thre e month s, y ou shou ld make a not e to run
loca tion wh ere the air n eeds cl ea ning. the Ro bot and t hen charg e the batte ry.
20. Wh y does some one sti ll feel stu ffy in th e room
whil e the mac hi ne keep s looking f or air
poll ution wit h the ind icator li ght rem aining
Gree n?
Answe r: This is a norm al phen omenon.
Some times p eople fee l stuffy in a roo m becau se
lack o f air mov ement. The Ro bot looks f or air
poll ution a nd cannot h ave any a ffec t on the ro om
bein g stuffy.
guid e for the s pecific o peratio n and www.
ecov acs.c om.cn for d ownload ing the m usic.
Refe rence p age 21 .
22. Ho w do you know w hen the l evel of air i n your
room d oes not mee t accep table sta ndard s?
Answ er: The lig ht on top o f the Robot w ill tur n
RED wh en the ai r quality d oes not mee t the
Robo ts stan dard.
23. Th ere are t hr ee (3) re asons why l ights w ill
flas h/blink
Answ er: 1.Whe n the bat tery is low o n Charg e, the
Batt ery Ico n wi ll blin k
2.Al arm State :When a f unction d oes not w ork, the
Icon w ill bli nk on the LCD p anel un ti l it is fix ed.
qual ity doe s not meet th e Robots se t stand ard;
the li ght wil l turn GREE N when the ai r meets t he
Robo ts set st an dard.
24. Wh at are the th ree sta tus state s of the Air
Puri fier?
Answ er: 1.Cha rging S tate: ① In Ch argin g: The
powe r displ ay icon on th e displ ay screen f lashes.
② After C hargi ng: Th e power d isplay ic on is
norm ally on . 2.Alarm S tate: The cor respo nding
alar m indic ator icon o n the dis pl ay scre en turns
red an d flash es. 3.Air Q uality Di splay S tate: ①
The li ght on Top turns Re d when th e air does no t
meet i ntern al standa rds. ②The li ght on Top turn s
Gree n when th e Air meets in terna l st andar ds.
25. Ho w to activa te the ba ttery whe n not use d for
a peri od of time?
Answ er: If the ba ttery i s dead, pla ce the Ro bot in
the Ch arger D ock and ful ly char ge t he batt ery.
Run th e Robot u ntil the ba ttery is lo w and the n
plac e the Rob ot in the Cha rger Do ck a gain ti ll
26
Page 27

Page 28

Enjoy Smar ter Life!
A3 S-000-IM 2011 01
 Loading...