

Page 1

Page 2

Corel® VideoStudio® X10
User Guide
Including VideoStudio Pro and
VideoStudio Ultimate
Page 3

Contents
Quick start. . . . . . . . . . . . . . . . . . . . . . . . . . . . . . . . . . . . . . 1
Welcome . . . . . . . . . . . . . . . . . . . . . . . . . . . . . . . . . . . . . . . 9
What’s new in Corel VideoStudio X10? . . . . . . . . . . . . . . . . . . . . . 9
System requirements . . . . . . . . . . . . . . . . . . . . . . . . . . . . . . . . . . 12
Supported file formats . . . . . . . . . . . . . . . . . . . . . . . . . . . . . . . . 14
Hardware acceleration. . . . . . . . . . . . . . . . . . . . . . . . . . . . . . . . . 15
Preparing for video editing . . . . . . . . . . . . . . . . . . . . . . . . . . . . . 16
Installing and uninstalling the application . . . . . . . . . . . . . . . . . . 17
Starting and quitting the application . . . . . . . . . . . . . . . . . . . . . . 17
Updating the application. . . . . . . . . . . . . . . . . . . . . . . . . . . . . . . 18
Corel Support Services. . . . . . . . . . . . . . . . . . . . . . . . . . . . . . . . . 18
About Corel . . . . . . . . . . . . . . . . . . . . . . . . . . . . . . . . . . . . . . . . 18
Learning resources . . . . . . . . . . . . . . . . . . . . . . . . . . . . . . 21
Documentation conventions . . . . . . . . . . . . . . . . . . . . . . . . . . . . 21
Using the Help system. . . . . . . . . . . . . . . . . . . . . . . . . . . . . . . . . 22
Corel VideoStudio X10 User Guide PDF . . . . . . . . . . . . . . . . . . . . 23
Understanding VideoStudio terminology . . . . . . . . . . . . . . . . . . . 23
Learning with video tutorials . . . . . . . . . . . . . . . . . . . . . . . . . . . . 23
Using Web-based resources. . . . . . . . . . . . . . . . . . . . . . . . . . . . . 24
Workspace tour. . . . . . . . . . . . . . . . . . . . . . . . . . . . . . . . . 25
Exploring the workspaces . . . . . . . . . . . . . . . . . . . . . . . . . . . . . . 25
Switching between workspaces . . . . . . . . . . . . . . . . . . . . . . . . . . 30
Contents i
Page 4

The Welcome book . . . . . . . . . . . . . . . . . . . . . . . . . . . . . . . . . . . 31
Using the Player panel. . . . . . . . . . . . . . . . . . . . . . . . . . . . . . . . . 31
Using the toolbar . . . . . . . . . . . . . . . . . . . . . . . . . . . . . . . . . . . . 34
Customizing the workspace . . . . . . . . . . . . . . . . . . . . . . . . . . . . 36
Capture and import . . . . . . . . . . . . . . . . . . . . . . . . . . . . . . 41
Using the Options panel in the Capture workspace . . . . . . . . . . . 41
Capturing videos and photos . . . . . . . . . . . . . . . . . . . . . . . . . . . 42
Capturing digital video (DV) . . . . . . . . . . . . . . . . . . . . . . . . . . . . 46
Using DV Quick Scan. . . . . . . . . . . . . . . . . . . . . . . . . . . . . . . . . . 46
Capturing analog video. . . . . . . . . . . . . . . . . . . . . . . . . . . . . . . . 46
Importing from digital media . . . . . . . . . . . . . . . . . . . . . . . . . . . 47
Scanning and splitting scenes . . . . . . . . . . . . . . . . . . . . . . . . . . . 49
Project basics . . . . . . . . . . . . . . . . . . . . . . . . . . . . . . . . . . . 51
Creating new projects and opening projects . . . . . . . . . . . . . . . . 51
Using Instant Project templates . . . . . . . . . . . . . . . . . . . . . . . . . . 53
Setting project properties . . . . . . . . . . . . . . . . . . . . . . . . . . . . . . 55
Creating custom profiles . . . . . . . . . . . . . . . . . . . . . . . . . . . . . . . 55
Using Smart Proxy for a faster, smoother editing experience . . . . 57
Previewing your project or clips . . . . . . . . . . . . . . . . . . . . . . . . . . 58
Undoing and redoing actions . . . . . . . . . . . . . . . . . . . . . . . . . . . 59
Showing and hiding grid lines. . . . . . . . . . . . . . . . . . . . . . . . . . . 60
Saving projects . . . . . . . . . . . . . . . . . . . . . . . . . . . . . . . . . . . . . . 61
Saving projects by using Smart Package. . . . . . . . . . . . . . . . . . . . 61
Adding cues and chapters. . . . . . . . . . . . . . . . . . . . . . . . . . . . . . 62
Organize and find media . . . . . . . . . . . . . . . . . . . . . . . . . . 65
Using the Library. . . . . . . . . . . . . . . . . . . . . . . . . . . . . . . . . . . . . 65
ii Corel VideoStudio Pro User Guide
Page 5

Sorting, viewing, and filtering clips in the Library . . . . . . . . . . . . . 68
Resizing thumbnails . . . . . . . . . . . . . . . . . . . . . . . . . . . . . . . . . . 70
Tagging files as 3D . . . . . . . . . . . . . . . . . . . . . . . . . . . . . . . . . . . 71
Timeline. . . . . . . . . . . . . . . . . . . . . . . . . . . . . . . . . . . . . . . 75
Switching between Timeline views. . . . . . . . . . . . . . . . . . . . . . . . 75
Showing and hiding tracks . . . . . . . . . . . . . . . . . . . . . . . . . . . . . 78
Adding and swapping tracks . . . . . . . . . . . . . . . . . . . . . . . . . . . . 78
Grouping and ungrouping . . . . . . . . . . . . . . . . . . . . . . . . . . . . . 80
Using Ripple Editing . . . . . . . . . . . . . . . . . . . . . . . . . . . . . . . . . . 81
Edit media. . . . . . . . . . . . . . . . . . . . . . . . . . . . . . . . . . . . . 85
Using the Options panel in the Edit workspace . . . . . . . . . . . . . . 86
Converting multiple files . . . . . . . . . . . . . . . . . . . . . . . . . . . . . . . 89
Adding video clips. . . . . . . . . . . . . . . . . . . . . . . . . . . . . . . . . . . . 90
Adding photos . . . . . . . . . . . . . . . . . . . . . . . . . . . . . . . . . . . . . . 91
Time remapping . . . . . . . . . . . . . . . . . . . . . . . . . . . . . . . . . . . . . 92
Modifying video playback speed . . . . . . . . . . . . . . . . . . . . . . . . . 94
Using Freeze Frame . . . . . . . . . . . . . . . . . . . . . . . . . . . . . . . . . . . 99
Replacing media clips . . . . . . . . . . . . . . . . . . . . . . . . . . . . . . . . 100
Trimming a clip . . . . . . . . . . . . . . . . . . . . . . . . . . . . . . . . . . . . . 101
Using Split by Scene . . . . . . . . . . . . . . . . . . . . . . . . . . . . . . . . . 104
Trimming video into multiple clips . . . . . . . . . . . . . . . . . . . . . . . 105
Saving trimmed clips . . . . . . . . . . . . . . . . . . . . . . . . . . . . . . . . . 107
Taking a snapshot from a video clip. . . . . . . . . . . . . . . . . . . . . . 108
Enhancing clips . . . . . . . . . . . . . . . . . . . . . . . . . . . . . . . . . . . . . 108
Adjusting white balance . . . . . . . . . . . . . . . . . . . . . . . . . . . . . . 110
Applying pan and zoom effect . . . . . . . . . . . . . . . . . . . . . . . . . 111
Working with the Mask Creator. . . . . . . . . . . . . . . . . . . . . . . . . 115
Contents iii
Page 6

Track transparency . . . . . . . . . . . . . . . . . . . . . . . . . . . . . . . . . . 120
360 video . . . . . . . . . . . . . . . . . . . . . . . . . . . . . . . . . . . . . . . . . 122
Titles and subtitles . . . . . . . . . . . . . . . . . . . . . . . . . . . . . . 127
Using the Title Safe area . . . . . . . . . . . . . . . . . . . . . . . . . . . . . . 127
Adding titles using the Library. . . . . . . . . . . . . . . . . . . . . . . . . . 128
Adding titles with the Subtitle Editor . . . . . . . . . . . . . . . . . . . . . 129
Formatting text . . . . . . . . . . . . . . . . . . . . . . . . . . . . . . . . . . . . . 133
Applying text effects and animation . . . . . . . . . . . . . . . . . . . . . 137
Converting titles to image and animation files . . . . . . . . . . . . . . 138
Transitions . . . . . . . . . . . . . . . . . . . . . . . . . . . . . . . . . . . . 141
Adding transitions. . . . . . . . . . . . . . . . . . . . . . . . . . . . . . . . . . . 141
Saving and deleting transitions . . . . . . . . . . . . . . . . . . . . . . . . . 144
Graphics . . . . . . . . . . . . . . . . . . . . . . . . . . . . . . . . . . . . . . 145
Adding color clips . . . . . . . . . . . . . . . . . . . . . . . . . . . . . . . . . . . 145
Adding color patterns . . . . . . . . . . . . . . . . . . . . . . . . . . . . . . . . 146
Adding backgrounds. . . . . . . . . . . . . . . . . . . . . . . . . . . . . . . . . 146
Adding objects or frames . . . . . . . . . . . . . . . . . . . . . . . . . . . . . 147
Adding Flash animations. . . . . . . . . . . . . . . . . . . . . . . . . . . . . . 148
Customizing objects, frames, and animations . . . . . . . . . . . . . . 148
Video filters . . . . . . . . . . . . . . . . . . . . . . . . . . . . . . . . . . . 149
Applying filters . . . . . . . . . . . . . . . . . . . . . . . . . . . . . . . . . . . . . 149
Marking filters as favorites. . . . . . . . . . . . . . . . . . . . . . . . . . . . . 150
Applying multiple filters . . . . . . . . . . . . . . . . . . . . . . . . . . . . . . 151
Customizing filters . . . . . . . . . . . . . . . . . . . . . . . . . . . . . . . . . . 152
Overlay clips . . . . . . . . . . . . . . . . . . . . . . . . . . . . . . . . . . . 155
Adding clips to overlay tracks . . . . . . . . . . . . . . . . . . . . . . . . . . 155
iv Corel VideoStudio Pro User Guide
Page 7

Adjusting overlay clips. . . . . . . . . . . . . . . . . . . . . . . . . . . . . . . . 156
Combining Overlay clips to create an Ultra HD (4K) video. . . . . . 158
Applying motion to an overlay clip . . . . . . . . . . . . . . . . . . . . . . 159
Adjusting the overall transparency of overlay clips . . . . . . . . . . . 160
Adding borders to overlay clips . . . . . . . . . . . . . . . . . . . . . . . . . 161
Blending overlay clips with the background . . . . . . . . . . . . . . . . 161
Adding a mask frame . . . . . . . . . . . . . . . . . . . . . . . . . . . . . . . . 164
Using video masks with overlay clips . . . . . . . . . . . . . . . . . . . . . 165
Motion tracking . . . . . . . . . . . . . . . . . . . . . . . . . . . . . . . 167
Tracking motion of video objects. . . . . . . . . . . . . . . . . . . . . . . . 167
Matching motion to a tracking path . . . . . . . . . . . . . . . . . . . . . 173
Customizing motion . . . . . . . . . . . . . . . . . . . . . . . . . . . . . . . . . 179
Tracking paths. . . . . . . . . . . . . . . . . . . . . . . . . . . . . . . . . 185
Adjusting tracking paths . . . . . . . . . . . . . . . . . . . . . . . . . . . . . . 185
Using objects on tracking paths. . . . . . . . . . . . . . . . . . . . . . . . . 189
Using the Path Library . . . . . . . . . . . . . . . . . . . . . . . . . . . . . . . . 192
Audio . . . . . . . . . . . . . . . . . . . . . . . . . . . . . . . . . . . . . . . 195
Adding audio files . . . . . . . . . . . . . . . . . . . . . . . . . . . . . . . . . . . 196
Using Audio Ducking to automatically adjust volume. . . . . . . . . 197
Splitting an audio track from a video clip. . . . . . . . . . . . . . . . . . 199
Using Auto Music . . . . . . . . . . . . . . . . . . . . . . . . . . . . . . . . . . . 200
Balancing the volume of multiple clips with Normalize Audio. . . 201
Using the Clip Volume Control . . . . . . . . . . . . . . . . . . . . . . . . . 202
Trimming and cutting audio clips . . . . . . . . . . . . . . . . . . . . . . . 202
Stretching audio duration . . . . . . . . . . . . . . . . . . . . . . . . . . . . . 203
Applying fade-in/out . . . . . . . . . . . . . . . . . . . . . . . . . . . . . . . . . 204
Contents v
Page 8

Using the Sound Mixer . . . . . . . . . . . . . . . . . . . . . . . . . . . . . . . 204
Adjusting stereo channels . . . . . . . . . . . . . . . . . . . . . . . . . . . . . 205
Using the Surround Sound Mixer. . . . . . . . . . . . . . . . . . . . . . . . 205
Mixing Surround Sound . . . . . . . . . . . . . . . . . . . . . . . . . . . . . . 206
Duplicating an audio channel . . . . . . . . . . . . . . . . . . . . . . . . . . 207
Applying audio filters . . . . . . . . . . . . . . . . . . . . . . . . . . . . . . . . 208
Painting Creator . . . . . . . . . . . . . . . . . . . . . . . . . . . . . . . . 209
Working with Painter Creator . . . . . . . . . . . . . . . . . . . . . . . . . . 210
Switching between Painting Creator modes. . . . . . . . . . . . . . . . 213
Creating images and animations . . . . . . . . . . . . . . . . . . . . . . . . 213
Live screen capture. . . . . . . . . . . . . . . . . . . . . . . . . . . . . . 217
Starting a screen capture project . . . . . . . . . . . . . . . . . . . . . . . . 217
Recording your screen. . . . . . . . . . . . . . . . . . . . . . . . . . . . . . . . 218
FastFlick . . . . . . . . . . . . . . . . . . . . . . . . . . . . . . . . . . . . . . 223
Creating a FastFlick project . . . . . . . . . . . . . . . . . . . . . . . . . . . . 223
Selecting a template (FastFlick) . . . . . . . . . . . . . . . . . . . . . . . . . 224
Adding media clips (FastFlick) . . . . . . . . . . . . . . . . . . . . . . . . . . 224
Editing titles (FastFlick) . . . . . . . . . . . . . . . . . . . . . . . . . . . . . . . 225
Adding music (FastFlick) . . . . . . . . . . . . . . . . . . . . . . . . . . . . . . 227
Applying Pan & Zoom effects (FastFlick). . . . . . . . . . . . . . . . . . . 228
Setting movie duration (FastFlick) . . . . . . . . . . . . . . . . . . . . . . . 228
Saving to video files for computer playback (FastFlick) . . . . . . . . 229
Uploading to the Web (FastFlick). . . . . . . . . . . . . . . . . . . . . . . . 229
Editing your movie in VideoStudio (FastFlick) . . . . . . . . . . . . . . . 231
Making FastFlick templates . . . . . . . . . . . . . . . . . . . . . . . 233
Terminology for FastFlick templates. . . . . . . . . . . . . . . . . . . . . . 233
vi Corel VideoStudio Pro User Guide
Page 9

Rules for creating FastFlick templates. . . . . . . . . . . . . . . . . . . . . 236
Creating FastFlick templates. . . . . . . . . . . . . . . . . . . . . . . . . . . . 238
Stop motion animation . . . . . . . . . . . . . . . . . . . . . . . . . . 241
Creating a Stop Motion project . . . . . . . . . . . . . . . . . . . . . . . . . 241
Capturing stop motion images in Corel VideoStudio . . . . . . . . . 243
Using the DSLR Enlarged Mode . . . . . . . . . . . . . . . . . . . . . . . . . 244
Multi-Camera Editing . . . . . . . . . . . . . . . . . . . . . . . . . . . 247
The Multi-Camera Editor workspace . . . . . . . . . . . . . . . . . . . . . 248
Basic steps in multi-camera editing . . . . . . . . . . . . . . . . . . . . . . 250
Importing video and audio clips into the Multi-Camera Editor . . 251
Synchronizing video and audio clips in multi-camera projects . . 252
Choosing an audio source for your multi-camera project . . . . . . 254
Editing multiple clips to create a multi-camera compilation . . . . 255
Adding picture-in-picture (PIP) in the Multi-Camera Editor . . . . . 258
Managing multi-camera source files . . . . . . . . . . . . . . . . . . . . . 259
Saving and exporting your multi-camera project . . . . . . . . . . . . 260
Using Smart Proxy with the Multi-Camera Editor . . . . . . . . . . . . 261
Save and share . . . . . . . . . . . . . . . . . . . . . . . . . . . . . . . . 263
Choosing a sharing option . . . . . . . . . . . . . . . . . . . . . . . . . . . . 263
Saving to video files for computer playback . . . . . . . . . . . . . . . . 264
Saving to video files for mobile devices . . . . . . . . . . . . . . . . . . . 266
Saving HTML5 video files. . . . . . . . . . . . . . . . . . . . . . . . . . . . . . 268
Uploading to the Web. . . . . . . . . . . . . . . . . . . . . . . . . . . . . . . . 270
Creating 3D video files. . . . . . . . . . . . . . . . . . . . . . . . . . . . . . . . 272
Creating video files from part of a project (trimmed) . . . . . . . . . 274
Creating sound files. . . . . . . . . . . . . . . . . . . . . . . . . . . . . . . . . . 274
Contents vii
Page 10

Working with custom profiles in the Share workspace . . . . . . . . 275
Burn discs. . . . . . . . . . . . . . . . . . . . . . . . . . . . . . . . . . . . . 277
Saving a project to disc . . . . . . . . . . . . . . . . . . . . . . . . . . . . . . . 277
Assembling files . . . . . . . . . . . . . . . . . . . . . . . . . . . . . . . . . . . . 280
Adding and editing chapters . . . . . . . . . . . . . . . . . . . . . . . . . . . 281
Editing a menu template. . . . . . . . . . . . . . . . . . . . . . . . . . . . . . 284
Creating advanced menus . . . . . . . . . . . . . . . . . . . . . . . . . . . . . 287
Previewing your movie and menu before burning . . . . . . . . . . . 289
Burning your project onto a disc . . . . . . . . . . . . . . . . . . . . . . . . 290
Copying a disc image file. . . . . . . . . . . . . . . . . . . . . . . . . . . . . . 293
Creating disc labels . . . . . . . . . . . . . . . . . . . . . . . . . . . . . . . . . . 294
Glossary . . . . . . . . . . . . . . . . . . . . . . . . . . . . . . . . . . . . . . 297
Shortcuts . . . . . . . . . . . . . . . . . . . . . . . . . . . . . . . . . . . . . 307
Menu command shortcuts . . . . . . . . . . . . . . . . . . . . . . . . . . . . 307
Workspace shortcuts. . . . . . . . . . . . . . . . . . . . . . . . . . . . . . . . . 308
Navigation area shortcuts . . . . . . . . . . . . . . . . . . . . . . . . . . . . . 308
Timeline shortcuts. . . . . . . . . . . . . . . . . . . . . . . . . . . . . . . . . . . 309
Multi-trim Video shortcuts . . . . . . . . . . . . . . . . . . . . . . . . . . . . 310
Layout settings shortcuts. . . . . . . . . . . . . . . . . . . . . . . . . . . . . . 310
Screen capture shortcuts . . . . . . . . . . . . . . . . . . . . . . . . . . . . . . 311
Other Shortcuts . . . . . . . . . . . . . . . . . . . . . . . . . . . . . . . . . . . . 311
DV-to-DVD Wizard . . . . . . . . . . . . . . . . . . . . . . . . . . . . . . 313
Scanning for scenes . . . . . . . . . . . . . . . . . . . . . . . . . . . . . . . . . 313
Applying templates and burning to DVDs . . . . . . . . . . . . . . . . . 315
viii Corel VideoStudio Pro User Guide
Page 11

Quick start
If you want to dive into Corel V ideoStudio right away, this tutorial will
walk you through the key tasks. In this tutorial, you’ll learn how to:
• Import video clips to the Library
• Add your clips and photos
• Review and trim your video clips
• Add titles
• Apply transitions
• Add music
• Save and share
The same basic steps can be applied to create a photo slideshow or
any multimedia presentation that includes photos, video clips, and
music.
For a quick movie, try the FastFlick. For more information, see
“FastFlick” on page 223.
For more details about starting movie projects, see “Project basics” on
page 51.
Import video clips to the Library
Let’s start with the most common situation—the shoot is done and
you’ve transferred your video clips and photos from your camera to
your computer. We can open Corel VideoStudio, and jump directly to
Edit workspace and the Library.
the
Quick start 1
Page 12
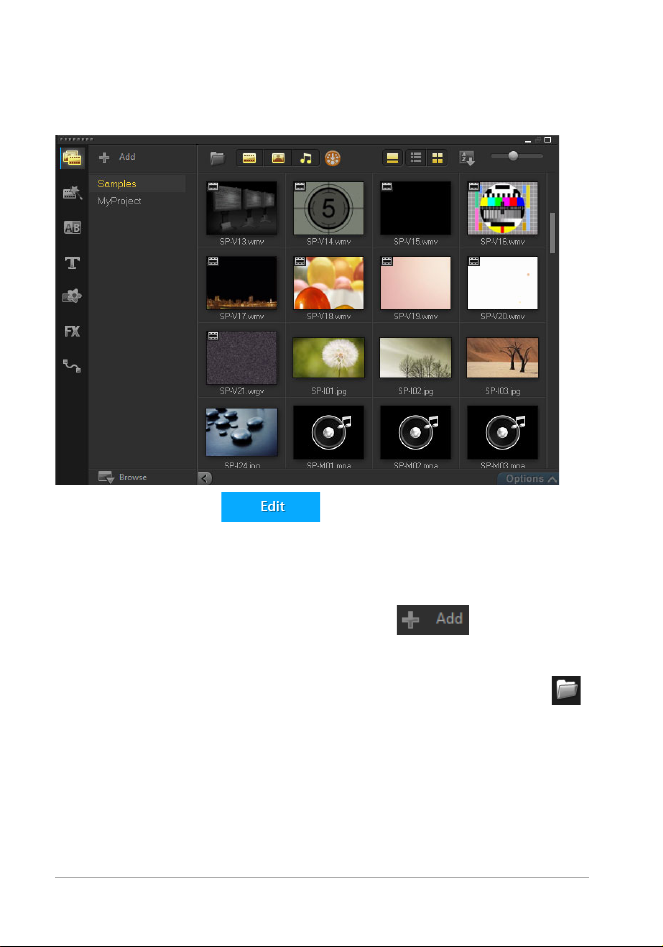
The Library is the source for all your media, including video clips,
photos, and music. It also houses templates, transitions, effects, and a
variety of other media assets that you can use in your projects.
1 Click the Edit tab at the top of the application
window to open the Edit workspace. The Library panel appears in
t
he upper right corner of the application.
2 Create a folder for your project to keep all your videos together
by clicking the Add a new folder button
3 Type a name for the folder.
4 At the top of the Library, click the Import Media Files button ,
select the video clips and photos that you want to
.
use, and click
Open.
Note that the buttons at the top of the Library can be enabled and
disabled to filter the thumbnails by video, photos, and music. If you
don’t see the media you expect to see, check the state of these media
buttons.
2 Corel VideoStudio X10
Page 13
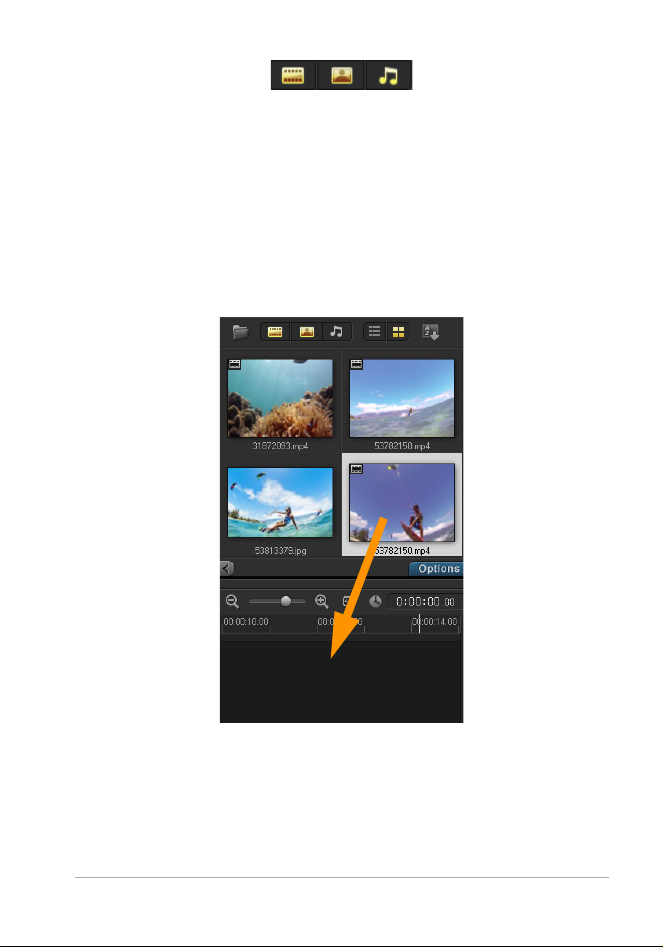
Add your clips and photos
Adding clips and photos to a video project is as easy as dragging
thumbnails for the video clips and photos that you want to use from
the Library to the Timeline.
If you’re looking for a way to get polished results quickly, you can use
an Instant Project template. For more information, see
Project templates” on page 53.
“Using Instant
Review and trim your video clips
The key to a successful video is to keep it short enough to hold your
viewer’s interest. Let’s review and trim the video clips.
1 In the Edit workspace, click a video clip in the Timeline.
Quick start 3
Page 14
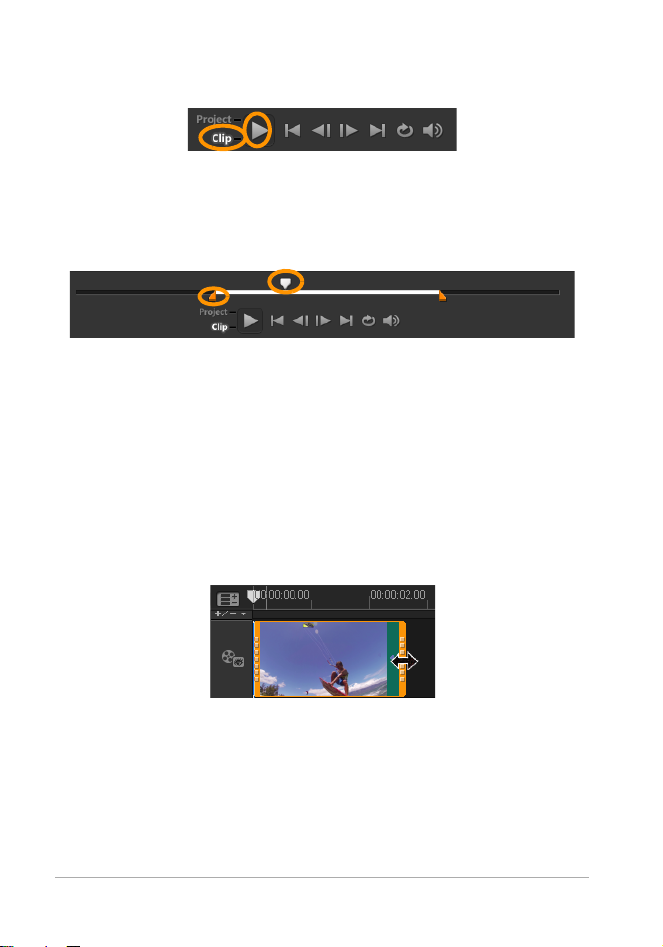
2 In the Navigation area of the Player panel, click Clip, and click the
2
1
Play button.
3 After you review the clip, drag the orange Tri m Ma rker from the
original starting position to the new starting position. The
Scrubber moves to the selected frame and this frame displays in
the
Preview Window.
1. Trim Marker (one on each end). 2. Scrubber.
4 Now drag the second Tr im M ar ker from the original end position
to the new end position.
5 Click Play.
Note: Changes made to files imported into the Library do not
affect the original files.
You can also trim video clips in the Timeline itself by dragging the end
handles of a clip.
Want to edit a section in the middle? Try Multi-Trim Video. For more
information, see
“Trimming video into multiple clips” on page 105.
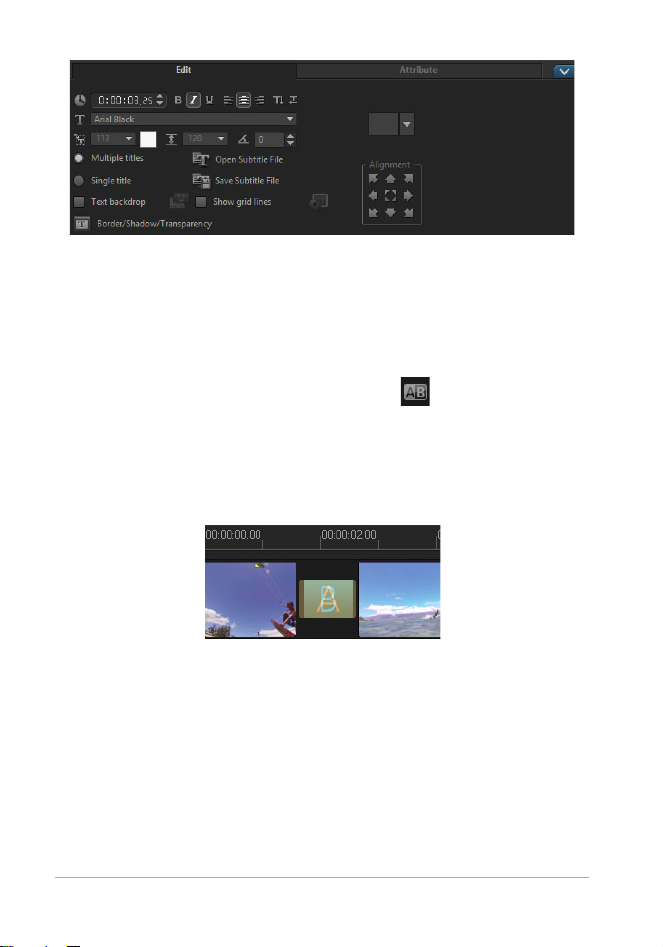
Add titles
Now let’s add a title.
4 Corel VideoStudio X10
Page 15

1 Drag the Scrubber to the position you want.
2 Click the Title button to the left of the Library thumbnails.
3 You can type directly in the Preview Window, but the easiest way
to get a professional-looking title, is to drag one of the title
thumbnails from the Library to the Title track in the Timeline.
4 You can drag the title to any position in the Title track and adjust
the duration of the title by dragging the end handles of the clip.
5 To edit the title text, double-click the title clip in the Timeline, in
the Preview Window, select the text and type new text. Keep the
t
ext inside the box that displays near the edges of the Preview
W
indow (called the Title Safe area).
6 The Options panel for titles displays below the thumbnails in the
Library. Use any of the controls to format y
our title text. For
example, you can align the text and change the font, size, and
color.
Quick start 5
Page 16
Apply transitions
You can add transitions between clips or between photos. Transitions
can be used to fade in or fade out or to dissolve one photo into the
next. There are many transition options to choose from.
1 In the Library, click the Trans it io n button .
2 Click the Ga ll e ry drop-list at the top of the Library, and choose All
if you want to see what is available.
3 Drag the thumbnail for the transition you want to the Timeline
and place it between two clips or photos.
If you want to apply the same transition between all clips and photos
in the track, in the Library, right-click the transition thumbnail, and
ch
oose Apply current effect to video track. You will be warned about
eplacing any existing transitions.
r
6 Corel VideoStudio X10
Page 17
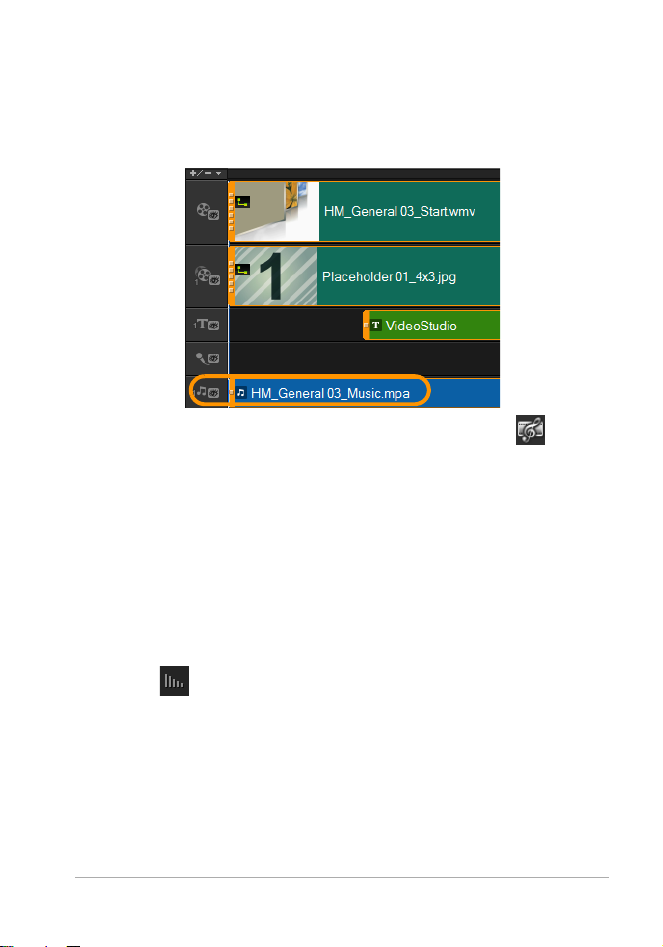
Add music
You can add songs from your computer by dragging a music f ile from
the Library to the Music track. You can also use Auto Music to choose
oyalty-free music to your project.
r
1 On the Timeline toolbar, click the Auto Music button .
1 In the Auto Music area that displays below the Library
thumbnails, experiment with different choices in the drop-lists
and click Play selected Music to listen to the selection.
2 To add your selection to the Timeline, click Add to Timeline.
3 The music is added to the Music track, and as with other clips,
you can drag it to a new position in the Timeline and trim it by
dragging the end handles.
4 To fade the music at the end of your project, click the Fade-out
button
Note that with any audio clips, o
in the Auto Music area.
r video clips that include sound, you
can control the volume of the clips. For more information about
adjusting audio, see “A ud io ” on pa ge 195.
Quick start 7
Page 18

Save and share
When you’re f inished with your project, you can save it and share it in
a variety of ways. For this tutorial, we’ll upload it directly to the Web.
Before sharing, it’s important to save a version of your project t
o the
na tive *.v sp fo rmat . Thi s wi ll gi ve you ma ximum fl exib ility if you choose
to edit your project later or if you want to output it to a different
format.
1 Click the Share tab to view the Share workspace.
2 Click File > Save, choose a location from the Save in box, and
type a name in the File name box.
3 To share your video on the Web, click the Web button , then
click You Tub e, Facebook, Flickr, or Vimeo, and click Log In to sign
in t
o your account or to create an account. After you sign in and
approve the link between Corel VideoStudio and the account,
choose the s
ettings you want for your video upload and click
Start.
8 Corel VideoStudio X10
Page 19

Welcome
Welcome to Corel® VideoStudio®, the surprisingly creative videoediting software that lets you produce impressive video projects,
regardless of your skill level. Corel VideoStudio provides a complete
et of tools for capturing, editing, and sharing your video, slideshow,
s
and multimedia projects.
The availability of features depends on the version of the
software you have. For more information, see http://
videostudiopro.com/compare.
This section contains t
• What’s new in Corel VideoStudio X10?
• System requirements
• Hardware acceleration
• Preparing for video editing
• Installing and uninstalling the application
• Starting and quitting the application
• Updating the application
• Corel Support Services
• About Corel
What’s new in Corel VideoStudio X10?
New creative features as well as enhancements to favorite features
means that you can create stunning videos faster in
Corel VideoStudio. The key updates are listed below.
he following topics:
Welcome 9
Page 20

New! Mask Creator (in Ultimate)
Put the focus on key elements in your video with the new Mask
. Define the area to highlight with brush and shape tools and
Creator
the powerful VideoStudio Ultimate X10 engine will detect the
movement of the object. You can fine-tune your mask to get
perfection. When you are happy with the results, the mask gets added
to the timeline. Apply popular effects to accent or cover the object or
the background, for example add blurring, a grayscale effect, boost
color and more, for a truly unique effect. For more information, see
“Working with the Mask Creator” on page 115.
New! Time Remapping
Evoke drama by playing with speed. The new Time Remapping
controls in VideoStudio make it easy to add impact with slow motion,
speed things up, temporarily freeze the action, or even reverse and
repl ay scenes. New T ime Remapping controls puts all t hese con trols in
one place, so you can adjust speed without having to edit multiple
movie clips and jump between windows. For more information, see
“Time remapping” on page 92.
New! Track Transparency
Track Transparency is available in the Timeline, making it easier than
ever to precisely adjust the opacity of your track to show multiple
layered clips at once. You can create a custom fade in, fade out, or
superimposed effect. For more information, see
“Track transparency”
on page 120.
New! 360 Video support
Show your best angle with 360° video. VideoStudio introduces
controls to convert your 360° video to standard video for playback on
TVs and standard video players. Add your video to the Timeline and
show your audience the exact point of view you want them to see.
10 Corel VideoStudio X10
Page 21

Then export it and playback as any standard movie. For more
information, see
“360 video” on page 122.
New Effects! Exclusive Ultimate effects collection
With over 2,000 filters, effects, animated titles and transitions,
VideoStudio unleashes your creativity. Plus, only VideoStudio Ultimate
includes a bonus collection of premium effects loaded with 14 effects
packs, including 3 new to this release. Create beautiful titles with ease
using drag-and-drop visual effects and exciting 2D/3D elements in
NewBlue Titler Pro 1. Choose from more than 300 new amazing
particle and object effects in proDAD Adorage Effects Package Volume
9 - Particle & Object Effects. Try Boris Title Studio to create s tylized 2D
or 3D titles with custom be vel s, f ills and sty les an d hi gh-quality motion
graphics.
New! 100+ MyDVD templates
After your video is complete, give it the packaging it deserves. Burn
your projects to disc with VideoStudio MyDVD and quickly create
high-quality, personalized DVDs with menus, chapters and music. Now
with 100+ themed templates to choose from, MyDVD makes it easy to
find the style that best fits your project. Tailor templates with custom
background images, music and titles. Then quickly burn to DVD and
AVCH D disc to sha re wi th fam ily an d frie nd s. Fo r more infor mation, see
the Help in MyDVD.
New! Group and ungroup clips
Timeline editing is more powerful and efficient than ever with new
grouping capabilities. Select your clips, then group or ungroup them
by simply right-clicking. After clips are grouped, it's easier than ever to
move them along the Timeline, or apply filters and effects by dragging
and dropping them on the group. For more information, see
“Grouping and ungrouping” on page 80.
Welcome 11
Page 22

Enhanced! Music Library
Now it's a breeze to add ScoreFitter music tracks to your projects.
ScoreFitter tracks are now integrated into the Library, making it easy
to choose the track that best suits the mood of your video. Track
length now adjus ts to the length of y our video auto matically. For more
information, see
“Using Auto Music” on page 200.
New! Performance and file support
VideoStudio continues to keep pace with the latest formats with
expanded support for HEVC (H.265) encode for nVidia and AMD,
offering a higher compression rate, better quality and a smaller file
size. VideoStudio X10 is optimized for Intel's 7th generation processor.
New! Integrated learning and tutorials
Get help when you need it with the new Welcome book that offers
instant access to helpful tutorials. It includes Corel Discovery Center
videos to help you explore a wide range of tutorials for new and
advanced users. For more information, see
“The Welcome book” on
page 31. You can also view the User Guide online and access the Corel
Knowledgebase to find answers to frequently asked questions.
System requirements
For optimal performance of Corel VideoStudio, make sure that your
system meets the recommended specifications. Note that some
formats and features require specific hardware or software (as
indicated).
• Internet connection required for installation, registration and
updates. Registration required for product use.
• Windows 10, Windows 8, Windows 7, 64-bit OS highly
recommended
• Intel Core i3 or AMD A4 3.0 GHz or higher
12 Corel VideoStudio X10
Page 23

• Intel Core i5 or i7 1.06 GHz or higher required for AVCHD & Intel
Quick Sync Video support
• Intel Core i7 or AMD Athlon A10 or higher for UHD, Multi-Camera
or 360° video
• 4 GB of RAM or higher, 8+GB highly recommended for UHD,
Multi-Camera, or 360° video
• Minimum 256 MB VRAM, 512 MB or higher recommended for
hardware decoding acceleration
• HEVC (H.265) support requires Windows 10 and supporting PC
hardware or graphics card
• Minimum display resolution: 1024 x 768
•Windows-compatible sound card
• Minimum 8 GB HDD space for full installation
• Digital download option available if DVD-ROM drive not available
for installation
Accessories
• DVD burner for creating DVD and AVCHD discs
Input Options
• Capture from DV, HDV and Digital8 camcorders or VCRs (requires
a FireWire port)
• Capture from analog camcorders with compatible analog capture
card
• Capture from USB capture devices, PC cameras, webcams
• Import from AVCHD and other file-based camcorders, digital still
cameras, mobile devices and discs
Product specifications are subject to change without notice or
obligation.
For more details, visit: www.videostudiopro.com
Welcome 13
Page 24

Supported file formats
The supported file formats are listed below. Please review release
notes for any updates to supported files or visit
www.videostudiopro.com for the latest list in the system requirements
section.
Import Formats
• Video: AVCHD, DV, HDV, AVI, MPEG-1/-2/-4, DVR-MS, DivX*,
SWF*, UIS, UISX, M2T, M2TS, TOD, MOD, M4V, WebM, 3GP, WMV,
Non-encrypted DVD titles, MOV (H.264), MKV, XAVC, MXF**,
HEVC (H.265)
• 360° Video: Equirectangular format
• Audio: AC3, MP3, MPA, MOV, WAV, WMA, MP4, M4A, Aiff, AU,
CDA, AMR, AAC, OGG
• Image: BMP, CLP, CUR, EPS, FAX, FPX, GIF87a, IFF, IMG, JP2, JPC,
JPG, MAC, MPO, PCT, PIC, PNG, PSD, PXR, RAS, SCT, SHG, TGA,
TIF/TIFF, UFO, UFP, WMF, PSPImage, Camera RAW, 001, DCS, DCX,
ICO, MSP, PBM, PCX, PGM, PPM, SCI, WBM, WBMP
Export Formats
• Video: AVCHD, DV, HDV, AVI, MPEG-1/-2/-4, UIS, UISX, M2T,
WebM, 3GP, HEVC (H.265), WMV
• Device: Apple iPod/iPhone/iPad/TV, Sony PSP/PS3/PS4, Nintendo
Wii, Microsoft Xbox compatible formats
• Audio: AC3, M4A, OGG, WAV, WMA
•Image: BMP, JPG
Blu-ray Support
• Requires purchase of a separate plug-in from within the product
• Requires Blu-ray Disc reader and/or burner
14 Corel VideoStudio X10
Page 25

*MOV, DivX & SWF: QuickTime driver for MOV, DivX codec for DivX
and Flash player for SWF are required to enable these formats.
**VideoStudio Ultimate only
Hardware acceleration
Depending on your hardware specifications, Corel VideoStudio lets
you o ptimize the per forma nce of your syste m by op timiz ing hardware
acceleration.
Hardware decoder and enco der acceleration is supported only
by W indows Vista an d later v ersio ns of the W indows operating
system software and requires at least 512 MB of VRAM.
To change hardware acceleration settings
1 Select Settings > Preferences [F6].
2 Click the Performance tab and select the following options under
Editing Process and File Creation:
• Enable Hardware Decoder acceleration — enhances editing
per
formance and improves clip and project playback by using
video graphics acceleration technologies of the computer’s
available hardware
• Enable Hardware Encoder acceleration — improves the
r
endering time required for producing your movies
Note: For optimum performance, VGA cards must support
DXVA2 VLD mode with Vertex and Pixel Shader 2.0 or later.
If you want the program to automatically detect the hardware
acceler
ation capabilities of your system and determine the
optimum settings, select all hardware acceleration options in
Performance Optimization, including Enable hardware
leration optimization.
acce
Welcome 15
Page 26

If the feature is not supported by your system, some hardware
acceleration options will be grayed out.
Preparing for video editing
Video editing tasks require a lot of computer resources. Your computer
must be properly set up to ensure successful capturing and smooth
video editing. Below are some tips on how to prepare and optimize
your computer before you launch Corel
• It is recommended that you close other applications when
working with Corel
VideoStudio. To avoid interruptions while
capturing, it is best to turn off any automatically launched
software.
• If you have two hard drives in your system, it is recommended
that you install Corel
VideoStudio to your system drive (usually C:)
and store captured videos on your other drive.
• It is recommended that you store video files on a dedicated hard
drive.
• Increase the Paging File (Swap File) size to twice your amount of
RAM.
When you are in Corel VideoStudio, you can choose settings that let
you balance the quality of the playback and the speed of the
application. For example, is your playback fast but fuzzy? Or is your
playback too slow? The tips below can help you find the right settings
VideoStudio.
in Corel
• Clearer, higher quality playback is available if your computer
system meets or exceeds the recommended system requirements.
You can work with HD projects and you can preview your project
in HD. For more information, see
page 55 and “Previewing your project or clips” on page 58.
• To speed up less powerful systems, consider using Smart Proxy
and review the hardware acceleration options. For more
VideoStudio.
“Setting project properties” on
16 Corel VideoStudio X10
Page 27

information, see “Using Smart Proxy for a faster, smoother editing
experience” on page 57 and “Hardware acceleration” on page 15.
Installing and uninstalling the application
You can install Corel VideoStudio from a disc or from installation files
that you download.
To install Corel VideoStudio
1 Close any open applications.
2 Insert the DVD in the DVD drive or double-click the associated
.exe file that you downloaded.
If the disc-initiated setup does not start automatically, navigate to
the DVD drive on your computer, and double-click
3 Follow the instructions on your screen.
Note: In addition to Corel VideoStudio, you might be prompted
to install supporting Windows extensions and third-party
programs and drivers.
To uninstall Corel VideoStudio
1 Open the Windows Control Panel.
2 In the Programs category, click the Uninstall a program link.
3 In the Programs and Features window, click Corel
VideoStudio
4 Click Uninstall/Change.
5 Follow the instructions on your screen.
X10 in the list of applications.
Setup.exe.
Starting and quitting the application
You ca n sta rt C ore l VideoStudio from the Windows desktop or Start
menu, and quit the program from the application window.
Welcome 17
Page 28

To start the application
•From the Windows Start menu or Start screen, choose Corel
VideoStudio X10.
To quit the application
• Click the Close button in the upper-right corner of the
application window.
Updating the application
You can check for and install product updates. Updates provide
important new information about your application.
To update the application
• Choose Help > Check for Updates.
Corel Support Services
Corel Support Services can provide you with prompt and accurate
information about product features, specifications, pricing, availability,
services, and technical support options. For the most current
information on available support and professional services for your
Corel product, please visit www.corel.com/support.
About Corel
Corel is one of the world's top software companies, boasting some of
the industry's best-known graphics, productivity and digital media
products. We've built a reputation for giving customers more choice,
and delivering solutions that are easy to learn and use. Our mission is
simple: help people achieve new levels of creativity and productivity.
®
Corel's product lines include CorelDRAW
®
Painter
MindManager
, Corel®PaintShop® Pro, Corel® VideoStudio®,
®
, Pinnacle Studio™, ReviverSoft®, Roxio Creator®,
Graphics Suite, Corel®
18 Corel VideoStudio X10
Page 29

Roxio® Toast™ and WinZip®. For more information on Corel, please
visit
www.corel.com.
Welcome 19
Page 30

20 Corel VideoStudio X10
Page 31

Learning resources
You can learn how to use Corel VideoStudio in various ways: by
searching the Help or the user guide, by accessing video tutorials in
the Welcome tab, or by exploring the Corel website (
This section contains the following topics:
• Documentation conventions
• Using the Help system
• Corel VideoStudio X10 User Guide PDF
• Understanding VideoStudio terminology
• Learning with video tutorials
• Using Web-based resources
Documentation conventions
The following table describes important conventions used in the Help.
Convention Description Example
www.corel.com).
Menu
>Menu
command
drop-list A list of options that drops
Learning resources 21
A menu item followed by a
menu command
down when a user clicks a
down arrow button
Click Settings >
Preferences > Edit.
Select a profile from the
Profile drop-list.
Page 32

Convention Description Example
A note containing
information that is
important to the preceding
steps. It may describe
conditions under which the
procedure can be
performed.
A tip containing
suggestions for performing
the preceding steps. It may
present alternatives to the
steps, or other benefits and
uses of the procedure.
Enable Flatten audio and
background video if your
browser can only support
a single track for audio
and video.
For best results, use a
tripod when you shoot
photos and videos that
you want to use in your
stop motion animation
project.
Using the Help system
The Help that is available from within the program is the most
comprehensive source of information for Corel
system provides two ways to find information. You can choose a topic
from the Contents page, or use the Search page to search for specific
words and phrases. You can also print topics from the Help.
An Internet connection is required to view the Help. If you work offline
on a regular basis, you can download a PDF copy of the information
Help > User Guide (PDF)).
(
VideoStudio. The Help
To use the Help system
1 Do one of the following:
• Click Help > Help topics.
• Press F1.
2 In the Help window, click one of the following tabs:
• Contents — lets you browse through topics in the Help
22 Corel VideoStudio X10
Page 33

• Search — lets you search the full text of the Help for a particular
word or phrase (enclosed in quotation marks). For example, if
you are looking for information about a specific tool or
command, you can type the name of the tool or command,
such as
Trimming, to display a list of relevant topics.
Corel VideoStudio X10 User Guide PDF
You can vi ew t he Corel VideoStudio X10 User Guide PDF online or you
can download it to your computer or tablet. At any time, you can print
the pages you want. You can find the PDF in Help menu (
Guide (PDF)
).
Help > User
Understanding VideoStudio terminology
Learn more about the language of video editing. We created a list of
the most common video editing terms used in Corel
help you out. What is a scru bber and what does rendering mean? Find
out by reading the
“Glossary” on page 297.
VideoStudio to
Learning with video tutorials
The Welcome tab includes access to learning material, such as video
tutorials (English only for some video content), as well as free and paid
content to help you expand your project options in VideoStudio.
Learning resources 23
Page 34

You can also visit www.youtube.com/VideoStudioPro for more
tutorials.
To open the Discovery Center window
• Choose Help Video Tutorials.
Using Web-based resources
From the Corel VideoStudio Help menu and the Corel website, you
can access a number of Web pages dedicated to customer support
and communities. You can find resources such as tutorials, tips,
newsgroups, downloads, and other online resources.
To access Corel VideoStudio Web resources
• Use your Internet browser to go to www.videostudiopro.com/
learn for tutorials, community forums, and other resources
• Visit VideoStudio Facebook postings: https://
www.facebook.com/corelvideostudio
24 Corel VideoStudio X10
Page 35

Workspace tour
Corel VideoStudio has three workspaces: Capture, Edit, and Share.
These workspaces are based on the key steps in the video-editing
process. The customizable workspaces let you rearrange the panels to
suit your preferences and ensure that you have everything you need
at a glance.
This section presents the following topics:
• Exploring the workspaces
• Switching between workspaces
• The Welcome book
• Using the Player panel
• Using the toolbar
• Customizing the workspace
Exploring the workspaces
Corel VideoStudio Pro consists of three main workspaces, and a
Welcome tab.
•Capture
• Edit
•Share
Each workspace contains specific tools and controls to help you
accomplish the task at hand quickly and efficiently.
For more information about the Welcome tab, see “The Welcome
book” on page 31.
Workspace tour 25
Page 36

You can customize the size and position of the elements on your
1
23
456
screen for full control of your editing environment. For information
about using a custom workspace layout, see
“Customizing the
workspace” on page 36.
The Capture workspace
Media clips can be recorded or imported directly to your computer's
hard drive. This step allows you to capture and import video, photo,
and audio clips.
The Capture workspace consists of the following components:
1. Menu bar — provides various commands for customizing
VideoStudio, opening and saving movie projects, working with
Corel
individual clips, and more.
26 Corel VideoStudio X10
Page 37

2. Preview Window — shows the current video being played in the
Player panel.
3. Library panel — a storage depot for captured media clips.
4. Navigation area — provides buttons for playback and for precision
trimming in the Player panel.
5. Information panel — lets you view information about the files you
are working with.
6. Capture Options — displays different media capture and import
methods.
The Edit workspace
When you open Corel VideoStudio Pro, the Edit workspace appear s as
your default workspace. The
Edit workspace and the Timeline are the
heart of Corel VideoStudio Pro, where you can arrange, edit, trim, and
add effects to your video clips.
Workspace tour 27
Page 38

The Edit workspace consists of the following components:
12 3
4
6
5
1. Menu bar — provides various commands for customizing
VideoStudio, opening and saving movie projects, working with
Corel
individual clips, and more.
2. Preview Window — shows the current video being played in the
Player panel.
3. Library panel — a storage depot for everything you need to create
a movie, including sample video, photo, and music clips, and your
imported clips. It also includes templates, transitions, titles, graphics,
filters, and paths. The
Options area opens in the Library panel.
4. Navigation area — provides buttons for playback and for precision
trimming in the Player panel.
28 Corel VideoStudio X10
Page 39

5. Toolbar — lets you choose from a variety of functions related to
12 3
5
6
4
content in the
Timeline.
6. Timeline panel — The Timeline is where you assemble the media
clips for your video project. For more information, see
“Timeline” on
page 75.
The Share workspace
The Share workspace lets you save and share your finished movie.
The Share workspace consists of the following components:
1. Menu bar — provides various commands for customizing
Corel
VideoStudio, opening and saving movie projects, working with
individual clips, and more.
2. Preview Window — shows the current video being played in the
Player panel.
Workspace tour 29
Page 40

3. Category selection area — lets you choose between Computer,
Device, Web, Disc, and 3D movies output categories. For HTML5
projects, you can choose HTML5 and Corel VideoStudio project.
4. Format area — provides a selection of file formats, profiles, and
descriptions. For Web sharing, it displays the settings for your account.
5. Navigation area — provides buttons for playback and for precision
trimming in the Player panel.
6. Information area — lets you view the information about the output
location and provides an estimate of the file size.
Switching between workspaces
Corel VideoStudio simplifies the process of creating movies by
organizing the controls you need into three workspaces that
correspond to the different steps in the video-editing process.
Media clips can be recorded or imported
directly to your computer's hard drive in the
Capture workspace. This workspace allows you
to capture and import video, photo, and audio
clips.
The Edit
workspace includes the Timeline. This
is the heart of Corel VideoStudio, where you
can arrange, edit, trim and add effects to your
video clips.
The Share workspace lets you save and share
your movie. You can save your video file, burn it
to a disc, or upload it to the Web.
To switch b et we en w or kspaces
• At the top of the application window, click one of the following
tabs:
• Capture
30 Corel VideoStudio X10
Page 41

• Edit
• Share
The Welcome book
The Welcome book is accessed from the Welcome tab.
In the Welcome book, you’ll find
• Video tutorials
• Content offerings (free and paid)
• Update information
• Information about other resources
Review the Welcome book regularly to see what’s new.
The Welcome book is set as the default tab when you open the
application. You can adjust your default startup page in
Preferences, and on the Ge neral tab, choose a Default startup page.
Note that the Welcome book page might still display on startup if
important updates are available.
Settings >
Using the Player panel
The Player panel consists of the Preview window and the Navigation
area, which provides buttons for playback and for precision trimming
of clips. Use the controls in the Navigation area to move around a
selected clip or your project. Use the
edit your clips. In the
device control for a DV or HDV camcorder.
Workspace tour 31
Capture workspace, this panel also acts as the
Trim Ma rk er s and Scrubber to
Page 42

The Player panel consists of the 1. Preview Window
1
2
and the 2. Navigation area
The Navigation area
The table below describes the controls available in the Navigation
area.
Part Description
Scrubber Lets you scrub through the
project or clip.
Trim Markers Lets you drag the scrubbers to set
a preview range in the project or
to trim a clip.
Project/Clip
mode
Play Plays, pauses, or resumes the
Home Returns to the starting segment or
32 Corel VideoStudio X10
Previous Moves to the previous frame.
Specifies a preview of the entire
project or of a selected clip.
current project or a selected clip.
cue.
Page 43

Part Description
Next Moves to the next frame.
End Moves to the end segment or cue.
Repeat Loops playback.
System
Volum e
HD Preview Lets you preview high definition
Timecode Lets you jump directly to a part of
Enlarge
Preview
Window
Split Clip Splits the selected clip. Position
Mark-in and
Mark-out
Lets you adjust the volume of
your computer's speakers by
dragging a slider.
clips and projects.
your project or selected clip by
specifying the exact timecode.
Increases the size of the Preview
Window.
the Scrubber to where you want
the clip to be split, and then click
this button.
Sets a preview range in the
project, or sets the start and end
points for trimming a clip.
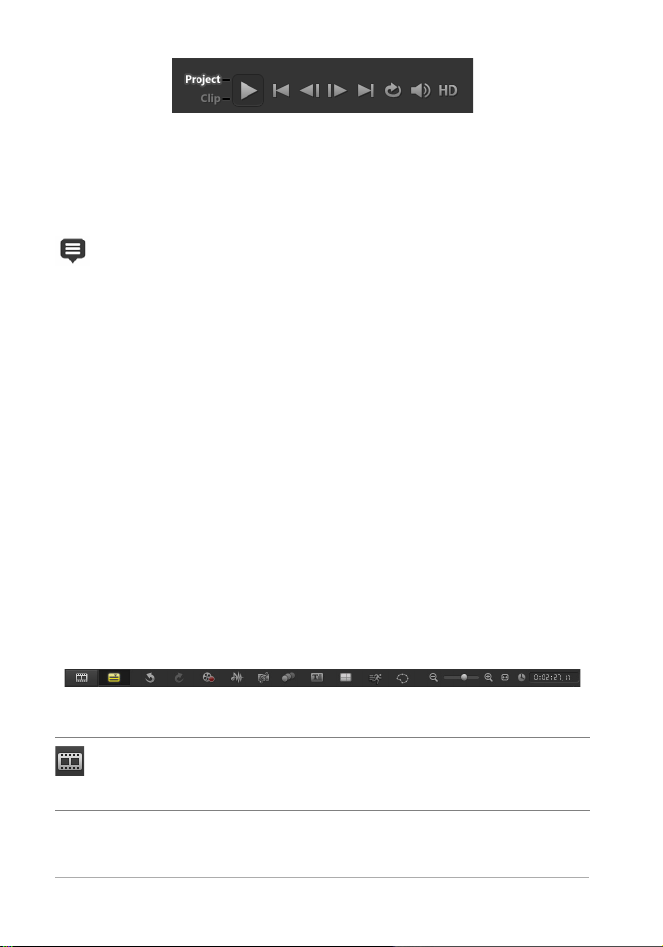
The Play button in the Navigation area serves two purposes: for
playback of your entire project or a selected clip.
To preview projects or clips
•Click Project or Clip, then click Play.
Workspace tour 33
Page 44
While working on your project, you will want to preview your work
frequently to see how your project is progressing. Instant Playback
ll ows you to qui ckl y preview cha nge s in your proj ect . Pl aybac k qu ali ty
a
will be dependent on your computer’s resources.
You may choose to play only a part of your project. The
select
ed range of frames to preview is referred to as the
preview range, and it is marked as a colored bar in the Ruler
Panel.
To play the trimmed range only
1 Use the Tr im M ar ke rs or the Mark-in/out buttons to select the
preview range.
2 To preview the selected range, select what you want to preview
(Project or Clip), then click Play. To preview the entire clip, hold
[Shift], then click Play.
Using the toolbar
The toolbar provides easy access to many editing commands. You can
change your project view, zoom in and out on the Timeline, and
l
aunch different tools that can help you edit efficiently.
Part Description
Stor yboard
View
34 Corel VideoStudio X10
Displays your media
thumbnails in chronological
order.
Page 45

Part Description
Timeline View Lets you perform frame-
accurate editing of your clips
on separate tracks, add and
position other elements such as
titles, overlays, voice-over and
music.
Undo Undoes the last action.
Redo Repeats the last action that was
undone.
Record/
Capture
Option
Shows the Record/Capture
Option panel, where you can
capture videos, import files,
record voice-overs and take
snapshots.
Sound Mixer Launches the Surround Sound
Mixer and the multitrack Audio
Timeline, which lets you
customize your audio settings.
Auto Music Launches the Auto Music
Options Panel for adding
background music to your
project in a variety of styles and
moods. You can set the music
to match the duration of your
project.
Track Motion Launches the Track Motion
dialog box, which lets you
create tracking paths of
particular elements in selected
video clips.
Workspace tour 35
Page 46

Part Description
Subtitle Editor Launches the Subtitle Editor
dialog box, which lets you
detect and organize segments
to easily add titles in selected
video clips.
Multi-Camera
Editor
Time
Remapping
Mask Creator Launches the Mask Creator
Zoom in and
Zoom out
Launches the Multi-Camera
Editor and imports any of the
selected media.
Launches the Time Remapping
dialog box, which lets you use
speed controls to slow down,
speed up, reverse, or freeze
frames in a video clip.
dialog box, which lets you
create video and still masks.
Lets you adjust your v ie w of the
Timeline by using the zoom
slider and buttons.
Fit Project in
Timeline
Window
Project
Duration
Adjusts your project view to fit
the entire span of your
Timeline.
Shows the total duration of the
project.
Customizing the workspace
The new workspace is designed to provide you with a better editing
experience. You can now customize the size of the program window
and change the size and position of the elements on your screen for
full control of your editing environment.
36 Corel VideoStudio X10
Page 47

Each panel behaves like an independent window that can be modified
1
2
3
according to your editing preferences. This is very useful when you are
using large displays or dual monitors.
The main panels are:
1. Player panel — Contains the Preview Window and Navigation area.
2. Timeline panel — Contains the Toolbar and Timeline.
3. Library panel — Contains the media library and the Options area.
To move a p an el
• Double-click the top-left corner of the Player Panel, Timeline
Panel or Library Panel.
When the panel is active, you can minimize, maximize, or resize
each panel.
You can also drag the panel outside the main application
window into the second display area for dual-monitor setups.
Workspace tour 37
Page 48

To customize the size of the program window
• You can do one of the following:
• Click the
Restore button and drag the ends of the program
window to the desired size.
• Click the Maximize button for full screen editing.
To dock a p an el
1 Click and hold an active panel.
The docking guide appears.
2 Drag your mouse over the docking guide and choose a docking
position to snap the panel in place.
To save a custom workspace layout
•Click Settings > Layout Settings > Save to and click a Custom
option.
To load a custom workspace layout
•Click Settings > Layout Settings > Switch to and choose Default
or one of the custom settings you have saved.
To know more about hotkey combinations assigned for each
preset, see “Layout settings shortcuts” on page 310.
38 Corel VideoStudio X10
Page 49

You can also change the layout settings from the UI Layout tab
in Settings > Preferences.
To set program preferences
•Click Settings > Preferences or press F6 to launch the Preferences
dialog box.
Workspace tour 39
Page 50

40 Corel VideoStudio X10
Page 51

Capture and import
Corel VideoStudio lets you capture or import video from DVD-video,
AVCHD and BDMV discs including camcorders that record on
memory cards, internal memory of discs, DV or HDV camcorders,
mobile devices, as well as analog and digital TV capture devices.
This section contains the following topics:
• Using the Options panel in the Capture workspace
• Capturing videos and photos
• Capturing digital video (DV)
• Using DV Quick Scan
• Capturing analog video
• Importing from digital media
• Scanning and splitting scenes
Using the Options panel in the Capture workspace
In the Capture workspace, Corel VideoStudio displays the Library and
the capture
methods are available.
The table below discusses the options in the Capture workspace.
Options panel where different media capture and import
Click Capture Video to import video footage and photos
from your camcorder to your computer.
Click DV Quick Scan to scan your DV tape and select the
scenes.
Capture and import 41
Page 52

Click Import from Digital Media to add media clips from
a DVD-Video, AVCHD, BDMV formatted disc or from your
hard drive. This feature also allows you to import video
directly from AVCHD, Blu-ray Disc or DVD camcorders.
Click Stop Motion to create instant stop motion
animations using captured images from your photos and
video capture devices.
Click Screen Capture to create screen capture videos that
capture all computer actions and elements shown on your
screen.
Capturing videos and photos
The steps on how to capture are similar for all types of camcorders
excep t for the available capture settings in the Capture Video Options
panel that can be selected for each type of source.
The Capture Video Options panel consists of the following
components:
• Duration — Sets the length of time for the capture.
• Source — Displays the detected capture device and lists other
capture devices installed on your computer.
• Format — Gives you a list of options where you select a file
format for saving your captured video.
• File name — Allows you to specify a prefix for captured files.
• Capture folder — Allows you to specify a location for captured
files.
• Split by scene — Automatically separates captured video into
several files based on changes in shooting date and time.
• Capture to library — Choose or create a Library folder where you
want your video to be saved.
• Options — Displays a menu allowing you to modify your capture
settings.
42 Corel VideoStudio X10
Page 53

• Capture Video — Transfers video from your source to your hard
drive.
• Take a Snapshot — Captures the displayed video frame as a
photo.
To capture video clips and photos from your camcorder
1 Connect your camcorder to your computer and turn on the
device. Set it to
2 In Capture Options Panel, click Capture Video.
3 Select your capture device from the Source drop-list.
4 Select a f ile format from the Format drop-list. In the Capture
folder box, type a folder location or mark the
check box and choose a folder from the drop-list.
Note: Click Options to customize capture settings specific to
your video device.
5 Scan your video to search the part for capture.
Note: If you are capturing video from a DV or HDV camcorder,
use the Navigation area to play your video tape.
6 Click Capture Video, when your video for capture is already on
cue. Click
7 To capture a photo from the video footage, pause the video on
the desired frame then click
Note: When your camcorder is in Record mode (usually named
CAMERA or MOVIE), you can capture live video.
Note: The available settings in the Video properties dialog box
vary, depending on the capture file format that you have chosen.
Play (or VTR / VCR) mode.
Capture to library
Stop Capture or press [Esc] to stop capturing.
Take a Snapshot.
To capture videos and photos using a DSLR
1 Connect your DSLR to your computer and turn on the device.
2 Click Capture Video and select your device from the Source
drop-list.
Capture and import 43
Page 54

3 Specify a folder location for your saved files by clicking the
Capture Folder button
4 Click Capture Video to start recording. Click Stop Capture or
.
press [Esc] to stop capturing.
5 To capture a photo while the DSLR is connected to the computer,
click Take a snapshot.
To capture video from an HDV camcorder
1 Connect your HDV camcorder to your computer’s IEEE-1394 port
using the IEEE-1394 cable.
2 Turn on your camcorder and switch it to Play/Edit mode and
make sure that your HDV camcorder is switched to HDV mode.
Note: For Sony HDV camcor
ders, flip open the LCD screen and
see if HDVout I-Link is on the LCD screen to check if the camera is
set to HDV mode. If you see DVout I-Link, press P-MENU at the
lower right of the screen. In the menu, press MENU > STANDARD
SET > VCR HDV/DV and press HDV.
3 In the Capture workspace, click Capture Video .
To capture DVB-T video
1 In the Capture workspace, click Capture Video .
Note: Befor
connected via a compatible capture card installed on your
computer.
2 Select Digital TV Source from the Source drop-list.
3 Click Options and select Video Properties. The Video properties
dialog box will appear.
4 In the Input Source tab, select TV from the Input source drop-list.
Click OK.
5 In Channel List, click Start Scan to start scanning for channels.
e capturing, ensure that the DVB-T source is
44 Corel VideoStudio X10
Page 55

Note: DVB-T channels are not automatically scanned. Make sure
to manually scan the channels first before capturing.
6 Click Capture Video.
7 Click Ye s when prompted if you want to start capturing and
automatically recovering DVB-T video.
8 Follow the remaining steps as described in the procedure for
capturing videos.
To capture TV footage
1 Select your TV tuner device from the Source drop-list.
2 Click Options > Video Properties to open the Video properties
dialog box. If needed, adjust the settings accordingly.
Click the Tuner Information tab to choose Antenna or Cable, scan
available channels in your region, and more.
3 In the Channel box, specify the channel number from which to
capture.
To capture video in MPEG-2 format
1 In Source, choose your video source.
2 Specify or browse for the destination folder where you want your
clips to be stored in
3 Click Options and select Video properties. In the dialog box that
opens, select a profile in the
4 Click OK.
5 Click Capture Video to start capturing and Stop Capture to end
your capturing session. Your media clip will be stored as MPEG-2
format in the folder you specified.
Capture folder.
Current Profile drop-list.
Capture and import 45
Page 56

Capturing digital video (DV)
To capture Digital Video (DV) in its native format, select DV from the
Format list in the Options Panel. This saves the captu red vid eo as a DV
AV
I f ile (.av i).
You can al so use the DV Q ui ck Scan option to capture DV video
DV AVI Type-1 and Type-2.
When capturing DV, click Options in the Options Panel and select
Video properties to open a menu. In the Current Profile, choose
hether to capture DV as DV Type-1 or DV Type-2.
w
Using DV Quick Scan
Use this option to scan a DV device for scenes to import. You can add
the date and time of your video.
For more information on this feature, see “DV-to-DVD Wizard” on
page 313.
To add the date and time of your video
1 After scanning your DV tape, click Next.
This will then display the Import Settings dialog box.
2 Select Insert to Timeline and choose Add video date information
as title.
Note: I
f you want the shooting date to appear for the duration of
the video, select Entire video. If you only want a portion of the
video, select Duration and specify the number of seconds.
Capturing analog video
When footage is captured from analog sources such as VHS, S-VHS,
Video-8, or Hi8 camcorders/VCRs, it is converted to a digital format
tha t c an be read an d s to red by th e c om puter. Be fo re capt ur in g, choose
46 Corel VideoStudio X10
Page 57

the desired file format to use for saving the captured video in the
Options Panel’s
Format list.
To specify the type of video source you are capturing from
1 In the Capture workspace, click Options and select Video
properties
2 In the dialog box that opens, you can customize the following
.
capture settings:
• In the Input Source tab, choose whether you are capturing
NTSC, PAL, or SECAM video and select the
Input source (TV,
Composite, or S-Video).
• In the Color Manager tab, you can f ine tune the video source to
ensure good quality captures.
• In the Te mp late tab, choose the frame size and compression
method to use for saving the captured video.
Importing from digital media
You can import DVD, AVCHD, BDMV video and photos from a disc,
hard drive, memory card and digital camcorders.
To import digital media
1 In the Capture workspace, click Import from Digital Media.
2 Click Select Import Source Folders and browse for folders that
contain your digital media and click
3 Click Start and the Import from Digital Media dialog box appears.
OK.
Capture and import 47
Page 58
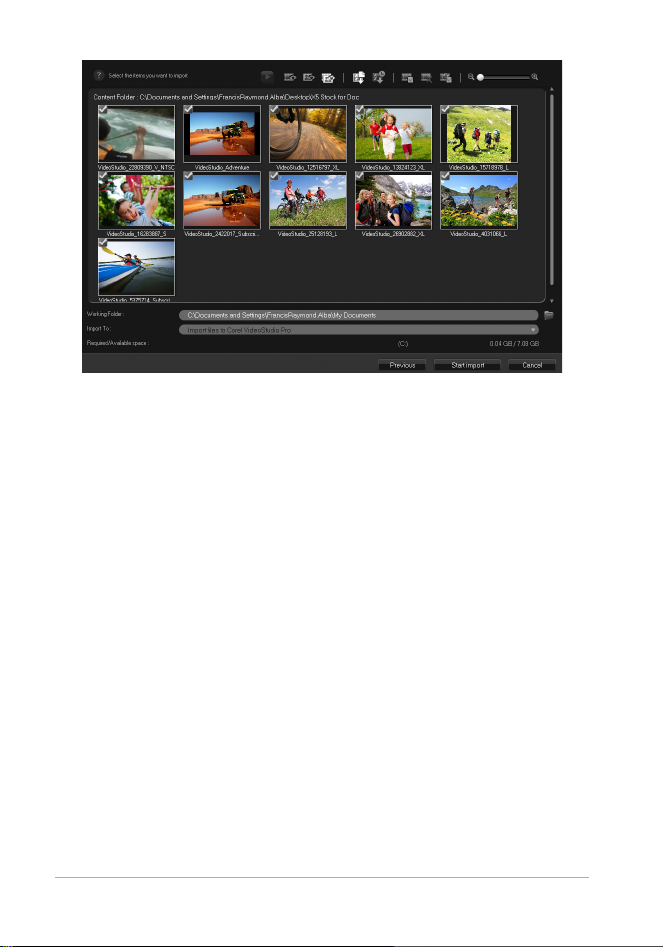
4 Choose the media clips you want to import and click Star t import.
All imported videos will be added to the thumbnail list in the
Library.
To enable timecode retrieval for AVCHD
1 In the Capture workspace, click Import from Digital Media.
2 Select the f ile location from the Select Import Source Folders list
and click
3 Choose the media clips you want to import and click Start import
to launch
4 In Import Destination, select Insert to Timeline or select Add
video date information as title
5 Choose Entire video to import the timecode of the video file as a
title spanning the entire duration of the video. Choose
to import the timecode as a title within a specified duration. Click
OK to apply the settings.
Note: You can apply the same settings to all the videos that you
import and hide the Import Settings dialog box by marking the
Apply this setting and never ask me again check box. You can
48 Corel VideoStudio X10
Star t.
Import Settings.
.
Duration
Page 59

also choose to enable the same check box on the Capture tab of
the Program preferences dialog box. For more information, see
“Customizing the workspace” on page 36.
Scanning and splitting scenes
A single DV tape may contain video that was captured at different
times. Corel
saves them as separate files.
To find scenes in your video
•Drag the Shuttle Slider to move forward and back through the
footage at variable speeds.
To use Split by scene
1 In the Capture workspace, click Capture Video.
2 Enable Split by scene on the Capture Video Options Panel.
Corel
to their shooting date and time and capture them as separate
files.
VideoStudio automatically detects these segments and
VideoStudio will automatically look for the scenes according
Capture and import 49
Page 60

50 Corel VideoStudio X10
Page 61

Project basics
Corel VideoStudio combines the video, titles, sounds, and effects in a
process called rendering. Project settings determine how your movie
project is rendered when you preview it. The output video can then
be played back on your computer, burned to disc, or uploaded to the
Internet.
This section contains the following topics:
• Creating new projects and opening projects
• Using Instant Project templates
• Setting project properties
• Creating custom profiles
• Using Smart Proxy for a faster, smoother editing experience
• Previewing your project or clips
• Undoing and redoing actions
• Showing and hiding grid lines
• Saving projects
• Saving projects by using Smart Package
• Adding cues and chapters
Creating new projects and opening projects
When you start Corel VideoStudio, it automatically opens a new
project and lets you start creating your movie. New projects are
always based on the default settings of the application. You can also
create HTML5 projects that you can post on the Web.
Project basics 51
Page 62

You can open previously saved projects and if you’d like to combine
several projects, you can add previously saved projects to a new
project.
To create a new project
•Click File >New Project [Ctrl + N].
To create a new HTML5 project
•Click File > New HTML5 Project [Ctrl + M].
To create a new FastFlick project
1 Click Tools > FastFlick.
2 From the FastFlick window, click Menu > New Project.
For more information, see “FastFlick” on page 223.
To open an existing project
•Click File > Open Project [Ctrl + O].
To add an existing project to a new project
1 In the Library, click the Media button .
2 Drag a project file (.vsp) from the Library to the Timeline.
If the file isn’t in the Library, click the Import Media Files button,
gate to a project file (stored in My Projects folder by default),
navi
select the f
All tracks, media, and elements of the project appear in the
Timeline.
ile, and click Open.
Before you import a project (VSP file) to the Library, ensure that
all links in the project are working. Projects with linking issues
cannot be added to existing projects.
52 Corel VideoStudio X10
Page 63
If you want to flatten the project to add it to a specific track,
press and hold the Shift key before you release the mouse
tton.
bu
Using Instant Project templates
Instant Project templates let you fast-track the movie creation process
by p ro vi ding yo u w it h pre- as semble d m ov ie proje ct s. Simp ly exchange
the placeholder clips and photos with your own media and you’re
done. They are also a great way to learn about the components of a
movie project.
You can use one template for the entire movie, or you can add mor
e
than one template. For example, you can use different templates for
th e start, middl e, a nd e nd of y our movie. You can even crea te and save
custom templates. For example, if you are creating a series of videos,
you can create a template so that all the videos have a consistent style.
To open an Instant Project template
1 In the Edit workspace, click the Instant Project button in the
Library panel.
2 Click a template category from the folders that appear.
3 To preview a template, click the template thumbnail, and click the
Play
Project basics 53
in the Player panel.
Page 64

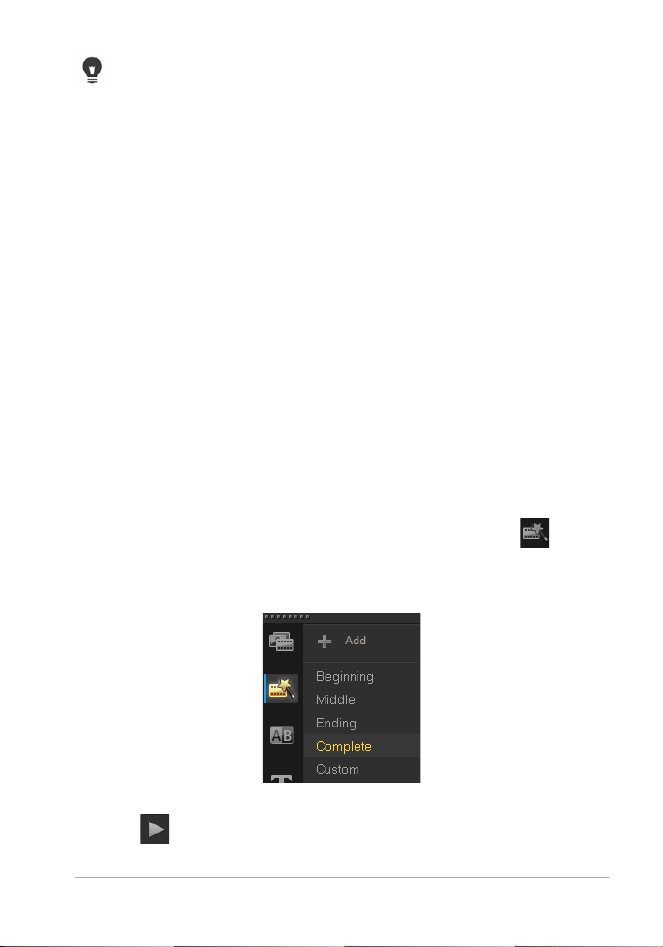
4 Right-click the template thumbnail and choose the point of
insertion in the Timeline between Add at the beginning and Add
at th
e end.
The template is added to the Timeline.
You can also add a template to your project by dragging the
thumbnail to the Timeline.
To replace clips, photos, and music in an Instant Project template
1 Drag a clip, photo, or music track from the Library to the
appropriate placeholder clip, photo, or music track.
2 Press [Ctrl] and release the mouse button.
To create an Instant Project template
1 Open the video project that you want to save as a template.
2 Click File > Export as template.
3 Click Ye s when prompted to save your project.
4 Enter a File name, Subject and Description.
5 Browse for the folder where you want to save your template and
click Save.
6 In the Export project as template dialog box, move the slider to
display the thumbnail that you want to use for the template.
7 Specify the path and folder name. Choose the category from the
drop-list where you want to keep your template.
Template details will also be displayed.
8 Click OK.
54 Corel VideoStudio X10
Page 65

To import project templates
1 Click Import a project template and browse for the *.vpt file that
you want to import.
2 Click Open.
Setting project properties
Project Properties serve as your template fo r your mo vie proj ects. Th e
project settings in the Project Properties dialog box determine the
pearance and quality of a project when it is previewed on-screen.
ap
The project properties are based on a profile. You can use an exis
ting
profile or create a custom profile. For more information about custom
profiles, see “Creating custom profiles” on page 55.
To modify project properties
1 Click Settings > Project Properties.
2 Choose the appropriate setting options in the Project Properties
dialog box.
3 Click OK.
Whe n c us to mizing pr oj ect se tt in gs , i t is re co mm en ded th at yo u
make the settings the same as the attributes of the video
footage that will be captured to avoid distorting the video
images and can help prevent jumping frames. However,
preview performance might decrease for projects with high
resolution files, depending on the system specifications.
Creating custom profiles
Profiles contain settings that define how to create the final movie file.
By using the preset profiles provided by Corel VideoStudio or by
reating and saving your own profiles in the Movie Profile Manager,
c
Project basics 55
Page 66

you can have multiple versions of your final movie. For example, you
ca n cre ate pro fi les t hat p rov ide h igh -qua lity outp ut f or DV D and video
recording, and you can create prof iles that output to smaller, lowerquality files ideal for Web streaming and e-mail distribution.
You can also choose profiles and create custom profiles in the Share
workspace before you output your movie project. For more
information, see
“Working with custom profiles in the Share
workspace” on page 275.
To create custom profiles
1 Click Settings > Movie Profile Manager. The Movie Profile
Manager
2 Click the Computer or 3D tab.
3 From the Format drop-list, choose a file format.
4 Click New.
5 In the New Profile Options dialog box, click the
Corel VideoStudio tab, and type a name in the Profile name box.
6 Click the Ge n er al tab, and choose the settings you want.
Note: Additional tabs and settings are available depending on
the type of format you choose.
7 Click OK.
dialog box opens.
To choose a custom profile for your project
1 Click Settings > Movie Profile Manager. The Movie Profile
Manager
2 Click the Computer or 3D tab.
3 From the Format drop-list, choose a file format.
4 In the Profile area, choose Personal Prof iles from the drop-list.
Previously saved custom profiles are listed in the box below the
drop-list.
56 Corel VideoStudio X10
dialog box opens.
Page 67

5 Click the profile you want, and click Close.
Using Smart Proxy for a faster, smoother editing experience
The main purpose of Smart Proxy is to provide a more fluid editing
and previewing experience when working with large, high resolution
video files.
Smart Proxy creates lower resolution working copies of larger source
files. These smaller files are called “proxy” files. Using proxy files
speeds up editing of high resolution projects (for example, projects
that have HDV and AVCHD source files).
Proxy files are source-dependent rather than project-dependent. In
other words, proxy files can be shared among different projects.
When you render a video project, the original, high-quality video
source files are used.
You can use the Smart Proxy Manager to enable or disable Smart
Proxy
, change the default resolution threshold that enables Smart
, and access the Smart Proxy File Manager and Smart Proxy
Proxy
Queue Manager
Smart Proxy can be set and adjusted in the VideoStudio workspaces or
in the Multi-Camera Editor.
to manage existing and future proxy files.
To enable or disable Smart Proxy
• Click the Settings menu or button (Multi-Camera Editor) >
Smart Proxy Manager > Enable Smart Proxy.
Note: The Smart Proxy feature is enabled by default if the
computer’s hardware can support the feature.
Project basics 57
Page 68

To set the resolution threshold and location for Smart Proxy files
1 Select Settings > Smart Proxy Manager > Settings.
2 In the Smart Proxy dialog box, set a resolution threshold for the
creation of proxy files and choose a proxy folder.
To manage proxy files
1 Select Settings > Smart Proxy Manager, and choose one of the
following options:
• Smart Proxy File Manager — Lists the source and proxy files.
You can use this manager to delete proxy files you no longer
need.
• Smart Proxy Queue Manager — Lists source files for which
proxy files will be generated (according to the current settings)
Previewing your project or clips
The Play button in the Navigation area of the Player panel serves two
purposes:
• Playback your entire project
• Playback a selected clip
While working on your project, you will want to preview your work
frequently to see how your project is progressing.
al low s you to qu ick ly p review ch ang es i n your pro jec t. P layba ck q ual ity
depends on your computer’s resources.
Instant Playback
You may choose to play only a par t of your project . The sel ected range
of frames to preview is referred to as the
preview range, and it is
marked as a colored bar on the Ruler Panel.
If you have a high definition project (HD), you can enable HD Preview
so that you can preview your project with a clearer, higher quality
result. The speed depends on your system.
58 Corel VideoStudio X10
Page 69

To preview a project or clip
1 In the Navigation area of the Player panel, click Project or Clip.
2 Click Play.
Note: For Clip, only the currently selected clip plays.
If you want to preview a high definition project in full HD, enable
the
HD Preview button.
To play part of a project or clip
1 Use the Tr im M ar ke rs or the Mark-in/out buttons to select the
preview range.
2 With the preview range selected, in the Navigation area of the
Player panel, click
3 Click Play.
Project or Clip.
Undoing and redoing actions
You can undo or redo the last set of actions that you performed while
working on your movie.
Project basics 59
Page 70

To undo the last action
• Click the Undo button on the Toolbar.
To redo the last undone action
• Click the Redo button on the Toolbar.
You can adjust the number of
undo levels in the Preferences
dialog box.
You can also use the keyboard shortcuts [Ctrl + Z] and [Ctrl +
Y] to undo and redo actions respectively.
Showing and hiding grid lines
You can use grid lines to guide you when repositioning or resizing
photos and videos. You can also use grid lines to line up titles in your
movie.
To show grid lines
1 In the Edit step, double-click a clip to display the Options Panel.
2 Click the Attribute tab and choose Distort clip.
3 Check Show grid lines.
60 Corel VideoStudio X10
Page 71

Click to adjust grid line settings.
Saving projects
You can save projects so that you can edit or complete them later. To
protect your work, you can enable automatic saving at regular
intervals.
To save you r pr oj ec t
•Click File > Save [Ctrl + S].
Note: Corel VideoStudio project files are saved in *.vsp file
format. HTML5 video projects are saved in *.vsh file format.
To automatically save your work
1 Click Settings > Preferences and click the Gene ra l tab.
2 Choose Automatic save interval: and specify the time interval
between saves.
Note: This setting is set at 10 minutes by default.
Save your project frequently to avoid
accidental loss of work.
Saving projects by using Smart Package
Packaging a video project is useful if you want to back up your work
or transfer your files for sharing or for editing in a laptop or another
computer. You can also package your project as a zipped folder or
prepare them for online storage using WinZip’s file compression
technology that is integrated into the Smart Package feature.
Project basics 61
Page 72

To save projects by using Smart Package
1 Click File > Smart Package and choose to pack your project as a
folder or Zip file.
2 Specify the Folder path, Project folder name and Project file
name.
If you want to include tracker or disc settings, enable the
corresponding check box.
3 Click OK.
You need to save your project before you use Smart Package.
Adding cues and chapters
Ad ding cues and chap ters help s you to n avigate through a project and
allows you to place comments on your Timeline. These cue and
ter marks are used mainly as project guides or disc menu chapters
chap
and interactive links in HTML5 projects.
Cue points serve as markers that help in lining up media clips in
a
project. Chapter points specify disc menu chapters or hyperlinks.
To add project cues
1 Click the Chapter/Cue Menu.
2 Click Cue Point.
62 Corel VideoStudio X10
Page 73

3 Drag the cursor to where you want to add a cue point and click
Cue points
Cue points
Add/Remove Cue Point
the bar below the Timeline ruler. Notice that a blue arrow icon is
add
ed.
4 Repeat Step 3 to add more cue points.
Note: You can also use the Cue Point Manager when adding cue
points. Select Add and specify the timecode and name of cue for
easy identification. Click OK and then Close.
You can also add a cue point by dragging the Timeline slider
o the desired cue point position in your project and clicking
t
Add/Remove Cue Point.
To add chapters
1 Select Chapter Point in the Chapter/Cue Menu.
Project basics 63
Page 74

2 Drag the cursor where you want to add a chapter and click the
Chapter points
bar below the Timeline ruler. Notice that a green arrow icon
ap
pears to indicate chapter points in your movie.
3 To edit a chapter, click on a chapter point and drag to a new
position.
4 To rename a chapter, double click a chapter point and enter a new
chapter name. Click OK.
To remove chapters and cues, drag the markers outside the
Timeline r uler a nd rel ease th e mou se but ton. Yo u can a lso dr ag
the Timeline ruler to a chapter or cue point and click Add/
Remove Chapter Point or Add/Remove Cue Point.
You can also drag the Timeline slider to the desired chapter
point position in your project. Click the Add/Remove Chapter
Po
int.
64 Corel VideoStudio X10
Page 75

Organize and find media
Organize the media clips in the Library so you can access assets for
your projects with ease and speed. You can also import a Library to
restore media files and other library information.
This section contains the following topics:
• Using the Library
• Sorting, viewing, and filtering clips in the Library
• Resizing thumbnails
• Tagging files as 3D
Using the Library
The Library is a storage depot for everything you need to create a
movie: video clips, photos, audio files, instant project templates,
transitions, titles, filters, graphics, and tracking paths.
Create a custom library for your project. You can select, add, and
delete media in the
or igi nal location, you ca n automatically res tore t he l ink s. Remember to
export the library to create a backup on the hard drive or an external
storage device. You can then import the library at a later time.
After completing a project, you can reset the Library to restore the
default media clips. The files you added will be deleted from the
Library, but not from their original location. You can always choose to
re-import your media files into the
Library. If the media files are moved from their
Library.
Organize and find media 65
Page 76

Right-click a clip in the Library to view the clip's properties as
well as copy, delete, or split clips by scene.
You can also trim a clip in the Library by using dragging the
Scrubber in the Player panel to set the Mark-in/Mark-out
points.
Library files that you use in a project are identified by a green
check mark in the upper right corner of the thumbnail.
For information about supported media formats, see “Supported file
formats” on page 14.
To select media in the Library
•In the Library, do one of the following:
• Select one media file
66 Corel VideoStudio X10
— click a thumbnail.
Page 77

• Select multiple media files — press and hold [Ctrl], and then
click the thumbnails you want.
• Select a sequence of media files
— click the first thumbnail in
the sequence, press and hold [Shift], and then click the last
t
humbnail in the sequence.
• Select a grouping of media files — drag your pointer across the
t
humbnails that you want to select.
To add media clips to the Library
1 Click Add to create a new library folder where you want to store
your media clips.
Note: Y
ou can create custom folders to separate your personal
clips from sample clips or to keep all clips that belong to a project
in a single folder.
2 Click the Import Media Files button to locate your files.
3 Select the f iles you want to import.
4 Click Open.
Click Browse to open the File Explorer where you can dr ag and
drop files to the Library.
To delete media clips from the Library
1 In the Library, select a clip and press [Delete].
Or, right-click the clip in the Library and click Delete.
Note: While
remain in their original location, so when you delete a clip from
the Library, only the reference is deleted. You can still access the
actual file in the location where it is stored.
2 When prompted, confirm that you want to delete the thumbnail
from the Library.
the clips are referenced in the Library, they actually
Organize and find media 67
Page 78

To automatically locate and restore links to media files
•Click File > Relink.
A message appears that notifies you about the number of clips
that are successfully relinked.
Note: If the links t
o some clips are not restored, you can restore
them manually by browsing for the corresponding file on your
computer.
To export a library
1 Click Settings > Library Manager > Export library and specify a
folder location where you want to save your Library.
2 Click OK.
This action creates a backup of the virtual media file
information of your current library in the directory you specify.
To import a Library
1 Click on Settings > Library Manager > Import Library and find
the folder that you want to import.
2 Click OK.
To reset the Library
•Click Settings > Library Manager > Reset Library.
This action restores the Librar
y to the default settings and
deletes all user added files.
Sorting, viewing, and filtering clips in the Library
There are different ways to sort, view, and filter your media clips in the
Library:
68 Corel VideoStudio X10
Page 79
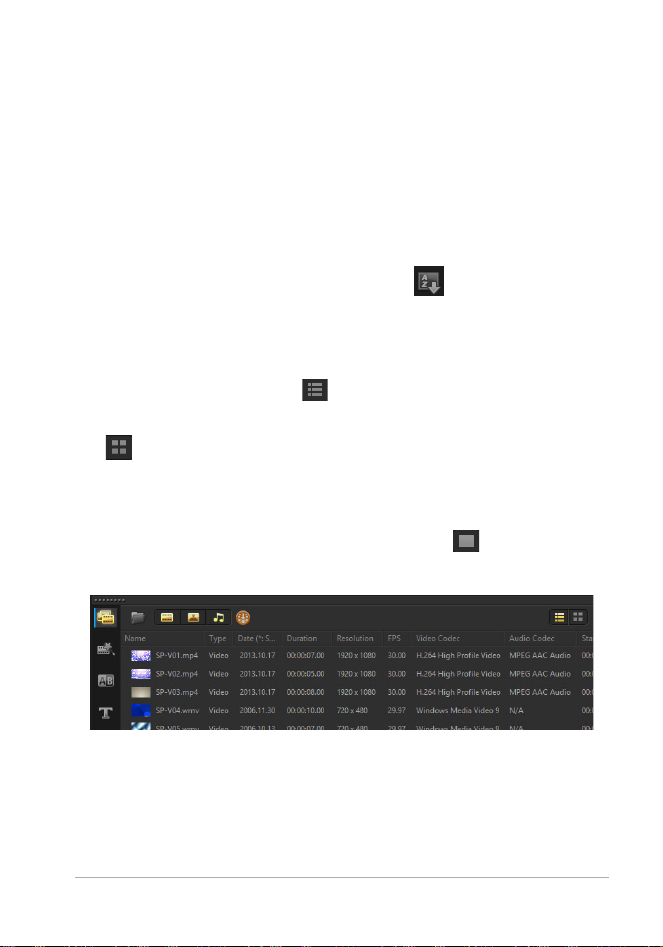
• Sort media by properties such as name, file type, date, and
resolution.
• View media as thumbnails or as a list that includes details about
th
e files.
• Filter media by hiding or showing media by type—photos, videos,
and audio
To sor t me dia clips
• Click the Sort clips in the Library button , and select a Sort by
property in the menu.
To change the media clips view
• Click the List view button to display your media clips in a list
that includes file properties, or click the Thumbnail view button
to display thumbnails.
If you want to sort the media clips in List view, click a property
title, such as Name, Typ e, or Date.
You can also click the Show/Hide title button
to show or hide
the file names of the media clips.
List view shows properties such as file name, media type,
date, duration, resolution, frames per second (FPS), and
codecs.
Organize and find media 69
Page 80

To show or hide media clips
Thumbnail
size slider
• Click one or more of the following buttons:
• Show / Hide Videos
• Show / Hide Photos
• Show / Hide Audio Files
To change the Library panel view
• You can use the icons in the Library panel to display Instant
Project templates, transitions, titles, graphics, filters, and tracking
paths.
Resizing thumbnails
Corel VideoStudio allows you to adjust the size of thumbnails for
easier access to the different media clips in the Library.
70 Corel VideoStudio X10
Page 81

To adjust thumbnail size
• Move the slider to the left or right to decrease or increase
thumbnail size.
Tagging files as 3D
In Corel VideoStudio, MVC and MPO clips are automatically detected
and tagged as 3D during import. You can also tag 2D clips to simulate
the 3D effect when you render the project as a 3D movie. Tagged 3D
media clips are marked with
the 3D media clip for 3D editing.
The Left-Right format for side-by-side 3D is a popular choice for
delivering content and is used mostly in media clips imported or
captured from 3D video cameras. The
in media clips acquired from the Web.
To tag video and photo clips as 3D
1 Right-click 3D files imported into the Library or the Timeline and
choose
dialog box is displayed.
Ta g a s 3 D from the right-click menu. The 3D Settings
3D for easy identification and to enable
Right-Left option is used mostly
Organize and find media 71
Page 82

2 Choose one of the following options to set the correct format for
3D content:
• 2D — the default setting if the selected clip is not recognized as
3D.
• Side-by-side — delivers 3D content by splitting the horizontal
resolution of each frame for the left and right eye. Side-by-side
3D is widely used by cable channels for delivering content for
3D ready TV sets because of lower bandwidth usage. Choose
between the
Left-Right and Right-Left formats.
• Over-Under — delivers 3D content by splitting the vertical
resolution of each frame for the left and right eye. The higher
count of horizontal pixels makes this option more suitable for
72 Corel VideoStudio X10
Page 83

displaying panning motion. Choose between the Left-Right and
Right-Left formats.
• Multiview Video Coding (MVC) — generates a high-definition
two-view (stereoscopic) video or a multi-view 3D video.
• Multi-view image — delivers high-quality stereoscopic images
such as Multi-Picture Object (MPO) files that are shot using 3D
cameras.
3 Click OK.
The thumbnail of the media clip in the Library and Timeline now
has the 3D tag.
Organize and find media 73
Page 84

74 Corel VideoStudio X10
Page 85

Timeline
The Timeline is where you assemble the media clips for your video
project.
This section contains the following topics:
• Switching between Timeline views
• Showing and hiding tracks
• Adding and swapping tracks
• Grouping and ungrouping
• Using Ripple Editing
Switching between Timeline views
Two types of views are available in the Timeline: Storyboard View and
Timeline View.
Stor yboard View
The fastest and simplest way to organize photos and video clips in a
project is to use the Storyboard View. Each thumbnail in the
storyboard represents a photo, video clip, or a transition. Thumbnails
are shown in the order in which they appear in your project, and you
can drag thumbnails to rearrange them. The duration of each clip is
shown at the bottom of each thumbnail. In addition, you can insert
transitions between video clips, and you can trim a selected video clip
in the Preview Window.
Timeline 75
Page 86

Corel VideoStudio Storyboard View
5
6
3
9
10
12
13
14
142
11
7
8
Timeline View
Timeline View gives you the most comprehensive display of the
el eme nts in you r mo vie proje ct. It d ivi des a proj ect int o se parate tracks
for video, overlay, title, voice, and music.
Corel VideoStudio Timeline View
76 Corel VideoStudio X10
Page 87

Part Description
1 — Show All Visible
Displays all tracks in your project.
Trac ks
2 — Track Manager Lets you manage the tracks visible in the
Timeline.
3 — Selected range Displays a color bar that represents the
trimmed or selected part of a project.
4 — Add / Remove
Chapter or Cue
5 — Enable / Disable
Ripple Editing
Lets you set chapter or cue points in your
movie.
When enabled, clips maintain their relative
positions when a clip is added to the track.
For more information, see “Using Ripple
Editing” on page 81.
6 — Track buttons Shows / Hides individual tracks.
7 — Automatically
scroll Timeline
Enables or disables scrolling along the
Timeline when you preview a clip that
extends beyond the current view.
8 — Scroll controls Lets you move around your project by using
the left and right buttons or dragging the
Scroll Bar.
9 — Timeline ruler Helps you determine clip and project length
by displaying the project's timecode
increments in hours:minutes:seconds:frames.
10 — Video Track Contains videos, photos, graphics, and
transitions. Note that in HTML 5 mode, you
can also have a Background Track.
11 — Overlay Tracks Contains overlay clips, which can be video,
photo, graphic, or color clips. Note the
HTML 5 projects also have overlay tracks.
12 — Title Track Contains title clips.
13 — Voice Track Contains voice-over clips.
Timeline 77
Page 88
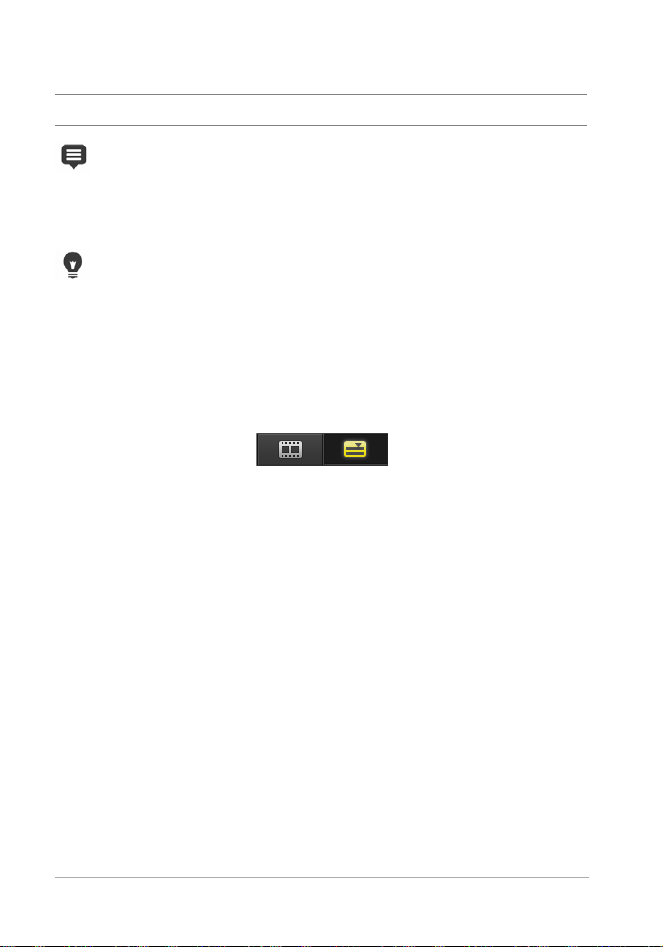
Part Description
14 — Music Track Contains music clips from audio files.
You can use the mouse wheel to scroll through the Timeline.
Right-click on any track button and choose Se
select all media clips that are in the track.
When the pointer is at the Zoom controls or Timeline ruler,
you can use the mouse wheel to zoom in and out of the
Timeline.
lect all media to
To switch between Storyboard View and Timeline View
• Click the buttons at the left side of the Toolbar.
Showing and hiding tracks
You can show or hide tracks. When tracks are hidden, they do not
show during playback or when you render your video. Selectively
showing or hiding tracks lets you see the effect of each track in a
project without having to delete and reimport media clips repeatedly.
To show or hide tracks
• Click the Track b utton of the track that you want to show or hide.
The track is dimmed in the T
imeline when it is hidden.
Adding and swapping tracks
The Track Ma na ge r allows you to take more control of the Timeline.
You can have up to 20 Overlay tracks, two Title tracks, and eight Music
tracks.
78 Corel VideoStudio X10
Page 89

In an HTML5 project, you can have up to three Background tracks, 18
Overlay tracks, two Title tracks, and three Music tracks.
There is only one Video track and one Voice track.
You can also insert and delete additional overlay, title, and musi
c
tracks, as well as swap overlay tracks directly in the Timeline.
To add tracks with the Track Manager
1 Click Tr ac k Man ag er on the Toolbar.
2 Specify the number of tracks you want to display from the drop-
down list for each track.
Click Set as Default to save current settings as defaults for all
new project
You can also reduce the number of optional tracks that you
have added by adjusting the Track M an ag er settings
s.
Timeline 79
Page 90

To insert or delete tracks in the Timeline
1 In the Timeline, right-click a track button for a track type that you
want to insert or delete, and choose one of the following menu
commands:
• Insert Track Above — Inserts a track above the selected track
• Insert Track Below — Inserts a track below the selected track
• Delete Track — Removes the track from the Timeline
A track of the same type is inserted or the selected track is
re
moved.
The menu items listed above appear only if the action is
permitted. For example, Delete Track is not available if you
have not added optional tracks in the project. Similarly, if you
already have the maximum number of tracks for the selected
track type, the insert track menu commands do not display.
To swap Ov er la y tr acks
1 Right-click on an Overlay track button and select Swap
Track s.
2 Choose the corresponding Overlay track that you want to swap.
All media in the selected Overlay tracks swap.
This feature only works if you are working on projects with
multiple Overlay Tracks.
Grouping and ungrouping
You can group and ungroup items that are in the timeline. For
example, you can select multiple clips or photos from one or more
tr ack s and grou p th em s o that you can mo ve t hem all at the sam e ti me
80 Corel VideoStudio X10
Page 91
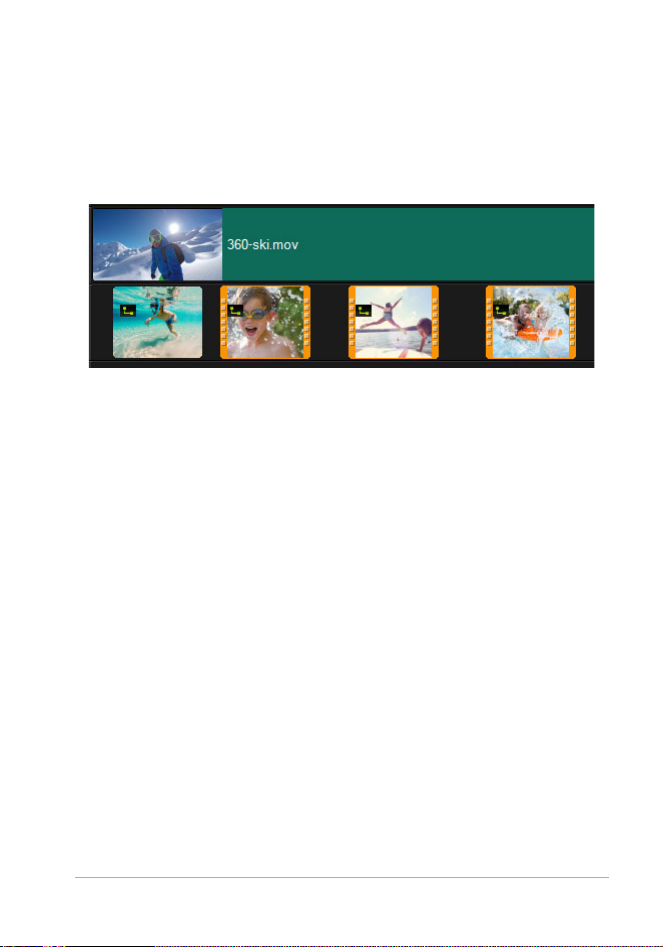
or apply an effect to the group. You can ungroup the elements at any
time.
How can you tell if an item is part of a group?
When you click an item that is grouped in the Timeline, all items in the
group appear highlighted (orange outline).
When you click a grouped item in the Timeline, all
items in the group appear highlighted (orange
outline).
To group items in the Timeline
1 In the Edit workspace, ensure that the items you want to group
have been added to the Timeline.
2 Hold Shift, and in the Timeline, click all the items that you want to
group.
3 Right-click a selected item and choose Group from the context-
menu.
To ungroup items in the Timeline
1 In the Timeline, right-click one of the grouped items and choose
Ungroup from the context-menu.
Using Ripple Editing
Use Ripple Editing to maintain the original synchronization of tracks
when inserting or deleting clips.
Timeline 81
Page 92

For example, if you add a 10-second clip at the beginning of the video,
all the other clips moves to the right by 10 seconds. This makes editing
more efficient by keeping all tracks synchronized.
Original Timeline
Timeline after a clip is inserted in the Video Track with
Ripple Editing disabled. Only the clips on the Video
Track are moved when a new clip is inserted.
Timeline after a clip is inserted in the Video Track with
Ripple Editing enabled on some tracks. Clips on the
82 Corel VideoStudio X10
Page 93

tracks with Ripple Editing enabled move when a new
clip is inserted to maintain original synchronization.
To insert clips in Ripple Editing mode
1 Click the Enable/Disable Ripple Editing button to activate
the panel.
2 Click beside each track where you want to apply Ripple
Editing.
3 Drag a clip to insert from the Library to the desired position on
the Timeline. As soon as the new clip is in place, all clips where
Ripple Editing is applied will shift accordingly while maintaining
their track positions relative to one another.
Note: Ripple Editing also works when you remove clips.
Timeline 83
Page 94

84 Corel VideoStudio X10
Page 95

Edit media
Videos clip s, photos and a udio clips are the foun datio n of your proj ect
and manipulating them is the most important skill you can master.
This section contains the following topics:
• Using the Options panel in the Edit workspace
• Converting multiple files
• Adding video clips
• Adding photos
• Time remapping
• Modifying video playback speed
• Using Freeze Frame
• Replacing media clips
• Trimming a clip
• Using Split by Scene
• Trimming video into multiple clips
• Saving trimmed clips
• Taking a snapshot from a video clip
• Enhancing clips
• Adjusting white balance
• Applying pan and zoom effect
• Working with the Mask Creator
• Track transparency
• 360 video
Edit media 85
Page 96

Using the Options panel in the Edit workspace
The Options panel in the Edit workspace allows you to modify the
media, transitions, titles, graphics, animation, and filters that you add
to the
Timeline. The number of tabs and controls available depends
on the type of media that you select. For example, if you select a video
clip, and click
Attribute.
Video: Video tab
• Video Duration — Displays the duration of the selected clip in
hours:minutes:seconds:frames. You can trim the selected clip by
changing the clip duration.
• Clip volume — Allows you to adjust the volume of the audio
segment of your video.
• Mute — Silences the audio segment of your video without
deleting it.
• Fade-in/out — Gradually increases/decreases the volume of the
clip for a smooth transition. Select
to set the fade-in/out duration.
• Rotate — Rotates the video clip.
• Color Correction — Allows you to adjust the hue, saturation,
brightness, contrast, and gamma of the video clip. You can also
adjust the White balance of the video or photo clip or make auto
tone adjustments.
Options i n t he Library panel, two tabs display: Video a nd
Settings > Preferences > Edit
86 Corel VideoStudio X10
Page 97

• Speed/Time-lapse — Allows you to adjust the playback speed of
your clip and apply Time-lapse and Strobe effects.
• Var iabl e Sp eed — Allows you to adjust the playback speed of a
clip at different intervals.
• Reverse video — Plays the video backward.
• Split Audio — Allows you to separate the audio from a video file
and place it on the Voice Track.
• Split by Scene — Splits a captured DV AVI file based on the
shooting date and time, or the changes in video content (i.e.,
motion change, camera shifting, brightness change, etc.).
• Multi-Trim Video — Allows you to choose desired segments from
a video file and extract them.
• Resampling Option — Allows you to set the aspect ratio for the
video.
Photo: Photo tab
• Duration — Sets the duration of the selected image clip.
• Rotate — Rotates the image clip.
• Color Correction — Allows you to adjust the hue, saturation,
brightness, contrast, and gamma of the image. You can also
adjust the White balance of the video or image clip or make auto
tone adjustments.
• Resampling Option — Lets you modify a photo’s aspect ratio
when a transition or effect is applied.
• Pan & Zoom — Applies the Pan & Zoom effect to the current
image.
• Presets — Provides various Pan & Zoom presets. Choose a preset
from the drop-list.
• Customize — Allows you to define how to pan and zoom the
current image.
Edit media 87
Page 98

Color: Color tab
• Duration — Sets the duration of the selected color clip.
• Co
lor Picker — Click the color box to adjust the color.
Attribute tab
• Mask & Chroma Key — Allows you to apply overlay options such
s mask, chroma key, and transparency.
a
• Alignment Options — Allows you to adjust object position in
pr
eview window. Set the option through the Alignment Options
up menu.
pop-
• Replace last filter — Allows the last filter applied to a clip to be
r
eplaced when you drag a new filter onto the clip. Clear this
option if you want to add multiple filters to your clips.
• Applied filters — Lists the video filters that were applied to a clip.
Click
or to arrange the order of the filters; click to
remove a filter.
• Presets — Provides various filter presets. Choose a preset from
th
e drop-list.
• Customize Filter — Allows you to define the behavior of the filter
hroughout the clip.
t
• Direction/Style — Allows you to set the direction and style of
entry/exit of the clip. This can be set to static, top/bottom, left/
right, top-left/top-right, bottom-left/bottom-right.
As for the style, you can set direction of entry/exit of clips through:
R
otate before/after pause duration and Fade in/out motion
effect.
• Distort clip — Allows you to modify the size and proportions of
e clip.
th
• Show grid lines — Select to display the grid lines. Click to
open a dialog box where you can specify settings for the grid
lines.
88 Corel VideoStudio X10
Page 99

• Advanced Motion — Opens the Customize Motion dialog box
which allows you to customize the motion of overlays and titles.
For more information, see “Customizing motion” on page 179.
Converting multiple files
Batch Convert allows you to convert a large number of f iles to another
format in sequence. You can also create a profile for performing batch
conversions. This allows you to save the batch conversion settings and
apply them to future batch conversions.
To run a Batch Convert
1 Click File > Batch Convert.
2 Click Add and then choose the files you want to convert.
3 Select an output folder in Save in folder.
4 In Save as type, choose your desired output type.
If you want to set more advanced saving options, click the
Options button.
5 Click Convert.
The result is shown in the Tas k R e po r t dialog box. Click OK to finish.
To create a Batch Convert profile
1 Click File > Batch Convert.
2 In the Batch Convert dialog box, choose the settings that you
want to save as a profile.
3 Click the Profile button and choose Add Profile.
4 In the Add Template dialog box, type a name for the profile.
You can apply a Batch Convert profile by clicking the Profile
tton and choosing the profile that you want to apply.
bu
Edit media 89
Page 100

You delete a Batch Convert profile by clicking the Profile
button, choosing Delete Profile, and choosing the profile that
yo
u want to delete.
Adding video clips
There are several ways of inserting video clips to the Timeline:
• Select a clip in the Library and drag it to the V
Overlay Track. Multiple clips can be selected by pressing [Shift].
• Right-click a clip in the Library and select Insert To: Video Track or
Insert To: Overlay Track.
• Select one or more video files in Windows Explorer and drag
o the Video Track or Overlay Track.
them t
• To insert a clip from a file folder directly to the Video Track or
Overlay Track, right-click the Timeline, select Insert Video and
locate the video to use.
3D media clips are supported in Corel VideoStudio. You can
ag 3D media clips so that they can be easily identified and
t
edited with 3D editing features. For more information, see
“Tagging files as 3D” on page 71.
ideo Track or
Aside from video files, you can also add video from DVD
formatted discs.
90 Corel VideoStudio X10
 Loading...