


VX807AU

DVD MULTIMEDIA STATION WITH BUILT-IN NAVIGATION &
7 ’’ TOUCH PANEL CONTROL
Owner’s Manual
VX807AU

1
VX807AU
English
English
Owner’s Manual
NOTICES / WARNINGS
Navigation: (SD807AU sold separetely)
Your VX807AU is navigation ready. If you did not include navigation in
your original purchase, you can very easily add navigation to your unit at
any stage by purchasing the Clarion SD807AU Installation is as simple as
inserting the MicroSD card.
The SD807AU comes with full 3D map coverage of Australia & New Zealand
and includes features such as: Turn-by-turn voice guidance with Text-to-
Speech,Motorway Junction View,Tunnel View,SUNA Predictive Traffic,3D
City & 3D landmarks, Extended Points of Interest, School Zones, Speed
Camera and much more.
To ensure you are not purchasing a product where the map is out of date,
the SD807AU comes with a “Latest Map Guarantee”. This means that no
matter when you decide to purchase the SD807AU you have a full 30 days
to download the latest map via Clarion’s decicated update site,“clarion.
naviextras.com”.
GPS Antenna:
Although the navigation Micro SD (SD807AU) is sold separately, it is
important to know that the GPS antenna is supplied with your VX807AU.
Clarion strongly recommends that the GPS antenna be installed at the same
time as your unit. This will save time and possibly additional installation cost
in the future because your unit will have to be removed from the dashboard.
Reverse Camera Warning:
For your safety, the driver should not watch any video sources and/or
operate the controls while driving.This includes the use of reversing cameras
while travelling in a forward direction which is prohibited,according to
Australian Road Laws.
Clarion strongly recommends that when installing a reverse camera to this
product, the camera’s power source be derived from the vihicles reversing
lamp circuit either directly (if suitable) or via the use of a relay. This will
ensure that the reverse camera can only be viewed while the vehicle is
travelling in a reverse direction.
Legal Safety Requirement:
According to Australian law, it is illegal for a driver to view a video source
while the vehicle is in motion. it is a legal requirement that the park brake
wire of this unit be connected to the vehicle park brake terminal.
Clarion Co.Ltd.,Clarion Australia Pty.Ltd.will not be held responsible for
improper installation of this product which infringes any law.

2
VX807AU
English
Owner’s Manual
Contents
1. FEATURES ...........................................................................................................4
Expanding Systems
..............................................................................................4
2. PRECAUTIONS
....................................................................................................5
3. CAUTIONS ON HANDLING.................................................................................8
Operation Panel
....................................................................................................8
USB Port
...............................................................................................................8
Cleaning
................................................................................................................8
Handling Discs
......................................................................................................9
4. OPERATION PANEL
..........................................................................................11
Functions of Buttons ...........................................................................................11
5. REMOTE CONTROL..........................................................................................12
Remote Control Functions ..................................................................................13
6. MAIN MENU.......................................................................................................15
7. DVD VIDEO PLAYER OPERATIONS ...............................................................16
Discs ...................................................................................................................16
Change DVD System Settings ............................................................................17
Watching to a Disc ..............................................................................................17
Showing DVD Player Mode Screen
....................................................................18
Operate the DVD Player Menu
............................................................................18
Showing Video Files Player Mode Screen ..........................................................19
Operate the Video Files Player Menu .................................................................20
Playable Video Disc Formats ..............................................................................21
8. CD PLAYER OPERATIONS
..............................................................................22
Listening to a Disc/Ejecting a Disc
.....................................................................22
Showing CD Player Mode Screen ......................................................................22
Operate the CD Player Menu ..............................................................................22
Listening to Compressed Audio .........................................................................23
Tag Display Function ..........................................................................................23
Playback MP3/WMA/AAC menu
........................................................................24
9. USB AUDIO OPERATIONS
..............................................................................25
Notes on Using USB Memories ..........................................................................25
Select USB Audio Mode .....................................................................................25
Playing Audio Files in USB Memory ...................................................................26
10. USB VIDEO OPERATIONS
..............................................................................27
Notes on Using USB Memory Device
.................................................................27
Select USB Video Mode .....................................................................................27
Playing Video Files in USB Memory ...................................................................27
Playable Video Format ........................................................................................27
11. iPod
®
OPERATIONS .......................................................................................29
Notes on Using iPod/iPhone
®
............................................................................29
iPod Audio Menu Operations ..............................................................................29
iPod Audio ID3 Mode Screen .............................................................................29
iPod Audio Playlist Mode Screen .......................................................................30
iPod Audio List Mode Screen
.............................................................................30
iPod Audio Bluetooth
®
Mode .............................................................................30
12. Bluetooth AUDIO PLAYER OPERATIONS .....................................................31
Selecting the Bluetooth Audio Mode ..................................................................31
Bluetooth Audio Player Settings .........................................................................31
Registering Your Bluetooth Audio Player (Pairing)
.............................................31
Selecting the Bluetooth Audio Player
.................................................................32
Controlling the Bluetooth Audio Player ...............................................................32
13. Bluetooth
TELEPHONE OPERATIONS ............................................................33
Select the BT Phone Mode .................................................................................33
Bluetooth Telephone Settings
............................................................................33
Registering Your Phone (Pairing) ........................................................................34

3
VX807AU
English
English
Owner’s Manual
Select the Phone .................................................................................................34
Get the Phone Book Data ...................................................................................34
Telephone Operations ........................................................................................34
14. TUNER OPERATIONS .....................................................................................36
15. DAB OPERATIONS ..........................................................................................38
16. Pandora
®
OPERATIONS ................................................................................40
Selecting the Pandora Mode ..............................................................................40
Pandora Bluetooth Mode ....................................................................................41
17. HDMI MODE ....................................................................................................42
Wire Connection of HDMI Mode .........................................................................42
Select HDMI Source ..........................................................................................43
18. Apple CarPlay™ ..............................................................................................43
To start Apple CarPlay ........................................................................................43
To go to Apple CarPlay screen ..........................................................................44
To move to Apple CarPlay screen .....................................................................44
To return to original screen ................................................................................45
19. AUX .................................................................................................................46
20. CAMERA INPUT OPERATIONS .....................................................................46
21. REAR SOURCE OPERATIONS .......................................................................47
DVD Video in Rear ..............................................................................................47
DVD Video Rear Source Control Info Mode. ......................................................47
DVD Video Rear Source Control Direct Mode. ..................................................47
AUX Video in Rear...............................................................................................48
22. FULL DIGITAL SOUND SYSTEM....................................................................48
23. NAVIGATION (SOLD SEPARATELY) ..............................................................49
24. SETTING OPERATIONS ..................................................................................50
General Setup Menu ...........................................................................................50
Video Setup Menu ..............................................................................................51
Audio Setup Menu ..............................................................................................51
Navigation Setup Menu ......................................................................................51
Others Setup Menu .............................................................................................52
Set the Anti-Theft Code ......................................................................................52
25. TROUBLESHOOTING .....................................................................................53
General ................................................................................................................53
DVD Player ..........................................................................................................53
USB Device .........................................................................................................54
Bluetooth ............................................................................................................54
TFT Screen ..........................................................................................................55
26. ERROR DISPLAY.............................................................................................56
DVD/CD Player ...................................................................................................56
27. SPECIFICATIONS ............................................................................................57
28. WIRE CONNECTION GUIDE ...........................................................................59
4
VX807AU
English
Owner’s Manual
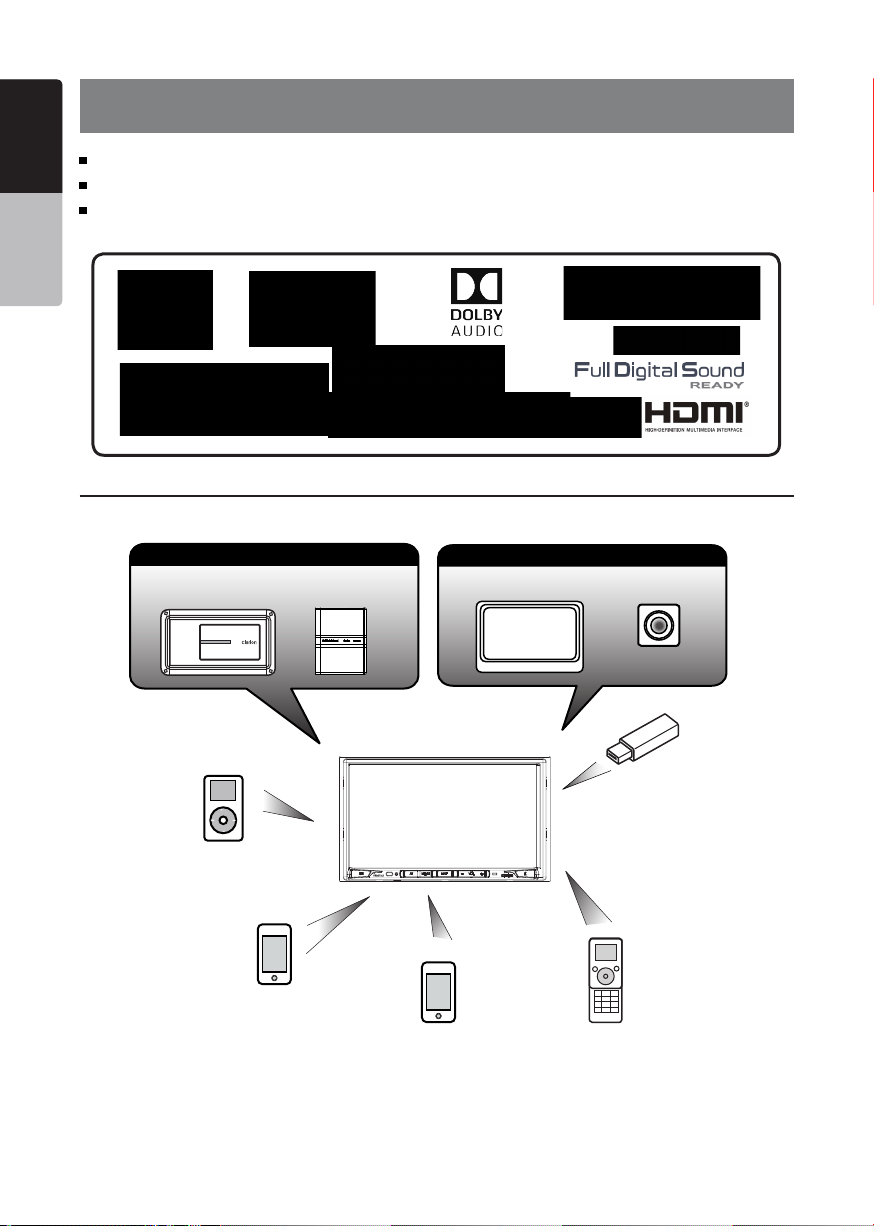
1. FEATURES
Expanding Systems
NOTE:
•
The items listed outside of the frames are the commercial products generally sold.
• CCA-771,CCA-802:Sold separately.
Apple CarPlay™
Optical Digital Output
Optional Navigation with “Latest Map Guarantee”(Navigation sold separately)
iPod
®
Expanding Visual Features
Rear Monitor
Rear Vision Camera
Expanding Audio Features
External Power
Amplier
External Sound
Processor
iPhone
®
USB
Memory
Bluetooth
Telephone
iPhone/Smartphone via HDMI
VX807AU
Connect via CCA-771,CCA-802

5
VX807AU
English
English
Owner’s Manual
2. PRECAUTIONS
WARNING
• For your safety, the driver should not watch any video sources and/or operate the controls while driving.
Please note that watching and operating any video sources while driving are prohibited by law in some
countries. Also, while driving, keep the volume to a level at which external sounds can be heard.
• Do not disassemble or modify this unit. It may cause an accident, re, or electric shock.
• Do not use this unit when a trouble exists, such as no screen content appears or no sound is
audible. It may cause an accident, fire, or electric shock. For that case, consult your authorized
dealer or a nearest Clarion service center.
• In case of a problem, such as any material has been entered in the unit, the unit gets wet, or
smoke or strange smells come out of the unit, etc., stop using this unit immediately, and consult
your authorized dealer or a nearest Clarion service center.
Using it in that condition may cause an accident, fire, or electric shock.
• Use a fuse with the same specication only when replacing the fuse.
Using a fuse with a different specification may causes a fire.
• For the installation of this unit or a change in the installation, ask your authorized dealer or a
nearest Clarion service center for safety. Professional skills and experiences are required to do
so.
• This navigation system should not be used to replace your own judgment. No itinerary suggested
by this navigation system should ever override any highway regulations, your own judgment, or a
knowledge of safe driving practices. Do not follow the navigation system’s suggested itinerary if it
would cause you to perform a dangerous or illegal act, place you in a dangerous situation, or take
you into an area you consider unsafe.
• The advice provided by the navigation system is to be regarded as a suggestion only. There may
be times when the navigation system displays the vehicle’s location incorrectly, fails to suggest
the shortest route, or fails to direct you to your desired destination. In such instances, rely on your
own driving judgment, taking into account the driving conditions at the time.
• Do not use the navigation system to locate emergency services. The database does not contain
a complete listing of emergency services such as police stations, fire halls, hospitals and walk-in
clinics. Please show discretion and ask for directions in such instances.
• As the driver, you alone are responsible for your driving safety.
• In order to avoid a trafc accident, do not operate the system while driving.
• In order to avoid a trafc accident, operate the system only when the vehicle is stopped at a safe
place and the parking brake is on.
• In order to avoid a trafc accident or trafc offense, remember that actual road conditions and
traffic regulations take precedence over the information contained on the navigation system.
• The software may contain inaccurate or incomplete information due to the passage of time,
changing circumstances, and the sources of information used. Please respect current traffic
conditions and regulations at all times while driving.
• Where actual road conditions and highway regulations differ from the information contained on
the navigation system, abide by the highway regulations.
• Keep the amount of time spent viewing the screen while driving to a strict minimum.
• The navigation system does not provide, nor represent in any way information on: trafc and
highway regulations; technical aspects of the vehicle including weight, height, width, load and
speed limits; road conditions including grade, percentage of incline and surface conditions;
obstacles such as the height and width of bridges and tunnels; and other current driving or road
conditions. Always rely on your own judgment when driving a car, taking into account current
driving conditions.

6
VX807AU
English
Owner’s Manual
• Changes or modications not expressly approved by the party responsible for compliance could
void the user’s authority to operate the equipment.
• Improper connection of speed pulse signal may result in serious damage or injury including
electrical shock, and interference with the operation of the vehicle’s anti-lock braking system,
automatic gearbox and speedometer indication.
7
VX807AU
English
English
Owner’s Manual
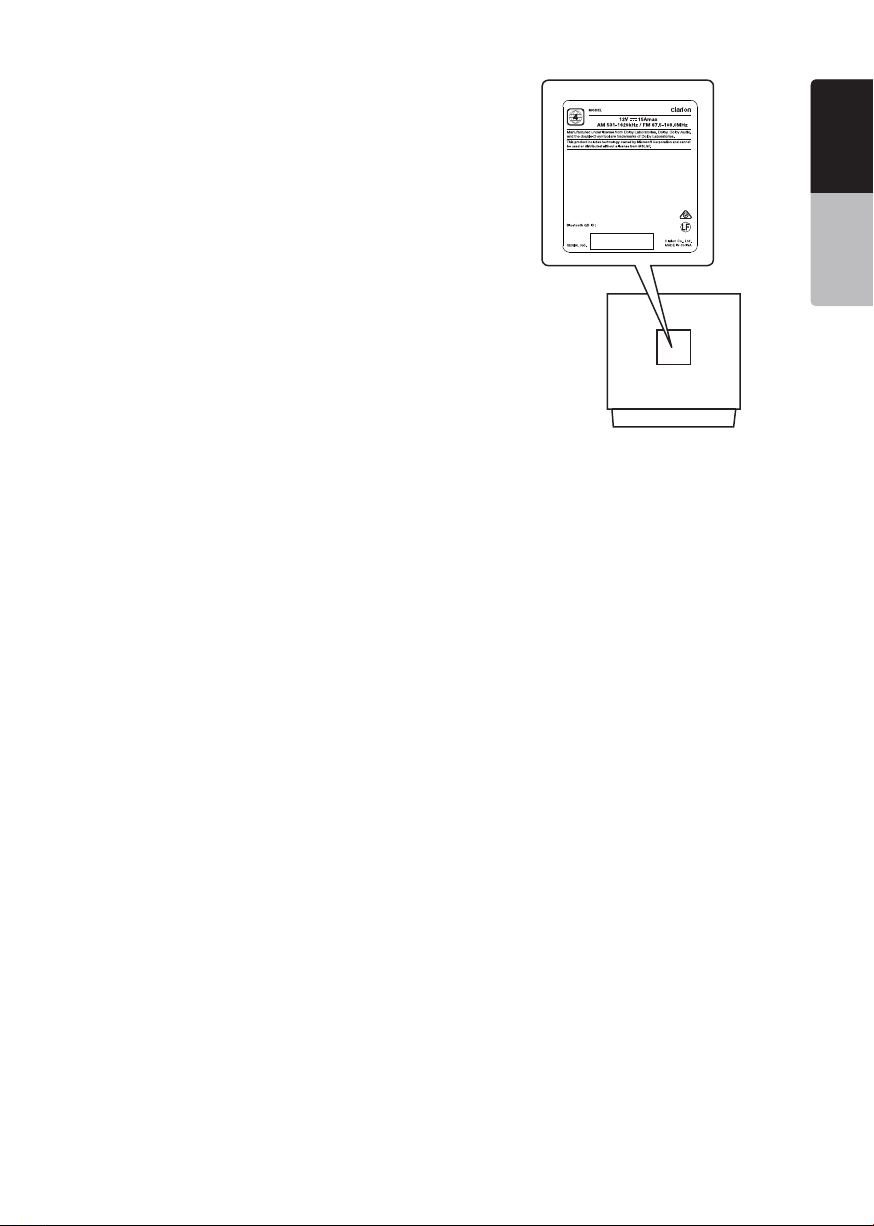
VX807AU
VX807AU
TX-1179K-A
D025034
1.When the inside of the car is very cold and
the player is used soon after switching on the
heater, moisture may form on the disc (DVD/
CD) or the optical parts of the player and
proper playback may not be possible. If
moisture forms on the disc (DVD/CD), wipe it
o with a soft cloth. If moisture forms on the
optical parts of the player, do not use the
player for about one hour. The condensation
will disappear naturally allowing normal
operation.
2.Driving on extremely bumpy roads which
cause severe vibration may cause the sound
to skip.
3.This unit uses a precision mechanism. Even
in the event that trouble arises, never open
the case, disassemble the unit, or lubricate
the rotating parts.

8
VX807AU
English
Owner’s Manual
3. CAUTIONS ON HANDLING
Operation Panel
• The operation panel will operate properly in a
temperature range of 0˚ to 60˚ C.
• Do not allow any liquids on the set from
drinks, umbrellas etc. Doing so may damage
the internal circuitry.
• Do not disassemble or modify the set in any
way. Doing so may result in damage.
• Subjecting the operation panel to shocks
may result in breakage, deformation or other
damage.
• Do not let cigarettes burn the display.
• If a problem should occur, have the set
inspected at your store of purchase.
• The remote control unit may not work if the
remote control sensor is exposed to direct
sunlight.
• In extremely cold weather, the display
movement may slow down and the display
may darken, but this is not a malfunction.
The display will work normally when the
temperature increases.
• Small black and shiny spots inside the liquid
crystal panel are normal for LCD products.
For a longer service life, be sure to read the following cautions.
Cleaning
• Cleaningthecabinet
Use a soft, dry cloth and gently wipe off
the dirt. For tough dirt, apply some neutral
detergent diluted in water to a soft cloth, wipe
off the dirt gently, then wipe again with a dry
cloth.
Do not use benzene, thinner, car cleaner, etc.,
as these substances may damage the cabinet
or cause the paint to peel. Also, leaving rubber
or plastic products in contact with the cabinet
for long periods of time may cause stains.
• Cleaningtheliquidcrystalpanel
The liquid crystal panel tends to collect dust,
so wipe it off occasionally with a soft cloth.
The surface is easily scratched, so do not rub
it with hard objects.
USB Port
• The USB memory sticks must be recognized
as “USB mass storage class” to work
properly. Some models may not operate
correctly.
When the memorized data is lost or
damagedbyanychance,Clarionshallnot
beliableforanydamage.
When using an USB memory stick, we
recommend that you backup your data stored
on it before by using a personal computer etc.
• Data les may be broken when using USB
memory sticks in the following situation:
When disconnecting the USB memory stick or
turning the power off during writing or reading
data. When affected by static electricity or
electric noise. Connect/disconnect the USB
memory stick when it is not accessed.
• Connecting with the computer is not
supported.
• Connecting with the USB Hub is not
supported.
9
VX807AU
English
English
Owner’s Manual
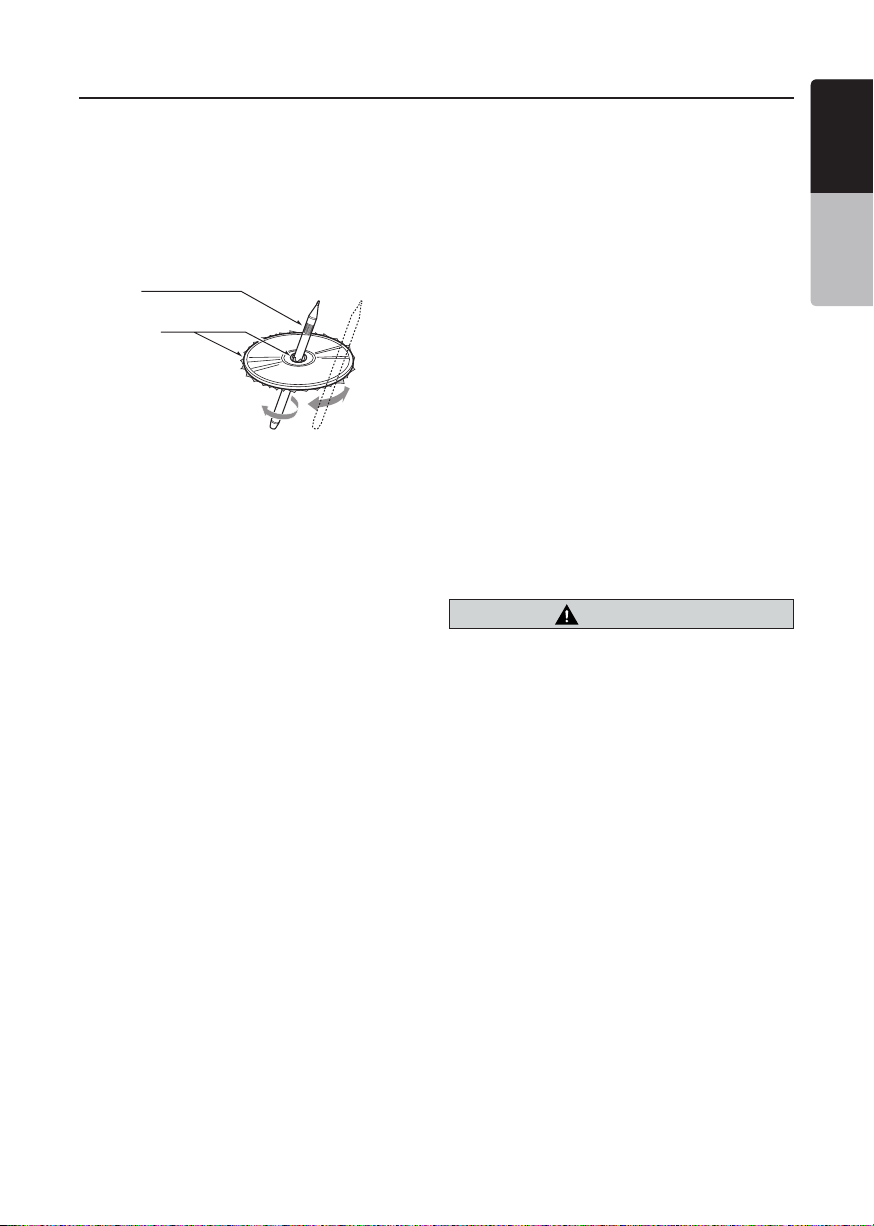
Handling Discs
Handling
• New discs may have some roughness
around the edges. If such discs are used,
the player may not work or the sound
may skip. Use a ball-point pen or the like
to remove any roughness from the edge
of the disc.
Ball-point pen
Roughness
Never stick labels on the surface of the
disc or mark the surface with a pencil or
pen.
• Never play a disc with any cellophane
tape or other glue on it or with peeling off
marks. If you try to play such a disc, you
may not be able to get it back out of the
DVD player or it may damage the DVD
player.
• Do not use discs that have large
scratches, are misshapen, cracked,
etc. Use of such discs may cause
misoperation or damage.
• To remove a disc from its storage case,
press down on the center of the case
and lift the disc out, holding it carefully
by the edges.
• Do not use commercially available disc
protection sheets or discs equipped with
stabilizers, etc. These may damage the
disc or cause breakdown of the internal
mechanism.
• Please note: The standard SD card slot
is for music, movie and/or background
image files only.
The MicroSD card slot is for Navigation
ONLY.Only insert SD807AU navigation
card.
• When using a SD card, we recommend
that you backup your data stored on it
before using a personal computer etc.
Storage
• Do not expose discs to direct sunlight or
any heat source.
• Do not expose discs to excess humidity
or dust.
• Do not expose discs to direct heat from
heaters.
Cleaning
• To remove ngermarks and dust, use
a soft cloth and wipe in a straight
line from the center of the disc to the
circumference.
• Do not use any solvents, such as
commercially available cleaners, anti-
static spray, or thinner to clean discs.
• After using special disc cleaner, let the
disc dry off well before playing it.
On Discs
• Never turn off the power and remove the
unit from the car with a disc loaded.
CAUTION
For your safety, the driver should not
insertorejectadiscwhiledriving.

10
VX807AU
English
Owner’s Manual
•
This product incorporates copyright protection
technology that is protected by U.S. patents
and other intellectual property rights. Use of this
copyright protection technology must be authorized
by Rovi Corporation, and is intended for home and
other limited viewing uses only unless otherwise
authorized by Rovi Corporation.
Reverse engineering or disassembly is prohibited.
•
“Made for iPod” and “Made for iPhone” mean
that an electronic accessory has been designed
to connect specifically to iPod or iPhone,
respectively,and has been certified by the developer
to meet Apple performance standards.
Use of the Apple CarPlay logo means that a vehicle
user interface meets Apple performance standards.
Apple is not responsible for the operation of this
device or its compliance with safety and regulatory
standards.
Please note that the use of this accessory with iPod
or iPhone may affect wireless performance.
iPhone, iPod and Siri are trademarks of Apple
Inc.,registered in the U.S. and other countries.
Apple CarPlay and Lightning are trademarks of
Apple Inc.
•
Android
TM
is the trademark of Google Inc.
•
The Bluetooth
®
word mark and logos are registered
trademarks owned by the Bluetooth
®
SIG, Inc. And
any use of such marks by Clarion Co., Ltd. is under
license. Other trademarks and trade names are
those of their respective owners.
•
Pandora, the Pandora logo, and the Pandora trade
dress are trademarks or registered trademarks of
Pandora Media, Inc. used with permission.
•
The terms HDMI and HDMI High-Definition
Multimedia Interface, and the HDMI Logo are
trademarks or registered trademarks of HDMI
Licensing LLC in the United States and other
countries.
•
Manufactured under license from Dolby
Laboratories.Dolby, Dolby Audio, and the double-D
symbol are trademarks of Dolby Laboratories.
Abouttheregisteredmarks,etc.
11
VX807AU
English
English
Owner’s Manual
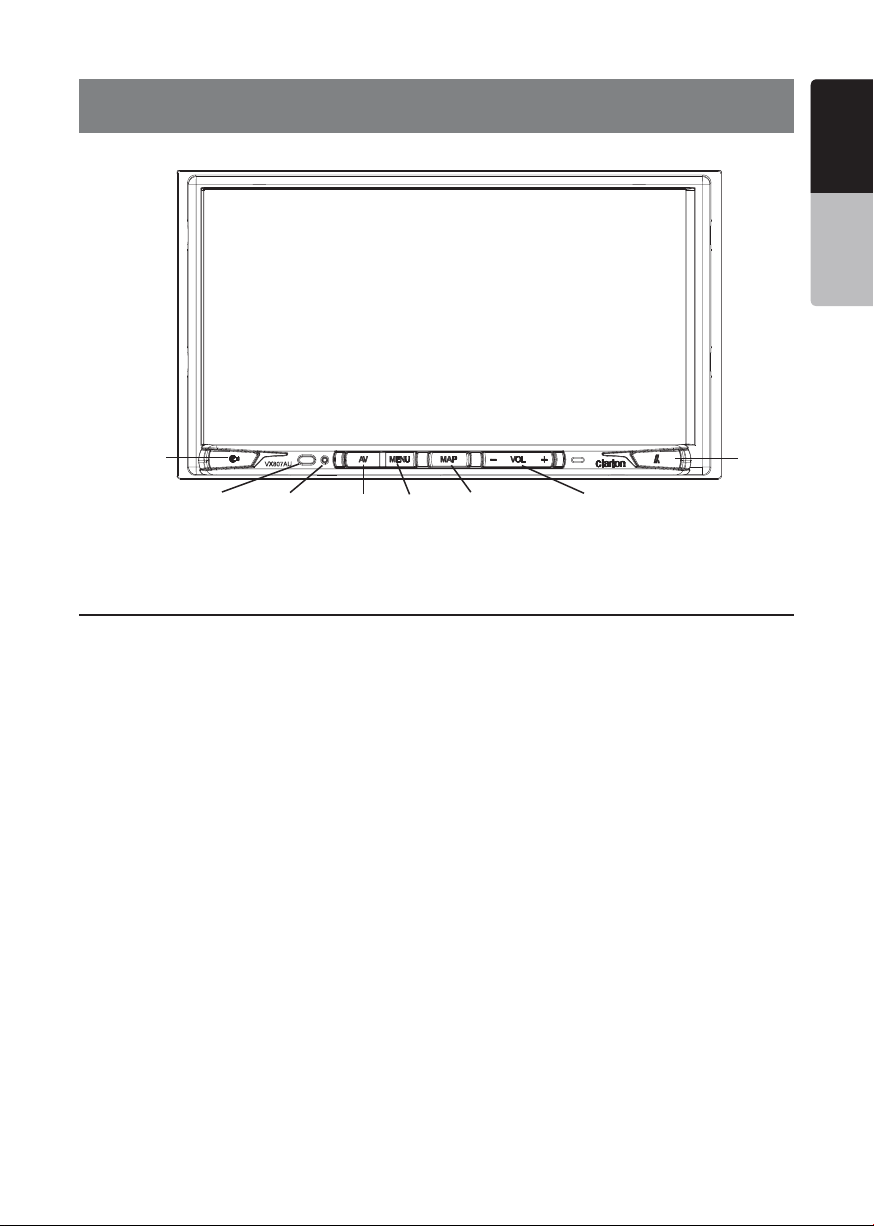
VX807AU
[MENU]
[MAP]
[Open/Tilt]
[AV]
[IR]
[RESET] [-VOL+]
4. OPERATION PANEL
Functions of Buttons
[MAP] Button
• Press this button to move to the Native Navigation
screen.
• Press and hold this button for 2 seconds to move to
Apple CarPlay map.
[AV] Button
• Press this button to display the current audio source
screen.
[MENU] Button
• Press this button to display main menu; press again
to return current source.
• Press and hold this button for 2 seconds to turn off
the monitor. Press anywhere on the touch screen to
turn on the monitor again.
[RESET] Button
• Press this button to hardware reset the unit.
Note: When the [RESET] button is pressed, frequencies of radio
stations, titles, etc. stored in memory are cleared.
[IR] SENSOR
• Receiver for the remote control unit (operating range:
30 degree in all directions).
[VOICE] Button
• Press this button until you hear the tone, then you
can use Siri
®
function.
[Open/Tilt] Button
• Press this button to open and close the panel.
• Keep pressing this button more than 2 seconds in
order to change the tilt angle.
[-VOL+] Button
• Press these buttons to increase or decrease the
volume level.
• Keep pressing one of these buttons for more than 2
seconds to quickly increase or decrease the volume
level.
Micro SD card slot (Navigation ONLY)
When open the front panel, micro SD card slot
appears. Only for Clarion navigation map card. (Sold
separately) Inserting anything other than specic
navigation card may cause damage to the unit or your
media.
Only navigation map card is available and don’t remove it when unit is powered on
[VOICE]
12
VX807AU
English
Owner’s Manual
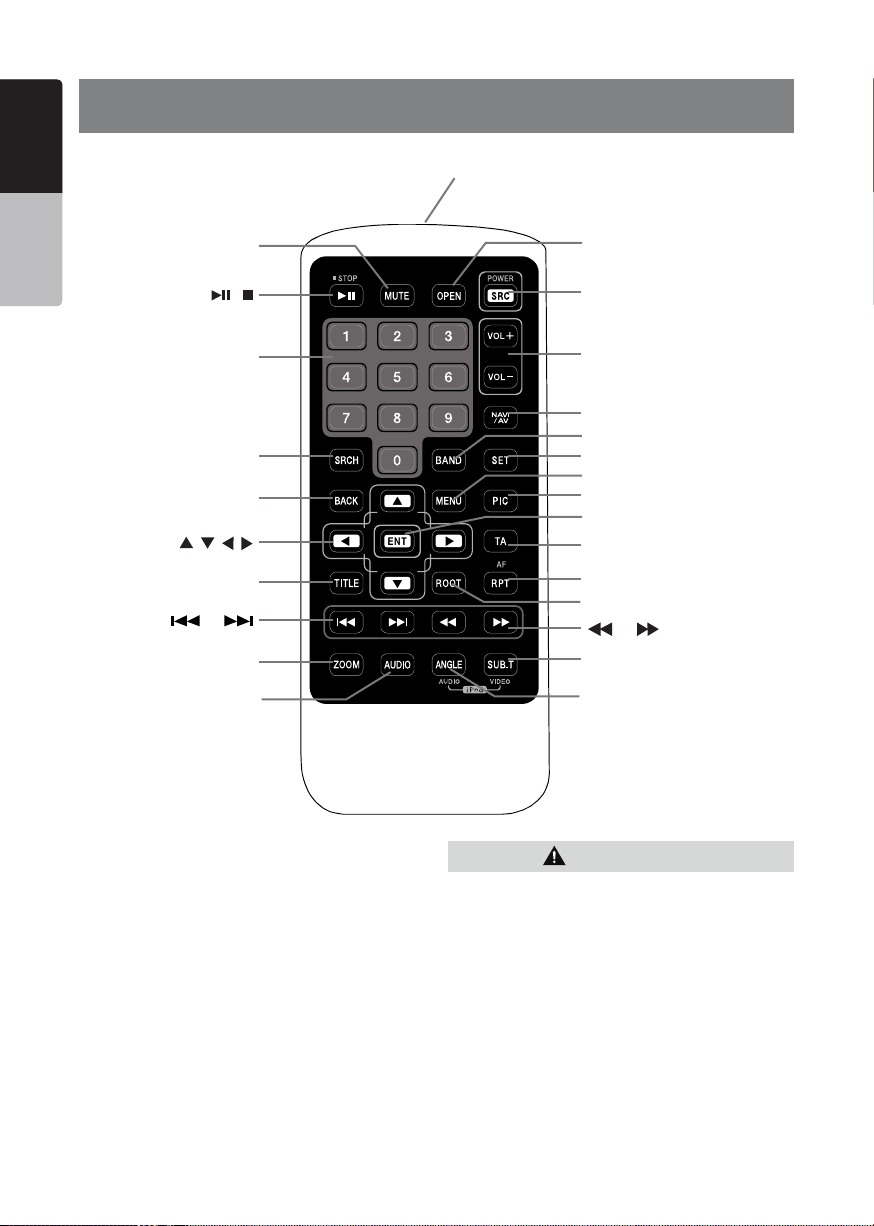
5. REMOTE CONTROL
Signal transmitter
Operating range : 30° in all directions
[ / ]
[ 0-9 ]
[SRCH]
[BACK]
[ , , , ]
[TITLE]
[ ], [ ]
[ZOOM]
[MUTE]
[AUDIO]
[POWER/SRC]
[VOLUME]
[SET]
[PIC]
[TA]
[RPT]
[ ], [ ]
[SUB.T]
[OPEN]
[ANGLE]
[NAVI/AV]
[MENU]
[BAND]
[ROOT]
[ENT]
RCX006 Remote Control Included
Replacing the batteries
1.Press the retention tab and pull out the
battery tray and remove the old battery.
2. Insert the new CR2025 battery and slide
the battery tray back in the remote control
the same direction that you removed it.
Please ensure the tray is inserted in the
correct direction.
• Keep the battery out of the reach of children.
Should the battery be swallowed, consult a doctor
immediately.
• Batteries (battery pack or batteries installed)
must not be exposed to excessive heat such as
sunshine, re or the like.
CAUTION

13
VX807AU
English
English
Owner’s Manual
[ / ] Button
• Press this button to play or pause video and audio
media.
• Press this button more than 1 second to stop video
and audio media.
[MUTE] Button
• Mute or Unmute the speaker.
• The symbol
on upper right area of the screen
indicates that speaker is muted.
[POWER/SRC] Button
• Press this button to move the focus to next available
source item on main menu.
[0 - 9] Buttons
• Use in the Key Pad screen to select the radio.
• Use to select the track in the track list screen.
• Press to enter DVD video chapters/titles in the Key
Pad screen.
[VOLUME] Buttons
• Increase and decrease volume.
[NAVI/AV] Button
• Press this button to switch to AV source from
navigation map.
[SRCH] Button
• Press this button to open chapter or title search
window while playing DVD.
[BAND] Button
• Switch to next band alternately.
[SET] Button
• Press this button to open the Audio setting menu in
any mode.
[BACK] Button
• Press this button to quit main menu if current screen
is main menu.
[
], [ ], [ ], [ ] Buttons
• Press this button for cursor movement in main menu
or Setting mode.
• From the main menu, you can select your desired
source or change your settings.
[MENU] Button
• Press this button to enter the MAIN MENU or return
current resource.
[PIC] Button
• No function.
[ENT] Button
• Press to x the entered data in the Key Pad screen
or enter the item the cursor is on.
[TA] Button
• Press this button to set TA On or Off.
[TITLE] Button
• Press to go to the title menu on the DVD.
[ROOT] Button
• Press to go to the root menu on the DVD.
Remote Control Functions
You can use the remote control to operate the VX807AU.
Note:
• The wireless remote control operation may not be optimal in direct sunlight.
CAUTION
• Use one CR2025 (3V) lithium battery.
• Remove the battery if the remote control is not
used for a month or longer.
• There is a danger of explosion if battery in
incorrectly replaced. Replaced only with the same
or equivalent type.
• Do not handle the battery with metallic tools.
• Do not store the battery with metallic objects.
• If the battery leaks, wipe the remote control
completely clean and install a new battery.
• When disposing of used batteries, comply with
governmental regulations or environmental public
institutions’ rules that apply in your country/area.
Important
• Do not store the remote control in high
temperatures or direct sunlight.
• The remote control may not function properly in
direct sunlight.
• Do not let the remote control fail onto the oor,
where it may become jammed under the brake or
accelerator pedal.

14
VX807AU
English
Owner’s Manual
[RPT] Button
• Press to perform chapter repeat / title repeat / repeat
off while playing DVD mode.
• Press to perform Repeat Track/Repeat All while
playing CD.
• Press to perform Repeat Track /Repeat Folder/
Repeat All while playing MP3/WMA, or video les on
disc.
• Press to perform Repeat Track /Repeat Folder/
Repeat All while playing MP3/WMA, or video les in
USB memory.
[
], [ ] Buttons
• Press to seek the next available lower or higher
station in Tuner mode.
• Press to select the next lower or higher chapter
number in DVD video mode.
• Press to select the next lower or higher track in CD,
USB Video, USB Audio mode.
• Press for movement of background source in
Navigation mode.
[
], [ ]Buttons
• Press to manually select the next lower or higher
station in Tuner modes.
• Press to perform fast-backward or fast-forward
searching. Press again to change the speed to 2x,
4x, 8x or 16x.
• Press for movement of background source in
Navigation mode.
[ZOOM] Button
• Press to turn on and zoom in while playing DVD. You
can zoom in up to 3x. (No all DVD disc supports this
function)
.
[AUDIO] Button
• Press to switch the AUDIO channel of the disc while
playing DVD.
[SUB-T] Button
• Press to switch next available subtitle while playing
DVD.
• Press to display Video menu in iPod mode.
[ANGLE] Button
• Press to switch the different ANGLE while playing
DVD. (No all DVD disc supports this function)
• Press to display Audio menu in iPod mode.
[OPEN] Button
• Press to eject disc from the unit.

15
VX807AU
English
English
Owner’s Manual
6. MAIN MENU
1 - Tuner---Touch the button to display the Tuner mode.
2 - TEL--- Touch the button to display the Telephone
mode.
3 - Apple CarPlay---Touch the button to display the
Apple CarPlay mode.
4 - Navigation---Touch the button to display the
Navigation mode.
5 - iPod Audio---Touch the button to display the iPod
Audio mode.
6 - BT Audio--- Touch the button to display the
Bluetooth Audio mode.
7- USB Audio---Touch the button to display the USB
Audio mode.
8- Disc Audio---Touch the button to display the Disc
Audio mode.
9 - DAB ---Touch the button to display the DAB mode.
10 - Pandora ---Touch the button to display the Pandora
mode.
11 - USB Video---Touch the button to display the USB
Video mode.
12 - Disc Video---Touch the button to display the Disc
Video mode.
13 - Camera---Touch the button to display the Camera
mode.
14 - AUX ---Touch the button to display the AUX mode.
15 - HDMI---Touch the button to display the HDMI
mode.
16 - Setting button---Touch the button to display the
Setting menu.
17 - Monitor off --- Touch the button to turn off the
monitor.
18 - Day/Night --- Touch the button to change the
dimmer.
19 - Audio off---Touch the button to make audio source
voice off.
20 - Rear---Touch the button to display the Rear mode.
Scrolling the menu
Swiping right or left will switch to the next or previous
pages of the main menu.
Customizing the menu button locations
1. Touch and hold any of the mode buttons on the main
menu for more than 2 seconds.
2. When it begins to “float”, drag the floating button to a
new location.
3. Lifting up your finger will drop the button in the new
location.
1 2
3 4
5
6 7 8
9 10 11 12
13 14 15
16
17
20
18
19

16
VX807AU
English
Owner’s Manual
7. DVD VIDEO PLAYER OPERATIONS
Playablediscs
This DVD video player can play the following
discs.
Playablediscs
CD TEXTDVD video discs Audio CD
Playablemediales
MP3/WMA/AAC
AboutCDExtradisc
A CD Extra disc is a disc in which a total of two
sessions have been recorded. The rst session
is Audio session and the second session is Data
session.
Your personally-created CDs with more than
second data sessions recorded cannot be played
on this DVD video player.
Note:
•
When you play a CD Extra disc, only the first
session will be recognized.
Discsthatcannotbeplayedback
This DVD video player cannot play back DVD-
Audio, DVD-RAM, Photo CDs, etc.
Note:
•
I
t may also not be possible to play back CDs
recorded on a CD-R unit and CD-RW unit.
(Cause: disc characteristics, cracks, dust/dirt,
dust/dirt on player’s lens, etc.)
•
If a CD-R or CD-RW disc that has not been
finalized is played, it will take a long time to
start playing. Also, it may not be possible to
play depending on its recording conditions.
•
You cannot play SuperAudio CD.
The CD player is not supported even if it is a
hybrid disc.
AboutMP3/WMA/AACplayback
This unit can play back CD-R/CD-RW, DVD-R/
RW and DVD+R/RW discs on which MP3/WMA/
AAC music data have been recorded.
For a detailed information, see the section
entitled “Listening to compressed audio”.
Noteonregionnumbers
The DVD video system assigns a region number
to DVD video players and DVD discs by sales
area. DVD video players sold in Europe can play
back DVD discs with the region number “ALL”,
“4” or any combination of numbers that also
incorporate a “4”.
The DVD video region number is marked on the
disc jacket as shown below.
4
ALL
1
2
3
Europe
Discs
MP4
17
VX807AU
English
English
Owner’s Manual
Change DVD System Settings
Note:
If the setup operation is performed in the middle of DVD
video play, the disc will restart from the beginning.
Selecting DVD Setup Menu
1. Touch the [Settings] button on the Main Menu to
access the Video setup menu.
2. Touch [Video] button. The video menu is displayed.
Setting up the Screen Size
Touch the [DVD Wide Screen Mode] button to turn on
or turn off the DVD wide screen mode.
The factory default setting is “off”
Note: Not all DVD discs support this function.
Setting up the password for parental level
control
The factory default pass code is “0000”.
1.In Main Menu Touch [Settings] button. Touch
[Others] button on the display. Touch the [Set
Password] ---- and a numerical key pad will appear.
Input a new password and conrm. The password is
set.
Note:
When a disc with view restrictions is inserted, you will
be prompted to input this password. The disc will not be
viewable until the correct password is entered.
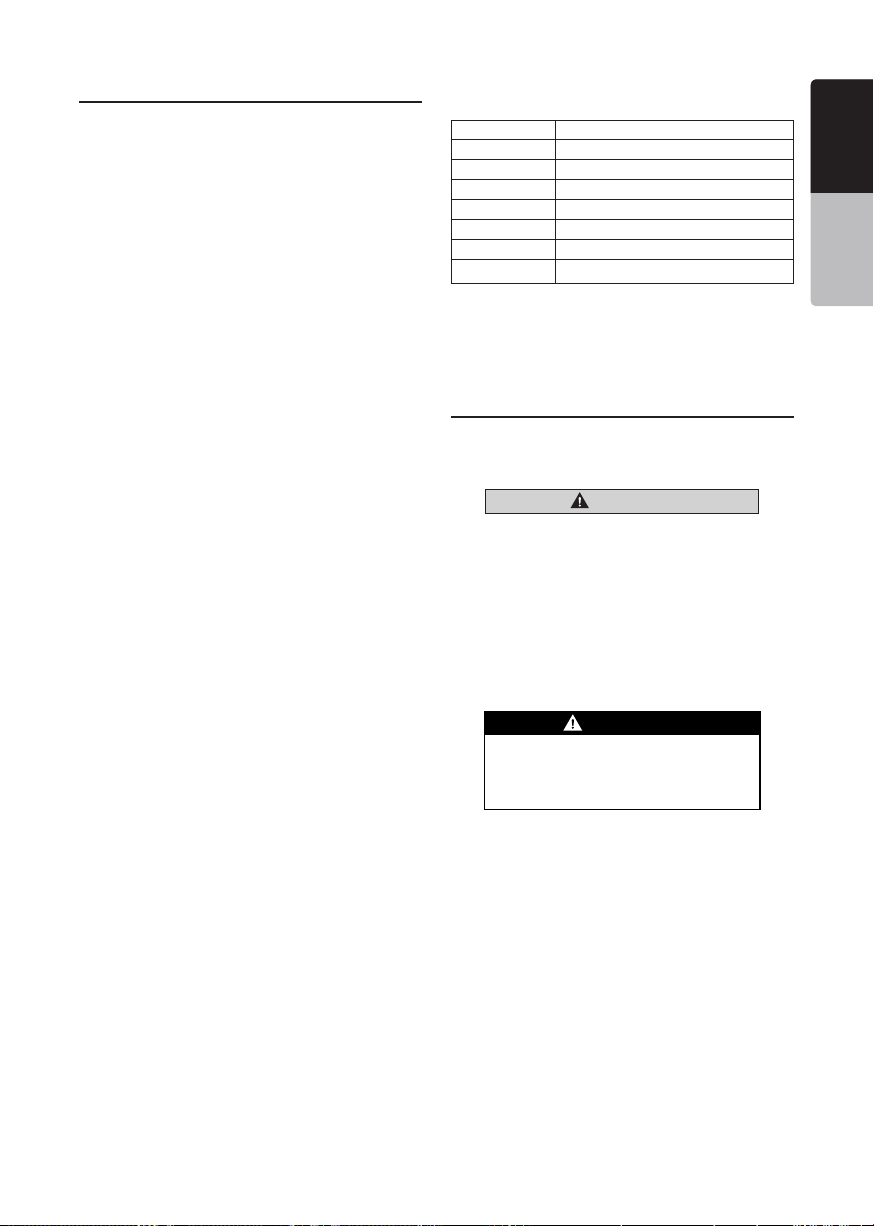
Set rating for parental level control
1.Select Others screen while in Setting mode. Touch
[Parental Control] button. Touch the desired rating for
level control. Use this table to set the parental level.
Kid Safe Kid Safe
G General Audiences
PG Parental Guidance Suggested
PG-13 Parents Strongly Cautioned
PG-R Parental Guidance Restricted
R Restricted
NC-17 No One 17 And Under Admitted
Adult Only Adult
• The contents that the parental level restricts vary
with the country code.
Note: The rating can be selected only under the
password unlocked status, and the limits can be set only
under the password locked status.
Watching to a Disc
1. To load a disc:
Insert the disc into the center of the insertion slot the
label side facing up.
CAUTION
For your safety, the driver should not
insert or eject a disc while driving.
Note:
• Never insert foreign objects into the disc insertion slot.
• If the disc is not inserted easily, there may be another
disc in the mechanism or the unit may require service.
• 8cm (single play) discs cannot be used.
2. Disc starts playing automatically.
WARNING
Some videos may be recorded at higher
than desired volume levels. Increase the
volume gradually from the minimal setting
after the video has started.
Ejecting a disc
1.To eject the disc, open the front panel by pressing
the Open button, then press the eject (image)
button
The play mode then switches to the Tuner mode.
If the disc is left in the ejected position for 10 seconds,
the disc is automatically reloaded.
Note:
If you force a disc in before auto reloading, it may
damage a disc.

18
VX807AU
English
Owner’s Manual
Showing DVD Player Mode Screen
After the disc is loaded, the play mode is automatically
engaged.
Touch any place on the screen to display the DVD
Video menu, touch the screen again to return to the
playback screen.The display will return to the playback
screen if you do not touch the screen for 10 seconds.
1 - Option button
2 - Show Cursor keys button
3 - Previous Chapter/Fast Backward button
4 - Play/Pause button
5 - Next Chapter/Fast Forward button
6 - Elapsed playing time
7 - Seek bar
8 - Total time
9 - Menu List button
10 - System time
11 - Bluetooth status indicator
12 - DVD playback information
13 - Shortcut button
14 - Repeat Switching button
15 - Audio Channel switching button
16 - Subtitle switching button
17 - Angle button
18 - Direct chapter or title searching button
19 - Information button
Operate the DVD Player Menu
You can select the button items displayed in the DVD
menu by directly touching them.
Play/Pause Playback
1. Touch [
] button to pause during playback.
2. Touch [ ] button again to resume playback.
Skip (Search) a Chapter
1. Touch [ ] or [ ] button during playback.
Chapters are skipped down or up from current
locations, as many times as the button is touched, and
then playback starts.
Skip use seek bar
Touch the spherical [ ] on seek bar and drag it to any
position where you want to start playback.
Fast Forward/Fast Backward
1. Touch [ ] or [ ] button and hold 2 seconds to
start fast backward or fast forward during playback.
The playback speed starts at 2x, then will increase
to 4x, 8x, and 16x. Release the button will continue
playing with normal speed.
Note:
• No audio is reproduced during fast forward and fast
backward operation.
• The fast forward and fast backward speed may differ
depending on the disc.
Search function
You can locate the beginning of a scene using the
chapter numbers or title numbers recorded on the
DVD Video disc.
1. Showing the DVD Video menu, touch [ ] button.
The Key Pad screen appears with the chapter/Title
number input mode.
Touching [
] button turns the Key Pad to the
chapter number input mode.
Touching [
] button turns the Key Pad to the
title number input mode.
• Title
A large segment to divide the data area of the disc.
• Chapter
A small segment to divide the data area of the disc.
14 15
16
19
18
13
101112
1
2
3
5 6
8
9
4
7
17
 Loading...