


130U
Canon
SURE SHOT
130u
SURE SHOT
130u
PR
SUP
PR
/AA
IR130
AAA
SUPER130
[in ■■i
[E] Instructions
[S] Instrucciones
[F] Mode d'empioi
® instrugoes

Handling Precautions
1. This camera is not resistant to water, and should
not be used outdoors if it is raining or snowing. If it
is accidentally dropped in water, contact an
authorized Canon service facility Keep the camera
out of salt spray and excessive humidity. If used at
the beach, clean it thoroughly afterward with a dry
cloth
2. Store the camera in a cool, dry, dust-free place. Be
sure to keep the camera out of direct sunlight, and
away from “hot spots" such as the trunk or rear
window shelf of a car. Avoid places where
mothballs are used, and use a desiccant in
excessive humidity
3. Do not attempt to disassemble the camera
yourself, since there is high-voltage circuitry inside.
4. The battery may explode or cause burns if
disassembled, recharged, shorted, exposed to high
temperatures, or disposed of in a fire.
5. Use a blower brush to remove dust and sand from
the lens and inside the camera. Do not apply any
fluids to the lens or body. Take the camera to an
authorized Canon service facility for a more
thorough cleaning if necessary.
6 Film passing through X-ray examinations at an
airport may be exposed and ruined even when
loaded in the camera. Request a different method
of inspection to avoid damage
7. Color reproduction may be adversely affected if the
film is left in the camera for a long time. Always
develop exposed film promptly
Convention
The following convention is used in these
instructions:
^ Warnings you should observe when using the
^ camera.
[3 Additional information on using the camera.
i
Refer to the page number indicated In parenthesis.
{->•’), for further details
[1-2

This device complies with Part 15 of the FCC Rules.
Operation is subject to the following two conditions: (1)
This device may not cause harmful interference, and (2)
this device must accept any interference received,
including interference that may cause undesired
operation
Do not make any changes or modifications to the
equipment unless otherwise specified in the instructions. If
such changes or modifications should be made, you could
be required to stop operation of the equipment
This equipment has been tested and found to comply with
the limits for a class B digital device, pursuant to part 15
of the FCC Rules. These limits are designed to provide
reasonable protection against harmful interference in a
residential installation. This equipment generates, uses
and can radiate radio frequency energy and, if not
installed and used in accordance with the instructions,
may cause harmful interference to radio communications
However, there is no guarantee that interference will not
occur in a particular installation If this equipment does
cause harmful interference to radio or television reception,
which can be determined by turning the equipment off
and on, the user is encouraged to try to correct the
interference by one or more of the following measures;
• Reorient or relocate the receiving antenna
• Increase the separation between the equipment and
receiver.
• Consult the dealer or an experienced radio/TV
technician for help.
This digital apparatus does not exceed the Class B
limits for radio noise emissions from digital apparatus
as set out in the interference-causing equipment
standard entitled "Digital Apparatus". ICES-003 of the
Industry Canada.
Get appareil numérique respecte les limites de bruits
radioélectriques applicables aux appareils
numériques de Classe B prescrites dans la norme
sur le matériel brouilleur: "Appareils Numériques",
NMB-003 édictée par l’Industrie Canada
C€
The CC Mark is a Directive coniormity
mark of the European Community (EC)

Thank you for purchasing this Canon product.
Before taking pictures, please read these instructions
carefully for a thorough understanding of how the
camera operates.
Contents
Handling Precautions
..
.............
.
..........
..,.,....2
Contents...........
.
....
...»
....................................
4
Nomenclature
..............................................
6
H I Basic Operations
■ Loading the Battery
.....................................
10
Loading the Film.,»,...»
....
»..............
.
............11
Removing the Film......................................12
Rewinding the Film in Mid-roll
............
12
Turning the Power On.»............................ 13
Checking the Battery Level
.......
» »
...........
13
Taking Pictures in Flash AUTO Mode
.......
14
Shutter Button
......................................
15
Green/Orange Lamps
...........................
16
Using Focus Lock
...
.
.........
»
.......
.
...........
17
Close-up Photography
.......
.
....
...»...........18
Subjects Difficult to Autofocus
.....
»»..»19
Holding the Camera
...............................
19
CÎ) Shooting with Self-timer
.......................
20
o ■ Advanced Operations
^ I Changing the Flash Mode.........................
.
.....
22
AUTO^ Flash AUTO
................................
23
AUTOV^ Flash AUTO with Red-eye
Reduction
.......
»
........................
23
> Flash ON (Fires for all shots)
.............
23
® Flash OFF (Never fires)
......................
23
+ 1.5®—1.5® Flash OFF with Manual
Exposure Compensation..24
[ Night Portrait (Slow-sync)
...
»
.....
24
U-4

3|
Using-Red-eye Reduction Function
Effectively
.
...........................................
25
Setting the Custom Functions
.......
.
...........
26
i Shooting with Remote Control eiazEra ........29
Replacing the Remote Control Battery
..
31
Imprinting the Date and Time .....32
Setting the Date and Time
....
.
................32
Imprinting Captions ,,,34
Selecting the Language.-..
.....................
35
Additional Information
Troubleshooting
...................................
.....36
Specifications..............................................38
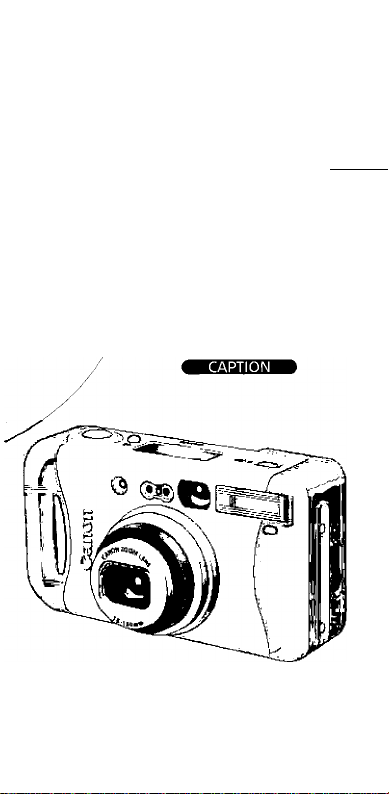
Please note that these instructions are for both the
model with the caption function and model without
caption function. Information relevant only to the
model with the caption function is marked with the
Gnzsa symbol
The separately sold Remote Control RC-5 is
available for use with the model only.
H-5
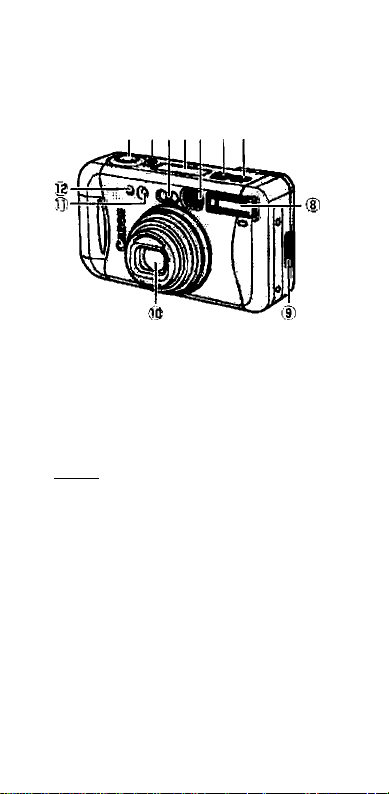
Nomenclature
®
Shutter button (^14)
Ci)| Self-timer/Remote control GBZEm button
(^20, 20, 29)
AF' sensor/Metering window
LCD panel (-^8. 9)
Viewfinder window
[MODE! Mode button (—>32, 34) cfiiUbi»
Flash mode button (->22, 28, 32-34)
Flash
Back cover release lever
Press this lever down to open the back cover.
Lens
Red-eye reduction/Self-timer lamp/AF*-assist
beam emitter (^20, 23, 25, 30)
In dark places, the AF-assist beam emitter will
light automatically.
Remote control sensor (—>29) i
* AF is an abbreviation for Auto Focus,
[1-6
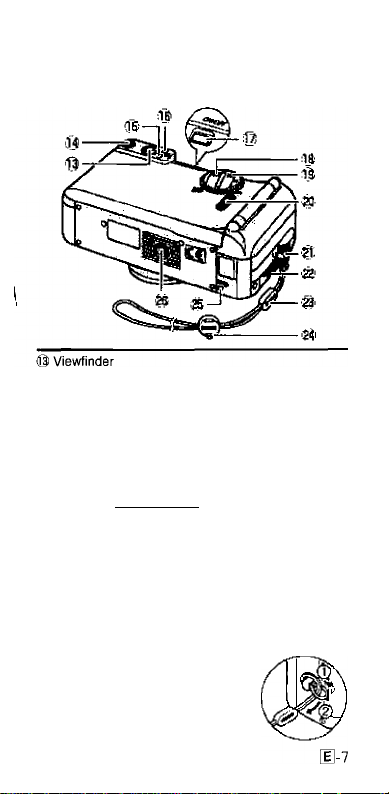
(0) Dioptric adjustment knob
Turn this knob to adjust the focus when you
cannot see the viewfinder image clearly.
© Orange lamp (->16)
© Green lamp (^16)
© Main switch
o Ell Zoom-out (wide-angle)/
Selection W9!nirsnh button (-^14, 33, 35)
® a: Zoom-in (lelephoto)/Set wauimim button
(^14. 28, 32-35)
© Film check window
@ Strap mount
@ Battery compartment cover (^10)
© Strap
@ Strap buckle pin
Use this pin to push the ^0 button.
© ^0 Mid-roll rewind button (^12)
© Tripod socket
Attaching the
Strap

LCD Panel
(Normally, only the required Information is displayed.)
0
'D ®
s-tAUTO
®(D @
1
© Custom Function number
@ Self-timer
© Film mark
© Frame counter
® Battery level indicator (->13)
® Night portrait (Slow-sync)
© Red-eye reduction mark
® ® Flash OFF (Never fires)
@ V Flash ON (Fires for all shots)
® Flash AUTO
(Q) Manual exposure compensation

Nomenclature
iij.
n
'»■
JM88?BS0mo1
-CAPTION DATE tUO,
-AUTOiVi
1.7)
I I
® (i.i
Date and time, caption number or Custom
Function number
Self-timer/Remote control
Frame counter
Film mark
Battery level indicator (^13)
Night portrait (Slow-sync)
Red-eye reduction mark
® Flash OFF (Never fires)
V Flash ON (Fires for all shots)
Flash AUTO
Manual exposure compensation
Caption imprinting
Date and time imprinting
lJ-9
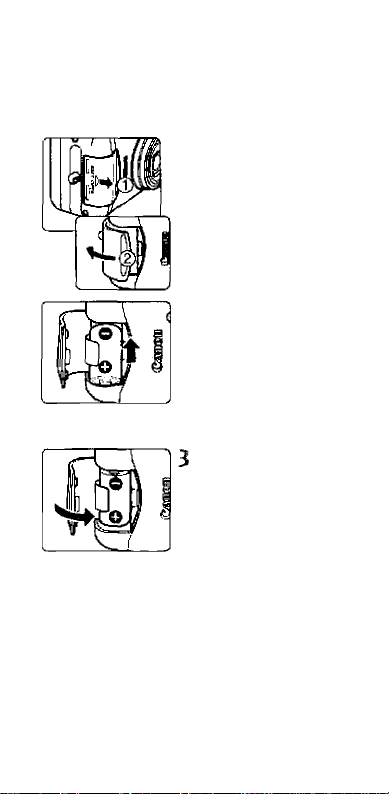
Applicable Battery; One lithium battery (CR2)
Loading the Battery
1 Open the battery
cover.
• Pull the lape to remove
the battery
• Align the + - terminals
correctly and insert the
battery - end first,
• appears on the
LCD panel,
Close the battery
cover.
• Push the cover closed
until you hear a clicking
sound
^The date display “
...........
”
on the LCD panel blinks.
Set the date and time
(^33) <
U-io
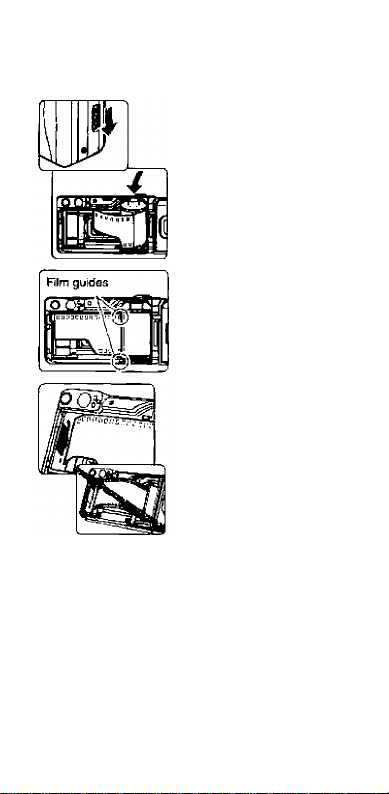
Loading the Film
1 Open the back cover
and load the film.
^ Position the film
correctly between the
film guides.
3 Pull the film out to
the (film leader
position indicator).
• Make sure that there is
no slack in the film when
you pull it out
• If you pull out too much
film, wind the film back
into the cartridge slightly
Close the back cover.
^The film automatically
winds on to the first
frame and “1" appears
on the frame counter.
H-ii
Loading the Film
ra
»A film speed of ISO 400 is recommended.
• The film speed is set to ISO 25 when non-DX
film is loaded. If the film does not have a DX-
code, insert it into the film compartment, close
the back cover and press the shutter button
once or twice.
• For slide (reversal) film, you can use DX-
coded film speeds of ISO 25, 50, 100, 200,
400. 800. 1600 and 3200.
Removing the Film
' ^
t The film rewinds
automatically when it
reaches the end
When S blinks, open the
back cover and remove the
film.
* •
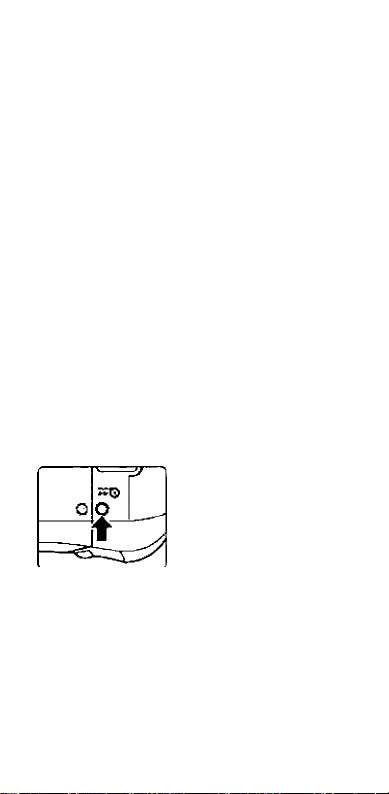
Rewinding the Fiim in Mid-roii
• Use the strap buckle pin on
the strap buckle to press
the ^0 button on the
bottom of the camera.
• Hold the button down until
the film starts to rewind.
H-12
 Loading...