

Page 1

;<4i
CT1-7808-000
V.. .\S4V;ÌÀ
© CANON INC. 2003
PRINTED IN TAIWAN
IMPRIMÉ À TAIWAN
Handling Precautions
Before taking pictures of important events, such as weddings and trips, check
1
to make sure the camera is working properly.
This camera is not resistant to water, and should not be used outdoors if it is raining
2.
or snowing. Keep the camera out of salt spray and excessive humidity. If used at
the beach, clean it thoroughly afterward with a dry cloth.
3. Store the camera in a cool, dry, dust-free place. Be sure to keep the camera out of
direct sunlight, and away from “hot spots” such as the trunk or rear window shelf of a
car. Avoid places where mothballs are used, and use a desiccant in excessive humidity.
4. Do not attempt to disassemble the camera yourself, since there is high-voltage
circuitry inside.
5. The battery may explode or cause burns if disassembled, recharged, shorted,
exposed to high temperatures, or disposed of in a fire.
6. Use a blower brush to remove dust and sand from the lens and inside the camera.
Do not apply any fluids to the lens or body.
Convention
O Warnings you should observe when using the camera.
[^ Additional information on using the camera.
Please note that these instructions are for both the model with the date function and
model without date function. Information relevant only to the model with the date
function is marked with the symbol.
Page 2

Nomenclature
(D ®@ © ® ® @
Attaching the Strap
®@® ® ® ®
Front
0) Shutter button
(2) Zoom-in (telephoto)/
Set eyiDJ Jie button
(3) Zoom-out (wide-angle)/
Selection button
0 LCD panel
(5) Ci) Self-timer button
(6) IMODEI Mode button
Q) ^<§> Flash mode button
cl) Back cover release lever
(9) Flash
QP; Viewfinder window
OPAF sensor/metering window
Soiling on the AF sensor causes Tocu&my
problems. Wipe off any dust or dirt before taking
pictures.
Main switch
Pressing the main switch turns the camera on and
sets the lens to the wide-angle position. If you
press it again, the lens retracts, the lens cover
closes and the camera switches off. When you
switch the camera off, the display on the LCD
panel does not disappear.
© Film check window
© Strap
@) Strap mount
Battery compartment cover
Hold this button down until the film starts to
rewind.
Tripod socket
1 I
Mid-roll rewind button
® Lens
Soiling on the lens causes focusing problems.
Wipe off any dust or dirt before taking pictures.
(Q) Red-eye reduction/Self-timer lamp/
AF-assist beam emitter
Page 3

Nomenclature
d)(D(z)
I
Front
Shutter button
(1)
m Zoom-in (telephoto)/
®
Set button
@
[53 Zoom-out (wide-angle)/
Selection button
LCD panel
®
Self-timer button
IMODEI Mode button
^<§> Flash mode button
Back cover release lever
Flash
®
Viewfinder window
OT)
AF sensor/metering window
®®® ® (D d)
Soiling on the AF sensor causes focusing
problems. Wipe off any dust or dirt before taking
pictures.
Lens
Soiling on the lens causes focusing problems.
Wipe off any dust or dirt before taking pictures.
Red-eye reduction/Self-timer lamp/
AF-assist beam emitter
Page 4
®—^
©
888888 -fi.!
iJIi lilE—®
I
--- -- -
@
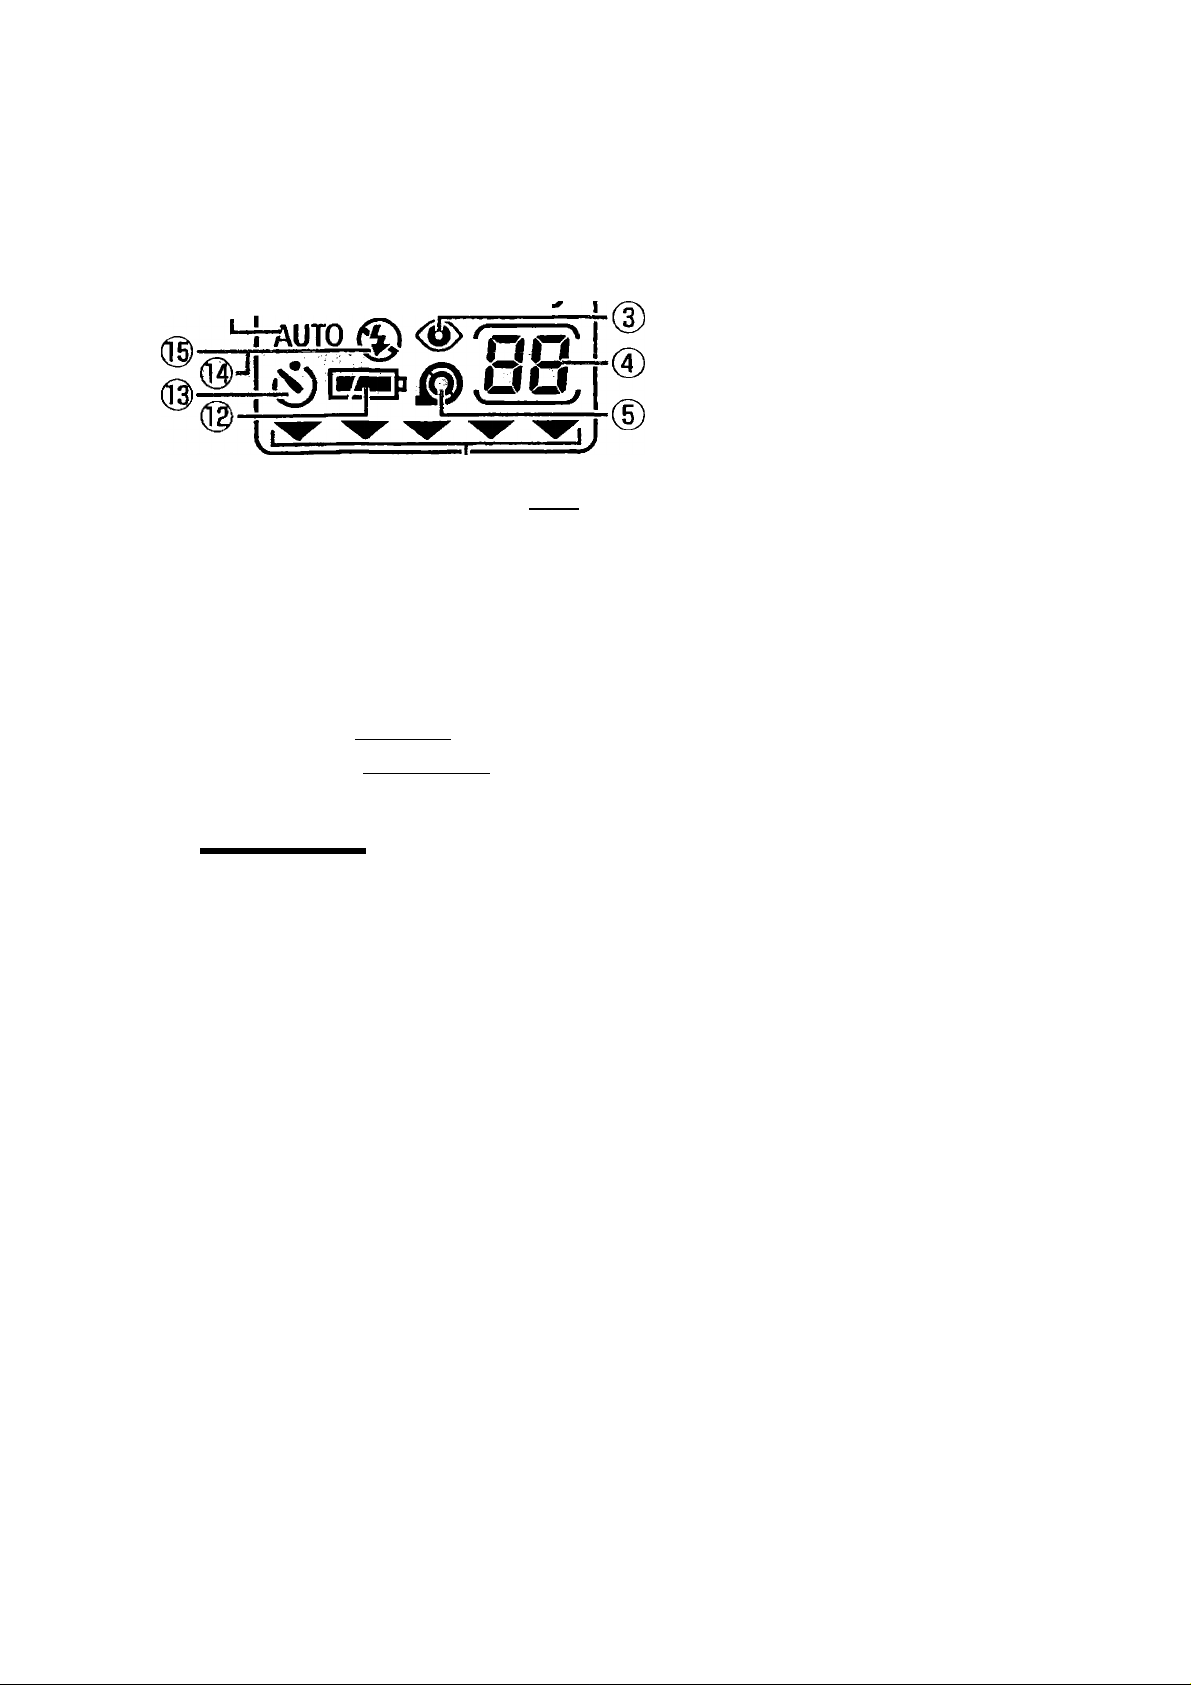
LCD Panel
(Normally, only necessary
information displayed)
0 Date mssami
Custom Function number
@ Manual exposure compensation
(3) Red-eye reduction mark
® Frame counter
(D Film mark
(D Real-time release
© Close-up
Mm
'88 SS:;88-h-5-t|
84^)
®-%, IS
©
■—AUT^<^ 'a^o)
«¡p 05“ ®
—©
® Mode selection indicator
® Portrait
® Night portrait
dj) Action
Battery level indicator
Self-timer
® V Flash ON (Fires for all shots)
® Flash OFF (Never fires)
Autoflash
®®
O When “H” is displayed, remove the battery from the camera, wait until “H”
I is no longer displayed and then reload the battery.
Page 5

-. o
Loading the Battery and Checking the Battery Level
■ Loading the Battery
Applicable Battery: One lithium battery (CR2)
^ Open the battery cover.
Load a new battery.
1
• Align the + - terminals correctly and
insert the battery - end first.
^The [»i> appears on the LCD panel.
Close the battery cover.
• Push the cover closed until you hear a
clicking sound.
■^The date display “
........
” on the LCD
panel blinks. Set the date and time.
O The camera will not operate if the + - terminals are aligned incorrectly.
■ Checking the Battery Level
Check that appears on the LCD panel when you turn the power on.
Change the battery if is displayed.
/ I S
(lit) The battery level OK.
S=l>
\J_y
/ I \
(lit) Prepare a new battery.
(blinking) Load a new battery.
A new battery will generally provide enough charge to shoot approx.
14 rolls of 24-exposure film (based on Canon’s Standard Test Method at
normal temperature and with 50% flash use). At low temperatures (-10°C/
14°F), the battery life is approximately one third of the normal figure.
p|| When you take consecutive shots using the flash, the battery level may
drop off temporarily and prevent the LCD panel from displaying
information correctly.
Page 6

Loading and Removing the Film
■ Loading the Film
’I Open the back cover and load the
film.
• Push the back cover release lever
down.
^ Position the film correctly
between the film guides.
Pull the film out to the
3
(film leader position indicator).
• Make sure that there is no slack in the
film when you pull it out.
• If the edge of the film leader goes
beyond the film leader position
indicator, rewind some of the film back
into the cartridge.
Close the back cover.
■►The film automatically winds on to the
first frame and “1” appears on the
frame counter.
• If the frame counter shows a blinking
“0”, the film did not load correctly. Load
the film again.
Film guides
/ (Oi;)
mo
loaQCoaaon l\ci i
.(i j
1
ISO 400 DX-coded film is recommended. The film^speed is set to ISO 25
when non-DX film is loaded. If the film does not have a DX-code, insert it
into the film compartment, close the back cover and press the shutter
button once or twice.
■ Removing the Film
The film rewinds automatically when it
reaches the end.
When the film is fully rewound, the frame
counter shows “0” and the blinks. Then
open the back cover and remove the film.
• If the © is not blinking, press the button.
o If you take more pictures than stipulated on the filrn, the (ast frame is cut
during developing, and the date and time may not be Imprinted on the last
frame.
Page 7

Taking Pictures in Autoflash (Full>auto) Mode
As long as the subject is in the wide area AF frame, the subject will be in
focus. The flash also fires automatically in low light or backlit conditions.
^ Press the main switch to turn the camera on.
^ Decide on the size of your subject.
• Pressing DC zooms in on your subject while pressing Iii3 zooms
out for a wide-angle shot.
Set the focus.
3
• Position the wide area AF frame over
your subject and lightly press the
shutter button halfway down.
. ^When the subject is in focus, the green
lamp lights.
• Keep the shutter button pressed
halfway.
4 Compose the shot and take the picture.
• Press the shutter button fully.
• Press the shutter button slowly and gently.
9 Holding the Camera
Grasp the camera firmly with both hands so that it does not move, and
make sure that your hair, fingers or camera strap etc. do not come into
contact with the lens, the AF sensor/metering window or the flash.
■• Shutter Button
The shutter button is a two-stage switch. Lightly press it halfway to
automatically determine focus and exposure. Press it fully to take the
picture.
• If the lens is left extended and is not used for 4 minutes, it is
automatically retracted to wide-angle position.
• In dark places, the AF-assist beam emitter will light automatically.
Wide area AF frame
Page 8

O Subjects Difficult to Autofocus
The green lamp may blink 4 times per second for subjects with the
following characteristics that cannot be brought into focus.
In situations like this, focus on something roughly the same distance away
as your subject and lock the focus for the shot.
Main types of subjects where focusing is difficult:
• Subjects in scenes without much contrast, ë.gi blue sky.’^or scenes bf
Plainly one cblor
• Subjects in very dark places ^ '
• Subjects in extreme backlit situations or subjects which are extremely
reflective, e;gT the body of a car^which^ÿves off a strong reflection .
• Subjects in a pHotograph;* some of which are close and sòme of vyhich
are in the distance; e.g. animals in a cage
• Subjects with a repetitive pattern, e.g. continuous windows in a
building,¡etc..
Page 9
Using Focus Lock
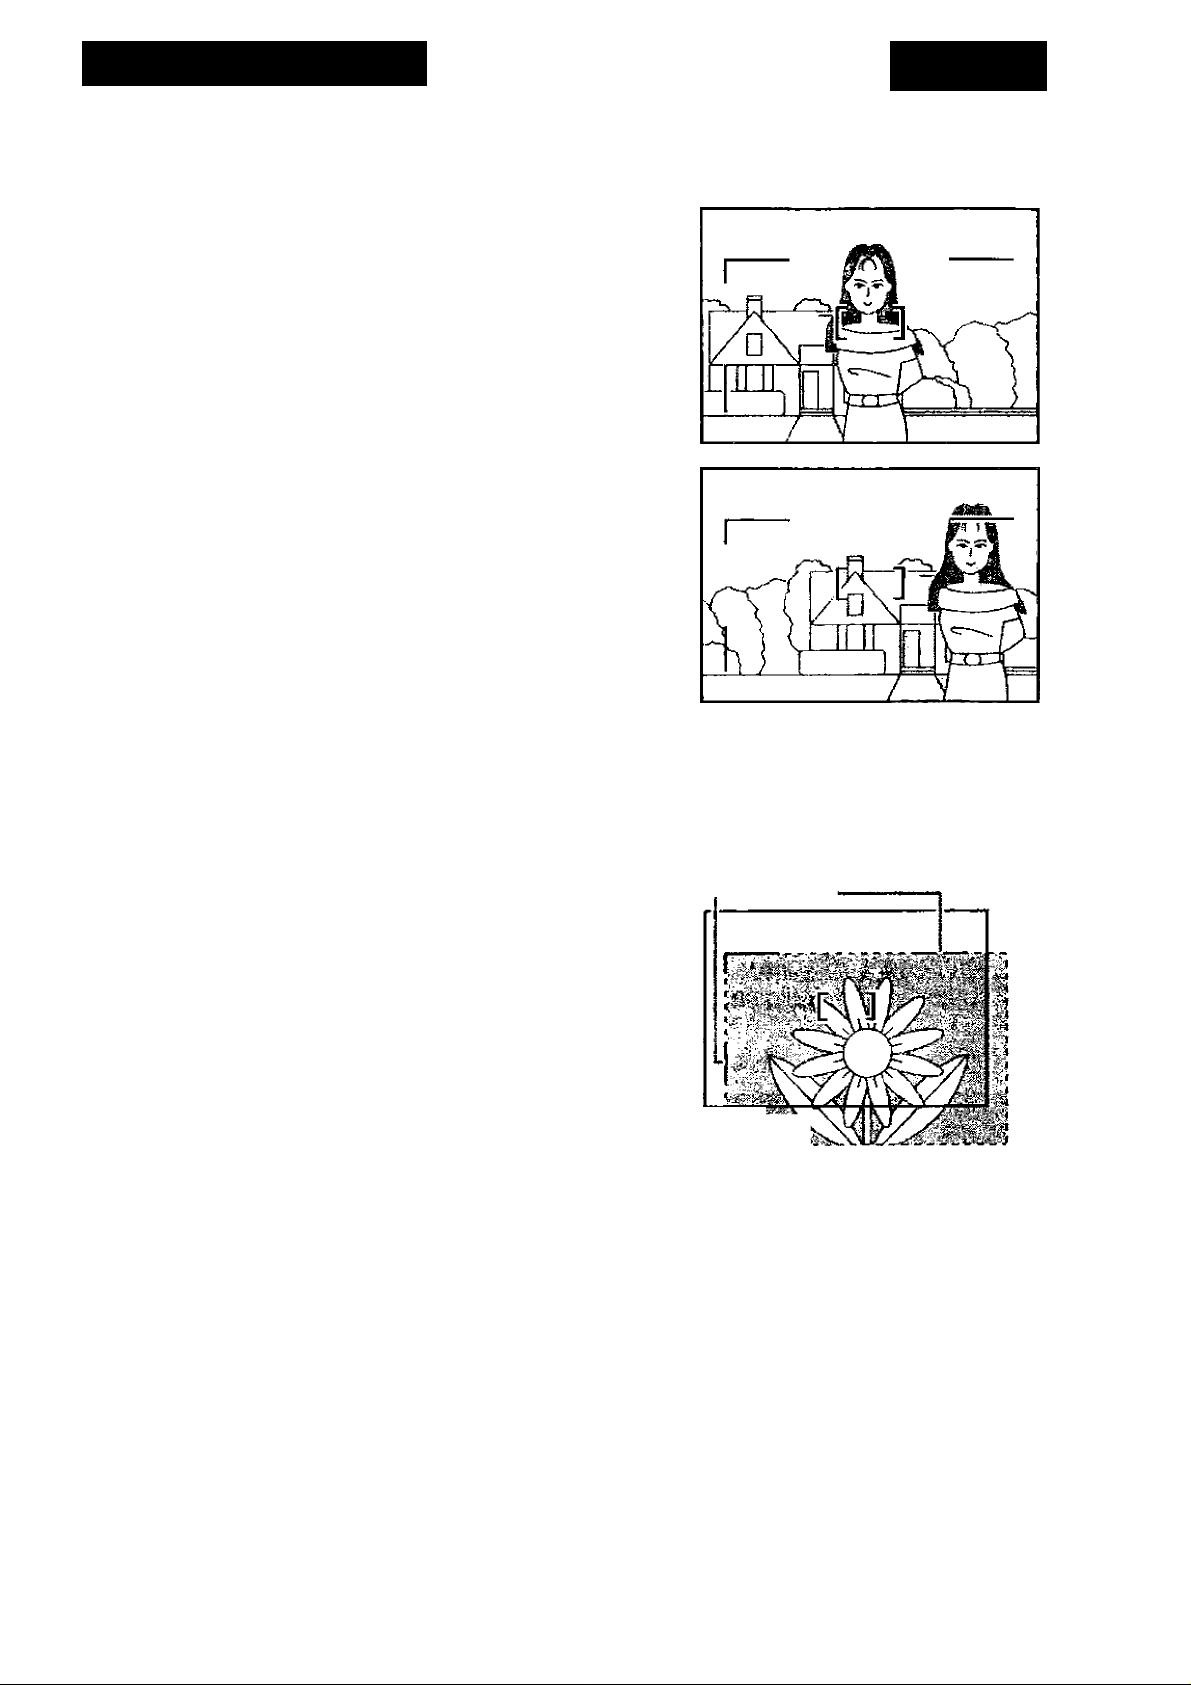
Lock the focus when you want the subject to be off center, or when the
subject is within 1.5 m/4.9 ft. of the camera.
Set the focus.
1
• Position the wide area AF frame over
your subject and lightly press the
shutter button halfway down. Keep the
shutter button pressed halfway.
■ c •'i
Compose the shot and take the
2
■
picture.
• Compose the shot and press the
shutter button fully!
Take care that the distance from the.parneFa to the subject does not
..i change. If the distance does change, lock the focus again^
■ Close-up Photography
When the shooting distance is closer than
1.5 m/4.9 ft., there is a difference between
what you see in the viewfinder and the
picture you actually take, and therefore the
part of the picture outside the close-up frame
Close-up frame
X
will be cut off.
After rocking the focus on your subject, bring
the subject into the close-up frame, compose
the shot and take the picture. Area actually photographed when™
the lens is in the telephoto
position (inside dotted line).
O li the green lamp blinks, move away from the subject until the lamp ptops
blinking.
-Mi;- ..fx
Page 10

Ci) Shooting with SelMimer
The self-timer function allows you to take a picture from a distance away
from the camera when it is attached to a tripod.
"I Set the camera to self-timer mode.
• Press the ci) button,
ci) appears on the LCD panel.
• If you then press the ci) button again,
Ci) disappears and self-timer mode is
cancelled.
^ Compose the picture and press the shutter button.
■►The self-timer lamp blinks and the shutter is released approximately
10 seconds later.
• To cancel the self-timer, press the <S) button again.
AUTO V
Page 11

Shooting with the Mode Button
Select the shooting mode.
e Press the IMODEI button, and align
uses center-point AF to focus in the center of the wide area
AF frame. ' '
with H, *3^, A, (§1.
^ Shooting Moving Objects
This mode selects servo autofocus, which keeps moving objects in focus,
and the continuous shooting function.
o • In low light or backlit conditions, the flash fires automatically.
You may not be able to focus on subjects moving rapidly.
* §► The red-eye reduction function can not be set.
• The green lamp does not light.
• No carnera shake warning is given, ? f
•'*The*camera^c©htf^^ to' adjust the focus for 40 seconds while the
shutter button is held down halfway.
• Even if set, Ihe Real-time Release Custom Function (CF1) will not operate.
Pi Shooting against Dark Backgrounds
Use this mode when you are taking pictures of people against a sunset or
nighttime background.
The flash illuminates the subject and the slow shutter speed captures the
background, allowing you to take beautiful pictures.
• Follow the steps in autoflash mode to take a picture.
• The red-eye reduction function will operate.
O • You cannotichange the flash mode.
• No camera sh^keiwarning is given. Because of the slow shutter speeds
(up to 2 seconds), you must use a tripod to keep the camera steady.
You should also ensure that the sMbject does not move in the moment
’after the flash fires,,, , -
Page 12

^ Shooting Portraits
Use this mode when you want to lessen the impact of the background and
highlight the subject.
The camera automatically zooms in, to a range of 1 to 3.7 m/3.3 to 12.1 ft.
to frame from the waist up of the subject and fires the flash for every shot
to produce highlights in the subject’s eyes.
• Follow the steps in autoflash mode,to take a picture.
• The red-eye reduction function will operate.
^ Shooting Close-up
Use this mode when you want to take close-up pictures of flowers and
insects.
You can get as close to 60 cm/2 ft. to the subject to take a picture. The
shooting distance range is between 0.6 m/2 ft. to infinity.
• Refer to Close-up Photography for the procedure to shoot in close-up.
o The lens.autpiTi^ti_cally zooms and locks into position.
You cannot operate the zoom.
Shooting in Real Time
Press the shutter button down halfway to focus on the subject and then
press the button fully to take a picture in real time. This mode enables you
to take pictures at the best moment.
o If you jDfess the shutter button all the way down in a single movement,
realtime release does not operate.
Page 13

Using Red-eye Reduction Function Effectively
When you use the flash to take photos of people in low light conditions,
their eyes sometimes glow red in the phdtograph. This is referred to as
the red-eye effect and is caused by the light of the flash being reflected off
the retina of the eye.
When the red-eye reduction operates, the red-eye reduction lamp lights
for approximately 1 second before the flash fires. This causes the
subject’s pupils to contract, minimizing the risk of red-eye.
©Take the picture from within 2 m/6.6 ft. of your subject.
©Attract the subject’s attention so that he or she looks at the camera.
• Set the lens to the wide-angle position.
• Raise the available light level as much as possible.
• The effectiveness of the red-eye reduction function varies from person
to person.
O When the red-eye reduction function operates, a picture can not be taken
for approximately^ second (the gi'een Mmp blinks 16 times). Hold down
the shutter button until you hear the sotirld: Of the filrrf winding on^%
Page 14
V<§> Changing the Flash Mode
You can cause the flash to fire for every shot or suppress flash operation
completely to suit the subject or location.
Select the flash mode.
• Press the ><ê> button to select the mode you want.
AUTO ^ Autoflash
In dark places and in backlit conditions, the flash fires
automatically.
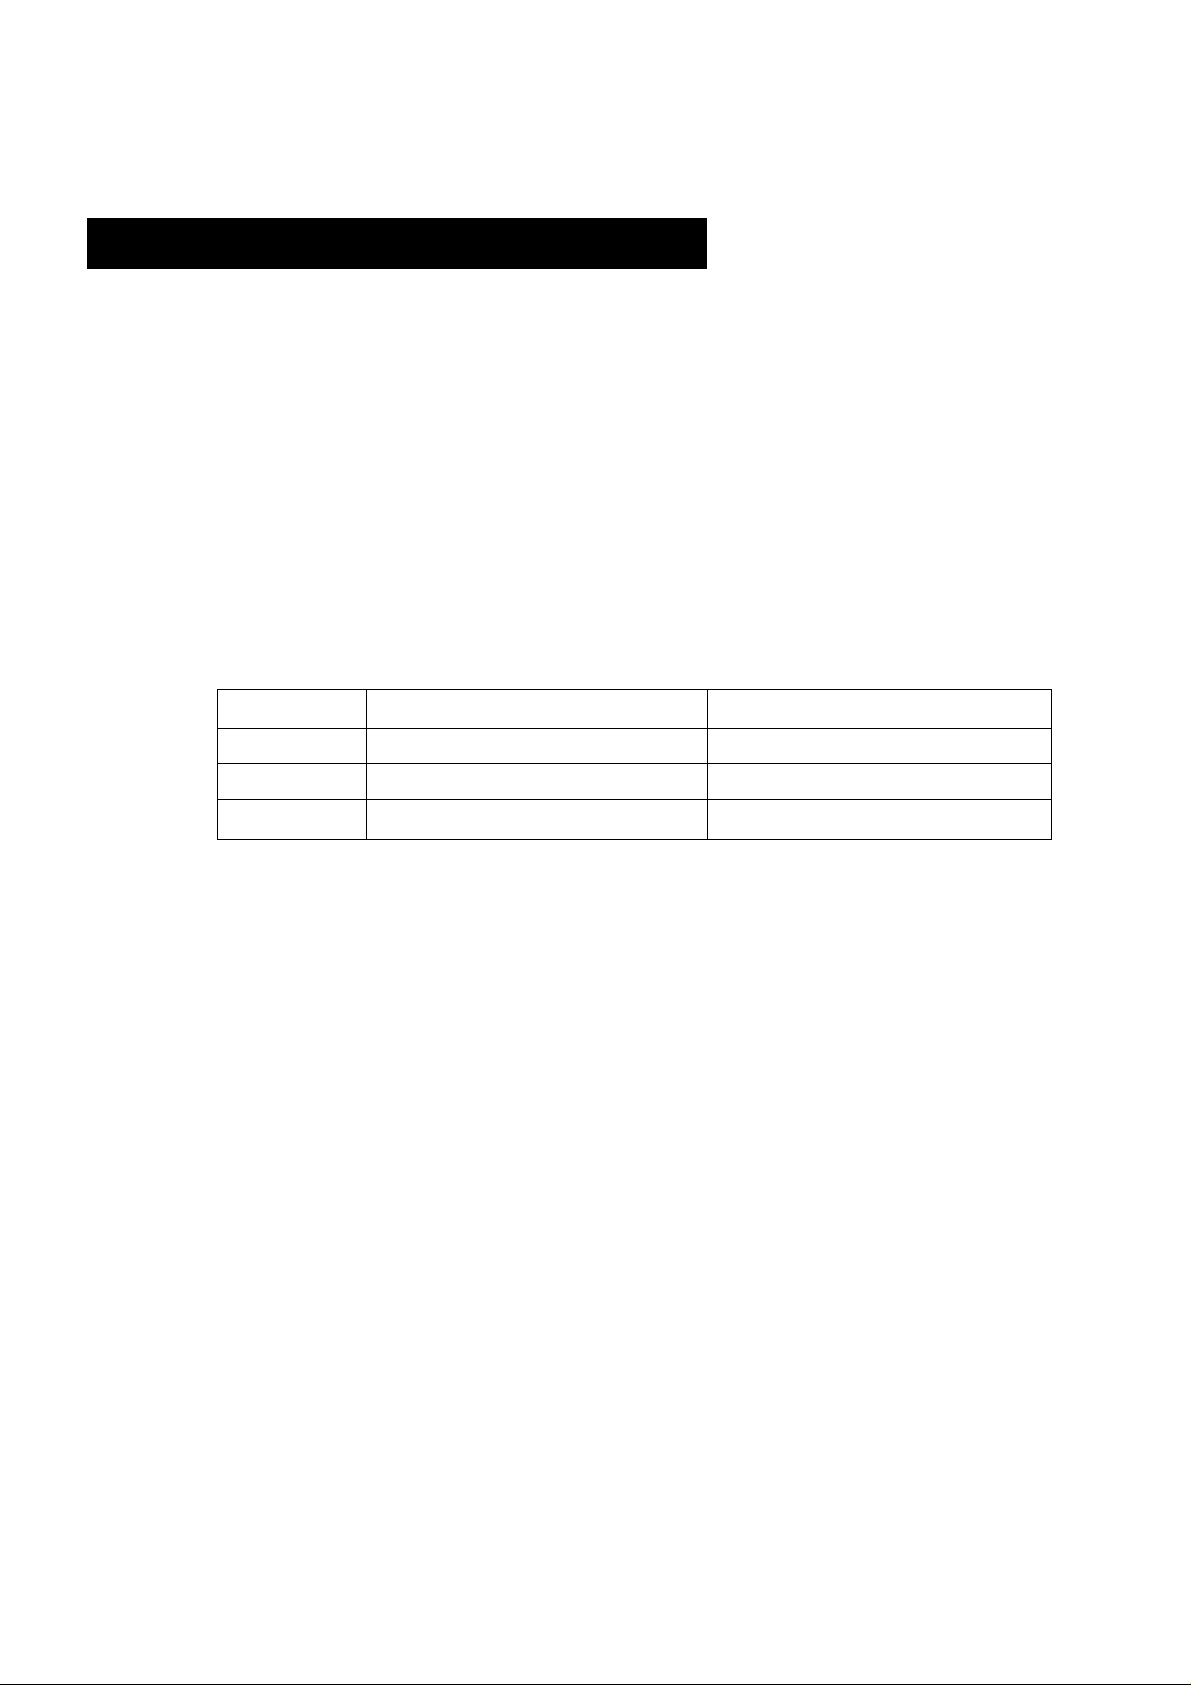
Flash Distance Range (with color print film)
Film speed Wide-angle
ISO 100
ISO 200
ISO 400 0.8-6.8 m (2.6-22.3 ft.)
You can select whether the autoflash mode initially set when
you turn the power on is AUToy<g> or auto^ Set the camera
to the desired autoflash mode and then switch the camera off.
0.8-3.4 m (2.6-11.2 ft.)
0.8-4.8 m (2.6-15.7 ft.)
1.0-2.5 m (3.3-8.2 ft.)
1.0-3.5 m (3.3-11.5 ft.)
1.0-5.0 m (3.3-16.4 ft.)
Telephoto
Page 15

AUTO ^<§> Autoflash with Red-eye Reduction
In dark places, the flash automatically fires after the red-eye
reduction lamp has lit.
%r Flash ON (Fires for all shots)
The flash fires when the picture is taken.
v<§>
-r1.5
“1.5
Flash ON with Red-eye Reduction (Fires for all
shots)
The flash always automatically fires after the red-eye reduction
lamp has lit.
Flash OFF (Never fires)
The flash does not fire.
Flash OFF with Manual Exposure Compensation
There is automatic exposure compensation in backlit
conditions but manual exposure compensation is also optional.
‘-S-T5 Exposure Compensation
You can use this setting to prevent your subject being too
dark (underexposed) when the surroundings are extremely
bright, such as at a ski-resort or in backlit conditions.
• ®“T5 Exposure Compensation
You can use this setting to prevent your subject being too
bright (overexposed) when the surroundings are extremely
dark, such as on a spotlit stage.
o Because of the slow shutter speeds in dark places in ®,
®t1.5 , and ®“i-5 modes, if the camera shake
warning comes on (the green lamp blinks 16 times per
second), you must use a tripod to keep the camera steady.
Page 16
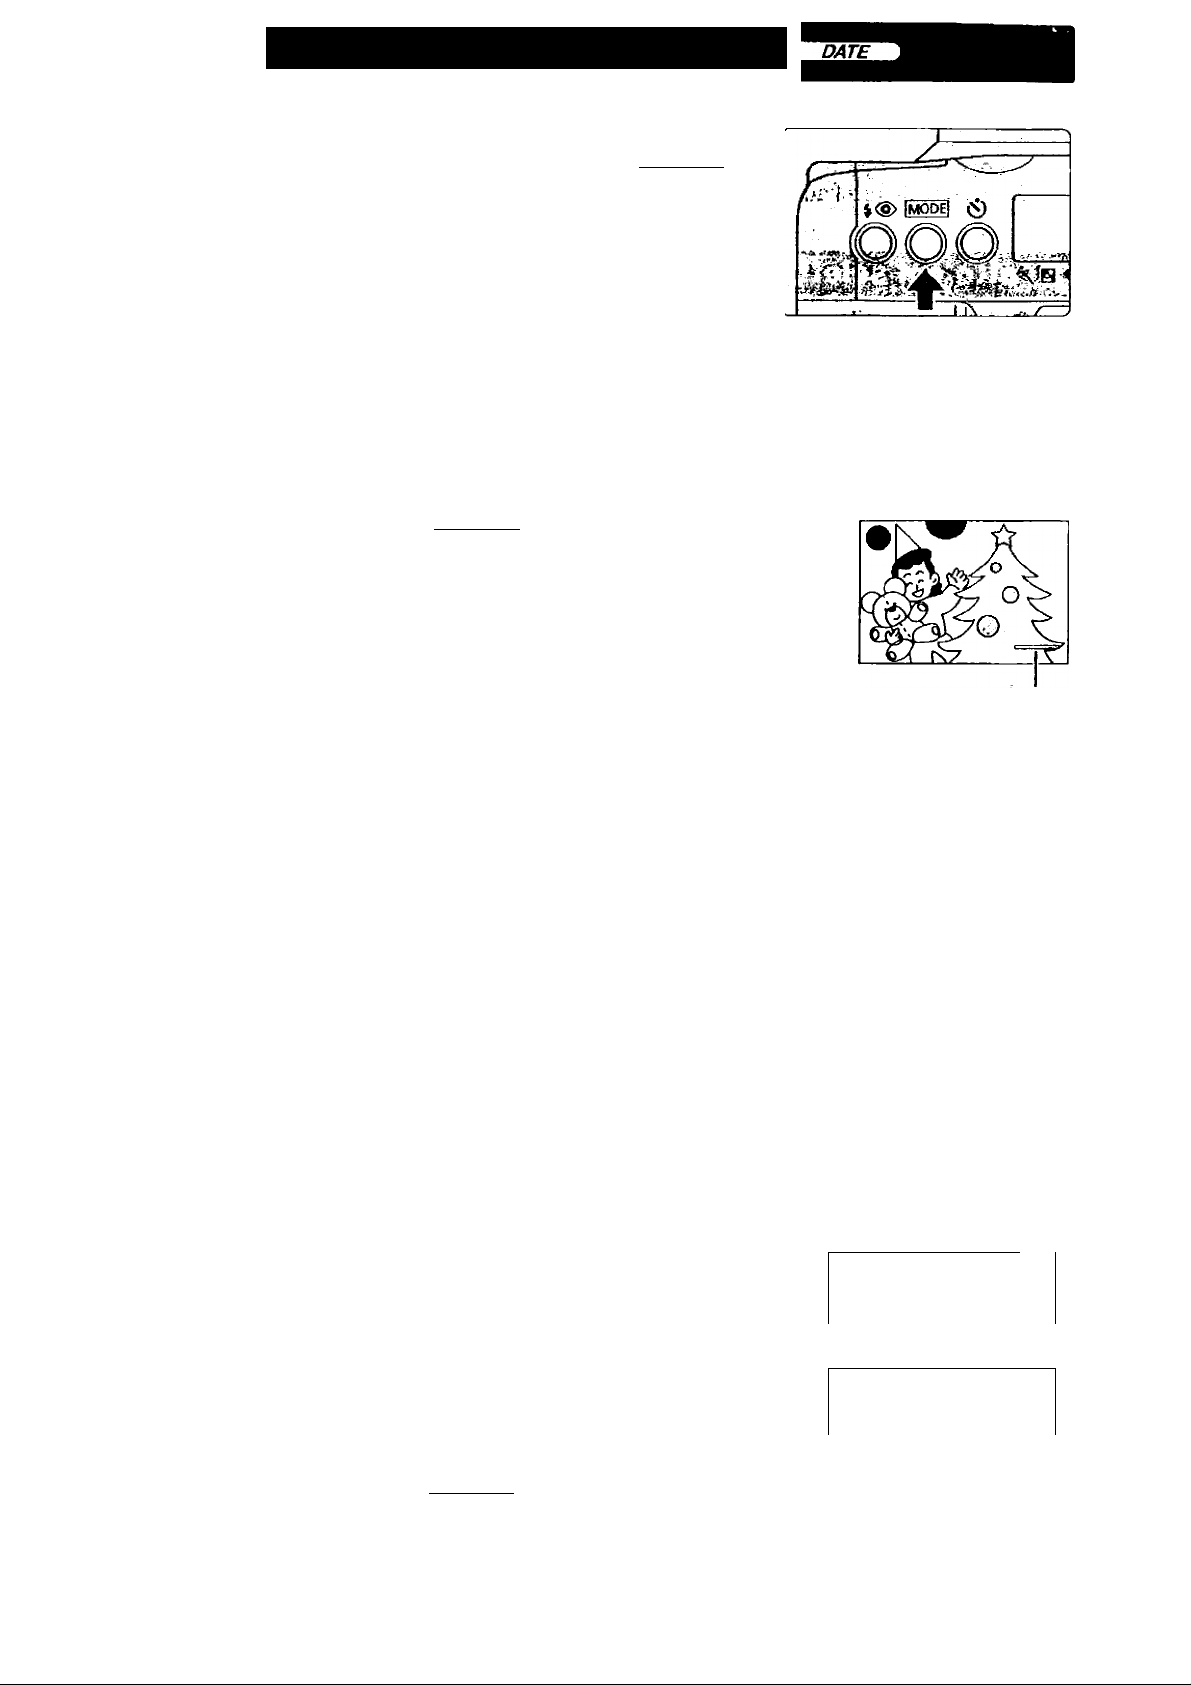
Imprinting the Date ànd Time
^ Select the Date mode.
• With the power off, press the IMODEI
button.
^ Select the date and time
combination.
• By pressing the Dill button, you cant
select the date and time combination.
The display changes in the cycle
shown below.
p <Year/Month/Day> -><Month/DayA'ear>
<No data imprinted>
<Day/Hour/Minute> ■ *—
<Day/MonthAfear>
--------
-
Press the IMODEI button and the power
switches off.
Date/time etc. imprinted here.
■ Setting the Date and Time
When you replace the battery or travel to the different timp zone, use the
following procedure to set or adjust the date ancj tirne settings.
*1 Select the Date mode.
2 Press the [iM] button for more than
2 seconds for date/time set mode.
J Press the button to select the
setting position (numbers blinking).
• Setting position cycles through in the
order year-month-day-hour-minute-(:).
4 Press the CfU button to set the
number.
Setting the Date
-I-
Jnu- ;3n
u “ (U Cu
" I ''
, ''
nti_ <n_’3n
U I iUtZU
r ^ ^
nti- O-Tin
U I (C €_u
-I-
' «
^ I ''
^ Repeat 3 and 4 above to set all
digits of the date and time.
• Pressing the II^II button while is blinking
resets the seconds (;) setting to zero.
Setting the Time
^ * Z '
- HriPH
" 1 ''
▼
^ Finish setting the date and time.
• Press the [♦♦♦] button and once stops
blinking, date and time setting is
completed.
• Press the IMODEI button and the power
switches off.
Each time the button is pressed, the number increases by one^ If kept
pressed, the number increases continuously. ''
*
^ 1 ^
íE-íSO-
^ \ ^
Page 17

Setting the Custom Functions
You can customize the functions listed below to suit your preferences or
the photography conditions.
^ Set the camera to Custom
Function setting mode.
CF
i - n
I u
• With the power off, hold down the Ci)
button and press the button.
[n}>
■♦•“CF 1-0” appears on the LCD panel.
Select a function.
• Each time you press the LlH button, the Custom Function number
changes in the cycle shown below.
CF1 -♦ CF2 -♦CFa CF4CF5
3 Set the function.
• Press the i<§> button to change the setting display to 1 (function
enabled).
Press the V<§> button again to change the setting to 0 (function
disabled).
• Turning the power on completes the settings.
CF1 ; Real-time Release
Refer to (SI Shooting in Real Time for information on using the
Real-time Release function.
Zi
CF2: Shooting Mode and Flash Mode Memory
Stores the shooting mode and the flash mode in memory
immediately before the camera is switched off. Useful when you
always want to set the shooting mode and the flash mode to a
particular mode.
CF3: Disabling Automatic Film Rewind
Useful for situations where you do not want the sudden sound of the
film rewinding. When you reach the end of the roll, the number on
the frame counter and the © blink. Press the  button to start
film rewinding.
CF4; Center-point AF
A convenient function when you want to place your subject off center
(using focus lock) or focus on one particular subject.
The subject must be positioned in the center of the wide area AF
frame.
CF5: Continuous Shooting
While the shutter button is pressed, you can take continuous shots.
[^ • The Custom Functions were all set to zero (0) at the factory setting.
• The Custom Function settings are retained even when you switch the
camera off and on, replace the film, or replace the battery.
Page 18

Major Specifications
Type: Fully-automatic 35 mm lens-shutter AF camera
Image Size: 24 x 36 mm
Lens: Canon zoom lens 38-150 mm f/5.6-11.3
Focusing: AIAF
Viewfinder Coverage: Approx. 84%
Viewfinder Information: Picture frame, Wide area AF frame, Close-up frame
Green lamp: Camera ready indicator/too-close warning/focusing-not-possible
warning/release lock while the red-eye reduction lamp is lit/
camera shake warning
Shooting Distance: Wide-angle; 0.8 m (2.6 ft.)-infinity
Telephoto; 1.0 m (3.3 ft.)-infinity
Close-up; 0.6 m (2 ft.)-infinity
Filnfi Speeds; DX-coded ISO 25-3200 set automatically in full-stop increments
Film Transport: Automatic, mid-roll rewind
Power Source: One CR2 lithium battery
Battery Life: Approx. 14 rolls (24-ex. • normal temperature with 50% flash use)
Dimensions (W x H x D): 107 x 58.7 x 51.5 mm/4.2 x 2.3 x 2 in.
Weight: 200 g/7.1 oz. (excluding battery)
• All the specifications above are based on Canon’s testing and measuring
standards.
• Specifications and physical appearance are subject to change without notice.
 Loading...