


BUSH - CD/DAB Hi-Fi Micro System
Installation & User Instructions – Please keep for future reference |
259/3089 (D) |
AUDIO IN |
Important – Please read these instructions fully before installing or using
These instructions contain important information which will help you get the best from your appliance and ensure safe and correct installation, use and maintenance.
If you need help or have damaged or missing parts, call the Customer Helpline: 0870 600 3030
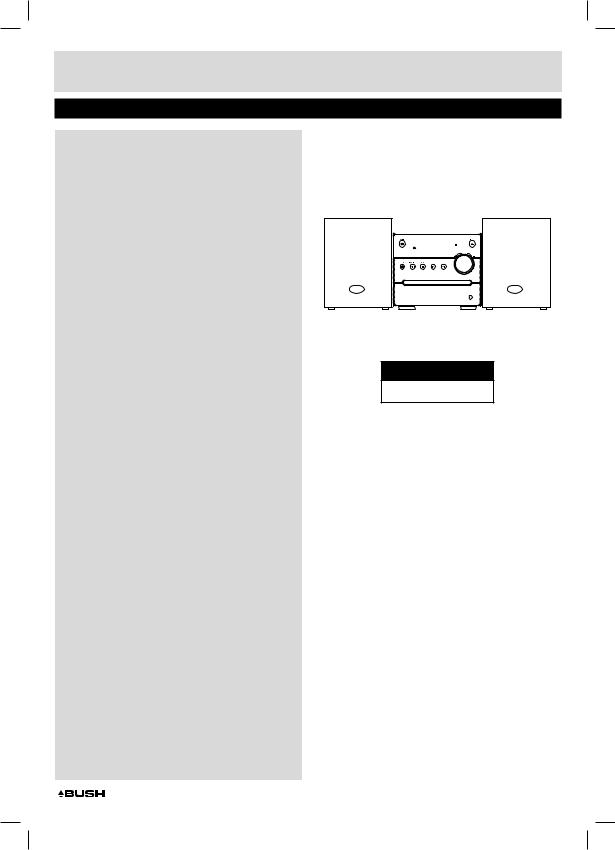
Table of contents
Accessories included............................ |
3 |
Overview of controls. . . . . . . . . . . . . . . . . . . . . . . . . . . . . |
3 |
Preperation for use. . . . . . . . . . . . . . |
4 |
Remote control battery installation.. .. .. .. .. .. .. .. .. .. .. .. .. .. |
4 |
Connecting the loud speakers. . . . . . . . . . . . . . . . . . . |
4 |
Connecting the mains power.. . . . . . . . . . . . . . . . . . . . |
4 |
Standby mode. . . . . . . . . . . . . . . . |
. 4 |
General operation . . . . . . . . . . . . . . . |
4 |
Volume controls. . . . . . . . . . . . . . . . . . . . . . . . . . . . . . . . . |
4 |
Mute function.. . . . . . . . . . . . . . . . . . . . . . . . . . . . . . . . . . . |
4 |
Tone controls.................................... |
5 |
DSP effects .. . . . . . . . . . . . . . . . . . . . . . . . . . . . . . . . . . . . . |
5 |
Loudness function.. . . . . . . . . . . . . . . . . . . . . . . . . . . . . . |
5 |
Switching modes................................ |
5 |
DAB (Radio) operation. . . . . . . . . . . . . |
5 |
Positioning the antenna.. . . . . . . . . . . . . . . . . . . . . . . . . |
5 |
Auto scan mode.. . . . . . . . . . . . . . . . . . . . . . . . . . . . . . . . . |
5 |
Manual tuning.. . . . . . . . . . . . . . . . . . . . . . . . . . . . . . . . . . |
6 |
Storing station presets.. . . . . . . . . . . . . . . . . . . . . . . . . . |
6 |
Recalling a station preset.. . . . . . . . . . . . . . . . . . . . . . . |
6 |
Display modes.. . . . . . . . . . . . . . . . . . . . . . . . . . . . . . . . . . |
6 |
Secondary services .. . . . . . . . . . . . . . . . . . . . . . . . . . . . . |
7 |
Pruning .. . . . . . . . . . . . . . . . . . . . . . . . . . . . . . . . . . . . . . . . . |
7 |
DRC ( Dynamic Range Control ).. . . . . . . . . . . . . . . . . . |
7 |
FM (Radio) operation . . . . . . . . . . . . . |
7 |
Scanning for stations .. . . . . . . . . . . . . . . . . . . . . . . . . . . |
7 |
Scan Modes..................................... |
7 |
Storing station presets.. . . . . . . . . . . . . . . . . . . . . . . . . . |
8 |
Recalling a station preset.. . . . . . . . . . . . . . . . . . . . . . . |
8 |
Display modes.. . . . . . . . . . . . . . . . . . . . . . . . . . . . . . . . . . |
8 |
CD operation . . . . . . . . . . . . . . . . . |
8 |
Playback.. . . . . . . . . . . . . . . . . . . . . . . . . . . . . . . . . . . . . . . . |
8 |
SkippingTracks.. . . . . . . . . . . . . . . . . . . . . . . . . . . . . . . . . |
8 |
Fast SearchingTracks.. . . . . . . . . . . . . . . . . . . . . . . . . . . |
8 |
Repeat Operation.. . . . . . . . . . . . . . . . . . . . . . . . . . . . . . . |
8 |
Numeric buttons.. . . . . . . . . . . . . . . . . . . . . . . . . . . . . . . . |
8 |
Programme playback.. . . . . . . . . . . . . . . . . . . . . . . . . . . |
9 |
Random CD Operation .. . . . . . . . . . . . . . . . . . . . . . . . . . |
9 |
Connecting an external audio device. . . . . . |
9 |
DAB availability. . . . . . . . . . . . . . . |
9 |
UK Mains plug information. . . . . . . . . |
10 |
Technical specifications. . . . . . . . . . . |
10 |
Care & maintenance. . . . . . . . . . . . . |
10 |
Disc handling information . . . . . . . . . . |
10 |
Disposal information. . . . . . . . . . . . . |
10 |
Product Code
CMC6DAB
Page 1
Safety information
Important – Please read these instructions fully before using
CAUTION: TO REDUCETHE RISK OFELECTRIC SHOCK,DO NOTREMOVE ANYCOVER.NO USER-SERVICEABLE PARTS INSIDE,REFER ANYSERVICINGTO QUALIFIED SERVICE PERSONNEL.
•Please read this owner’s guide
•Please take the time to follow the instructions in this owner’s guide carefully.. It will help you set up and operate your system properly and enjoy all of its advanced features..
•Please save this owner’s guide for future reference..
•The product label is located on the back of the product..
•Heed all warnings - on the product and in the owner’s guide..
•Do not use this apparatus near water or moisture..
•Do not use this product near a bathtub,washbowl, kitchen sink,and laundry tub,in a wet basement, near a swimming pool,or anywhere else that water or moisture is present..
•Only use attachments/accessories specified by the manufacturer..
•Unplug this apparatus during lightning storms or when unused for long periods of time - to prevent damage to this product..
•Refer all servicing to qualified service personnel
•Servicing is required when the apparatus has been damaged in any way:such as liquid has been spilled or objects have fallen into the apparatus;the
apparatus has been exposed to rain or moisture,does not operate normally,or has been dropped -
•Do not attempt to service this product yourself..
•Opening or removing covers may expose you to dangerous voltages or other hazards..
•To prevent risk of fire or electric shock,avoid overloading wall outlets,extension cords,or integral convenience receptacles..
•Use suitable power sources - Plug the product into a suitable power source,as described in the operating instructions or as marked on the product..
•The mains plug is used as the disconnect device,the disconnect device shall remain readily accessible..
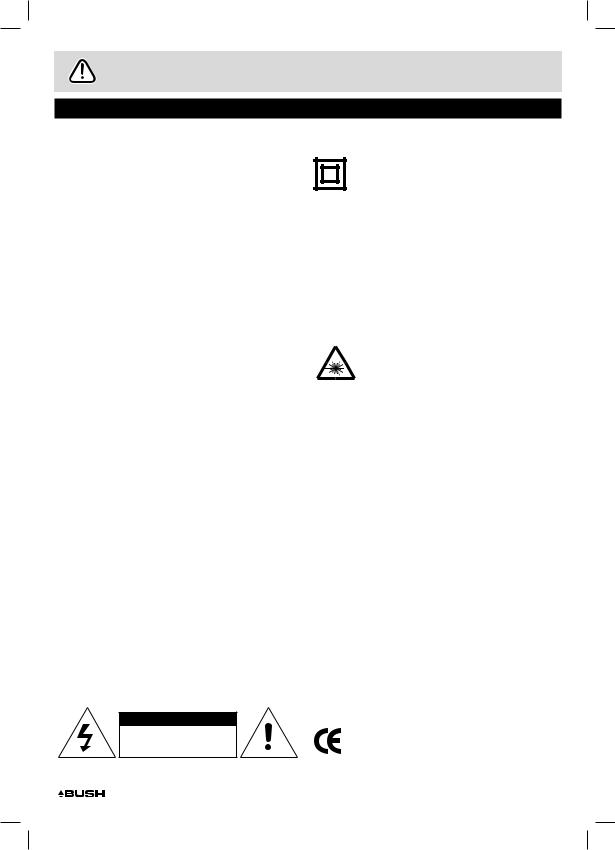
CAUTION
RISK OF ELECTRIC SHOCK!
DO NOT OPEN!
This symbol means that this unit is double insulated.. An earth connection is not required..
CAUTION : CLASS 1 LASER PRODUCT
This product utilizes a Class 1 laser..This laser DVD Player is equipped with safety switches to avoid exposure when the door is open and the safety interlocks are defeated.. Invisible laser radiation is present when the Player’s lid is open and the system’s interlock has failed or been defeated.. It is very important that you avoid direct exposure to the laser beam at all times.. Please do not attempt to defeat or bypass the safety switches..
LASER SAFETY
This unit employs a laser,only qualified service personnel should attempt repair..
•Any electrical work that is required to install this appliance MUSTbe carried out by a qualified electrician..
•Before making any electrical connections,ensure the following:
•Do not bend,stretch or pull the supply cable in order to avoid electric shock..
•The supply voltage should be the same as that indicated in the technical specifications and the appliance rating plate..
•When installed,the power socket must be within easy reach..
•If the socket outlets in your home are not suitable for the plug supplied with this unit check with a qualified electrician for replacement..
•The use of multiple connectors or extension cables are not recommended..
•The appliance must be connected to a 100-240 volt 50/60Hz AC supply by means of a three pin socket..
•The main plug is used as the disconnect device,the disconnect device shall remain readily operable..
•In order to disconnect the apparatus from the mains completely,switch off the outlet and remove the mains plug completely..
This product complies with European low voltage (2006/95/EC) and electromagnetic compatibility (2004/108/EC) directives..
Page 2

Functions & controls
Please familiarize yourself with the parts and accessories listed below
|
Accessories included |
|
|
• |
1 x CMC6DAB |
• 1 x Remote control |
• 2 x Speakers |
• |
1 x Instruction manual |
(with batteries) |
|
|
|
|
|
|
Overview of controls |
|
|
1 |
13 |
2 |
12 |
|
11 |
3 |
10 |
|
|
4 |
9 |
5 |
8 |
|
|
6 |
7 |
|
|
|
AUDIO IN |
14 |
16 |
15 |
STANDBY |
|
|
EJECT |
|
17 |
|
|
|
36 |
CD |
DAB/FM |
AUX IN |
|
|
18 |
|
|
|
|
19 |
MENU |
INFO |
REPEAT |
35 |
20 |
|
|
|
34 |
21 |
|
|
|
33 |
|
|
|
|
|
22 |
ENTER |
|
32 |
|
23 |
|
|
|
|
|
|
|
PROGRAM |
31 |
|
|
|
|
|
24 |
|
|
SHUFFLE |
30 |
|
|
|
||
|
|
|
LOUD |
29 |
|
|
|
|
|
|
|
|
DSP |
28 |
|
TONE |
MUTE |
|
|
25 |
|
|
|
27 |
VOLUME
26
Main Unit |
13: LED display |
25:TONE button |
||||||||
1: STANDBYindicator LED |
14: ANTENNA cable |
26:VOLUME -/+ buttons |
||||||||
2: STANDBYbutton |
15: SPEAKER terminals |
27: MUTE button |
||||||||
3: SOURCE SELECTbutton |
16: MAINS cable |
28: DSP button |
||||||||
4: PLAY/PAUSE button |
Remote Control |
29: LOUD button |
||||||||
5: STOP button |
17: STANDBYbutton |
30: SHUFFLE button |
||||||||
6: CD DRAWER |
18: SOURCE buttons |
31: PROGRAM button |
||||||||
7: AUX INPUTsocket |
19: MENU/STOP button |
32: FFWD |
|
/TUNE+ button |
||||||
8: PREVIOUS |
|
/SCANbutton |
20: PLAY/PAUSE button |
33: SKIP |
|
/ SCAN+ button |
||||
|
|
|||||||||
|
|
|||||||||
9: SKIP |
|
/ SCAN+ button |
21: ENTER button |
34: REPEATbutton |
||||||
|
||||||||||
|
||||||||||
10:VOLUME control |
22: FRWD /TUNEbutton |
35: INFO button |
||||||||
11: IR sensor |
23: PREVIOUS |
|
/SCANbutton |
36: EJECTbutton |
||||||
|
||||||||||
|
||||||||||
12: DISC EJECTbutton |
24: NUMERIC buttons |
|
|
|
||||||
Page 3
 Loading...