


 1
1


BCR31DAB
Introduction and Contents
Thank you for buying this Bush product, which is designed to give you many years of trouble-free service. You may already be familiar with using a similar unit, but please take time to read these instructions.
They are designed to familiarise you with the unit’s many features and to ensure you get the very best from your purchase.
Safety is important
Your safety and the safety of others are important.
Please therefore, ensure you read the “Safety Instructions” before you operate this unit.
Warranty
In the unlikely event that your product fails to work normally, please call the below free phone number to discuss the problem with one of our qualified service engineers.
Australia. |
New Zealand |
|
Bush Warranty: 1800 509 394 |
Bush Warranty: 0800 450 259 |
|
Contents |
|
|
Introduction and Contents …………………….………………………………………………….…………….... |
2 |
|
Safety Instructions ………………………………………………………………………………………………… |
3 |
|
Your DAB+ Radio …..…………………………………………………………………………….…………….... |
4 |
|
What is DAB+..………………………………………………………………………..…………….……………... |
5 |
|
Getting Started …………………………………………………………………….……………...……………… |
6-7 |
|
Using DAB+ Radio...……………………..…………………………………………….……………...…………. |
8-10 |
|
Using Presets……………………………………………………………………………………………………… |
11 |
|
Using FM Radio …………………………………………………………………….……………...…………….. |
12-13 |
|
System Setup…………………………………………………………………….……………...……………….. |
14-19 |
|
Troubleshooting and Technical Specification……………………………….……………...…….…………… |
20 |
|
Warranty…………………………………………………………………….……………...……………………… |
21 |
|
2

BCR31DAB
Safety Instructions
Ensure that you read all of the safety instructions before using this unit.
Safety Considerations
nPosition the power cable and other connected cables so that they are not likely to be walked on, pinched or where items can be placed on or against them.
nDo not use the unit in humid or damp conditions.
nDo not allow the unit to get wet.
nNever allow children to insert foreign objects into holes or slots on the unit.
nDo not cover the ventilation with items such as tablecloths, curtains, etc. This may cause overheating.
nNo naked flame sources, such as lit candles, should be placed on or near the unit.
nDo not expose the unit to dripping or splashing water, and no objects filled with liquids, such as vases, should be placed on or near the apparatus.
nDo not place the unit in closed cabinet without proper ventilation.
Cleaning
nDisconnect the unit from the mains supply before cleaning.
nDo not use any liquids or aerosol cleaners, as this may damage the unit. Use a soft, dust free cloth.
Servicing
nThere are no user serviceable parts in the unit. When servicing, refer to qualified service professional.
nConsult your retailer if you are ever in doubt about the installation / operation / safety of the product.
3
BCR31DAB
Your DAB+ Radio
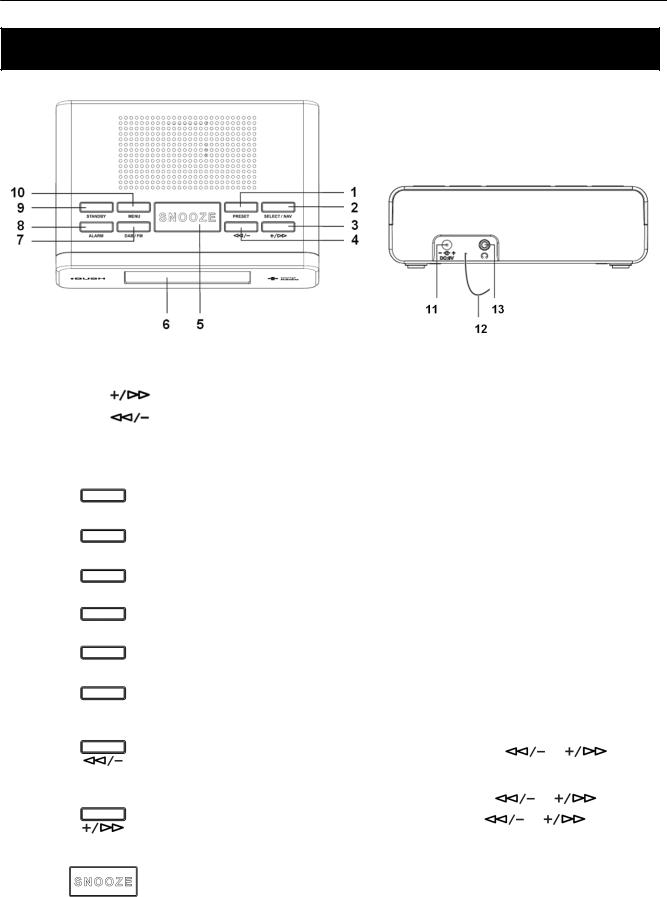
1. |
PRESET Button |
6. |
LCD Display |
11. |
DC Jack |
2. |
SELECT/NAV Button |
7. |
DAB+/FM Button |
12. |
Aerial |
3. |
Button |
8. |
ALARM Button |
13. |
Headphone Jack |
4. |
Button |
9. |
STANDBY Button |
|
|
5. |
SNOOZE Button |
10. |
MENU Button |
|
|
Control |
|
DAB+ and FM |
|
|
|
|
|
||
STANDBY |
|
Press the Standby Button to turn the radio on or off. |
|
|
|
|
|
|
|
|
|
|
|
|
MENU |
|
Press the Menu Button to enter the Main Menu or select other menus. |
|
|
|
|
|
|
|
|
|
|
|
|
DAB+/FM |
|
Press the DAB+/FM Button to switch between DAB+ and FM modes. |
|
|
|
|
|
|
|
|
|
|
|
|
ALARM |
|
Press the Alarm Button once, to set alarm1 and press again to set alarm2. |
|
|
|
|
|
|
|
|
|
|
|
|
|
|
Press and hold the Preset Button to enter the preset options. |
|
|
PRESET |
|
(Note: for detail please refer page 11) |
|
|
|
|
|
|
|
SELECT/NAV |
|
Press the Select/Nav Button to an option or confirm. |
|
|
|
|
|
|
|
|
|
|
|
|
|
a. Press to decrease or increase the volume level |
|
|
|
|
b. |
In DAB+ mode, press the SELECT/NAV Button then press the |
or |
|
|
|
Buttons to select different DAB+ stations or options. |
|
|
|
c. |
In FM mode, press the SELECT/NAV Button, then press the |
or |
|
|
|
|||
|
|
Buttons to adjust the FM frequency, or press and hold the |
or |
Buttons |
|
|
to auto search FM Stations. |
|
|
|
|
|
||
|
a. |
When alarm is activated, press the Snooze Button to delay the alarm for 5 minutes. |
||
|
b. |
Press the Snooze Button to set the radio sleep time. |
|
|
|
|
|
|
|
4

BCR31DAB
What is DAB+
DAB+ was developed in Europe by a consortium of broadcasters and manufacturers. DAB+ uses digital compression techniques to transform the source material, i.e. music and speech, into better quality audio.
Interference free reception
Analogue systems suffer from an effect called “multipath distortion”. This is caused because waves do not behave in an orderly fashion, but bounce and reflect off buildings etc. DAB+ sees this as an advantage and uses the direct and reflected signals to actually reinforce the end result, allowing for better service more of the time.
No need to re-tune
A single DAB+ frequency can be used to cover the whole of the Australia, so solving many of the problems experienced with the earlier analogue system. DAB+ scans automatically and tunes-in all of the available stations in your area.
Scolling text
Broadcasters can transmit text to your radio. This way you can read the name of the DJ, artist, song title or any other information they choose.
DAB+ coverage
Check your local coverage at www.digitalradioplus.com.au, or alternatively text 0409-DRPLUS to receive an SMS confirming whether you reside in a DAB+ broadcast area.
5

BCR31DAB
Getting Started
Carefully remove your DAB+ Receiver from the box. You may wish to store the packaging for future use.
In the Box
Inside the box you will find:
nDAB+ Radio (Main Unit)
nPower Adapter
nUser Guide
Positioning your DAB+ Radio
Place your DAB+ Receiver on a flat / stable surface that is not subject to vibrations.
Avoid the following locations:
nWhere the radio will be exposed to direct sunlight.
nWhere the radio will be close to heat radiating sources.
nWhere the humidity is high and ventilation is poor.
nWhere it is dusty.
nWhere it is damp or there is a possibility of water dripping or splashing onto unit.
Adjusting the Aerial
The aerial should be extended to ensure you receive the best reception possible in both DAB+ and FM radio modes. It may be necessary to alter the position of the DAB+ RADIO and /or aerial to achieve the best signal.
Using Headphones
You will require headphones fitted with a 3.5 mm diameter stereo plug. The headphone socket is located on the back of this unit. Headphones are not supplied with this DAB+ Receiver.
Turning the Unit On/Off
Connect the power adapter to the DC Jack on the back of the unit. Then insert the power adapter into the wall outlet. Turn the mains power on and then press the STANDBY Button to turn on the unit. Press the Standby Button to turn the unit to Standby.
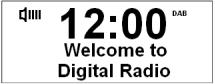 When you turn on your radio for the first time you will be presented with this image.
6
BCR31DAB
Getting Started
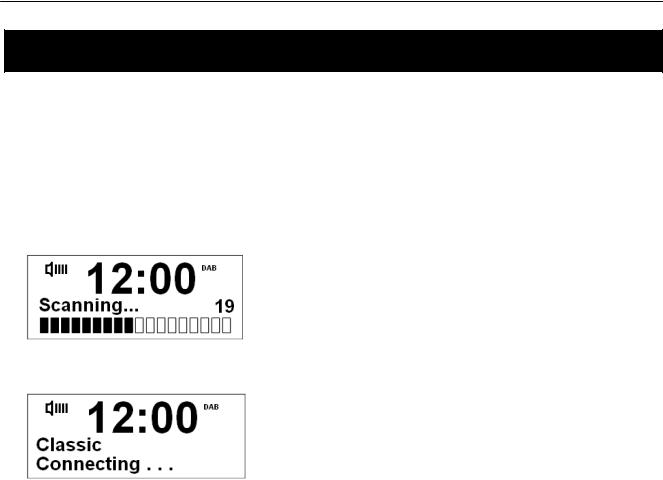
@ Note: When you turn on the radio it will automatically search and store all the available stations. You should conduct an additional Full Scan to ensure all stations are picked up and stored. It is also recommended every few months to run a new scan to pick up any new DAB+ that may have begun broadcasting after purchasing your DAB+ radio.
For initial use, conduct a full scan to auto search and store all DAB+ radio stations. Press the Menu Button and use the  or
or  Buttons to select the Full Scan option. Press the Select/NAV Button to confirm.
The Full Scan may take you 1-2 minutes to complete, after all stations are stored you will see:
@Note: a. The DAB+ stations will be displayed and stored in alphanumeric order. The first station in the list will begin to play. b. If no DAB+ signal is found, it may be necessary for you to relocate your radio.
7
 Loading...