


BV9358B

USER’S MANUAL
BV9358B
BLUETOOTH® | DVD/MP3/CD AM/FM RECEIVER
BLUETOOTH® | DVD/MP3/CD Y AM/FM RECEPTOR
1016
iPod® / iPhone® are trademarks of Apple, Inc. registered in the U.S. and other countries.
BOSS Audio Systems is not affiliated with Apple, Inc.
The Bluetooth® word mark and logos are registered trademarks owned by Bluetooth SIG, Inc. and any use of such marks by BOSS Audio Systems is under license.
Other trademarks and trade names are those of their respective owners.
iPod® / iPhone® son marcas comerciales de Apple, Inc., registradas en los EE.UU. y otros países.
BOSS Audio Systems no está afiliado con Apple, Inc.
Las marcas registradas marca Bluetooth® y sus logotipos son marcas registradas propiedad de Bluetooth SIG, Inc. y cualquier uso de dichas marcas por parte de
BOSS Audio Systems es bajo licencia. Otras marcas y nombres comerciales pertenecen a sus respectivos propietarios.
USER’S MANUAL
BV9358B
BLUETOOTH®
DVD/MP3/CD AM/FM RECEIVER
FEATURING 6.2" (157mm) WIDESCREEN TOUCHSCREEN
DIGITAL TFT LED MONITOR
BLUETOOTH®
DVD/MP3/CD Y AM/FM RECEPTOR
CON PANTALLA DIGITAL TFT LED DE 6.2" (157mm)
BOSS Audio Systems
3451 Lunar Court • Oxnard, CA 93030
www.bossaudio.com
800-999-1236 US Toll-free
805-988-0192 US Local Main
tech support: www.bossaudio.com/support/technical-support

Content
To ensure safety while driving and to comply with laws, drivers should
not watch video or operate the video device while driving.
01
A
ccessories ………………………………………………………………………………………………………………………………………...02
Unit Installation………………………………………………………………………………………………………………………………..03
Wire Connection………………………………………………………………………………………………………………………………03
Parking Brake Connection ………………………………………………………………………………………………………04
Speaker connection……………………………………………………………………………………………………………………….05
Button Description………………………………………………………………………………………………………………………….06
Remote Control………………………………………………………………………………………………………………………………..07
Main Menu…………………………………………………………………………………………………………………………………………...10
Radio Operation……………………………………………………………………………………………………………………………….10
DVD Operation………………………………………………………………………………………………………………………………..11
USB /SD Operation………………………………………………………………………………………………………………………..12
Settings Operation ………………………………………………………………………………………………………………………..12
Bluetooth Operation……………………………………………………………………………………………………………………..15
Aux in Operation …………………………………………………………………………………………………………………………….16
Notes of Disc……………………………………………………………………………………………………………………………………...17
Troubleshooting ……………………………………………………………………………………………………………………………..18
General Specification…………………………………………………………………………………………………………………..20
Power Cable
T
rim Ring
User Manual
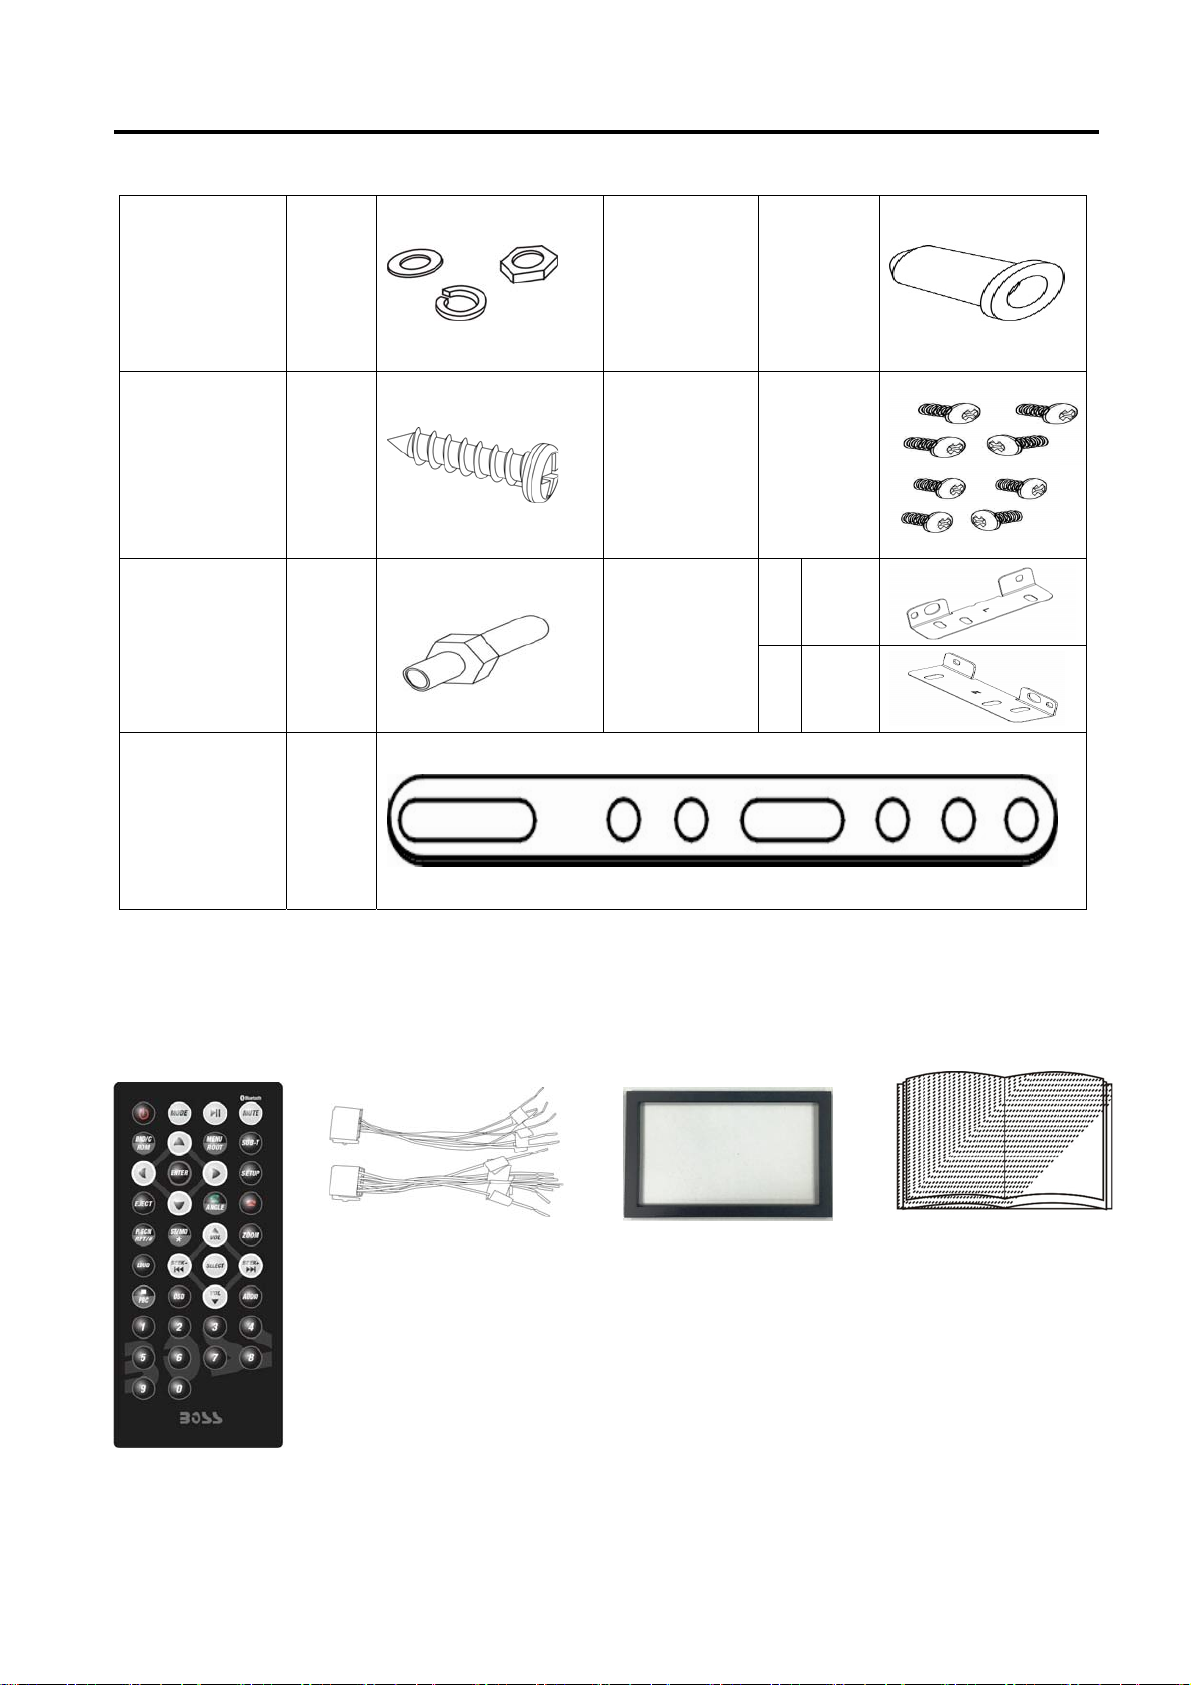
Accessories
Package contains the following accessories for installation and operation of the unit.
(1) Washer,
Spring
(2) Washer,
M5 Nut
1
(5) Rubber
Cushion
1
(3) Screw
1
(6) Screw
8
1 Left
(4) Bolt 1
(7)installation
bracket
1 Right
(5) Mounting
Strap
1
02
Remote Control

Unit Installation
1. Put the 2 brackets to the left and right side of the unit;
2. Use screws to fix the brackets to the unit.
Wire Connection
The Description of the Input/output Interface of the Rear Cabinet
03
Bracket
Screw
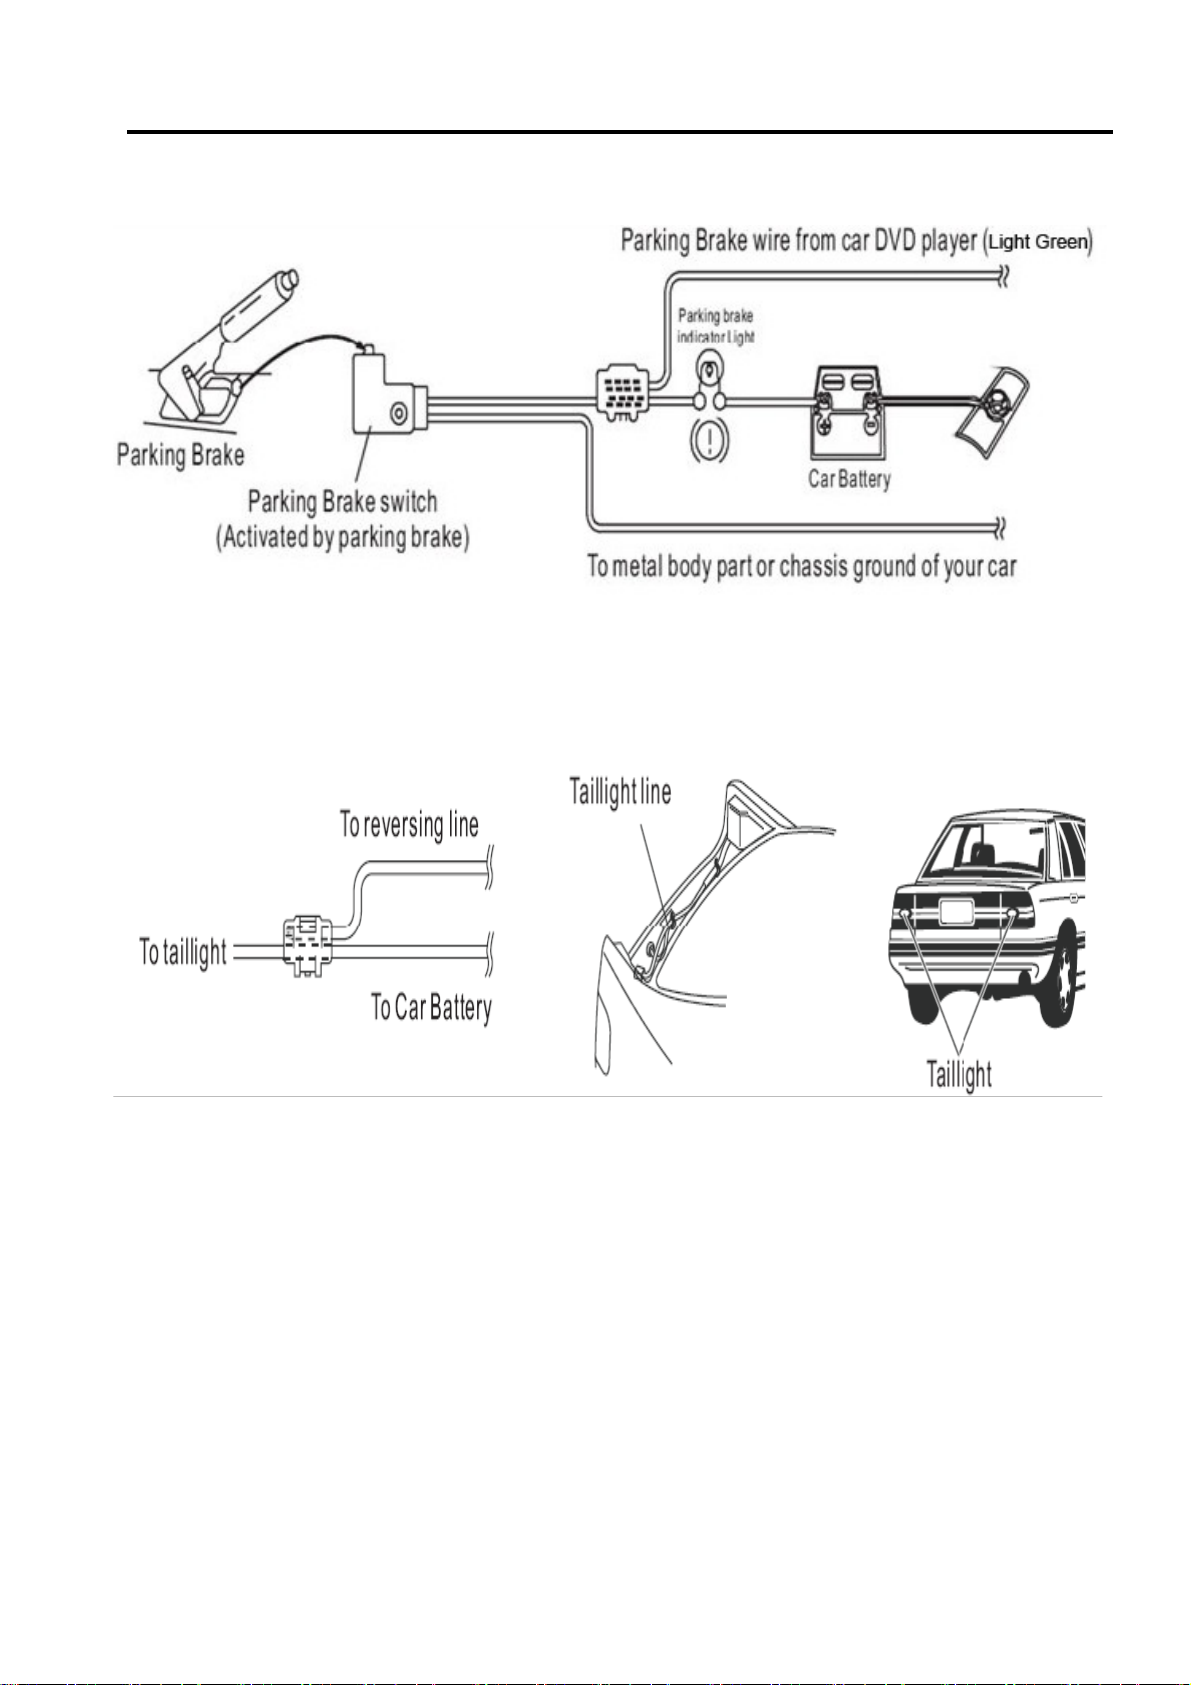
Parking Brake Connection
1. In order for videos to be viewed, and to comply with federal and local laws, the parking brake wire
must be connected to the power side of the parking brake switch.
Connecting the reversing line to taillight on the car
04
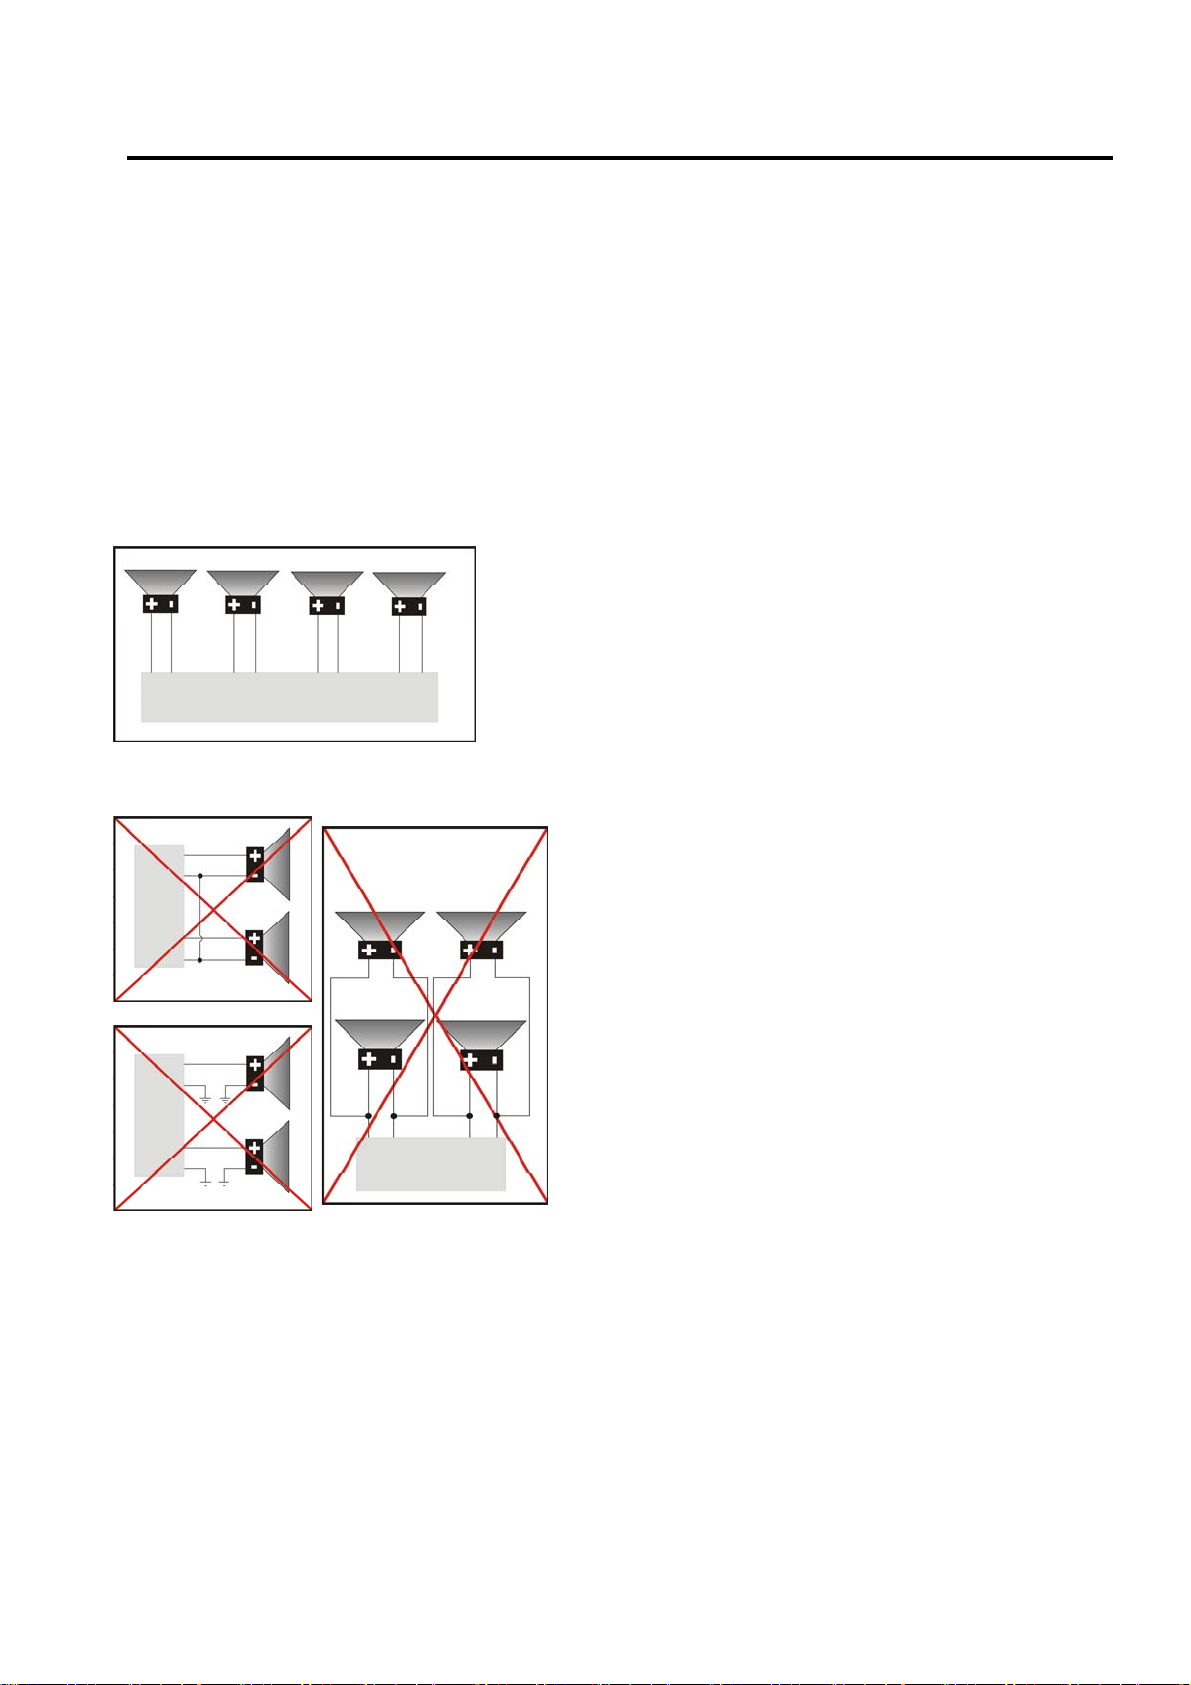
Speaker Connection
After connecting, when you start up the reverse gear, the unit will receive the picture from car rear
view camera.
Note:
-
Use only with 4-8 ohm, non-chassis grounded speakers
-
Always observe correct polarity
- Loudspeaker cables and/or optional external power amplifiers must always be about 11.8 inch
away from the antenna and/or antenna extension parts.
Connect the speakers according the following diagram, incorrect connections will damage the unit or
your loudspeakers.
Correct connection
Left front - Right front | Left rear - Right rear
Incorrect connections
05
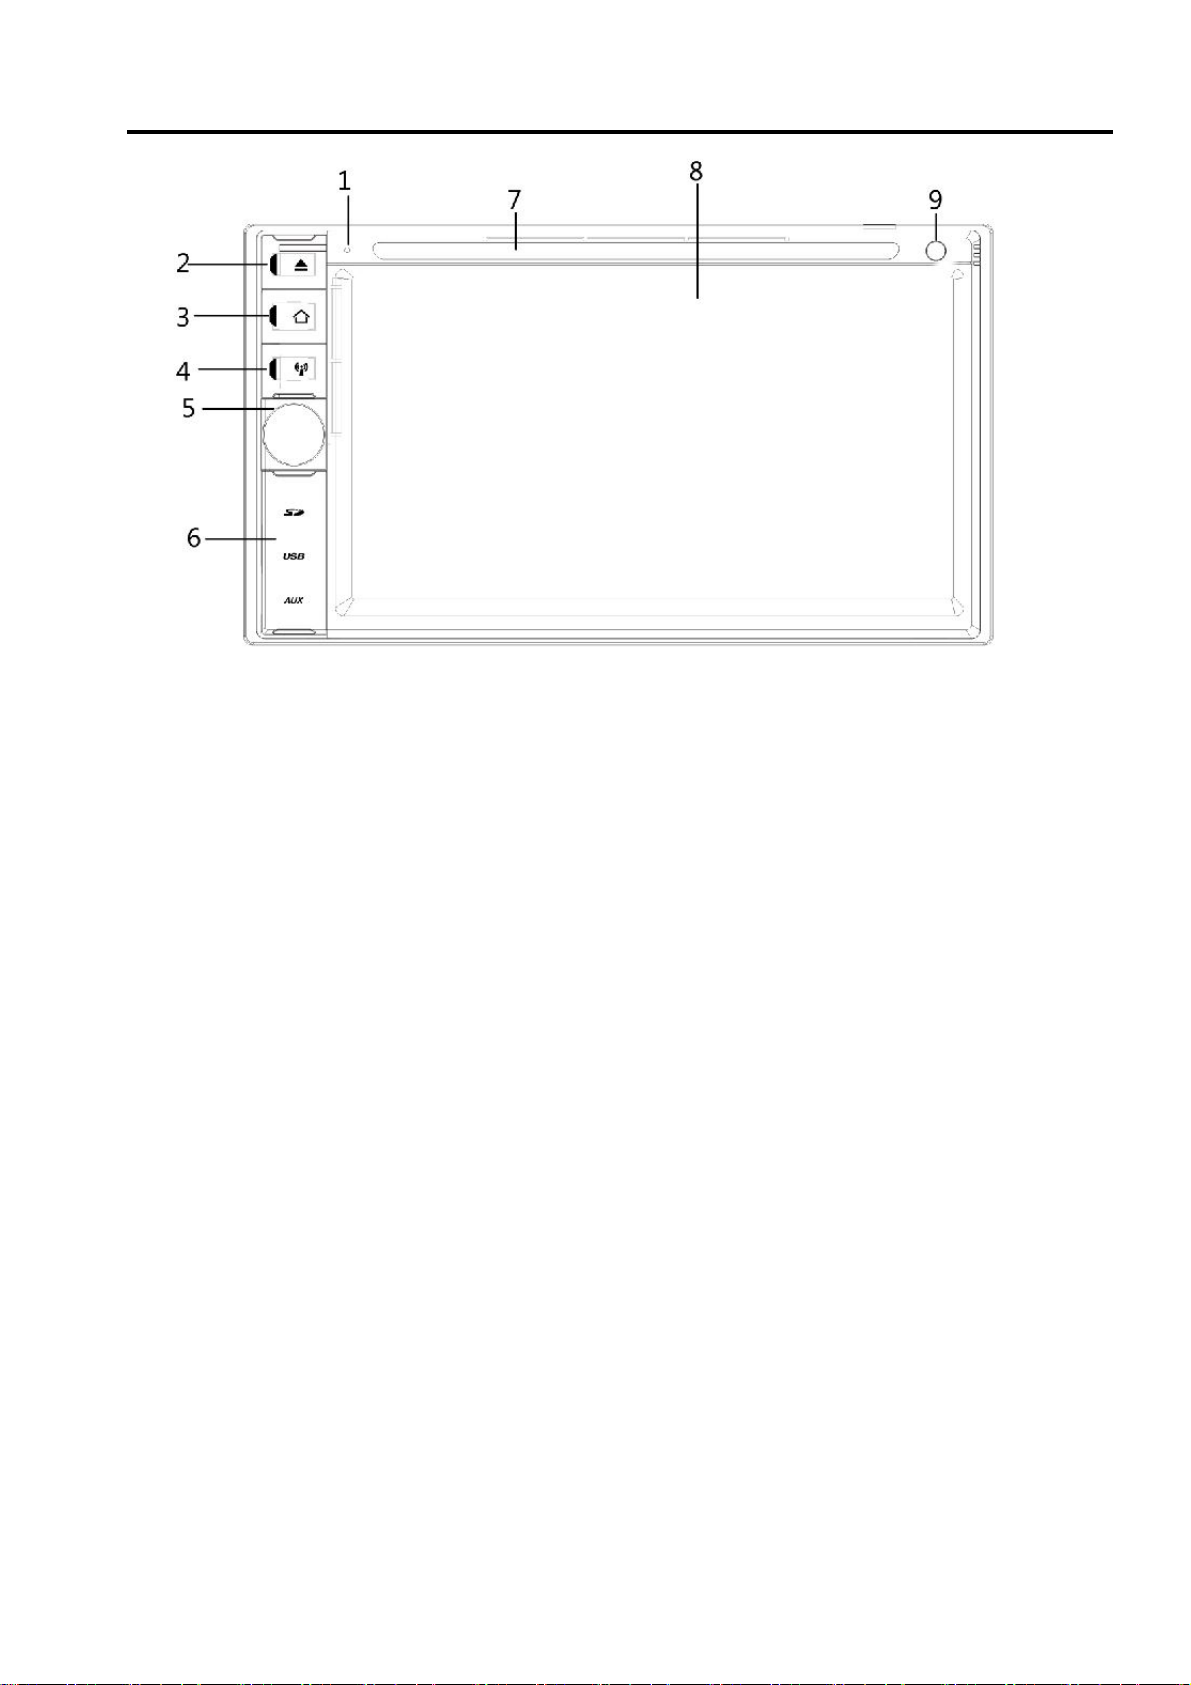
Button Description
1. MIC
IR Remote control signal receiving window. Max distance is 6-8 meters, 45 angels.
2. EJECT Button
Press to eject a disc. If the disc is not removed for about 10 seconds after eject, the disc is reinserted
automatically.
3. MENU BUTTON
Press menu button to return back to main menu.
4. BAND BUTTON
Press band button to band of FM and AM.
5. POWER / MUTE Button /VOL
Press it to turn on the unit. Press and hold for 2 seconds to turn the unit off .Press the button.
briefly to mute .Please notes that the volume will be muted on all audio output connector.
Press VOL knob to power on unit and Press and hold for 2 seconds to turn the unit off
Rotate VOL knob to increase or reduce the volume.
6. USB Slot / SD/MMC CARD Slot /AUX-IN Jack
USB slot for Multimedia playback files only. insert a USB into this slot and the unit will automatically
start reading and playback. * Supported Music File Format: MP3, WMA files.
SD/MMC card slot, for Multimedia playback files only. Insert a SD/MMC CARD into this slot and the unit
will automatically start reading and playback. * Supported Music File Format:MP3, WMA files
Put the Aux plug into the AUX-IN jack which was marked on front panel.
7. DISC Slot
8. Info Display
LCD display Information when operation the unit.
Press to eject a disc. If the disc is not removed for about 10 seconds after eject, the disc is reinserted
automatically.
9. Remote Sensor
06
 Loading...