

Bang & Olufsen BeoVision 10-32, BeoVision 10-40, BeoVision 10-46 Getting Started
BeoVision 10


This Getting Started contains information about the daily use of your Bang& Olufsen
product and connected equipment. The Getting Started explains usage of more
than one model, all models may not be available on your market. We expect your
retailer to deliver, install and set up your product.
Your television offers more features and functions than described in this Getting Started.
Among other things; Timer functions and auto standby. These and other features
are described in more detail in a Guide.
The Guides are found on www.bang-olufsen.com/guides
On www.bang-olufsen.com you can also nd further information and relevant
FAQs about your product.
Your Bang& Olufsen retailer is your rst stop for all your service queries.
To nd your nearest retailer, visit our website…
www.bang-olufsen.com
Dear Customer
3510803 1102
Technical specications, features and the use
thereof are subject to change without notice.
Use only with the cart, stand, tripod, bracket, or
table specied by the manufacturer, or sold with
the apparatus. When a cart is used, use caution
when moving the cart /apparatus combination to
avoid injury from tip-over.
Unplug this apparatus during lightning storms or
when unused for long periods of time.
Refer all servicing to qualied service personnel.
Servicing is required when the apparatus has been
damaged in any way, such as power-supply cord
or plug is damaged, liquid has been spilled or
objects have fallen into the apparatus, the
apparatus has been exposed to rain or moisture,
does not ope rate normally, or has been dropped.
The mains plug of the power supply cord shall
remain readily operable.
Do not expose batteries or battery packs to
excessive heat such as sunshine, re or the like.
Follow instructions to ensure correct and safe
installation and interconnection of equipment in
multimedia systems.
Read these instructions.
Keep these instructions.
Heed all warnings.
Follow all instructions.
Do not use this apparatus near water.
Clean only with dry cloth.
Do not block any ventilation openings. Install in
accordance with the manufacturer’s instructions.
Do not install near any heat sources such as
radiators, heat registers, stoves, or other apparatus
(including ampliers) that produce heat.
Do not defeat the safety purpose of the polarized
or grounding-type plug. A polarized plug has two
blades with one wider than the other. A grounding
type plug has two blades and a third grounding
prong. The wide blade or the third prong are
provided for your safety. If the provided plug does
not t into your outlet, consult an electrician for
replacement of the obsolete outlet.
Protect the power cord from being walked on
or pinched particularly at plugs, convenience
receptacles, and the point where they exit from
the apparatus.
Only use attachments/accessories specied by the
manufacturer.
WARNING: To reduce the risk of fire or
electric shock, do not expose this
appliance to rain or moisture. Do not
expose this equip ment to dripping or
splashing and ensure that no objects
filled with liquids, such as vases, are
placed on the equipment.
To completely disconnect this equipment
from the AC Mains, disconnect the mains
plug from the wall socket. The disconnect
device shall remain readily operable.
The lightning flash with arrowhead
symbol within an equilateral triangle,
is intended to alert the user to the
presence of un insulated “dangerous
voltage” within the product’s
en closure that may be of sufficient
magnitude to constitute a risk of
electric shock to persons.
The exclamation point within an
equi lateral triangle is intended to alert
the user to the presence of important
operating and main tenance (servicing)
instructions in the literature
accompanying the product.

Daily use
Contents
Daily use
6 How to use your remote control
8 Introduction
10 Change picture format and speaker combinations
Installation and setting up
12 Set up your television – BeoVision 10-32
14 Set up your television – BeoVision 10-40/46
15 Cleaning
16 Connection panels – BeoVision 10-32
17 Connection panels – BeoVision 10-40/46
18 First-time setup of your television
TV LIGHT RADIO
DTV DVD C D
V.MEM TEXT A.MEM
7 8 9
4 5 6
LIST
0
MENU
1 2 3
STOP PLAY
BACK
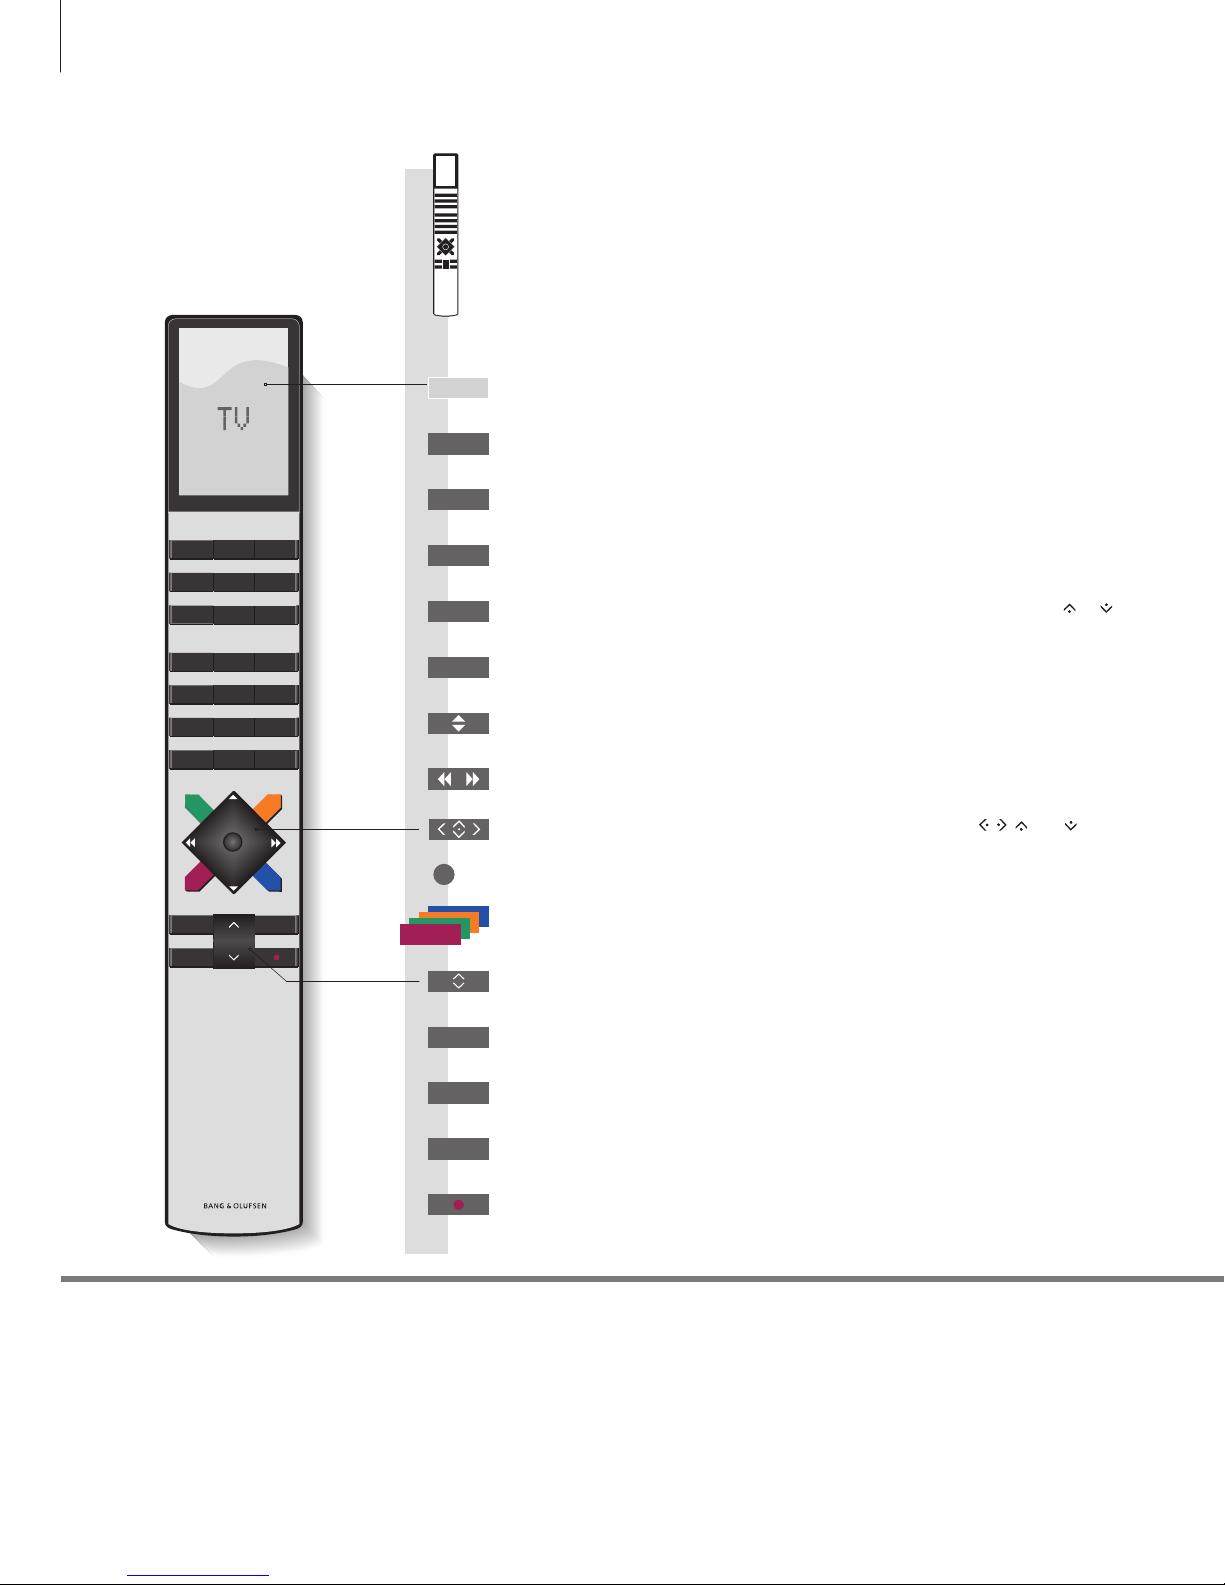
How to use your remote control
Important
– for more information: www.bang-olufsen.com
Select colour specic functions
Adjust volume
To mute, press the middle of the button
The Beo4 display shows you the activated source or function
Navigation and centre button; move left, right, up and down
, , and – move in
menus by pressing the button in the direction you need
Centre button is used for selecting and accepting
Rewind or wind, search backwards or forwards
Start playback of a DVD or CD
Switch on a connected set-top box
Standby
Bring up the main menu of the active source
Pause and stop playback
Switch on the TV*
1
Select channels and enter information in on-screen menus
Step through channels
Hold for continuous step
Move backwards through menus and the Beo4 list. Long press to exit menus
completely
Beo4 operation
Your television can be operated with the Beo4 remote control.
Display extra “buttons” for functions or sources in the Beo4 display. Use or to
step in the list
Some buttons can be recongured during the setup process. See the Guide for further information.
NOTE! For general information about remote control operation, see the Guide enclosed with your
remote control.
1
*Beo4 buttons
TV
PLAY
TV
DTV
0 – 9
STOP
MENU
BACK
LIST
6
STOP
PLAY
BACK
Living Room
TV V.MEM RADIO
DTV N.MUSIC N.RADIO
PC DVD CD
Daily use
2
*About buttons
3
*Coloured buttons
Actual zone
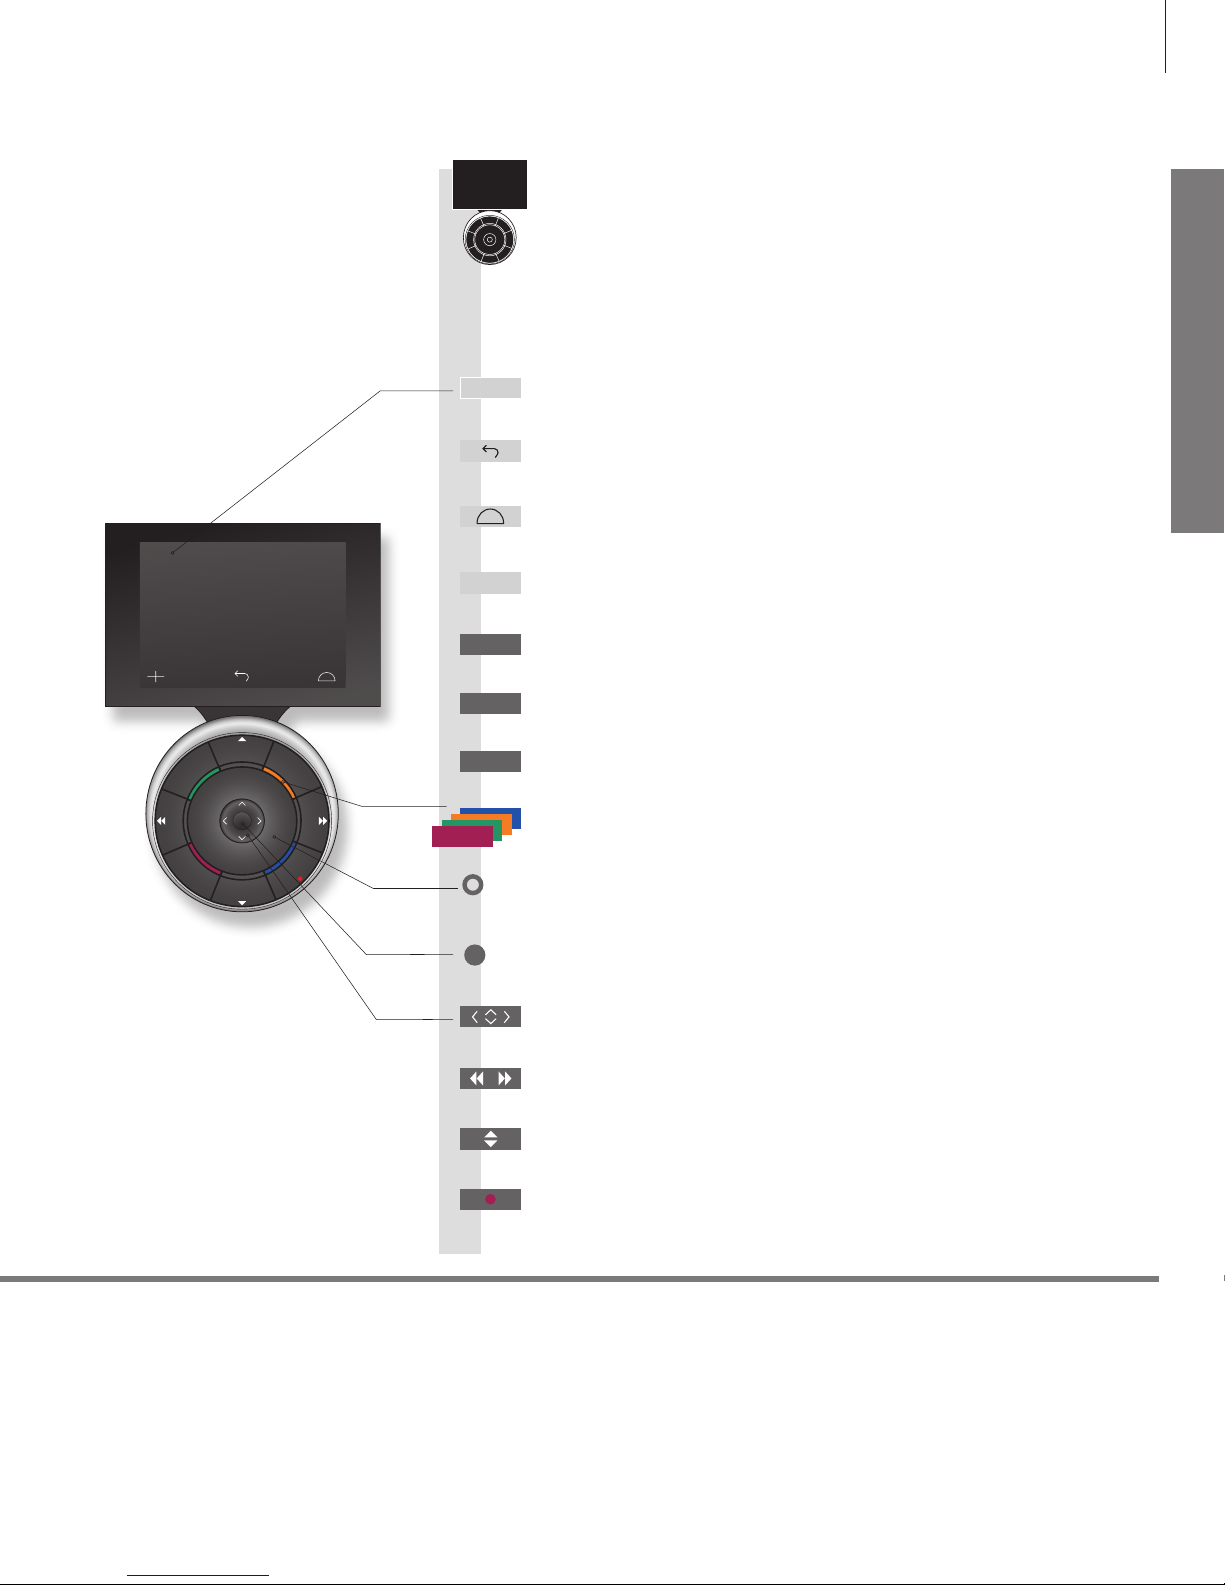
Soft buttons on Beo6
Light grey buttons indicate that you have to press a text in the display. Dark grey buttons indicate that you have to
press a hard button.
Press the wheel next to the colour to activate a coloured button.
Indicates the actual zone on Beo6 as it was named during the setup process.
Depending on the activated source, different soft buttons appear on the screen. Touch the screen to activate the function.
Start playback of a DVD or CD
Step through channels
Hold for continuous step
Navigation button left, right, up and down – move in menus by pressing the
button in the direction you need
Standby
Rewind or wind, search backwards or forwards
Pause and stop playback
Soft button, touch screen to select*
2
Switch on a source or select a function
Centre button is used for selecting and accepting
Turn to adjust volume
To mute, turn quickly counter-clockwise
Bring up Scene buttons, such as Zones or Speaker
Press again to return
Select colour specic functions*
3
Press volume wheel next to the colour
Bring up digits to select, for example, channels
Press again to return
Back up through Beo6 displays
Move backwards through menus. Long press to exit menus completely
Beo6 operation
Your television can also be operated with the Beo6 remote control as
described in this Getting Started and the Guide, but you can also
operate your television with Beo5 which is operated similarly to Beo6.
PLAY
STOP
TV
BACK
+
7
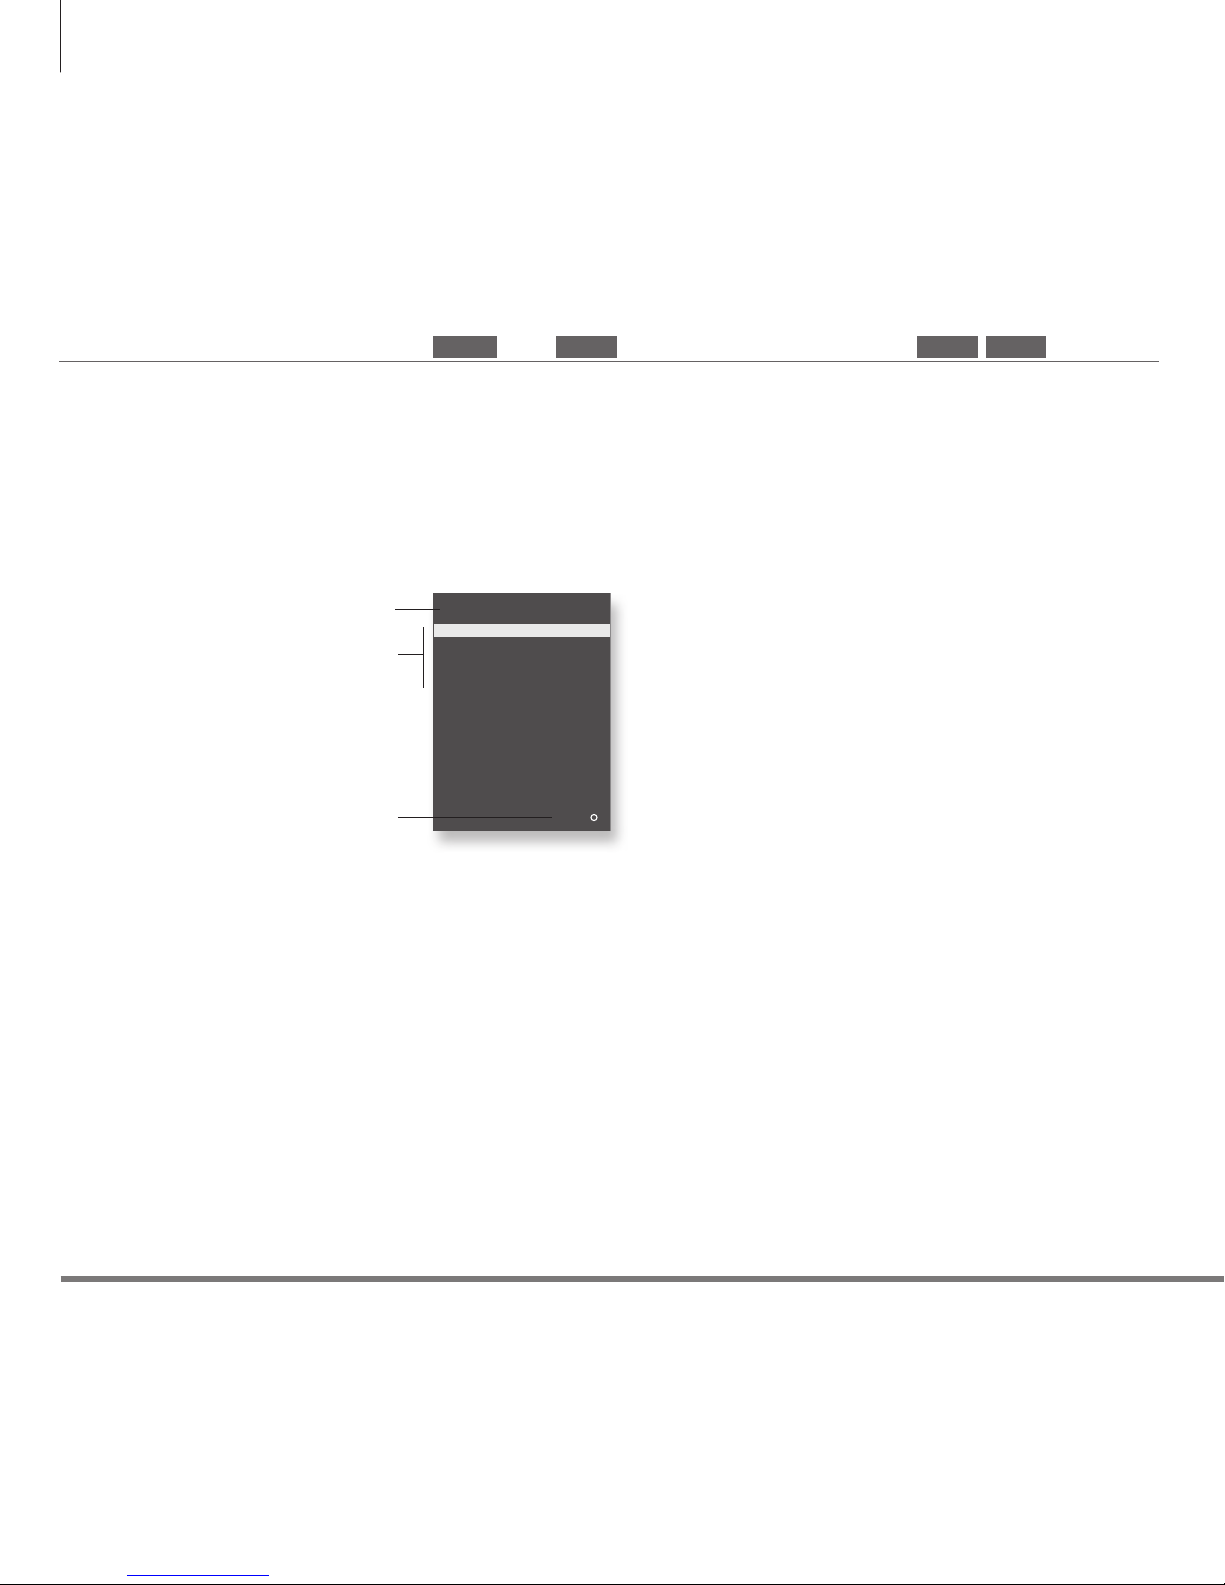
Navigate in menus and select settings using your remote control. Pressing MENU
twice brings up the menus for the selected source.
Information about the selected source is shown in
the display. On-screen menus allow you to adjust
settings.
Display and menus
Introduction
Show menuSwitch on TV Switch on connected equipment
or
Important
On the rst pages in this Getting Started, you will nd an overview of the buttons on Beo4 and Beo6.
For general information about remote control operation, see the Guide enclosed with your remote
control.
Remote control
TV SETUP
SLE EP TIM ER
PLAY T IMER
OPT IONS
sel ect
TV V. MEM MENU MENU
8
Menu name
Menu options
Information eld
Example of on-screen menu
 Loading...