


 ®
®
802.11g Access Point
WL-300g
(For 802.11g and 802.11b Wireless Clients)
User’s Manual
E1838 / Oct 2004

Copyright Information
No part of this manual, including the products and software described in it, may be reproduced, transmitted, transcribed, stored in a retrieval system, or translated into any language in any form or by any means, except documentation kept by the purchaser for backup purposes, without the express written permission of ASUSTeK COMPUTER INC. (“ASUS”).
ASUS PROVIDES THIS MANUAL “AS IS” WITHOUT WARRANTY OF ANY KIND, EITHER EXPRESS OR IMPLIED, INCLUDING BUT NOT LIMITED TO THE IMPLIED WARRANTIES OR CONDITIONS OF MERCHANTABILITY OR FITNESS FORAPARTICULAR PURPOSE. IN NO EVENT SHALL ASUS, ITS DIRECTORS, OFFICERS, EMPLOYEES ORAGENTS BE LIABLE FORANYINDIRECT, SPECIAL, INCIDENTAL, OR CONSEQUENTIAL DAMAGES (INCLUDING DAMAGES FOR LOSS OF PROFITS, LOSS OF BUSINESS, LOSS OF USE OR DATA, INTERRUPTION OF BUSINESS AND THE LIKE), EVEN IF ASUS HAS BEENADVISED OF THE POSSIBILITY OF SUCH DAMAGESARISING FROM ANY DEFECT OR ERROR IN THIS MANUAL OR PRODUCT.
Product warranty or service will not be extended if: (1) the product is repaired, modified or altered, unless such repair, modification of alteration is authorized in writing by ASUS; or (2) the serial number of the product is defaced or missing.
Products and corporate names appearing in this manual may or may not be registered trademarks or copyrights of their respective companies, and are used only for identification or explanation and to the owners’ benefit, without intent to infringe.
SPECIFICATIONS AND INFORMATION CONTAINED IN THIS MANUAL ARE FURNISHED FOR INFORMATIONAL USE ONLY, AND ARE SUBJECT TO CHANGE AT ANY TIME WITHOUT NOTICE, AND SHOULD NOT BE CONSTRUEDAS A COMMITMENT BYASUS.ASUS ASSUMES NO RESPONSIBILITY OR LIABILITY FOR ANY ERRORS OR INACCURACIES THAT MAY APPEAR IN THIS MANUAL, INCLUDING THE PRODUCTS AND SOFTWARE DESCRIBED IN IT.
Copyright © 2004 ASUSTeK COMPUTER INC. All Rights Reserved.
2 |
ASUS 802.11g Access Point |

Copyright Information
ASUSTeK COMPUTER INC. (Asia-Pacific)
Company Address: |
15 Li-Te Road, Peitou, Taipei 112 |
General Telephone: |
+886-2-2894-3447 |
General Fax: |
+886-2-2894-7798 |
Web Site Address: |
www.asus.com.tw |
General Email: |
info@asus.com.tw |
Technical Support |
|
MB/Others (Tel): |
+886-2-2890-7121 |
Notebook (Tel): |
+886-2-2894-3447 |
Desktop/Server (Tel): |
+886-2-2890-7123 |
Networking (Tel): |
+886-2-2890-7902 |
Support Fax: |
+886-2-2890-7698 |
ASUS COMPUTER INTERNATIONAL (America) |
|
Company Address: |
44370 Nobel Drive, Fremont, CA 94538, USA |
General Fax: |
+1-510-608-4555 |
Web Site Address: |
usa.asus.com |
General Email: |
tsd@asus.com |
Technical Support |
|
General Support: |
+1-502-995-0883 |
Notebook (Tel): |
+1-510-739-3777 x5110 |
Support Email: |
notebooktsd@asus.com |
Support Fax: |
+1-502-933-8713 |
ASUS COMPUTER GmbH (Germany & Austria) |
|
Company Address: |
Harkort Str. 25, D-40880 Ratingen, Germany |
General Telephone: |
+49-2102-95990 |
General Fax: |
+49-2102-959911 |
Web Site Address: |
www.asuscom.de |
Online Contact: |
www.asuscom.de/sales |
Technical Support |
|
Component Support: |
+49-2102-95990 |
Notebook Support: |
+49-2102-959910 |
Online Support: |
www.asuscom.de/support |
Support Fax: |
+49-2102-959911 |
ASUS 802.11g Access Point |
3 |

|
Table of Contents |
|
1. |
Introduction ............................................................................. |
7 |
|
Overview .............................................................................................. |
7 |
|
The ASUS Wireless LAN Family ..................................................... |
8 |
|
System Requirements .................................................................. |
10 |
|
Wireless Performance ........................................................................ |
11 |
|
Site Topography ............................................................................ |
11 |
|
Range ........................................................................................... |
11 |
|
Site Surveys .................................................................................. |
11 |
|
Roaming Between ASUS APs ...................................................... |
12 |
|
Roaming Guidelines ..................................................................... |
12 |
|
ASUS 802.11g AP Status Indicators ................................................... |
13 |
|
Power Requirements .......................................................................... |
13 |
2. Installation .............................................................................. |
14 |
|
|
Installation Procedure ......................................................................... |
14 |
|
Wall Mounting Option ......................................................................... |
15 |
3. |
Software Configuration ........................................................ |
17 |
|
Configuring the ASUS 802.11g AP ..................................................... |
17 |
|
Installing the ASUS WLAN Utilities ............................................... |
19 |
|
ASUS WLAN Utilities .......................................................................... |
20 |
|
Connecting to the ASUS WLAN Web Manager .................................. |
20 |
|
Device Discovery ................................................................................ |
21 |
|
User Name and Password ............................................................ |
22 |
|
Home Page ................................................................................... |
22 |
|
Access Point Mode ............................................................................. |
23 |
|
Quick Setup ........................................................................................ |
24 |
|
Configure Wireless Interface ........................................................ |
24 |
|
Wireless .............................................................................................. |
25 |
|
Interface ........................................................................................ |
25 |
|
Bridge ........................................................................................... |
30 |
|
Access Control .............................................................................. |
33 |
|
RADIUS Setting ............................................................................ |
34 |
|
Advanced ...................................................................................... |
35 |
|
IP Config ............................................................................................. |
37 |
|
LAN ............................................................................................... |
37 |
|
Get IP Automatically ..................................................................... |
37 |
|
Yes ................................................................................................ |
37 |
|
No ................................................................................................. |
37 |
4 |
ASUS 802.11g Access Point |

Table of Contents |
|
System Setup ..................................................................................... |
38 |
Operation Mode ............................................................................ |
38 |
Home Gateway Mode ................................................................... |
39 |
Change Password ........................................................................ |
43 |
Firmware Upgrade ........................................................................ |
44 |
Setting Management ..................................................................... |
45 |
Factory Default ............................................................................. |
46 |
Restoring Factory Default Settings ............................................... |
46 |
Status & Log ....................................................................................... |
47 |
Status ............................................................................................ |
47 |
LAN Interface ................................................................................ |
47 |
Wireless ........................................................................................ |
47 |
Firmware Restoration ......................................................................... |
48 |
Using a Hub .................................................................................. |
48 |
4. Troubleshooting ..................................................................... |
49 |
Common Problems and Solutions ...................................................... |
49 |
Reset to Defaults ................................................................................ |
50 |
5. Appendix ................................................................................ |
53 |
External Antenna Connector .............................................................. |
53 |
Operating frequency range ................................................................. |
54 |
Number of operating channels ........................................................... |
54 |
DSSS PHY frequency channel plan ................................................... |
54 |
Glossary ............................................................................................. |
55 |
6. Safety Information ................................................................ |
64 |
Federal Communications Commission ............................................... |
64 |
FCC Radio Frequency Interference Requirements ...................... |
65 |
FCC RF Exposure Guidelines (Access Points) ............................ |
65 |
FCC RF Exposure Guidelines (Wireless Cards) ........................... |
66 |
Canadian Department of Communications ........................................ |
66 |
Operation Channel for Different Domains ..................................... |
66 |
ASUS 802.11g Access Point |
5 |

France Restricted Frequency Band .................................................... |
67 |
Appendix - GNU General Public License ................................. |
69 |
Licensing Information ......................................................................... |
69 |
Availability of source code ............................................................ |
69 |
The GNU General Public License ...................................................... |
70 |
6 |
ASUS 802.11g Access Point |

Chapter 1 - Introduction
1. Introduction
Overview
Thank you for purchasing theASUS 802.11g WLAN AP. The ASUS 802.11g AP is an Access Point designed to be fully compliant with IEEE pre 802.11g and 802.11b standards. 802.11g is a proposed (to be finalized) new extension to 802.11b (used in majority of wireless LANs today) that broadens 802.11b's data rates to 54 Mbps within the 2.4 GHz band using OFDM (orthogonal frequency division multiplexing) technology. 802.11g allows backward compatibility with 802.11b devices but only at 11 Mbps or lower, depending on the range and presence of obstructions.
Wireless LANs are complementary extensions to existing wired LANs, offering complete mobility while maintaining continuous network connectivity to both corporate and home Intranets. They add a new level of convenience for LAN users. PC users stay connected to the network anywhere throughout a building without being bound by a LAN wires. This is accomplished through the use of ASUS Access Points. ASUS Access Points with built-in Internet gateway capability, allows your family to share a broadband Modem and one ISP account simultaneously from different rooms without wires! ASUS WLAN products can keep you connected anywhere, any time.
1. Introduction
ASUS 802.11g Access Point |
7 |
Family WLAN
.1 Introduction
Chapter 1 - Introduction
The ASUS Wireless Family
The ASUS Wireless family contains a several wireless network solutions for 802.11g & 802.11b wireless local area networks in the home or office.
Access Point or Client
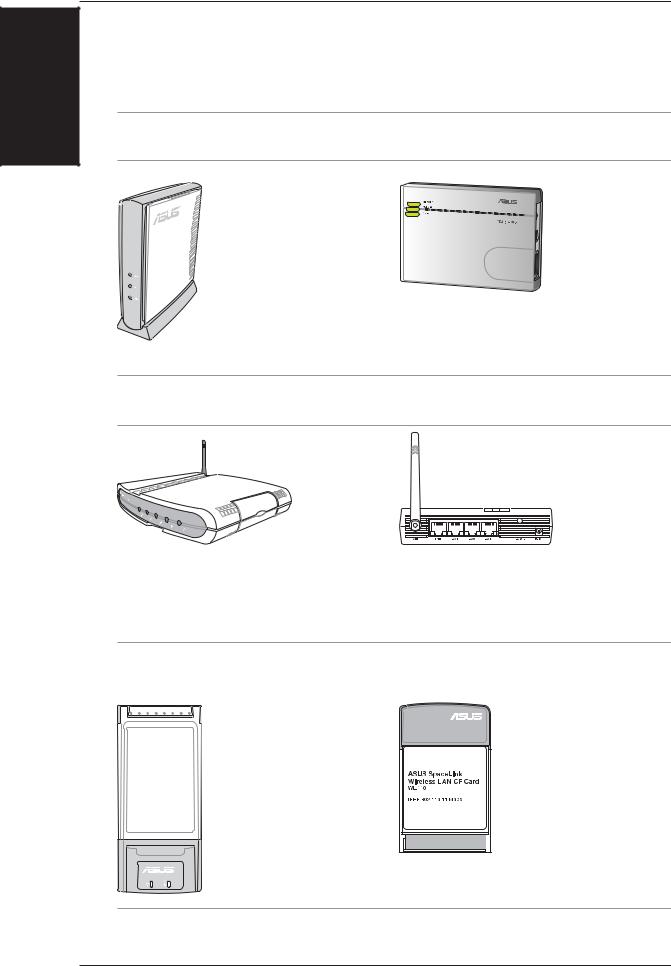
The ASUS WLAN 802.11g |
The ASUS 3 in 1 |
Access Point (WL-300g) creates |
Pocket Access Point |
a wireless network using the |
(WL-330g) creates a |
IEEE 802.11g and 802.11b |
wireless network |
wireless standards. |
using the IEEE |
|
802.11g/b wireless |
|
standards. |
Access Point & Router
The ASUS WLAN Gateway (WL-500g) creates a wireless network using the IEEE 802.11g/b wireless standards and allows sharing a single Internet connection.
The ASUS WLAN 802.11g Pocket Router (WL530g) creates a wireless network using the IEEE 802.11g and 802.11b wireless standards and allows sharing a single Internet connection.
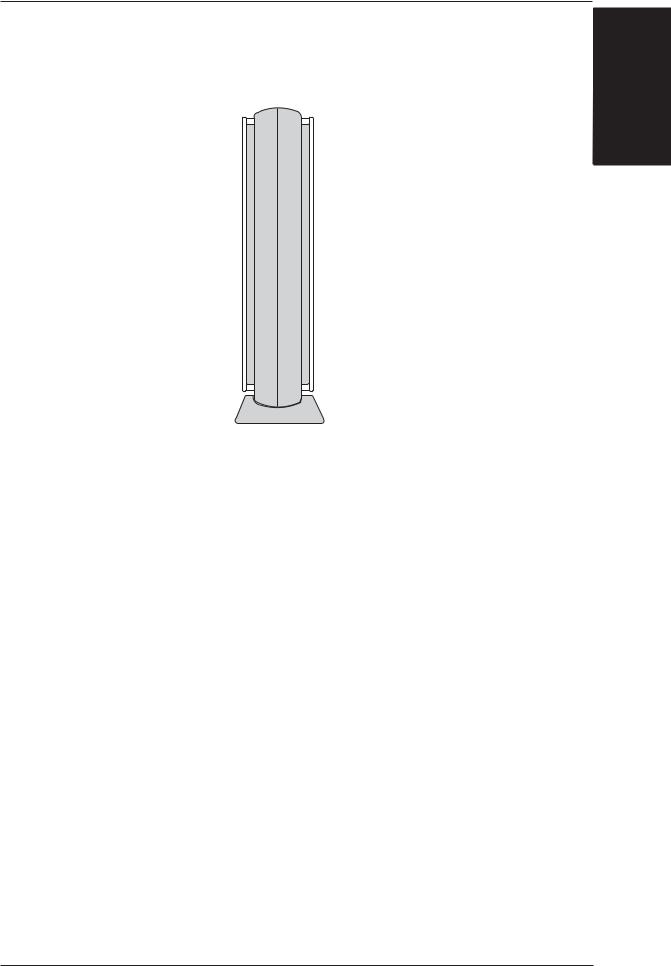
PCMCIA Client |
Compact Flash (CF) Client |
|
|
The ASUS WLAN PC Card (WL-107g) is a wireless LAN adapter that fits into a PCMCIA Type II slot in a Notebook PC and creates a wireless network using the IEEE 802.11g/b wireless standards.
The ASUS 802.11b Wireless CF Card (WL-110) is a IEEE 802.11b wireless LAN adapter that fits into a Compact Flash Type II slot in a Portable Digital Assistant (PDA).
(The illustrations are not to scale.)
8 |
ASUS 802.11g Access Point |

Chapter 1 - Introduction
PCI Client
The ASUS WLAN
PCI Card (WL138g) is a wireless LAN adapter that fits into a standard PCI slot in a desktop PC and creates a wireless network using the IEEE 802.11g/b wireless standards.
USB Access Point or Client USB Client
The ASUS USB Wireless |
|
|
LAN Adapter (WL-160g) |
|
|
creates a wireless network |
|
|
using the IEEE 802.11g/b |
802. |
|
wireless standards and |
11g |
54Mbps |
|
connects to any computer using USB2.0 connectivity.
The ASUS USBWireless LANAdapter(WL-167g) is thumb-sized and creates a wireless network using the IEEE 802.11g/b wireless standards and connects to any computer using USB2.0 connectivity.
Access Point & File Server
1. Introduction WLAN Family
The ASUS WLAN 802.11g Access Point (WLHDD) creates a wireless network using the IEEE 802.11g and 802.11b wireless standards.Also serves as a file server (wireless network attached storage).
(The illustrations are not to scale.)
ASUS 802.11g Access Point |
9 |

Requirements
.1 Introduction
Chapter 1 - Introduction
System Requirements
To begin using the ASUS 802.11g WLAN AP, you must have the following minimum requirements:
•An Ethernet (10Base-T or 10/100Base-TX) adapter for wired client
•At least one 802.11g (54Mbps) or one 802.11b (11Mbps) wireless adapter for wireless mobile clients
•TCP/IP and an Internet browser installed
The Product Package
Each ASUS 802.11g AP comes with:
•One ASUS 802.11g WLAN Access Point
•One ASUS 802.11g WLAN Access Point Quick Start Guide
•One power adapter (5 Volts DC, 1 Amp)
•One support CD (utilities and user’s manual)
•One RJ-45 Ethernet cable (straight-through)
•One Bracket for ceiling mounting
•One Bracket for office partition mounting
•One Sticker for wall mounting alignment
10 |
ASUS 802.11g Access Point |
Chapter 1 - Introduction
Wireless Performance
This section provides the user with ideas for how to improve the performance of a ASUS WLAN network.
Site Topography
For optimal performance, locate wireless mobile clients and the ASUS AP s away from transformers, heavy-duty motors, fluorescent lights, microwave ovens, refrigerators, and other industrial equipment. Signal loss can occur when metal, concrete, walls or floors block transmission. Locate the ASUS AP s in open areas or add the ASUS AP s as needed to improve coverage.
Microwave ovens operate in the same frequency band as the ASUS AP . Therefore, if you use a microwave within range of the ASUS AP you may notice network performance degradation. However, both your microwave and your the ASUS AP will continue to function.
Range
Every environment is unique with different obstacles, barriers, materials, etc. and, therefore, it is difficult to determine the exact range that will be achieved without testing. However, has developed some guidelines to estimate the range that users will see when the product is installed in their facility, but there are no hard and fast specifications.
Radio signals may reflect off of some obstacles or be absorbed by others depending on their construction. For example, with two 802.11b radios, you may achieve up to 1000' in open space outdoors where two devices have a line of sight, meaning they see each other with no obstacles. However, the same two units may only achieve up to 300' of range when used indoors.
By default, the ASUS AP will automatically adjust the data rate to maintain a usable radio connection. Therefore, a client that is close to the ASUS AP may operate at higher speeds while a client that is on the fringe of coverage may operate at lower speeds. As mentioned earlier, you can configure the data rates that the ASUS AP will use. If you limit the range of data rates available to the ASUSAP, you may reduce the effective wireless range of the WLAN coverage.
Site Surveys
A site survey (utility provided with the ASUS WLAN Cards) analyzes the installation environment and provides users with recommendations for equipment and its placement. The optimum placement differ depending on the ASUS AP design and specifications.
1.Introduction |
Performance |
ASUS 802.11g Access Point |
11 |

Roaming
.1 Introduction
Chapter 1 - Introduction
Roaming Between ASUS APs
If there are multiple ASUS APs on the network, then a wireless mobile client may seamlessly roam from one ASUS AP to another.
Each ASUS AP creates its own wireless cell or coverage area. This is also known as a Basic Service Set (BSS). Any wireless mobile client can communicate with a particular ASUS AP if it is within the ASUS AP’s coverage area.
If the cells of multiple ASUS APs overlap, then the wireless mobile client may switch from one ASUS AP to another as it travels throughout the facility. During the hand-off from one ASUS AP to another, the wireless mobile client maintains an uninterrupted connection to the network. This is known as “roaming.”
Multiple ASUS APs connected to a common Ethernet network form an Extended Service Set (ESS). All members of an Extended Service Set are configured with an ID, known as the SSID or ESSID. Wireless mobile clients must be configured with the same SSID as the ASUS APs on the network; a client can only roam between ASUS APs that share the same SSID.
Roaming Guidelines
•An ASUS WLAN Card can only roam between APs of the same type.
•All ASUS APs must have the same SSID.
•All computers with ASUS WLAN Cards must have the same SSID as the Access Points that they will roam between.
•If WEP encryption is enabled, then all ASUS APs and client adapters must use the same encryption level and WEP Key(s) to communicate.
•The ASUS APs’ cells must overlap to ensure that there are no gaps in coverage and to ensure that the roaming client will always have a connection available.
•ASUS APs that use the same Channel should be installed as far away from each other as possible to reduce potential interference.
•It is strongly recommended that you perform a site survey using the utility provided with the ASUS WLAN Card to determine the best location for each ASUS AP in the facility.
12 |
ASUS 802.11g Access Point |
Chapter 1 - Introduction
ASUS 802.11g AP Status Indicators
There are three LEDs on the front of the ASUS 802.11g WLAN AP, as shown here.


 Power (Amber)


 Air (Green)


 Link (Green)
1.Introduction |
StatusIndicators |
Power LED
OFF: |
No power or performing boot sequence |
ON: |
System ready |
Blinking: |
Firmware upgrade failed |
Air LED
OFF: |
No power |
ON: |
Wireless function ready |
Blinking: |
Transmitting or receiving data (wireless) |
Link LED
OFF: |
No power |
ON: |
Has physical connection to an Ethernet network |
Blinking: |
Transmitting or receiving data (through Ethernet wire) |
Power Requirements
The ASUS 802.11g AP requires power from an external power supply. The ASUS 802.11g AP ships with a UL listed, Class 2 power supply (5V, 1A).
ASUS 802.11g Access Point |
13 |

Hardware .2 Procedure
Chapter 2 - Hardware Installation
2. Installation
This chapter describes the installation procedure for the ASUS 802.11g AP and includes a description of the LEDs found on the unit.
Installation Procedure
Follow these steps to install the ASUS 802.11g WLAN AP.
1.Determine the best location for the ASUS 802.11g WLAN AP. Keep in mind the following considerations:
•The length of the Ethernet cable that connects the Access Point to the network must not exceed 100 meters.
•For standard placement, try to place the Access Point on a flat, sturdy surface as far from the ground as possible, such as on top of a desk or bookcase, keeping clear of metal obstructions and away from direct sunlight.
•For external antenna mounting, install the external antennas so that they are clear of obstructions; refer to the documentation that came with the antennas for mounting and installation instructions.
•Try to centrally locate the Access Point or its antennas so that it will provide coverage to all of the wireless mobile devices in the area.
•Use only the power supply that came with this unit. Other power supplies may fit but the voltage and power may not be compatible.
Note: It is the responsibility of the installer and users of the ASUS 802.11g AP to guarantee that the antenna is operated at least 20 centimeters from any person. This is necessary to insure that the product is operated in accordance with the RF Guidelines for Human Exposure which have been adopted by the Federal Communications Commission.
2.Place the Access Point in the desired location. Wall mounting is also possible for the Access Point. Refer to the section entitled “Wall Mounting Option” on the next page for details.
3.Attach one end of an RJ-45 Ethernet cable to the Access Point and attach the other end to the RJ-45 10Base-T port of a network hub, switch, router, or patch panel (possibly on a wall).
14 |
ASUS 802.11g Access Point |

Chapter 2 - Hardware Installation
4.Attach one end of theAC power adapter, included in the product package, to the back of the ASUS 802.11g AP and the other end to a power outlet.
2. Hardware Mounting
Note: Use the Access Point only with the power adapter supplied in the product package. Using another power supply may damage the Access Point.
The Power LED on the front of the Access Point will light up when the unit is powered ON. In addition, the green Link LED will turn ON to indicate that the Access Point has a physical Ethernet network connection.
Wall Mounting Option
Out of the box, the ASUS 802.11g AP is designed to sit on a raised flat surface like a file cabinet or book shelf. The unit may also be converted for mounting to a wall or ceiling.
Follow these steps to mount the Access Point to a wall:
1.Remove the base by pressing the tab and sliding the base.
2.Remove the side cover to expose the mounting hooks.
3.Locate the screws provided with the Access Point.
4.Mark two holes in a flat surface using the provided hole template.
5.Tighten the two provided screws until only 1/4” is showing.
6.Latch the Access Point onto the two screws.
Note: Readjust the screws if you cannot latch the Access Point onto the screws or if it is too loose.
ASUS 802.11g Access Point |
15 |

Hardware .2 Mounting
Chapter 2 - Hardware Installation
Step 1
Before: After:
1
2
Step 2
Before: After:
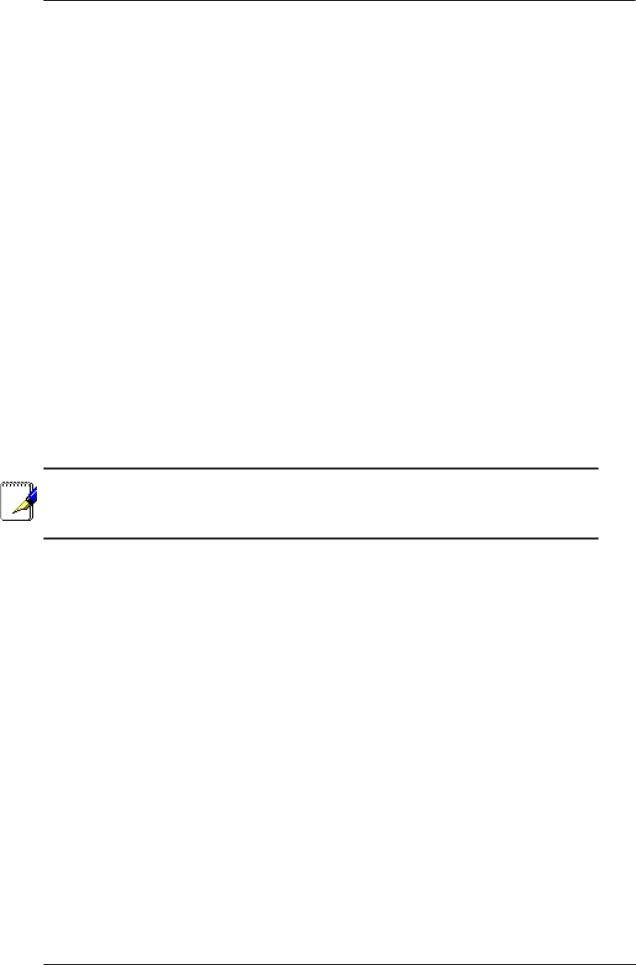
Note: Mounting brackets are provided for you to hang the ASUS 802.11g AP on an office partition or office ceiling.
16 |
ASUS 802.11g Access Point |
Chapter 3 - Software Configuration
3. Software Configuration
Configuring the ASUS 802.11g AP
The ASUS 802.11g AP can be configured to meet various usage scenarios. Some of the factory default settings may suit your usage; however, others may need changing. Prior to using the ASUS 802.11g AP, you must check the basic settings to guarantee it will work in your environment.
Configuring the ASUS 802.11g AP is done through a web browser. You need a Notebook PC or desktop PC connected to the ASUS 802.11g AP (either directly or through a hub) and running a web browser as a configuration terminal. The connection can be wired or wireless. For the wireless connection, you need an IEEE 802.11g/b compatible device, e.g. ASUS WLAN Card, installed in your Notebook PC. You should also disable WEP and set the SSID to “default” for your wireless LAN device.
If you want to configure the ASUS 802.11g AP or want to access the Internet through the ASUS 802.11g AP, TCP/IP settings must be correct. Normally, the TCP/IP setting should be on the IP subnet of the ASUS 802.11g AP.
Note: Changing TCP/IP settings may require rebooting your PC. When rebooting, the ASUS 802.11g AP should be switched ON and in the ready state.
3.Software |
Configuring |
|
|
ASUS 802.11g Access Point |
17 |

Chapter 3 - Software Configuration
Advanced IP Settings
If you want to set your IP address manually, the following default settings of the ASUS 802.11g AP should be known:
•IP address 192.168.1.1
•Subnet Mask 255.255.255.0.
If you set your computer’s IP manually, it needs to be on the same segment. For example:
•IP address 192.168.1.xxx (xxx can be any number between 2 and 254 that is not used by another device)
•Subnet Mask 255.255.255.0 (same as the ASUS 802.11g AP)
•Gateway 192.168.1.1 (this is the ASUS 802.11g AP IP address)
•DNS 192.168.1.1 (ASUS 802.11g AP IP address or your own).
Software .3 Settings IP
18 |
ASUS 802.11g Access Point |

Chapter 3 - Software Configuration
Installing the ASUS WLAN Utilities
Follow these steps to install the ASUS WLAN Utilities in Microsoft Windows. Insert the support CD. Double-click setup.exe (in the root of the support CD) if your autorun has been disabled.
(1) Click Install...Utilities.
(3)Click Yes after reading the license agreement.
(2)Click Next after reading the welcome screen.
(4)Click Next to accept the default destination folder or click Browse to specify another path.
3.Software |
InstallingUtilities |
|
|
(5)Click Next to accept the default (6) Click Finish when setup is complete. program folder or enter another name.
ASUS 802.11g Access Point |
19 |
Chapter 3 - Software Configuration
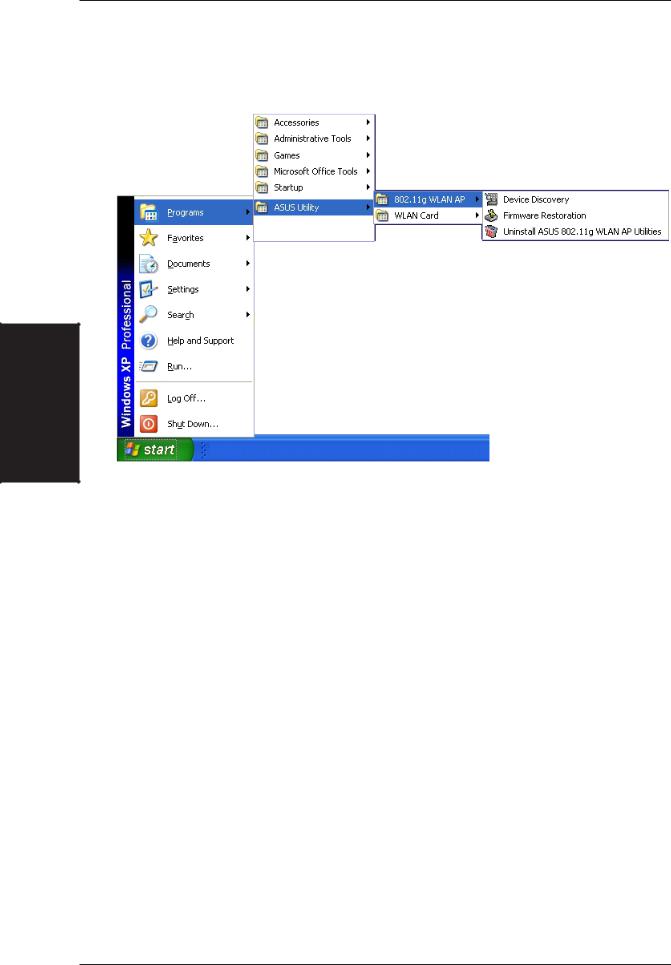
ASUS WLAN Utilities
After installation, you can launch the utilities through the Start menu.
Software .3 Utilities WLAN
Connecting to the ASUS WLAN Web Manager
Wired Ethernet Connection
Besides using a network hub, you can also connect a LAN cable from your computer to the ASUS 802.11g AP using either a straight or crossover cable because the ASUS 802.11g AP has auto-crossover capability.
Wireless Connection
If you are using a Notebook PC with a wireless adapter, you can connect to the ASUS WLAN Web Manager without a wired Ethernet connection. Just make sure your TCP/IP settings are set correctly.
20 |
ASUS 802.11g Access Point |
Chapter 3 - Software Configuration
Device Discovery
Run the ASUS WLAN Device Discovery from the Start menu and click Config on the device.
Manually Entering the Address
You can also open your PC’s web browser and enter the IP address of the ASUS 802.11g AP : http://192.168.1.1
If your computer’s IP is not on the same subnet as the ASUS 802.11g AP (192.168.1.X), you will be asked to change it. The IP address can be any number from 2 to 254 that is not used by another device. Gateway is not required.
3.Software |
WLANUtilities |
|
|
(This is the wrong setting.) |
(This is the correct setting.) |
Note: You can also change your TCP/IP settings through Windows network properties as shown earlier.
ASUS 802.11g Access Point |
21 |

Software .3 Utilities WLAN
Chapter 3 - Software Configuration
Restart your Windows if you are asked to.
Note: If you cannot find any the |
|
ASUS 802.11g APs due to a |
|
problem in the IP settings, push |
|
and hold the “Restore” button |
Restore |
on the ASUS 802.11g AP over |
|
five seconds to restore factory |
|
default settings. |
|
User Name and Password
Once connected, a window will ask for the User name and Password in order to log in. The factory default values are “admin” and “admin”.
Home Page
After logging in, you will see the ASUS 802.11g AP home page. The default pages will be for the Access Point mode. Router and Home Gateway modes are described later in this manual.
22 |
ASUS 802.11g Access Point |

Chapter 3 - Software Configuration
Access Point Mode
In “Access Point” mode, the ASUS 802.11g AP will operate as a MAC layer learning bridge and forward packets between wireless mobile clients and the Ethernet network.
A wireless LAN that uses the ASUS 802.11g AP in “Access Point” mode generally consists of one or more 802.11g/b Access Points and one or more wireless mobile clients that have an 802.11g/b adapter installed.
The ASUS 802.11g AP maintains a table of MAC addresses, which it has learned are located either on the Ethernet network or on the radio network by monitoring the source address of packets it receives. For example, if the ASUS 802.11g AP receives a packet over its radio, it creates an entry in its table for the node that sent the packet and labels the entry as a member of the radio network. The ASUS 802.11g AP removes an entry from the table after five minutes of inactivity.
When the ASUS 802.11g AP receives a packet from the Ethernet network, it compares the packet’s destination address with the node addresses listed in its table. If the packet’s destination address is not in the table, the ASUS 802.11g AP will forward the packet to the wireless mobile clients. If the packet’s destination address is listed in the table as a member of the radio network, the ASUS 802.11g AP will forward the packet to the wireless mobile clients. If the packet’s destination address is listed in the table as a member of the Ethernet network, the ASUS 802.11g AP will not forward the packet to the wireless mobile clients. The ASUS 802.11g AP applies the same principles to determine if a packet received over its radio should be forwarded to the Ethernet network.
The ASUS 802.11g AP forwards all broadcast packets to wireless mobile clients. Given this, the ASUS 802.11g AP can only support a limited amount of network traffic. It is recommended that you only use the ASUS 802.11g AP on networks that contain less than 512 nodes.
The number of wireless mobile clients that can be supported by the ASUS 802.11g AP depends on the amount of information that each client exchanges with the network. Therefore, the number of clients that can be supported by one ASUS 802.11g AP will vary based on the applications in use and how frequently network information is accessed.
3.Software |
AccessPoint |
|
|
ASUS 802.11g Access Point |
23 |
PointAccess |
Software.3 |
|
|
Chapter 3 - Software Configuration
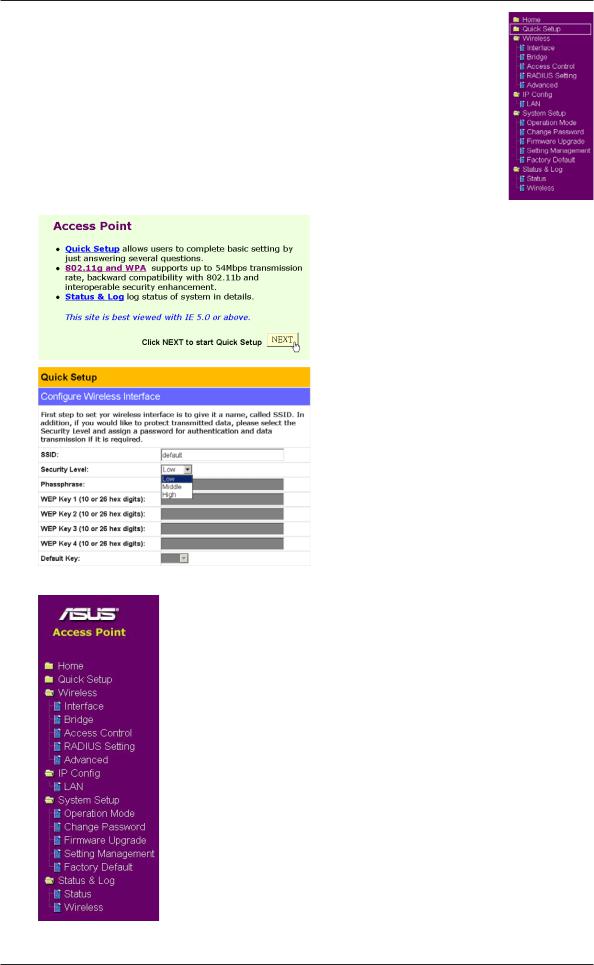
Quick Setup
Click Next to enter the Quick Setup page. Follow the instructions to setup the ASUS 802.11g AP. Tips are given when you move your cursor over each item.
Configure Wireless Interface
First step to set your wireless interface is to give it a name, called SSID. In addition, if you would like to protect transmitted data, please select Security Level as Medium or High. Selecting Medium allows only those users who use the same WEP key to connect to this access point and to transmit data with 64-bit or 128-bit WEP encryption. Selecting High allows only those users who use the same WPA pre-shared key to connect to this access point and to transmit data with TKIP encryption.
(See next few pages for item descriptions.)
If you would like to perform other settings, click an item on the menu to reveal a sub menu. Follow the instructions to setup the ASUS 802.11g AP. Tips are given when you move your cursor over each item.
24 |
ASUS 802.11g Access Point |
 Loading...