


 Loading...
SMART Notebook™10.8
Mac OS X operatingsystemsoftware
User’sguide
Trademarknotice
SMART Notebook, SMART Response, SMART Board, SMART Document Camera, SMART Exchange, SMART Classroom Suite, DViT, smarttech, theSMART logoand all SMART taglines aretrademarks or registeredtrademarks of SMART Technologies ULC intheU.S. and/or other countries. Mac andMac OS aretrademarks of Apple Inc., registeredintheU.S. andother countries. Windows, is either aregisteredtrademark or trademarks of Microsoft CorporationintheU.S. and/or other countries. Adobe, FlashandReader areeither registeredtrademarks or trademarks of AdobeSystems IncorporatedintheU.S. and/or other countries. All other third-party product and company names may betrademarks of their respectiveowners.
Copyright notice
© 2008–2011 SMART Technologies ULC. All rights reserved. Nopart of this publicationmay bereproduced, transmitted, transcribed, storedinaretrieval system or translatedintoany languageinany form by any means without theprior writtenconsent of SMART Technologies ULC. Informationinthis manual is subject tochange without noticeanddoes not represent acommitment onthepart of SMART.
Oneor moreof thefollowingpatents: US6320597; US6326954; US6741267; US7151533; US7757001; USD616462; andUSD617332. Other patents pending.
06/2011

Contents
Chapter 1: Getting started |
1 |
About SMART Notebook software, SMART Product Drivers andSMART Tools |
2 |
GettingstartedwithSMART Notebook software |
3 |
Chapter 2: Creating and working with files |
9 |
Creatingfiles |
9 |
Openingfiles |
9 |
Savingfiles |
10 |
Exportingfiles |
12 |
Printingfiles |
14 |
Reducingfilesizes |
15 |
Undoingandredoingactions |
16 |
Chapter 3: Creating and working with pages |
19 |
Displayingpages |
20 |
Zoominginandout |
21 |
Creatingpages |
22 |
Cloningpages |
23 |
Rearrangingpages |
23 |
Groupingpages |
24 |
Renamingpages |
26 |
Extendingpages |
26 |
Recordingpages |
26 |
Deletingpages |
28 |
Clearingpages |
28 |
Displayingstudent pageborders |
29 |
Workingwithpagebackgrounds andthemes |
30 |
Chapter 4: Creating basic objects |
35 |
Writingordrawingdigital ink |
36 |
Creatingshapes andlines |
40 |
Creatingtext |
44 |
Creatingtables |
49 |
Chapter 5: Working with objects |
59 |
Selectingobjects |
60 |
Changingobjects’ properties |
62 |
Positioningobjects |
65 |
i

C ON T EN T S
Lockingobjects |
68 |
Cutting, copyingandpastingobjects |
70 |
Cloningobjects |
70 |
Resizingobjects |
71 |
Rotatingobjects |
73 |
Flippingobjects |
75 |
Groupingobjects |
75 |
Addinglinks toobjects |
76 |
Addingsounds toobjects |
78 |
Animatingobjects |
79 |
Deletingobjects |
79 |
Chapter 6: Using your own content |
81 |
Insertingpictures |
82 |
Insertingmultimediafiles |
83 |
Usingcontent from otherprograms |
86 |
Attachingfiles andwebpages |
87 |
Addingyourcontent totheGallery |
89 |
Sharingyourcontent ontheSMART Exchangewebsite |
93 |
Chapter 7: Using content from SMART resources |
95 |
Findingandusingcontent from theGallery |
95 |
Findingandusingcontent from theSMART Exchangewebsite |
97 |
Chapter 8: Using SMART Notebook software in your classroom |
99 |
Presentingfiles tostudents |
99 |
Displayingfiles indifferent views andmodes |
102 |
Usingpresentationtools |
106 |
Displayinglinks |
117 |
Enablingtwopeopletouseaninteractivewhiteboard |
118 |
Chapter 9: Customizing the toolbar |
121 |
Customizingthetoolbarbuttons |
121 |
Controllinghow thetoolbardisplays availableoptions |
122 |
Index |
123 |
ii

Chapter 1
Getting started
About SMART Notebook software, SMART Product Drivers andSMART Tools |
2 |
About SMART Notebook software |
2 |
About SMART Product Drivers |
3 |
About SMART Tools |
3 |
GettingstartedwithSMART Notebook software |
3 |
Menu |
3 |
Toolbar |
4 |
PageSorter |
5 |
OpeningthePageSorter |
5 |
CustomizingthePageSorter |
5 |
Gallery tab |
6 |
OpeningtheGallery tab |
6 |
CustomizingtheGallery tab |
6 |
Attachments tab |
6 |
OpeningtheAttachments tab |
6 |
CustomizingtheAttachments tab |
6 |
Properties tab |
7 |
OpeningtheProperties tab |
7 |
CustomizingtheProperties tab |
7 |
Pagearea |
7 |
This chapterintroduces youtoSMART Notebook™ collaborativelearningsoftware,
SMART Product Drivers andSMART Tools andexplains thebasics of usingyourinteractiveproduct.
1
C H A PT ER 1
Gettingstarted
About SMART Notebook software, SMART Product Drivers and SMART Tools
SMART Notebook software, SMART Product Drivers andSMART Tools areprograms that youcan usewithyourinteractiveproduct.
About SMART Notebooksoftware
UseSMART Notebook softwaretocreatelessons orpresentations. Each .notebook filecontains a series of pages, andeachpagehas its ownobjects, properties andsettings. Youcanaddfreehand objects, geometric shapes, straight lines, text, pictures, Adobe® Flash® Playercompatiblecontent andtables toapage. Youcanmanipulateandedit theseobjects at any time.
Youcansaveyourfiles inthe .notebook format, whichyoucanopeninany Windows®, Mac or Linux® computerrunningSMART Notebook software. Youcanalsoexport yourfiles toavariety of formats.
ThePageSorterdisplays thumbnails of all of thepages inthecurrent file. Thesoftwareautomatically updates thesethumbnails whenyouchangethecontents of thepages.
Copy clipart, backgrounds, multimediacontent and .notebook files andpages toyourpagefrom the Gallery. TheGallery alsoprovides access tothefollowingresources:
•Gallery Essentials – acollectionof thousands of subject-specific images andmultimedia content
•LessonActivity Toolkit – acollectionof customizabletools andtemplates that youcanuseto createprofessional-lookingandinteractivelessons
•OnlineResources – onlinecontent foreducators whouseSMART products, includinglesson activities, educational softwareandadviceforusingyourproduct
Youcanattachacopy of afile, ashortcut toafileoralink toawebpage. This enables youtoquickly findandopenfiles andwebpages whenyoupresent yourfile.
Youcaninstall SMART Notebook Tools, whichaddspecial features tothesoftware. Thesetools includethefollowing:
•SMART Document Camera™
•SMART Response™ assessment software
2

C H A PT ER 1
Gettingstarted
About SMART Product Drivers
Yourinteractiveproduct detects contact withits screenandsends eachcontact point, alongwithPen tool information, totheconnectedcomputer. SMART Product Drivers translates theinformationinto mouseclicks anddigital ink. SMART Product Drivers enables youtoperform normal computer operations by pressingthescreenwithyourfinger(oninteractivewhiteboards)oratetheredpen(on interactivependisplays).
Youcanalsowriteordraw onthescreenindigital ink usingapentray pen(oninteractive whiteboards)ortetheredpen(oninteractivependisplays), andthensaveoreraseyournotes.
About SMARTTools
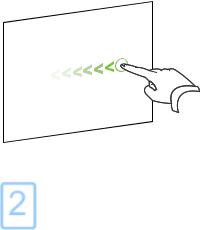
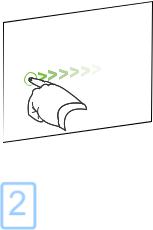
Draw attentiontospecific parts of apageusingSMART Tools, suchas theScreenShade, Spotlight, MagnifierandPointer.
Getting started with SMART Notebook software
Youcanstart SMART Notebook softwareby pressing Notebook intheDock.
N NOTE
If yourcomputer’s display refreshrateis less than60Hz, awarningmessageappears whenyou first openSMART Notebook software. Youcanchangethedisplay refreshrateby opening System Preferences > Displays inMac OS X operatingsystem software.
Whenyoustart SMART Notebook softwarethefirst time, atutorial fileopens automatically. Youcan readthecontents of this filetolearnmoreabout thesoftwareandthenew features inthelatest release. Whenyoustart thesoftwaresubsequent times, anew, blank fileopens automatically. You cancreateanotherfile(see Creatingfiles onpage9)oropenafile(see Openingfiles onpage9)at any time.
TheSMART Notebook softwarewindow consists of thefollowingsections:
•Toolbar
•Tabs (PageSorter, Gallery, Attachments andProperties)
•Pagearea
Menu
Themenucontains all thecommands youcanusetomanipulatefiles andobjects in SMART Notebook software.
3

C H A PT ER 1
Gettingstarted
Toolbar
Thetoolbarenables youtoselect anduseavariety of commands andtools withinSMART Notebook software.
Previous Page* |
CreativePens* |
Next Page* |
Eraser* |
AddPage* |
Lines* |
OpenFile* |
Shapes* |
Save* |
Magic Pen* |
Fill* |
|
Paste* |
Text* |
Undo* |
Properties* |
Redo* |
MoveToolbar* |
Delete* |
Adjust Volume |
DeletePage |
PinPage |
Show/HideScreenShade* |
Customize |
Full Screen* |
WelcomeCenter |
Transparent Background |
SMART Keyboard |
Zoom |
SMART Recorder |
Dual/SinglePageDisplay* |
ClearPage |
ScreenCapture* |
Instant Conferencing |
SMART Document Camera* |
ShapeRecognitionPen* |
Show All Links |
ClonePage |
Insert Table* |
Measurement Tools* |
Show/HideAlignment |
RegularPolygons* |
Select* |
SMART Exchange* |
Pens* |
ClearInk |
Calligraphic Pens* |
|
4

C H A PT ER 1
Gettingstarted
N NOTES
•Buttons markedwithanasterisk (*)appearinthetoolbarby default. Youcancustomizethe toolbartoincludethebuttons youusemost often(see Customizingthetoolbaronpage121).
•Additional buttons areavailableif SMART Notebook Tools areinstalledonyourcomputer. Formoreinformationonthesebuttons, seethe UsingSMART Notebook Tools sectionof the Help.
By default, thetoolbarappears at thetopof theSMART Notebook softwarewindow. However, you
canmoveit tothebottom of thewindow by pressing Move Toolbar  . This is useful insituations whereyouoryourstudents can’t reachthetoolbarwhenit’s at thetopof thewindow.
PageSorter
ThePageSorterdisplays all of thepages intheopenfileas thumbnails andautomatically updates thesethumbnails as youchangethecontents of thepages.
UsingthePageSorter, youcandothefollowing:
•Display pages
•Createpages
•Clonepages
•Clearpages
•Deletepages
•Renamepages
•Rearrangepages
•Moveobjects from onepagetoanother
•Grouppages
Opening the Page Sorter
ToopenthePageSorter, press Page Sorter  .
.
Customizing the Page Sorter
YoucanmovethePageSorterfrom onesideof theSMART Notebook softwarewindow totheother by pressing Move Sidebar  .
.
YoucanresizethePageSorterby draggingits borderleft orright. YoucanalsohidethePageSorter whenyou’renot usingit by selectingthe Auto-hide check box. (Todisplay thePageSorterwhenit’s hidden, press Page Sorter  .)
.)
5

C H A PT ER 1
Gettingstarted
N NOTE
If youreducethePageSortertoits minimum size, theauto-hidefeatureturns onautomatically.
Gallerytab
TheGallery tabcontains clipart, backgrounds, multimediacontent, files andpages that youcanuse inyourlessons, anddisplays preview images of this content. TheGallery tabalsoprovides access to otheronlineresources. Formoreinformation, see Usingcontent fromSMARTresources onpage95.
Youcanalsoincludeyourowncontent andcontent from otherteachers inyourschool intheGallery tab(see Addingyourcontent totheGallery onpage89).
Opening the Gallery tab
ToopentheGallery tab, press Gallery  .
.
Customizing the Gallery tab
YoucanmovetheGallery tabfrom onesideof theSMART Notebook softwarewindow totheotherby pressing Move Sidebar  .
.
YoucanresizetheGallery tabby draggingits borderleft orright. YoucanalsohidetheGallery tab whenyou’renot usingit by selectingthe Auto-hide check box. (Todisplay theGallery tabwhenit’s hidden, press Gallery  .)
.)
N NOTE
If youreducetheGallery tabtoits minimum size, theauto-hidefeatureturns onautomatically.
Attachmentstab
TheAttachments tabdisplays thefiles andwebpages attachedtothecurrent file. Formore information, see Attachingfiles andwebpages onpage87.
Opening the Attachments tab
ToopentheAttachments tab, press Attachments  .
.
Customizing the Attachments tab
YoucanmovetheAttachments tabfrom onesideof theSMART Notebook softwarewindow tothe otherby pressing Move Sidebar  .
.
YoucanresizetheAttachments tabby draggingits borderleft orright. Youcanalsohidethe Attachments tabwhenyou’renot usingit by selectingthe Auto-hide check box. (Todisplay the Attachments tabwhenit’s hidden, press Attachments  .)
.)
6
C H A PT ER 1
Gettingstarted
N NOTE
If youreducetheAttachments tabtoits minimum size, theauto-hidefeatureturns onautomatically.
Propertiestab
TheProperties tabenables youtoformat objects onapage, includingdigital ink, shapes, lines, text andtables. Dependingontheobject youselect, youcanchangethefollowing:
•Thecolor, thickness andstyleof lines
•Thetransparency andfill effects of objects
•Thefont type, sizeandstyleof text
•Theanimationof objects
TheProperties tabdisplays only theoptions that areavailablefortheobject youselect. Formore informationondisplayingandsettingobject properties intheProperties tab, see Changingobjects’ properties onpage62.
TheProperties tabalsoincludes a Page Recording button. Youcanusethis featuretorecordyour actions onthecurrent page(see Recordingpages onpage26).
Opening the Properties tab
ToopentheProperties tab, press Properties  .
.
Customizing the Properties tab
YoucanmovetheProperties tabfrom onesideof theSMART Notebook softwarewindow tothe otherby pressing Move Sidebar  .
.
YoucanresizetheProperties tabby draggingits borderleft orright. YoucanalsohidetheProperties tabwhenyou’renot usingit by selectingthe Auto-hide check box. (Todisplay theProperties tab whenit’s hidden, press Properties  .)
.)
N NOTE
If youreducetheProperties tabtoits minimum size, theauto-hidefeatureturns onautomatically.
Pagearea
Thepageareadisplays thecontents of aselectedpageinafile. This is theareaof thepagewhere youcreateandwork withobjects (see Creatingbasic objects onpage35).
7

Chapter 2
Creating and working with files
Creatingfiles |
9 |
Openingfiles |
9 |
Savingfiles |
10 |
Exportingfiles |
12 |
Printingfiles |
14 |
Reducingfilesizes |
15 |
Undoingandredoingactions |
16 |
InSMART Notebook software, youcancreateoropenSMART Notebook software(.notebook)files. Aftercreatingoropeninga .notebook file, youcansaveit, print it, export it tootherformats and completeothercommontasks. Inaddition, youcanwork withthepages withinthe .notebook file.
Creating files
Whenyoustart SMART Notebook softwareforthefirst time, atutorial fileopens automatically. When youstart thesoftwaresubsequent times, anew .notebook fileopens automatically. However, you cancreateanew fileat any time.
gTo create a file
1.Select File > New.
If you’reworkingonafilewithunsavedchanges, adialogbox appears andprompts youtosave thecurrent file.
2.Press Yes tosaveyourchanges, andthenfollow theon-screeninstructions.
Opening files
WithSMART Notebook software10, youcanopen:
•.notebook files (thedefault fileformat forSMART Notebook software9.5, 9.7and10)
•.xbk files (thedefault fileformat forSMART Notebook software8, 9.0and9.1)
9

C H A PT ER 2
Creatingandworkingwithfiles
Afteryouopenafile, youcansavethefileas a .notebook or .xbk file.
Themethodby whichyouopenafileis thesameforall versions of SMART Notebook software.
gTo open a file
1.Press Open File  .
.
The Opendialogbox appears.
2.Browsetoandselect thefileyouwant toopen.
3.Press Open.
T TIP
Youcanopenarecently openeddocument by selectingthe File menu, andthenselectingthe filename.
Saving files
By default, SMART Notebook softwaresaves yourfiles in .notebook format. Anyonewith SMART Notebook software 9.5orlaterforWindows operatingsystems, Mac OS X operating system softwareorLinux operatingsystems installedonhis orhercomputercanopena .notebook file.
N NOTE
Thedefault fileformat forSMART Notebook software10is .notebook, but thedefault fileformat for versions 8, 9.0and9.1is .xbk. If youwant toopenyourfileinSMART Notebook software8, 9.0or 9.1, saveyourfilewiththe .xbk extension. However, the .xbk format doesn’t support someof the objects andproperties availableinSMART Notebook software10. If yousaveyourfileinthe .xbk format, SMART Notebook softwaredoesn’t savetheobjects orproperties inyourfilethat the .xbk format doesn’t support. Also, if youcreatetext inSMART Notebook software10andsaveyourfile in .xbk format, you’reunabletoedit thetext inSMART Notebook software8, 9.0or9.1.
gTo save a new file
1.Press Save  .
.
The Savedialogbox appears.
2.Browsetothefolderwhereyouwant tosavethenew file.
3.Typeanameforthefileinthe SaveAs box.
10
C H A PT ER 2
Creatingandworkingwithfiles
4.If youwant tomakesurethat yourfileretains its formatting, select the SMART Notebook File format.
OR
If youwant tocreateafilethat youcanopenwithSMART Notebook software8, 9.0and9.1, select the SMART Notebook XBK File format.
5.Press Save.
If you’resavingyourfileinthe .xbk format andthereareobjects orproperties inyourfilethat the
.xbk format doesn’t support, adialogbox appears indicatingthat SMART Notebook software won’t savetheseobjects orproperties if youcontinue. Press Yes.
gTo save an existing file
Press Save  .
.
gTo save an existing file with a new name or location
1.Select File > Save As.
The Savedialogbox appears.
2.Browsetothefolderwhereyouwant tosavethenew file.
3.Typeanameforthefileinthe SaveAs box.
4.If youwant tomakesurethat yourfileretains its formatting, select the SMART Notebook File format.
OR
If youwant tocreateafilethat youcanopenwithSMART Notebook software8.x, 9.0and9.1, select the SMART Notebook XBK File format.
5.Press Save.
If you’resavingyourfileinthe .xbk format andthereareobjects orproperties inyourfilethat the
.xbk format doesn’t support, adialogbox appears indicatingthat SMART Notebook software won’t savetheseobjects orproperties if youcontinue. Press Yes.
11

C H A PT ER 2
Creatingandworkingwithfiles
Exporting files
Youcanexport your .notebook files tothefollowingformats:
•HTML
•Pictureformats o PNG
o JPEG o TIFF o BMP
•InteractiveWhiteboardCommonFileFormat (CFF)
N NOTES
•SMART Notebook softwaredoesn’t includeattachments whenyouexport files as pictures. Toincludeattachments, youmust export yourfileas eitherHTMLorPDF (Adobe Reader® 6.0orlater).
•SMART Notebook softwaredoesn’t export files that youattachtoyour .notebook fileas an alias. If youwant toincludeanattachment, attachacopy of thefile(see Attachingfiles and webpages onpage87).
•SMART Notebook softwaredoesn’t export somegradient, patternandimageeffects. These effects may appearas asolidfill orappearincorrectly intheexportedfile.
gTo export a file as HTML
1.Select File > Export > Web Page. A dialogbox appears.
2.Browsetothefolderwhereyouwant toexport thefile.
3.Typeanameforthefileinthe SaveAs box.
4.Press Save.
gTo export a file as picture files
1.Select File > Export > Image Files. A dialogbox appears.
12
C H A PT ER 2
Creatingandworkingwithfiles
2.Select afolderwhereyouwant toexport thefiles.
3.Select apictureformat inthe ImageFormat drop-downlist.
4.Select apicturesizeinthe ImageSizedrop-downlist.
5.Typeanameforthefiles inthe SaveAs box.
6.Press Save.
gTo export a file as a PDF file
1.Select File > Export > PDF. A dialogbox appears.
2.Press Thumbnails, Handouts or Full Page.
3.Optionally, typeheadertext inthe Headerbox, footertext inthe Footerbox andthecurrent dateinthe Datebox.
4.Optionally, select the Show page borders check box toshow aborderaroundeachprinted page.
5.Optionally, select the Show page numbers check box toshow apagenumberoneachpage.
6.If youpressed Thumbnails or Handouts instep2, select athumbnail sizeinthe Thumbnail Sizedrop-downlist and, optionally, select the Show Thumbnail titles check box toshow titles undereachthumbnail.
7.Press Continue.
The Savedialogbox appears.
8.Browsetothefolderwhereyouwant toexport thefile.
9.Typeanameforthefileinthe SaveAs box.
10.Press Save.
gTo export a file as a CFF file
1.Select File > Export > CFF. A dialogbox appears.
2.Browsetothefolderwhereyouwant toexport thefile.
3.Typeanameforthefileinthe SaveAs box.
13

C H A PT ER 2
Creatingandworkingwithfiles
4. Press Save.
N NOTE
Youcanalsoimport CFF files (see Importingfiles fromotherinteractivewhiteboardprograms
onpage87).
Printing files
Youcanprint all pages orselect pages ina .notebook file. Youcanprint thepages as thumbnails,
handouts orfull pages.
gTo print a file
1.Select File > Print. A dialogbox appears.
2.Press Thumbnails, Handouts or Full Page.
3.Optionally, typeheadertext inthe Headerbox, footertext inthe Footerbox andthecurrent dateinthe Datebox.
4.Optionally, select the Show page borders check box toshow aborderaroundeachprinted page.
5.Optionally, select the Show page numbers check box toshow apagenumberoneachpage.
6.If youpressed Thumbnails or Handouts instep2, select athumbnail sizeinthe Thumbnail Sizedrop-downlist and, optionally, select the Show Thumbnail titles check box toshow titles undereachthumbnail.
7.Press Continue.
A dialogbox appears.
8.If all print settings aren’t visible, click thedisclosuretrianglebesidethe Printerdrop-downlist.
9.Select All toincludeall pages. OR
Select From toincludeselect pages, andthentypethepagerange.
10.Select otherprint settings, includingtheprinternameandthenumberof copies.
11.Press Print.
14

C H A PT ER 2
Creatingandworkingwithfiles
Reducing file sizes
If your .notebook files containlargepictures (pictures over1MB infilesize), yourfiles couldopenand runslowly. Youcanreducethepictures’ filesizewithout noticeably reducingtheirquality. As aresult, your .notebook files’ overall filesizes will besmallerandthefiles will openandrunmorequickly.
gTo reduce the size of a large picture when inserting it in a file
1.Insert thepictureas describedin Insertingpictures onpage82. Afteryoupress Open, the ImageOptimizationdialogbox appears.
2.Press Optimize toreducethepicture’s filesize. OR
Press Keep Resolution tonot reducethepicture’s filesize.
N NOTE
Whenyouinsert aBMP file, SMART Notebook softwareinternally converts thefiletoPNG format. This conversionreduces thesizeof thefile. As aresult, youmight not needtoexport anoptimizedversionof the .notebook file(see Toexport anoptimizedfileonthenext page) evenif theBMP fileis over1MB insize.
T TIP
If youwant tousethesameoptionwheninsertinglargepictures inthefuture, select the
Always use this option check box.
Alternatively, youcanset yourpreferenceforinsertinglargepictures inthe Preferences dialogbox by followingtheprocedurebelow.
gTo reduce the size of a large picture after inserting it in a file
1.Select thepicture.
2.Press thepicture’s menuarrow, andthenselect Image Optimization. The ImageOptimizationdialogbox appears.
3.Click Optimize.
gTo set your preference for inserting large pictures
1.Select Notebook > Preferences.
The SMART Notebook Preferences dialogbox appears.
15

C H A PT ER 2
Creatingandworkingwithfiles
2.Select Ask every time I insert a large image tohavetheoptionof reducingornot reducing largepictures’ filesizes whenyouinsert them.
OR
Select Never change the resolution of inserted images toneverreducelargepictures’ file sizes whenyouinsert them.
OR
Select Always change image resolution to optimized file size toalways reducelarge pictures’ filesizes whenyouinsert them.
3.Press OK.
gTo export an optimized file
1.Select File > Export Optimized File.
N NOTE
This menuoptionis availableonly if thefilecontains oneormorelargepictures.
A dialogbox appears.
2.Browsetothefolderwhereyouwant tosavethenew file.
3.Typeanameforthefileinthe SaveAs box.
4.Press Save.
Undoing and redoing actions
Whenyoumakechanges toafile, youcanreversetheeffects of yourprevious actions and commands.
N NOTE
If twopeopleareusingyourinteractiveproduct, pressing Undo and Redo affects theactions of bothusers.
gTo reverse the effect of the last action
Press Undo  .
.
N NOTE
Youcanundoanunlimitednumberof actions.
16
C H A PT ER 2
Creatingandworkingwithfiles
gTo reinstate the last action reversed with the Undo command
Press Redo  .
.
17

Chapter 3
Creating and working with pages
Displayingpages |
20 |
Zoominginandout |
21 |
Creatingpages |
22 |
Cloningpages |
23 |
Rearrangingpages |
23 |
Groupingpages |
24 |
Renamingpages |
26 |
Extendingpages |
26 |
Recordingpages |
26 |
Deletingpages |
28 |
Clearingpages |
28 |
Displayingstudent pageborders |
29 |
Workingwithpagebackgrounds andthemes |
30 |
Applyingpagebackgrounds andthemes |
30 |
Applyingbackgrounds usingtheProperties tab |
30 |
Applyingbackgrounds andthemes usingtheGallery |
32 |
Creatingthemes |
33 |
A .notebook fileis composedof aseries of pages, eachwithits ownobjects andproperties.
A thumbnail of eachpageappears inthePageSorter. UsingeitherthePageSorterormenu commands, youcandisplay anexistingpage, createablank page, createacloneof anexistingpage ordeleteanexistingpage.
Youcanalsochangeapage’s background, extendapage’s height, renameapage, rearrangepages withinafile, grouppages withinafileandcompleteothercommontasks.
19
C H A PT ER 3
Creatingandworkingwithpages
Displaying pages
Youcandisplay any pageinthefileusingthePageSorter. Youcandisplay thenext orprevious page inthefileusingbuttons orgestures.
Youcanzoom inorout whenviewingapage. Youcanalsoset thepagetofit yourdisplay orset the page’s widthtothesamewidthas thedisplay.
gTo display a page
1.If thePageSorterisn’t visible, press Page Sorter  .
.
2.Press thethumbnail of thepageyouwant todisplay.
gTo display the next page in a file
Press Next Page  . OR
. OR
Swipeyourfingeracross thepagefrom right toleft.
A messageappears, displayingthecurrent page’s number.
20
C H A PT ER 3
Creatingandworkingwithpages
gTo display the previous page in a file
Press Previous Page  . OR
. OR
Swipeyourfingeracross thepagefrom left toright.
A messageappears, displayingthecurrent page’s number.
Zooming in and out
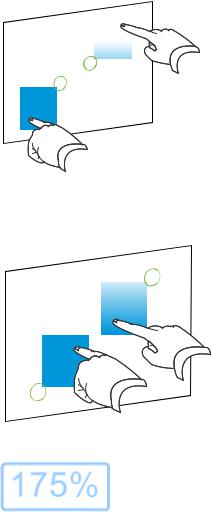
Youcanzoom inandout usingthemenuormultitouchgestures (if yourinteractiveproduct supports
multitouchgestures).
gTo zoom in or out using the menu
1.Select View > Zoom.
2.Select amagnificationlevel between50% and300%. OR
Select Entire Page tomaketheentirepagefit yourdisplay. OR
Select Page Width toset thepage’s widthtothesamewidthas thedisplay.
21
C H A PT ER 3
Creatingandworkingwithpages
gTo zoom in or out using multitouch gestures
Dragyourfingers inoppositedirections tozoom in.
OR
Dragyourfingers towardeachothertozoom out.
A messageappears, displayingthecurrent zoom level.
Creating pages
Youcanaddablank pagetotheopenfileusingthe AddPagebuttonorthePageSorter.
gTo insert a page using the Add Page button
Press Add Page  .
.
Thenew pageappears afterthecurrent page.
22

C H A PT ER 3
Creatingandworkingwithpages
gTo insert a page using the Page Sorter
1.If thePageSorterisn’t visible, press Page Sorter  .
.
2.Select thethumbnail of thepageyouwant thenew pagetoappearafter.
3.Press thethumbnail’s menuarrow, andthenselect Insert Blank Page. Thenew pageappears aftertheselectedpage.
Cloning pages
As analternativetocreatingablank page, youcancreateaduplicate(or“clone”)of anexistingpage.
N NOTE
Youcancloneapageonly if it contains content.
gTo clone a page
1.If thePageSorterisn’t visible, press Page Sorter  .
.
2.Select thethumbnail of thepageyouwant toclone.
3.Press thethumbnail’s menuarrow, andthenselect Clone Page. Theclonedpageappears immediately afterthecurrent page.
N NOTE
Youcanrepeat this process as many times as youwant.
Rearranging pages
If youwant, youcanrearrangetheorderof thepages inafile.
gTo rearrange pages
1.If thePageSorterisn’t visible, press Page Sorter  .
.
2.Press thethumbnail of thepageyouwant tomoveinthefile. A blueborderappears aroundthethumbnail.
23

C H A PT ER 3
Creatingandworkingwithpages
3.Dragthethumbnail toits new positioninthePageSorter. A bluelineindicates thepage’s new position.
4.Releasethethumbnail.
Grouping pages
Youcangrouppages inafile. This enables youtofindaparticulargroupquickly inthePageSorter, andthendisplay its pages. This is useful whentherearealot of pages inafile.
gTo create or edit a group
1.If thePageSorterisn’t visible, press Page Sorter  .
.
2.Press thefirst group’s menuarrow, andthenselect Edit Page Groups.
All thegroups andpages forthecurrent filearedisplayed. Groups appearas bluebars and pages appearas thumbnails:
oIf youcreatedandeditedthegroups inthis file, thepages appearunderthebluebars you createdandrenamed.
oIf youhaven’t editedthegroups, adefault grouptitled Group1appears andincludes all of thepages andtheirthumbnails below its bluebar.
N NOTE
Thumbnails below eachbluebarincludethesamemenuarrow options as thumbnails inthe PageSorter. This enables youtopress athumbnail inagroup, select its menuarrow, and thendeletethepage, clearthepage, insert anew page, clonethepage, renamethepage, addaScreenShadetothepageoraddthepagetotheGallery.
3.Press the Add New Group buttonintheupper-right corner.
A new bluebarappears andanew pageappears below thebluebar.
4.Press thebluebar’s menuarrow, andthenselect Rename Group.
5.Typeanew nameforthegroup.
24

C H A PT ER 3
Creatingandworkingwithpages
6. Dothefollowing:
oTomoveapageintoagroup, press thepage’s thumbnail, andthendragit below the group’s bluebarandtotheright of thethumbnail youwant it tofollow.
oTorearrangetheorderof pages inagroup, press apage’s thumbnail, andthendragit to theright of thethumbnail youwant it tofollow.
oTorearrangetheorderof groups, press agroup’s bluebar, andthendragit below theblue barof thegroupyouwant it tofollow.
N NOTES
oYoucanalsochangetheorderof thegroups by selectingabluebar’s menu arrow, andthenselecting Move Up or Move Down.
oSMART Notebook softwarenumbers pages sequentially across afile. If you changetheorderof groups, SMART Notebook softwarerenumbers thepages in thegroups accordingly.
oTodeleteagroupandkeepits pages, moveall of its pages todifferent groups. Whena groupcontains nopages, SMART Notebook softwareautomatically deletes it.
oTodeleteagroupandall pages inthegroup, press thebluebar’s menuarrow, andthen select Delete Group.
7.Press  .
.
gTo access a group in the Page Sorter
1.If thePageSorterisn’t visible, press Page Sorter  .
.
2.Press thefirst group’s menuarrow, andthenselect thenameof thegroupyouwant toaccess. ThePageSorterdisplays thethumbnail forthefirst pageinthegroupyouwant toaccess.
25

C H A PT ER 3
Creatingandworkingwithpages
Renaming pages
Whenyoucreateapage, SMART Notebook softwareautomatically names this pagewiththedate andtimeof its creation. Youcanchangethis name.
gTo rename a page
1.If thePageSorterisn’t visible, press Page Sorter  .
.
2.Double-click thepage’s name.
3.Typeanew nameforthepage.
4.Press elsewhere.
Extending pages
If youneedmoreroom at thebottom of apage, youcanextendthepagevertically without affecting thepage’s width.
gTo extend a page
1.If you’redisplayingthepageinEntirePageview, select adifferent zoom level.
2.Press the Extend Page link at thebottom of thepage.
Recording pages
ThePageRecordingoptions enableyoutorecordyouractions onthecurrent page.
N NOTE
SMART Recorderis adifferent but similartool. UsingSMART Recorder, youcanrecordyour actions inprograms otherthanSMART Notebook software. WithSMART Recorder, youcan recordafull screen, specifiedwindow orrectangularportionof thescreen. If youconnect a microphonetoyourcomputer, youcanalsorecordaudio.
gTo record a page
1.If theProperties tabisn’t visible, press Properties  .
.
2.Press Page Recording.
26
Loading...