


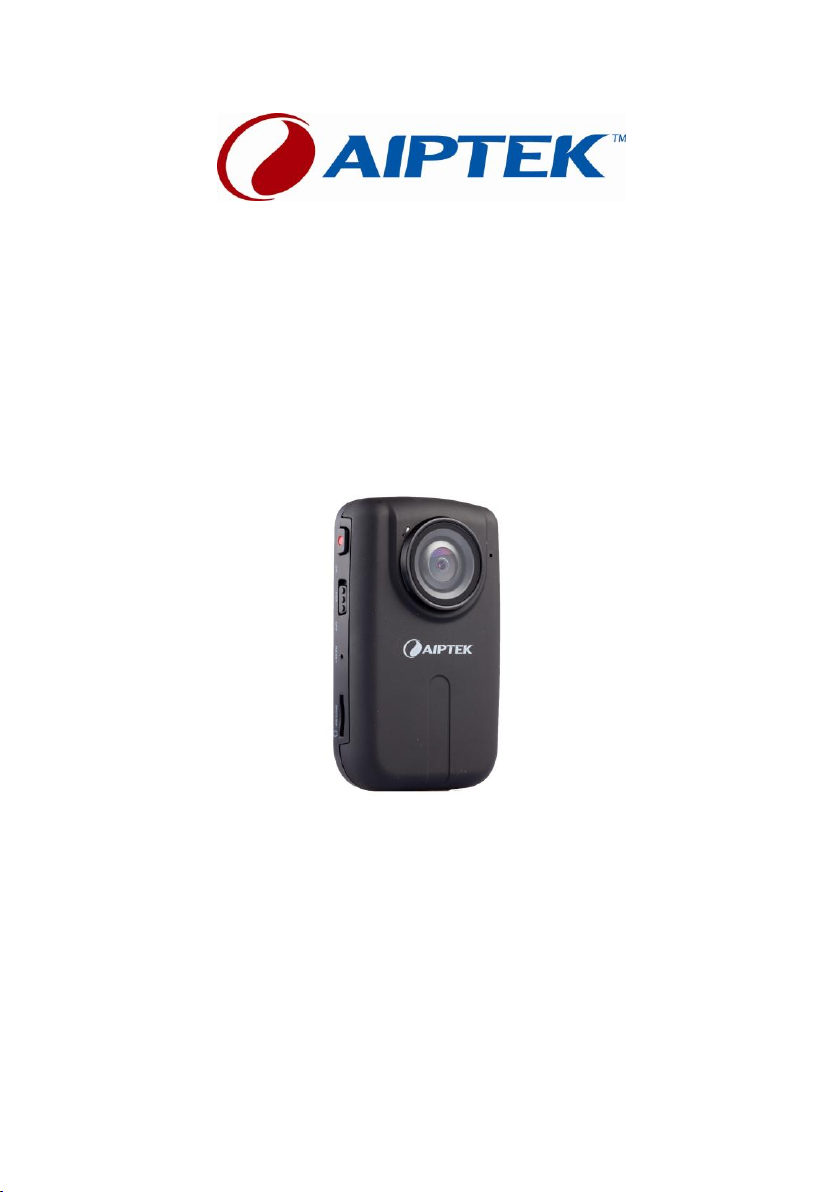
SportyCam Z3
SportyCam Z3
e-Manual
Version: 1.0
EN
DE
FR
IT
EN
DE
FR
IT
FI
NO
SV
RU
TC

SportyCam Z3 e-Manual DA
www.aiptek.eu Page 2
EN
Welcome at Aiptek
Thank you very much for purchasing this SportyCam Z3 from Aiptek. SportyCam Z3 is a Full
HD outdoor camcorder with an ultra wide-angle lens. Small, light and fully equipped with
the best hardware, the Z3 is the ultimate tool for all outdoor activities like diving, surfing,
climbing, and biking. Equipped with a wide range of mount plates and fixing material the
SportyCam Z3 can be fixed under all circumstances. The Full HD wide-angle lens is recording
in uncompromising quality. Operate Z3 easily and comfortable with the handy remote
control. Or enjoy your experiences again by connecting SportyCam Z3 to your HDTV. No
matter which activity, no matter how deep or high, SportyCam Z3 will follow you.
Before you start enjoying this product it’s recommend to read this manual and follow the
instructions step by step to get the best result with your new outdoor camera.
Best Regards,
Aiptek Team
Safety Notice
1. Do not drop, puncture, roll or disassemble the camera; otherwise the warranty will be
voided.
2. Avoid all contact with water, and dry hands before using.
3. Do not expose to high temperature or leave in direct sunlight.
4. Use the Camera with care. Make sure there are no sharp things scratch the display and
lens of the camera. Keep away things made of metal.
5. For your own safety, avoid using the Camera when there is a storm or lightning.
6. Use only the accessories supplied by the manufacturer.
7. Keep the camera out of the reach of infants.
If the time arises to throw away your product, please recycle all the components possible.
Batteries and rechargeable batteries are not to be disposed in your domestic waste! Please
recycle them at your local recycling point. Together we can help to protect the environment.

SportyCam Z3 e-Manual DA
www.aiptek.eu Page 3
EN
Content
S
S
y
y
s
s
t
t
e
e
m
m
R
R
e
e
q
q
u
u
i
i
r
r
e
e
m
m
e
e
n
n
t
t
s
s
3
3
P
P
a
a
c
c
k
k
a
a
g
g
e
e
C
C
o
o
n
n
t
t
e
e
n
n
t
t
4
4
K
K
n
n
o
o
w
w
i
i
n
n
g
g
y
y
o
o
u
u
r
r
C
C
a
a
m
m
e
e
r
r
a
a
7
7
O
O
p
p
e
e
r
r
a
a
t
t
i
i
n
n
g
g
I
I
n
n
s
s
t
t
r
r
u
u
c
c
t
t
i
i
o
o
n
n
s
s
8
8
R
R
e
e
c
c
o
o
r
r
d
d
i
i
n
n
g
g
1
1
0
0
R
R
e
e
m
m
o
o
t
t
e
e
C
C
o
o
n
n
t
t
r
r
o
o
l
l
1
1
0
0
S
S
e
e
t
t
t
t
i
i
n
n
g
g
s
s
1
1
2
2
F
F
i
i
l
l
e
e
S
S
t
t
o
o
r
r
a
a
g
g
e
e
a
a
n
n
d
d
P
P
l
l
a
a
y
y
1
1
4
4
C
C
o
o
n
n
n
n
e
e
c
c
t
t
i
i
n
n
g
g
Y
Y
o
o
u
u
r
r
C
C
a
a
m
m
e
e
r
r
a
a
1
1
5
5
S
S
p
p
e
e
c
c
i
i
f
f
i
i
c
c
a
a
t
t
i
i
o
o
n
n
s
s
1
1
7
7
System Requirements
Operating System
Windows XP SP2 / Vista / 7
CPU
AMD or Intel CPU with 3.2 GHz or Multicore CPU
RAM
1 GB (2 GB recommended)
Graphic card
256 MB memory
Software
H.264 decoder (Quick Time Player 7.4.1 or above)
Other
1 free USB port, CD/DVD player
*Note: The specification might be modified without notice
SportyCam Z3 e-Manual DA
www.aiptek.eu Page 4
EN
!
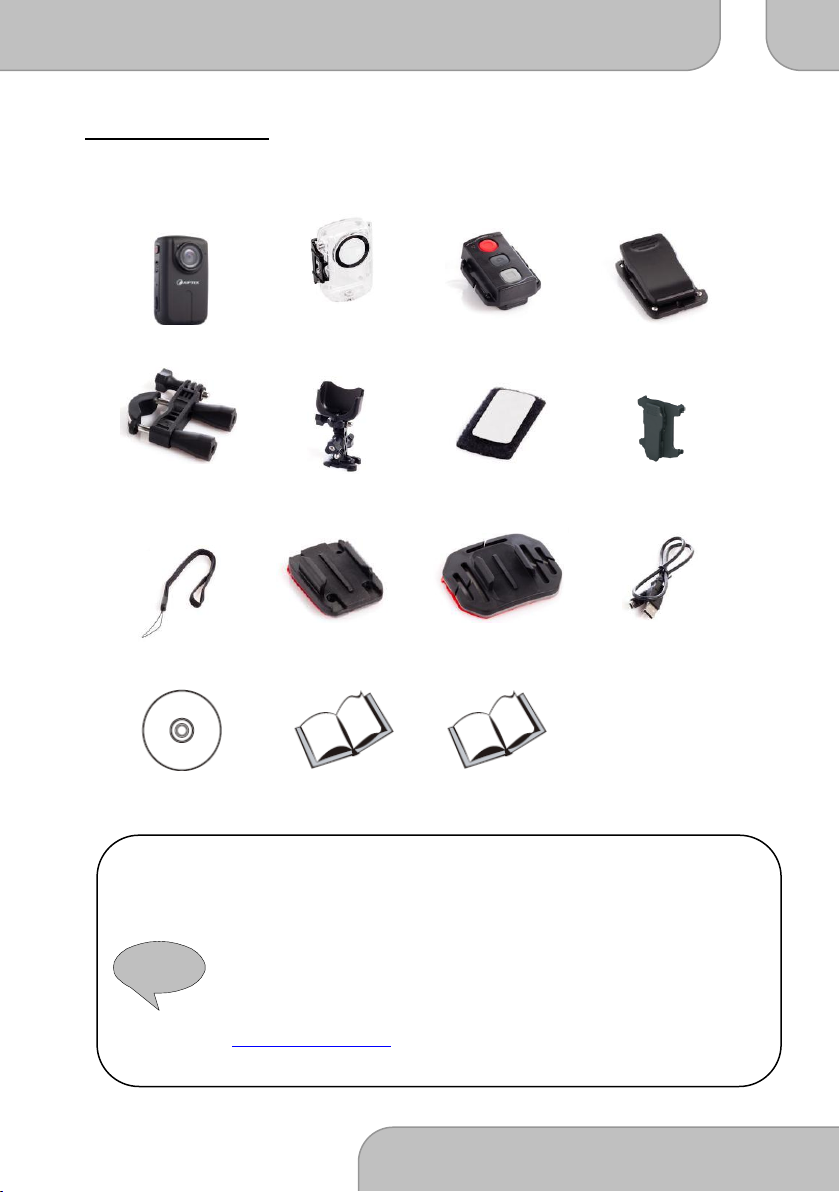
Package Content
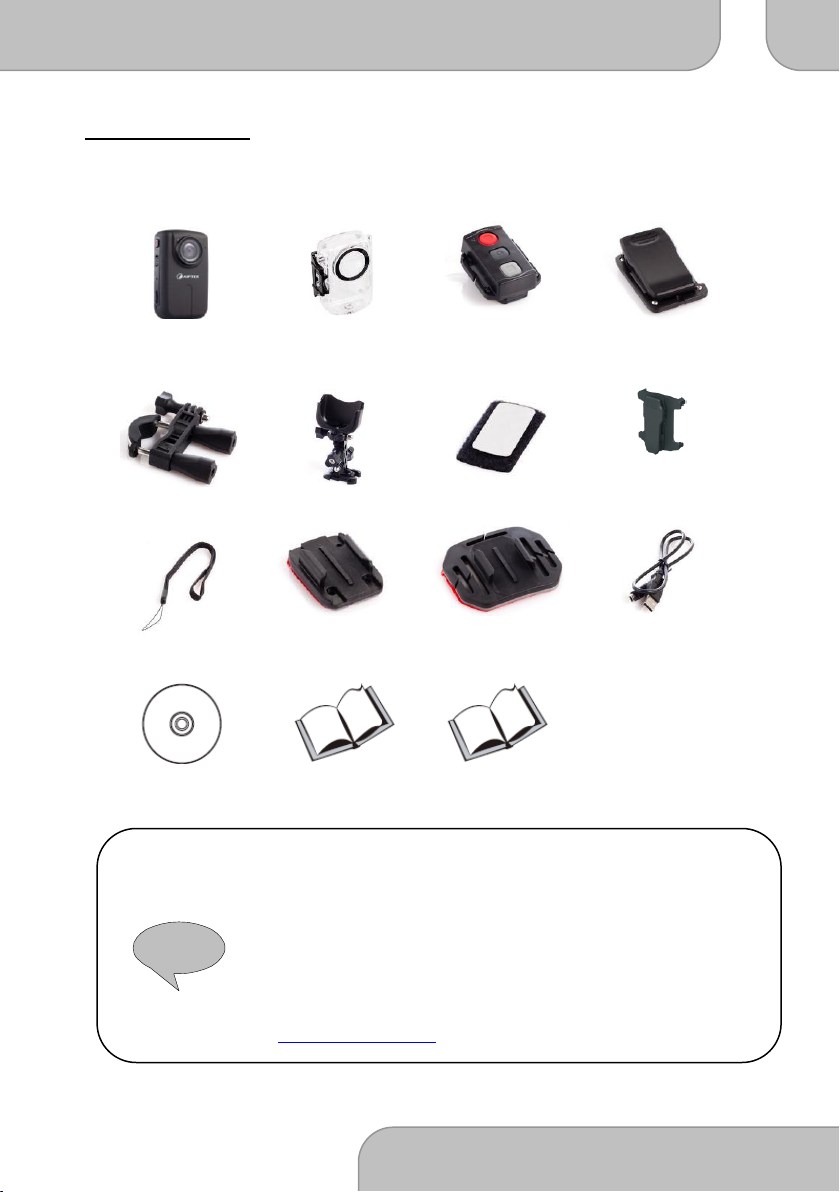
Please check if the following items are located in your packaging:
SportyCam Z3
Waterproof case
Remote Control
Clip for
waterproof case
Bike mount
Three-way pivot-arm
Velcro
Clip for
Remote Control
Wrist-strap
Flat mounting plate
Curved mount plate
0,5 m USB cable
Software CD
Warranty card
User’s Manual
Please note: Contact your dealer immediately if package is incomplete.
The actual items may by different from the pictures here.
Package is subject to change without further notice.
The actual accessories may vary with configuration listed here,
depending on the specifications of the product you purchase.
Please do not hesitate to contact your local dealer or visit
www.aiptekshop.com for optional accessories.

SportyCam Z3 e-Manual DA
www.aiptek.eu Page 5
EN

SportyCam Z3 e-Manual DA
www.aiptek.eu Page 6
EN
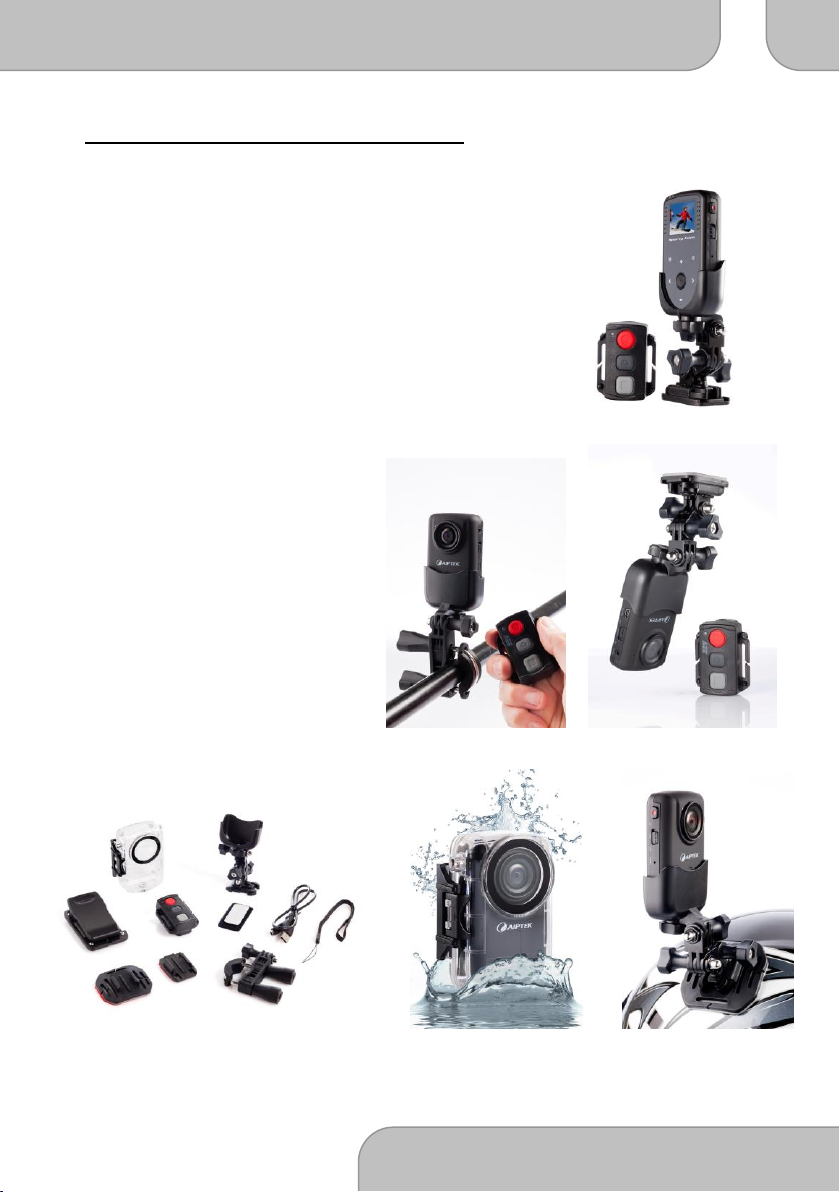
Where to use your SportyCam Z3
-
-
B
B
i
i
k
k
i
i
n
n
g
g
-
-
C
C
a
a
n
n
o
o
e
e
i
i
n
n
g
g
-
-
D
D
i
i
v
v
i
i
n
n
g
g
-
-
H
H
i
i
k
k
i
i
n
n
g
g
-
-
M
M
o
o
t
t
o
o
c
c
r
r
o
o
s
s
s
s
-
-
M
M
o
o
u
u
n
n
t
t
a
a
i
i
n
n
C
C
l
l
i
i
m
m
b
b
i
i
n
n
g
g
-
-
R
R
a
a
f
f
t
t
i
i
n
n
g
g
-
-
R
R
u
u
n
n
n
n
i
i
n
n
g
g
-
-
S
S
k
k
i
i
i
i
n
n
g
g
-
-
S
S
k
k
y
y
d
d
i
i
v
v
i
i
n
n
g
g
/
/
P
P
a
a
r
r
a
a
c
c
h
h
u
u
t
t
i
i
n
n
g
g
-
-
S
S
n
n
o
o
w
w
b
b
o
o
a
a
r
r
d
d
i
i
n
n
g
g
-
-
S
S
u
u
r
r
f
f
i
i
n
n
g
g
-
S
S
u
u
r
r
v
v
e
e
i
i
l
l
l
l
i
i
a
a
n
n
c
c
e
e

SportyCam Z3 e-Manual DA
www.aiptek.eu Page 7
EN
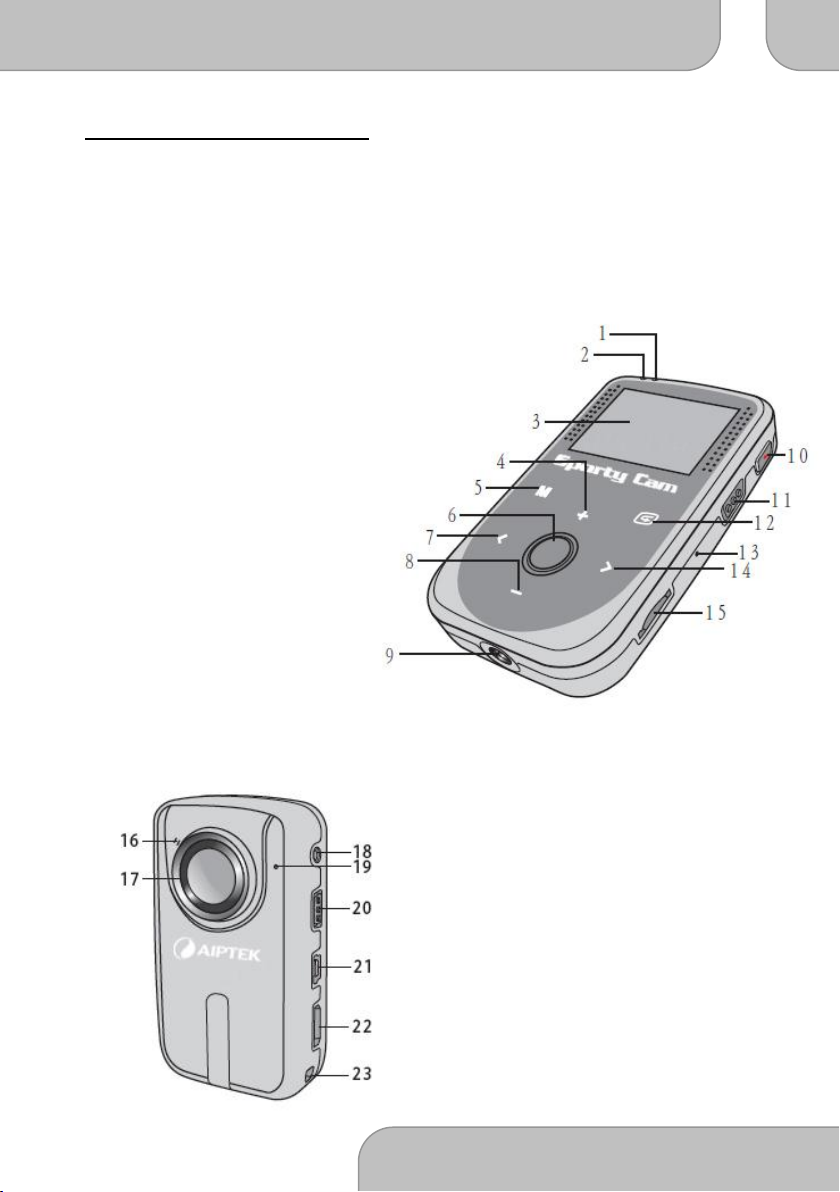
Knowing your Camera
1. Status Indicator (green)
2. Power Indicator (red)
3. TFT Display Screen
4. Navigation Up / Volume Up / Zoom In
5. Menu
6. OK / Shutter / Lock / Rotate
7. Navigation Left / Previous / Rewind
8. Navigation Down / Volume Down / Zoom Out
9. Screw-type socket
10. Video / Voice Record
11. VOX Switch
12. Playback
13. Reset
14. Navigation Right / Next / Forward
15. Micro SD Card Slot
Operating Instructions
16:9 working area
16. Self-timer Indicator
17. Lens
18. AV Out
19. Microphone
20. Power Switch
21. Mini USB Port
22. HDMI Out
23. Lanyard Hole
SportyCam Z3 e-Manual DA
www.aiptek.eu Page 8
EN
!
Operating Instructions
Charge: Please completely charge your SportyCam Z3 before the first use. The
power indicator (red led) will blink up slowly while charging and if the
red led is constantly on, the Z3 is fully charged. It takes about 4 hours to
fully charge the device. Now the camera is ready for your first outdoor
action.
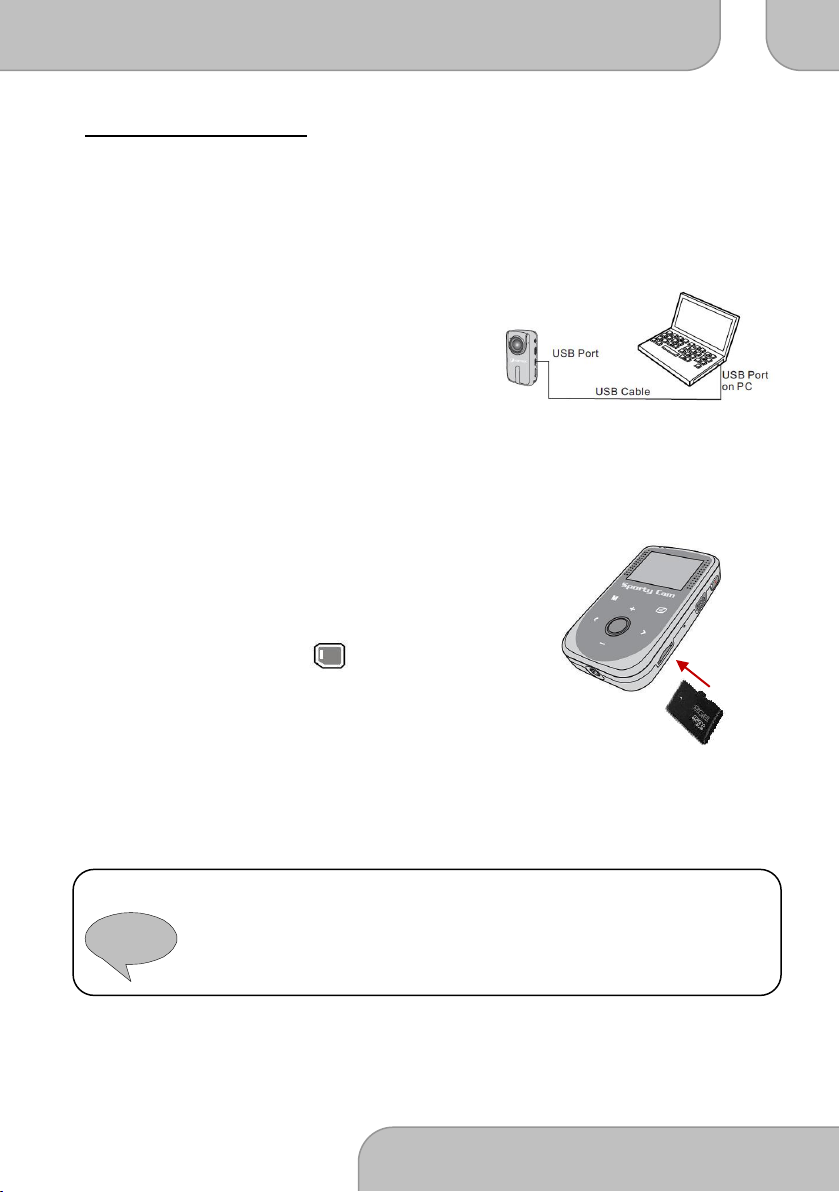
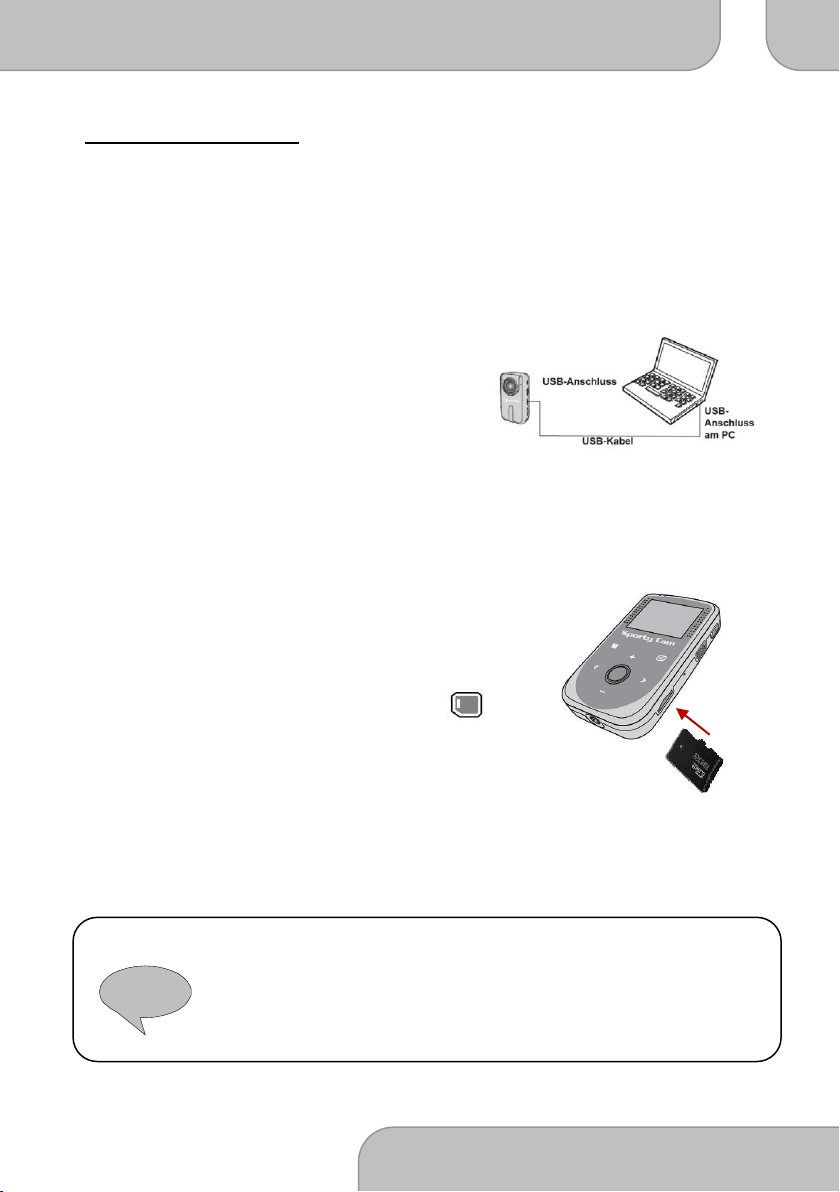
Storage: The camera has a built-in internal memory for storage, but you can
insert a micro-SD/SDHC memory card to expand your camera’s memory
capacity.
1. Insert the card as the direction of
indication until it reaches the end of the
slot.
2. When the card is inserted successfully,
the icon ( ) will appear on screen
and the internal memory will become
inaccessible.
To remove the card, push the card to release it and then pull it out
gently.
Please Note: When using a brand new memory card, you are recommended to
format the card with the camera. The camera will use the external
memory card as the main storage medium. Only when the inserted card
is removed the files will be stored in the built-in memory.

SportyCam Z3 e-Manual DA
www.aiptek.eu Page 9
EN
Power ON
Power OFF
!
Turning on / off: To turn on the camera, push the
Power button towards “On”.
The power indicator will light red.
To turn off the camera, push the
Power button down to the “Off”
position. Now the power is turned off.
Please note: If the power is not turned on after you have completed the above procedures,
please check if the following have been done correctly:
1. Battery is correctly charged.
2. The [Auto Off] setting may cause the camcorder to turn off after it is idle
for a period of time.
Setting the preferred language
The default language of SportyCam Z3 is English. You can change it to your preferred
language in the Settings menu. Touch the Menu button (M) and navigate Right (>) to
“Setup”, go down and Select “Language”. Now you can choose your preferred language.
Confirm with “OK”.
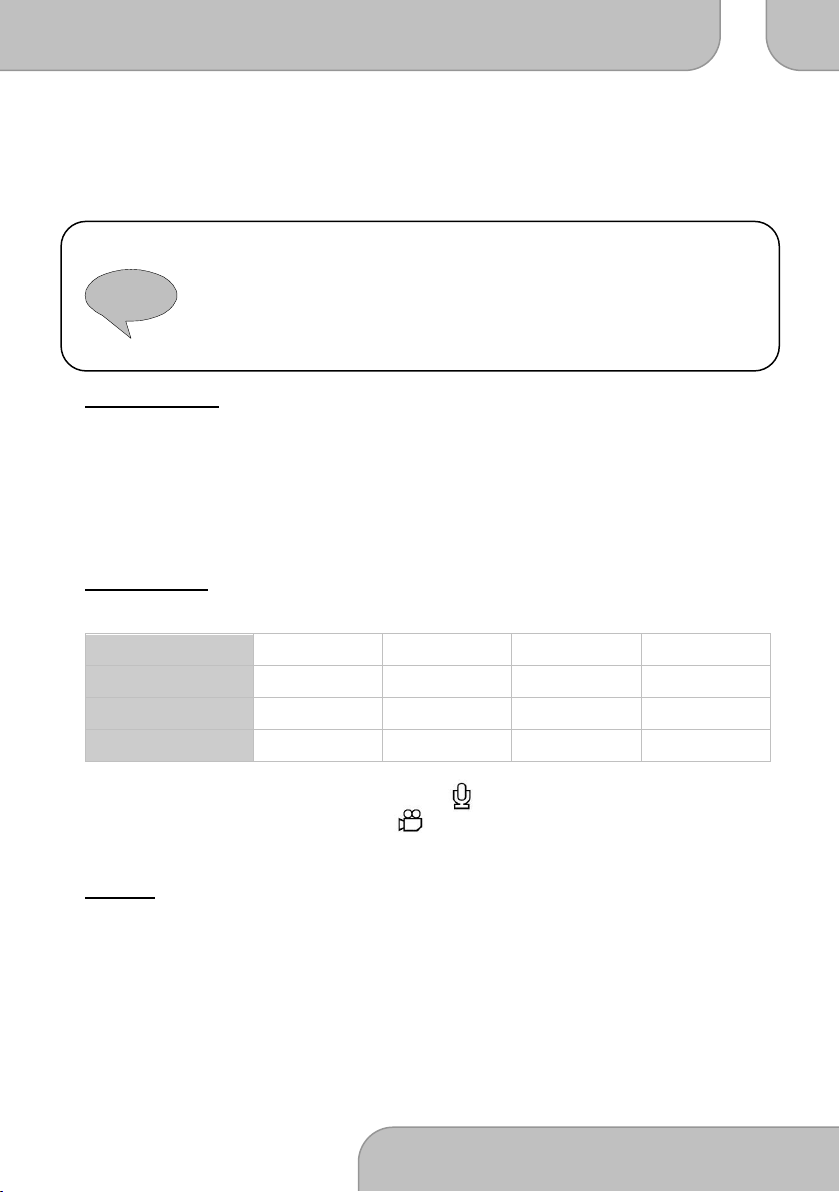
Battery charge indicator
Icon
Description
Full battery life
Moderate battery life
Low battery life
Empty battery life

SportyCam Z3 e-Manual DA
www.aiptek.eu Page 10
EN
Comprehending icons on the screen
Preview Mode
1. Mode icon
2. Battery level indicator
3. Resolution
4. Memory card inserted
5. Memory left
6. Recorded time
7. Zoom indicator
Playback Mode
1. Mode icon
2. Battery level indicator
3. Duration
4. File name
5. Playback Volume
Recording
Video
Video mode is the default setting.
1. Press Menu button (M) and use the sensor keys (+/−) to select
‘‘Capture’’ mode. Use the sensor keys (+/−) to select ‘‘Capture’’
mode. Press Shutter/OK to enter and select Video Mode. Press the
Menu Button (M) to return to preview.
2. Press the Record button to start or stop recording
3. Press the Zoom buttons (+/−) to zoom in/out the screen
SportyCam Z3 e-Manual DA
www.aiptek.eu Page 11
EN
VOX ON
VOX OFF
(Latin for: “Voice”)
Picture
1. Press Shutter / OK button to take a picture.
2. Zooming: press the Zoom buttons (+/−) to zoom in/out the screen
3. For better image quality, it is recommended that you hold the
camera steady to avoid blurring caused by hand shake.
Voice
1. Enter Menu (M) and use the sensor keys Up / Down (+/−) to select
‘’Capture mode’’, press Shutter/OK to enter and confirm ‘’Voice
Mode’’. Leave the menu with the Menu button (M).
2. Press the Record button to start or stop recording
VOX: “Voice-activated-recording”. With
the VOX switch you can turn on the
audio triggered recording.
In VOX mode, the camera automatically
starts recording for two minutes when
ambient noises rise above 65 dB.
If it remains under 65dB for 2 minutes, Z3 will automatically stop
recording and enter the preview mode.
In preview mode, if the external sound goes beyond 65dB again, Z3 will
automatically start recording again.
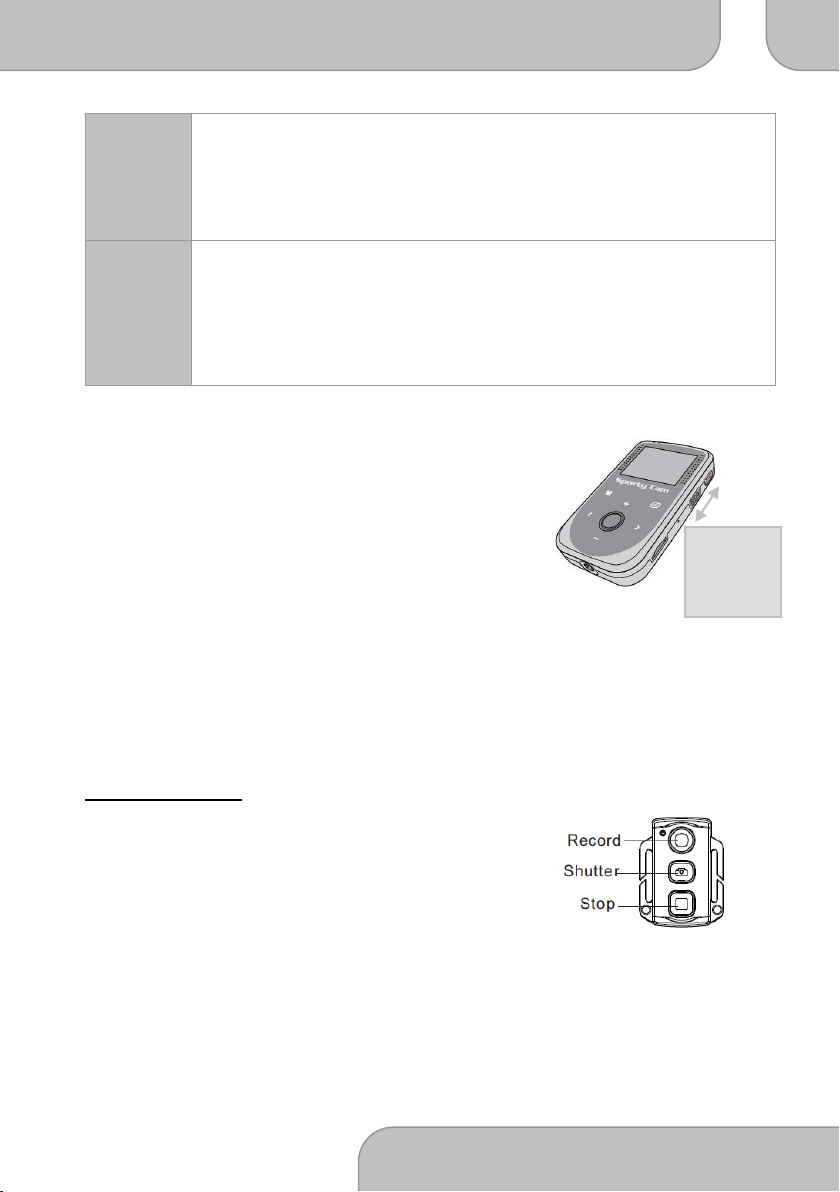
Remote Control
You can use the remote control to start and stop a recording
or to take a picture. The red indicator led will blink once
when you press any of the buttons.
You can match a remote control to one or more SportyCam
Z3. In order to do that, please perform the two steps shown below:
1. Turn off Z3, press and hold „OK/Shutter“, turn the power switch to „ON”, and then
release „OK/Shutter“ when Z3 is turned on.

SportyCam Z3 e-Manual DA
www.aiptek.eu Page 12
EN
!
2. Press both „Record“ and „Stop“ on the remote control within 3 seconds to finish
the remote control code pairing process.
Please Note: The remote control range is about 5 meters.
If code pairing is successful, Z3 will act accordingly when you press any
of the keys on the remote control.
If code pairing fails, please repeat the above code pairing process.
Settings
You can navigate through the settings with the touch-sensitive buttons. Select “M” to see
the settings menu and use “OK / Shutter” to select a setting. Press “<” and “>” for left /
right and “+” and “−“ for up / down navigation. Press “M” again to leave the setup menu.
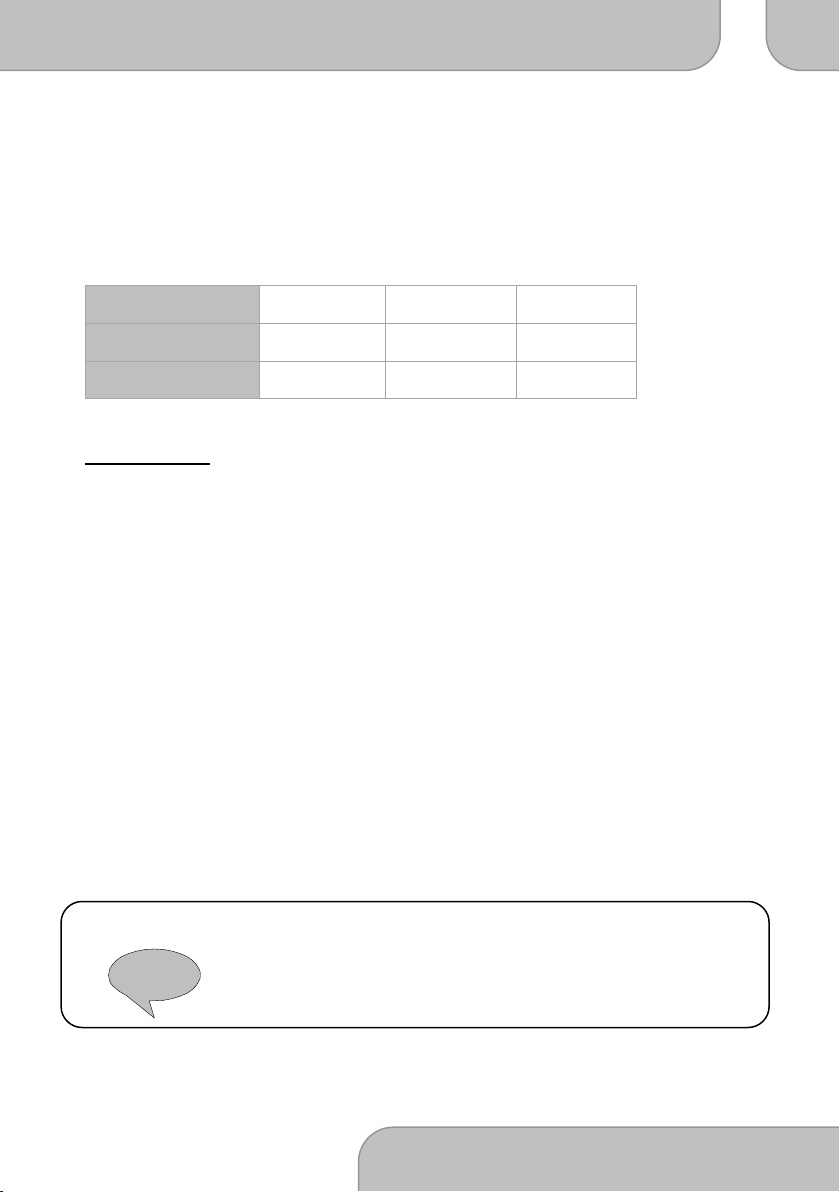
Camcorder
Resolution: Choose between four different recording qualities:
Setting
1080p
720p
WVGA
QVGA
Resolution in pixel
1920 x 1080
1280 x 720
848 x 480
320 x 240
Frames per second
30
60
60
30
Format
16 : 9
16 : 9
53 : 30
4 : 3
Capture Mode: Select microphone ( f ) voice recording or camcorder ( ) for
video recording
Camera
Single Shot: Activate Single Shot mode. The shutter button takes one single picture
Treble Shot: You will now take 3 pictures in a row. Good for taking pictures of fast
moving objects or short action scenes
SportyCam Z3 e-Manual DA
www.aiptek.eu Page 13
EN
!
Continuous: The Z3 will now take continual pictures automatically. You can set up
different timings (Off, 2, 3, 5, 10, 20, 30 or 60 seconds)
Selftimer: Activates the selftimer (Off, 5 or 10 seconds)
Resolution: Select one of three different picture resolutions (3, 5 or 8 Megapixel)
Setting
3M
5M
8M*
Resolution in pixel
2048 x 1536
2592 x 1944
3200 x 2400
Asprect ratio
4 : 3
4 : 3
4 : 3
* interpolated
Setup
Beep: Select if you want the keys to beep
Time Display: Select if you want your recordings to have a time and date stamp in the
bottom right corner
Loop Record: Activates continuous recording. The camera will now delete the oldest
files on your microSD card when it is full. Best for using Z3 as a
surveillance camera or monitor
Auto Standby: Activate Auto Standby. The camera will be in standby after 0, 2, 5 or 10
Minutes. You can reactivate the camera by pressing the shutter or
record button
TV standard: Select the TV standard PAL or NTSC depending on your area
Format: Formatting will delete all files on the active device
(Internal memory or microSD card when inserted)
Please Note: All files (videos, pictures and voice recordings) will be deleted, even
when they are protected! Make sure to backup recorded material that
you need in future.
Default: Restore the settings to factory default

SportyCam Z3 e-Manual DA
www.aiptek.eu Page 14
EN
Language: Set your preferred language
Frequency: Set the Light Source Frequency 50Hz or 60Hz depending on your area in
order to avoid flickering on your monitor or TV
Flicker settings reference:
Area
England
Germany
France
Italy
Spain
Russia
Setting
50 Hz
50 Hz
50 Hz
50 Hz
50 Hz
50 Hz
Area
Portugal
America
Taiwan
China
Japan
Korea
Setting
50 Hz
50 Hz
60 Hz
60 Hz
50/60 Hz
50 Hz
Please note: The flicker setting is based on the frequency standard of your local
power supply.
Set date and time: Set the current time and date
Reset: If the camera stopped responding to key strokes, please resart the
device by shortly pressing the reset key with a small pentip
File Storage and Play
You can view all recordings directly on SportyCam Z3. It has a built-in TFT-display and
speaker.
1. To enter playback mode, press the Playback button ( ).
2. Playback Video / Voice files: Select “Record” if you want to view your video and voice
recordings. Set up the camera to Video Mode or Voice Mode before viewing the recordings.
3. Playback photos: Select “Capture” to view pictures.

SportyCam Z3 e-Manual DA
www.aiptek.eu Page 15
EN
!
Navigating the playlist
1. Navigate the recorded file with “<” and “>”.
2. Touch “−“ to enter thumbnail view mode.
3. Press the Shutter Button to play or pause the file.
4. Adjust the playback volume with “+” and “−“.
5. Press “<” to rewind and “>” to forward a video recording.
6. Touch “M” to delete (one, all) or protect recordings from a manual delete.
Please note: This will not protect your recordings if you format your microSD-card!
Photo
1. Navigate the recorded file with “<” and “>”.
2. Touch “−“ to enter thumbnail view mode.
3. Press the Shutter Button to enlarge a picture and “+” or “-“ to zoom in or zoom
out.
4. You can rotate the current picture by pressing the OK / Shutter button.
5. Touch “M” to start a slideshow, delete (one, all), protect or tag a picture with
DPOF. The slideshow shows every picture for 5 seconds
6. Please refer to User’s Manual about DPOF.
7. You can leave the menu by touching the “Playback” button ( . ).
What is DPOF? As a standard to record the print orders sent by the Micro SD card,
DPOF (Digital Print Order Format) is applicable to the photos shot by
digital cameras. You can designate the photos to be printed and the
number of their copies.
The following operations can be executed if your digital camera is DPOF
compatible: Insert the Micro SD card into a DPOF compatible printer to
output the photos as ordered. The printer compatible with your camera
can follow the DPOF orders to print the photos.
You can leave the menu by touching the “Playback” button ( ). Now the camera is in
preview mode again and ready to record.
SportyCam Z3 e-Manual DA
www.aiptek.eu Page 16
EN
!
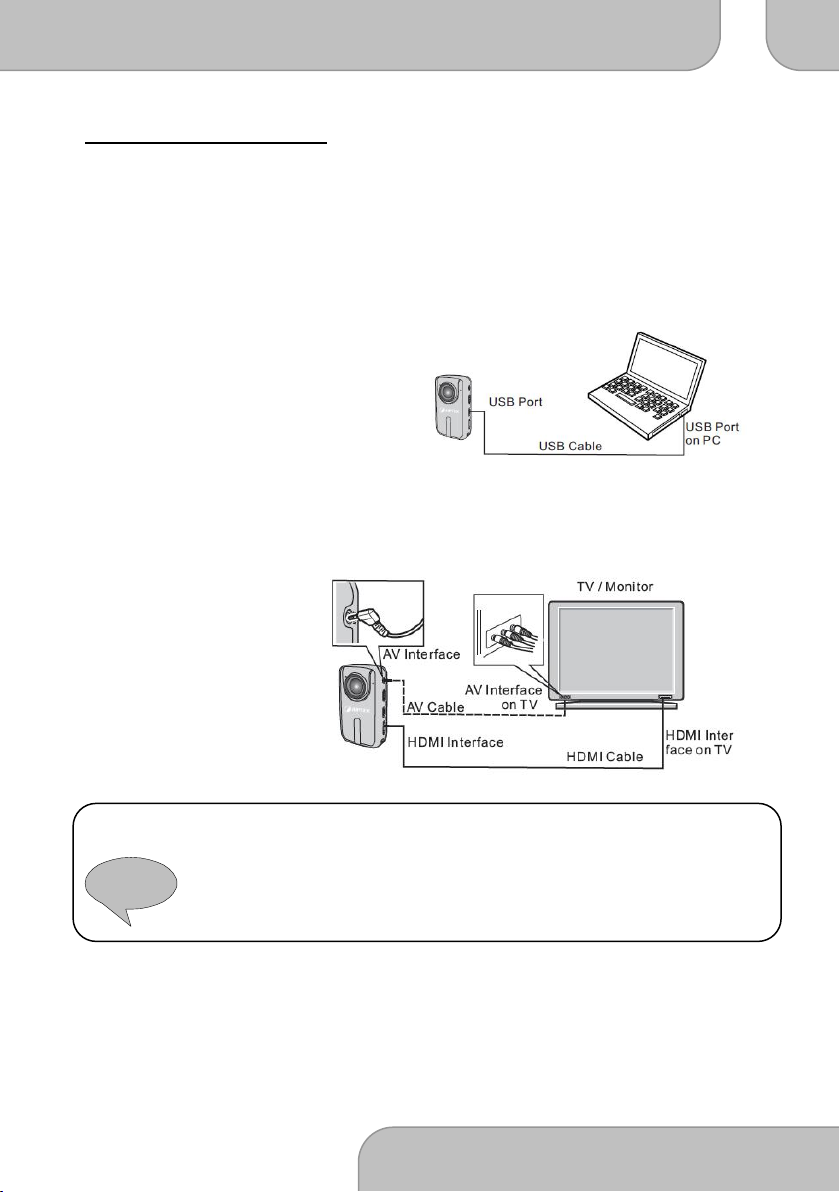
Connecting your camera
USB cable: You can copy the recorded video files to your computer via the USB
cable, or remove the microSD card and insert it into a card reader to
read the data. Then, you can edit or view the material with the bundled
software or simply playback with the Windows Media Player or
QuickTime.
HDMI/AV-cable: You can also use an HDMI or AV-cable to connect Z3
to a TV or computer monitor.
Please Note: After connecting Z3 to the monitor via the HDMI cable, select the input
source for the monitor to display the data.
If you select the AV cable, please connect each of its terminals to the
relevant TV or monitor terminal in the same color.
* HDMI and AV cable are not included
SportyCam Z3 e-Manual DA
www.aiptek.eu Page 17
EN
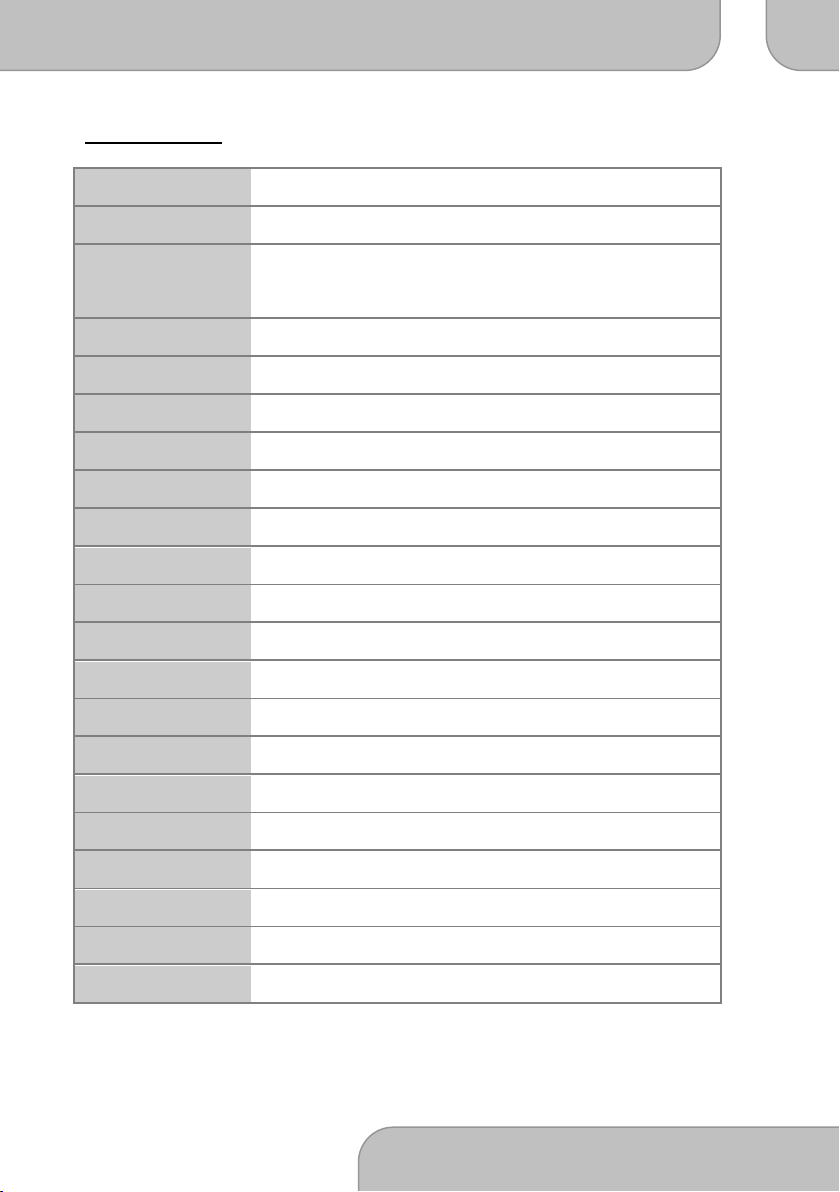
Specifications
*Note: Specifications are subject to change without notification
Sensor type
5 mega-pixel CMOS sensor, 1/2.5 "
View angle
Full HD: 130 °; HD 720p: 170 °
Video modes
1920 x 1080, 30 fps, 16:9; 1280 x 720, 60 fps, 16:9
848 x 480, 60 fps, 16:9; 320 x 240, 30 fps, 16:9
Image resolution
3200 x 2400 interpolated; 2592 x 1944; 2048 x 1536
File format
AVC (Advanced Video Recording) H.264 (.MOV), JPEG, WAV
Display
1.5 " (3.7 cm) diagonal, 960 x 240 pixels
Internal memory
40 MB for storage
External memory
Micro SD / SDHC up to 32 GB
Aperture range
F2.8
Focal length
F = 2.8mm
Focus range
30 cm ~ ∞
Digital zoom
4X (HD, WVGA, QVGA)
Waterproofed
IP 68 (30 m) with additional case
Remote control
Yes (Rec, Stop, Snapshot)
Connection
Mini USB (USB 2.0), mini HDMI, 3.5 mm mini jack
Power supply
Input: DC: 110-240V, 50 / 60Hz; Output: AC: 5V, 1.0 A
Battery
1400 mAh, 3.7V, Li-Ion rechargeable battery
Power consumption
1.3 W
Dimension
85 mm x 50 mm x 23 mm (L x W x H)
Weight
81 g
Operating condition
temperature: -30 °C ~ 50 °C; humidity: 15% ~ 85 %
SportyCam Z3
Handbuch
e-Manuals in
English, German, French, Italian, Finish, Swedish, Norwegian,
Russian, and Traditional Chinese are available on CD.
Version: 1.0

SportyCam Z3 Handbuch DA
www.aiptek.eu Seite 2
DE
Willkommen bei Aiptek
Vielen Dank, dass Sie diese SportyCam Z3 von Aiptek erworben haben. Die SportyCam Z3
ist eine Full HD Outdoor-Videokamera mit einem Ultra-Weitwinkelobjektiv. Die Z3 ist klein,
leicht und mit bester Hardware komplett ausgestattet. Somit stellt sie das ultimative
Werkzeug für alle Outdoor-Aktivitäten dar, beispielsweise Tauchen, Surfen, Klettern und
Radfahren. Die SportyCam Z3 wird mit verschiedenen Montageplatten und
Befestigungsmaterialien geliefert und kann überall montiert werden. Das Full
HD-Weitwinkelobjektiv ermöglicht Aufnahmen in kompromissloser Qualität. Die Z3 kann
mit der praktischen Fernbedienung einfach und komfortabel bedient werden. Oder
genießen Sie Ihre Erlebnisse, indem Sie die SportyCam Z3 an Ihren HDTV anschließen. Ganz
gleich, bei welchen Aktivitäten, egal wie hoch oder tief: Die SportyCam Z3 wird Ihnen
folgen.
Bevor Sie beginnen, dieses Produkt zu nutzen, sollten Sie dieses Handbuch lesen und die
Anweisungen Schritt für Schritt befolgen, um mit Ihrer neuen Outdoor-Kamera beste
Ergebnisse zu erzielen.
Mit freundlichen Grüßen,
das Aiptek Team
Sicherheitshinweis
1. Die Kamera nicht fallen lassen, darauf schlagen, kugeln oder demontieren;
anderenfalls erlischt die Garantie.
2. Vermeiden Sie Kontakt mit Wasser, und trocknen Sie die Hände vor der Nutzung ab.
3. Setzen Sie sie keinen hohen Temperaturen oder direktem Sonnenlicht aus.
4. Gehen Sie sorgfältig mit der Kamera um. Stellen Sie sicher, dass Display und Objektiv
der Kamera nicht durch scharfe Gegenstände zerkratzt werden. Halten Sie Metallteile
von der Kamera fern.
5. Zu Ihrer eigenen Sicherheit sollten Sie die Kamera nicht bei Stürmen oder Blitzschlag
verwenden.
6. Verwenden Sie ausschließlich vom Hersteller bereitgestelltes Zubehör.
7. Halten Sie die Kamera fern von Kleinkindern.
Wenn der Zeitpunkt zum Entsorgen des Produkts gekommen ist, recyceln Sie nach
Möglichkeit alle Komponenten.
Batterien und wiederaufladbare Akkus dürfen nicht im Hausmüll entsorgt werden! Bitte
recyceln Sie diese in einer Recycling-Sammelstelle vor Ort. Zusammen können wir zum
Schutz der Umwelt beitragen.

SportyCam Z3 Handbuch DA
www.aiptek.eu Seite 3
DE
Inhalt
S
S
y
y
s
s
t
t
e
e
m
m
a
a
n
n
f
f
o
o
r
r
d
d
e
e
r
r
u
u
n
n
g
g
e
e
n
n
3
3
V
V
e
e
r
r
p
p
a
a
c
c
k
k
u
u
n
n
g
g
s
s
i
i
n
n
h
h
a
a
l
l
t
t
4
4
B
B
e
e
d
d
i
i
e
e
n
n
e
e
l
l
e
e
m
m
e
e
n
n
t
t
e
e
d
d
e
e
r
r
K
K
a
a
m
m
e
e
r
r
a
a
7
7
B
B
e
e
t
t
r
r
i
i
e
e
b
b
s
s
a
a
n
n
w
w
e
e
i
i
s
s
u
u
n
n
g
g
e
e
n
n
8
8
A
A
u
u
f
f
n
n
a
a
h
h
m
m
e
e
1
1
0
0
F
F
e
e
r
r
n
n
b
b
e
e
d
d
i
i
e
e
n
n
u
u
n
n
g
g
1
1
1
1
E
E
i
i
n
n
s
s
t
t
e
e
l
l
l
l
u
u
n
n
g
g
e
e
n
n
1
1
2
2
D
D
a
a
t
t
e
e
i
i
s
s
p
p
e
e
i
i
c
c
h
h
e
e
r
r
u
u
n
n
d
d
W
W
i
i
e
e
d
d
e
e
r
r
g
g
a
a
b
b
e
e
1
1
4
4
K
K
a
a
m
m
e
e
r
r
a
a
a
a
n
n
s
s
c
c
h
h
l
l
i
i
e
e
ß
ß
e
e
n
n
1
1
6
6
T
T
e
e
c
c
h
h
n
n
i
i
s
s
c
c
h
h
e
e
D
D
a
a
t
t
e
e
n
n
1
1
7
7
Systemanforderungen
Betriebssystem
Windows XP SP2 / Vista / 7
Prozessor
AMD oder Intel CPU mit 3,2 GHz oder Mehrkern-CPU
Arbeitsspeicher
1 GB (2 GB empfohlen)
Grafikkarte
256 MB Speicher
Software
H.264 Decoder (Quick Time Player 7.4.1 oder höher)
Sonstiges
1 freier USB-Anschluss, CD/DVD-Player
*Hinweis: Die Spezifikation kann ohne Ankündigung geändert werden
SportyCam Z3 Handbuch DA
www.aiptek.eu Seite 4
DE
!
Verpackungsinhalt
Bitte überprüfen Sie, ob folgende Artikel in Ihrer Verpackung enthalten sind:
Sporty Cam Z3
Wasserfestes
Gehäuse
Fernbedienung
Clip für wasserfestes
Gehäuse
Fahrradhalterung
Dreiwege-
Schwenkarm
Klettverschluss
Clip für
Fernbedienung
Handgelenksschlaufe
Flache
Montageplatte
Gebogene
Montageplatte
0,5 m USB-Kabel
Software CD
Garantiekarte
Benutzerhandbuch
Bitte beachten Sie: Wenden Sie sich sofort an Ihren Händler, wenn der
Verpackungsinhalt unvollständig ist.
Die eigentlichen Artikel können von den hier dargestellten Bildern
abweichen. Die Verpackung kann ohne vorherige Ankündigung
geändert werden.
Das eigentliche Zubehör kann von der hier aufgeführten Konfiguration
abweichen, je nach Spezifikationen des von Ihnen erworbenen
Produkts.
Bitte zögern Sie nicht, Ihren Händler zu kontaktieren oder
www.aiptekshop.com zu besuchen, wenn Sie optionales Zubehör
benötigen.

SportyCam Z3 Handbuch DA
www.aiptek.eu Seite 5
DE
SportyCam Z3 Handbuch DA
www.aiptek.eu Seite 6
DE
Einsatzbereiche für Ihre SportyCam Z3
- Radfahren
- Kanufahren
- Tauchen
- Wandern
- Motocross
- Bergsteigen
- Rafting
- Laufen
- Skifahren
- Skydiving / Fallschirmspringen
- Snowboarden
- Surfen
- Überwachung
SportyCam Z3 Handbuch DA
www.aiptek.eu Seite 7
DE
Bedienelemente der Kamera
1. Statusanzeige (grün)
2. Stromanzeige (rot)
3. TFT-Display
4. Navigation nach oben / Lautstärke erhöhen / Heran zoomen
5. Menü
6. OK / Auslöser / Sperren / Drehen
7. Navigation nach links / Zurück / Rücklauf
8. Navigation nach unten / Lautstärke verringern
/ Heraus zoomen
9. Schraubbuchse
10. Video-/Sprachaufnahme
11. VOX-Schalter
12. Wiedergabe
13. Reset
14. Navigation nach rechts / Weiter / Vorlauf
15. Steckplatz microSD-Karte
16:9 Arbeitsbereich
16. Selbstauslöser-Anzeige
17. Objektiv
18. AV-Ausgang
19. Mikrofon
20. Netzschalter
21. Mini USB-Anschluss
22. HDMI-Ausgang
23. Öse für Trageschlaufe
SportyCam Z3 Handbuch DA
www.aiptek.eu Seite 8
DE
!
Betriebsanweisungen
Laden: Bitte laden Sie Ihre SportyCam Z3 vor der ersten Anwendung vollständig
auf. Die Netzanzeige (rote LED) wird während des Ladevorgangs
langsam blinken; wenn die rote LED dauerhaft leuchtet, ist die Z3
vollständig geladen. Es dauert etwa 4 Stunden, bis das Gerät geladen ist.
Jetzt ist die Kamera bereit für Ihren ersten Outdoor-Einsatz.
Speicher: Die Kamera besitzt einen integrierten Speicher, aber Sie können eine
microSD/SDHC-Speicherkarte einsetzen, um den Speicher der Kamera
zu erweitern.
1. Setzen Sie die Karte in der gezeigten
Richtung ein, bis das Ende
des Steckplatzes erreicht ist.
2. Wenn die Karte erfolgreich eingesetzt
wurde, erscheint das Symbol ( )auf
dem Bildschirm und der interne Speicher
ist nicht mehr zugänglich.
Um die Karte zu entnehmen, drücken Sie darauf, und ziehen Sie sie
vorsichtig heraus.
Bitte beachten Sie: Wenn Sie eine brandneue Speicherkarte verwenden, sollten Sie die
Karte mit der Kamera formatieren. Die Kamera wird den externen
Speicher als Haupt-Speichermedium verwenden. Nur, wenn die
eingelegte Karte entfernt wird, werden Dateien auf dem integrierten
Speicher abgelegt.

SportyCam Z3 Handbuch DA
www.aiptek.eu Seite 9
DE
Einschalten
Ausschalten
!
Ein-/Ausschalten: Zum Einschalten der Kamera drücken
Sie die Power-Taste in Richtung „On
(Ein)“. Die Netzanzeige wird rot
aufleuchten.
Zum Ausschalten der Kamera drücken
Sie die Power-Taste nach unten in die
„Off (Aus)“-Stellung. Jetzt ist die
Stromversorgung ausgeschaltet.
Bitte beachten Sie: Wenn die Stromversorgung nach Fertigstellung der obigen Vorgänge nicht
eingeschaltet ist, prüfen Sie bitte, dass Folgendes korrekt ausgeführt wurde:
1. Batterie ist ordnungsgemäß geladen.
2. Die Einstellung [Auto Off] kann bewirken, dass die Videokamera nach einer
gewissen Zeit im Leerlauf ausgeschaltet wird.
Einstellen der gewünschten Sprache
Die Standardsprache der SportyCam Z3 ist Englisch. Sie können diese im Einstellungsmenü
auf Ihre gewünschte Sprache ändern. Berühren Sie die Menü-Taste (M), und navigieren
Sie nach rechts (>) auf „Setup (Konfiguration)“, gehen Sie nach unten und wählen Sie
„Language (Sprache)“. Sie können jetzt Ihre gewünschte Sprache auswählen. Bestätigen Sie
mit „OK“.
Batteriestatusanzeige
Icon
Description
Akku vollständig geladen
Akku teilweise geladen
Akku fast leer
Akku komplett leer

SportyCam Z3 Handbuch DA
www.aiptek.eu Seite 10
DE
Bildschirmsymbole
Vorschau-Modus
1. Modus-Symbol
2. Batteriestatusanzeige
3. Auflösung
4. Speicherkarte eingesetzt
5. Verbleibender Speicher
6. Aufnahmezeit
7. Zoom-Anzeige
Wiedergabe-Modus
1. Modus-Symbol
2. Batteriestatusanzeige
3. Dauer
4. Dateiname
5. Wiedergabelautstärke
Aufnahme
Video
Der Video-Modus ist die Standardeinstellung.
1. Drücken Sie die Menü-Taste (M), und verwenden Sie die
Sensortasten (+/−), um den Modus „Capture
(Erfassen)“ auszuwählen. Drücken Sie den Auslöser/OK, um den
Video-Modus aufzurufen. Drücken Sie die Menü-Taste (M), um zur
Vorschau zurückzukehren.
2. Drücken Sie die Aufnahme-Taste , um die Aufnahme zu starten
oder zu stoppen.
3. Drücken Sie die Zoom-Tasten (+/−), um den Bildschirm
heran/heraus zu zoomen.
Bild
1. Drücken Sie die Taste Auslöser/OK, um ein Foto zu machen.
2. Zoomen: Drücken Sie die Zoom-Tasten (+/−), um den Bildschirm
heran/heraus zu zoomen.
3. Um bessere Bildqualität zu erreichen, sollten Sie versuchen, die
Kamera still zu halten, um ein Verwackeln durch Händezittern zu
vermeiden.

SportyCam Z3 Handbuch DA
www.aiptek.eu Seite 11
DE
VOX EIN
VOX AUS
(Lateinisch für:
„Stimme“)
Sprache
1. Öffnen Sie das Menü (M), und verwenden Sie die Sensortasten
Aufwärts/Abwärts (+/−), um den „Capture mode
(Erfassungsmodus)“ auszuwählen; drücken Sie Auslöser/OK, um
den „Voice Mode (Sprache-Modus)“ aufzurufen. Verlassen Sie das
Menü über die Menü-Taste (M).
2. Drücken Sie die Aufnahme-Taste, um die Aufnahme zu starten oder
zu stoppen.
VOX: „Sprachgesteuerte Aufnahme“. Mit
dem VOX-Schalter können Sie die
audiogesteuerte Aufnahme einschalten.
Im VOX-Modus startet die Kamera die
Aufnahme automatisch für zwei
Minuten, wenn die
Umgebungsgeräusche über 65 dB steigen.
Wenn diese 2 Minuten lang unter 65 dB bleiben, wird die Z3 die
Aufnahme automatisch stoppen und den Vorschau-Modus aufrufen.
Wenn der Geräuschpegel wieder über 65 dB steigt, wird die Z3 die
Aufnahme erneut automatisch starten.
Fernbedienung
Sie können die Fernbedienung verwenden, um die Aufnahme zu
starten bzw. zu stoppen oder um ein Bild zu machen. Die rote
LED wird blinken, wenn Sie eine der Tasten drücken.
Sie können die Fernbedienung für eine oder mehrere
SportyCam Z3 verwenden. Führen Sie dafür bitte die beiden folgenden Schritte aus:
1. Schalten Sie die Z3 aus, drücken Sie die Taste „OK/Auslöser“ und halten Sie diese
gedrückt, schalten Sie den Netzschalter auf „ON (EIN)“, und lassen Sie die Taste
„OK/Auslöser“ los, wenn die Z3 eingeschaltet ist.
SportyCam Z3 Handbuch DA
www.aiptek.eu Seite 12
DE
!
2. Drücken Sie innerhalb von 3 Sekunden sowohl „Record (Aufnahme)“ als auch
„Stop (Stopp)“ auf der Fernbedienung, um den Kopplungsvorgang der
Fernbedienung abzuschließen.
Bitte beachten Sie: Die Reichweite der Fernbedienung beträgt etwa 5 Meter.
Wenn die Kopplung erfolgreich war, wird die Z3 beim Drücken
der Tasten auf der Fernbedienung entsprechend reagieren.
Wenn die Kopplung fehlschlägt, wiederholen Sie den
Kopplungsvorgang.
Einstellungen
Sie können mit den berührungsempfindlichen Tasten durch die Einstellungen navigieren.
Wählen Sie „M“, um das Einstellungsmenü aufzurufen, und verwenden Sie „OK/Auslöser“,
um eine Einstellung auszuwählen. Drücken Sie zum Navigieren „<“ und „>“ für links/rechts
bzw. „+“ und „−„ für oben/unten. Drücken Sie erneut „M“, um das Konfigurationsmenü zu
verlassen.
Videokamera
Auflösung: Wählen Sie zwischen vier verschiedenen Aufnahmequalitäten aus:
Einstellung
1080p
720p
WVGA
QVGA
Auflösung in Pixel
1.920 x 1.080
1.280 x 720
848 x 480
320 x 240
Bilder pro Sekunde
30
60
60
30
Format
16 : 9
16 : 9
53 : 30
4 : 3
Aufnahme-Modus: Wählen Sie das Mikrofon ( ) zur Sprachaufnahme oder
die Videokamera ( ) zur Videoaufnahme.
Kamera
Einzelaufnahme: Aktiviert den Einzelaufnahme-Modus. Die Kamera nimmt ein
einzelnes Foto auf.
3 Aufnahmen: Sie können nun 3 Bilder nacheinander aufnehmen. Das ist ideal zum
Aufnehmen von schnell beweglichen Objekten oder kurzen
Action-Sequenzen.
SportyCam Z3 Handbuch DA
www.aiptek.eu Seite 13
DE
!
Serienbilder: Die Z3 wird automatisch ständig Bilder aufnehmen. Sie können
verschiedene Zeitintervalle festlegen (Aus, 2, 3, 5, 10, 20, 30 oder 60
Sekunden)
Selbstauslöser: Aktiviert den Selbstauslöser (Aus, 5 oder 10 Sekunden)
Auflösung: Wählen Sie eine von drei verschiedenen Bildauflösungen
(3, 5 oder 8 Megapixel)
Einstellung
3M
5M
8M*
Auflösung in Pixel
2.048 x 1.536
2.592 x 1.944
3.200 x 2.400
Seitenverhältnis
4 : 3
4 : 3
4 : 3
* interpoliert
Konfiguration
Signal: Wählen Sie, ob ein Tastenton ausgegeben werden soll
Uhrzeit-Anzeige: Wählen Sie, ob in Ihren Aufnahmen Datum und Uhrzeit
in der unteren rechten Ecke eingeblendet werden sollen.
Aufnahmeschleife: Aktiviert die dauerhafte Aufnahme. Die Kamera wird nun die
ältesten Dateien auf Ihrer microSD-Karte löschen, wenn diese voll ist.
Das ist ideal, wenn die Z3 als Überwachungskamera oder Monitor
verwendet werden soll.
Stand-by: Aktiviert die automatische Stand-by-Funktion. Die Kamera wird nach
0, 2, 5 oder 10 Minuten in den Stand-by-Modus versetzt. Sie können
die Kamera reaktivieren, indem Sie auf den Auslöser oder die
Aufnahme-Taste drücken.
TV Standard: Wählen Sie den TV-Standard PAL oder NTSC abhängig von Ihrem
Bereich.
Format: Durch das Formatieren werden alle Dateien auf dem aktiven Gerät
gelöscht. (Interner Speicher oder microSD-Karte, falls eingelegt)
Bitte beachten Sie: Alle Dateien (Videos, Bilder und Sprachaufnahmen) werden
gelöscht, auch wenn diese geschützt sind! Stellen Sie sicher, dass Sie
aufgenommenes Material sichern, wenn es später noch benötigt
wird.
 Loading...