


HYPERPEN 12000U
Table of contents
 Loading...
AIPTEK HYPERPEN 12000U, HYPERPEN 8000U PRO, HYPERPEN 8000U, HYPERPEN 6000U, HYPERPEN 12000U HPT User Manual

82-032-90010 V1.0
Tablet
E-manual

English
Introduction
The product provides you with good-quality writing and drawing
convenience. It offers you 7 kinds of software, including Tablet
Manager, NetMeeting, CADIX, Pen Soft, Free Notes, Office Ink and
Art Dabbler. With those applications, it's easier for you to interact with
your PC and to do more creative works. To make the best use of the
product, please read the contents carefully.
Safety Information
Avoid
- Dampening the products.
- Using volatile chemicals to clean the products .
- Dropping the products off the table or to the ground.
- Strongly bumping the products into hard stuffs.
- Stepping on the products.
- Putting heavy stuffs on the products.
- Disassembling the products.
If you find any problems, please have the device repaired by qualified
personnel. Do not repair this device by yourself.
English
Chapter 1: Installation
Hardware
Step 1
Step 2
Step 3
Software
Step 1
Step 2
Connect the Product with Your PC
Plug the USB cable into the USB port of your PC.
Check the Power
Check the small square on the tablet. If the small square shows
blinking light, your product is successfully powered.
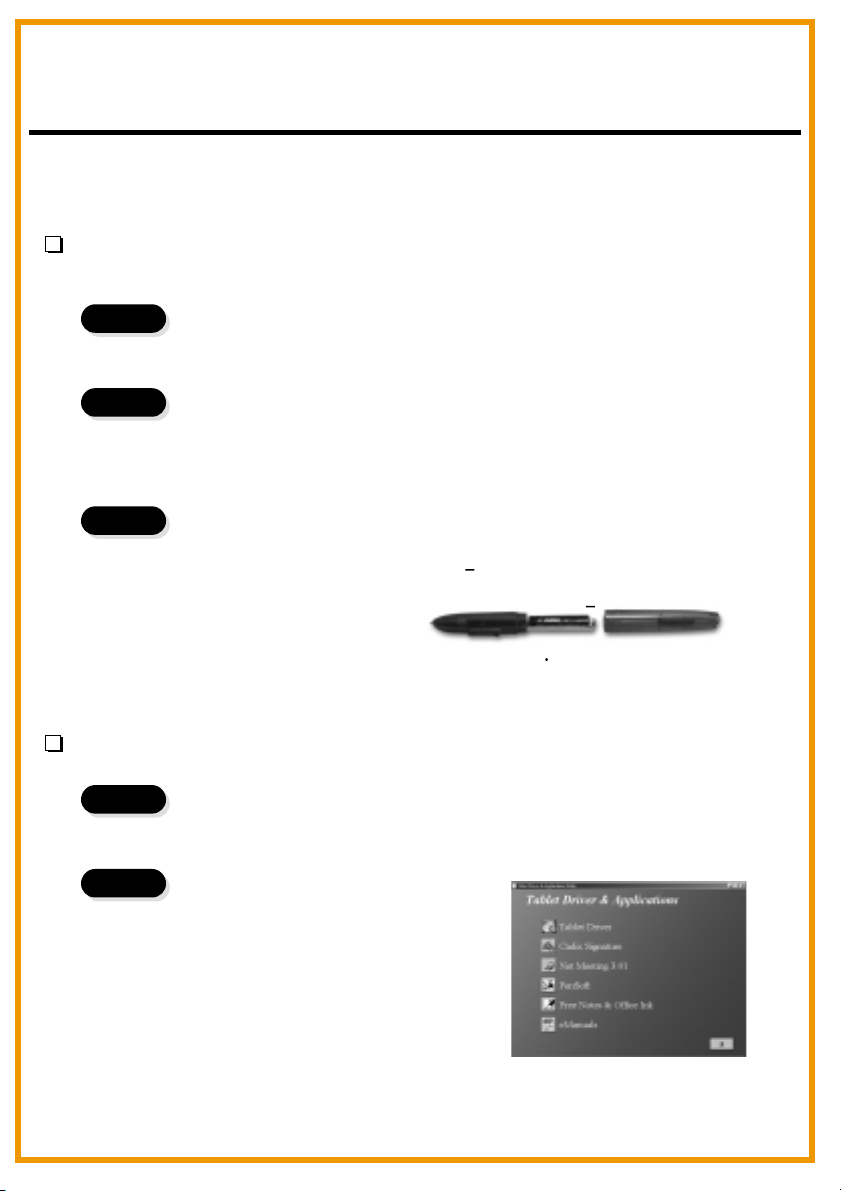
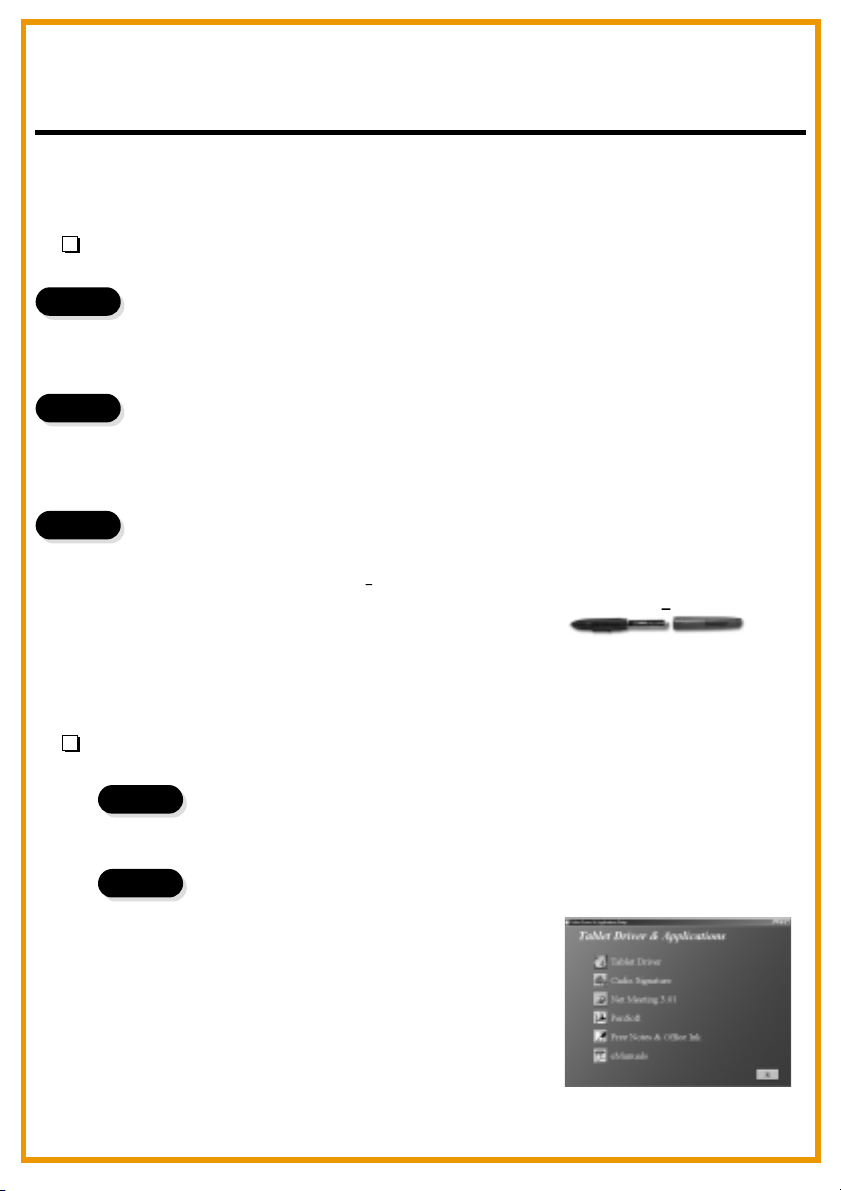
Insert the Battery
Unwind your pen and insert one AAA battery into the
compartment, positioning the + and ends as shown
below. Then wind your pen.
* The battery life span is around one year
+
Placing the CD driver
Place the installation CD in your CD drive.
Showing Tablet
The screen shows the Tablet.
OR
If the screen doesn't show the
Tablet, click and choose .
Type " " or where your CD drive is
located and click .
Start Run
d
OK
English
Step 3
Note
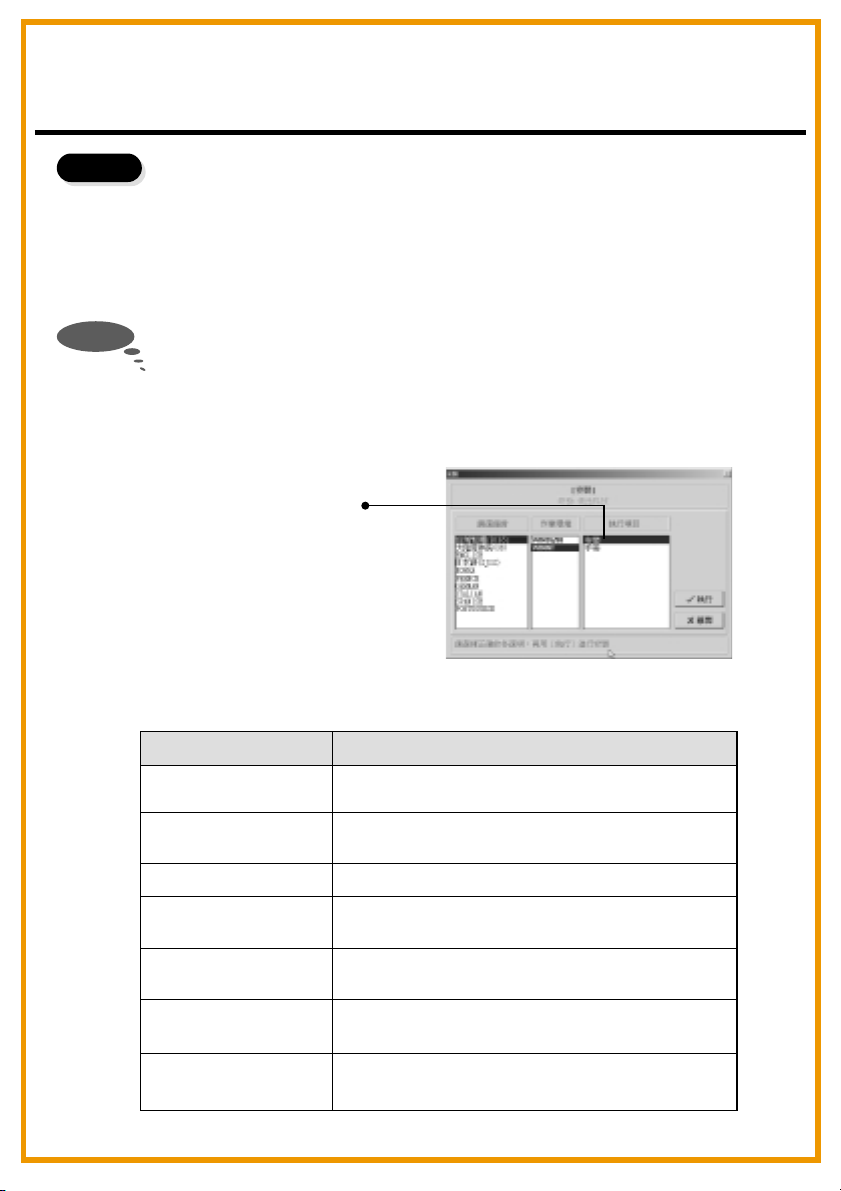
Choosing the Application You Want
There are7 applications on the Tablet. They are Tablet Driver, Cardix
Signature, Net Meeting 3.01, Free Notes, Office Ink and Pen Soft. To
use Art Dabbler, please insert the other Art Dabbler CD driver. To
choose the application, click the icon beside each application. Please
follow the directions on the screen to install.
The guidelines of Cardix Signature, Net Meeting 3.01, Pen Soft, Free
Notes, Office Ink and Art Dabbler are not included in this user guide.
To see more information of the applications, go to the Tablet.
you click the AP icon, the next screen shows the installation guideline
icon on the right. This would be ineffective if your PC is unable to
connect to the web.
Installation guideline
Tablet
As
Application
Tablet Driver
Cardix Signature
Net Meeting 3.01
Pen Soft
Art Dabbler
(in the other CD)
Free Notes
Office Ink
Use
Adjusts functions of the tablet and the pen
in the Tablet.
Supports handwriting signature recognition
when opening screen saver.
Supports on-line handwriting talk.
Supports handwriting recognition &
annotation functions.
Supports a variety of drawing functions.
Shows your real handwriting and drawing in
Email.
Special handwriting inking in any software.
English
Chapter 2: Getting Started
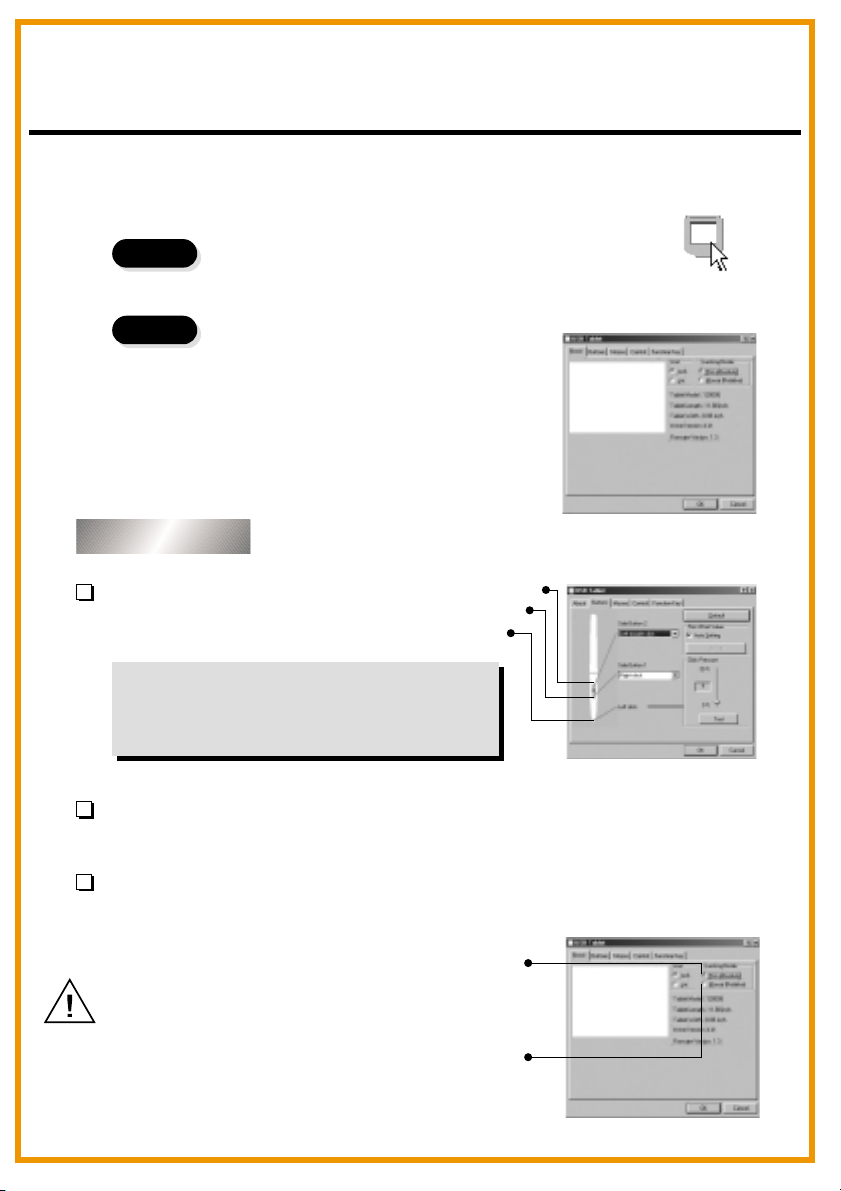
Step 1
Step 2
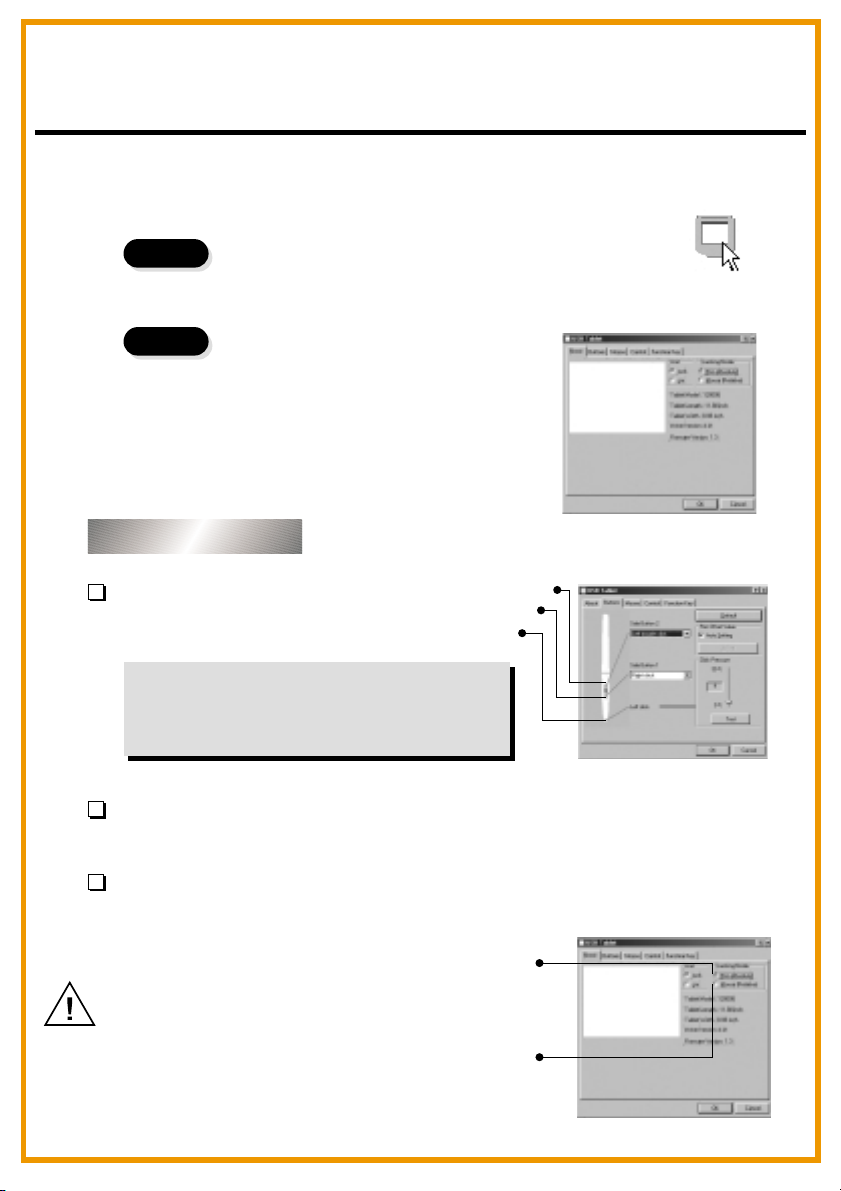
Click on the tablet icon at the bottom right of the tool bar
(The tablet icon appears when the cable is plugged in .)
You enter the Tablet screen.
To select functions, click on buttons on
the tool bar.
Using the Pen
Side buttons/
Click on Buttons to customize
side buttons.
Default settings
The upper button = left double-click mouse button.
The lower button = right mouse button.
The pen point = left mouse button.
Upper button
Lower button
Pen point
Pressure/
Move the slide up and down to adjust the pen pressure.
Mouse/
The pen is used as normal handwriting pen or mouse. To change mode, select
"Pen" or "Mouse".
Pen
Please put your pen on the hollow of
the tablet while idle. If you place the
pen on the tablet, the mouse is
seriously affected.
Mouse
English
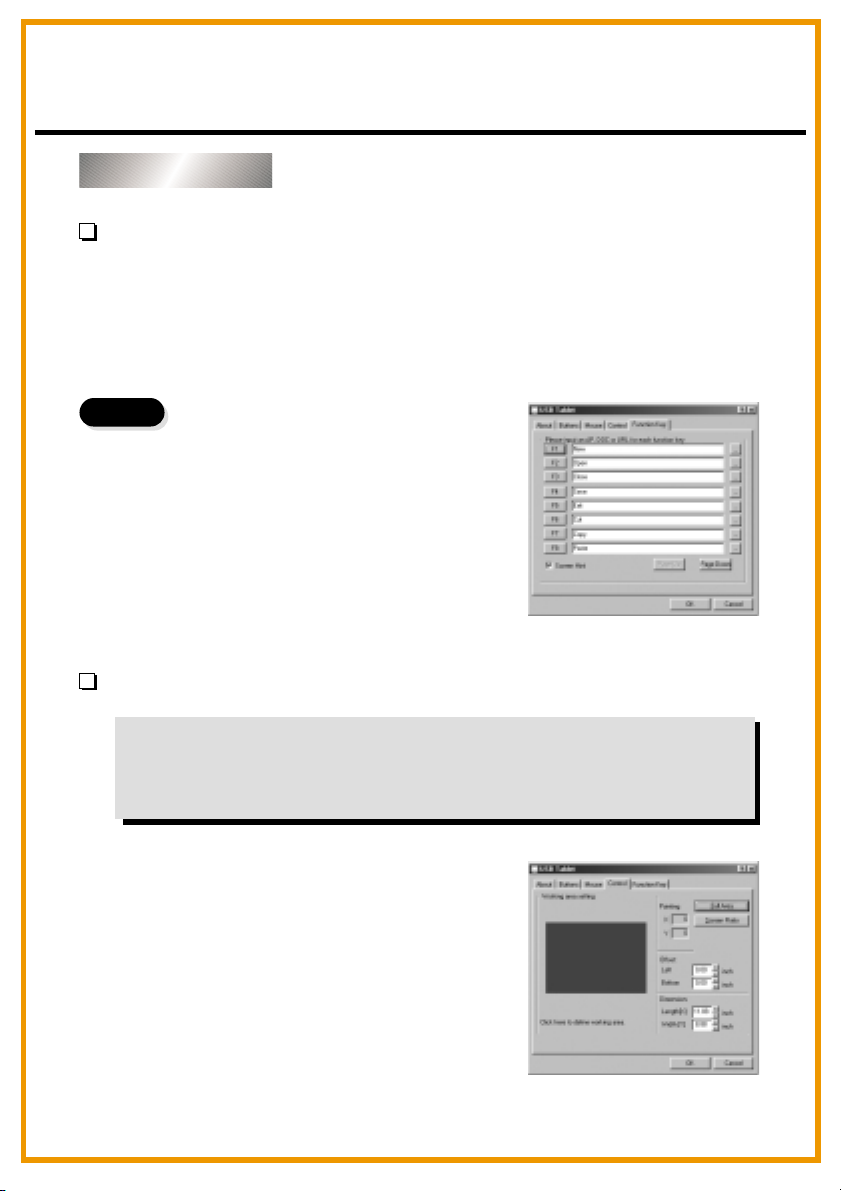
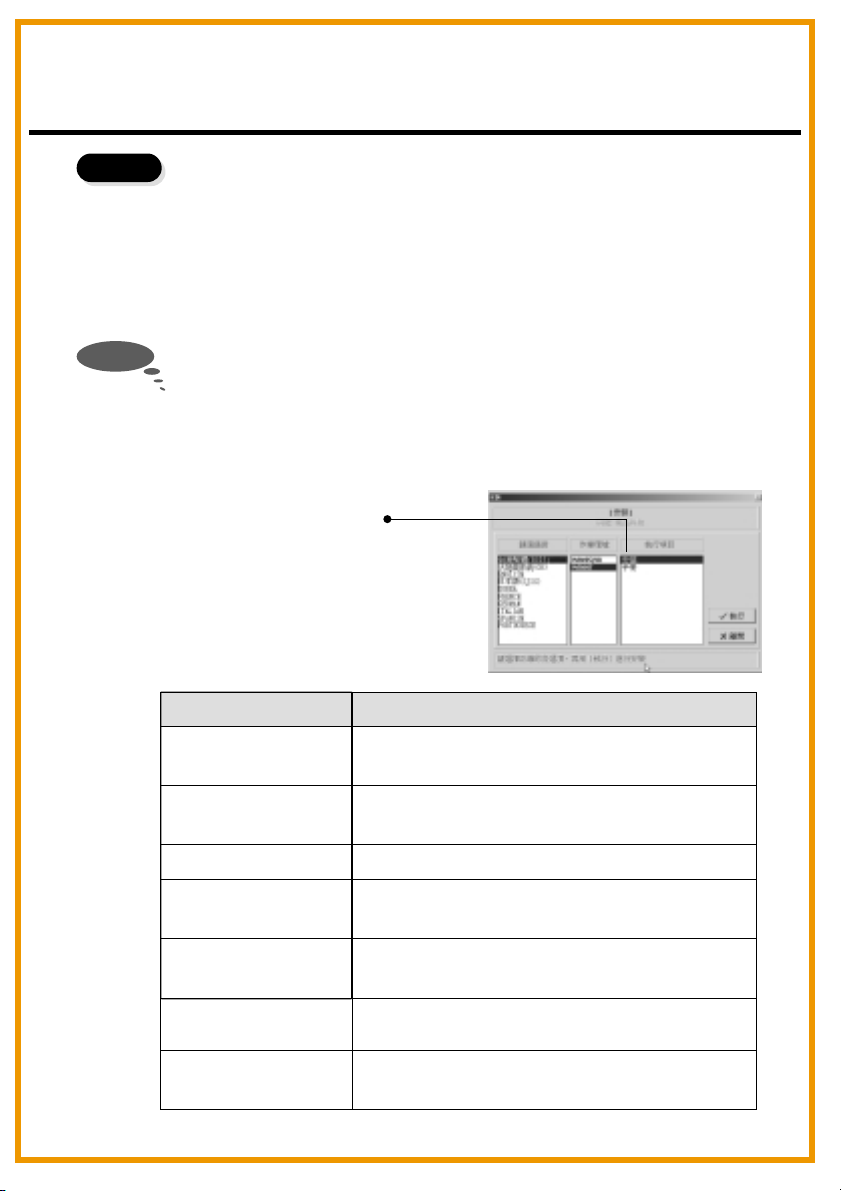
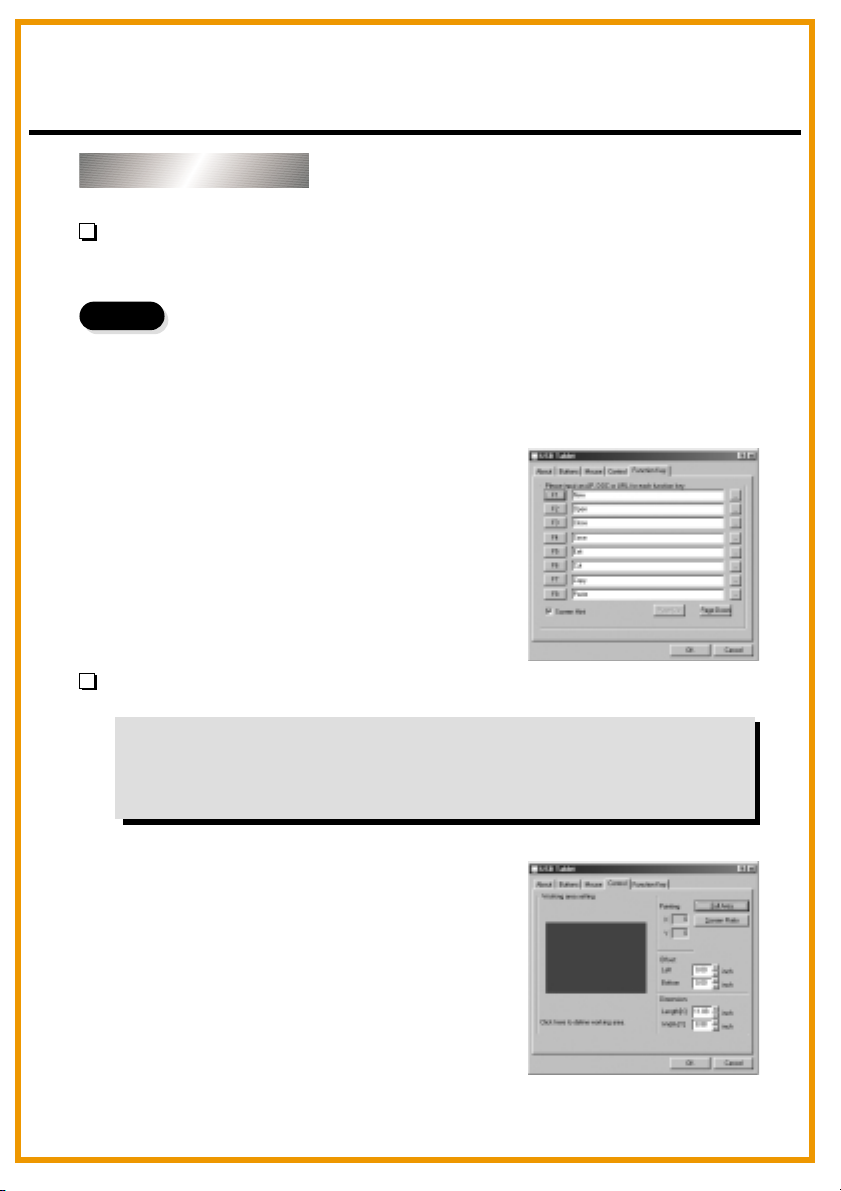
Using the Tablet
Selecting the function keys
Steps
1. Click on the Function Key icon on
the tool bar.
2. Key in the path name or URL.
3. Click "OK".
Adjusting the workspace
The workspace of your tablet is in proportion to the size of the screen.
To reduce the scope of the workspace, click "Control" and customize
the size .
English
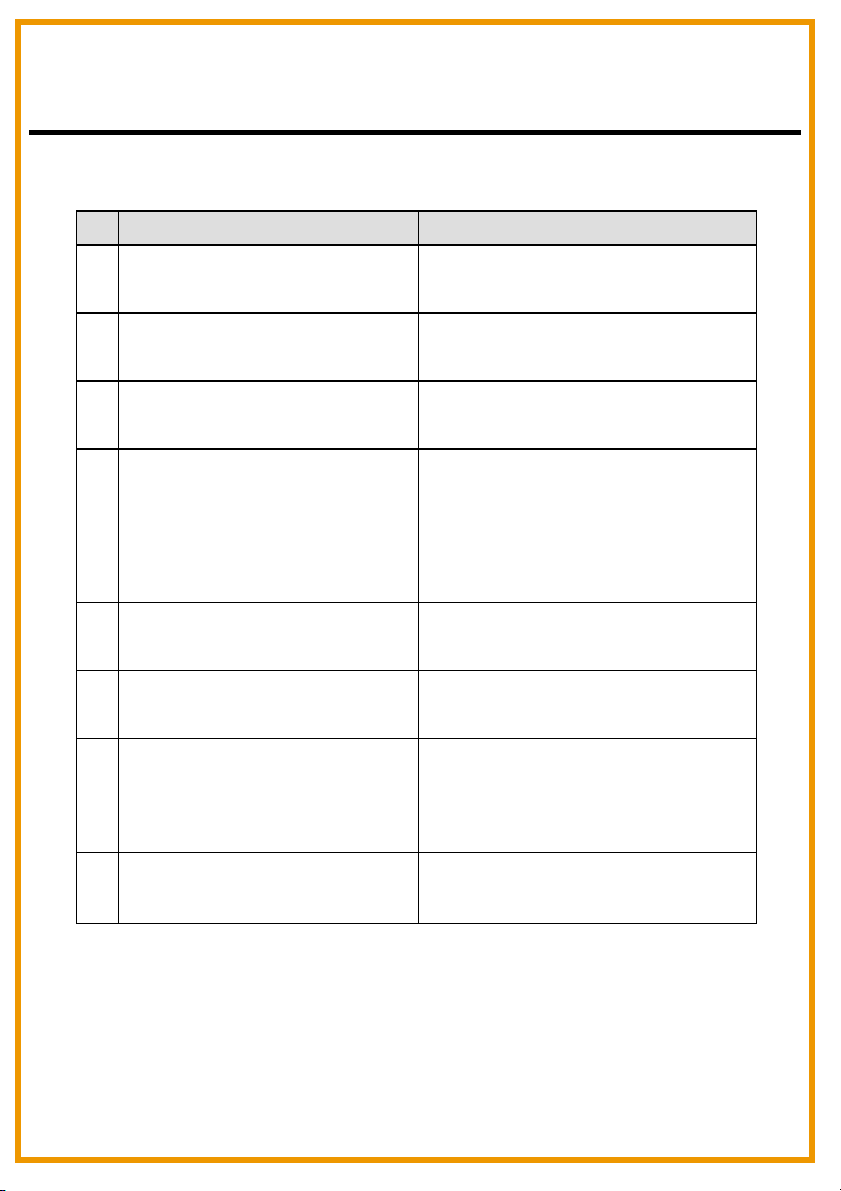
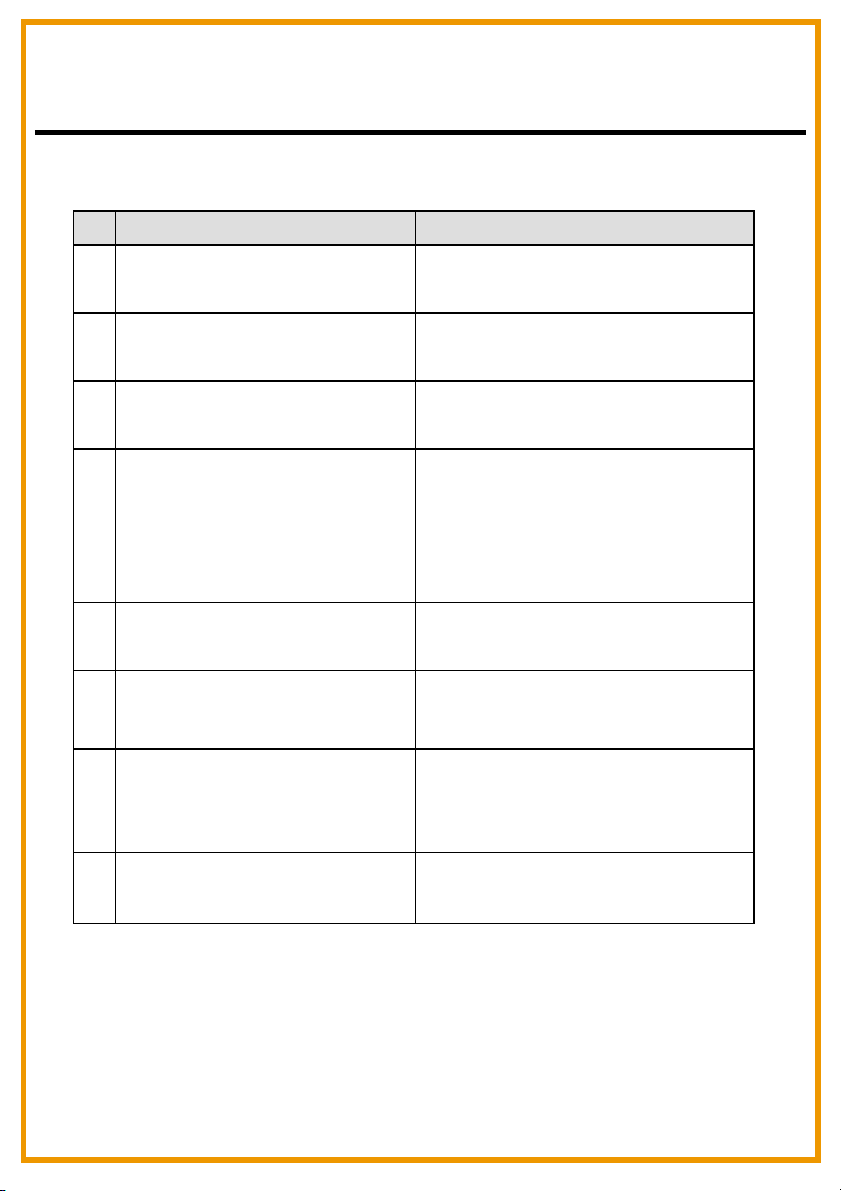
Chapter :3Q&A
No
Does Mac support the
1.
product?
Standard mouse can't move
2.
on the screen.
The tablet can't work with the
3.
other PC peripherals.
What is proximity?
4.
What can't be put on the
5.
tablet?
PC screen is interfered when
6.
the tablet placed aside.
The pen has leaking problem
7.
Question
Answer
Only for OS 9.0 version.
Remove the wireless pen from
the tablet.
Please go to upgrade new driver.
It's the height between the
wireless pen and the tablet.
Within a certain height, the
wireless pen is effective on
the tablet.
Heavy stuffs or stuffs with
frequency.
Move the tablet away from the
PC screen.
Go to the Tablet icon and
click "Button". Then select "Pen
offset value" to test the pen.
No connection to the
8.
computer
Re-plug in the cable.
Deutsch
Einführung
Der produkt ermöglicht ein hochqualitatives Schreiben und Zeichnen
und bietet 7 verschiedene Softwarepakete, inklusive Tablet Manager,
NetMeeting, CADIX, Pen Soft, Free Notes, Office Ink und Art
Dabbler. Diese Anwendungen erleichtern den Dialog mit dem PC und
fördern das kreatives Arbeiten. Um die Qualitäten des Tablet
kennenzulernen, sollten sie sich den Inhalt dieser Anleitung sorgfältig
durchlesen.
Informationen zur Sicherheit
Vermeiden
Sie
- Ein Feuchtwerden der Produkte.
- Das Benutzen von flüchtigen Chemikalien zum Säubern der
Produkte.
- Ein Fallenlassen der Produkte vom Tisch oder auf den Boden.
- Ein starkes Stoßen gegen harte Gegenstände.
- Ein Treten auf die Produkte.
- Ein Plazieren von schweren Gegenständen auf die Produkte.
- Ein Öffnen der Produkte.
Wenden Sie sich bei Problemen und wegen einer Reparatur an qualifiziertes
Servicepersonal. Versuchen Sie nicht, das Gerät selbst zu reparieren.
Deutsch
Kapitel 1: Installation
Hardware
1. Schritt
2. Schritt
3. Schritt
Software
Schritt Das produkt mit dem PC verbinden
Schließen Sie das USB-Kabel an den USB-Port des PC.
Schritt Netzspannung überprüfen
Kontrollieren Sie das schmale Quadrat in Tablet. Falls dieses schmale
Quadrat blinkt, ist das produkt erfolgreich versorgt.
Schritt Einsetzen der Batterie
Öffnen Sie den Stift und setzen Sie die AAA Batterie in das Fach, achten
Sie auf die Polung (+ und ), wie unten gezeigt.
Schließen Sie dann den Stift wieder.
*
Die Lebensdauer der Batterie beträgt etwa ein Jahr.
1. Schritt
Schritt Anbringen der CD Treiber
Legen Sie die Installations-CD in das CD-Laufwerk.
+
2. Schritt
Schritt Anzeigen des Tablets
Der Bildschirm zeigt das ablet.
ODER
Falls der Bildschirm das Tablet nicht
anzeigt, klicken Sie auf Start und wählen
Ausführen. Geben Sie “d” oder die
entsprechende Bezeichnung des CDLaufwerks an und klicken Sie auf OK.
Deutsch
3. Schritt
Hinweis
Tablet
Schritt Wahl der gewünschten Applikationen
Das produkt bietet 7Applikationen. Die Tablet Treiber, Cardix Signature,
Net Meeting 3.01, Free Notes, Office Ink und Pen Soft. Vor der
Benutzung von Art Dabbler muss der andere Art Dabbler CD Treiber
eingelegt werden. Die Wahl der Applikation geschieht mit einem Klick
auf das Symbol neben der jeweiligen Applikation.
Die Anweisungen für Cardix Signature, NetMeeting 3.01, Pen Soft,
Free Notes, Office Ink und Art Dabbler sind dem Benutzerhandbuch
nicht beigefügt. Weitere Informationen zu den Applikationen finden Sie
im Tablet. Nach einem Klick auf das AP Symbol zeigt der nächste
Bildschirm rechts das Symbol der Installationsanweisung. Ohne Zugang
des PCs zum Internet ist dies uneffektiv.
Installationsanweisung
Applikation
Tablet Treiber
Regelt Funktionen des Tablets und des Stiftes
im Tablet.
Benutzen
Cardix Signature
Net Meeting 3.01
Pen Soft
Art Dabbler
(auf der anderen CD)
Free Notes
Office Ink
Unterstützt das Erkennen handgeschriebener
Unterschrift, wenn Screensaver aktiviert wird.
Unterstützt On-Line Handwriting Talk.
Unterstützt Supports Handschriftenerkennung
& Anmerkungsfunktionen.
Unterstützt verschiedene Zeichenfunktionen.
Email mit echter Handschrift und
Zeichnungen.
Spezielle Handschrifttinte in jeder
Software.
Deutsch
Kapitel 2: Los geht's
1. Schritt
2. Schritt
Schritt Klicken Sie auf das Tabletsymbol unten rechts auf
der Symbolleiste (das Tabletsymbol erscheint, wenn das
Kabel angeschlossen ist.)
Schritt Öffnen Sie den Tablet
Bildschirm.
Klicken Sie zur Funktionsauswahl auf
Tasten der Symbolleiste.
Den Stift benutzen
Seitentasten/
Klicken Sie auf “Tasten” zum Anpassen
der Seitentasten.
Standardeinstellungen
Die obere Taste = Doppelklick linke Maustaste.
Die untere Taste = rechte Maustaste.
Die Stiftspitze = linke Maustaste.
Obere Taste
Untere Taste
Stiftspitze
Druck/
Schieben Sie den Regler rauf und runter, um den Stiftdruck zu ändern.
Maus/
Der Stift wird als normaler Schreibstift oder Maus benutzt. Zum Wechseln des
Modus, wählen Sie “Stift” oder “Maus”.
Stift
Legen Sie den Stift auf die Mulde des
Tablets, wenn er nicht benutzt wird.
Das Plazieren des Stifts auf dem Tablet
zieht die Maus in Mitleidenschaft.
Maus
Deutsch
Das Tablet benutzen
Auswahl der Funktionstasten
1.
Schritte
Regeln des Arbeitsbereichs
Klicken Sie auf das Funktionstastensymbol auf der Symbolleiste.
2.
Geben Sie die Pfadnamen oder die URL an.
3.
Klicken Sie auf “OK“.
Der Arbeitsbereich des Tablets steht im Verhältnis zur Größe des
Bildschirms. Um die Arbeitsfläche zu verringern, klicken Sie auf
“Kontrolle” und passen Sie die Größe an.
Deutsch
Kapitel 3: Fragen & Antworten
Nr.
Unterstützt Mac produkt?
1.
Standardmaus kann nicht auf dem
2.
Bildschirm bewegt werden.
Das Tablet funktioniert nicht mit
3.
anderen PC-Peripheriegeräten.
Was bedeutet Proximity?
4.
Welche Gegenstände sollten nicht
5.
auf das Tablet platziert werden?
Der PC-Bildschirm wird gestört,
wenn das Tablet auf der Seite
6.
platziert wird.
Der Stift ist undicht.
7.
Fragen
Antworten
Nur für das Betriebssystem Version 9.0.
Entfernt den kabellosen Stift vom
Tablet.
Aktualisieren Sie die neuen Treiber.
Es ist der Abstand zwischen dem
kabellosen Stift und dem Tablet.
Die Effektivität beschränkt sich
auf eine bestimmte Distanz.
Schwere Gegenstände, oder solche die
eine Frequenz ausstrahlen.
Entfernen Sie das Tablet vom
PC-Bildschirm.
Wählen Sie das Tablet symbol und
klicken Sie “Taste”. Wählen Sie nun
“Stift Offsetwert” um den Stift zu testen.
Keine Verbindung zum Computer
8.
Schließen Sie das Kabel wieder an.
Loading...